

Sony RM-LVR1 Operating Manual

Live-View Remote
RM-LVR1
This Handbook is a supplement for this unit’s Operating Instructions.
It introduces some added or modified functions
and describes their operation.
Also refer to the Operating Instructions of this unit.
© 2014 Sony Corporation 4-535-957-11 (1)

Table of contents
Clock Setting
Button hold function
LCD screen indicator
…………………………………………………………………………………………………
…………………………………………………………………………………
…………………………………………………………………………………
REC display while movie recording and interval photo recording
Switching the screen indicator with the DISP button
Camera setting
……………………………………………………………………………………………
Changing the camera settings via this unit’s MENU
Automatic exposure setting
Automatic camera date setting
Zooming
Warning message
…………………………………………………………………………………………………………
………………………………………………………………………………………
Memory card warning indicator
………………………………………………………………………
…………………………………………………………………
…………………………………………………………………
……………………………
………………………………
………
3
4
5
5
5
6
6
7
7
8
9
9
Multi camera control
Preparing this unit
……………………………………………………………………………………
HDR-AS100V
Registering a camera on this unit
This unit’s LCD screen indicators
Connecting this unit to the cameras
Switching the Live-View display
Recording images
………………………………………………………………………………………
Resetting the Network settings
……………………………………………………
……………………………………………………………
……………………………………………………………
………………………………………………………
………………………………………………………………
………………………………………………………………
10
10
11
12
14
14
15
16
2-GB
Clock Setting
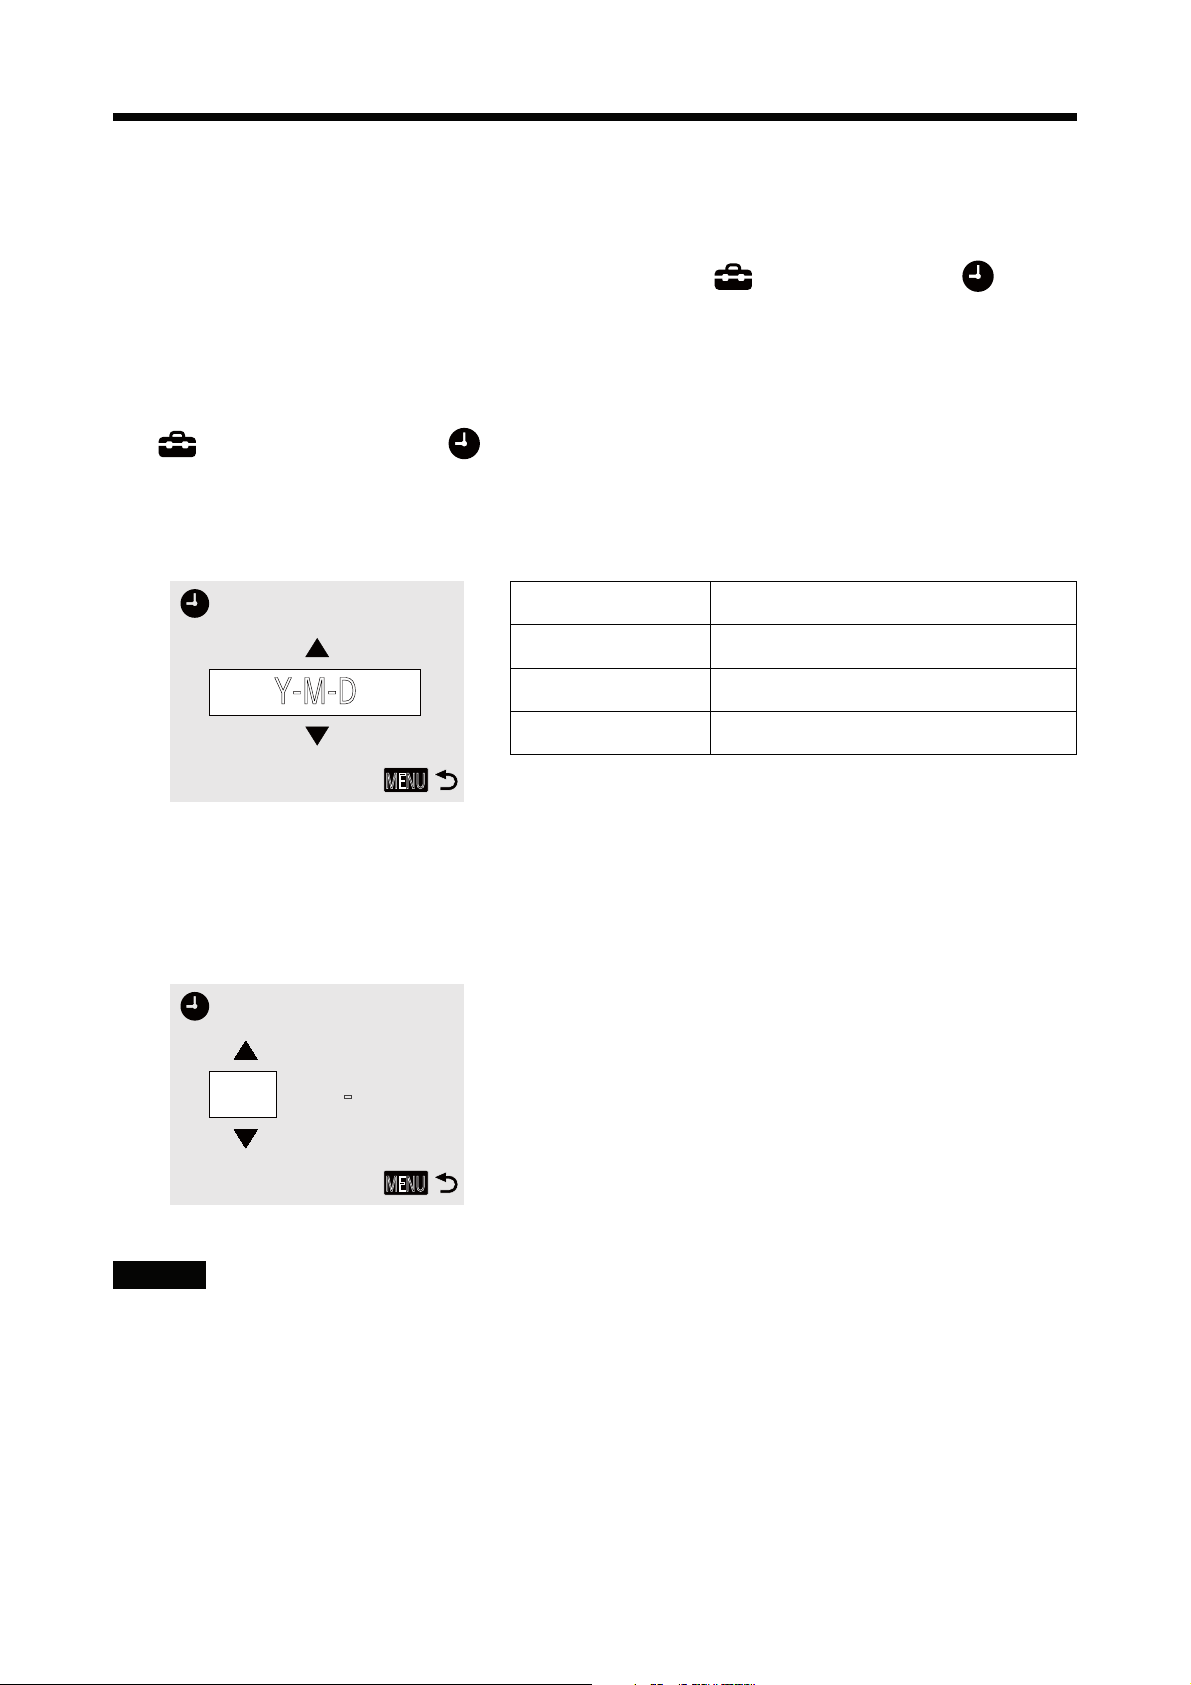
You can set the year/month/day/time by selecting Main Settings Clock
Setting.
You can also select the date format.
Press the MENU button to display the setting items. Then select
1
Main Settings Clock Setting.
Select the desired date format and then press REC/ENTER
2
button.
Y-M-D Year-Month-Day
M-D-Y Month-Day-Year
Y-M-D
MENU
Press the UP button or DOWN button to select the desired date
3
and then press the REC/ENTER button to confirm.
Press the MENU button to return to the previous setting.
2014
11
- -
MENU
M(Eng)-D-Y Month (in English)-Day-Year
D-M-Y Day-Month-Year
Note
ˎ When using for the first time or after updating of this unit’s software, the clock
setting screen is displayed. Set the clock before using this unit.
3-GB
Button hold function
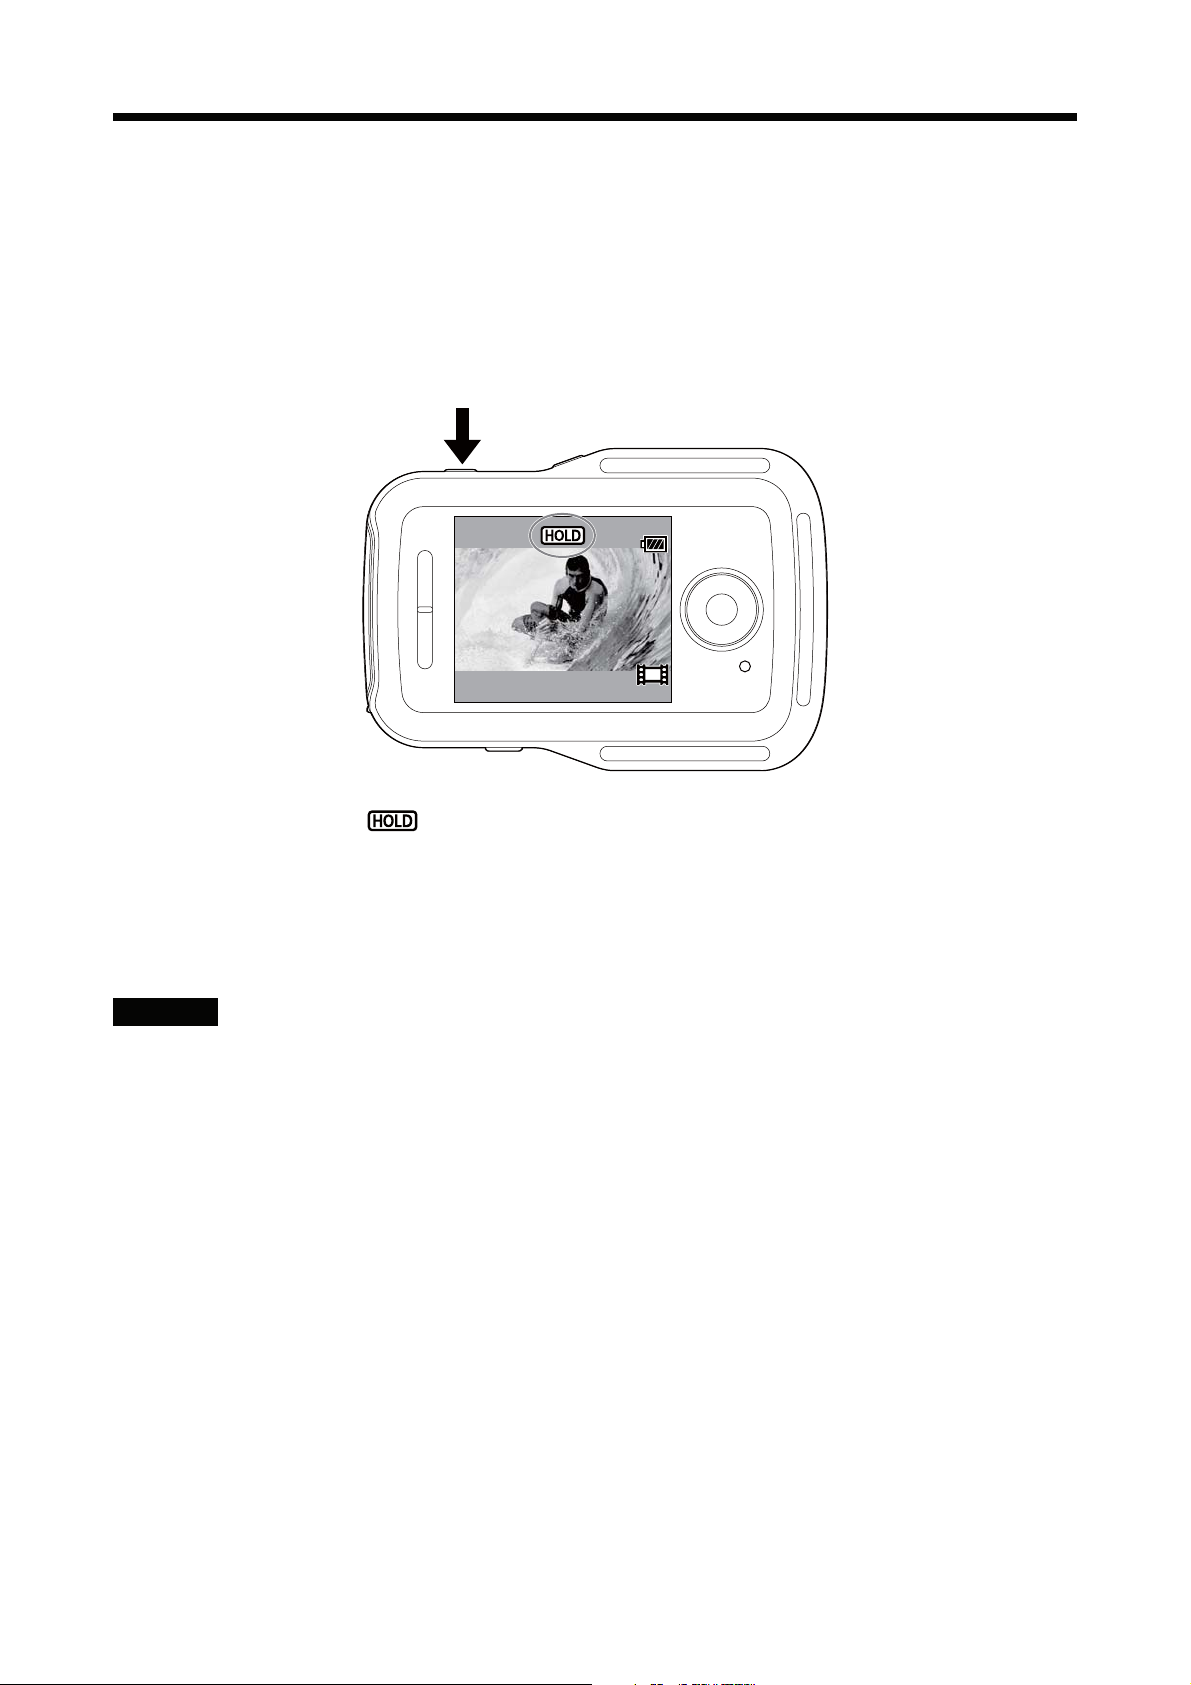
This function prevents you from accidentally pressing this unit’s buttons while
carrying it around.
Press the MENU button of this unit for 2 seconds or more to set the button hold
function.
REC
ENTER
In button hold mode, appears on the LCD screen of this unit. The REC/ENTER
button, DISP button, UP button and DOWN button of this unit are disabled.
To cancel button hold mode, press the MENU button of this unit for 2 seconds or
more, or press the ON/OFF (Power) button to turn off the power of this unit.
Notes
ˎ The button hold function is only available when this unit is connected to a
amera by Wi-Fi. When not connected, the button hold function cannot be used.
c
ˎ The button hold function cannot be used during MENU display.
ˎ When the Wi-Fi connection between this unit and the camera is disconnected,
the button hold function is cancelled.
4-GB
LCD screen indicator
REC display while movie recording and interval photo recording
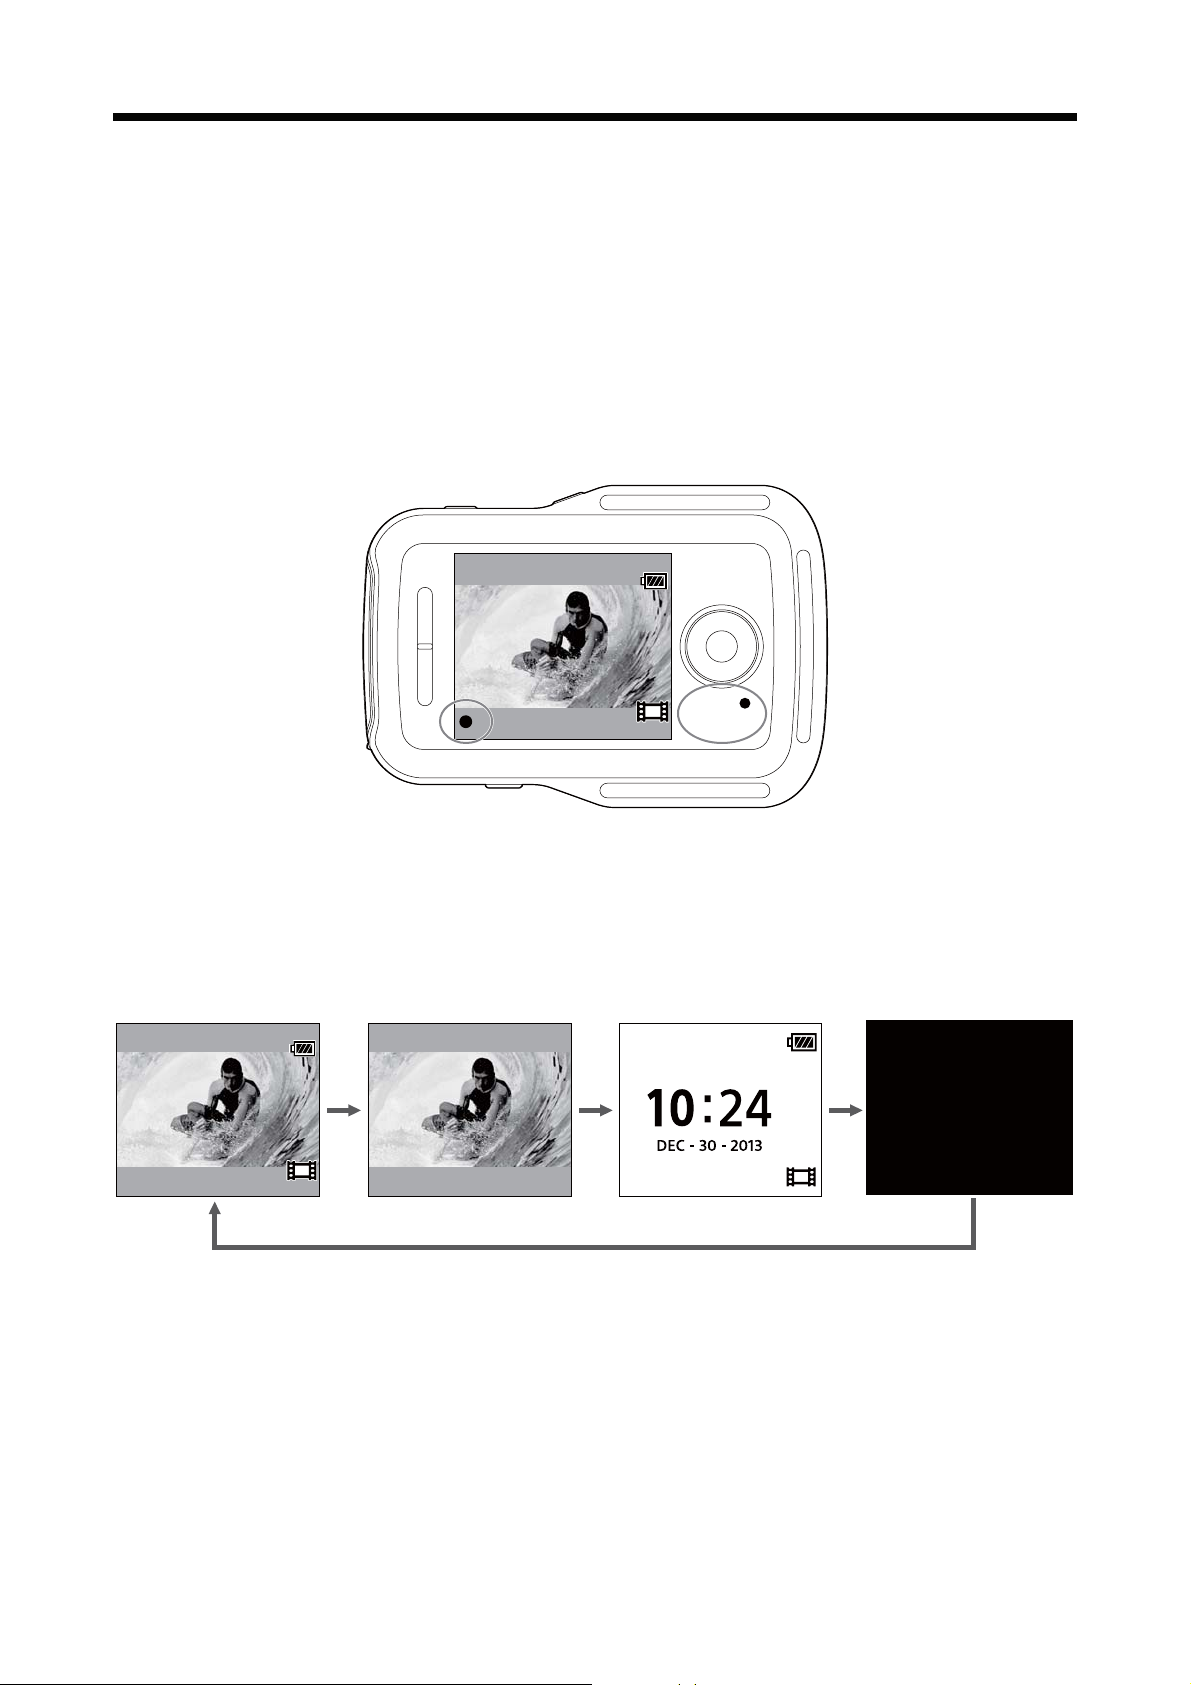
When you start recording by pressing the REC/ENTER button of this unit, the REC/
Wi-Fi lamp changes from blue to red and Ć appears at the bottom left of the
screen.
REC
ENTER
Switching the screen indicator with the DISP button
When this unit is connected to a camera by Wi-Fi, pressing the DISP button of this
unit switches this unit’s LCD screen display as follows:
Live-View display Icon off Clock display Screen off
AM
5-GB
 Loading...