

Sony PSR-600 Quick Start Manual

Quick Start Guide
Guide de démarrage
4-153-620-12 (1)©2009 Sony Corporation / Printed in China
2
EN
3 EN
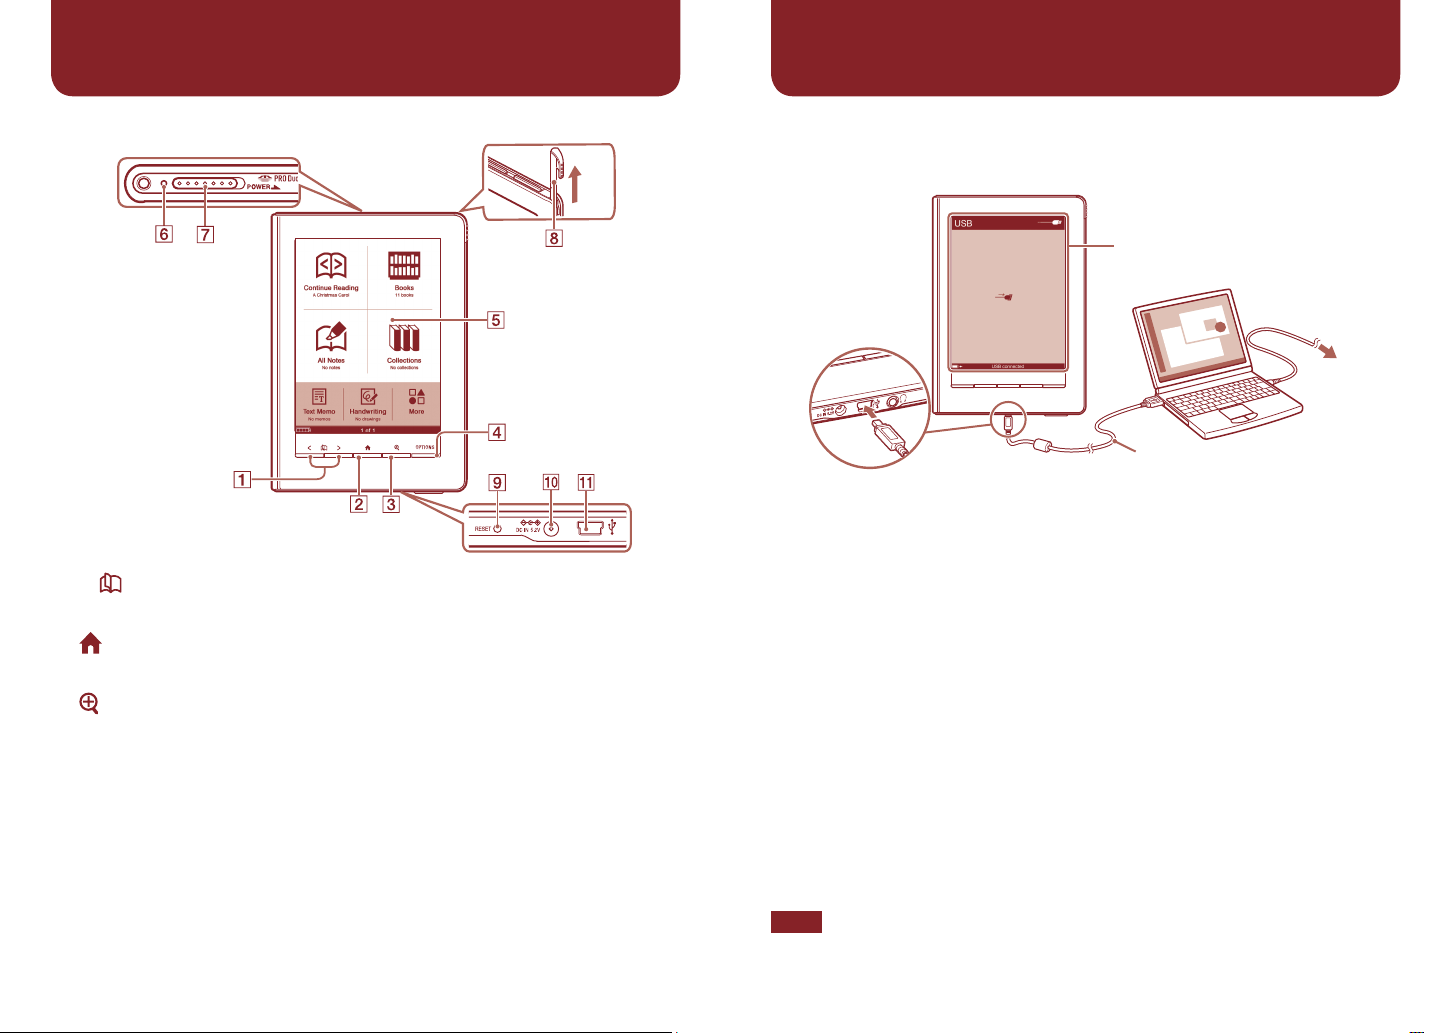
Navigation Controls
Home menu is
displayed.
Getting Started
“USB connected” screen
To AC outlet
USB cable (supplied)
Connect to
USB connector
< > (Page Turn) buttons
Turns the page.
(Home) button
Displays the Home menu.
(Size) button
OPTIONS button
Displays the Option menu.
Touch screen
Provides simple commands by
touching the screen.
Charge indicator
Lights up when the Reader is
charging.
POWER switch
Stylus
Used for precise touch screen
operations.
RESET button
DC IN jack
Used to connect the AC
Adapter for Reader (ACS5220E) (optional).
USB connector
1 Charge the Reader via USB (as shown above) at least 5 minutes
until “USB connected” appears on the Reader.
Keep your computer in an active mode while charging the Reader.
To fully charge the Reader, wait about 4 hours or less until the charge
indicator (lights up in red while charging) goes off.
2 Disconnect the Reader from your computer, and then follow the
on-screen instructions of the Reader to complete the initial
settings.
To select an item on the touch screen, tap the item. To apply the
setting, tap “OK.”
Note
You cannot operate the Reader while it is connected to your computer.
4
EN
5 EN
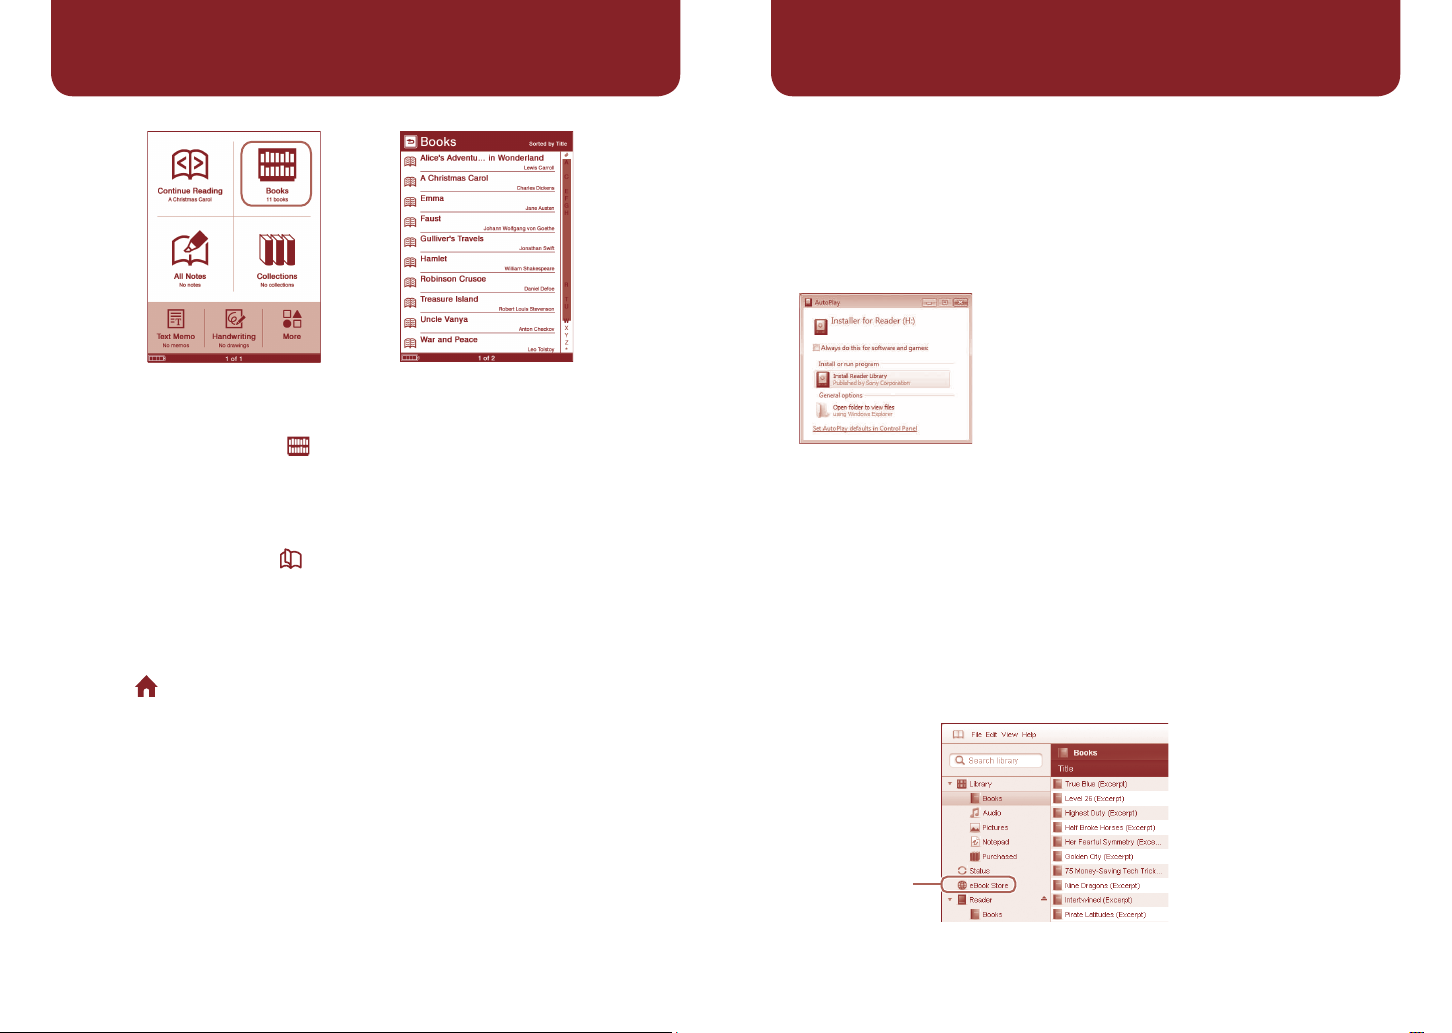
Reading eBooks
Home menu “Books” list
Getting eBooks
To purchase or download eBooks, install Reader Library software on your
computer and register to the eBook store.
When the Reader is connected to your PC, the AutoPlay window appears
on the screen.
1 Click “Install Reader Library” in the “Installer for Reader” window,
and then follow the on-screen instructions.
AutoPlay window
(in case of Windows Vista)
1 In the Home menu, tap (“Books”).
2 Tap the desired book in the “Books” list.
To turn pages, press the < > (Page Turn) buttons.
To return to the “Books” list
Press the OPTIONS button, then tap “Return to List.”
To return to the Home menu
Press the (Home) button.
If the installation launcher does not start, access the Installation launcher
stored on the Reader manually.
“My Computer”(“Computer” in the case of Vista) – “Installer for
Reader” – “Windows” – “Setup Reader Library”
To install Reader Library on a Macintosh
When the Reader is connected to your Mac, “LAUNCHER” and
“READER” appear on the desktop. Click the following, and then follow
the on-screen instructions: “LAUNCHER” – “Mac” – “Setup Reader
Library”
From the Start menu, click the following:
2 Start Reader Library, and then click “eBook Store.”
“eBook Store”
 Loading...