

Sony PMC-R30L, PMC-R35L User Manual
Personal
Component
System
3-867-445-13 (1)
Operating Instructions page 2
Manual de instrucciones página 2
GB
GB
ES
ES
PMC-R30L
PMC-R35L
©1999 by Sony Corporation
Warning
To prevent fire or shock hazard, do
not expose the player to rain or
moisture.
To avoid electrical shock, do not open
the cabinet. Refer servicing to
qualified personnel only.
Information
This Compact Disc player is classified as
a CLASS 1 LASER product.
The CLASS 1 LASER PRODUCT label is
located on the bottom exterior.
Warning
Do not install the appliance in a confined
space, such as a bookcase or built-in cabinet.
CAUTION
You can use this player on AC power
source only. You cannot use it on
batteries.
When you use this player for the first time,
or when you have not used it for a long
time, leave it connected to AC power
source for about one hour to charge the
built-in backup battery for the clock, timer,
preset radio stations, etc. You can use the
player during charging. The player will
charge the battery automatically as long as
it is connected to a power source.
When you disconnect the AC power cord
after charging, be sure to turn the power
off first. Once fully charged, the backup
battery will last for about 30 minutes
without being connected to any power
sources.
If the stored data are erased, reenter them
when you use the player again.
Notice for customers in the United
Kingdom
A moulded plug complying with BS 1363 is
fitted to this equipment for your safety and
convenience.
Should the fuse in the plug supplied need to
be replaced, same rating fuse approved by
ASTA or BSI to BS 1362, (i.e. marked with
or mark) must be used.
If the plug supplied with this equipment has
a detachable fuse cover, be sure to attach the
fuse cover after you change the fuse. Never
use the plug without the fuse cover. If you
should lose the fuse cover, please contact
your nearest Sony service station.
GB
Introduction2

Table of contents
Basic Operations
4 Playing a CD
6 Listening to the radio
8 Playing a tape
10 Recording on a tape
The CD Player
12 Using the display
13 Locating a specific track
14 Playing tracks repeatedly
(Repeat Play)
15 Playing tracks in random order
(Shuffle Play)
16 Creating your own program
(Program Play)
The Radio
18 Presetting radio stations
19 Playing preset radio stations
Setting Up
25 Hooking up the system
27 Selecting the audio emphasis
(SOUND/MEGA BASS)
Additional Information
28 Precautions
30 Troubleshooting
32 Maintenance
33 Specifications
34 Index
Basic Operations
GB
The Timer
20 Setting the clock
21 Waking up to music
24 Falling asleep to music
Introduction
GB
3
Basic Operations
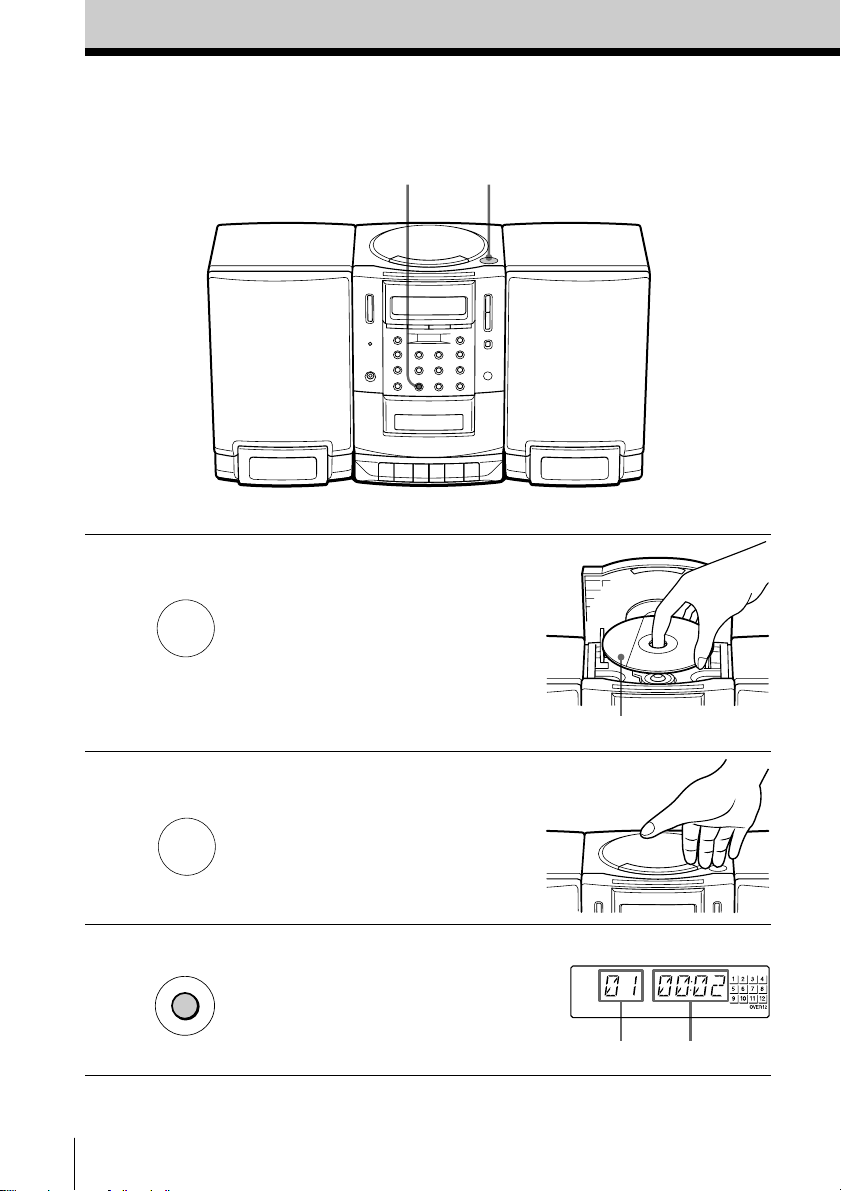
Playing a CD
For hookup instructions, see pages 25 - 26.
1,23
1 Press 6PUSH OPEN/CLOSE
2 Close the lid of the CD
3 Press ^ (( on the remote)
GB
Basic Operations4
PUSH
OPEN/CLOSE
Z
PUSH
OPEN/CLOSE
Z
NX
down to open the CD
compartment and place the CD
on the CD compartment.
compartment.
(direct power-on).
The player plays all the tracks
once.
With the label side up
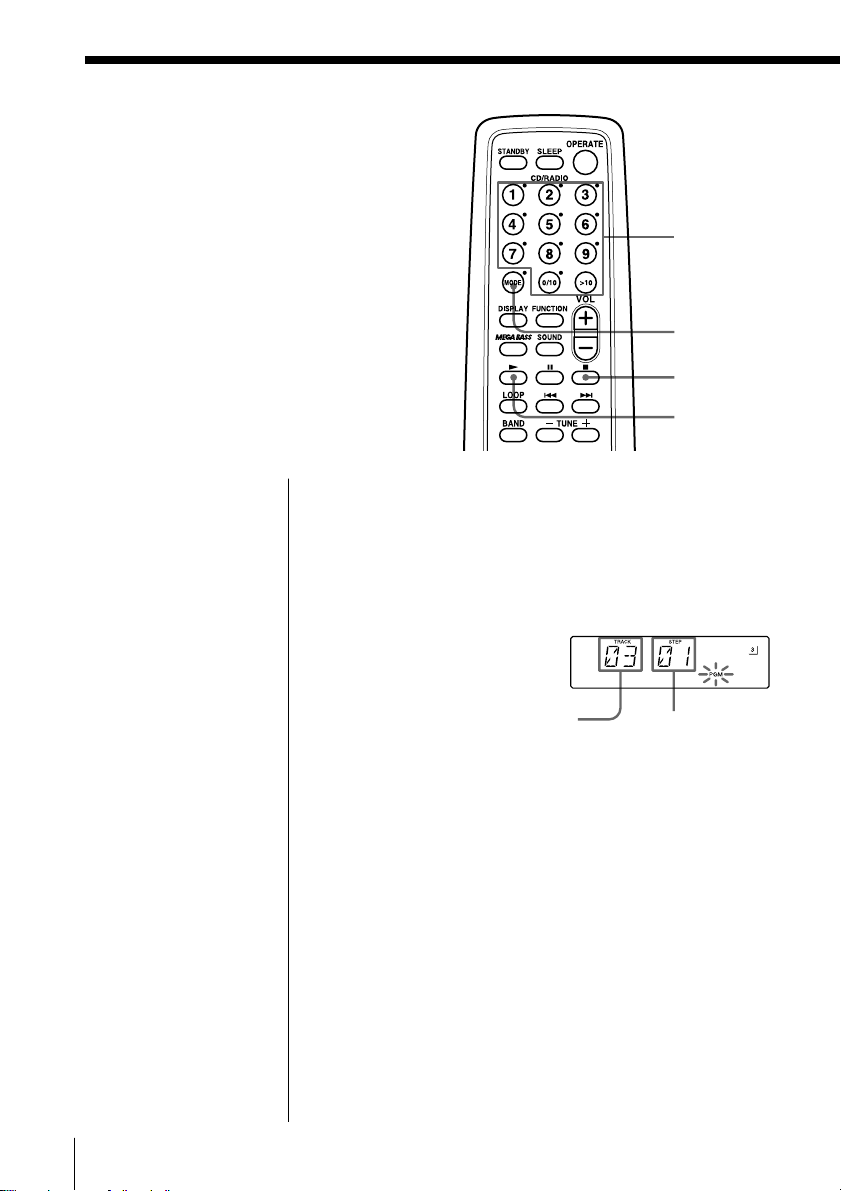
Display
Track number
Playing time
Use these buttons for additional operations
OPERATE
6PUSH OPEN/CLOSE
VOLUME +, –
AMS/SEARCH =, +
^
p
Basic Operations
Tip
Next time you want to
listen to a CD, just press
^. The player turns on
automatically and starts
playing the CD.
To Press
adjust the volume VOLUME +, – (VOL +, –
on the remote)
stop playback p
pause playback ^ (P on the remote)
Press the button again to
resume play after pause.
go to the next track AMS/SEARCH +
go back to the previous track AMS/SEARCH =
remove the CD 6PUSH OPEN/CLOSE
turn on/off the player OPERATE
Basic Operations
GB
5
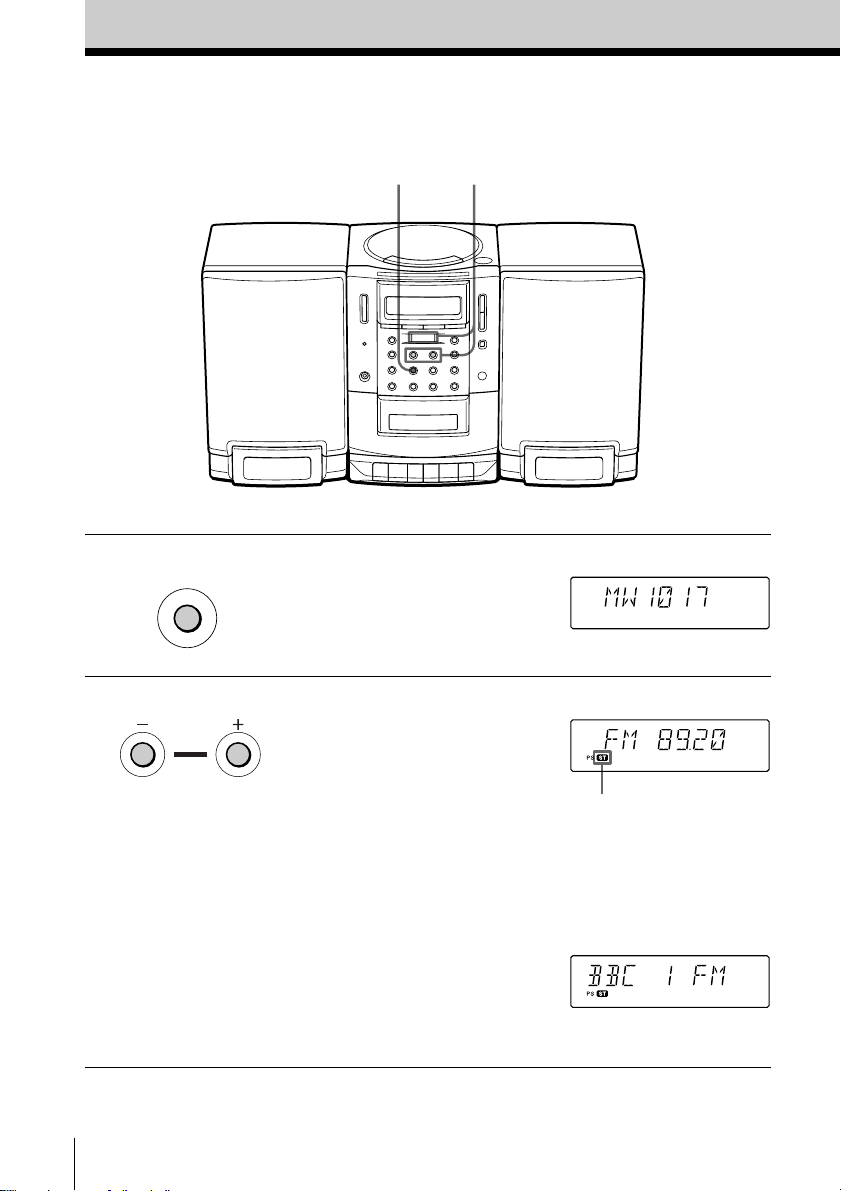
Listening to the radio
12
For hookup instructions, see pages 25 - 26.
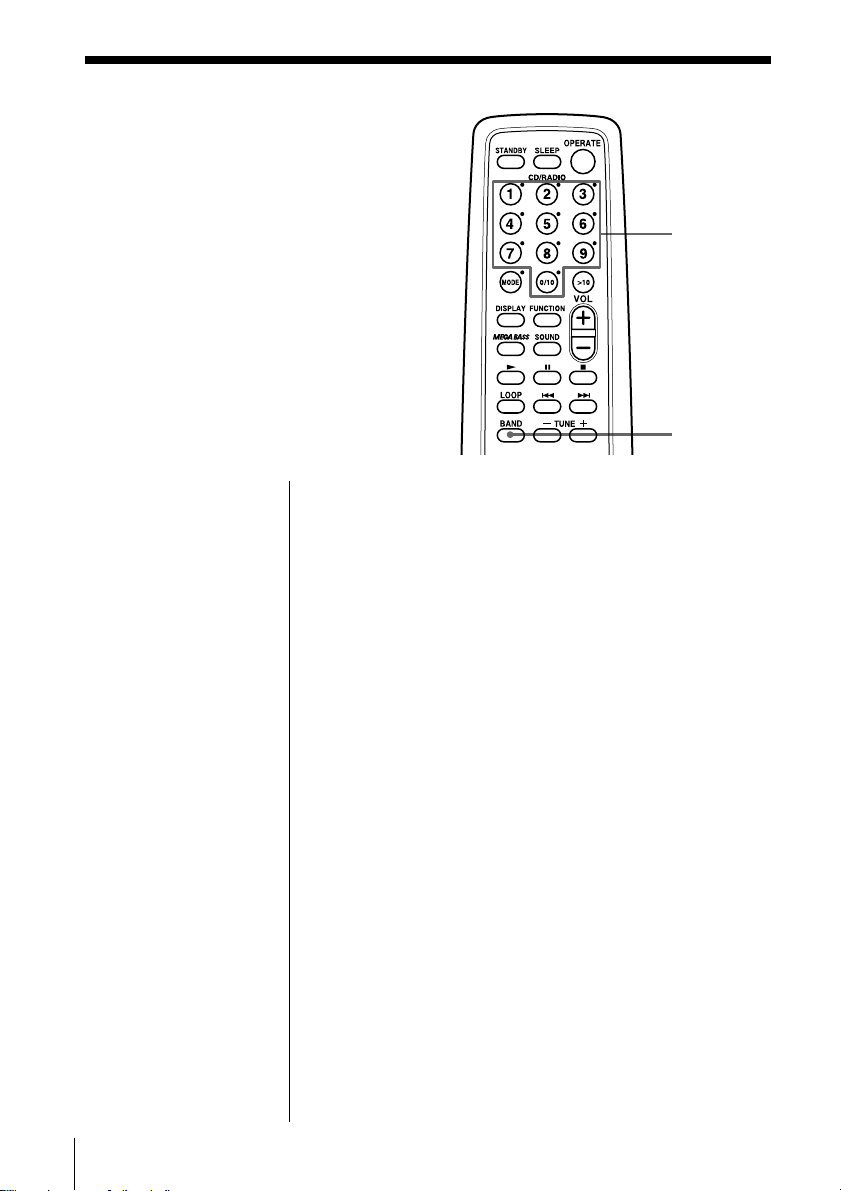
1 Press BAND until the band you
2 Hold down TUNING•TIME SET
GB
Basic Operations6
BAND
TUNING
TIME SET
want appears in the display
(direct power-on).
+ or – (TUNE + or – on the
remote) until the frequency digits
begin to change in the display.
The player automatically scans
the radio frequencies and stops
when it finds a clear station.
If you can't tune in a station,
press the button repeatedly to
change the frequency step by
step.
When you tune in an FM station
that provides RDS (Radio Data
System) services, the name of the
station appears in the display and
“R•D•S” indicator lights up.
Display
Display
Indicates an FM stereo
broadcast.
Use these buttons for additional operations
Tips
• If the FM broadcast is
noisy, press PLAY
MODE•MONO/ST ISS
until “MONO” appears
in the display and the
radio will play in
monaural.
• Next time you want to
listen to the radio, just
press BAND. The player
turns on automatically
and starts playing the
previous station.
• RDS is available only on
FM stations.
• To display the
frequency when the
station name is shown
in the display, press
DSPL ENT MEM to
make “PS” disappears
from the display.
• If the reception of RDS
is weak or has poor
quality, “R•D•S”
indicator will go off.
OPERATE
VOLUME + , –
PLAY MODE
MONO/ST ISS
To Press
adjust the volume VOLUME +, – (VOL +, – on
the remote)
turn on/off the radio OPERATE
To improve broadcast reception
FM
Keep the FM lead aerial (supplied) as horizontal as
possible (see page 26).
MW/LW
Keep the MW/LW loop aerial (supplied) away as far
as possible from the player and then reorient the
aerial (see page 26).
Basic Operations
Basic Operations
GB
7

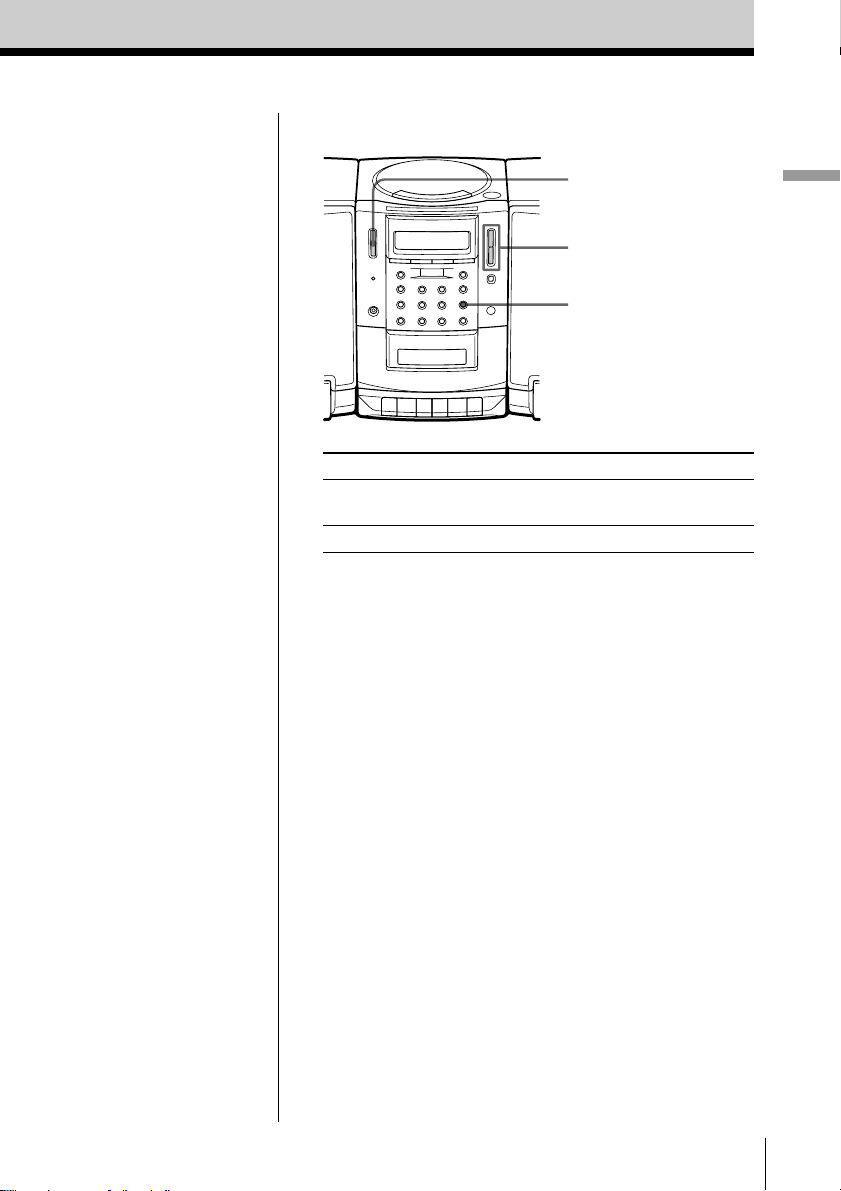
Playing a tape
For hookup instructions, see pages 25 - 26.
12
1 Press p6 to open the tape
M
recorded tape. Use TYPE I
(normal) tape only. Close the
compartment.
compartment and insert a
X
x Z
2 Press (.
z
N
m
GB
Basic Operations8
The player turns on (direct
power-on) and starts playing.
With the side you want
to play facing you
Display
Use these buttons for additional operations
Tip
Next time you want to
listen to a tape, just
press (. The player
turns on automatically
and starts playing the
tape.
OPERATE
VOLUME +, –
p6
P
0, )
To Press
adjust the volume VOLUME +, – (VOL +, –
on the remote)
stop playback p6
fast-forward or rewind the tape ), 0
pause playback P
Press the button again to
resume play after pause.
eject the cassette p6
turn on/off the player OPERATE
Basic Operations
Basic Operations
GB
9
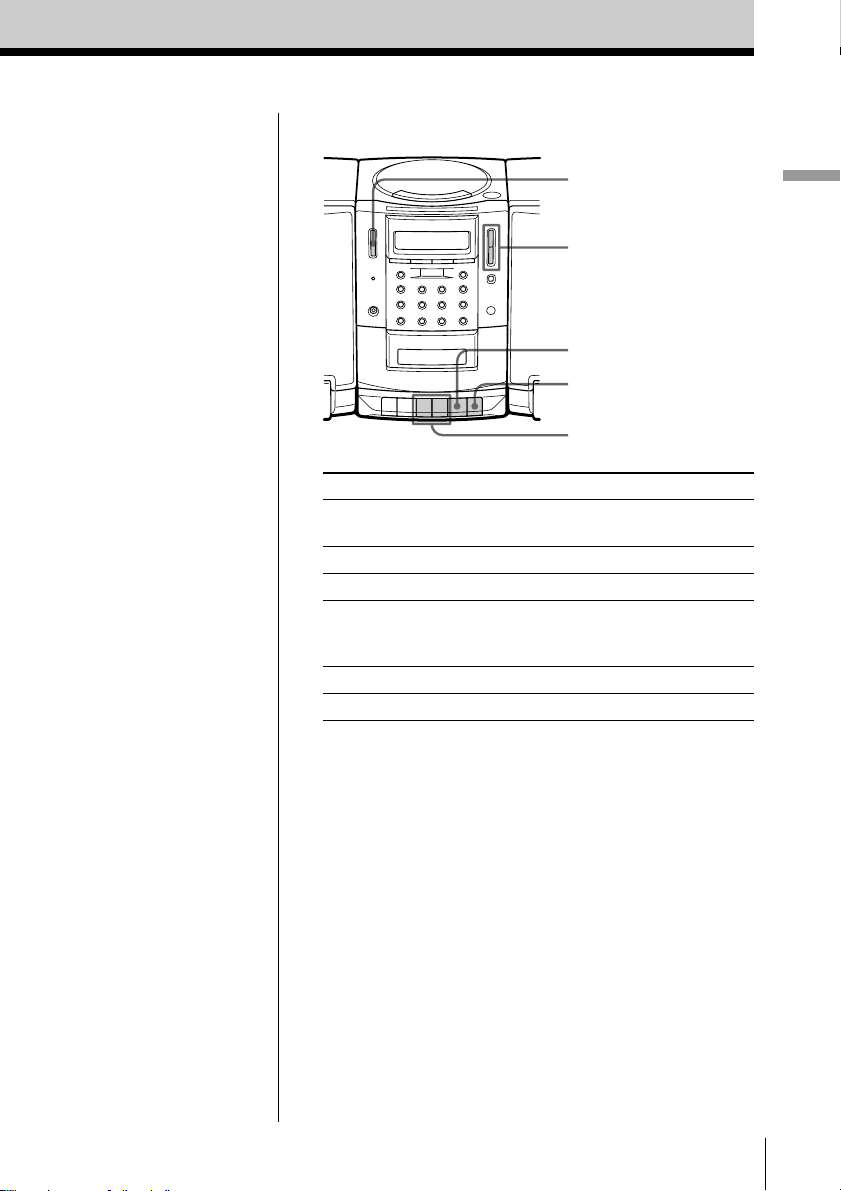
Recording on a tape
31
For hookup instructions, see pages 25 - 26.
1 Press p6 to open the tape
M
tape. Use TYPE I (normal) tape
only.
compartment and insert a blank
X
x Z
2 Select the program source you
want to record.
x
BAND
GB
Basic Operations10
To record from the CD player,
insert a CD (see page 4) and press
p on the CD section.
To record from the radio, tune in
the station you want (see page 6).
With the side you want to
record on facing you
Display

3 Press r to start recording.
z
N
(( is depressed automatically.)
m
Use these buttons for additional operations
Basic Operations
OPERATE
PLAY MODE
MONO/ST ISS
p6
P
Tips
• Adjusting the volume or
the audio emphasis (see
page 27) will not affect
the recording level.
• If the MW/LW
program makes a
whistling sound after
you've pressed r in step
3, press PLAY MODE•
MONO/ST ISS
(Interference Suppress
switch) repeatedly until
the noise is at a
minimum.
• To erase a recording,
proceed as follows:
1 Insert the tape whose
recording you want to
erase.
2 Turn on the power.
3 Press FUNCTION on
the remote repeatedly
until “TAPE” appears
in the display.
4 Press r.
To Press
stop recording p6
pause recording P
Press the button again to
resume recording.
turn on/off the player OPERATE
Basic Operations
11
GB
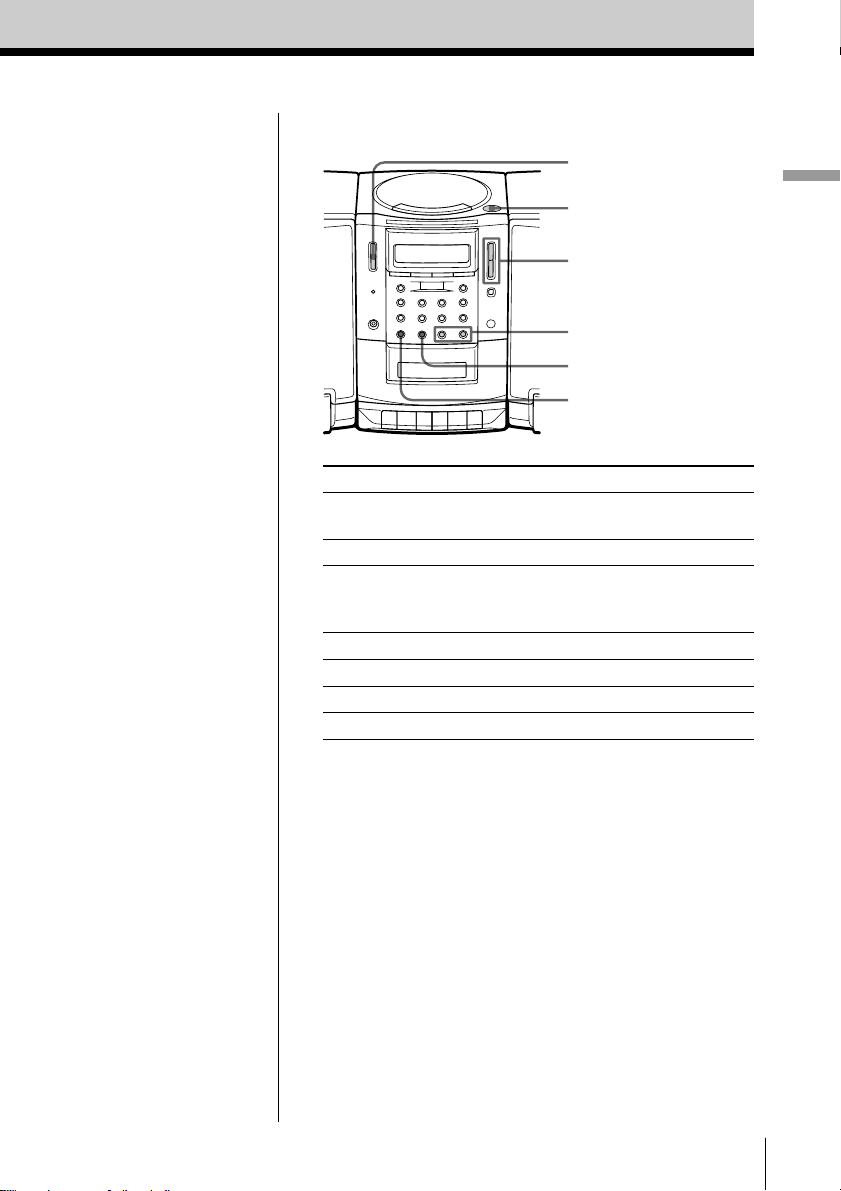
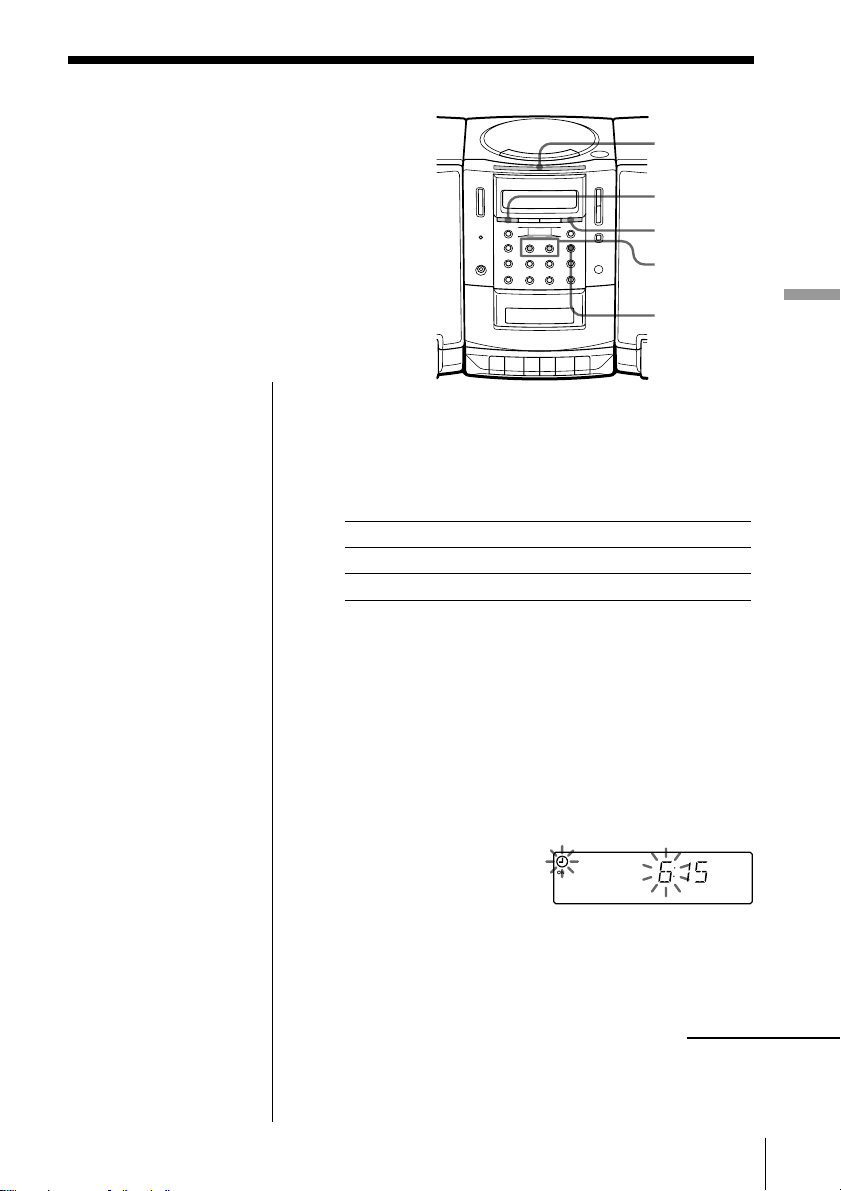
The CD Player
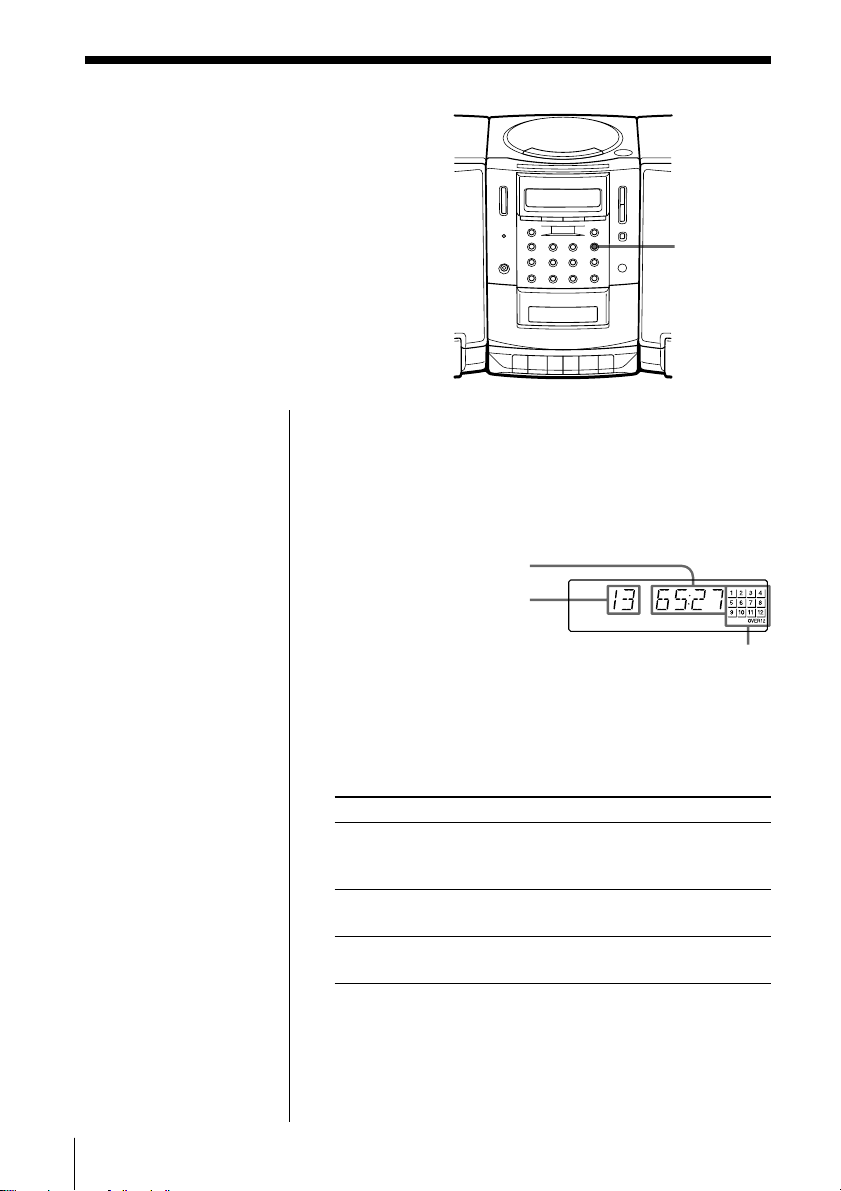
Using the display
You can check information about the CD
using the display.
Checking the total track numbers and playing
time
Press DSPL ENT MEM in stop mode.
If the CD has more than 12 tracks, “OVER 12” appears
in the display.
Total playing time
Total track numbers
DSPL
ENT MEM
Music calendar
Checking the remaining time
Press DSPL ENT MEM while playing a CD.
The track numbers in the music calendar disappear
after they are played.
To display
the current track number once
and the remaining time
on the current track*
the number of tracks left and twice
the remaining time on the CD
the current track number three times
and playing time
* For a track whose number is more than 20 the remaining
time appears as “– –:– –”.
GB
The CD Player12
Press
DSPL ENT MEM
Locating a specific
track
You can quickly locate any track using
the number buttons on the remote. You
can also find a specific point in a track
while playing a CD.
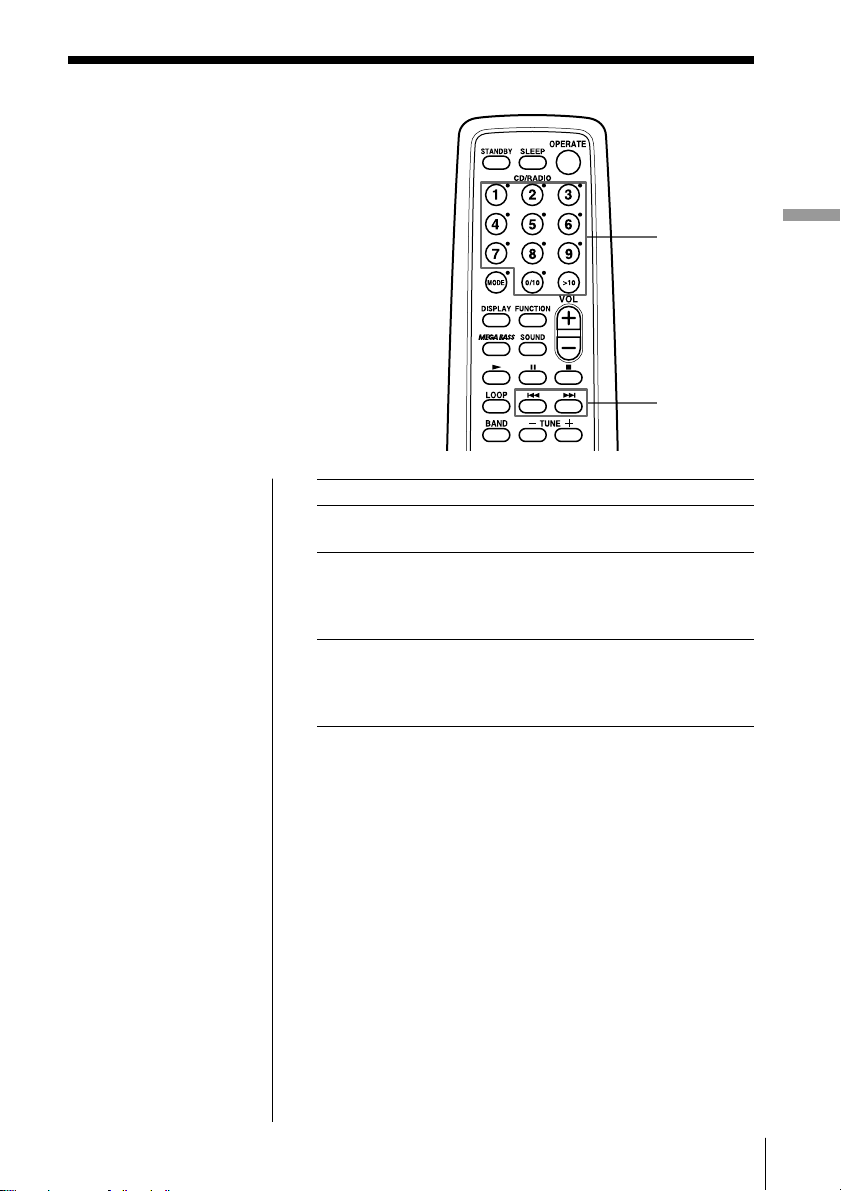
Number
buttons
=, +
The CD Player
Note
You cannot locate a
specific track if
“SHUF” or “PGM” is lit
in the display. Turn off
the indication by
pressing p.
Tip
When you locate a
track numbered over
10, press >10 first, then
the corresponding
number buttons.
Example:
To play track number
23, press >10 first, then
2 and 3.
To locate Press
a specific track directly the number button of the
track
a point while listening to + (forward) or =
the sound (backward) while playing
and hold down until you
find the point
a point while observing + (forward) or =
the display (backward) in pause and
hold down until you find
the point
The CD Player 13
GB
Playing tracks
repeatedly
(Repeat Play)
You can play tracks repeatedly in
normal, shuffle or program play modes
(see pages 15 - 17).
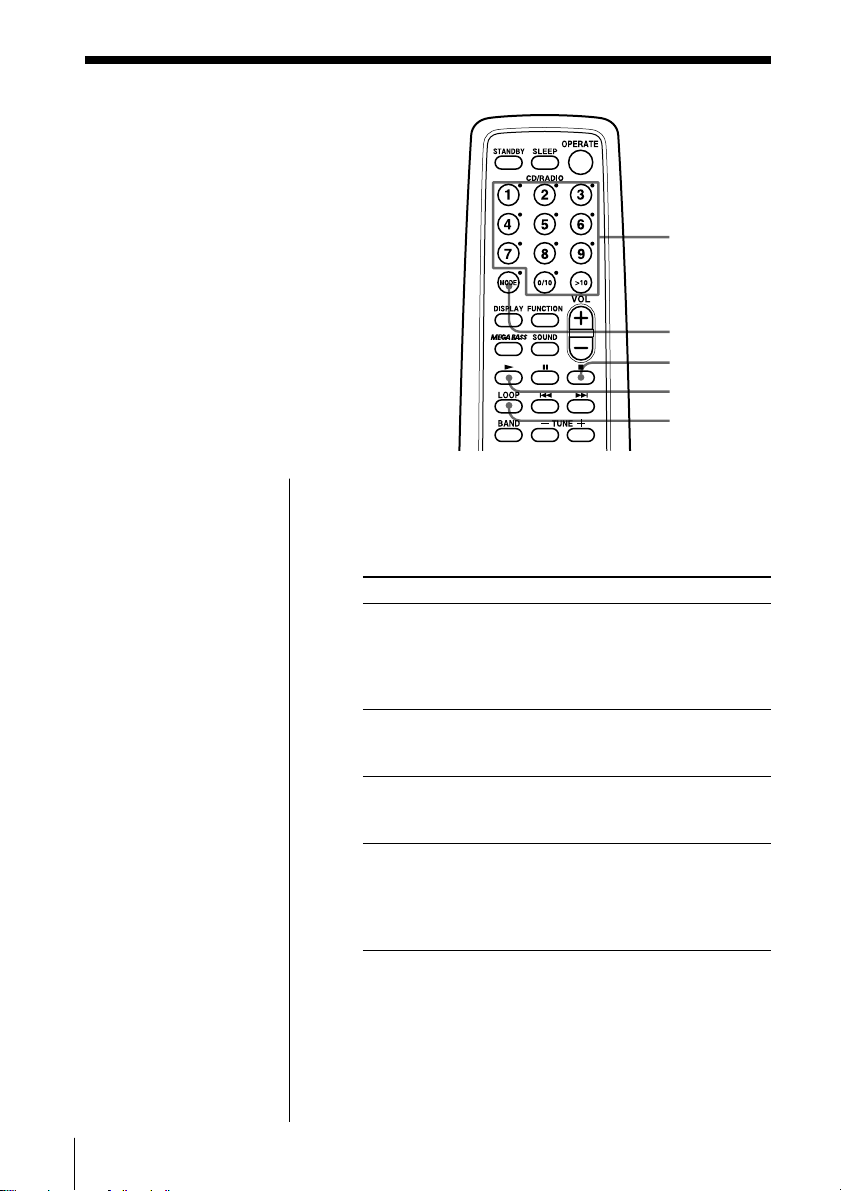
On the player
• Use PLAY MODE•
MONO/ST ISS instead
of MODE.
• When you’ve selected
REP 1, select the track
by pressing = or
+ then ^.
Tip
Press and hold LOOP
on the remote during
play to repeat a
selected part of a CD.
When you release
LOOP, the player
returns to normal play.
1 Press p.
“CD” appears in the display.
2 Proceed as follows:
To repeat Do this
a single track 1 Press MODE until “REP 1”
all the tracks 1 Press MODE until “REP
tracks in random order 1 Press MODE until “SHUF
programmed tracks 1 Press MODE until “PGM
Number
buttons
MODE
p
(
LOOP
appears.
2 Select the track by
pressing the number
button.
ALL” appears.
2 Press (.
REP” appears.
2 Press (.
REP” appears.
2 Program tracks (see step 3
on page 16.)
3 Press (.
To cancel Repeat Play
Press MODE until “REP” disappears from the display.
GB
The CD Player14
Playing tracks in
random order
(Shuffle Play)
You can play tracks in random order.
On the player
1 Press p.
2 Press PLAY MODE•
MONO/ST ISS until
“SHUF” appears in
the display.
3 Press ^.
1 Press p.
“CD” appears in the display.
2 Press MODE until “SHUF” appears in the display.
3 Press ( to start shuffle play.
To cancel Shuffle Play
Press MODE until “SHUF” disappears from the
display.
The CD Player
MODE
p
(
The CD Player 15
GB
Creating your
own program
(Program Play)
You can arrange the playing order of up
to 20 tracks on a CD.
On the player
1 Press p.
2 Press PLAY MODE•
MONO/ST ISS until
“PGM” appears in
the display.
3 Press = or +
and then press DSPL
ENT MEM for the
tracks you want to
program in the order
you want.
4 Press ^.
Tips
• You can play the same
program again, since
the program is saved
until you open the CD
compartment.
• You can record your
own program. After
you’ve created the
program, insert a blank
tape and press r to
start recording.
1 Press p.
“CD” appears in the display.
2 Press MODE until “PGM” appears in the display.
3 Press the number buttons for the tracks you want
to program in the order you want.
The programed tracks appear in the music
calender.
4 Press ( to start program play.
Programed track
Number
buttons
MODE
p
(
Playing order
GB
The CD Player16

To cancel Program Play
Press MODE until “PGM” disappears from the
display.
To check the order of tracks before play
Press DSPL ENT MEM on the player.
Every time you press the button, the track number
appears in the programed order.
To change the current program
Press p once if the CD is stopped and twice if the CD
is playing. The current program will be erased. Then
create a new program following the programing
procedure.
The CD Player
The CD Player 17
GB
The Radio
Presetting radio
stations
You can store radio stations into the
player’s memory. You can preset up to
30 radio stations, 10 for each band.
Number
buttons
BAND
On the player
1 Press BAND to select
the band.
2 Set the frequency to
the station you want.
3 Press and hold DSPL
ENT MEM for 2
seconds.
4 Press PRESET + or –
until the preset
number (1 to 10) you
want for the station
flashes in the music
calendar.
5 Press DSPL ENT
MEM again.
1 Press BAND until the band you want appears in
the display.
2 Set the frequency to the station you want.
3 Press and hold the number buttons that you want
to preset the new station for 2 seconds.
GB
The Radio18
Playing preset
radio stations
Once you've preset the stations, use the
number buttons on the remote or the
PRESET +/– to tune in your favorite
stations.
Number
buttons
BAND
The Radio
On the player
1 Press BAND to select
the band.
2 Press PRESET + or –
to tune in the stored
station.
1 Press BAND to select the band.
2 Press the number buttons to tune in the stored
station.
The Radio
19
GB
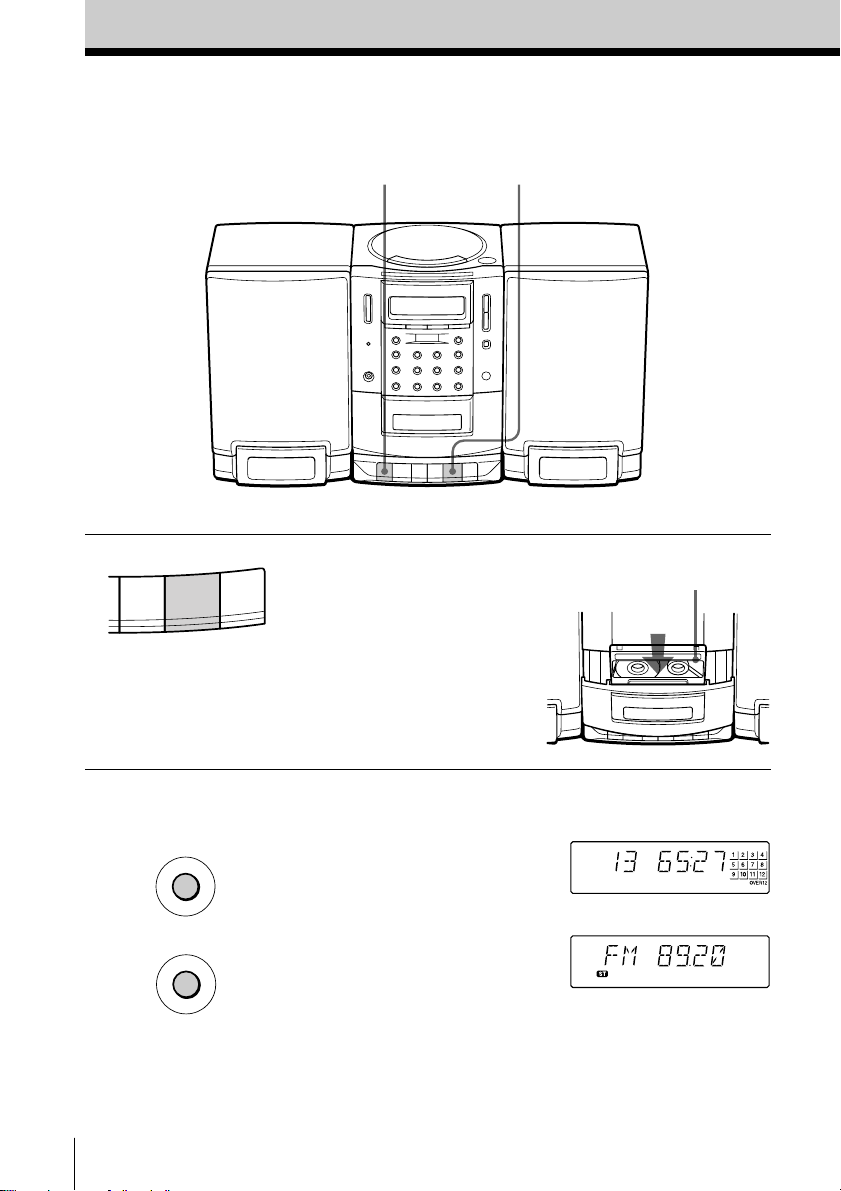
The Timer
Setting the clock
“– –:– –” indication appears in the
display until you set the clock.
Tip
The time display
system:
24-hour system
Before you begin, hook up the system (see pages 25 -
26).
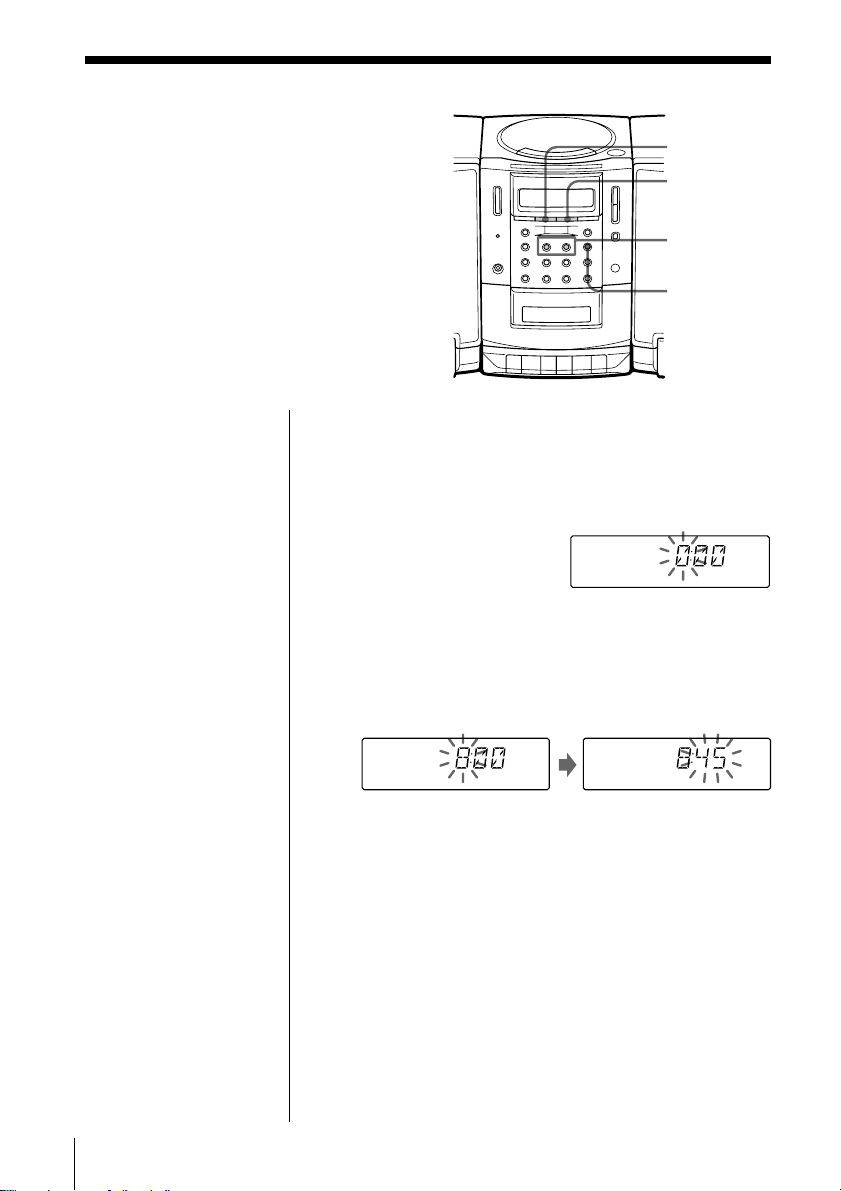
1 Press and hold CLOCK for 2 seconds until the
2 Press TUNING•TIME SET + or – until you set the
CLOCK
SUMMER
TUNING
TIME SET +, –
DSPL
ENT MEM
hour digit flashes.
current hour. Then press DSPL ENT MEM.
The minute digits flash. Set the minutes by
pressing TUNING•TIME SET + or – until the
correct minute is displayed.
3 Press DSPL ENT MEM.
The clock starts from 00 seconds.
To change the display to the daylight saving time
(summer time) indication
Press and hold SUMMER for 2 seconds.
“SUMMER” appears in the display and the time
indication changes to summer time.
To cancel the summer time indication
Press and hold SUMMER again until “SUMMER”
disappears from the display.
GB
The Timer20
Waking up to
music
You can wake up to music or a radio
program at a preset time. Make sure you
have set the clock (“Setting the clock” on
page 20).
Before you begin, make sure the t (clock) indication
is not lit in the display. If it is lit, press STANDBY.
1 Prepare the music source you want to play.
To play Do this
the radio Tune in a station.
a CD Insert a CD.
2 Press TIMER.
The t (clock) and the music source (“CD” or
“RADIO”) flash.
3 Select the music source (“CD” or “RADIO”) by
pressing TUNING•TIME SET + or –, then DSPL
ENT MEM.
4 Set the timer to the hour you want the music to
start by pressing TUNING•TIME SET + or –, then
DSPL ENT MEM.
SNOOZE
TIMER
STANDBY
TUNING
TIME SET +, –
The Timer
DSPL
ENT MEM
Set the minutes, then press DSPL ENT MEM.
5 Set the timer to the hour and the minutes you
want the music to go off. (Do as step 4.)
continued
The Timer 21
GB
 Loading...