

Page 1
3-810-991-12(1)
Flat Component
System
Operating Instructions
Mode d’emploi
Manual de Instrucciones
Manual de Instruções
GB
F
E
P
GB
1
fT
MJ-L1
MJ-L1A
©1996 by Sony Corporation
Page 2
English
WARNING
To prevent fire or shock hazard, do not
expose the unit to rain or moisture.
To avoid electrical shock, do not open the cabinet. Refer servicing to
qualified personnel only.
Do not install the appliance in a confined space, such as a bookcase
or built-in cabinet.
US and foreign patents licensed from Dolby Laboratories Licensing
Corporation.
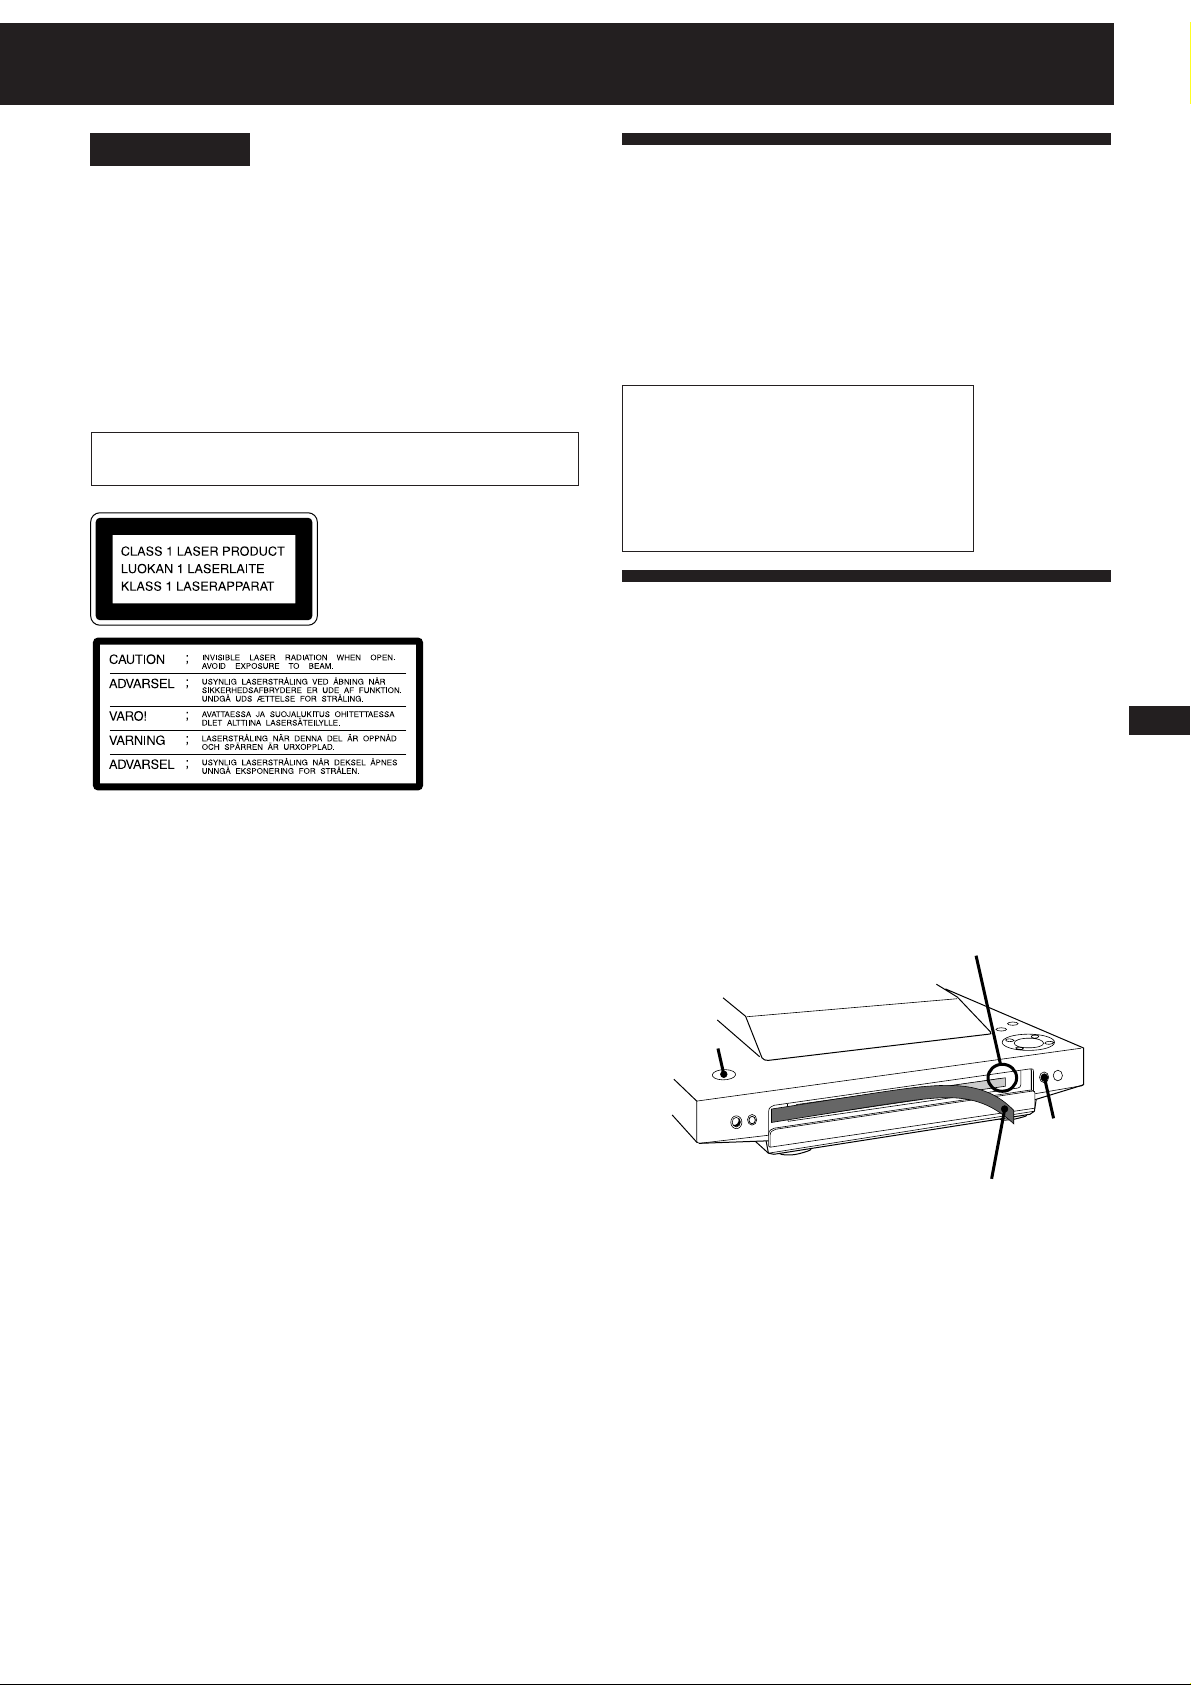
Laser component in this product is capable of emitting radiation
exceeding the limit for Class 1.
This appliance is classified as a
CLASS 1 LASER product. The
CLASS 1 LASER PRODUCT
MARKING is located on the rear
exterior.
This caution
label is located
inside the unit.
Welcome!
Thank you for purchasing the Sony Flat Component System. This
series is packed with fun features. Here are just a few:
•A preset feature, that lets you store and recall up to 30 of your
favourite radio stations
•A timer that lets you set the CD player, MD deck or radio to turn
on and off whenever you want
•An MD deck that lets you record from the radio or CD player
•A remote that lets you control your system from your seat
The MJ-L1/MJ-L1A consists of the following:
(MJ-L1)
-Main unit : HCD-MJ1
-Speaker System : SS-MJ1
-Remote Control : RM-SMJ1
(MJ-L1A)
-Main unit : HCD-MJ1A
-Remote Control : RM-SMJ1
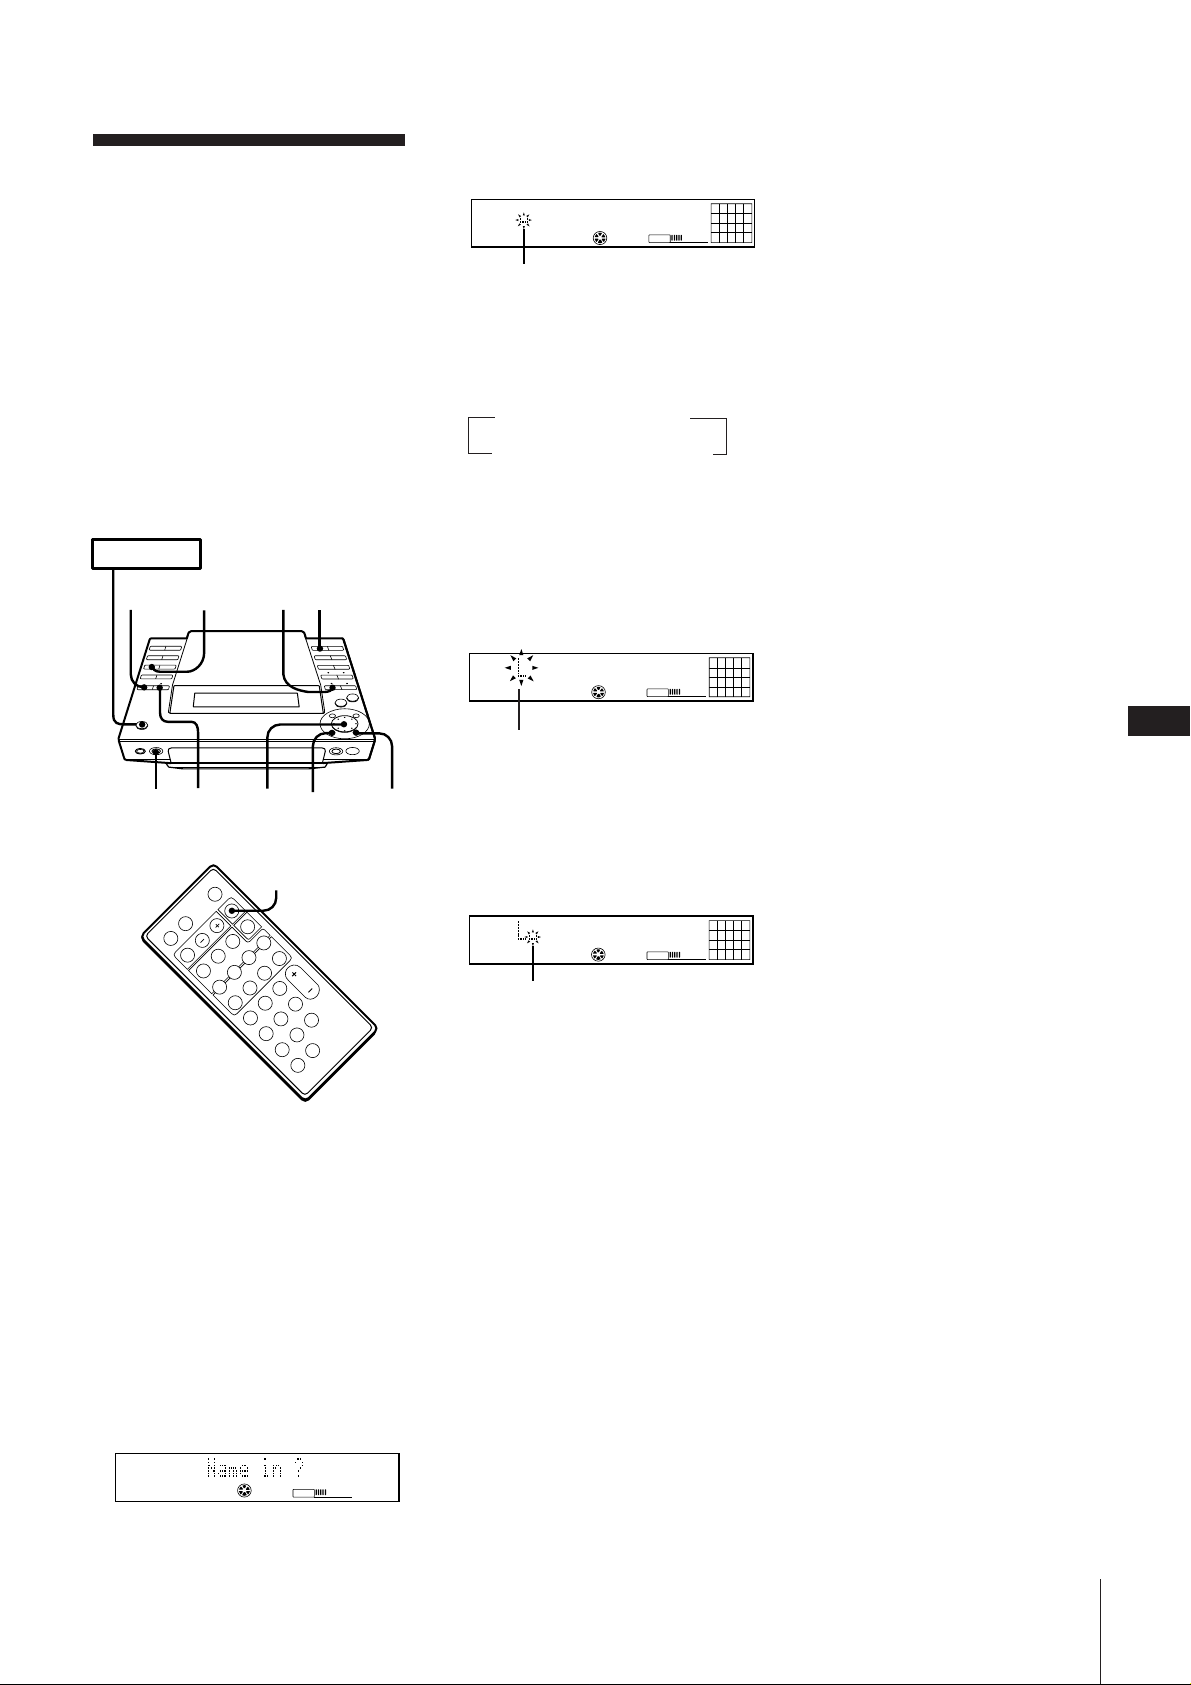
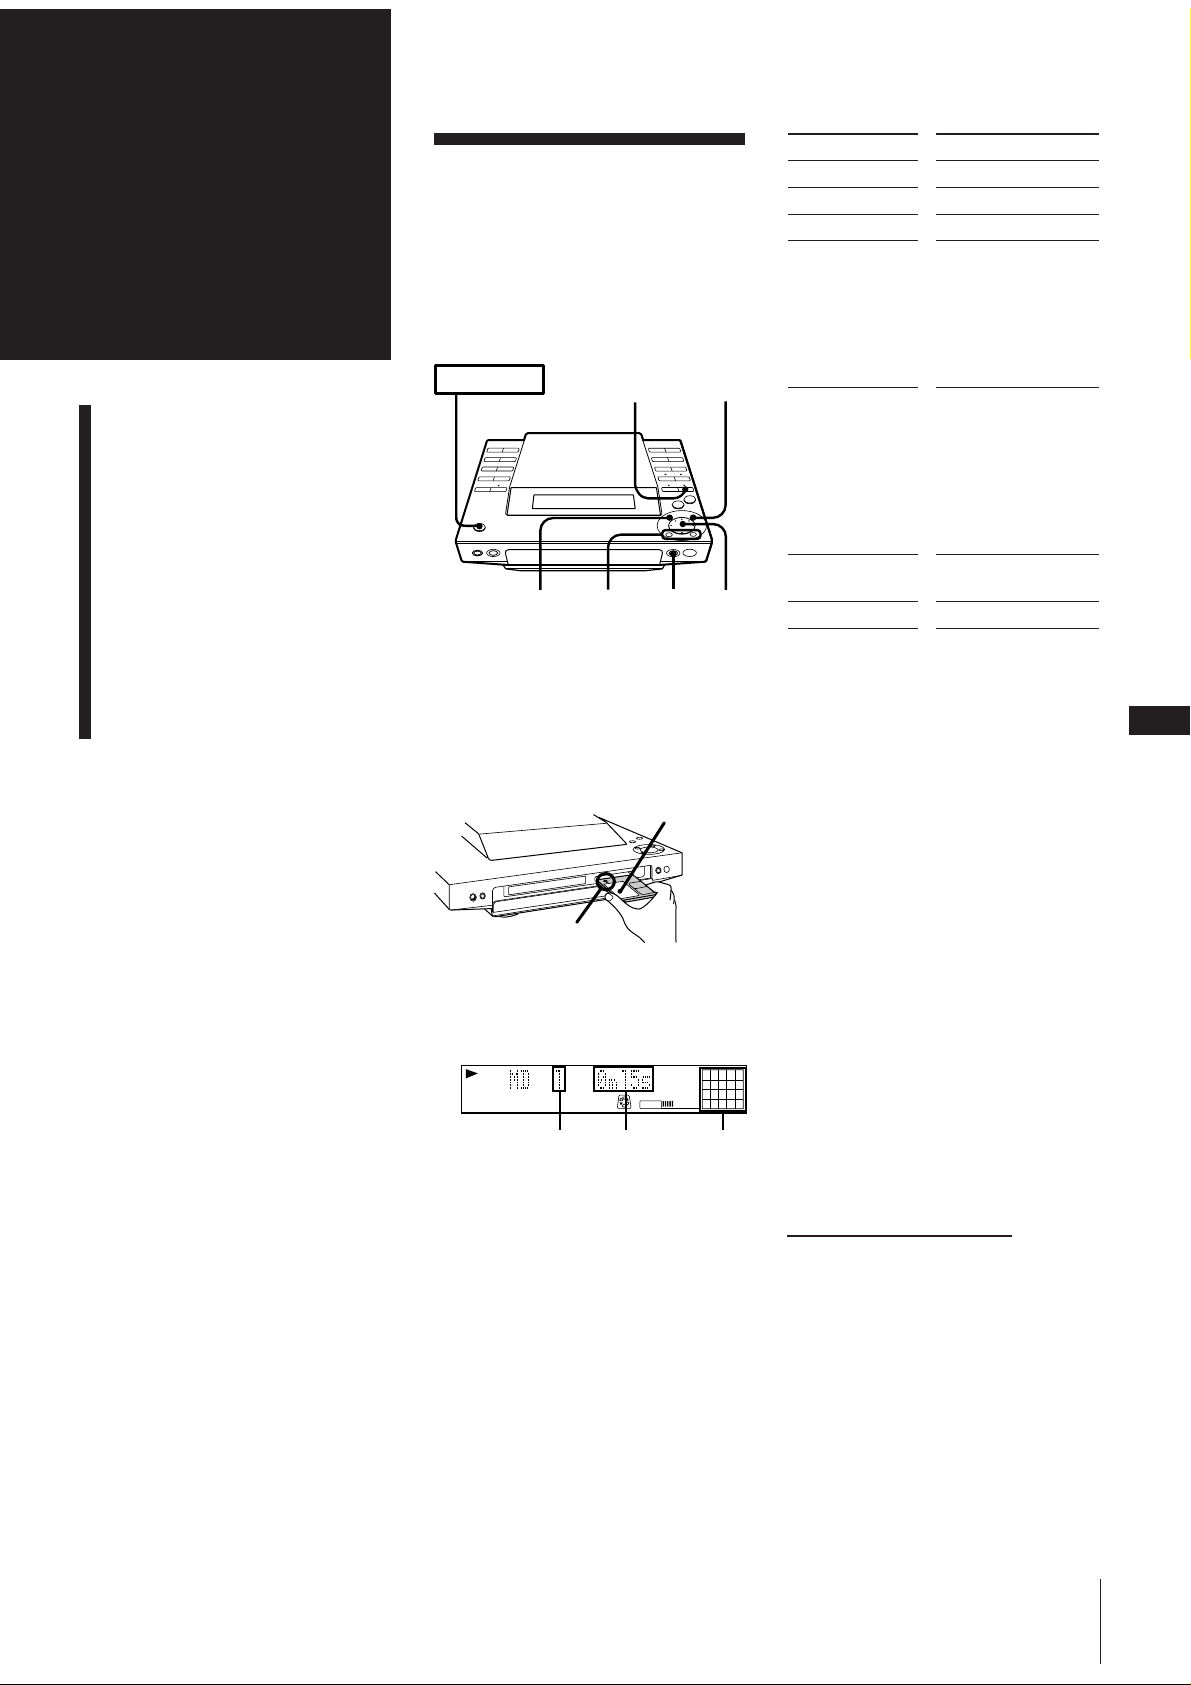
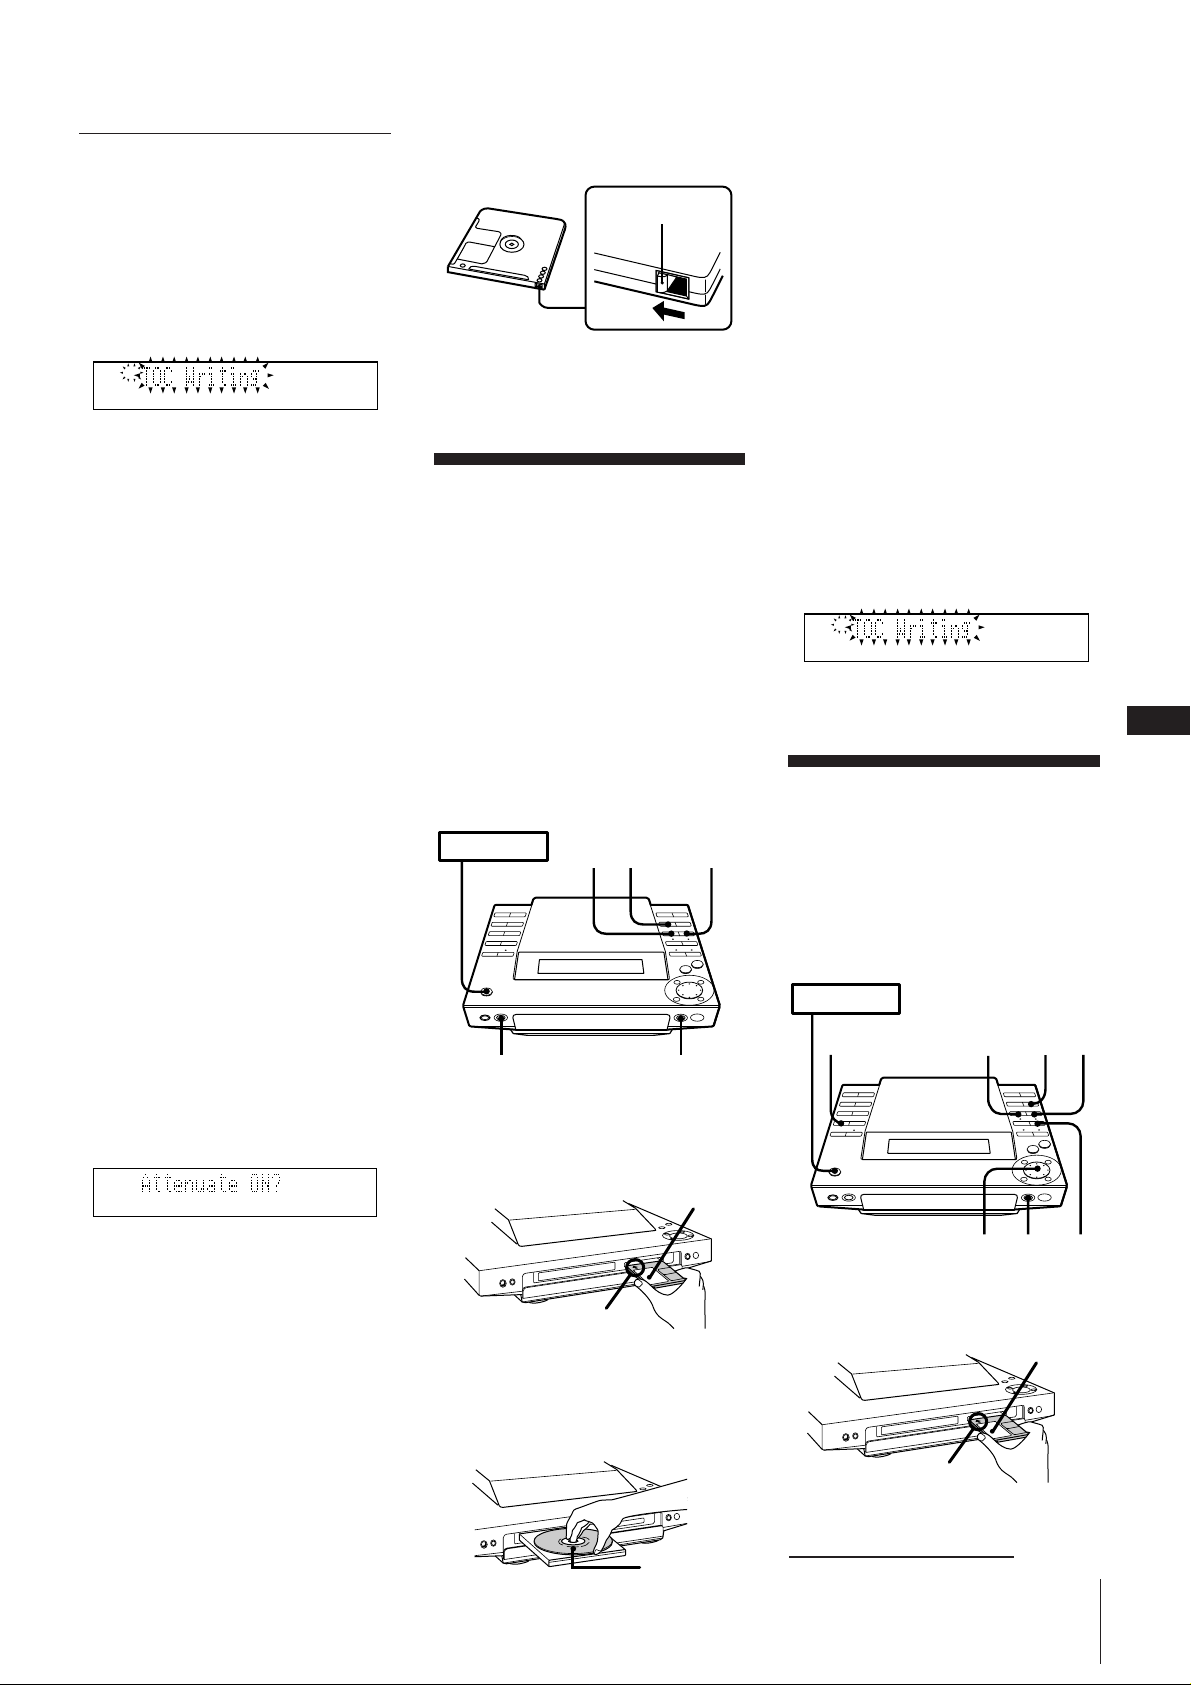
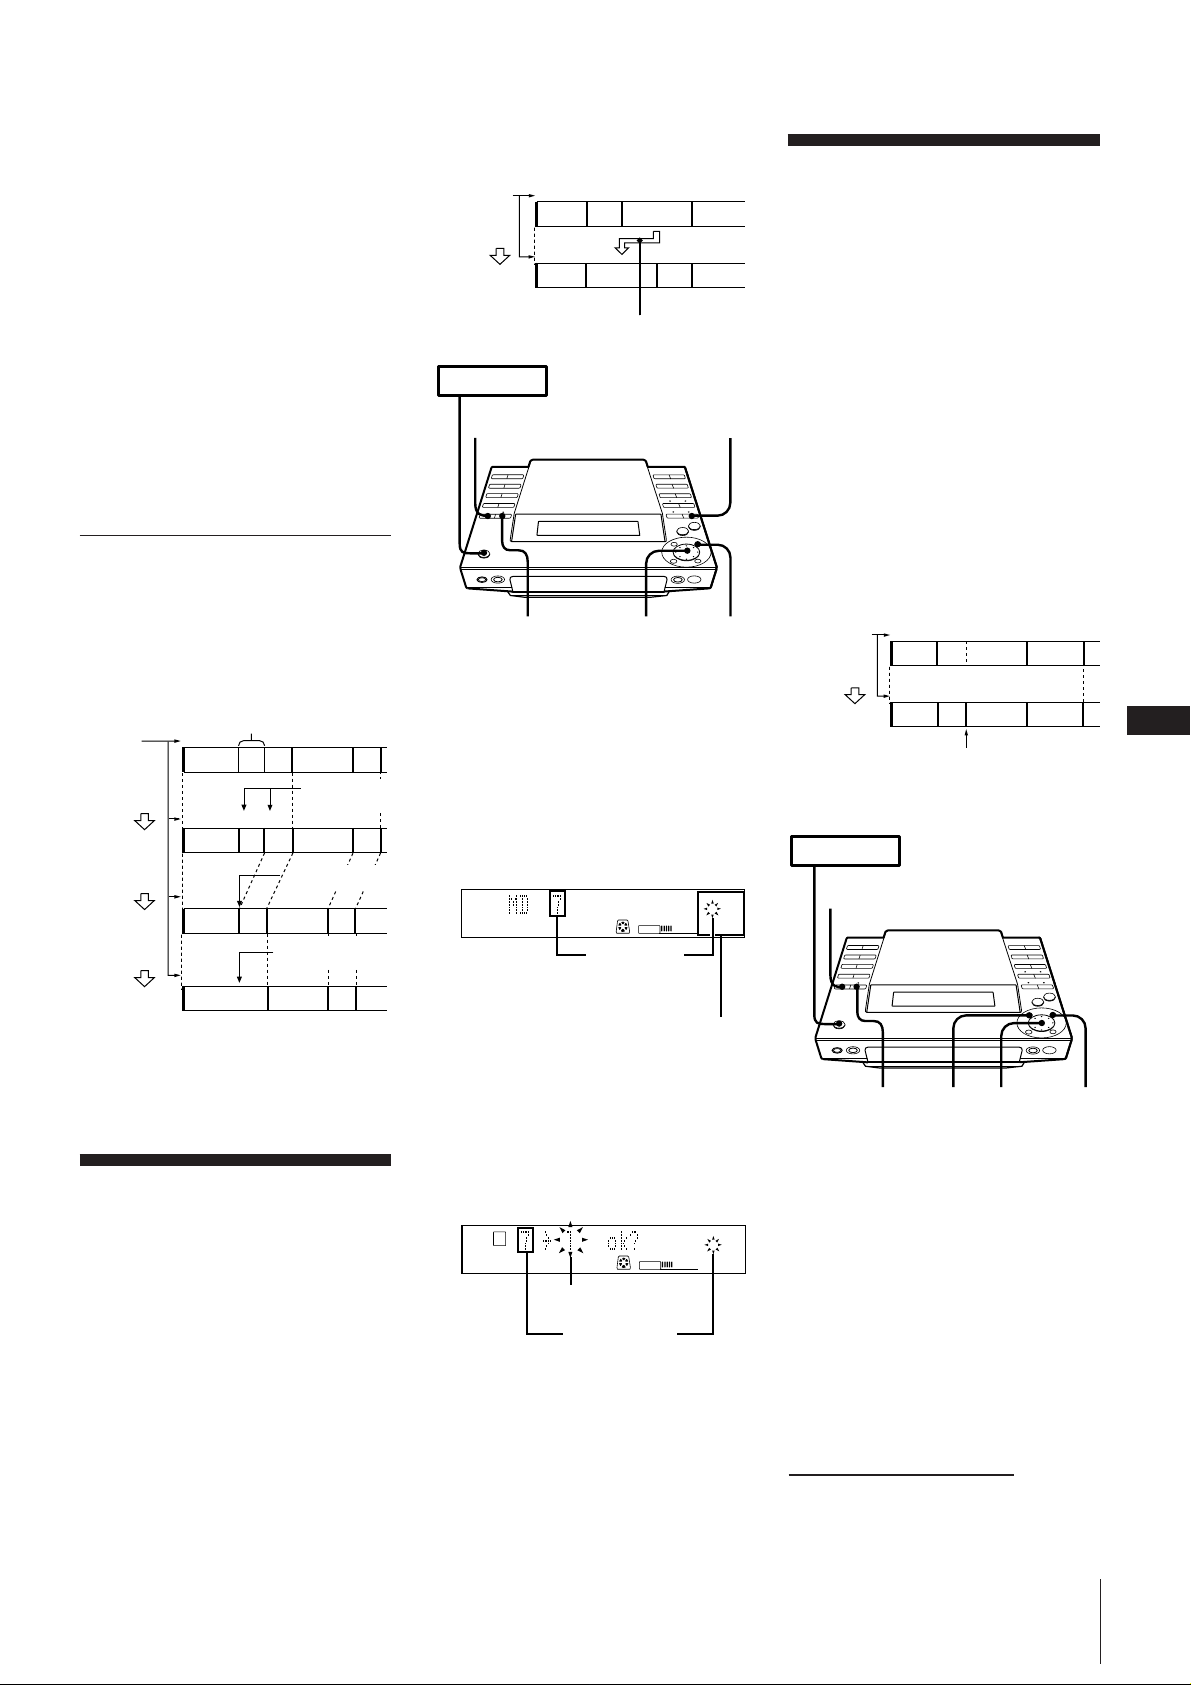
Before Using This Unit
Make sure to take out the sheet inside the
disc slot on the MD deck.
GB
1 Connect the mains lead to the wall outlet and press POWER.
2 Press MD § to open the lid.
3 Remove the adhesive tape and take out the sheet inside the disc
slot.
The sheet may come out by itself when you remove the adhesive
tape.
Take out sheet
POWER
MD §
Remove tape
Before setting up the system, press MD § to close the lid, press
POWER to turn off the power, and disconnect the mains lead.
2
Page 3

Table of Contents
Chapter 1: Setting Up
Connecting the Stereo 4
Inserting the Battery 5
Setting the Clock 6
Chapter 2: the CD Player
Playing a CD (normal play) 7
Using the Display 8
Playing Tracks Repeatedly (repeat play) 8
Playing Tracks in Random Order (shuffle play) 9
Playing Tracks in the Desired Order
(programme play) 9
Assigning a Name to a CD (disc memo function) 10
Chapter 3: Playing MDs
Playing an MD (normal play) 11
Using the Display 12
Playing Tracks Repeatedly (repeat play) 12
Playing Tracks in Random order (shuffle play) 13
Playing Tracks in the Desired Order
(programme play) 13
Chapter 8: Additional Features
Falling Asleep to Music 26
Waking Up to Music 26
Timer-Recording Radio Programmes 27
Connecting Optional Equipment 28
For Your Information
Precautions 29
Maintenance 29
Guide to the Serial Copy Management System 30
System Limitations of MD 31
MD Display Messages 31
Troubleshooting Guide 32
Specifications 33
Index to Parts and Controls 33
Index 35
GB
3
Chapter 4: Recording on MDs
Before Recording 14
Recording a CD 15
Recording from the Radio 15
Recording on an MD Manually 16
Marking Track Numbers While Recording 16
Chapter 5: Editing Recorded MDs
Erasing Recordings (erase function) 18
Moving Recorded Tracks (move function) 19
Dividing Recorded Tracks (divide function) 19
Combining Recorded Tracks (combine function) 20
Labelling Recordings (title function) 20
Chapter 6: the Radio
Listening to the Radio 22
Presetting Radio Stations 23
Playing Preset Radio Stations 24
Chapter 7: Sound Adjustment
Adjusting the Sound 25
Page 4
Chapter 1:
FM 75
Ω
AM
y
Setting
Up
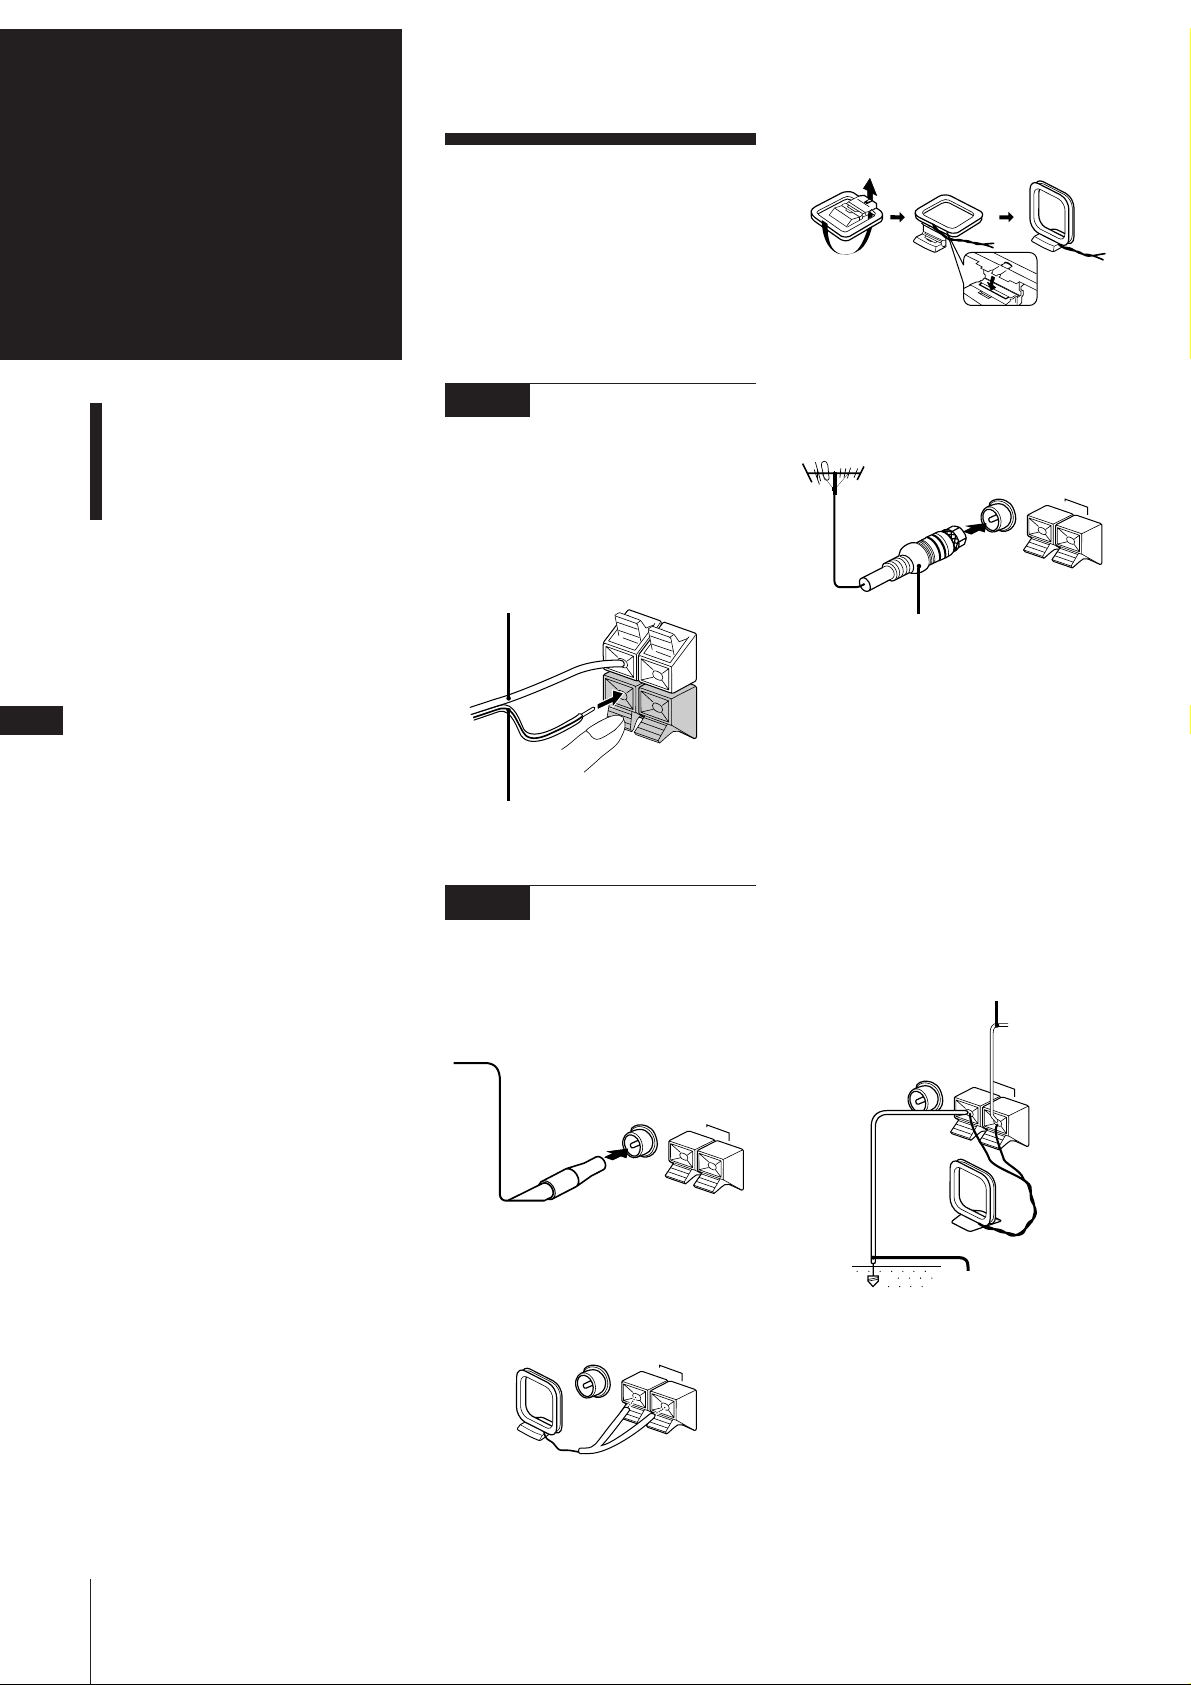
Connecting the Stereo
Inserting the Battery
Setting the Clock
Connecting the
Stereo
Use the illustrations below to connect your
stereo.
If you want to connect any optional
components to the stereo, see “Connecting
Optional Equipment” in Chapter 8.
STEP 1
Connecting the
Speakers (For MJ-L1 only)
Connect the right speaker to the SPEAKER
R connectors and the left speaker to the
SPEAKER L connectors with the grey cord
to ‘ (grey) and the black-lined cord to ’
(black).
Grey cord to ‘
(grey)
R
L
To set up the AM loop aerial
To improve the FM reception
Connect an outdoor FM aerial to the FM
75Ω terminal, using a 75-ohm coaxial cable
and IEC standard socket connector.
FM 75
IEC standard socket connector
(not supplied)
AM
Ω
y
GB
To improve the AM reception
4
Black-lined cord to ’
(black)
STEP 2
Connecting the
After you connect the AM aerial, connect a
6- to 15-meter insulated wire to the AM
terminal. Connect the y terminal to earth.
Important
Ground the external aerial against lightning
from the y terminal.
To prevent a gas explosion, do not connect
the ground wire to a gas pipe.
Aerials
FM lead aerial connection
Connect the supplied lead aerial to the FM
75Ω terminal.
FM 75
AM loop aerial connection
Connect the supplied loop aerial to the AM
and the y terminals.
FM 75
Ω
AM
Ω
y
AM
y
Insulated wire
(not supplied)
Ground wire
(not supplied)
Chapter 1: Setting Up
Page 5
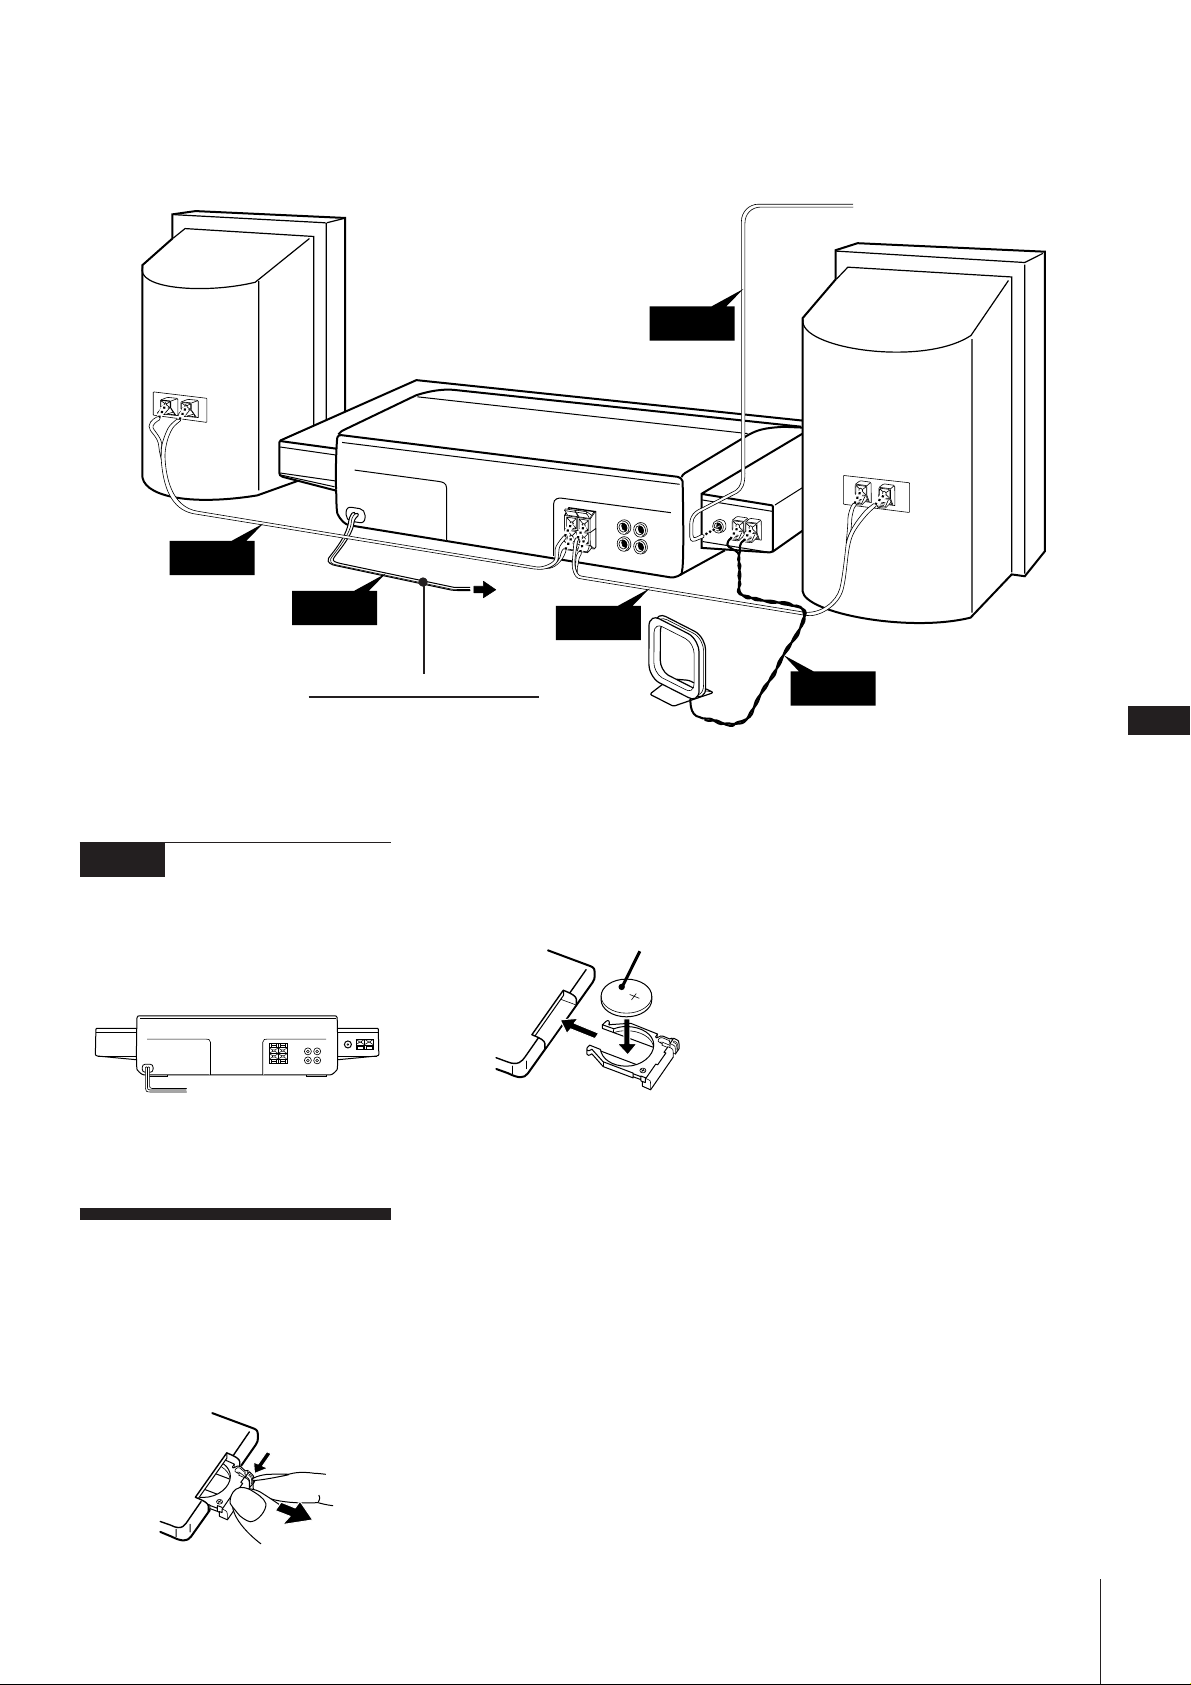
Front
speaker (R) *
STEP 1
FM lead aerial
(supplied)
STEP 2
Front speaker
(L) *
STEP 3
!Do this connection last!
* Front speakers are supplied for MJ-L1 only.
STEP 3
Connecting the
Power
Connect the main lead cord to a wall outlet
after you have made all the above
connections.
/
to a wall outlet
Inserting the
Battery
to a wall outlet
STEP 1
AM loop aerial
(supplied)
2Insert a lithium battery CR2025 with the
+ side facing up.
a lithium battery
CR2025
3Insert the battery case.
CAUTION
Danger of explosion if battery is incorrectly
replaced.
Replace only with the same or equivalent
type recommend by the manufacturer.
Discard used batteries according to the
manufacturer's instructions.
STEP 2
GB
5
To avoid battery leakage
If you are not going to use the remote for a
long time, remove the battery to avoid
damage caused by corrosion from battery
leakage.
Notes on lithium battery
•Keep the lithium battery out of the reach
of children.
Should the battery be swallowed,
immediately consult a doctor.
•Wipe the battery with a dry cloth to
assure a good contact.
•Be sure to observe the correct polarity
when installing the battery.
•Do not hold the battery with metallic
tweezers, otherwise a short-circuit may
occur.
Install a lithium battery in the supplied
remote for remote control.
1 Slide out and remove the battery case.
Battery life
You can expect the remote to operate for
about six months (using a Sony CR2025
lithium battery) before the battery run
down. When the battery no longer operates
the remote, replace the battery with a new
one.
Chapter 1: Setting Up
Page 6
Setting the Clock
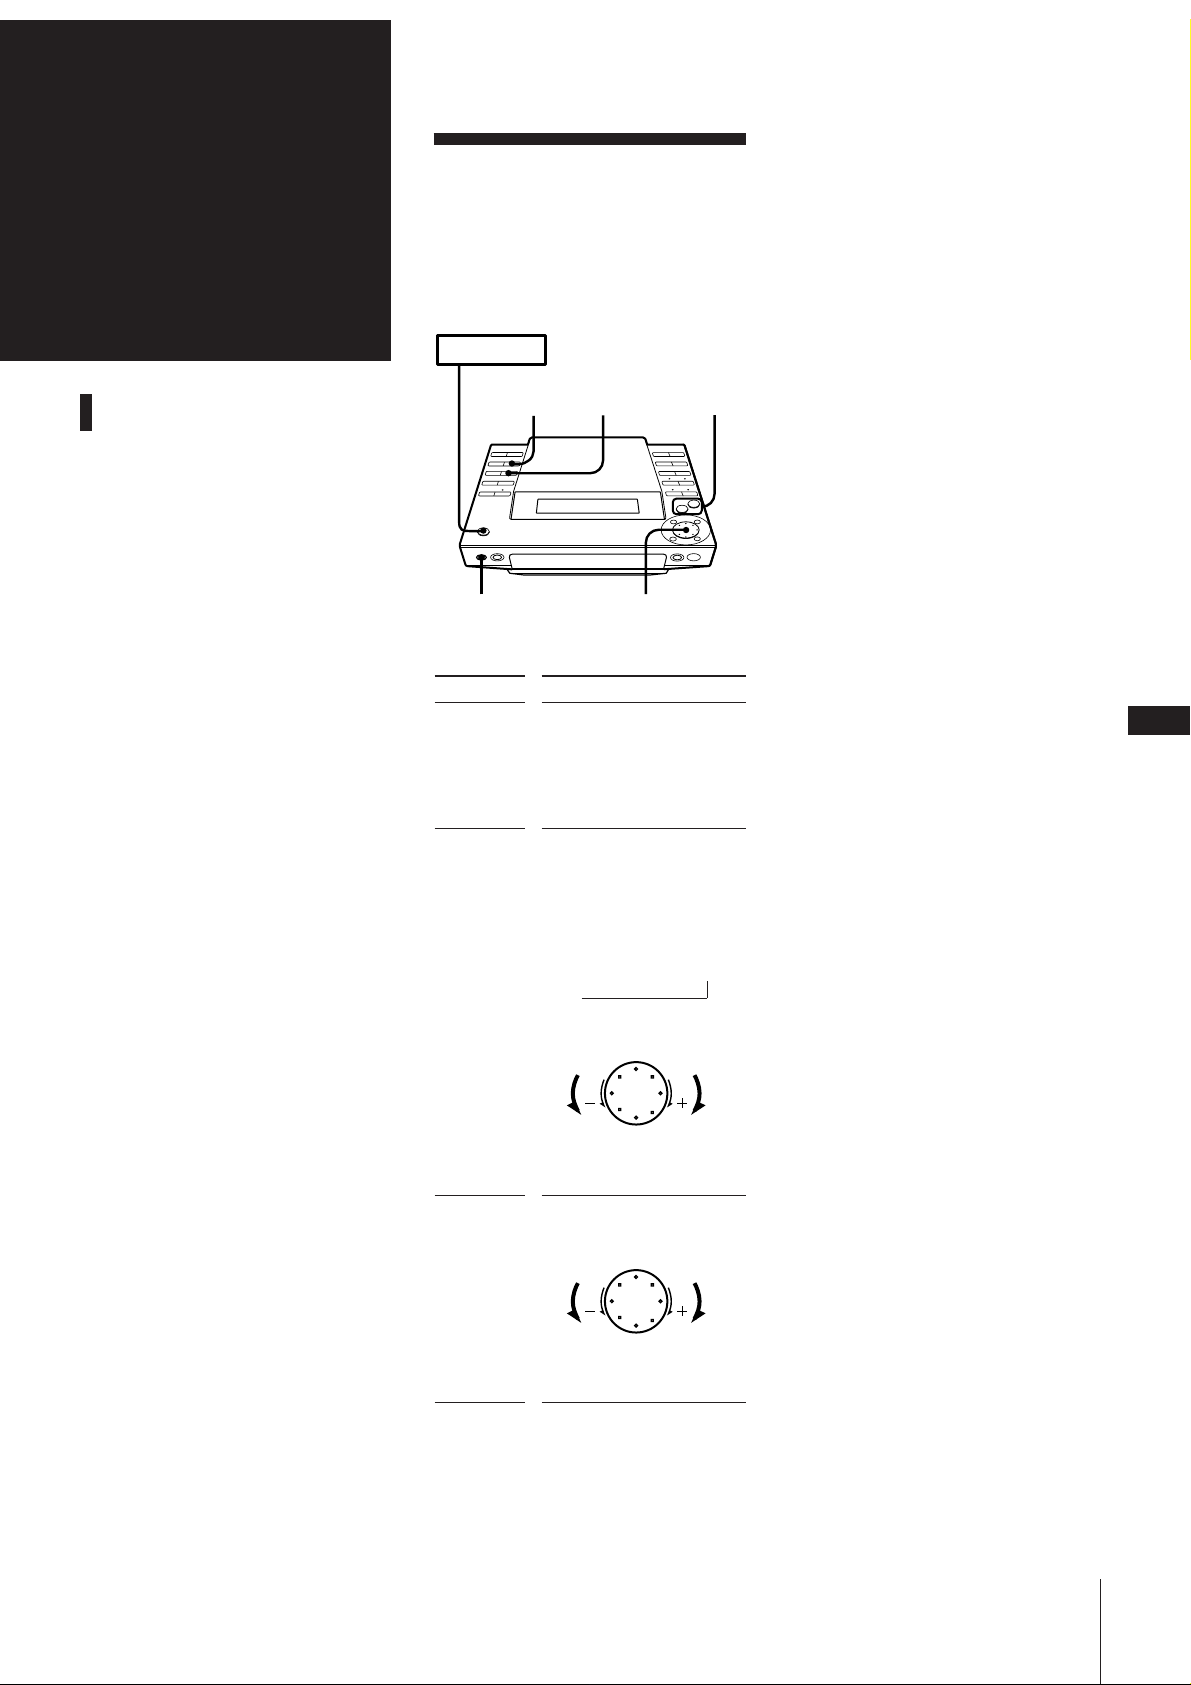
To check the time while power is on
Press CLOCK.
The current time is displayed for 4 seconds.
GB
The built-in clock shows the time in the
display even when the power is off.
Use the buttons on the unit for this
operation.
1
3,5
2,4
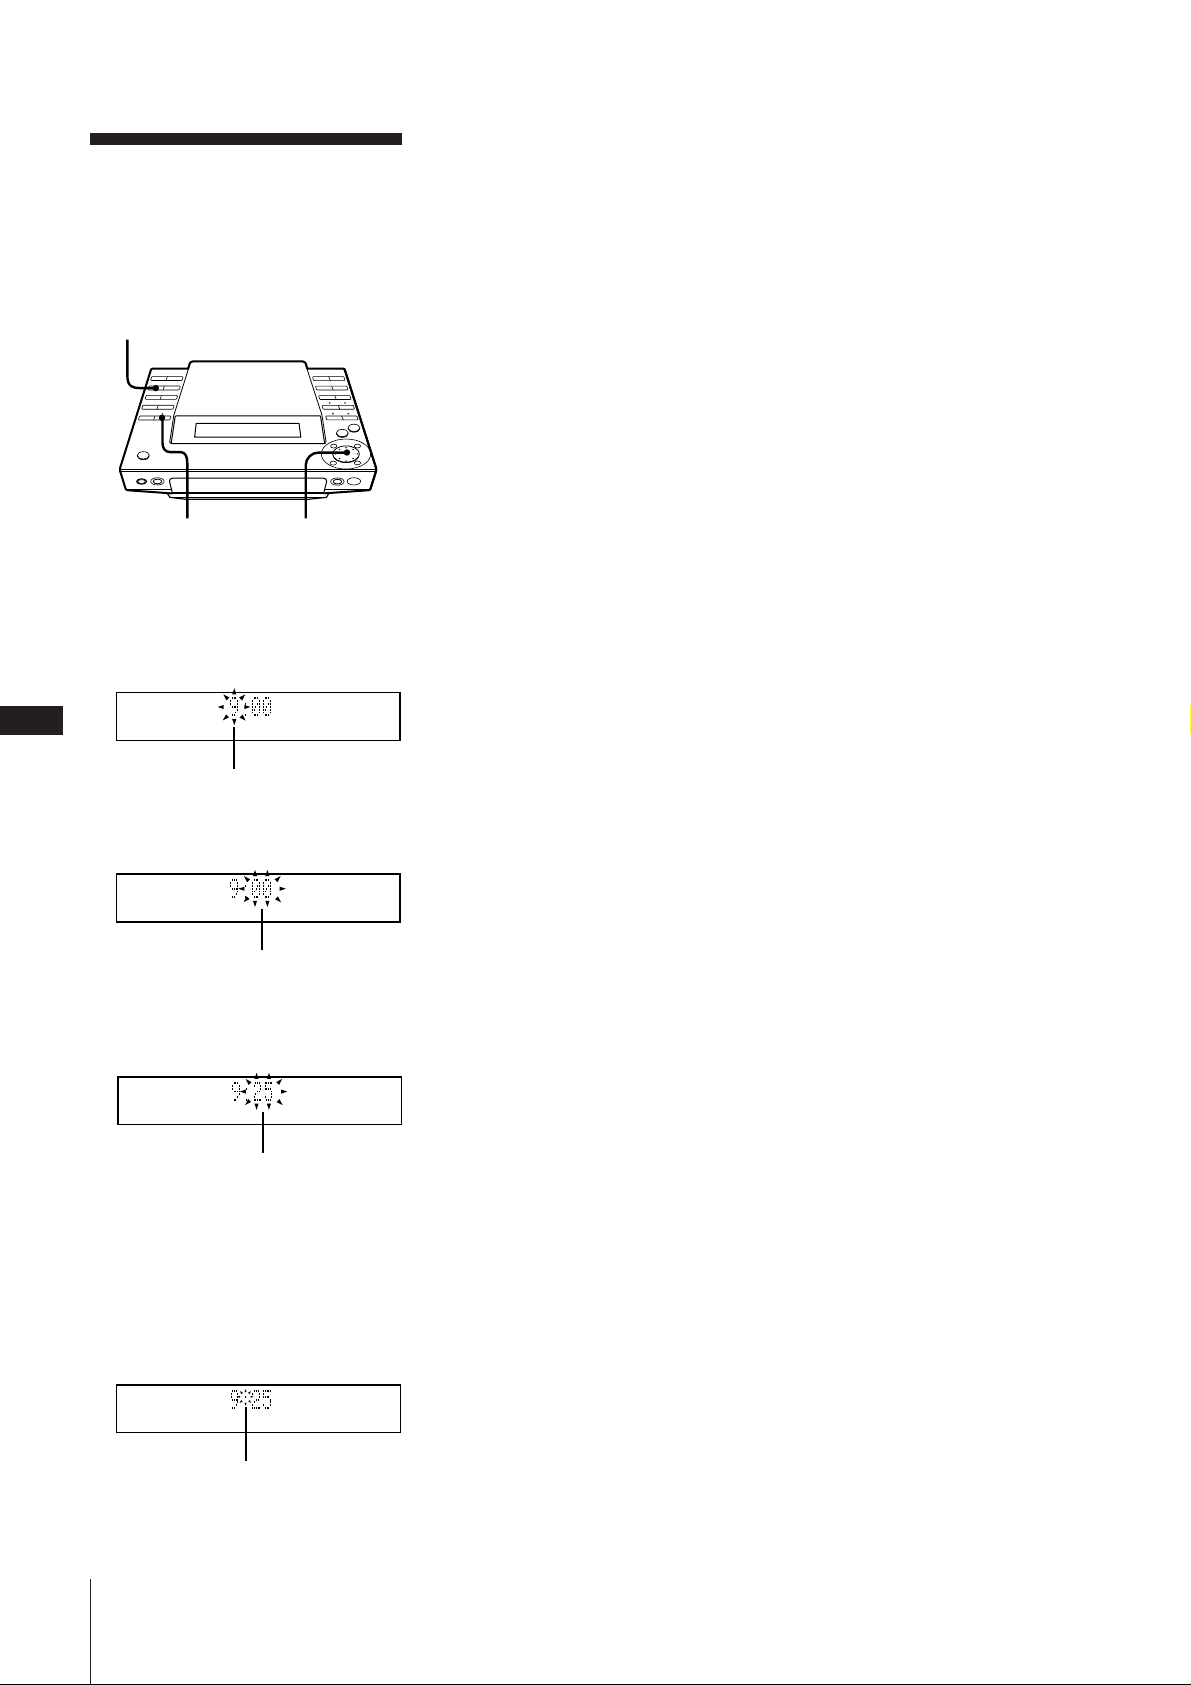
1 Press CLOCK.
2 Set the current hour by turning the JOG
dial until the correct hour appears.
6
flashing
To correct the clock setting
With the power turned off, repeat steps 1
through 5.
With the power turned on, press CLOCK
twice and repeat steps 2 through 5.
3 Press ENTER/YES.
The minute indication begins flashing.
flashing
4 Set the current minute by turning the
JOG dial until the correct minute
appears.
flashing
5 Press ENTER/YES.
The clock starts running and the upper
dot flashes. Use the time signal to set the
clock accurately.
The upper dot flashes for the first half of
a minute (0 to 29 seconds), and the
lower dot flashes for the last half of a
minute (30 to 59 seconds).
flashing
Chapter 1: Setting Up
Page 7
Chapter 2:
the CD
Player
Playing a CD (normal play)
Using the Display
Playing Tracks Repeatedly
(repeat play)
Playing Tracks in Random
Order (shuffle play)
Playing Tracks in the
Desired Order
(programme play)
Assigning a Name to a CD
(disc memo function)
Playing a CD
(normal play)
You can play a CD in four modes: normal,
repeat, shuffle, and programme. The mode
decides which tracks (songs) you will listen
to, in which order, and whether or not they
will repeat.
You can operate the stereo system from the
unit itself or from the supplied remote. You
can play either a 12 cm (5-inch) or 8 cm (3inch) CD. When you play an 8 cm CD, place
it on the inner circle of the disc tray. Do not
use a CD adapter.
Before you play the CD, decrease the sound
level by pressing VOLUME –, to prevent
damage to the speakers.
POWER m ON
1
0/)
32
JOG
3Press fl (or CD ( on the remote).
The disc tray closes and the first track
starts playing.
CD
TRACK
Track
number
To
Stop play
Pause
Resume play
Go forward to
another track
„
Go back to a
previous track
Locate a specific
track directly
Remove the CD
* Button on the remote
1
2738495
6
VOLUME
Playing
time
Press
(CD p*)
fl (CD P*)
fl (CD (* or P*)
During play or pause,
turn the JOG dial
clockwise. Release
when you reach the
track you desire.
Or use + on the
remote.
During play or pause,
turn the JOG dial
counterclockwise.
Release when you
reach the track you
desire.
Or use = on the
remote.
Number buttons on
the remote
CD §
11
Music
calendar
10
GB
7
>10
p
Numeric
buttons
P
(
=
+
(
r
Pp
1 Press CD.
The unit enters the CD play mode.
2 Press CD § and place a CD (label side
facing up) on the disc tray.
Label side up
To directly locate a track numbered 11 or
more
Press >10 first, then enter the
corresponding digits.
Example: To locate track number 30, press
>10, 3, and 10 in this order.
One Touch Play feature
Press CD ( on the remote when the
power is off. If a CD is loaded in the player,
you will be able to listen to the CD without
pressing any other buttons.
When you press CD on the unit, power
turns on and function switches to CD
automatically.
You can start playback from a desired track
1 In step 2, turn the JOG dial until the
desired track number appears on the
display.
2 Press fl.
continue to next page ➔
Chapter 2: the CD Player
Page 8
➔ continued
POWER m ON
REPEAT
To find a point in a track
You can find a particular point in a track
while the track is playing or while it’s in
pause mode. Use the buttons on the unit to
operate this feature.
To
Go forward
quickly in a track
Press
) on the unit and
release it at the desired
point.
Go backwards
quickly in a track
0 on the unit and
release it at the desired
point.
Search quickly
without listening
During pause, 0 or
) on the unit and
release it at the desired
point.
Using the Display
You can use the display on the unit to check
CD and track information such as the total
number of tracks, total playing time of the
CD, the time remaining on the CD, etc.
POWER m ON
DISPLAY
To check the remaining time during
playback
Press DISPLAY repeatedly.
Each time you press the button, the
display changes as follows:
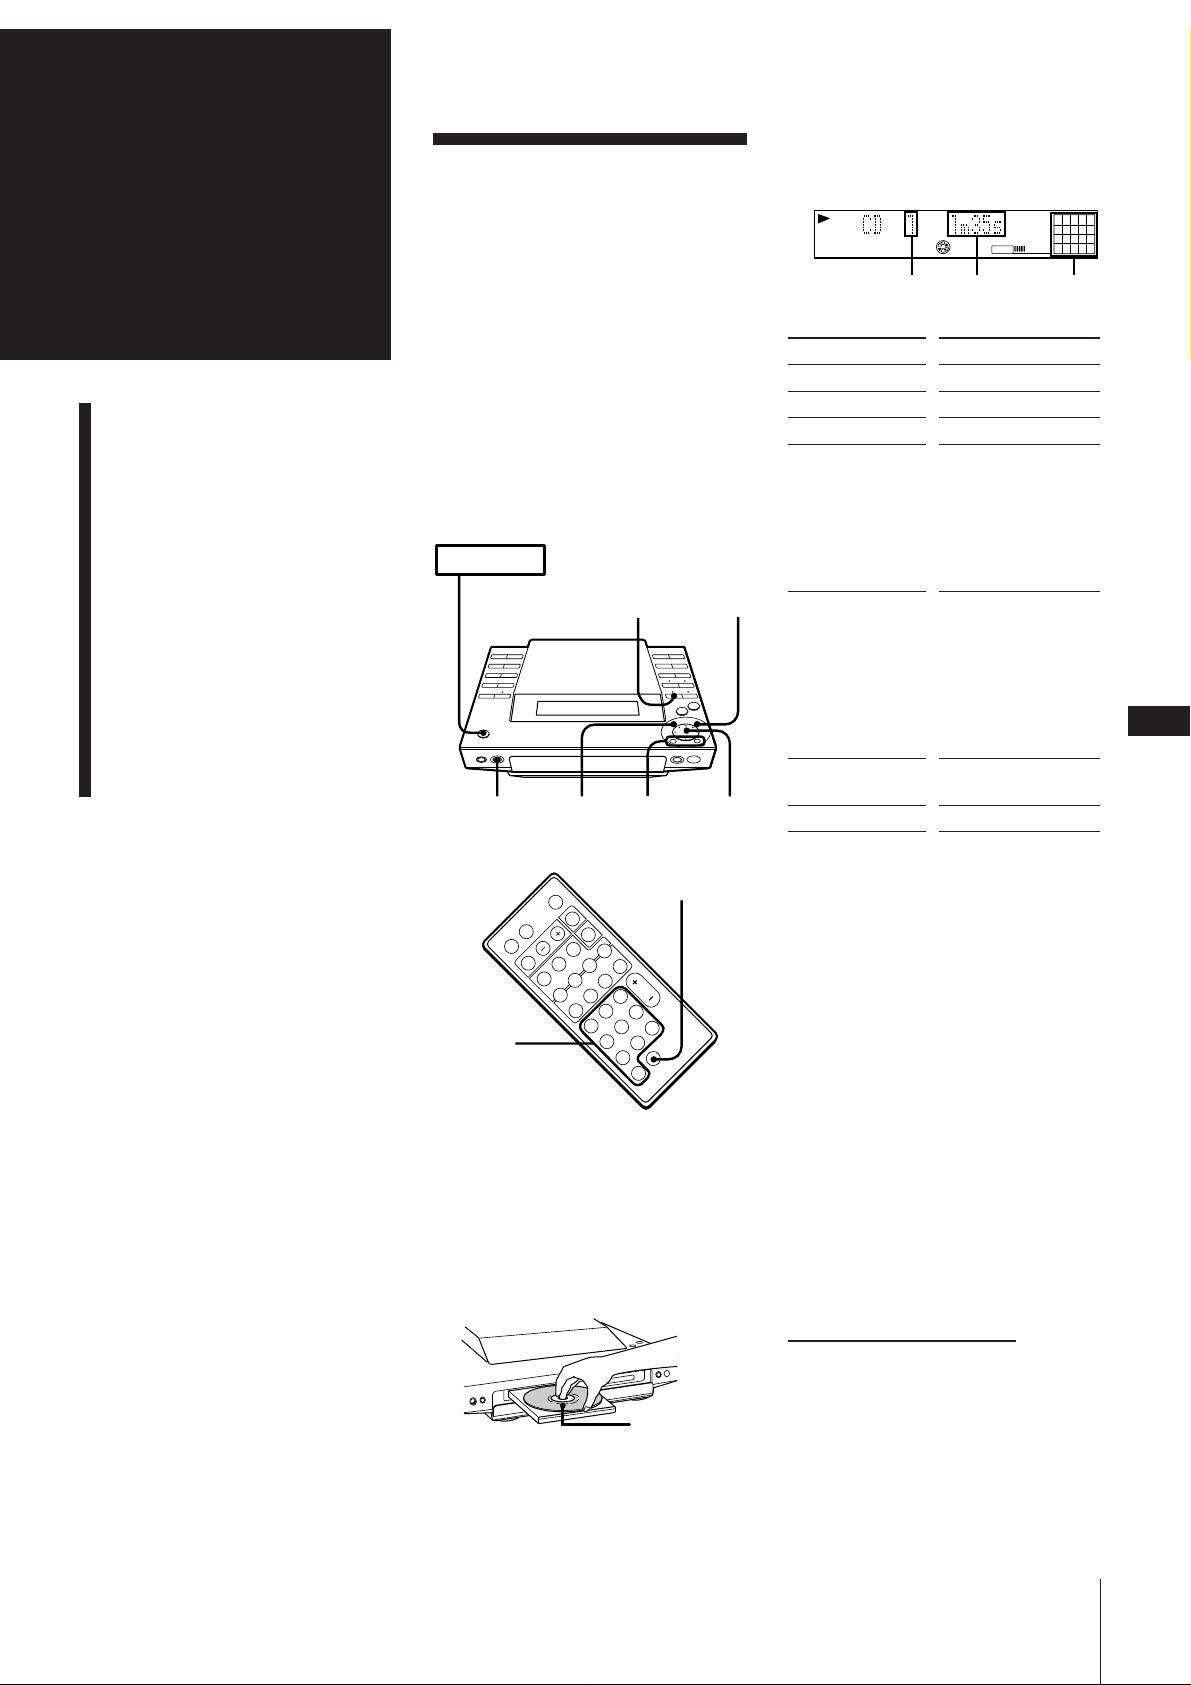
Current track number
and playing time
m
TRACK
Track
number
CD
Playing
time
VOLUME
2738495
6
10
11
Music
calendar
µ
Current track number and
remaining time on track
2738495
6
10
TRACK
CD
VOLUME
11
Remaining time
µ
Remaining time on CD*
2
TRACK
CD
VOLUME
61173849510
Remaining time
* Remaining time in programme during
programme play
To check the disc memo, total
number of tracks and the total
playing time
Press DISPLAY in stop mode. If you stored
a name for the disc (see “Assigning a Name
to a CD”), the disc memo appears on the
display. Each time you press the button, the
display changes as follows:
Disc memo*
1
2
VOLUME
61173849510
<
DISC
CD
Disc memo
Total number of tracks and
total playing time
1
2
VOLUME
61173849510
CD
Playing Tracks
Repeatedly
(repeat play)
You can choose between two different
repeat play modes. One repeats all the
tracks in the current play mode; the other
repeats a single track.
Repeating all the tracks
Press REPEAT repeatedly until “REPEAT”
appears in the display.
Playing mode
Normal play
Shuffle play
Programme play
Repeating a single track (in normal
play mode only)
While the desired track is being played,
press REPEAT repeatedly until “REPEAT
1” appears in the display.
To cancel repeat play
Press REPEAT so that “REPEAT” or
“REPEAT 1” disappears from the display.
Tracks played
Repeats all the tracks
on the CD.
All tracks on the CD
are reshuffled.
Repeats all the
programmes in their
programmed order.
GB
8
Total
number
of tracks
Total
playing
time
* Appears only if you stored a disc memo.
The Music Calendar Display
This display lights according to the number
of tracks on the CD. As each track is
played, the corresponding number
disappears. Tracks numbered greater than
20 are not displayed.
Chapter 2: the CD Player
Page 9
Playing Tracks in
Random Order
(shuffle play)
You can play all the tracks on the CD in
random order.
POWER m ON
2
Playing Tracks in the
Desired Order
(programme play)
You can programme up to 24 tracks to play
in any order you choose. To do this,
designate the tracks in the order you want
them to play.
POWER m ON
4 Press ENTER/YES.
The step number appears for about one
second, then the total playing time
appears. (This shows that the
programme has been entered.)
CD
Total playing time
Last programmed
track number
PROGRAM
VOLUME
111395
7
3
2
p
P
(
=
rPp
+
(
1 Press CD.
The unit enters CD play mode.
2 Press PLAY MODE (or P.MODE on the
remote) repeatedly until “SHUFFLE”
appears in the display.
3 Press fl.
“ J ” appears and then all the tracks
play in random order.
To play the tracks in original order
Press PLAY MODE repeatedly until
“SHUFFLE” and “PROGRAM” disappear
from the display. The tracks continue
playing in their original order.
To skip an undesired track
Turn the JOG dial clockwise (or press +
on the remote).
EDIT/NO
12
46 3
2
p
6
P
(
=
rPp
+
(
3
Numeric
buttons
>10
1 Press CD.
The unit enters CD play mode.
2 Press PLAY MODE (or P.MODE on the
remote) repeatedly until “PROGRAM”
appears in the display.
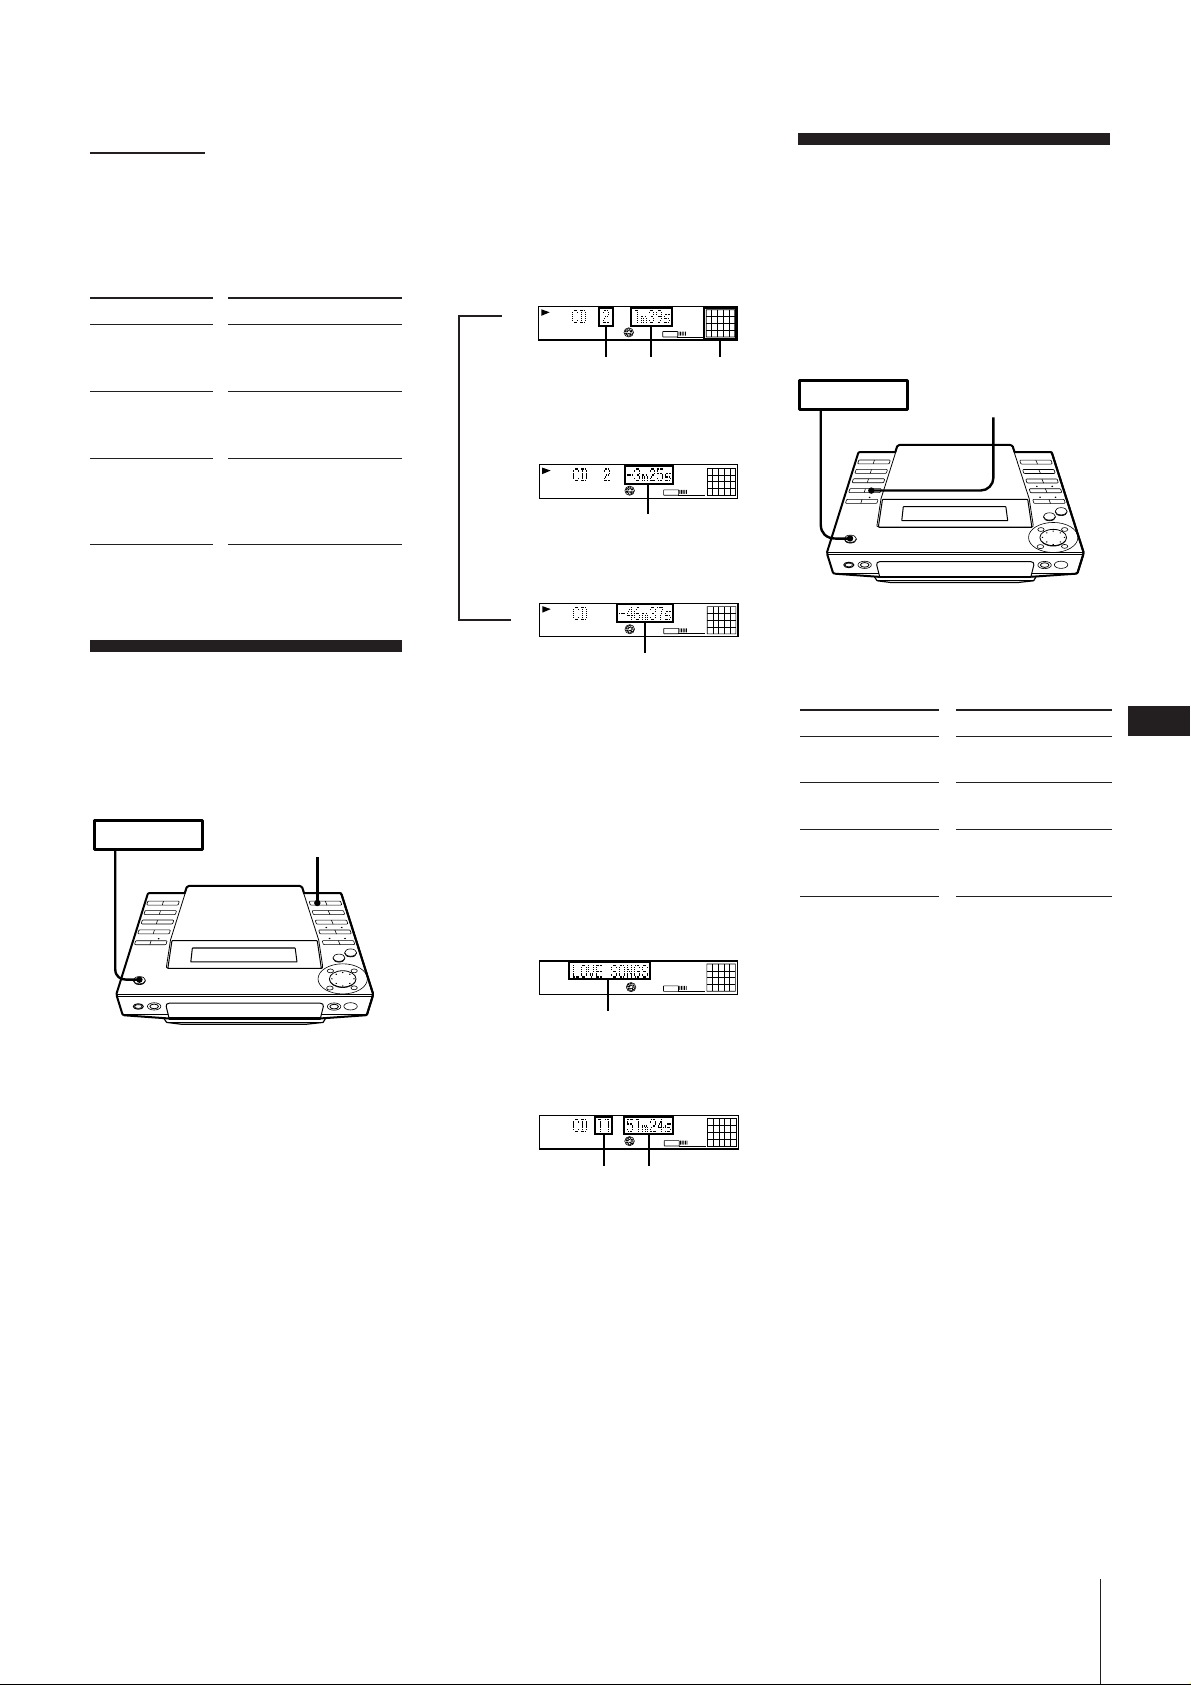
3 Turn the JOG dial (or press =/+
on the remote) to choose a track.
The track number and the total playing
time including the selected track flashes
in the display. (The programme is not
entered at this time.)
›–
Go to previous
track
CD
Track number
Go to next
track
PROGRAM
VOLUME
7
5 To programme additional tracks, repeat
steps 3 and 4.
6 Press fl.
All the tracks play in the order you
choose.
To play the tracks in original order
Press PLAY MODE repeatedly until
“PROGRAM” and “SHUFFLE” disappear
from the display. The tracks continue
playing in their original order.
To select tracks using the number
buttons on the remote
In step 3, press the number buttons in the
order you want to programme. Each time
you press a button, the track you selected is
programmed.
You don’t need to press ENTER/YES.
To programme a track with a number
greater than 10, press >10 first, then enter
the corresponding digits.
Example: To locate track number 30, press
>10, 3, and 10 in this order.
To change the programme
To
Add a track at
the end of the
programme
Erase the entire
programme
* You can also add a track during
playback when you select tracks with
the number buttons on the remote.
Notes
•The programme you made remains in
memory even after it has been played
back.
Press fl to play the same programme
again.
•If “--.--” appears instead of the total
playing time during programming, this
means the total playing time has exceeded
100 minutes. You can still select other
tracks.
Operation
1.Turn the JOG dial
until the desired track
number appears in
the display.*
2.Press ENTER/YES.
During stop, press on
the player.
GB
9
Chapter 2: the CD Player
Page 10
Assigning a Name to
a CD (disc memo
function)
You can assign names to your CDs.
Names may consist of uppercase and
lowercase letters, numbers and symbols (up
to 12 characters for each CD). You can store
a maximum of 20 names in the unit.
The name appears in the display when you
insert a CD or press DISPLAY in stop
mode. If you record the CD on a blank MD*
using “CD syncro recording”, the name is
stored on the MD automatically.
* A brand-new MD, or an MD which has been
erased using the “all erase function”
POWER m ON
351
DISPLAY
4Press ENTER/YES.
A cursor flashes in the display.
1
2738495
6
DISC
CD
VOLUME
11
cursor
5Press CHARACTER repeatedly to select
the character type.
Each time you press the button, the
character changes as follows:
nuppercasenlowercase
spaceNsymbolsNnumbers N
You can use the following symbols:
! " # $ % & ' ( ) * + , – . / : ; < = > ? @ _ `
(space)
6Turn the JOG dial until the desired
character appears in the display.
The selected character flashes.
1
2738495
6
DISC
CD
VOLUME
11
To check the name
Press DISPLAY in stop mode.
If you press DISPLAY again, the original
display returns.
10
Note
“No name” appears in the display if you
did not assign a name to the current disc.
To delete a name
1 Press EDIT/NO repeatedly until “Name
Erase?” appears in the display.
2 Press ENTER/YES.
Disc names appear in the display.
3 Turn the JOG dial until the disc name
you want to erase appears in the display.
4 Press ENTER/YES.
“Complete” appears in the display for
about two seconds and the selected disc
name is erased.
10
2 4,9 6 7
0
DISPLAY
p
P
(
=
rPp
+
(
1 Press CD.
The unit enters CD play mode.
2 Press CD § and place a CD.
Be sure the total number of tracks and
total playing time appear in the display.
Note
You can assign names only when the
player is in stop mode and the play
mode is set to normal (SHUFFLE and
PROGRAM are not lit).
3 Press EDIT/NO repeatedly until “Name
in?” appears in the display.
flashing
To enter a space quickly
Press ) when the cursor is flashing.
7Press ) .
The cursor shifts to the right and stands
by for input of the next character.
1
2738495
6
DISC
CD
VOLUME
11
Next character
8Repeat steps 5 and 7 to enter additional
characters until you have entered the
entire name.
If you want to enter the same type of
character, skip step 5.
If you entered the wrong character
Press ) or 0 until the character to
be corrected starts flashing, and repeat
steps 5 to 7 to enter the correct character.
To erase a character
Press ) or 0 until the character to
be erased starts flashing, then press
EDIT/NO.
9Press ENTER/YES.
This completes the labelling procedure.
GB
10
10
CD
VOLUME
Chapter 2: the CD Player
Page 11
Chapter 3:
Playing
MDs
Playing an MD
(normal play)
Using the Display
Playing Tracks Repeatedly
(repeat play)
Playing Tracks in Random
Order (shuffle play)
Playing an MD
(normal play)
You can play an MD in four modes: normal,
repeat, shuffle, and programme. The mode
decides which tracks (songs) you will listen
to, in which order, and whether or not they
will repeat.
POWER m ON
3
1
0/)
2
„
JOG
To
Stop play
Pause
Resume play
Go forward to
another track
Go back to a
previous track
Locate a specific
track directly
Remove the MD
* Button on the remote
Press
(MD p*)
fl (MD P*)
fl (MD (* or P*)
During play or pause,
turn the JOG dial
clockwise. Release
when you reach the
track you desire.
Or use + on the
remote.
During play or pause,
turn the JOG dial
counterclockwise.
Release when you
reach the track you
desire.
Or use = on the
remote.
Number buttons on
the remote
MD §
Playing Tracks in the
Desired Order
(programme play)
1 Press MD.
The unit enters MD play mode.
2 Press MD § and insert an MD.
Label side up
Arrow pointing
toward the MD
deck
3 Press fl (or MD ( on the remote).
The first track starts playing.
TRACK
Track
number
MD
VOLUME
Playing
time
Music
calendar
To directly locate a track numbered 11 or
more
Press >10 first, then enter the
corresponding digits.
If the track number is 100 or more, press
>10 twice and enter the number.
Example:
To locate track number 30, press >10, 3,
and 10 in this order.
To locate track number 100, press >10,
>10, 1, 10 and 10 in this order.
One Touch Play feature
Press MD ( on the remote when the
power is off. If a MD is loaded in the
player, you will be able to listen to the MD
without pressing any other buttons.
When you press MD on the unit, power
turns on and function switches to MD
1
2
38495
6
7
11
12
automatically.
10
You can start playback from a desired track
1 In step 2, turn the JOG dial until the
desired track number appears on the
display.
2 Press fl.
GB
11
continue to next page m
Chapter 3: Playing MDs
Page 12
TOC
VOLUME
TRACK
MD
7
1113956284
10
TOC
VOLUME
TRACK
MD
7
1113956284
10
m continued
POWER m ON
REPEAT
To find a point in a track
You can find a particular point in a track
while the track is playing or while it is in
pause mode. Use the buttons on the unit to
operate this feature.
To
Go forward
quickly in a track
Press
) on the unit and
release it at the desired
point.
Go backwards
quickly in a track
0 on the unit and
release it at the desired
point.
Search quickly
without listening
During pause, 0 or
) on the unit and
release it at the desired
point.
Using the Display
You can use the display on the unit to check
MD and track information such as the total
number of tracks, total playing time of the
MD, the time remaining on the MD etc.
POWER m ON
DISPLAY
To check the remaining time during
playback
Press DISPLAY repeatedly.
Each time you press the button, the
display changes as follows:
Current track number
and playing time
TOC
m
TRACK
Track
number
Playing
time
MD
VOLUME
111395
7
628410
Music
calendar
µ
Current track number and
Remaining time on the track
Remaining time
µ
Track name*
Track name
* If no title is recorded, “No Name”
appears in the display.
To check the disc name, total number
of tracks, total playing time and
remaining recordable time
Press DISPLAY in stop mode. If you stored
a name for the disc (see “Labelling
Recordings (title function)”), the disc name
appears on the display. Each time you press
the button, the display changes as follows:
The Music Calendar Display
•This display lights according to the
number of tracks on the MD. As each
track is played, the corresponding
number disappears. Tracks numbered
greater than 20 are not displayed.
•When you play a premastered MD, a
frame appears around the music
calendar. It does not appear when you
play a recordable MD.
To check the current track name while
playing an MD
Press SCROLL.
Press SCROLL during scrolling to pause or
continue scrolling.
You can put titles on your recorded MDs
and tracks. See “Labelling Recordings (title
function)”.
Playing Tracks
Repeatedly
(repeat play)
You can choose between two different
repeat play modes. One repeats all the
tracks in the current play mode; the other
repeats a single track.
GB
12
Disc name*
2738495
TOC
m
DISC
1
6
10
11
MD
VOLUME
Disc name
µ
Total number of tracks and
Total playing time
2738495
TOC
Total
number
of tracks
Total
playing
time
1
6
10
11
MD
VOLUME
µ
Remaining recordable time of
the MD (Recordable MDs only)*
2738495
TOC
DISC
1
6
10
11
MD
VOLUME
Remaining time
* The remaining recordable time of the disc
is not shown for premastered MDs.
Repeating all the tracks
Press REPEAT repeatedly until “REPEAT”
appears in the display.
Playing mode
Normal play
Tracks played
Repeats all the tracks
on the MD.
Shuffle play
All tracks on the MD
are reshuffled.
Programme play
Repeats all the
programmes in their
programmed order.
Repeating a single track (in normal
play mode only)
While the desired track is being played,
press REPEAT repeatedly until “REPEAT
1” appears in the display.
To cancel repeat play
Press REPEAT so that “REPEAT” or
“REPEAT 1” disappears from the display.
Chapter 3: Playing MDs
Page 13

Playing Tracks in
Random Order
(shuffle play)
You can play all the tracks on the MD in
random order.
POWER m ON
2
3
2
1
4 Press ENTER/YES.
Playing Tracks in the
Desired Order
(programme play)
You can programme up to 25 tracks to play
in any order you choose. You can do this
by designating the tracks in the order you
want them to play.
POWER m ON
The step number appears for about one
second, then the total playing time
appears. (This shows that the
programme has been entered.)
TOC
Total playing time
Last programmed
track number
MD
VOLUME
PROGRAM
6119
4
5 To programme additional tracks, repeat
261
steps 3 and 4.
6 Press fl.
All the tracks play in the order you
choose.
To cancel the programme play
„
34
„
Press and then press PLAY MODE
repeatedly until “PROGRAM” and
“SHUFFLE” disappears from the display.
The tracks continue playing in their original
order.
p
P
(
=
rPp
+
(
1 Press MD.
The unit enters MD play mode.
2 Press PLAY MODE (or P.MODE on the
remote) repeatedly until “SHUFFLE”
appears in the display.
3 Press fl.
“ J ” appears and then all the tracks
play in random order.
To cancel shuffle play
Press and then press PLAY MODE
repeatedly until “SHUFFLE” and
“PROGRAM” disappear from the display.
The tracks continue playing in their original
order.
To skip an undesired track
Turn the JOG dial clockwise (or press +
on the remote).
>10
r
3
2
p
P
(
+
Pp
=
(
6
Numeric
buttons
1 Press MD.
The unit enters MD playing mode.
2 Press PLAY MODE (or P.MODE on the
remote) repeatedly until “PROGRAM”
appears in the display.
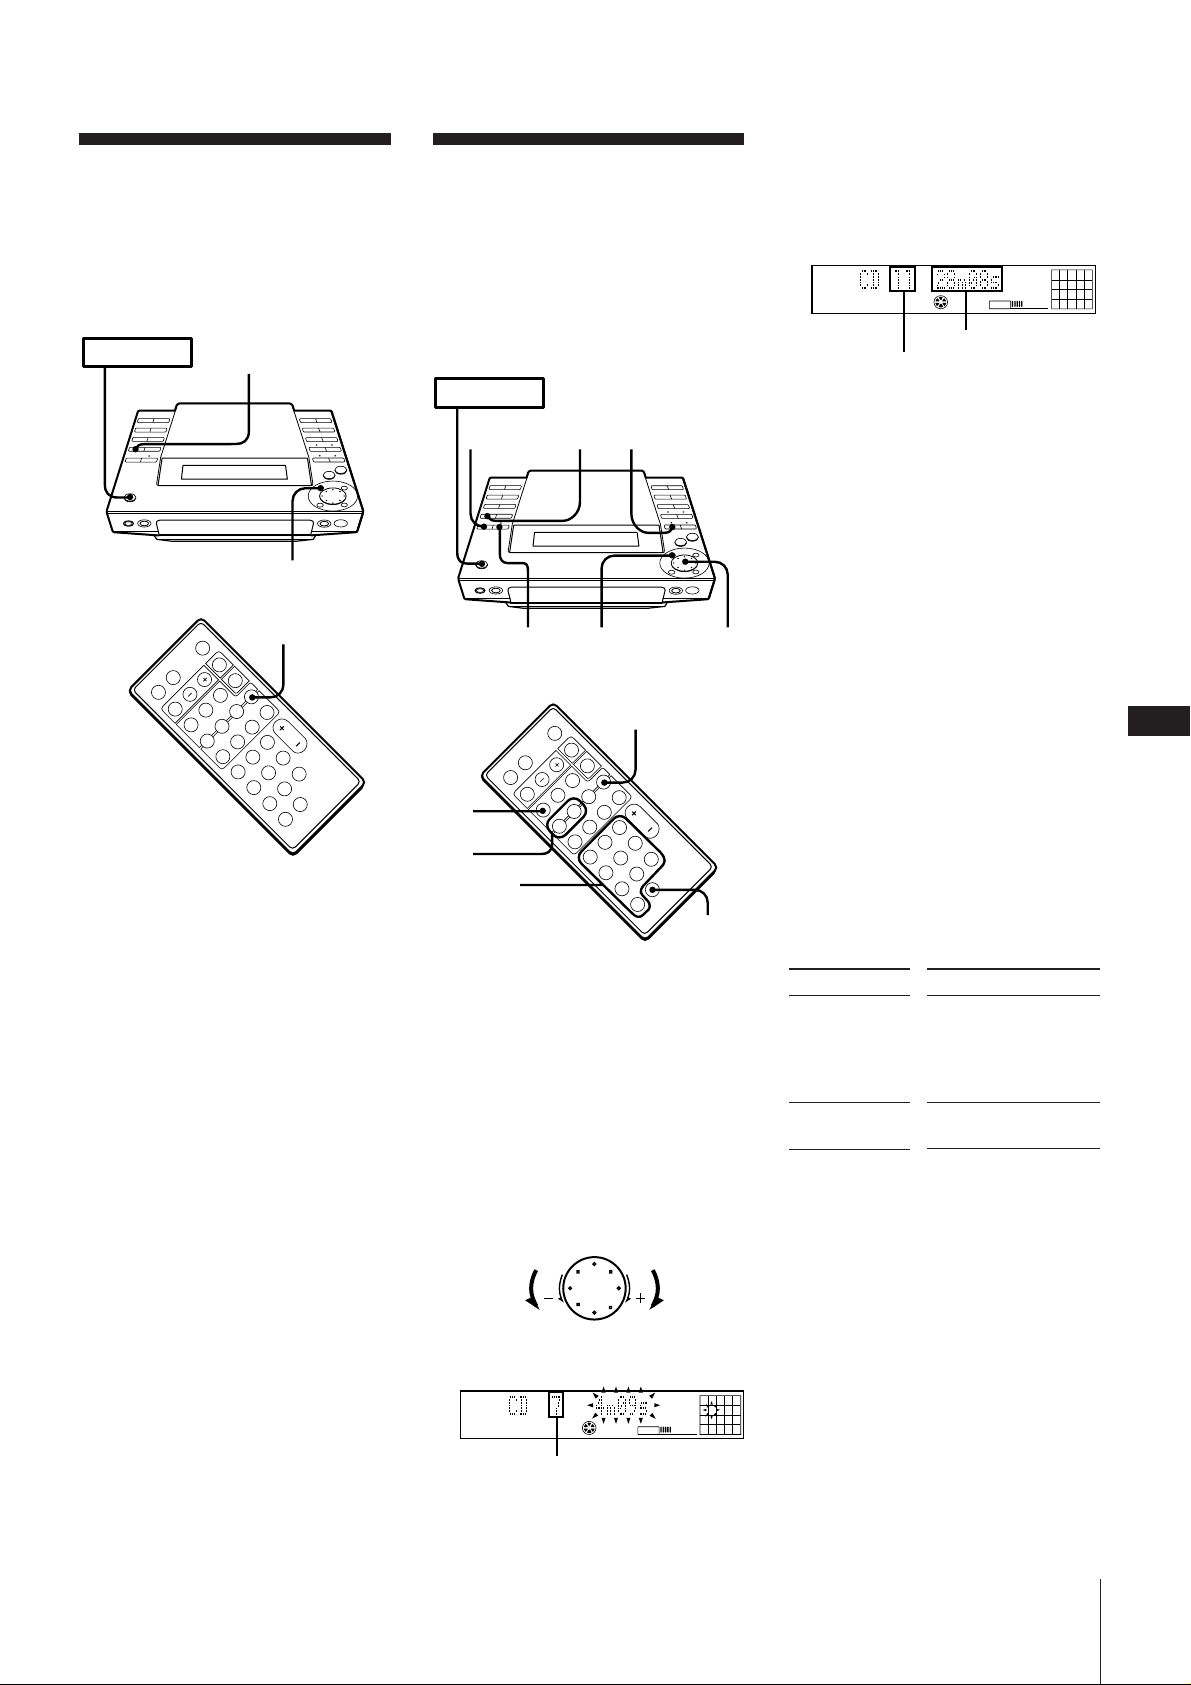
3 Turn the JOG dial (or press =/+
on the remote) to choose a track.
The track number and the total playing
time including the selected track appear
in the display, and the track number
flashes in the music calendar. (The
programme is not entered at this time.)
›–
Go to previous
track
TOC
Track number
Go to next
track
PROGRAM
MD
VOLUME
3215
11
4
987610
To select tracks using the number
buttons on the remote
In step 3, press the number buttons in the
order you want to programme. Each time
you press a button, the track you selected is
programmed.
You don't need to press ENTER/YES.
To programme a track with a number
greater than 10, press >10 first, then enter
the corresponding digits.
If the track number is 100 or more, press
>10 twice and enter the number.
Example:
To locate track number 30, press >10, 3,
and 10 in this order.
To locate track number 100, press >10,
>10, 1, 10 and 10 in this order.
To change the programme
To
Add a track at
the end of the
programme
Erase the entire
programme
Notes
•The programme you made remains in the
unit even after it has been played back.
Press fl to play the same programme
again.
• If “--.--” appears instead of the total
playing time during programming, this
means the total playing time has
exceeded 100 minutes. In this case, you
can also select other tracks.
Operation
1.Turn the JOG dial
until the desired track
number appears in
the display.
2.Press ENTER/YES.
During stop, press on
the player.
GB
13
Chapter 3: Playing MDs
Page 14
Chapter 4:
Recor ding
on MDs
Before Recording
Recording a CD
Recording from the Radio
Recording on an MD
Manually
Marking Track Numbers
While Recording
Before Recording
MD allows you to digitally record and play
back music with a sound quality similar to
CD. In addition, because MDs are opticalmagnetic discs, they are free from the
problems of stretching or becoming tangled
like ordinary cassette tapes. The recording
method is also different from that of
cassette tapes, because it is possible to write
track numbers and edit recordings.
Digital Recording and
Analog Recording
This unit uses one of the following
recording methods, depending on the
sound source to be recorded and how the
unit is connected to the sound source.
Digital recording
When recording from this unit's CD player,
the MD deck records the digital signal in
the form of a digital signal.
Analog recording
In the cases listed below, the MD deck
converts an analog signal into a digital
signal and records the digital signal.
•When recording from this unit's Radio
•When recording from audio equipment
connected to this unit's TAPE jacks
MD recording and the Serial Copy
Management System
Since the MD deck uses the SCMS (Serial
Copy Management System), MDs recorded
from a CD played back from this unit's CD
player cannot be used to make digital
copies onto other MDs.
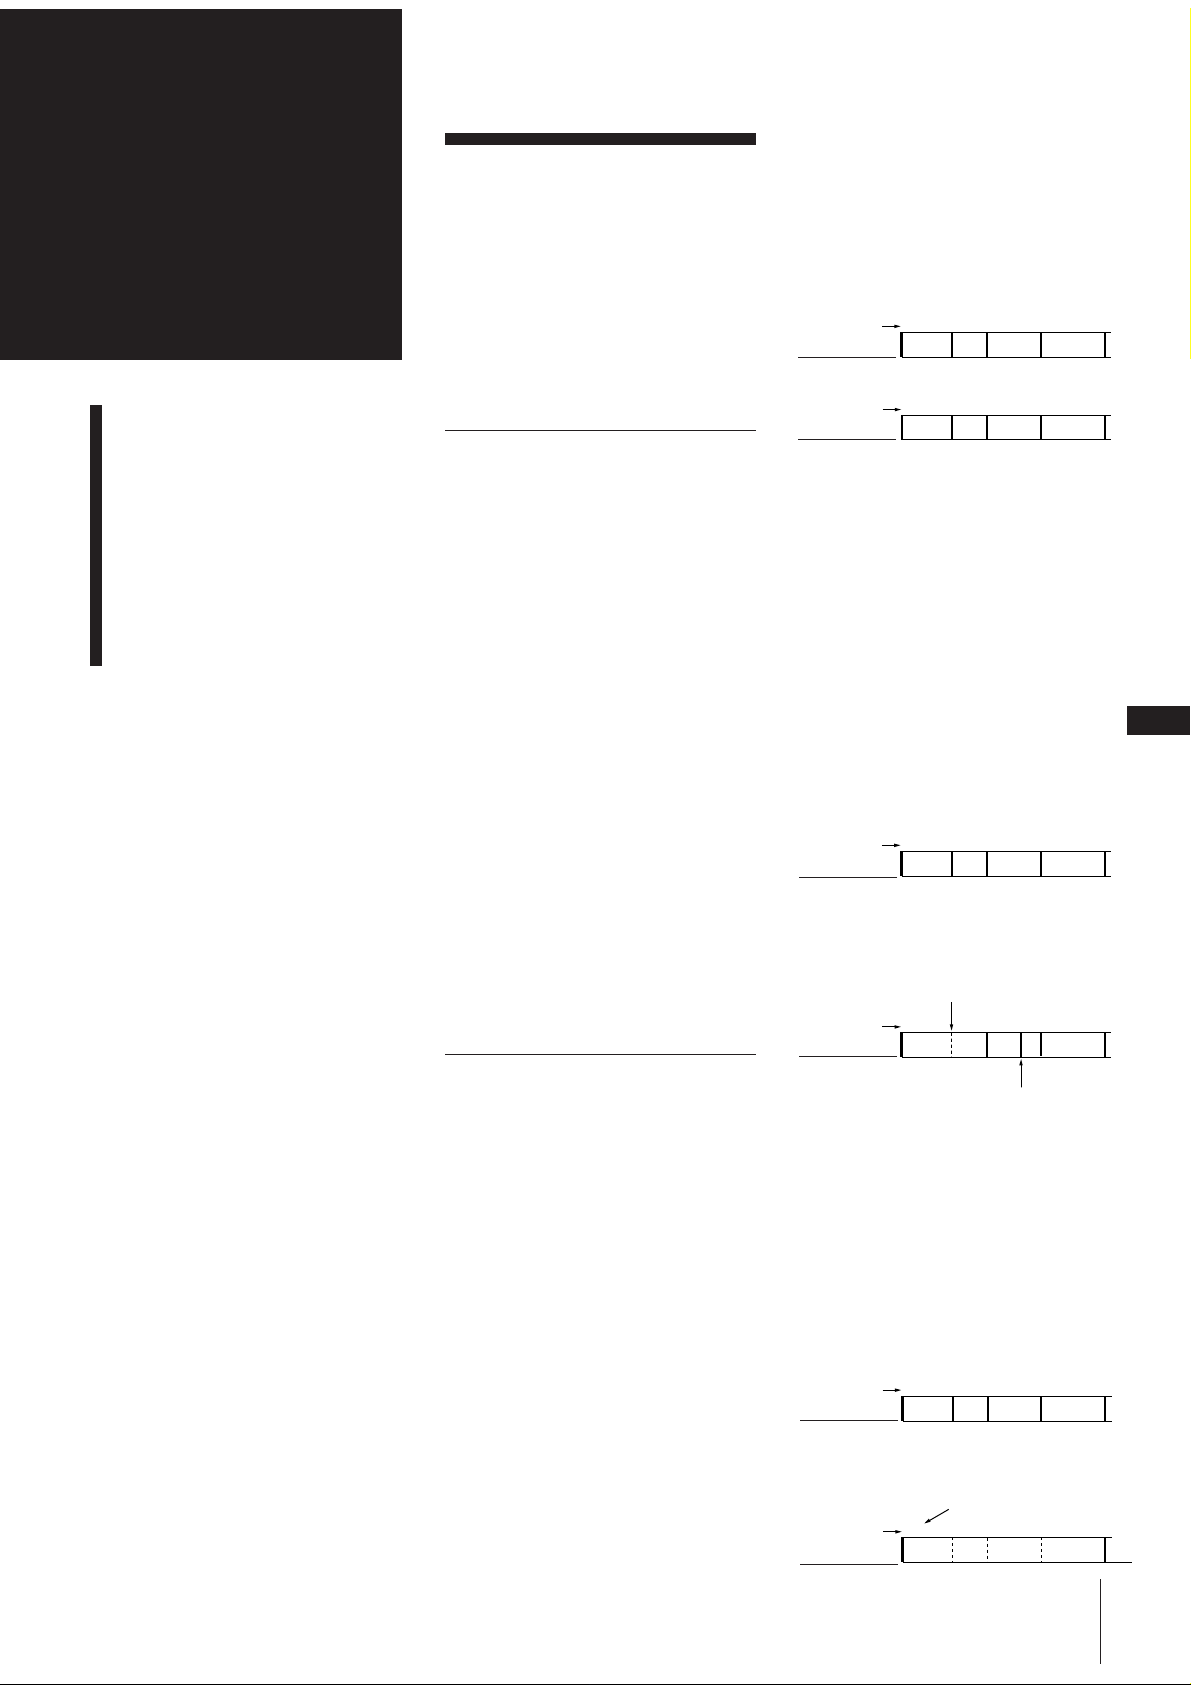
Track Marking
The way in which track numbers are
written differs according to the sound
source being recorded. You can also write
track numbers manually.
MD track numbers (TOC)
In an MD, the track number (track
sequence) and track start and end point
information, etc., is recorded in an area
called the “Table of Contents” (TOC) that is
managed apart from the music. As a result,
not only can you instantaneously find the
start of a track, but you can quickly edit
recorded tracks simply by changing the
TOC information.
For example, with a cassette tape, erasing a
track entails re-recording the track with no
sound from the start. With an MD, you can
delete a track simply by writing over the
information in the TOC.
When recording digital signals from a CD
The MD deck automatically marks track
numbers in the same sequence as the
original CD.
However, if recording is paused, the
portion recorded up to that point is counted
as one track. When recording is started
again, the track number increases by one.
track
number
sound source
track
number
recorded MD
If a single track from the same CD is
recorded repeatedly, the track or tracks are
recorded as a single, continuous track with
a single track number.
You can also mark track numbers manually
during recording (see “Marking Track
Numbers Manually (track marking
function)”).
If you select “LEVEL SYNC” during analog
recording
The track number is written in sync with
the level of the input signal from the sound
source. In other words, if the input signal
from the sound source is continuously at or
below a certain fixed level for two seconds
or more, a track number is written the next
time the input signal exceeds that level.
track
number
sound source
track
number
recorded MD
If you do not select “LEVEL SYNC” during
analog recording
Only one track number is written at the
start of a recording. The entire recording is
counted as one track.
You can also mark track numbers manually
during recording (see “Marking Track
Numbers Manually (track marking
function)”).
track
number
sound source
track
number
recorded MD
123 4
ABC D
.
123 4
ABC D
123 4
ABC D
Track numbers are not
written if the input signal
is below the level for less
than two seconds (if the
blank between the two
tracks is short, etc.).
1234
ABC DC
Track numbers are written
during a track if the input
signal is below the level for
more than two seconds.
123 4
ABC D
Only one track number is
written at the start of the
recording
1
ABC D
Chapter 4: Recording on MDs
.
.
GB
14
Page 15
Notes on Recording
TOC
POWER m ON
6
41
REC
STOP
2
53
When “TOC” flashes in the display
Do not move the unit or pull out the mains
lead. The MD deck is updating the Table Of
Contents (TOC).
Changes to an MD made through recording
are saved only when you update the TOC
by ejecting the MD or by pressing POWER
to switch the MD deck to standby.
TOC
open the slot. To enable recording, close the
slot.
Rear of the disc
Record-protect tab
Slide the tab in the
direction indicated
by the allow
3 Press CD SYNCHRO
The unit enters CD play pause mode.
The “REC PAUSE” indicator flashes, the
MD deck stands by for recording, and
the CD player stands by for playback.
4 Press REC PAUSE (or MD P on the
remote).
The MD deck starts recording, and the
CD player starts playing.
To stop recording
Press REC STOP.
Do not disconnect the main lead
immediately after recording
If you do so, the recorded sound may not
be saved to the MD.
If “Auto Cut” appears in the display
(auto cut)
There has been no sound input for
30 seconds while recording from a CD. The
30 seconds of silence are replaced by a
blank of about 3 seconds and the MD deck
changes to recording pause.
If “Smart Space” appears in the
display (smart space)
There has been an extended silence of 4 to
30 seconds in length while recording from a
CD. The silence is replaced with a blank of
about 3 seconds and the MD deck continues
recording. However, a new track number
may not be written during these 3 seconds.
If “REC LEVEL OVER” appears in the
display while recording from audio
equipment connected to this unit's
TAPE IN jacks
This message is displayed because a highlevel signal was input during analog
recording. If the sound is distorted, rerecord the sound source again according to
the following procedure.
1 Press EDIT/NO repeatedly during
recording or recording pause until
“Attenuate ?” appears in the display.
2 Press ENTER/YES.
“Attenuate ON?” appears in the display.
Recording a CD
You can easily make digital recordings
from CD on an MD (CD synchro
recording), marking track numbers in the
same sequence as the original CD. When
you use a blank MD*, the CD name which
you have stored using the “disc memo”
function is also record on the MD
automatically.
When recording additional tracks on a
recordable MD, the MD deck will
automatically start recording from the end
of the existing sound.
* A brand-new MD, or an MD which has been
erased using the “erase function”.
POWER m ON
413
REC STOP
2
1 Press MD § and insert a recordable
MD.
Label side up
When “TOC“ flashes in the display
The MD deck is currently updating the
Table of Contents (TOC).
Do not move the MD deck or pull out the
mains lead. Changes to an MD made
through recording are saved only when
you update the TOC by ejecting the MD or
by pressing POWER to switch the deck to
standby.
GB
15
Recording from the
Radio
You can record from the tuner onto an MD
(analog recording).
If you use a recorded MD, the MD deck will
automatically start recording from the end
of the existing sound.
3 Press ENTER/YES again.
The ATTENUATE indicator lights up.
4 Re-record the sound.
The recording level is reduced.
Note
Once you change the setting, it is stored in
the unit. Be sure to release this setting after
recording.
To release this setting
Repeat steps 1 to 4, and confirm that
“Attenuate OFF?” is displayed in step 2.
To protect the recorded sound
To make it impossible to record on an MD,
slide the tab in the direction of the arrow to
1 Press MD § and insert a recordable
Arrow pointing
toward the MD
deck
MD.
Label side up
2 Press CD §, place a CD, then press
CD § again to close the disc tray.
Arrow pointing
toward the MD
deck
continue to next page m
Label side up
Chapter 4: Recording on MDs
Page 16
m continued
2 Press TUNER/BAND repeatedly until
the band you want appears in the
display.
As you press this button, the band
changes as follows:
FM ˜ AM
3 Press TUNING repeatedly until
“PRESET” appears in the display.
4 Turn the JOG dial (or press PRESET –/+
on the remote) to tune in a preset station
you want to record.
Recording on an MD
Manually
When recording additional tracks on a
recordable MD, the MD deck will
automatically start recording from the end
of the existing sound.
POWER m ON
REC
STOP
4
3
When you stop recording, you can
start playback from the beginning of
the last track that was recorded
This is a convenient way to check the
contents of a recording. You might find it
useful right after recording a favorite song
from the radio, etc.
1 Press MD during recording.
Recording stops.
2 Press fl (or MD ( on the remote)
while the number of the last track flashes
in the display (about 15 seconds).
Playback starts from the beginning of the
last track that was recorded.
›–
Go to previous
preset station
Frequency Preset number
Go to next
preset station
PRESET
MD
VOLUME
5 Press REC (or MD r REC on the
remote).
The REC PAUSE indicator flashes and
MD deck stands by for recording.
6 Press REC PAUSE (or MD P on the
remote).
The MD deck starts recording.
To stop recording
Press REC STOP.
To record a station you have not
stored
Press TUNING repeatedly until
“MANUAL” appears in the display, and
turn the JOG dial to tune in a station you
want.
When you stop recording, you can
start playback from the beginning of
the last track that was recorded
This is a convenient way to check the
contents of a recording. You might find it
useful right after recording a favorite song
from the radio, etc.
1 Press MD during recording.
Recording stops.
2 Press fl (or MD ( on the remote)
while the number of the last track flashes
in the display (about 15 seconds).
Playback starts from the beginning of the
last track that was recorded.
5
JOG
1
2
1 Press MD § and insert a recordable
MD.
2 Press one of the FUNCTION buttons
(TAPE, TUNER/BAND or CD) on the
unit to select a sound source you want
to record (or press FUNCTION
repeatedly on the remote).
3 Press REC (or MD r REC on the
remote).
The REC PAUSE indicator flashes and
the MD deck stands by for recording.
When recording from CD, track
numbers will be written automatically
in the same sequence as the CD.
When recording from a source other
than CD, see “Marking Track Numbers
Automatically” in order to write track
numbers automatically.
4 Press REC PAUSE (or MD P on the
remote).
The MD deck starts recording.
5 Start playing the sound source.
To
Pause recording*
Resume recording
Stop recording
* Whenever you pause recording, the track
number increases by one. For example, if
you paused recording while recording on
track 4, the track number increases by one
and recording continues on the new track
when restarted.
Press
REC PAUSE (or MD
P on the remote)
REC PAUSE (or MD
P on the remote)
REC STOP
Marking Track
Numbers While
Recording
The way in which track numbers are
written differs according to the sound
source being recorded. See “Track
Marking” for details.
Marking Track Numbers
Manually (track marking
function)
You can mark a track number at any time
while recording on an MD, no matter what
sound source you selected.
POWER m ON
Press REC (or MD r REC on the remote) at
the place you want to add a track mark
while recording.
Note
If you decide the track number mark is
unnecessary, or the location is incorrect,
you can use the combine function to undo
the mark (see “Combining Recorded Tracks
(combine function)”) .
REC
GB
16
Chapter 4: Recording on MDs
Page 17
Marking Track Numbers
Automatically
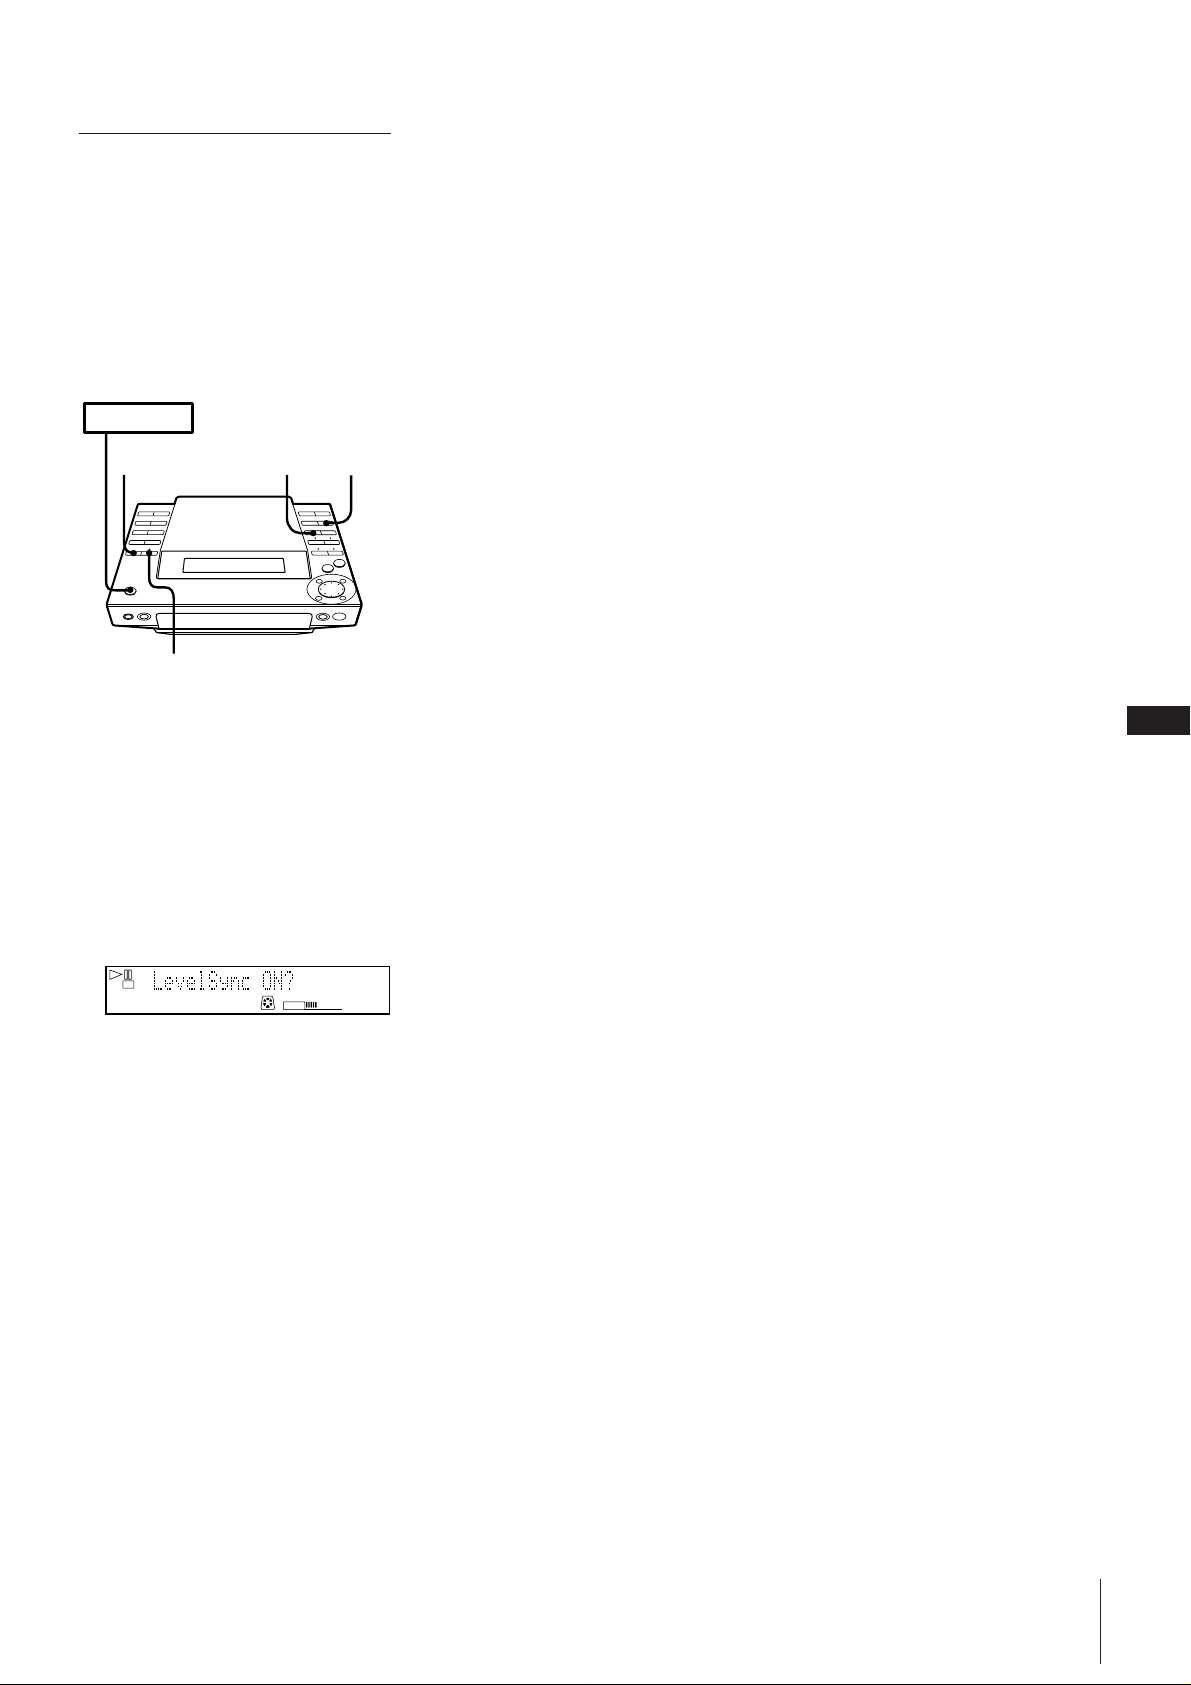
(level synchro function)
You can mark track numbers automatically
even when recording from an analog
source. The MD deck marks a new track
number if the signal level is continuously at
or below a certain fixed level for 2 seconds
or more, and then exceeds that level.
POWER m ON
251
3,4
1 Press REC (or MD r REC on the
remote).
The REC PAUSE indicator flashes and
the MD deck stands by for recording.
2 Press EDIT/NO repeatedly until
“LevelSync?” appears in the display
3 Press ENTER/YES.
“LevelSync ON?” appears in the
display.
TOC
REC
MD
VOLUME
1
4 Press ENTER/YES.
“LEVEL-SYNC” appears in the display.
5 Starts recording.
Note
This setting is stored in the unit. Release it
after recording.
To cancel level synchro
1 Press EDIT/NO until “LevelSync?”
appears during recording or recording
pause.
2 Press ENTER/YES.
“LevelSyncOFF?” appears in the display.
3 Press EDIT/YES.
“LEVEL-SYNC” disappears in the
display.
GB
17
Chapter 4: Recording on MDs
Page 18
GB
POWER m ON
21
3,4
„
18
Chapter 5:
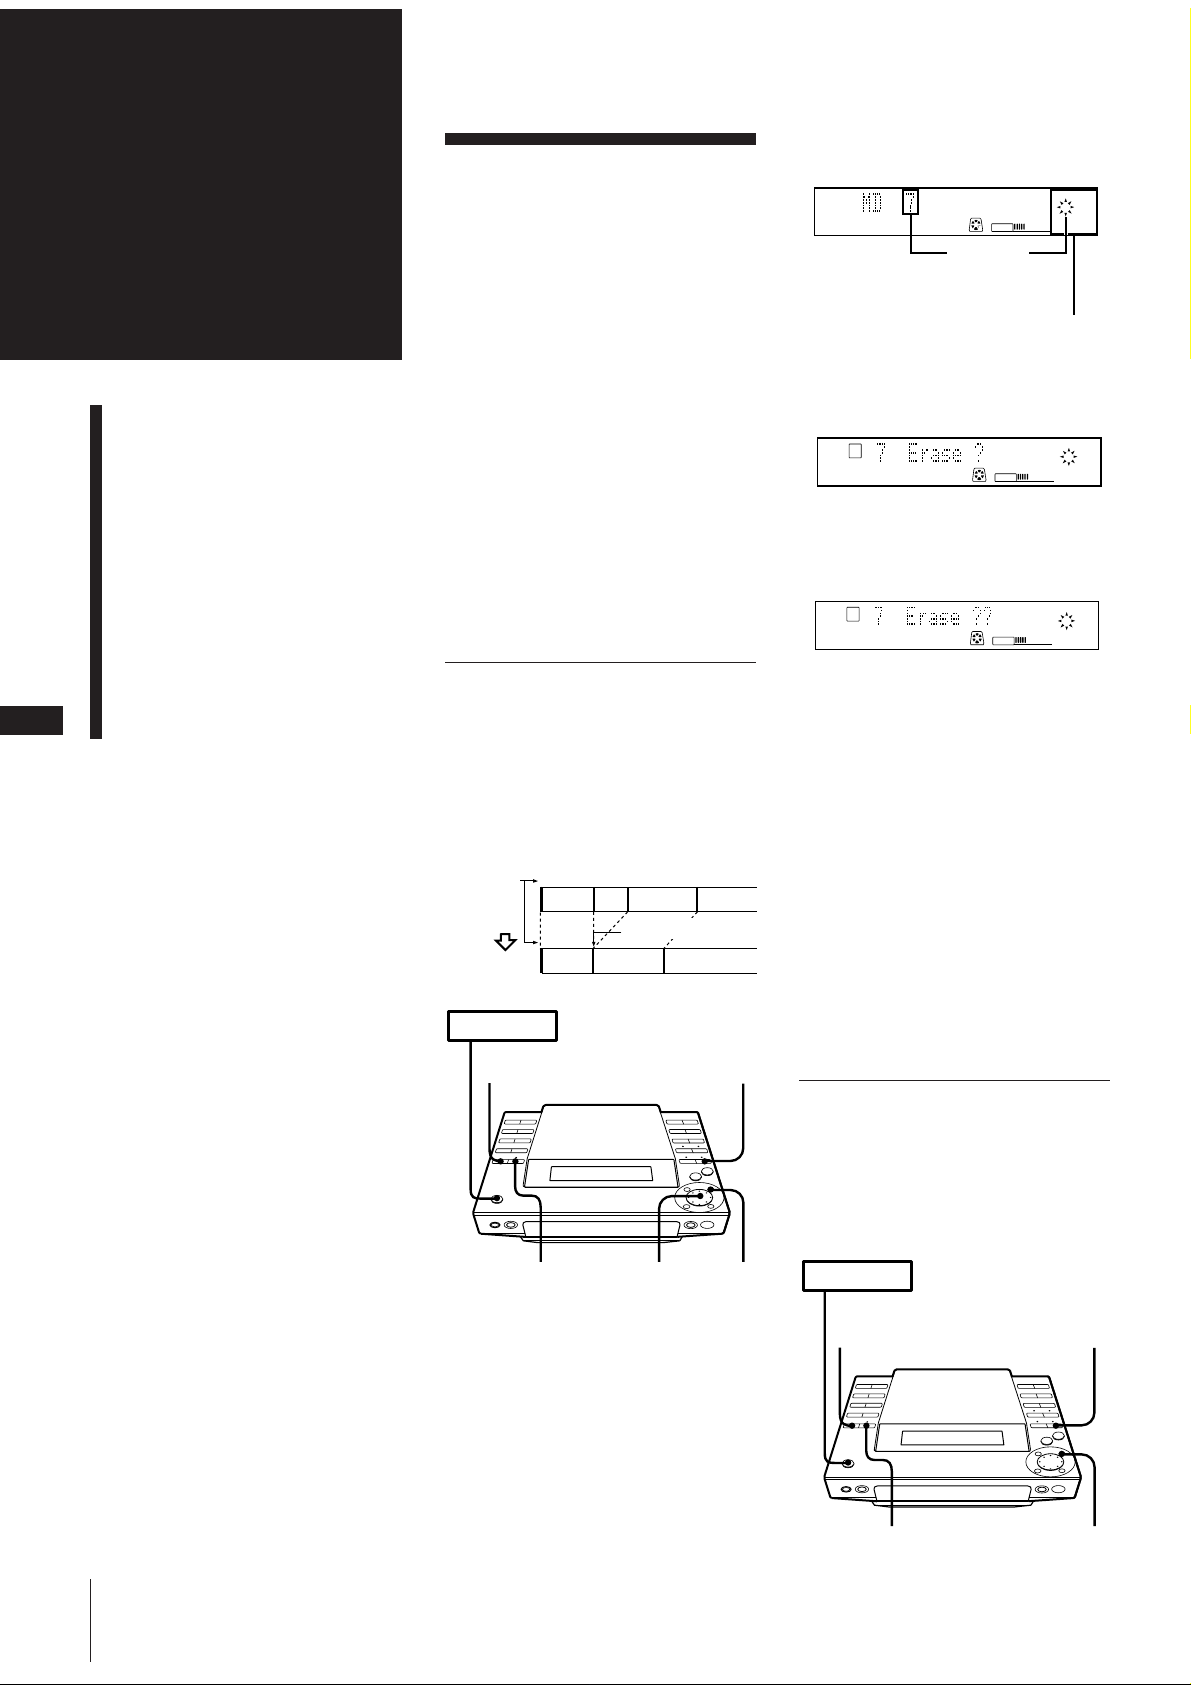
Erasing Recordings
(erase function)
Editing
You can erase the recorded sound easily.
Since erasing updates the TOC, you do not
Recorded MDs
Erasing Recordings
(erase function)
Moving Recorded Tracks
(move function)
Dividing Recorded Tracks
(divide function)
Combining Recorded Tracks
(combine function)
Labelling Recordings
(title function)
have to record over previous material. You
can choose from the following three erase
methods:
• Erasing a single track
• Erasing all tracks
• Erasing parts of a track
When erasing two or more tracks
When you erase a track, all tracks following
the erased one are renumbered. For
example, if you erase track 1, the original
track 2 will be renumbered as track 1.
To avoid confusion, you should erase
starting from high track numbers and
proceeding to low track numbers. This
prevents renumbering of tracks that have
not yet been erased.
Erasing a single track
You can erase a track simply by specifying
its track number. When you erase the
track, the total number of tracks on the MD
decreases by one and all tracks following
the erased one are renumbered.
Example: Erasing B
Track
number
Erasing
POWER m ON
23
1
AB C D
B is erased.
1
23
AC D
4
2 Turn the JOG dial to select the track
number you want to erase.
1
2738495
6
10
TRACK
MD
VOLUME
Track
number you
want to erase
11
Music calendar
3 Press EDIT/NO repeatedly until “Erase
?” appears in the display.
TOC
EDIT
TRACK
MD
VOLUME
1
6
11
2738495
4 Press ENTER/YES.
“Erase ??” appears in the display.
TOC
EDIT
TRACK
MD
VOLUME
1
6
11
2738495
10
5 Press ENTER/YES again.
“Complete” appears in the display for a
few seconds and the track selected in
step 2 is erased.
6 Repeat steps 2 to 5 to erase more tracks.
To stop before the track has been
erased
Press .
If “Erase!! ?” appears in the display
The track was recorded or edited on
another MD deck and is record-protected.
If you still want to erase the track, press
ENTER/YES while this indication is
displayed.
10
31
1 Press MD.
The unit enters MD play mode.
Chapter 5: Editing Recorded MDs
Erasing all tracks
You can easily create a blank MD. You can
erase all recorded tracks, titles and names at
the same time.
Note that once erased, MD data cannot be
recovered.
24,5
„
Page 19
1 Press MD.
POWER m ON
2,4
53,6„1
The unit enters MD play mode.
2 Press EDIT/NO repeatedly until “All
Erase?” appears in the display in stop
mode.
3 Press ENTER/YES.
“All Erase??” appears in the display.
4 Press ENTER/YES again.
When all recorded tracks, the disc name,
and titles on the MD have been erased,
“Complete” appears for a few seconds.
To stop before all tracks, the disc
name, and titles have been erased
Press .
Erasing part of a track
By using the divide, erase, and combine
functions, you can erase specific portions of
a track.
Example: Erasing a part of track A
Track
number
Dividing
Erasing
Combining
Part to be erased
12
A
1234
#2 #3
A#1
#2 is erased.
1
1
A#1
#3 B C
A(#1+#3)
2
34
#1 and #3 are
combined.
2
B
3
B
C
A is divided
into 3 parts.
5
B
C
3
C
Example: Moving C to track position 2
Track
number
Moving
Track C moves to track position 2.
POWER m ON
1A23 4
B
C
12 34
ACBD
D
31
2,54,6
„
Dividing Recorded
Tracks
(divide function)
In the following cases, you can divide a
track into two or more tracks and put new
track numbers for searching particular
points of the tracks.
•When you recorded from an analog
source and therefore the MD contains
only one track number
•When you want to put markings in a track
to find particular points
After you divide a track
The total number of tracks on the MD
increases by one and all tracks following
the divided track are renumbered.
Example: Dividing track 2 to create a new
track for C
Track
number
Dividing
1 Press MD.
The unit enters MD play mode.
2 Turn the JOG dial until the track
number you want to move appears in
the display.
For example, if you want to move 7th
track to 1st, turn the JOG dial until 7th
track appears in the display.
TRACK
MD
VOLUME
Track
number you
want to move
Music calendar
1
6
11
2738495
10
Track 2 is divided, creating a separate
track for C, and all the following
tracks are renumbered.
12 3
AB C D
123 4
AB C D
GB
19
Moving Recorded
Tracks
(move function)
You can change the position of any track.
After you move a track, the tracks between
the new and old track positions are
automatically renumbered.
3 Press EDIT/NO repeatedly until
“Move ?” appears in the display.
4 Press ENTER/YES.
5 Turn the JOG dial until the new track
number appears.
TOC
EDIT
New track number
Track number
you want to
move
MD
VOLUME
1
6
11
6 Press ENTER/YES.
After you have moved the track,
“Complete” appears for a few seconds.
To stop before the track has been
moved
Press .
2738495
1 While playing the MD, press fl at the
point where you want to create a new
track.
10
The deck pauses playing.
2 Press EDIT/NO repeatedly until
“Divide ?” appears in the display.
3 Press ENTER/YES.
“Rehearsal” alternates with “Position
ok?” in the display, and the starting
portion of the new track begins playing
repeatedly.
continue to next page m
Chapter 5: Editing Recorded MDs
Page 20
m continued
POWER m ON
31
64,9
0
5
2 7
SCROLL
4 If the starting position is incorrect, press
EDIT/NO.
If it is correct, go to step 6.
TOC
EDIT
TRACK
MD
VOLUME
1
6
11
2738495
Example: Combining B and C
Track
number
Combining
10
123 4
AB C D
12 3
AB C D
If “Sorry” appears in the display
The tracks cannot be combined. This
sometimes happens when you have edited
the same track many times. This is due to a
technical limitation of the MD system, not a
mechanical error.
GB
20
Playing track
number flashes
5 While monitoring the sound, turn the
JOG dial to find the starting position of
the new track.
The starting portion of the new track is
played back repeatedly.
The starting position can be moved
within a maximum range of –128 to
+127 steps (of about 0.06 second each)
within a track.
6 Press ENTER/YES when the position is
correct.
When the track has been divided,
“Complete” appears for a few seconds
and the newly created track begins
playing. The new track will have no
track title even if the original track was
labeled.
To stop before the track has been
divided
Press .
You can undo a track division
Combine the tracks again, then redivide the
tracks if necessary.
You can divide a track while recording
Use the track marking function.
Combining Recorded
Tracks
(combine function)
You can combine two consecutive tracks
into one. This function is useful for
combining several songs into a single
medley, or several independently recorded
portions into a single track.
After you combine two tracks
The total number of tracks decreases by one
and all tracks following the combined
tracks are renumbered.
B and C are combined
into one track.
POWER m ON
Labelling Recordings
(title function)
31
You can put titles on your recorded MDs
and tracks.
Titles may consist of uppercase and
lowercase letters, numbers and symbols for
a maximum of 80 characters for each titles
per a disc.
„
1
Press MD.
The unit enters MD play mode.
24,5
2 Turn the JOG dial until the second track
of the two to be combined appears.
For example, when combining tracks 3
and 4, turn the JOG dial until 4 appears.
TOC
EDIT
TRACK
MD
VOLUME
Track
number you
want to
combine
1
6
11
2738495
10
1 Press MD.
The unit enters MD play mode.
2 When you want to title the disc, press
3 Press EDIT/NO repeatedly until
“Combine?” appears in the display.
4 Press ENTER/YES.
“Rehearsal” alternates with “Track ok?”
in the display. The place where the two
tracks will join (i.e., the end of the first
track and the beginning of the second
track) repeatedly plays back.
so that the deck stops playback.
When you want to title a track, press
fl while playing the track you want to
title so that the deck pauses playback.
You can title a track during playback or
recording. You can also title tracks
without pausing, but if you don’t finish
entering the title before the track ends,
the title will be erased.
5 Press ENTER/YES when the position is
correct.
When the tracks have been combined,
“Complete” appears for a few seconds.
If both of the combined tracks have
track titles, the title of the second track
is erased.
To stop before the tracks have been
combined
Press .
3 Press EDIT/NO repeatedly until “Name
in?” appears in the display.
4 Press ENTER/YES.
A cursor flashes in the display.
TOC
EDIT
cursor
DISC
MD
VOLUME
1
6
11
2738495
10
You can undo a track combination
Divide the tracks again, then repeat the
combine function with the correct tracks if
necessary.
Chapter 5: Editing Recorded MDs
Page 21
5 Press CHARACTER repeatedly to select
the character type.
Each time you press, the character
changes as follows:
nuppercase nlowercase
spaceNsymbols Nnumbers N
You can use the following symbols:
! " # $ % & ' ( ) * + , – . / : ; < = > ? @ _ `
(space)
6 Turn the JOG dial until the desired
character appears in the display.
The selected character flashes.
To delete the title of the disc and the
titles of all of the tracks
(name erase function)
You can erase all titles on an MD
simultaneously.
Note that once erased, titles cannot be
recovered. If you want to stop deleting,
press .
1 While the deck is stopped, press EDIT/
NO repeatedly until “Name Erase?”
appears in the display.
2 Press ENTER/YES.
“Name Erase ??” appears in the display.
3 Press ENTER/YES again.
All titles are erased.
TOC
EDIT
DISC
MD
VOLUME
To enter a space quickly
Press ) while the cursor is flashing.
7 Press ).
The cursor shifts rightward and stands
by for the input of the next character.
TOC
EDIT
DISC
MD
VOLUME
Next character
8 Repeat steps 5 and 7 until you have
entered the entire title.
If you want to enter the same type of
character, skip step 5.
If you entered the wrong character
Press ) or 0 until the character to
be corrected starts flashing, and repeat
steps 5 to 7 to enter the correct character.
To erase a character
Press ) or 0 until the character to
be erased starts flashing, then press
EDIT/NO.
11
1
6
11
1
6
2738495
2738495
10
10
GB
21
9 Press ENTER/YES.
This completes the labelling procedure
and the title scrolls in the display.
To stop before the track has been
labelled
Press .
To check the titles
You can check the disc or track name by
pressing SCROLL.
To check the
Disc name
Track name
* Press SCROLL again to pause, and once
more to continue scrolling.
Press SCROLL*
While the deck is stopped
While the deck is playing
Chapter 5: Editing Recorded MDs
Page 22

Chapter 6:
VOLUME
AUTO
the
Radio
Listening to the
Radio
You can have the tuner automatically scan
and tune in the stations with clear signals.
This feature saves you time in searching for
stations with clear signals. However, you
will have to manually tune in the stations
with weak signals that are skipped by
automatic tuning.
“TUNED” appears in the display.
“STEREO” also appears if the tuned FM
station is broadcasting in stereo.
›–
Scans a lower
frequency
station
Scans a higher
frequency
station
Listening to the Radio
Presetting Radio Stations
Playing Preset Radio
Stations
POWER m ON
2
STEREO/
MONO
1
3,4
1Press TUNER/BAND (or BAND on the
remote) repeatedly until the band you
want appears in the display.
Each time you press this button, the
band changes as follows:
FM ˜ AM
VOLUME
Receiving frequency
2Press TUNING repeatedly until
“AUTO” appears in the display.
AUTO
VOLUME
3Turn the JOG dial clockwise to scan a
higher frequency station.
To tune in a lower frequency station,
turn the JOG dial counter-clockwise.
The tuner starts scanning radio
frequencies, and stops automatically
when it finds a clear station.
4 If you do not want to listen to the station
selected, turn the JOG dial again to
restart the scan.
When the desired station is not
tuned in
Automatic tuning may skip stations with a
weak signals. Tune in the station manually.
1 Press TUNING repeatedly until
“MANUAL” appears in the display.
2 Keep turning the JOG dial until the
desired station is tuned in.
To improve AM broadcast reception
Reorient the supplied AM loop aerial for
AM.
AM
When an FM programme is not received
clearly
Press STEREO/MONO so that “MONO”
appears in the display. There will be no
stereo effect, but the reception will
improve. Press STEREO/MONO again to
restore the stereo effect.
One Touch Play feature
Press BAND on the remote when the power
is off. You will be able to listen to the last
received station without pressing any other
buttons.
When you press TUNER/BAND on the
unit, power turns on and function switches
to TUNER automatically.
GB
22
Chapter 6: the Radio
Page 23

When the desired station is not tuned in
VOLUME
PRESET
POWER m ON
2
53,8
6
4
DISPLAY
0
Presetting Radio
Stations
You can store radio frequencies in the
tuner’s memory to tune in your favourite
stations quickly. You can preset up to
20 FM stations and 10 AM stations in any
order.
Use the buttons on the unit for presetting
stations.
POWER m ON
STEREO/
41
MONO
2
Automatic tuning may skip stations
with a weak signals. Tune in the station
manually.
1 Press TUNING repeatedly until
“MANUAL” appears in the
display.
2 Keep turning the JOG dial until the
desired station is tuned in.
4 Press EDIT/NO repeatedly until “Frq-
Memory ?” appears in the display.
5 Press ENTER/YES.
AUTO
VOLUME
MEMORY
VOLUME
Preset number flashes
Assigning a Name for a
Preset Station
(station name)
You can assign a name consisting of up to
ten character for each preset station.
Names may consist of uppercase and
lowercase letters, numbers and symbols.
The station name appears in the display
when you tune the preset station. If you
record the preset station on an MD using
timer recording function, the name will be
stored on the MD automatically.
1 Press TUNER/BAND (or BAND on the
2 Press TUNING repeatedly until
3 Turn the JOG dial clockwise to scan a
5,7
remote) repeatedly until the band you
want appears in the display.
Each time you press this button, the
band changes as follows:
FM ˜ AM
Receiving frequency
“AUTO” appears in the display.
higher frequency station.
To tune in a lower frequency station,
turn the JOG dial counter-clockwise.
The tuner starts scanning radio
frequencies, and stops automatically
when it finds a clear station.
“TUNED” appears in the display.
“STEREO” also appears if the tuned FM
station is broadcasting in stereo.
›–
Scans a lower
frequency
station
3,6
VOLUME
AUTO
VOLUME
Scans a higher
frequency
station
AUTO
VOLUME
6 Turn the JOG dial to select a preset
channel number.
7 Press ENTER/YES.
The station is stored at the preset
number you selected.
lights
PRESET
VOLUME
8 Repeat steps 1 to 7 for each station you
want to store.
To change the preset number
Start again from step 1.
When an FM programme is not received
clearly
Press STEREO/MONO so that “MONO”
appears in the display. There will be no
stereo effect, but the reception will
improve. Press STEREO/MONO again to
restore the stereo effect.
GB
23
1 Tune in the preset station you would
like to assign a name.
2 Press EDIT/NO repeatedly until “Name
in?” appears in the display.
PRESET
VOLUME
3 Press ENTER/YES.
A cursor flashes in the display.
Cursor flashes
4 Press CHARACTER repeatedly to select
character type.
Each time you press this button, the
character changes as follows:
nuppercasenlowercase
spaceNsymbolsNnumbersN
You can use the following symbols:
! " # $ % & ' ( ) * + , – . / : ; < = > ? @ _ `
(space)
continue to next page ➔
Chapter 6: the Radio
Page 24
➔continued
5 Turn the JOG dial until the desired
character appears in the display.
The selected character flashes.
PRESET
VOLUME
To enter a space quickly
Press ) while the cursor is flashing.
6 Press ).
The cursor shifts rightward and stands
by for the input of the next character.
PRESET
VOLUME
7 Repeat steps 4 and 6 until you have
entered the entire title.
If you want to enter the same character,
skip step 4.
If you entered the wrong character
Press ) or 0 until the character to
be corrected starts flashing, and repeat
steps 4 to 6 to enter the correct character.
To erase a character
Press ) or 0 until the character to
be erased starts flashing, then press
EDIT/NO.
8 Press ENTER/YES.
This completes the assigning procedure
and the name appears in the display.
To erase the station name
You can erase the station name by changing
all the characters of that name into
“spaces”.
Playing Preset Radio
Stations
Once you have preset the stations, use the
JOG dial to quickly tune in your favourite
stations.
POWER m ON
2
3
1 Press TUNER/BAND repeatedly to
select the band you want.
FM ˜ AM
2 Press TUNING so that “PRESET”
appears in the display.
3 Turn the JOG dial (or press PRESET
(–/+) on the remote ) to tune in a preset
station.
The station frequency appears and the
system begins receiving the stations.
›–
1
GB
24
To change the display
Press DISPLAY.
Each time you press the button, the
frequency or station name (if you have
stored one) appears in the display
repeatedly.
Go to previous
preset station
Frequency Preset number
To select a station directly
After step 1 above, you can quickly tune in
your favourite stations preset on channel
numbers 1 to 10 by pressing the corresponding numeric buttons.
When, you select channel numbers greater
than 10, press >10 first, then enter the
corresponding digits.
Example:
To select channel number 25, press >10,
2 and 5 in this order.
Go to next
preset station
PRESET
MD
VOLUME
Chapter 6: the Radio
Page 25
Chapter 7:
Adjusting the Sound
Sound
Adjustment
Adjusting the Sound
To fully enjoy the sound coming from your
stereo system, make the following audio
adjustments.
You can also use the remote to do this
operation.
POWER m ON
BASS/
TREBLE
PHONES
To adjust
the volume
the bass or
treble sound
BALANCE VOLUME +/–
JOG
Do this
Increasing the volume, press
VOLUME + (or VOL + on
the remote
Decreasing the volume,
press VOLUME – (or VOL –
on the remote
1 Press BASS/TREBLE to
select the sound tone
you want to adjust.
Each time you press this
button, the tone changes
as follows:
BASSnTREBLEnOFF
n
2 Turn the JOG dial to
adjust the tone
GB
25
›–
Decreases
bass/treble
sound
the balance
To listen through the headphones
Connect the headphones to PHONES jack.
No sound will come from the speakers.
Press BALANCE and turn
the JOG dial to adjust the
balance
›–
Shifts
sound to
the left
Increases
bass/treble
sound
Shifts
sound to
the right
Chapter 7: Sound Adjustment
Page 26
Chapter 8:
POWER m ON
TIMER
SELECT
4,5,6,8 5,6,7
32
,9
Additional
Features
Falling Asleep to Music
Waking Up to Music
Falling Asleep to
Music
You can set the stereo system to turn off
automatically so you can go to sleep to
music (sleep timer).
Before setting the sleep timer, make sure
the clock has been set correctly.
You can set the sleep timer even if you have
already set the wake-up timer.
Use the button on the remote for this
operation.
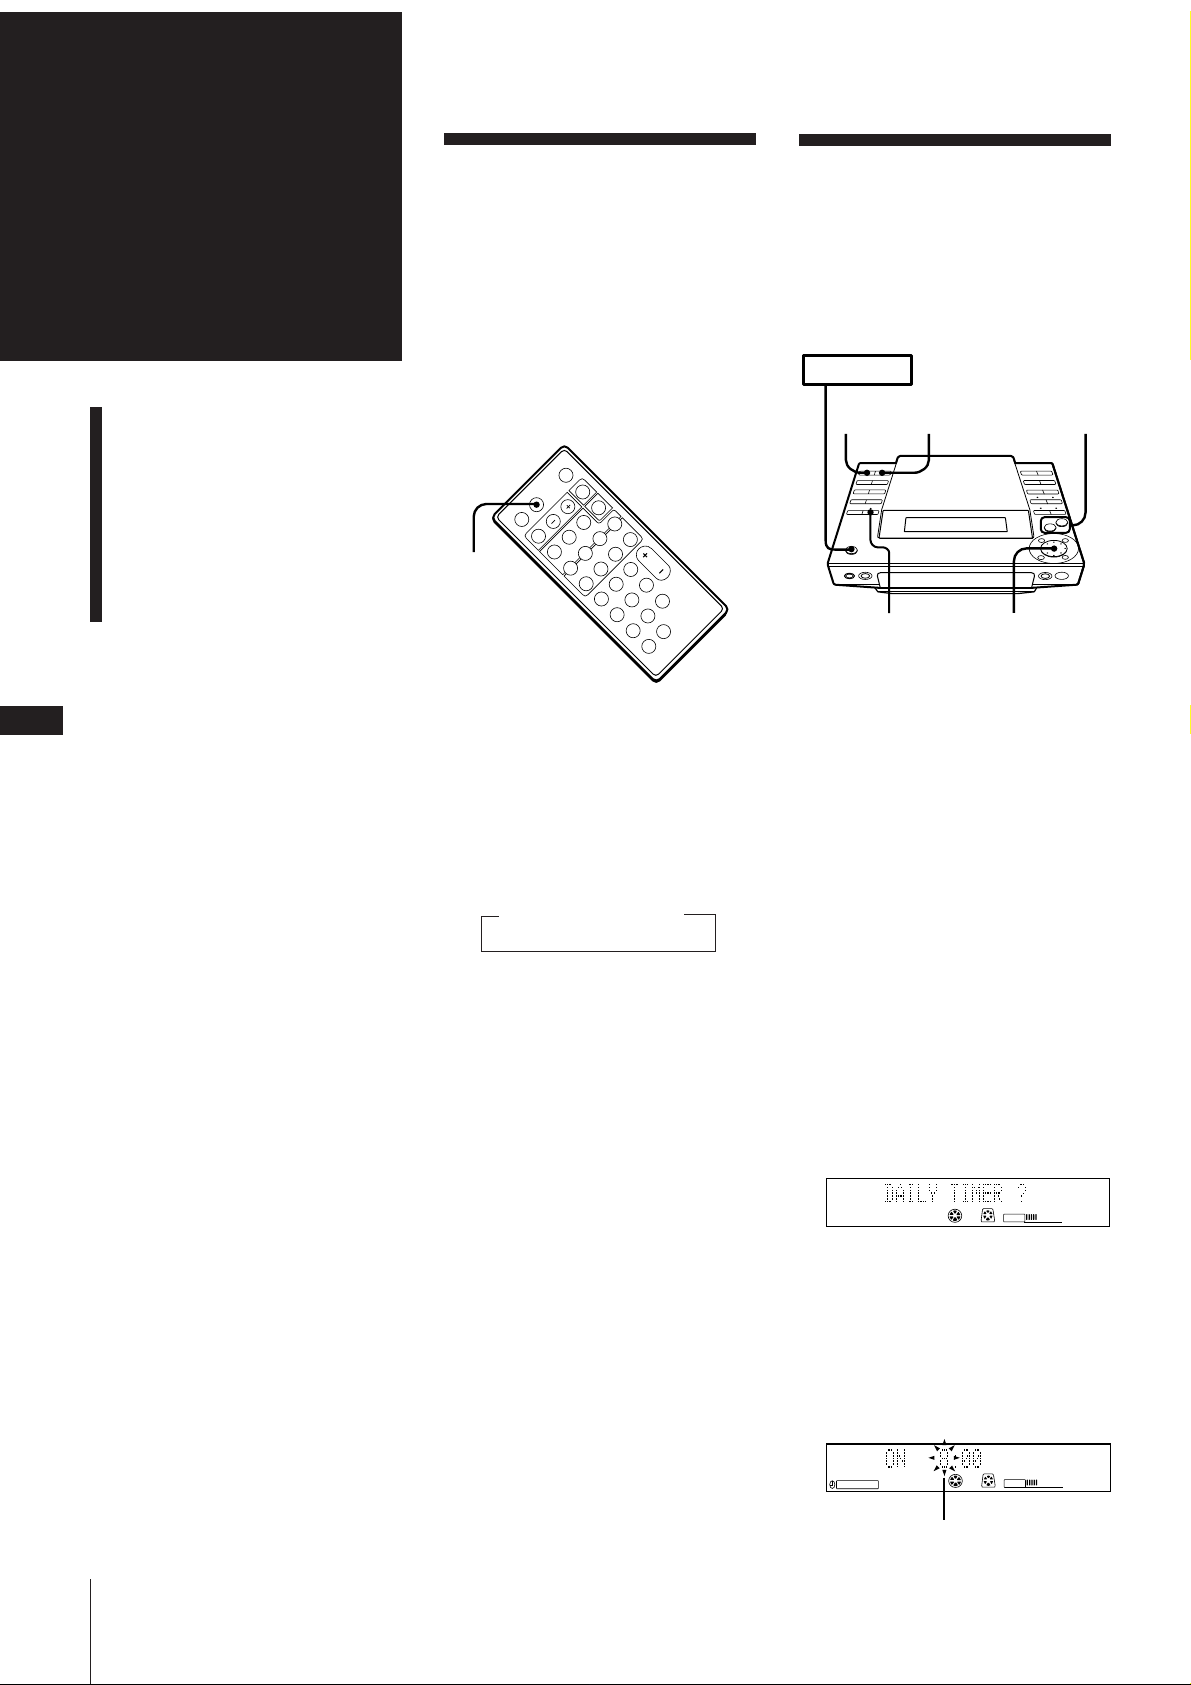
Waking Up to Music
You can wake up to music at a preset time.
You only need to set the timer once. The
timer will remain activated until you reset it
or disconnect the main leads.
Before setting the timer, make sure the
clock has been set correctly.
GB
26
Timer-Recording Radio
Programmes
Connecting Optional
Equipment
p
SLEEP
P
(
=
rPp
+
(
1Play your favourite sound source (a
tape, the tuner or a CD).
2 Press SLEEP repeatedly to choose how
long you want the music to play.
The sleep time indication appears in the
display.
n 90 n 80 ... 10 n OFF
The minute indication sets the timer to
turn the power off after 90 to 10 minutes
in ten minute intervals.
To cancel the sleep timer
Press SLEEP repeatedly until “OFF”
appears in the display.
To check the remaining time before
the sleep timer turns off the system
Press SLEEP once.
The remaining time (in minutes) is
displayed for several seconds.
1Prepare the sound source.
To wake up to the radio
Tune in the preset station you want.
To wake up to a CD
Insert a CD. If you want it to play from a
specific track, do the necessary procedures for programmed CD play (see
“Playing Tracks in the Desired Order
(programme play)”).
To wake up to a MD
Insert a MD.
2Press VOLUME +/– to adjust the
volume.
After you finish adjusting, stop playing
CD or MD.
3Press TIMER SET repeatedly until
“DAILY TIMER ?” appears in the
display.
MD
CD
VOLUME
Chapter 8: Additional Features
To change the remaining time while
the sleep timer is on
Press SLEEP repeatedly to select the
remaining time you desire.
4Press ENTER/YES.
“ON” appears and hour digits flash in
the display.
5Set the time you want the system to
turn on.
1 Use the JOG dial to set the hour.
DAILY
CD MD
flashing
VOLUME
Page 27
2 Press ENTER/YES.
The minutes digits flash in the
display.
DAILY
3 Use the JOG dial to set the minutes.
DAILY
4 Press ENTER/YES.
“OFF” appears and the hour digits
flash in the display.
DAILY
CD MD
flashing
CD MD
flashing
CD MD
VOLUME
VOLUME
VOLUME
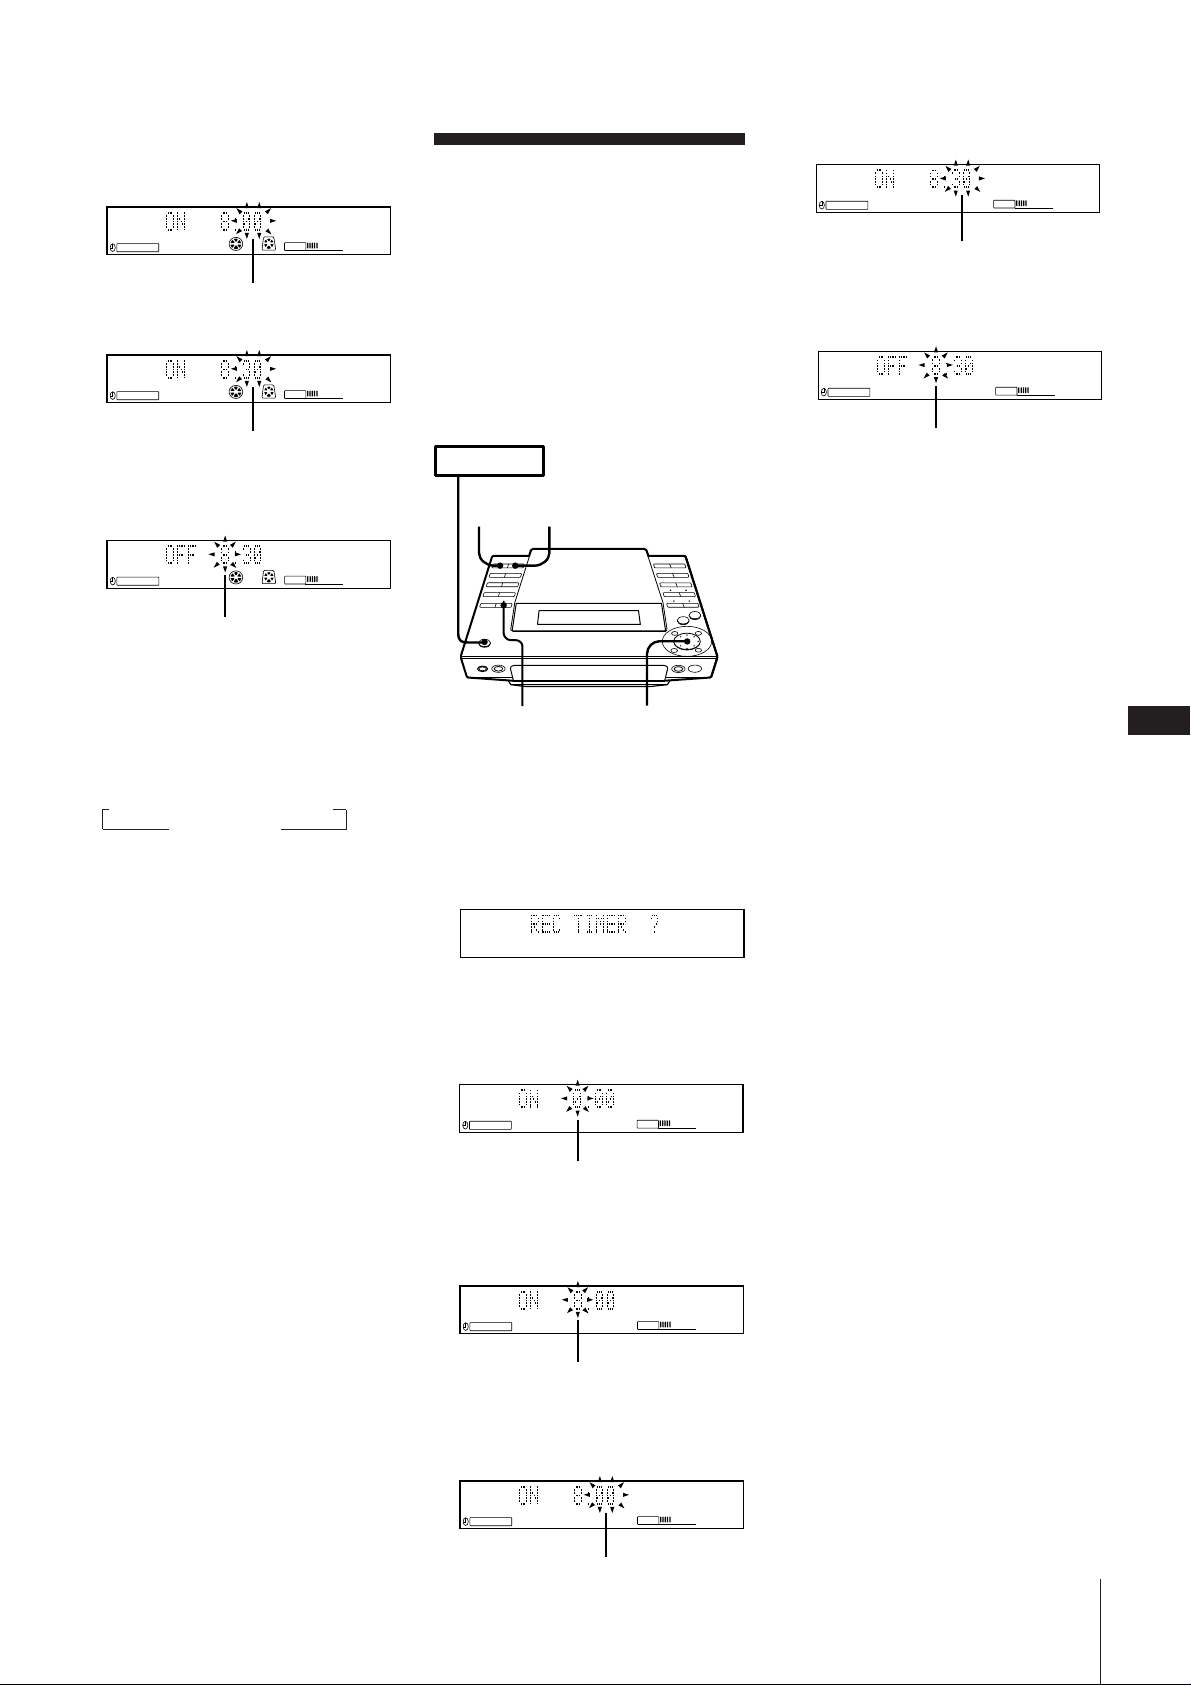
Timer-Recording
Radio Programmes
You can set the timer to record from the
radio at a certain time. This timer works
only once for each setting. The volume level
is automatically set to MIN.
If you record from a preset station you have
assigned a name, the name, on time and off
time are stored on the MD automatically.
•Preset the station you want to record.
•Make sure the clock has been set correctly.
POWER m ON
TIMER
SELECT
,8
2
3 Use the JOG dial to set the minutes.
REC
flashing
4 Press ENTER/YES.
“OFF” appears and the hour digits
flash in the display.
REC
flashing
VOLUME
VOLUME
5 Set the time you want the system to turn
off in the same way.
6 Press ENTER/YES.
The preset items appear in the display
sequentially.
flashing
6 Set the time you want the system to turn
off in the same way.
7 Use the JOG dial to select a sound
source.
The display changes as follows:
n CD PLAY ˜ TUNER N
n MD PLAY N
8 Press ENTER/YES.
The preset items appear in the display
sequentially.
9 Press POWER to turn off the system.
About 15 seconds before the preset time,
the power will go on at the preset time
and the music will play. At the turn-off
time, the power will go off again.
To cancel the timer
Press TIMER SELECT repeatedly until
“TIMER OFF” appears in the display.
To change the timer
Repeat all above procedure from step 1.
You can check the preset items
Press TIMER SELECT repeatedly until
“DAILY” appears in the display again.
Preset items appear in the display.
3,4,5,6 4,5
1 Tune the preset station you want to
record.
2 Press TIMER SET repeatedly until the
“REC TIMER ?” appears in the display.
3 Press ENTER/YES.
“REC” appears and hour digits flash in
the display.
REC
flashing
VOLUME
4 Set the time you want the system to
start recording.
1 Use the JOG dial to set the hour.
REC
VOLUME
7 Insert a recordable MD.
“TOC Reading” appears in the display
for a few seconds and the MD deck
reads the contents of the MD.
8 After “TOC Reading” disappears from
the display, press POWER to turn off the
system.
About 15 seconds before the preset time,
the power turns on and the volume level
is automatically set to the MIN.
Notes
•Do not turn off the power while “TOC
Reading” appears in the display. The
timer operation may not be performed
correctly.
•If you use a brand new MD, nothing is
recorded for the first 15 seconds.
To cancel the timer
Press TIMER SELECT repeatedly until
“TIMER OFF” appears in the display.
To change the timer
Repeat all above procedure from step 1.
You can check the preset items
Press TIMER SELECT repeatedly until
“REC” appears in the display again. Preset
items appear in the display.
GB
27
flashing
2 Press ENTER/YES.
The minutes digits flash in the
display.
REC
MD
flashing
VOLUME
Chapter 8: Additional Features
Page 28
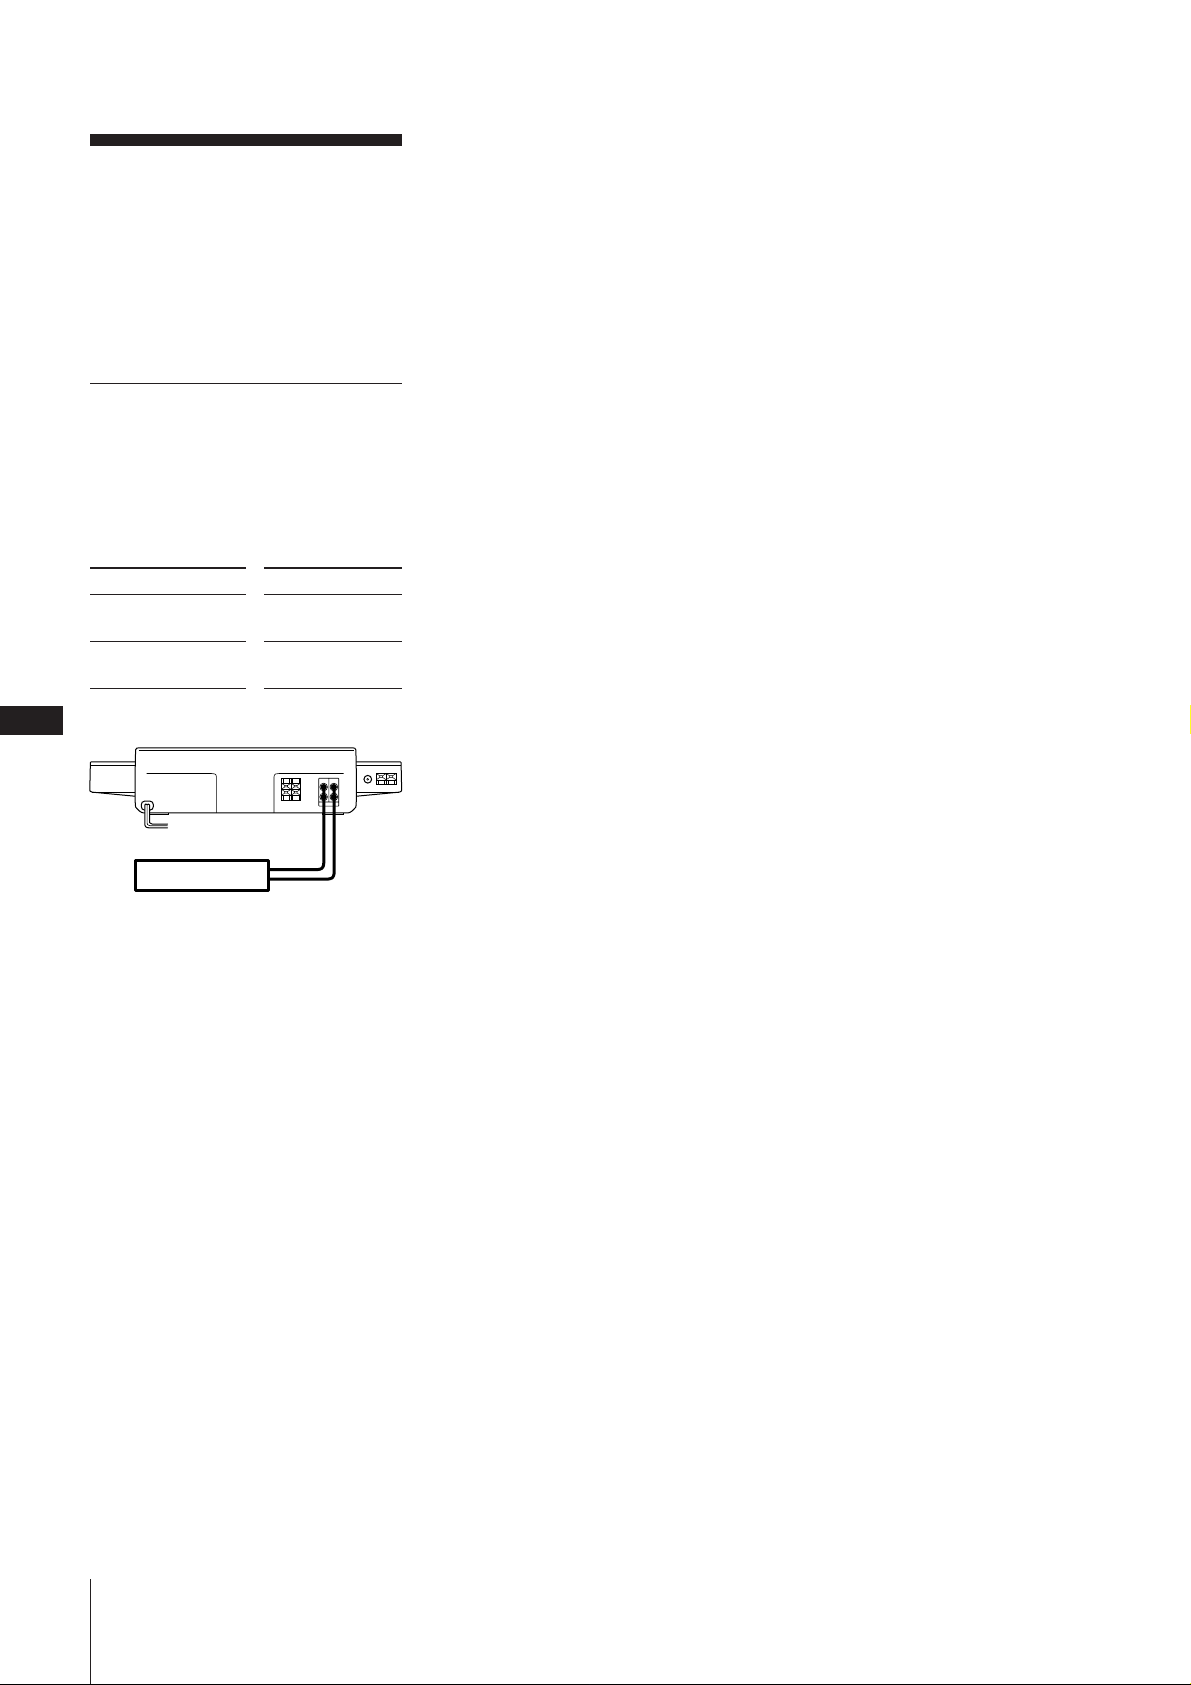
Connecting Optional
Equipment
For greater enjoyment of your stereo
system, you can connect a stereo cassette
deck to the stereo. You can record from
sound sources of the system into the
cassette deck.
Connecting a stereo
cassette deck
Use audio cords and make sure to connect
the plugs to jacks of the same colour.
See the instruction manual of the stereo
cassette deck for details.
GB
28
Connect
LINE IN jacks of the
cassette deck
LINE OUT jacks of
the cassette deck
Cassette Deck
To listen to the sound from the
cassette deck
Press TAPE.
With
TAPE OUT jacks
TAPE IN jacks
OUT IN
L
R
TAPE
Chapter 8: Additional Features
Page 29

For Your
Information
Precautions
Maintenance
Guide to the Serial Copy
Management System
System Limitations of MD
MD Display Messages
Troubleshooting Guide
Specifications
Index to Parts and Controls
Index
Precautions
If you have any questions or problems
concerning your stereo system, please
consult your nearest Sony dealer.
On safety
• The use of optical instruments with this
product will increase eye hazard.
• The unit is not disconnected from the AC
power source (mains) as long as it is
connected to the wall outlet, even if the
unit itself has been turned off.
• Unplug the system from the mains if it is
not to be used for an extended period of
time. To disconnect the mains lead, pull
it out by the plug. Never pull the cord
itself.
• Should any solid object or liquid fall into
a component, unplug the stereo system
and have the component checked by
qualified personnel before operating it
any further.
• AC power cord must be changed only at
the qualified service shop.
On installation
Place the stereo system in a location with
adequate ventilation to prevent heat buildup in the stereo system.
On condensation in the CD player
and the MD deck component
If the system is brought directly from a cold
to a warm location, or is placed in a very
damp room, moisture may condense on the
lens inside the CD player or the MD deck.
Should this occur, the CD player or the MD
deck will not operate. Remove the CD or
the MD and leave the system turned on for
about an hour until the moisture
evaporates.
Notes on handling MDs
Because the MD itself is housed in a
cartridge, you can handle it normally
without being concerned about dirt or
fingerprints. However, malfunctioning may
result if the cartridge itself is dirty or
warped.
In case colour irregularity is
observed on a nearby TV screen
(For MJ-L1 only)
With this magnetically shielded type of
speaker system, the speakers can be
installed near a TV set. However, colour
irregularity may still be observed on the TV
screen depending on the type of your TV
set.
If colour irregularity is observed...
Turn off the TV set once, then turn it on
after 15 to 30 minutes.
If colour irregularity is observed again...
Place the speakers farther away from the
TV set.
Maintenance
To clean the cabinet
Use a soft cloth slightly moistened with
mild detergent solution.
To clean the CD
When a CD is dirty, clean it with a cleaning
cloth. Wipe the CD from the centre out.
Notes on CD
• Do not use solvents such as benzene,
thinner, commercially available cleaners,
or anti-static spray intended for vinyl
LPs.
• If there is a scratch, dirt or fingerprints on
the CD, it may cause a tracking error.
Notes on MD
• Do not expose the MD to direct sunlight
or heat sources such as hot air ducts, nor
leave it in a car parked in direct sunlight
as there can be a considerable rise in
temperature inside the car.
• Periodically remove dust and debris from
the cartridge surface by wiping it with a
dry cloth.
GB
29
Do not open the shutter on the MD
cartridge
Trying to force the shutter open will
damage the shutter.
CartridgeShutter
For Your Information
Page 30
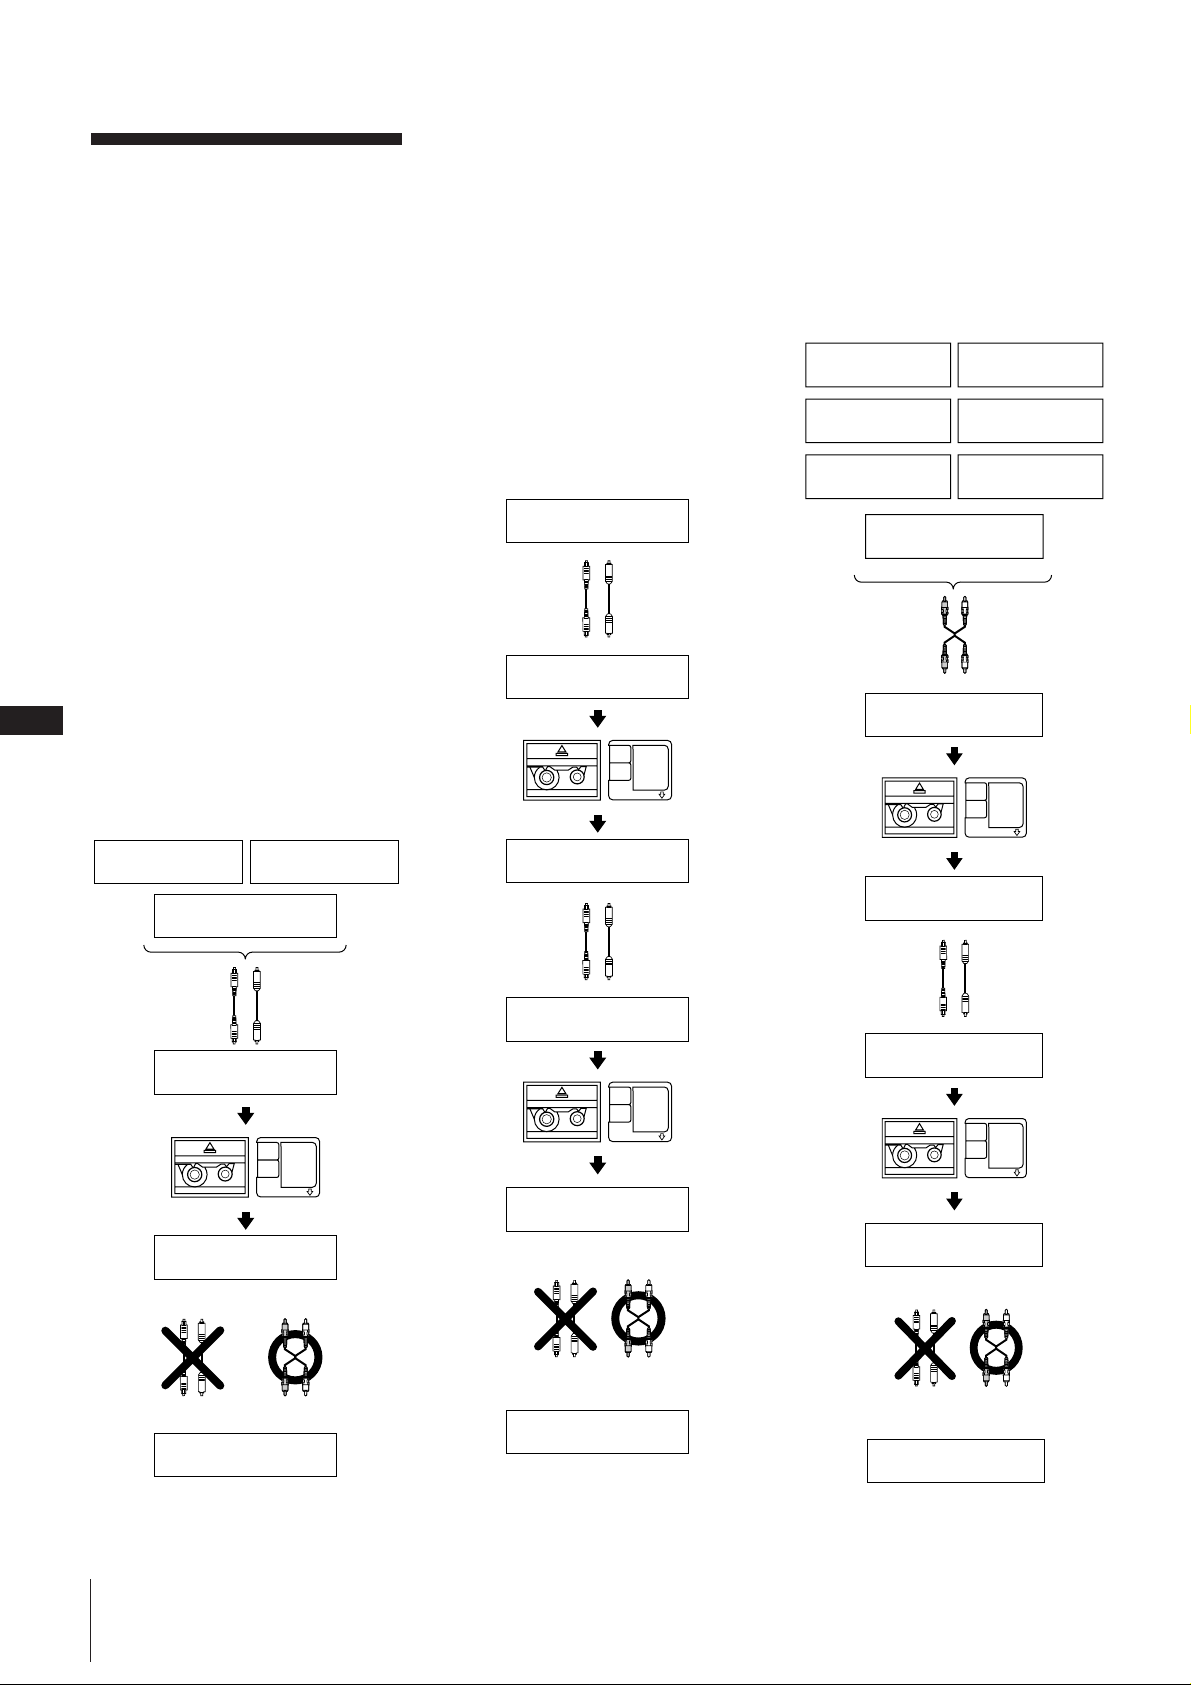
GB
30
Guide to the Serial
Copy Management
System
An MD recorded through a digital input
cannot be used to make another recording
with digital input. As a digital audio
component, this MD deck conforms with
the Serial Copy Management System
standards. The Serial Copy Management
System restricts copies made by recording
digital signals to first-generation copies
only.
However, subsequent recording from the
first-generation copy onto another
recordable DAT tape or MD is possible
through the analog input jack on the DAT
or MD deck.
There are three general rules that apply to
this unit.
Rule 1
You can record from digital programme
sources (CDs, DATs or premastered MDs)
onto a DAT tape or recordable MD via the
digital input jack on a DAT or MD deck.
You cannot, however, record from this
recorded DAT tape or MD onto another
DAT tape or recordable MD via a digital
input jack on the DAT or MD deck.
CD player
DAT deck
Rule 2
You can record a digital signal input from a
digital satellite broadcast onto a DAT tape
or recordable MD via the digital input jack
on the DAT or MD deck which is capable of
handling a sampling frequency of 32 kHz
or 48 kHz. (This unit supports 44.1 kHz
only.)
You can then record the contents of this
recorded DAT tape or MD (first-generation)
onto another DAT tape or recordable MD
via digital input jack on the DAT or MD
deck to create a second-generation digital
copy. Note, however, that on some BS
tuners, second-generation digital copying
may not be possible.
Playing
Optical cable or
coaxial digital
connecting cable
Recording
DAT or MD
Playback
BS tuner
Digital output jack
Digital input jack
DAT deck or MD deck
Firstgeneration
DAT tape or
MD recorded
via digital-todigital
connection
DAT deck or MD deck
Rule 3
You can record a DAT tape or MD recorded
via the DAT or MD deck’s analog input jack
onto another DAT tape or MD via the DAT
or MD deck’s digital output jack. You
cannot, however, make a second-generation
DAT tape or MD copy via the DAT or MD
deck’s digital output jack.
Turntable
CD player
DAT deck
Playing
Audio connecting
cord
MD deck
Tuner
Cassette deck
Microphone
amplifier
Line (analog) output
jacks
Line (analog) input
jacks
DAT deck or MD deckRecording
DAT tape or
MD recorded
DAT or MD
via analog-todigital
connection
Playing
Optical cable or
coaxial digital
connecting cable
Recording
DAT or MD
Playing
Digital output jack
Optical cable
or coaxial
digital
connecting
cable
Digital input jack
Recording
MD deck
Digital output jack
Digital input jack
DAT deck or MD deck
DAT deck or MD deck
Line (analog) output jacks
Line (analog) input jacks
DAT deck or MD deck
Firstgeneration
DAT tape or
MD recorded
via digital-todigital
connection
Audio
connecting
cord
Optical cable or
coaxial digital
connecting cable
Recording
DAT or MD
Playback
Optical cable
or coaxial
digital
connecting
cable
Recording
DAT deck or MD deck
DAT deck or MD deck
Digital output jack
Digital input jack Line (analog) input jacks
DAT deck or MD deck
Digital output jack
Digital input jack
Line (analog) output jacks
Second
generation
DAT tape or
MD recorded
via digital-todigital
connection
Audio
connecting
cord
Playing
Recording
DAT or MD
Playing
Optical cable
or coaxial
digital
connecting
cable
Recording
DAT deck or MD deck
Optical cable or
coaxial digital
connecting cable
Digital output jack
Digital input jack
DAT deck or MD deck
DAT deck or MD deck
Digital output jack Line (analog) output jacks
Audio
connecting
cord
Digital input jack
Line (analog) input jacks
DAT deck or MD deck
Firstgeneration
DAT tape or
MD recorded
via digital-todigital
connection
For Your Information
Page 31

System Limitations
of MD
The recording system in your MD deck is
radically different from those used in
cassette and DAT decks and is
characterized by the limitations described
below. Note, however, that these
limitations are due to the inherent nature of
the MD recording system itself and not to
mechanical causes.
”Disc Full” lights up even before the
MD has reached the maximum
recording time (60 or 74 minutes)
When 255 tracks have been recorded on the
MD, “Disc Full” lights up regardless of the
total recorded time. More than 255 tracks
cannot be recorded on the MD. To continue
recording, erase unnecessary tracks or use
another recordable MD.
”Disc Full” lights up before the
maximum number of tracks is
reached
Fluctuations in emphasis within tracks are
sometimes interpreted as track intervals,
increasing the track count and causing
“Disc Full” to light up.
The remaining recording time does
not increase even after erasing
numerous short tracks
Tracks under 12 seconds in length are not
counted and so erasing them may not lead
to an increase in the recording time.
Some tracks cannot be combined
with others
Track combination may become impossible
when tracks are edited.
The total recorded time and the
remaining time on the MD may not
total the maximum recording time
(60 or 74 minutes)
Recording is done in minimum units of 2
seconds each, no matter how short the
material. The contents recorded may thus
be shorter than the maximum recording
capacity. Disc space may also be further
reduced by scratches.
Tracks created through editing may
exhibit sound dropout during search
operations.
Track numbers are not recorded
correctly
Incorrect assignment or recording of track
numbers may result when CD tracks are
divided into several smaller tracks during
digital recording.
”TOC Reading” appears for a long
time
If the inserted recordable MD is brand new,
“TOC Reading” appears in the display
longer than for MDs that have been used.
Limitations when recording over an
existing track
• The correct remaining recording time
may not be displayed.
• You may find it impossible to record over
a track if that track has been recorded
over several times already. If this
happens, erase the track using the Erase
Function.
• The remaining recording time may be
shortened out of proportion to the total
recorded time.
• Recording over a track to eliminate noise
is not recommended since this may
shorten the duration of the track.
• You may find it impossible to label a
track while recording over it.
The correct recorded/playing time
may not be displayed during
playback of monaural-format MDs.
MD Display Messages
The following table explains the various
messages that appear in the display.
Message
All Erase?
Attenuate?
Auto cut
Blank Disc
Cannot Copy
Cannot EDIT
Combine?
Disc Error
Disc Full
Meaning
Erase all tracks on an MD?
(Erase Function)
Attenuate the recording
level during analog
recording?
The MD deck is pausing
the recording because
silence continued for 30
seconds or more during
digital recording.
The inserted recordable
MD is brand new or all
tracks on the MD have been
erased.
You cannot make a digital
recording. (See “Guide to
the Serial Copy
Management System”.)
You tried to edit in
PROGRAM or SHUFFLE
play mode.
Combine two tracks into
one? (Combine Function)
The inserted MD is
damaged, or does not
contain a TOC.
You can not make
recording because there is
no time remaining on the
disc. (See “System
Limitations of MD”.)
Divide?
Eject
Erase?
Impossible
LEVEL
SYNC?
Move?
Name Full
Name in?
NO DISC
No Track
OVER
Protected
REC LEVEL
OVER
Retry
Retry Error
Smart Space
Sorry
Divide one recorded track
into two tracks? (Divide
Function)
Displayed when you
remove the MD.
Erase a single track on an
MD? (Erase Function)
You tried to combine from
the first track on an MD,
which is not possible.
Mark track numbers
automatically during
recording? (Level Synchro
Function)
Change the order of the
tracks by moving tracks to
any desired position? (Move
Function)
There is no more space to
store track or disc titles.
Create titles for your
recorded MDs and tracks?
(Title Function)
There is no MD in the deck.
The inserted MD has a disc
title but no tracks.
The end of the last track
was reached while
conducting a high-speed
search.
The inserted MD is
protected against erasure.
A high-level signal was
input while recording from
audio equipment connected
to this unit’s TAPE IN jacks.
The MD deck is redoing the
recording because of
vibrations or disc scratches
encountered during
recording.
Because of numerous
vibrations or disc scratches,
continuous recording
attempts have been made
but normal recording is not
possible.
The signal was input again
after silence continued for
30 seconds or less during
digital recording.
You tried to combine tracks
that cannot be combined
For Your Information
GB
31
Page 32

GB
32
TOC
(flashing)
TOC reading
TRACK
(lighted)
TRACK
(flashing)
Welcome
The MD deck is updating
the table of contents (TOC).
(Do not move the MD deck
or pull out the mains lead.
If you do, the recorded
material may not be saved
normally. If you disconnect
the mains lead immediately
after recording, you cannot
save the recording.
The MD deck is reading the
contents of the MD. (If the
inserted recordable MD is
brand new, “TOC Reading”
appears in the display
longer than for MDs that
have been used.)
The MD deck is recording a
blank portion.
The MD deck is recording
over existing material.
Displayed when you insert
an MD.
Troubleshooting
Guide
If you run into any problem using the
stereo, use the following check list after first
checking the following two points:
• The mains lead is connected firmly.
• The speakers are connected correctly and
firmly.
Should any problem persist after you have
made the checks below, consult your
nearest Sony dealer.
General
There is no sound.
m Press POWER to turn on the
stereo.
m Adjust the volume.
m The headphones are connected.
Disconnect them.
The left and right sounds are
reversed.
m Check the speaker connection and
speaker placement.
There is severe hum or noise.
m TV or VCR is too close to the
stereo system. Move the stereo
system away from the TV or VCR.
”0:00” flashes in the display.
m Mains interruption occurred. Set
the clock and timer settings again.
CD Player
The CD tray does not close.
m The CD is not placed correctly.
The CD will not play.
m The CD is dirty.
m The CD is inserted with the label
side down.
m The player is in pause mode.
m Moisture condensation has built
up. Leave the system turned on
for about an hour until the
moisture evaporates.
Play does not start from the first
track.
m The CD player is in programme or
shuffle mode. Press CONTINUE.
The “PROGRAM” or “SHUFFLE”
display will disappear.
“OVER” appears in the display.
m The CD reaches the end while you
are searching quickly by pressing
) down.
“Step Full” appears in the display.
m You have programmed 24 tracks
already.
“Name Full” appears in the display.
m You have put 21 disc names
already.
MD Deck
The MD deck does not operate or
operates poorly.
m The MD may be damaged (“Disc
Error” appears).
Take the MD out and insert it
again. If “Disc Error” remains,
replace the MD.
The MD deck does not play back.
m Moisture condensation has built
up. Take the MD out and leave the
system turned on for about an
hour until the moisture
evaporates.
m The MD is inserted in the wrong
direction. Slide the MD into the
disc compartment with the label
side up and the arrow pointing
towards the opening until the deck
grips it.
m The MD may not be recorded.
Replace the disc with one that has
been recorded.
The MD deck does not record.
m The MD is record-protected
(“Protected” appears). Slide the
tab to close the slot.
m A premastered MD is inserted.
Replace it with a recordable MD.
m There is not enough time left on
the MD. Replace it with another
recordable MD with fewer
recorded tracks or erase
unnecessary tracks.
An incompletely inserted MD cannot
be pulled out.
m The MD deck’s self-lock system
has gripped the MD.
Insert the MD completely, then
press MD §.
“OVER” appears in the display.
m The MD reaches the end while you
are searching quickly by pressing
) down.
The sound has a lot of static.
m Strong magnetism from a
television or a similar device is
interfering with operations. Move
the deck away from the source of
strong magnetism.
Tuner
”TUNED” flashes in the display.
m Adjust the aerial.
”STEREO” flashes in the display.
m Adjust the aerial.
Severe hum or noise.
m Adjust the aerial.
m The signal strength is too weak.
Connect the external aerial.
m Connect the earth wire.
A stereo FM programme cannot be
received in stereo.
m When “MONO” appears in the
display, press STEREO/MONO on
the remote so that “MONO”
disappears.
m Adjust the aerial.
Timer
The timer does not function.
m Set the clock correctly.
m The mains has been cut off. While
the timer works, press the POWER
switch to turn off the system.
m Make sure “DAILY” or “REC”
appears in the display.
Remote
The remote does not function.
m The battery have run down.
Replace the battery.
m There is an obstacle between the
remote and the system. Remove
the obstacle.
For Your Information
Page 33

Restoring the Factory
Settings
1 Unplug the mains lead.
2 Plug it back into wall outlet while
holding down POWER on the unit.
Specifications
CD player section
System Compact disc and digital audio
system
Laser Semiconductor laser (λ=780 nm)
Emission duration: continuous
Laser output
Max 44.6 µW*
* This output is the value
measured at a distance of 200
mm from the objective lens
surface on the Optical Pick-up
Block with 7 mm aperture.
Wavelength
780 – 790 nm
Frequency response
2 Hz – 20 kHz
MiniDisc deck section
System MiniDisc digital audio system
Disc MiniDisc
Laser Semiconductor laser (λ = 780 nm)
Laser output
Max 44.6 µW*
* This output is the value
measured at a distance of 200
mm from the objective lens
surface on the Optical Pick-up
Block with 7 mm aperture.
Laser diode properties
Material: GaAIAs
Revolutions (CLV)
Approx. 400 rpm to 900 rpm
Error correction
Advanced Cross Interleave Reed
Solomon Code (ACIRC)
Sampling frequency
44.1 kHz
Modulation system
EFM
(Eight-to-Fourteen Modulation)
Number of channels
2 stereo channels
Frequency response
5 Hz – 20 kHz
Wow and flutter
Below measurable limit
Tuner section
AM tuner section
Tuning range
531 – 1,602 kHz
(with the interval set at 9 kHz)
Aerial AM loop aerial,
External aerial terminals
Intermediate frequency
450 kHz
Timer section
System Quartz lock system
Timer setting
One-minute step
Sleep timer
10-minute step, max. 90 minutes
Amplifier section
DIN power output
(MJ-L1)
30 W + 30 W
(6 ohms at 1 kHz, DIN)
(MJ-L1A)
30W + 30W
(4 ohmes at 1kHz,DIN)
Continuous RMS power output
(MJ-L1)
40 W + 40 W
(6 ohms at 1 kHz, 10% THD)
(MJ-L1A)
(4 ohms at 1 kHz, 10% THD)
Music power output
(MJ-L1)
70 W + 70 W
(6 ohms at 1 kHz, 10% THD)
(MJ-L1A)
70 W + 70 W
(4 ohms at 1 kHz, 10% THD)
Inputs TAPE (phono jacks):
voltage 250 mV
impedance 47 kilohms
Outputs TAPE (phono jacks):
voltage 250 mV
impedance 1 kilohms
PHONES (stereo phone jack):
accepts headphones of 8 ohms
or more.
Speaker section (SS-MJ1,supplied for
MJ-L1 only)
Speaker system
2-way, bass reflex type
Speaker units
Woofer: 13 cm (5 1/8 in.),
cone type
Tweeter: 2.5 cm (1 in.),
dome type
Rated impedance
6 ohms
Dimensions
Approx. 190 x 385 x 165 mm
x
(7 1/
15 1/4 x 6 1/2 in.) (w/h/d)
2
incl. projecting parts and controls
Mass Approx. 4.0 kg (8 lb 13 oz)
General
Power requirements
220 – 230 V AC, 50/60 Hz
Power consumption
95 W
Dimensions
Approx. 430 x 95 x 290 mm
(17 x 33/4 x 111/2 inches) (w/h/d)
incl. projecting parts and controls
Mass Approx. 7.0 kg (15 lb 7 oz)
Design and specifications are subject to
change without notice.
Index to Parts and
Controls
Refer to the pages indicated in parentheses
for how to use the controls.
Controls with an asterisk have built-in
lamps on themselves.
GB
Front Panel
CD player section
1345
2
68 !¢
1 PLAY MODE button (9)
2 CHARACTER button (10)
3 REPEAT button (8)
4 Display window (7, 8)
5 DISPLAY button (8)
6 EDIT/NO button (10)
7 CD § (eject) button (7)
8 ENTER/YES button (9, 10)
9 Disc tray (7)
0fl (play/pause) button (7)
!¡0 (fast backward) button (8)
!™ JOG dial (7)
!£ ) (fast forward) button (8)
!¢ (stop) button (7)
!£!“!`097
33
FM tuner section
Tuning range
87.5 – 108.0 MHz (50 kHz step)
Aerial FM lead aerial
Aerial terminal
75 ohm unbalanced
Intermediate frequency
10.7 MHz
Supplied accessories
Sony RM-SMJ1 Remote (1)
Sony lithium battery, CR2025 (1)
FM lead aerial (1)
AM loop aerial (1)
Speaker cords (2)*
*Supplied for MJ-L1 only)
For Your Information
Page 34

MiniDisc deck section
SYNC REC
LEVEL-SYNC
TOC
EDIT
TRACK DISC
MD
1
6
11
16
2
7
12
17
3
8
13
18
4
9
14
19
5
10
15
20
1
SHUFFLE
PROGRAM
REPEAT 1
ATTENUATE
23
Amplifier section
MD deck section
GB
34
13470
2
65
!` !“ !»
1 PLAY MODE button (13)
2 CHARACTER button (21)
3 REPEAT button (12)
9
8
!¥!ƒ!!¢ !⁄!£
46
1 BASS/TREBLE button (25)
2 BALANCE button (25)
3 FUNCTION buttons
4 Display window (11, 12)
5 REC PAUSE button (15)
6 CD SYNCHRO button (15)
7 DISPLAY button (12)
8 SCROLL button (12, 21)
9 REC button (16)
0 REC STOP button (15)
4 POWER switch (7, 27)
5 PHONES jack (25)
6 VOLUME +/– buttons (25)
!¡EDIT/NO button (15, 18)
!™ ENTER/YES button (13, 15, 18)
!£Disc slot (11)
!¢fl (play/pause) button (11)
!0 (fast backward) button (12)
!§MD § (eject) button (11)
Rear Panel
!¶JOG dial (11)
!•) (fast forward) button (12)
!ª (stop) button (11)
Tuner section
12 345 6 7 8
1 SPEAKER connectors (4)
2 TAPE OUT jacks (28)
3 TAPE IN jacks (28)
4 FM 75 Ω COAXIAL connector (4)
5y (earth) terminal (4)
6 AM terminal (4)
7 Mains lead (5)
9
0!` !“
23
1
5
TAPE button (16, 28)
MD button (11, 18)
CD button (7, 16)
TUNER/BAND button (16, 22)
7
1 Playing time/track number/title
indication (11)
2 MD indication
fl (play/pause) (11)
[REC] (15)
SYNC (synchro) (15)
LEVEL-SYNC (level synchro) (14)
´ (TOC edit) (15)
REPEAT 1 (12)
SHUFFLE (13)
PROGRAM (13)
DISC (11)
TRACK (11)
3 Music calendar (11)
Tuner section
1
4 5 6321
TUNED
STEREO MONO
2
MANUAL
AUTO
PRESET
1 Frequency/time/station name
indications (6, 22, 23, 26)
2 Tuner indications
TUNED (22)
STEREO MONO (22)
MANUAL (22)
AUTO (22)
PRESET (24)
Remote (RM-SMJ1)
1 CHARACTER button (23)
2 CLOCK button (6)
3 TIMER SELECT button (27)
4 TIMER SET button (26)
5 STEREO/MONO button (22)
6 Display window (22)
7 DISPLAY button (24)
8 TUNER/BAND button (22)
9 TUNING button (22)
0 EDIT/NO button (23)
!¡ENTER/YES button (23)
!™ JOG dial (22)
For Your Information
Display Window
CD player section
1
CD
TRACK DISC
1 Playing time/track number indication
(7)
2 CD indication
fl (play/pause) (7)
REPEAT 1 (8)
SHUFFLE (9)
PROGRAM (9)
DISC (7)
TRACK (7)
3 Music calendar (7)
23
SHUFFLE
1
2
PROGRAM
6
7
REPEAT 1
11
12
16
17
1
2
3
P
(
4
5
p
=
+
(
rPp
7
8
9
0
3
4
5
8
9
10
13
14
15
18
19
20
6
!`
1 SLEEP button (26)
2 FUNCTION button (16)
3 Tuner operating buttons
BAND button (22)
PRESET + / – buttons (24)
Page 35

4 CD operating buttons
( (play) button (7)
P (pause) button (7)
p (stop) button (7)
=(search backward) button (7)
+ (search forward) button (7)
REPEAT button (8)
P.MODE (play mode) button (9)
5 MD operating buttons
( (play) button (11)
P (pause) button (11)
p (stop) button (11)
=(search backward) button (11)
+ (search forward) button (11)
r REC button (16)
REPEAT button (12)
P.MODE (play mode) button (13)
6 Numeric buttons (7, 11, 24)
7 POWER button (7)
8 DISPLAY button (8, 12)
9 SCROLL button (12, 21)
0 VOL +/– buttons (25)
!¡>10 button (7, 11, 24)
Index
Aerials 4, 32
Assigning
a name to a CD 10
CD
inserting 7
taking out 7
CD synchro-recording 15
Checking
the display (CD) 8
the display (MD) 12
Clock setting 6
Combining 20
Connecting
the system 4
optional equipment 28
Display
checking the display (CD) 8
checking the display (MD) 12
MD display messages 31
Dividing 19
Erasing
all tracks 18
a part of a track 19
a single track 18
a station name 24
Inserting battery 5
Labelling
a CD 10
an MD 20
radio stations 23
Listening
the radio 22
Locating
a particular point in a track (CD) 8
a particular point in a track (MD) 12
a specific track (CD) 7
a specific track (MD) 11
MD
inserting 11
premastered 12
recordable 12, 15
system limitations 31
taking out 11
Moving tracks 19
Music calendar
CD 7
MD 11
Playing
a CD (normal play) 7
an MD (normal play) 11
tracks in random order (shuffle play)
(CD) 9
tracks in random order (shuffle play)
(MD) 13
track in the desired order (programme
play) (CD) 9
track in the desired order (programme
play) (MD) 13
tracks repeatedly (repeat play) (CD) 8
tracks repeatedly (repeat play) (MD) 12
Radio stations
assigning a name 23
presetting 23
tuning in 22
Recording
a CD 15
analog 14
before recording 14
digital 14
a radio programme 15
Recording CDs on an MD
automatically 15
manually 16
Record-protect tab 15
Remote 7, 11, 26, 34
SCMS (Serial Copy Management
System) 14, 30
Sound adjusting 25
Station name 23
Timer
falling asleep to music 26
timer recording 27
waking up to music 26
TOC (Table Of Contents) 15
Track marking
automatic track marking 17
manual track marking 16
Tuner 22
GB
35
For Your Information
Page 36

Français
AVERTISSEMENT
Afin d’éviter tout risque d’incendie ou
d’électrocution, ne pas exposer cet
appareil à la pluie ou à l’humidité.
Afin d’éviter tout risque de choc électrique, ne pas ouvrir le coffret.
Confier toute réparation à un technicien qualifié uniquement.
N’installez pas l’appareil dans un espace confiné comme dans une
bibliothèque ou un meuble encastré.
Dolby Laboratories Licensing Corporation autorise une license
d’exploitation de ses brevets d’invention américains et étrangers.
Le composant laser de cet appareil est capable d’émettre des
radiations dépassant la limite de la Classe 1.
Cet appareil est classé produit
laser de classe 1. L’indication
CLASS 1 LASER PRODUCT est
collée à l’arrière, à l’extérieur de
l’appareil.
Cette étiquette
de précaution se
trouve à
l’intérieur de
l’appareil.
Bienvenue!
Nous vous remercions de votre achat de ce Système à Composants
Plats Sony. Cette série vous apporte de nombreuses fonctions
pratiques et amusantes dont voici un simple aperçu:
•Une fonction de préréglage qui vous permet de mémoriser jusqu’à
30 de vos stations radio favorites.
•Une minuterie qui vous permet de mettre en service ou hors
service le lecteur CD, la platine MD ou la radio au moment où vous
le souhaitez.
•Une platine MD (minidisque) qui vous permet d’enregistrer, la
radio ou le lecteur CD étant votre source de musique.
•Une télécommande qui autorise un contrôle de votre chaîne à
partir de votre fauteuil.
Le système MJ-L1/MJ-L1A comprend les éléments
suivants:
(MJ-L1)
-L’unité principale: HCD-MJ1
-Des enceintes acoustiques: SS-MJ1
-Une télécommande: RM-SMJ1
(MJ-L1A)
-L’unité principale: HCD-MJ1A
-Une télécommande: RM-SMJ1
Avant d’utiliser cet appareil
F
Assurez-vous d’avoir enlevé la feuille dans
la fente de disque de la platine MD.
1 Raccordez le cordon d’alimentation à une prise murale et
appuyez sur POWER.
2 Appuyez sur MD § pour ouvrir le couvercle.
3 Enlevez le ruban adhésif et sortez la feuille à l’intérieur de la
fente.
La feuille peut sortir d’elle-même quand vous enlevez le ruban
adhésif.
Sortez la feuille
POWER
MD §
Enlevez le ruban adhésif
2
Avant d’installer la chaîne, appuyez sur MD § pour fermer le
couvercle, sur POWER pour mettre la chaîne hors tension et
débranchez le cordon d’alimentation secteur.
Page 37

Table des matières
Chapitre 1: Installation
Branchement de la chaîne stéréo 4
Mise en place de la pile 5
Réglage de l’horloge 6
Chapitre 2: Lecteur CD
Lecture d’un CD (lecture normale) 7
Utilisation de l’affichage 8
Lecture répétée des plages (lecture à répétition) 8
Lecture des plages dans un ordre aléatoire
(lecture aléatoire) 9
Lecture des plages dans l’ordre souhaité
(lecture programmée) 9
Attribution d’un nom à un CD
(fonction Mémento de disque) 10
Chapitre 3: Lecture de MD
Lecture d’un MD (lecture normale) 11
Utilisation de l’affichage 12
Lecture répétée des plages (lecture à répétition) 12
Lecture des plages dans un ordre aléatoire
(lecture aléatoire) 13
Lecture des plages dans l’ordre souhaité
(lecture programmée) 13
Chapitre 7: Réglage du son
Réglage du son 25
Chapitre 8: Fonctions complémentaires
Ecoute avec chronorupteur 26
Réveil en musique 26
Enregistrement d’émissions radio par minuterie 27
Branchement d’un appareil en option 28
Informations supplémentaires
Précautions 29
Entretien 29
Introduction au Système de Gestion de
Copie Sérielle 30
Limitations du système des MD 31
Messages MD sur affichage 31
Guide de dépannage 32
Fiche technique 33
Nomenclature des commandes et organes 34
Index 35
F
3
Chapitre 4: Enregistrement sur MD
Avant d’enregistrer 14
Enregistrement d’un CD 15
Enregistrement d’une émission de radio 16
Enregistrement manuel sur un MD 16
Inscription des numéros de plage à l’enregistrement 16
Chapitre 5:
Effacement d’enregistrements (fonction Effacement) 18
Déplacement de plages enregistrées
(fonction Déplacement) 19
Division des plages enregistrées (fonction Division) 19
Combinaison de plages enregistrées
(fonction Combinaison) 20
Attribution d’un titre aux enregistrements
(fonction Titrage) 20
Montage de MD enregistrés
Chapitre 6: Radio
Ecoute de la radio 22
Préréglage des stations radio 23
Ecoute des stations préréglées de la radio 24
Page 38

Chapitre 1:
FM 75
Ω
AM
y
Branchement de la
chaîne stéréo
Installation
Branchement de la chaîne
stéréo
Mise en place de la pile
Réglage de l’horloge
Reportez-vous aux illustrations suivantes
pour raccorder votre stéréo.
Si vous souhaitez raccorder d’autres
composants en option à la stéréo, reportezvous au Chapitre 8 “Branchement
d’appareils en option”.
Etape 1
enceintes (MJ-L1
seulement)
Raccordez l’enceinte droite aux connecteurs
SPEAKER R et l’enceinte gauche aux
connecteurs SPEAKER L, le cordon gris à la
borne ‘ (grise) et le cordon rayé noir à la
borne ’ (noire).
Branchement des
Mise en place de l’antenne cadre AM
Pour améliorer la réception FM
Raccorder une antenne FM extérieure à la
borne FM 75Ω à l’aide d’un câble coaxial de
75 ohms et d’un connecteur à douille de
norme CEI.
FM 75
AM
Ω
y
Cordon gris à ‘
(gris)
R
L
F
4
Cordon rayé noir à ’
(noir)
Etape 2
Branchement des
Connecteur à douille de norme CEI
(non fourni)
Pour améliorer la réception AM
Après avoir raccordé l’antenne AM,
raccordez un fil isolé de 6 à 15 mètres de
long à la borne AM. Raccordez la borne y à
la terre.
Important
Par mesure de protection contre la foudre,
raccordez l’antenne extérieure à la borne y.
Pour éviter une explosion de gaz, ne
raccordez jamais le fil de mise à la terre à
une canalisation de gaz.
antennes
Fil isolé
Branchement de l’antenne fil FM
Raccordez l’antenne fil fournie à la borne
FM 75Ω.
FM 75
AM
Ω
y
(non fourni)
Chapitre 1: Installation
Branchement de l’antenne cadre AM
Raccordez l’antenne cadre fournie à la
borne AM et la borne y.
FM 75
AM
Ω
y
Fil de mise à la terre
(non fourni)
Page 39

Enceinte avant
(Droit) *
Etape 1
Antenne fil FM
(fournie)
Etape 2
Enceinte avant
(Gauche) *
Etape 3
à une prise
secteur
Effectuez cette connexion en dernier lieu!
* Les enceintes avant ne sont fournies qu’avec le MJ-L1.
Etape 3
Branchement sur
2Installez une pile au lithium CR2025 en
le secteur
Branchez le cordon d’alimentation sur une
prise secteur après avoir terminé toutes les
connexions ci-dessus.
/
à une prise secteur
Mise en place de la
pile
Installez une pile au lithium dans la
télécommande fournie.
3Remettez le logement de pile en place.
ATTENTION
Danger d’explosion si la pile n’est pas
correctement mise en place.
Remplacez la pile par le type de pile
recommandé par le fabricant ou par une
pile de type équivalent.
Les piles usées doivent être déposées
conformément aux instructions du
fabricant.
Etape 1
Antenne cadre AM
(fournie)
dirigeant la face + vers le haut.
Pile au lithium
CR2025
Etape 2
F
5
Pour éviter un suintement de la pile
Si vous prévoyez une longue période
d’inutilisation de la télécommande, retirez
la pile pour éviter la corrosion causée par le
suintement de l’électrolyte.
Remarque sur la pile au lithium
•Gardez la pile au lithium hors de portée
des enfants. Si elle devait être avalée,
consultez immédiatement un médecin.
•Essuyez la pile avec un chiffon sec pour
assurer un bon contact.
•Veillez à insérer la pile dans le bons sens.
•Ne pas tenir la pile avec une pince
métallique afin d’éviter tout court-circuit.
1 Tirez sur le logement de pile et
enlevez-le.
Autonomie de la pile
La télécommande fonctionnera
normalement pendant six mois environ
avec une pile au lithium Sony CR2025.
Quand elle ne peut plus alimenter la
télécommande, remplacez-la par une
neuve.
Chapitre 1: Installation
Page 40

Réglage de l’horloge
L’horloge incorporée indique l’heure sur
l’affichage même quand l’appareil est hors
tension. Servez-vous des touches de
l’appareil pour les réglages suivants.
1
Pour vérifier l’heure pendant la mise
sous tension
Appuyez sur CLOCK.
L’heure actuelle est affichée pendant 4
secondes.
Pour ajuster le réglage de l’horloge
Quand l’appareil est hors tension, répétez
les étapes 1 à 5.
Quand l’appareil est sous tension, appuyez
deux fois sur CLOCK et répétez les étapes 2
à 5.
3,5
2,4
1 Appuyez sur CLOCK.
2 Réglez à l’heure actuelle en tournant la
bague JOG jusqu’à apparition du chiffre
des heures correct.
F
6
3 Appuyez sur ENTER/YES.
L’indication des minutes se met à
clignoter.
Clignote
Clignote
4 Réglez les minutes en tournant la bague
JOG jusqu’à apparition du chiffre des
minutes correct.
Clignote
5 Appuyez sur ENTER/YES.
L’horloge se met en marche et le point
supérieur clignote. Utilisez le top
horaire officiel pour un réglage précis.
Le point supérieur clignote pendant la
première moitié de la minute (de 0 à 29
secondes) et le point inférieur pendant
la seconde moitié (de 30 à 59 secondes).
Clignote
Chapitre 1: Installation
Page 41

Chapitre 2:
Lecteur
CD
Lecture d’un CD
(lecture normale)
Utilisation de l’affichage
Lecture répétée des plages
(lecture à répétition)
Lecture des plages dans un
ordre aléatoire (lecture
aléatoire)
Lecture des plages dans
l’ordre souhaité (lecture
programmée)
Attribution d’un nom à un
CD (fonction Mémento de
disque)
Lecture d’un CD
(lecture normale)
Vous disposez de 4 modes de lecture d’un
CD: lecture normale, répétée, aléatoire et
programmée. Le mode détermine quelles
plages (chansons) seront reproduites, dans
quel ordre et si elles seront répétées ou non.
Vous pouvez contrôler la chaîne stéréo
directement par les touches de l’appareil
proprement dit ou via la télécommande
fournie. Vous pouvez reproduite des CD de
12 cm (5 pouces) ou de 8 cm (3 pouces).
Pour la lecture d’un CD de 8 cm, posez-le
sur le cercle central du plateau, sans utiliser
aucun autre adaptateur de CD.
Avant de commencer la lecture d’un CD,
réduisez le niveau sonore en appuyant sur
VOLUME –, afin d’éviter d’endommager
vos haut-parleurs.
POWER m ON
1
0/)
32
JOG
>10
3 Appuyez sur fl (ou CD ( de la
télécommande). Le plateau de disque se
referme et la lecture commence par la
première plage.
TRACK
Numéro
de plage
Afin de
Arrêter la lecture
Interrompre la
lecture
Reprendre la
lecture
Avancer à une
autre plage
„
Reculer à une autre
plage
Localiser
directement une
plage donnée
Retirer le CD
* Touche de la télécommande
1
2738495
6
CD
VOLUME
Durée de
lecture
Appuyez sur
(CD p*)
fl (CD P*)
fl (CD (* ou P*)
Pendant la lecture ou
la pause, tournez la
bague JOG vers la
droite. Relâchez-la dès
que vous arrivez à la
plage souhaitée. Ou
bien utilisez + de la
télécommande.
Pendant la lecture ou
la pause, tournez la
bague JOG vers la
gauche. Relâchez-la
dès que vous arrivez à
la plage souhaitée. Ou
bien utilisez = de la
télécommande.
Touches numériques
de la télécommande
CD §
11
Grille
musicale
10
F
7
p
Touches
numériques
P
(
=
+
(
r
Pp
1Appuyez sur CD.
La platine passe en mode de lecture CD.
2Appuyez sur CD § et placez un CD
(étiquette vers le haut) sur le plateau de
disque.
Etiquette vers
le haut
Pour passer directement à la plage No.11 ou
à une plage ultérieure
Appuyez d’abord sur >10, puis entrez les
chiffres correspondants.
Exemple: Pour localiser le numéro de plage
30, appuyez sur >10, 3 et 10 dans cet ordre.
Fonction de lecture instantanée
Appuyez sur CD ( de la télécommande
alors que l’appareil est hors tension. Si un
CD est installé dans la platine, la lecture
commence sans qu’il soit nécessaire
d’actionner d’autres touches.
Si vous appuyez sur la touche CD de
l’appareil, il se met sous tension et la
lecture CD commence automatiquement.
Vous pouvez commencer la lecture à partir
de la plage souhaitée.
1 A l’étape 2, tournez la molette JOG
jusqu’à apparition du numéro de la
plage souhaitée sur l’affichage.
2 Appuyez sur fl.
à suivre ➔
Chapitre 2: Le lecteur CD
Page 42

➔ suite
POWER m ON
REPEAT
Pour localiser un point sur une plage
Il est possible de localiser un point donné
sur une plage pendant sa lecture ou en
mode Pause. Servez-vous des touches de
l’appareil pour utiliser cette fonction.
Afin de
Avancer
rapidement sur
une plage
Reculer
rapidement sur
une plage
Rechercher
rapidement sans
écoute
Appuyez sur
la touche ) de
l’appareil et relâchez au
point souhaité.
la touche 0 de
l’appareil et relâchez au
point souhaité.
la touche 0 ou ) de
l’appareil pendant la
pause, et relâchez au
point souhaité.
Utilisation de
l’affichage
L’affichage de l’appareil vous permet de
F
surveiller diverses informations relatives
aux CD, telles que le nombre total de
8
plages, leur durée totale de lecture, la durée
restante sur le CD, etc.
POWER m ON
DISPLAY
Pour vérifier la durée restante
pendant la lecture
Appuyez de façon répétée sur DISPLAY.
A chaque pression sur la touche, l’affichage
change comme suit:
Numéro de plage actuelle
et durée de lecture
m
Numéro
de plage
TRACK
CD
Durée de
lecture
VOLUME
2738495
6
10
11
Grille
musicale
µ
Numéro de plage actuelle et
durée restante sur la plage
2738495
6
10
TRACK
CD
VOLUME
11
Durée restante
µ
Durée restante sur le CD*
2
TRACK
CD
VOLUME
61173849510
Durée restante
* Durée restante du programme lors d’une
lecture programmée
Pour vérifier le mémento du disque,
le nombre total de plages et leur
durée de lecture totale
Appuyez sur DISPLAY en mode Stop. Si
vous avez mémorisé un nom pour le disque
(cf. “Attribution d’un nom à un CD”), le
mémento apparaît sur l’affichage. A chaque
pression sur la touche, l’affichage change
comme suit:
Mémento de disque*
1
2
VOLUME
61173849510
DISC
CD
Mémento de disque
<
Nombre total de plages et
durée de lecture totale
1
2
VOLUME
61173849510
Nombre total
de plages
CD
Durée totale
de lecture
Lecture répétée des
plages (lecture à
répétition)
Vous disposez de deux modes de répétition
de la lecture: répétition de toutes les plages
du CD selon le mode actuel ou répétition
d’une seule plage.
Répétition de toutes les plages
Appuyez de façon répétée sur REPEAT de
manière à obtenir “REPEAT” sur
l’affichage.
Mode de lecture
Lecture normale
Lecture aléatoire
Lecture
programmée
Répétition d’une seule plage (en
mode de lecture normale
uniquement)
Pendant la lecture de la plage souhaitée,
appuyez plusieurs fois sur REPEAT jusqu’à
ce que “REPEAT 1” apparaisse sur
l’affichage.
Pour annuler la lecture répétée
Appuyez sur REPEAT pour que “REPEAT”
ou “REPEAT 1” disparaisse de l’affichage.
Plages reproduites
Répétition de toutes
les plages du CD
Répétition de toutes
les plages du CD
dans un ordre
aléatoire
Répétition de toutes
les plages
programmées dans
l’ordre programmé
* Apparaît uniquement si mémorisé sur le
disque.
Affichage de la grille musicale
Cet affichage s’allume selon le numéro des
plages du CD. Dès qu’une plage est
reproduite, le numéro correspondant
disparaît. Les numéros des plages au-delà
de 20 ne sont pas affichés.
Chapitre 2: Le lecteur CD
Page 43

Lecture des plages
dans un ordre
aléatoire (lecture
aléatoire)
Le lecteur peut reproduire toutes les plages
d’un CD dans un ordre imprévisible.
POWER m ON
2
Lecture des plages
dans l’ordre souhaité
(lecture
programmée)
Vous pouvez programmer jusqu’à 24
plages qui seront reproduites dans l’ordre
de votre choix. Pour cela, désignez les
plages dans l’ordre voulu pour la lecture.
POWER m ON
Appuyez sur ENTER/YES.
4
Le numéro d’ordre de la lecture apparaît
pendant une seconde environ, puis la
durée totale de lecture. (Ceci indique
que la programmation est effective.)
CD
Durée totale de lecture
Numéro de la dernière
plage programmée
PROGRAM
VOLUME
5 Pour programmer d’autres plages,
répétez les étapes 3 et 4.
111395
7
3
2
p
P
(
=
rPp
+
(
1 Appuyez sur CD.
Le lecteur se met en mode de lecture
CD.
2 Appuyez de façon répétée sur PLAY
MODE (ou sur P.MODE de la
télécommande) jusqu’à apparition de
“SHUFFLE” sur l’affichage.
3 Appuyez sur fl.
Le voyant “J” apparaît, puis toutes les
plages sont reproduites dans un ordre
aléatoire.
Pour écouter les plages dans l’ordre
original
Appuyez de façon répétée sur PLAY
MODE jusqu’à ce que “SHUFFLE” et
“PROGRAM” disparaissent de l’affichage.
La lecture des plages se poursuit dans
l’ordre original.
Pour sauter une plage donnée
Tournez la bague JOG vers la droite (ou
appuyez sur + de la télécommande).
EDIT/NO
12
46 3
2
p
6
P
(
=
rPp
+
(
3
Touches
numériques
>10
1 Appuyez sur CD.
Le lecteur se met en mode de lecture
CD.
2 Appuyez de façon répétée sur PLAY
MODE (ou P.MODE de la
télécommande) jusqu’à apparition de
“PROGRAM” sur l’affichage.
3 Tournez la bague JOG (ou appuyez sur
=/+ de la télécommande) pour
choisir une plage.
Le numéro de la plage et la durée totale
de lecture, y compris la plage choisie,
clignotent sur l’affichage. (La
programmation n’est pas encore
effective à ce stade.)
›–
Passage à la
plage précédente
Numéro de plage
Passage à la
plage suivante
CD
VOLUME
PROGRAM
7
6 Appuyez sur fl.
Toutes les plages sont reproduites dans
l’ordre programmé.
Pour reproduire les plages dans
l’ordre original
Appuyez de façon répétée sur PLAY
MODE jusqu’à ce que “SHUFFLE” et
“PROGRAM” disparaissent de l’affichage.
La lecture des plages se poursuit dans
l’ordre original.
Pour sélectionner les plages par les
touches numériques de la
télécommande
A l’étape 3, entrez les numéros des plages
dans l’ordre dans lequel vous voulez les
programmer. A chaque pression sur une
touche, la plage choisie est programmée.
Il n’est pas nécessaire d’appuyer sur
ENTER/YES.
Pour programmer une plage dont le
numéro est supérieur à 11, appuyez
d’abord sur >10, puis entrez les chiffres
correspondants.
Exemple: Pour localiser le numéro de plage
30, appuyez sur >10, 3 et 10 dans cet ordre.
Pour changer la programmation
Afin de
Ajouter
une plage à
la fin du
programme
Effacer tout
le
programme
* Vous pouvez aussi ajouter une plage
pendant la lecture si vous sélectionnez
son numéro par les touches numériques
de la télécommande.
Remarques
•Le programme composé reste en mémoire
même après qu’il a été reproduit.
Appuyez sur fl pour écouter à nouveau
le même programme.
•Si “--.--” apparaît au lieu de la durée
totale de lecture pendant la
programmation, c’est le signe que la
programmation dépasse 100 minutes.
Rien ne vous interdit cependant de
sélectionner d’autres plages.
Opération
1. Tournez la bague JOG
jusqu’à apparition du
numéro de la plage voulue
sur l’affichage.*
2. Appuyez sur ENTER/YES.
Pendant l’arrêt, appuyez sur
la touche du lecteur
Chapitre 2: Le lecteur CD
F
9
Page 44

Attribution d’un
nom à un CD
(fonction Mémento
de disque)
A chacun de vos CD, vous pouvez donner
un nom, comportant jusqu’à 12 caractères
en utilisant les lettres majuscules et
minuscules, des chiffres et des symboles. Il
est possible de mémoriser jusqu’à 20 de ces
noms dans le lecteur. Le nom apparaît sur
l’affichage quand vous insérez un CD ou
que vous appuyez sur DISPLAY en mode
d’arrêt. Si vous enregistrez le CD sur un
MD* vierge par la fonction
“d’enregistrement synchronisé de CD”, le
nom sera automatiquement mémorisé sur
le minidisque.
* Un MD neuf, ou un MD qui a été remis à
l’état vierge par la fonction d’effacement
complet.
POWER m ON
3 Appuyez de façon répétée sur EDIT/
NO jusqu’à apparition de “Name in?”
sur l’affichage.
CD
VOLUME
4 Appuyez sur ENTER/YES.
Un curseur clignote sur l’affichage.
1
6
DISC
CD
VOLUME
11
Curseur
5 Appuyez de façon répétée sur
CHARACTER pour choisir le type de
caractères.
A chaque pression sur la touche, le type
change comme suit:
nmajusculesnminuscules
espaceNsymbolesNchiffresN
Les symboles suivants sont utilisables:
! " # $ % & ' ( ) * + , – . / : ; < = > ? @ _ `
(espace)
2738495
Pour vérifier le nom
Appuyez sur DISPLAY en mode d’arrêt.
Si vous appuyez une nouvelle fois sur
DISPLAY, l’affichage original réapparaît.
Remarque
L’indication “No name” apparaît sur
l’affichage si aucun nom n’a été attribué au
disque utilisé.
Pour effacer le nom d’un CD
10
1 Appuyez de façon répétée sur EDIT/
NO jusqu’à apparition de “Name
Erase?” sur l’affichage.
2 Appuyez sur ENTER/YES.
Les noms de disque apparaissent sur
l’affichage.
3 Tournez la bague JOG jusqu’à ce que le
nom du disque à effacer apparaisse sur
l’affichage.
4 Appuyez sur ENTER/YES.
Le message “Complete” apparaît
pendant deux secondes environ et le
nom du disque sélectionné est effacé.
351
F
10
2 4,9 6 7
DISPLAY
p
P
(
+
=
(
1 Appuyez sur CD.
Le lecteur se met en mode de lecture
CD.
2 Appuyez sur CD § et installez un CD.
Vérifiez que le nombre total de plages et
la durée totale de lecture apparaissent
sur l’affichage.
Remarque
Vous pouvez attribuer un nom à un CD
seulement quand le lecteur est en mode
d’arrêt et que le mode de lecture est
normal (les voyants SHUFFLE et
PROGRAM sont éteints).
Chapitre 2: Le lecteur CD
DISPLAY
0
rPp
6 Tournez la bague JOG jusqu’à appari-
tion du caractère souhaité sur
l’affichage. Le caractère sélectionné
clignote.
1
2738495
6
DISC
CD
VOLUME
11
Clignote
Pour entrer rapidement un espace
Appuyez sur ) pendant que le
curseur clignote
7 Appuyez sur ).
Le curseur se déplace vers la droite et
attend l’entrée du caractère suivant.
1
2738495
6
DISC
CD
VOLUME
11
Clignote
8 Répétez les étapes 5 et 7 pour entrer
d’autres caractères et composer le nom
souhaité pour le CD.
Si vous voulez entrer le même type de
caractères, sautez l’étape 5.
En cas d’erreur de caractère
Appuyez sur ) ou 0 jusqu’à ce que
le caractère à corriger clignote et répétez
les étapes 5 à 7 pour entrer le caractère
correct.
Pour effacer un caractère
Appuyez sur ) ou 0 jusqu’à ce que
le caractère à effacer clignote , puis
appuyez sur EDIT/NO.
9 Appuyez sur ENTER/YES.
L’attribution d’un nom est ainsi achevée.
10
10
Page 45

Chapitre 3:
Lecture
de MD
Lecture d’un MD (lecture
normale)
Utilisation de l’affichage
Lecture répétée des plages
(lecture à répétition)
Lecture des plages dans un
ordre aléatoire (lecture
aléatoire)
Lecture des plages dans
l’ordre souhaité (lecture
programmée)
Lecture d’un MD
(lecture normale)
Vous disposez de 4 modes de lecture d’un
MD: lecture normale, répétée, aléatoire et
programmée. Le mode détermine quelles
plages (chansons) seront reproduites, dans
quel ordre et si elles seront répétées ou non.
POWER m ON
3
1
0/)
2
„
JOG
1 Appuyez sur MD.
La platine passe en mode de lecture
MD.
2 Appuyez sur MD § et placez un MD.
Etiquette vers
le haut
Flèche dirigée vers
la platine MD
3 Appuyez sur fl (ou MD ( de la
télécommande). La lecture commence
par la première plage.
1
2
38495
6
7
11
TRACK
Numéro
de plage
MD
VOLUME
Durée de
lecture
12
Grille
musicale
Afin de
Arrêter la lecture
Interrompre la
lecture
Reprendre la
lecture
Avancer à une
autre plage
Reculer à une
autre plage
Localiser
directement une
plage donnée
Retirer le MD
* Touche de la télécommande
Pour passer directement à la plage No.11 ou
au-delà
Appuyez d’abord sur >10, puis entrez les
chiffres correspondants.
Si le numéro est supérieur à 100, appuyez
deux fois sur >10 et entrez le numéro.
Exemple:
Pour localiser le numéro de plage 30,
appuyez sur >10, 3 et 10 dans cet
ordre.
Pour localiser le numéro de plage 100,
appuyez sur >10, >10, 1, 10 et 10 dans
cet ordre.
Fonction de lecture instantanée
Appuyez sur MD ( de la télécommande
10
alors que l’appareil est hors tension. Si un
MD est installé dans la platine, la lecture
commence sans qu’il soit nécessaire
d’actionner d’autres touches.
Si vous appuyez sur la touche MD de
l’appareil, il se met sous tension et
commence automatiquement la lecture de
MD.
Appuyez sur
(MD p*)
fl (MD P*)
fl (MD (* ou P*)
Pendant la lecture ou
la pause, tournez la
bague JOG vers la
droite. Relâchez-la dès
que vous arrivez à la
plage souhaitée. Ou
bien utilisez + de la
télécommande.
Pendant la lecture ou
la pause, tournez la
bague JOG vers la
gauche. Relâchez-la
dès que vous arrivez à
la plage souhaitée. Ou
bien utilisez = de la
télécommande.
Touches numériques
de la télécommande
MD §
F
11
Vous pouvez commencer la lecture à partir
de la plage souhaitée.
1 A l’étape 2, tournez la bague JOG
jusqu’à apparition du numéro de la
plage souhaitée sur l’affichage.
2 Appuyez sur fl.
à suivre m
Chapitre 3: Lecture de MD
Page 46

➔ suite
POWER m ON
REPEAT
Pour localiser un point sur une plage
Il est possible de localiser un point donné
sur une plage pendant sa lecture ou en
mode Pause. Servez-vous des touches de
l’appareil pour utiliser cette fonction.
Afin de
Avancer
rapidement sur
une plage
Reculer
rapidement sur
une plage
Rechercher
rapidement sans
écoute
Appuyez sur
la touche ) de
l’appareil et relâchez au
point souhaité.
la touche 0 de
l’appareil et relâchez au
point souhaité.
la touche 0 ou )
de l’appareil pendant la
pause, et relâchez au
point souhaité.
Utilisation de
l’affichage
L’affichage de l’appareil vous permettra de
surveiller diverses informations relatives
aux MD, telles que le nombre total de
plages, leur durée totale de lecture, la durée
F
restante sur le MD, etc.
12
POWER m ON
DISPLAY
Pour vérifier la durée restante
pendant la lecture
Appuyez de façon répétée sur DISPLAY.
A chaque pression sur la touche, l’affichage
change comme suit:
Numéro de plage actuelle
et durée de lecture
m
TOC
TRACK
Numéro
de plage
Durée de
lecture
111395
7
628410
MD
VOLUME
Grille
musicale
µ
Numéro de plage actuelle et
durée restante sur la plage
TOC
TRACK
Durée restante
µ
1113956284
7
MD
VOLUME
10
Nom de plage*
TOC
TRACK
1113956284
7
MD
VOLUME
10
Nom de plage
* Si aucun titre n’est enregistré, “No name”
apparaît sur l’affichage.
Pour vérifier le nom du disque, le
nombre total de plages, leur durée
de lecture totale et la durée
enregistrable restante
Appuyez sur DISPLAY en mode Stop. Si
vous avez mémorisé un nom pour le disque
(cf. “Etiquetage des enregistrements
(fonction Titrage)”), le nom du disque
apparaît sur l’affichage. A chaque poussée
sur la touche, l’affichage change comme
suit:
Mémento de disque*
2738495
TOC
m
DISC
1
6
10
11
MD
VOLUME
Affichage de la grille musicale
• Cet affichage s’allume selon le numéro
des plages du MD. Dès qu’une plage est
reproduite, son numéro correspondant
disparaît. Les numéros des plages au-delà
de 20 ne sont pas affichés.
• A la lecture d’un MD pré-enregistré, un
cadre apparaît autour de la grille
musicale; il n’apparaît pas à la lecture
d’un MD enregistrable.
Pour vérifier le nom de la plage actuelle
pendant sa lecture
Appuyez sur SCROLL.
Appuyez sur SCROLL pendant le
défilement pour interrompre ou continuer
celui-ci.
Il est possible de placer un titre sur vos
disques et plages enregistrées. Reportezvous à “Attributions d’un nom aux
enregistrements (fonction Titrage)”.
Lecture répétée des
plages (lecture à
répétition)
Vous disposez de deux modes de répétition
de la lecture: la répétition de toutes les
plages du MD selon le mode actuel, ou
répétition d’une seule plage.
Chapitre 3: Lecture de MD
Mémento de disque
µ
Nombre total de plages et
leur durée de lecture totale
2738495
TOC
Nombre total
de plages
Durée totale
de lecture
1
6
10
11
MD
VOLUME
µ
Durée enregistrable restant sur le MD
(uniquement MD enregistrable)*
2738495
TOC
DISC
1
6
10
11
MD
VOLUME
Remaining time
* La durée enregistrable restante n’apparaît
pas dans le cas des MD pré-enregistrés.
Répétition de toutes les plages
Appuyez de façon répétée sur REPEAT
jusqu’à ce que “REPEAT” apparaisse sur
l’affichage.
Mode de lecture
Lecture normale
Plages reproduites
Répétition de toutes les
plages du MD
Lecture aléatoire
Répétition de toutes les
plages du MD dans un
ordre aléatoire
Lecture
programmée
Répétition de toutes les
plages programmées
dans l’ordre
programmé
Répétition d’une seule plage (en mode
de lecture normale uniquement)
Pendant la lecture de la plage souhaitée,
appuyez sur plusieurs fois sur REPEAT
jusqu’à apparition de “REPEAT 1” sur
l’affichage.
Pour annuler la lecture répétée
Appuyez sur REPEAT pour que “REPEAT”
ou “REPEAT 1” disparaisse de l’affichage.
Page 47

Lecture des plages dans
un ordre aléatoire
(lecture aléatoire)
Le peut reproduire toutes les plages d’un
MD dans un ordre imprévisible.
POWER m ON
2
1
Pour cela, désignez les plages dans l’ordre
voulu pour la lecture.
POWER m ON
5 Pour programmer d’autres plages,
6 Appuyez sur fl.
261
Pour reproduire les plages dans
l’ordre original
Appuyez sur , puis de façon répétée sur
PLAY MODE jusqu’à ce que “SHUFFLE” et
“PROGRAM” disparaissent de l’affichage.
La lecture des plages se poursuit dans
l’ordre original.
répétez les étapes 3 et 4.
Toutes les plages sont reproduites dans
l’ordre programmé.
3
„
2
p
P
(
=
rPp
+
(
1 Appuyez sur MD.
La platine se met en mode de lecture
MD.
2 Appuyez de façon répétée sur PLAY
MODE (ou sur P.MODE de la
télécommande) jusqu’à apparition de
“SHUFFLE” sur l’affichage.
3 Appuyez sur fl.
Le voyant “J” apparaît, puis toutes les
plages sont reproduites dans un ordre
aléatoire.
Pour écouter les plages dans l’ordre
original
Appuyez sur , puis de façon répétée sur
PLAY MODE jusqu’à ce que “SHUFFLE” et
“PROGRAM” disparaissent de l’affichage.
La lecture des plages se poursuit dans
l’ordre original.
Pour sauter une plage donnée
Tournez la bague JOG vers la droite (ou
appuyez sur + de la télécommande).
Lecture des plages dans
l’ordre souhaité
(lecture programmée)
34
>10
r
3
2
p
P
(
+
Pp
=
(
6
Touches numériques
1 Appuyez sur MD.
La platine se met en mode de lecture
MD.
2 Appuyez de façon répétée sur PLAY
MODE (ou P.MODE de la
télécommande) jusqu’à apparition de
“PROGRAM” sur l’affichage.
3 Tournez la bague JOG (ou appuyez sur
=/+ de la télécommande) pour
choisir une plage.
Le numéro de la plage et la durée totale
de lecture, y compris la plage choisie,
apparaissent sur l’affichage, et le
numéro de plage clignote dan la grille
musicale. (La programmation n’est pas
encore effective à ce stade.)
›–
Passage à la
plage précédente
TOC
Numéro de plage
Passage à la
plage suivante
PROGRAM
MD
VOLUME
11
4
3215
987610
4 Appuyez sur ENTER/YES.
Le numéro d’ordre de la lecture
apparaît pendant une seconde environ,
puis la durée totale de lecture. (Ceci
indique que la programmation est
effective.)
TOC
MD
VOLUME
PROGRAM
6119
„
4
Pour sélectionner les plages par les
touches numériques de la
télécommande
A l’étape 3, entrez les numéros des plages
dans l’ordre dans lequel vous voulez les
programmer. A chaque pression sur une
touche, la plage choisie est programmée.
Il n’est pas nécessaire d’appuyer sur
ENTER/YES.
Pour programmer une plage dont le
numéro est supérieurà 11, appuyez d’abord
sur >10, puis entrez les chiffres
correspondants.
Si le numéro est supérieur à 100, appuyez
deux fois sur >10 et entrez le numéro.
Exemple:
Pour localiser le numéro de plage 30,
appuyez sur >10, 3 et 10 dans cet
ordre.
Pour localiser le numéro de plage 100,
appuyez sur >10, >10, 1, 10 et 10 dans
cet ordre.
Pour changer la programmation
Afin de
Ajouter une
plage à la
fin du
programme
Effacer tout
le
programme
Remarques
• Le programme composé reste en
mémoire même après qu’il a été
reproduit.
Appuyez sur fl pour écouter à nouveau
le même programme.
• Si “--.--” apparaît au lieu de la durée
totale de lecture pendant la
programmation, c’est le signe que la
programmation dépasse 100 minutes.
Rien ne vous interdit cependant de
sélectionner d’autres plages.
Opération
1. Tournez la bague JOG
jusqu’à apparition du
numéro de la plage voulue
sur l’affichage.
2.
Appuyez sur ENTER/YES.
Pendant l’arrêt, appuyez sur
la touche de la platine.
F
13
Vous pouvez programmer jusqu’à 25
plages qui seront reproduites dans l’ordre
de votre choix.
Durée totale de lecture
Numéro de la dernière
plage programmée
Chapitre 3: Lecture de MD
Page 48

Chapitre 4:
Enregistr ement
sur MD
Avant d’enregistrer
Enregistrement d’un CD
Enregistrement d’une
émission de radio
Enregistrement manuel sur
un MD
Inscription des numéros de
plage à l’enregistrement
F
14
Avant d’enregistrer
Les minidisques (MD) vous permettent
d’enregistrer et de reproduire
numériquement de la musique avec une
qualité sonore comparable à celle des CD.
De plus, comme il s’agit de disques
magnéto-optiques, les MD ne présentent
pas le risque d’allongement ou de déchirure
du ruban comme les cassettes ordinaires. La
méthode d’enregistrement aussi est
différente des cassettes car il est possible
d’inscrire des numéros de plage et de
monter (“éditer”) les enregistrements.
Enregistrement numérique
et enregistrement
analogique
Cette platine utilise une des méthodes
d’enregistrement suivantes, selon la source
sonore à enregistrer et selon le mode de
connexion de l’appareil à la source sonore.
Enregistrement numérique
Lors d’un enregistrement à partir du lecteur
CD de cet appareil, la platine MD enregistre
les signaux numériques sous forme
numérique.
Enregistrement analogique
Dans les cas suivants, la platine MD
convertit les signaux analogiques en
signaux numériques et elle les enregistre
sous forme numérique.
• A l’enregistrement à partir de la radio de
l’appareil.
• A l’enregistrement à partir d’un
composant raccordé aux prises TAPE de
cet appareil.
Enregistrement MD et Système de Gestion
de Copie Sérielle
Comme la platine MD utilise le SCMS
(Système de Gestion de Copie Sérielle), les
MD enregistrés à partir de CD joués sur le
lecteur CD de cet appareil ne peuvent pas
être utilisés pour effectuer des copies
numériques sur d’autres platines MD.
Inscription des plages
La façon d’inscrire les numéros des plages
diffère selon la source sonore à enregistrer.
Une inscription manuelle des numéros est
également possible.
Par exemple, dans le cas d’une cassette,
l’effacement d’une plage suppose le
ré-enregistrement de celle-ci sans son
depuis le début. En revanche, sur un MD,
vous pouvez effacer une plage simplement
en “écrasant” les informations qui la
concerne dans la TOC.
A l’enregistrement des signaux numériques
d’un CD
La platine MD inscrit automatiquement les
numéros de plage dans l’ordre où elles se
trouvent sur le CD original.
Cependant, en cas de pause de
l’enregistrement, la partie enregistrée
jusque là est comptée comme une plage. A
la reprise de l’enregistrement, le numéro de
plage augmente donc d’une unité.
Numéro
de plage
source sonore
Numéro
de plage
MD enregistré
Si une plage donnée d’un CD est
enregistrée de façon répétée, la ou les
plage(s) sont enregistrées comme une seule
plage continue etont le même numéro de
plage.
Vous pouvez aussi numéroter
manuellement les plages pendant
l’enregistrement (voir “Inscription
manuelle des numéros de plage”).
Si vous sélectionnez “LEVEL SYNC” pendant
un enregistrement analogique
Le numéro de plage est inscrit en
synchronisation avec le niveau du signal
d’entrée, provenant de la source sonore.
Autrement dit, si le signal d’entrée de la
source sonore reste pendant deux secondes
à un certain niveau fixé ou en-dessous, un
numéro de plage sera inscrit la prochaine
fois que le signal d’entrée dépassera ce
niveau.
Numéro
de plage
source sonore
Numéro
de plage
MD enregistré
123 4
ABC D
.
123 4
ABC D
123 4
ABC D
Les numéros de plage ne sont
pas inscrits si le signal d’entrée
reste en dessous du niveau
pendant moins de 2 secondes
(si le blanc entre les plages est
très court, etc.).
1234
ABC DC
.
Chapitre 4: Enregistrement sur MD
Numéros de plage des MD (TOC)
Sur un MD, le numéro des plages (leur
ordre), des informations sur leur point
initial et final, etc., sont enregistrés dans un
espace appelé “Table des Matières” (TOC),
géré à part. Par conséquent, non seulement
vous pouvez localiser à l’instant le début
d’une plage, mais vous pouvez aussi éditer
rapidement des plages enregistrées par
simple modification des informations de la
table des matières (TOC).
Les numéros de plage sont
inscrits si le signal d’entrée
reste en dessous du niveau
pendant plus de 2 secondes.
Page 49

Si vous ne sélectionnez pas “LEVEL SYNC”
POWER m ON
413
2
REC STOP
lors de l’enregistrement analogique
Seul un numéro de plage est inscrit au
début d’un enregistrement. Tout
l’enregistrement est considéré comme une
plage.
Vous pouvez inscrire des numéros de plage
au cours de l’enregistrement de façon soit
manuelle (voir “Inscription manuelle des
numéros de plage”).
Numéro
de plage
source sonore
Numéro
de plage
MD enregistré
Remarques sur
l’enregistrement
Si “TOC” clignote sur l’affichage
Ne déplacez pas l’appareil et ne débranchez
pas le cordon secteur, car la platine MD est
en train de mettre à jour la Table des
Matières (TOC).
Les changements apportés à un MD par
enregistrement sont mémorisés uniquement
si vous mettez à jour la TOC par éjection du
MD ou par pression sur l’interrupteur
POWER pour mettre la platine MD en
mode d’attente.
Ne débranchez pas le cordon secteur
immédiatement après
l’enregistrement
Sinon, les sons enregistrés risquent de ne
pas être sauvegardés sur le MD.
Si “Auto Cut” apparaît sur l’afficheur
(auto cut)
Il n’y a pas eu d’entrée de son pendant 30
secondes durant l’enregistrement d’un
disque compact. Ces 30 secondes de silence
sont remplacées par un espace vierge
d’environ 3 secondes et la platine MD est
placée en mode de pause d’enregistrement.
Si “Smart Space” apparaît sur
l’afficheur (smart space)
Il y a eu un silence prolongé d ’une durée
de 4 à 30 secondes pendant
l’enregistrement d’un disque compact. Le
silence est remplacé par un espace vierge
de 3 secondes et la platine MD poursuit
l’enregistrement. Pendant ces 3 secondes,
un nouveau numéro de plage ne peut pas
être inscrit.
123 4
ABC D
Seul un numéro de plage
est inscrit au début de
l’enregistrement.
1
ABC D
TOC
Si “REC LEVEL OVER” apparaît sur
l’affichage pendant l’enregistrement
à partir d’un appareil audio raccordé
aux prises TAPE IN de la chaîne.
Ce message apparaît si un signal de niveau
élevé est entré pendant l’enregistrement
analogique. Si le son est distordu,
recommencez l’enregistrement en
procédant comme suit.
1 Appuyez de façon répétée sur EDIT/
NO pendant l’enregistrement ou la
pause d’enregistrement jusqu’à ce que
“Attenuate?” apparaisse sur l’affichage.
2 Appuyez sur ENTER/YES.
.
Le message “Attenuate ON?” est
affiché.
* Un minidisque tout neuf ou un
minidisque qui a été remis à l’état vierge
par la fonction “Effacement”.
1 Appuyez sur MD § et installez un MD
enregistrable.
Etiquette vers
3 Appuyez à nouveau sur ENTER/YES.
Le voyant ATTENUATE s’allume.
4 Recommencez l’enregistrement du son.
Le niveau d’enregistrement sera réduit.
Remarque
Tout réglage modifié est mémorisé par
l’appareil. Une fois cet enregistrement
terminé, veillez à annuler ce réglage.
Pour annuler le réglage
Répétez les étapes 1 à 4 et assurez-vous que
“Attenuate OFF?” a été affiché à l’étape 2.
Flèche dirigée vers
la platine MD
2 Appuyez sur CD §, installez un CD et
appuyez à nouveau sur CD § pour
fermer le plateau de disque.
le haut
F
15
Pour protéger le son enregistré
Pour interdire tout enregistrement sur un
MD, poussez l’onglet dans le sens de la
flèche pour ouvrir la cavité. Pour permettre
l’enregistrement, refermez la cavité.
Arrière du disque
Onglet protecteur
d’enregistrement
Glisser l’onglet dans
le sens de la flèche
Enregistrement d’un
CD
Vous pouvez facilement enregistrer un CD
sur un MD (enregistrement synchronisé de
CD ) en inscrivant les numéros des plages
dans le même ordre que sur le CD original.
Si vous utilisez un MD vierge*, le nom du
CD, mémorisé par la fonction “Mémento de
disque”, sera automatiquement enregistré
sur le MD.
Si vous enregistrez de nouvelles plages sur
un MD enregistrable, l’enregistrement
commence automatiquement à la fin de
l’enregistrement précédent.
3 Appuyez sur CD SYNCHRO.
La platine passe en mode de pause de
lecture CD.
Le voyant “REC PAUSE” clignote, la
platine MD se met en mode d’attente
d’enregistrement et le lecteur CD en
mode d’attente de lecture.
4 Appuyez sur REC PAUSE (ou MD P de
la télécommande).
La platine MD commence
l’enregistrement et le lecteur CD
commence la lecture.
Pour arrêter l’enregistrement
Appuyez sur REC STOP.
Si “TOC” clignote sur l’affichage
Ne déplacez pas l’appareil et ne
débranchez pas le cordon du secteur, car la
platine MD est en train de mettre à jour la
Table des Matières (TOC).
Les changements apportés à un MD par
enregistrement sont mémorisés
uniquement si vous mettez à jour la TOC
par éjection du MD ou par pression de
l’enregistrement précédent sur
l’interrupteur POWER pour mettre la
platine MD en mode d’attente.
TOC
Chapitre 4: Enregistrement sur MD
Etiquette vers
le haut
Page 50

Enregistrement
d’une émission de
radio
Vous pouvez enregistrer une émission de
radio sur un MD (enregistrement
analogique).
Si vous utilisez un MD enregistré, la platine
MD commencera automatiquement
l’enregistrement à la fin du dernier
enregistrement.
POWER m ON
1 Appuyez sur MD § et installez un MD
enregistrable.
F
16
Flèche dirigée vers
la platine MD
2 Appuyez de façon répétée sur TUNER/
BAND jusqu’à obtention de la gamme
souhaitée sur l’affichage.
A chaque pression sur la touche, la
gamme change comme suit:
FM ˜ AM
3 Appuyez de façon répétée sur TUNING
jusqu’à obtention de “PRESET” sur
l’affichage.
4 Tournez la bague JOG (ou appuyez sur
PRESET –/+ de la télécommande) pour
accorder la station préréglée à
enregistrer.
6
53
41
Etiquette vers
le haut
REC
STOP
2
Le voyant REC PAUSE clignote et la
platine MD passe en mode d’attente
d’enregistrement.
6 Appuyez sur REC PAUSE (ou sur MD
P de la télécommande).
La platine MD commence
l’enregistrement.
Pour arrêter l’enregistrement
Appuyez sur REC STOP.
Pour enregistrer une station non
préréglée
Appuyez de façon répétée sur TUNING
jusqu’à apparition de “MANUAL” sur
l’affichage, puis tournez la bague JOG pour
accorder la station souhaitée.
Quand vous arrêtez l’enregistrement,
vous pouvez commencer la lecture à
partir de la dernière plage
enregistrée.
Vous pouvez ainsi contrôler rapidement le
contenu d’un enregistrement, par exemple
une chanson que vous venez d’enregistrer
de la radio.
1 Appuyez sur MD pendant
l’enregistrement.
L’enregistrement s’arrête.
2 Appuyez sur fl (ou MD ( de la
télécommande) quand le numéro de la
dernière plage clignote sur l’affichage
(environ 15 secondes).
La lecture commence à partir du début de
la dernière plage enregistrée.
Enregistrement
manuel sur un MD
Si vous enregistrez d’autres plages sur un
MD enregistrable, la platine MD
commencera automatiquement
l’enregistrement à la fin du dernier
enregistrement.
POWER m ON
REC
STOP
4
3
Appuyez sur REC (ou MD r REC de la
3
télécommande).
Le voyant REC PAUSE clignote et la
platine MD passe en mode d’attente
d’enregistrement. Si vous enregistrez
depuis un CD, les numéros des plages
seront automatiquement inscrits dans le
même ordre que sur le CD.
A l’enregistrement d’une autre source,
reportez-vous à “Inscription
automatique des numéros de plage”
l’enregistrement automatique des
numéros.
4 Appuyez sur REC PAUSE (ou MD P de
la télécommande). La platine MD
commence l’enregistrement.
5 Commencez la lecture de la source
sonore.
Afin de
Interrompre
l’enregistrement*
Poursuivre
l’enregistrement
Arrêter
l’enregistrement
* A chaque pause de l’enregistrement, le
numéro de plage augmente d’une unité.
Par exemple, si vous faites une pause
pendant l’enregistrement de la plage 4, le
numéro de plage augmentera de 1 et, à sa
reprise, l’enregistrement commencera
comme une nouvelle plage.
Quand vous arrêtez l’enregistrement,
vous pouvez commencer la lecture à
partir de la dernière plage
enregistrée.
Vous pouvez ainsi contrôler rapidement le
contenu d’un enregistrement, par exemple
une chanson que vous venez d’enregistrer
de la radio.
1 Appuyez sur MD pendant
l’enregistrement.
L’enregistrement s’arrête.
2 Appuyez sur fl (ou MD ( de la
télécommande) quand le numéro de la
dernière plage clignote sur l’affichage
(environ 15 secondes).
La lecture commence à partir du début de
la dernière plage enregistrée.
Appuyez sur
REC PAUSE (ou MD
P de la télécommande)
REC PAUSE (ou MD
P de la télécommande)
REC STOP
›–
Passage à une
station préréglée
précédente
Fréquence
Passage à une
station préréglée
suivante
PRESET
MD
VOLUME
Numéro de
préréglage
5 Appuyez sur REC (ou MD r REC de la
télécommande).
Chapitre 4: Enregistrement sur MD
5
JOG
1
2
1 Appuyez sur MD § et installez un MD
enregistrable.
2 Appuyez sur une des touches
FUNCTION (sur TAPE, TUNER/BAND
ou CD) de l’appareil pour sélectionner
la source sonore à enregistrer (ou
appuyez de façon répétée sur
FUNCTION de la télécommande).
Inscription des
numéros de plage à
l’enregistrement
Le mode d’inscription des numéros de
plage diffère selon la source sonore à
enregistrer. Reportez-vous à “Inscription
des numéros de plage” pour les détails.
Page 51

Inscription manuelle des
numéros de plage
(fonction de marquage de
plage)
Vous pouvez inscrire un numéro de plage à
tout moment pendant l’enregistrement
d’un MD, quelle que soit la source sonore
utilisée.
POWER m ON
Appuyez sur REC (ou MD r REC de la
télécommande) à l’endroit où vous
souhaitez poser un repère de plage pendant
l’enregistrement.
Remarque
Si vous pensez que le marquage du numéro
de plage est inutile ou que l’endroit marqué
n’est pas le bon, vous pouvez utiliser la
fonction Combinaison pour annuler le
repère (voir “Combinaison de plages
enregistrées”).
REC
Inscription automatique
des numéros de plage
(fonction Synchronisation
du niveau)
1 Appuyez sur REC (ou MD r REC de la
télécommande).
Le voyant REC PAUSE clignote et la
platine MD passe en mode d’attente
d’enregistrement.
2 Appuyez de façon répétée sur EDIT/
NO jusqu à ce que “LevelSync?” soit
affiché.
3 Commencez sur ENTER/YES.
Le message “LevelSync ON?” est
affiché.
TOC
REC
MD
VOLUME
1
4 Appuyez sur ENTER/YES.
Le message “LEVEL-SYNC” est affiché.
5 Commencez l’enregistrement.
Remarque
Ce réglage est mémorisé par l’appareil.
Annulez-le après l’enregistrement.
Pour annuler la synchronisation de
niveau
1 Appuyez sur EDIT/NO jusqu’à
apparition du message “LevelSync?”
pendant l’enregistrement ou la pause
d’enregistrement.
2 Appuyez sur ENTER/YES.
Le message “LevelSync OFF?” est
affiché.
3 Appuyez sur EDIT/YES.
Le message “LEVEL-SYNC” disparaît
de l’affichage.
F
17
Les numéros de plage peuvent être inscrits
manuellement même lors de
l’enregistrement d’une analogique. La
platine MD inscrit un nouveau numéro de
plage si le niveau du signal reste en
dessous d’un certain niveau pendant 2
secondes ou plus, puis dépasse ce niveau.
POWER m ON
251
3,4
Chapitre 4: Enregistrement sur MD
Page 52

Chapitre 5:
VOLUME
MD
1
6
11
2738495
10
TRACK
TOC
EDIT
POWER m ON
21
3,4
„
Montage de
MD
enregistrés
Effacement
d’enregistrements
(fonction Effacement)
Effacement
d’enregistrements
(fonction
Effacement)
Il est possible d’effacer facilement des sons
enregistrés. Comme l’effacement met à jour
la TOC, il n’est pas nécessaire d’enregistrer
sur des enregistrements antérieurs. Trois
modes d’effacement sont à votre
disposition.
• Effacement d’une seule plage
• Effacement de toutes les plages
• Effacement d’une partie d’une plage
2 Tournez la bague JOG pour sélectionner
le numéro de plage à effacer.
1
2738495
6
10
TRACK
MD
VOLUME
Numéro
de plage à
effacer
11
Grille musicale
3 Appuyez de façon répétée sur EDIT/
NO jusqu’à ce que “Erase ?” soit affiché.
F
18
Déplacement de plages
enregistrées (fonction
Déplacement)
Division des plages
enregistrées (fonction
Division)
Combinaison de plages
enregistrées (fonction
Combinaison)
Attribution d’un titre aux
enregistrements
(fonction Titrage)
Pour effacer deux ou plusieurs plages
Si vous effacez une plage, le numéro de
toutes les plages suivantes est modifié. Par
exemple, si vous effacez la plage 1, la plage
2 originale deviendra la plage 1.
Pour éviter des confusions, commencez par
effacer les plus grands numéros et passez
ensuite aux plus petits, ce qui évitera de
renuméroter des plages non encore
effacées.
Effacement d’une seule
plage
Pour effacer une seule plage, spécifiez son
numéro. Lorsqu’elle est effacée, le nombre
total de plages sur le MD diminue d’une
unité et toutes les plages qui suivent sont
renumérotées.
Exemple: Effacement de B
Numéro
de plage
Effacement
23
1
AB C D
B est effacé.
1
23
AC D
4 Appuyez sur ENTER/YES.
Le message “Erase ??” apparaît.
TOC
EDIT
TRACK
MD
VOLUME
1
6
11
2738495
10
5 Appuyez à nouveau sur ENTER/YES.
Le message “Complete” apparaît
pendant quelques secondes sur
l’affichage et la plage sélectionnée à
l’étape 2 est effacée.
6 Répétez les étapes 2 à 5 pour effacer
d’autres plages.
Pour arrêter avant l’effacement de la
plage
Appuyez sur .
Si le message “Erase!?” apparaît sur
l’affichage
La plage a été enregistrée ou éditée sur une
4
autre platine MD et elle est protégée contre
l’enregistrement. Si vous souhaitez quand
même effacer cette plage, appuyez sur
ENTER/YES pendant que le message est
affiché.
POWER m ON
Chapitre 5: Montage de MD enregistrés
1 Appuyez sur MD.
L’appareil passe en mode de lecture
MD.
Effacement de toutes les
plages
31
24,5
„
Vous pouvez facilement ramener un disque
à l’état vierge en effaçant d’un coup les
plages, les titres et les noms enregistrés.
Sachez cependant qu’une fois effacées, les
données du MD sont irrécupérables.
Page 53

1 Appuyez sur MD.
L’appareil passe en mode de lecture
MD.
2 Appuyez de façon répétée sur EDIT/
NO jusqu’à ce que “All Erase?” soit
affiché en mode d’arrêt.
3 Appuyez sur ENTER/YES.
Le message “All Erase??” est affiché.
4 Appuyez à nouveau sur ENTER/YES.
Une fois que toutes les plages, nom de
disque et titres ont été effacés du MD, le
message “Complete” apparaît pendant
quelques secondes.
Pour arrêter avant l’effacement total
du MD
Appuyez sur .
Effacement d’une partie
d’une plage
A l’aide des fonctions Division, Effacement
et Combinaison, vous pouvez effacer des
sections particulières d’une plage.
Exemple: Effacement d’une partie de la
plage A
Numéro
de plage
Division
Effacement
Combinaison
Partie à effacer
12
A
1234
#2 #3
A#1
1
1
A#1
A(#1+#3)
2
#3 B C
B
A est divisé
en 3 parties.
B
#2 est effacé.
34
#1 et #3 sont
combinées.
2
B
Exemple: Déplacement de C à la position
de plage 2
Numéro
de plage
Déplacement
1A23 4
B
C
12 34
ACBD
D
Pour arrêter avant le déplacement de
la plage
Appuyez sur .
Division des plages
La plage C prend à la position de plage 2.
enregistrées
(fonction Division)
POWER m ON
Dans les cas suivants, vous pouvez diviser
31
2,54,6
„
1 Appuyez sur MD.
La platine se met en mode de lecture
MD.
3
C
5
C
3
C
2 Tournez la bague MD jusqu’à
apparition du numéro de plage à
déplacer sur l’affichage.
Par exemple, pour déplacer la 7 ème
plage à la 1ère position, tournez la
bague JOG jusqu’à apparition de la
7 ème plage sur l’affichage.
TRACK
MD
VOLUME
Numéro de
plage à
déplacer
Grille musicale
1
6
11
2738495
une plage en plusieurs et attribuer de
nouveaux numéros afin de localiser des
points particuliers sur une plage.
• Lors d’un enregistrement à partir d’une
source analogique, car dans ce cas le MD
ne comporte qu’un seul numéro de plage.
• Quand vous voulez placer des repères sur
une plage pour localiser des points
particuliers.
Après avoir divisé une plage
Le nombre total des plages du MD
augmente d’une unité et toutes les plages
qui suivent la plage divisée sont
renumérotées.
Exemple: Division de la plage 2 pour
créer une nouvelle plage C
Numéro
de plage
Division
La plage 2 est divisée, ce qui crée une
10
plage séparée pour C; toutes les
plages suivantes sont renumérotées.
POWER m ON
12 3
AB C D
123 4
AB C D
2,4
F
19
3 Appuyez de façon répétée sur EDIT/
NO jusqu’à ce que “Move?” soit affiché.
Déplacement de
plages enregistrées
(fonction
Déplacement)
Vous pouvez changer la position de
n’importe quelle plage sur le MD. Après
déplacement, les plages sont
automatiquement renumérotées.
4 Appuyez sur ENTER/YES.
5 Tournez la bague JOG jusqu’à
apparition du nouveau numéro de
plage.
TOC
EDIT
Nouveau numéro de
plage
MD
Numéro de
plage à
déplacer
VOLUME
6 Appuyez sur ENTER/YES.
Une fois que vous avez déplacé la plage,
le message “Complete” apparaît
pendant quelques secondes.
1
6
11
2738495
10
53,6„1
1 Pendant la lecture du MD, appuyez sur
fl au point où la nouvelle plage doit
être créée.
La lecture est interrompue.
2 Appuyez de façon répétée sur EDIT/
NO jusqu’à ce que “Divide?” soit
affiché.
à suivre ➔
Chapitre 5: Montage de MD enregistrés
Page 54

➔ suite
POWER m ON
31
64,9
0
5
2 7
SCROLL
3 Appuyez sur ENTER/YES.
Le message “Rehearsal” alterne avec
“Position ok?” sur l’affichage et la
lecture du début de la nouvelle plage est
reproduite de façon répétée.
4 Si la position initiale ne convient pas,
appuyez sur EDIT/NO.
Si elle est correcte, passez à l’étape 6.
TOC
EDIT
TRACK
MD
VOLUME
Le numéro de la
plage lue clignote
1
6
11
2738495
Après combinaison de deux plages
Le nombre total des plages diminue d’une
unité et toutes les plages suivant les plages
combinées sont renumérotées.
Exemple: Combinaison de B et C
Numéro
de plage
Combinaison
10
POWER m ON
5 En écoutant le son, tournez la bague
JOG pour trouver la position initiale de
la nouvelle plage.
La lecture de la position initiale de la
nouvelle plage est répétée.
La position initiale peut être décalée
d’un maximum de –128 à +127 paliers
(d’environ 0,06 seconde chacun) sur une
même plage.
6 Appuyez sur ENTER/YES quand la
position est correcte.
Quand la plage a été divisée,
F
20
“Complete” apparaît pendant quelques
secondes et la plage qui vient d’être
créée est reproduite. Elle ne porte pas de
titre, même si la plage originale avait été
titrée.
1 Appuyez sur MD.
La platine se met en mode de lecture
MD.
2 Tournez la bague JOG jusqu’à
Pour arrêter avant la division de la
plage
Appuyez sur .
Vous pouvez annuler la division d’une
plage
Combinez à nouveau les plages, puis au
besoin, divisez-les une nouvelle fois.
Pour diviser une plage pendant
l’enregistrement
Utilisez la fonction de marquage de plage.
apparition de la seconde des deux
plages à combiner. Par exemple, pour
combiner les plages 3 et 4, tournez la
bague JOG pour afficher 4.
3 Appuyez de façon répétée sur EDIT/
NO jusqu’à ce que “Combine?” soit
affiché.
4 Appuyez sur ENTER/YES.
Combinaison de
plages enregistrées
(fonction
Combinaison)
Vous pouvez combiner deux plages
consécutives en une. Cette fonction s’avère
pratique pour combiner plusieurs chansons
en un seul “pot-pourri” ou plusieurs parties
enregistrées indépendamment sur une
seule plage.
Le message “Rehearsal” alterne avec
“Track ok?” sur l’affichage. La jonction
des deux plages (la fin de la première et
le début de la seconde) est reproduite de
façon répétée.
5 Appuyez sur ENTER/YES si la position
convient.
Une fois les plages combinées,
“Complete” apparaît quelques
secondes. Si chacune des plages
combinées avait un titre, celui de la
seconde est effacé.
Pour arrêter avant la combinaison
des plages
Appuyez sur .
Vous pouvez annuler une combinaison de
plages
Divisez à nouveau les plages, puis au
besoin, recombinez d’autres plages.
Si “Sorry” (excuse) apparaît sur l’affichage
La combinaison des plages est impossible.
123 4
AB C D
12 3
AB C D
B et C sont combinées en une plage.
Ceci se produit parfois si vous avez édité de
nombreuses fois la même plage. Il s’agit
d’une limitation technique du système MD
et non d’une erreur mécanique.
Attribution d’un titre
aux enregistrements
31
1
6
11
„
2738495
24,5
TOC
EDIT
TRACK
MD
VOLUME
Numéro
de la plage à
combiner
(fonction Titrage)
Vous pouvez donner aux MD ou plages
enregistrés des titres, composés de lettres
majuscules ou minuscules, de chiffres et de
symboles. Chaque titre peut avoir jusqu’à
80 caractères par disque.
10
1 Appuyez sur MD.
La platine se met en mode de lecture
MD.
2 Si vous souhaitez donner un titre au
disque, appuyez sur pour arrêter la
lecture. Si vous souhaitez donner un
titre à une plage, appuyez sur fl
pendant la lecture de la plage à titrer, de
manière à effectuer une pause.
Il est possible de titrer une plage
pendant la lecture ou l’enregistrement.
Vous pouvez aussi donner un titre à une
plage sans passer par la pause, mais il
sera effacé s’il n’est pas terminé avant la
fin de la plage.
3 Appuyez de façon répétée sur EDIT/NO
jusqu’à ce que “Name in?” soit affiché.
Chapitre 5: Montage de MD enregistrés
Page 55

4 Appuyez sur ENTER/YES.
Un curseur clignote sur l’affichage.
TOC
EDIT
DISC
MD
VOLUME
1
6
11
2738495
Curseur
5 Appuyez de façon répétée sur
CHARACTER pour sélectionner le type
de caractères.
A chaque pression, le type change
comme suit:
nmajusculesnminuscules
espaceNsymbolesNchiffres N
Les symboles suivants sont utilisables:
! " # $ % & ' ( ) * + , – . / : ; < = > ? @ _ `
(espace)
6 Tournez la bague JOG jusqu’à affichage
du caractère souhaité.
Le caractère sélectionné clignote.
TOC
EDIT
DISC
MD
VOLUME
11
1
6
2738495
Pour entrer rapidement un espace
Appuyez sur ) pendant que le
curseur clignote.
7 Appuyez sur ).
Le curseur se déplace vers la droite et
attend l’entrée du caractère suivant.
TOC
EDIT
DISC
MD
VOLUME
1
6
11
2738495
Pour vérifier les titres
Vous pouvez vérifier le titre de disque ou
des plages en appuyant sur SCROLL.
10
Pour vérifier
un titre de
disque
un titre de
plage
Appuyez sur SCROLL*
pendant l’arrêt de la
platine.
pendant la lecture de la
plage.
* Appuyez une nouvelle fois sur SCROLL
pour arrêter et à nouveau pour continuer
le défilement.
Pour effacer le titre d’un disque et le
titre de toutes les plages (fonction
Effacement de nom)
Il est possible d’effacer d’un coup tous les
titres d’un MD.
Sachez que, une fois effacés, les titres ne
sont plus récupérables. Pour arrêter
l’effacement, appuyez sur .
1 La platine étant à l’arrêt, appuyez sur
EDIT/NO de façon répétée jusqu’à ce
10
que “Name Erase?” soit affiché.
2 Appuyez sur ENTER/YES.
Le message “Name Erase??” apparaît
sur l’affichage.
3 Appuyez à nouveau sur ENTER/YES.
Tous les titres sont effacés.
10
F
21
Caractère suivant
8 Répétez les étapes 5 et 7 pour entrer
d’autres caractères et composer le titre
souhaité.
Si vous voulez entrer le même type de
caractère, sautez l’étape 5.
En cas d’erreur de caractère
Appuyez sur ) ou 0 jusqu’à ce que
le caractère à corriger clignote et répétez
les étapes 5 à 7 pour entrer le caractère
correct.
Pour effacer un caractère
Appuyez sur ) ou 0 jusqu’à ce que
le caractère à effacer clignote, puis
appuyez sur EDIT/NO.
9 Appuyez sur ENTER/YES.
L’attribution d’un titre est ainsi achevée
et celui-ci défile sur l’affichage.
Pour arrêter avant l’entrée du titre
Appuyez sur .
Chapitre 5: Montage de MD enregistrés
Page 56

Chapitre 6:
Radio
Ecoute de la radio
Préréglage des stations
radio
Ecoute des stations
préréglées de la radio
Ecoute de la radio
Le tuner explore automatiquement les
gammes et il accorde les stations dont les
signaux sont clairs. Ceci vous évite d’avoir
à rechercher les stations dont les signaux
sont puissants, mais vous pouvez aussi
accorder manuellement les stations aux
signaux faibles, ignorées lors de l’accord
automatique.
POWER m ON
2
STEREO/
MONO
1
4Si vous ne souhaitez pas écouter la
station accordée, tournez la bague JOG
pour relancer l’exploration.
Si la station souhaitée n’est pas
accordée
Il se peut que l’accord automatique saute
les stations dont les signaux sont faibles.
Dans ce cas, effectvez l’accord
manuellement.
1 Appuyez de façon répétée sur TUNING
jusqu’à ce que “MANUAL” soit affiché.
2 Continuez à tourner la bague JOG
jusqu’à ce que la station souhaitée soit
accordée.
Pour améliorer la réception AM
Réorientez l’antenne cadre AM pour la
réception AM.
F
22
3,4
1 Appuyez de façon répétée sur TUNER/
BAND (ou sur BAND de la
télécommande) jusqu’à ce que la gamme
souhaitée soit affichée.
A chaque pression sur la touche, la
gamme change comme suit,
FM ˜ AM
VOLUME
Fréquence reçue
2 Appuyez de façon répétée sur TUNING
jusqu’à ce que “AUTO” soit affiché.
AUTO
VOLUME
3 Tournez la bague JOG vers la droite
pour passer à une fréquence plus haute.
Pour accorder une fréquence plus basse,
tournez la bague JOG vers la gauche. Le
tuner commence l’exploration des
fréquences et il s’arrête
automatiquement dès qu’il a capté une
station claire. Le voyant “TUNED” est
affiché. Le voyant “STEREO” apparaît
aussi si la station FM accordée émet en
stéréo.
AM
Si une émission FM n’est pas reçue
clairement
Appuyez sur STEREO/MONO de manière
à afficher “MONO”. L’effet stéréo sera
perdu, mais la réception sera meilleure.
Appuyez à nouveau sur STEREO/MONO
pour rétablir l’effet stéréo.
Fonction ecoute instantanée
Appuyez sur BAND de la télécommande
quand l’appareil est hors tension. Vous
pourrez écouter la dernière station reçue
sans avoir à appuyer sur d’autres touches.
Quand vous appuyez sur TUNER/BAND
de l’appareil, il se met sous tension et la
radio est automatiquement sélectionnée.
Chapitre 6: Radio
›–
Passage à une
fréquence
plus basse
Passage à une
fréquence plus
haute
AUTO
VOLUME
Page 57

Le message “TUNED” est affiché.
VOLUME
PRESET
Préréglage des
Le message “STEREO” apparaît aussi si
la station FM accordée émet en stéréo.
stations radio
Vous pouvez stocker des fréquences radio
dans la mémoire de la radio de manière à
retrouver rapidement vos stations
préférées. Vous pouvez prérégler jusqu’à 20
stations FM et 10 AM.
Utilisez les touches de l’appareil pour
prérégler les stations.
POWER m ON
STEREO/
41
MONO
2
Passage à une
fréquence
plus basse
Si la station souhaitée n’est pas accordée
Il se peut que l’accord automatique saute
les stations dont les signaux sont faibles.
Dans ce cas, passez à l’accord manuel.
1 Appuyez de façon répétée sur TUNING
jusqu’à ce que “MANUAL” soit affiché.
2 Continuez à tourner la bague JOG
jusqu’à ce que la station souhaitée soit
accordée.
4Appuyez de façon répétée sur EDIT/
NO jusqu’à ce que “Frq-Memory ?” soit
affiché.
5,7
3,6
1Appuyez de façon répétée sur TUNER/
BAND (ou BAND de la télécommande)
jusqu’à ce que la gamme souhaitée soit
affichée.
A chaque pression sur la touche, la
gamme change comme suit:
FM ˜ AM
5Appuyez sur ENTER/YES.
Le numéro de préréglage clignote
6Tournez la bague JOG pour sélectionner
un numéro de préréglage.
VOLUME
7Appuyez sur ENTER/YES.
Fréquence reçue
2Appuyez de façon répétée sur TUNING
jusqu’à ce que “AUTO” soit affiché.
AUTO
VOLUME
La station est mémorisée sur le numéro
de préréglage sélectionné.
3Tournez la bague JOG vers la droite
pour rechercher une station d’une
fréquence plus haute. Par contre, pour
en rechercher une d’une fréquence plus
basse, tournez la bague JOG vers la
gauche. Le tuner commence
l’exploration des fréquences et il s’arrête
automatiquement dès qu’une station
claire est accordée.
8Répétez les étapes 1 à 7 pour chaque
station que vous souhaitez mémoriser.
Pour changer le numéro de
préréglage
Recommencez à partir de l’étape 1.
Si une émission FM n’est pas reçue
clairement
Appuyez sur STEREO/MONO de manière
à afficher “MONO”. L’effet stéréo sera
perdu, mais la réception sera meilleure.
Appuyez à nouveau sur STEREO/MONO
pour rétablir l’effet stéréo.
›–
Passage à une
fréquence plus
haute
AUTO
VOLUME
AUTO
VOLUME
MEMORY
VOLUME
S’allume
PRESET
VOLUME
Attribution d’un nom à
une station préréglée
(Nom de station)
Vous pouvez donner à chaque station
préréglée un nom, comportant jusqu’à 10
caractères, choisis parmi les majuscules, les
minuscules, les chiffres et les symboles. Le
nom de la station est affiché quand une
station préréglée est accordée. Si vous
enregistrez la station préréglée sur un MD à
l’aide de la fonction d’enregistrement par
minuterie, le nom sera automatiquement
mémorisé sur le MD.
POWER m ON
2
4
DISPLAY
0
53,8
6
1 Accordez la station préréglée à laquelle
vous voulez donner un nom.
2 Appuyez de façon répétée sur EDIT/
NO jusqu’à ce que “Name in?” soit
affiché.
PRESET
VOLUME
3 Appuyez sur ENTER/YES.
Un curseur clignote sur l’affichage.
Le curseur clignote
4 Appuyez de façon répétée sur
CHARACTER pour choisir un type de
caractères.
A chaque pression sur la touche, le type
de caractères change comme suit:
nmajusculesnminuscules
espaceNsymbolesNchiffres N
Les symboles suivants sont utilisables:
! " # $ % & ' ( ) * + , – . / : ; < = > ? @ _ `
(espace)
F
23
à suivre ➔
Chapitre 6: Radio
Page 58

F
24
➔ suite
5 Tournez la bague JOG jusqu’à ce que le
caractère souhaité soit affiché.
Le caractère sélectionné clignote.
PRESET
VOLUME
Pour entrer rapidement un espace
Appuyez sur ) pendant que le
curseur clignote.
6 Appuyez sur ).
Le curseur se déplace vers la droite et
attend l’entrée du caractère suivant.
PRESET
VOLUME
7 Répétez les étapes 4 et 6 pour entrer
d’autres caractères et enregister tout le
nom de la station.
Si vous voulez entrer le même type de
caractère, sautez l’étape 4.
En cas d’erreur de caractère
Appuyez sur ) ou 0 jusqu’à ce que
le caractère à corriger clignote et répétez
les étapes 4 à 6 pour entrer le caractère
correct.
Pour effacer un caractère
Appuyez sur ) ou 0 jusqu’à ce que
le caractère à effacer clignote, puis
appuyez sur EDIT/NO.
8 Appuyez sur ENTER/YES.
L’entrée du nom de la station est ainsi
achevée et il défile sur l’affichage.
Ecoute des stations
préréglées de la
radio
Une fois que les stations ont été préréglées,
servez-vous de la bague JOG pour accorder
rapidement celles que vous voulez écouter.
POWER m ON
2
3
1
1 Appuyez de façon répétée sur TUNER/
BAND pour sélectionner la gamme
souhaitée.
FM ˜ AM
2 Appuyez sur TUNING de manière que
“PRESET” soit affiché.
3 Tournez la bague JOG (ou appuyez sur
PRESET –/+ de la télécommande) pour
accorder la station souhaitée.
La fréquence de la station apparaît et la
station est reçue.
Pour effacer le nom d’une station
Il est possible d’effacer le nom d’une station
en changeant en “espaces” tous les
caractères de ce nom.
Pour changer l’affichage
Appuyez sur DISPLAY.
A chaque pression sur la touche, la
fréquence ou le nom de station (si vous en
avez mémorisé un) apparaît de façon
répétée sur l’affichage.
›–
Passage à une
station préréglée
précédente
Fréquence Numéro de
Pour sélectionner directement une
station
Après l’étape 1 précédente, vous pouvez
avoir rapidement accès à une station
préréglée sur les numéros 1 à 10 en
appuyant sur la touche numérique
correspondante.
Pour choisir des numéros supérieurs à 10,
appuyez d’abord sur >10, puis entrez les
chiffres correspondants.
Exemple:
Pour sélectionner le canal 25, appuyez
sur >10, 2 et 5 dans cet ordre.
Passage à une
station préréglée
suivante
PRESET
MD
VOLUME
préréglage
Chapitre 6: Radio
Page 59

Chapitre 7:
Réglage du
son
Réglage du son
Pour bénéficier pleinement de la qualité de
votre chaîne stéréo, effectuez les réglages
audio suivants.
Pour cela, vous pouvez utiliser aussi la
télécommande.
POWER m ON
Pour écouter par le casque
Raccordez le casque à la prise PHONES.
Dans ce cas, aucun son ne provient des
haut-parleurs.
Réglage du son
PHONES
Pour
ajuster
le volume
les sons
graves et
aigus
BASS/
TREBLE
BALANCE VOLUME +/–
JOG
Opération à effectuer
Pour l’augmenter, appuyez
sur VOLUME + (ou VOL +
de la télécommande).
Pour le diminuer, appuyez
sur VOLUME – (ou VOL –
de la télécommande).
1 Appuyez sur BASS/
TREBLE pour sélectionner
le son à ajuster.
A chaque pression sur la
touche, le son change
comme suit:
BASSnTREBLEnOFF
n
2 Tournez la bague JOG
pour ajuster le son.
F
25
la balance
›–
Diminue les
sons graves/
aigus
Appuyez sur BALANCE et
tournez la bague JOG pour
ajuster la balance.
›–
Déplace le
son vers la
gauche.
Augmente
les sons
graves/aigus
Déplace le
son vers la
droite.
Chapitre 7: Réglage du son
Page 60

Chapitre 8:
POWER m ON
TIMER
SELECT
4,5,6,8 5,6,7
32
,9
Fonctions
complémentaires
Ecoute avec chronorupteur
Réveil en musique
Enregistrement
d’émissions radio par
minuterie
Branchement d’un appareil
en option
Ecoute avec
chronorupteur
Vous pouvez programmer la chaîne stéréo
pour qu’elle se mette automatiquement
hors tension, ce qui vous permet de vous
endormir en musique (écoute par
temporisateur).
Avant de régler le chronorupteur, assurezvous que l’horloge est correctement ajustée.
Le chronorupteur peut être programmé,
même si la minuterie de réveil a déjà été
réglée.
Utilisez les touches de la télécommande
pour ces opérations.
p
SLEEP
P
(
=
rPp
+
(
Réveil en musique
Il est possible de vous réveiller en musique
à un moment donné. Une fois que la
minuterie a été programmée, elle reste
utilisable jusqu’à ce que son réglage soit
annulé ou que le cordon d’alimentation soit
débranché.
Avant de programmer la minuterie,
assurez-vous que l’horloge est correctement
ajustée.
F
26
1 Faites jouer votre source sonore favorite
(cassette, tuner, CD, etc.).
2 Appuyez de façon répétée sur SLEEP
pour déterminer la durée d’écoute.
L’indication de la durée du compte à
rebours apparaît sur l’affichage.
n 90 n 80 ... 10 n OFF
Le chronorupteur coupera
l’alimentation après une durée de 90 à
10 minutes, ajustée par tranches de 10
minutes.
Pour annuler le chronorupteur
Appuyez de façon répétée sur SLEEP
jusqu’à ce que “OFF” soit affiché.
Pour vérifier la durée restante du
compte à rebours avant la mise hors
tension de la chaîne
Appuyez une fois sur SLEEP.
La durée restante (en minutes) est affichée
pendant quelques secondes.
Pour changer la durée restante
quand le chronorupteur fonctionne
Appuyez de façon répétée sur SLEEP pour
sélectionner la nouvelle durée du compte à
rebours.
1Préparez la source sonore.
Pour vous réveiller au son de la radio
Accordez la station à écouter au réveil.
Pour vous réveiller au son d’un CD
Installez un CD. Si vous voulez écouter
la lecture d’une plage donnée, effectuez
les préparatifs nécessaires (cf. “Lecture
des plages dans l’ordre souhaité
(Lecture programmée)”).
Pour vous réveiller au son d’un MD
Installez le MD dans la platine.
2Appuyez sur VOLUME +/– pour ajuster
le volume.
Après les réglages, arrêtez la lecture du
CD ou du MD.
3Appuyez de façon répétée sur TIMER
SET jusqu’à ce que “DAILY TIMER ?”
soit affiché.
MD
CD
VOLUME
4Appuyez sur ENTER/YES.
Le voyant “ON” apparaît et le chiffre
des heures clignote.
5Programmez l’heure à laquelle la chaîne
doit se mettre en service.
1 Servez-vous de la bague JOG pour
régler l’heure.
DAILY
CD MD
VOLUME
Chapitre 8: Fonctions complémentaires
Clignote
Page 61

2 Appuyez sur ENTER/YES.
Les chiffres des minutes clignotent
sur l’affichage.
DAILY
3 Servez-vous de la bague JOG pour
régler les minutes.
DAILY
4 Appuyez sur ENTER/YES.
Le message “OFF” apparaît et le
chiffre des heures clignote sur
l’affichage.
DAILY
CD MD
Clignote
CD MD
Clignote
CD MD
VOLUME
VOLUME
VOLUME
Enregistrement
d’émissions radio
par minuterie
En programmant la minuterie, il est
possible d’enregistrer une émission radio à
un moment donné. Cette minuterie ne
fonctionne qu’une seule fois par réglage. Le
niveau du volume est automatiquement
réglé sur MIN.
Si vous enregistrez l’émission d’une station
à laquelle vous avez donné un nom, celui-ci
ainsi que l’heure de mise en/hors service
seront automatiquement inscrits sur le MD.
•Préréglez la station à enregistrer.
•Assurez-vous que l’horloge est à l’heure.
POWER m ON
TIMER
SELECT
,8
2
3 Servez-vous de la bague JOG pour
régler les minutes.
REC
Clignote
4 Appuyez sur ENTER/YES.
Le message “OFF” apparaît et le
chiffre des heures clignote sur
l’affichage.
REC
Clignote
VOLUME
VOLUME
5 De la même façon, programmez l’heure
à laquelle la chaîne doit se mettre hors
service.
6 Appuyez sur ENTER/YES.
Les postes préréglés apparaissent
successivement sur l’affichage.
Clignote
6 De la même façon, programmez l’heure
à laquelle la chaîne doit se mettre hors
service.
7 Servez-vous de la bague JOG pour
sélectionner la source sonore.
L’affichage change comme suit:
n CD PLAY ˜ TUNER N
n MD PLAY N
8 Appuyez sur ENTER/YES.
Les postes préréglés apparaissent
successivement sur l’affichage.
9 Appuyez sur POWER pour mettre la
chaîne hors tension.
Environ 15 secondes avant le moment
programmé, l’appareil se met sous
tension et la musique commence. Au
moment programmé pour la mise hors
service, l’appareil se met hors tension.
Pour annuler la minuterie
Appuyez de façon répétée sur TIMER
SELECT jusqu’à ce que “TIMER OFF” soit
affiché.
Pour changer la programmation
Recommencez toutes les opérations depuis
l’étape 1.
Pour vérifier les postes de la
programmation
Appuyez de façon répétée sur TIMER
SELECT jusqu’à apparition de “DAILY” sur
l’affichage. Les postes programmés
apparaissent sur l’affichage.
3,4,5,6 4,5
1 Accordez la station à enregistrer.
2 Appuyez de façon répétée sur TIMER
SET jusqu’à ce que “REC TIMER ?” soit
affiché.
3 Appuyez sur ENTER/YES.
Le message “REC” apparaît et les
chiffres des heures clignotent sur
l’affichage.
REC
Clignote
VOLUME
4 Programmez l’heure à laquelle
l’enregistrement doit commencer .
1 Servez-vous de la bague JOG pour
régler l’heure.
REC
Clignote
2 Appuyez sur ENTER/YES.
Les chiffres des minutes clignotent
sur l’affichage.
VOLUME
7 Insérez un MD enregistrable.
Le message “TOC Reading” apparaît
pendant les quelques secondes sur
l’affichage où la platine MD lit le
contenu du MD.
8 Après disparition de “TOC Reading”,
appuyez sur POWER pour mettre la
chaîne hors tension.
Environ 15 secondes avant l’heure
programmée, l’appareil est mis sous
tension et le niveau du volume est réglé
automatiquement sur MIN.
Remarques
•Ne coupez pas l’alimentation pendant
que “TOC Reading” est affiché car la
minuterie risquerait de ne pas
fonctionner correctement.
•Sur vous utilisez un tout nouveau MD,
rien ne sera enregistré pendant les 15
premières secondes.
Pour annuler la minuterie
Appuyez de façon répétée sur TIMER
SELECT jusqu’à ce que “TIMER OFF” soit
affiché.
Pour changer la programmation
Recommencez toutes les opérations depuis
l’étape 1.
Pour vérifier les postes de la
programmation
Appuyez de façon répétée sur TIMER
SELECT jusqu’à apparition de “REC” sur
l’affichage. Les postes programmés
apparaissent sur l’affichage.
F
27
MD
REC
Clignote
VOLUME
Chapitre 8: Fonctions complémentaires
Page 62

Branchement d’un
appareil en option
Pour profiter au maximum de votre chaîne
stéréo, vous pouvez raccorder une platinecassette stéréo. Vous pouvez alors
enregistrer les sources sonores de la chaîne
sur cette platine-cassette.
Branchement d’une
platine-cassette stéréo
Utilisez des cordons audio et veillez à
raccorder les fiches et les prises de même
couleur.
Consultez le mode d’emploi de votre
platine-cassette stéréo pour les détails.
Raccordez
les prises LINE IN de
la platine-cassette
les prises LINE OUT
de la platine-cassette
F
28
Platine à cassette
Pour écouter le son de la platinecassette
Appuyez sur TAPE.
Sur
les prises TAPE
OUT.
les prises TAPE IN.
OUT IN
L
R
TAPE
Chapitre 8: Fonctions complémentaires
Page 63

Informations
supplé-
mentair es
Précautions
Entretien
Introduction au Système de
Gestion de Copie Sérielle
Limitations du système des
MD
Messages MD sur affichage
Guide de dépannage
Fiche technique
Nomenclature des
commandes et organes
Index
Précautions
Pour toute question ou difficulté
concernant la chaîne stéréo, veuillez
consulter le revendeur Sony le plus proche.
Sécurité
• L’emploi d’instruments optiques avec cet
appareil augmente les risques pour les
yeux.
• La chaîne stéréo n’est pas déconnectée de
la source d’alimentation secteur tant
qu’elle est branchée sur la prise murale,
même si vous l’avez mise hors tension.
• Débranchez la chaîne de la prise murale
si vous ne comptez pas l’utiliser pendant
un certain temps. Pour débrancher le
cordon secteur, tirez sur la fiche mais pas
sur le cordon.
• Si un solide ou un liquide pénétrait dans
un des composants, débranchez la chaîne
et faites-la vérifier par un technicien
qualifié avant de la réutiliser.
• Si vous devez changer le cordon
d’alimentation secteur, faites appel à un
réparateur qualifié uniquement.
Installation
Installez la chaîne dans un endroit bien
ventilé pour éviter une surchauffe interne.
Condensation sur le lecteur CD et la
platine MD
Si la chaîne stéréo est transportée
directement d’un endroit froid vers un
endroit chaud, ou si elle est placée dans une
pièce très humide, de l’humidité peut se
condenser sur la lentille à l’intérieur du
lecteur CD ou de la platine MD. Dans ce
cas, le lecteur CD ou la platine MD sont
incapables de fonctionner. Retirez le CD ou
le MD et laissez la chaîne sous tension
pendant une heure environ, c’est-à-dire
jusqu’à évaporation de l’humidité.
Si vous observez une altération des
couleurs sur l’écran du téléviseur se
trouvant à proximité (MJ-L1
seulement)
Etant donné que les enceintes sont blindées
magnétiquement, elles peuvent être
installées près d’un téléviseur. Il est
cependant possible que vous observiez une
altération des couleurs avec certains types
de téléviseur.
Si vous observez une altération des
couleurs…
Mettez le téléviseur hors tension et
remettez-le à nouveau sous tension 15 à 30
minutes plus tard.
Si vous observez encore une altération des
couleurs…
Ecartez les enceintes du téléviseur.
Entretien
Nettoyage du coffret
Utilisez un chiffon doux légèrement
imprégné d’une solution détergente neutre.
Entretien des CD
Quand un CD est sale, essuyez-le avec un
chiffon de nettoyage. Essuyez le CD du
centre vers l’extérieur.
Remarques sur les CD
• N’utilisez pas de solvants comme de la
benzine, du diluant, des produits de
nettoyage vendus dans le commerce, ni
de vaporisateurs anti-électricité statique
destinés aux disques en vinyle.
• Si le CD est rayé, sale ou couvert de traces
de doigts, il risque d’y avoir des erreurs
d’alignement.
F
29
Remarques sur la manipulation des
MD
Comme le MD est protégé par une
cartouche, vous pouvez le manipuler
normalement sans crainte de souillures ou
de traces de doigts. Cependant, des
défaillances risquent de se produire si la
cartouche proprement dite est
endommagée ou tordue.
N’ouvrez pas le volet de la cartouche MD
En forçant son ouverture, vous risquez
d’endommager le volet.
Cartouche Volet
Remarques sur les MD
• Ne soumettez pas les MD aux rayons
directs du soleil ou à des sources de
chaleur, comme des sortiés d’air chaud;
ne les laissez pas dans une voiture
stationnée en plein soleil, car la
température peut s’élever fortement.
• Nettoyez régulièrement la poussière et les
souillures sur la surface de la cartouche
du MD à l’aide d’un linge sec.
Informations supplémentaires
Page 64

Introduction au
Système de Gestion
de Copie Sérielle
Un minidisque enregistré via une entrée
numérique ne peut pas servir pour
effectuer un autre enregistrement
numérique. En tant que composant
audionumérique, cette platine MD respecte
les normes du “Système de Gestion de
Copie Sérielle” (SCMS) qui limite à la
première génération les copies effectuées.
Cependant, l’enregistrement ultérieur
d’une copie de première génération sur une
autre cassette DAT ou un MD enregistrable
est possible via la prise d’entrée analogique,
prévue sur la platine DAT ou MD.
Trois règles générales s’appliquent à cet
appareil.
Règle 2
Vous pouvez enregistrer une entrée de
signal numérique provenant d’une
émission numérique par satellite sur une
cassette DAT ou un disque MD via la prise
d’entrée numérique sur la platine DAT ou
MD si elle est capable de traiter la
fréquence d’échantillonnage de 32 kHz ou
48 kHz. (Cet appareil accepte uniquement
la fréquence 44,1 kHz.)
Vous pouvez ensuite enregistrer le contenu
de cette cassette DAT ou de ce MD
(première génération) sur une autre cassette
DAT ou disque MD enregistrable via la
prise d’entrée numérique de la platine DAT
ou MD afin de créer une copie numérique
de seconde génération. Sachez cependant
que la copie numérique de seconde
génération est rendue impossible avec
certains tuners d’émissions par satellite
(BS).
Règle 3
Vous pouvez enregistrer une cassette DAT
ou un disque MD enregistré via la prise
d’entrée analogique de la platine DAT ou
MD sur une autre cassette DAT ou disque
MD via la prise d’entrée numérique de la
platine DAT ou MD. Cependant, vous ne
pouvez pas réaliser une copie DAT ou MD
de seconde génération via la prise de sortie
numérique de la platine DAT ou MD.
Tourne-disque
Lecteur CD
Platine DAT
Lecture
Platine MD
Tuner
Platine à cassette
Amplificateur
Microphone
Règle 1
Vous pouvez enregistrer à partir de sources
numériques (CD, DAT ou MD préenregistré) sur une cassette DAT ou un
disque MD enregistrable via la prise
d’entrée numérique de la platine DAT ou
MD. Cependant, vous ne pouvez pas
enregistrer à partir de cette cassette DAT ou
disque MD sur une autre cassette DAT ou
F
disque MD via la prise d’entrée numérique
de la platine DAT ou MD.
30
Lecture
Câble optique ou
câble de
raccordement
numérique coaxial
Enregistrement
DAT ou MD
Lecture
Prise de sortie numérique
Câble optique ou
câble de
raccordement
numérique coaxial
Prise d’entrée numérique
Enregistrement
Platine MD
Prise de sortie
numérique
Prise d’entrée
numérique
Platine DAT ou MD
Platine DAT ou MD
Prises de sortie de ligne
(analogique)
Prises d’entrée de ligne
(analogique)
Platine DAT ou MD
Platine DATLecteur CD
Enregistrement
Enregistrement
Cassette DAT ou
MD de première
génération
enregistré via
une connexion
numérique-ànumérique
Cordon de
raccordement
audio
Enregistrement
Lecture
Câble optique ou
câble de
raccordement
numérique coaxial
Platine DAT ou MD
DAT ou MD
Lecture
Câble optique ou
câble de
raccordement
numérique coaxial
Platine DAT ou MD
Platine DAT ou MD
DAT ou MD
Lecture
Prise de sortie numérique
Câble optique ou
câble de
raccordement
numérique coaxial
Prise d’entrée numérique
Platine DAT ou MD
Platine DAT ou MD
Tuner BS
Prise de sortie numérique
Prise d’entrée numérique
Prise de sortie
numérique
Prise d’entrée
numérique
Prises de sortie de ligne
(analogique)
Prises d’entrée de ligne
(analogique)
Cassette DAT ou
MD de première
génération
enregistré via
une connexion
numérique-ànumérique
Cassette DAT ou
disque MD de
seconde
génération
enregistré par
connexion
numérique-ànumérique.
Cordon de
raccordement
audio
Cordon de
raccordement
audio
Enregistrement
DAT ou MD
Lecture
Câble optique ou
câble de
raccordement
numérique coaxial
Enregistrement
DAT ou MD
Lecture
Prise de sortie numérique
Câble optique ou
câble de
raccordement
numérique coaxial
Prise d’entrée numérique
Enregistrement
Prises de sortie de ligne
(analogique)
Prises d’entrée de ligne
(analogique)
Platine DAT ou MD
Cassette DAT
ou disque MD
enregistré par
connexion
analogique-ànumérique
Platine DAT ou MD
Prise de sortie
numérique
Prise d’entrée
numérique
Platine DAT ou MD
Cassette DAT ou
MD de première
génération
enregistré via
une connexion
numérique-ànumérique
Platine DAT ou MD
Prises de sortie de ligne
(analogique)
Cordon de
raccordement
audio
Prises d’entrée de ligne
(analogique)
Platine DAT ou MD
Informations supplémentaires
Page 65

Limitations du
système des MD
Le système d’enregistrement de votre
platine MD est radicalement différent de
celui qui est utilisé sur une platine-cassette
ou une platine DAT et il se caractérise par
certaines limitations, décrites ci-après.
Notez cependant que ces limitations sont
inhérentes au système d’enregistrement
MD et qu’elles ne sont nullement dues à
des défectuosités mécaniques.
”Disc Full” s’allume alors que le MD
n’a pas encore atteint la durée
maximale d’enregistrement (60 ou
74 minutes).
Quand 255 plages ont été enregistrées sur le
MD, “Full Disc” apparaît, quelle que soit la
durée d’enregistrement totale. Il est
impossible d’enregistrer plus de 255 plages
sur un MD. Pour continuer à enregistrer,
effacez des plages superflues ou utilisez un
autre MD enregistrable.
”Disc Full” s’allume alors que le
nombre maximum de plages n’est
pas encore atteint.
Des fluctuations d’accentuation sur les
plages sont parfois interprétées comme des
intervalles de plage, ce qui fait monter leur
nombre et provoque l’allumage du message
“Disc Full”.
La durée d’enregistrement
n’augmente pas même après
effacement de nombreuses plages
courtes.
Les plages de moins de 12 secondes ne sont
pas comptées et il se peut que leur
effacement ne fasse pas augmenter la durée
d’enregistrement.
Il est impossible de combiner
certaines plages avec d’autres.
La combinaison de plages peut devenir
impossible quand celles-ci ont été “éditées”.
La durée totale enregistrée plus la
durée restante sur le MD ne sont pas
égales à la durée d’enregistrement
maximum (60 ou 74 minutes).
L’enregistrement s’accomplit par unités
minimales de 2 secondes chacune, quelle
que soit la briéveté des données sonores. De
ce fait, il se peut que le contenu enregistré
soit plus court que la capacité maximale
d’enregistrement. Il se peut aussi que de
l’espace soit gaspillé sur le disque par des
griffes.
Des plages créées par édition
présentent des pertes sonores
pendant la recherche.
Les numéros des plages ne sont pas
enregistrés correctement.
Une affectation ou une inscription
incorrecte des numéros de plage peut se
produire quand des plages CD sont
divisées en plusieurs petites sections
pendant l’enregistrement numérique.
Le message “TOC Reading” reste
longtemps affiché.
Si le MD enregistrable installé est tout neuf,
ce message reste affiché plus longtemps que
dans le cas d’un MD déjà utilisé.
Limitations à l’enregistrement sur
une plage existante
• Il se peut que la durée d’enregistrement
restante ne soit pas correctement affichée.
• Il peut s’avérer impossible d’enregistrer
sur une plage si celle-ci a déjà été
enregistrée plusieurs fois. Dans ce cas,
éliminez cette plage par la Fonction
Effacement.
• La durée d’enregistrement restante peut
être raccourcie sans proportion avec le
total de la durée enregistrée.
• Enregistrer sur une plage pour en
éliminer les parasites n’est pas conseillé
car ceci peut réduire la durée de la plage.
• Il peut s’avérer impossible de titrer une
plage pendant qu’elle est réenregistrée.
La durée de lecture/d’enregistrement
correcte peut ne pas apparaître
pendant la lecture d’un minidisque
mono.
Messages MD sur
affichage
Le tableau suivant explique les différents
messages qui apparaissent sur la fenêtre
d’affichage.
Message
All Erase?
Attenuate?
Auto cut
Blank Disc
Signification
Efface toutes les plages sur
un MD? (Fonction
Effacement).
Atténue le niveau
d’enregistrement pendant
un enregistrement
analogique.
La platine MD passe en
mode de pause
d’enregistrement, car un
silence de plus de 30
secondes s’est prolongé
pendant l’enregistrement
numérique.
Le MD enregistrable
installé est tout neuf ou
toutes les plages du MD
ont été effacées.
Cannot Copy
Cannot EDIT
Combine?
Disc Error
Disc Full
Divide?
Eject
Erase?
Impossible
LEVEL
SYNC?
Move?
Name Full
Name in?
NO DISC
No Track
OVER
Protected
REC LEVEL
OVER
Impossible de réaliser un
enregistrement numérique.
(Cf. “Introduction au
Système de Gestion de
Copie Sérielle”.)
Vous essayez un montage
en mode de lecture
PROGRAM ou SHUFFLE.
Combiner deux plages en
une? (Fonction
Combinaison)
Le MD installé est
endommagé ou ne contient
pas de TOC.
L’enregistrement est
impossible car le disque est
plein. (Cf. “Limitations du
système des MD”.)
Diviser une plage
enregistrée en deux?
(Fonction Division)
Affiché quand vous retirez
le MD.
Effacer une seule plage du
MD? (Fonction Effacement)
Vous essayez une
combinaison à partir de la
première plage du MD, ce
qui est impossible.
Inscription automatique
des numéros de plage
pendant l’enregistrement?
(Fonction Synchronisation
de niveau)
Changer l’ordre des plages
par déplacement vers une
position souhaitée?
(Fonction Déplacement)
Il n’y a plus de place pour
stocker des titres de disque
ou de plages.
Créer des titres pour vos
MD ou plages enregistrés
(Fonction Titrage)
Aucun MD n’est installé
dans la platine.
Le MD installé a un titre
mais aucune plage.
La fin de la dernière plage
est atteint par recherche
accélérée.
Le MD installé est protégé
contre effacement.
Un signal de niveau
excessif a été entré pendant
l’enregistrement à partir
d’un appareil audio
raccordé à TAPE IN de cet
appareil.
F
31
Informations supplémentaires
Page 66

Retry
Retry Error
Smart Space
Sorry
TOC
(clignotant)
F
32
Lecture TOC
TRACK
(allumé)
TRACK
(clignotant)
Welcome
La platine MD recommence
l’enregistrement à cause
des vibrations ou griffes
présentes sur le disque.
Par suite de vibrations ou
de griffes, des essais
d’enregistrement ont été
répétés, mais un
enregistrement normal est
impossible.
Le signal est apparu à
nouveau après un silence
continu de 30 secondes ou
moins pendant un
enregistrement numérique.
Vous essayez de combiner
deux plages qui ne peuvent
pas l’être.
La platine MD met à jour la
table des matières (TOC).
Ne bougez pas la platine et
ne débranchez pas le
cordon secteur. Sinon, les
données enregistrées ne
seront pas mémorisées
normalement. Si vous
débranchez le cordon
secteur immédiatement
après l’enregistrement, les
données ne seront pas
sauvegardées.
La platine MD lit le contenu
du MD. Si le MD
enregistrable installé est
tout neuf, le message “TOC
Reading” est affiché plus
longtemps que dans le cas
d’un MD déjà utilisé.
La platine MD enregistre
une portion vierge.
La platine MD enregistre
sur des données existantes.
Affiché quand vous insérez
un MD.
Guide de dépannage
En cas de problème, parcourez la liste
suivante après avoir vérifié les deux points
suivants:
• Le cordon d’alimentation secteur doit être
branché à fond.
• Les enceintes doivent être raccordées
correctement.
Si le problème n’est pas résolu après les
vérifications suivantes, consultez un
revendeur Sony.
Difficultés d’ordre général
Absence de son.
m Appuyez sur POWER pour mettre
l’appareil sous tension.
m Ajustez le volume.
m Un casque d’écoute est branché.
Débranchez-le.
Les sons des canaux gauche et droit
sont inversés.
m Vérifiez le raccordement et la
disposition des enceintes.
Bourdonnement ou bruits
importants.
m La chaîne est installée trop près
d’un téléviseur ou magnétoscope.
Eloignez la chaîne du téléviseur ou
du magnétoscope.
”0:00” clignote sur l’affichage.
m Une interruption d’alimentation
s’est produite. Ajustez l’horloge et,
au besoin, recommencez les
programmations sur la minuterie.
Lecteur CD
Le plateau CD ne se referme pas.
m Le CD n’est pas posé correctement.
La lecture du CD ne démarre pas.
m Le CD est sale.
m Le CD est à l’envers.
m Le lecteur est en mode de pause.
m De l’humidité s’est condensée.
Laissez la chaîne sous tension
pendant environ une heure jusqu’à
ce que l’humidité se soit évaporée.
La lecture ne démarre pas par la
première plage.
m Le lecteur CD est en mode
Programme ou Shuffle. Appuyez
sur CONTINUE; le voyant
“PROGRAM” ou “SHUFFLE”
disparaîtra.
”OVER” apparaît sur l’affichage.
m Le CD est arrivé à sa fin pendant la
recherche rapide alors que vous
appuyiez ).
”Step Full” apparaît sur l’affichage.
m Vous avez déjà programmé 24
plages.
”Name Full” apparaît sur l’affichage.
m Vous avez déjà mémorisé 21 noms
de disque.
Platine MD
La platine MD ne fonctionne pas ou
fonctionne mal.
m Il se peut que le MD soit
endommagé (“Disc Error”
apparaît).
Retirez le MD et insérez-le à
nouveau. Si “Disc Error” subsiste,
remplacez le MD.
La platine MD n’effectue pas la
lecture.
m Une condensation d’humidité s’est
produite. Laissez la platine MD
sous tension pendant une heure
environ jusqu’à évaporation de
l’humidité.
m Le MD est installé à l’envers.
Insérez le MD dans le logement de
disque en dirigeant l’étiquette vers
le haut et la flèche vers l’ouverture
jusqu’à ce qu’il soit attiré à
l’intérieur.
m Il se peut que le MD ne soit pas
enregistré. Remplacez-le par un
disque enregistré.
La platine MD n’enregistre pas.
m Le MD est protégé contre écriture
(“Protected” apparaît). Poussez
l’onglet pour refermer la cavité.
m Un MD pré-enregistré est installé.
Remplacez-le par un MD
enregistrable.
m Il ne reste pas d’espace sur le MD.
Remplacez-le par un autre
enregistrable, présentant moins de
plages ou effacez des plages
superflues.
Un MD incomplètement inséré ne
peut plus être retiré.
m Le système d’auto-verrouillage de
la platine a saisi le MD. Insérez
celui-ci à fond, puis appuyez sur
MD §.
”OVER” apparaît sur l’affichage.
m Le MD est arrivé à sa fin pendant
la recherche rapide alors que vous
appuyiez sur ).
Le son est fortement parasité.
m Un magnétisme puissant, causé
par un téléviseur ou un autre
appareil, a causé des interférences.
Ecartez la platine de la source de
magnétisme.
Tuner
“TUNED” clignote sur l’affichage.
m Réglez l’antenne.
Informations supplémentaires
“STEREO” clignote sur l’affichage.
m Réglez l’antenne.
Page 67

Bourdonnement ou bruits
importants.
m Réglez l’antenne.
m Le signal est trop faible. Raccordez
une antenne extérieure.
m Raccordez un fil de terre.
Une émission FM stéréo n’est pas
reçue en stéréo.
m Si “MONO” apparaît sur
l’affichage, appuyez sur STEREO/
MONO de la télécommande pour
faire disparaître “MONO”.
m Ajustez l’antenne.
Minuterie
La minuterie ne fonctionne pas.
m Réglez correctement l’horloge.
m L’alimentation secteur a été
coupée. Pendant que fonctionne la
minuterie, appuyez sur
l’interrupteur POWER pour mettre
la chaîne hors tension.
m Assurez-vous que “DAILY” ou
“REC” est affiché.
Télécommande
La télécommande ne fonctionne pas.
m Les piles sont épuisées. Remplacez
les deux piles.
m Il y a un obstacle entre la
télécommande et la chaîne.
Enlevez l’obstacle.
Réinitialisation aux
réglages d’usine
1 Débranchez le cordon secteur.
2 Rebranchez le cordon sur la prise
secteur tout en appuyant sur
l’interrupteur POWER de l’appareil.
Fiche technique
Section Lecteur CD
Système
Système audionumérique à
disque compact
Laser Laser à semiconducteur
(λ=780 nm)
Durée d’émission: Continue
Puissance de sortie du laser:
Max. 44,6 µW*
* Cette sortie est la valeur
mesurée à une distance de 200
mm de la surface de la lentille
d’objectif sur le bloc de capteur
optique avec ouverture de
7 mm.
Longueur d’onde
780 – 790 nm
Réponse en fréquence
2 Hz – 20 kHz
Section Platine MD
Système
Système audionumérique à mini-
disque
Disque Minidisque
Laser Laser à semiconducteur
(λ=780 nm)
Puissance de sortie du laser:
Max. 44,6 µW*
* Cette sortie est la valeur
mesurée à une distance de 200
mm de la surface de la lentille
d’objectif sur le bloc de capteur
optique avec ouverture de
7 mm.
Propriétés de diode laser
Matériau: GaAIAs
Révolutions (CLV)
Env. de 400 à 900 tr/mn.
Correction d’erreur
Code Advanced Cross Interleave
Reed Solomon (ACIRC)
Fréquence d’échantillonnage
44,1 kHz
Système de modulation
EFM (Modulation 8 à 14)
Nombre de canaux
2 canaux stéréo
Réponse en fréquence
5 Hz à 20 kHz
Pleurage et scintillement
Inférieur au seuil mesurable
Section Tuner
Section Tuner FM
Plage d’accord
87,5 - 108,0 MHz (palier de
50 kHz)
Antenne Antenne FM fil
Borne d’antenne
75 ohms, asymétrique
Fréquence intermédiaire
10,7 MHz
Section Tuner AM
Plage d’accord
531 – 1.602 kHz
(avec intervalle réglé à 9 kHz)
Antenne Antenne cadre AM
Bornes d’antenne extérieure
Fréquence intermédiaire
450 kHz
Section Minuterie
Système Système piloté par quartz
Réglage de minuterie
Par palier d’une minute
Chronorupteur
Palier de 10 min., maximum
90 min.
Section Amplificateur
Puissance de sortie DIN
(MJ-L1)
30 W + 30 W
(6 ohms à 1 kHz, DIN)
(MJ-L1A)
30 W + 30 W
(4 ohms à 1 kHz, DIN)
Puissance de sortie efficace en continu
(MJ-L1)
40 W + 40 W
(6 ohms à 1 kHz, 10% DHT)
(MJ-L1A)
40 W + 40 W
(4 ohms à 1 kHz, 10% DHT)
Puissance de sortie musicale
(MJ-L1)
70 W + 70 W
(6 ohms à 1 kHz, 10% DHT)
(MJ-L1A)
70 W + 70 W
(4 ohms à 1 kHz, 10% DHT)
Entrées TAPE (prises cinch):
Tension: 250 mV
Impédance: 47 kilohms
Sorties TAPE (prises cinch):
Tension: 250 mV
Impédance: 1 kilohm
PHONES (prise 6,35 stéréo):
accepte un casque de 8 ohms ou
plus
Section haut-parleur (SS-MJ1,
fournies avec le MJ-L1 seulement)
Système d’enceintes
2 voies, type basse réflex
Haut-parleurs
Woofer: 13 cm (51/8”), type à cône
Tweeter: 2,5 cm (1”), type à dôme
Impédance nominale
6 ohms
Dimensions
Env. 190 x 385 x 165 mm
(71/2 x 151/4 x 61/2”) (l/h/p)
y compris saillies et commandes
Poids Env. 4,0 kg (8 livres 13 onces)
Accessoires fournis
Télécommande Sony RM-SMJ1 (1)
Pile au lithium Sony CR2025 (1)
Antenne FM fil (1)
Antenne cadre AM (1)
Cordons de haut-parleurs (2)*
*Fournies avec le MJ-L1
seulement
Données générales
Alimentation
Secteur 220 – 230 V, 50/60 Hz
Consommation
95 W
Dimensions
Env. 430 x 95 x 290 mm
(17 x 33/4 x 111/2”) (l/h/p)
y compris saillies et commandes
Poids Env. 7,0 kg (15 livres 7 onces)
Conception et spécifications sous réserve de
changements sans préavis.
Informations supplémentaires
F
33
Page 68

Nomenclature des
TRACK DISC
1
6
11
16
2
7
12
17
3
8
13
18
4
9
14
19
5
10
15
20
1
SHUFFLE
PROGRAM
REPEAT 1
CD
23
SYNC REC
LEVEL-SYNC
TOC
EDIT
TRACK DISC
MD
1
6
11
16
2
7
12
17
3
8
13
18
4
9
14
19
5
10
15
20
1
SHUFFLE
PROGRAM
REPEAT 1
ATTENUATE
23
commandes et
organes
Consultez les pages indiquées entre
parenthèses à propos de l’utilisation des
commandes.
Les commandes accompagnées d’un
astérisque ont un voyant incorporé.
Panneau avant
Section Lecteur CD
1345
2
5 Touche de pause d’enregistrement
(REC PAUSE) (15)
6 Touche de synchronisation CD
(CD SYNCHRO) (15)
7 Touche d’affichage (DISPLAY) (12)
8 Touche de défilement (SCROLL) (12, 21)
9 Touche d’enregistrement (REC) (16)
0 Touche d’arrêt d’enregistrement
(REC STOP) (15)
!¡Touche Edition/Non (EDIT/NO)
(15, 18)
!™ Touche Entrée/Oui (ENTER/YES)
(13, 15, 18)
!£Logement du minidisque (11)
!¢Touche de lecture/pause (fl) (11)
! Touche de recul rapide (0) (12)
!§Touche d’éjection de MD (MD §) (11)
!¶Bague de réglage (JOG) (11)
!•Touche d’avance rapide ()) (12)
!ªTouche d’arrêt ( ) (11)
Section Tuner
3 Touches de fonction (FUNCTION)
Touche de cassette (TAPE) (16, 28)
Touche de minidisque (MD) (11, 18)
Touche de disque compact (CD) (7, 16)
Touche de tuner/gamme
(TUNER/BAND) (16, 22)
4 Interrupteur d’alimentation (POWER)
(7, 27)
5 Prise de casque (PHONES) (25)
6 Touches de volume (VOLUME +/–) (25)
Panneau arrière
4 5 6321
7
68 !¢
F
1 Touche de mode de lecture
34
(PLAY MODE) (9)
2 Touche de caractères (CHARACTER)
(10)
3 Touche de répétition (REPEAT) (8)
4 Fenêtre d’affichage (7, 8)
5 Touche d’affichage (DISPLAY) (8)
6 Touche Edition/Non (EDIT/NO) (10)
7 Touche d’éjection CD (CD §) (7)
8 Touche Entrée/Oui (ENTER/YES)
(9, 10)
9 Plateau de disque (7)
0 Touche de lecture/pause (fl) (7)
!¡Touche de recul rapide (0) (8)
!™ Bague de réglage (JOG) (7)
!£Touche d’avance rapide ()) (8)
!¢Touche d’arrêt ( ) (7)
Section Platine Mini-Disque
13470
2
65
8
12 345 6 7 8
1 Connecteurs de haut-parleurs
(SPEAKER) (4)
2 Prises de sortie de lecteur de cassette
(TAPE OUT) (28)
!£!“!`097
3 Prises d’entrée de lecteur de cassette
(TAPE IN) (28)
4 Connecteur coaxial
(FM 75 Ω COAXIAL) (4)
9
0!` !“
5 Borne de masse (y) (4)
6 Borne AM (4)
1 Touche de caractères (CHARACTER)
7 Cordon d’alimentation secteur (5)
(23)
2 Touche d’horloge (CLOCK) (6)
3 Sélecteur de minuterie (TIMER SELECT)
(27)
4 Touche de réglage de minuterie
(TIMER SET) (26)
Fenêtre d’affichage
5 Sélecteur STEREO/MONO (22)
6 Fenêtre d’affichage (22)
Section Lecteur CD
7 Touche d’affichage (DISPLAY) (24)
8 Touche de tuner/gamme
(TUNER/BAND) (22)
9 Touche de mode d’accord (TUNING)
(22)
0 Touche Edition/Non (EDIT/NO) (23)
!¡Touche Entrée/Oui (ENTER/YES) (23)
!™ Bague de réglage (JOG) (22)
1 Indication de durée de lecture/numéro
de plage (7)
9
Section Amplificateur
2 Indication de CD
fl (lecture/pause) (7)
REPEAT 1 (répétition 1 plage) (8)
23
1
SHUFFLE (lecture aléatoire) (9)
PROGRAM (programmation) (9)
DISC (disque) (7)
TRACK (plage) (7)
3 Grille musicale (7)
!` !“ !»
1 Touche de mode de lecture
(PLAY MODE) (13)
2 Touche de caractères (CHARACTER)
(21)
3 Touche de répétition (REPEAT) (12)
4 Fenêtre d’affichage (11, 12)
Informations supplémentaires
!¥!ƒ!!¢ !⁄!£
Section Platine Minidisque
46
5
1 Touche graves/aigus (BASS/TREBLE)
(25)
2 Touche d’équilibrage (BALANCE) (25)
Page 69

1 Indication de durée de lecture/numéro
de plage/titre (11)
2 Indication de MD
fl (lecture/pause) (11)
[REC] (enregistrement) (15)
SYNC (synchronisation) (15)
LEVEL-SYNC (synchro de niveau) (14)
´ (TOC edit) (15)
REPEAT 1 (répétition 1 plage) (12)
SHUFFLE (lecture aléatoire) (13)
PROGRAM (programmation) (13)
DISC (disque) (11)
TRACK (plage) (11)
3 Grille musicale (11)
Section Radio
TUNED
1
STEREO MONO
2
MANUAL
AUTO
PRESET
1 Indication de la fréquence/heure/nom
de station (6, 22, 23, 26)
2 Indications de radió
TUNED (station accordée) (22)
STEREO MONO (22)
MANUAL (accord manuel) (22)
AUTO (accord automatique) (22)
PRESET (station préréglée) (24)
Télécommande (RM-SMJ1)
1
2
3
P
(
4
5
p
=
+
(
rPp
6
1 Touche de chronorupteur (SLEEP) (26)
2 Touche de fonction (FUNCTION) (16)
3 Touches d’utilisation du tuner
Touche de gamme (BAND) (22)
Touches de préréglage (PRESET +/–)
(24)
4 Touches d’utilisation du lecteur CD
Touche de lecture (() (7)
Touche de pause (P) (7)
Touche d’arrêt (p) (7)
Touche de recherche arrière (=) (7)
Touche de recherche avant (+) (7)
Touche de répétition (REPEAT) (8)
Touche de mode de lecture (P.MODE)
(9)
7
8
9
0
!`
5 Touches d’utilisation de la platine MD
Touche de lecture (() (11)
Touche de pause (P) (11)
Touche d’arrêt (p) (11)
Touche de recherche arrière (=) (11)
Touche de recherche avant (+) (11)
Touche d’enregistrement (r REC) (16)
Touche de répétition (REPEAT) (12)
Touche de mode de lecture (P.MODE)
(13)
6 Touches numériques (7, 11, 24)
7 Interrupteur d’alimentation (POWER)
(7)
8 Touche d’affichage (DISPLAY) (8,12)
9 Touche de défilement (SCROLL) (12, 21)
0 Touches de volume (VOL +/–) (25)
!¡Touche >10 (7, 11, 24)
Index
Affichage
Messages MD affichés 31
Vérification (CD) 8
Vérification (MD) 12
Antennes 4, 32
Attribution d’un nom titre
à un CD 10
à un MD 20
aux stations radio 23
Branchements
de la chaîne stéréo 4
d’un appareil en option 28
CD (Compact Disc)
Insertion 7
Retrait 7
Combinaison de plages 20
Division de plages 19
Déplacement de plages 19
Ecoute de la radio 22
Effacement
de toutes les plages 18
d’une partie d’une plage 19
d’une seule plage 18
d’un nom de station 24
Enregistrement
analogique 14
avant l’enregistrement 14
d’un CD 15
d’une émission radio 15
numérique 14
Enregistrement d’un CD sur un MD
automatique 15
manuel 16
Enregistrement synchronisé de CD 15
Grille musicale
de CD 7
de MD 11
Inscription de marque
Inscription automatique 16
Inscription manuelle 15
Insertion de la pile 5
Lecture
d’un CD (lecture normale) 7
d’un MD (lecture normale) 11
d’un CD (lecture aléatoire) 9
d’un MD (lecture aléatoire) 13
d’un CD (lecture programmée) 9
d’un MD (lecture programmée) 13
d’un CD (lecture à répétition) 8
d’un MD (lecture à répétition) 12
Localisation
d’un point donné d’une plage (CD) 8
d’un point donné d’une plage (MD) 12
d’une plage particulière (CD) 7
d’une plage particulière (MD) 11
Minidisque (MD)
insertion 11
limitations du système MD 31
MD enregistrable 15
MD pré-enregistré 12
retrait du MD 11
Minuterie
Chronorupteur 26
Enregistrement par minuterie 27
Réveil en musique 26
Nom de station 23
Onglet protecteur d’enregistrement 15
Radio 22
Réglage d’horloge 6
Réglage du son 25
SCMS (Système de Gestion de Copie
Sérielle) 14, 30
Stations radio
Attribution d’un nom 23
Préréglage 23
Accord 22
Télécommande 7, 11, 26, 35
TOC (Table des matières) 15
Vérification
sur affichage (CD) 8
sur affichage (MD) 12
F
35
Informations supplémentaires
Page 70

Español
ADVERTENCIA
Para evitar incendios o el riesgo de
electrocución, no exponga la unidad a la
lluvia ni a la humedad.
Para evitar descargas eléctricas, no abra la unidad. En caso de
avería, solicite los servicios de personal cualificado.
No instale el aparato en un espacio cerrado, como una estantería
para libros o un armario empotrado.
Las patentes EE.UU. y extranjeras han sido otorgadas por Dolby
Laboratories Licensing Corporation.
El componente de láser de este producto es capaz de emitir
radiación que sobrepase los límites para la clase 1.
Este aparato está clasificado
como productor láser de clase 1
(CLASS 1 LASER). la etiqueta
CLASS 1 LASER PRODUCT se
encuentra en la parte posterior
exterior.
Esta etiqueta de
protección se
encuentra en el
interior de la
unidad.
¡Bienvenido!
Muchas gracias por la adquisición de este sistema plano de
componentes Sony. Esta serie dispone de funciones muy útiles. He
aquí algunas:
•Función de memorización, que le permitirá almacenar e invocar
hasta 30 de sus emisoras de radiodifusión favoritas.
•Amplificador, que le permitirá ajustar la cualidad del sonido a
gran variedad de tipos y ambientes de música.
•Temporizador que le permitirá activar y desactivar el reproductor
de discos compactos, del deck de minidiscos, o de la radio cuando
desee.
•Deck de minidiscos que le permitirá grabar de la radio o del
reproductor de discos compactos.
•Telemando que le permitirá controlar el sistema desde su asiento.
El MJ-L1/MJ-L1A se compone de lo siguiente:
(MJ-L1)
Unidad principal: HCD-MJ1
Sistema de altavoces: SS-MJ1
Telemando: RM-SMJ1
(MJ-L1A)
- Unidad principal: HCD-MJ1A
- Telemando: RM-SMJ1
Antes de utilizar esta unidad
Cerciórese de extraer la lámina del interior de la ranura del disco del deck de
minidiscos.
1 Conecte el cable de alimentación a un tomacorriente de la red y
presione POWER.
2 Presione MD § para abrir la tapa.
3 Despegue la cinta adhesiva y extraiga la lámina del interior de la
ranura del disco.
La lámina puede salirse sola cuando despegue la cinta adhesiva.
POWER
Extraiga la lámina
MD §
Despegue la cinta
E
2
Antes de instalar el sistema, presione MD § para cerrar la tapa,
presione POWER para desconectar la alimentación, y desconecte el
cable de alimentación.
Page 71

Índice
Capítulo 1: Instalación
Conexión del sistema estéreo 4
Colocación de la pila 5
Ajuste del reloj 6
Capítulo 2: Reproductor de discos
compactos
Reproducción de un disco compacto
(reproducción normal) 7
Utilización del visualizador 8
Reproducción con repetición de canciones
(reproducción repetida) 8
Reproducción de canciones en orden arbitrario
(reproducción aleatoria) 9
Reproducción de canciones en el orden deseado
(reproducción programada) 9
Asignación de nombres a discos compactos (función de
memorando de disco) 10
Capítulo 3: Reproducción de minidiscos
Reproducción de un minidisco
(reproducción normal) 11
Utilización del visualizador 12
Reproducción con repetición de canciones
(reproducción repetida) 12
Reproducción de canciones en orden arbitrario
(reproducción aleatoria) 13
Reproducción de canciones en el orden deseado
(reproducción programada) 13
Capítulo 6: Radio
Escucha de la radio 22
Memorización de emisoras de radiodifusión 23
Sintonía de emisoras de radiodifusión memorizadas 24
Capítulo 7: Ajuste del sonido
Ajuste del sonido 25
Capítulo 8: Funciones adicionales
Para dormirse con música 26
Para despertarse con música 26
Grabación de programas radiofónicos con el
temporizador 27
Conexión de equipos opcionales 28
Información adicional
Precauciones 29
Mantenimiento 29
Guía del sistema de administración de copia en
serie 30
Limitaciones del sistema de minidiscos 31
Mensajes de visualización de minidiscos 31
Guía para la solución de problemas 32
Especificaciones 33
Índice de partes y controles 33
Índice alfabético 35
E
3
Capítulo 4: Grabación de minidiscos
Antes de grabar 14
Grabación de un disco compacto 15
Grabación de la radio 16
Grabación manual en un minidisco 16
Marcación de números de canciones durante la
grabación 17
Capítulo 5: Edición de minidiscos
grabados
Borrado de grabaciones (función de borrado) 18
Movimiento de canciones grabadas
(función de movimiento) 19
División de canciones grabadas
(función de división) 19
Combinación de canciones grabadas (función de
combinación) 20
Titulación de grabaciones (función de titulación) 20
Page 72

Capítulo 1:
Conexión del sistema
estéreo
Instalación
Conexión del sistema
estéreo
Colocación de la pila
Ajuste del reloj
Para conectar su sistema estéreo, utilice las
ilustraciones siguientes.
Si desea conectar cualquier componente
opcional al sistema estéreo, consulte
“Conexión de equipos opcionales” del
Capítulo 8.
Conexión de los
altavoces (Para el MJ-L1
solamente)
Conecte el altavoz derecho a los conectores
SPEAKER R y el izquierdo a los conectores
SPEAKER L con los conductores grises a ‘
(grises) y los de línea negra a ’ (negros).
PASO 1
Conductor gris
a ‘ (gris)
Para colocar la antena de cuadro de AM
Para mejorar la recepción de FM
Conecte una antena de FM exterior al
terminale FM 75Ω, utilizando un cable
coaxial de 75 ohmios y un conector hembra
estándar IEC.
FM 75
R
L
Conector hembra estándar IEC
(no suministrado)
AM
Ω
y
Para mejorar la recepción de AM
Después de haber conectado la antena de
AM, conecte un conductor aislado de 6 a 15
E
4
Conductor con línea
negra a ’ (negro)
PASO 2
Conexión de las
antenas
Conexión de la antena monofilar de
FM
Conecte la antena monofilar suministrada
al terminal FM 75Ω.
FM 75
AM
Ω
y
metros al terminal AM. Conecte el terminal
y a tierra.
Importante
Conecte la antena exterior a tierra desde el
terminal y como medida de protección
contra rayos. Para evitar la explosión de
gas, no conecte el conductor de puesta a
tierra a un tubo de gas.
Conductor aislado
(no suministrado)
FM 75
AM
Ω
y
Capítulo 1: Instalación
Conexión de la antena de cuadro
Conecte la antena de cuadro suministrada a
los terminales AM y y.
FM 75
AM
Ω
y
Conductor de
puesta a tierra
(no suministrado)
Page 73

Altavoz delantero
(derecho) *
PASO 1
Antena monofilar de
FM (suministrada)
PASO 2
Altavoz delantero
(izquierdo) *
PASO 3
a un
tomacorriente
de la red
¡Realice esta conexión en último lugar!
* Los altavoces delanteros solamente se suministran con el MJ-L1.
PASO 3
Conexión de la
alimentación
Conecte el cable de alimentación a un
tomacorriente de la red después de haber
realizado todas las conexiones
anteriormente mencionadas.
/
a un tomacorriente de la red
Colocación de la pila
Inserte una pila de litio en el telemando
suministrado para control remoto.
1 Deslice y extraiga la caja de la pila.
2Inserte una pila de litio CR2025 con la
cara + hacia arriba.
3Inserte la caja de la pila.
PRECAUCIÓN
Peligro de explosión si reemplaza
incorrectamente la pila.
Reemplácela solamente por otra del mismo
tipo o equivalente recomendada por el
fabricante. Deshágase de las pilas de
acuerdo con las instrucciones del
fabricante.
Duración de la pila
Usted podrá esperar que el telemando
funcione durante unos seis meses
(utilizando una pila de litio CR2025 Sony)
antes de que se agote la pila. Cuando la
pila no puedan alimentar más el telemando,
reemplácela por otra nueva.
PASO 1
Antena de cuadro de
AM (suministrada)
pila de litio CR2025
PASO 2
Para evitar la fuga del electrólito de la pila
Cuando no vaya a utilizar el telemando
durante mucho tiempo, extráigale la pila a
fin de evitar el daño que podría causar el
electrólito de la misma en caso de fugarse.
Notas sobre la pila de litio
•Mantenga la pila de litio fuera del alcance
de los niños.
Si alguien traga la pila, consulte
inmediatamente a un médico.
•Frote la pila con un paño seco para
asegurar su buen contacto.
•Cuando instale la pila, tenga en cuenta su
polaridad correcta.
•No sujete la pila con pinzas metálicas, ya
que de lo contrario podría provocar un
cortocircuito.
E
5
Capítulo 1: Instalación
Page 74

Ajuste del reloj
El reloj incorporado mostrará la hora en el
visualizador, incluso aunque la
alimentación esté desconectada.
Para realizar esta operación, utilice las
teclas de la unidad.
1
Para comprobar la hora mientras la
alimentación esté conectada
Presione CLOCK.
La hora actual se visualizará durante 4
segundos.
Para corregir la hora
Con la alimentación desconectada, repita
los pasos 1 a 5.
Con la alimentación conectada, presione
dos veces CLOCK y repita los pasos 2 a 5.
3,5
1 Presione CLOCK.
2 Ajuste la hora actual girando el mando
de lanzadera hasta que aparezca la hora
correcta.
E
6
3 Presione ENTER/YES.
La indicación de los minutos comenzará
a parpadear.
parpadeando
parpadeando
4 Ajuste los minutos actuales girando el
mando de lanzadera hasta que
aparezcan los minutos correctos.
2,4
parpadeando
5 Presione ENTER/YES.
El reloj comenzará a funcionar y
parpadeará el punto superior. Utilice
una señal horaria para ajustar el reloj
con precisión.
El punto superior parpadeará durante la
primera mitad del minuto (0 a 29
segundos), y el punto inferior lo hará
durante la última mitad del minuto (30 a
59 segundos).
parpadeando
Capítulo 1: Instalación
Page 75

Capítulo 2:
Reproductor
de discos
compactos
Reproducción de un disco
compacto (reproducción
normal)
Utilización del visualizador
Reproducción con
repetición de canciones
(reproducción repetida)
Reproducción de canciones
en orden arbitrario
(reproducción aleatoria)
Reproducción de canciones
en el orden deseado
(reproducción
programada)
Asignación de nombres a
discos compactos
(función de memorando
de disco)
Reproducción de un
disco compacto
(reproducción
normal)
Usted podrá reproducir un disco compacto
en los cuatro modos de reproducción:
normal, repetida, aleatoria, y programada.
El modo decidirá qué canciones se
escucharán, en qué orden, y si se repetirán
o no.
Usted podrá controlar su sistema estéreo
desde el mismo o utilizando el telemando
suministrado. Podrá reproducir un disco
compacto de 12 cm o de 8 cm. Cuando
reproduzca un disco compacto de 8 cm,
colóquelo en el círculo interior de la
bandeja del disco. No utilice un adaptador
para disco compacto.
Antes de reproducir un disco compacto,
reduzca el nivel del sonido presionando
VOLUME –, a fin evitar dañar los altavoces.
POWER m ON
1
0/)
32
JOG
>10
3Presione fl (o CD ( del telemando).
La bandeja del disco se cerrará y se
iniciará la reproducción de la primera
canción.
CD
TRACK
Para
parar la
reproducción
realizar una pausa
reanudar la
reproducción
avanzar a otra
canción
retroceder a una
canción anterior
„
localizar
directamente una
canción específica
extraer el disco
compacto
* Tecla del telemando
Número de
canción
Tiempo de
reproducción
presione
(CD p*)
fl (CD P*)
fl (CD (* o P*)
Durante la
reproducción o en el
modo de pausa, gire el
mando de lanzadera
hacia la derecha.
Suéltelo cuando llegue
a la canción deseada.
O utilice + del
telemando.
Durante la
reproducción o en el
modo de pausa, gire el
mando de lanzadera
hacia la izquierda.
Suéltelo cuando llegue
a la canción deseada.
O utilice = del
telemando.
las teclas numéricas
del telemando.
CD §
VOLUME
Calendario
de canciones
1
6
11
2738495
10
E
7
p
Teclas
Numeric
numéricas
buttons
P
(
=
+
(
r
Pp
1 Presione CD.
La unidad entrará en el modo de
reproducción de discos compactos.
2 Presione CD § y coloque el disco
compacto (con la cara de la etiqueta
hacia arriba) en la bandeja del disco.
Cara de la
etiqueta
hacia arriba
Para localizar directamente una canción de
número 11 o superior
Presione en primer lugar >10, y después
introduzca los dígitos correspondientes.
Ejemplo: para localizar la canción número
30, presione >10, 3, y 10 por este orden.
Función de reproducción presionando una
sola tecla
Presione CD ( del telemando cuando la
alimentación esté desconectada. Cuando
haya un disco compacto cargado en el
reproductor, podrá escucharlo sin presionar
ninguna otra tecla.
Cuando presione CD de la unidad, la
alimentación se conectará y la función
cambiará automáticamente a la de
reproducción de discos compactos.
Usted podrá iniciar la reproducción desde la
canción deseada
1 En el paso 2, gire el mando de lanzadera
hasta que en el visualizador aparezca el
número de la canción deseada.
2 Presione fl.
continúa en la página siguiente ➔
Capítulo 2: Reproductor de discos compactos
Page 76

➔ continuación
POWER m ON
REPEAT
Para buscar un punto de una canción
Usted podrá buscar un punto particular de
una canción con la unidad en reproducción
o en el modo de pausa. Para realizar esta
operación, utilice las teclas de la unidad.
Para
buscar rápida y
progresivamente
en una canción
buscar rápida y
regresivamente
en una canción
buscar
rápidamente sin
escuchar
presione
) de la unidad, y
suéltela en el punto
deseado.
0 de la unidad, y
suéltela en el punto
deseado.
Durante el modo de
pausa, 0 o ) de la
unidad, y suéltela en el
punto deseado.
Utilización del
visualizador
Usted podrá utilizar el visualizador de la
unidad para comprobar la información del
disco compacto y de las canciones, tal como
el número total de canciones, el tiempo de
reproducción total del disco compacto, el
tiempo restante del disco compacto, etc.
POWER m ON
DISPLAY
Para comprobar el tiempo restante
durante la reproducción
Presione repetidamente DISPLAY.
Cada vez que presione la tecla, la
visualización cambiará de la forma
siguiente:
Tiempo de reproducción
de la canción actual
m
Número de canción
TRACK
µ
CD
Tiempo de
reproducción
VOLUME
2738495
6
10
11
Calendario
de
canciones
Número de la canción actual y
tiempo de reproducción
2738495
6
10
TRACK
CD
VOLUME
11
Tiempo restante
µ
Tiempo restante del disco compacto*
2
TRACK
CD
VOLUME
61173849510
Tiempo restante
* Tiempo restante del programa durante
la reproducción programada
Para comprobar el memorando del
disco, el número total de canciones,
y el tiempo total de reproducción
Presione DISPLAY en el modo de parada.
Si ha almacenado un nombre para el disco
(consulte “Asignación de nombres a discos
compactos”), el memorando de disco
aparecerá en el visualizador. Cada vez que
presione la tecla, la visualización cambiará
de la forma siguiente:
Memorando de disco*
1
2
VOLUME
61173849510
DISC
CD
Memorando de disco*
<
Número total de canciones y
tiempo de reproducción total
1
2
VOLUME
61173849510
Número
total de
canciones
CD
Tiempo de
reproducción
total
* Solamente aparecerá si ha almacenado
un memorando de disco.
Visualización del calendario de canciones
Esta visualización aparecerá de acuerdo
con el número de canciones del disco
compacto. A medida que vayan
reproduciéndose las canciones, los
números correspondientes desaparecerán.
Las canciones de número superior a 20 no
se visualizarán.
Reproducción con
repetición de
canciones
(reproducción
repetida)
Usted podrá elegir entre dos modos
diferentes de reproducción repetida. En
uno, se repetirán todas las canciones en el
modo de reproducción actual, y en el otro
se repetirá una sola canción.
Repetición de todas las canciones
Presione repetidamente REPEAT hasta que
en el visualizador aparezca “REPEAT”.
Modo de
reproducción
Reproducción
normal
Reproducción
aleatoria
Reproducción
programada
Repetición de una sola canción (en el
modo de reproducción normal
solamente)
Mientras esté reproduciéndose la canción
deseada, presione repetidamente REPEAT
hasta que en el visualizador aparezca
“REPEAT 1”.
Para cancelar la reproducción
repetida
Presione REPEAT hasta que “REPEAT” o
“REPEAT 1” desparezca del visualizador.
Canciones
reproducidas
Repetición de todas las
canciones del disco
compacto.
Todas las canciones del
disco compacto
ordenadas
arbitrariamente
Repetición de todas las
canciones del programa
en el orden de
programación.
E
8
Capítulo 2: Reproductor de discos compactos
Page 77

Reproducción de
canciones en orden
arbitrario
(reproducción
aleatoria)
Usted podrá reproducir todas las canciones
del disco compacto en orden arbitrario.
POWER m ON
2
3
2
p
P
(
=
rPp
+
(
1 Presione CD.
La unidad entrará en el modo de
reproducción de discos compactos.
2 Presione repetidamente PLAY MODE (o
P.MODE del telemando) hasta que en el
visualizador aparezca “SHUFFLE”.
3 Presione fl.
Aparecerá “ J ” y después se
reproducirán todas las canciones en
orden arbitrario.
Para reproducir las canciones en el
orden original
Presione repetidamente PLAY MODE hasta
que “SHUFFLE” y “PROGRAM”
desaparezcan del visualizador. Las
canciones continuarán reproduciéndose en
su orden original.
Para saltar una canción no deseada
Gire el mando de lanzadera hacia la
derecha (o presione + del telemando).
Reproducción de
canciones en el
orden deseado
(reproducción
programada)
Usted podrá programar hasta 24 canciones
para reproducirlas en el orden elegido.
Para ello, designe las canciones en el orden
en el que desee reproducirlas.
POWER m ON
EDIT/NO
12
46 3
2
p
6
P
(
=
rPp
+
(
3
Teclas
Numeric
numéricas
buttons
>10
1 Presione CD.
La unidad entrará en el modo de
reproducción de discos compactos.
2 Presione repetidamente PLAY MODE (o
P.MODE del telemando) hasta que en el
visualizador aparezca “PROGRAM”.
3 Gire el mando de lanzadera (o presione
=/+ del telemando) para elegir
una canción.
En el visualizador parpadearán el
número de canción y el tiempo de
reproducción total incluyendo la
canción seleccionada. (La canción no se
programará todavía.)
›–
Retroceso a
canciones anteriores
Número de canción
Avance a canciones
posteriores
CD
VOLUME
PROGRAM
7
4 Presione ENTER/YES.
El número del orden de reproducción
aparecerá durante aproximadamente un
segundo, y después aparecerá el tiempo
de reproducción total. (Esto indicará
que la canción se ha programado.)
111395
PROGRAM
CD
Número de la última
canción programada
VOLUME
Tiempo de
reproducción total
7
5 Para programar canciones adicionales,
repita los pasos 3 y 4.
6 Presione fl.
Todas las canciones se reproducirán en
el orden elegido.
Para reproducir las canciones en el
orden original
Presione repetidamente PLAY MODE hasta
que “SHUFFLE” y “PROGRAM”
desaparezcan del visualizador. Las
canciones continuarán reproduciéndose en
su orden original.
Para seleccionar canciones utilizando
las teclas numéricas del telemando
En el paso 3, presione las teclas numéricas
en el orden en que desee programar. Cada
vez que presione una tecla, la canción
seleccionada se programará.
Usted no necesitará presionar ENTER/YES.
Para programar una canción con un
número superior a 10, presione en primer
lugar >10, y después introduzca los dígitos
correspondientes.
Ejemplo: para programar la canción número
30, presione >10, 3, y 10 por este orden.
Para cambiar el programa
Para
añadir una
canción al final
del programa
borrar todo el
programa
* Usted también podrá añadir una
canción durante la reproducción cuando
seleccione canciones con las teclas
numéricas del telemando.
Notas
•El programa confeccionado permanecerá
en la memoria incluso después de haberse
reproducido.
Para volver a reproducir el mismo
programa, presione fl.
•Si en vez del tiempo de reproducción total
aparece “--.--” durante la programación,
significará que el tiempo de reproducción
total ha sobrepasado 100 minutos. Usted
todavía podrá seleccionar otras canciones.
Capítulo 2: Reproductor de discos compactos
Operación
1. Gire el mando de
lanzadera hasta que en
el visualizador aparezca
la canción deseada.*
2. Presione ENTER/YES.
Durante el modo de
parada, presione del
reproductor.
E
9
Page 78

Asignación de
nombres a discos
compactos (función
de memorando de
disco)
Usted podrá asignar nombres a sus discos
compactos. Los nombres pueden
componerse de letras mayúsculas y
minúsculas, números, y símbolos (hasta 12
caracteres por cada disco compacto). Usted
podrá almacenar un máximo de 20
nombres en la unidad.
El nombre aparecerá en el visualizador
cuando inserte un disco compacto o
presione DISPLAY en el modo de parada.
Si usted graba un disco compacto en un
minidisco en blanco* utilizando la
“grabación sincronizada con un disco
compacto”, el nombre se almacenará
automáticamente en el minidisco.
* Minidisco nuevo, o minidisco borrado con la
“función de borrado total”.
POWER m ON
351
2 4,9 6 7
DISPLAY
0
Nota
Usted podrá asignar nombres solamente
cuando el reproductor esté en el modo
de parada, y el modo de reproducción
esté ajustado al normal (sin
visualización de SHUFFLE ni
PROGRAM).
3Presione repetidamente EDIT/NO hasta
que en el visualizador aparezca “Name
in?”.
CD
VOLUME
4Presione ENTER/YES.
En el visualizador parpadeará un
cursor.
1
2738495
6
DISC
CD
VOLUME
11
cursor
5Presione repetidamente CHARACTER
para seleccionar el tipo de carácter.
Cada vez que presione la tecla, el
carácter cambiará de la forma siguiente:
nmayúsculas nminúsculas
espacioNsímbolosNnúmerosN
Usted podrá utilizar los símbolos
siguientes:
! " # $ % & ' ( ) * + , – . / : ; < = > ? @ _ `
(espacio)
6Gire el mando de lanzadera hasta que en
el visualizador aparezca el carácter
deseado.
El carácter seleccionado parpadeará.
Si introdujo un carácter erróneo
Presione ) o 0 hasta que el carácter
que desee corregir comience a
parpadear, y repita los pasos 5 a 7 para
introducir el correcto.
Para borrar un carácter
Presione ) o 0 hasta que el carácter
que desee borrar comience a parpadear,
y presione EDIT/NO.
9 Presione ENTER/YES.
De esta forma habrá finalizado el
procedimiento de asignación de título.
Para comprobar el nombre
Presione DISPLAY en el modo de parada.
Si vuelva a presionar DISPLAY,
reaparecerá la visualización original.
10
Nota
Si no ha asignado nombre al disco actual,
en el visualizador aparecerá “No name”.
Para borrar un nombre
1 Presione repetidamente EDIT/NO hasta
que en el visualizador aparezca “Name
Erase?”.
2 Presione ENTER/YES.
En el visualizador aparecerán nombres
de discos.
3 Gire el mando de lanzadera hasta que en
el visualizador aparezca el nombre del
disco que desee borrar.
4 Presione ENTER/YES.
En el visualizador aparecerá “Complete”
durante unos dos segundos y el nombre
de disco seleccionado se borrará.
E
10
DISPLAY
p
P
(
=
rPp
+
(
1 Presione CD.
La unidad entrará en el modo de
reproducción de discos compactos.
2 Presione CD § y coloque un disco
compacto.
Cerciórese de que en el visualizador
hayan aparecido el número total de
canciones y el tiempo de reproducción
total.
1
6
DISC
CD
VOLUME
11
parpadeando
Para introducir rápidamente un espacio
Presione ) cuando el cursor esté
parpadeando.
7Presione ).
El cursor se desplazará hacia la derecha
y esperará la introducción del carácter
siguiente.
1
6
DISC
CD
VOLUME
11
Carácter siguiente
8Repita los pasos 5 y 7 para introducir
caracteres adicionales hasta que haya
completado el nombre.
Si desea introducir el mismo tipo de
carácter, salte el paso 5.
2738495
10
2738495
10
Capítulo 2: Reproductor de discos compactos
Page 79

Capítulo 3:
Reproducción de un
minidisco
Repr oducción
de minidiscos
Reproducción de un
minidisco (reproducción
normal)
Utilización del visualizador
Reproducción con
repetición de canciones
(reproducción repetida)
Reproducción de canciones
en orden arbitrario
(reproducción aleatoria)
Reproducción de canciones
en el orden deseado
(reproducción
programada)
(reproducción
normal)
Usted podrá reproducir un minidisco en los
cuatro modos de reproducción: normal,
repetida, aleatoria, y programada. El modo
decidirá qué canciones se escucharán, en
qué orden, y si se repetirán o no.
POWER m ON
1 Presione MD.
La unidad entrará en el modo de
reproducción de minidiscos.
2 Presione MD § e inserte un minidisco.
Flecha apuntando hacia
el deck de minidiscos
3 Presione fl (o MD ( del telemando).
Se iniciará la reproducción de la primera
canción.
3
TRACK
Número
de
canción
1
0/)
Cara de la etiqueta
hacia arriba
Tiempo de
reproducción
MD
2
VOLUME
„
JOG
1
2
38495
6
7
10
11
12
Calendario
de
canciones
Para
parar la
reproducción
realizar una
pausa
reanudar la
reproducción
avanzar a otra
canción
retroceder a una
canción anterior
localizar
directamente una
canción específica
extraer el
minidisco
* Tecla del telemando
Para localizar directamente una canción de
número 11 o superior
Presione en primer lugar >10, y después
introduzca los dígitos correspondientes.
Si el número de canción es 100 o superior,
presione dos veces >10 y después
introduzca el número.
Ejemplo:
Para localizar la canción número 30,
presione >10, 3, y 10 por este orden.
Para localizar la canción número 100,
presione >10, >10, 1, 10, y 10 por este
orden.
Función de reproducción presionando una
sola tecla
Presione MD ( del telemando cuando la
alimentación esté desconectada. Cuando
haya un minidisco cargado en el
reproductor, podrá escucharlo sin presionar
ninguna otra tecla.
Cuando presione MD de la unidad, la
alimentación se conectará y la función
cambiará automáticamente a la de
reproducción de minidiscos.
presione
(MD p*)
fl (MD P*)
fl (MD (* o P*)
Durante la
reproducción o en el
modo de pausa, gire el
mando de lanzadera
hacia la derecha.
Suéltelo cuando llegue
a la canción deseada.
O utilice + del
telemando.
Durante la
reproducción o en el
modo de pausa, gire el
mando de lanzadera
hacia la izquierda.
Suéltelo cuando llegue
a la canción deseada.
O utilice = del
telemando.
las teclas numéricas
del telemando.
MD §
E
11
Usted podrá iniciar la reproducción desde la
canción deseada
1 En el paso 2, gire el mando de lanzadera
hasta que en el visualizador aparezca el
número de la canción deseada.
2 Presione fl.
continúa en la página siguiente ➔
Capítulo 3: Reproducción de minidiscos
Page 80

➔ continuación
POWER m ON
REPEAT
Para buscar un punto de una canción
Usted podrá buscar un punto particular de
una canción con la unidad en reproducción
o en el modo de pausa. Para realizar esta
operación, utilice las teclas de la unidad.
Para
buscar rápida y
progresivamente
en una canción
buscar rápida y
regresivamente
en una canción
buscar
rápidamente sin
escuchar
presione
) de la unidad, y
suéltela en el punto
deseado.
0 de la unidad, y
suéltela en el punto
deseado.
Durante el modo de
pausa 0 o ) de la
unidad y suéltela en el
punto deseado.
Utilización del
visualizador
Usted podrá utilizar el visualizador de la
unidad para comprobar la información del
minidisco y de las canciones, tal como el
número total de canciones, el tiempo de
reproducción total del minidisco, el tiempo
E
restante del minidisco, etc.
12
POWER m ON
DISPLAY
Para comprobar el tiempo restante
durante la reproducción
Presione repetidamente DISPLAY.
Cada vez que presione la tecla, la
visualización cambiará de la forma
siguiente:
Tiempo de reproducción
de la canción actual
m
TOC
TRACK
Número de canción
Tiempo de
reproducción
111395
7
628410
MD
VOLUME
Calendario
de
canciones
µ
Número de la canción actual y
tiempo de reproducción
TOC
TRACK
1113956284
7
MD
VOLUME
10
Tiempo restante
µ
Nombre de la canción*
TOC
TRACK
1113956284
7
MD
VOLUME
10
Nombre de la canción
* Si no hay título registrado, en el
visualizador aparecerá “No name”.
Para comprobar el nombre del disco,
el número total de canciones, y el
tiempo total de reproducción, y el
tiempo de grabación restante
Presione DISPLAY en el modo de parada.
Si ha almacenado un nombre para el disco
(consulte “Titulación de grabaciones
(función de titulación)”), el nombre de
disco aparecerá en el visualizador. Cada
vez que presione la tecla, la visualización
cambiará de la forma siguiente:
Visualización del calendario de canciones
• Esta visualización aparecerá de acuerdo
con el número de canciones del minidisco.
A medida que vayan reproduciéndose las
canciones, los números correspondientes
desaparecerán. Las canciones de número
superior a 20 no se visualizarán.
• Cuando reproduzca un minidisco
pregrabado, alrededor del calendario de
canciones aparecerá un cuadro. No
aparecerá cuando reproduzca un
minidisco grabable.
Para comprobar el nombre de la canción
actual durante la reproducción de un
minidisco
Presione SCROLL.
Presione SCROLL durante el desplazamiento
para realizar una pausa o continuar el
desplazamiento.
Usted podrá asignar títulos a sus minidiscos y
canciones grabados. Consulte “Titulación de
grabaciones (función de titulación)”.
Reproducción con
repetición de canciones
(reproducción repetida)
Usted podrá elegir entre dos modos
diferentes de reproducción repetida. En
uno, se repetirán todas las canciones en el
modo de reproducción actual, y en el otro
se repetirá una sola canción.
Capítulo 3: Reproducción de minidiscos
Nombre de disco*
TOC
m
MD
DISC
VOLUME
Memorando de disco
µ
Número total de canciones y
tiempo de reproducción total
TOC
Número
total de
canciones
MD
VOLUME
Tiempo de
reproducción
total
µ
Tiempo de grabación restante del
minidisco (minidiscos grabables
solamente)*
TOC
MD
DISC
VOLUME
Tiempo restante
* El tiempo de grabación restante del
minidisco no se mostrará para discos
pregrabados.
2738495
1
6
10
11
Repetición de todas las canciones
Presione repetidamente REPEAT hasta que
en el visualizador aparezca “REPEAT”.
Modo de
2738495
1
6
10
11
reproducción
Reproducción
normal
Reproducción
aleatoria
Canciones reproducidas
Repetición de todas las
canciones del minidisco.
Todas las canciones del
minidisco ordenadas
arbitrariamente
Reproducción
programada
Repetición de todas las
canciones del programa en
el orden de programación.
2738495
1
6
10
11
Repetición de una sola canción (en el
modo de reproducción normal solamente)
Mientras esté reproduciéndose la canción
deseada, presione repetidamente REPEAT hasta
que en el visualizador aparezca “REPEAT 1”.
Para cancelar la reproducción repetida
Presione REPEAT hasta que “REPEAT” o
“REPEAT 1” desparezca del visualizador.
Page 81

Reproducción de
canciones en orden
arbitrario
(reproducción
aleatoria)
Usted podrá reproducir todas las canciones
del minidisco en orden arbitrario.
Reproducción de
canciones en el orden
deseado (reproducción
programada)
Usted podrá programar hasta 25 canciones
para reproducirlas en el orden elegido.
Para ello, designe las canciones en el orden
en el que desee reproducirlas.
4 Presione ENTER/YES.
El número del orden de reproducción
aparecerá durante aproximadamente un
segundo, y después aparecerá el tiempo
de reproducción total. (Esto indicará
que el programa se ha introducido.)
TOC
MD
VOLUME
Tiempo de reproducción total
Número de la última canción programada
PROGRAM
6119
4
POWER m ON
2
3
1
„
2
p
P
(
=
rPp
+
(
1 Presione MD.
La unidad entrará en el modo de
reproducción de minidiscos.
2 Presione repetidamente PLAY MODE (o
P.MODE del telemando) hasta que en el
visualizador aparezca “SHUFFLE”.
3 Presione fl.
Aparecerá “ J ” y después se
reproducirán todas las canciones en
orden arbitrario.
Para cancelar la reproducción
aleatoria
Presione y después presione
repetidamente PLAY MODE hasta que
“SHUFFLE” y “PROGRAM” desaparezcan
del visualizador. Las canciones
continuarán reproduciéndose en su orden
original.
Para saltar una canción no deseada
Gire el mando de lanzadera hacia la
derecha (o presione + del telemando).
POWER m ON
261
„
>10
3
34
2
p
P
(
=
+
(
r
Pp
6
Numeric
Teclas
buttons
numéricas
5 Para programar canciones adicionales,
6 Presione fl.
Para cancelar la reproducción
programada
Presione y después presione
repetidamente PLAY MODE hasta que
“SHUFFLE” y “PROGRAM” desaparezcan
del visualizador. Las canciones continuarán
reproduciéndose en su orden original.
Para seleccionar canciones utilizando
las teclas numéricas del telemando
En el paso 3, presione las teclas numéricas
en el orden en que desee programar. Cada
vez que presione una tecla, la canción
seleccionada se programará.
Usted no necesitará presionar ENTER/YES.
Para programar una canción con un
número superior a 10, presione en primer
lugar >10, y después introduzca los dígitos
correspondientes.
Si el número de canción es 100 o superior,
presione dos veces >10 y después
introduzca el número.
Ejemplo:
1 Presione MD.
La unidad entrará en el modo de
reproducción de minidiscos.
2 Presione repetidamente PLAY MODE (o
P.MODE del telemando) hasta que en el
visualizador aparezca “PROGRAM”.
3 Gire el mando de lanzadera (o presione
=/+ del telemando) para elegir
una canción.
En el visualizador parpadearán el
número de canción y el tiempo de
reproducción total incluyendo la
canción seleccionada y en el calendario
de canciones parpadeará el número de
canción. (El programa no se introducirá
todavía.)
›–
Retroceso a
canciones anteriores
TOC
Número de canción
Avance a canciones
posteriores
3215
PROGRAM
MD
VOLUME
11
4
987610
Para cambiar el programa
Para
añadir una
canción al
final del
programa
borrar todo
el programa
Notas
• El programa confeccionado permanecerá
en la memoria incluso después de
haberse reproducido.
Para volver a reproducir el mismo
programa, presione fl.
• Si en vez del tiempo de reproducción
total aparece “--.--” durante la
programación, significará que el tiempo
de reproducción total ha sobrepasado 100
minutos. En este caso, usted todavía
podrá seleccionar otras canciones.
Capítulo 3: Reproducción de minidiscos
repita los pasos 3 y 4.
Todas las canciones se reproducirán en
el orden elegido.
E
13
Para programar la canción número 30,
presione >10, 3, y 10 por este orden.
Para programar la canción número 100,
presione >10, >10, 1, 10, y 10 por este
orden.
Operación
1.Gire el mando de
lanzadera hasta que en el
visualizador aparezca la
canción deseada*.
2.Presione ENTER/YES.
Durante el modo de parada,
presione del reproductor.
Page 82

Capítulo 4:
Grabación de
minidiscos
Antes de grabar
Grabación de un disco
compacto
Grabación de la radio
Grabación manual en un
minidisco
Marcación de números de
canciones durante la
grabación
E
14
Capítulo 4: Grabación de minidiscos
Antes de grabar
El minidisco le permitirá grabar y
reproducir digitalmente música con sonido
de calidad similar a la de un disco
compacto. Además, como los minidiscos
son discos magnetoópticos, están exentos
de los problemas de verse estirados o
enredados como las cintas de cassettes
normales. El método de grabación también
es diferente al de las cintas de cassettes,
porque es posible escribir números de
canciones y editar grabaciones.
Grabación digital y
grabación analógica
Esta unidad utiliza uno de los métodos de
grabación siguientes, dependiendo de la
fuente de sonido a grabarse y de la forma
de conexión de la unidad a la fuente de
sonido.
Grabación digital
Cuando grabe del reproductor de discos
compactos de esta unidad, el deck de
minidiscos grabará la señal digital en forma
de señal digital.
Grabación analógica
En los casos indicados a continuación, el
deck de minidiscos convertirá la señal
analógica en señal digital y grabará la señal
digital.
• Cuando grabe de la radio de la unidad
• Cuando grabe de un equipo de audio
conectado a las tomas TAPE de esta
unidad
Grabación de minidiscos y sistema de
administración de copia en serie
Como el deck de minidiscos utiliza el
sistema de administración de copia en serie
(SCMS), los minidiscos grabados de discos
compactos reproducidos en el reproductor
de discos esta unidad no podrán utilizarse
para realizar copias digitales en otros
minidiscos.
Marcación de canciones
La forma de escritura de los números de
canciones diferirá de acuerdo con la fuente
de sonido que esté grabándose. Usted
también podrá escribir manualmente
número de canciones.
Números de canciones de minidiscos
(TOC)
En un minidisco, el número de canción
(secuencia de canción) y la información
sobre el punto de comienzo y el de
finalización, etc., se graban en un área
denominada “Tabla de índice” (TOC) que
se administra aparte de la música. Como
resultado, usted no solamente podrá
encontrar instantáneamente el comienzo de
una canción, sino que podrá editar
rápidamente canciones cambiando
simplemente la información de la TOC.
Por ejemplo, con una cinta de cassette, el
borrado de una canción supone la
regrabación de la misma sin sonido desde
el principio. Con un minidisco, usted
podrá borrar una canción reescribiendo
simplemente la información de la TOC.
Cuando grabe señales digitales de un disco
compacto
El deck de minidiscos marcará
automáticamente números de canciones en
la misma secuencia que la del disco
compacto original.
Sin embargo, si realiza una pausa en la
grabación, la parte grabada hasta tal punto
se contará como una canción. Cuando
vuelva a iniciar la grabación, el número de
canción aumentará en uno.
número de
canción
fuente de
sonido
número de
canción
minidisco
grabado
S
i graba repetidamente una sola canción del
mismo disco compacto, la canción o las
canciones se grabarán como una sola canción
continua con un solo número de canción.
Usted también podrá marcar manualmente
números de canciones durante la grabación
(consulte “Marcación manual de números
de canciones (función de marcación de
canciones)”).
Si selecciona “LEVEL SYNC” durante la
grabación analógica
El número de canción se escribirá en
sincronización con el nivel de la señal de
entrada procedente de la fuente de sonido.
En otras palabras, si la señal de entrada
procedente de la fuente de sonido
permanece continuamente a un nivel, o a
nivel inferior, a cierto nivel determinado
durante dos segundos o más, se escribirá
un número de canción la próxima vez que
la señal de entrada sobrepase tal nivel.
número de
canción
fuente de
sonido
número de
canción
minidisco
grabado
123 4
ABC D
.
123 4
ABC D
123 4
ABC D
Los números de canciones no se
escribirán si la señal de entrada
permanece a nivel inferior
durante menos de dos segundos
(si el espacio en blanco entre
dos canciones es corto, etc.)
1234
ABC DC
Los números de canciones se
escribirán si la señal de
entrada permanece a nivel
inferior durante más de dos
segundos.
.
Page 83

Si no selecciona “LEVEL SYNC” durante la
POWER m ON
413
2
REC STOP
grabación analógica
Al comienzo de una grabación se escribirá
un número de canción solamente. La
grabación completa se contará como una
canción. Usted también podrá marcar
manualmente números de canciones
durante la grabación (consulte “Marcación
manual de números de canciones (función
de marcación de canciones)”).
número de
canción
fuente de
sonido
número de
canción
minidisco
grabado
123 4
ABC D
.
Al comienzo de la grabación
se escribirá un número de
canción solamente.
1
ABC D
Si en el visualizador aparece “REC
LEVEL OVER” durante la grabación de
un equipo de audio conectado a las
tomas TAPE IN de la unidad
Este mensaje se ha visualizado porque
durante la grabación analógica se introdujo
una señal de alto nivel. Si el sonido se
distorsiona, vuelva a grabar la fuente de
sonido de acuerdo con el procedimiento
siguiente:
1 Presione repetidamente EDIT/NO
durante la grabación o en el modo de
grabación en pausa hasta que en el
visualizador aparezca “Attenuate ?”.
2 Presione ENTER/YES.
En el visualizador aparecerá “Attenuate
ON?”.
3 Vuelva a presionar ENTER/YES.
Se encenderá el indicador ATTENUATE.
4 Vuelva a grabar el sonido.
El nivel de grabación se reducirá.
* Minidisco nuevo, o minidisco borrado con la
“función de borrado”.
1 Presione MD § e inserte un minidisco
grabable.
Cara de la etiqueta
hacia arriba
Notas sobre la grabación
Cuando en el visualizador parpadee
“TOC”
No mueva la unidad ni desconecte el cable
de alimentación. El deck de minidiscos
estará actualizado la tabla de índice (TOC).
Los cambios realizados en un minidisco
durante la grabación solamente se
almacenarán cuando actualice la TOC al
extraer el minidisco o cuando presione
POWER para poner el deck de minidiscos
en espera.
TOC
No desconecte el cable de
alimentación inmediatamente
después de la grabación.
Si lo hiciese, es posible que el sonido
grabado no se almacenase en el minidisco.
Si “Auto Cut” aparece en el
visualizador (corte automático)
No ha habido entrada de sonido por
espacio de 30 segundos durante la
grabación de un disco compacto. Los 30
segundos de silencio son sustituidos por un
espacio en blanco de unos 3 segundos y la
platina de minidiscos se pone en pausa de
grabación.
Si “Smart Space” aparece en el
visualizador (reducción de espacio en
blanco)
Se ha producido un silencio prolongado de
4 a 30 segundos durante la grabación de un
disco compacto. El silencio se sustituye por
un espacio en blanco de 3 segundos y la
platina de minidiscos continúa la
grabación. Sin embargo, puede que no se
escriba un nuevo número de canción
durante estos 3 segundos.
Nota
Después de haber cambiado el ajuste, éste
se almacenará en la unidad. Después de la
grabación, cerciórese de anular este ajuste.
Para anular este ajuste
Repita los pasos 1 a 4, y confirme que en el
paso 2 esté visualizándose “Attenuate
OFF?”.
Para proteger el sonido grabado
Para impedir la grabación de un minidisco,
deslice la lengüeta en el sentido de la flecha
para abrir la ranura. Para habilitar la
grabación, cierre la ranura.
Parte posterior
del disco
Lengüeta de protección
contra la grabación
Deslice la lengüeta en
el sentido indicado
por la flecha.
Grabación de un
disco compacto
Usted podrá realizar fácilmente
grabaciones digitales de un disco compacto
en un minidisco (grabación sincronizada
con un disco compacto) marcando los
números de canciones en la misma
secuencia que la del disco compacto
original. Cuando utilice un minidisco en
blanco*, el nombre del disco compacto que
haya almacenado utilizando la función de
“memorando de disco” también se grabará
automáticamente en el minidisco.
Cuando grabe canciones adicionales en un
minidisco grabable, el deck de minidiscos
iniciará automáticamente la grabación
desde el final del sonido existente.
Flecha apuntando hacia
el deck de minidiscos
2 Presione CD §, coloque el disco
compacto, y vuelva a presionar § para
cerrar la bandeja del disco.
Cara de la
etiqueta hacia
arriba
3 resione CD SYNCHRO.
La unidad entrará en el modo de
reproducción de discos compactos en
pausa.
El indicador “REC PAUSE” parpadeará,
el deck de minidiscos entrará en el
modo de grabación en pausa, y el
reproductor de discos compactos
permanecerá en el de reproducción en
pausa.
4 Presione REC PAUSE (o MD P del
telemando).
El deck de minidiscos iniciará la
grabación, y el reproductor de discos
compactos la reproducción.
Para parar la reproducción
Presione REC STOP.
Cuando en el visualizador parpadee “TOC”
El deck de minidiscos estará actualizado la
tabla de índice (TOC).
No mueva la unidad ni desconecte el cable
de alimentación. Los cambios realizados en
un minidisco durante la grabación
solamente se almacenarán cuando actualice
la TOC al extraer el minidisco o cuando
presione POWER para poner el deck de
minidiscos en espera.
TOC
Capítulo 4: Grabación de minidiscos
E
15
Page 84

Grabación de la
radio
Usted podrá grabar del sintonizador en un
minidisco (grabación analógica).
Si utiliza un minidisco grabado, el deck de
minidiscos iniciará automáticamente la
grabación desde el final del sonido
existente.
POWER m ON
1 Presione MD § e inserte un minidisco
grabable.
Cara de la etiqueta
hacia arriba
E
16
Flecha apuntando hacia
el deck de minidiscos
2 Presione repetidamente TUNER/BAND
hasta que en el visualizador aparezca la
banda deseada.
A medida que presione esta tecla, la
cambiará de la forma siguiente:
FM ˜ AM
3 Presione repetidamente TUNING hasta
que en el visualizador aparezca
“PRESET”.
4 Gire el mando de lanzadera (o presione
PRESET –/+ del telemando) para
sintonizar la emisora memorizada que
desee grabar.
›–
Retroceso a
emisoras
anteriores
Frecuencia Número de
6
53
41
Avance a
emisoras
posteriores
PRESET
MD
VOLUME
memorización
REC
STOP
2
5 Presione REC (o MD r REC del
telemando).
El indicador REC PAUSE parpadeará y
el deck de minidiscos entrará en el
modo de grabación en pausa.
6 Presione REC PAUSE (o MD P del
telemando).
El deck de minidiscos iniciará la
grabación.
Para parar la grabación
Presione REC STOP.
Para grabar una emisora que no haya
memorizado
Presione repetidamente TUNING hasta que
en el visualizador aparezca “MANUAL”, y
después gire el mando de lanzadera para
sintonizar la emisora deseada.
Cuando pare la grabación, podrá
iniciar la reproducción desde el
comienzo de la última canción
grabada.
Esto será muy útil para comprobar el
contenido de una grabación. Usted podrá
encontrar esto especialmente conveniente
después de haber grabado sus cancones
favoritas de la radio, etc.
1 Presione MD durante la grabación.
Se iniciará la grabación
2 Presione fl (o MD ( del telemando)
mientras en el visualizador esté
parpadeando (durante unos 15 segundos)
la última canción.
La reproducción se iniciará desde el
comienzo de la última canción grabada.
Grabación manual en
un minidisco
Cuando grabe canciones adicionales en un
minidisco grabable, el deck de minidiscos
iniciará automáticamente la grabación
desde el final del sonido existente.
POWER m ON
REC
STOP
5
4
JOG
1
3
2
1 Presione MD § e inserte un minidisco
grabable.
2 Presione una de las teclas FUNCTION
(TAPE, TUNER/BAND, o CD) de la
unidad para seleccionar la fuente de
sonido que desee grabar (o presione
repetidamente FUNCTION del
telemando).
3 Presione REC (o MD r REC del
telemando).
El indicador REC PAUSE parpadeará y
el deck de minidiscos entrará en el
modo de grabación en pausa.
Cuando grabe de un disco compacto, los
números de las canciones se escribirán
automáticamente en la misma secuencia
que la del disco compacto.
Cuando grabe de otra fuente que no sea
un disco compacto, consulte “Marcación
automática de números de canciones” a
fin de escribir automáticamente los
números de canciones.
4 Presione REC PAUSE (o MD P del
telemando).
El deck de minidiscos iniciará la
grabación.
5 Inicie la reproducción de la fuente de
sonido.
Para
realizar una pausa
en la grabación*
reanudar la
grabación
parar la grabación
* Cada vez que realice una pausa en la
grabación, el número de canción
aumentará en uno. Por ejemplo, si realiza
una pausa durante la grabación de la
canción 4, el número de la canción
aumentará en uno y, cuando reanude la
grabación, ésta continuará en la nueva
canción.
Cuando pare la grabación, podrá
iniciar la reproducción desde el
comienzo de la última canción
grabada.
Esto será muy útil para comprobar el
contenido de una grabación. Usted podrá
encontrar esto especialmente conveniente
después de haber grabado sus cancones
favoritas de la radio, etc.
1 Presione MD durante la grabación.
Se iniciará la grabación
2 Presione fl (o MD ( del telemando)
mientras en el visualizador esté
parpadeando (durante unos 15 segundos)
la última canción.
La reproducción se iniciará desde el
comienzo de la última canción grabada.
presione
REC PAUSE (o MD P
del telemando)
REC PAUSE (o MD P
del telemando)
REC STOP
Capítulo 4: Grabación de minidiscos
Page 85

Marcación de
números de canciones
durante la grabación
Marcación automática de
números de canciones
(función de sincronización
con el nivel)
La forma de escritura de los números de las
canciones diferirá de acuerdo con la fuente
de sonido que esté grabándose. Con
respecto a los detalles, consulte “Marcación
de canciones”.
Marcación manual de
números de canciones
(función de marcación de
canciones)
Usted podrá marcar un número de canción
en cualquier momento durante la grabación
de un minidisco, independientemente de la
fuente de sonido que haya seleccionado.
POWER m ON
Presione REC (o MD r REC del telemando)
en el punto en el que desee añadir una
marca de canción durante la grabación.
Nota
Si decide que la marcación de números es
innecesaria, o que la ubicación es
incorrecta, podrá utilizar la función de
combinación para anular la marca (consulte
“Combinación de canciones grabadas
(función de combinación)”).
REC
Usted podrá marcar automáticamente
números de canciones incluso durante la
grabación de una fuente analógica. El deck
de minidiscos marcará un nuevo número
de canción si el nivel de la señal permanece
continuamente a un nivel, o a nivel inferior,
a cierto nivel determinado durante 2
segundos o más, y después sobrepasa dicho
nivel.
POWER m ON
251
3,4
1 Presione REC (o MD r REC del
telemando).
El indicador REC PAUSE parpadeará y
el deck de minidiscos entrará en el
modo de grabación en pausa.
2 Presione repetidamente EDIT/NO hasta
que en el visualizador aparezca
“LevelSync?”.
3 Presione ENTER/YES.
En el visualizador aparecerá “LevelSync
ON?”.
TOC
REC
MD
VOLUME
1
E
17
4 Presione ENTER/YES.
En el visualizador aparecerá “LEVELSYNC”.
5 Inicie la grabación.
Nota
Este ajuste se almacenará en la unidad.
Anúlelo después de la grabación.
para cancelar la sincronización con el
nivel
1 Presione EDIT/NO hasta que aparezca
“LevelSync?” durante la grabación o el
modo de grabación en pausa.
2 Presione ENTER/YES.
En el visualizador aparecerá “LevelSync
OFF?”.
3 Presione EDIT/YES.
“LEVEL-SYNC” desaparecerá del
visualizador.
Capítulo 4: Grabación de minidiscos
Page 86

Capítulo 5:
VOLUME
MD
1
6
11
2738495
10
TRACK
TOC
EDIT
POWER m ON
21
3,4
„
Edición de
minidiscos
grabados
Borrado de grabaciones
(función de borrado)
Borrado de
grabaciones (función
de borrado)
Usted podrá borrar fácilmente el sonido
grabado. Como el borrado actualiza la
TOC, usted no tendrá que volver a grabar
sobre el material previamente grabado.
Usted podrá elegir entre los tres métodos
de borrado siguientes:
• Borrado de una sola canción
• Borrado de todas las canciones
• Borrado de partes de una canción
2 Gire el mando de lanzadera para
seleccionar el número de la canción que
desee borrar.
TRACK
3
Presione repetidamente EDIT/NO hasta
que en el visualizador aparezca “Erase ?”.
MD
VOLUME
Número de la
canción que
desea borrar
Calendario de canciones
11
1
6
2738495
10
E
18
Movimiento de canciones
grabadas (función de
movimiento)
División de canciones
grabadas (función de
división)
Combinación de canciones
grabadas (función de
combinación)
Titulación de grabaciones
(función de titulación)
Cuando borre dos o más canciones
Cuando borre una canción, todas las
canciones siguientes a ésta se renumerarán.
Por ejemplo, si borra la canción 1, la
canción 2 original se renumerará como
canción 1.
Para evitar confusiones, usted deberá
comenzar a borrar desde los números de
canciones más altos y seguir hacia los más
bajos. Esto evitará la renumeración de
canciones que no haya borrado todavía.
Borrado de una sola
canción
Usted podrá borrar una canción
especificando simplemente su número de
canción. Cuando borre la canción, el
número total de canciones del minidisco se
reducirá en uno, y todas las demás
canciones siguientes a la borrada se
renumerarán.
Ejemplo: Borrado de B
Número
de
canción
Borrado
23
1
AB C D
B se borra.
1
23
AC D
4
4 Presione ENTER/YES.
En el visualizador aparecerá “Erase ??”.
TOC
EDIT
TRACK
MD
VOLUME
1
6
11
2738495
10
5 Vuelva a presionar ENTER/YES.
En el visualizador aparecerá
“Complete” durante algunos segundos,
y la canción seleccionada en el paso 2 se
borrará.
6 Repita los pasos 2 a 5 para borrar más
canciones.
Para parar antes de que la canción se
haya borrado
Presione .
Si en el visualizador aparece “Erase!!?”
La canción fue grabada o editada en otro
deck de minidiscos y está protegida contra
grabación.
Si todavía desea borrar la canción, presione
ENTER/YES mientras esté visualizándose
la indicación.
Borrado de todas las
canciones
Usted podrá crear fácilmente un minidisco
en blanco. Usted podrá borrar al mismo
POWER m ON
31
24,5
„
tiempo todas las canciones, todos los
títulos, y todos los nombres.
Tenga en cuenta que después de haber
borrado los datos del minidisco, no podrá
recuperarlos.
1 Presione MD.
La unidad entrará en el modo de
reproducción de minidiscos.
Capítulo 5: Edición de minidiscos grabados
Page 87

1 Presione MD.
POWER m ON
2,4
53,6„1
La unidad entrará en el modo de
reproducción de minidiscos.
2 Presione repetidamente EDIT/NO hasta
que en el visualizador aparezca “All
Erase?” en el modo de parada.
3 Presione ENTER/YES.
En el visualizador aparecerá “All
Erase?”.
4 Vuelva a presionar ENTER/YES.
Cuando se hayan borrado todas las
canciones, el nombre del disco, y los
títulos almacenados en el minidisco,
aparecerá durante algunos segundos
“Complete”.
Ejemplo:Movimiento de C a la posición
Número
de canción
Movimiento
de canción 2
POWER m ON
1A23 4
B
C
12 34
ACBD
La canción C se mueve a
la posición de canción 2.
D
6 Presione ENTER/YES.
Después de haber movido la canción, en
el visualizador aparecerá “Complete”
durante algunos segundos.
Para parar antes de que se haya
movido la canción
Presione .
División de
canciones grabadas
31
(función de división)
Para parar antes de que se hayan
borrado todas las canciones, el
nombre del disco, y los títulos
Presione .
Borrado de una parte de
una canción
Utilizando las funciones de división,
borrado, y combinación, podrá borrar
partes específicas de una canción.
Ejemplo:Borrado de una parte de la
Número
de
canción
canción A
División
Borrado
Combinación
Parte a borrarse
12
A
1234
#2 #3
A#1
1
1
A#1
#3 B C
A(#1+#3)
2
B
A se divide
en 3 partes.
B
#2 se borra.
34
#1 y #3 se
combinan.
3
2
C
B
En los casos siguientes, podrá dividir una
canción en dos o más canciones y colocar
nuevos números de canciones para buscar
puntos particulares de canciones.
• Cuando haya grabado de una fuente
analógica y, por lo tanto, el minidisco
contenga solamente un número de
2,54,6
„
1 Presione MD.
la unidad entrará en el modo de
reproducción de minidiscos.
2 Gire el mando de lanzadera hasta que
en el visualizador aparezca el número
3
C
5
C
de la canción que desee mover.
Por ejemplo, si desea mover la 7.
canción a la 1.a, gire el mando de
lanzadera hasta que en el visualizador
aparezca la 7.a canción.
TRACK
Número de la
canción que
desea mover
Calendario de canciones
MD
VOLUME
a
1
2738495
6
11
10
canción.
• Cuando desee poner marcas en una
canción para buscar puntos particulares
de la misma.
Después de haber dividido una canción
El número total de canciones del minidisco
aumentará en uno, y todas las canciones
siguientes a la dividida se renumerarán.
Ejemplo:División de la canción 2 para
Número
de canción
crear una nueva canción para C
12 3
AB C D
División
123 4
AB C D
La canción 2 se divide, creándose una
canción separada para C, y todas las
canciones siguientes se renumerarán.
E
19
Movimiento de
canciones grabadas
(función de
movimiento)
Usted podrá cambiar la posición de
cualquier canción. Después de haber
movido una canción, las canciones entre las
posiciones de la canción nueva y antigua se
renumerarán automáticamente.
3 Presione repetidamente EDIT/NO hasta
que en el visualizador aparezca
“Move ?”.
4 Presione ENTER/YES.
5 Gire el mando de lanzadera hasta que
aparezca el nuevo número de canción.
TOC
EDIT
Nuevo número de
canción
Número de la
canción que
desea mover
MD
VOLUME
1
6
11
2738495
10
1 Durante la reproducción del minidisco,
presione fl en el punto en el que desee
crear una nueva canción.
El deck entrará en el modo de
reproducción en pausa.
continúa en la página siguiente ➔
Capítulo 5: Edición de minidiscos grabados
Page 88

➔ continuación
POWER m ON
31
64,9
0
5
2 7
SCROLL
2 Presione repetidamente EDIT/NO hasta
que en el visualizador aparezca
“Divide ?”.
3 Presione ENTER/YES.
En el visualizador se alternarán
“Rehearsal” y “Position ok?”, y la parte
de comienzo de la nueva canción se
reproducirá repetidamente.
4 Si la posición de comienzo es incorrecta,
presione EDIT/NO.
Si es correcta, vaya al paso 6.
TOC
EDIT
TRACK
El número de la canción en
reproducción parpadeará.
MD
VOLUME
1
6
11
2738495
Después de haber combinado dos canciones
El número total de canciones disminuirá en
uno y todas las canciones siguientes a las
combinadas se renumerarán.
Ejemplo:Combinación de B y C
10
Número
de canción
Combinación
POWER m ON
123 4
AB C D
12 3
AB C D
B y C se combinan en una canción.
31
Para parar antes de haber combinado
las canciones
Presione .
Si desea anular una combinación de
canciones
Vuelva a dividir las canciones, y después
repita la función de combinación con las
canciones correctas, si es necesario.
Si en el visualizador aparece “Sorry”
L
as canciones no podrán combinarse. Esto
sucede a veces si ha editado la misma
canción muchas veces. Esto se debe a una
limitación técnica del sistema de
minidiscos, y no significa ningún error
mecánico.
5 Escuchando el sonido, gire el mando de
lanzadera hasta encontrar la posición de
la nueva canción.
La parte de comienzo de la nueva
canción se reproducirá repetidamente.
El punto de comienzo podrá moverse
dentro de un margen máximo de –128 a
+127 pasos (de unos 0,06 segundos cada
uno) dentro de una canción.
6 Cuando la posición sea correcta,
E
20
presione ENTER/YES.
Cuando haya dividido la canción,
aparecerá durante algunos segundos
“Complete”, y se iniciará la
reproducción de la canción nuevamente
creada. La nueva canción no tendrá
título aunque lo tuviese la original.
Para parar antes de que la canción se
haya dividido
Presione .
Usted podrá anular una división de canción
Vuelva a dividir las canciones, y después
repita la función de combinación con las
canciones correctas, si es necesario.
Usted podrá dividir una canción durante la
grabación
Utilice la función de marcación de canciones.
Combinación de
canciones grabadas
(función de
combinación)
Usted podrá combinar dos canciones
consecutivas. Esta función será muy útil
para combinar varias canciones en una sola
mezcla, o varias partes independientemente
grabadas en una sola canción.
24,5
„
1 Presione MD.
La unidad entrará en el modo de
reproducción de minidiscos.
2 Gire el mando de lanzadera hasta que
aparezca la segunda canción de las dos
que desee combinar.
Por ejemplo, para combinar las
canciones 3 y 4, gire el mando de
lanzadera hasta que aparezca 4.
TOC
EDIT
TRACK
MD
VOLUME
Número
de canción
que desea
combinar
1
6
11
2738495
10
3 Presione repetidamente EDIT/NO hasta
que en el visualizador aparezca
“Combine?”.
4 Presione ENTER/YES.
En el visualizador se alternarán
“Rehearsal” y “Track ok?”. La parte en
el que se unirán las dos canciones (es
decir, el final de la primera canción y el
comienzo de la segunda) se reproducirá
repetidamente.
5 Presione ENTER/YES en el punto
correcto.
Cuando haya combinado dos canciones,
aparecerá “Complete” durante unos
segundos. Si las dos canciones
combinadas poseen títulos, el título de
la segunda se borrará.
Titulación de
grabaciones (función
de titulación)
Usted podrá asignar títulos a las minidiscos
y canciones que haya grabado.
Los títulos pueden componerse de letras
mayúsculas y minúsculas, números, y
símbolos, hasta 80 caracteres por cada título
de minidisco compacto.
1 Presione MD.
La unidad entrará en el modo de
reproducción de minidiscos.
2 Cuando desee asignar un título al disco,
presione para que el reproductor pare
la reproducción.
Cuando desee asignar un título a una
canción, presione fl durante la
reproducción de la misma para que el
reproductor entre en el modo de
reproducción en pausa.
Usted podrá asignar un título a una
canción durante la reproducción o la
grabación. También podrá asignar
títulos a canciones sin realizar una
pausa, pero si no finaliza la introducción
del título antes de que finalice la
canción, el título se borrará.
Capítulo 5: Edición de minidiscos grabados
Page 89

3
Presione repetidamente EDIT/NO hasta
que en el visualizador aparezca “Name
in?”.
4 Presione ENTER/YES.
En el visualizador parpadeará un
cursor.
TOC
EDIT
DISC
MD
VOLUME
1
6
11
2738495
cursor
5 Presione repetidamente CHARACTER
para seleccionar el tipo de carácter.
Cada vez que presione la tecla, el
carácter cambiará de la forma siguiente:
nmayúsculas nminúsculas
espacioNsímbolosNnúmerosN
Usted podrá utilizar los símbolos
siguientes:
! " # $ % & ' ( ) * + , – . / : ; < = > ? @ _ `
(espacio)
6 Gire el mando de lanzadera hasta que
en el visualizador aparezca el carácter
deseado.
El carácter seleccionado parpadeará.
TOC
EDIT
DISC
MD
VOLUME
1
6
11
2738495
Para introducir rápidamente un espacio
Presione ) cuando el cursor esté
parpadeando.
7 Presione ).
El cursor se desplazará hacia la derecha
y esperará la introducción del carácter
siguiente.
9 Presione ENTER/YES.
De esta forma habrá finalizado el
procedimiento de asignación de título, y
éste se desplazará por el visualizador.
Para parar antes de haber titulado la
cnación
Presione .
10
Para comprobar los títulos
Usted podrá comprobar el nombre del
disco o de la canción presionando SCROLL.
Para
comprobar el
nombre del
disco
nombre de la
canción
* Para realizar una pausa, vuelva a
presionar SCROLL, y una vez más para
continuar el desplazamiento.
Para borrar el título de un disco y los
títulos de todas las canciones
(función de borrado de nombres)
Usted podrá borrar simultáneamente todos
los títulos de un minidisco.
Tenga en cuenta que, después de haber
borrado los títulos no podrá recuperarlos.
Si desea parar el borrado, presione .
10
1 Con el deck parado, presione
repetidamente EDIT/NO hasta que en el
visualizador aparezca “Name Erase?”.
2 Presione ENTER/YES.
En el visualizador aparecerá “Name
Erase ??”.
3 Vuelva a presionar ENTER/YES.
Se borrarán todos los títulos.
presione SCROLL*
mientras el deck esté
parado.
mientras el deck esté en
reproducción.
E
21
TOC
EDIT
DISC
MD
VOLUME
1
6
11
Carácter siguiente
8 Repita los pasos 5 y 7 para introducir
caracteres adicionales hasta que haya
completado el título.
Si desea introducir el mismo tipo de
carácter, salte el paso 5.
Si introdujo un carácter erróneo
Presione ) o 0 hasta que el carácter
que desee corregir comience a
parpadear, y repita los pasos 5 a 7 para
introducir el correcto.
Para borrar un carácter
Presione ) o 0 hasta que el carácter
que desee borrar comience a parpadear,
y presione EDIT/NO.
2738495
10
Capítulo 5: Edición de minidiscos grabados
Page 90

Capítulo 6:
Radio
Escucha de la radio
Escucha de la radio
Usted podrá hacer que el sintonizador
explore automáticamente frecuencias de
radiodifusión, y sintonice emisoras con
señales claras.
Esta función le permitirá ahorrar tiempo en
la búsqueda de emisoras con señales claras.
Sin embargo, las emisoras con señales
débiles pueden saltarse con la sintonía
automática. Sintonice manualmente las
emisoras saltadas con la sintonía
automática.
3Gire el mando de lanzadera hacia la
derecha para explorar emisoras de
frecuencia superior.
Para explorar emisoras de frecuencia
inferior, gire el mando de lanzadera
hacia la izquierda.
El sintonizador comenzará a explorar
automáticamente las frecuencias de
radiodifusión, y se parará cuando
encuentre una emisora clara.
En el visualizador aparecerá “TUNED”.
También aparecerá “STEREO” si la
emisora sintonizada de FM está
transmitiendo en estéreo.
E
22
Memorización de emisoras
de radiodifusión
Sintonía de emisoras de
radiodifusión
memorizadas
POWER m ON
2
STEREO/
MONO
1
3,4
1 Presione repetidamente TUNER/BAND
(o BAND del telemando) hasta que en el
visualizador aparezca la banda deseada.
Cada vez que presione la tecla, la banda
cambiará de la forma siguiente:
FM ˜ AM
VOLUME
Frecuencia de recepción
›–
Exploración de
emisoras
frecuencia inferior
Exploración de
emisoras frecuencia
superior
AUTO
VOLUME
4Si no desea escuchar la emisora recibida,
gire el mando de lanzadera para
reiniciar la exploración.
Cuando no logre sintonizar la
emisora deseada
La sintonía automática puede saltar una
emisora de señal débil. Sintonice esta
emisora manualmente.
1 Presione repetidamente TUNING hasta
que en el visualizador aparezca
“MANUAL”.
2 Mantenga girado el mando de lanzadera
hasta lograr sintonizar la emisora
deseada.
Para mejorar la recepción de AM
Cambie la orientación de la antena de
cuadro de AM suministrada para AM.
Capítulo 6: Radio
2 Presione repetidamente TUNING hasta
que en el visualizador aparezca
“AUTO”.
AUTO
VOLUME
AM
Cuando un programa de FM no se reciba
claramente
Presione STEREO/MONO del telemando
de forma que en el visualizador aparezca
“MONO”. No habrá efecto estéreo, pero la
recepción mejorará. Para restablecer el
efecto estéreo, vuelva a presionar STEREO/
MONO.
Función de reproducción presionando una
sola tecla
Presione BAND del telemando cuando la
alimentación esté desconectada. Usted
podrá escuchar la última emisora recibida
sin necesidad presionar ninguna otra tecla.
Si presiona TUNER/BAND de la unidad, la
alimentación se conectará y la función
cambiará automáticamente a TUNER.
Page 91

En el visualizador aparecerá “TUNED”.
VOLUME
PRESET
POWER m ON
2
53,8
6
4
DISPLAY
0
Memorización de
emisoras de
También aparecerá “STEREO” si la
emisora sintonizada de FM está
transmitiendo en estéreo.
radiodifusión
Usted podrá almacenar en la memoria del
sintonizador las frecuencias de sus
emisoras favoritas para sintonizarlas
rápidamente. Podrá memorizar hasta 20
emisoras de FM, 10 de MW, y otras 10 de
LW en cualquier orden.
Para memorizar emisoras, utilice las teclas
de la unidad.
POWER m ON
STEREO/
41
MONO
2
Exploración de
emisoras
frecuencia inferior
Cuando no logre sintonizar la emisora
deseada
La sintonía automática puede saltar
emisoras de señal débil. Sintonice estas
emisoras manualmente.
1 Presione repetidamente TUNING
hasta que en el visualizador aparezca
“MANUAL”.
2 Mantenga girado el mando de
lanzadera hasta lograr sintonizar la
emisora deseada.
4 Presione repetidamente EDIT/NO hasta
que en el visualizador aparezca “Freq
5,7
3,6
Memory ?”.
1Presione repetidamente TUNER/BAND
(o BAND del telemando) hasta que en el
visualizador aparezca la banda deseada.
Cada vez que presione la tecla, la banda
cambiará de la forma siguiente:
FM ˜ AM
VOLUME
Frecuencia de recepción
5 Presione ENTER/YES.
Número de memorización parpadeando
6 Gire el mando de lanzadera para
seleccionar un número de
memorización.
›–
Exploración de
emisoras frecuencia
superior
AUTO
VOLUME
AUTO
VOLUME
MEMORY
VOLUME
Asignación de nombres a
emisoras memorizadas
(denominación de
emisoras)
Usted podrá asignar un nombre compuesto
por hasta diez caracteres a dada emisora
memorizada.
Los nombres pueden componerse de letras
mayúsculas y minúsculas, números, y
símbolos.
El nombre de la emisora aparecerá en el
visualizador cuando sintonice la emisora
memorizada. Si graba la emisora
memorizada en un minidisco utilizando la
función de grabación con el temporizador,
el nombre de la emisora se almacenará
automáticamente en el MD.
E
23
1 Sintonice la emisora memorizada a la
que desee asignar un nombre.
2 Presione repetidamente EDIT/NO hasta
que en el visualizador aparezca “Name
in?”.
PRESET
VOLUME
2Presione repetidamente TUNING hasta
que en el visualizador aparezca
“AUTO”.
AUTO
VOLUME
3Gire el mando de lanzadera hacia la
derecha para explorar emisoras de
frecuencia superior.
Para explorar emisoras de frecuencia
inferior, gire el mando de lanzadera
hacia la izquierda.
El sintonizador comenzará a explorar
automáticamente las frecuencias de
radiodifusión, y se parará cuando
encuentre una emisora clara.
7 Presione ENTER/YES.
La emisora se almacenará en el número
de memorización seleccionado.
encendido
VOLUME
8 Repita los pasos 1 a 7 para cada emisora
que desee almacenar.
Para cambiar el número de
memorización
Comience de nuevo desde el paso 1.
Cuando un programa de FM no se reciba
claramente
Presione STEREO/MONO del telemando
de forma que en el visualizador aparezca
“MONO”. No habrá efecto estéreo, pero la
recepción mejorará. Para restablecer el
efecto estéreo, vuelva a presionar STEREO/
MONO.
PRESET
3 Presione ENTER/YES.
En el visualizador parpadeará un cursor.
Cursor flashes
4 Presione repetidamente CHARACTER
para seleccionar el tipo de carácter.
Cada vez que presione la tecla, el
carácter cambiará de la forma siguiente:
nmayúsculas nminúsculas
espacioNsímbolosNnúmerosN
Usted podrá utilizar los símbolos
siguientes:
! " # $ % & ' ( ) * + , – . / : ; < = > ? @ _ `
(espacio)
continúa en la página siguiente ➔
Capítulo 6: Radio
Page 92

E
24
➔ continuación
5 Gire el mando de lanzadera hasta que en
el visualizador aparezca el carácter
deseado.
El carácter seleccionado parpadeará.
PRESET
VOLUME
Para introducir rápidamente un espacio
Presione ) cuando el cursor esté
parpadeando.
6 Presione ).
El cursor se desplazará hacia la derecha
y esperará la introducción del carácter
siguiente.
PRESET
VOLUME
7 Repita los pasos 4 y 6 para introducir
caracteres adicionales hasta que haya
completado el título.
Si desea introducir el mismo tipo de
carácter, salte el paso 4.
Si introdujo un carácter erróneo
Presione ) o 0 hasta que el carácter
que desee corregir comience a
parpadear, y repita los pasos 4 a 6 para
introducir el correcto.
Para borrar un carácter
Presione ) o 0 hasta que el carácter
que desee borrar comience a parpadear,
y presione EDIT/NO.
8 Presione ENTER/YES.
De esta forma habrá finalizado el
procedimiento de asignación de nombre,
y éste se desplazará por el visualizador.
Para borrar el nombre de una
emisora
Usted podrá borrar el nombre de una
emisora cambiando todos los caracteres de
la misma por “espacios”.
Para cambiar la visualización
Presione DISPLAY.
Cada vez que presione la tecla, la frecuencia
o el nombre de la emisora (si le ha asignado
uno) aparecerá repetidamente en el
visualizador.
Sintonía de emisoras
de radiodifusión
memorizadas
Después de haber memorizado sus
emisoras favoritas, utilice el mando de
lanzadera para sintonizarlas rápidamente.
POWER m ON
2
3
1
1 Presione repetidamente TUNER/BAND
para seleccionar la banda deseada.
FM ˜ AM
2 Presione TUNING de forma que se en el
visualizador aparezca “PRESET”.
3 Para sintonizar una emisora
memorizada, gire el mando de
lanzadera (o presione PRESET –/+ del
telemando).
Aparecerá la frecuencia de la emisora y
el sistema iniciará su recepción.
›–
Retroceso a emisoras
anteriores
Frecuencia Número de
Para seleccionar directamente una
emisora
Después del paso 1 anterior, podrá
sintonizar rápidamente sus emisoras
favoritas memorizadas en los números de
canales 1 a 10 presionando las teclas
numéricas correspondientes.
Para seleccionar números de canales
superiores a 10, presione en primer lugar
>10 y después introduzca los dígitos
correspondientes.
Ejemplo:
Para seleccionar el canal número 25,
presione >10, 2, y 5 por este orden.
Avance a emisoras
posteriores
PRESET
MD
VOLUME
memorización
Capítulo 6: Radio
Page 93

Capítulo 7:
Ajuste del sonido
Ajuste del
sonido
Ajuste del sonido
Para disfrutar plenamente del sonido de su
sistema estéreo, realice los ajustes del
sonido siguientes.
Usted también podrá utilizar el telemando
para realizar esta operación.
POWER m ON
BASS/
TREBLE
PHONES
Para
ajustar
el volumen
el sonido de
graves o
agudos
BALANCE VOLUME +/–
JOG
Haga lo siguiente
Aumento del volumen:
presione VOLUME + (o
VOL + del telemando)
Reducción del volumen:
presione VOLUME – (o
VOL – del telemando)
1 Presione BASS/TREBLE
para seleccionar el tono
de sonido que desee
ajustar. Cada vez que
presione esta tecla, el
tono cambiará de la
forma siguiente:
BASSnTREBLEnOFF
n
E
25
2 Gire el mando de
lanzadera para ajustar el
tono.
›–
Reducción del
sonido de
graves/agudos
el equilibrio
Para escuchar a través de auriculares
Conecte los auriculares a la toma PHONES.
A través de los altavoces no saldrá sonido.
Presione BALANCE y gire
el mando de lanzadera para
ajustar el equilibrio.
›–
Desplazamiento
del sonido hacia
la izquierda
Aumento del
sonido de
graves/agudos
Desplazamiento
del sonido hacia
la derecha
Capítulo 7: Ajuste del sonido
Page 94

Capítulo 8:
POWER m ON
TIMER
SELECT
4,5,6,8 5,6,7
32
,9
Para dormirse con
música
Para despertarse con
música
Funciones
adicionales
Para dormirse con música
Para despertarse con
música
Grabación de programas
radiofónicos con el
temporizador
Conexión de equipos
opcionales
E
26
Usted podrá programar su sistema estéreo
para que la alimentación se desconecte
automáticamente a fin de poder irse a
dormir escuchando música (temporizador
cronodesconectador).
Antes de programar el temporizador
cronodesconectador, cerciórese de que el
reloj esté correctamente ajustado.
Usted podrá programar el
cronodesconectador aunque ya haya
programado el temporizador despertador.
Para realizar esta operación, utilice las
teclas de la unidad.
p
SLEEP
P
(
=
rPp
+
(
1 Ponga en reproducción su fuente de
sonido favorita (un deck de cassettes, el
sintonizador, o un disco compacto).
2 Presione repetidamente SLEEP para
elegir la duración de la reproducción de
música.
En el visualizador aparecerá la
indicación del temporizador
cronodesconectador.
n 90 n 80 ... 10 n OFF
Usted podrá despertarse con música a la
hora deseada. Solamente tendrá que
programar el temporizador una vez. El
temporizador permanecerá activado hasta
que lo reajuste o hasta que desconecte el
cable de alimentación. Antes de programar
el temporizador, cerciórese de que el reloj
esté correctamente ajustado.
1Prepare la fuente de sonido.
Para despertarse con la radio
Sintonice la emisora memorizada que
desee.
Para despertarse con un disco compacto
Inserte el disco compacto. Si desea que
se reproduzca desde una canción
específica, realice los procedimientos
necesarios para la reproducción
programada de un disco compacto
(consulte “Reproducción de canciones
en el orden deseado (reproducción
programada)”).
Capítulo 8: Funciones adicionales
La indicación de los minutos programa
el temporizador cronodesconectador
para que desconecte la alimentación
después de 90 a 10 minutos en
intervalos de diez minutos.
Para cancelar el temporizador
cronodesconectador
Presione repetidamente SLEEP hasta que
en el visualizador aparezca “OFF”.
Para comprobar el tiempo restante
antes de que el temporizador
cronodesconectador desconecte la
alimentación del sistema
Presione SLEEP una vez.
El tiempo restante (en minutos) se
visualizará durante varios segundos.
Para cambiar el tiempo designado
mientras el temporizador
cronodesconectador esté activado
Presione repetidamente SLEEP para
seleccionar el tiempo restante deseado.
Para despertarse con un minidisco
Inserte el minidisco.
2Presione VOLUME +/– para ajustar el
volumen.
Después de haber finalizado el ajuste,
pare la reproducción del disco compacto
o del minidisco.
3Presione repetidamente TIMER SET
hasta que en el visualizador aparezca
“DAILY TIMER ?”.
MD
CD
VOLUME
4Presione ENTER/YES.
En el visualizador aparecerá “ON” y
parpadearán los dígitos de la hora.
Page 95

5 Programe la hora a la que desee que se
conecte la alimentación del sistema.
1 Para programar la hora, utilice el
mando de lanzadera.
CD MD
CD MD
CD MD
CD MD
VOLUME
VOLUME
VOLUME
VOLUME
DAILY
parpadeando
2 Presione ENTER/YES.
En el visualizador parpadearán los
dígitos de los minutos.
DAILY
parpadeando
3 Para programar los minutos, utilice
el mando de lanzadera.
DAILY
parpadeando
4 Presione ENTER/YES.
En el visualizador aparecerá “OFF” y
parpadearán los dígitos de la hora.
DAILY
parpadeando
6 Programe, de la misma forma, la hora a
la que desee que se desconecte la
alimentación del sistema.
7 Utilice el mando de lanzadera para
seleccionar una fuente de sonido.
La visualización cambiará de la forma
siguiente:
n CD PLAY ˜ TUNER N
n MD PLAY N
8 Presione ENTER/YES.
los ítemes programados aparecerán
secuencialmente en el visualizador.
9 Presione POWER para desconectar la
alimentación del sistema.
Unos 15 segundos antes de la hora
programada, la alimentación se
conectará y se reproducirá la música. A
la hora de desconexión, la alimentación
volverá a desconectarse.
Para cancelar el temporizador
Presione repetidamente TIMER SELECT
hasta que en el visualizador aparezca
“TIMER OFF”.
Para cambiar el temporizador
Repita todo el procedimiento anterior
desde el paso 1.
Usted podrá comprobar los ítemes programados
presione repetidamente TIMER SELECT
hasta que en el visualizador vuelva a
aparecer “DAILY”.
En el visualizador aparecerán los ítemes
programados.
Grabación de
programas
radiofónicos con el
temporizador
Usted podrá programar el temporizador
para que grabe de la radio a la hora
deseada. Este temporizador solamente
funcionará una vez para cada programa. El
nivel del volumen se ajustará
automáticamente al mínimo.
Si graba de una emisora memorizada a la
que le haya asignado un nombre, el
nombre, la hora de conexión, y la hora de
desconexión se almacenarán
automáticamente en el minidisco.
•Memorice la emisora que desee grabar.
•Cerciórese de que el reloj esté
correctamente ajustado.
POWER m ON
TIMER
SELECT
,8
2
3,4,5,6 4,5
1Sintonice la emisora memorizada que
desee grabar.
2Presione repetidamente TUNER/BAND
hasta que en el visualizador aparezca
“REC TIMER ?”.
3Presione ENTER/YES.
En el visualizador aparecerá “REC” y
parpadearán los dígitos de la hora.
REC
parpadeando
VOLUME
4Programe la hora a la que desee que el
sistema inicie la grabación.
1 Utilice el mando de lanzadera para
programar la hora.
REC
parpadeando
VOLUME
2 Presione ENTER/YES.
En el visualizador parpadearán los
dígitos de los minutos.
MD
REC
parpadeando
3 Utilice el mando de lanzadera para
programar los minutos.
REC
parpadeando
4 Presione ENTER/YES.
En el visualizador aparecerá “OFF” y
los dígitos de la hora parpadearán.
REC
parpadeando
VOLUME
VOLUME
VOLUME
5 Programe de la misma forma la hora a la
que desee que se desconecte la
alimentación del sistema.
6 Press ENTER/YES.
The preset items appear in the display
sequentially.
7 Inserte un minidisco grabable.
En el visualizador aparecerá “TOC
Reading” durante algunos segundos y el
deck de minidiscos leerá el contenido
del minidisco.
8 Después de que “TOC Reading” haya
desaparecido del visualizador, presione
POWER para desconectar la
alimentación del sistema.
Unos 15 segundos antes de la hora
programada, la alimentación se
conectará y el nivel del volumen se
ajustará automáticamente al mínimo.
Notas
•No desconecte la alimentación
mientras esté visualizándose “TOC
Reading”. Si lo hiciese, la operación
podría no realizarse correctamente.
•Si utiliza un minidisco nuevo, no se
grabará nada durante los primeros 15
segundos.
Para cancelar el temporizador
Presione repetidamente TIMER SELECT
hasta que en el visualizador aparezca
“TIMER OFF”.
Para cambiar el temporizador
Repita todo el procedimiento mencionado
desde el paso 1.
Usted podrá comprobar los ítemes
programados
Presione repetidamente TIMER SELECT
hasta que en el visualizador vuelva a
aparecer “REC”. Los ítemes programados
aparecerán en el visualizador.
Capítulo 8: Funciones adicionales
E
27
Page 96

Conexión de equipos
opcionales
Para disfrutar más de su sistema estéreo,
podrá conectarle un deck de cassettes
estéreo. También podrá grabar de fuentes
de sonido del sistema en el deck de
cassettes.
Conexión de un deck de
cassettes estéreo
Utilice cables conectores de audio y
cerciórese de conectar las clavijas a las
tomas del mismo color.
Con respecto a los detalles, consulte el
manual de instrucciones del deck de
cassettes estéreo.
Conecte
las tomas LINE IN
del deck de cassettes
las tomas LINE OUT
del deck de cassettes
E
28
Cassette Deck
Deck de cassettes
Para escuchar el sonido del deck de
cassettes
Presione TAPE.
a
las tomas TAPE
OUT
las tomas TAPE IN
OUT IN
L
R
TAPE
Capítulo 8: Funciones adicionales
Page 97

Información
adicional
Precauciones
Mantenimiento
Guía del sistema de
administración de copia
en serie
Limitaciones del sistema de
minidiscos
Mensajes de visualización
de minidiscos
Guía para la solución de
Precauciones
Si tiene alguna pregunta o problema en
relación con su sistema estéreo, consulte a
su proveedor Sony.
Seguridad
• La utilización de instrumentos ópticos
con este producto aumentará el riesgo de
daño a sus ojos.
• El sistema estéreo no se desconectará de
la fuente de alimentación de CA (red)
mientras el cable del tal sistema esté
enchufado en una toma de la red, incluso
aunque ponga en OFF el interruptor de
alimentación del mismo.
• Cuando no vaya a utilizar el sistema
estéreo durante mucho tiempo,
desenchúfelo de la fuente de alimentación
(red). Para desenchufar el cable de
alimentación, tire del enchufe. No tire
nunca del propio cable.
• Si dentro de cualquier componente del
sistema entra un líquido o un objeto
sólido, desenchúfelo de la red y haga que
sea comprobado por personal cualificado.
• Cuando tenga que cambiar el cable de
alimentación de CA, solicite este servicio
a un taller de reparaciones cualificado
solamente.
problemas
Instalación
Especificaciones
Índice de partes y controles
Índice alfabético
Coloque el sistema estéreo en un lugar
adecuadamente ventilado a fin de evitar su
recalentamiento interno.
Condensación de humedad en el
reproductor de discos compactos y
en el deck de minidiscos
Si traslada el sistema directamente de un
lugar frío a otro cálido, o si lo coloca en una
sala muy húmeda, es posible que se
condense humedad en el interior del
objetivo del reproductor de discos
compactos o del deck de minidiscos.
Cuando ocurra esto, el reproductor de
discos compactos o el deck de minidiscos
no funcionará. Extraiga el disco compacto
o el minidisco y deje el sistema con la
alimentación conectada durante
aproximadamente media hora hasta que se
evapore la humedad.
Notas sobre el manejo de los
minidiscos
Como el propio minidisco está alojado en
un cartucho, podrá manejarlo normalmente
sin preocuparse por la suciedad ni las
huellas dactilares. Sin embargo, si el
cartucho se ensucia o alabea, puede
producirse un mal funcionamiento.
No abra el obturador del cartucho del
minidisco
Si trata de abrir a la fuerza el obturador, lo
dañará.
Obturador
En caso de que se produzcan
alteraciones del color en la pantalla
del televisor (Para el MJ-L1
solamente)
Gracias al sistema de altavoces protegidos
magnéticamente, es posible instalar
altavoces cerca de un televisor. No
obstante, pueden producirse alteraciones
del color en la pantalla del televisor
dependiendo del tipo de televisor.
Si se observan alteraciones del color…
Desconecte la alimentación del televisor, y
vuelva a conectarla después de 15 o 30
minutos.
Si vuelven a observarse alteraciones del
color…
Aleje los altavoces del televisor.
Cartucho
Mantenimiento
Limpieza de la caja
Utilice un paño suave ligeramente
humedecido en una solución muy diluida
de detergente.
Limpieza de los discos compactos
Cuando se ensucie un disco compacto,
frótelo con un paño limpiador. Hágalo del
centro hacia los bordes.
Notas sobre los discos compactos
•
No utilice disolventes tales como benceno,
diluidor de pintura, ni limpiadores ni
pulverizadores antiestáticos destinados a
discos analógicos.
•
Si existen rayas, suciedad, o huellas
dactilares en un disco compacto, es posible
que se produzca un error de seguimiento.
Notas sobre los minidiscos
• No exponga los minidiscos a la luz solar
directa ni a fuentes térmicas tales como
conductos de aire cálido, ni los deje en el
interior de un automóvil aparcado al sol,
porque la temperatura interior del mismo
podría aumentar considerablemente.
• Limpie periódicamente el polvo y la
suciedad de la superficie del cartucho
frotándola con un paño seco.
E
29
Información adicional
Page 98

Guía del sistema de
administración de
copia en serie
Un minidisco grabado a través de una
entrada digital no podrá utilizarse para
realizarse otra grabación con entrada
digital. Como componente de audio
digital, este deck de minidiscos está de
acuerdo con las normas del sistema de
administración de copia en serie. El
sistema de administración de copia en serie
restringe las copias realizadas grabando
señales digitales a copias de la primera
generación solamente.
Sin embargo, la grabación subsecuente de
la copia de la primera generación en otra
cinta audiodigital o en otro minidisco
grabable será posible a través de las tomas
de entrada analógica del deck de cinta
audiodigital o del deck de minidiscos.
Regla 1
Usted podrá grabar de fuentes de
programas digitales (discos compactos,
cintas audiodigitales, o minidiscos
grabables a través de las tomas de entrada
digital en un deck de cinta audiodigital o en
un deck de minidiscos. Sin embargo, no
podrá grabar de esta cinta audiodigital o de
este minidisco a otra cinta audiodigital ni
minidisco a través de las tomas de entrada
E
digital del deck de cinta audiodigital ni del
30
deck de minidiscos.
Reproductor de
discos compactos
Reproducción
Grabación
Cinta
audiodigital
o minidisco
Reproducción
Toma de salida digital
Cable
conector
óptico o
digital
coaxial
Toma de entrada digital
Grabación
Deck de minidiscos
Cable conector
óptico o digital
coaxial
Deck de cinta audiodigital o
de minidiscos
Deck de cinta audiodigital o
de minidiscos
Deck de cinta audiodigital o
de minidiscos
Toma de salida digital
Toma de entrada digital
Tomas de salida de línea
(analógicas)
Tomas de entrada de línea
(analógicas)
Deck de cinta
audiodigital
Cinta
audiodigital o
minidisco de
primera
generación
grabado a través
de una conexión
digital a digital
Cable
conector
de audio
Regla 2
Usted podrá grabar una entrada de señal
digital de una emisión vía satélite en una
cinta audiodigital o en un minidisco a
través de las tomas de entrada digital del
deck de cinta audiodigital o del deck de
minidiscos capaz de manejar una frecuencia
de muestreo de 32 kHz o de 48 kHz. (Esta
unidad soporta solamente 44,1 kHz.)
Usted podrá grabar después el contenido
grabado de esta cinta audiodigital o de este
minidisco (primera generación) en otra
cinta audiodigital o en otro minidisco
grabable a través de las tomas de entrada
digital del deck de cinta audiodigital o del
deck de minidiscos para crear una copia
digital de segunda generación. Sin
embargo, tenga en cuenta que en algunos
sintonizadores de recepción vía satélite la
copia digital de segunda generación puede
resultar imposible.
Reproducción
Cable conector
óptico o digital
coaxial
Grabación
Cinta
audiodigital
o minidisco
Reproducción
Cable conector
óptico o digital
coaxial
Grabación
Cinta
audiodigital
o minidisco
Reproducción
Toma de salida digital
Cable
conector
óptico o
digital
coaxial
Toma de entrada digital
Grabación
Sintonizador de
recepción vía satélite
Toma de salida digital
Toma de entrada digital
Deck de cinta audiodigital o
de minidiscos
Deck de cinta audiodigital o
de minidiscos
Toma de salida digital
Toma de entrada digital
Deck de cinta audiodigital o
de minidiscos
Deck de cinta audiodigital o
de minidiscos
Tomas de salida de línea
(analógicas)
Tomas de entrada de línea
(analógicas)
Deck de cinta audiodigital o
de minidiscos
Cinta
audiodigital o
minidisco de
primera
generación
grabado a través
de una conexión
digital a digital
Cinta
audiodigital o
minidisco de
segunda
generación
grabado a través
de una conexión
digital a digital
Cable
conector
de audio
Regla 3
Usted podrá grabar una cinta audiodigital o
un minidisco grabado a través de las tomas
de entrada analógicas del deck de cinta
audiodigital o del deck de minidiscos en
otra cinta audiodigital o minidisco a través
de las tomas de salida digital del deck de
cinta audiodigital o del deck de minidiscos.
Sin embargo, no podrá realizar una copia
de cinta audiodigital o de minidisco de
segunda generación a través de las tomas
de salida digital del deck de cinta
audiodigital ni del deck de minidiscos.
Giradiscos Sintonizador
Reproductor de
discos compactos
Deck de cinta
audiodigital
Reproducción
Grabación
Cinta
audiodigital
o minidisco
Reproducción
Cable conector
óptico o digital
coaxial
Grabación
Cinta
audiodigital
o minidisco
Reproducción
Toma de salida digital
Cable
conector
óptico o
digital
coaxial
Toma de entrada digital
Grabación
Deck de minidiscos
Cable conector
de audio
Deck de cinta audiodigital o
Deck de cinta audiodigital o
Deck de cinta audiodigital o
Deck de cinta audiodigital o
Deck de cinta audiodigital o
Deck de cassettes
Amplificador de
micrófono
Tomas de salida de
línea (analógicas)
Tomas de entrada de
línea (analógicas)
de minidiscos
de minidiscos
Toma de salida digital
Toma de entrada digital
de minidiscos
de minidiscos
Tomas de salida de línea
(analógicas)
Tomas de entrada de línea
(analógicas)
de minidiscos
Cinta
audiodigital o
minidisco
grabado a través
de una conexión
analógica a
digital
Cinta
audiodigital o
minidisco de
primera
generación
grabado a través
de una conexión
digital a digital
Cable
conector
de audio
Información adicional
Page 99

Limitaciones del
sistema de minidiscos
El sistema de grabación de su deck de
minidiscos es radicalmente diferente al de
los utilizados en decks de cassettes y de
cinta audiodigital, y se caracteriza por las
limitaciones descritas a continuación. Sin
embargo, tenga en cuenta que estas
limitaciones se deben a la naturaleza
inherente del sistema de grabación de
minidiscos en sí, y no a causas mecánicas.
“Disc Full” se visualizará incluso antes
de haber alcanzado el tiempo máximo
de grabación (60 o 74 minutos).
Cuando se hayan grabado 255 canciones en
el minidisco, se visualizará “Disc Full”
independientemente del tiempo total
grabado. En un minidisco no podrán
grabarse más de 255 canciones. Para
continuar grabando, borre canciones
innecesarias o utilice otro minidisco
grabable.
“Disc Full” se visualizará antes de que se
alcance el número máximo de canciones.
Las fluctuaciones de énfasis dentro de las
canciones se interpretan a veces como
intervalos entre canciones, lo que aumenta
el cómputo de canciones y causa la
visualización de “Disc Full”.
El tiempo de grabación restante no
aumenta incluso después de haber
borrado numerosas canciones cortas.
Las canciones de menos de 12 segundos de
duración no se cuentan y, por lo tanto,
aunque se borren, el tiempo de grabación
no aumentará.
Algunas canciones no pueden
combinarse con otras.
La combinación de canciones puede
resultar imposible cuando las canciones
están editadas.
El tiempo grabado total y el tiempo
restante del minidisco puede no ser
el tiempo máximo de grabación (60 o
74 minutos).
La grabación se realiza en unidades mínimas
de 2 segundos cada una, independientemente
de lo corto que sea el material. Por lo tanto, el
contenido grabado puede ser más corto que
la capacidad máxima de grabación. El
espacio del disco también puede reducirse
debido a rayaduras.
Las canciones creadas mediante
edición pueden presentar pérdida de
sonido durante las operaciones de
búsqueda.
Los números de las canciones no se
graban correctamente.
La asignación o la grabación incorrecta de
números de canciones puede producirse
cuando las canciones del disco compacto se
dividen en pistas más pequeñas durante la
grabación digital.
“TOC Reading” aparece durante
mucho tiempo.
Si el minidisco insertado es nuevo, “TOC
Reading” permanecerá en el visualizador
durante más tiempo que en el caso de
minidiscos ya utilizados.
Limitaciones cuando se grabe sobre
una canción ya existente
• Es posible que no se visualice el tiempo
de grabación restante correcto.
•
Puede resultar imposible grabar sobre una
canción si tal canción se ha grabado varias
veces. Cuando suceda esto, borre la canción
utilizando la función de borrado.
• El tiempo restante de grabación puede
acortarse en proporción al tiempo
grabado total.
• No se recomienda grabar sobre una
canción para eliminar el ruido, porque esto
puede acortar la duración de la canción.
•
Es posible que no pueda asignar un título a
una canción cuando esté grabando sobre ella.
Es posible que el tiempo grabado/de
reproducción no se visualice durante
la reproducción de minidiscos de
formato monoaural.
Mensajes de
visualización de
minidiscos
En la tabla siguiente se explican los diversos
mensajes que aparecen en el visualizador.
Mensaje
All Erase?
Attenuate?
Auto cut
Blank Disc
Cannot Copy
Cannot EDIT
Combine?
Significado
¿
Desea borrar de todas las
canciones del minidisco?
(Función de borrado)
¿Desea atenuar del nivel de
grabación durante la grabación
analógica?
El deck de minidiscos sen
encuentra en el modo de
grabación en pausa porque el
silencia ha durado 30 segundos
o más durante la grabación
digital.
El minidisco grabable insertado
es nuevo, o ha borrado todas las
canciones del minidisco.
Usted no puede realizar la
grabación digital. (Consulte
“Guía del sistema de
administración de copia en
serie”.)
Usted ha intentado editar en el
modo de reproducción
programada o aleatoria.
¿Desea combinar dos canciones
en una? (Función de
combinación)
Disc Error
Disc Full
Divide?
Eject
Erase?
Impossible
LEVEL
SYNC?
Move?
Name Full
Name in?
NO DISC
No Track
OVER
Protected
REC LEVEL
OVER
Retry
Retry Error
Smart Space
Sorry
El minidisco insertado está
dañado o no contiene TOC.
Usted no puede realizar la
grabación porque no queda
tiempo restante en el disco.
(Consulte “Limitaciones del
sistema de minidiscos”.)
¿Desea dividir una canción en
dos? (Función de división)
Se visualizará cuando extraiga el
minidisco.
¿Desea borrar una canción de un
minidisco? (Función de borrado)
Usted ha intentado combinar
desde la primera canción de un
minidisco, lo cual es imposible.
¿Desea marcar automáticamente
los números de las canciones
durante la grabación? (Función
de sincronización con el nivel)
¿Desea cambiar el orden de las
canciones moviéndolas a
cualquier posición deseada?
(Función de movimiento)
No hay espacio para almacenar
títulos de canciones o del disco.
¿Desea crear títulos para sus
canciones y minidiscos grabados?
(Función de titulación)
No hay minidisco en el deck de
minidiscos.
El minidisco insertado posee
título pero no contiene canciones.
Ha llegado al final de la última
canción cuando estaba realizando
la búsqueda a gran velocidad.
El minidisco insertado está
protegido contra borrado.
Durante la grabación de un
equipo de audio conectado a
TAPE IN de esta unidad se
introdujo una señal de alto nivel.
El deck de minidiscos está
volviendo a realizar la grabación
debido a vibraciones o
rayaduras del disco encontradas
durante la grabación.
Debido a numerosas vibraciones
o rayaduras del disco, se han
realizado intentos continuos de
grabación pero la grabación
normal no es posible.
La señal se volvió a introducir
después de un silencio de 30
segundos o menos durante la
grabación digital.
Usted ha intentado combinar
canciones que no pueden
combinarse.
Información adicional
E
31
Page 100

TOC
(parpadeando)
TOC reading
TRACK
(encendido)
TRACK
(parpadeando)
Welcome
El deck de minidiscos está
actualizando la tabla de índice
(TOC). (No mueva el deck de
minidiscos. Si lo hiciese, es
posible que el material grabado
no se almacenase normalmente.
Si desconecta el cable de
alimentación inmediatamente
después de la grabación, ésta no
se almacenará.
El deck de minidiscos está
leyendo el contenido del
minidisco. (Si el minidisco
insertado es nuevo, “TOC
Reading” se visualizará durante
más tiempo que en el caso de
minidiscos ya utilizados.)
El deck de minidiscos está
grabando una parte en blanco.
El deck de minidiscos está
grabando sobre material existente.
Se visualizará cuando inserte un
minidisco.
Guía para la solución
de problemas
Si se encuentra con algún problema al
E
utilizar su sistema estéreo, repase la lista de
comprobaciones siguiente después de haber
32
verificado los dos puntos siguientes:
• El cable de alimentación deberá estar
firmemente conectado.
• Los cables de los altavoces deberán estar
también firmemente conectados.
Si el problema persiste después de haber
realizado las comprobaciones siguientes,
consulte a su proveedor Sony.
General
No hay sonido.
m Presione POWER para conectar la
alimentación del sistema estéreo.
m Ajuste el volumen.
m Hay unos auriculares conectados.
Desconéctelos.
El sonido entre los canales derecho e
izquierdo está invertido.
m Compruebe la conexión y la
ubicación de los altavoces.
El zumbido o el ruido es considera-ble.
m Hay un televisor o una
videograbadora demasiado cerca
del sistema estéreo. Aleje el
sistema estéreo del televisor o de la
videograbadora.
En el visualizador parpadea “0:00”.
m Se ha producido una interrupción
del suministro eléctrico. Vuelva a
ajustar el reloj y a programar el
temporizador.
Información adicional
Reproductor de discos
compactos
La bandeja del disco compacto no se
cierra.
m El disco compacto no está
correctamente colocado.
El disco compacto no se reproduce.
m El disco compacto está sucio.
m El disco compacto está insertado
con la etiqueta hacia abajo.
m El reproductor está en el modo de
pausa.
m
Se ha condensado humedad.
Deje el sistema con la alimentación
conectada durante
aproximadamente una hora hasta
que se haya evaporado la humedad.
La reproducción no se inicia desde la
primera canción.
m El reproductor de discos
compactos está en el modo de
reproducción programada o
aleatoria. Presione CONTINUE.
La indicación “PROGRAM” o
“SHUFFLE” desaparecerá.
En el visualizador aparece “OVER”.
m El disco compacto ha llegado al
final durante la búsqueda rápida
manteniendo presionada ).
En el visualizador aparece “Step Full”.
m Usted ya ha programado 24
canciones.
En el visualizador aparece “Name
Full”.
m Usted ya ha introducido 21
nombres de discos.
Deck de minidiscos
El deck de minidiscos no funciona o
funciona mal.
m El minidisco puede estar dañado
(aparece “Disc Error”).
Extraiga el minidisco y vuelva a
insertarlo. Si sigue apareciendo
“Disc Error”, reemplace el
minidisco.
El deck de minidiscos no reproduce.
m Se ha condensado humedad.
Extraiga el minidisco y deje el
sistema con la alimentación
conectada durante
aproximadamente una hora hasta
que la humedad se evapore.
m Ha insertado el minidisco en
sentido erróneo. Deslícelo en su
compartimiento con la cara de la
etiqueta hacia arriba y la flecha
apuntando hacia la abertura hasta
que el deck lo sujete.
m Es posible que el minidisco no esté
grabado. Reemplace el minidisco
por otro grabado.
El minidisco no se graba.
m El minidisco está protegido contra
grabación (se está visualizando
“Protected”). Deslice la lengüeta
para cerrar la ranura.
m Ha insertado un minidisco
pregrabado. Reemplácelo por otro
grabable.
m No queda suficiente tiempo en el
minidisco. Reemplácelo por otro
minidisco grabable con menos
canciones grabadas o borre
canciones innecesarias.
Un minidisco incompletamente
insertado no puede extraerse.
m El sistema de autobloqueo del
deck de minidisco ha sujetado el
minidisco. Inserte completamente
el minidisco y después presione
MD §.
En el visualizador aparece “OVER”.
m El disco compacto ha llegado al
final durante la búsqueda rápida
manteniendo presionada ).
El sonido posee muchos estáticos.
m Un magnetismo intenso
procedente de un televisor u otro
dispositivo similar está
interfiriendo las operaciones.
Aleje el deck de la fuente de
magnetismo intenso.
SIntonizador
En el visualizador parpadea “TUNED”.
m Ajuste la antena.
En el visualizador parpadea “STEREO”.
m Ajuste la antena.
El zumbido o el ruido es considerable.
m Ajuste la antena.
m La intensidad de la señal es
demasiado débil. Conecte una
antena exterior.
m Connect the earth wire.
No es posible recibir en estéreo un
programa transmitido en estéreo.
m Cuando en el visualizador esté
indicándose “MONO”, presione
STEREO/MONO del telemando
de forma que desaparezca
“MONO”.
m Ajuste la antena.
Temporizador
El temporizador no funciona.
m Ajuste correctamente el reloj.
m Se desconectó el cable de
alimentación. Mientras el
temporizador esté trabajando,
presione el interruptor POWER
para desconectar la alimentación
del sistema.
m Cerciórese de que esté
visualizándose “DAILY” o “REC”.
 Loading...