

Sony MINIDISC ZS-M35 User Manual
Personal MiniDisc System
3-867-609-21 (1)
Personal MiniDisc
System
ZS-M35
Operating Instructions page 2
Manual de instrucciones página 2
GB
GB
ES
ES
ZS-M35
©1999 Sony Corporation
Warning
To prevent fire or shock hazard, do
not expose the player to rain or
moisture.
Notice for customers in the United
Kingdom
A moulded plug complying with BS 1363 is
fitted to this equipment for your safety and
convenience.
To avoid electrical shock, do not open
the cabinet. Refer servicing to
qualified personnel only.
Information
This Compact Disc/MiniDisc player is
classified as a CLASS 1 LASER product.
The CLASS 1 LASER PRODUCT label is
located at the bottom.
Warning
Do not install the appliance in a confined
space, such as a bookcase or built-in cabinet.
Should the fuse in the plug supplied need to
be replaced, same rating fuse approved by
ASTA or BSI to BS 1362, (i.e. marked with
or mark) must be used.
If the plug supplied with this equipment has
a detachable fuse cover, be sure to attach the
fuse cover after you change the fuse. Never
use the plug without the fuse cover. If you
should lose the fuse cover, please contact
your nearest Sony service station.
GB
2
Introduction

Table of contents
Basic Operations
4 Playing a CD
6 Recording a whole CD (Synchronized recording)
8 Playing an MD
10 Listening to the radio
The CD Player•The MD
Player
12 Using the display
15 Checking CD text information
17 Locating a specific track
18 Playing tracks repeatedly
(Repeat Play)
19 Playing tracks in random order
(Shuffle Play)
20 Creating your own programme
(Programme Play)
The Radio
22 Presetting radio stations
24 Playing preset radio stations
25 Using the Radio Data System
(RDS)
Recording
32 Recording the track you are
listening to
(Synchronized recording of a
single track – REC IT)
34 Recording the tracks you
programmed
(Synchronized recording of the
tracks you programmed)
36 Recording from the radio or a CD
38 Extending the recording time
(Monaural recording)
40 Recording on a recorded MD
Editing recorded tracks on
the MD
41 Before editing
43 Erasing recordings
(Erase Function)
46 Dividing recorded tracks
(Divide Function)
48 Combining recorded tracks
(Combine Function)
50 Moving recorded tracks
(Move Function)
51 Labelling recordings
(Name Function)
The Audio Emphasis
56 Selecting the audio emphasis
(SOUND/MEGA BASS)
The Timer
57 Setting the clock
59 Waking up to music
61 Falling asleep to music
62 Timer-recording radio
programmes
Setting Up
64 Preparing the system
68 Saving power
69 Connecting optional components
Additional Information
71 Precautions
73 System limitations of the MD
75 Getting to know the MD
77 Troubleshooting
80 Error messages
81 Specifications
82 Index
Introduction
Basic Operations
GB
GB
3
Basic Operations
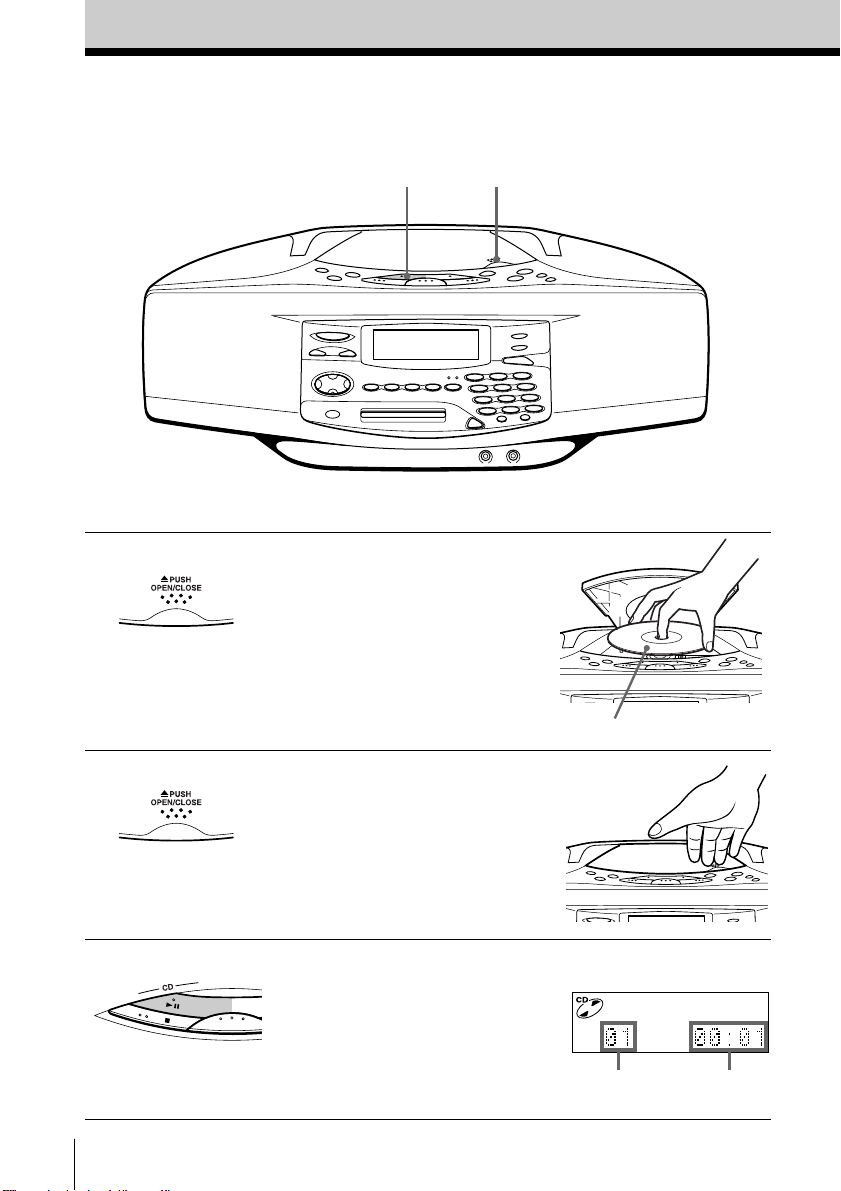
Playing a CD
1, 23
For hookup instructions, see pages 64 - 67.
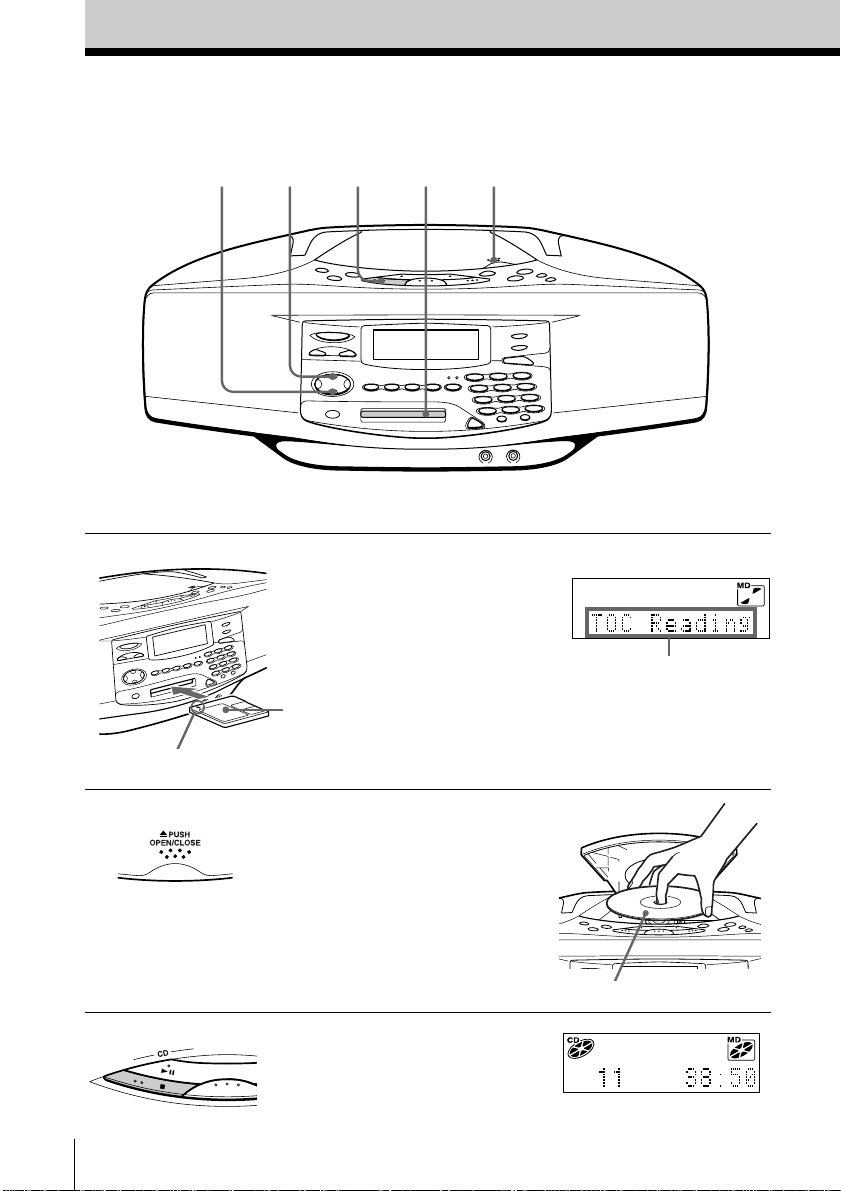
1 Press Z PUSH OPEN/CLOSE
down to open the CD
compartment and place the CD
on the CD compartment.
2 Close the lid of the CD
compartment.
3 Press CD u (CD N on the
remote).
The player turns on (direct
power-on) and the player plays
all the tracks once.
GB
Basic Operations
4
With the label side up
Display
Track
number
Playing
time
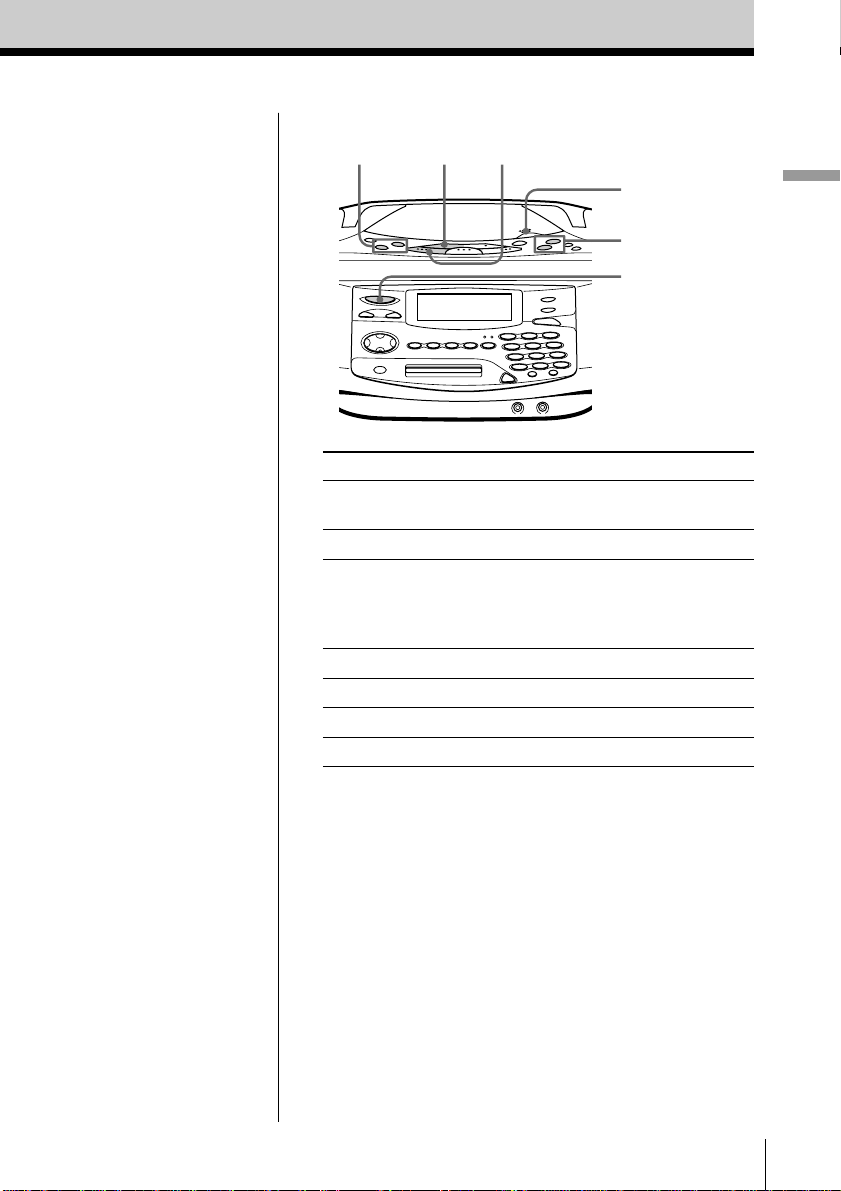
Use these buttons for additional operations
. , >
CD u
CD x
Z PUSH
OPEN/CLOSE
VOLUME –, +
OPERATE
Basic Operations
Tip
Next time you want to
listen to a CD, just press
CD u. The player
turns on automatically
and starts playing the
CD.
To Press
adjust the volume VOLUME +, –
(VOL +, – on the remote)
stop playback CD x
pause playback CD u (CD X on the
remote)
Press the button again to
resume play after pause.
go to the next track >
go back to the previous track .
remove the CD Z PUSH OPEN/CLOSE
turn on/off the player OPERATE
Basic Operations
GB
5
Recording a whole CD
(Synchronized recording)
5
3421
For hookup instructions, see pages 64 - 67.
1 Insert a recordable MD (direct
power-on).
With the label
side up
Insert in the direction of
the arrow
Display
After “TOC Reading” is
displayed, the disc name
will be displayed if it is
labelled.
2 Press Z PUSH OPEN/CLOSE
and place the CD on the CD
compartment.
Press Z PUSH OPEN/CLOSE
again to close the CD
compartment.
3 Press CD x.
GB
Basic Operations
6
With the label side up
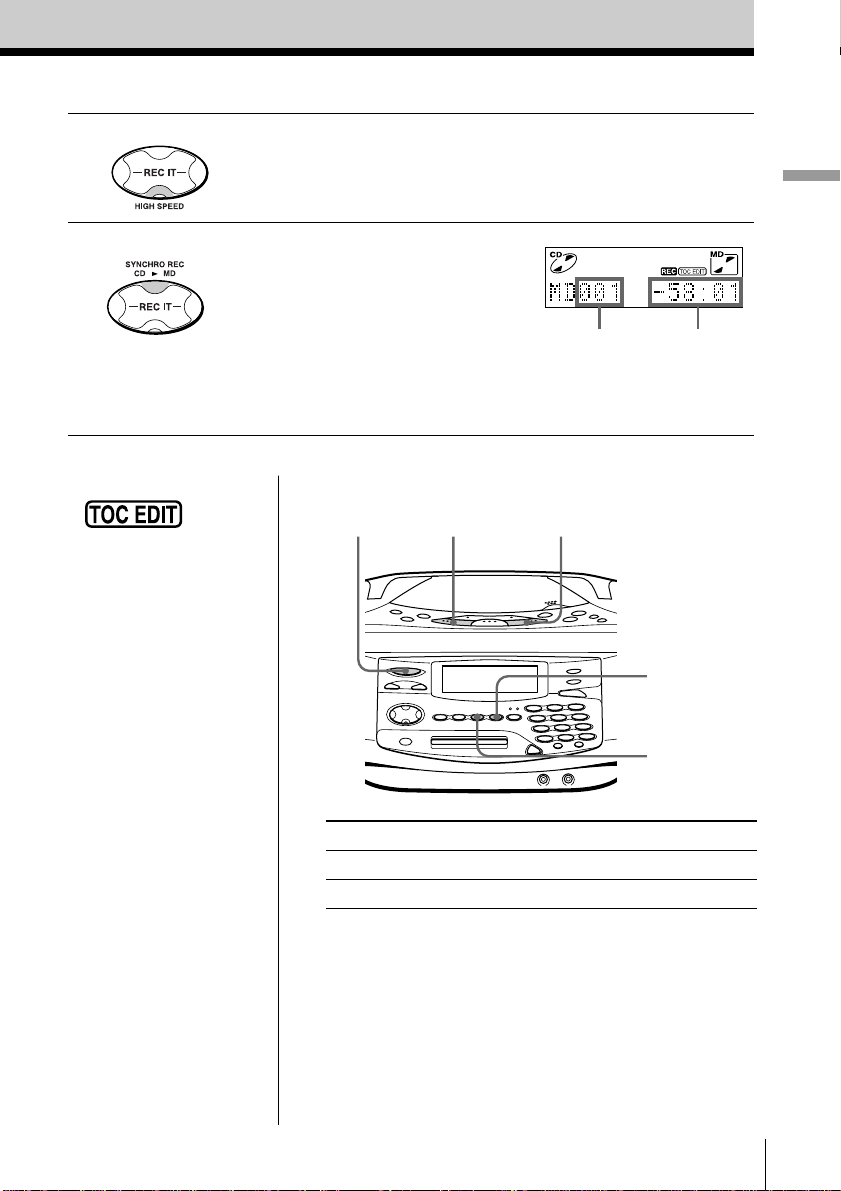
4 To record at high speed, press HIGH SPEED.
The indicator lights up.
To record at normal speed, skip this step.
5 Press SYNCHRO REC CD N
MD.
The player starts recording
automatically.
If the MD has any previous
recording, recording will be
made from the last recorded
position.
Track number
of MD
Basic Operations
Remaining
recording
time of MD
Notes
• After you
stop recording, do not
disconnect the mains
lead or move the
player while “TOC
EDIT” is flashing in the
display. If you do so,
recording may not be
done properly.
• When you record a
whole CD, you cannot
pause recording.
Tips
• Adjusting the volume or
the audio emphasis
(page 56) will not affect
the recording level.
Keep the volume at a
moderate level so as to
prevent the sound from
skipping.
• To record over the
previous recording, see
page 40.
• Once the clock is set, the
recording date and time
are stamped
automatically (page 57).
• You can label an MD or a
track during recording
(page 51).
Use these buttons for additional operations
OPERATE
To Press
stop recording MD x or CD x
turn on/off the player OPERATE
If “CD>MD OK?” alternates with time display
There is not enough space on the MD to record the whole
CD.
If it is all right to record as much as possible and cancel
recording of some tracks, press YES•ENTER. To stop
recording, press NO•CANCEL.
If any other messages are displayed, see page 80.
CD x
MD x
YES
ENTER
NO
CANCEL
Basic Operations
GB
7

Playing an MD
1
For hookup instructions, see pages 64 - 67.
2
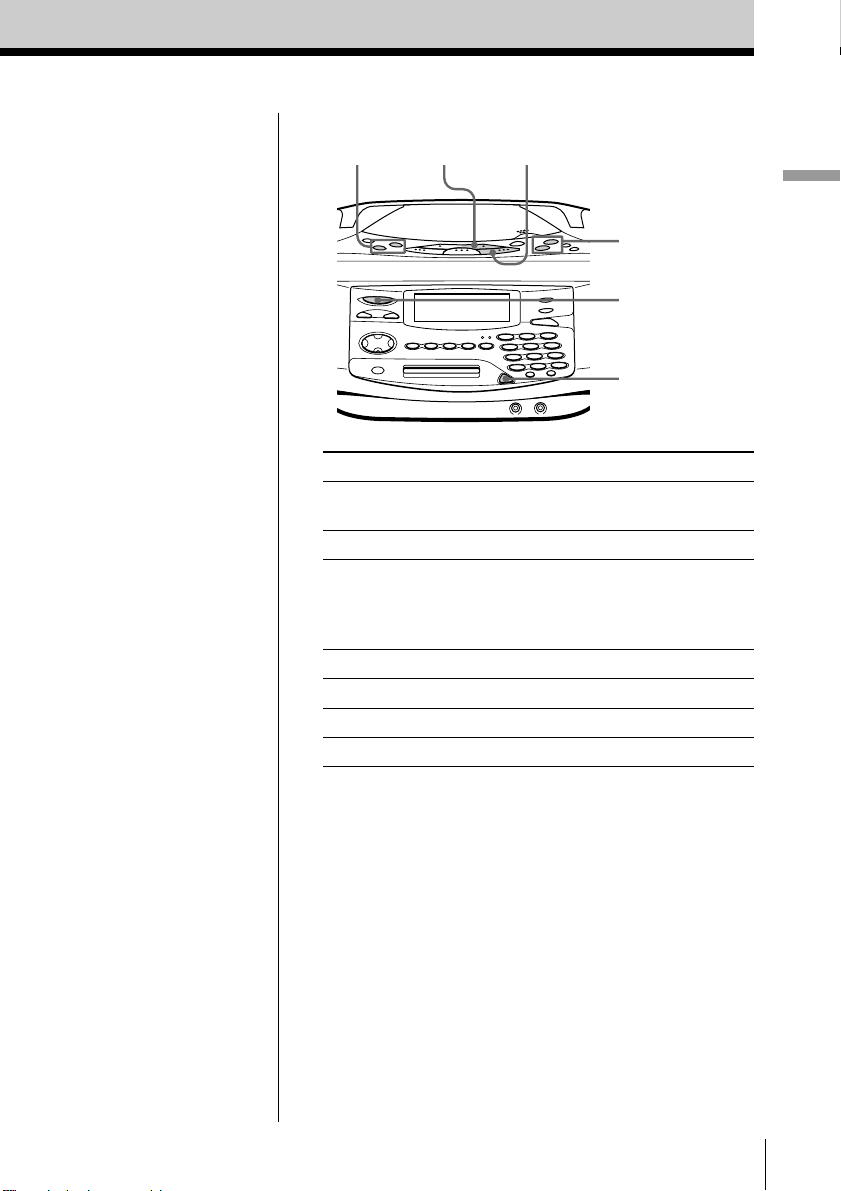
1 Insert the MD (direct power-on).
With the label
side up
Insert in the direction of
the arrow
Display
After “TOC Reading” is
displayed, the disc name
will be displayed if it is
labelled.
2 Press MD u (MD N on the
remote).
The player plays all the tracks
once.
GB
Basic Operations
8
Track name is displayed
if it is labelled.
m
Track number
Playing time
Use these buttons for additional operations
., >
MD u
MD x
VOLUME –, +
OPERATE
Z
Basic Operations
Tip
Next time you want to
listen to a MD, just press
MD u. The player
turns on automatically
and starts playing the
MD.
To Press
adjust the volume VOLUME +, –
(VOL +, – on the remote)
stop playback MD x
pause playback MD u (MD X on the
remote)
Press the button again to
resume play after pause.
go to the next track >
go back to the previous track .
remove the MD Z
turn on/off the player OPERATE
Basic Operations
GB
9
Listening to the radio
12
For hookup instructions, see pages 64 - 67.
10
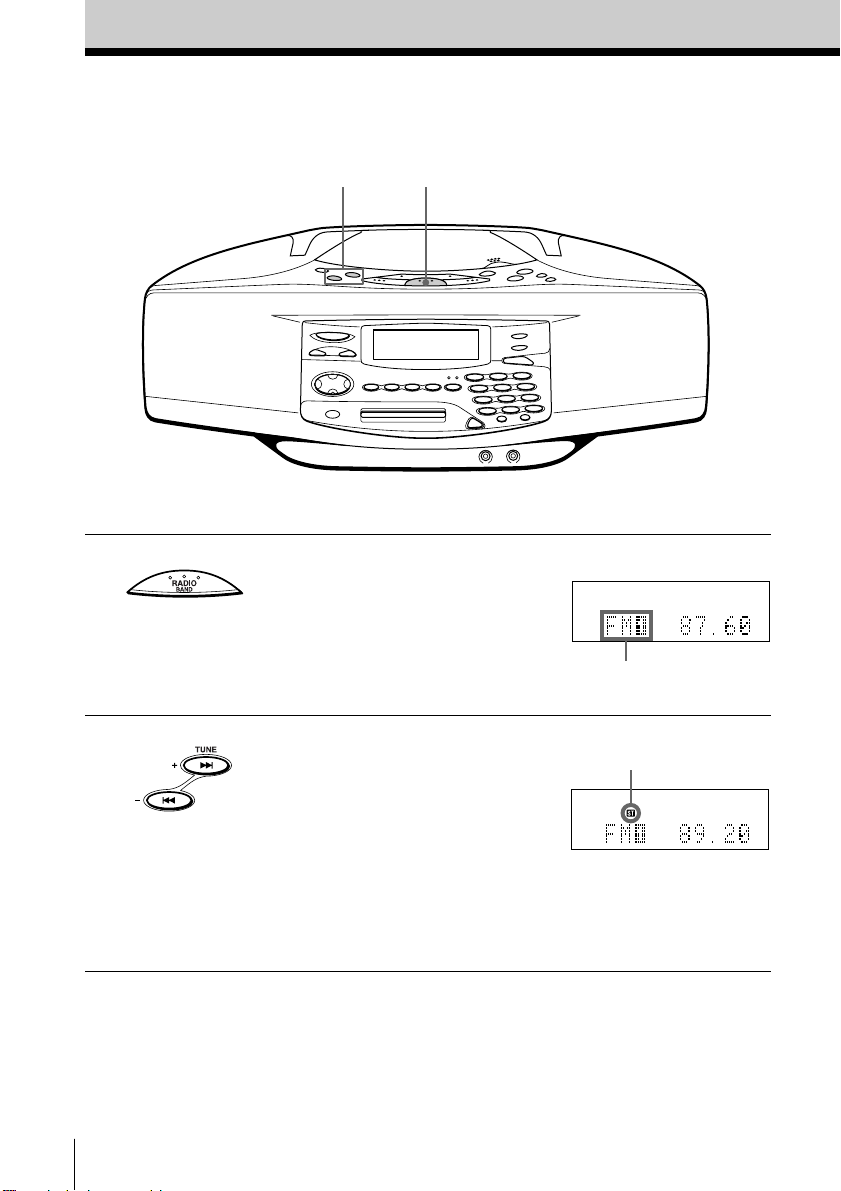
1 Press RADIO BAND until the
band you want appears in the
display (direct power-on).
2 Hold down TUNE + or TUNE –
until the frequency digits begin to
change in the display.
The player automatically scans
the radio frequencies and stops
when it finds a clear station.
If you can’t tune in a station,
press TUNE + or TUNE –
repeatedly to change the
frequency step by step.
GB
Basic Operations
Display
“FM1”, “FM2”, “MW” or
“LW” appears
Indicates an FM stereo
broadcast
Use these buttons for additional operations
OPERATE
VOLUME –, +
MONO/ST
REPEAT
Basic Operations
Tips
• The “FM1” and “FM2”
bands have the same
functions. You can store
the stations you want
separately in “FM1” and
“FM2” (page 22).
• If the FM broadcast is
noisy, press MONO/
ST•REPEAT (MODE on
the remote) until
“Mono” appears in the
display and radio will
play in monaural.
• Next time you want to
listen to the radio, just
press RADIO BAND.
The player turns on
automatically and starts
playing the previous
station.
To Press
adjust the volume VOLUME +, –
turn on/off the radio OPERATE
(VOL +, – on the remote)
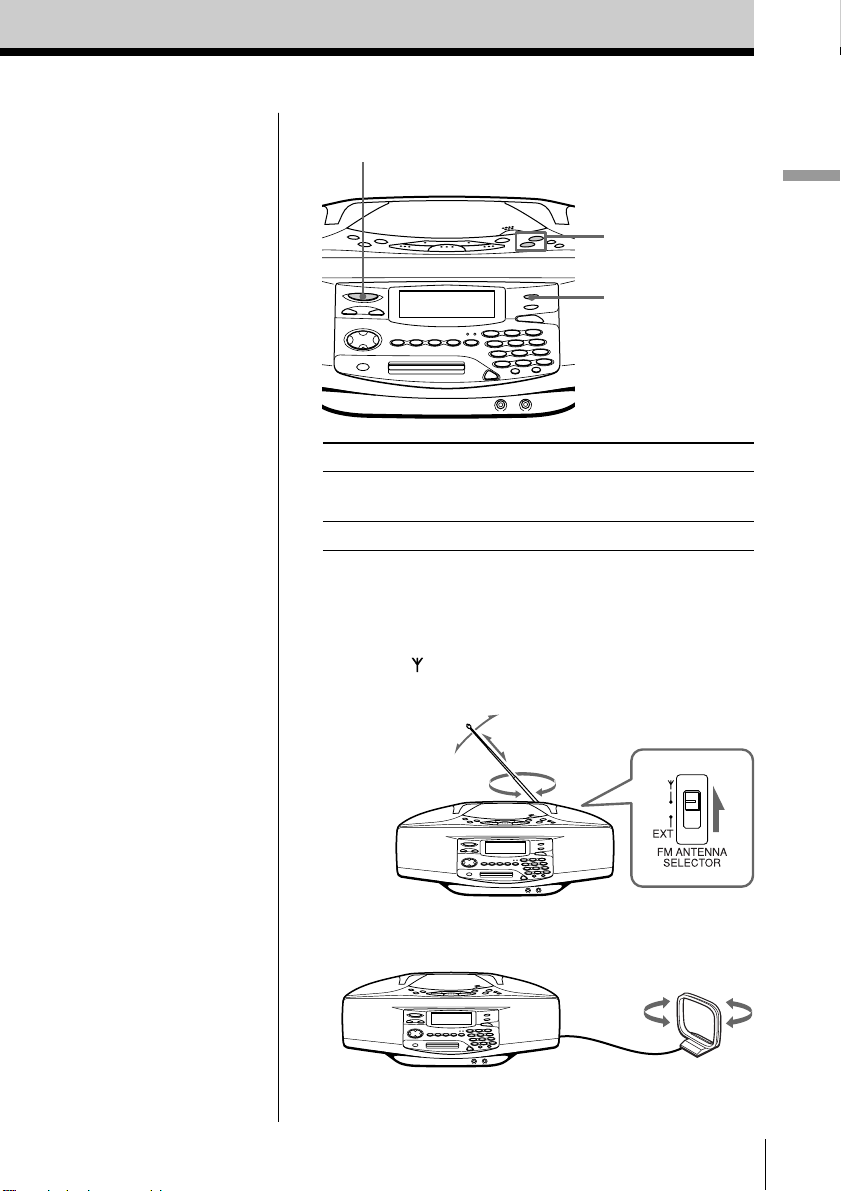
To improve broadcast reception
FM:
Set the FM ANTENNA SELECTOR at the rear of the
player to “
” (telescopic aerial).
Reorient the aerial for FM.
MW/LW:
Keep the MW/LW loop aerial as far as possible from
the player and reorient it.
If the broadcast is still noisy, connect the external
aerial (page 67).
Basic Operations
11
GB
The CD Player•The MD Player
Using the display
You can check information about the CD
and MD using the display.
DISPLAY
Tip
When using the CD
containing text
information, the disc
name, the artist name,
etc. appear in the
display (page 15).
Note
During repeat play
(page 18), shuffle play
(page 19) and
programme play (page
20), the number of
tracks left and
remaining time on the
CD will not be
displayed.
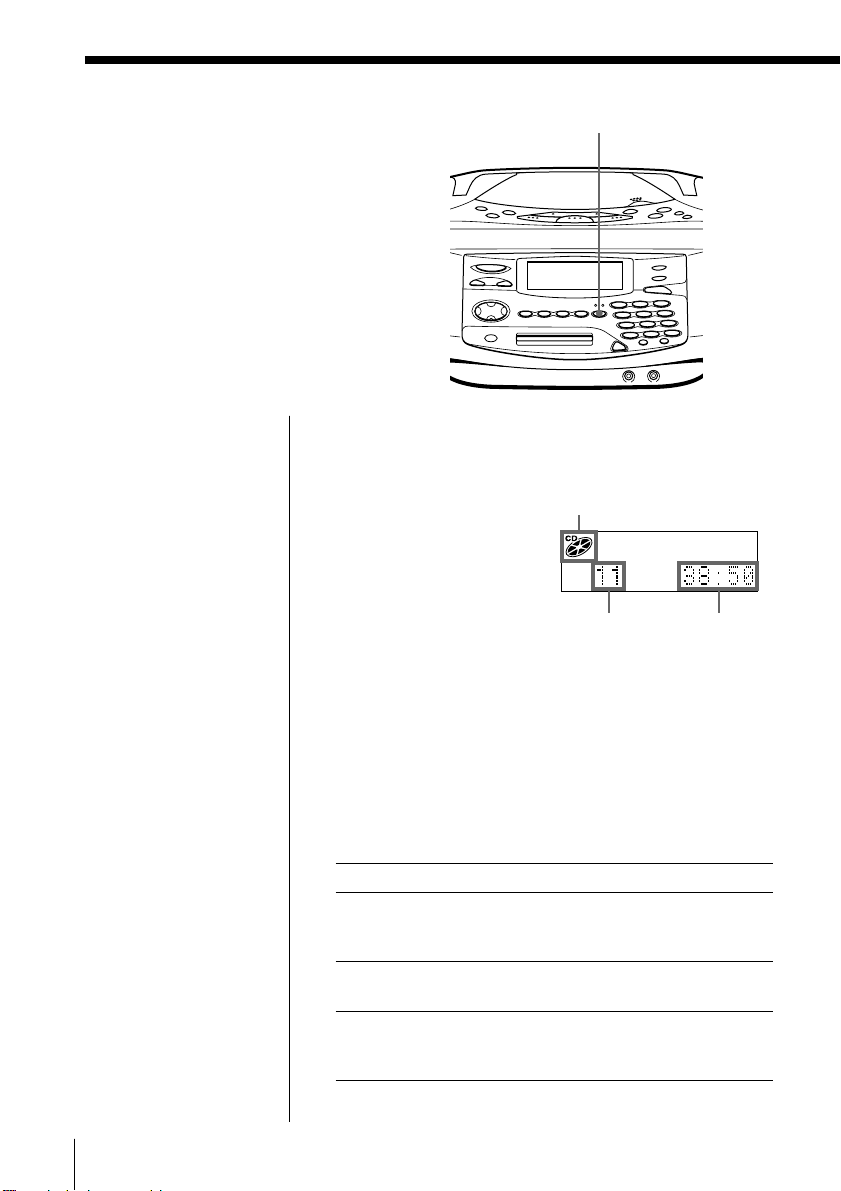
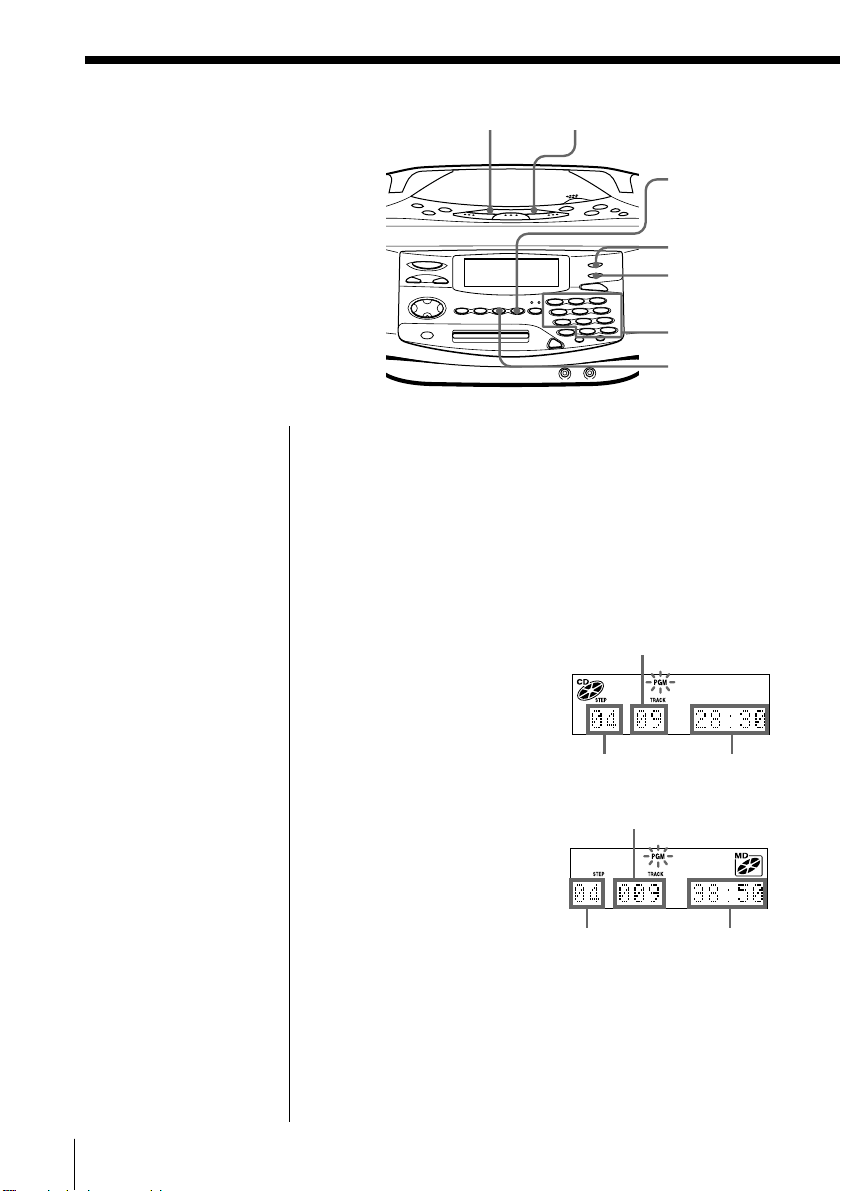
During stop (CD)
The total track number and playing time are
displayed.
CD indication
Total track
number
Total playing
time
During play (CD)
The current track number and playing time are
displayed.
To check the remaining time
Press DISPLAY.
To display
the current track number and once
remaining time on the current
track
the number of tracks left and t wi ce
remaining time on the CD
the current track number three times
and playing time (normal
indication)
Press DISPLAY
12
GB
The CD Player•The MD Player
Tip
The disc name is
displayed only with the
MDs that have been
electronically labelled.
If the MDs not be
labelled, the
indication only will be
displayed.
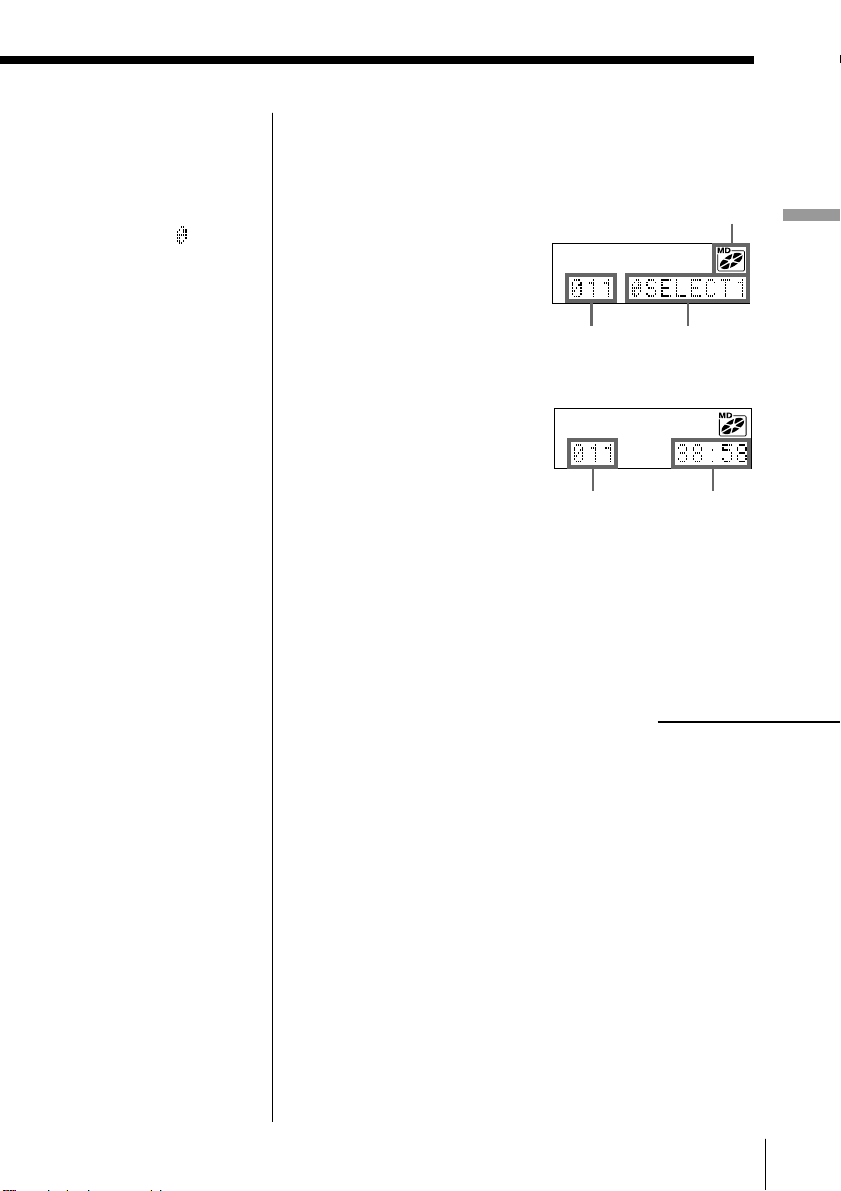
During stop (MD)
The total track number and playing time are
displayed.
MD
indication
The CD Player•The MD Player
Total track
number
Disc name
m
Total track
number
To check the remaining recording time on the MD
Press DISPLAY.
Total playing
time
continued
The CD Player•The MD Player
13
GB
Using the display (continued)
Tip
The track name is
displayed only with the
MDs that have been
electronically labelled.
If the MDs not labelled,
the indication only
will be displayed.
Note
During repeat play
(page 18), shuffle play
(page 19) and
programme play (page
20), the number of
tracks left and
remaining time on the
MD will not be
displayed.
During play (MD)
The current track number and the track name are
displayed first, then the current track number and the
playing time are displayed.
To check the remaining time, recording date and
time, etc.
Press DISPLAY.
To display
the current track number and once
remaining time on the current
track
the number of tracks left t wi ce
and the disc name
the number of tracks left three times
and remaining time on
the MD
recording date and time* four times
the current track number five times
and the track name
the current track number six times
and playing time
(normal indication)
Press DISPLAY
14
GB
The CD Player•The MD Player
* Once the clock is set, the recording date and time are
stamped automatically (page 57).
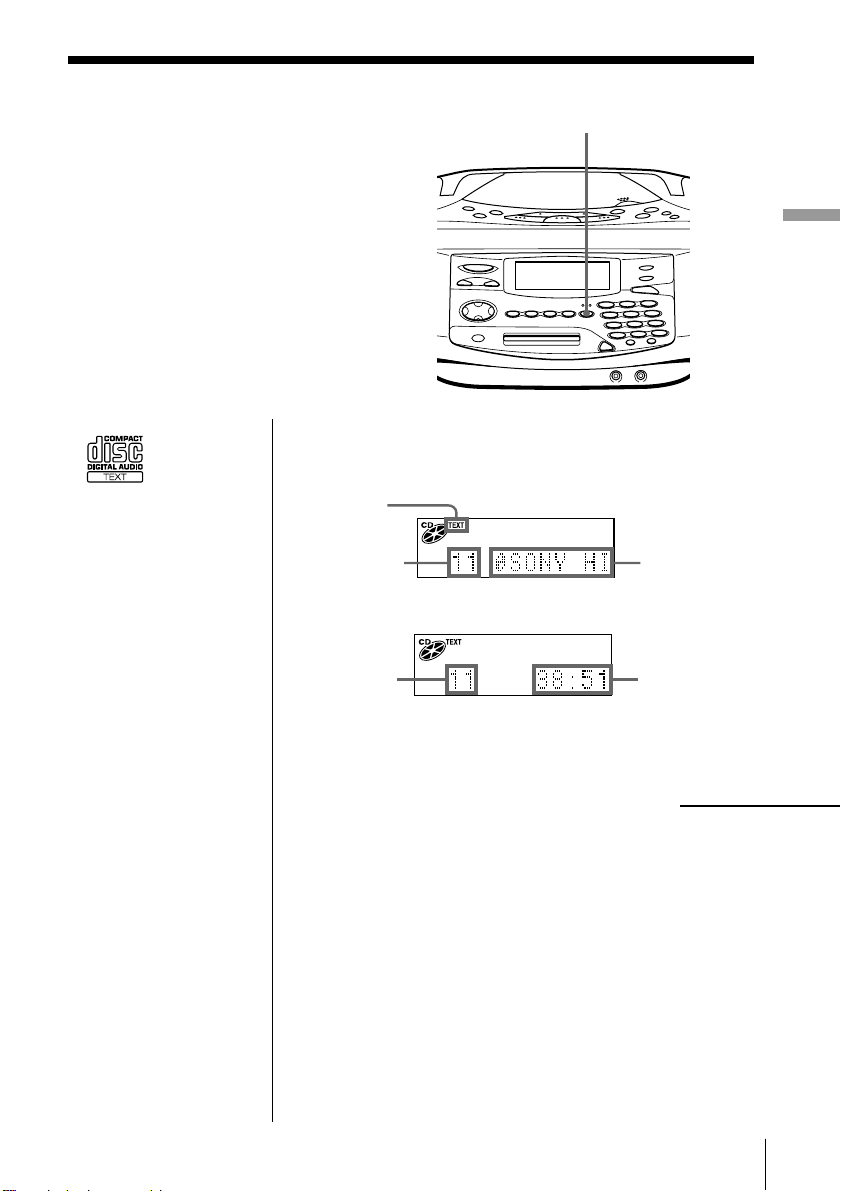
Checking CD text information
You can display the CD text (the disc
name, the artist name, the track name,
etc.) when this information is recorded
on the CD.
DISPLAY
The CD Player•The MD Player
Tips
• This mark
appears on
the CD, the
CD case, etc., when the
CD contains text
information.
• This player can display
up to 1,500 characters
of text information per
CD. If a CD has text
information of more
than 1,500 characters,
the excess characters
will be omitted.
During stop (CD)
The total track number and playing time are
displayed.
CD text
indication
Total track
number
Disc name/
artist name
m
Total track
number
Total playing
time
continued
The CD Player•The MD Player
15
GB

Checking CD text information (continued)
During play (CD)
The current track number and the track name are
displayed first, then the current track number and the
playing time are displayed.
If you press DISPLAY, indications in the display
change as follows:
To display
the current track number and once
remaining time on the current
track
the number of tracks left and twi ce
the disc name/artist name
the number of tracks left and three times
remaining time on the CD
the current track number and four times
the current track name
the current track number and five times
playing time (normal indication)
Press DISPLAY
16
GB
The CD Player•The MD Player
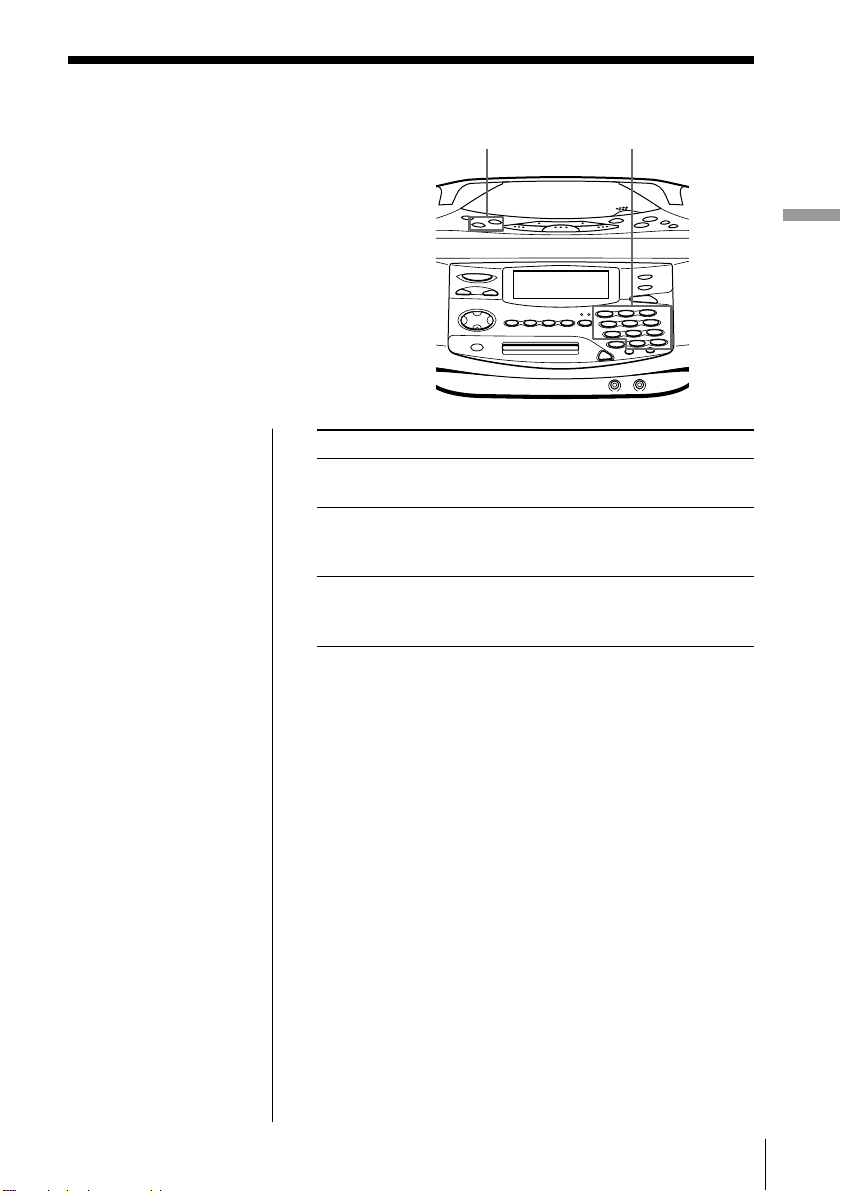
Locating a specific track
You can quickly locate any track on a CD
or an MD using the number/character
buttons. You can also find a specific
point in a track while playing a CD or an
MD.
., >
Number/character
buttons
The CD Player•The MD Player
Note
You cannot locate a
specific track if “REP
PGM”, “REP SHUF”,
“PGM” or “SHUF” is
lit in the display. Turn
off the indication by
pressing x.
Tips
• To locate a track
numbered over 10,
press >10 first, then the
corresponding
number/character
buttons.
Example:
To play the track
number 23, press >10
first, then 2 and 3.
To play the track
number 10, you can use
the 0/10 button as well
as >10, 1 and 0.
• To select a track on an
MD numbered 100 or
more, press >10 twice,
then the corresponding
number/character
buttons.
To locate Press
a specific track directly the number/character button of
the track.
a point while listening to > (forward) or . (backward)
the sound while playing and hold down
until you find the point.
a point while observing > (forward) or . (backward)
the dis play in pause and hold down until
you find the point.
The CD Player•The MD Player
17
GB
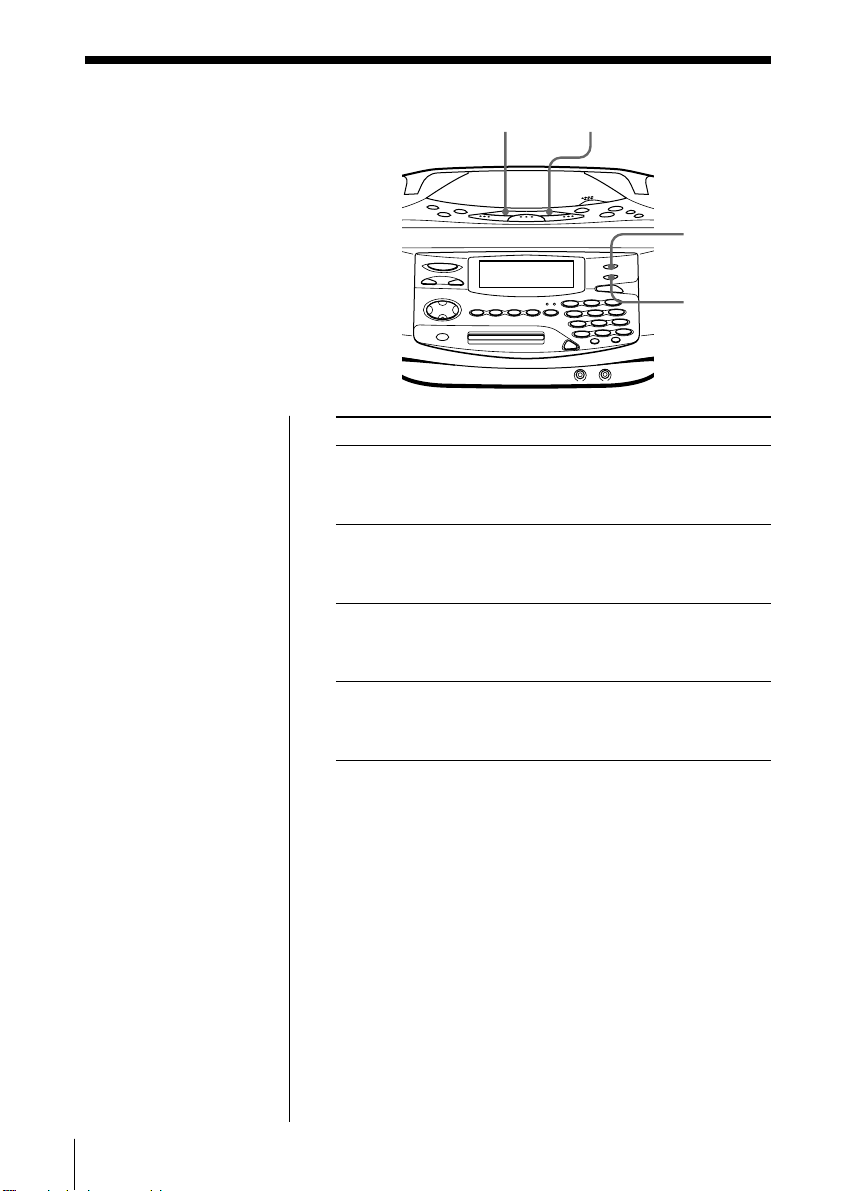
Playing tracks
repeatedly
(Repeat Play)
CD u MD u
You can play tracks repeatedly in
normal, shuffle or programme play
modes.
On the remote
During stop, press
MODE repeatedly until
“REP 1”, “REP ALL”,
“REP SHUF” or “REP
PGM” appears in the
display. Then play the
CD or the MD.
You can also select
“REP 1” or “REP ALL”
during play.
To repeat
a single track
all the tracks
tracks in random order
programmed tracks
REPEAT
SHUF/PGM
Do this
1 Play the track you want.
2 Press REPEAT until “REP 1”
appears in the display.
1 Start normal play.
2 Press REPEAT until “REP ALL”
appears in the display.
1 Start shuffle play (page 19).
2 Press REPEAT until “REP
SHUF” appears in the display.
1 Start programme play (page 20).
2 Press REPEAT until “REP PGM”
appears in the display.
18
GB
The CD Player•The MD Player
To cancel Repeat Play
Stop play first. Then, press REPEAT until “REP”
disappears from the display.
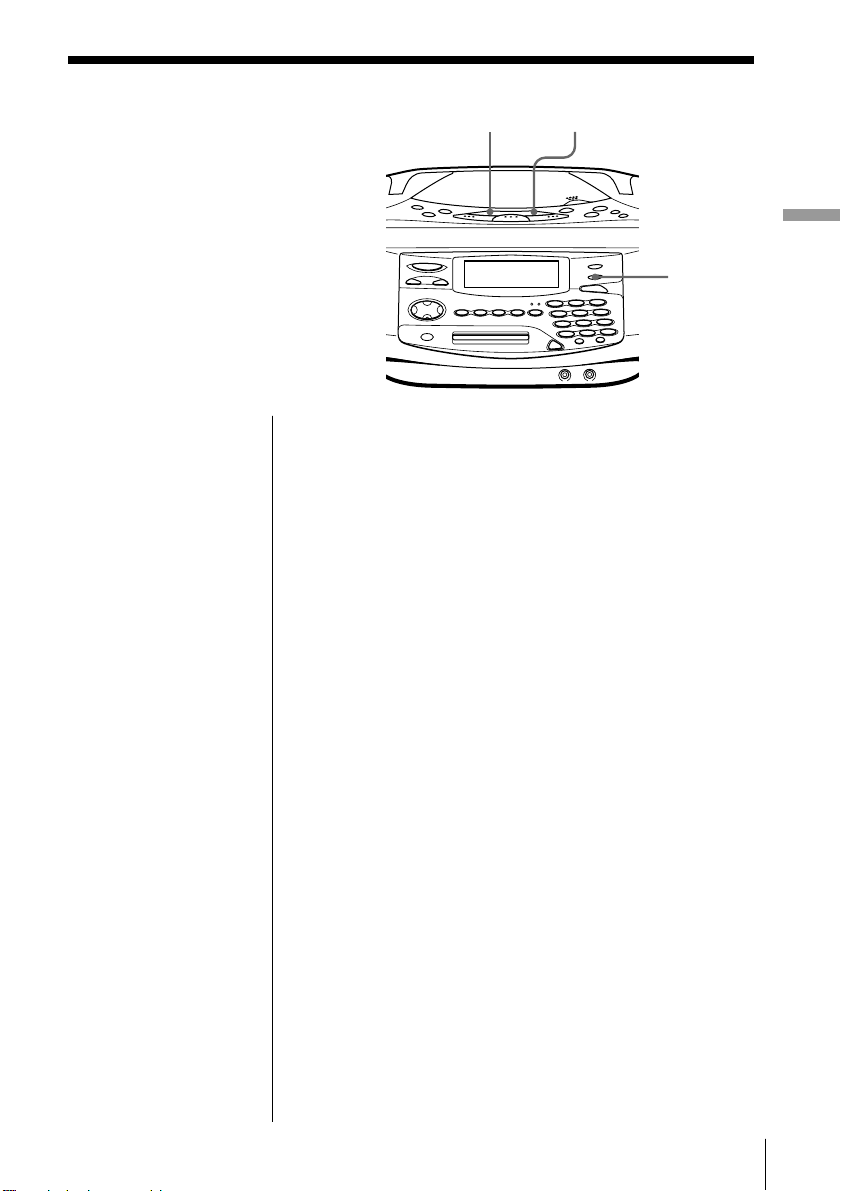
Playing tracks
in random
CD u MD u
order
You can play tracks in random
order.
Tip
During shuffle play,
you cannot select the
previous track by
pressing ..
On the remote
Press MODE until
“SHUF” appears in the
display.
(Shuffle Play)
The CD Player•The MD Player
SHUF/PGM
Before you begin, make sure that the CD or MD player
is in stop mode.
1 Press SHUF/PGM until “SHUF” appears in the
display.
2 Press CD u (or MD u) to start shuffle play.
To cancel Shuffle Play
Stop play first. Then, press SHUF/PGM until “SHUF”
disappears from the display.
The CD Player•The MD Player
19
GB
Creating your
own programme
(Programme Play)
CD u MD u
YES
ENTER
You can arrange the playing order
of up to 20 tracks on a CD or an MD.
On the remote
Press MODE until
“PGM” appears in the
display, then press the
number/character
button to select the
track.
Before you begin, make sure that the CD or MD player
is in stop mode.
1 Press SHUF/PGM until “PGM” appears in the
2 Press the number/character buttons for the tracks
Tip
If you made a mistake,
press NO•CANCEL
and re-enter the track
number using the
number/character
buttons.
REPEAT
SHUF/PGM
Number/
character
buttons
NO
CANCEL
display.
you want to programme in the order you want.
(In case of CD)
Track number
Playing
order
Total programmed
time
20
GB
The CD Player•The MD Player
Playing
order
Track number
Total programmed
time
(In case of MD)
3 Press CD u ( or MD u) to start programme
play.

Tips
• If the programme play
is finished, the
programme is saved.
You can play the same
programme again by
pressing u.
• If you open the lid of
the CD compartment,
the programme is
erased.
• If you take out the MD,
the programme is
erased.
• During play, total
programmed time
cannot be displayed.
To cancel Programme Play
Stop play first. Then, press SHUF/PGM until “PGM”
disappears from the display.
To check the order of tracks before play
Before starting the programme play, press
YES•ENTER.
Every time you press YES•ENTER, the track number
appears in the programmed order.
To change the current programme
Change before starting the programme play.
To
erase the last track in
the programme
change the whole
programme completely
Do this
1 Press NO•CANCEL.
The track programmed last is
erased.
2 Re-enter the track numbers by
pressing the number/character
buttons.
1 Press x to erase the whole
programme.
2 Create a new programme
following the programming
procedure.
The CD Player•The MD Player
The CD Player•The MD Player
21
GB
The Radio
Presetting radio stations
You can store radio stations into the
player’s memory. You can preset
up to 40 stations, 10 for each band in
any order.
YES
ENTER
RADIO
BAND
AUTO PRESET/
RDS
EDIT
Number/
character
buttons
>, .
Tip
If you automatically
preset the “FM1” or
“FM2” band, 10 radio
stations are stored in
“FM1” band and 10
more radio stations are
stored in “FM2” band.
1 Press RADIO BAND until the band you want
appears in the display.
2 Hold down AUTO PRESET/RDS until “Auto
Preset” flashes in the display.
The stations are stored in memory from the lower
frequencies (from the preset number 1, in
numerical order) as long as the station has a signal
strong enough.
When you’ve done presetting, the station stored in
the preset number 1 will be tuned in
automatically.
If a station cannot be preset automatically
You need to preset a station with a weak signal
manually. Also, when you want to replace preset
stations with a new one, proceed as follows:
1 Press RADIO BAND until the band you want
appears in the display.
2 Press TUNE + or TUNE – repeatedly until you
tune in the station you want.
3 Hold down the number/character button that you
want to preset the new station on for 2 seconds.
The new station replaces the old one.
22
GB
The Radio
The characters you can
input
• Uppercase letters:
ABCD.....WXYZ
• Lowercase letters:
abcd.....wxyz
• Numbers and symbols:
0123456789!"#$%&()*.;
<=>? @_`+ –’,/:
(space)
To label the preset station
1 According to the procedure on page 24, tune in the
station you want to label.
2 Press EDIT for 2 seconds.
3 Input the name of the station (up to 8 characters).
For details, see step 3 on page 52.
To Use
move the cursor > or .
select the characters the number/character
buttons
erase the characters DELETE
insert the characters INSERT
4 Press YES•ENTER.
The Radio
The Radio
23
GB
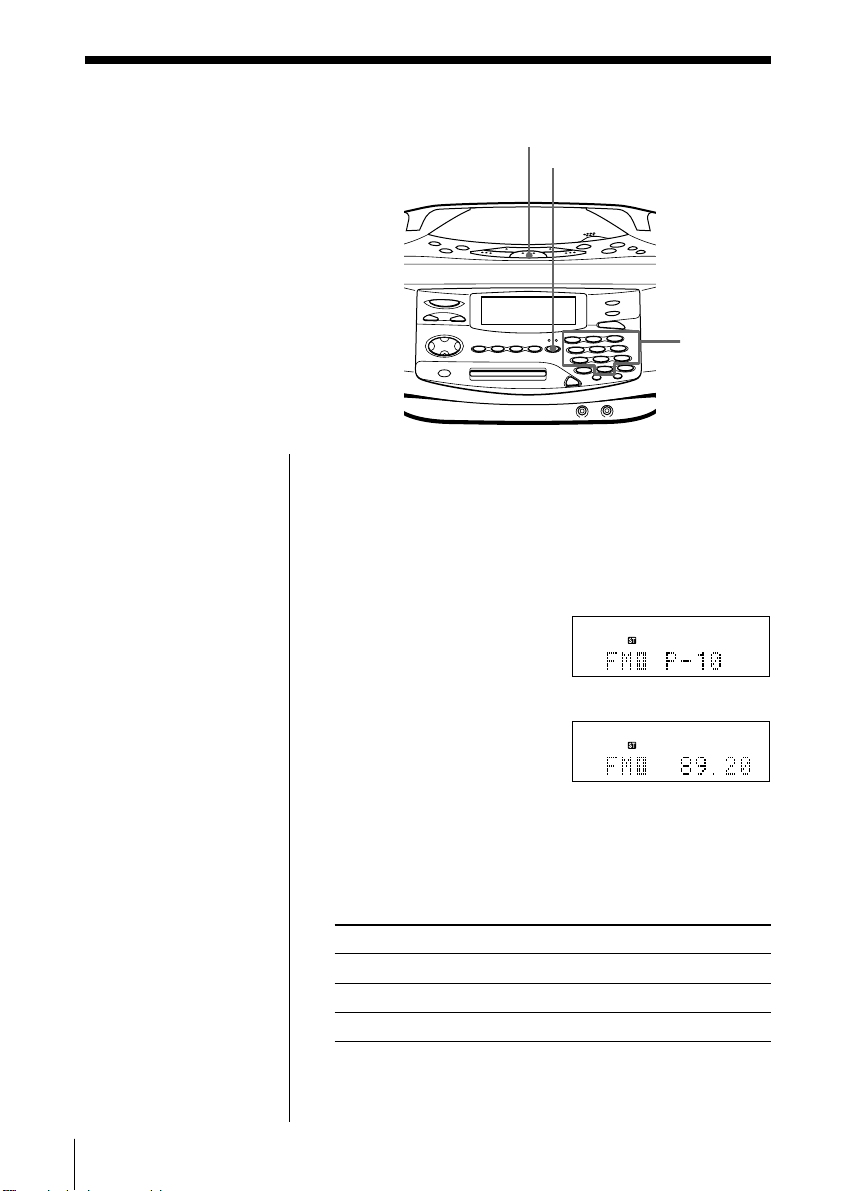
Playing preset radio stations
Once you’ve preset the stations,
use the number/character buttons
to tune in your favourite stations.
1 Press RADIO BAND until the band you want
2 Press the number/character buttons of the station
RADIO
BAND
DISPLAY
Number/
character
buttons
appears in the display.
you want.
The preset number is displayed, then the
frequency of the station.
24
GB
m
To check the station name and preset number
Press DISPLAY.
Each time you press the button, the indication in the
display changes as follows:
To display Press DISPLAY
station name once
preset number twice
frequency (normal display) three times
The Radio
Using the Radio Data System (RDS)
Radio Data System (RDS) is a
broadcasting service that allows
radio stations to send additional
information along with the regular
programme signal. This player
offers convenient RDS features like
station name display, location of
stations by programme type, etc.
RDS is available only on FM
stations.
YES
ENTER
RADIO
BAND
DISPLAY
AUTO PRESET/
RDS
The Radio
EDIT
>, .
Notes
• Not all FM stations
provide RDS services,
nor do they provide the
same type of services. If
you are not familiar
with the RDS system,
check with your local
radio stations for
details on RDS services
in your area.
• RDS may not work
properly if the station
you are tuned in is not
transmitting the RDS
signal properly or if the
signal strength is weak.
Before receiving RDS broadcasts
Be sure to preset the FM stations according to the
procedure on page 22.
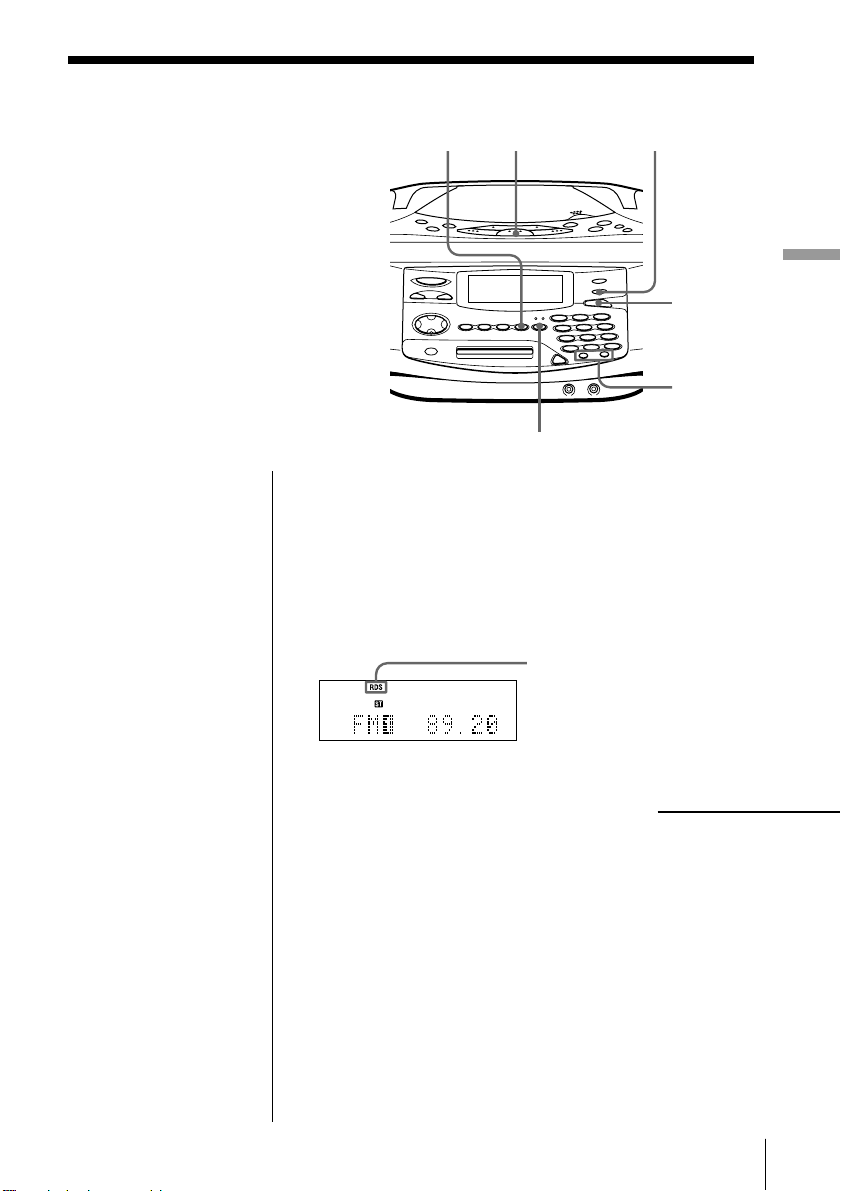
Receiving RDS broadcasts
Simply select a station from the FM band.
When you tune in a
station that provides
RDS services, “RDS” will
be displayed.
continued
The Radio
25
GB

Using the Radio Data System (RDS) (continued)
Notes
• If the RDS broadcast is
not received, the
station name,
programme type and
radio text may not
appear in the display.
In addition, if the
receiving conditions
are not good, the above
information may not
appear in the display
properly.
• When receiving a
station that does not
provide the station
name information,
“No PS” will be
displayed when you
select “PS Disp”.
• When receiving a
station that does not
provide the
programme type
information,
“No PTY” will be
displayed when you
select “PTY Disp”.
• When receiving a
station that does not
provide the radio text
information, “No RT”
will be displayed when
you select “RT Disp“.
• Certain characters (!, ?,
&, etc.) will not be
displayed. Blanks are
inserted in place of
these characters.
To check the RDS information
Press DISPLAY.
Each time you press the button, the indication in the
display changes as follows:
Indication
Station name Station name you labelled
PS Disp Station name,
PTY Disp Programme type
RT Disp Radio text,
Preset number Preset number
Frequency —
(normal display)
What information it shows
up to 8 characters
up to 64 characters
26
GB
The Radio
Note
During recording the
EON function does not
work.
Monitoring traffic information, news, or
weather informatin (EON)
Using the Enhanced Other Networks (EON) function,
the player can automatically switch to a network
station broadcasting traffic information, news, or
weather information. After the programme ends, the
player switches back to the station you were listening
to.
1 Tune in the station that provides the EON
function.
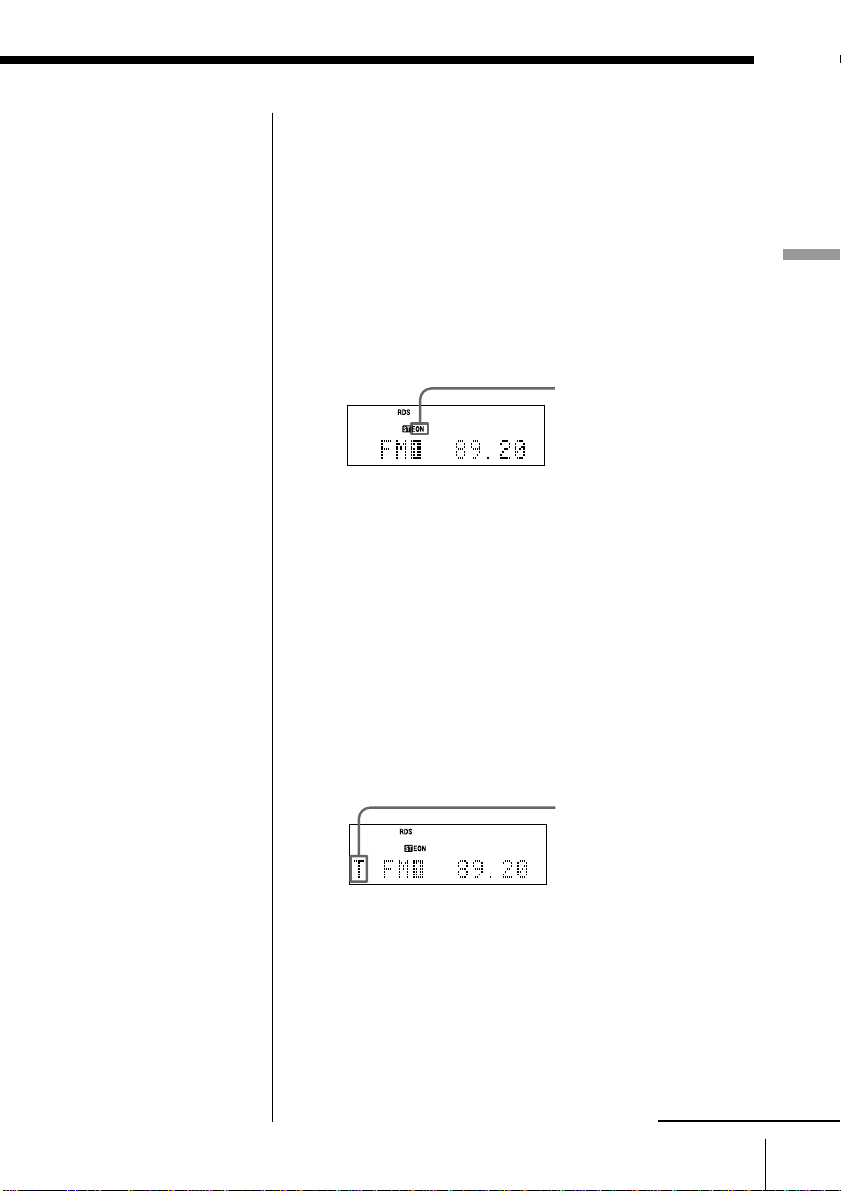
When receiving an
EON station, EON is
displayed.
2 Press AUTO PRESET/RDS.
3 Press > or . until “EON Wait” appears in
the display.
4 Press YES•ENTER.
5 Press > or . until the information you want
appears in the display.
The display changes as follows: “Traffic” t
“News” t “Weather” t “Off”
6 Press YES•ENTER.
The player stands by for the EON stations to start
broadcasting the information you selected.
The Radio
Lights up while standing
by for the information
you selected, and then
starts flashing when
receiving the
information.
“T” for “Traffic”
“N” for “News”
“W” for “Weather”
When not receiving an
EON station, “*” is
displayed.
When a certain network station starts broadcasting
the information you selected, it switches to that
station automatically.
continued
The Radio
27
GB

Using the Radio Data System (RDS) (continued)
Monitoring traffic announcement (TA)
Press TA SEARCH on the remote.
The player starts searching for a station that is
broadcasting the traffic information. When it locates
the station, it switches to that station. If it cannot
locate the station, “Not Found” appears in the display
and it starts searching for a station that will broadcast
the traffic information. When it locates the station, it
switches to that station automatically and stands by
for the traffic information. If you want to select
another station, press TA SEARCH again.
If the station the player located provides the EON
function, the player automatically switches to another
network station when that station starts broadcasting
the traffic information.
28
GB
The Radio

Note
“Not Found” appears
when the programme
type that you selected
is not currently being
broadcast.
Locating a station by programme type (PTY)
You can locate a station you want by selecting a
programme type.
1 While listening to the radio, press AUTO PRESET/
RDS.
2 Press > or . until “PTY Search” appears in
the display.
3 Press YES•ENTER.
4 Press > or . until the programme type you
want appears in the display.
See the list of programme types (PTY) on pages 30
and 31.
5 Press YES•ENTER.
The player starts searching the preset RDS stations
for the programme. “PTY Search” is flashing
during searching.
When the player finds the programme type you
want, it stops searching.
continued
The Radio
The Radio
29
GB

Using the Radio Data System (RDS) (continued)
List of programme types (PTY)
Characters in parentheses show the indications in the display.
News (News)
Short accounts of facts, events and
publicly expressed views, reportage and
actuality.
Current affairs (Affairs)
Topical programme expanding or
enlarging upon the news, generally in
different presentation style or concept,
including debate, or analysis.
Information (Info)
Programme the purpose of which is to
impart advice in the widest sense.
Sport (Sport)
Programme concerned with any aspect of
sport.
Education (Educate)
Programme intended primarily to
educate, of which the formal element is
fundamental.
Drama (Drama)
All radio plays and serials.
Culture (Culture)
Programmes concerned with any aspect
of national or regional culture, including
language, theater, etc.
Science (Science)
Programmes about the natural sciences
and technology.
Varied (Varied)
Used for mainly speech-based
programmes usually of lightentertainment nature, not covered by
other categories. Examples include:
quizzes, panel games, personality
interviews.
Pop Music (Pop M)
Commercial music, which would
generally be considered to be of current
popular appeal, often featuring in
current or recent record sales charts.
Rock Music (Rock M)
Contemporary modern music, usually
written and performed by young
musicians.
M.O.R. Music (M.o.R. M)
(Middle of the Road Music). Common
term to describe music considered to be
“easy-listening”, as opposed to Pop,
Rock or Classical. Music in this category
is often but not always, vocal, and
usually of short duration.
Light classics (Light M)
Classical Musical for general, rather
than specialist appreciation. Examples
of music in this category are
instrumental music, and vocal or choral
works.
Serious classics (Classics)
Performances of major orchestral works,
symphonies, chamber music, etc., and
including Grand Opera.
Other Music (Other M)
Musical styles not fitting into any of the
other categories. Particularly used for
specialist music of which Rhythm &
Blues and Reggae are examples.
Weather (Weather)
Weather reports and forecasts and
Meteorological information.
Finance (Finance)
Stock Market reports, commerce,
trading, etc.
30
GB
The Radio
 Loading...