

Sony MDS-B6P Owner’s Manual
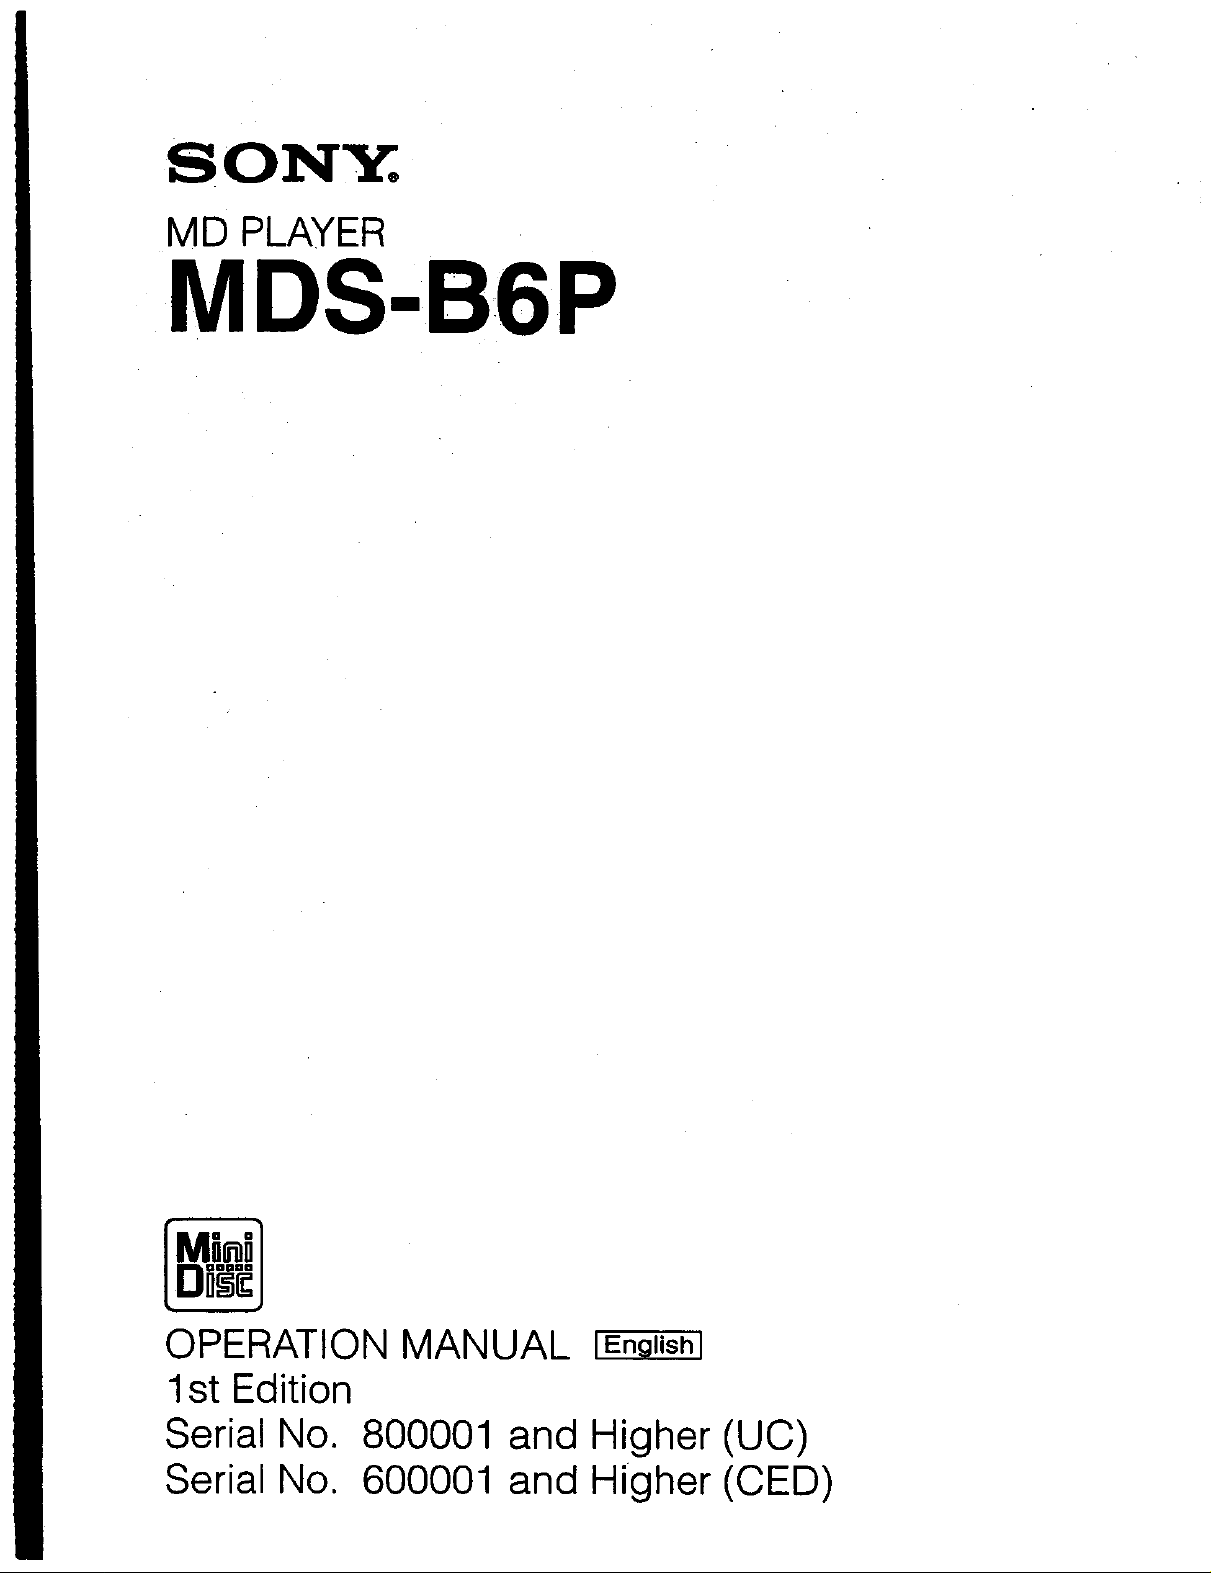
SONY.
MD PLAYER
MDS-B6P
OPERATION MANUAL
1st Edition
Serial No.
Serial No.
800001
6000O1
and Higher (UC)
and Higher (CED)
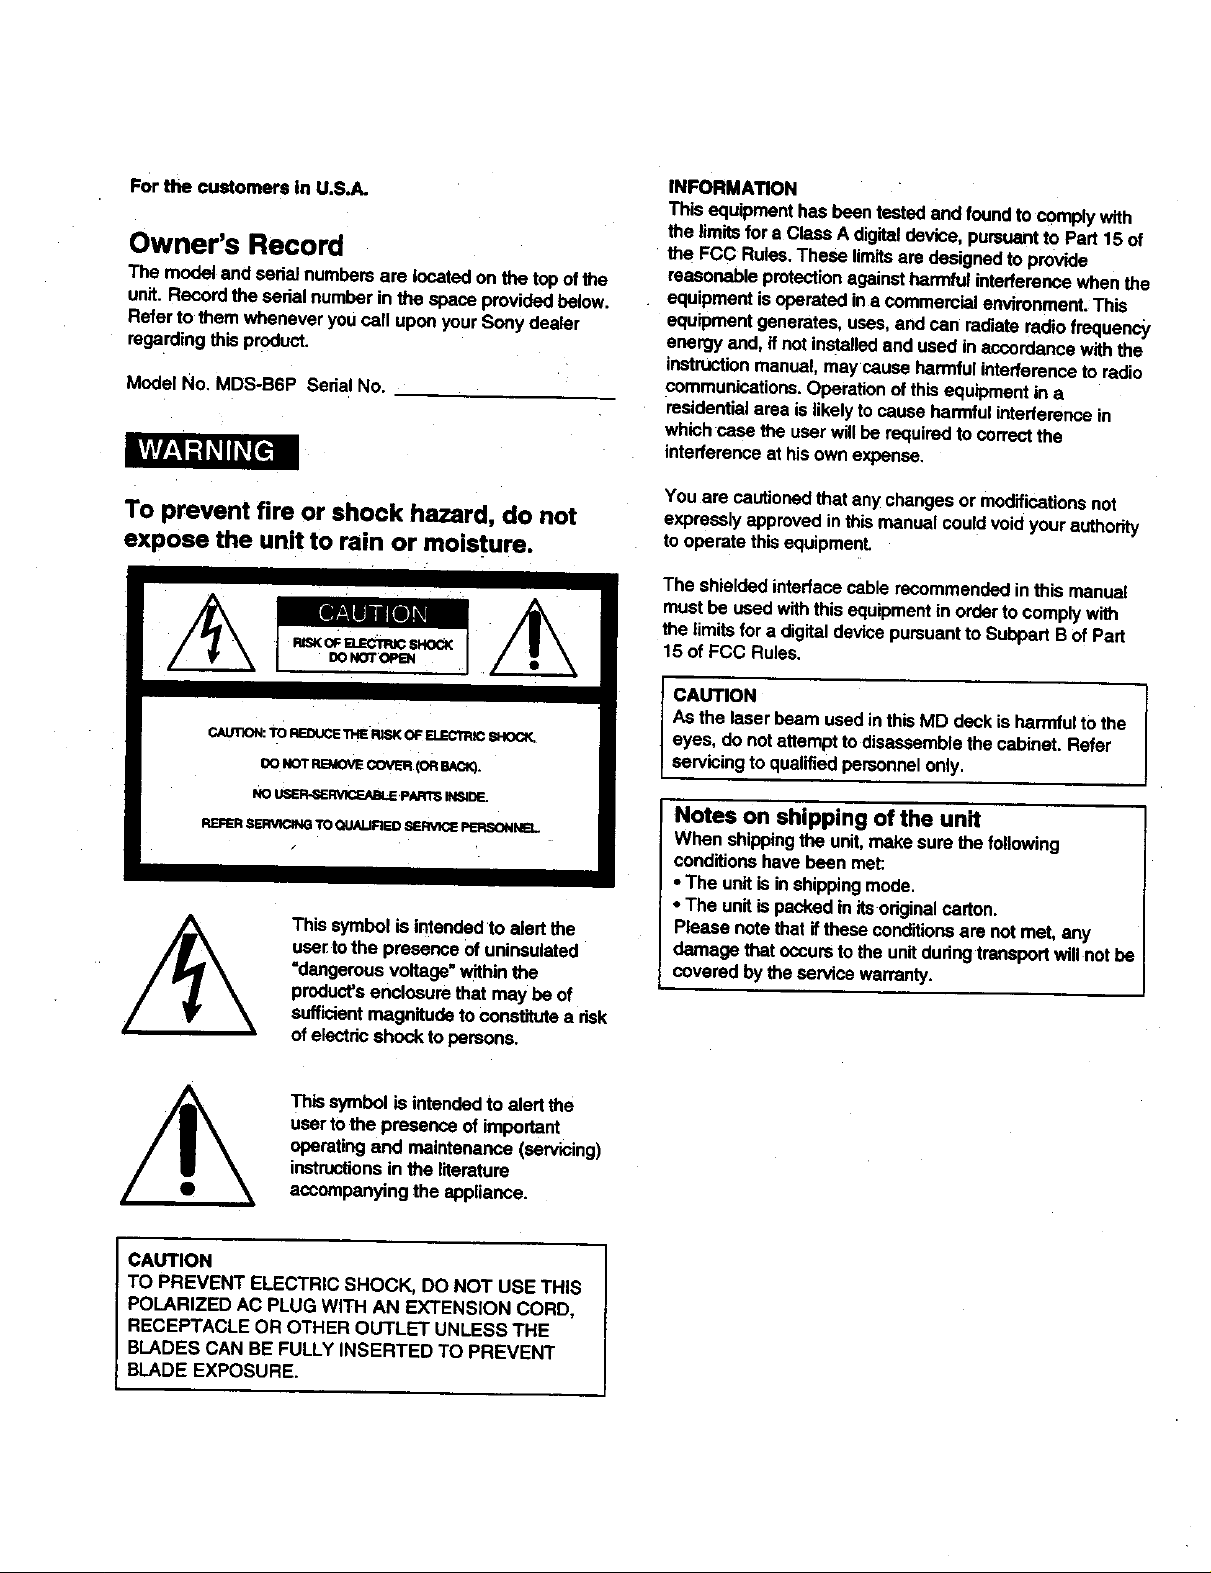
For the customers in U.S.A.
Owner's Record
The modelandsedal numbersare locatedon thetopofthe
unit.Recordthe sedalnumberin the spaceprovidedbelow.
Referto them whenever youcall uponyourSonydealer
regardingthis product.
Model No. MDS-B6P Serial No.
To prevent fire or shock hazard, do not
expose the unit to rain or moisture.
CAUIX_: TO REDUCE"n'IERISK OF ELECTR_ SHOCK.
OONOTRBeOVECOVER(ORBACK).
NO U_'R-SE_.pAR11; INSIDE.
REFER SERVICING TO QUALIRED SERVICE PERSONNEL
Thissymbolisintendedto alert the
use_tothe presence ofuninsulated
"dangerousvoltage"withinthe
product'senclosurethat maybeof
sufficientmagnitudeto€o_ a risk
ofelestdcshockto persons.
INFORMATION
This equipment has been tasted and found to comply with
the limits for a Class A digital device, pursuant to Part 15 of
the FCC Rules. These limitsare designed to provide
reasonable protection against harmful interference when the
equipment isoperated in a commercial environment. This
equipment generates, uses, and can radiate radio frequency
energy and, if not installed and used in accordance with the
instruction manual, may cause harmful interference to radio
communications. Operation of this equipment in a
residential area is likely to cause harmful interference in
which case the user will be required to correct the
interference at his own expense.
You are cautioned that any changes or modifications not
expressly approved in this manual could void your authority
to operate this equipmenL
The shieldedinterfacecablerecommendedin this manual
mustbe usedwiththis equipment inorderto complywith
the limitsfor a digitaldevicepursuantto SubpartBofPart
15 of FCC Rules.
CAUTION
Asthe laserbeamusedinthisMD deckisharmfultothe
ayes, donotattempttodisassemblethe cabinet. Refer
servicingtoqualifiedpersonnelonly.
Notes on shipping of the unit
When shipping the unit, make sure the fo_owing
conditions have been met:
• The unit is in shipping mode.
• The unit is packed in its.original carton.
Please note that if these conditions are not met, any
damage that occurs to the unitdudng transport will not be
covered by the service warranty.
This symbol is intended to alert the
user to the presence of important
operating and maintenance (servicing)
instructions in the literature
accompanying the appliance.
CAUTION
TO PREVENT ELECTRIC SHOCK, DO NOT USE THIS
POLARIZED AC PLUG WITH AN EXTENSION CORD,
RECEPTACLE OR OTHER OUTLET UNLESS THE
BLADES CAN BE FULLY INSERTED TO PREVENT
BLADE EXPOSURE.
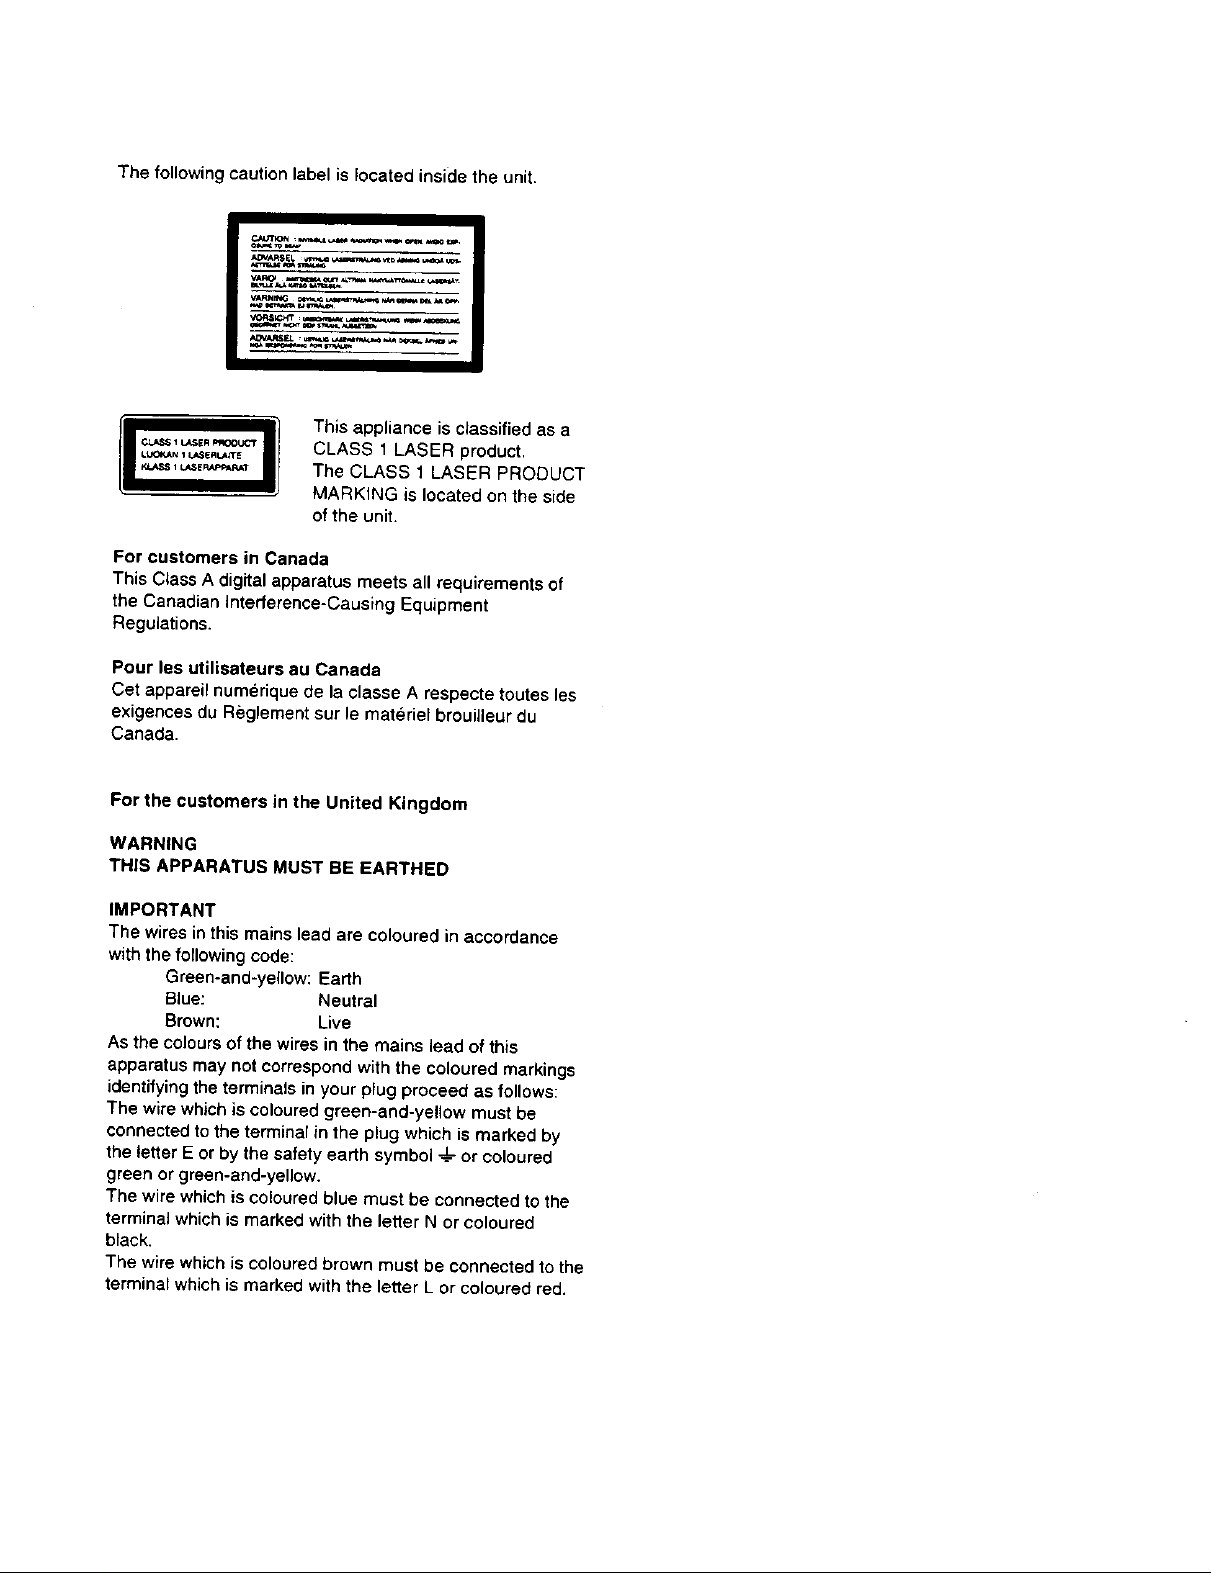
The following caution label is located inside the unit.
_a_NITw-'_¢¢ _ _n=_t_'4 _ _40q_a
This appliance is classified as a
CLASS 1 LASER product.
The CLASS 1 LASER PRODUCT
MARKING is located on the side
oftheunit.
For customers in Canada
This Class A digital apparatus meets all requirements of
the Canadian Intederence-Causing Equipment
Regulations.
Pour les utilisateurs au Canada
Cet appareil numerique de la classe A respecte toutes les
exigences du Reglement sur le materiel brouilleur du
Canada.
For the customers in the United Kingdom
WARNING
THIS APPARATUS MUST BE EARTHED
IMPORTANT
The wires in this mains lead are coloured in accordance
with the following code:
Green-and-yellow: Earth
Blue: Neutral
Brown: Live
As the colours of the wires in the mains lead of this
apparatus may not correspond with the coloured markings
identifying the terminals in your plug proceed as follows:
The wire which is colourad green-and-yellow must be
connected to the terminar in the plug which is marked by
the letter E or by the safety earth symbol ._d_or coloured
green or green-and-yellow.
The wire which is cotoured blue must be connected to the
terminal which is marked with the letter N or coloured
black,
The wire which is coloured brown must be connected to the
terminal which is marked with the letter L or coloured red.
Chapter 1
Overview
1-1 Features ........................................................................................... 1-1
!
1-1-1 Features of the MiniDisc ........................................................ 1-1
1-I-2 Operational Features .............................................................. I-1
Chapter 2
Function of Parts and
Controls
Chapter 3
Preparations
Chapter 4
Playback
(Continued)
2-1 Front Panel ...................................................................................... 2-1
2-2 Rear Panel ....................................................................................... 2-3
I
3-1 Precautions ...................................................................................... 3-1
3-1-1 Installation Precautions .......................................................... 3-1
3- 1-2 Handling Precautions ............................................................. 3- I
3-1-3 Shipping Precautions .............................................................. 3-1
3-2 Connections ..................................................................................... 3-2
3-2-1 Precautions ............................................................................. 3-2
3-2-2 Basic Connection Examples ................................................... 3-2
3-2-3 Connecting and Setting the Keyboard ................................... 3-3
3-3 Handling MiniDiscs ........................................................................ 3-4
3-4 Setting the Analog Output Reference Level ................................. 3-5
4-1 Overview of Playback Procedures ................................................ 4-1
4-2 Playback Procedures ...................................................................... 4-2
4-2-1 Playing From the First Track on the MD ............................... 4-2
4-2-2 Locating a Specific Point (Search) ......................................... 4-2
4-2-3 Playing a Single Track Only .................................................. 4-3
4-2-4 Rehearsal Playback ................................................................ 4-3
4-3 Locating a Track ............................................................................ 4-4
4-3-1 Locating a Specific Track ...................................................... 4-4
4-3-2 Locating the Beginning of a Track (AMS) ............................ 4-4
4-3-3 Preparing the Next Track During Playback ........................... 4-5
4-4 Display Information during Playback .......................................... 4-6
4-5 Playing Tracks Repeatedly ............................................................ 4-7
4-6 Program Play .................................................................................. 4-8
4-7 Playing Tracks in Random Order (Shuffle Play) ...................... 4-10
4-8 Starting Playback Instantly (Multi-Access Function) ............... 4-11
4-9 Varying the Playback Speed (Variable-Speed Playback) ......... 4-13
4-10 Error Checking ........................................................................... 4-14
Table of Contents 1

Table of Contents
IIIll
Chapter 5
Editing Functions
Chapter 6
Setup Menu
5-1 Overview of Editing Functions ...................................................... 5-1
5-1-1 Types of Editing Functions .................................................... 5-1
5-1-2 RAM Edit ............................................................................... 5-1
5-1-3 Track Numbers After Editing Operations .............................. 5-1
5-1-4 Editing Operations During Rehearsal Playback ..................... 5-1
5-1-5 Undo function ........................................................................ 5-2
5-2 Erasing Tracks (Erase Function) .................................................. 5-3
5-3 Dividing a Recorded Track (Divide Function) ............................ 5-4
5-4 Combining Recorded Tracks (Combine Function) ..................... 5-6
5-5 Moving Recorded Tracks (Move Function) ................................. 5-7
5-6 Editing Titles ................................................................................... 5-8
5-7 Marking the Cue Point ................................................................ 5-10
5-8 Trimming ...................................................................................... 5-12
5-8-1 Head Trimming .................................................................... 5-12
5-8-2 End Trimming ...................................................................... 5-14
6-1 The Overview of the Setup Menu ................................................. 6-1
6-2 Setting Up for Timer-Activated Function .................................... 6-2
6-3 Setting the Playback Resume Mode .............................................. 6-3
6-4 Setting the RS-232C Interface ....................................................... 6-4
6-5 Setting the Auto Cue Function ...................................................... 6-5
6-6 Setting the Rehearsal Playback Function .................................... 6-6
6-7 Setting the EOM Function ............................................................. 6-7
6-8 Reading the Hours Meter .............................................................. 6-8
6-9 Disabling the Buttons While C,,ntrolling Remotely .................... 6-9
Chapter 7
Maintenance
Appendix
I -1 Cleaning and Reset Switch ............................................................. 7-17-2 Display Messages ............................................................................. 7-2
Menu Item List ..................................................................................... A-1
Pin Assignments for REMOTE (25P) connector ............................... A-3
RS-232C Protocol ................................................................................. A-5
RS-232C Protocol ............................................................................ A-5
Specifications .................................................................................. A-5
Operating Method ............................................................................ A-5
List of Commands ......................................................................... A-10
Command Descriptions ...................................................................... A-11
Specifications ....................................................................................... A-26
Index ........................................................................................................ I-1
2 Tabte of Contents

The MDS-B6P is a MtmD_sc deck for professmnal use
m any kind of broadcastmg, announcements, or
program production
1-1-1 Features of the MiniDisc
Text entry
You can use the wire-connected remote controller
supplied with the MDS-B5 or an IBM keyboard to
enter titles for recorded discs and tracks Title data.
which can total 1,792 characters per disc, appear m the
&spla 3 wmdow dunng playback
ATRAC (Adaptive Transform Acoustic
Coding) data compression technology
By ehmmatmg inaudible sound data to obtain a
compression rano of 1:5. ATRAC data compression
technology enable_ the recording of sound mformanon
of almost the same quahty and quanmy as a CD, but
on a smaller dr, c
74 minutes of playback or recording
A single MD can be u_ed to play back or record up to
74 minutes of sound information In monoaural mode.
you can record and pla_ back up to 148 minutes.
Direct track access
You can use the w_re-connected remote controller
supphed with the MDS-B5 or an IBM keyboard (not
supphed) to &rectly access any of the MD's 255 tracks
without the long cueing nine reqmred for tape.
Various playback functions
The MDS-B6P'_ various playback functions include
repeat playback, programmed playback, and random
playback You can also vary the playback speed
between __.125% of the normal speed
Multiple editing functions
The MDS-B6P's edmng functions allow you to divide,
combine, and mo_e tracks on the MD. You can use
the rehearsal funcuon to precisely position edit points
on a track as 3ou monitor the sound
Unhke tracks on an analog cassette or DAT tape.
specific MD tracks or an entire MD can be erased
instantly
Durability
Because MDs use a non-contact system hke compact
d_scs, they are superior to cassette tape m durability
1-1-2 Operational Features
Instant playback function
The MDS-B6P can store the first part of up to 10
selected tracks into memory m order to begin instant
playback
Two cueing modes
You can use the A MODE button to select the
following two cueing modes
AUTO PAUSE mode
AUTO PAUSE mode pauses the MD deck at the
begmmng of a track, then starts playback when you
press the PLAY/PAUSE button Use th_s mode to pre-
cue tracks during on-air broadcasting with mulnple
MD decks.
AUTO CUE mode
AUTO CUE mode pauses the MD deck when it detects
a rise in the au&o signal following the inaudible
portion before the start of a track This mode _s good
for playing specml sound effect_ m theater
productmns, etc
Chapter 1 Overv,ew "_-1

1-1 Features
II II
NEXT TRACK SELECT function
During single-deck operations, you can specify the
_o
next track to be played as you are playing another one.
UNDO function
You can undo the last editing operation (e.g., when
you have mistakenly erased a track).
?
Single track play
No matter what the cueing mode may be, you can
always play back single tracks. After playing a single
track, the deck stops rather than pauses, thus
preventing the mistaken playback of another track.
Playback display variations
The MDS-B6P displays track information (playing
time, track title, etc.) for the current and the next tracks
that have been selected for playback. By pressing the
DISPLAY button, you can display the following track
information:
• Remaining playing time and title of the current track
• Elapsed time and title of the current track
• Remaining playing time of the current track and a list
of programmed tracks during Program Play or Instant
Playback.
• Playing time and title of the next track
End-of-message (EOM) function
This function outputs a tally signal from the
REMOTE(25P) connector before the end of a track or
the disc.
You can use the Setup menu to specify how far in
advance of the end the tally signal is output.
Cue point function
This function outputs a tally signal from the
REMOTE(25P) connector whenever a cue point is
detected during playback. Up to 255 cue points can be
marked per disc.
Track trimming function
You can temporarily modify the starting and ending
points of a track. The head trimming edit allows you
to specify the starting point in accordance to the audio
rising point.
Rehearsal function
You can play back a portion of a track repeatedly in
order to precisely determine points for cueing or track
division. You can also use the Setup menu to specify
the length of the portion to be repeated and the interval
between the end of one repeat and the start of another.
RAM Edit function
You can do temporary editing, such as dividing,
combining, and moving the tracks on the MD, without
overwriting the TOC information. The results of the
RAM edit function will be lost when the MiniDisc is
ejected. You can use the RAM edit function on pre-
mastered MDs.
Digital time meter
The digital time meter displays the accumulated
spindle motor operation time.
Easy menu operations
The editing and setting operations on the MDS-B6P
are done using two types of menus: the Edit menu and
the Setup menu. Menu operations are easily done
using the AMS control, turning it to select items and
pressing it to select the setting.
1-2 Chapter 1 Overview
Keyboard operations
Error check function
You can use the supphed keyboard template on any
IBM keyboard to operate the MDS-B6P
Remote control function
The MDS-B6P can be controlled by external control
s_gnals input to the REMOTE_25PI connector on the
rear panel You can select an), of four pin assignments
for the REMOTE(25P) connector, depending on the
apphcat_on
When the deck _s controlled by external control
s_gnals, you can disable the operation buttons and
controls on the front panel by using the Kill Local
functmn
RS-232C interface
The MDS-B6P can be controlled by a personal
computer or other external eqmpment connected to the
deck through the RS-232C interface
The MDS-B6P can play back a d_sc at four times
normal playback speed, allowing you to qmckly verify
the integrity of tracks before a broadcast
?
Rack mounting compatibility
Two MDS-B6P decks can be mounted side by side in a
standard 19-inch EIA rack
TOC data back-up function
If power to the MDS-B6P Is suddenly cut off, edited
TOC data m the MDS-B6P's RAM will be saved and
maintained by an internal back-up power supply for up
to three days
• TOC data may be lost If the power is cut at the
moment of the begmnmg or the end of editing
operation
"Due to the hm_ted capacity of the RAM. cue points
and trimming point specifications are not saved
Chapter 1 Overview 1-3
SINGLE button
0 PHONES jackand volume control 0 Disc
compartment
Display
window
I I *
0
KEY BOARO connector
A.MODE button
!
(_ CUE/STDEY button
EJECT button
DISPLAY button
REHEARSAL button
ENTER/YES button
EDIT/NO button
AMS control
I Search buttons
PLAY/PAUSE button
STOP button
0 PHONES jack and volume control
Connects headphones. Use the volume control to
adjust the sound level of the PHONES jack.
O Display window
Indicates the current MD deck operating status. While
the deck is stopped, the disc title, total track number,
and total playing time are displayed. During playback,
the track title and time information of the current track
or the next track are displayed. When using a menu,
the menu number and menu item are displayed.
Disc compartment
Automatically loads an inserted disc.
SINGLE button
Press to play only one track. "'I" appears in the
display window.
0 A.MODE button
Selects the cueing mode. The following are selected in
sequential order each time you press this button.
OFF: The cueing function is disabled. Playback
starts when you press the PLAY/PAUSE button or
select a track using the AMS control.
A.PAUSE: When you press the PLAY/PAUSE
button or select a track using the AMS control, the
MD deck locates the beginning of the track and
pauses. Playback starts when you press the
PLAY/PAUSE button.
A.CUE: When you press the PLAY/PAUSE button
or select a track using the AMS control, the MD
deck pauses whenever the audio signal rises above
a specified threshold level. Playback starts when
you press the PLAY/PAUSE button.
Chapter 2 Function of Parts and Controls 2-1

2-1 Front Panel
I I
O EJECT button
Press to eject the disc from the disc compartment.
CUE/STDBY (standby) button
Press to return to the position where you last pressed
the PLAY/PAUSE button. After finding the position,
O DISPLAY button
During playback, press this button to select the
the MD deck enters playback pause. Use this button to
check or return to a cueing position.
following display contents:
• Remaining playing time and title of the current track
t')
• Elapsed time and title of the current track
• Remaining playing time of the current track and the
fo
"t3
Program Play list during Program Play or the Instant
Playback function
• Playing time and title of the next track
"13
O REHEARSAL button
Press to play a portion of a track repeatedly. If you
t[_ PLAY/PAUSE button
Press to start playback.
Press during playback to temporarily pause the MD
deck; press again to cancel pause.
The PLAY/PAUSE button lights during playback. It
flashes while the MD deck is in playback pause.
STOP button
Press to stop playback or recording.
press this button during playback, the portion starting
=
from that point is repeated. If you press the button
while the deck is stopped, the beginning of the first
track on the disc or the selected track is repeated.
During rehearsal playing, you can move the repeated
portion forward or backward by turning the AMS
1_ KEY BOARD connector
Connects any IBM keyboard for control of the MD
deck using the supplied keyboard template.
This connector has a cap for protection. Remove the
cap only when connecting a keyboard.
control. Pressing the _ or _ button changes the
unit for adjusting the start of Rehearsal Play.
After confirming the cue point or editing point using
the rehearsal function, press the CUE STDBY button
to pause the deck at the position where the rehearsal
started or press EDIT/NO button to execute an editing
While using the keyboard, turning the MD deck off,
then turning it on again quickly may cause the
keyboard to malfunction. If this occurs, unplug the
keyboard cord and plug it again.
function.
O ENTER/YES button
Press to execute an editing function.
You can also execute editing functions by pressing the
AMS control.
O EDIT/NO button
Press to display the Edit menu or cancel an editing
function.
I_1 AMS control
Turn to locate the beginning of a track.
When using the Edit menu or the Setup menu, turn this
control to select the menu item and press it to select
the setting.
1]) Search buttons
al,al: Hold down this button during playback to scan
backward while monitoring the sound.
II_l_: Hold down this button during playback to scan
forward while monitoring the sound.
2-2 ChaDter 2 Function of Parts and Controls
O REMOTE(25P) connector
J
©
I Iio- I
@
,!i
) ANALOG OUT connectors
O AES/EBU OUT connector
L_J_
POWER switch
Ground connector
AC IN connector
O
to
"11
o
o_
"0
o,
o
o
=_
t PLAYBACK level controls and MODE switch
O RS-232C connector
I_) REMOTE connector
Il! REMOTE (25P) connector
Connects to external equipment for remote control.
13 1
25 14
You can choose any off our pin assignments,
depending on the purpose.
See "Pinassigmnents_)rREMOTE (25P) connector"on
page A-3.
O fEC(958) OUT connector
0 ANALOG OUT connectors (XLR-type, 3-pin)
Output a two channels of analog audio signals.
Pin assignment
GND
2 HOT
3 COLD
AES/EBU OUT connector (XLR-type)
Outputs two channels of digital audio signals in AES/
EBU format.
OPOWER switch
Press to turn on the MD deck. Press again to turn the
MD deck off.
OUT
1 3 2
Chapter 2 Function of Parts and Controls 2-3
2-2 Rear Panel
IIll I
0 Ground connector
Connects directly to ground.
0 AC IN connector
Connects to an AC outlet with the supplied AC power
cord.
O IEC(958) OUT connector (RCA-type, phono)
Outputs digital audio signals (IEC958-TYPE2).
r_
C
g
0 PLAYBACK level controls and MODE switch
o
-0
PLAYBACK level controls
Adjust the analog output reference level during
playback. Adjust the level of each channel (CH-I(L)/
o
CH-2(R)) by turning the control with a fiat
screwdriver.
MODE switch
Selects monaural or stereo mode for the analog output
signal.
When MONO is selected, the signals of channet 1 and
2 are mixed and lowered to below -6 dB, then output
from ANALOG OUT CH-I(L) and CH-2(R).
O RS-232C connector
t 5
6 9
You can use a personal computer connected to the
MDS-B6P's RS-232C connector to control the MDS-
B6P including following operations:
• Button operations
PLAY/PAUSE, STOP, EJECT, PREVIOUS, NEXT,
CUE STDBY
• Direct track access
• Selecting menu functions
Selecting the timing for the end-of-message (EOM)
tally signal output, setting the AUTO PAUSE and
AUTO CUE functions
• Displaying time and character data and messages on
an external computer
See "RS-232C Protocol" on page A-5 for details.
_) REMOTE connector
Connects the remote controller supplied with the
MDS-B5.
2-4 Chapter 2 Functionof Parts and Controls
3-1-1 Installation Precautions
If trouble occurs
Install the MD deck on a flat surface m a temperature-
controlled room Avmd using or stonng the MD deck
at a location that _s
• e,_tremely hot or cold
•damp
• subject to severe ;'tbratlons
• subject to strong magnetic fields
• subject to many hours of direct sunhght or close to
heating eqmpment
3-1-2 Handling Precautions
•Check the MD deck's operating '_oltage before you
plug tt in It must be identical with that of your local
power suppl)
• If you drop any hqmd or metal object reside the MD
deck. _mmedmtely stop using it. unplug the power
cord from the socket, and contact Sony ser\ me
personnel
• If the MD deck wdl be unused for a long time, make
sure to unplug its power cord from the socket. When
unplugging the power cord, grasp Jt by the plug, not
the cord.
• Do not dmassemble the MD deck The laser hght
used in the deck can cause damage to your eyes If
the MD deck needs to be inspected, contact Sony
service personnel
Should you detect an abnormal noise, smell, or smoke.
_rnmedmtely turn off the power, unplug the power cord
from the socket, and contact Sony service personnel
AC power cord
Do not use any power cord other than the one supplied
with the MD deck
3-1-3 Shipping Precautions
When shlppmg the MD deck. make sure that the MD
deck is packed in its original carton. If not. an)'
damage that occurs to the MD deck dunng transport
wdl not be covered by the service warrant),
Caution
The use of opncal instruments with this product will
increase eye hazard
Condensation
Bringing m the MD deck from a cold place or turning
on the room heatmg may cause moisture to condense
on the lens within the MD deck. resuhmg m abnormal
operation If th_s occurs, leave the power on The
mossture wdl evaporate within an hour and the MD
deck w,dl funcnon normally again
If the MD deck does not operate normall._ after a few
hours, contact Son,, service personnel
Chaoter 3 preparations 3-1
3-2-1 Precautions
•Turn off all equipment before connecting or
d_sconnectmg any cables
• Insert all electrical plugs firmly since mcomplete
connecuon may cause nmse
• Use a cord somewhat longer than needed to prevent
the plug from being pulled out when jarred or shaken
¢3
-o
"0
...j
_J
==
3-2-2 Basic Connection Examples
To an exlemal remotecontroller
_ Remote sngnal
OOr_
TO the remote
controller
suppbed wdh
the MDS-B5
4
Remote s=gnal
AES/EBU dngntalsagnals
Dlgl_l audno signals
To audtolv_deo equtpment
for professtonal use
120 V AC (for
the U.S and
AC power cord 220 to 230 V AC
l, other dagutalrecordnng
b Canada)
(for the
European
countries)
To an M[:)recorder or
devrce
TO a personaF computer
3-2 Chapter 3 Preparatuons
Remote eEgnal
Analog audLo sugnals or tape recorder
I_ TO an analog maxlng console
III II I II III III I I II
3-2-3 Connecting and Setting the
Keyboard
You can use an)' IBM keyboard to control the MD
deck The supphed keyboard template has the same
ke_ ]ndlcauons found on the front panel of the deck
Be sure to remove the cap from the KEY BOARD
connector when connecting a keyboard
A
LI, Turn the AMS control to select etther -KB ENG
101'" or "'KB JPN 106 " Press the AMS control to
select the item
5 Press the EDIT/NO button to exit from the Setup
menu
O
D)
'[] o o
0 i[] 0 0
J
KEY BOARD connector
Specifying the keyboard type
Use the Setup menu to specify the keyboard type.
1 Press the EDIT/NO button whde holding down the
STOP button
The Setup menu appear_ in the display window
2 Turn the AMS control to d_splay the menu item
F07 ("KB ENG 101"" or "'KB JPN 106") in the
wmdow
1.o
-o
o
FO]
KB ENIS 10 1 ._.0o-_'°
3 Press the AMS control
The indication flashes and you can change the
setting
Chapter 3 Preparatrons 3-3
Unlike CDs (Compact Discs), the Mini Disc is encased
within a hard plastic cartridge which allows you to
handle it without fear of dust or fingerprint
contamination. However, a MiniDisc that has been
contaminated or bent may cause the MD player to
malfunction. To prevent damage to the contents of a
disc and to enjoy clear sound permanently, take the
following precautions when handling a MiniDisc.
Do not open the shutter to expose the disc
If you do so, the data on the disc may be damaged.
"13
0
Shutter Cartridge
Store MiniDiscs in a proper location
Do not place the cartridge where it will be subject to
extremes of sunlight, temperature, moisture or dust.
Cleaning the MiniDisc
Gently wipe the cartridge with a dry soft cloth to
remove dust.
3-4 Chapter 3 Preparations
You can adjust the analog output reference level
during playback within a range of+8 dB to -12 dB by
turning the PLAYBACK level controls on the rear of
the MD deck.
The analog output reference level is factory set at +4
dB (at -20 dB from full bit).
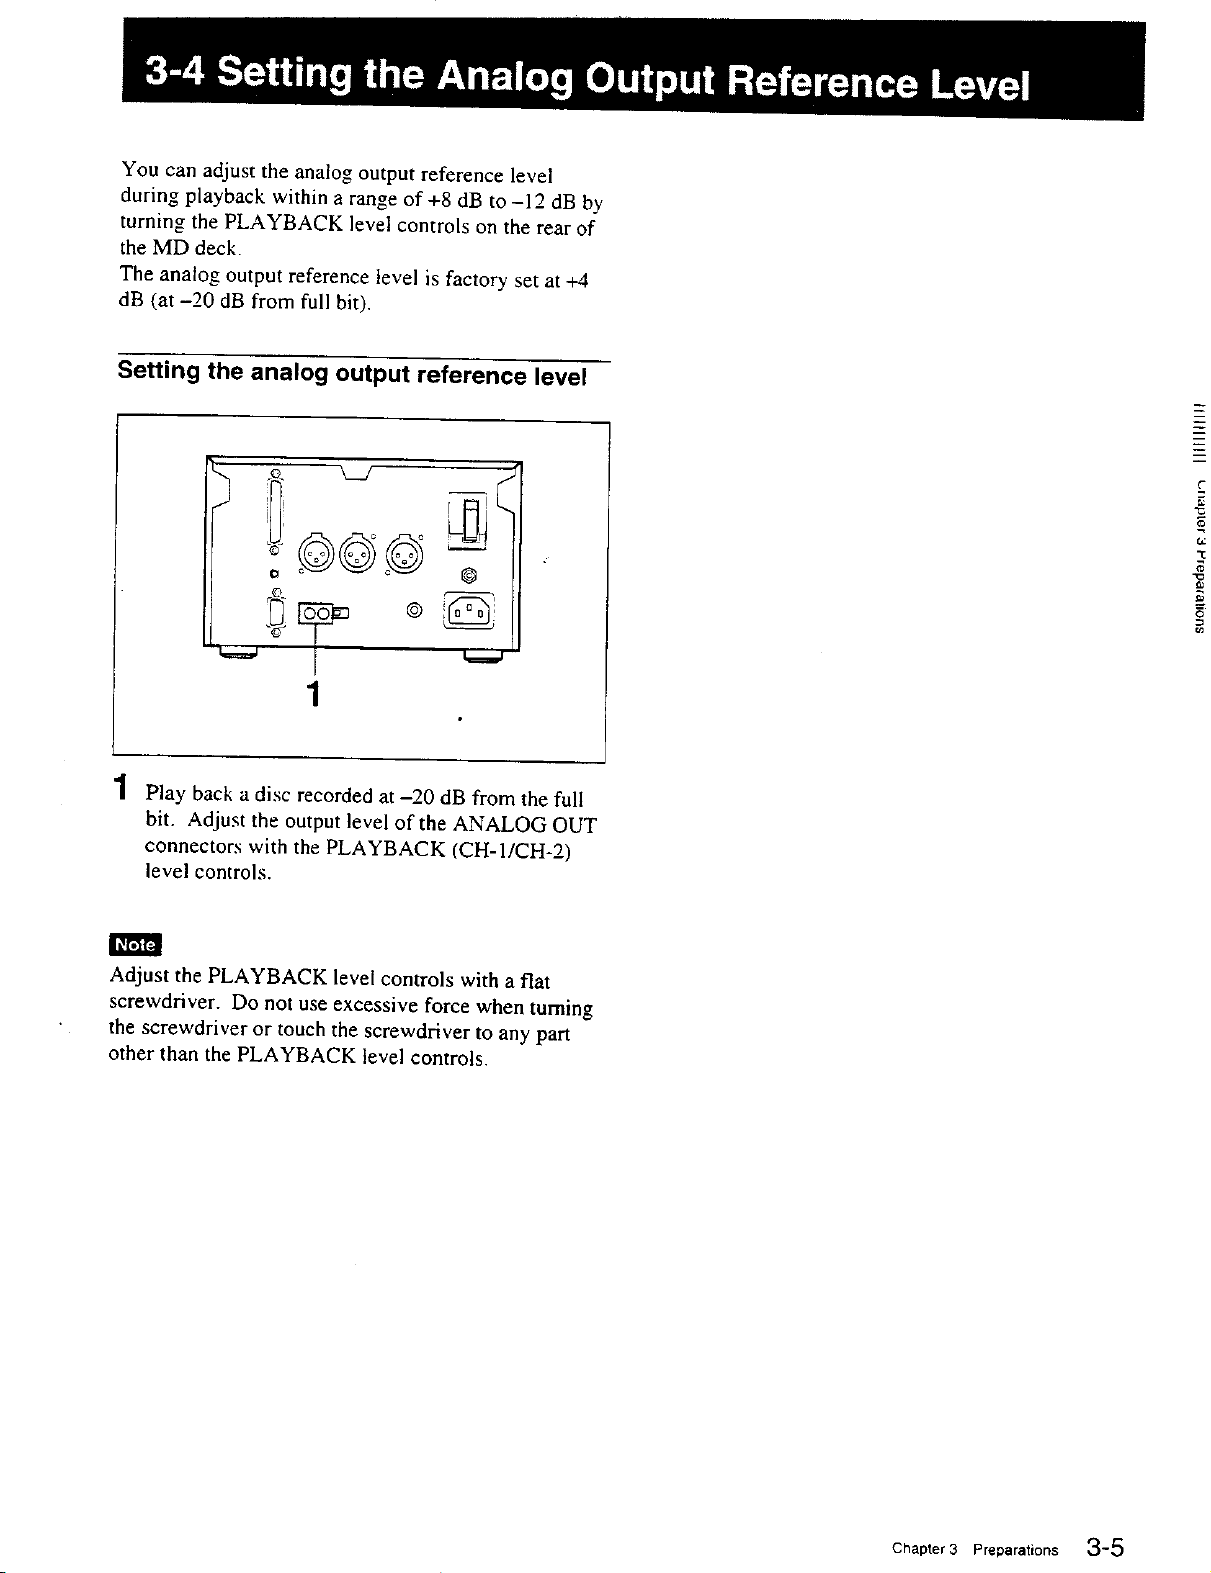
Setting the analog output reference level
o @
1
c
t_
"t
1
Play back a disc recorded at -20 dB from the full
bit. Adjust the output level of the ANALOG OUT
connectors with the PLAYBACK (CH-1/CH-2)
level controls.
h_'fi'lYJ
Adjust the PLAYBACK level controls with a flat
screwdriver. Do not use excessive force when turning
the screwdriver or touch the screwdriver to any part
other than the PLAYBACK level controls.
Chapter 3 Preparations 3-5
The MDS-B6P provides many playback functions that
can be used for a variety of purposes. This section
gives an overview of these functions and their
application.
Cueing before playback (AUTO mode)
To start playback instantly
You can memorize the beginning of selected tracks into
the MD deck's built-in memory in order to begin playback
the instant you press the PLAY/PAUSE button.
See "4-8 Starting Playback Instantly (Multi-Access
Function)" on page 4-11.
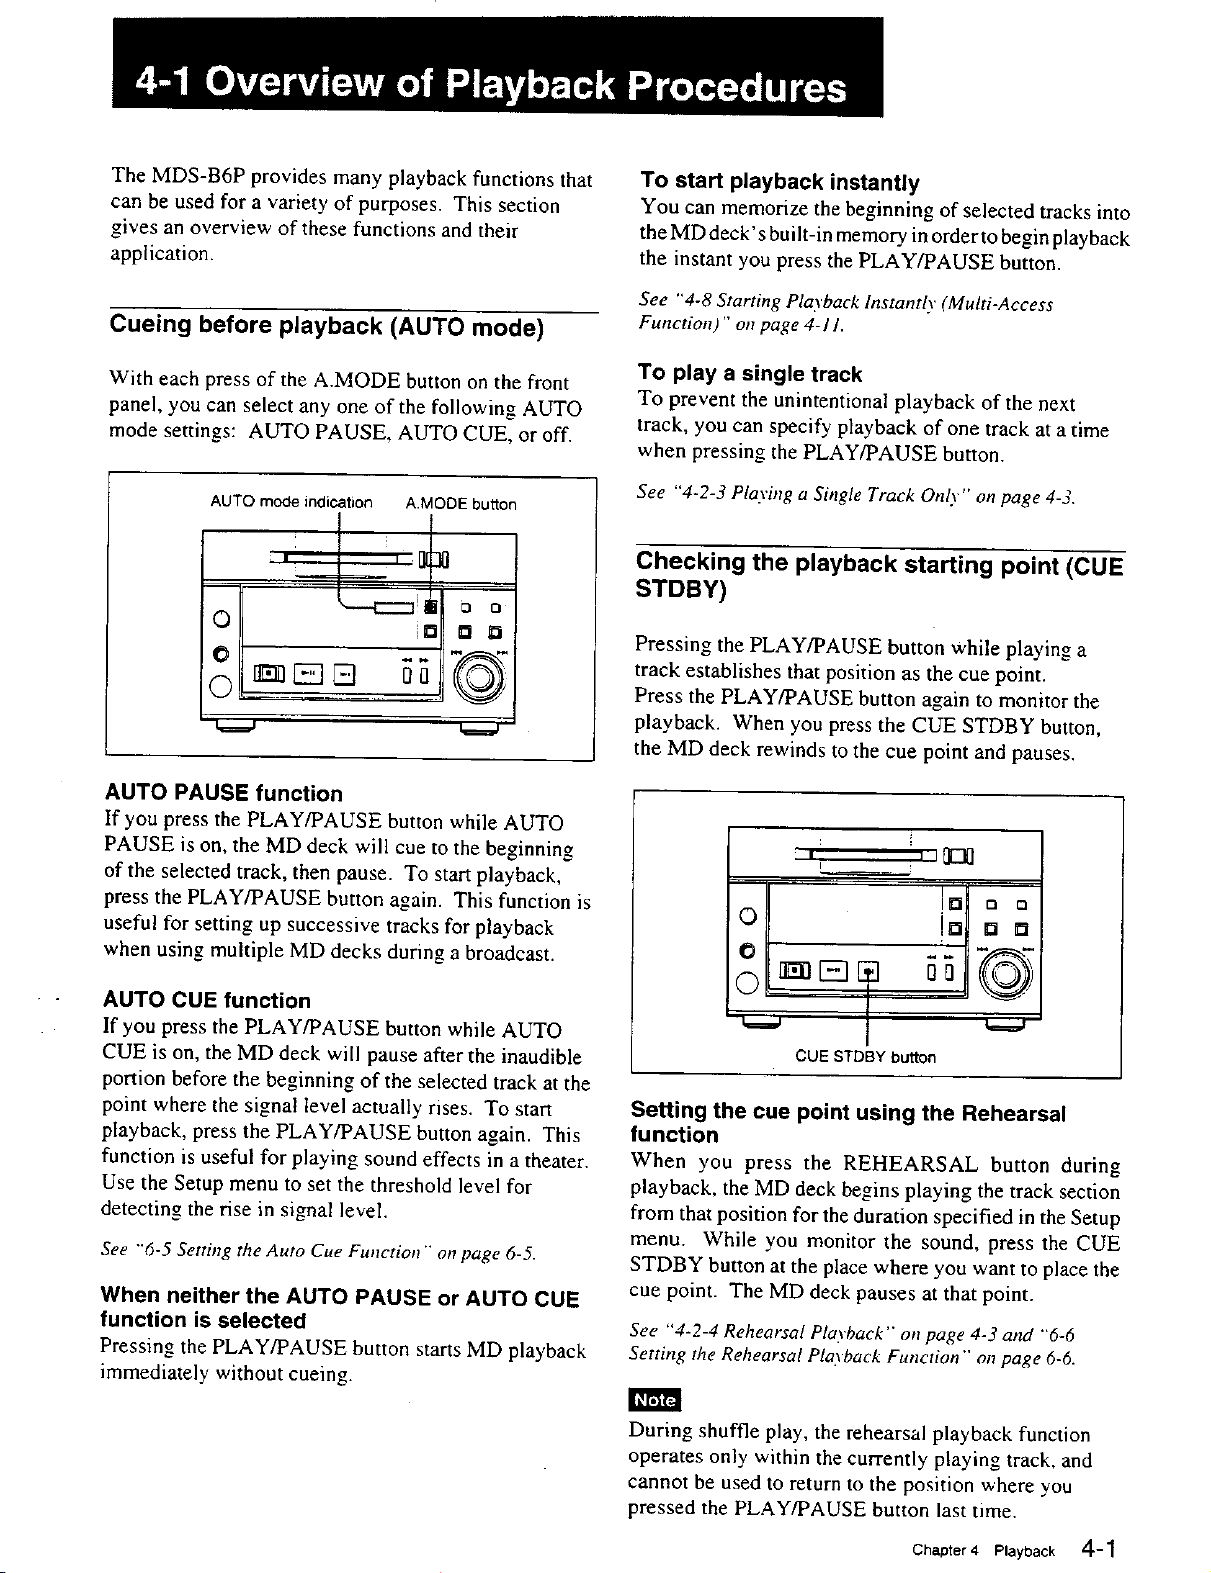
With each press of the A.MODE button on the front
panel, you can select any one of the following AUTO
mode settings: AUTO PAUSE, AUTO CUE, or off.
AUTO mode indication
A.MODE button
I
o I
AUTO PAUSE function
If you press the PLAY/PAUSE button while AUTO
PAUSE is on, the MD deck will cue to the beginning
of the selected track, then pause. To start playback,
press the PLAY/PAUSE button again. This function is
useful for setting up successive tracks for playback
when using multiple MD decks during a broadcast.
AUTO CUE function
If you press the PLAY/PAUSE button while AUTO
CUE is on, the MD deck will pause after the inaudible
portion before the beginning of the selected track at the
point where the signal level actually rises. To start
playback, press the PLAY/PAUSE button again. This
function is useful for playing sound effects in a theater.
Use the Setup menu to set the threshold level for
detecting the rise in signal level.
See "'6-5 Setting the Auto Cue Function ""on page 6-5.
When neither the AUTO PAUSE or AUTO CUE
function is selected
Pressing the PLAY/PAUSE button starts MD playback
immediately without cueing.
,D D E3
To play a single track
To prevent the unintentional playback of the next
track, you can specify playback of one track at a time
when pressing the PLAY/PAUSE button.
See "4-2-3 Playing a Single Track Only" on page 4-3,
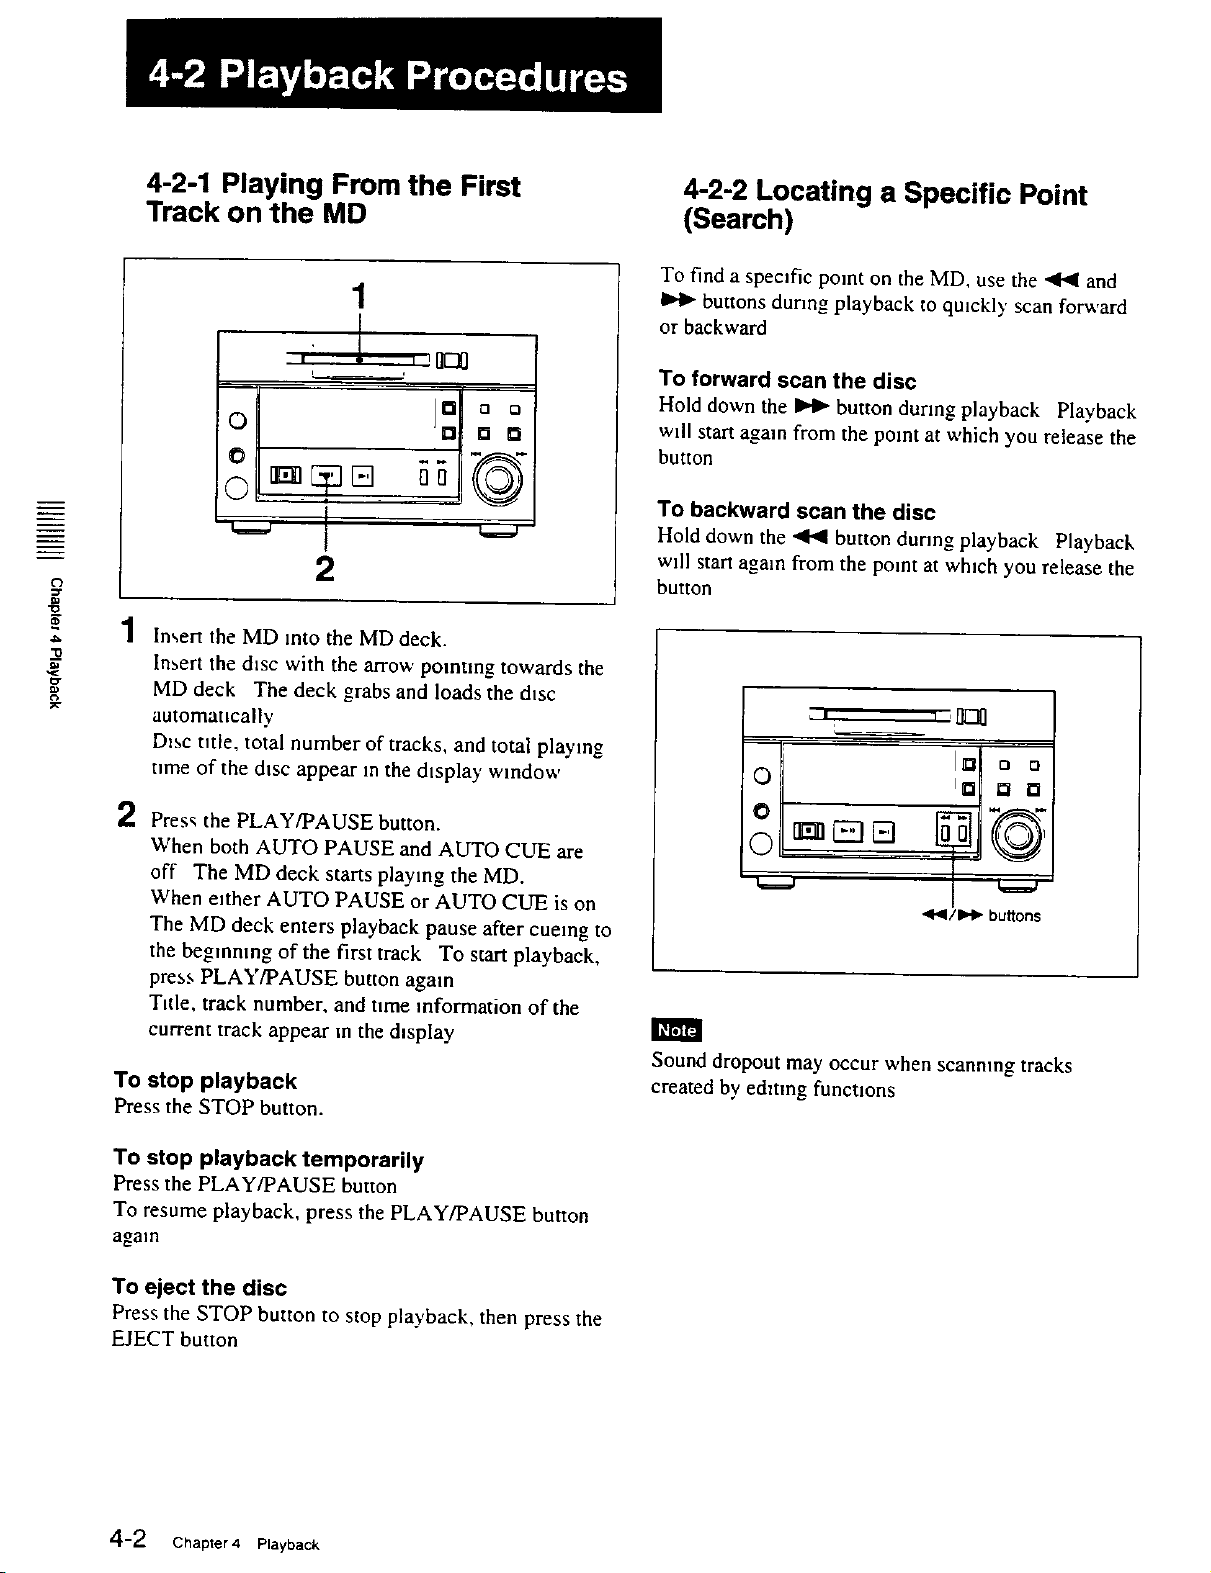
Checking the playback starting point (CUE
STDBY)
Pressing the PLAY/PAUSE button while playing a
track establishes that position as the cue point.
Press the PLAY/PAUSE button again to monitor the
playback. When you press the CUE STDBY button,
the MD deck rewinds to the cue point and pauses.
I J I_[]
0 o=
[0 D D
0 rr rml aa
CUE STDB¥ button
Setting the cue point using the Rehearsal
function
When you press the REHEARSAL button during
playback, the MD deck begins playing the track section
from that position for the duration specified in the Setup
menu. While you monitor the sound, press the CUE
STDBY button at the place where you want to place the
cue point. The MD deck pauses at that point.
See "4-2-4 Rehearsal Playback'" on page 4-3 and "'6-6
Setting the Rehearsal Playback Function ""on page 6-6,
During shuffle play, the rehearsal playback function
operates only within the currently playing track, and
cannot be used to return to the position where you
pressed the PLAY/PAUSE button last time.
Chapter4 Playback 4-1
4-2-1 Playing From the First
Track on the MD
4-2-2 Locating a Specific Point
(Search)
To find a specific point on the MD, use the _ and
buttons during playback to qu=ckly scan forw,ard
or backward
t'3
=_.
"o
lit
x-
, -.-.--_ []_
0 o om
0 o o
o0 ii
2
1
Insert the MD mto the MD deck.
Insert the dtsc with the arrow pomtmg towards the
MD deck The deck grabs and loads the dtsc
automattcally
Disc title, total number of tracks, and total playing
ume of the dtsc appear in the dtsplay window
2
Press the PLAY/PAUSE button.
When both AUTO PAUSE and AUTO CUE are
off The MD deck starts playing the MD.
When either AUTO PAUSE or AUTO CUE is on
The MD deck enters playback pause after cueing to
the beginning of the first track To start playback,
press PLAY/PAUSE button agam
Tttle, track number, and ttme reformation of the
current track appear m the d_splay
To stop playback
Press the STOP button.
To forward scan the disc
Hold down the _ button during playback Playback
will start again from the point at which you release the
button
To backward scan the disc
Hold down the _ button dunng playback Playback
wdl start again from the point at which you release the
button
, I I '[]_
I[] o o
0 IG 0 0
°
0 n__E!!El
.ql41/IP-l_bu_ons
Sound dropout may occur when scanning tracks
created by edmng functions
To stop playback temporarily
Press the PLAY/PAUSE button
To resume playback, press the PLAY!PAUSE button
agam
To eject the disc
Press the STOP button to stop playback, then press the
EJECT button
4-2 Chapter 4 Playback
4-2-3 Playing a Single Track Only
4-2-4 Rehearsal Playback
In single-track-playback mode, the MD deck plays
only single track that you have selected This prevents
unintentional playback of the next track
In single-track-playback mode. the MD deck stops
when track playback ends, even if AUTO PAUSE or
AUTO CUE has been selected
To select single-track-playback mode
Press the SINGLE button
"'1""appears in the display window
To turn off single-track-playback mode, press the
SINGLE button again
SINGLE button
J = ,{]_1]
,1_ t3 Q
O m"O []
t
o ©-
"1" (single-track-playback) red,cation
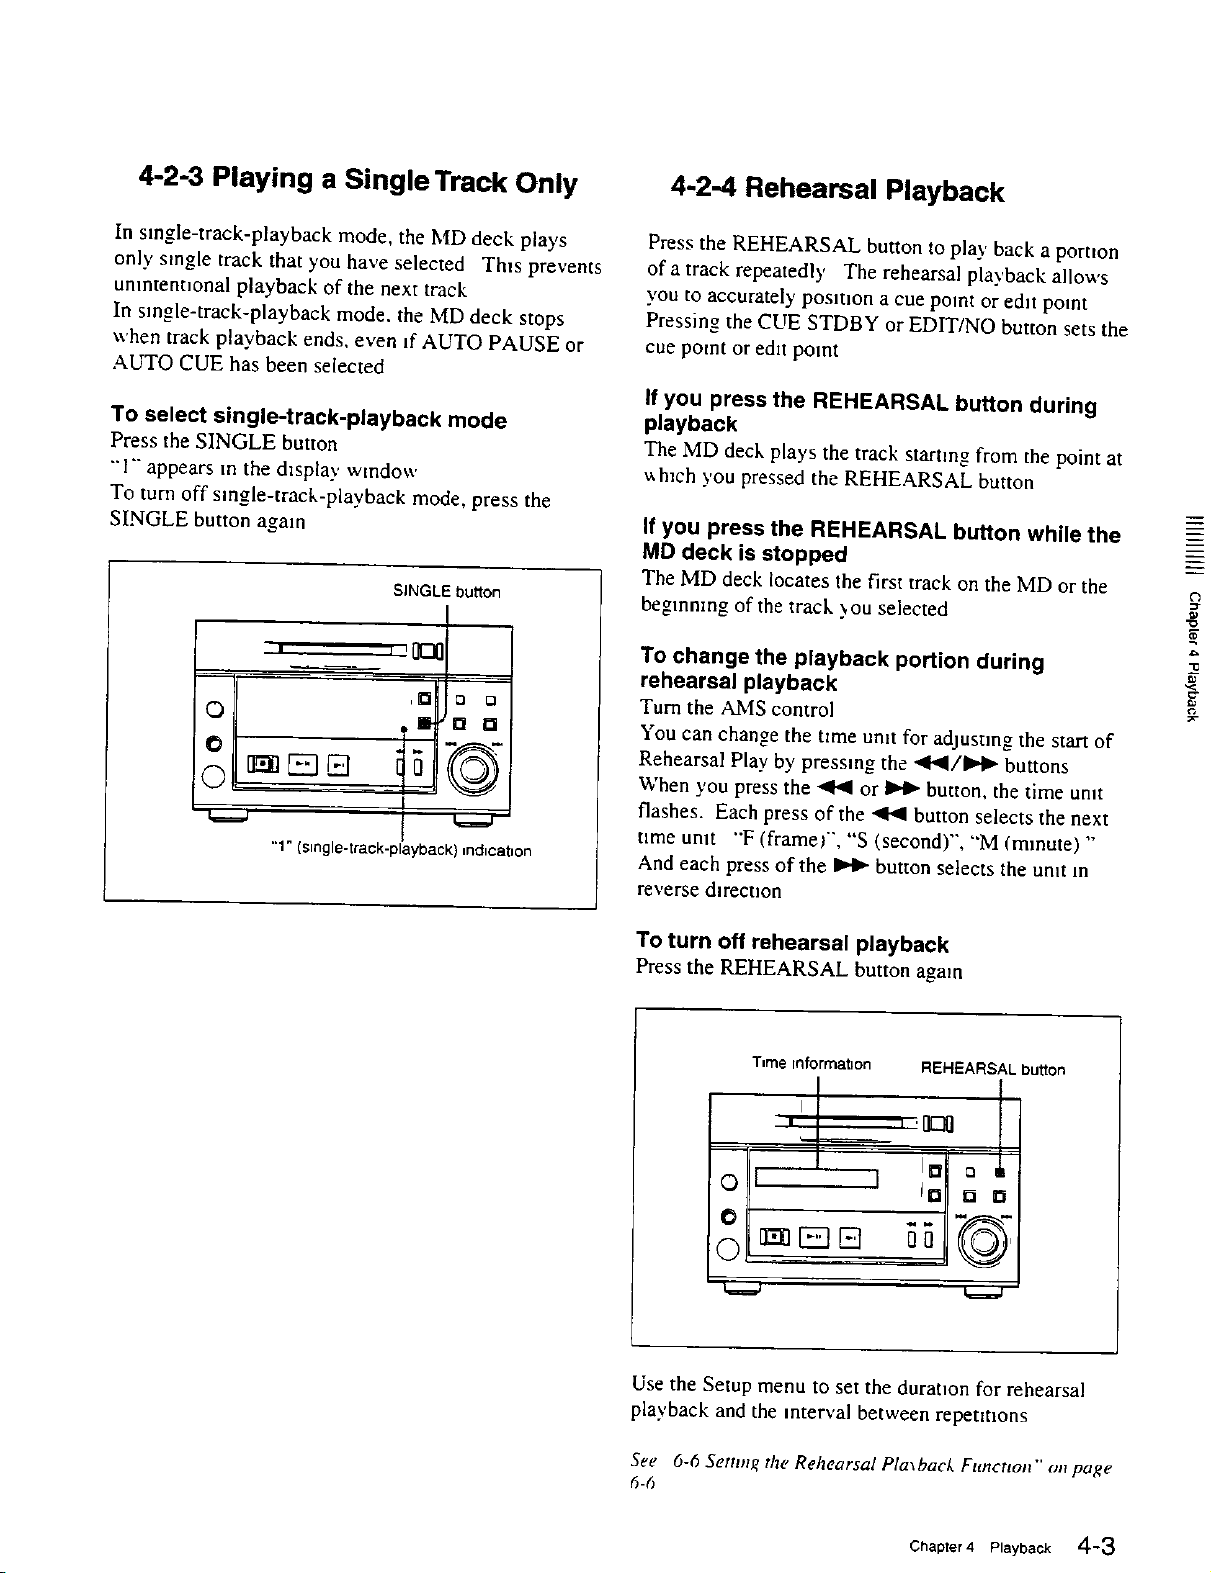
Press the REHEARSAL button to play back a pornon
of a track repeatedly The rehearsal playback allows
you to accurately postt_on a cue point or edit point
Pressing the CUE STDBY or EDIT/NO button sets the
cue point or e&t point
If you press the REHEARSAL button during
playback
The MD deck plays the track starting from the point at
wh_ch you pressed the REHEARSAL button
If you press the REHEARSAL button while the
MD deck is stopped
The MD deck locates the first track on the biD or the
beginning of the track _ou selected
To change the playback portion during
rehearsal playback
Turn the AIMS control
You can change the tzme unit for adjusting the start of
Rehearsal Play by pressing the ,411_l/ll,,Ib buttons
When you press the _ or _ button, the time unit
flashes. Each press of the _ button selects the next
rime unit "F (framer', "S (second)", "M (minute) "
And each press of the _ button selects the unit m
reverse d_rect_on
m
¢0
_2
To turn off rehearsal playback
Press the REHEARSAL button again
T=me ioforrnatlon REHEARSAL button
I
ID [] D
° I
0
Use the Setup menu to set the duration for rehearsal
playback and the interval between repetitions
See 6-6 Setting the Rehearsal Pla\bacL Function" on page
6-6
Chapter4 Playback 4-3
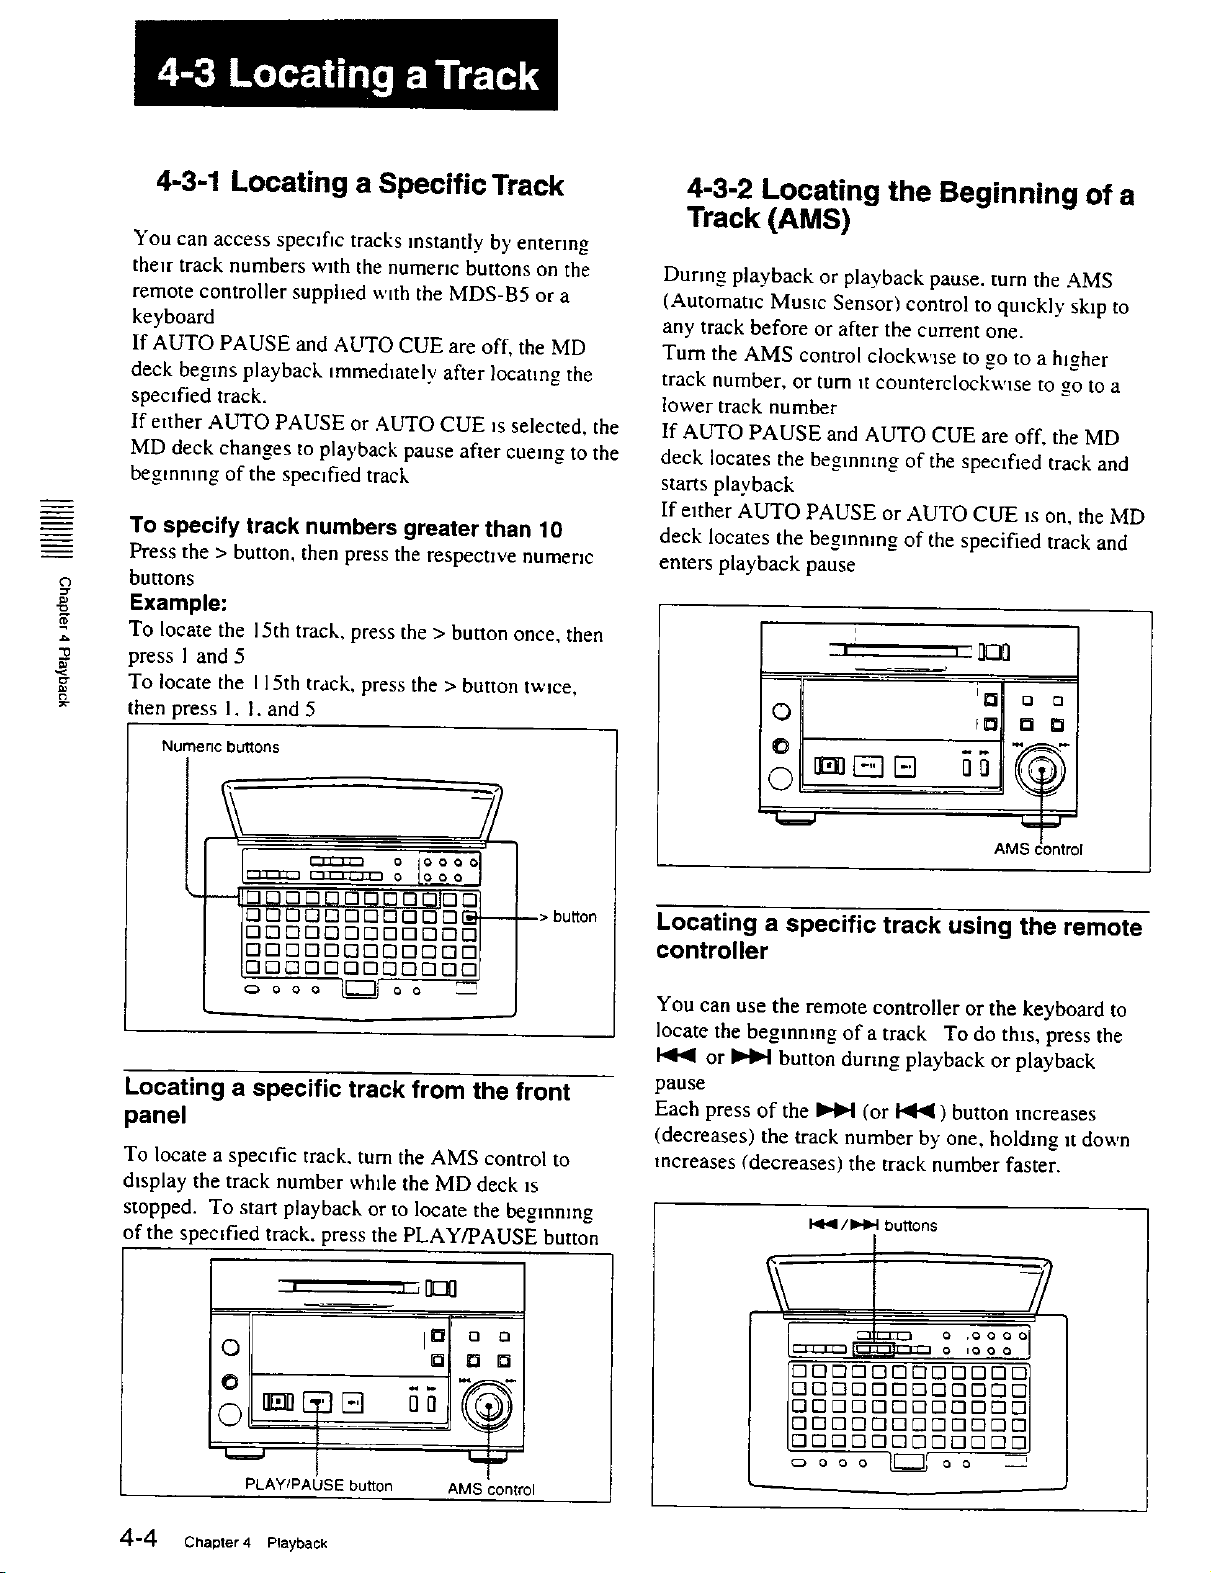
4-3-1 Locating a Specific Track
4-3-2 Locating the Beginning of a
Track (AMS)
You can access specific tracks instantly by entering
their track numbers with the numeric buttons on the
remote controller supplied with the MDS-B5 or a
keyboard
If AUTO PAUSE and ALrI'O CUE are off, the MD
deck begins playback immediately after locating the
spectfied track.
If either AUTO PAUSE or AUTO CUE is selected, the
MD deck changes to playback pause after cueing to the
beginning of the specified track
To specify track numbers greater than 10
Press the > button, then press the respective numeric
o
laJ
buttons
Example:
To locate the 15th track, press the > button once, then
press I and 5
To locate the I LSth track, press the > button twice,
then press 1. I. and 5
Numeric buttons
During playback or playback pause, turn the AMS
(Automatic Mustc Sensor) control to quickly skip to
any track before or after the current one.
Turn the AMS control clockwise to go to a higher
track number, or turn it counterclockwise to go to a
lower track number
If AUTO PAUSE and AUTO CUE are off, the MD
deck locates the beginning of the spectfied track and
starts playback
If etther AUTO PAUSE or AUTO CUE _s on, the MD
deck locates the begmmng of the specified track and
enters playback pause
i
_ 0 0
0 no
toool
IaDnOOD:_DOOD_---
D [] Drnl
lOOOOOOOOOOOOl
IODDDDODODDODE
Locating a specifictrackfrom the front
panel
To locate a spectfic track, turn the AMS control to
dtsplay the track number while the MD deck is
stopped. To start playback or to locate the beginning
of the specified track, press the PLAY/PAUSE button
• I r[]IS]I]
0
jO o o
0
--> bu_on
AMS (
Locating a specific track using the remote
controller
You can use the remote controller or the keyboard to
locate the beginning of a track To do this, press the
or _ button during playback or playback
pause
Each press of the _ (or _ ) button increases
(decreases) the track number by one, holding it down
increases (decreases) the track number faster.
I<_1 / b4_l buttons
r7 r7 _ _3r_E3 _ E3_ n _ C
rl rl C3rl D r-i i_ r7 D D t-I C
0 n [3 D D E]rTl_D D E]r-
"7D rl n E3r7 r7 _ rl r7 E3r7
-i _ D r7 r7 1-1C]r-]_ r7 r7 r-
PLAWPAUSE button AMS control
4-4 Chapter 4 Playback
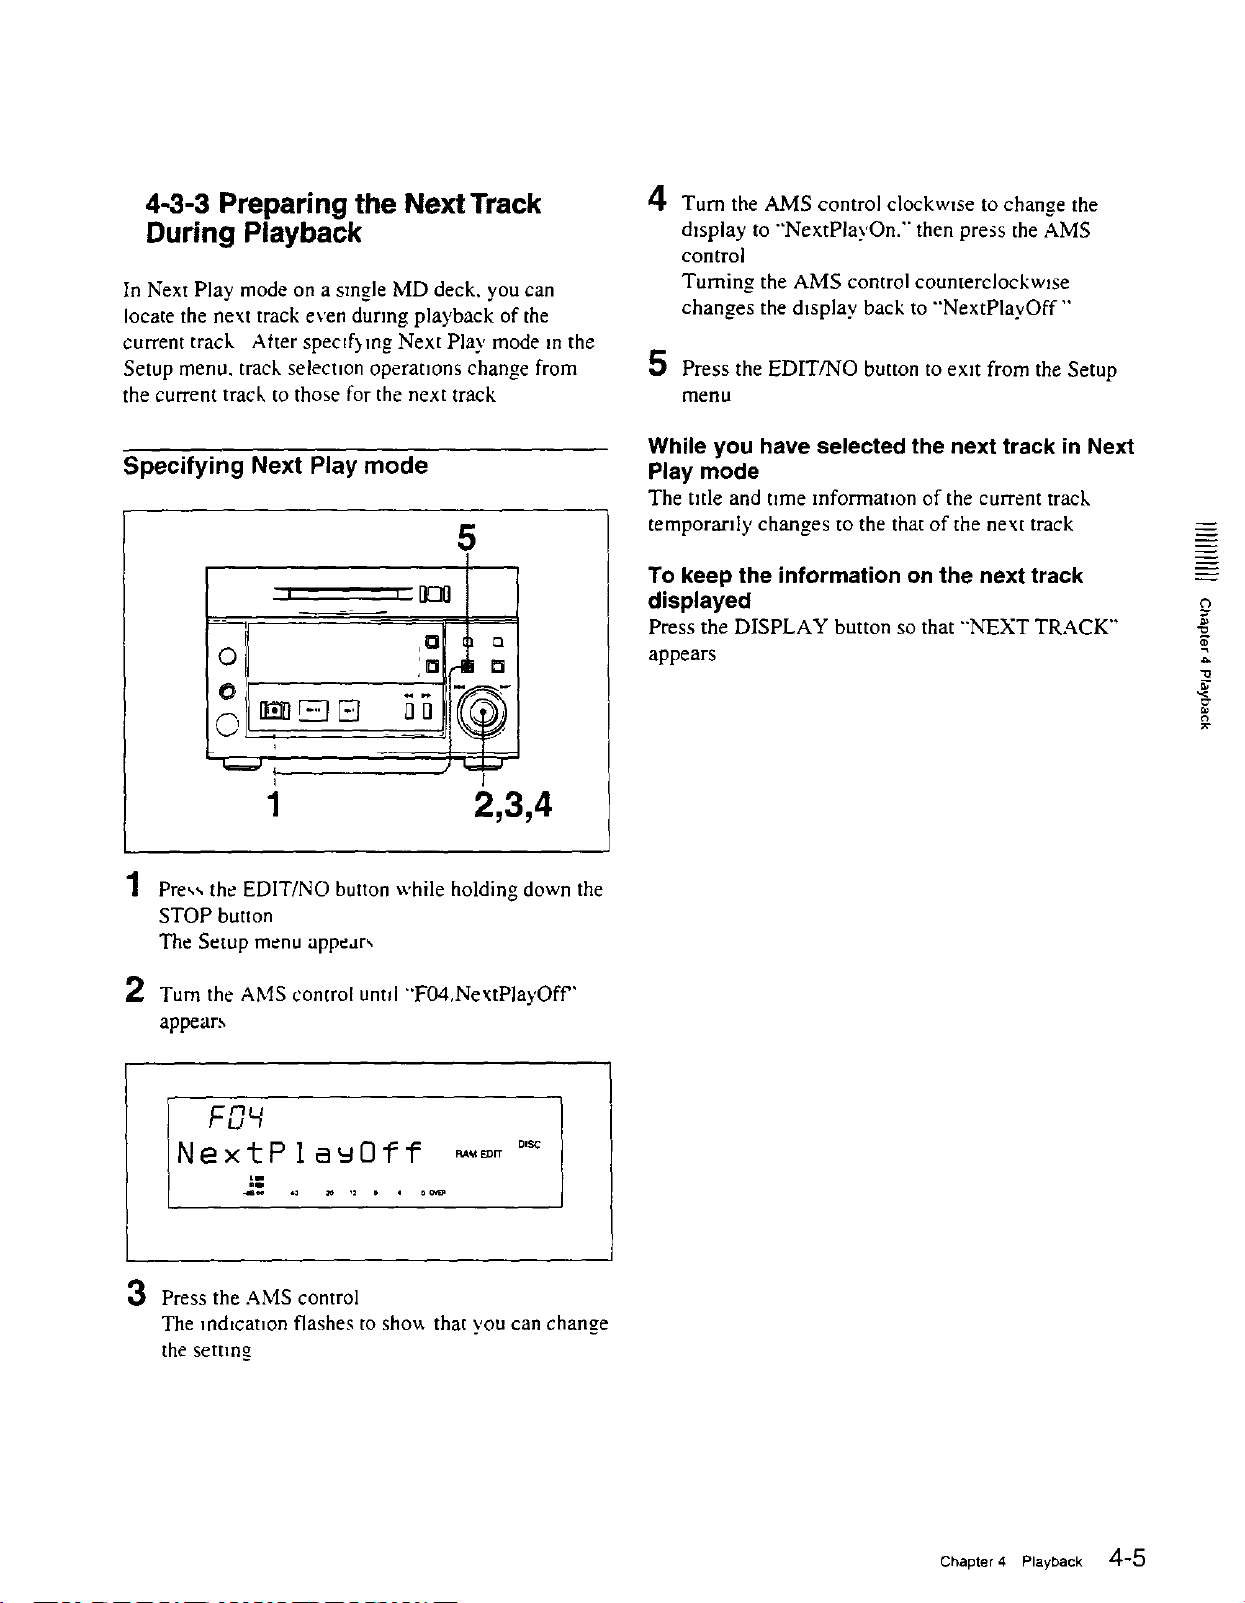
4-3-3 Preparing the Next Track
During Playback
In Next Play mode on a smgle MD deck, you can
locate the next track even durmg playback of the
current track After specff}mg Next Play mode m the
Setup menu. track selecuon operations change from
the current track to those for the next track
Specifying Next Play mode
5
:"1
O rr_Jr_.
4 Turn the AMS control clockwtse to change the
d_splay to "'Ne×tPlay'On.'" then press the AMS
control
Turning the AMS control counterclockwzse
changes the display back to "Ne×tPlayOff"
Press the EDIT/NO button to exit from the Setup
menu
While you have selected the next track in Next
Play mode
The utle and t_me mformat_on of the current track
temporarily changes to the that of the next track
To keep the information on the next track
displayed
Press the DISPLAY button so that "'NEXT TRACK"
appears
o
"o
J_
.-Q
I
1
]
2,3,4
1 Pre,,,, the EDIT/NO button while holding down the
STOP button
The Setup menu appear,,
2 Turn the AMS control untd "'F04,NextPla.,/Off'
appear.,,
FO_
Nex_PleuOff,_. . . °_'_"_'_ °"_
3 Press the AMS control
The mdtcat_on flashes to shov. that you can change
the setting
Chapter 4 Playback 4-5
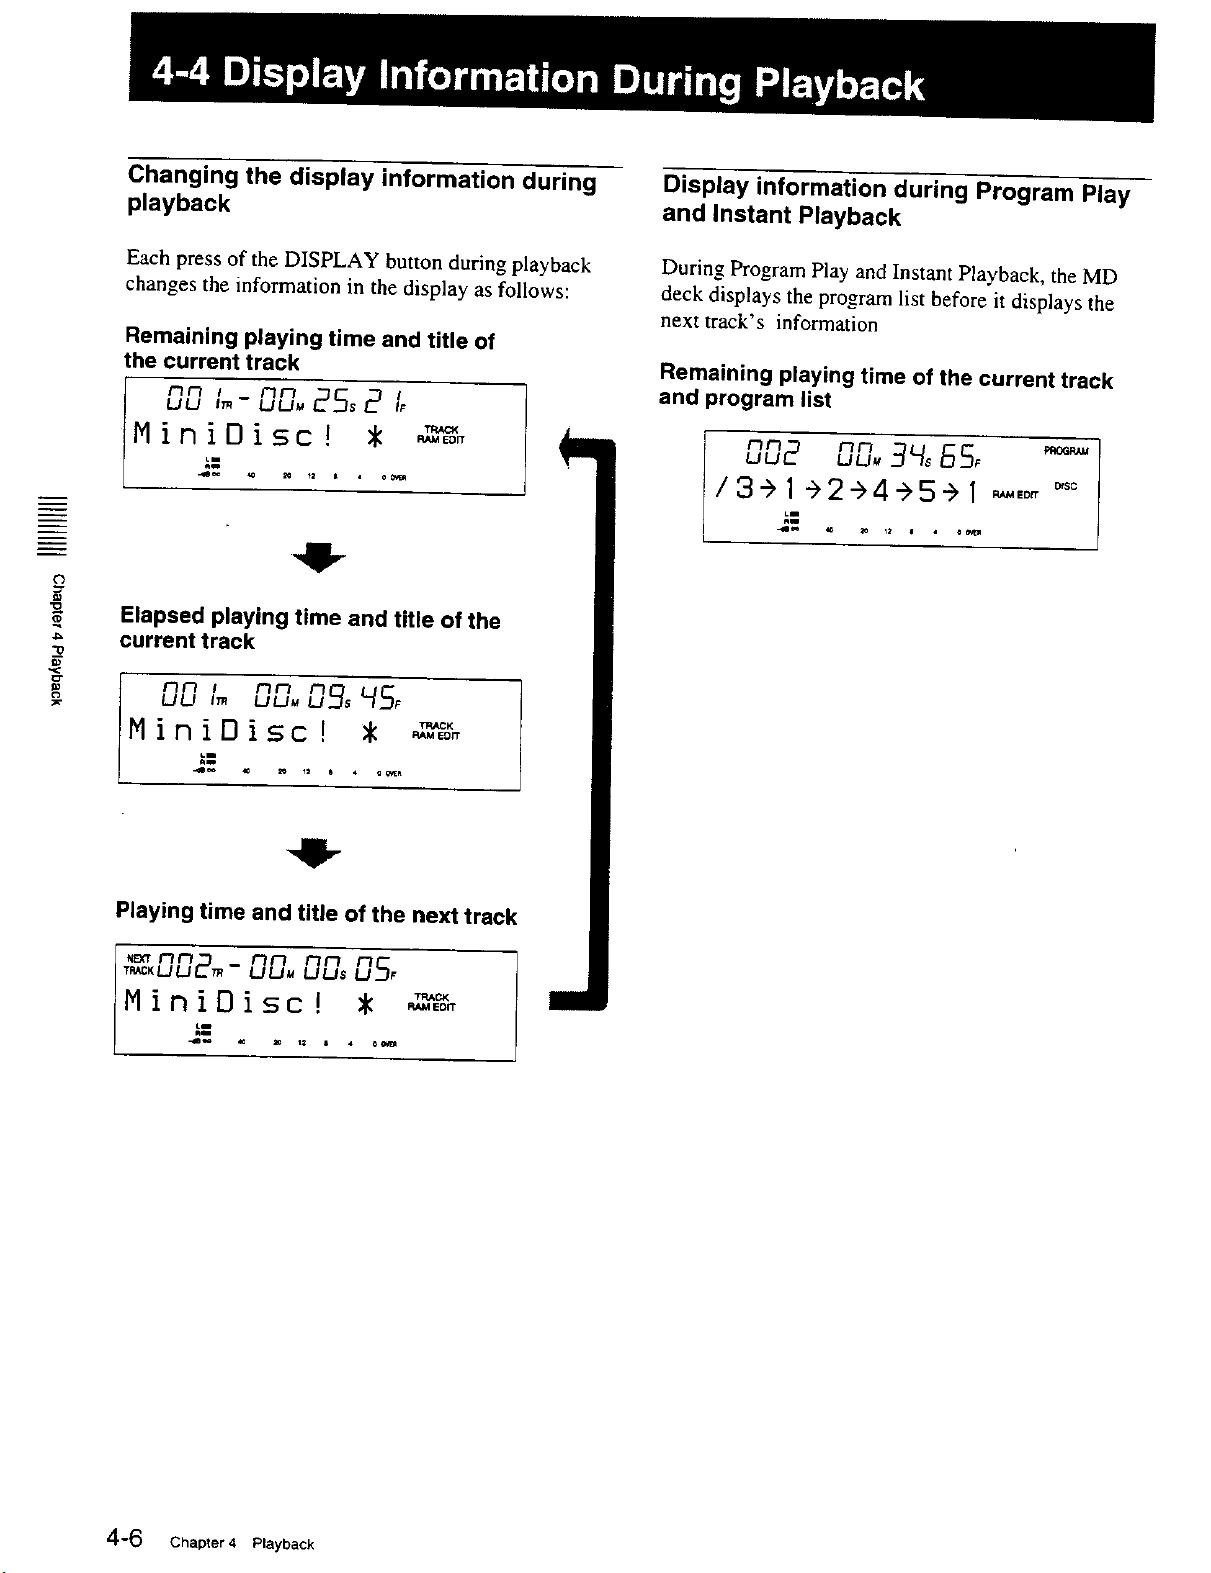
Changing the display information during
playback
Display information during Program Play
and Instant Playback
Each press of the DISPLAY button during playback
changes the information in the display as follows:
Remaining playing time and title of
the current track
UU Ltt_t_
TRAC_
MiniOisc!
_M EOR
Duriug Program Play and Instant Playback, the MD
deck displays the program list before it displays the
next track's information
Remaining playing time of the current track
and program list
1"3N
UU2 Niluu. 3H,BS,
/3"> 1->2->4->5-> I _,_ _°=
j-'. .....
41-
m
Elapsed playing time and title of the
current track
nn + mm _J_s L{S_
UU Im UUu
TRACK
MiniDisc! *
RAMEDIT
41-
Playing time and title of the next track
1"3I'l 1"3I"3
"m_:KUU2m- nnUU_ LJ/.Js 0S,
MiniOisc! ,
4-6 Chapter 4 Playback
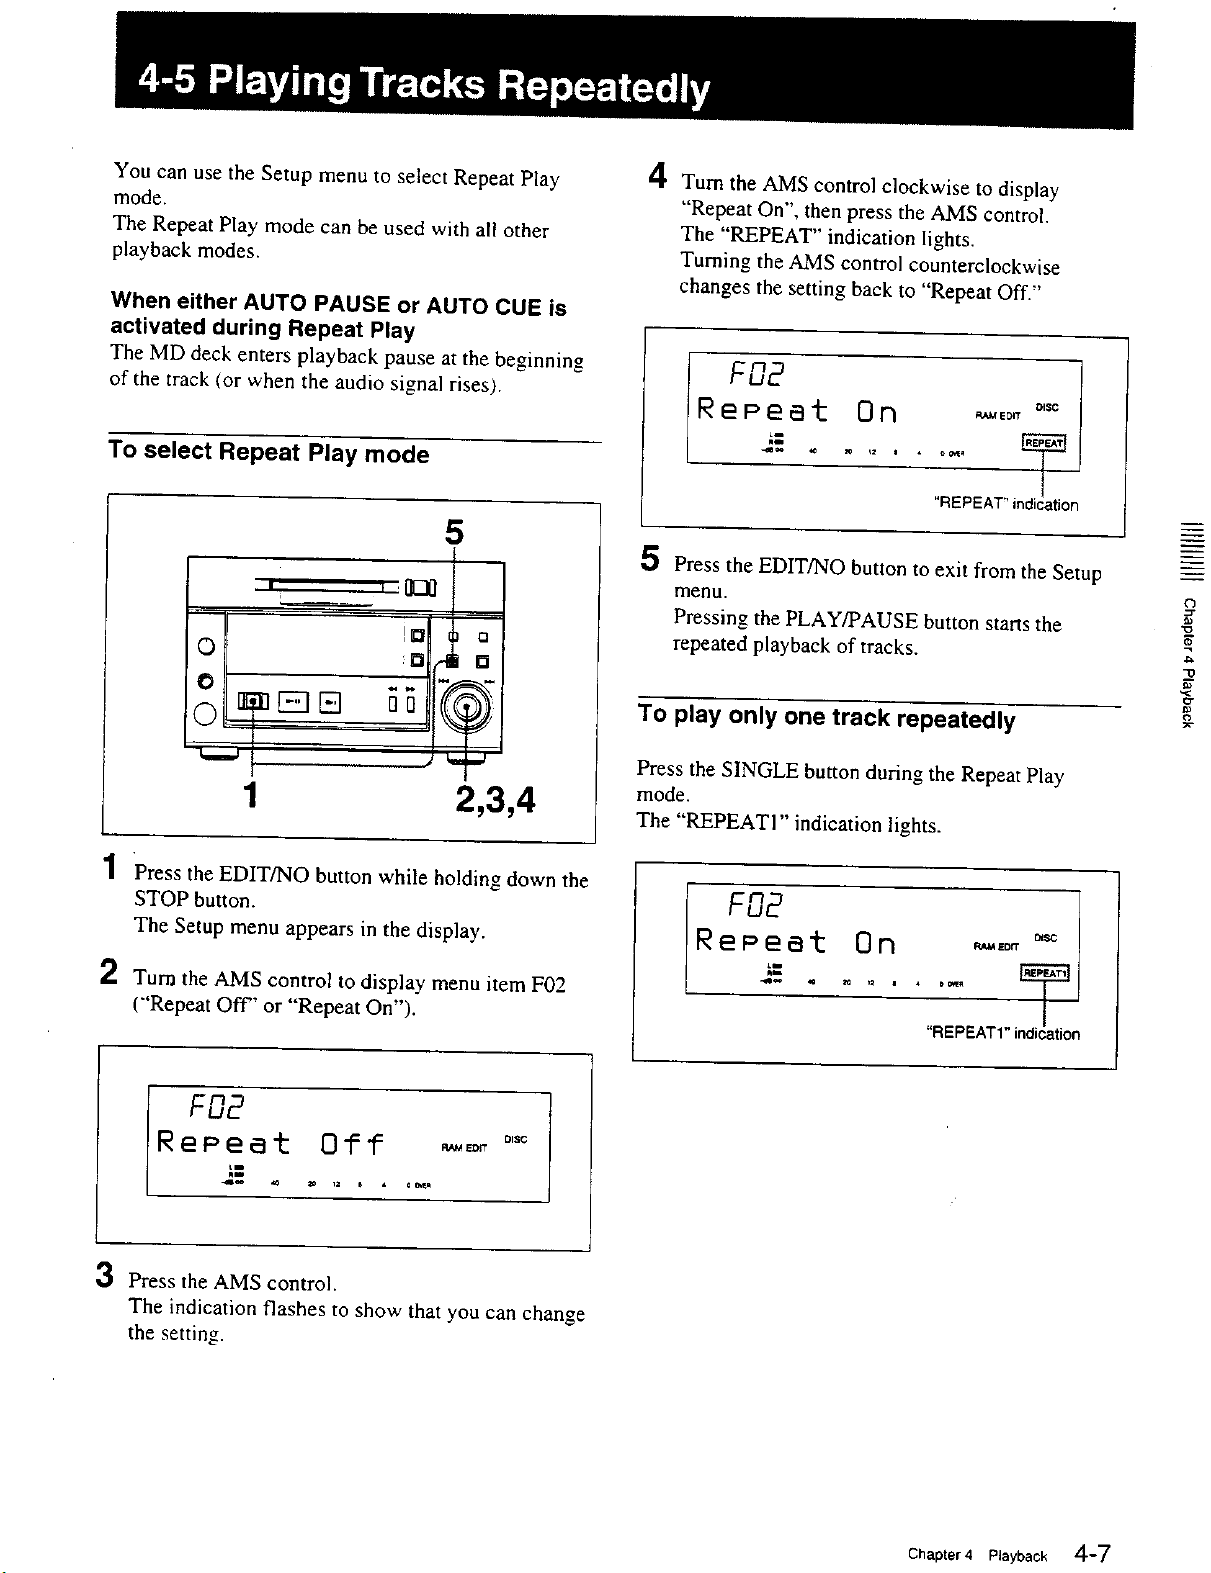
You can use the Setup menu to select Repeat Play
mode.
The Repeat Play mode can be used with all other
playback modes.
When either AUTO PAUSE or AUTO CUE is
activated during Repeat Play
The MD deck enters playback pause at the beginning
of the track (or when the audio signal rises).
To select Repeat Play mode
5
= t ,[][_]
0
0
0
I=1 o
:=1 []
4 Turn the AMS control clockwise to display
"Repeat On", then press the AMS control.
The "REPEAT" indication lights.
Turning the AMS control counterclockwise
changes the setting back to "Repeat Off."
"REPEAT" indication
5 Press the EDIT/NO button to exit from the Setup
menu.
Pressing the PLAY/PAUSE button starts the
repeated playback of tracks.
To play only one track repeatedly
(3
1
2,3,4
1 Press the EDIT/NO button while holding down the
STOP button.
The Setup menu appears in the display.
2 Turn the AMS control to display menu item F02
("Repeat Off" or "Repeat On").
2=. .........
3 Press the AMS control.
The indication flashes to show that you can change
the setting.
Press the SINGLE button during the Repeat Play
mode.
The "REPEAT1" indication lights.
RePeet On -,o. ==
"REPEAT1" indication
Chapter 4 Playback 4-7

Use the Program Play function to specify the playback
sequence of multiple tracks.
• To turn the Program Play function on, use the Setup
menu.
• To program tracks, use the Edit menu.
You can specify the playback sequence of up to 25
tracks.
When either AUTO PAUSE or AUTO CUE is
activated during Program Play
The MD deck enters playback pause at the beginning
of each track in the program (or when the audio signal
rises).
4
Turn the AMS control clockwise to display
"Program," then press the AMS control.
"PROGRAM" lights up in the display.
Turning the AMS control clockwise displays
"Continue", "Shuffle", "Program", and "Multi
Access" in sequence. Turning the control
counterclockwise displays the same items in
reverse sequence.
F0,
To select Program Play mode
5
|' I J[]_]
0 !o4 o
1
1 Press the EDIT/NO button while holding down the
STOP button.
The Setup menu appears in the display.
2,3,4
2 Turn the AMS control until menu item F01
("Continue", "Shuffle", "'Program", or "'Multi
Access") appears.
"PROGRAM" indication
5 Press the EDIT/NO button to exit from the Setup
menu.
After making a program, press the PLAY/PAUSE
button to start playing the program.
To play an entire program repeatedly
Select "F01 :Program" and "F02:Repeat On" in the
Setup menu. The programmed selections will play
back repeatedly.
Con : inue
2" .........
3 Press the AMS control.
The indication flashes to show that you can change
the setting.
4-8 Chapter 4 Playback
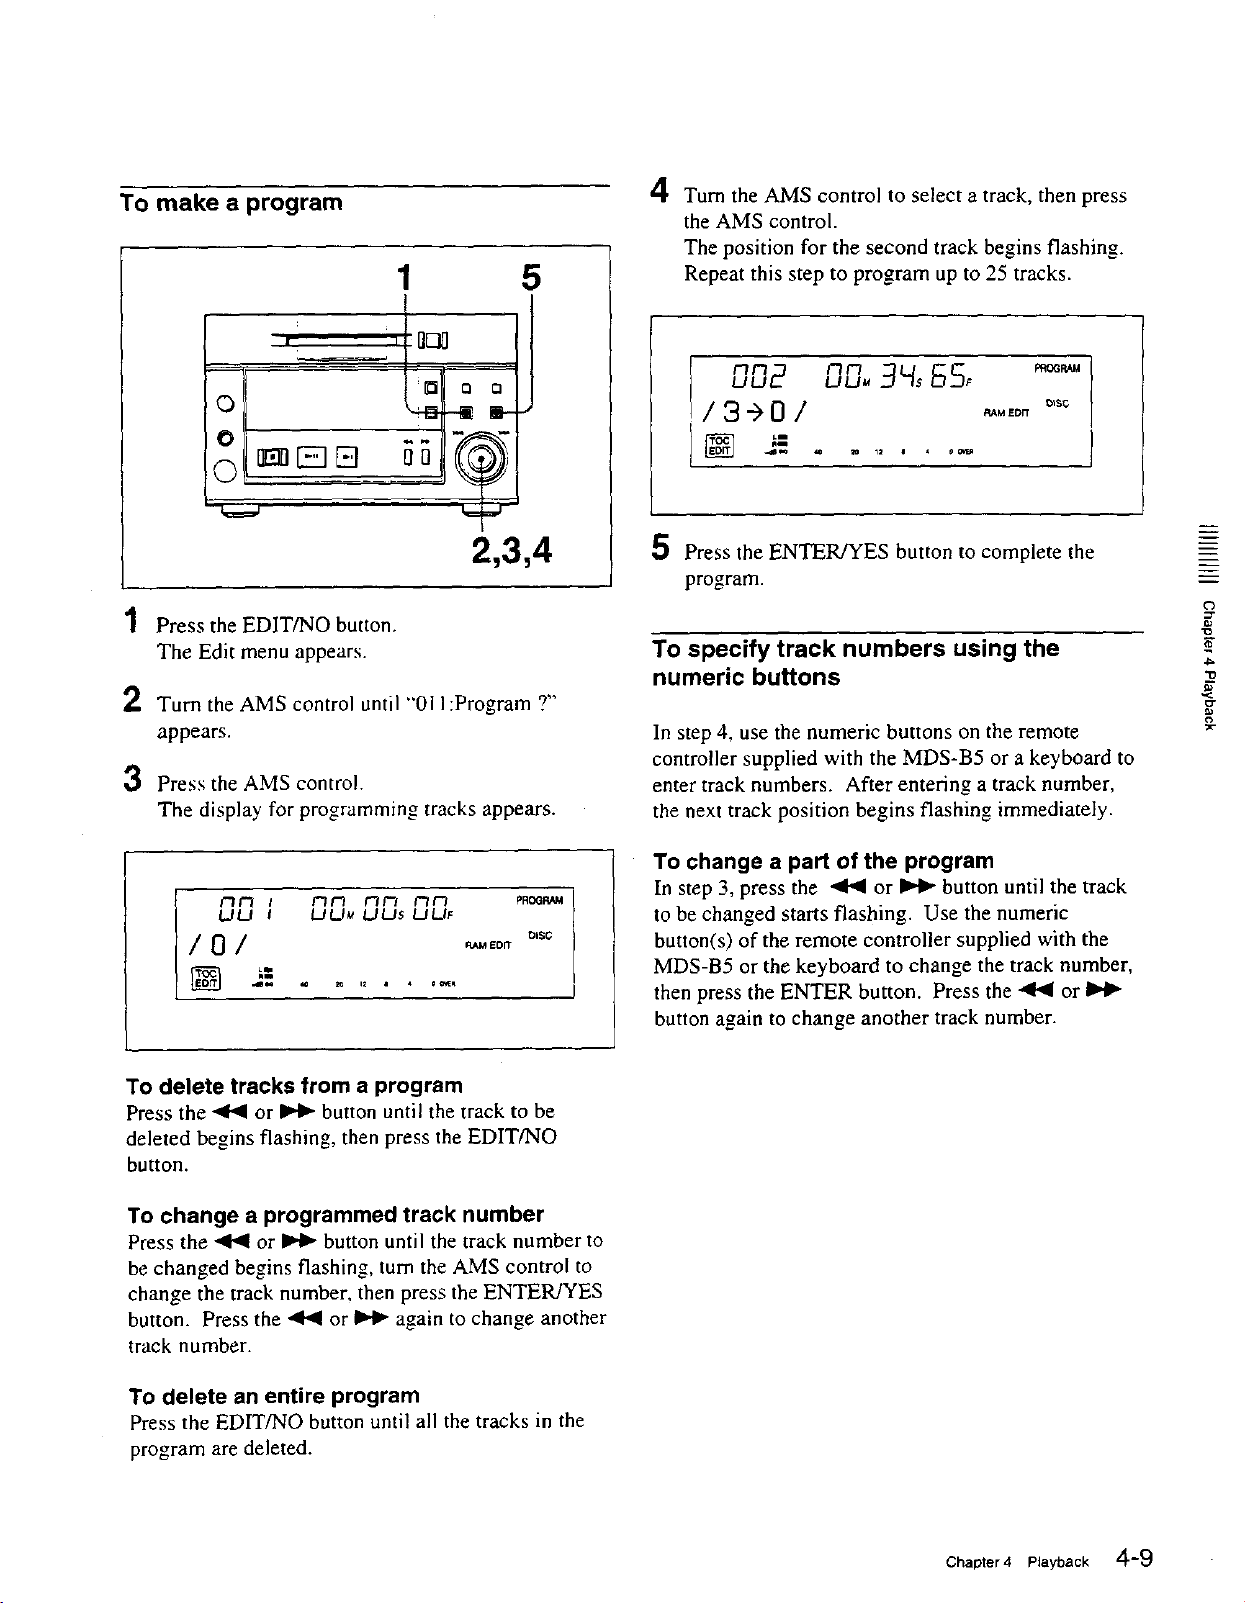
To make a program
, r FIE]]
°
o
1 5
4
Turn the AMS control to select a track, then press
the AMS control.
The position for the second track begins flashing.
Repeat this step to program up to 25 tracks.
r3F;
UU_ F'lr7
/3-)0/
[] =
2,3,4
1 Press the EDIT/NO button.
The Edit menu appears.
2 Turn the AMS control until "'011:Program ?"
appears.
3 Press the AMS control.
The display for programming tracks appears.
r_/-_ i /'1/-"/ /_/-1 /i.//_./ PROGI_M
LJLJ I LJLJ_ LJI.Js UUF
/0/
To delete tracks from a program
Press the -<1,<1or _ button until the track to be
deleted begins flashing, then press the EDIT/NO
button.
[)lSC
5 Press the ENTER/YES button to complete the
program.
To specify track numbers using the
numeric buttons
In step 4, use the numeric buttons on the remote
controller supplied with the MDS-B5 or a keyboard to
enter track numbers. After entering a track number,
the next track position begins flashing immediately.
To change a part of the program
In step 3, press the ,4<1 or _ button until the track
to be changed starts flashing. Use the numeric
button(s) of the remote controller supplied with the
MDS-B5 or the keyboard to change the track number,
then press the ENTER button. Press the .,4<1 or
button again to change another track number.
m
t'3
p_
"o
g
To change a programmed track number
Press the "<1'<1or _ button until the track number to
be changed begins flashing, turn the AMS control to
change the track number, then press the ENTER/YES
button. Press the 4<1 or IH_ again to change another
track number.
To delete an entire program
Press the EDIT/NO button until all the tracks in the
program are deleted.
Chapter4 Playback 4-9
 Loading...