

Page 1
SONY.
Video TV Recorder El
GV-200
Operating Instructions
■iimu
»1990 by Sony Corporation
Page 2
Owner’s Record
The model ano señal numbers ai
space provided betow. Refer to if
re9ar0in9 tms product.
Model NO. GV-200 Serial No. .
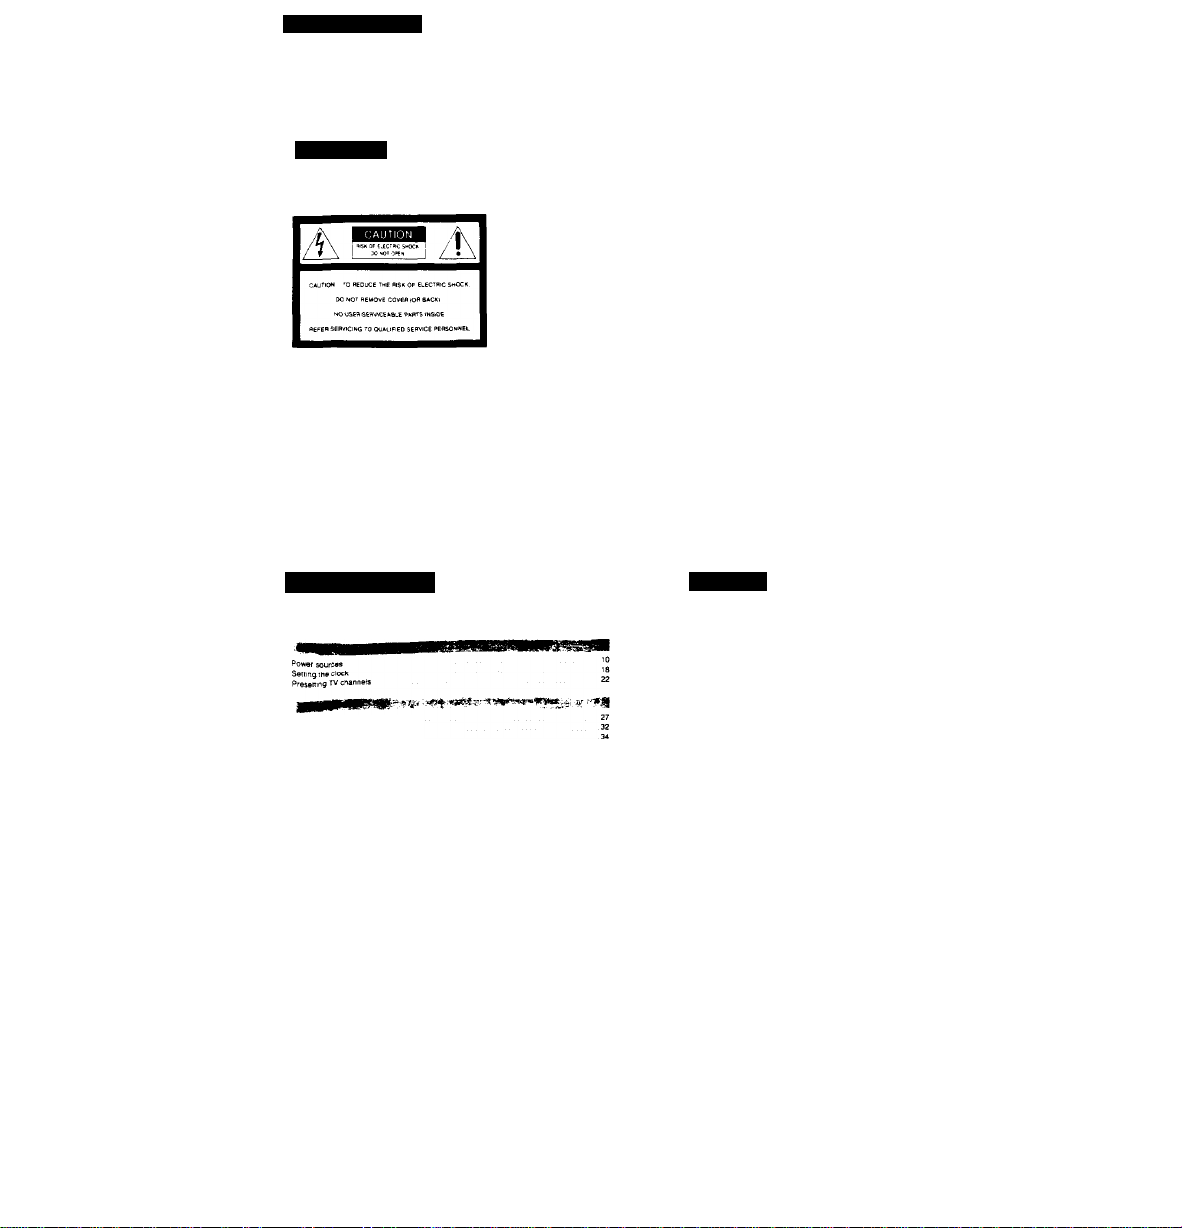
WARNING
To prevent fire or shock hazard, do not expose the unit to
rain or moisture.
This symbol IS intended to alert the user to the presence of umnsuiateb
'dangerous voltage " withm me product's enclosure mat may be ot sufficient
magnitude to constitute a risk of electric shock to persons.
This symbol IS intended lo alert the user to the presence of important
operating and mainienartce (servicir>g| Instructions in the literature
accompanying the appfiar>ce
INFORMATION
This equipment generates and uses radio frequency energy and if not installed and uaed
pfooerlY, that is. m strict accordance with the msnufactuter’s ifistruciions, cause
interference to radio and television receotion. it has been type leeted and found to comply
with the limits lor a Class B computing device in accordance with the specifications m
SuDpan J of Part 1S of FCC Rules, which are designed to provide reasonable protection
against such interference in a residential installation However, there is no guarantee that
interference will not occur m a particular installation If this equipment does cause inter
ference to radio or television recepnon. which can be determined by turning the equipment
off and on. the user is encouraged to try to correct the interference by one or more of the
following measures;
Reorient the receiving antenna
Relocate the equipment with respect to me receiver
Move the equipment away from me receiver
Plug the equipment into a different outlet so that equipment and receiver are on different
branch circuits.
It necessary, the user should consult the dealer or an espenenceo raOioHetevision technician
for additional suggestions. The user may find the following pooKiet prepared by me Federal
Communications Commission helpful;
"How to Identify and Resolve RadiO-TV Interference Problems ' This booHlei is available
from the U S. Government Printing Office. Masnmgton. OC 20402. StOCK No 004-00000345-4.
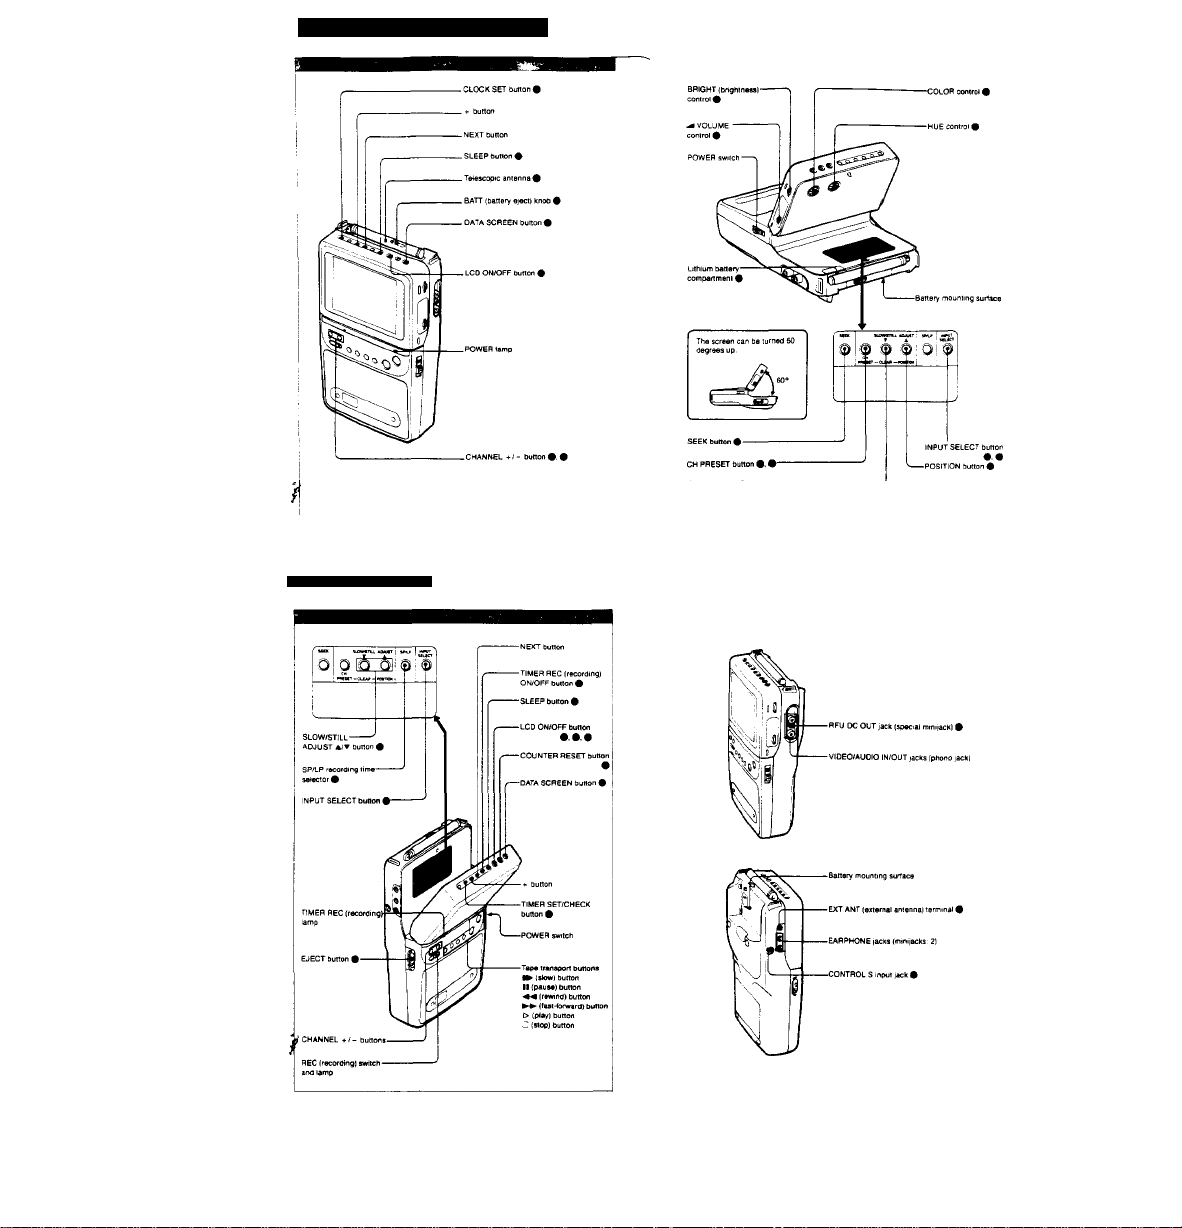
Table of Contents
Features
Location of parts and controls
vVaicnmg TV programs
To set the unit to turn off automatically
Inserting the cassette
aecoiQing Ofograms
To Stan recording at me desired lime
Playing back the recorded tapes
Connecting an outdoor antenna
Using as a monitor of the 9mm video camera recorder
To connect arwther TV or color monitor
Tape editing
Precautions
Maintenance
Notes on moisture condensation
Using you' recoroer abroad
Specifications
List of recommended accessories
Troubleshooting
On screen display
Quick reference on timer setting
Features
For detaiis. tefer to the pages indiened m ф.
With the Sony GV-200 video TV recorder, you can;
— view playback picture ot 8 mm vkmo tapes. #
— view VJ programs. 9
— record TV programs. •
Vou can also connect the recorder to another equipment.
Compact and lighiweignt design allows you outdoor use.
— Timer recording ф
— Sleep timer turns the power off automatically #
— Screen can be cleared when it is not necessary; e.g. *
TV/monhor which is connected to this i
— Crystahciear stiii/slow and picture search i
— Convenient four power sources 9
— Capable of receivir>g CATV chanrwls #
— High quality 4 mchea crystal panal
This unit uses 9 mm video format cassettes. It records m the SP mode (approximatelY t 43
cftMsecond) and the LP mode (approximatety 0.72 cmlsecont) and tan play back m ihe SP
mode and LP moda.
The quality of tha playback picture m the LP mode, however, will not be as good as that m
the SP mode.
Television programs, films, video tapes and other materials may be copyrighted.
Unauihonzed recording of such material may be contrary to the provisions of the cooynghi
For using the recorder abroad, see page ф.
m viewing pictures w
ir when listening only to the sound, ф
nLCD9
Page 3
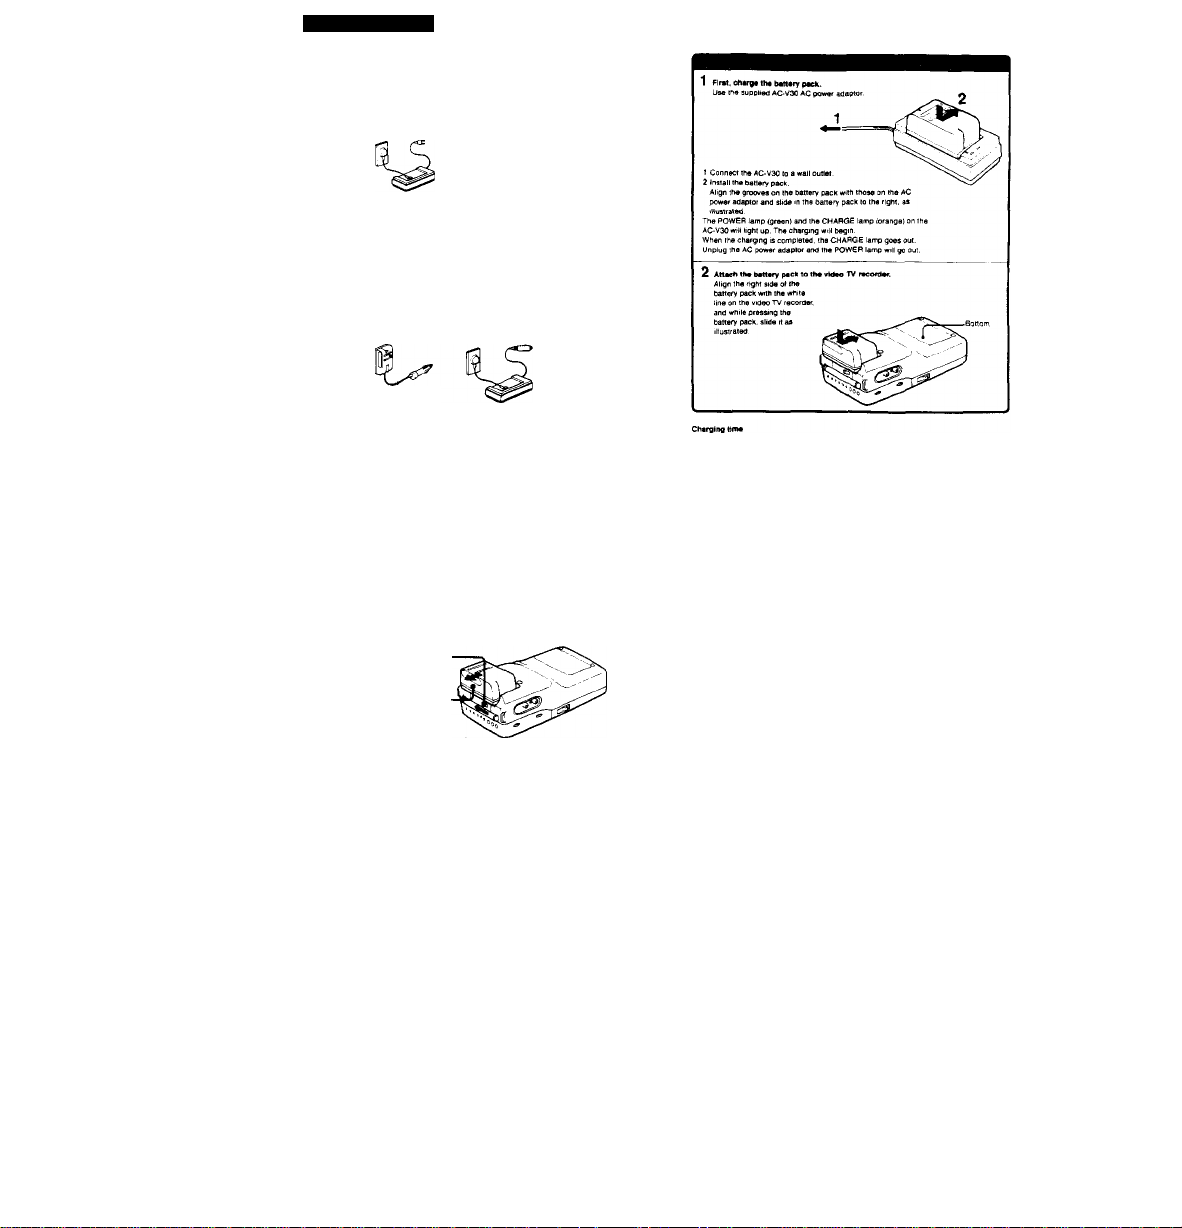
Location of Parts and Controls
Location of Parts and Controls
^«tar 10 ih* pagM indtoaMd m • tor OMaito.
Page 4
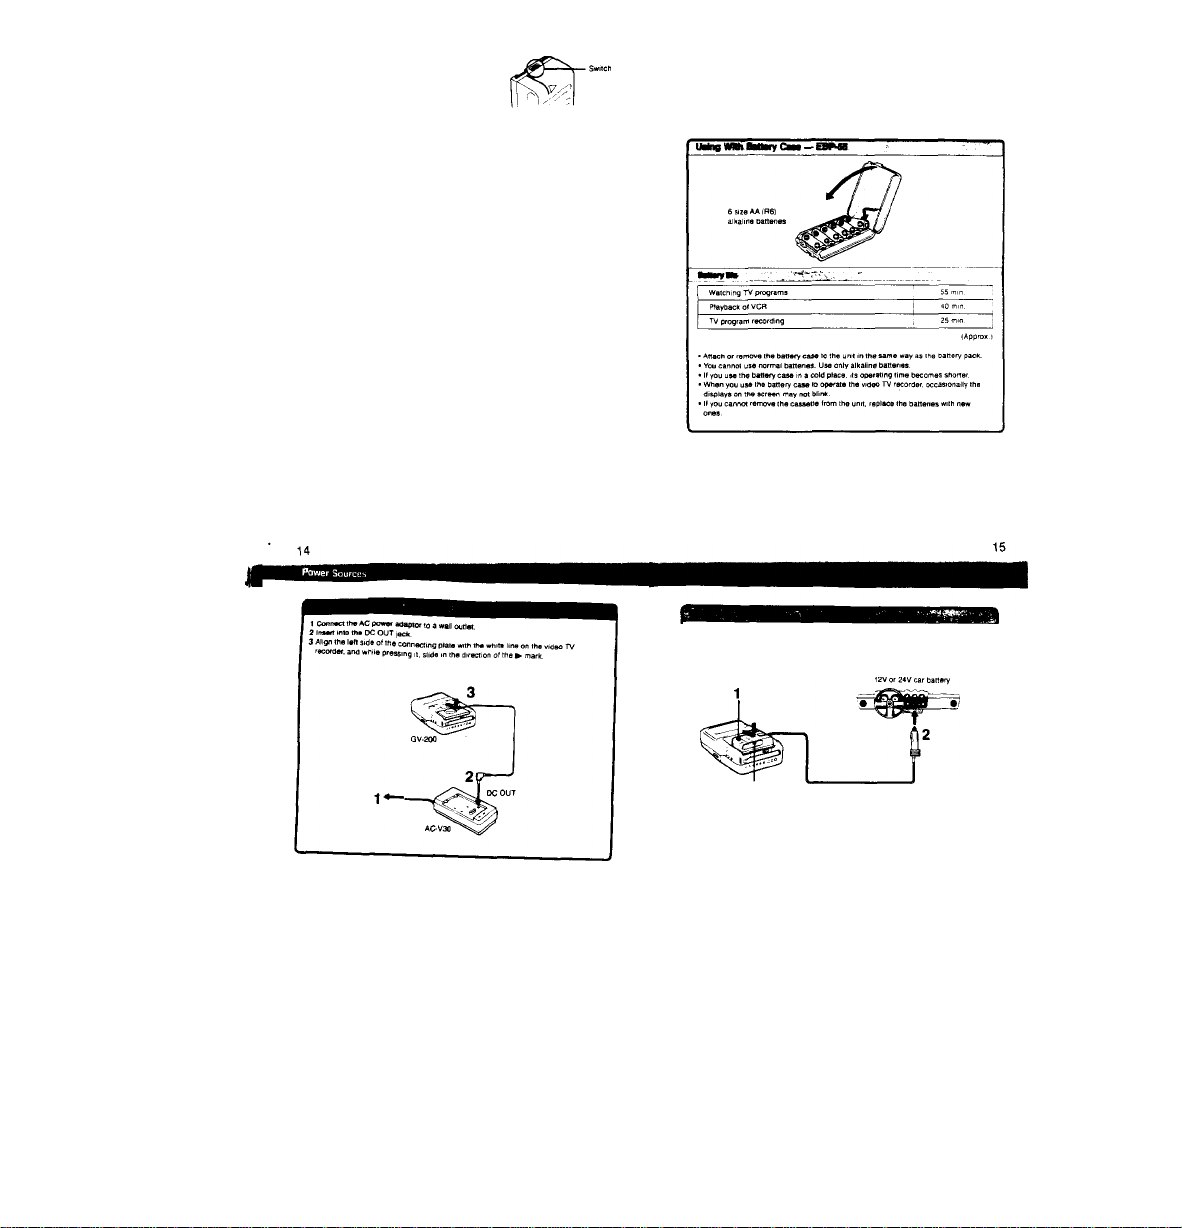
Power Sources
AC power aoapior
AC-V30 isuppiiedi
Ojiaoors Batterv oacit
NP-66H (suppiiea).
NP-77H NP-77or
NP-55
Ô car DC pacK DCP-77
or DC pack DCP-55
[DCC-I6B car Danery
cord supplieû)
•e accessories eicept the AC-V30 arto the NP-66H are optional.
Disconnecting the power source during recording or piayCack may damage the
inserted cassene ¡ape.
If this IS done Dy accident, supply the power again immediately ar>d turn the power oi
Car Darterv charger/
adaptor DC-V30
10
1 While Sliding the SATT ki
in the arrow direction.
• Slide the battery pack as illustrated
NP-55
60 min
(AC-V30 'Si
The battery pack cannot be charged when the AC power adaptor is
• An NP-66H. NP-77H. NP-77
battery charger.
NP-S5 can also be charged with
sed ¡0 operate tr
eSC-56 cr8C-7-
■ ■«
A fully-charged battery pack ci
Watching TV programs
TV program recording
M for a Mile« 2 or 3
The "operatirg time" described m
recorder <s the time during which ir
charged banery pack.
Past winding or rewindiig operation ot the tape consumes much more battery power tna
normal tape transport operation. Conseouemiy. banery life becomes sooner when fast
winding or rewinding is performed freouenily
CtMT^ ««tiM kMMnr Radi
The battery pack you have purchased <s not charged. Fully charge the battery pack before
Recharge the baRery pack whan H la eihaiietad.
• If the operation <s completed before BATTERY DOWN is indicated, it is recommended th
you discharge the battery pack by playing back or recording on another tape until the
BATTERY DOWN indication blinks rapidly-
• Do not recharge the battery pack before H has been discharged. Repeated charging whi
some battery capacity remains will reduce ihe banery capacity.
X
Battery pack eara
• Remove the banery pack from the video TV recorder after use. and keep >i m a cool place.
When the battery pack is installed on a video TV recorder a slight amouni ot current Mows
to the recorder even though the POWER switch is turned off. it causes overdischarge and
shortens the battery life.
• The battery peck is always discharging — even when it is not >n use. Thus, the banery
should be charged before eecn use.
13
Page 5
Ho« to uM ttw Mttch on tho batttry pock
Usa this switch as a rafnindoi tor me charging condition. Slide
It to the Otank side when the charging is completed Slide it to
the red side when the Dartery has oeen discharged.
How many times can the battery pack be recharged?
The oaitery pack can be recharged more than 500 times provided that it is (uHv charged anc
exnausteo at each operation.
M me 8ATTERY DOWN indication Oimks rapidly after turning on me recorder even ihougn
a fully charged oariery pack is installed, the battery pack should be replaced wm a brand
Charging temperature
Lower temperatures require longer charging time The battery pack should be charged in a
temperature ranging from 10®C to 30°C (5®F to 86®F|
The battery peck witi be warm atter charging or using.
While the oaitery pack is charged or used, a chemical change which generates electric
energy occurs mside me battery pack Therefore, the battery pack becomes warm.
When the charging la compleled. remove the battery peck from the charger.
Within 24 hours after charging, remove the battery pack from the charger Otherwise,
overcharging may occur as a siignt amount of current flows from the charger to me battery
Se sure to put the battery pack In the case to carry.
If the .n ало - terminals are snortu:ircu>ied with a meiai piece, the battery w>li be
abnormally healed. This is very dangerous. Never put an uncovered battery pack in a pocket
together with a key holder, etc.
Replace me paitery ¡ust when the POWER lamp changes from slow
Olinking 10 fast blinking. During recording, the BATTERY DOWN
indication blinks slowly five minutes belore the battery piack is
discharged.
Turn off the power of me video tv recorder before replacing the
oatteiY While tepiac'ng me battery, keep me cassette mside the
cassette holder Recording can be resumed smoothly without any
picture distortion.
If the terminals are soiled, me battery life will become shorter
When the terminals are soiled, or when the banery pack or case i
long time, repeat attaching ana removing it sevetal times This w
the battery pack or case and me video TV recorder.
Also, wipe the • and - terminais with a soft doth or paper
1 Attach to the video TV recorder.
2 Connect to the cigarette lighier socket.
improya me contact ot
To remove the connecting plate
While Sliding the ВАТТ knob, sikM e
CAUTION
EXTENSION CORD, RECEPTACLE OR OTHER OUTLET UNLESS THE BLADES CAN ЙР
FULLY INSERTED TO PREVENT BLADE EXPOSURE
‘ wS ouilei “ '«-g as II PS connecied to me
* P‘"<»se Of safety and will tit -nto the
i)ur «iif
• White the unit is m use. particufarty aunng charging, keep it away from AM receivers and
video equipment because n wni disturb AM reception ana video operation.
• Be careful not lo let any metal obiecf touch the metal projection on me battery pack or tn
WAC power adaptor. When the battery pack is hot used, keep it in its case
^ Keep me video TV recorder away from me power source ii
screen.
I the conneciing plate.
POLARIZED AC PLUG WITH AN
t. noise may appear on the
• When you use the OCP-77 or OCP-S5, connect if only to ihe cars with negative
ground f2V or 24V car battery
• Attach or remove the DC pack m the same way as me battery pack.
Notaa on the we of the GV>2t)0 In e ear
• For your safety, do not watch the TV or operate the controls while driving.
• Avoid leaving the unit In a place wrth very nigh temperature. II you do. it may cause
distortion of the cabinet or malfunction ot the unit.
• If you use mis unit while your car is not m use, me car battery will be consumed.
Avoid using mis vmrt in such conoifion ovei f 2 hours.
Page 6
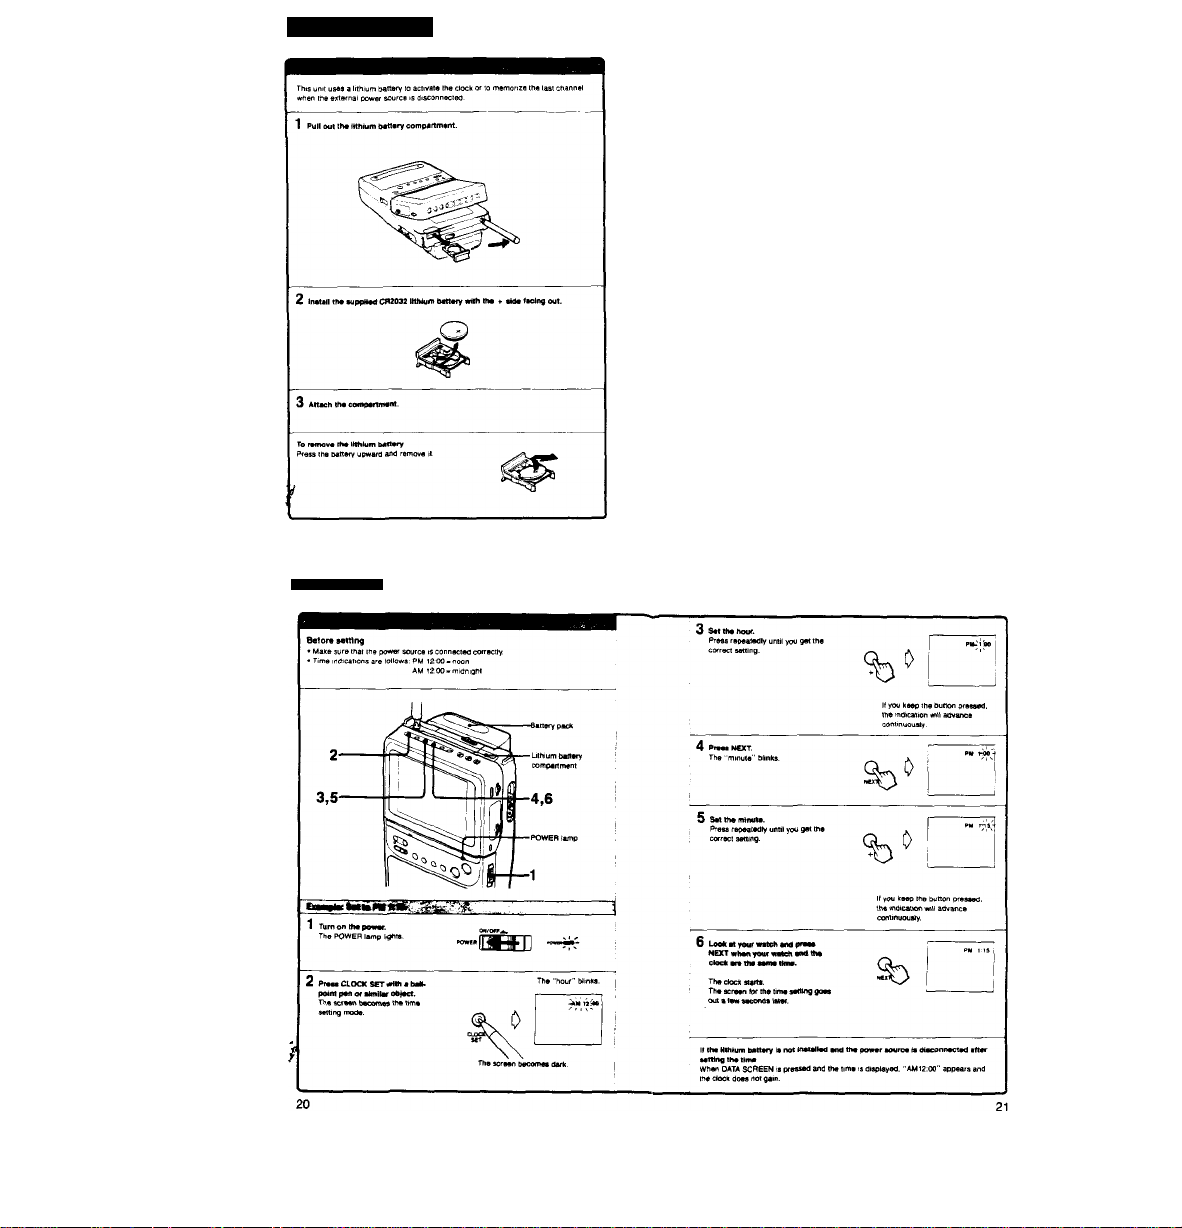
Setting the Clock
LHNum battery Ilf*
Approximately 1 year m r>ormai operation.
II me lithium Dattery Decomes weak, the AM12:00 will appear on the screen when the
DATA SCREEN button is pressed. In this case, replace the battery with a Sony CR2032
iiihium battery.
Use ol a battery other than Sony CR2032 may presem a nsk oi tire or explosion
Alter replacing the Oaciery. reset ihe clock
Notes on lithium battery
• Keep Ihe lithium Oaiiery out ol the reach of children.
Should Ihe oattery De swallowed, immediately consult a doctor.
• Wipe the battery with a dry ckrth to assure a good contact
• Be sure to observe the correct polartty when irtstailing the battery.
• Do not hold the battery with metallic tweezers, otherwise a short-circuit may occur
• Do not Creak up the Oattery n«r throw it mio a lire, which might cause it lo explode.
Carefully dispose of the used battenes.
wAmmo
Battery may expkxte if mieireeied. Oo not recharge, disasaemwe or dispose of m fire.
18
Setting the Clock
19
Page 7

Presetting TV channels
Vouf reeewer is caesW« r»cs*vir>g VHF channeit 2-l3, UHF channels i4-69 ano caOisTV
chann^s 1 (A-8\,9M9(A-2loA-ti, t4-36(A to W, 66-^25 W v30 WW .6*). The cnannet
numbers < -99 «v<ll be display m (he display window. This unit is presei at (he fac(ory to
receive certain channels (See (he 'Preset channels') if you want (o receive oiner channels,
you need to preset (hem as toUows
Presetting TV channels
Pm«t chinnala
2-13 I 14-36 37-«2 *3 «4^
2-13 1 i*-36 37-42 43
70.9T' 96 : 99
To add ttM eraaed chennela again.
See (he "To preset new channels" on page Z Z
Page 8

Presetting TV channels
rr«XMney<MHl> 50 100 ISO 200 250 300 «X 500 600 TOO
VHP/UHP cn«nn»W UHF’4-69
CATV cnirnM
Cable TV systems use leciers or numbers lo designate channels.
To tune m a channel, refer lo this chart. If you warti lo receive channels W + 30 ~ W + 84. you
need to preset them.
CorresDonCing CATV chann«
23 24 25 26 27 28
Check with your local cable TV company lor more complete mformaiion on the available
chartneis.
• The designation of the cable TV channels conforms to ihe EIA/NCTA recommendation.
Note
Pay cable TV systems use scrambled or encoded signals and require special converters
(decoders) m addition to the normal cable connections.
B C 0 E
30 31 32 33 34 35 36
26
Watching TV Programs
[ oasic opefaiion ,
Watching TV Programs
To be continued
When you do not know the channel of the TV program you want to
the unit m a movtng car. search the program as follows.
1 PreMSCEK.
For VHP channels, press once.
Por UHP channels, press twice.
To return to the previoua chanrtel. press again.
; Preee CHANNEL <k/-and Mieei
After selecting the channel, the channel range display goes out after a lew
Page 9

Watching TV Programs
It IS recommsndM that ^ clear the screen wneo you
view me oiaynack picture ol this recoraer with another
TV Of n>omiof Press LCO ON/OFF flattery life will last
longer if you use the umt with tne jnctyre tuthed oh
To Oispiay the picture on ihis unit, press LCD ON/OFF
Note
When no picture is oispiayed. if me sound is set to a
connected, the unit seems to Qe turned off mough it
e POWEfi switch when n
I «ipiar th* dMMMf ум ■
IS DATA SCREEN.
To clear me screen, press DATA SCREEN again.
Whan SEEK is prassed. the VHF or UHF channel
range is displayed instead of the channel numper
The display i$ cleared a law seconds after
"Laat chenneT memory function
• While you are waiching the TV fthe lithium panery 13 installed). il the power source is
disconnected or the battery реек becomes exhausted, the unit turns off with me last
channel oemg memorized.
When you turn on me unit again, the last cnannal will appear on the screen
• The same thing occurs whan the TV signal is cut off. for example when you go through
a tunnel while driving a car
• It the lithium oattery pecomes exhausted pi
channel being memorized.
30
To Set the Unit to Turn off Automatically
le power source is connected, t.
Adjust the contrpia to your preference.
- SLEEP Timer
1 SL6EP
Note
When you use the unn with rechargeable battenes. me unit may oe turned off before tf
selected time because the batteries are exhausted.
Press SLEEP repeaiedfy until you have the " display.
Tou can also stop iha SLEEP timer by turning oft the unit with the POWER swucn
33
Page 10

Inserting the Cassette
« power Murco « connoctM to th* Ш
1 Open the cassette holder with the EJECT Sutton.
> Insert the cassette with the window side up.
i Close the cassette holder.
When you slide the EJECT Sutton, the power vmll Se supplied and the cassette holder
wit Se opened even it the power is turned olt. When the cassette holder opens, me
power will Se turned off automatically. Slide POWER if you want to continue the
operation aner closing ms cassette holder.
1.
Qq not open №e cassette noider wiMie thè v>nit >s m thè perticai position If you do,
e cessene may fall oui of me noder and tne cessene can Se damaged.
' 34 35
Г'"''
When a new recording is made on a
previously recoroed tape, me previous
recording is automatically erased
protect a recoroing, slide the safety tab oi
IP cover tne opening
Notes
• When opening and closing me cassette holder, do not push me cover o( me noider lorcioiy.
• When you have made a recording with mis unit on a tape from its Beginning, and if you
play Sacii this tape with another VCR. the beginning of me tape may not be biaved back.
Also, by using me same tape for recording, the previously recorded pictures can remain
alihougn you record me new pictures.
To arvoid these cases, advance me tape tor about tS seconds before recording wiin mis
> Store cassettes m tneir cases when may are not to be used and keep tf
posmon to prevertt inwuwon of dust and uneven wind'ng.
• Always insert me cassette m the right position
• Never insert anything m me small holes on the rear of the cassette
T o
Recording
- gsnnot be
- ■
■
.■ -
Recording can
laoe. be made.
a
Recording TV Programs
Ataom tiM гмотМ ■««
íThe SíOL'lIME comroi setting tu
36
о effect on the recording level.
Run the video TV recorder for about ts seconds at the beginning of a cassette before
recording. It will avCKd missing the starting point during playbeck on another video cassette
recorder.
37
Page 11

Two lap« spoeds can m Moctad with tha SP/LP sslaettv.
Th« racQiflin« iim« in th« LP mod« is twice as lon^ as that lO the SP mode Pof Oerter orcture
and sound, recording m me SP mode is recommended During praybacn. ine mode in which
(he tape was recorded is selected auiomancaiiy
Cmmmm and tiMir PwsordM« Nm
There are two fomiats lor a mm indeo recording. NTSC ano pal. Video cassette rapes are
made to corresoono id the respective (ormais Use NTSC Format cassette tapes for mis umi
vou will hnd 'P6" on the package ol the cassette
/n some countries, however o nl y P A L f or m a r cAss*tl» ta o e s w it h " P S " o n m e O a ct ta g e sa r a
availaOie it a PAL Format cassette is used with this unit, me actual recording lime may ditter
from me standard recording iime mdieaieO on me cassette.
ml on a tape which has been recorded in the PCM mode, and ii you
ismg a VCfl with PCM lunction. occasionally the sound may be out
audio monitor switch of the vCP to me standard position
Press the SLEEP Outton during recording, vou can leave the unit function
Oed or wnen you go out. etc
The unit wiK be turned oh aoiomaticaHy at the preen tirne. For operancn.
'CASSETTE” indication IS
displayed wrien you slide
the PEC switch.
-CASSETTI -
A TV {xogram iwthin iA hours can be preset tor autotnaiic recording.
Far bener recording ot picture end sound, using an awernai antenna is recommended. See
page 48.
• Make sure thei the oowet is suoQiied. is the Oatlery peck tutiy charged? (For long
recording, using the AC power source is recommended.)
• Set the clock «Page 18).
• insert a cassette (Page 34). Маке sure mat the safety tao is slid m
• Select me reconling mode, SP or tP
PoaalblaeauM
1
when you go ic
seepage 3 2.
Pewmd the tape or use
a new cassette.
• The counter reading a i
only at
• There will oe a time lag ol several seconds on the couhier reading at
forward and rewind c^attona.
• The»» will be also a time lag of several second« wnen the tape re c on j eo m l P or S P modes
miK«o or the tape having a oiaok portion between the recorded portions is piayeo Dack.
3 Set the report"*'®
j the point of the tape may not correspond exactly use me couhier
1 guidi
2 »™«Т111018»тта«Ж.
The screen Decom« dark-
1 Sol ihe how with the +
button.
Each time you preea f"o *
button, the hour mdicaoon
increavee one by one
If you keep button
pressed, me mdicatipn «hit
increase centmuousw.
%
tepeated tast-
ON Tiias >
pw в-.гв,-
------
--
3 Set the minute* with the +
button.
Each time you press the *
button, the minuiee
indication increeaes ore by
one.
If you t«ee the button
pceseed. the indication will
incresae dontinuousiy.
To be continued
40
%
ON Tiwa у
PM s?,v
PM « 30
OFF т м е
DFR 1 Щ
Page 12

To S!art Recording at tre Oestred Time
1^'
4 «ha rworfllng
t Set the hour wrth me *
outten.
ъ
2 Press NEXT
3 Set the minute with the
Dutton
%
4 Press NEXT
ъ
5 PrMa TIMER REC OH/OFW.
» The DOwei is turned ott and the TIMER REC tamp lights (timer stand&y model.
The recording starts automatically at the preset start time and the power is turned off at the
preset end time.
• it the safety tao on the cassette is slid out or if no cassette is inserted when you press the
Timer REC ON/OPF Button, CASSETTE" indication will appear
Note
Be sure to press the TIMER REC ON/QFF button only after you have finished the timer
settings. If you press ii while presetting, the power turns off at this point and the preset
^ogram IS erased.
' During timer recording, both picture and sound will be muted. To listen to the sound and
waicn the picture, press LCD ONfOFF
When the TIMER R6C lamo is lit, arty buttons eticept tor the TIMER REC ON/OFF Dutton
and the TIMER SETICHECK Dutton do not function.
42
Playing Back the Recorded Tapes
1 °pu^'b*30
ON TIME
1 FM в:М
ON TIME
AM S’.M
ON TIME
FU S:30
OFF TIME
OFF T(ME.
OFF TIME
FM S:4S
RK
-FM 9j^.
PM 8Î301
FM 1-«..
J 'jK .
Press Timer REC ON/OFF again.
The TIMER REC lamp goes out.
To coTTdct ItM HffMr wHIin during setting
Press TIMER SETiCHECK while Ihe TIMER REC lamp is in
The power IS turned on and the turn-on aro lum-ott times *
stUny ш/Ш eamçtMIng tfw wtting
Press TIMER нес ONfOPF to canc#
the timer again
timet recording mode, then t
le displayed lor a 'ew
TedlthgimdrwWIdlhdl^toiwiny
Vou can set the timer recording start and ело times during piaybacit or recording
After playing oack or recording, set the recording mode (SPfLPi and channel and then press
TIMER REC ON/OFF
Recording stops. Recording starts again after the power is fed. When a power mierruoiion
occurs during the timer recording standby mode and the power is tea again, the timer
senings are memorized. (When the lithium battery is installed.>
You can record to me end of me tape.
It the tape ends before the turn-off time, recording will stop and the power w
Toad|MttlM|rietuM
Adjust the BRIGHT. COLOR, and HUE controls
(page 3i)
Use the SLEEP lunction.
You can have me unit turned oft at me preset iii
See page 32.
Page 13

Яаушд Bach the Recorded Гаре^
' To view the slow
¡ DiayOKK picture
I
-------------
^ ' To locate a
{ particular oomt
while viewing the
' mciure — Picture
I search
5 rewind
b!
acvance
b'
^0 resume noiiriat
PieybacK,
press > •
l^hen you release
the buiTOh. the unit
return to the
previous rnode.
If etreeke appear In the atM and stow piayBeck mode
Adjust the piciure.
1 Play bacK ihe «ow motion picture. iwwrsna ujmt
2 Press SLOW/STILL ADJUST so that the sireaKs
To adiust the upper portion of the picture, presa e.
To adjust the lower portion of the picture, press ▼.
The still picture will also be aPjusieP at the same time.
When the playback picture la viewad on another TV or monitor
The horizontal bands appear m the still, slow, picture search and FR picture search mooes.
Before playing back the tape m these modes, presa LCD ON/OFF and clear the screen on
this unit, and the horizontal bands are reduced.
About the cryttaLcleer atlH/alo«* and picture eetrch on LCD
Noiseless picturs can oe viewed m the siiii. slow and picture search rnode, due to the feature
ol the liquid crystal
*Notea on still and slow playback picturas
■ The still picture will automatically oe released alter about 5 minutes and will return lo
normal playback.
• The slow playback picture will be released after about t minute ai
playback. After it returns, the Iwbutton will not function for about
To view the picture
at high speed —
FR picture search
'Ы
Connecting an Outdoor Antenna
If you cannot Obtain satisfactory recaption with an indoor antenna, or when recording TV
programs, use an outdoor antenna.
UHF antenna
(Channel 14-69)
Supplied sign« splitter
To antenna
terminal
'• 4WÜ'
VHF ar,tarma
(Channel 2-13)
m
The VIDEO/AUOlO IN/OUT jacks are automatically s<
to the operation condition of the unit.
Refer me following diagram.
INPUT SeLECT
TUNER (TV progrwn)
«When the LINE mode is selecled with INPUT SELECT,
me INPUT or OUTPUT mflicatiort appears with LINE.
When Che LINE OUT jacks of another equipment is connected to VIDEO/AUDIO of this unit
and signals ara output from the jacks of this unit to another equipment, the picture of
a n oi fm equwiTtent may be disturbed.
Turn Off the power of (his unit or disconnect the connection berween ffis unit and a ni it ts r
equipment.
Stop or nacorpfwg mode Ptaybaek moda
0 the inpul or Output jacks accoroing
Note to CATV syMom Inateller:
This reminder is provided to call the CATV system installer's attention to Article 020-22 of the
NEC that provides guidelines for proper grounding and. m particular, specitlea that the cable
ground Shall be connecieO to the grounding sydem ol the building, as close to the point of
cable entry as practical.
Page 14

Connecting jn Outdoor Antenna
• Befor« connecting the antennas, turn off the umt
• Make connections firmiy a loose connection may cause a Oistorteo oicture
For ^CA-3W Of vCA-»e Car antenna, «
Por aataiis. rater to me .nstructioo manual ot the cat antenna
• 50
To Connect Another TV or Color Monitor
H you connect this unit to another TV or cow monitor, you can view the playback pictures oi
the selected TV program on a larger screen.
Using as a Monitor of the 8mm Video Camera Recorder
Wifh Che following соппеетюп. you car view OKtturea Being recoroee by me connecteo
viOec camera recoroer. Aiao you can view ihe pJayDJCk pictures from the video
camera recorder on this unit
• When the TV to be connected has etereo audio mpui, jee a commarcially available
connecting cprO k»e a Sony VMC-91DMSVKDMS connecting e o rO .
The RFU-89UCKA includes the roliowiiig accesaones.
— pFU adaplor II!
— Antenna selector (t)
— Antenna stfector adaptoi 11)
It the VHF input lermioal ot your TV is a 30t>ohm twm-lead plug, u
adaptor.
la antenna selector
сммаИкноИ^ .
7(3 view the pUybac* piciure ol ihia unit, sat the antenna satecior of the RFU kit to 3
Channel wh«hev*t charmel >s not active m your arM arvj select the same channel oi
connected TV.
•52 53
Page 15

lape Editing
I
n aquvpM w tt i w xl e o/ a ua o
Precautions
• operate the unit on 6.0 V (banery pacX)/6.5 V (car batteryVT 5 V (AC power adapior)/9 V
(battery easel
• For DC or AC operation, use the accessories recommended m ttus manual
• Should any solid ob|Sct or liquid lall mio the cabinet, unplug the unit and nave it checker
by Qualilied personnel betöre operating it any further
• Avoid rough handling or mechanical shock to the unit.
• Do not apply excessive force to the LCD.
• Remove and store video cassettes after recording or playback.
• Do not wrap up the unit and operate it because neat may build up internally.
• Avoid using and storing the recorder >n the following locations.
— Uocaiions susceptible to vibration
— Locations exposed to strong magnetic fields.
~ Locations near TV or radio transmitters where strong radio waves are generated.
• Do not put (he unit on the sand.
Wh«n the VTR 10 be connected be* stereo audio input, use a commercially available
connecting cord tike a Sony VMC-910MS/920MS connecting cord.
56
• When the unit will not be used for a long penod of time, penodically turn on the pr
operate the recorder and play back a tape for about three minutes
• Clean the recorder body with a dty. soh cloth, or a soft cloth lightly moistened wur
deiargent solution. Do not use any type of solvent which may damage me finish
Page 16

Maintenance
To ensure a dear prcture. clean the video needs periodically
It playOacK pictures are noisy or hardly visible, the video heads
may be contaminated, in this case, clean me video heads with
the Sony V8-25Ct.H cleaning cassene <not supplied)
according to the msiruaions.
Ceullon
Do hot use commercially available wei-type cleaning cassettes.
They may damage me video heads.
a. consult your Sony s(
When playback pictures are not clear even i
may be damaged, in this case, the video he.
your Sony service facility for replacing the vi
A Duill-in lighting system is assembled inside the liquid crystal screen ot this unit. The life of
the small fluorescent lamp used for this builNn lighting system runs out over a penod of use.
If me lamp becomes dimmer or goes off immediately after you turn >i on. even with new
banenes. replace the lamp with a new one To replace the lamp, consult the dealer where you
purchased me unit, or a Sony service facility. The expected life of the small fluorescent lamp
IS about three yean when me unit is used tor an hour a day. When you use the unit m a cold
environment, me fluorescent lamp will be dimmer ai first. As soon as ths temperature ot me
lamp rises. ii will regain its original brightness.
OnBHtCMNKirrf<llii|lnl|
• Do not press hard on the surface of ths liquid crystal panel. Doing so may cause the screen
to become uneven or leed to mallunaioning of me liquid crystal panel.
• Do not use this umt in an environment where me temperature is below (32“R or above
4t?^(104«F).
• It you use this unit in a cold environmam. the image may sometimes appear to be trailing,
^osvever, mis is not due to a maltuncnon.
constant bnght points of light (red. blue, and green) may sometimes appear on the screen
However, this is not due to a malfunction
er using the cleaning cassette, the video head
1 needs to be replaced with a new one. Consult
Notes on Moisture Condensation
If the unit IS brought directly horn a cold to a warm location, moisture may condense
inside the unit, in this condition, the tape may adhere to the need drum and be
damaged or the unit may not operate correctly. To prevent possible damage under
these circumsiances. the unit is lurnishsd with moisture senso's
_ Hashes on the scr
Dutton
Only the EJECT Dutton tunctioi
Elect the cassette and turn otf the ui
SI this time. (Watching TV
e cassette holder open at
Using Your Recorder Abroad
If you preoare fully charged battery packs and the supplied AC power adaptor (which can b
used m all areas wim the local power supply of tOO V - 240 V.) you can use your recorder ir
any country.
Each country has special TV color broadcast and electricity systems.
This unit IS designed to record and play back using the NTSC color video signals.
Recording and playback of video sources cased on other color systems cannot be
guaranteed.
NTSC system eounines
Sahama islands. Canada. Central America, Japan. Korea, Maxico. Taiwan, the
PhiHioif>es. J.S A., etc.
60
Specifications
Video recording system Rotary two-head helical scanning PM system
Audio recording system
Video signal
Usable cassettes
Tape speed
Recording time
Playback lime
Fast forward/rewindmg tii
Picture 4 inches measured diagonally
On-screen display TN LCD/TFT active matrix method
Channel coverage
VIOEO/AUOlO tN/OUT
Video input
Video output
Audio input
Earphone
CONTROL S
Rotary head, PM si
EIA standard. NTSC color
8 mm video format cassettes
SP: approx. 1 43 cm/see.
LP approx. 0 T2 cm/sec.
SP mode: 2 hours
rs (with Sony P6-I20 cassette)
0.2X 6.2 cm (3’/, X 2V, inches)
Total piciure-eiemefli number 112.086 (479 x 234)
VHP: 2-13 cnanneis
UHF: 14-69 Channels
Cable TV channefs: 1. 14-36. 66-94. S
75-Ohm miniiack for VMFfUHF
Selectable auiomaiicaliy due lo the operation
Phono jack. i Vp-p, 75 ohms, unbalanced, sync negativi
Phono lack, l vp-p, 7 5 ohms, unbalanced, sync negativi
Phonoiack. -7 5dSs(0dSs-O 775 Vrmsi,
input impedance more man 47 kiiohms
Phono lack, - 7 5 dBs (330 mV) at load impedance
47 kllohms. output impedance less than 10 kilohms
8 ohms, lOOmW
Mlniiack. 8 ohms x 2
Miniiack
61
Page 17

List of Recommended Accessories
Crystal IPCK
’2-hour cycle
Only for recording, 1
Power requiremenis
Power consumplion
Operatirtg temperature
Storage temperature
Oimertsions
Accessories $uppiie<
Power consumption
Power reguiremenis
Output voltage
Weight
Design ai
I spectficaiions subject to change without notice.
On Datiery mounting surface
6 0 V(Batteryoacku6.S V(caroattery|/7 S V(ACpoweraoapiorV
9 V (battefv case)
6 5 W ilor cominuous piayOack)
O'Cio 40»C (32=Fio tOA-R
-20'C to «бО^С (-4»F to tAO'F)
129<71 «226 mm (w/h/d)
(S'.
9 Inches)
Approx 1 1 kg (2 lb 7 02) not
Earphones(t)
Signal splitter (i)
Carrying case (i)
Satiery pack NP-66M (i)
AC power adaptor AC-V30 (i)
Lithium battery (t)
20 W
100 - 240 V AC. 50/60 Hz
DC OUT 7 5 V. 1 6 A in operating mode
Battery charge terminal. 10 V. 1 3 A in charge m
O’C to 40'C (32»F to 1CM«F)
-20"Cto ♦60"C<-4'>Fto »tAO'F)
Approx. 67« 39X 136 mm iw/h/dl
(2V, « ity,x % '/ ■, inches*
including projecting pads and controls
Approx. 310 g (11 oz)
I battery pi
Troubleshooting
If you think have a orooiem. double-check before calling the servKeman. Vou may have
overlooked something relatively simple!
' '"riillii
The unit IS not operable even
il the POWER switch is turned on.
•
a Power turns off automatically
durng operation.
The battery pack is Quickly
discharged.
o The clock blinks showing "AM
s 12:00'
The playback picfure is not clear. • The video heads may be contaminated. Clean
S Ounr>g recording, trie picture IS
• not clear.
j Recording cannot be made.
?
?
The tape does not run even if the
K tape transport button IS pressed.
The cassette cannot be ejected. « No power is supplied to the unit.
• No battery pack i$ attached.
• The Battery pack is exhausted. — Charge it.
(page 11).
• AC power adaptor or car Battery cord is
disconnected.
• The Battery pack is exhausted.
• The SLEEP timer has been set.
• The ambient temperature is too low.
• The battery pack has not been charged fully.
If (he lithium battery has been changed, reset the
clock (page 20), and if necessary, reset the timer
the heads using the Sony ve-2SCLH cleaning
caaaene (optional). For details on cleaning,
refer to the шз(гис1юп8 furnished with the
cleaning cassette.
• The video heads may be damaged.
TV signal Is loo weak. Adjust the indoor antenna
or connect an external antenna.
• The safety tab on the cassette is slid out.
« Moisture condensation has occured.
• The tape is at its end.
• The cassette is not inserted.
• 'Timer setting has been made.
Presa the TIMER REC ON/OFF button and turn,
on the unit again.
• Moisture condensation nas occured.
• The battery oeck i$ exhausted.
Use the charged banery. (page 11)
Eattery pack
eanery charger
(X pack
Antenna connector
Signal splitter
Antenna cord CCD-6M
Car antenna VCA-3W
Car battery charger
Connecting cord
Video Walkman hood
Car connacting pack (connect
to the AUOlO OUT terminal so
that you c»t listen to the sound
with the car stereo)
RFU adaptor kit RFU-69UCKA
Cleaning
The screen is cleared.
Picture appears bi
Double images or gnosis
NP-66H, NP-77H, NP-77of NP-55
eC-77
XP-77
EAC-40
EAC-45
CCO-2
VCA-4E
D(^V30
VMC-910MS/920MS (1 m/2 m)
. VMC-710M/720MI1 m/2m)
. VCV-GV300
CPA-2
V6-25CLH
LCD ON/OFF button hi
Press It again.
Adjust COLOR, (page 3i|.
Check the external antenna.
This IS often caused By local interference
(e g. cars, neon signs, hair dryers, etc i
Adjust antenna for minimum mterfererwe.
Reflections from nearby mountains or Bui
often cause this problem
A highly directional antenna may improve
s:
le not Set the clock (page 20).
A timer recording has not bi
• The safety tab on the cassette was slid out
(page 36)
• The tape was not long enough.
. The TIMER REC ON/OFF bufton has not been
pressed.
• The clock was not set correctly.
• The battery pack was exhausted.
• There has been a power interruption (lor AC
operation).
• Moisture condensation has occured. (page 39)
•
-
•
•
•
•
•
-
-
•
-
•
-
-
•
•
63
64
65
Page 18

On Screen Display
66
Quick Fteference on Timer Setting
P'ess TIMES SEC ON/OFF again
To ehseà the seWng
Press TIMER SET/CHECK while (he TIMER REC lamp is lit The power is turnea on
ana the lum-on ana the turn-ot< times will pe displayea.
N you have Mde a MoMlt* hi II
press TIMER REC ON/OFF 10 cancel the timer recorOing. i
set (he (imer again
Press LCD ON/OFF
Quick Reference on Timer Setting
Refer to page 40 of this manual for aeiails.
1 Prate TIMER SET/CHECK.
The screen becomes CarK.
-Current time
- Recording m
I Set ttM minute.
Set the minute.
Is
> Prete TIMER REC ON/OFF.
Sony Corporation Pnnted in Japan
 Loading...