

Page 1
4-669-904-11(1)
R
Page 2

Notice to Users
©2002 Sony Corporation All rights
reserved. This manual and the software
described herein, in whole or in part, may
not be reproduced, translated or reduced
to any machine-readable form without
prior written approval.
EXCEPT AS SPECIFICALLY SET FORTH
IN THE END-USER LICENSE
AGREEMENT, SONY CORPORATION
PROVIDES THIS MANUAL, THE
SOFTWARE AND THE OTHER
INFORMATION CONTAINED HEREIN
“AS IS” WITH NO WARRANTY AND
HEREBY EXPRESSLY DISCLAIMS ANY
IMPLIED WARRANTIES OF
MERCHANTABILITY,
NONINFRINGEMENT OR FITNESS FOR
ANY PARTICULAR PURPOSE WITH
REGARD TO THIS MANUAL, THE
SOFTWARE, OR SUCH OTHER
INFORMATION. IN NO EVENT SHALL
SONY CORPORATION BE LIABLE FOR
ANY INCIDENTAL, CONSEQUENTIAL,
OR SPECIAL DAMAGES, WHETHER
2
BASED ON TORT, CONTRACT, OR
OTHERWISE ARISING OUT OF OR IN
CONNECTION WITH THIS MANUAL,
THE SOFTWARE, OR OTHER
INFORMATION CONTAINED HEREIN
OR THE USE THEREOF.
THIS DOES NOT AFFECT YOUR
STATUTORY RIGHTS.
Sony Corporation reserves the right to
make any modification to this manual or
the information contained herein at any
time without notice.
The software described herein may also
be governed by the terms of a separate
user license agreement.
This product contains software owned by
Sony Corporation and licensed from third
parties. Use of such software is subject to
the terms and conditions of license
agreements enclosed with this product.
Software specifications are subject to
change without notice and may not
necessarily be identical to current retail
versions.
Page 3

Before using this software, please read the accompanying End-User License
Agreement which governs use of this software.
• This software or document is protected by copyright, and distributed under
licenses restricting its use, copying, and distribution. No part of this software or
document may be reproduced in any form by any means and rental of this
software may not be allowed without prior authorization of Sony Corporation.
• Sony Corporation assumes no responsibility for any inconvenience caused by
misuse or any use not stated in this document.
• The supplied software cannot be used with any device other than those devices
specified herein.
• The specifications of the supplied software are subject to change without notice.
Customer Support
In the U.S.A.
How to contact the AIBO Customer Link.
Call 1-800-427-2988
Email address: aibosupport@info.sel.sony.com
In Europe
How to contact the AIBO Clinic.
English line: +44 (0)-20-7365-2937
3
Page 4

For Customers in the U.S.A.
This device complies with Part 15 of the FCC Rules. Operation is subject to the
following two conditions: (1) This device may not cause harmful interference, and (2)
this device must accept any interference received, including interference that may cause
undesired operation.
Regulatory Information
This equipment has been tested and found to comply with the limits for a Class B
digital device, pursuant to Part 15 of the FCC Rules. These limits are designed to
provide reasonable protection against harmful interference in a residential installation.
This equipment generates, uses, and can radiate radio frequency energy and, if not
installed and used in accordance with the instructions, may cause harmful interference
to radio communications. However, there is no guarantee that interference will not
occur in a particular installation. If this equipment does cause harmful interference to
radio or television reception, which can be determined by turning the equipment off and
on, the user is encouraged to try to correct the interference by one or more of the
following measures:
• Reorient or relocate the receiving antenna.
• Increase the separation between the equipment and receiver.
• Connect the equipment into an outlet on a circuit different from that to which the
receiver is connected.
• Consult the dealer or an experienced radio/TV technician for help.
You are cautioned that any changes or modifications not expressly approved in this
manual could void your authority to operate this equipment.
4
Page 5

For Customers in Canada
This Class B digital apparatus complies with Canadian ICES-003.
Cet appareil numérique de la classe B est conforme à la norme NMB-003 du Canada.
For Customers in Europe
(Für Kunden in Euorpa)
CE (EMC) Marking Conformity Remarks
a) This equipment complies with EN55022.
Class B digital for use in following areas: residential, business, and light-industrial.
b) This product conforms with the following European Directive:
89/336/EEC (EMC directive)
Hinweise zur Konformität mit dem CE-Zeichen (EMV)
a) Dieses Gerät entspricht der europäischen Norm EN55022 Klasse B (digital) für die
Verwendung in folgenden Gebieten: Wohngebiete, Gewerbegebiete und
Leichtindustriegebiete.
b) Dieses Gerät erfüllt die folgende europäische Richtlinie:
89/336/EWG (EMV-Richtlinie)
5
Page 6

“OPEN-R” is the standard interface for the entertainment robot
system that Sony is actively promoting. This interface expands the
capability of the entertainment robot through a flexible combination
of hardware and interchangeable software to suit various applications.
The “AIBO” ERS-210 series and “AIBO-ware” ERF-210AW06E
conform to OPEN-R version 1.1.3.
“AIBO,” the AIBO logo
trademarks of Sony Corporation.
“Memory Stick,” “
Corporation.
In this manual, the “™” and “®” marks have been omitted.
Other information about AIBO is available on the Internet at the following site:
http://www.aibo.com/
Reproduction in whole or in part without written permission is prohibited. All
rights reserved.
, “OPEN-R” and the OPEN-R logo are registered
” and “ ” are trademarks of Sony
6
Page 7

First of all, check that you have
the following items.
AIBO-ware “Memory Stick” User’s Guide (this manual)
Quick Guide End-User License Agreement
Self-charge markers
(green marker, blue marker,
front marker base, rear marker
base, pink ball)
Markers for the AIBO Self-charging
Function (Operating Instructions)
7
Page 8

Table of Contents
Getting Started
Welcome to “AIBO Recognition”! ............................................................. 12
Emotions and instincts of AIBO..................................................... 13
Modes and conditions of AIBO.................................................................. 14
Preparations ................................................................................................ 16
Living with AIBO
Charging AIBO’s battery pack ................................................................... 22
When you want to charge AIBO..................................................... 22
AIBO charges on its own (self-charge) .......................................... 24
If AIBO is not charged.................................................................... 31
Sleeping and waking up.............................................................................. 32
Communicating with AIBO
Teaching AIBO its new name ..................................................................... 34
Teaching AIBO to recognize you ............................................................... 36
From you to AIBO...................................................................................... 39
Communicating by touch, visually and by voice............................ 39
Communicating for training AIBO................................................. 40
Having AIBO take a photo ......................................................................... 41
8
Page 9

Additional Information
Notes on use ............................................................................................... 46
Troubleshooting.......................................................................................... 48
Reference Materials
Words apprehensible to AIBO.................................................................... 52
For more information about “AIBO” ERS-210 series (name of parts, settings,
“Memory Stick” use, safety precautions, etc.), refer to the “AIBO” ERS-210
series Operating Instructions.
9
Page 10

Page 11
Getting Started
Welcome to “AIBO Recognition”!
“AIBO Recognition” is AIBO-ware for the AIBO ERS-210 series.
This chapter explains how to get AIBO ready to use “AIBO
Recognition.”
* In this manual, “AIBO Recognition ERF-210AW06E” is
referred to as “AIBO Recognition” hereinafter.
Page 12

Welcome to “AIBO Recognition”!
“AIBO Recognition” is AIBO-ware that gives AIBO a gentle and intelligent
character.
When AIBO is loaded with AIBO Recognition, it acts on its own volition as it
learns about you and its environment.
AIBO can recognize your face
(page 36)
AIBO has the ability to recognize your face and
the sound of your voice. AIBO remembers the
faces of those people it is closest to. The
special affection AIBO shows these people is
unique.
AIBO never runs out of energy because
it knows how to self-charge!
(page 24)
Whenever battery power is low, AIBO returns to
the Station and charges itself. When charging is
complete, AIBO leaves the Station and resumes
its former activity.
12
In order for AIBO to self-charge, the Energy Station ERA-210P1 (optional) is required.
Page 13
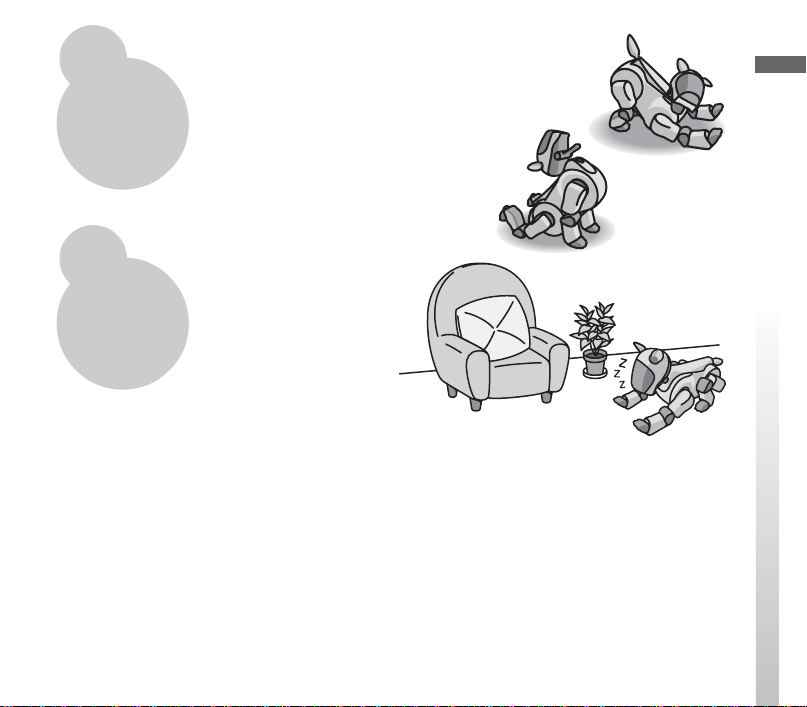
AIBO loves communication!
When you call or play with AIBO... it is happy! If you
communicate frequently with AIBO, it will repay you
with growing expressions of affection.
AIBO also loves to take
naps
If you leave AIBO alone, it will enjoy a
peaceful nap without disturbing you.
However, while AIBO dozes, it is
always waiting for you to call.
Emotions and instincts of AIBO
When AIBO is loaded with AIBO Recognition, it displays emotions such as joy
and sadness, as well as desires such as wanting to play or to sleep.
These emotions and desires will change in response to a variety of conditions that
affect the behavior of AIBO, including interaction with people and its
surroundings.
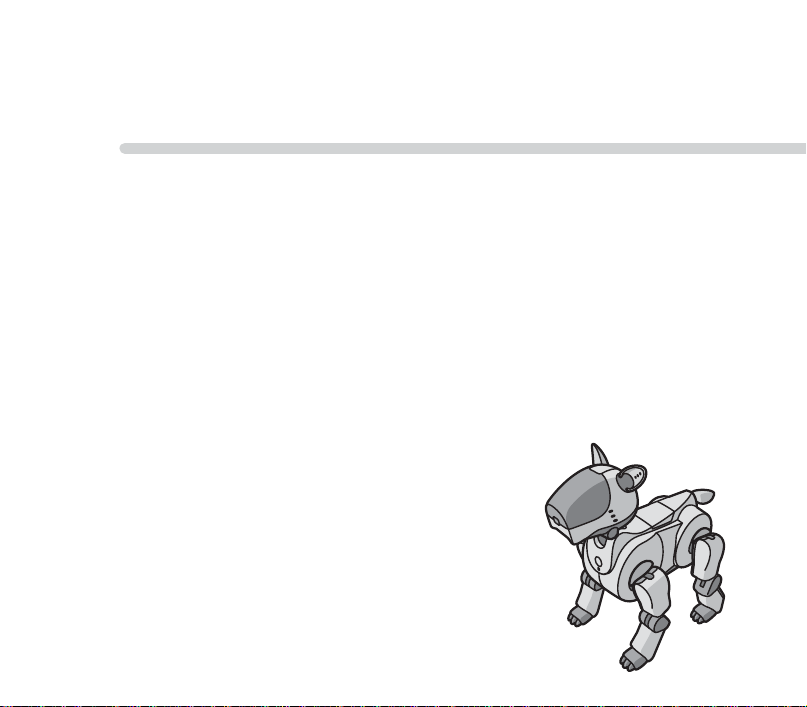
AIBO is an autonomous robot that acts on its own initiative, according to its
emotions, its desires, and the information it collects from its surroundings through
its built-in camera and microphone.
Getting Started
13
Page 14
Modes and conditions of AIBO
p
t.
de
t.
.
,
,
sensors.
p
o
t.
.
.
g
.
.
S
t.
14
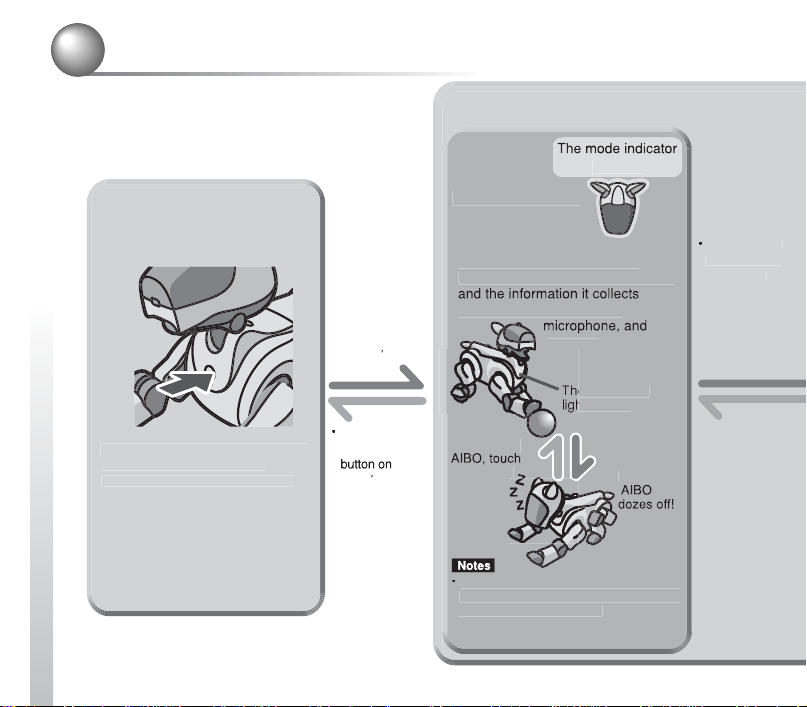
With AIBO Recognition, AIBO can enter
the following modes and conditions.
Pause mo
To turn AIBO off, press the Pause
button located on its ches
Place AIBO in this mode before
changing or replacing the battery
or “Memory Stick.”
When you press
ause button
the
n AIBOs ches
When you press
ause
the
AIBOs ches
• When AIBO has
been active for
an extended
period.
Active condition
oes off
Autonomous
mode
AIBO moves around on its own
AIBO acts on its own volition
based on its emotions, its instincts
through its built-in camera,
chest light
ts green
To wake up
or talk to i
Do not place AIBO in any location where
it might fall or be subjected to vibration,
or on any unstable surface
• Do not place anything near AIBO that
may hinder its movement.
ometimes
AIBO returns
to the Station
on its own
• You place
AIBO on the
Station while it
is operating.
Page 15

y.
c
c
one o
g
g.
y.
• AIBO moves
de
g
.
from the
Station on its
own.
• You remove
AIBO from the
Station.
oes off
Station mo
AIBO takes a nap or even stays
awake while chargin
Pick up AIBO
quickl
Put down AIBO.
An object is
caught in any
one of AIBO’s
joints.
The mode indicator
ick-up
ondition
When AIBO is picked up, it moves
into the Pick-up condition. This is to
prevent AIBO from makin
movements that might surprise the
person picking it up, possibly causing
them to drop it in consequence.
Note
When two or more of AIBO’s paw sensors
are pressed, it thinks it has been placed on
the floor and returns to Autonomous mode.
AIBO may start walking after returning to
Autonomous mode, so be careful not to
touch any of its paw sensors when you
hold it.
The mode indicator
Jam
ondition
Getting Started
The Energy Station ERA-210P1 is an
optional accessor
Press the
head sensor
for 3 seconds.
If an object becomes jammed in any
f AIBOs joints, AIBO goes limp,
and all of its joints become loose. This
condition prevents you from getting
your fingers caught between AIBO’s
joints and injuring them.
15
Page 16
Preparations
Let’s get AIBO ready to use AIBO Recognition.
Note
If AIBO is loaded with any other AIBO-ware “Memory Stick,” place AIBO in the Pause
mode (the chest light goes off) before switching the “Memory Stick.” To place AIBO in
the Pause mode, press the pause button on AIBO’s chest.
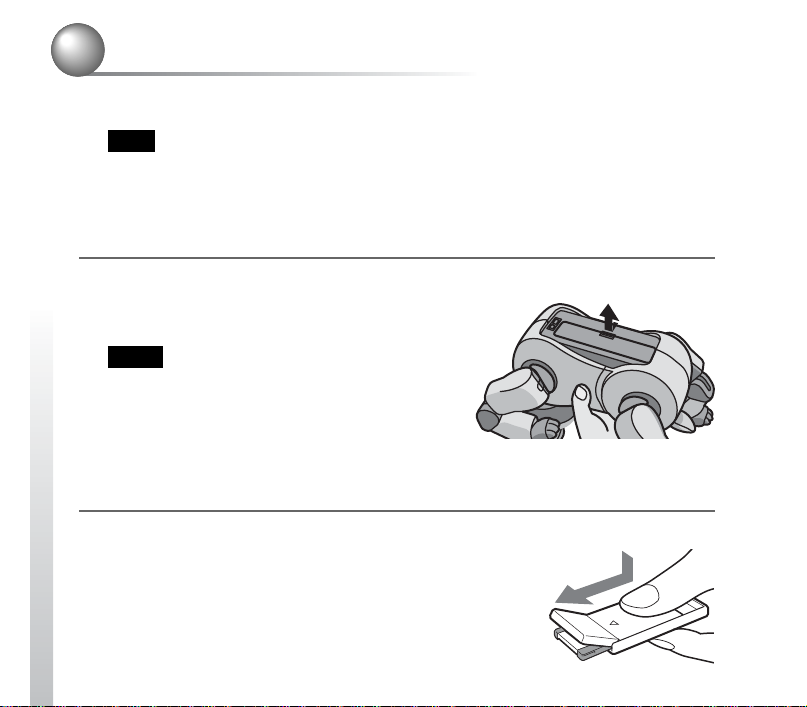
1
Grasp AIBO securely by the body, turn it upside down, and open the
cover.
Notes
• Lift AIBO by its body, and not by its extremities.
• If your hands are comparatively small, you may
drop AIBO when grasping or turning it upside
down. Be careful to hold AIBO.
• Do not touch AIBO’s charging terminal with your hand. Doing so may soil the
terminal and cause poor contact.
2
Remove the “Memory Stick” from its case.
Slide the lid toward the b mark.
16
Page 17
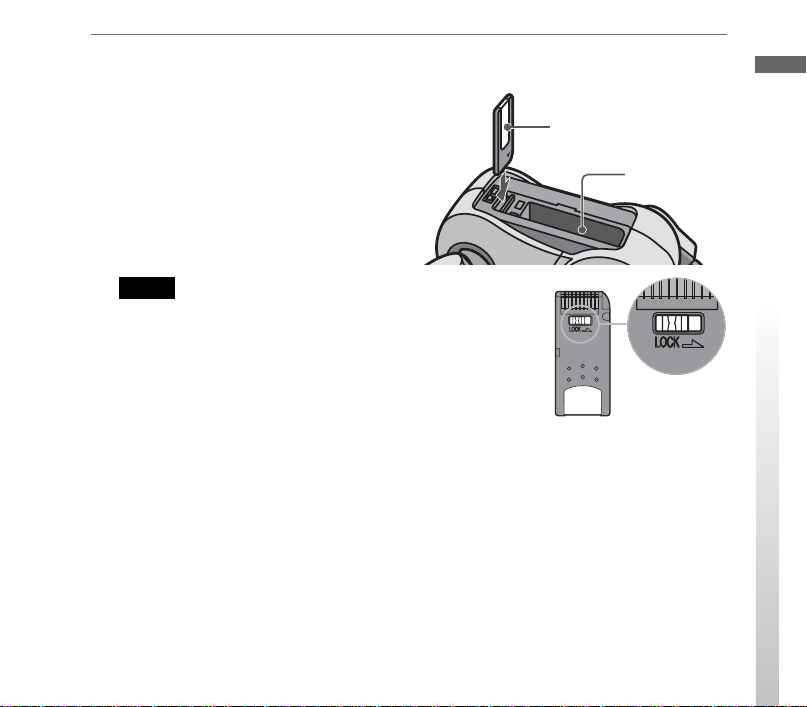
3
Check that you are holding the “Memory Stick” in the right direction,
and insert it into AIBO.
With the V mark pointing down and the
label facing the direction of the battery slot,
insert the “Memory Stick” until you hear it
click into place.
Notes
• Make sure that you orient the “Memory Stick” correctly.
If you insert it incorrectly oriented, you may damage the
“Memory Stick” or AIBO.
• Do not set the safety switch of the “Memory Stick” to
“LOCK.” Doing so will make it impossible for AIBO’s
learning and taking photo functions to work.
Label side
Battery slot
Getting Started
17
Page 18

4
After checking that the battery pack is correctly oriented, insert it, and
then close the cover.
Hold the battery pack with the connector facing downward, and insert it into the slot
until you hear it click into place.
18
Push here.
5
Charge up the battery pack.
Refer to the “AIBO” ERS-210 series Operating Instructions for how to charge up
the battery pack.
Attach the cover as shown in the
illustration.
Page 19

6
Place AIBO on the floor as shown on the right.
Place AIBO on a flat, non-slippery surface, such as a carpet
with a short nap.
And choose a quiet place to place AIBO so that it can hear
whatever you say to it.
Notes
• On a slippery floor or a carpet with a long nap, AIBO may
fall down or carpet may be caught between its joints, so it
may not move forward.
• Be sure to place AIBO on the floor as shown above. This will
prevent AIBO from moving unexpectedly and being damaged
when you press the pause button.
7
Press the pause button on AIBO’s chest.
The chest light lights up green.
After a while, AIBO will begin moving automatically.
Note
If its eyes flash red when you press the pause button, the “Memory Stick’s” write protect
switch is in the “LOCK” position. Press the pause button once more to put AIBO in the
Pause mode, then unlock the write protect switch on the “Memory Stick.”
Getting Started
19
Page 20

Page 21

Living with AIBO
When AIBO is hungry, it instinctively charges on its own, and if AIBO
is sleepy, it dozes off.
These are some of the habits of the “autonomous robot” AIBO.
Page 22

Charging AIBO’s battery pack
AIBO operates on battery power.
Because the battery pack is only partially charged when you purchase it, the first
thing you need to do is charge it. AIBO can operate for about 1.5 hours (in
Autonomous mode) with a fully charged ERA-201B1 Lithium Ion Battery Pack.
• AIBO can return to the Station for charging on its own (self-charge).
When you want to charge AIBO
Charging with the AC adaptor
Insert the battery pack into AIBO, and connect the conversion plug to both the
charging terminal and the AC adaptor. The battery pack will automatically begin
charging. If you happen to connect the conversion plug to the battery pack and the
AC adaptor although AIBO is moving, AIBO stops moving and the battery pack
will begin charging. Refer to the “AIBO” ERS-210 series Operating Instructions
for details.
While charging
The chest light lights
orange.
When charging has finished
The chest light goes off, and AIBO enters Pause mode.
To start up AIBO, remove the conversion plug and
22
press the pause button.
AC adaptor
Conversion plug
Chest light
Page 23

Charging with the ERA-201P1 Energy Station (optional)
When you place AIBO on the Station, charging begins.
For details on charging AIBO, refer to the Operating
Instructions of the ERA-210P1 Energy Station.
When you place AIBO on the Station, AIBO not only
enters Station mode and is charged, it stays on the
Station in a relaxed and comfortable manner.
While being charging
The chest light lights
orange.
In this document, the Energy Station ERA-210P1 is referred to as the “Station.”
Notes
• Do not place any substance within the range of the front legs of AIBO. The front legs
of AIBO may knock it down. AIBO may move from the Station also.
• Do not move the rear legs of AIBO in Station mode. Since AIBO moves its front legs
in Station mode, the rear legs may hit against the front legs.
Living with AIBO
23
Page 24

AIBO charges on its own (self-charge)
AIBO uses the supplied markers to find its way back to the Station (optional
accessory) for charging.
AIBO charges on its own in the following situations:
• battery power is low.
• you say “Go to the Station.”
Note
If AIBO is more than 70 cm from the
pink ball on top of the marker stack,
AIBO will not be able to find the
Station.
Setting the markers on the Station
If you want AIBO to self-charge, you must set the supplied self-charge marker on
the Station so AIBO can find its way back to the Station. For details on setting the
markers, refer to the Operating Instructions for the markers.
Recommended setup locations:
• Sunny locations
• Locations where fluorescent lighting is used
• Places where there are no objects with colors similar to those of the markers
24
Page 25

Open space required
AIBO’s self-charge operation requires an open space with a radius of at least 1.2
meter around the pink ball on top of the marker stack.
Approx.1.2 m
Do not place any
objects in this area.
Living with AIBO
25
Page 26

If AIBO cannot find the Station
AIBO may not be able to find the Station if the room is poorly lit even if the
marker is set on the Station.
If this happens, use the following procedure to check whether AIBO can properly
see the colors of the marker in an indoor environment.
Note
If AIBO is more than 70 cm from the pink ball on top of the marker stack, AIBO will not
be able to find the Station.
1
Place AIBO on the Station, and simultaneously press and hold the chin
and back sensors for 3 seconds or more.
(Next, perform the procedure described by the audio guidance.)
If you want to set me so I can leave the Station by myself, press the
sensor on my head.
If you want me to check the marker colors, press the sensor on my
back.
Within 10 seconds
26
Page 27

2
Approx. 20 cm
Press the back sensor.
Now I will check the marker colors. Remove me from the Station and
set me down behind it. Make sure my head is about 20 cm behind the
rear marker.
Within 20 seconds
3
Remove AIBO from the Station and set it down about 20 cm behind the
rear marker.
Press the sensor on my back.
Within 10 seconds
Living with AIBO
27
Page 28

4
Press the back sensor.
AIBO will move its head to check the colors of the marker.
I saw the marker! I’m done checking the marker colors.
I want to return to the Station.
The marker color check is complete.
I couldn’t find the markers. The markers might not have been placed on
the Station, or the room lighting makes it difficult for me to find them.
If you hear this message, confirm the following, then start the marker color check again
from the beginning.
• Is the marker set properly on the Station? Refer to the “Markers for the AIBO Selfcharging Function” for details on how to set the markers on the Station.
• Is the room too dark? Try making the room brighter.
• Are you using fluorescent lighting (recommended)?
• Are there objects similar in color to those of the marker near the Station? If there is,
move them away from the Station.
28
Page 29

Setting whether AIBO is permitted to leave the Station
You can set whether AIBO is permitted to leave the Station after charging.
If you set AIBO to “Leave the Station,” AIBO will leave the Station on its own
when charging is complete and resume its previous activity. You do not need to
remove AIBO from the Station.
If the Station is in an elevated location and you do not want AIBO to leave the
Station on its own, set AIBO to “Do not leave the Station.”
“Do not leave the Station” is set as the default.
Note
When AIBO is set to “Leave the Station,” be careful of the following:
• Do not leave AIBO alone in a room where no one is present.
• Do not place the Station on an unsafe surface (such as one where it might fall, or one
that is unstable or tilted). Falling or toppling could result in injury to persons or
damage to AIBO.
The following describes how to change the setting from “Do not leave the Station”
to “Leave the Station.”
Use the same procedure to change the setting from “Leave the Station” to “Do not
leave the Station.”
Living with AIBO
29
Page 30

30
1
Place AIBO on the Station, and simultaneously press and hold the chin
and back sensors for 3 seconds or more.
(Next, perform the procedure described by the audio guidance.)
If you want to set me so I can leave the Station by myself, press the
sensor on my head.
If you want me to check the marker colors, press the sensor on my
back.
Within 10 seconds
2
Press the head sensor.
Set whether you want me to leave the Station by myself.
My settings won’t allow me to leave the Station.
Can’t I leave the Station by myself? Pleeeeeease?
If I can, press the sensor on my back.
Within 10 seconds
3
If AIBO can leave the Station on its own, press the back sensor.
Now I can leave the Station by myself! Make sure you don’t put the
Station in an elevated location. I’m going to finish registration.
This completes registration.
Page 31

If AIBO is not charged
If AIBO is unable to self-charge and you do not charge it, the chest light goes off
and AIBO enters the Pause mode. If you do not charge AIBO or replace the battery
pack, it will not move even if you press the pause button.
Living with AIBO
31
Page 32

Sleeping and waking up
AIBO instinctively knows when it needs to sleep. AIBO will doze off if it is tired,
or it is bored and you do not play with it.
When it is fully rested, AIBO will open its eyes and act according to its own
volition.
To wake up AIBO while it is sleeping, gently touch or talk to AIBO.
32
Page 33

Communicating with AIBO
First of all, you need to teach AIBO its new name and your own name,
and teach it to recognize your face.
If you call AIBO’s name, or gently touch or talk to AIBO, it will look at
you and eagerly respond.
Page 34

Teaching AIBO its new name
Give AIBO a name. After you teach AIBO its name, it will respond when called.
However, if you teach AIBO a new name, it forgets the old one.
Even after AIBO learns its own name, it reacts when you call it “AIBO.”
You can only teach AIBO its name when it is in Autonomous mode.
Note
AIBO recognizes a name registered with AIBO Recognition only when it is being
operated with the AIBO Recognition software. AIBO will not recognize owner
information when it is being operated with any other AIBO-ware “Memory Stick.”
1
While AIBO is in Autonomous mode, say “Name registration.”
(Next, perform the procedure described by the audio guidance.)
I am ready to remember my new name! Press the sensor on my back.
Within 10 seconds
2
Press the back sensor.
After the count down, say my new name.
Make sure the name does not take longer than 2 seconds to say.
3, 2, 1, go!
Within 10 seconds
34
AIBO’s tail light flashes
blue and orange
alternately.
Page 35

3
Tell AIBO the name in 2 seconds or less.
That's my name! Thank you for naming me.
This completes registration.
If you make a mistake when teaching AIBO its new name...
Listen to the audio guide, and register the name again from the beginning.
Communicating with AIBO
35
Page 36

Teaching AIBO to recognize you
AIBO can be taught to recognize your face, as well as the sound of your name and
voice. AIBO remembers the face, name and voice of the person it is close to. The
special affection AIBO shows that person is unique.
You can only teach AIBO to recognize your face, name and voice when it is in
Autonomous mode.
Note
AIBO recognizes owner information registered with AIBO Recognition only when it is
being operated with the AIBO Recognition software. AIBO will not recognize owner
information when it is being operated with any other AIBO-ware “Memory Stick.”
1
While AIBO is in Autonomous mode, say “Owner registration.”
Hello owner. Teach me to recognize your face, name, and the sound of
your voice. Press the sensor on my back.
Within 10 seconds
2
Press the back sensor.
After the countdown, say your name.
Make sure your name does not take longer than 2 seconds to say.
3, 2, 1, go!
Within 10 seconds
36
AIBO’s tail light flashes
blue and orange
alternately.
Page 37

3
Tell AIBO the name in 2 seconds or less.
AIBO confirms your name:
That’s what I’ll call you from now.
Now teach me the sound of your voice. First of all, say “I am your
owner.”
4
Say “I am your owner.”
Next, say “one, two, three, four, five.”
5
Say “one, two, three, four, five.”
I have memorized your voice!
Communicating with AIBO
37
Page 38

38
Approx.
Now teach me to recognize your face. I have a
camera built into my nose. Maybe you know where it
is? Hold your face in front of the camera so that
I can see it. About 50 centimeters away
should do the trick.
When AIBO can
see your face
I can see your face! I will
remember what you look like. Hold still until the music finishes.
Wait for a moment without moving.
I have memorized your face. I am pleased to meet you!
This completes registration.
Hmmm? I can’t see your face.
If you hear this message, confirm the following, then perform the procedure again.
• When teaching AIBO to recognize your face, make sure you hold your head straight
without tilting it to the side.
• If you are wearing a distinctive item, such as thick-rimmed glasses, AIBO may not be
able to identify you.
• If your hair is covering your face, AIBO may not be able to identify you.
• If the room is dark, or the light is coming from behind you, AIBO may not be able to
identify you.
Page 39

From you to AIBO
There are several ways that you can communicate with AIBO:
Communicating by touch, visually and by voice
Color camera
Allows AIBO to identify
objects by color,
movement, and distance.
It also allows AIBO to
distinguish your face from
the faces of other people.
Chin sensor
Head sensor
Back sensor
Stereo microphone
(left and right)
Allows AIBO to pick up
your words. AIBO waits
patiently for you to call it.
For a list of words that
AIBO can understand, see
Paw sensors (4)
If you gently press one of AIBO’s sensors and then release it,
AIBO thinks you are trying to communicate. AIBO loves to
communicate with you, and always waits patiently.
page 52.
Communicating with AIBO
39
Page 40

Communicating for training AIBO
AIBO’s head sensor allows you to train AIBO by praising and scolding it.
Through this type of training, AIBO changes its behavior and gradually displays a
greater range of behavior.
Praising AIBO
While gently pressing the head sensor, move your
fingers back and forth twice.
You can also praise AIBO by saying “Good boy/
Good girl/Good AIBO.”
Scolding AIBO
Firmly press the head sensor momentarily.
You can also scold AIBO by saying “Don’t do that”
to it.
Cheering for AIBO
When AIBO fails to do something, say “Go for it” to AIBO to cheer it up.
AIBO will try harder to perform the behavior you are encouraging.
40
Page 41

Having AIBO take a photo
When you say “Take a picture” to AIBO while it is in Autonomous or Station
mode, AIBO starts a countdown, then snaps a picture for you.
AIBO can memorize up to 20 pictures.
Notes
• If AIBO takes more than 20 pictures, each
new picture will replace the oldest one in
AIBO’s memory.
• Note that using AIBO to take pictures may
infringe the image right of third parties.
Sony can assume no responsibility in such
cases. We request that you avoid taking
pictures that cause inconvenience to other
people or infringe their rights.
Color
camera
About the pictures
• Pictures are stored into the “Memory Stick” in the JPEG format.
• The picture resolution is approximately 180 × 140 pixels.
• Flicker (horizontal stripes) or reddish or bluish bands may appear in the pictures due to
the illumination at the time.
• Fast movements may appear distorted in the picture.
Communicating with AIBO
41
Page 42

1
When AIBO is in Autonomous or Station mode, tell AIBO “Take a
picture.”
AIBO nods to your request.
I am going to take a picture now! When you are ready, press the sensor
on my back.
Take a picutre.
Within 10 seconds
2
Press the back sensor.
AIBO starts a countdown, and then takes a picture when the shutter noise sounds.
Note
When you set the safety switch of the “Memory Stick” to “LOCK,” AIBO cannot store
any picture.
42
Page 43

Viewing pictures taken by AIBO
Pictures taken by AIBO are stored in the “Memory Stick” of AIBO. To see them,
one of the following devices is required as the system that copies data stored in the
“Memory Stick” to your personal computer (PC):
x PC equipped with a slot for a “Memory Stick.”
x PC equipped with an external “Memory Stick” adaptor drive.
x PC equipped with a PC card adaptor for a “Memory Stick” and a PC card
slot or PC card adaptor drive.
1
Remove the “Memory Stick” from AIBO.
Refer to the “AIBO” ERS-210 series Operating Instructions for how to remove a
“Memory Stick.”
2
Insert the removed “Memory Stick” into your PC.
Refer to the Operating Instructions supplied with your PC or “Memory Stick”
adapter for details on how to insert the “Memory Stick.”
Communicating with AIBO
43
Page 44

3
Copy or move photo files stored in the “Memory Stick” to your PC.
Copy or move the JPEG files stored under “\OPEN-R\APP\PC\PHOTO” of the
“Memory Stick” to your PC.
Five-digit numbers are sequentially assigned to pictures AIBO shot: the smallest
number is assigned to the oldest file. Each file is named as “IMGxxxxx.JPG,” where
xxxxx indicates a sequential number, and stored in the “Memory Stick.”
See the Operating Instructions supplied with each product required to see pictures
for how to copy pictures.
Memo
If there is no photo file in the “PHOTO” folder, photo files are numbered from “00000”
sequentially.
Otherwise, photo files are numbered based on the number of the photo file stored the last
time in this folder.
4
Remove the “Memory Stick” from your PC.
Refer to the Operating Instructions supplied with your PC or “Memory Stick”
adapter for details on how to remove the “Memory Stick.”
44
Page 45

Additional Information
This chapter provides notes on usage, a troubleshooting guide, and
other information concerning AIBO.
Page 46

Notes on use
To protect the saved data on the “Memory Stick,” note the following:
• The supplied AIBO-ware “Memory Stick” is an accessory of “AIBO
Recognition” ERF-210AW06E. Using it also to save data from PCs or
camcorders, or for anything other than AIBO, may damage AIBO.
• Do not touch the terminal A with your hand or
metal objects.
• The saved data may be erased or broken if the
“Memory Stick” is used in a place subject to static
electricity or electric noise.
• Do not stick anything other than a dedicated
“Memory Stick” sticker in the area indicated by
B. A stick er has already been attached to the
AIBO-ware “Memory Stick” supplied with AIBO
Recognition at the factory.
• Do not bend, drop or apply a strong physical shock
to the “Memory Stick.”
• Do not disassemble or modify the “Memory Stick.”
• To remove the “Memory Stick” from AIBO while it is still operating, first press
the pause button to stop AIBO’s movements and wait until the “Memory Stick”
access indicator goes off.
• Keep the “Memory Stick” away from water and other liquids.
46
Page 47

• Do not use or store the “Memory Stick” in places subject to:
– Excessively high temperatures, such as a car parked in the sun,
– Direct sunlight, or
– High humidity or corrosive gas.
• When carrying or storing the “Memory Stick,” keep it in the supplied case.
• AIBO Recognition is designed for use with “AIBO ERS-210/210A. ” It cannot be
used with any other version of AIBO.
• AIBO Recognition cannot be used except through the AIBO-ware “Memory
Stick” on which it is supplied.
• Sony assumes no responsibility for any malfunctions that may occur as a result
of using AIBO Recognition in a way not specified in this manual.
• The specifications of this software are subject to change without notice.
What is an AIBO-ware “Memory Stick”?
It is a “Memory Stick” produced for exclusive AIBO use, and on which is stored
application software that can be executed on an AIBO.
Notes
• Do not set the safety switch of the “Memory Stick” to
“LOCK.” Doing so will make it impossible for AIBO’s
learning and taking photo functions to work.
• If the write protect switch on the “Memory Stick” is set
to “LOCK,” AIBO’s eye lights flash red to warn you
when you press the pause button to start it up. Press the
pause button once more to put AIBO in the Pause mode,
then unlock the write protect switch on the “Memory
Stick.”
When you start up AIBO, the eyes normally light green.
Additional Information
47
Page 48

Troubleshooting
If you experience any of the following difficulties, use this troubleshooting guide to
correct the problem before contacting AIBO Customer Link. Should the problem
persist, contact the AIBO Customer Link. (See page 3 for details on the AIBO
Customer Support.)
Symptom • Remedy
48
AIBO does not move
even when you press the
pause button.
When you press the
pause button, the chest
light flashes in green and
orange alternately, and a
warning sound is output.
AIBO emits a sad
melody and does not
move when you press the
pause button.
• The battery pack is not installed to AIBO.
t Insert the battery pack to AIBO (see page 18). After inserting
the battery pack into AIBO, press the pause button again to
cancel Pause mode.
• The battery power is low.
t Recharge the battery pack or replace the battery pack with a
charged one.
• The temperature of the battery pack is abnormally high.
t Wait until the battery cools down.
• The “Memory Stick” with AIBO-ware is not inserted into AIBO.
• A “Memory Stick” other than one designed exclusive for AIBO
(unusable with AIBO ERS-210 series) is inserted into AIBO.
• The AC adaptor and conversion plug are connected to AIBO’s
charging terminal.
t Disconnect the AC adaptor and conversion plug form AIBO,
and then restart AIBO.
Page 49

Symptom • Remedy
The battery pack latch
(BATT Z) does not
work, and you cannot
remove the battery pack.
It takes a long time for
AIBO to start moving.
AIBO tries to walk but it
does not move forward.
AIBO falls often.
After you pick AIBO up,
it moves only slowly
without moving its
hands and legs.
The mode indicator is
flashing, and AIBO does
not move and its joints
are limp.
The chest light flashes
orange.
• The program is still running. Press the pause button to stop the
program, then remove the battery pack.
• AIBO is loading data from the “Memory Stick.” Wait a while.
• The floor may be too slippery.
t Place AIBO on a surface that is not too slippery, such as a
carpet with a short nap.
• The floor may be too slippery, inclined or unstable.
t Place AIBO on a flat surface that is not too slippery.
• AIBO enters the Pick-up condition whenever it is picked up.
t Check whether the mode indicator is lit and, if so, place
AIBO on the floor. If AIBO does not move after a while,
press the head sensor for 3 seconds. AIBO enters
Autonomous mode again.
• If an object becomes jammed in one of AIBO’s joints, AIBO will
stop moving (Jam condition).
t Place AIBO on the floor, then press the head sensor for 3
seconds.
• There may be a problem with the battery pack.
t Check to see if the battery pack is inserted into AIBO’s main
body correctly. If the back light flashes although the battery
pack is inserted correctly, contact the AIBO Customer Link.
Additional Information
49
Page 50

Symptom • Remedy
50
AIBO asks to be charged
even with a fully
charged battery pack.
AIBO emits no sound.
AIBO fails to selfcharge.
AIBO will not register
owner information.
• With a fully charged battery pack, AIBO Recognition can
normally operate for about 1.5 hours (in Autonomous mode). If
the operating period continues to be much shorter, the battery
pack may be reaching the end of its service life. Replace it with a
new battery pack.
• The volume setting may be set to “0.”
t Adjust the volume higher (refer to the “AIBO” ERS-210
series Operating Instructions).
• The markers are not set properly on the Station.
t Refer to the “Markers for the AIBO Self-charging Function”,
and set them properly.
• AIBO cannot recognize the markers due to its surroundings.
t Make the room brighter (fluorescent lighting is
recommended), and remove any objects from around the
Station that are similar in color to those of the markers. Next,
perform a marker color check (page 26) to test whether AIBO
can find the Station.
• AIBO cannot clearly identify your face.
t Hold your head straight without tilting it to the side. If you
are wearing a distinctive item, such as thick-rimmed glasses,
hair is covering your face, the room is poorly lit, or there is a
light source behind you, AIBO may not be able to identify
you.
Page 51

Reference Materials
Words apprehensible to AIBO
Page 52

Words apprehensible to AIBO
This section lists words AIBO can understand. Call out words listed later in this
section to praise, scold, teach or play with AIBO.
AIBO does not understand what you say when:
z While AIBO is emitting sounds or moving, it cannot hear you easily.
z AIBO may not recognize several words depending on its mode or condition.
z Even though AIBO understands you, it may choose not to respond or do as you say.
z AIBO cannot hear you if its surroundings are noisy. Call out to AIBO under quiet
conditions.
z If you say a word whose pronunciation is unclear, AIBO cannot recognize it. Speak very
clearly.
z Calling AIBO’s name
AIBO./Registered name (the name you gave
AIBO)
AIBO reacts when it is called. Even after AIBO
learns its own name, it reacts when you call it
“AIBO.”
52
z Teaching AIBO
Name registration.
Give a name to AIBO (see page 34).
What’s your name?
AIBO answers the name you gave to it in its own
voice.
Owner registration.
You can teach AIBO its owner's (your) name
(page 36).
What’s your owner’s name?
AIBO answers its owner’s name (your name) in its
own voice.
Page 53

z Praising, scolding or
encouraging AIBO
Good boy./Good girl./Good AIBO.
These words are for praising AIBO. They have the
same effect as when you praise AIBO by pressing the
head sensor.
Don’t do it./Don’t do that.
These words are for scolding AIBO. They have the
same effect as when you scold AIBO by pressing the
head sensor.
Go for it.
These words are for encouraging AIBO.
z Greetings
Good morning./Hello./Hi./Good night./
Bye bye./I’m here./Nice to meet you./Shake./
Shake hands.
z Self-charge
Go to the Station.
AIBO starts the procedure for self-charging.
z Taking a picture
Take a picture.
AIBO takes a picture with its built-in camera.
(page 41)
z Moving
Come here./Over here./Sit down./Stand up./
Lay down./Go right./Turn right./Go left./
Turn left.
z Answering AIBO
Yes./No.
These words are for answering questions asked by
AIBO.
Reference Materials
53
Page 54

Page 55

Page 56

Printed in Japan © 2002 Sony Corporation
*466990411
(1)
*
 Loading...