

Sony D-FJ737 User Manual
3-235-448-21 (2)
FM/AM
Portable
CD Player
Operating Instructions
About the area code
The area code of the location in which you purchased the CD player
is shown on upper left of the bar code label on the package.
For accessories supplied with your CD player, check the area code
of your model and see “Accessories (supplied/optional).”
D-FJ737
© 2001 Sony Corporation

WARNING
To prevent fire or shock
hazard, do not expose the unit
to rain or moisture.
Do not install the appliance in a confined
space, such as a bookcase or built-in
cabinet.
To prevent fire, do not cover the ventilation
of the apparatus with newspapers, tablecloths, curtains, etc. And don’t place lighted
candles on the apparatus.
To prevent fire or shock hazard, do not place
objects filled with liquids, such as vases, on
the apparatus.
Don’t throw a battery, dispose it as the
injurious wastes.
Certain countries may regulate disposal of
the battery used to power this product. Please
consult with your local authority.
2

Table of Contents
Getting started
Locating the controls ................................... 4
Playing a CD
1.Connect your CD player.......................... 6
2.Insert a CD. ............................................. 6
3.Play a CD. ............................................... 7
Playback options
Playing tracks repeatedly (Repeat play) .... 10
Playing a single track (Single play)........... 10
Playing tracks in random order
(Shuffle play)......................................... 10
Playing tracks in your favorite order
(PGM play)............................................ 11
Using the Radio
Inserting the battery ................................... 12
Listening to the radio................................. 13
Available features
G-PROTECTION function........................ 15
Emphasizing the bass sound (SOUND) .... 15
Protecting your hearing (AVLS)................ 16
Locking the controls (HOLD) ................... 16
Turning off the operation beep sound........ 17
Connecting your CD player
Connecting a stereo system ....................... 18
Connecting to a power source
Using the rechargeable batteries................ 20
Using the dry batteries............................... 22
Using the external battery case.................. 22
Notes on the power source ........................ 23
Additional information
Precautions ................................................ 24
Maintenance .............................................. 24
Troubleshooting......................................... 25
Specifications ............................................ 27
Accessories (supplied/optional) ................ 29
3

Getting started
Locating the controls
For details, see pages in parentheses.
CD player (front)
1 Display
(pages 8, 10, 11, 15, 16)
2 REPEAT/ENTER button
(pages 9 - 11)
3 PLAY MODE
button
(pages 9 - 11)
4 SOUND button
(page 15)
5 HOLD switch
(page 16)
6 OPEN switch
(page 6)
7 VOLUME +/–
buttons
(page 7)
CD player (inside)
8 ./>
(AMS/search)
buttons
(pages 7, 10, 11)
9 u (play/pause)
button
(pages 6, 7, 11)
q; x (stop)/CHG
(charge) button
(pages 7, 17, 20)
qa EXT BATT
(external battery)/
DC IN 4.5 V (external
power input) jack
(pages 6, 20, 23)
qs LINE OUT
(OPTICAL) jack
(page 18)
qd i (headphones) jack
(page 6)
CD player (rear)
qf G-PROTECTION
switch
(page 15)
4
qg AVLS switch
(page 16)
qh Battery compartment
(page 20)

Tuner-remote control
(Front)
qjVOL (volume)
control
(page 7)
qk i (headphones) jack
(page 6)
ql . (AMS/search)
buttons
(pages 7, 10, 11)
w; REMOTE jack
(page 6)
wa X (pause) button
(page 7)
(Rear)
Attaching the strap to the tuner-remote control
To keep the high sensitivity, attach the supplied strap to the remote control and wear it on
your belt, etc.
ws x (stop) button
(pages 7, 17)
wd CD/RADIO selector
(page 13)
wf N/> (play•AMS/
search) buttons
(pages 7, 10, 11)
wg HOLD switch
(page 16)
Getting started
wh Tune dial
(page 13)
Note
Use only the supplied remote control. You cannot operate this CD
player with the remote control supplied with other CD players.
wj BAND (AM•
FM/MONO•FM/ST)
selector
(page 13)
wk Battery compartment
(page 12)
5

Playing a CD
You can also use rechargeable batteries and dry batteries as a power source.
1
. Connect your CD player.
1 Connect the AC power adaptor.
2 Connect the headphones/earphones to
the tuner-remote control.
3 Connect the remote control cord to
the CD player and the tuner-remote
control.
Notes
• Connect the headphones/earphones to the
tuner-remote control securely. Also connect
the remote control cord to the CD player and
the tuner-remote control securely.
A loose connection may cause noise during
playback or radio reception.
• Use only the supplied remote control
cord. Do not use any other
cord.
2
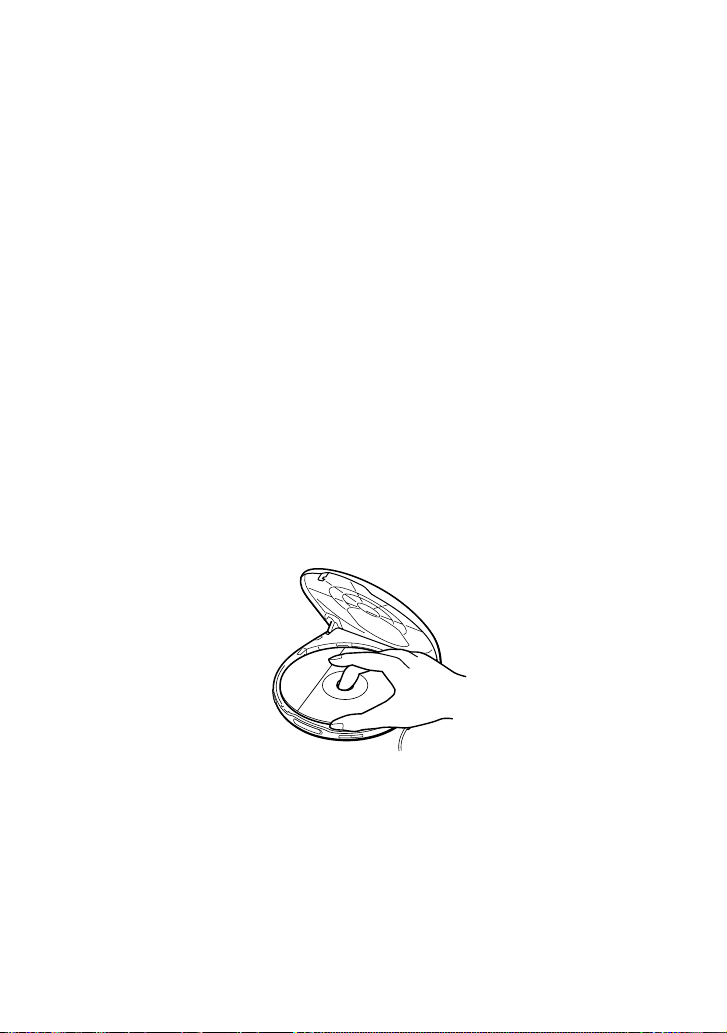
. Insert a CD.
1 Slide OPEN to open the CD
player lid.
to EXT BATT/DC IN 4.5V
to i (headphones)
u button
2 Place the CD on the tray and close
to an AC outlet
AC power
adaptor
Headphones
or
Earphones
to i
(headphones)
to REMOTE
Remote
control
cord
the lid.
6
OPEN switch
Label side up

3
. Play a CD.
1 Press u.
3 Turn up the volume
on the CD player.
4 Adjust the volume on
the tuner-remote control.
1 Set CD/RADIO to “CD.”
2 Adjust the volume by
pressing VOLUME +
or –.
2 Press N/>.
To Press
Play u (N/> for the tuner-remote
control)
Pause u (X for the tuner-remote control)
Stop x/CHG (x for the tuner-remote
Find the beginning of the current track (AMS*1) .once quickly*
Find the beginning of the previous tracks (AMS) .repeatedly*
Find the beginning of the next track (AMS) > (N/> for the tuner-remote
Find the beginning of the succeeding tracks (AMS) > (N/> for the tuner-remote
Go backwards quickly Hold down .*
Go forward quickly Hold down > (N/> for the tuner-
*1Automatic Music Sensor
2
*
These operations can be done during both play and pause.
2
control)*
2
2
control) once quickly*
control) repeatedly*
2
remote control) *
2
2
2
Playing a CD
(Continued)
7
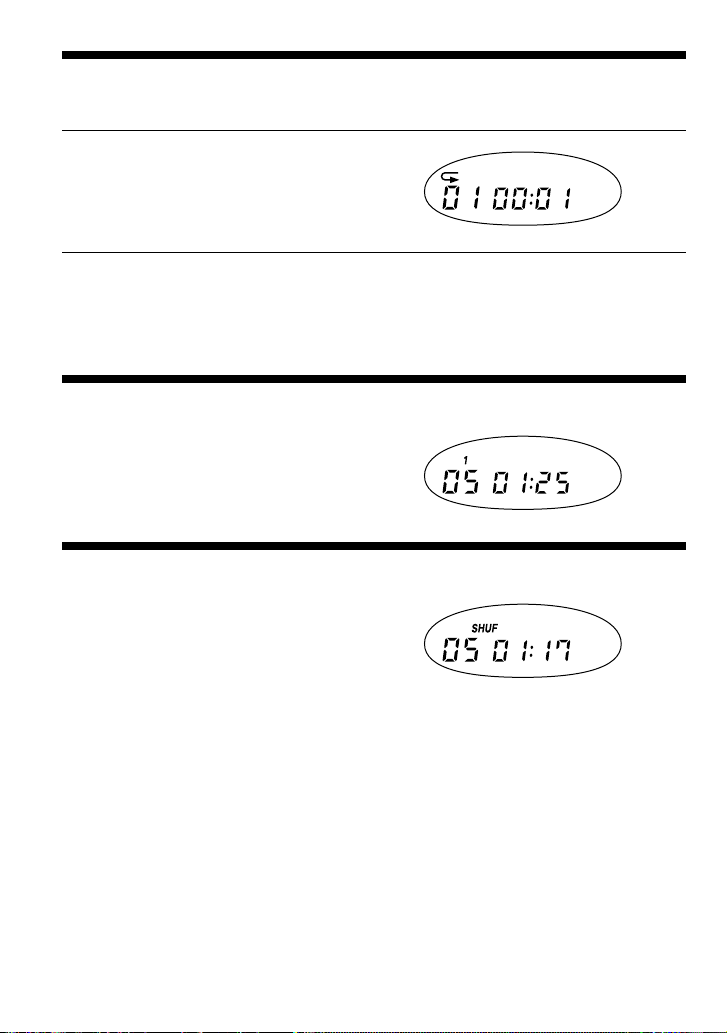
About the display
• When you press u (N/> for the tuner-remote control) after changing the CD or turning
off and on the player, the total number of tracks in the CD and total playing time appear for
about two seconds.
• During play, the track number and the elapsed playing time of the current track appear.
• During pause, the elapsed playing time flashes.
If the volume level does not increase
• If AVLS is set to “LIMIT”, set it to “NORM.” For details, see “Protecting your hearing
(AVLS).”
• If the headphones are connected to the LINE OUT (OPTICAL) jack, connect them to the
i (headphones) jack.
Setting the maximum volume level
1 Set VOL (volume) on the tuner-remote control to maximum.
2 Adjust the volume on the CD player to the level that you want it to be.
This level becomes the maximum volume for the remote control.
About CD-Rs/CD-RWs
This CD player is compatible with CD-Rs/CD-RWs but playback capability may vary depending
on the quality of the disc, the recording device and application software.
Removing the CD
Remove the CD while pressing the pivot in the center of the tray.
8

Playback options
You can enjoy various ways of playback using PLAY MODE and REPEAT/ENTER.
PLAY MODE button
Each time you press the button, you can
change the playback mode.
No indication
(Normal play)
“1”
(Play a single track)
“SHUF”
(Play tracks in random order)
“PGM”
(Play tracks in your favorite order)
Playback options
REPEAT/ENTER button
REPEAT
You can repeat play that is selected using
PLAY MODE.
ENTER
You can select tracks for PGM play
mode.
./> buttons
u button
x/CHG button
9
Playing tracks repeatedly (Repeat play)
You can play tracks repeatedly in normal, single, shuffle and PGM play modes.
During playback, press REPEAT/ENTER.
Note on ./>
During Repeat play, you can locate the first track after the last track by pressing > repeatedly.
You can also locate the last track after first track by pressing . repeatedly.
Playing a single track (Single play)
During playback, press PLA Y MODE
repeatedly until “1” appears.
Playing tracks in random order (Shuffle play)
During playback, press PLA Y MODE
repeatedly until “SHUF” appears.
10
 Loading...