

Page 1

Micro Hi-Fi
Component
System
Operating Instructions
4-249-164-11(1)
CMT-SE1
©2003 Sony Corporation
Page 2
WARNING
To prevent fire or shock hazard, do not
expose the unit to rain or mo ist u r e.
To prevent fire, do not cover the ventil at ion of the
apparatus with news papers, table-cloths, curtains, etc.
And don’t place lighted candle s on the apparatus.
To prevent fire or shock hazard, do not place obje c ts
filled with liquids, such as vases , on the ap pa ratus.
Do not install the appliance in a confined space,
such as a bookcase or built-in cabi ne t.
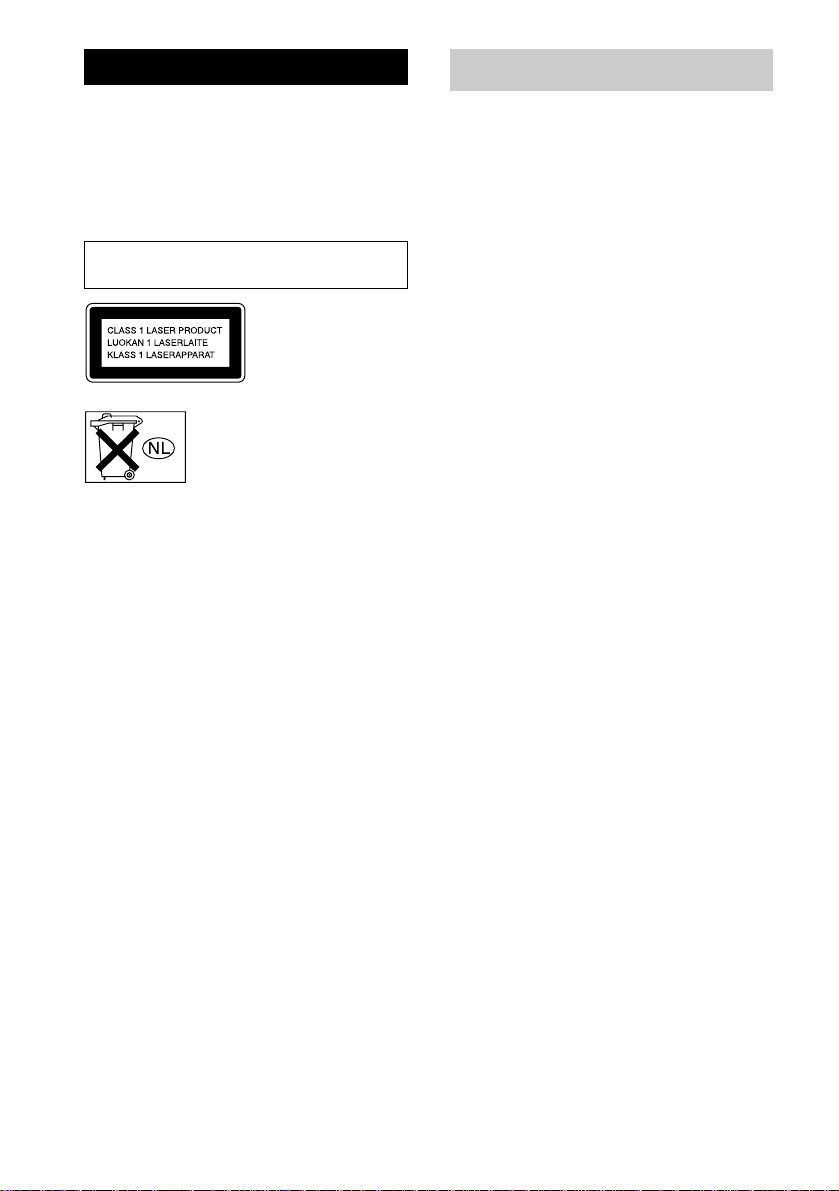
This appliance is
classified as a CLASS 1
LASER product. This
label is located on the
rear exterior.
Don’t throw away the battery with
general house waste, dispose of it
correctly as chemical was te.
How to use this manual
This manual mainly e xpl ains operations using
the remote, but the same operations can also be
performed usin g th e buttons on the system
having the same or similar names.
GB
2
Page 3

Table of Contents
How to use this manual...........................2
Getting Started
Hooking up the system............................4
Setting the clock......................................5
CD – Play
Loading a disc........................ ... .... ..........6
Playing a disc..........................................6
— Normal Play/Shuffle Play
Playing repeatedly...................................7
— Repeat Play
Creating your own program.................... 7
— Program Play
Tuner
Presetting radio stations..........................8
Listening to the radio ..............................9
— Preset Tuning
— Manual Tuning
Using the Radio Data System
(RDS)..............................................10
Sound Adjustment
Adjusting the sound............... ... ............11
Optional Components
Hooking up optional components.........14
Listening to audio from a connected
component......................................15
Recording on a connected
component......................................15
Troubleshooting
Problems and remedies.........................16
Messages............................................... 18
Additional Information
Precautions............................................19
Specifications........................................20
List of button locations and reference
pages...............................................22
Timer
Falling asleep to music..........................11
— Sleep Timer
Waking up to music ..............................12
— Daily Timer
Display
Turning off the display..........................13
— Power Saving Mode
Viewing information about th e disc in th e
display.............................................13
GB
3
Page 4
Getting Started
Hooking up the system
Perform the following procedures 1 to 3 to hook up your syste m using the supplied co rds and
accessories.
AM loop antenna
Right speaker
FM lead antenna
1
3
1 Connect the speakers.
Connect the rig ht and left speaker cords to
the SPEAKER terminals as shown below.
Ω
4
SE
U
E
C
AN
PED
IM
L
R
R
AKE
PE
S
2 Connect the FM and AM antennas.
Set up the AM loop antenna, then connect
it.
Left speaker
2
L
IA
X
A
O
C
M
M
F
Ω
75
Extend the FM lead antenna horizontally
Note
To prevent noise pickup, keep the antennas away from
the system and other components.
3 Connect the mains lead to mains.
If the plug does not fi t t he w all socket,
detach the supplied plug adaptor (only for
models equipped w ith an adaptor).
To turn on the system , press ?/1.
A
AM loop antenna
GB
4
Page 5
Attaching the speaker pads
Attach the supplied speaker pads to the bottom
of the speakers to stabilize the speakers and
prevent them from sl ip pi ng.
Inserting two R6 (size AA)
batteries into the remote
e
E
E
e
Note
If you do not use the remote for a long period of time,
remove the batteries to avoid possible damage from
battery leakage and corrosion.
Tip
When the remote no longer operates the system,
replace both batteries with new ones.
Setting the clock
Getting Started
1 Press ?/1 to turn on the system.
2 Press CLOCK/TIMER SET.
3 Press . or > repeatedly to set the
hour.
4 Press ENTER.
5 Press . or > repeatedly to set the
minute.
6 Press ENTER.
The clock starts worki ng.
To adjust the clock
1 Press CLOCK/TIMER SET.
2 Press . or > until “CLOCK SE T?”
appears, then press ENTER.
3 Do the same procedures as step 3 to 6
above.
Note
The clock is not displayed in Power Saving Mode.
Tip
When you adjust the clock while the system is off, do
the same procedures as step 2 to 6 ab o ve .
Opening the front cover
Pull down the upper right corner of th e fr ont
cover on the unit.
Front cover
GB
5
Page 6
CD – Play
Loading a disc
1 Press CD (or FUNCTION on the unit
repeatedly) to switch the function to
CD.
2 Insert a disc in the disc slot with the
label side up.
Playing a disc
— Normal Play/Shuffle Play
This system lets you play CD in different play
modes.
Track number Playing time
When you pl ay
a disc, insert it
with the label
side up.
Notes
• When you turn on the system, the disc is not pulled
into the disc slot until “CD No Disc” appears in the
display. Do not attempt to push in the disc until “CD
No Disc” appears.
• Do not use a disc with tape, seals or paste on it as this
may cause malfunction.
1 Press CD (or FUNCTION on the unit
repeatedly) to switch the function to
CD.
2 Press PLAY MODE in stop mode
repeatedly until the mode you want
appears.
Select To play
No display
(Normal Play)
SHUFFLE
(Shuffl e Play)
PROGRAM
(Program Play)
The tracks on the disc in
original order.
All tracks on the disc in
random or der.
The tracks on the disc in the
order you want them to be
played (see “Creating your
own program” on page 7).
3 Press N.
Other operations
To Do this
Stop play Press x.
Pause Press X. Press again to resume
Select a track Press . or > repeatedly.
Find a point in a
track
Remove a disc Press Z EJECT on the unit.
Note
You cannot change the play mode during playback.
Tip
When disc access ta kes a long time, set “CD PowerOn”
by CD power manage function (page 9).
play.
Keep pressing m or M during
playback and release it at the
desired point.
GB
6
Page 7
Playing repeatedly
Creating your own
— Repeat Play
You can play all the tracks or a single track on a
disc repeat ed l y.
Press REPEAT repeatedly during playback
until “REPEAT” or “RE PE A T 1” a ppe ars.
REPEAT: For all the tracks on the disc up to five
times.
REPEAT 1: For a single track only.
To cancel Repeat Play
Press REPEAT repeatedly until both
“REPEAT” and “REPEAT 1” disappear.
Note
When you select “REPEAT 1”, that track is repeated
endlessly until “REPEAT 1” is canceled.
program
—Program Play
You can make a pro g r am of up to 25 steps.
1 Press CD (or FUNCTION on the unit
repeatedly) to switch the function to
CD.
2 Press PLAY MODE in stop mode
repeatedly until “PROGRAM” appears.
3 Press . or > repeatedly until the
desired track number appears.
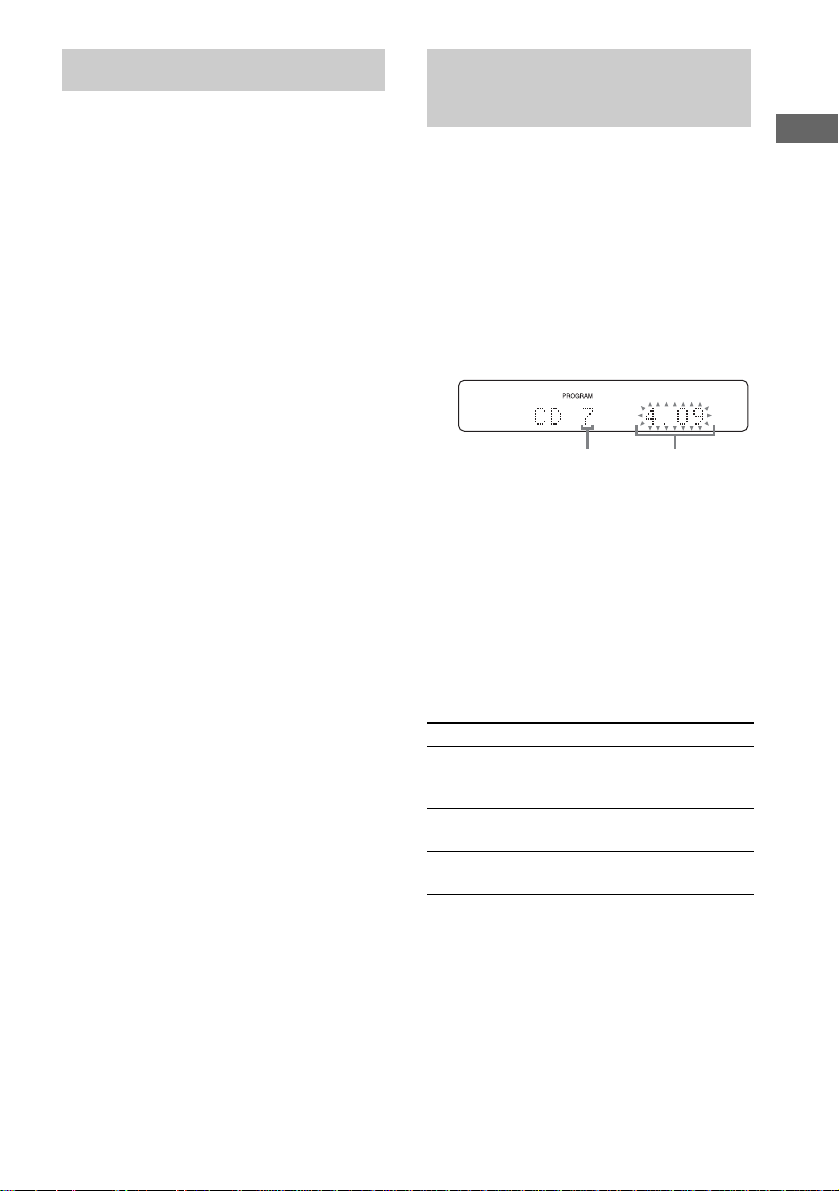
Selected track number Total playing time
4 Press ENTER.
The track is programmed.
The step number appears, followed b y th e
last programmed track number.
5 To program additional tracks, repeat
steps 3 and 4.
6 Press N.
Program Play star ts .
Other operations
To Do this
Cancel Program Play Press PLAY MODE in stop
Clear a track from the
end
Add a track to the end
of the program
Tips
• The program you made remains after Program Play
finishes. To play the same program again, press N.
However, the program is cleared when you eject the
disc.
• “– –.– –” appears when the total program time
exceeds 100 minutes, or when you select a CD track
numbered 21 or over.
mode repeatedly until
“PROGRAM” disappears.
Press CLEAR in stop mode.
Perform steps 3 and 4 in stop
mode.
CD – Play
GB
7
Page 8

Tuner
Presetting radio stations
You can preset up to 20 FM stations and 10 AM
stations. You can th en tune in any of those
stations simply by sel e ct ing the corresponding
preset number.
5 Press PRESET +/– repeatedly to select
the desired preset number.
6 Press ENTER.
7 Repeat steps 1 through 6 to preset
other stations.
Tip
Press TUNING MODE to stop scanning.
Manual tuning preset
Automatic tuning preset
You can automatically tune in all of t he st ations
that can be receiv ed in your area and the n st ore
the radio frequency of the desired stations.
1 Press TUNER/BAND repeatedly (or
move lever on the unit to FM or AM) to
select “FM” or “AM”.
2 Press TUNING MODE repeatedly until
“AUTO” appears in the display.
3 Press TUNING +/–.
The frequency changes as the system scans
for a station. Scanning stops automatically
when a station is tuned in. At that time,
“TUNED” and “STEREO” (for stereo
program only) appear.
If “TUNED” does not appear and the
scanning does not stop
Set the freque ncy of the desired radio
station as described in steps 2 and 3 of
“Manual tuning preset” (page 8).
4 Press TUNER MEMORY.
The preset number flashes. Perform steps 5
and 6 while the preset number flash es.
You can manually tune in and store the radio
frequency of the desired stations.
1 Press TUNER/BAND repeatedly (or
move lever on the unit to FM or AM) to
select “FM” or “AM”.
2 Press TUNING MODE repeatedly until
both “AUTO” and “PRESET” disappear
from the display.
3 Press TUNING +/– repeatedly to tune in
the desired station.
4 Press TUNER MEMORY.
5 Press PRESET +/– repeatedly to select
the desired preset number.
6 Press ENTER.
7 Repeat steps 1 through 6 to preset
other stations.
Other operations
To Do this
Tune in a station
with a weak signal
Set another station
to the existing
preset number
Follow the procedure described
in “Manual tuning preset”
(page 8).
After step 4, press PRESET +/–
repeatedly to select the preset
number you want to store the
station.
Preset number
GB
8
Tips
• The pr es et sta ti ons a re ret ai ne d for about half a day
even if you disconnect the mains lea d or if a power
failure occurs.
• To improve the reception, adjust the supplied
antennas or connect an externa l an te nna .
Page 9

To improve tuner reception
When tuner recept io n is poor, set CD player
power off by CD power manage function.
CD power is factory set to on.
1 Press CD (or FUNCTION on the unit
repeatedly) to switch the function to CD.
2 Press ?/1 to turn off the system.
3 Press ?/1 while holding x.
“CD PowerOff” appears.
To set CD power on
Repeat the procedure above and “CD PowerOn”
appears.
Notes
• When “CD PowerOff” is selected, disc access time is
increased.
• You can not c ha nge the setting in Power Saving
Mode.
Listening to the radio
You can listen to a radio station either by
selecting a preset station, or by manually tuning
in the station.
Listening to a preset station
— Preset Tuning
Preset radio stations in th e tuner’s memory first
(see “Presetting radio stati o ns” on page 8).
1 Press TUNER/BAND repeatedly (or
move lever on the unit to FM or AM) to
select “FM” or “AM”.
2 Press TUNING MODE repeatedly until
“PRESET” appears in the display.
3 Press PRESET +/– repeatedly to select
the desired preset station.
Listening to non-preset radio
station
— Manual Tuning
1 Press TUNER/BAND repeatedly (or
move lever on the unit to FM or AM) to
select “FM” or “AM”.
2 Press TUNING MODE repeatedly until
both “AUTO” and “ PRESET” disappear
from the display.
3 Press TUNING +/– repeatedly to tune in
the desired station.
Tips
• To improve broadcast reception, adjust the supplie d
antennas, or connect a commercially available
external antenna.
• When an FM stereo program has static noise, press
FM MODE repeatedly until “MONO” appears.
There will be no stereo effect, b ut th e reception will
improve.
• Press TUNING MODE repeatedly until “AUTO”
appears in step 2 above, then press TUNING +/–.
The frequency indication changes and scanning stops
automatically when the system tunes in a station
(Automatic Tuning).
Tuner
GB
9
Page 10

Using the Radio Data System (RDS)
What is the Radio Da t a
System?
Radio Data System (RDS) is a broadcasting
service that al l ows radio stations t o se nd
additional information along with the regula r
program signal. RDS is available only on FM
stations.*
Note
RDS may not work properly if the station you are tuned
in is not transmitting the RDS signal properly or if the
signal is weak.
* Not all FM stations provide RDS service, nor do they
provide the same types of se rv ic es . If yo u are no t
familiar with the RDS system, check with your local
radio stations for detail s on RDS services in your
area.
Receiving RDS broadcasts
Simply select a station from the FM band.
When you tune in a stat i on t hat provides RDS
services, the stat ion name app ears in t he displa y.
To check the RDS information
Each time you press DISPLAY, the display
changes cycli cally as follows:
Station name* t Frequenc y t Clock displa y
t Bass level t Treble level
* If the RDS broadcast is not properly received, the
station name may not a ppe ar in the display.
10
GB
Page 11

Sound Adjustment
Timer
Adjusting the sound
You can adjust the bass a nd treble to enjo y more
powerful sound.
Generating a more dynamic
sound (Dynamic Bass Feed
Back)
DBFB is factory set to on.
To cancel the DBFB, press DBFB.
Adjusting the bass and treble
You can adjust the bass and treble .
Press BASS +/– or TREBLE +/– repeatedly
to adjust the level you want to set.
To adjust the bass and treble on
the unit
1 Press BASS/TREBLE on the unit repeatedly
to select “BASS” or “TREBL E”.
Each time you press the button, the display
changes as follows:
BASS y TREBLE
2 Press +/– on the unit repeatedly to adjust the
level while “BASS” or “TREBLE” appears.
To exit the bass and treble
settings
Press any button other t han BASS +/–, TR EBLE
+/–, BASS/TREBLE on the unit or +/–
unit.
Also, if you do not perform any operations for a
few seconds, the di splay automatically retu rns to
the original display.
on the
Falling asleep to music
—Sleep Timer
You can set the system to turn off after a certain
time, so that you can fall asleep to music.
Press SLEEP.
Each time you press the button, the minute
display (the turn-off ti me) change s cy clical ly as
follows:
AUTO* t 90min t 80min t … t 10m in
t OFF
* The system automatically turns off in 240 minutes or
after the current CD finishes playing.
Other operations
To Do this
Check the
remaining time**
Change the time to
turn off
Cancel the Sleep
Timer Function
**You cannot check the remaining time if you select
“AUTO”.
Tip
You can use the Sleep Timer, even if you have not set
the clock.
Press SLEEP once.
Press SLEEP repeatedly to select
the time you want.
Press SLEEP repeatedl y unti l
“OFF” appears.
Sound Adjustment/Timer
11
GB
Page 12

Waking up to music
— Daily Timer
You can wake up to music at a preset time. Make
sure you have set the cl ock (see “Setting the
clock” on page 5).
1 Prepare the sound source you want to
play.
• CD: Inser t a disc. To start from a specific
track, make a program (see “Creating
your own program” on page 7).
• TUN ER: T une in th e pr es et ra di o st at io n
(see “Listening to t he radio” on page 9).
2 Press VOL +/– (or turn VOLUME control
on the unit) to adjust the volume.
3 Press CLOCK/TIMER SET.
4 Press . or > repeatedly until
“DAILY SET ?” appears, then press
ENTER.
5 Set the time to start playing.
Press . or > repeatedly to set the
hour, then press ENTER.
The minute indication flashes.
Press . or > repeatedly to set the
minute, then press ENTER.
6 Set the time to stop playing following
the same procedure as step 5.
7 Press . or > repeatedly until the
desired sound source appears.
Each time you press the but to n, th e di sp lay
changes cycli cal l y as follows:
TUNER y CD PLAY
8 Press ENTER.
The start time, the stop time, the sound
source and the volu m e appear in turn, then
the original display returns.
9 Press ?/1 to turn off the system.
Other operations
To Do this
Check the setting 1 Press CLOCK/TIMER
Change the setting Start over from step 1.
Cancel the timer
Notes
• If you use the Daily Timer and the Sleep Timer at the
same time, the Sleep Timer has priority.
• If the system is on about 15 seconds before the preset
time, the Daily Timer will not be act iv ated.
• You cannot use the optional component connected to
MD (TAPE) IN jack as the sound source for Daily
Timer.
SELECT.
2 Press . or >
repeatedly until “DAILY
ON?” appears, then press
ENTER.
1 Press CLOCK/TIMER
SELECT.
2 Press . or >
repeatedly until “DAILY
OFF?” appears, then press
ENTER.
12
GB
Page 13

Display
Turning off the display
— Power Saving Mode
The clock display can be turned off to minimize
the amount of power consumed during standby
(Power Saving Mode).
Press DISPLAY repeatedly while the
system is off until the clock display
disappears.
To cancel Power Saving Mode
Press DISPLAY while the system is off. Each
time you press the button, the display switches
cyclically as follows:
Clock display* y No display (Power Saving
Mode)
* The clock is displayed only if you set the clock.
Note
You cannot perform the following operations in Power
Saving Mode.
– setting the clock
– changing the CD power manage function
– switching the MD (TAPE) function
Tips
• ?/1 indicator lights up even in Power Saving Mode.
• The timer continues to operate in Power Saving
Mode.
Viewing information about the disc in the display
You can check the playing time and remaining
time of the current track or that of the disc.
Checking the r emaining time
and titles (CD)
Press DISPLAY during Normal Play.
Each time you press the button, the display
changes cyclically as follows:
Current track nu m ber and elapsed playi ng t ime
t Current track number and remaining time t
Remaining time of the disc*1 t Track title of
CD-TEXT disc
Bass level t Treble level
*1
“– –.– –” appears in Program Play mode.
*2
When the disc contains more than 20 tracks,
CD-TEXT is not displayed from track 21 on.
Checking the total playing
time and titles (CD)
Press DISPLAY in stop mode.
Each time you press the button, the display
changes cyclically as follows:
Total playing time t Disc title* t
Clock display t Bass level t Treble level
* For CD-TEXT discs (c erta in characters cannot be
displayed).
Note
When fast forward or fast reverse is performed, elap sed
playing time and remaining time of the track may not
be displayed accurately.
*2
t Clock display t
Display
13
GB
Page 14

Optional Components
Hooking up optional components
To enhance your sy st em, you can connect optional componen t s. Ref er to the operating ins tr uctions
provided with each component.
Optional digital component
To the digital
input jack of an
optional digital
component
To the audio
input jack of an
optional analog
component
A MD (TAPE) IN jack (stereo mini
jack)
Use audio cord (not supplied) to con nect an
optional analog com ponent (MD deck or ta pe
deck, etc.) to this jack. Yo u can then listen to the
sound from the co m ponent.
B MD (TAPE) OUT jack (stereo
mini jack)
Use audio cord (not supplied) to con nect an
optional analog com ponent (MD deck or ta pe
deck, etc.) to this jack. Yo u can then listen to the
sound through this s ys te m .
Optional analog component
From the audio
output jack of an
optional analog
component
C CD OPTICAL OUT DIGITAL
jack
Use a digital optical cable (square, not supplied)
to connect an amplifier, MD deck, or DAT deck
with a digital optical in put jack. Dig ital si gnal is
output only when the system function is set to
CD. If the jack is covered with a cap, remove it
before use.
14
GB
Page 15

Listening to audio from a
Recording on a connected
connected component
Listening to a connected MD
deck
1 Connect the audio cord.
See “Hooking up optional components” on
page 14.
2 Press MD (TAPE) (or FUNCTION on the
unit) repeatedly until “MD” appears.
Start playi ng the connecte d component.
Listening to a connected tape
deck
1 Connect the audio cord.
See “Hooking up optional components” on
page 14.
2 Press MD (TAPE) (or FUNCTION on the
unit) repeatedly until “TAPE” appears.
Hold down FUNCTION on the unit and
press ?/1 on the unit. This switches the
MD function to TAPE. Once you enab le the
TAPE function, just pr ess MD (TAPE).
Tip
If you cannot select “MD” by pressing MD (TAPE) (or
FUNCTION
system and t h en press ?/1 on the unit while holding
down FUNCTION on the unit. The function will
change from “TAPE” to “MD”, and “MD” wi ll appear
in the display. To change back to “TAPE”, repeat the
same procedure. However, you cannot switch the MD/
TAPE function in Power Saving Mode.
on the unit) repeatedly, turn of f th e
component
Making an analog recording
1 Connect the audio cord.
See “Hooking up optional components” on
page 14.
2 Start recording.
Refer to the operating instructions provided
with connected component.
Making a digital recording
1 Connect the digital optical cable.
2 Start recording.
Refer to the operating instructions provided
with connected component.
Note
You can digitally record from the discs only. However,
you cannot record from copy prohib ite d discs.
Optional Components
15
GB
Page 16

Troubleshooting
Problems and remedies
Should you encounter a problem with your
system, do the following:
1 Make sure the mains lead and speaker
cords are correctly and firmly connected.
2 Find your problem in the troubleshooting
checklist below and take the indicated
corrective action.
If the problem persists after doing all of the
above, consult yo ur nearest Sony dealer.
When the ?/1 indicator flashes
Immediatel y unplug th e mains lea d and check
the following items.
• Are the system control cables connected
correctly?
• If your system has a voltage selector, is the
voltage selector set to the correct voltage?
Check the voltage for your region, the n
make sure the voltage selector is set
correctly.
• Are the + and – speaker cord s shortcircuited?
• Are you using the supplie d speakers?
• Is anything blocking the ventila tion holes
on the rear of the system?
Check all the above items and fix any
problems found. A ft er ?/1 indicator stops
flashing, reconnect the mains lead and turn on
the system. If the indicator still flashes, or if
the cause of the prob l em cannot be found
even after checki ng all the above items,
consult your neares t Sony dealer.
General
“– –:– –” appears in the displa y .
• A power interruption has occurred. Set the clock
(page 5) and timer setting (page 12) again.
The clock setting/radio presetting/timer is
canceled.
• Redo the following:
– “Setting the clock” (page5)
– “Presetting radio stations” (pag e8)
– “Check th e setting” (page 12)
There is no sound.
• Press VOL +/– or turn VOLUME control on the
unit clockwise.
• Make sure the headphones are not connected.
• Check the speaker connections (page4).
Sound comes from one channel, or
unbalanced left and right volume.
• Place the speakers as symmetrically as possible.
• Conne c t the supplied speakers.
Sound lacks bass.
• Check that the speaker’s + and – jacks are
connected correctly.
There is severe hum or noise.
• Move the system away from the source of noise.
• C onne ct the system to a differen t mains.
• Install a noise filter (comme r ci ally available) to
the mains line.
The timer cannot be set.
• Set the clock again (page 5).
The timer does not function.
• Press CLOCK/TIM ER SELEC T to set the timer
and light up “DAILY” in the display (page 12).
• Check the timer setting and set the correct time
(page 12).
• Cancel the Sleep Timer Function (page 11).
• Make sure the clock is correctly set.
The color on the TV screen is irregular.
• Move the speakers farther away from the TV set.
The remote does not function.
• Rem ove the obst ac le.
• Move the remote closer to the system.
• Point the remote at the system’s sensor.
• Replace the batteries (R6/size AA).
• Locate the system away from the fluoresce nt light.
16
GB
Page 17

CD
“LOCKED” appears.
• Contact your Sony dealer or local authorized Sony
service facility.
The disc does not eject.
• Consult your nearest Sony dealer.
Play does not start.
• Check whether a disc is loaded (The DISC
indicator lights up when a disc is loaded) .
• Wipe the disc clean (page 19).
• Replace the disc.
• Load the disc that this system can play.
• Loa d the disc co rre c tly.
• Loa d the disc in the player with the label side up .
• Remove the disc and wipe away the moisture on
the disc, then leave the system turned on for a few
hours until the moisture evapora tes.
•Press N to start play.
Disc access takes a long time.
• Set “CD PowerOn” by CD power manage
function (page 9).
The sound skips.
• Wipe the disc clean (page 19).
• Replace the disc.
• Try movi ng the system to a place without
vibration (e.g., on top of a stable stand) .
• Try moving the speakers away from the s ystem, or
placing them on separate stands. When you listen
to a track with bass sounds at high volume, the
speaker vibration may cause the sound to skip.
Play does not start from the first track.
• Press PLAY MODE repeatedly until both
“PROGRAM” and “SHUFFLE” disappear to
return to Normal Play.
Tuner
Severe hum or noise/stations cannot be
received.
• Set the proper band and frequency (page 8).
• Connect the antenna properly (page 4).
• Find a place and an orientation that provide good
reception, then set up the a nte nna again. If you
cannot obtain good reception, we recommend you
connect a commercially av ai lab le external
antenna.
• T he supplied FM lead antenna receives signals
along its entire length, so make sure you extend it
fully.
• Keep the antennas away from the system and
other components.
• Consult your nearest Sony dealer if the supplied
AM antenna has come off the plastic stand.
• Try turning off surrounding electrical equipment.
• S e t “CD Powe rOff” by CD power mana ge
function (page 9).
A stereo FM program cannot be received in
stereo.
• Press FM MODE until “MONO” disappears from
the display.
Optional components
There is no sound.
• Refer to General item “There is no sound.”
(page 16) and check the condition of the syste m.
• Connect the component properly (page 14) while
checking:
– if the cords are connected properly.
– if the cord plugs are firmly inserted all the way.
• Turn on the connected component.
• Refer to the operating instructions supplied with
the connected component and st art pl ay ing.
• Press MD (TAPE) (or FUNCTION on the unit)
repeatedly to select “MD” or “TAPE” (page15).
The sound is distorted.
• Set the volume of the connected component
lower.
Troubleshooting
continued
17
GB
Page 18

If the system still does not
operate properly after performing
the above measures, reset the
system as follows:
1 Disconnect the mains lead.
2 Reconnect the mains lead.
3 Press ?/1 to turn on the system.
4 Move lever on the unit to x and press
FUNCTION and ?/1 on the unit.
The system is reset to the factory settings. You
should set the sett in gs you made, such as th e
preset stations, clock, and timer.
Messages
One of the following messages may appear or
flash in the display during operation.
CD
No Disc
There is no disc in the player.
No Step
All of the programmed tracks have been erased.
Over
You have reached the end of the disc while pressing
M during playback or pause.
Push STOP!
You pressed PLAY MODE during playback.
Step Full!
You tried to program 25 or more tracks (s te ps) .
TUNER
Complete!
The preset operation ended normal l y.
TIMER
OFF TIME NG
The Daily Timer start and end times are set to the
same time.
SET CLOCK!
You tried to set the timer, be f or e you set th e clock.
SET TIMER!
You pressed CLOCK/TIMER SELECT, before you
set the timer.
18
GB
Page 19

Additional Information
Precautions
On operating voltage
Before operating the system, check that the operating
voltage of your system is identical with the voltage of
your local power supply.
On safety
• The unit is not disconnected from the AC power
source (mains) as long as it is connec te d to the wall
outlet, even if the unit itse lf has been turned off.
• Unpl ug the system from the wall outlet (mains ) if it
is not to be used for an extended period of time. To
disconnect the power cord (mains le ad), pull it out by
the plug. Never pull the c or d itse lf .
• Should any solid object or liquid fall into the system,
unplug the system and have it checked by qua lified
personnel before operating it any furthe r .
• AC power cord (mains lead) must be chan ged only at
the qualified service shop.
On placement
• Do not place the system in an inclined position.
• Do not place the system in locations where it is;
– Extremely hot or cold
– Dusty or dirty
– Very humid
– Subject to vibrations
– Subject to direct sunlight.
• Use caution when placing the unit or speakers on
surfaces that have been specially treat ed (wi th wa x,
oil, polish, etc.) as staining or discolo ration of the
surface may result.
On heat buildup
• Although the system heats up during operation, this
is not a malfunction.
• P lace the system in a l o ca tion with adeq uate
ventilation to prevent heat build-up in the system.
• If you continuously use this system at a high volume,
the cabinet temperature of th e to p, si de and bot tom
rises considerably. To avoid burning yourself, do not
touch the cabinet.
• To pre vent a malfunction, do not cover the
ventilation hole.
On operation
• If the system is brought directly from a cold to a
warm location, or is placed in a very damp room,
moisture may condense on the lens inside the CD
player. Should this occur, the system will not operate
properly. Remove the disc and lea ve the syste m
turned on for about an hour until the mois tur e
evaporates.
• When you move the system, take out any disc.
If you have any questions or problems concerning your
system, please consult your ne are st S ony de a le r .
Notes on discs
• Before playing, clean the disc with a cleaning cloth.
Wipe the disc from the center out.
• Do not use solvents such as benzene, thinner,
commercially avai lab le cleaners or anti-static s pray
intended for vinyl LPs.
• Do not expose the disc to direct sunlight or heat
sources such as hot air ducts, nor leave it in a car
parked in direct sunlight.
• Do not use discs encircled with a protection ring.
This may cause a malfunction to th e system.
• When using discs that have glue or similar tacky
substance on the label side of the disc or tha t use d a
special ink when the label w as printed, there is a
chance that the disc or la bel ma y become att ached to
parts inside this unit. When this occurs, it may not be
possible to remove the disc, and may also cause this
unit to malfunction. Be sure to check that the label
side of the disc is not sticky before using.
The following types of disc should not be used:
– Rental or u sed di scs with atta ched seals where t he
glue extends beyond the seal. The perimeter of the
seal on the disc is tacky.
– Discs that have labels printed us ing a special ink
that feels tacky when touched.
• Discs with non-standard shapes (e.g., heart, square,
star) cannot be played on this unit. Attempting to do
so may damage the unit. Do not use such discs.
Notes on CD-R and CD-RW
• This system can play CD-R/CD-RW discs edited by
the user. However, note that playback of some discs
may not be possible depending on the recording
device used for recording or the disc cond ition.
• CD-R and CD-RW discs that have not been finalized
(processing to allow play by a normal CD pla ye r )
cannot be played.
• CD-R and CD-RW discs recorded in multi-session
mode are not supported.
Additional Informat ion
continued
19
GB
Page 20

Music discs encoded with copyright
protection technologies
This product is designed to playback di sc s tha t
conform to the Compa ct Disc (CD) stand ard. Recently,
various music discs encoded with copyright protection
technologies are mark eted b y some record co mpa nies.
Please be aware that among those discs, t here are some
that do not conform to the CD standard and may not be
playable by this product.
Cleaning the cabinet
Clean the cabinet, panel and co ntro ls with a soft cloth
slightly moistened wi th mild dete rgent soluti on. Do not
use any type of abrasive pad, scouring powder or
solvent such as thinner, benzen e or al co hol.
Specifications
Main Unit (HCD-SE1)
Amplifier section
DIN power output (rated): 55 + 55 W
(4 ohms at 1 kHz, DIN)
Continuous RMS power output (reference):
80 + 80 W
(4 ohms at 1 kHz, 10%
THD)
Inputs
MD (TAPE) IN (stereo mini jack):
Sensitivity 450/250 mV,
impedance 47 kilohms
Outputs
CD OPTICAL OUT DIGITAL:
Optical Wavelength:
660 nm
PHONES: Accepts headphones with
an impedance of 8 ohms or
more
MD (TAPE) OUT (stereo mini jack):
Impedance 1 kilohm
SPEAKER: Accepts imp edance of
4 ohms
CD player section
Laser Semiconductor lase r
(CD: λ=780 nm)
Emission duration:
continuous
Frequency response 2 Hz – 20 kHz
Wavelength 780 – 790 nm
20
Tuner section
FM stereo, FM/AM superheter odyne tuner
FM tuner section
Tuning range 87.5 – 108.0 MHz
(50 kHz step)
Antenna FM wire antenna
Antenna terminals 75 ohms unbalanced
Intermediate frequency 10.7 MHz
AM tuner section
Tuning range 531 – 1,602 kHz
(9 kHz step)
Antenna AM loop antenna, external
antenna terminal
Intermediate frequency 450 kHz
GB
Page 21

Speaker (SS-SE1)
Speaker system 2-way, bass-reflex type
Speaker units
Woofer: 13 cm dia., cone type
Tweeter: 2.5 cm dia., soft-dome-
type
Nominal impedance 4 ohms
General
Power requirements 230 V AC, 50/60 Hz
Power consumption 45 W
0.3 W (in Power Saving
mode)
Dimensions (w/h/d) incl. projecting parts and controls
Amplifier/Tuner/CD se c tion:
Approx. 155 × 119 ×
289 mm
Speakers: Approx. 160 × 280 ×
270 mm
Mass
Amplifier/Tuner/CD se c tion:
Approx. 3.0 kg
Speakers: Approx. 4.0 kg net per
speaker
Supplied accessori es Remote (1)
R6 (size AA) batteries (2)
AM loop antenna (1)
FM lead antenna (1)
Speaker pads (8)
Additional Informat ion
Design and specifications are subject to change
without notice.
21
GB
Page 22

List of button locations and reference pages
How to use this page
Use this page to find the location of bu tto ns an d oth er
parts of the system that are mentioned in the text.
Main unit
ALPHABETICAL ORDER
A – O
AM qa (8, 9)
BASS/TREBLE qs (11)
DBFB 3 (11)
Disc slot 4
Display window 5
FM qa (8, 9)
Front cover 7
FUNCTION qf (6, 7, 9, 15, 18)
Lever qa qd
P – Z
PHONES jack 9
PRESET +/– qa (8, 9)
Remote sensor 2
VOLUME control 8 (12)
Illustration number
r
PRESET +/– qa (8, 9)
Name of button/part Reference page
RR
BUTTON DESCRIPTIONS
?/1 (power) 1 (4, 9, 12, 15, 18)
./> (go back/go forward)
qd (5, 6, 12)
NX (play pause) qd (6)
x (stop) qd (6, 9, 18)
Z EJECT (eject) 6 (6)
+/– q; (11)
22
?/1
GB
Page 23

Remote control
ALPHABETICAL ORDER
A – Q
BASS +/– w; (11)
CD 7 (6, 7, 9)
CLEAR 6 (7)
CLOCK/TIMER SELECT 2
(12, 18)
CLOCK/TIMER SET 3 (5, 12)
DBFB ql (11)
DISPLAY wf (10, 13)
ENTER 5 (5, 7, 8, 12)
FM MODE 9 (9)
MD (TAPE) wd (15)
PLAY MODE qk (6, 7, 18)
PRESET +/– qj (8, 9)
R – Z
REPEAT qh (7)
SLEEP 1 (11)
TREBLE +/– qd (11)
TUNER/BAND 8 (8, 9)
TUNER MEMORY q; (8)
TUNING MODE ws (8, 9)
TUNING +/– qf (8, 9)
VOL +/– qg (12)
BUTTON DESCRIPTIONS
?/1 (powe r) 4 (4, 9, 12, 18)
N (play) wa (6)
x (stop) qs (6, 9)
./> (go back/go forward)
qj (5, 6, 12)
m/M (rewind/fast forward)
qf (6, 18)
X (pause) qa (6)
Additional Informat ion
23
GB
Page 24

Sony Corporation Printed in Korea
 Loading...