How it Works
Log In / Sign Up
Buy Points
How it Works
FAQ
Contact Us
Questions and Suggestions
Users
Sony
Loading...
C
CMT-BX30
3
CMT-BX30R
13
CMT-BX3R
3
CMT-BX4R
2
CMT-BX5
7
cmt-bx50bt
2
CMT-BX50BTI
3
CMT-BX50BTi Marketing
CMT-BX5BT
3
CMT-BX70DBI
4
CMT-BX77DBI
5
CMT-BX7DAB
CMT-C5
6
CMT-C7NT
5
CMT-CP1
5
CMT-CP100
9
CMT-CP100K
CMT-CP101
11
CMT-CP101 - Micro Hi Fi Component System
CMT-CP11
9
CMT-CP11K
2
CMT-CP1K
CMT-CP2W
4
CMT-CP2WA
4
CMT-CP300
12
CMT-CP333
7
CMT-CP33MD
4
CMT-CP500K
CMT-CP500MD
8
CMT-CP505MD
7
CMT-CP555
8
CMT-CPX1
12
CMT-CPX11
7
CMT-CPX22
10
CMT-CPX22 - Micro Hi Fi Component
CMT-CPZ1
9
CMT-CPZ1DAB
2
CMT-CPZ2
14
CMT-CPZ3
15
CMT-CQ1
10
CMT-CX4iP
2
CMT-CX5
CMT-CX5BIP
12
CMT-CX5IP
17
Cmt-cxip
CMT-DC1
5
CMT-DC1K
CMT-DC500MD
4
CMT-DF1
13
CMT-DH3
16
CMT-DH30
14
CMT-DH40R
CMT-DH50
CMT-DH50R
11
CMT-DH5BT
10
CMT-DH70SWR
12
CMT-DH7BT
3
CMT-DH7BT - Micro Hi Fi Component System
CMT-DV2D
9
CMT-DX2D
7
CMT-DX400
13
CMT-DX400A
7
CMT-E300HD
CMT-E301
5
CMT-E350HD
CMT-ED1
6
CMT-ED1A
4
CMT-ED2
4
CMT-ED2U
2
CMT-EH10
11
CMT-EH12
CMT-EH12LIV
2
CMT-EH15
15
CMT-EH20DAB
2
CMT-EH25
11
CMT-EH26
12
CMT-EH45
CMT-EH45DAB
CMT-EH55DAB
CMT-EP30
8
CMT-EP301
CMT-EP303
9
CMT-EP305
6
CMT-EP313
8
CMT-EP315
3
CMT-EP40
7
CMT-EP404
9
CMT-EP414
3
CMT-EP50
7
CMT-EP505
10
CMT-EP505 - Micro Hi Fi Component System
CMT-EP50LIV
2
CMT-EP515
8
CMT-EP707
12
CMT-EP707 Operating Instructions (CMTEP707)
CMT-EX1
8
CMT-EX100
5
CMT-EX200
2
CMT-EX22
2
CMT-EX5
8
Loading...
Loading...
Nothing found
CMT-DH30
Operating Manual
207 pgs
7.47 Mb
0
User Manual
112 pgs
4.51 Mb
0
User Manual [bg]
104 pgs
909.2 Kb
0
User Manual [cs]
104 pgs
1.03 Mb
0
User Manual [es]
207 pgs
7.71 Mb
0
User Manual [fi]
206 pgs
2.06 Mb
0
User Manual [fr]
112 pgs
4.56 Mb
0
User Manual [hu]
104 pgs
5.62 Mb
0
User Manual [nl]
207 pgs
7.45 Mb
0
User Manual [pt]
104 pgs
891.68 Kb
0
User Manual [ro]
103 pgs
1.02 Mb
0
User Manual [ru]
219 pgs
8.68 Mb
0
User Manual [sk]
104 pgs
2.55 Mb
0
User Manual [sv]
207 pgs
7.46 Mb
0
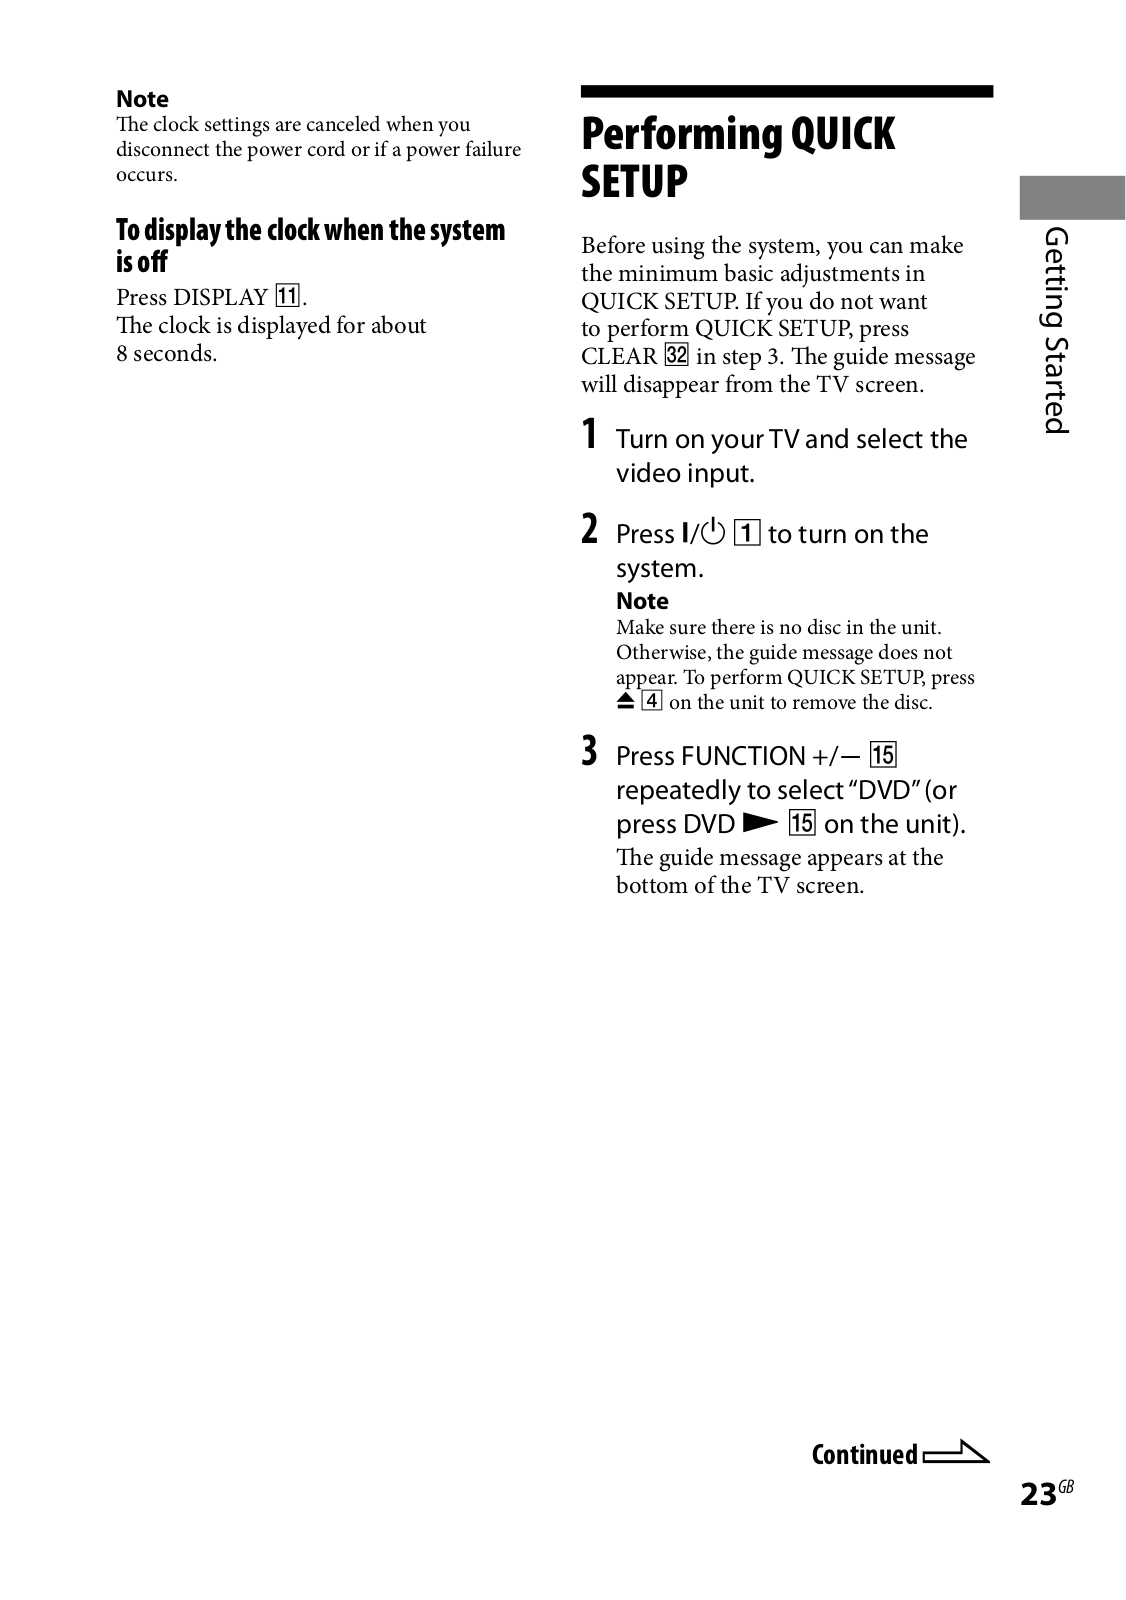
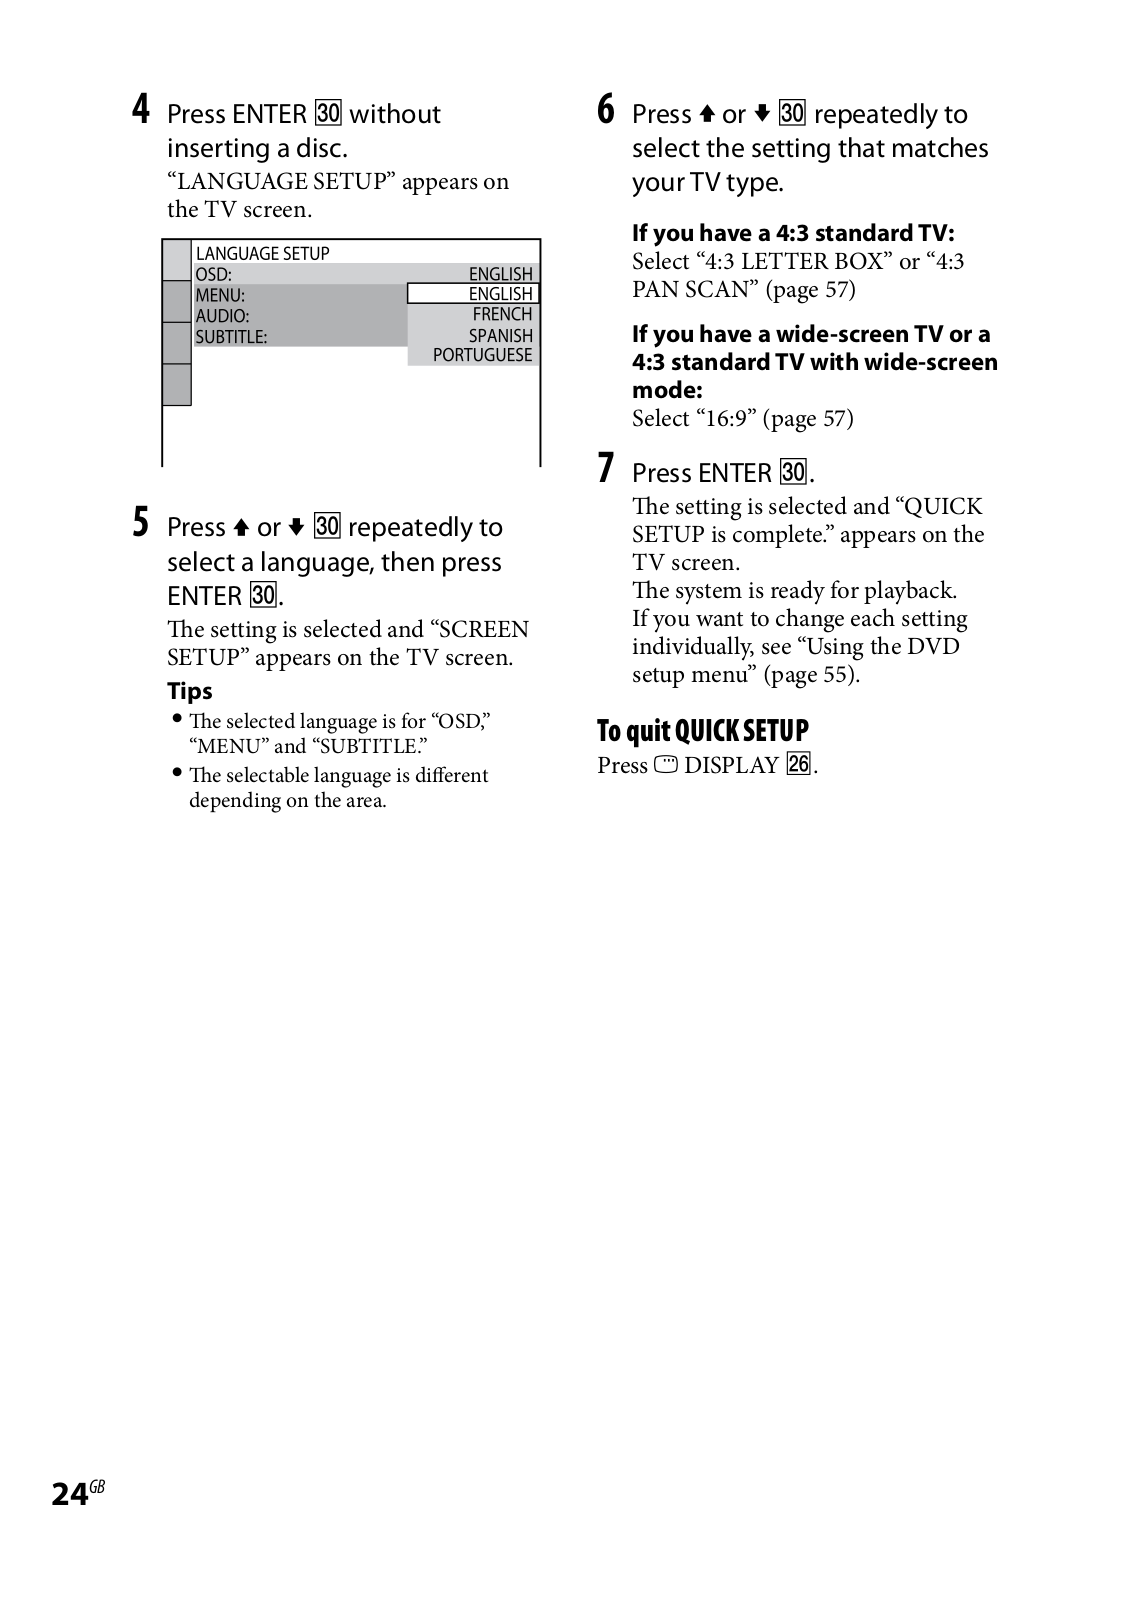
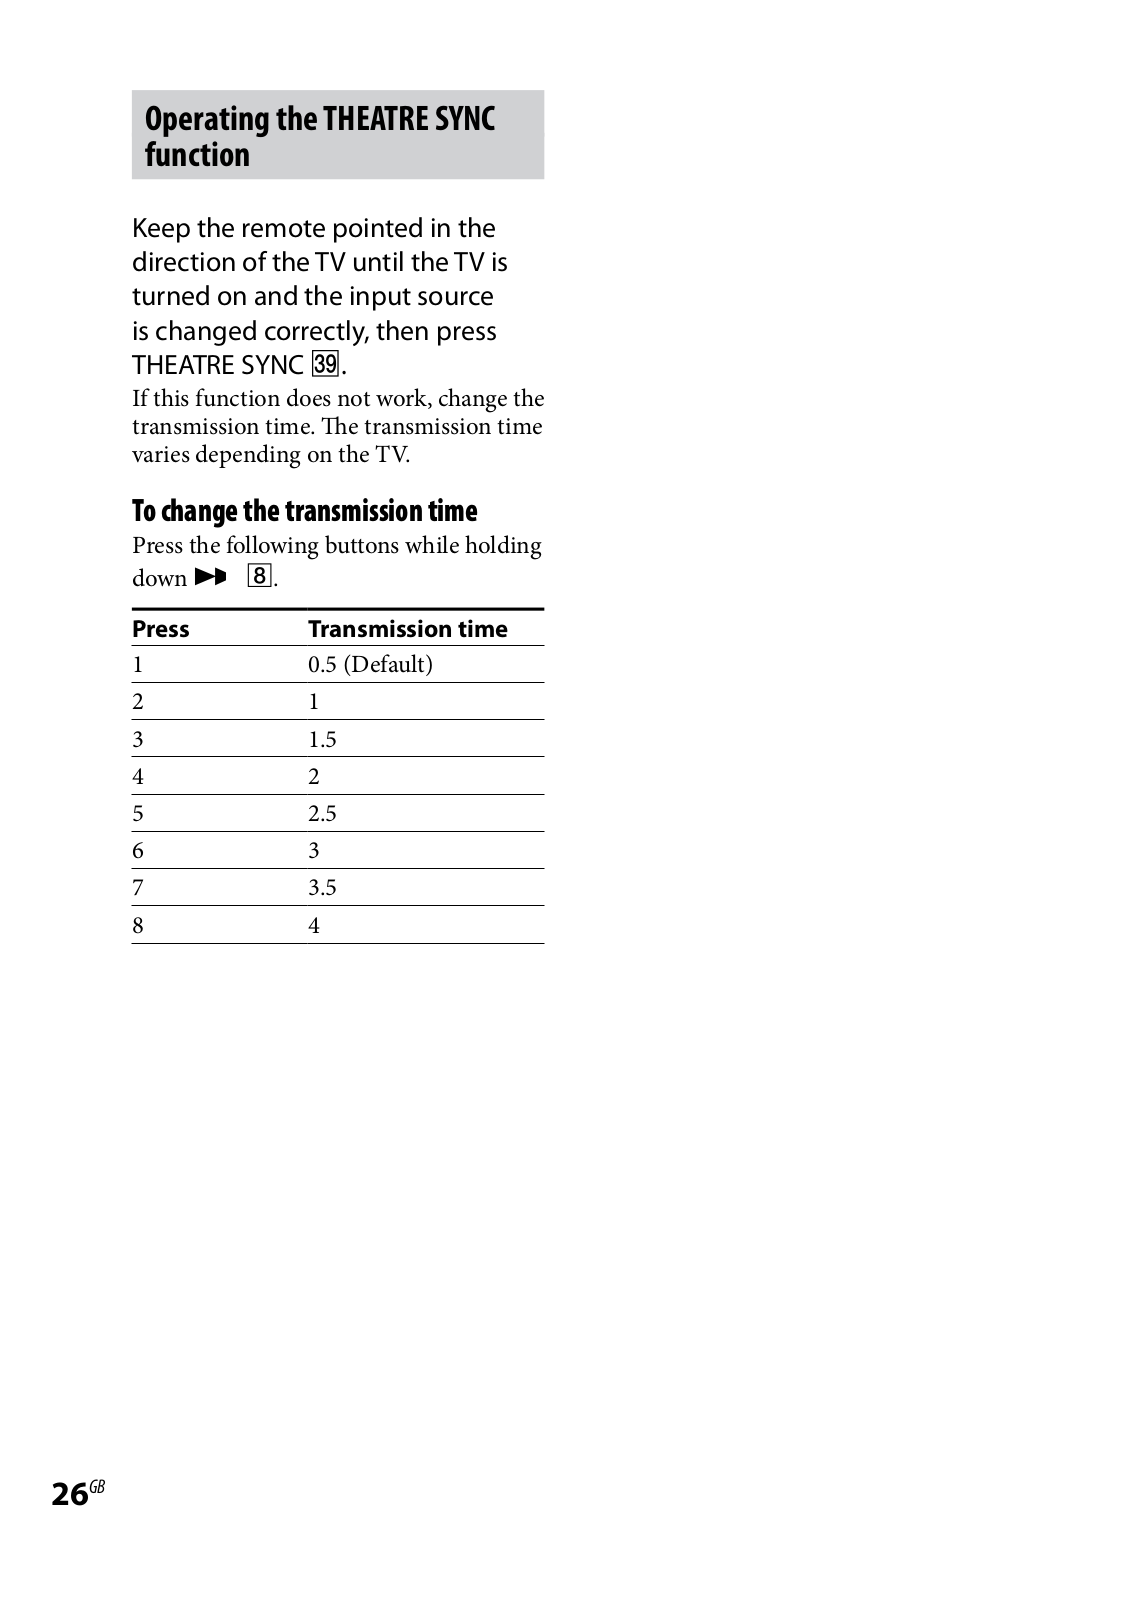
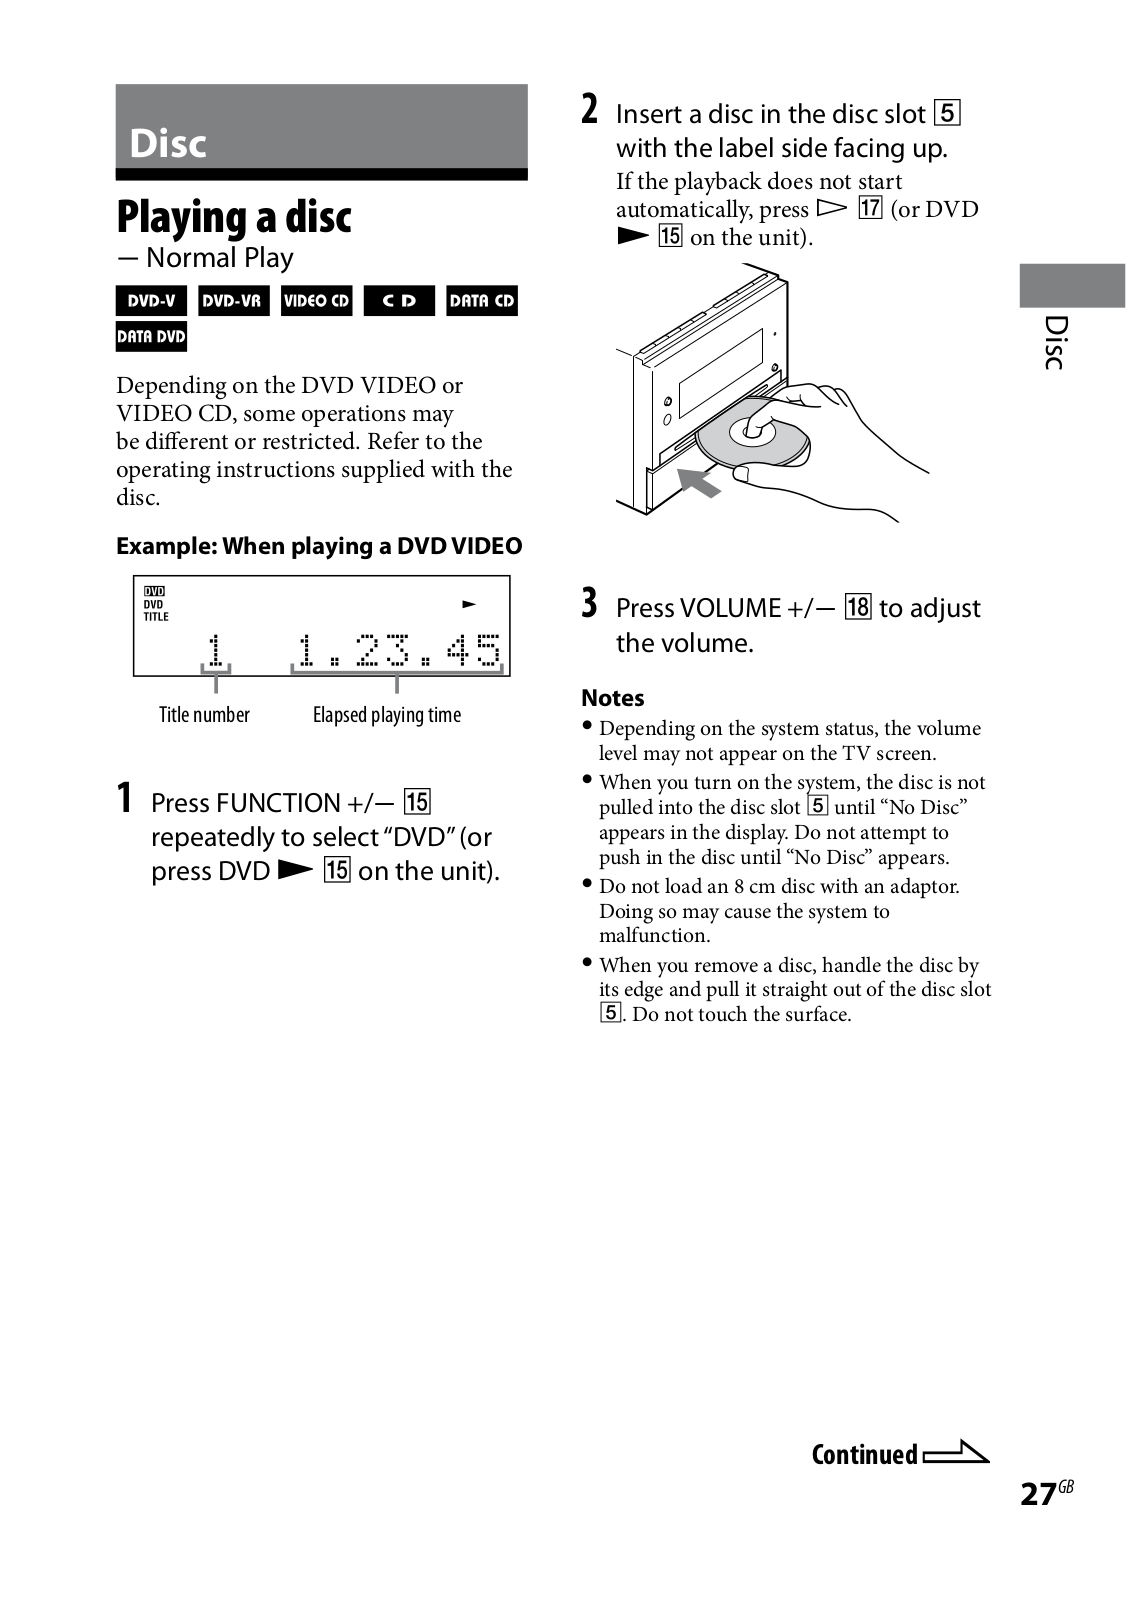
Table of contents
Loading...
Sony CMT-DH30 User Manual [es]
...
Sony User Manual [es]
Download
Specifications and Main Features
Frequently Asked Questions
User Manual
Download
Loading...
+
177
hidden pages
Unhide
You need points to download manuals.
1 point = 1 manual.
You can buy points or you can get point for every manual you upload.
Buy points
Upload your manuals
 Loading...