

Page 1
FM/AM
Compact Disc
Player
3-241-106-11 (1)
Operating Instructi on s
Mode d’emploi
Manual de instrucciones
Owner’s Record
The model and serial numbers are located on the bot tom of the unit.
Record these numbers in the spa ce provided below.
Refer to these numbers whenever you call upon your Sony dealer regarding this produc t.
Model No. CDX-CA900X Serial No.
For installation and connections, see the supplied installation/connections manual.
En ce qui concerne l’installation et les connexions, consulter le manuel
d’installation/raccordement fourni.
Para obtener información sobre la instalación y las conexiones, consulte el manua l de
instalación/conexiones suministrado.
US
FR
ES
CDX-CA900X
© 2002 Sony Corporation
Page 2
Warning
Welcome !
This equipment has been tested and found to
comply with the limits for a Class B digital
device, pursuant to Part 15 of the FCC Rules.
These limits are designed to provide reasonable
protection against harmful interference in a
residential installation. This equipment
generates, uses, and can radiate radio frequency
energy and, if not installed and used in
accordance with the instructions, may cause
harmful interference to radio communications.
However, there is no guarantee that interference
will not occur in a particular installation. If this
equipment does cause harmful interference to
radio or television reception, which can be
determined by turning the equipment off and on,
the user is encouraged to try to correct the
interference by one or more of the following
measures:
– Reorient or relocate the receiving antenna.
– Increase the separation between the equipment
and receiver.
– Connect the equipment into an outlet on a
circuit different from that to which the receiver
is connected.
– Consult the dealer or an experienced radio/TV
technician for help.
You are cautioned that any changes or
modifications not expressly approved in this
manual could void your authority to operate this
equipment.
Thank you for purchasing this Sony Compact
Disc Player. You can enjoy its various features
even mo re with:
• Optional CD/MD units (both changers and
players)*
• CD TEXT information (displayed when a CD
TEXT disc*
• Supplied controller accessories
Card remote commander RM-X112
Rotary commander RM-X6S
*1 This unit works with Sony products only.
*2 A CD TEXT disc is an audio CD that includes
The “XM Ready” logo indicates that this product
will control a Sony XM tuner module (sold
separately).
Please see your nearest authorized Sony dealer
for details on the XM tuner module.
For instructions on XM tuner operation, please
refer to the XM tuner module’s included
instruction manual.
1
.
2
is played).
information such as the disc name, artist name,
and track names. This information is recorded on
the disc.
THIS DEVICE COMPLIES WITH PART 15
OF THE FCC RULES. OPERATION IS
SUBJECT TO THE FOLLOWING TWO
CONDITIONS;
(1) THIS DEVICE MAY NOT CAUSE
HARMFUL INTERFERENCE, AND
(2) THIS DEVICE MUST ACCEPT ANY
INTERFERENCE RECEIVED, INCLUDING
INTERFERENCE THAT MAY CAUSE
UNDESIRED OPERATION.
CAUTION
The use of optical instruments with this product
will increase eye hazard.
2
Page 3

Table of Contents
Location of controls. . . . . . . . . . . . . . . . . . . . 4
Precautions . . . . . . . . . . . . . . . . . . . . . . . . . . 6
Notes on discs . . . . . . . . . . . . . . . . . . . . . . . . 6
Getting Started
Resetting the unit. . . . . . . . . . . . . . . . . . . . . . 7
Detaching the front panel . . . . . . . . . . . . . . . 8
Setting the clock . . . . . . . . . . . . . . . . . . . . . . 9
CD Player
CD/MD Unit (optional)
Playing a disc. . . . . . . . . . . . . . . . . . . . . . . . . 9
Display items. . . . . . . . . . . . . . . . . . . . . . . . 10
Playing tracks repeatedly
— Repeat Play . . . . . . . . . . . . . . . . . . . . 11
Playing tracks in ra ndom order
— Shuffle Play . . . . . . . . . . . . . . . . . . . . 11
Labeling a CD
— Disc Memo*. . . . . . . . . . . . . . . . . . . . 12
Locating a di sc by name
— List-up* . . . . . . . . . . . . . . . . . . . . . . . 13
* Functions available with optional CD/MD unit
Radio
Storing stations automatically
— Best Tuning Memory (BTM). . . . . . . 13
Receiving the stored stations. . . . . . . . . . . . 14
Storing only the desired stations . . . . . . . . . 14
Storing station names
— Station Memo. . . . . . . . . . . . . . . . . . . 15
Tuning in a station through a list
— List-up . . . . . . . . . . . . . . . . . . . . . . . . 15
Other Functions
Using the rotary commander. . . . . . . . . . . . 16
Adjusting the sound characteristics . . . . . . 17
Quickly attenuating the sound . . . . . . . . . . 1 7
Changing the sound and display settings
— Menu . . . . . . . . . . . . . . . . . . . . . . . . . 17
Setting the equalizer (EQ7). . . . . . . . . . . . . 18
Setting the Dynamic Soundstage Organizer
(DSO). . . . . . . . . . . . . . . . . . . . . . . . . . . 19
Adjusting the front and rear volume. . . . . . 20
Adjusting the volume of the
subwoofer(s). . . . . . . . . . . . . . . . . . . . . . 20
Selecting the spectrum analyzer (SA). . . . . 21
Connecting auxiliary audio equipment . . . . 2 1
Additional Information
Maintenance . . . . . . . . . . . . . . . . . . . . . . . . 22
Removing the unit. . . . . . . . . . . . . . . . . . . . 24
Specifications . . . . . . . . . . . . . . . . . . . . . . . 25
Troubleshooting . . . . . . . . . . . . . . . . . . . . . 26
Error displays/Messages. . . . . . . . . . . . . . . 27
3
Page 4
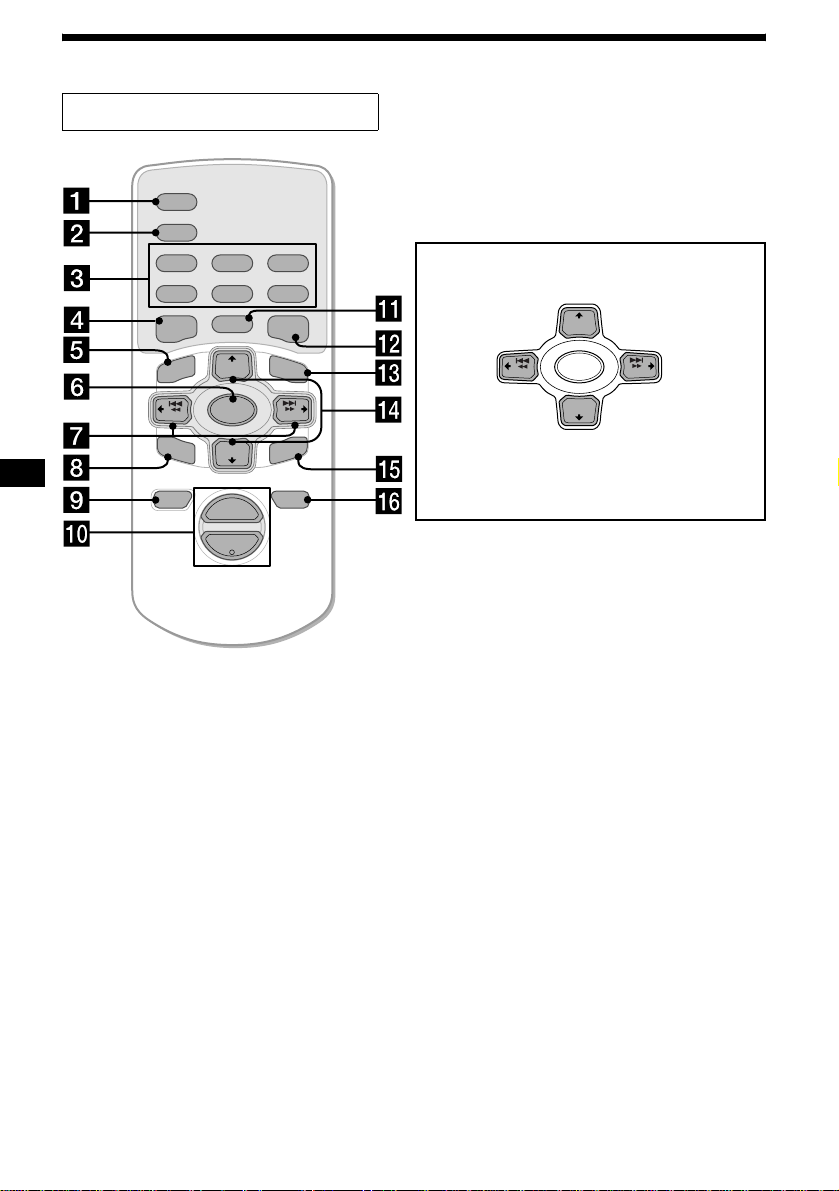
Location of controls
Card remote comman der RM-X112
SCRL
DSPL
REP SHUF
1
2
3
4
5
6
MODE
EQ7DSO
LIST
+
DISC
MENU
–
SEEK
SOUND
SOURCE
DISC
+
VOL
–
+
SEEK
–
ENTER
ATTOFF
(DISC)
(M): to select upwards
(SEEK)
(<):to selec t
leftwards/
.
SEEK
(m): to select downwards
In menu mode, the currently selectable button(s) of
these 4 are indicated with a “ v” in the display.
Tip
See “Replacing the lithium battery” on page 22 for details
on how to replace the batteries.
+
DISC
SOURCE
–
DISC
(DISC)
+
SEEK
(SEEK)
–
(,):to select
rightwards/
>
Refer to the pages listed for details.
a SCRL button 10
b DSPL (dis play mode change) button
c Number buttons
(1) REP
(2) SHUF
T o store stations/receive stored stations.
d DSO button 19
e MENU button
To display the me nus .
f SOURCE (Power on/Radio/CD/MD*
AUX*2) button
T o select the source.
g SEEK (</,) buttons
To skip tracks, fast-forward, reverse a track,
tune in stations automatically, find a station
manually, and select a setting.
h SOUND button 17, 20
i OFF (Stop/Power off) button 8, 9, 21
j VOL buttons (+/–)
To turn up or down the volume.
4
k MODE button
To change the operation.
l EQ7 button 18
m LIST button 13, 15
n DISC (M/m) buttons
T o receiv e preset stations, chan ge the disc*
skip albums*
4
, and select a menu.
3
,
o ENTER button
1
/
To ent er a se tting.
p A TT button 17
*1 When an optional MD unit is connected.
*2 Available only when an optional Sony portable
device connected to BUS AUDIO IN of the unit. You
cannot connect any optional CD/MD units at the
same time.
*3 When an optional CD/MD unit is connected.
*4 Available only when optional CD unit with the MP3
file control function is connected, and MP3 file is
played.
Page 5
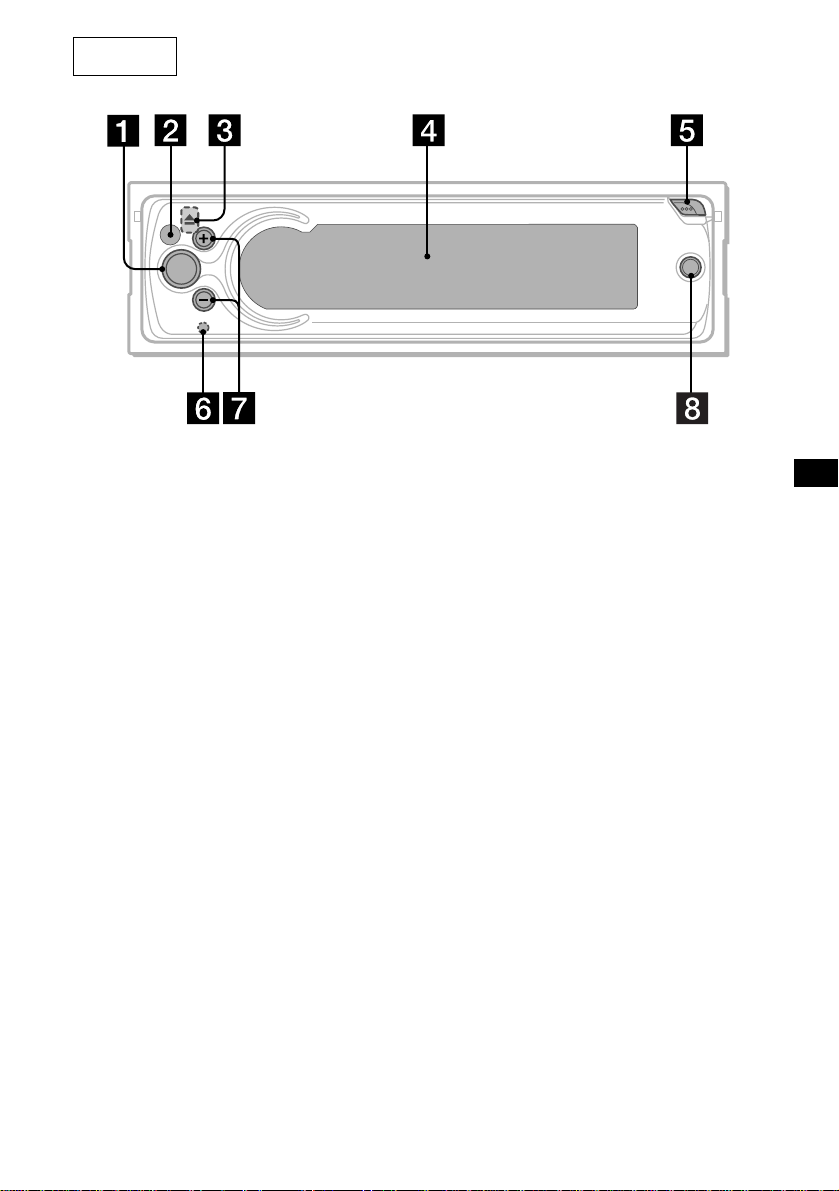
Main unit
VOL
SOURCE
a SOURCE button
b Receptor f or the card remo t e
commander and rotary commander
c Z (eject) button (located on the front side
of the unit, behind the front panel) 9
d Display window
e OPEN button 8, 9
f RESET button (located on the front side of
the unit, behind the front panel) 7
g VOL (+/–) buttons
h OFF button*
OFF
CDX-CA900X
* Warning when installing in a car without
an ACC (accessory) position on the
ignition switch
After turning off the ignition, be sure to press
(OFF) for 2 seconds to turn off the clock
display.
Otherwise, the clock display does not turn off
and this causes battery drain.
Note
If the unit is turned off by pressing (OFF) for 2
seconds, the unit cannot be operated with the
card remote commander or the rotary
commander unless (SOURCE) on the unit is
pressed or a disc is inserted to activate the unit.
5
Page 6

Precautions
Notes on discs
• If your car has bee n parked in direct sunl ight,
allow the unit to cool off before operating it.
• Power antennas will extend automatica lly
while the unit is operating.
• While driving, do not use the CUSTOM FILE
feature or any other functions which may divert
your attention from the road.
If you have any quest ions or proble m s
concerning your unit that are not covered in this
manual, please co nsult your nearest Sony dealer.
Moisture condensation
On a rainy day or in a very damp area, moisture
condensation ma y occur inside the lense s and
display of the unit. Should this occur, the unit
will not operate properly. In such a case, remove
the disc and wait for about an hour until the
moisture has evaporated.
To maintain high sound quality
Be careful not to splash juice or other soft drinks
onto the unit or discs.
• To keep the disc clean, do not touch the surface.
Handle the disc by its ed ge.
• Keep your discs in th eir cases or disc
magazines when not in use.
Do not subject the discs to heat/hig h
temperature. Avoid le a ving th em in park ed cars
or on dashboards/rear trays.
• Do not attach labels, or use discs with sticky
ink/residue. Such discs may stop spinning
when used, caus in g a m alfunction, or may rui n
the disc.
• Do not use any discs with labels or stickers
attached.
The following malfunctions may result from
using such discs:
– Inability to eject a disc (due to a label or
sticker peeling off and jamming the eject
mechanism).
– Inability to read audio data correctly (e.g.,
playback skippin g, or n o pl ayback) due to
heat shrinking of a sticker or label causing a
disc to warp.
• Discs with non-standard shapes (e.g., heart,
square, star) c annot be played on this unit.
Attempting to do so may damage the unit. Do
not use such discs.
• You cannot play 8 cm (3 in.) CDs.
6
Page 7
• Before playin g, cl ean the discs with a
commercially available cleaning cloth. Wipe
each disc from the center out. Do not use
solvents such as ben zine, thinner , co mmercially
available cleaners, or antistatic spray intended
for analog discs.
Notes on CD-R/CD-RW discs
• You can play CD-Rs (recordable CDs)/CDRWs (rewritabl e C Ds ) designed for audi o use
on this unit.
Look for these marks to di st i nguish CD-Rs/
CD-RWs for audio use.
These marks denote that a disc is not for audio
use.
Getting Started
Resetting the unit
Before operating the unit for the first time, or
after replacing the car battery or changing the
connections, you must reset the unit.
Remove the front panel and press the RESET
button with a pointed object, such as a ball-point
pen.
RESET button
Note
Pressing the RESET button will erase the clock setting
and some stored contents.
• Some CD-Rs/CD-RWs (depending on the
equipment used for its recording or the
condition of the disc) may not play on this unit.
• You cannot play a CD-R/a CD-RW that is not
finalized*.
* A process necessary for a recorded CD-R/CD-RW
disc to be played on the audio CD player.
7
Page 8
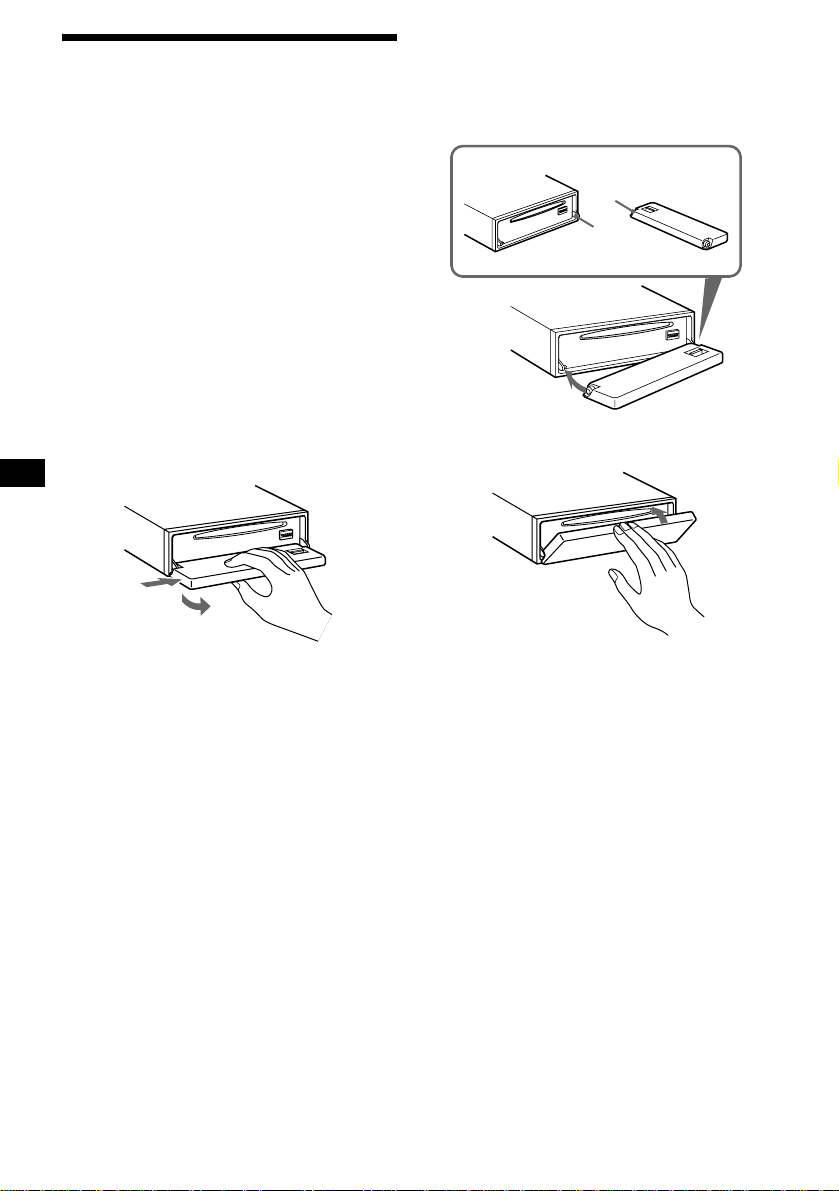
Detaching the front panel
You can detach the front panel of this unit to
protect the unit from being stolen.
Caution alarm
If you turn the ignition switch to the OFF
position without removing the front panel, the
caution alarm wi ll beep for a few seconds.
If you connect an optional amplifier and do not
use the built-in amplifier, the beep sound will be
deactivated.
1 Press (OFF)*.
CD/MD playback or radio reception stops
(the key illumination and display remain on).
* If your car has no ACC position on the ignition
switch, be sure to turn the unit off by pressing
(OFF) for 2 seconds to avoid car battery drain.
2 Press (OPEN), then slide the front
panel to the right, and gently pull out
the left end of the front panel.
1
2
Notes
• If you detach the panel while the unit is still turned
on, the power will turn off automatically to prevent
the speakers from being damaged.
• Do not drop or put excessive pressure on the front
panel and its display window.
• Do not subject the front panel to heat/high
temperature or moisture. Avoid leaving it in a parked
car or on a dashboard/rear tray.
Tip
When carrying the front panel with you, use the
supplied front panel case.
Attaching the front panel
Place hole A of the front panel onto the spindle
B on the unit, then lightly push the left side in.
Press (SOURCE) on the unit (or in sert a CD) to
operate the unit.
A
B
x
Note
Do not put anything on the inner surface of the front
panel.
8
Page 9
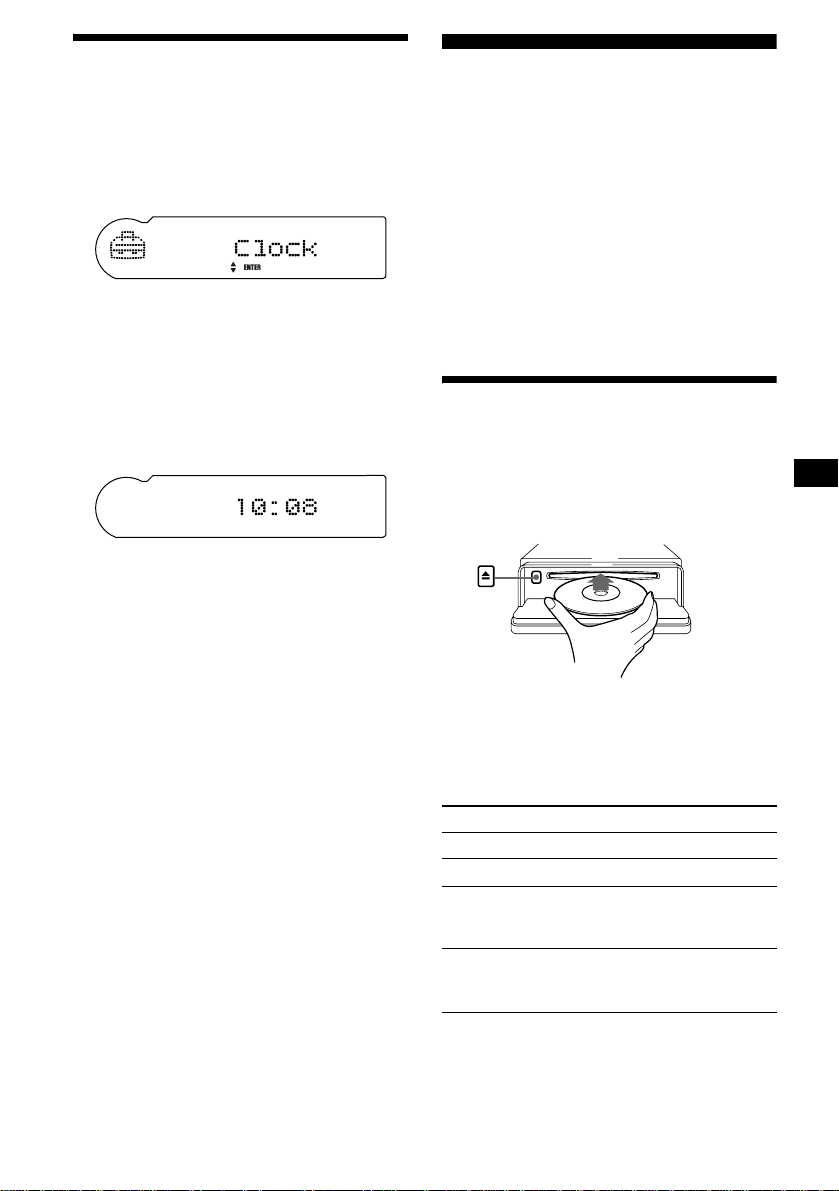
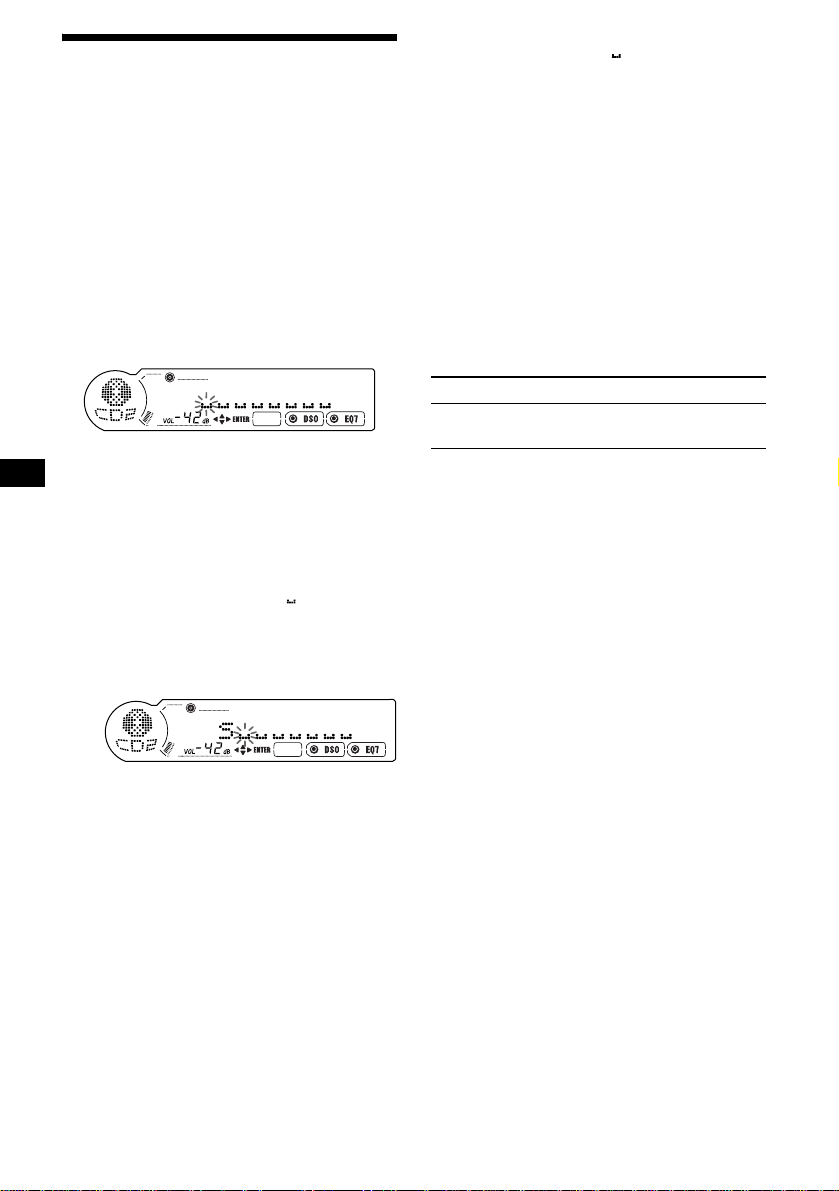
Setting the clock
The clock uses a 12-ho ur di gi t al indication.
Example: To set the clock to 10:08
1 Press (MENU), then press M or m
repeatedly until “Clock” appears.
1 Press (ENTER).
The hour indication flashes.
2 Press M or m to set the hour.
3 Press ,.
The minute indication flashes.
4 Press M or m to set the minute.
2 Press (MENU) twice.
The clock starts. After the clock setting is
completed, the display return s to normal play
mode.
Tip
When D.Info mode is set to on, the time is always
displayed (page 17).
CD Player
CD/MD Unit (optional)
In addition to playing a CD with this unit, you
can also control external CD (MP3 playable CD)/
MD units. If you connect optional MP3 playable
CD units (eg., MP3 CD changer), you can pla y
MP3 files; compressed audio files (tracks ) wi t h
quality of sound.
Note
If you connect an optional CD (MP3 playable CD) unit
with the CD TEXT function, the CD TEXT information
will appear in the display when you play a CD TEXT
disc.
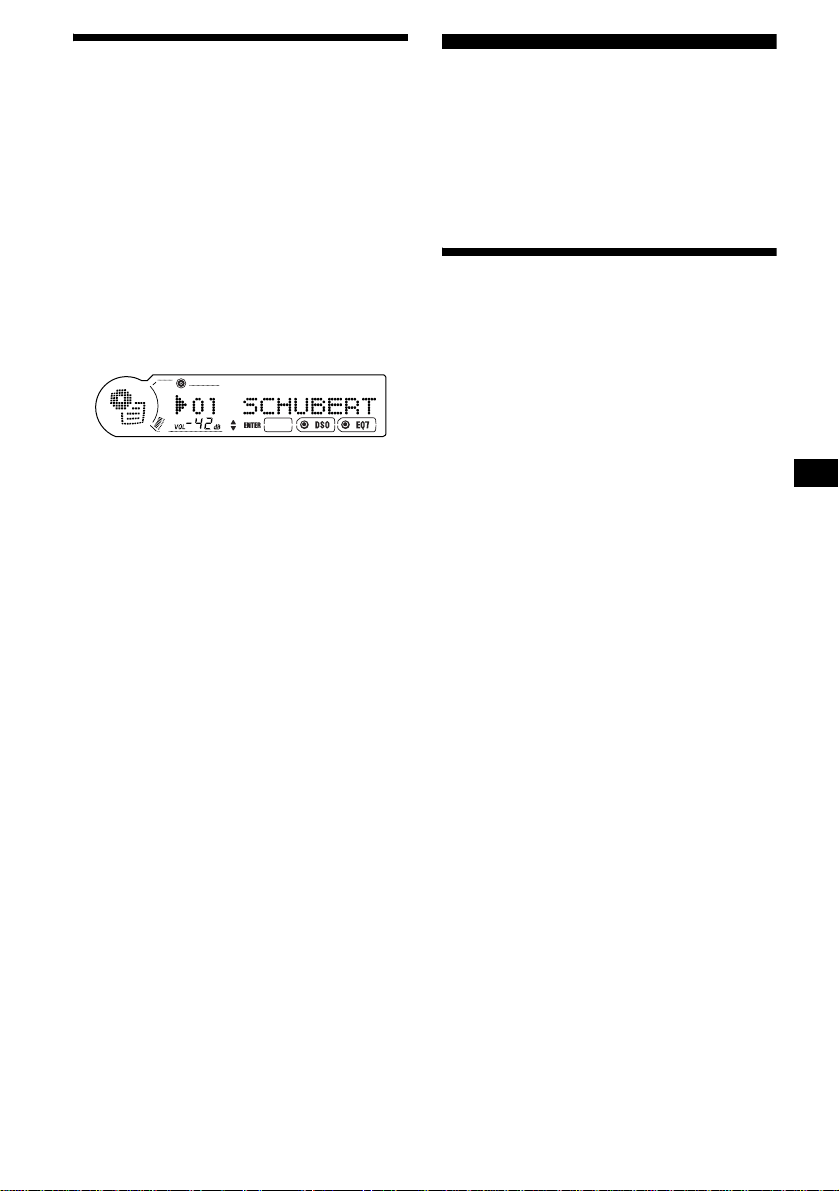
Playing a disc
(With this unit)
1 Press (OPEN) and inse r t the disc
(labeled side up).
2 Close the front panel.
Playback starts automatically.
If a disc is already inserted, press (SOURCE)
repeatedly unt il “C D ” appears to start pla yback.
To Press
Stop playback (OFF)
Eject the disc (OPEN) then Z
Skip tracks
– Automatic
Music Sensor
Fast-forward/
reverse
– Manual Search
(SEEK) (./>)
[once for each track]
(SEEK) (m/M)
[hold to desired point]
continue to next page t
9
Page 10
Notes
• While the first/last track on the disc is playing, if
< or , is pressed, playback skips to the last/first
track of the disc.
• When the last track on the disc is over, playback
restarts from the first track of the disc.
• With an optional unit connected, playback of the
same source will continue on to the optional CD/MD
unit.
(With optional unit)
1 Press (SOURCE) repeatedly to select
“CD” or “MD (MS*
1
).”
2 Press (MODE) repeatedly until the
desired unit appears.
Playback starts.
To Press
Skip discs
–Disc selection
Skip albums*
–Albums selection
*1 MS: MG Memory Stick System-up Player MGS-X1
*2 Available only when an MP3 file is played.
Albums are folders of a CD containing MP3 files.
Cautions when connecting MGS-X1 and MD unit(s)
This unit recognizes MGS-X1 as an MD unit.
• When you want to pl a y MGS- X1, pre ss (SOURCE) to
select “MS” or “MD.” If “MS” appears in the source
display, MGS-X1 starts to play. If “MD” appears in
the source display, press (MODE) to select “MS,” to
start playback.
• When you want to pla y an M D uni t, pr ess (SOURCE)
to select “MD” or “MS.” If your desired MD unit
appears in the source display, it starts to play. If “MS”
or another MD unit appears in the source display,
press (MODE) to select your desired MD unit, to
start playback.
Notes when connecting MP3 playable CD unit(s)
• If a disc with no MP3 files (tracks) is inserted, “NO
Music” appears in the display and playback of the
next disc starts.
• Before playing a track, this unit reads all track and
album information on the disc. Depending on the
track structure, it may take more than a minute
before playback begins. During this time, “Read” is
displayed. Please wait for play to start automatically
when the reading is complete.
(DISC) (+) or (DISC) (–)
[once for each d is c]
2
(DISC) (+) or (DISC) (–)
[hold to desired po int]
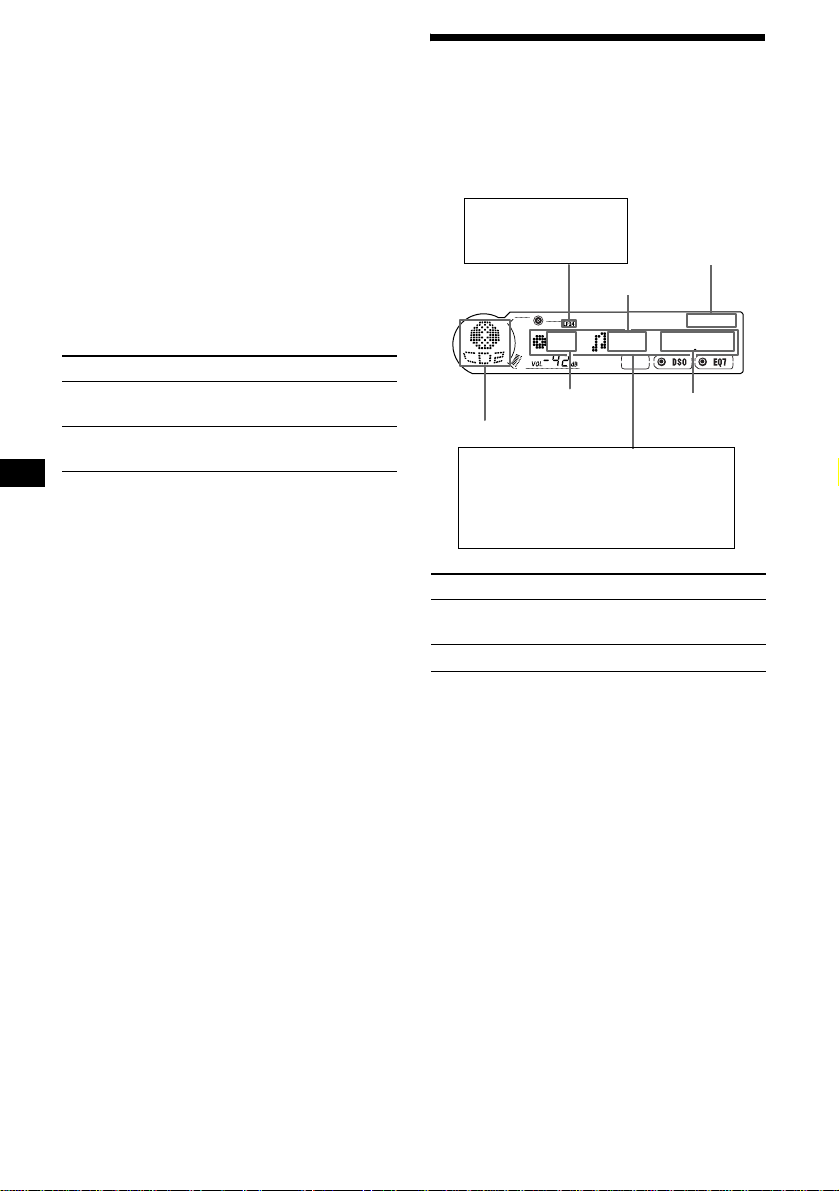
Display items
When the disc/album/track changes, any
prerecorded title*
automatically displayed (if the Auto Scroll
function is set to “on,” names exceeding 12
characters will be scrolled (page 17)).
MDLP display*
LP2: LP2 playback
LP4: LP4 playback
Source
Displayable items
• Disc name*
• Track name*
• Album name*1*
•ID3 tag*1*
To Press
Switch display
item
Scroll display item (SCRL)
*1 When pressing (DSPL), “NO Disc Name”, “NO
Album Na me”, or “NO Track Name” indicates that
there is no disc name, album name, or track name
and “NO ID3 Tag” indi ca tes t h at t her e i s no ID 3 t a g.
*2 Available only when optional MD unit with the
MDLP function is connected, and an MDLP disc is
played.
*3 Available only when an MP3 file is played.
*4 If the disc has been labeled by this uni t using the
CUSTOM FILE function, Disc Memo is displayed
preferentially.
*5 Only for CD TEXT discs with the artist name.
Notes
• Some characters cannot be displayed. Characters
and signs which cannot be displayed appear as “ *.”
• For some CD TEXT discs or ID3 tags with very
many characters, information may not scroll.
• This unit cannot display the artist name for each
track o f a CD TEXT disc or an alb um.
Tip
When A.Scroll (Auto Scroll) is set to off and the disc/
album/track name is changed, the disc/album/track
name or ID3 tag does not scroll.
1
of the new disc/albu m/track is
2
Track number
Disc/Album*
number
3
3
1*4
/Artis t n ame*
1
3
Elapsed
playing time
(DSPL)
Clock
5
10
Page 11

Playing tracks repeatedly
— Repeat Play
The disc in the main unit will rep eat a track, the
entire album, or the en tire disc when it reac hes
the end. For repeat pl ay, you can select:
•REP
····Track — to repeat a track.
•REP
····Album*
•REP
·····Disc*
*1 Available only when an MP3 file is played.
*2 Available only when one or more optional CD/MD
units are connected.
During playback, press (1) (REP)
repeatedly until the desired setting
appears in the display.
Repeat Play starts .
To return to normal play mode, select
“REP
······off.”
1
— to repeat an album.
2
— to repeat a disc.
Playing tracks in random
order
— Shuffle Play
You can select:
• SHUF
···Album*
an album in th e current o ptional C D unit with
the MP3 file control functi on i n r andom order.
• SHUF
····Disc — to play the tracks on the
current disc in random order.
• SHUF
·Changer*
current optional CD (MD) unit in random
order.
• SHUF
·····All*
the connected CD (MD ) units (including thi s
unit) in random orde r.
*1 Available only when an MP3 file is played.
*2 Available only when one or more optional CD (MD)
units are connected.
*3 Available only when one or more optional CD units,
or two or more optional MD units are connected.
During playback, press (2) (SHUF)
repeatedly until the desired setting
appears in the display.
Shuffl e Play starts.
To return to normal play mode, select
“SHUF
·····off.”
Note
“SHUF·····All” will not shuffle tracks between CD units
and MD units.
1
— to play the MP3 files on
2
— to play the tracks in the
3
— to play all the tracks in all
11
Page 12
Labeling a CD
— Disc Memo (For a CD unit with the
CUSTOM FILE function)
You can label each disc wi th a custom name
(Disc Memo). You can enter up to 8 characters
for a disc. If you la bel a CD , you can locate the
disc by name (page 13).
1 Start playing the disc you want to label
in a CD unit with the CUSTOM FILE
function.
2 Press (MENU), then press M or m
repeatedly until “Name Edit” appears.
3 Press (ENTER).
The unit will repeat the disc during the
labeling procedure.
4 Enter the characters.
1 Press M or m re peatedly to select
the desired character.
A y B y C ... y 0 y 1 y 2 ...
y + y – y
*1 (blank space)
2 Press , after locating the desired
character.
If you press <, you can move back to the
left.
3 Repeat steps 1 and 2 to ente r the
entire name.
5 Press (MENU) twice.
The unit returns to no rmal CD play mode.
... y *1 y A
*
Tips
• Simply overwrite or enter “ ” to correct or erase a
name.
• There is another way to start labeling a CD: Press
(LIST) for 2 seconds instead of performing steps 2
and 3. You can also complete the operation by
pressing (LIST) for 2 seconds instead of step 5.
• You can label CDs on a unit without the CUSTOM
FILE function if that unit is connected along with a
CD unit that has the function. The Disc Memo will be
stored in the memory of the CD unit with the
CUSTOM FILE function.
Note
REP····Track/shuffle play is suspended until the Name
Edit is complete.
Viewing the Disc Memo
As a display item, the D is c Memo always takes
priority over any ori gina l CD TEXT information.
To Press
View (DSPL) during CD/CD
Tip
To find out about other items that can be displayed,
see page 10.
TEXT disc playbac k
Erasing the Disc Memo
1 Press (SOURCE) repeatedly to select
“CD.”
2 Press (MODE) repeatedly to select the
CD unit storing the Disc Memo.
3 Press (MENU), th en press M or m
repeatedly until “Name Delete”
appears.
4 Press (ENTER).
The stored names will appear.
5 Press M or m repeatedly to select the
disc name you want to erase.
The stored names will appear.
6 Press (ENTER) for 2 seconds.
The name is erased.
Repeat steps 5 and 6 if you want to erase
other names.
7 Press (MENU) twice.
The unit returns to normal CD play mode.
Notes
• When the Disc Memo for a CD TEXT disc is erased,
the original CD TEXT infor mat ion is displ ayed.
• If you cannot find the Disc Memo you want to erase,
try selecting a different CD unit in step 2.
• If you have already erased all of the Disc Memo, the
unit returns to normal CD play mode in step 4.
12
Page 13
Locating a disc by name
— List-up (For a CD unit with the CD TEXT/
CUSTOM FILE function, or an MD unit)
Y ou can use this function for discs that have been
assigned custom names*
2
discs*
.
*1 Locating a disc by its custom name: when you
assign a name for a CD (page 12) or an MD.
*2 Locating discs by the CD TEXT information: when
you play a CD TEXT disc on a CD unit with the CD
TEXT function.
1 Press (LIST).
The name assigned to the current disc appears
in the display.
2 Press M or m repeatedly until you find
the desired disc.
3 Press (ENTER) to play the disc.
Note
Some letters cannot be displayed (exception: Disc
Memo).
1
or for CD TEXT
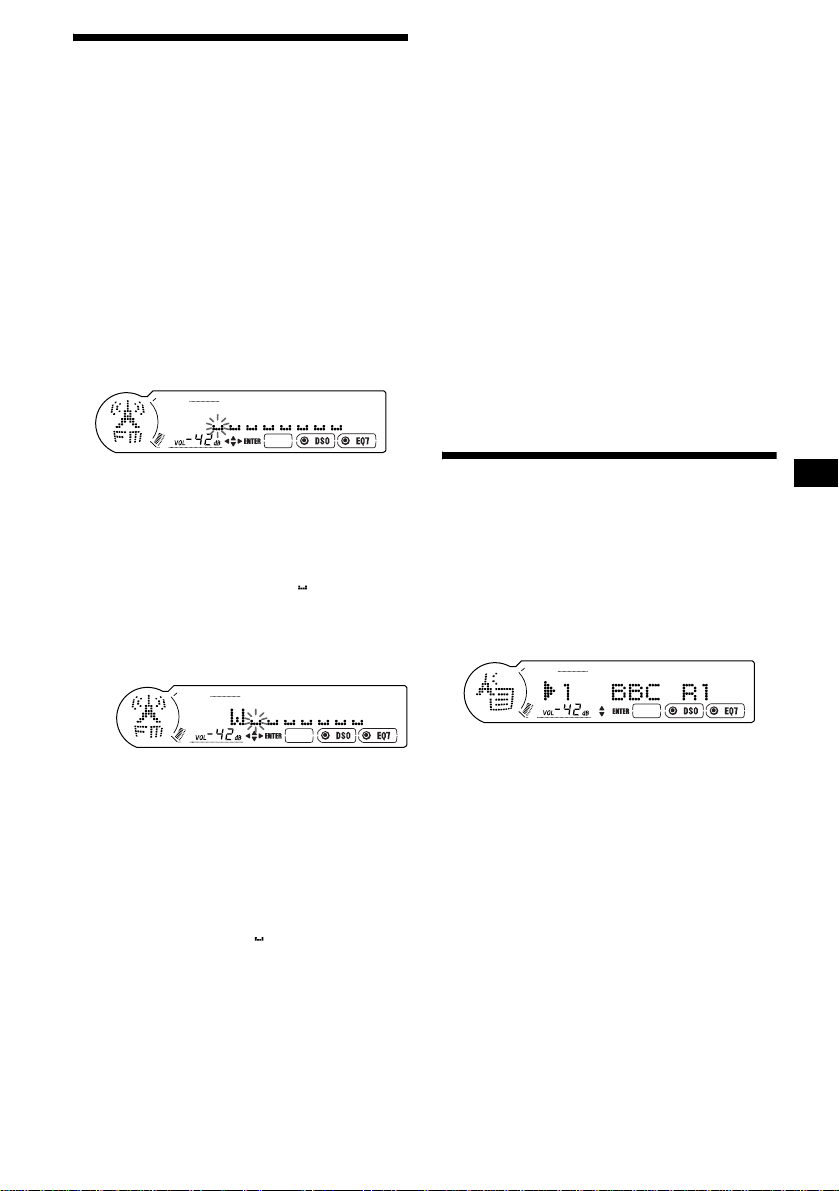
Radio
The unit can store up to 6 stations per band
(FM1, FM2, FM3, AM1, an d AM 2).
Caution
When tuning in stations while driving, use Best
Tuning Memory to prevent accidents.
Storing stations
automatically
— Best Tuning Memory (BTM)
The unit selects the stations with the strongest
signals within the selected band, and stores them
in the order of their frequency.
1 Press (SOURCE) repeatedly to select
“TUNER.”
2 Press (MODE) repeatedly to select the
band.
3 Press (MENU), then press M or m
repeatedly until “BTM” appears.
4 Press (ENTER).
A beep sounds whe n th e setting is stored.
Notes
• If only a few stations can be received due to weak
signals, some number buttons will retain their former
settings.
• When a number is indicated in the display, the unit
starts storing stations from the one currently
displayed.
13
Page 14

Receiving the stored stations
1 Press (SOURCE) repeatedly to select
“TUNER.”
2 Press (MODE) repeatedly to select the
band.
3 Press the number button ((1) to (6))
on which the desired station is stored.
Tip
Press
M or m to receive the stations in the order they
are stored in the memory (Preset Search function).
If preset tuning does not work
Press < or , to search for the
station (automatic tuning).
Scanning stops when the unit receives a
station. Repeat until the desired station is
received.
Tips
• If automatic tuning stops too frequently, turn on the
Local Seek to limit seek to stations with stronger
signals (see “Changing the sound and display
settings” on page 17).
• If you know the frequency of the station you want to
listen to, press and hold
approximate frequency, then press
repeatedly to fine adjust to the desired frequency
(manual tuning).
If FM stereo reception is poor
Select monaural reception mode
(see “Changing th e sound and display
settings” on pag e 17).
The sound improves, but bec om es monaural
(“ST” disappears).
Note
If interference occurs, this unit will automatically
narrow the reception frequency to eliminate noise (IF
Auto function). In such cases, some FM stereo
broadcasts may become monaural while in the stereo
reception mode.
Tips
• To always hear FM stereo broadcasts in stereo, you
can change the IF Auto setting and widen the
frequency signal reception (see “Changing the
sound and display settings” on page 17). Note that
some interference may occur in this setting.
• If FM broadcasts are difficult to hear, set DSO to off
(page 19).
< or , to locate the
< or ,
Storing only the desired
stations
Yo u can manually prese t t he desired stations on
any chosen number butto n.
1 Press (SOURCE) repeatedly to select
“TUNER.”
2 Press (MODE) repeatedly to select the
band.
3 Press < or , to tune in the station
that you want to store.
4 Press the desired number button ((1)
to (6)) for 2 seconds until “MEM”
appears in the source display.
The number button indication appears in the
display.
Note
If you try to st or e a no t her s t at io n o n t he same n um be r
button, the previously stored station will be erased.
14
Page 15
Storing station names
— Station Memo
Yo u can assign a name to ea ch radio station and
store it in memory. The name of the station
currently tuned in appears in the display. Y ou can
assign a name usi ng up to 8 characters for a
station.
Storing the station names
1 Tune in a station whose name you
want to store.
2 Press (MENU), then press M or m
repeatedly until “Name Edit” appears.
3 Press (ENTER).
Erasing the station name
1 During radio reception, press (MENU),
then press M or m repeatedly until
“Name Delete” appears.
2 Press (ENTER).
3 Press M or m repeatedly to select the
station whose name you want to
erase.
4 Press (ENTER) for 2 secon d s.
The name is erased.
Repeat steps 3 to 4 if you want to erase other
names.
5 Press (MENU) twice.
The unit retu rns to normal radio receptio n
mode.
Note
If you have already erased all of the station names, the
unit returns to normal radi o reception mode in step 2.
4 Enter the characte rs.
1 Press M or m repeatedly to select
the desired character.
A y B y C ... y 0 y 1 y 2 ...
y + y – y
*1 (blank space)
2 Press , aft er lo cat i ng th e desired
character.
If you press <, you can move back to the
left.
3 Repeat steps 1 and 2 to enter the
entire name.
... y *1 y A
*
5 Press (MENU) twice.
The unit returns to n or m al radio reception
mode.
Tips
• Simply overwrite or enter “ ” to correct or erase a
name.
• There is another way to start storing station names:
Press (LIST) for 2 seconds instead of performing
steps 2 and 3. You can also complete the operation
by pressing (LIST) for 2 seconds instead of step 5.
Tuning in a station through a
list
— List-up
1 During radio reception, press (LIST)
momentarily.
The frequency or the nam e assigned to the
current s tation appears in the display.
2 Press M or m repeatedly until you find
the desired station.
If no name is assigned to the selected station,
the frequency appears in the display.
3 Press (ENTER) to tune in the desired
station.
15
Page 16
Other Functions
You can also control the unit (and optional CD/
MD units) with a rotary commander .
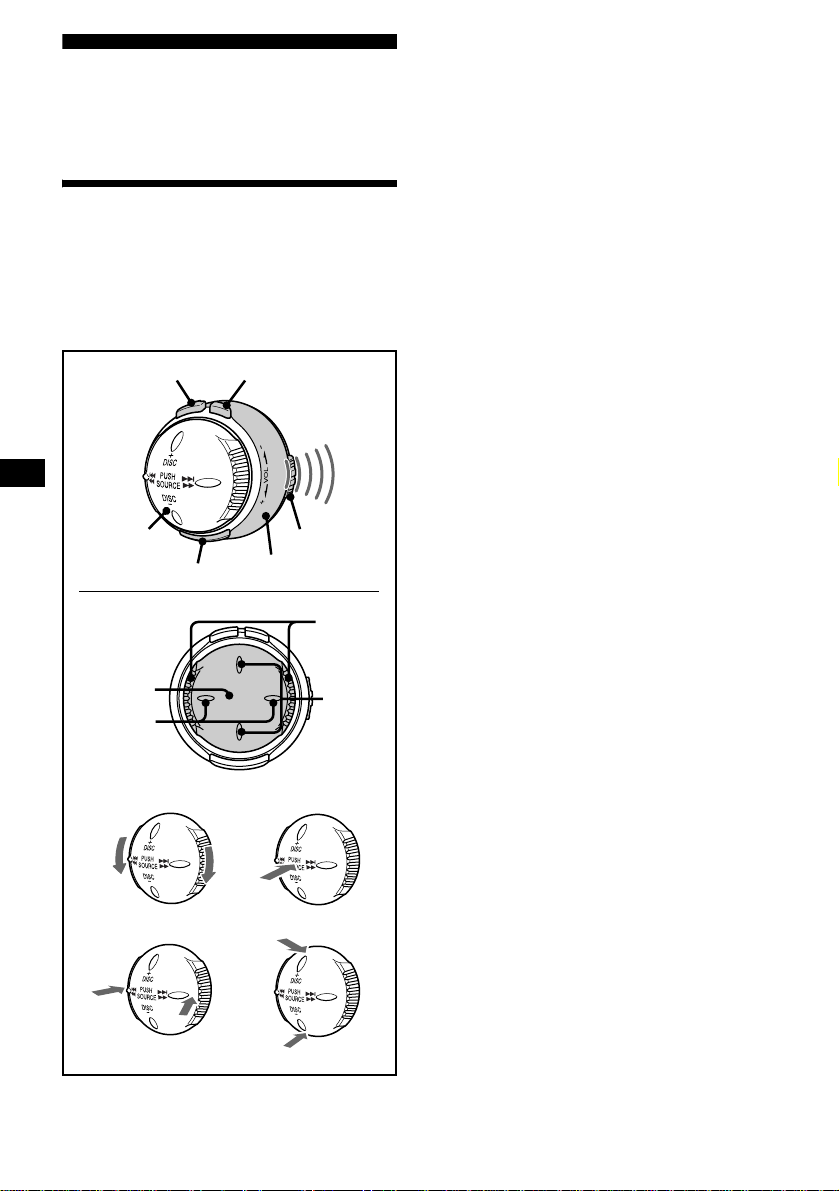
Using the rotary commander
First, put a supplied lithium battery CR2032 in
the rotary commander.
See “Replacing the lithium battery” on page 22
and “Notes on lithium battery” on page 23, for
details about how to install the lithium battery.
1
3
3
B
C
AB
4
.>
mM
2
+
DISC
PUSH
SOURCE
DISC
-
6
5
A
D
a ATT button
Attenuate so un d.
b OFF button*
1
Stop playback or r adi o r eception.
c A VOL (volume) control
Rotate to adjust the volume.
B SOURCE control
Press to change the source.
(Radio/CD/MD*
2
/AUX*3)
C ./> control
Press to:
– tune in stations automatically.
– skip trac k s on the disc.*
2
Press and hold to:
– find a station manually.
– fast-forward/reverse a track.
D DISC +/– control
Press to:
– receive preset stations.
– change the disc.*
Press and hold to:
– change the album.*
2
4
d MODE button
Change operation (Ra di o band/CD unit/
2
MD*
unit)
e Infrared emitter
The rotary commander emits infr ared ra ys in
the direction of th e di al setting.
f Infrared rays dial
Rotate the dial to change the direction of
infrared rays.
*1 If your car has no ACC (accessory) position on the
ignition key switch, be sure to press (OFF) for
2 seconds to turn off the clock indication after
tuning off the ignition.
*2 Only if the corresponding optional equipment is
connected.
*3 Avilable only when an optional Sony portable
device connected to BUS AUDIO IN of the unit. You
cannot connect any optional CD/MD units at the
same time.
*4 Available only when optional CD unit with the MP3
file control function is connected, and an MP3 file is
played.
16
C
D
Page 17
Adjusting the sound
characteristics
Yo u can adjust the bass, tr ebl e, balance, fader,
and subwoofer volume.
Changing the sound and
display settings
— Menu
The following items can be set:
1 Select the item you want to adjust by
pressing (SOUND) repeatedly.
Each time you pr ess (SOUND), the item
changes as follows:
BAS (bass) t TRE (treble) t
BAL (left-right) t FAD (front-rear) t
SUB (subwoo fe r volum e )
2 Adjust the selected item by pressing
< or ,.
Note
Adjust within 3 seconds after selecting the item.
Quickly attenuating the
sound
(With the rotary commander or the card
remote commander)
Press (ATT).
“ATT·······on” appears in the display
momentarily.
To restore the previous volume level, press
(ATT) again.
Tip
When the interface cable of a car telephone is
connected to the ATT lead, the unit decreases the
volume automatically when a telephone call comes in
(Telephone ATT function).
(Set Up)
• Clock (page 9)
• Beep — to turn the beeps on or off.
• AUX-A (page 21) — to turn the AUX source
display on or off.
(Display)
• D.Info (Dual I nf ormation) — to display th e
clock and the play m ode at the same time (o n).
• SA (Spectrum Analyzer) (page 21) — to
change the display pattern of the soun d si gnal
level.
• Dimmer — to change the brightness of the
display.
– Select “Auto” to dim the display only when
you turn the lights on.
– Select “on” to dim the display.
– Select “off” to deactivate the Dimmer.
• Contrast — t o adjust the contrast if the
indications on the di splay are not recognizable
because of the unit’s installation position.
• A.Scroll (Auto Scroll)
– Select “on” to scroll all automatically
displayed names exceeding 12 characters.
– When Auto scroll is set to off and the disc/
album/track is changed, the disc /a lbum/track
name or ID3 tag does not scroll.
•Demo
– Select “on” to activate the Demo display.
The Demo display w i ll appear about 10
seconds after the unit is turned of f.
(Play Mode)
• Local on/off (Local seek mode) (page 14)
– Select “on” to only tune into stations with
stronger signal s.
• Mono on/off (Monaural mode) (p age 14)
– Select “on” to hear FM stereo broadcast s in
monaural. Select “off” to return to normal
mode.
• IF Auto/Wide (pag e 14)
continue to next page t
17
Page 18
(Sound)
• EQ7 Tune (page 19) — to adjust the equalizer
curve.
• HPF (High pass filter) (page 20)
• LPF (Low pass filter) (page 20)
• Loudness — to enjoy bass and treble even at
low volumes. The bass and treble will be
reinforced.
• AUX Level (page 21) — to adjust the volume
level of connected auxiliary equipment.
1 Press (MENU).
To set A.Scroll, press (MENU) during CD/
MD playback.
2 Press M or m repeatedly until the
desired item appears.
3 Press < or , to select the desired
setting (Example: “on” or “off”).
4 Press (MENU).
After the mode setting is completed, the
display returns to normal play mode.
Note
The displayed item will differ depending on the source.
Tip
You can easily switch among categories by pressing
M or m for 2 seconds.
Setting the equalizer (EQ7)
You can select an equa l i zer curve for 7 music
types (Vocal, Club, Jazz, New Age, Rock,
Custom, Xplod, and off (equalizer off)).
You can store and adjust the equalizer settings
for frequency and level.
Yo u can store the EQ7 sett ing for each source.
Selecting the equalizer curve
1 Press (SOURCE) to select a desired
source.
2 Press (EQ7) repeatedly until the
desired equalizer cur ve appears.
Each time you press (EQ7), the item
changes.
To cancel the equalizing effect, select “off.”
After 3 seconds, the display returns to the
normal playback mo de.
18
Page 19
Adjusting the equalizer curve
1 Press (MENU).
2 Press M or m repeatedly until “EQ7
T une” appears, then press (ENTER).
3 Press < or , to selec t t he desired
equalizer curve, then press (ENTER).
Each time you pr ess < or ,, the item
changes.
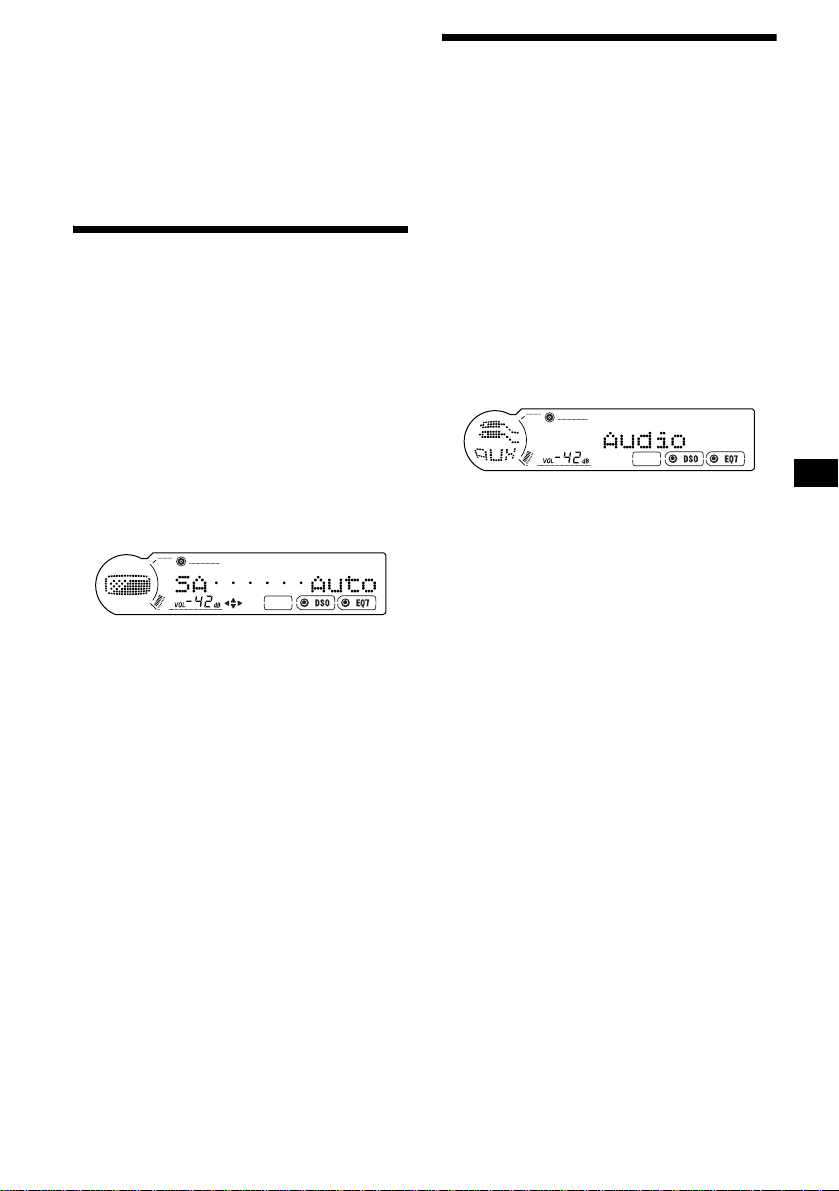
4 Select the desired frequency and level.
1 Press < or , to select the desired
frequency.
Each time you press < or ,, the
frequency changes.
62Hz y 157Hz y 396Hz y 1. 0kHz
y 2.5kHz y 6.3kHz y 16kHz
2 Press M or m to adjust the desired
volume level.
The volume level is adjustable in 1 dB
steps from –10 dB to +10 dB.
To restore the factory-set equalizer curve,
press (ENTER) for 2 seconds.
5 Press (MENU) twice.
After the effect setting is complete, the
display returns to normal playback mode.
Setting the Dynamic
Soundstage Organizer (DSO)
If your speakers are installed into the lower part
of the doors, the sound will come from below
and may not be clear.
The DSO (Dynamic Soundstage Organizer)
function crea te s a more amb ien t s oun d as i f t he re
were speakers above the dashboard (virtual
speakers).
You can store the DSO setting for each source.
DSO mode and image of virtual speakers
*3
*2
*4
*1 DSO 1
*2 DSO 2
*3 DSO 3
*4 DSO OFF
1 Press (SOURCE) to select a desired
source.
2 Press (DSO) repeatedly until the
desired DSO setting appears.
Each time you press (DSO), the DSO setting
changes “DSO········1-3”, and “off.”
*3
*1
*1
*2
*4
To cancel the DSO function, select
“DSO······off.” After 3 seconds, the display
returns to the normal playback mode.
Notes
• Depending on the type of car interior or type of
music, DSO may not have a desirable affect.
• If FM broadcasts are difficult to hear, set DSO to off.
19
Page 20
Adjusting the front and rear
volume
Adjusting the volume of the
subwoofer(s)
1 Press (SOURCE) to select a desired
source.
2 Press (SOUND) repeatedly until “FAD”
appears.
3 Press < or , repeatedly to adjust
the volume of front/rear speakers.
After 3 seconds, the display returns to the
normal playback mode.
Adjusting the cut-off frequency for the
front/rear speakers
To match the characteristics of the installed
speaker system, you can select the cut-off
frequency of the speakers.
Cut-off frequency
Level
off
Frequency (Hz)
1 Press (SOURCE) to select a desired
source.
2 Press (SOUND) repeatedly until “SUB”
appears.
3 < or , repeatedly to adjust the
volume.
After 3 seconds, the display returns to the
normal playback mo de.
Tip
The volume level is adjustable from –10 dB to +10 dB.
(Below –1 0 dB, “–∞ dB” is displayed.)
Adjusting the cut-off frequency for the
subwoofer(s)
To match the characteristics of th e connected
subwoofer(s), you can cut out the unwanted high
and middle freq uency signals entering the
subwoofer(s). By setting the cut-off frequency
(see the diagram below), the subwoofer(s) will
output only low frequency signals so you can get
a clearer sound image.
Cut-off frequency
Level
off
1 During playback or radio reception,
press (MENU).
2 Press M or m repeatedly until “HPF”
appears.
3 Press < or , to se lect the cut -off
frequency.
Each time you press < or ,, the frequ ency
changes as foll ows:
off (default setting) y 78Hz y 125Hz
4 Press (MENU).
After the frequency setting is complete, the
display return s t o normal playback mode.
20
Frequency (Hz)
1 During playback or radio reception,
press (MENU).
2 Press M or m repeatedly until “LPF”
appears.
Page 21
3 Press < or , to selec t th e cut-off
frequency.
Each time you pr ess < or ,, the frequency
changes as follows:
off (default setti n g) y 125Hz y 78Hz
4 Press (MENU).
After the frequency setting is complete, the
display returns to normal playback mode.
Selecting the spectrum
analyzer (SA)
The sound si gnal le v el i s di spl ayed on a s pec trum
analyzer. You can select a display for 10 patterns
(SA·········1-9), of f (s pectru m analyzer of f), o r the
automatic display mode where all the patterns
appear.
1 Press (SOURCE) to select a desired
source.
2 Press (MENU).
3 Press M or m repeatedly until “SA”
appears.
4 Press < or , to selec t t he desired
setting.
5 Press (MENU).
After the setting is complete, the display
returns to norma l playback mode.
Connecting auxiliary audio
equipment
The unit’s AUX IN (external audio input)
terminal on this unit is also u sed as the BUS
AUDIO IN (audio input) terminal .
You can listen to the sound from your car
speakers by connecting an optional Sony
portable devices.
Note
If you connect an optional Sony CD/MD unit, you
cannot connect any portable devices and cannot
select “AUX.”
Selecting auxiliary equipment
Press (SOURCE) repeatedly to select
“AUX.”
Adjusting the volume level
You can adjust the volume for each connected
audio equipment.
1 Press (MENU), then press M or m
repeatedly until “AUX Level” appears.
2 Press (ENTER).
3 Press M or m repeatedly to select the
desired volume level.
The volume level is adjustable in 1 dB steps
from –6 dB to +6 dB.
4 Press (MENU) twice.
After the setting is complete, the display
returns to normal playback mode.
To deactivate auxiliary equipment in
the music source display
1 Press (OFF).
CD/MD playback o r ra di o reception stops
(the key illumination and display remain on).
2 Press (MENU).
3 Press M or m repeatedly until “AUX-
A·····on” appears.
4 Press , to select “AUX-A····off.”
5 Press (MENU).
To restore the indication, select “AUX-A····· on.”
21
Page 22
Additional Information
Notes
• For safety, turn off the ignition before cleaning the
connectors, and remove the key from the ignition
switch.
• Never touch the connectors directly with your fingers
or with any metal device.
Maintenance
Fuse replacement
When replacing th e fuse, be sure to use one
matching the amperage rating stated on the
original fuse. I f t he fuse blows, check the powe r
connection and replace the fuse. If the fuse blows
again after replacement, there may be an internal
malfuncti on . In such a case, co nsult your nearest
Sony dealer.
Fuse (10 A)
Warning
Never use a fuse with an amperage rating
exceeding the one supplied with the unit as this
could damage the un it.
Cleaning the connectors
The unit may not functi on pr operly if the
connectors between the unit and the front panel
are not clean. In order to prevent this, detach the
front panel (page 8 ) and clean the connect o r s
with a cotton swab dipped in alcohol. Do not
apply too much fo rce. Otherwise, the connectors
may be damaged.
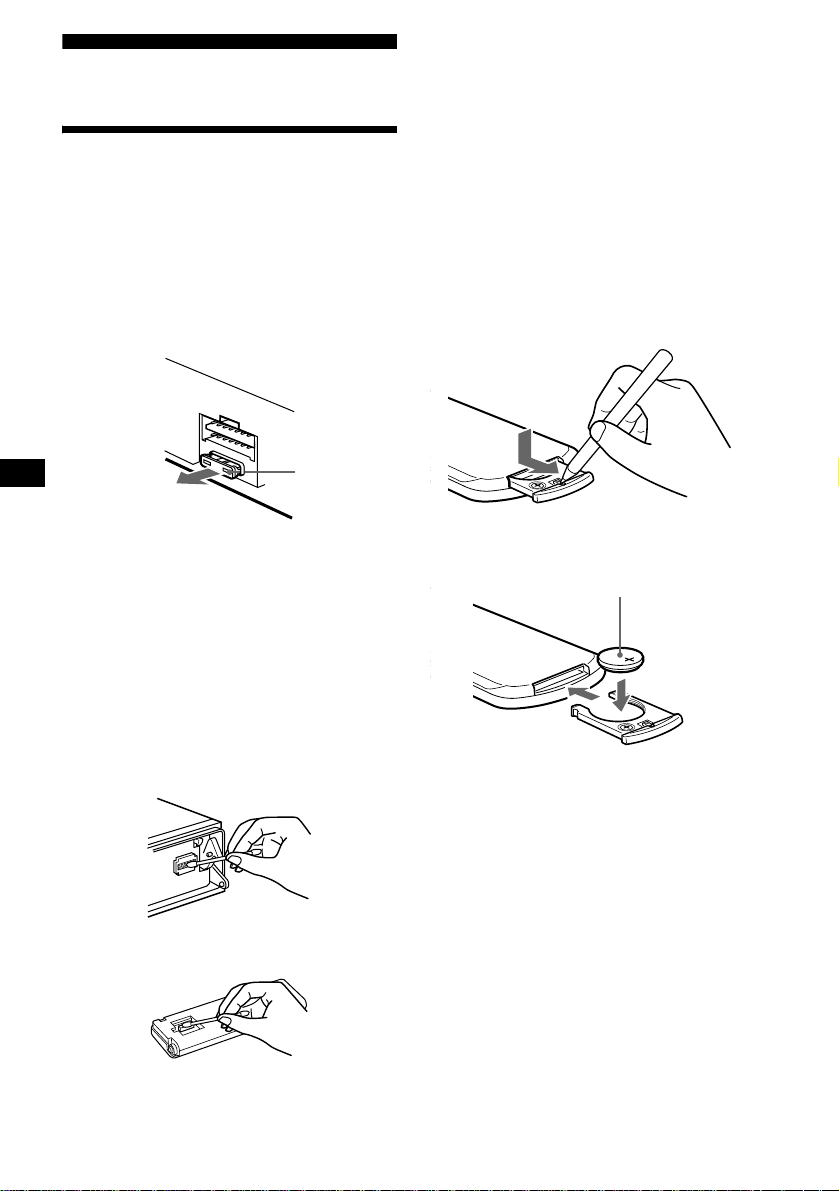
Replacing the lithium battery
Under normal conditions, batteries will last
approximately 1 y ear. (The servi ce life may be
shorter, depending on the co nditions of use.)
When the batt ery bec omes wea k, the range o f the
card remote/rotary commander becomes shorter.
Replace the new lithium battery. Use of any other
battery may present a risk of fire or explosion.
RM-X112: lithium battery CR2025
x
CR2025
+ side up
22
Main unit
Back of the front panel
Page 23
RM-X6S: lithium battery CR2032
1 Opening the battery compartment lid
Hold the infrared adjusting dial and open the
battery compartment lid by rotating
counterclockwise with a coin.
2 Removing the battery
Press the side of the battery as illustrated,
then remove.
Notes on lithium battery
• Keep the lithium battery out of the reach of
children. Should th e battery be swallowed,
immediately consult a doctor.
• Wipe the battery with a dry cloth to assure a
good contact.
• Be sure to obs er ve the correct polarity w hen
installing the battery.
• Do not hold the battery with metallic tweezers,
otherwise a shor t-circuit may occur.
WARNING
Battery may explode if mistreated.
Do not recharge, disassemble, or dispose of
in fire.
3 Inserting a battery
Insert the battery as illu stra ted. Ma ke sure the
polarity of the battery is oriented in the
correct way.
CR2032
+ side up
23
Page 24
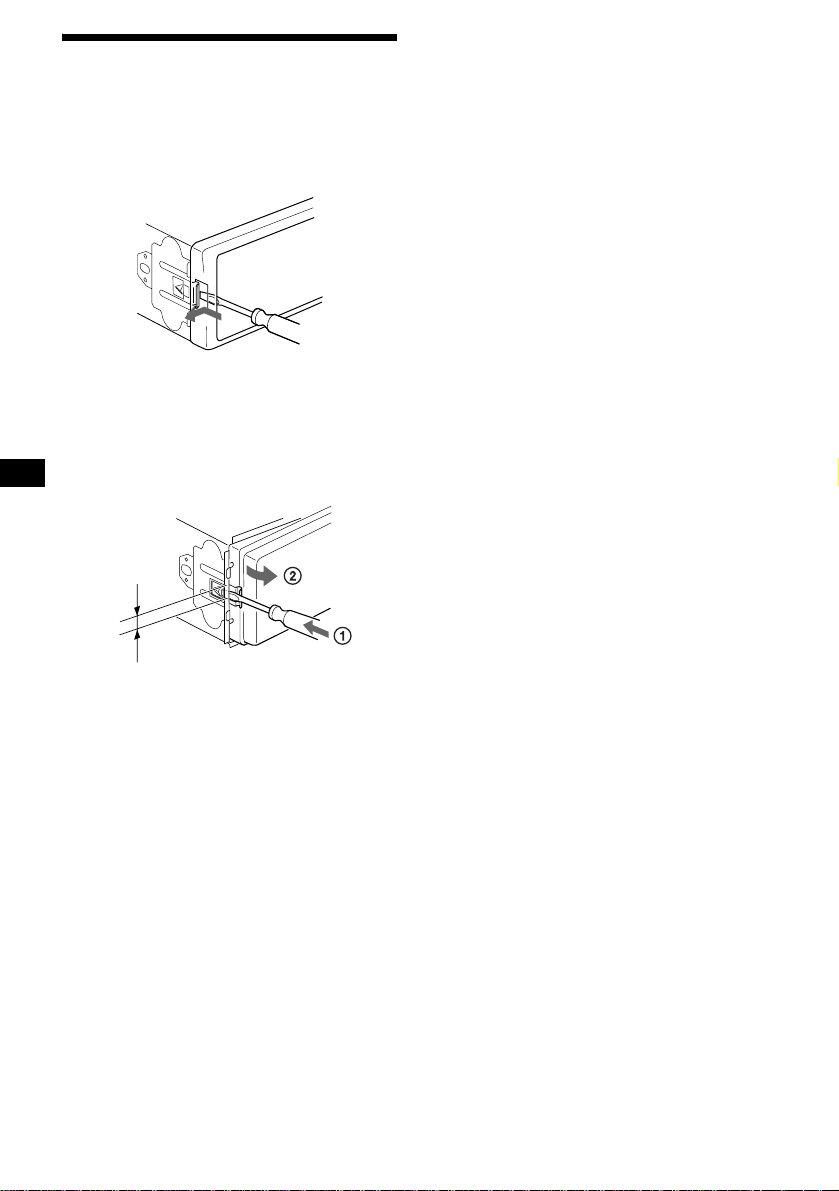
Removing the unit
1 Remove the front cover
1 Detach the front panel (pag e 8) .
2 Press the clip inside t he f ront cover
with a thin screwdriver.
3 Repeat step 2 for the other side.
2 Remove the unit
1 Use a thin screwdriver to push in
the clip on the left side of the unit,
then pull out the left side of the unit
until the catch clears the mounting.
4 mm
3
(
/16 in.)
2 Repeat step 1 for the right side.
3 Slide the unit out of its mounting .
24
Page 25

Specifications
AUDIO POWER SPECIFICATIONS
POWER OUTPUT AND TOTAL HARMONIC DISTORTION
23.2 watts per channel minimum continuous average power into 4 ohms,
4 channels driven from 20 Hz to 20 kHz with no more than 5% total
harmonic distortion.
CD Player section
Signal-to-noise ratio 90 dB
Frequency response 10 – 20,000 Hz
Wow and flutter Below measurable limi t
Tuner section
FM
Tuning range 87.5 – 107.9 MHz
Antenna terminal External antenna connector
Intermediate frequency 10.7 MHz/450 kHz
Usable sensitivity 8 dBf
Selectivity 75 dB at 400 kHz
Signal-to-noise ratio 66 dB (stereo),
Harmonic distortion at 1 kHz
Separation 35 dB at 1 kHz
Frequency response 30 – 15,000 Hz
72 dB (mono)
0.6 % (stereo),
0.3 % (mono)
AM
Tuning range 530 – 1,710 kHz
Antenna terminal External antenna connector
Intermediate frequency 10.7 MHz/450 kHz
Sensitivity 30 µV
Power amplifier section
Outputs Speaker outputs
Speaker impedance 4 – 8 ohms
Maximum power output 52 W × 4 (at 4 ohms)
(sure seal connectors)
General
Outputs Audio outputs (front/rear)
Inputs Telephone ATT control
Tone controls Bass ±10 dB at 62 Hz
Loudness +8 dB at 100 Hz
Power requirements 12 V DC car battery
Dimensions
Mounting dimensions
Mass Approx. 1.3 kg
Supplied accessories Card remote commander (1)
Optional accessories BUS cable (supplie d with
Optional equipment CD changer (10 discs)
Note
This unit cannot be connected to a digital preamplifier
or an equalizer.
Design and specifications are subject to change
without notice.
Subwoofer output (mono)
Power antenna relay control
terminal
Power amplifier control
terminal
terminal
Illumination control termin al
BUS control input terminal
BUS audio input or AUX IN
terminal
Antenna input terminal
Treble ±10 dB at 16 kHz
+2 dB at 10 kHz
(negative ground)
Approx. 178 × 50 × 179 mm
(7 1/8 × 2 × 7 1/8 in.)
(w/h/d)
Approx
. 182
×
1
(
7
/4
(w/h/d)
(2 lb 14 oz.)
Parts for installation and
connections (1 set)
Front panel case (1)
Rotary commander (1)
an RCA pin cord)
RC-61 (1 m), RC-62 (2m)
CDX-757MX, CDX-656
CD chang er (6 discs)
CDX-T70MX, CDX-T69
MD chang er (6 discs)
MDX-66XLP
MG-MS System-up Player
MGS-X1
XM Radio Tuner
XT-XM1
Source selector
XA-C30
53 × 162 mm
× 2 1/8 × 6 1/2 in.)
25
Page 26

Troubleshooting
The following checklist will help you remedy
problems you may encounter with your un it.
Before going through the checklist below, check
the connect i on and operating procedures.
General
No sound.
•Press (VOL) to adjust the volume.
• Cancel the ATT function.
• Set the fader control to th e center positio n for
a 2-speaker syste m.
The contents of the memory have been
erased.
• The RESET button has been pressed.
t Store again into the memory.
• The power cord or battery has been
disconnected.
• The power connectin g cord is not connected
properly.
No beep sound.
• The beep sound is canceled (page 17).
• An optional power am plifier is connected
and you are not using the built-in amplifier.
Indications di sappe ar fr om /do not ap pear i n
the display.
• The clock display disappears if yo u pr ess
(OFF) for 2 seconds (page 5).
• Remove the front pane l a nd clean the
connectors. See “ Cleaning the connectors”
on page 22 for details.
Stored stations and correct time are erased.
The fuse has blown.
Makes noise when the ignition key is in the
ON, ACC, or OFF posit ion.
The leads are no t matched correctly wi th the
car’s accessory power connect or.
No power is being supplied to the unit.
• Check the conne ct ion. If everything is in
order, check the fuse.
• The car does not hav e an A CC posit ion (pag e
5).
t Press (SOURCE) on the unit (or insert a
disc) to turn on the unit.
The power is continuously supplied to the
unit.
The car does not have an A CC position.
The power antenna does not extend.
The power antenna does not have a relay box.
Cannot turn off the “--------” indication.
You entered the name edit mode.
t Press (LIST) for 2 seconds.
CD/MD playback
A disc cannot be loaded.
• Another CD/MD is already loaded.
• The CD/MD has been forcibly inserted
upside down or in the wrong way.
Playback does not begin.
• Defective MD or dirty CD.
• CD-R/CD-RW that is not finalized.
• You tried to playback a CD-R / CD - RW not
designed for audio use.
• Some CD-Rs/CD - RWs may not pla y du e to
its recording equipment or the disc
condition.
A disc is automatically ejected.
The ambient tempe ra t ur e exceeds 50°C.
The operation buttons do not function.
CD will not be ejected.
Press the RESET button.
The sound skips from vi br a tion.
• The unit is installed at an angle of mor e th a n
60°.
• The unit is not in s talled in a sturdy part of
the car.
The sound skips.
Dirty or defect ive disc.
Radio reception
Preset tuning is not possible.
• Store the co rr ect frequency in the memory.
• The broadcas t sig nal is too weak.
The stations cannot be received.
The sound is hampered by noises.
• Connect a power antenna control lead (blue)
or to the power supply lead of the car’s
antenna booster. (Only if your car has builtin FM/AM antenna in the rear/side glass.)
• Check the connection of the car an te nna.
• The auto antenna will not go up.
t Check the connection o f t he power
antenna contro l lead.
• Check the frequency.
• When the DSO m ode is on, the sound is
sometimes hampered by noises.
t Se t t he D SO mode to “off” or change the
DSO mode (page 19).
26
Page 27

Automatic tuning is not possible.
• The local seek mode is set to “on.”
t S et the local seek mode to “off” (page
17).
• The broadcas t signal is too weak.
t Perform manual tuning.
The “ST” indication flashes.
• Tune in the frequency accu rately.
• The broadcas t signal is too weak.
t Set to the monaural re ception mode ( page
17).
A program broadcast in stereo is heard in
monaural.
• The unit is in monaural reception mode.
t Cancel monaural reception mode (page
17).
Interference occurs during FM reception.
The wide mode is selected.
t Set the IF mode to “IF Auto” (page 14).
Error displays/Messages
Error displays
(For this unit and optiona l CD/MD changers)
The following indica tions will flash for about
5 seconds , a nd an alarm sound will be heard.
1
Blank*
No tracks have been recorded on an MD.*
t Play an MD with recorded tracks on it.
1
Error*
• An insert ed CD is dirty or inser te d upside
down.*
2
t Clean or insert the CD correctly.
• An insert ed CD/MD cannot pla y because of
some problem.*
2
t Insert another CD/MD.
High Temp
The ambient temp er at ure is more than 50°C
(122°F).
t Wait until the temperature goes down
below 50°C (122°F).
NO Disc*
1
No disc is inserted in the CD/MD unit.
t Insert discs in th e C D/MD unit.
NO Magazine
The disc magazine is not i nserted in the CD/
MD unit.
t Insert the magazine in the CD/MD u nit.
NO Music
A CD which is not a music file is inserted in
the MP3 playable CD unit.
t Insert a music CD in the MP3 playable CD
unit.
Not Ready
The lid of the MD unit is open or the MDs are
not inserte d properly.
t Cl os e th e lid or insert the MDs properly.
Push Reset
The CD/MD unit ca nnot be operated becau se
of some problem.
t Press the RESET button on the unit.
2
*1 When the CD/MD changer is connected to the unit,
the disc number of the CD or MD appears in the
display .
*2 The disc number of the disc causing the error
appears in the display.
If these solution s do not help improve the
situation, consul t y our nearest Sony dealer.
continue to next page t
27
Page 28

Messages
Local Seek +/–
The Local Seek mode is on during automatic
tuning (page 14).
“” or “”
You have reached the beginning or th e end of
the disc and you cannot go any further.
28
Page 29

29
Page 30

Félicitations !
Nous vous remercions d’avoir fait l’acquisition
de ce lecteur de disq ues compacts Sony. Vous
pouvez profiter encore davantage des mu l t ip le s
fonctions de cet appareil à l’aide des fonctions et
des accessoire s ci -dessous :
• Appareils CD ou M D en option (changeurs et
lecteurs)*
• Informations CD TEXT (affichées lors de la
lecture d’un disque CD TEXT*
• Accessoires de comm ande fournis
Mini-télécommande RM-X112
Satellite de commande RM-X6S
*1 Cet appareil fonctionne uniquement avec des
*2 Un disque CD TEXT est un CD audio contenant
Le logo "XM Ready" indique que ce produit
commande un tuner XM Sony (vendu
séparément).
Consultez votre revendeur agréé Sony le plus
proche pour obtenir plus d'informations sur le
tuner XM.
Pour en savoir plus sur le fonctionnement du
tuner XM, reportez-vous au manuel utilisateur
fourni avec le tuner XM
1
.
2
).
produits Sony.
des informations telles que le nom du disque, le
nom de l’artiste et les noms des plages. Ces
informations sont enregistrées sur le disque.
.
2
Page 31

Table des matières
Emplacement des commandes. . . . . . . . . . . . 4
Précautions . . . . . . . . . . . . . . . . . . . . . . . . . . 6
Remarques sur les disques. . . . . . . . . . . . . . . 6
Préparation
Réinitialisation de l’appareil . . . . . . . . . . . . . 7
Retrait de la façade . . . . . . . . . . . . . . . . . . . . 8
Réglage de l’horloge . . . . . . . . . . . . . . . . . . . 9
Lecteur CD
Lecteur CD ou MD (en option)
Lecture d’un disque. . . . . . . . . . . . . . . . . . . . 9
Rubriques d’affichage . . . . . . . . . . . . . . . . . 11
Lecture de plages en boucle
— Lecture répétée. . . . . . . . . . . . . . . . . . 11
Lecture des plages au hasard
— Lecture aléatoire . . . . . . . . . . . . . . . . 12
Identification d’un CD
— Fonction de mé m o de disque* . . . . . . 12
Localisation d’un d is que par son nom
— Affichage automatique des titres* . . . 13
* Fonctions disponibles avec le lecteur CD/MD en
option
Radio
Mémorisation automatique des stations
— Mémorisat i on des meilleurs accords
(BTM). . . . . . . . . . . . . . . . . . . . . . . . . . . 14
Syntonisation des s ta t ions mémorisées . . . . 14
Mémorisation des stations souhaitées
uniquement . . . . . . . . . . . . . . . . . . . . . . . 15
Mémorisation des noms de station
— Fonction de mé m oi re des stations . . . 15
Syntonisation d’un e s ta ti on à partir d’une liste
— Affichage automatique des titres . . . . 16
Autres fonctions
Fonctionnement du satellite de
commande . . . . . . . . . . . . . . . . . . . . . . . 16
Réglage des caractéristiques du son . . . . . . 17
Atténuation rapide du son. . . . . . . . . . . . . . 17
Modificatio n des réglages du son et de
l’affichage
— Menu . . . . . . . . . . . . . . . . . . . . . . . . . 18
Réglage de l’égaliseur (EQ7) . . . . . . . . . . . 1 9
Réglage du répartiteur dynamique du son émis
(DSO). . . . . . . . . . . . . . . . . . . . . . . . . . . 20
Réglage du volume avant et arrière . . . . . . 20
Réglage du volum e du ou des caisson(s) de
graves . . . . . . . . . . . . . . . . . . . . . . . . . . . 21
Sélection de l’analyseur de spectre
(SA) . . . . . . . . . . . . . . . . . . . . . . . . . . . . 22
Raccordement d’un appareil audio
auxiliaire. . . . . . . . . . . . . . . . . . . . . . . . . 22
Informations complémentaires
Entretien . . . . . . . . . . . . . . . . . . . . . . . . . . . 23
Démontage de l’appareil. . . . . . . . . . . . . . . 25
Caractéristiques techniques. . . . . . . . . . . . . 26
Dépannage . . . . . . . . . . . . . . . . . . . . . . . . . 27
Affichage des erreurs et messages . . . . . . . 28
3
Page 32

Emplacement des commandes
Mini-télécommande RM-X11 2
SCRL
DSPL
REP SHUF
1
2
3
4
5
6
MODE
EQ7DSO
LIST
+
DISC
MENU
–
SEEK
SOUND
SOURCE
DISC
+
VOL
–
+
SEEK
–
ENTER
ATTOFF
(DISC)
(M) : pour déplacer la
(SEEK)
(<) :pour déplacer
la sélection
vers la gauche/
.
Dans le menu, la ou les touches pouvant être
sélectionnées parmi ces 4 touches sont indiquées par
le symbole “
Conseil
Reportez-vous à la section “Remplacement de la pile au
lithium” à la page 24 pour obtenir des informations
détaillées sur la façon de remplacer la pile.
sélection vers le haut
+
DISC
SOURCE
–
SEEK
DISC
(DISC)
(m) : pour déplacer la
sélection vers le bas
v
” dans la fenêtre d’affichage.
SEEK
(SEEK)
–
(,) :pour déplacer
+
la sélection
vers la droite/
>
Pour plus de détails, reportez-vous aux pages indiquées.
a Touche SCRL 11
b Touche DSPL (modification du mode
d’affichage)
c T ouches numériques
(1) REP
(2) SHUF
Pour mémorise r des stations ou synt oniser
des stations mémorisées.
d Touche DSO 20
e Touche MENU
Pour afficher les menus.
f Touche SOURCE (Mise sous tension/
Radio/CD/MD*
1
/AUX*2)
Pour sélectionner l a source.
g Touches SEEK (</,)
Pour passer d’une pl age à l’autre, avancer
rapidement ou reculer dans une pl age,
syntoniser des stations automatiquement ou
manuellement ou sélectionner un réglage.
h Touche SOUND 17, 20, 21
i T ouche OFF (Arrêt/Mise hors tension)
8, 10, 23
4
j Touches VO L (+ /–)
Permettent de régler le volume.
k Touche MODE
Pour changer le m ode de fonctionnement.
l Touche EQ7 19
m Touche LIST 13, 16
n Touches DISC (M/m)
Pour syntoniser des sta t i ons présélectionnées,
changer de disque*
4
l’autre*
ou choisir un menu.
3
, passer d’un album à
o Touche ENTER
Pour valider un réglag e.
p Touche ATT 17
*1 Lorsqu’un appareil MD en option est raccordé.
*2 Disponi ble uniquement lorsqu’un appareil portatif
Sony en option est raccordé à l’entrée BUS AUDIO
IN de l’appareil. Vous ne pouvez pas raccorder en
même temps un appareil CD ou MD en option.
*3 Lorsqu’un appareil CD ou MD en option est
raccordé.
*4 Disponi ble uniquement lorsqu’un appareil CD
compatible MP3 en option est raccordé et qu’un
fichier MP3 est en lecture.
Page 33

Appareil principal
VOL
SOURCE
a Touche SOURCE
b Récepteur des signaux de la mini-
télécommande et du sat el l ite de
commande
c Touche Z (éjection) (située à l’avant de
l’appareil, derrière la façade) 10
d Écran d’affichage
e Touche OPEN 8, 10
f Touche RESET (située à l’avant de
l’appareil, derrière la façade) 7
g Touches VOL (+/–)
h Touche OFF*
OFF
CDX-CA900X
* Avertissement en cas d’installation de
l’appareil da ns une voiture dont le contact
ne comporte pas de posi tion ACC
(accessoires)
Après avoir éteint le moteur, n’oubliez pas
d’appuyer sur la touche (OFF) pendant
2 secondes pour éteindre l’affichage de
l’horloge.
Sinon, l’affichage de l’horloge reste allumé, ce
qui décharge la batterie.
Remarque
Si vous désactivez l’appareil en appuyant sur
(OFF) pendant 2 secondes, l’appareil ne peut
plus être commandé par la mini-télécommande
ni par le satellite de commande, sauf si vous
appuyez sur la touche (SOURCE) de l’appareil
ou que vous insérez un disque dans l’appareil
pour l’activer.
5
Page 34

Précautions
Remarques sur les disques
• Si votre voiture est restée stationnée en plein
soleil, laissez refroidir l’appareil avant de
l’utiliser.
• Les antennes él ect riques se déploien t
automatiquement lorsque l’appare il fonctionne.
• N’utilisez pas la fonction CUSTOM FILE
pendant que vous cond ui sez, ni aucune autre
fonction qui pourrait diminuer l’attention
portée à la route.
Si vous avez des questions ou des problèmes au
sujet du fonction nement de cet appareil qui ne
sont pas abordés dans ce mode d’emploi,
consultez votre détaillant Sony.
Condensation
Par temps de pluie ou dans des régions très
humides, de l’humidité peut de se condenser à
l’intérieur des lentilles et dans l’écran
d’affichage de l’appareil. Si cela se produit,
l’appareil ne fonct ionne pas correctem ent. Dans
ce cas, retirez le disque et attendez environ une
heure que l’humidité se soit évaporée.
Pour conserver un s on de hau te qualité
Vei llez à ne pas renverser de jus de fruit ni
d’autres boissons sucrées sur l’appareil ou sur les
disques.
• Pour que le disque reste propre, ne touchez pas
sa surface. Saisissez le disque par les bords.
• Rangez vos disques dans leur boîtier ou dans un
chargeur lorsque vous ne vous en servez pas.
Ne soumettez pas les disques à des
températures élevées. Év itez de les laisser dans
une voiture en stationnement, sur le tableau de
bord ou la plage arrière.
• Ne collez pas d’étiquettes sur les disques et
n’utilisez pas de disques rendus collants par de
l’encre ou des résidus. De tels disques peuvent
s’arrêter de tourner en cours de lecture et
provoquer des problèmes de fonctionnement ou
de s’endommager.
• N’utilisez pas de disques portant des étiquettes
ou des autocollants.
L’utilisation de ce ge nr e de disques peut
entraîner les problèmes de fonctionnement
suivants :
– Impossibilité d’éjecter un disque lorsque
l’étiquette ou l’autocollant se décolle et
bloque le mécanisme d’éjection.
– Erreurs de lec ture des données audi o (p. ex.
sauts de lecture ou aucune lecture)
provo quées par une déformation du disque
suite au rétrécissement de l’étiquette ou de
l’autocollant sou s l’effet de la ch aleur.
• Les disques de forme non standard (p. ex. en
forme de cœur, de carré ou d’étoile) ne peuvent
pas être lus avec cet ap pareil. Vous risquez
d’endommager votre lecteur si vous essayez de
le faire. N’utilisez pas de tels disques.
• Ce lecteur ne pe rme t pa s l a le ctur e d es CD de 8
cm (3 po.).
6
Page 35

• Avant la lecture, nettoyez les disques avec un
chiffon de nettoyage disponible dans le
commerce. Essuyez chaque disque en partant
du centre vers le bord. N’utilisez pas de
solvants tels que de la benzine, du diluant, des
produits de nettoyage ordinaires ou des
vaporisa teur s ant istat ique s dest inés aux disq ues
de vinyle.
Remarques sur les disques CD-R et
CD-RW
• Cet appareil permet la lecture de s di sques CDR (CD enregistra bles) et CD-RW (CD
réinscriptible s) destinés à un usage audio.
Repérez l’un des lo gos ci-dessous pour
identifier les disques CD-R et CD-RW à usage
audio.
La présence de l’un des l ogos ci-des sous indique
que le CD n’est pas destiné à l’usage audio.
Préparation
Réinitialisation de l’appareil
Avant la première utilisation de l’appareil ou
après avoir remplacé la batterie du véhicule ou
modifié les raccordements, vous devez
réinitialiser l’appareil.
Retirez la façade , pu is appuyez sur la touche
RESET avec un objet pointu comme un stylo à
bille.
To uche RESET
Remarque
Une pression sur la touche RESET efface l’heure et
certaines informations sauvegardées en mémoire.
• Il est possible que ce lecteur ne puisse pas lire
certains disques CD-R ou CD-RW, selon
l’appareil utilisé po ur l ’ enre gist re ment ou l’é tat
du disque.
• L’appareil ne peut pas lire un disque CD-R ou
CD-RW qui n’est pas finalisé*.
* Processus nécessaire pour qu’un disque CD-R ou
CD-RW enregistré puisse être lu sur un lecteur CD
audio.
7
Page 36

Retrait de la façade
Vous pouvez retirer la façade de cet appareil pour
le protéger contre le vol.
Alarme d’avertissement
Si vous mettez la clé de contact en position OFF
sans ôter la façade, l’ al arme d’avertissement
retentit pendant quelques secondes.
Si vous raccordez un amplificateur en option et
que vous n’utilisez pas l’ amplificateur intégré,
l’alarme est désactivée.
1 Appuyez sur (OFF)*.
La lecture du disque CD ou MD ou la
réception radio s’arrête (l’éclairage des
touches et l’affichage restent allumés).
* Si le contact de votre voiture n’est pas doté
d’une position ACC (accessoire), veillez à
appuyer sur (OFF) pendant 2 secondes pour
éteindre l’appareil et éviter que la batterie du
véhicule ne se décharge.
2 Appuyez sur (O PEN), faites glisser la
façade vers la droite, puis tirez
doucement vers vous l’extrémité
gauche de la façade.
Installation de la façade
Enfilez l’orifice A de la façade sur la tige B sur
l’appareil, puis poussez doucement sur le côté
gauche pour l’engager en position.
Appuyez sur (SOURCE) (o u insérez un C D )
pour faire fonctionner l’appareil.
A
B
x
1
2
Remarques
• Si vous retirez la façade alors que l’appareil est sous
tension, l’alimentation est automatiquement coupée
de manière à éviter d’endommager les hautparleurs.
• N’exercez pas de pression excessive sur la façade
(y compris l’écran d’affichage) et ne l’é cha ppe z pas.
• N’exposez pas la façade à des températures
élevées ou à l’humidité. Évitez de la laisser dans
une voiture en stationnement, sur le tableau de bord
ou la plage arrière.
Conseil
Lorsque vous transportez la façade, glissez-la dans
l’étui fourni à cet effet.
8
Remarque
Ne posez rien sur la face interne de la façade.
Page 37

Réglage de l’horloge
L ’horloge numérique fonctionne suivant un cycle
de 12 heures.
Exemple : Pour régler l’horloge à 10:08
Lecteur CD
Lecteur CD ou MD (en
option)
1 Appuyez sur (MENU), puis appuyez
plusieurs fois sur M ou m jusqu’à ce
que l’indication “Cl ock” s’affiche.
1 Appuyez sur (ENTER).
L’indication des heures clignote.
2 Appuyez sur M or m pour régler
l’heure.
3 Appuyez sur ,.
L’indication des minutes clignote.
4 Appuyez sur M or m pour régler les
minutes.
2 Appuyez deux fois sur (MENU).
L’horloge commence à fonctionner. Une fois
le réglage de l’horloge terminé, l’écran
d’affichage revient au mode de lecture
normal.
Conseil
Lorsque le mode D.Info est activé, l’heure reste
affichée en permanence (page 18).
Cet apparei l v ou s pe rmet , en plu s de l a le ct ur e de
CD, de piloter des appareils CD, CD comp atibles
MP3 ou MD externes. Si vous raccordez des
lecteurs de CD compatibles MP3 (p. ex. un
changeur CD MP3), vous pouvez faire la lecture
de fichiers MP 3, des fichiers (plages) audio
comprimés offrant un son de grande qualité.
Remarque
Si vous raccordez un lecteur CD ou CD compatible
MP3 en option disposant de la fonction CD TEXT, les
informations CD TEXT apparaissent dans l’écran
d’affichage lorsque vous écoutez un disque CD TEXT.
Lecture d’un disque
(Avec cet appareil)
1 Appuyez sur (OPEN) et insérez le
disque (côté imprimé vers le haut).
2 Fermez la façade.
La lecture commence automatiquement.
Pour commencer la lecture si un disque se trouve
déjà dans l’appareil, appuyez plusieurs fois sur
(SOURCE) jusqu’à ce que l’indication “CD”
s’affiche.
Suite à la page suivante t
9
Page 38

Pour Appuyez sur
arrêter la lecture (OFF)
éjecter le disque (OPEN), puis Z
passer d’une plage
à l’autre
(SEEK) (./>)
[une fois pour chaque plage]
–Accès
automatique
aux titres
avancer
rapidement ou
reculer dans une
plage
(SEEK) (m/M)
[maintenir la touche
enfoncée jusqu’au poi nt
souhaité]
–Recherche
manuelle
Remarques
• Lorsque la première ou la dernière plage du disque
est en lecture, si vous appuyez sur la touche
< or ,, la lecture passe à la dernière ou à la
première plage du disque.
• Lorsque la dernière plage du disque est terminée, la
lecture reprend à partir de la première plage du
disque.
• Avec un appareil en option raccordé, la lecture de la
même source continue sur le lecteur CD ou MD en
option.
(Avec un appareil en option)
1 Appuyez plusieurs fois sur la touche
(SOURCE) pour sélectionner “CD” ou
“MD (MS*
1
)”.
2 Appuyez plusieurs fois sur (MODE)
jusqu’à ce que l’appareil souhaité
s’affiche.
La lecture commen ce .
Précautions à pr endre lors du raccordement
d’appareils MGS-X1 ou MD
Cet appareil reconnaît le MGS-X1 comme étant un
appareil MD.
• Pour lancer la lecture sur un lecteur MGS-X1,
appuyez sur (SOURCE) pour sélectionner “MS” ou
“MD”. Lorsque “MS” s’affiche comme source, le
MGS-X1 commence la lecture. Si “MD” est affiché
comme source, appuyez sur (MODE) pour
sélectionner “MS” et lancer la lecture.
• Pour lancer la lecture sur un lecteur MD, appuyez
sur (SOURCE) pour sélectionner “MD” ou “MS”.
Lorsque l’appareil MD souhaité s’affiche comme
source, la lecture commence. Si “MS” ou un autre
appareil MD s’affiche comme source, appuyez sur
(MODE) pour sélectionner l’appareil MD souhaité et
lancer la lecture.
Remarques sur le raccordement de lecteurs CD
compatibles MP3
• Si un disque sans fichiers (plages) MP3 est inséré,
l’indication “NO Music” s’affiche à l’écran et la
lecture du prochain disque commence.
• Avant de lancer la lecture d’une plage, cet appareil
lit toutes les informations des plages et des albums
du disque. Selon la structure des plages, cette
recherche d’informations peut durer plus d’une
minute avant que la lecture ne puisse commencer.
Pendant cette période, l’indication “Read” s’affiche à
l’écran. Attendez que toutes les informations soient
lues et que la lecture commence automatiquement.
Pour Appuyez sur
passer d’un disque
à l’autre
–Sélection d’un
(DISC) (+) ou (DISC) (–)
[une fois pour chaque
disque]
disque
passer d’un album
à l’autre*
2
–Sélection d’un
album
*1 MS : Lecteur MG System-up à Memory Stick MGS-
X1
*2 Disponible uniqu em ent l ors de la lec tur e d’u n
fichier MP3.
Les albums sont des dossiers d’un CD contenant
des fichiers MP3.
(DISC) (+) ou (DISC) (–)
[maintenir la touche
enfoncée jusqu’au poi nt
souhaité]
10
Page 39

Rubriques d’affichage
Lorsque le disque, l ’a lbum ou la plage change,
tout titre préenregis tr é*
nouvel album ou de la nouvelle pla ge est
automatiquement affiché. Si la fonction de
défilement automatique Auto Scroll est réglée à
“on”, les noms de plu s de 12 caractères défilent
dans l’écran d’affichage (page 18).
Affichage MDLP*
LP2 : lecture LP2
LP4 : lecture LP4
Numéro de disque
ou d’album*
Source
Rubriques affichables
• Nom du disque*
l’artiste*
• Nom de la plage*
• Nom de l’album*1*
•Étiquette ID3*1*
Pour Appuyez sur
passer d’une
rubrique
d’affichage à
l’autre
faire défiler la
rubrique
d’affichage
1
du nouveau disque, du
2
Numéro de plage
3
1*4
5
/Nom de
1
3
3
(DSPL)
(SCRL)
Horloge
Durée de
lecture écoulée
Remarques
• Certains caractères ne peuvent pas être affichés.
Les caractères non compatibles sont remplacés par
le symbole “ *” à l’affichage.
• Pour certains disques CD TEXT ou étiquettes ID3
contenant un grand nombre de caractères, le
défilement automatiqu e peut ne pas fonctionne r.
• Cet appareil ne peut pas afficher le nom de l’artiste
de chaque plage d’un disque CD TEXT ou d’un
album.
Conseil
Lorsque la fonction A.Scroll (défilement automatique)
est désactivée et que le nom du disque, de l’album ou
de la plage est modifié, ce nom ainsi que l’étiquette
ID3 ne défilent pas.
Lecture de plages en boucle
— Lecture répétée
Le lecteur principal répète une plage, la totalité
d’un album ou la totalité du disque lorsque la
lecture de la section à répéter est terminée. Pour
répéter la lecture, vous pouvez sélectionner :
•REP
····Track — pour répéter une plage.
•REP
····Album*
•REP
·····Disc*
*1 Disponible uniquement lors de la lecture d’un
fichier MP3.
*2 Disponible uniquement lorsqu’un ou plusieurs
lecteurs CD ou MD en option sont raccordés.
En cours de lecture, appuyez
plusieurs fois sur (1) (REP) jusqu’à ce
que le réglage souhaité apparaisse
dans la fenêtre d’affichage.
La lecture répétée commence.
Pour revenir en mode de le ct ure normal,
sélectionnez “REP
1
— pour répéter un al bu m .
2
— pour répéter tout le disque.
······off”.
*1 Lorsque vous appuyez sur (DSPL), l’indication “NO
Disc Name”, “NO Album Name” ou “NO Track
Name” indique qu’il n’existe aucun nom de disque,
nom d’album ou nom de plage et l’indication “NO
ID3 Tag” qu’il n’y a pas d’étiquette ID3.
*2 Disponible uniquement lorsqu’un lecteur MD en
option doté de la fonction MDLP est raccordé et
qu’un disque MDLP est en cours de lecture.
*3 Disponible uniquement lors de la lecture d’un
fichier MP3.
*4 Si le disque a été identifié avec la fonction
CUSTOM FILE de cet appareil, le mémo de disque
s’affiche en priorité.
*5 Uniquement pour les disques CD TEXT contenant
le nom de l’artiste.
11
Page 40

Lecture des plages au hasard
— Lecture aléatoire
Vous po uvez sélectionner :
•SHUF
···Album*
ordre aléatoire le s fich iers MP3 d’un album
dans le lecteur CD compatible MP3 (en option)
en cours de lecture.
•SHUF
····Disc — pour écout er les plages du
disque en cours de le ct ur e dans un ordre
aléatoire.
•SHUF
·Changer*
ordre aléatoire les plages avec l’appareil CD ou
MD (en option) e n cours de lecture.
•SHUF
·····All*
aléatoire toutes les plages de tous les lecteurs
CD ou MD raccordés, y compris cet appareil.
*1 Disponible uniqu em ent l ors de la lec tur e d’u n
fichier MP3.
*2 Disponible uniquement lorsqu’un ou plusieurs
lecteurs CD ou MD en option sont raccordés.
*3 Disponible uniquement lorsqu’un ou plusieurs
lecteurs CD en option ou deux ou plusieurs
lecteurs MD en option sont raccordés
En cours de lecture, appuyez
plusieurs fois sur (2) (SHUF) jusqu’à
ce que le réglage souhaité apparaisse
dans la fenêtre d’affichage.
La lecture aléatoire com mence.
Pour revenir en mode de lecture normal,
sélectionnez “SHUF
Remarque
La fonction “SHUF·····All” ne passe pas de façon
aléatoire des plages de lecteurs CD aux plages de
lecteurs MD.
1
— pour écouter dans un
2
— pour écouter dans un
3
— pour écouter dans un ordr e
·····off”.
Identification d’un CD
— Fonction de mémo de disque (pour un
lecteur CD disposant de la fonction CUSTOM
FILE)
Vous pouvez identifier c haque disque a vec un nom
personnalisé (mémo de disque). Vous pouvez
saisir jusqu’à 8 caract ères pour chaque disque.
Lorsque vous a vez identifié un CD, vous pouvez
ensuite le localiser par son nom (page 13).
1 Lancez la lecture du disque que vous
souhaitez identifier dans un lecteur
CD disposant de la fonction CUSTOM
FILE.
2 Appuyez sur (MENU), puis appuyez
plusieurs fois sur M ou m jusqu’à ce
que l’indication “Name Edit”
apparaisse.
3 Appuyez sur (ENTER).
L ’appareil répète la lecture du disque au cours
de la procédure d’identification.
4 Saisissez les caractères du nom
souhaité.
1Appuyez plusi eurs fois s ur M or m
pour sélectionner le caractère
souhaité.
A y B y C ... y 0 y 1 y 2 ...
y + y – y
*1 Insertion d’un espace
2Appuyez sur , lorsque vous avez
repéré le caractère souhaité.
... y *1 y A
*
12
Pour revenir vers la gauche, appuyez sur
<.
3Répétez les étapes 1 et 2 pour
saisir le reste du nom.
5 Appuyez deux fois sur (MENU).
Le lecteur revient en mode de lecture CD
normal.
Page 41

Conseils
• Pour corriger ou effacer un nom, procédez
simplement par réécriture ou saisissez “ ”.
• Il existe une autre méthode pour identifier un CD :
au lieu d’effectuer les étapes 2 et 3, appuyez sur
(LIST) pendant 2 secondes. Vous pouvez
également compléter l ’opération en appuyant sur
(LIST) pendant 2 secondes au lieu d’effectuer
l’étape 5.
• Vous pouvez identifier les CD avec un appareil ne
disposant pas de la fonction CUSTOM FILE si cet
appareil est raccordé à un autre lecteur CD
disposant de cette fonction. Le mémo de disque est
alors sauvegardé dans la mémoire du lecteur CD
doté de la fonction CUSTOM FILE.
Remarque
La lecture répétée d’une plage (REP····Track) ou la
lecture aléatoire est interrompue jusqu’à ce que
l’édition du nom (Name Edit) soit terminée.
Affichage du mémo de disque
En tant que rubrique d’affichage, le mémo de
disque est toujours affiché en priorité par rapport
aux informations CD TEXT d’origine.
Pour Appuyez sur
afficher le nom
(DSPL)
pendant la lecture
d’un disque CD ou CD TEXT
Conseil
Pour en savoir plus sur les autres rubriques
affichables, reportez-vous à la page 11.
Suppression du mémo de disque
1 Appuyez plusieurs fois sur la touche
(SOURCE) pour sélectionner “CD”.
2
Appuyez plusieur s fois sur
(MODE)
pour
sélectionner le lecteur CD sur leque l le
mémo de disque est enregistré.
3
Appuyez sur
plusieurs fois sur
(MENU)
, puis appuyez
M
ou m jusqu’à ce que
l’indicatio n “Na m e De le te” ap pa ra is se.
4 Appuyez sur (ENTER).
Les noms mémorisés apparaissent.
5 Appuyez plusieurs fois sur M ou m
pour sélectionner le nom de disque
que vous souhaitez effacer.
Les noms mémorisés apparaissent.
6 Appuyez sur (ENTER) pendant
2 secondes.
Le nom est effacé.
Répétez les étapes 5 et 6 pour effacer
d’autres mémos.
7 Appuyez deux fois sur (MENU).
Le lecteur revient en mode de le ct ur e CD
normal.
Remarques
• Lorsque le mémo d’un disque CD TEXT est effacé,
les informations CD TEXT d’origine s’affichent.
• Si vous ne réussissez pas à trouver le mémo de
disque que vous souhaitez effacer, essayez de
sélectionner un autre lecteur CD à l’étape 2.
• Si vous avez déjà effacé tous les mémos de disque,
l’appareil revient en mode de lecture CD normal à
l’étape 4.
Localisation d’un disque par
son nom
— Affichage automatique des titres (pour un
lecteur CD disposant de la fonctio n CD TEXT
ou CUSTOM FILE ou pour un lecteur MD)
Vous pouvez utiliser cette fonction pour les
disques auxquels vous avez attribué des noms*
et pour les disques CD TEXT*
*1 Localiser un disque par son nom : lorsque vous
avez attribué un nom (mémo) au CD (page 12,13)
ou au MD.
*2 Localiser un disque grâce aux informations CD
TEXT lorsque vous écoutez un disque CD TEXT
sur un lecteur CD doté de la fonction CD TEXT.
1 Appuyez sur (LIST).
Le nom attribué au disque en cours de lecture
s’affiche à l’écran.
2 Appuyez plusieurs fois sur M ou m
jusqu’à ce que vous ayez repéré le
disque souhaité.
3 Appuyez sur (ENTER) pour lancer la
lecture du disque.
Remarque
Certaines lettres ne peuvent pas être affichées
(exception : fonction de mémo de disque).
2
.
1
13
Page 42

Radio
L ’appareil peut mémoriser jusqu’à 6 stations
pour chaque bande radio (FM1, FM2, FM3,
AM1 et AM2).
Attention
Pour syntoniser des stations pendant que vous
conduisez, nous vous conseillons d’utiliser la
fonction de mémorisation des meille ur s acco rd s
(BTM) afin d’éviter les accidents.
Mémorisation automati que
des stations
— Mémorisatio n de s me illeurs accords
(BTM)
L’appareil sélect i onne les stations do nt les
signaux sont les pl us pui ssants dans la bande
sélectionnée et les mémorise dans l’ordre des
fréquences.
1 Appuyez plusieurs fois sur (SOURCE)
pour sélectionner “TUNER”.
2 Appuyez plusieurs fois sur (MODE)
pour sélectionner la bande.
3 Appuyez sur (MENU), puis appuyez
plusieurs fois sur M ou m jusqu’à ce
que l’indication “BTM” apparaisse.
4 Appuyez sur (ENTER).
Un bip retentit lorsque le réglage est
mémorisé.
Remarques
• Si quelques stations seulement peuvent être
captées en raison de la faiblesse des signaux,
certaines touches numériques conservero nt leur
réglage précédent.
• Si un numéro est affiché à l’écran, l’appareil
commence la mémorisation des stations à partir de
la station affichée.
14
Syntonisation des stations
mémorisées
1 Appuyez plusieurs fois sur (SOURCE)
pour sélectionner “TUNER”.
2 Appuyez plusieurs fois sur (MODE)
pour sélectionner la bande.
3 Appuyez sur la touche numérique ((1)
à (6)) sur laquelle la station souhaitée
est mémorisée.
Conseil
Appuyez sur
dans l’ordre de leur enregistrement dans la mémoire
(fonction de recherche des présélections).
Si la fonction de syntonisation des
présélections ne fonctionne pas
Conseils
• Si la syntonisation automatique s’arrête trop
fréquemment, activez la recherche locale pour
limiter la recherche aux stations dont les signaux
sont plus puissants (reportez-vous à la section
“Modification des réglages du son et de l’affichage”
à la page 18).
• Si vous connaissez la fréquence de la station que
vous souhaitez écouter, maintenez la touche
, enfoncée pour localiser la fréque nce
approximativement, puis appuyez plusieurs fois sur
< ou , pour la syntoniser avec précision
(syntonisation manuelle).
Si la réception stéréo FM est mauv ais e
Remarque
En cas d’interférences, cet appareil restreint
automatiquement la fréquence de réception pour
supprimer les parasites (fonction IF Auto). En pareil
cas, certaines émissions stéréo FM peuvent passer à
la réception mono, même si le mode de réception
stéréo est activé.
Conseils
• Pour toujours écouter en stéréo des émissions stéréo
FM, vous pouvez modifier le réglage IF Auto et
étendre la récep ti o n du sig na l d e fr éq ue nce (re po rtezvous à la section “Modification des réglages du son et
de l’affichage” à la page 18). Notez que certaines
interférences peuvent se produire avec ce réglage.
• Si vous avez de la difficulté à entendre les émissions
FM, réglez DSO à “off” (page 20).
M ou m pour syntoniser les stations
Appuyez sur < ou , pour rechercher
la station (syntonisation automatique).
Le balayage s’interrompt lorsque l’appareil
capte une station. Répétez l’action jusqu’à ce
que vous captiez la station souhaitée.
< ou
Sélectionnez le mode de réception mono
(reportez-vous à la section “Modification des
réglages du son et de l’affichage” à la page 18).
La qualité sonore es t am élior ée, ma is le so n est
diffusé en mono (l’indication “ST” disparaît).
Page 43

Mémorisation des stations
souhaitées uniquement
Vous pouvez présélectionner manuellement les
stations souhaitées sur les touches numériques de
votre choix.
1 Appuyez plusieurs fois sur (SOURCE)
pour sélectionner “TUNER”.
2 Appuyez plusieurs fois sur (MODE)
pour sélectionner la bande.
3 Appuyez sur < ou , pour syntoniser
la station que vous souhaitez
mémoriser.
4 Appuyez sur la touche numérique
souhaitée ((1) à (6)) pendant
2 secondes jusqu’à ce que l’indication
“MEM” apparaisse en tant que source.
Le numéro de la touche s’affiche à l’écran.
Remarque
Si vous mémorisez une autre station sur la même
touche, la station mémorisée précédemment est
effacée.
Mémorisation des noms de
station
— Fonction de mémoire de s stations
Vous po uvez attribuer un nom à chaque s ta tion
de radio et l’enregistrer dans la mémoire. Le nom
de la station syntonisée apparaît alors dans
l’écran d’affichage. Vous pouvez attribuer un
nom de station com prenant jusqu’à 8 caractères.
Mémorisation des noms de station
1 Syntonisez une station dont vous
souhaitez mémoriser le nom.
2 Appuyez sur (MENU), puis appuyez
plusieurs fois sur M ou m jusqu’à ce
que l’indication “Name Edit”
apparaisse.
3 Appuyez sur (ENTER).
4 Saisissez les carac tè res du nom
souhaité.
1 Appuyez plusieurs fois sur M or m
pour sélectionner le caractère
souhaité.
A y B y C ... y 0 y 1 y 2 ...
y + y – y
*1 Insertion d’un espace
2 Appuyez sur , lorsque vous avez
repéré le caractère souhaité.
Pour revenir vers la gauche, appuyez sur
<.
3 Répétez les ét apes 1 et 2 pour
saisir le reste du nom.
... y *1 y A
*
5 Appuyez deux fois sur (MENU).
L’appareil revient au mode de réc ep tio n ra dio
normal.
Conseils
• Pour corriger ou effacer un nom, procédez
simplement par réécriture ou saisissez “ ”.
• Il existe une autre méthode pour mémoriser les
noms de station : au lieu d’effectuer les étapes 2 et
3, appuyez sur (LIST) pendant 2 secondes. Vous
pouvez également compléter l’opération en
appuyant sur (LIST) pendant 2 secondes au lieu
d’effectuer l’étape 5.
Suppression d’un nom de la station
1 En cours de réception rad io , ap puyez
sur (MENU), puis appuyez plusieurs
fois sur M ou m jusqu’à ce que
l’indication “Name Delete” apparaisse.
2 Appuyez sur (ENTER).
3 Appuyez plusieurs fois sur M ou m
pour sélectionner le nom de station
que vous souhaitez effacer.
4 Appuyez sur (ENTER) pendant
2 secondes.
Le nom est effacé.
Répétez les ét apes 3 e t 4 p our effacer d’autres
noms.
5 Appuyez deux fois sur (MENU).
L’appareil revient au mode de réc ep tio n ra dio
normal.
Remarque
Si vous avez déjà effacé tous les noms de station,
l’appareil revient en mode de réception radio normal à
l’étape 2.
15
Page 44

Syntonisation d’une station à
partir d’une liste
— Affichage automatique des titres
1 En cours de réception radio, appuyez
brièvement sur (LIST).
La fréquence ou le nom attribué à la station
actuelle s’affiche à l’écran.
2 Appuyez plusieurs fois sur M ou m
jusqu’à ce que vous ayez sélectionné
la station souhaitée.
Si aucun nom n’est attribué à la station
sélectionnée, la fr équence s’affiche à l’écran.
3 Appuyez sur (ENTER) pour syntoniser
la station sélectionnée.
Autres fonctions
Vous pouvez également pilot er l’appareil (et les
appareils CD/MD en option) avec un satell ite de
commande.
Fonctionnement du satellite
de commande
To ut d’a bor d, installe z la pile au lithi um CR203 2
fournie dans le satellite de commande. Reportezvous à la section “Remplace m en t d e la pile au
lithium” à la page 24 et “Remarques sur la pile au
lithium” à la page 25 pour obtenir des informations
détaillées sur la façon d’installer la pile au lith ium.
1
2
16
3
3
B
C
4
.>
mM
+
DISC
PUSH
SOURCE
DISC
-
6
5
A
D
AB
C
D
Page 45

a Touche ATT
Permet d’atténue r le son.
b Touche OFF*
1
Permet d’arrêter la lecture d’un disque ou la
réception radio.
c A Commande VOL (volume)
Faites tourner cette partie de la
commande pour régler le volume.
B Commande SOURCE
Appuyez ici pour changer la source
sonore.
(Radio/CD/MD*
2
/AUX*3)
C Commande ./>
Appuyez sur c et te commande pour :
– syntoniser aut omatiquement des
stations de radio.
– passer d’une plage à l’autre sur un
disque.*
2
Appuyez sur c et te commande et
maintenez-la enfoncée pour :
– syntoniser une station manuellement.
– avancer rapidement ou reculer dans une
plage.
D Commande DISC +/–
Appuyez sur c et te commande pour :
– syntoniser les stations mémori sé es.
– changer de disq ue.*
2
Appuyez sur c et te commande et
maintenez-la enfoncée pour :
– changer d’album.*
4
d Touche MODE
Appuyez sur cett e t ouche pour changer de
mode de fonctionnement (bande radio/
lecteur CD/lec t eur MD*
2
)
e Émetteur à infrarouges
Le satellite de commande transmet des
rayons infrarou ges dans la direction réglée
avec la molette.
f Molette de réglage de la direction des
rayons infrarouges
Tournez la molette pour modifier la direction
des rayons infrarouges.
Réglage des caractéristiques
du son
Vous p ouvez régler les graves, les a iguës, la
balance gauche-droite, l’équilibre avant-arrière
ainsi que le volume du caisson de graves.
1 Sélectionnez le par a m ètre que vous
souhaitez régler en appuyant
plusieurs fois sur (SOUND).
À chaque pression sur la touche (SOUND), la
rubrique change comme suit :
BAS (graves) t TRE (aiguës) t
BAL (gauche-droite) t
FAD (avant-arrière) t SUB (volume du
caisson de gr aves)
2 Réglez le paramètre sél ectionné en
appuyant sur < ou ,.
Remarque
Effectuez ce réglage dans les 3 secondes après avoir
sélectionné le paramètre.
Atténuation rapide du son
(À l’aide du satellite de commande ou de la
mini-télécommande)
Appuyez sur (ATT).
“ ATT·······on” apparaît brièvement dans
l’écran d’affichage.
Pour rétablir le niveau de volum e précédent,
appuyez de nouveau sur la touche (ATT).
Conseil
Lorsque le câble d’interface d’un téléphone de voiture
est raccordé au fil ATT, l’appareil réduit
automatiquement le volume lors d’un appel
téléphonique entrant (fonction ATT du téléphone).
*1 Si le contact de votre voiture n’est pas doté d’une
position ACC (accessoire), veillez à appuyer sur
(OFF) pendant 2 secondes pour désactiver
l’affichage de l’horloge après avoir coupé le
moteur.
*2 Uniquement si l’appareil en option correspondant
est raccordé.
*3 Disponible uniquement lorsqu’un appareil portatif
Sony en option est raccordé à l’entrée BUS AUDIO
IN de l’appareil. Vous ne pouvez pas raccorder en
même temps un appareil CD ou MD en option.
*4 Disponible uniquement lorsqu’un appareil CD
compatible MP3 en option est raccordé et qu’un
fichier MP3 est en lecture.
17
Page 46

Modification des réglages du
son et de l’affichage
— Menu
Les paramètres suivants peuvent être réglés :
(configuration)
• Clock (horlo ge) (page 9)
• Beep — pour activer ou désactiver le bip.
• AUX-A (page 23) — pour activer ou désactiver
l’affichage de la source AUX.
(affichage)
• D.Info (double informat ion) — pour afficher
simultanément l’horloge et le mode de lecture
(on).
• SA (analyseur de spectre) (page 22) — pour
modifier l’affichage des niveaux de signal
sonore.
• Dimmer (gradateur) — pour modifier la
luminosité de l’affichage.
– Sélectionnez “Auto” pour que la luminosité
de l’afficha ge soit réduite unique ment lorsque
vous allumez les phares.
– Sélectionnez “on ” pour réduire la luminosité
de l’affichage.
– Sélectionnez “off” pour désactiver le
gradateur de luminosité.
• Contrast — p our régler le contras t e si les
indications à l’écran ne peuvent pas être
distinguées en raison de la position
d’installation de l’appareil.
• A.Scroll (défilement automatique)
– Sélectionnez “on” pour faire défiler
automatiquement à l’écran tous les noms de
plus de 12 caractères.
– Lorsque le défilement automatique est
désactivé et que le disque, l’album ou la plage
est modifié, son nom a insi que l’é tiqu ette ID3
ne défilent pas.
•Demo
– Sélectionnez “on ” pour activer l’affichage de
démonstration.
L ’affichage de démonstration apparaît environ
10 secondes après la mise hors tension de
l’appareil.
(mode de lecture)
• Local on/off (mod e de recherche loca le) (page
14)
– Sélectionnez “on” pour syntonise r
uniquement les sta t io ns dont les signaux sont
puissants.
• Mono on/off (mod e m ono) (page 14)
– Sélectionnez “on” pour écouter les émissions
FM stéréo en mono. Sélectionnez “off” pour
revenir au mode normal.
• IF Auto/Wide (page 14)
(son)
• EQ7 Tune (page 19) — pour régler la courbe de
l’égaliseur.
• HPF (filtre passe -haut) (page 20)
• LPF (filtre passe- bas) (page 21)
• Loudness (int ensité sonore) — pour une bonne
reproduction des graves et des aiguës, même à
faible volume. Les graves et les aiguës sont
amplifiées.
• AUX Level (page 22) — pour régler le volum e
d’un appareil auxiliaire raccordé .
1 Appuyez sur (MENU).
Pour régler “A.Scroll”, appuyez sur (MENU)
en cours de lecture d’un CD ou d’un MD.
2 Appuyez plusieurs fois sur M ou m
jusqu’à ce que la rubrique souhaitée
apparaisse.
3 Appuyez sur < ou , pour
sélectionner le réglage so uhaité, par
exemple : “on” ou “off”.
4 Appuyez sur (MENU).
Une fois le réglage terminé, l’écran
d’affichage revient au mode de lecture
normal.
Remarque
Les rubriques affichées varient selon la source.
Conseil
Vous pouvez facilement passer d’une catégorie à
l’autre en appuyant sur M ou m pendant 2 secondes.
18
Page 47

Réglage de l’égaliseur (EQ7)
Il est possible de sélectionner une courbe
d’égaliseur pour 7 ty pes de musique (Vocal,
Club, Jazz, New Age, Rock, Custom et Xplod),
ainsi que de dés ac t iver l’égaliseur (“off”).
Vous pouvez régler et mémor is er les fréquences
et les niveaux de l’égaliseur.
Vous pouvez sauvegarder un jeu de réglages EQ7
pour chaque source.
Sélection de la courbe de l’égaliseur
1 Appuyez sur (SOURCE) pour
sélectionner la source souhaité e.
2 Appuyez plusieurs fois sur (EQ7) pour
sélectionner la courbe d’égaliseur
souhaitée.
À chaque pression sur la touche (EQ7), la
rubrique change.
Pour annuler l’effet de l’égalise ur,
sélectionnez “off”. Après 3 secondes,
l’affichage revient en mode de lecture normal.
Réglage de la courbe de l’égaliseur
1 Appuyez sur (MENU).
2 Appuyez plusieurs fois sur M ou m
jusqu’à ce que l’indication “EQ7 Tune”
apparaisse, puis appuyez sur
(ENTER).
3 Appuyez sur < ou , pour
sélectionner la courbe d’égaliseur
souhaitée, puis appuyez sur (ENTER).
À chaque pression sur la touche < ou ,, la
rubrique chang e.
4 Sélectionnez la fréquence et le niveau
souhaités.
1 Appuyez sur < ou , pour
sélectionner la fréquence
souhaitée.
À chaque pression sur la touche < ou ,,
la fréquence change.
62Hz y 157Hz y 396Hz y 1.0k Hz
y 2.5kHz y 6.3kHz y 16kHz
2 Appuyez sur M ou m pour régler le
volume au niveau souha i té.
Le niveau de volume peut être régl é par
incréments de 1 dB, de –10 à +10 dB.
Pour restaurer la courbe par défaut de
l’égaliseur, appuyez sur (ENTER) pendant
2 secondes.
5 Appuyez deux fois sur (MENU).
Lorsque le réglage est terminé, l’affichage
revient en mode de lecture normal.
19
Page 48

Réglage du répartiteur
dynamique du son émis
(DSO)
Si vos haut-parleurs sont installés dans la par tie
inférieure des portières, le son est émis à un
niveau proche du sol et il se peut qu’il ne soit pas
clair.
La fonction DSO (Dyn am i c Soundstage
Organizer) crée un son mieux réparti, comme s’il
y avait des haut-parleurs dan s l e t abl eau de bord
(haut-parleu rs virtuels).
Vous po uvez sauvegarder un réglage D SO pour
chaque source.
Répartition des haut-parleur s vi rtuels sel on
les réglages DSO
*3
*2
*4
*1 DSO 1
*2 DSO 2
*3 DSO 3
*4 DSO OFF
1 Appuyez sur (SOURCE) pour
sélectionner la source souhaitée.
2 Appuyez plusieurs fois sur (DSO)
jusqu’à ce que le réglage DSO
souhaité s’affiche.
À chaque pression sur la touche (DSO), le
réglage DSO change de “DSO········1” à
“DSO········3”, puis à “off”.
*3
*1
*1
*2
*4
Réglage du volume avant et
arrière
1 Appuyez sur (SOURCE) pour
sélectionner la source souhaitée.
2 Appuyez plusieurs fois sur (SOUND)
jusqu’à ce que l’indication “FAD”
apparaisse.
3 Appuyez plusieurs fois sur < ou ,
pour équilibrer le volume des
haut-parleurs avant et arrière.
Après 3 second es, l’af f ichage rev ient en m ode
de lecture normal.
Réglage de la fréquence de coupure
pour les haut-parleurs avant et arrière
Pour mieux faire correspondre le son aux
caractéristiques des haut -p arleurs installés, vou s
pouvez sélectionner la fréquence de coupu re des
haut-parleurs.
Fréquence de coupure
off
Niveau
Fréquence (Hz)
Pour désactiver la fonction DSO, sélect ionnez
“DSO······off”. Après 3 secondes, l’affichage
revient en mode de lecture norm al.
Remarques
• Selon l’intérieur de la voiture ou le type de musique,
la fonction DSO peut avoir un effet indésirable.
• Si vous avez de la difficulté à entendre les émissions
FM, réglez DSO à “off”.
20
Page 49

1 En cours de lecture ou de réception
radio, appuyez sur (MENU).
2 Appuyez plusieurs fois sur M ou m
jusqu’à ce que l’indication “HPF”
apparaisse.
3 Appuyez sur < ou , pour
sélectionner la fréquence de coupure.
À chaque pression su r < ou ,, la
fréquence cha nge comme suit :
“off” (désacti vé, réglage par dé faut) y
78Hz y 125Hz
4 Appuyez sur (MENU).
Lorsque le réglage de la fréquence est
terminé, l’affichage revient en mode de
lecture norma l.
Réglage du volume du ou
des caisson(s) de graves
1 Appuyez sur (SOURCE) pour
sélectionner la source souhaité e.
2 Appuyez plusieurs fois sur (SOUND)
jusqu’à ce que l’indication “SUB”
apparaisse.
3 Appuyez plusieurs fois sur < ou ,
pour régler le volume.
Après 3 secondes, l’affichage revient en mode
de lecture normal.
Conseil
Le niveau de volume peut être réglé de –10 à +10 dB
(à moins de –10 dB, “–∞ dB” s’affic he).
Réglage de la fréquence de coupure du
ou des caisson(s) de graves
Pour mieux faire correspondre le son aux
caractéristiques du ou des caisson(s) de graves
raccordé(s), vous pouvez supprimer les signaux de
haute et de moyenne fréquence émis vers les
caissons de graves. Lorsque v ous régl ez la
fréquence de coupure (reportez-vous au diagramme
ci-dessous), le ou les caisson(s) de graves émet
(tent) uniquement des signaux de basse fréquence.
Le résultat est une image sonore plus nette.
Fréquence de coupure
Niveau
off
Fréquence (Hz)
1 En cours de lecture ou de réception
radio, appuyez sur (MENU).
2 Appuyez plusieurs fois sur M ou m
jusqu’à ce que l’indication “LPF”
apparaisse.
3 Appuyez sur < ou , pour
sélectionner la fréquence de coupure.
À chaque pression sur < ou ,, la
fréquence chang e comme suit :
“off” ( désactivé, réglage par dé faut) y
125Hz y 78Hz
4 Appuyez sur (MENU).
Lorsque le réglage de la fréquence est
terminé, l’affichage revient en mode de
lecture normal.
21
Page 50

Sélection de l’analyseur de
spectre (SA)
Raccordement d’un appareil
audio auxiliaire
Le niveau du signal sonore est a ffiché par un
analyseur de spectre. V ous pouvez sélectionner
un affichage en 10 conf igurations (SA········· 1 à 9)
ou le mode d’ affichage automati que où tou tes le s
configur ati ons ap parai ssent , ou e ncore désa cti v er
l’analyseur de spectre (off).
1 Appuyez sur (SOURCE) pour
sélectionner la source souhaitée.
2 Appuyez sur (MENU).
3 Appuyez plusieurs fois sur M ou m
jusqu’à ce que l’indication “SA”
apparaisse.
4 Appuyez sur < ou , pour
sélectionner le réglage souhaité.
5 Appuyez sur (MENU).
Lorsque le réglage est terminé, l’affichage
revient en mode de lecture norm al.
Le connecteur AUX IN (entrée audio externe) de
cet appareil se rt également de conn ecteur BUS
AUDIO IN (entrée audio).
Ainsi, vous pouvez raccorder un appareil portatif
Sony en option et l’éc outer par les haut-parleurs
de la voiture.
Remarque
Si vous raccordez un appareil CD ou MD Sony en
option, vous ne pouvez raccorder aucun appareil
portatif et vous ne pouvez pas sélectionner “AUX”.
Sélection de l’appareil auxiliaire
Appuyez plusieurs fois sur (SOURCE)
pour sélectionner “AUX”.
Réglage du niveau de volume
Vous pouvez régler le volume de chaque appareil
audio raccordé.
1 Appuyez sur (MENU), puis appuyez
plusieurs fois sur M ou m jusqu’à ce
que l’indication “AUX Level”
apparaisse.
2 Appuyez sur (ENTER).
3 Appuyez plusieurs fois sur M ou m
pour régler le volume au niveau
souhaité.
Le niveau de volume peut être régl é par
incréments de 1 dB, de –6 à +6 dB.
4 Appuyez deux fois sur (MENU).
Lorsque le réglage est terminé, l’affichage
revient en mode de lect ur e normal.
22
Page 51

Pour désactiver l’appareil auxiliaire
dans l’affichage de la source de
musique
1 Appuyez sur (OFF).
La lecture du disq ue CD ou MD ou la
réception radio s’arrête (l’éclairage des
touches et l’affichage restent allumés).
2 Appuyez sur (MENU).
3 Appuyez plusieurs fois sur M ou m
jusqu’à ce que l’indication
“AUX-A·····on” apparaisse.
4 Appuyez sur , pour sélectionner
“AUX-A····off”.
5 Appuyez sur (MENU).
Pour afficher de nouveau l’indication,
sélectionnez “AUX-A·····on”.
Informations
complémentaires
Entretien
Remplacement du fusible
Lorsque vous remplacez le fusib le, ve illez à util iser
un fusible dont la capacité, en ampères, correspond
à celle indiquée s u r l’ancien fusib le . Si le fusible
fond, vérifiez le ra cc o rd eme n t d e l’alimentation et
remplacez le fusible. Si le fusible fond de nouveau
après av oir été remplacé, il est possible qu e
l’appareil soit défec tu eux. Le cas échéan t,
consultez votre détaillant Sony le plus proche.
Fusible (10 A)
Avertissement
N’utilisez jamais de fusible dont la capacité en
ampères dépa sse celle du fusible fourni avec
l’appareil, car vous risquer iez d’endommager
l’appareil.
Nettoyage des connecteurs
L’appareil peut ne pas fonctionner c orrectement
si les connecteu rs entre l’apparei l e t la façade
sont souillés. Pour éviter cette situation, enlevez
la façade (page 8) et nettoyez les connec teurs à
l’aide d’un coton-tige imbibé d’alcool. N’exercez
pas une pression trop forte, car vous risqueriez
d’endommager les connecteurs.
Appareil principal
Suite à la page suivante t
23
Page 52

Arrière de la façade
Remarques
• Pour plus de sécurité, coupez le moteur et retirez la
clé du contact avant de nettoyer les connecteurs.
• Ne touchez jamais les connecteurs directement
avec les doigts ou avec un outil métallique.
Remplacement de la pile au lithium
En fonctionnement normal, une pile dure environ
1 an. (La durée de vie de la pile peut être plus
courte, selon les conditions d’utilisation.)
Lorsque la pile est faible, la portée de la minitélécommande ou du satellite de commande
diminue.
Remplacez alors la pile par une pile au lithium
neuve. L’utilisation de tout autre type de pile
pose un risque d’i ncendie ou d’explosion.
RM-X112 : pile au lithium CR2025
RM-X6S : pile au lithium CR2032
1 Ouverture du couvercle du logem ent
de la pile
Saisissez la molette de réglage de di rection
des rayons infrar ouges et ouvrez le couverc le
du logement de la pile en le faisant tourner
dans le sens contra ir e des aiguilles d’un e
montre avec une pièce de monnaie.
2 Retrait de la pile
Appuyez sur le côté de la pile comme
indiqué, puis retirez-l a.
24
x
CR2025
côté + vers le haut
3 Insertion de la pile
Insérez une pile tel qu’illustré. Veillez à
respecter la polarité lors de l’insta llati on de la
pile.
CR2032
côté + vers le haut
Page 53

Remarques sur la pile au lithium
• Tenir la pile au lithium hors de la portée des
enfants. En cas d’ingestion de la pile, consulter
immédiatement un médecin.
• Essuyez la pil e a vec un chi f fon sec pour a ssure r
un bon contact.
• Veillez à respecter la polarité lors de
l’installation de la pile.
• Ne tenez pas la pi le avec des pi nces
métalliques, car cela pourrait entraîner un
court-circuit.
ATTENTION
Utilisée de façon incorrecte, la pile peut
exploser. Ne pas la recharger, la démonter ni
la jeter au feu.
Démontage de l’appareil
1 Démontez le panneau avant
1 Retirez la faça de ( page 8).
2 Appuyez sur la pince située dans le
panneau avant avec un tournevis
fin.
3 Répétez l’étape 2 de l’autre côté.
2 Démontez l’appareil
1 Utilisez un tournevis fin pour
enfoncer l’attache du côté gauche
de l’appareil, puis tirez le côté
gauche de l’appareil jusqu’à son
dégagement complet.
4 mm
3
(
/16 po)
2 Répétez l’étape 1 du côté droit.
3 Faites glisser l’appareil hors de son
support.
25
Page 54

Caractéristiques techniques
Lecteur CD
Rapport signal/bruit 90 dB
Réponse en fréquence 10 à 20.000 Hz
Pleurage et scintillement En dessous du seuil
mesurable
Radio
FM
Plage de syntonisation 87,5 à 107,9 MHz
Borne d’antenne Connecteur d’antenne
Fréquence intermédiaire 10,7 MHz/450 kHz
Sensibilité utile 8 dBf
Sélectivité 75 dB à 400 kHz
Rapport signal/bruit 66 dB (stéréo),
Distorsion harmo nique à 1 kHz
Séparation 35 dB à 1 kHz
Réponse en fréquence 30 à 15.000 Hz
externe
72 dB (mono)
0,6 % (stéréo),
0,3 % (mono)
AM
Plage de syntonisation 530 à 1.710 kHz
Borne d’antenne Connecteur d’antenne
Fréquence intermédiaire 10,7 MHz/450 kHz
Sensibilité 30 µV
externe
Amplificateur de puissance
Sorties Sorties de haut-parleurs
Impédance des haut-parleurs
Puissance de sortie maximale
(connecteurs de sécurité)
4 à 8 ohms
52 W × 4 (à 4 ohms)
Généralités
Sorties Sorties audio (avant-arrière)
Entrées Fil de commande ATT
Commandes de tonalité Graves ±10 dB à 62 Hz
Intensité sonore +8 dB à 100 Hz
Alimentation requise Batterie de voiture 12 V CC
Dimensions
Dimensions du support
Poids
Accessoires fournis Mini-télécommande (1)
Accessoires en option C â ble BUS (fo ur ni avec un
Appareils en option C ha nge ur CD ( 10 dis que s)
Remarque
Cet appareil ne doit pas être branché à un
préamplificateur numérique ni à un égaliseur.
La conception et les caractéristiques techniques sont
sujettes à modification sans préavis.
Sortie de caisson de graves
(mono)
Fil de commande de relais
d’antenne électrique
Fil de commande
d’amplificateur de
puissance
téléphone
Fil de commande de
l’éclairage
Connecteur d’entrée de
commande BUS
Connecteur d’entrée audio
BUS/AUX IN
Connecteur d’entrée de
l’antenne
Aiguës ±10 dB à 16 kHz
+2 dB à 10 kHz
(masse reliée au négatif)
Environ. 178 × 50 × 179 mm
(7 1/8 × 2 × 7 1/8 po.)
(l/h/p)
Environ. 182 × 53 × 162 mm
1
(
× 2 1/8 × 6 1/2 po.)
7
/4
(l/h/p)
Environ
. 1,3 kg
(2 lb 14 oz.)
Pièces d’installation et de
raccordement (1 jeu)
Étui pour la façade (1)
Satellite de comma nde (1)
câble à broche RCA)
RC-61 (1 m), RC-62 (2 m)
CDX-757MX, CDX-656
Changeur CD (6 disques)
CDX-T70MX, CDX-T69
Changeur MD (6 disques)
MDX-66XLP
Lecteur MG-MS System-up
MGS-X1
Récepteur radio XM
XT-XM1
Sélecteur de source
XA-C30
26
Page 55

Dépannage
La liste de contrôle suivante vous aidera à
remédier aux problèmes que vous pourriez
rencontrer avec cet appareil.
Avant de passer en revue la liste ci-dessous,
vérifiez les procéd ur es de raccordemen t et
d’utilisation.
Généralités
Aucun son.
• Réglez le volume en appuyant sur (VOL).
• Désactivez la fonction ATT.
• Pour un système à 2 haut-parleurs, réglez la
commande d’équi l ibre avant-arrière à l a
position médiane.
Le contenu de la mémoire a été effacé.
• La touche de réinitialisation (RESET) a été
enfoncée.
t Recommencez la procédure
d’enregistrement dans la mémoire.
• Le câble d’alimentation ou la batterie a été
déconnecté.
• Le câble d’alimentation n’est pas raccordé
correctement.
Aucun bip ne se fait en tendre.
• Le bip est désactivé (page 18).
• Un amplificateu r de puissance en option est
raccordé et vous n’utilisez pas
l’amplificateur intégré.
Aucune indication n’apparaît dans l’écran
d’affichage ou les indications disparaissent.
• L’affichage de l’horloge disparaît si vous
appuyez sur (OFF) pendant 2 secondes
(page 5).
• Retirez la façade et nettoyez les connecteurs.
Reportez-vous à la section “Nettoyage des
connecteurs” à la page 23 pour plus de
détails.
Les stations mémorisées et l’heure correcte
sont effacées.
Le fusible est fondu.
Émission de bruits lorsque la clé de contact
est en position ON, ACC ou OFF.
Les fils ne sont pas raccor dés correctement au
connecteur d’alimentati on de la v oiture desti né
aux accessoires.
L’appareil ne reçoit pas d’électricité.
• Vérifiez le raccordement. Si tout est en
ordre, vérifiez le fusible.
• Le contact de la voiture n’est pas équipé
d’une position ACC (page 5).
t Appuyez sur (SOURCE) (ou insérez un
CD) pour activer l’apparei l .
L’appareil est alimenté en permanence.
Le contact d e la v o itu re n’ est pas éq ui pé d’ un e
position ACC.
L’antenne électrique ne se déploie pas.
L’antenne électrique ne dispose pas d’un
boîtier de relais.
Impossible de supprimer l’indication “--------”.
Vous êtes en mode d’édition du nom.
t
Appuyez sur
(LIST)
pendant 2 secondes.
Lecture de CD et de MD
Impossibl e d’ introduire un di s q ue.
• Un autre CD ou MD est déjà en place .
• Le CD ou MD a été introduit de force à
l’envers ou dans le mauvais sens.
La lecture ne commence pas.
• Disque MD défectueux ou disque CD souillé.
• CD-R ou CD-RW non finalisé.
• Vous avez essayé de lancer la lec ture d’un
disque CD-R ou CD-RW qui n’est pas conçu
pour une utilisati on audio.
• Certains disques CD-R ou CD-RW peuvent
ne pas être lus en raison de l’appareil utilisé
pour l’enregistrement ou de l’état du disque.
Un disque est automatiquement éjecté.
La température ambiante dépasse 50°C.
Les touches de commande ne fonctionnent pas.
Impossible d’éjecter le CD.
Appuyez sur la to uche RESET.
Le son est irrégulier en raison de vibrations.
• L’appareil est installé suivant un angle de
plus de 60°.
• L’appareil n’est pas installé à un endr oi t
suffisamment stable de la voiture.
Le son saute.
Le disque est sale ou défectueux.
Réception radio
Impossible de syntoniser une présélection.
• Enregistrez la fréquence correcte dans la
mémoire.
• Le signal reçu est trop faible.
Suite à la page suivante t
27
Page 56

Impossible de syntoniser des stations.
Le son comporte des parasites.
• Raccordez un fil d e commande d’antenne
électrique (bleu) au câble d’aliment at i on de
l’amplificateur d’antenne de la voiture.
(Uniquement si votre voiture est équipée
d’une antenne FM/AM intégrée dans la vitre
arrière/latérale.)
• Vérifiez le raccordement de l’antenn e de la
voiture.
• L’antenne automatique ne se déploie pas.
t Vérifiez le raccordement du fil de
commande de l’ant enne électrique.
• Vérifiez la fréque nce.
• Lorsque le mode DSO est activé, le son peut
parfois compo r ter des parasites.
t Changez le réglage du mo de D S O ou
réglez-le à “off” (page 20).
La syntonisation automatique est
impossible.
• Le mode de recherche locale est réglé à “on”.
t Régl ez le mode de recherch e l o c ale à
“off” (page 18).
• Le signal reçu est trop faible.
t Utilisez la syntonisation manuelle.
L’indi c a t i on “ST” clignote.
• Syntonisez la fréquence correctement.
• Le signal reçu est trop faible.
t Activez le mode de réception mono
(page 18).
Une émission en stéréo est entendue en
mono.
• L’appareil est en mode de réception mono.
t Désactivez le mode de réception mono
(page 18).
Des interférences se produisent en cours de
réception FM.
Le mode de réception étendue (wid e) est
sélectionné.
t Réglez le mode IF à “IF Auto” (page 14).
Affichage des erreurs et
messages
Affichage des erreurs
(pour cet appareil et les changeurs CD ou
MD en option)
Les indications suivantes cli gnotent pendant
environ 5 secondes et une alarme retenti t.
1
Blank*
Aucune plage n’a été enregistrée sur un MD.*
t Ins ér ez un MD contenant des pl ages
enregistrées.
1
Error*
• Le CD est sale ou in séré à l’envers.*
t
Nettoyez le CD o u in sérez-le correcte men t.
• Le CD ou MD inséré ne peut pas être lu en
raison de certains pr oblèmes.*
2
t Insérez un autre CD ou MD.
High Temp
La température ambiante est supérieure à
50°C (122°F).
t Attendez que la temp érature descende en
dessous de 50°C (122°F).
NO Disc*
1
Aucun disque n’a été inséré dans le lecteur CD
ou MD.
t I ns ér ez un disque dans le lecteur CD ou
MD.
NO Magazine
Le chargeur n’a pas été inséré dans le lecteur
CD ou MD.
t Insérez le chargeur dans le lecteur CD ou
MD.
NO Music
Un CD ne contenant aucun fichier de musique
a été inséré dans le lecteur CD c ompatible
MP3.
t
Insérez un CD contenant des fichiers de
musique dans le lecteur CD compatible MP3.
Not Ready
Le couvercle du lecteur MD est ouvert ou les
MD ne sont pas insérés correctement.
t Fermez le couvercle ou insére z
correctement les MD.
Push Reset
Le lecteur CD ou MD ne peut pas fonctionne r
en raison de cert ains problèmes.
t Appuyez sur la touche RESET de
l’appareil.
*1 Lorsqu’un changeur CD ou MD est raccordé à
l’appareil, le numéro de disque du CD ou du MD
s’affiche à l’écran.
*2 Le numéro du disque qui a provoqué l’erreur
s’affiche à l’écran.
Si ces solutions ne permettent pas d’améliorer la
situation, consultez votre détaillant Sony le plus
proche.
Messages
Local Seek +/–
Le mode de recherche locale est activé en
cours de synton is at i on automatique (pa ge 14).
“” ou “”
Vous avez atteint le début ou la fin du disque et
2
vous ne pouvez pas aller plus loin.
2
28
Page 57

29
Page 58

Bienvenido
E
p
p
Gracias por adquir ir este reproductor de dis cos
compactos Son y. Disfrutará aún más de sus
distintas funciones con los siguientes elementos:
• Unidades opci onales de CD/MD (ca m bi adores
y reproductores)*
• Información CD TEXT (mostrada al reproducir
discos CD TEXT*
• Accesorios de controlador
suministrados
Control remoto de tar je ta RM -X112
Mando rotatorio RM-X6S
*1 Esta unidad funciona solamente con productos
Sony.
*2 Un disco CD TEXT es un CD de audio que incluye
información como el nombre del disco, el nombre
del artista y los nombres de las pistas. Esta
información está grabada en el disco.
l logotipo “XM Ready” indica que este
roducto controlará un módulo de sintonizador
Sony XM (se vende por separado).
Si desea obtener detalles sobre el módulo de
sintonizador XM, póngase en contacto con su
roveedor Sony más cercano.
Para obtener instrucciones sobre el
funcionamiento del sintonizador XM, consulte el
manual de instrucciones suministrado con el
módulo de sintonizador XM.
1
.
2
).
2
Page 59

Tabla de contenido
Ubicación de los controles. . . . . . . . . . . . . . . 4
Precauciones . . . . . . . . . . . . . . . . . . . . . . . . . 6
Notas sobre los discos . . . . . . . . . . . . . . . . . . 6
Procedimientos iniciales
Restauración de la unidad . . . . . . . . . . . . . . . 7
Extracción del panel frontal. . . . . . . . . . . . . . 8
Ajuste del reloj . . . . . . . . . . . . . . . . . . . . . . . 9
Reproductor de CD
Unidad de CD/MD (opcional)
Reproducción de discos. . . . . . . . . . . . . . . . . 9
Elementos de la pantalla . . . . . . . . . . . . . . . 11
Reproducción repetida de pistas
— Reproducción repetida. . . . . . . . . . . . 11
Reproducción de pistas en orden aleatorio
— Reproducción aleatoria . . . . . . . . . . . 12
Asignación de nombres a un CD
— Memorando de discos* . . . . . . . . . . . 12
Localización de disc os por nombre
— Listado* . . . . . . . . . . . . . . . . . . . . . . . 14
* Funciones disponibles con una unidad opcional de
CD/MD
Radio
Almacenamiento automático de emisoras
— Memoria de la mejor sintonía
(BTM). . . . . . . . . . . . . . . . . . . . . . . . . . . 14
Recepción de las emisoras almacenadas . . . 15
Almacenamiento de las emisoras
deseadas . . . . . . . . . . . . . . . . . . . . . . . . . 15
Almacenamiento de nombres de emisoras
— Memorando de emisoras . . . . . . . . . . 16
Sintonización de em i so ras mediante una lista
— Listado . . . . . . . . . . . . . . . . . . . . . . . . 16
Otras funciones
Uso del mando rotatorio . . . . . . . . . . . . . . . 17
Ajuste de las características del soni do. . . . 18
Atenuación rápida del sonido. . . . . . . . . . . 18
Cambio de los ajustes de sonido y de la pantalla
— Menú . . . . . . . . . . . . . . . . . . . . . . . . . 18
Ajuste del ecualizador (EQ7) . . . . . . . . . . . 19
Ajuste del Organi zador de sonido de baja
frecuencia dinámico (DSO) . . . . . . . . . . 20
Ajuste del volumen frontal y posterior. . . . 21
Ajuste del volumen de los altavoces
potenciadores de graves. . . . . . . . . . . . . 21
Selección del analizador de
espectros (SA) . . . . . . . . . . . . . . . . . . . . 22
Conexión de equipo s auxiliares de
audio . . . . . . . . . . . . . . . . . . . . . . . . . . . . 22
Información complementaria
Mantenimiento . . . . . . . . . . . . . . . . . . . . . . 23
Extracción de la unidad. . . . . . . . . . . . . . . . 25
Especificaciones . . . . . . . . . . . . . . . . . . . . . 26
Solución de problemas . . . . . . . . . . . . . . . . 2 7
Mensajes y avisos de error . . . . . . . . . . . . . 28
3
Page 60

Ubicación de los controles
Control remoto de tarjeta RM-X1 12
SCRL
DSPL
REP SHUF
1
2
3
4
5
6
MODE
EQ7DSO
LIST
+
DISC
MENU
–
SEEK
SOUND
SOURCE
DISC
+
VOL
–
+
SEEK
–
ENTER
ATTOFF
(DISC)
(SEEK)
(<):para
En el modo de menú, los botones que se pueden
seleccionar de estos 4 se indican con “ v” en la
pantalla.
Sugerencia
Consulte “Sustitución de la pila de litio” en la página 24
para obtener detalles sobre cómo cambiar las pilas.
(M): para seleccionar
seleccionar
hacia la
izquierda/
.
hacia arriba
–
SEEK
(m): para seleccionar
hacia abajo
DISC
SOURCE
DISC
(DISC)
+
–
+
SEEK
(SEEK)
(,): para
seleccionar
hacia la
derecha/>
Consulte las páginas indicadas para obtener información detallada.
a Botón SCRL 11
k Botón MODE
b Botón DSPL (cambio del modo de
indicación)
c Botones numéricos
(1) REP
l Botón EQ7 19
m Botón LIST 14, 16
n Botones DISC (M/m)
(2) SHUF
Para almacenar emisoras y recibir e m is oras
almacenadas.
d Botón DSO 20
e Botón MENU
Para mostrar los menú s.
f Botón SOURCE (encendido/radio/CD/
MD*
1
/AUX*2)
Para seleccio na r l a fu en te.
o Botón ENTER
p Botón ATT 18
*1 Con una unidad de MD opcional conectada.
*2 Disponible únicamente si se conecta un dispositivo
g Botones SEEK (</,)
Para omitir pistas, avanzar o re tr oceder
rápidamente una pi sta, sintonizar emisoras
en forma automática, buscar una emisora en
*3 Con una unidad de CD/MD opcional conectada.
*4 Disponible solamente cuando hay conectada una
forma manual y seleccionar un ajuste.
h Botón SOUND 18, 21
i Botón OFF (Detener/Ap agar ) 8, 10, 23
j Botones VOL (+/–)
4
Para subir o bajar el volume n.
Para cambiar el funcionamiento.
Para recibir emisoras memorizadas, cambiar
el disco*
3
, omitir álbumes*4 y seleccionar un
menú.
Para ingresar un ajuste.
portátil opcional de Sony a la toma BUS AUDIO IN
de la unidad. No es posible conectar unidades de
CD/MD opcionales simultáneamente.
unidad de CD opcional con la función de control de
archivos MP3 y se reproduce el archivo MP3.
Page 61

Unidad principal
VOL
SOURCE
a Botón SOURCE
b Receptor para el control remoto de
tarjeta y para el mando rotatorio
c Botón Z (expulsar) (ubicado en la parte
delantera de la unid ad, de tr ás del panel
frontal) 10
d Pantalla
e Botón OPEN 8, 10
f Botón RESET (ubicado en la parte
delantera de la unid ad, de tr ás del panel
frontal) 7
g Botones VOL (+/–)
h Botón OFF*
OFF
CDX-CA900X
* Advertencia sobre la instalación en un
automóvil sin posición ACC (auxiliar) en la
llave de encendido
Después de apagar el motor, presione (OFF)
durante 2 segundos para desactivar la
indicación del reloj.
En caso contrario, l a indicación del reloj no se
desacti vará y causará el desgaste de la bat ería.
Nota
Si la unidad se apag a pr esionando (OFF)
durante 2 segundo s, no podrá utilizarse con el
control remoto de tarjeta ni con el mando
rotatorio, a menos que se presione (SOURCE)
en la unidad o que se inserte un disco para que
dicha unidad se active primero.
5
Page 62

Precauciones
Notas sobre los discos
• Si estaciona el automóvil bajo la luz directa de l
sol, deje que la unidad se e nfrí e antes de usarl a.
• Las antenas m otorizadas se exte nderán
automáticamente mientras la unidad se
encuentra en funci onamiento.
• No use la opción CUSTOM FILE ni ninguna
otra función mientras conduce par a no distraer
su atención del volante.
Si desea realizar alguna consulta o solucionar
algún problema rel at ivo a la unidad y que este
manual no trate, consulte con el proveedor Sony
más cercano a su domicilio.
Condensación de humedad
En días lluviosos o en zonas muy húmedas, es
posible que se condense humedad dentro de las
lentes y la pantalla de l a unidad. Si esto ocurre,
ésta no funcionará cor rectamente. En este cas o,
extraiga el disco y esper e una hora
aproximadamente hasta que se haya evaporado la
humedad.
Para mantener una alta cal idad de
sonido
Asegúrese de no derramar jugos ni bebidas
suaves sobre la unidad o los di scos.
• Para mantener los discos limpios, no toque su
superficie. Tómelos por los bordes.
• Guarde los discos en sus cajas o en los
cargadores de discos cuando no los utilice.
No someta los discos al calor ni a altas
temperaturas. Evite dejarlos en automóviles
estacionados, o en los tableros o las ban dej as
traseras.
• No adhiera eti quetas, ni utilice disc os con
residuos o tinta pegaj osos. Tales discos pueden
dejar de girar dura nte el uso, causar fallas de
funcionamie nt o, o pueden daña rse.
• No use discos con etiquetas pegadas o
autoadhesivos.
Su uso puede prod ucir las siguientes fal l as de
funcionamiento:
– Imposibili dad de expulsar el disco (dado que
se ha despegado la etiqueta o el autoadhesivo,
y se obstruye el mecanismo de expulsión).
– Imposibilidad de leer los datos de audio
correctamente (por ejemplo, se interrumpe la
reproducción o simplemente no la hay)
debido a que el cal or contrae el autoadhesivo
o la etiqueta y hace que e l di s co se
distorsione.
• Los discos co n formas no es t andarizadas (p.ej.,
corazón, cuadrado, estrella) no pueden
reproducirse en esta unidad. Si lo intenta,
puede dañar la unidad. No utilice tales discos.
• No es posible reproducir CD de 8 cm .
6
Page 63

• Antes de la reproducción, limpie los d iscos co n
un paño de limpieza disponible en el mercado.
Hágalo desde el centro hacia los bordes. No use
disolventes como bencina, dilu yentes,
limpiadores comerciales ni aeroso les
antiestáticos para discos analógicos.
Notas sobre discos CD-R/CD-RW
• Puede reproducir discos CD-R (discos
compactos gr ab ables) y discos CD-R W (discos
compactos reescribible s) dis eñado s para u so de
audio en esta unidad.
Busque estas marcas p ara dife rencia r los disc os
CD-R y CD-RW para uso de audio.
Estas marcas ind i can que el disco no es para uso
de audio.
Procedimientos iniciales
Restauración de la unidad
Antes de utilizar la unidad por primera vez, o
después de sustituir la batería del automóvil o de
cambiar las conexiones, debe restaurarla.
Extraiga el panel frontal y presione el botón
RESET con un objet o con punta, como por
ejemplo un bolígrafo.
Botón RESET
Nota
Al presionar RESET, se borra el ajuste del reloj y
algunos contenidos en memoria.
• Es posible que algunos di scos CD-R y C D -RW
(según el equipo utilizado para su grabació n o
la condición del dis co) no puedan reprod ucirse
en esta unidad.
• No es posible reproducir un disco CD-R o un
CD-RW que no esté finalizado*.
* Este es un proceso necesario para reproducir un
disco grabado CD-R o CD-RW en el reproductor
de CD de audio.
7
Page 64

Extracción del panel frontal
Puede extraer el panel frontal de esta unidad para
evitar que la roben.
Alarma de precaución
Si gira la llave de encendido hasta la posición
OFF sin haber extraído el panel fron tal, la alar ma
de precaución emite tonos durante unos
segundos.
Si conecta un amplificador opcional de potencia
y no utiliza el incorporado, los tonos s e
desactivan.
1 Presione (OFF)*.
La reproducc ión de CD /MD o la re cepc ión de
la radio se detiene (la iluminación de las
teclas y la pantalla permanecen activadas).
* Si el automóvil no dispone de una posición ACC
en la llave de encendido, asegúrese de apagar
la unidad presionando (OFF) durante 2
segundos para evitar que se gaste la batería.
2 Presione (OPEN), luego desplace el
panel frontal hacia la derecha y tire
suavemente su extremo izqui erdo.
Instalación del panel frontal
Coloque e l orificio A del panel frontal en el eje
B de la unidad, luego presione ligeramente el
lado izquierdo hacia adentro.
Presione (SOURCE) en la unidad (o inserte un
CD) para utilizar la uni dad.
A
B
x
1
2
Notas
• Si extrae el panel con la unidad encendida, la
alimentación se desactiva automáticamente para
evitar que los altavoces se dañen.
• No deje caer el panel frontal ni su pantalla. T ampoco
ejerza excesiva presión sobre éstos.
• No someta el panel frontal al calor ni a altas
temperaturas o humedad. Evite dejarlo en un
automóvil estacionado o sobre el tablero o la
bandeja trasera.
Sugerencia
Al transportar el panel frontal, utilice el estuche
suministrado.
8
Nota
No coloque nada sobre la superficie interior del panel
frontal.
Page 65

Ajuste del reloj
El reloj emplea una indicación digital de 12
horas.
Ejemplo: Para ajustar el reloj a las 10:08
Reproductor de CD
Unidad de CD/MD
(opcional)
1 Presione (MENU) y, a continuación, M
o m varias veces hasta que aparezca
“Clock”.
1 Presione (ENTER).
La indicación de hora parpadea.
2 Presione M o m para ajustar la hora.
3 Presione ,.
La indicación de minutos parpadea.
4 Presione M o m para ajustar los
minutos.
2 Presione (MENU) dos veces.
El reloj se pone en funcionamiento. Al
finalizar el ajuste del reloj, la pantalla vuelve
al modo de reproducción normal.
Sugerencia
Si el modo D.Info está activado, siempre se mostrará
la hora (p ágina 18).
Además de reproducir un CD con esta unid ad,
también puede controlar las unidades externas de
CD (CD con capaci dad para reproduci r MP3) y
MD. Si conecta uni dades opcionales de CD con
capacidad para reproducir MP3 (como el
cambiador de CD MP3), podrá reproducir
archivos MP3, que son archivos (pistas) de audio
comprimidos con calidad de sonido.
Nota
Si conecta una unidad de CD opcional (CD con
capacidad para reproducción MP3) con la función CD
TEXT, la información CD TEXT aparecerá en la
pantalla al reproducir discos CD TEXT.
Reproducción de discos
(Con esta unidad)
1 Presione (OPEN) e inserte el disco
(cara etiquetada hacia arr i ba) .
2 Cierre el panel frontal.
La reproducción se inicia automáticamente.
Si ya hay un disco insertado, presione
(SOURCE) varias veces hasta que aparezca
“CD” para iniciar la reproducción.
continúa en la página siguiente t
9
Page 66

Para Presione
Detener la
(OFF)
reproducción
Expulsar el disco (OPEN) luego Z
Omitir pistas
–Sensor de música
(SEEK) (./>)
[una vez por pista]
automático
Avanzar o
retroceder
rápidamente
–Búsqueda
(SEEK) (m/M)
[manténgalo pres i onado
hasta alcanzar el punto
deseado]
manual
Notas
• Si presiona < o , mientras se reproduce la
primera o l a últ ima pi sta de un disc o , la reprod ucci ón
salta a la última o a la primera pi sta del mismo.
• Cuando finalice la última pista del disco, la
reproducción comenzará nuevamente con la
primera pista del disco.
• Con una unidad opcional conectada, la
reproducción de la misma fuente continuará en la
unidad de CD/MD opcional.
(Con unidad opcional)
Precauciones al conectar unidades MGS-X1 y MD
Esta unidad reconoce MGS-X1 como una unidad MD.
• Si desea reproducir MGS-X1, presione (SOURCE)
para seleccionar “MS” o “MD”. Si aparece “MS” en la
pantalla de fuente, se inicia la reproducción de
MGS-X1. Si aparece “MD” en la pantalla de fuente,
presione (MODE) para seleccionar “MS” e iniciar la
reproducción.
• Si desea reproducir una unidad MD, presione
(SOURCE) para seleccionar “MD” o “MS”. Si la
unidad MD deseada aparece en la pantalla de
fuente, se inicia su reproducción. Si en la pantalla
de fuente aparece “MS” u otra unidad MD, presione
(MODE) para seleccionar la unidad MD deseada e
iniciar la reproducción.
Notas sobre la conexión de unidades de CD con
capacidad para reproducir MP3
• Si se inserta un disco que no contiene archivos MP3
(pistas), aparecerá la indicación “NO Music” en la
pantalla y se iniciará la reproducción del disco
siguiente.
• Antes de reproducir una pista, la unidad lee toda la
información sobre las pistas y el álbum que contiene
el disco. Según la estructura de las pistas, podría
tardar más de un minuto antes de comenzar la
reproducción. Durante este tiempo, aparece “Read”
en la pantalla. Espere hasta que la reproducción se
inicie automáticamente una vez terminada la
lectura.
1 Presione (SOURCE) varias veces para
seleccionar “CD” o “MD (MS*
1
)”.
2 Presione (MODE) varias veces hasta
que aparezca la unidad deseada.
Comienza la reproducción.
Para Presione
Omitir discos
–Selección de
discos
Omitir álbumes*
–Selección de
álbumes
*1 MS: MG Memory Stick System-up Player MGS-X1
*2 Sólo está disponible cuando se reproduce un
archivo MP3.
Los álbumes son carpetas de un CD que
contienen archivos MP3.
(DISC) (+) o (DISC) (–)
[una vez para cada dis co]
2
(DISC) (+) o (DISC) (–)
[manténgalo pres i onado
hasta alcanzar el punto
deseado]
10
Page 67

Elementos de la pantalla
Al cambiar el disco/álbum/pista, el título
pregrabado*
aparece automát i camente (si la función de
desplazamiento automático está ajustada en
“on”, se desplazarán los nombres con más de 12
caracteres (p ágina 18)).
Para Presione
Cambiar el
elemento de la
pantalla
Desplazar el
elemento por la
pantalla
1
del nuevo disco/album/pista
Pantalla MDLP*
2
LP2: reproducción LP2
LP4: reproducción LP4
Número de pista
Número de
disco/álbum*
Fuente
Elementos qu e s e ve n en la pantalla
• Nombre del disco*
del artista*
5
• Nombre de la pista*
• Nombre del álbum*1*
• Indicador ID3*1*
Tiempo de
3
reproducción
transcurrido
1*4
/Nombre
1
3
3
(DSPL)
(SCRL)
Reloj
Notas
• Algunos caracteres no pueden mostrarse. Los
caracteres y signos que no se pueden mostrar
aparecen como “ *”.
• Con algunos discos CD TEXT o indicadores ID3 que
contienen muchos caracteres, es posible que la
información no se desplace.
• Esta unidad no puede mostrar el nombre del artista
de cada pista de un disco o álbum CD TEXT.
Sugerencia
Si el desplazamiento automático (Auto Scroll) está
desactivado y se cambia el nombre del disco/álbum/
pista, no se desplaza dicho nombre ni el indicador
ID3.
Reproducción repetida de
pistas
— Reproducción repetida
Se repetirá una pi sta o el álbum completo de la
unidad principal o todo el disco cuando llegue a l
final. Para la reproducción repetida, es p osible
seleccionar las siguientes opciones:
•REP
····Track — para repetir una pista.
•REP
····Album*
•REP
·····Disc*
*1 Sólo está disponible cuando se reproduce un
archivo MP3.
*2 Disponible solamente cuando hay conectada una o
más unidades de CD/MD opcionales.
Durante la reproducción, presione (1)
(REP) varias veces hasta que el ajuste
deseado aparezca en la pantalla.
Comienza la reproducción repetida.
Para recuperar el modo de reproducción normal,
seleccione “REP
1
— para repetir un álbum.
2
— para repetir un di sco.
······off”.
*1 Al presionar (DSPL), los mensajes “NO Disc
Name”, “NO Album Name” o “NO Track Name”
indican que no hay ningún nombre de disco, de
álbum o de pista y el mensaje “NO ID3 Tag” indica
que no hay ningún indicador ID 3.
*2 Disponible solamente cuando se conecta una
unidad de MD opcional con la función MDLP y se
reproduce un disco MDLP.
*3 Sólo está disponible cuando se reproduce un
archivo MP3.
*4 Si el disco ha sido etiquetado por esta unidad con
la función CUSTOM FILE, se muestra Memorando
del disco como primera opción.
*5 Sólo para discos CD TEXT con nombre del artista.
11
Page 68

Reproducción de pistas en
orden aleatorio
— Reproducción aleatoria
Es posible seleccionar:
•SHUF
···Album*
archivos MP3 de un álbum de la unidad d e CD
opcional con l a función de contro l de archiv os
MP3 en orden aleat or io .
•SHUF
····Disc — para reproducir las pistas del
disco en orden alea to ri o.
•SHUF
·Changer*
de la unidad de CD (MD) opcional en orden
aleatorio.
•SHUF
·····All*
pistas de todas las unidades de CD (MD)
conectadas (incluida esta unidad) en ord en
aleatorio.
*1 Sólo está disponible cuando se reproduce un
archivo MP3.
*2 Disponible solamente cuando hay conectada una o
más unidades de CD (MD) opcionales.
*3 Disponible solamente cuando hay conectada una o
más unidades de CD opcionales, o dos o más
unidades de MD opcionales.
Durante la reproducción, presione (2)
(SHUF) varias veces hasta que el
ajuste deseado aparezca en la
pantalla.
Comienza la reproducción aleatoria.
Para recuperar el modo de reproducci ón normal,
seleccione “SHUF
Nota
“SHUF·····All” no reproduce las pistas en orden
aleatorio entre unidades de CD y de MD.
1
— para reproducir los
2
— para reproduci r las pistas
3
— para reproduc ir to das las
·····off”.
Asignación de nombres a un
CD
— Memorando de discos (Para una unidad de
CD con función CUSTOM FILE)
Puede asignar n ombres a los discos con un
nombre personalizado (Memorando del disco).
Puede ingresar hasta 8 caracteres por disco. Si le
asigna nombre a un CD, podrá localizarlo con
dicho nombre (página 14).
1 Comience a reproducir el disco al que
desee asignar un nombre en una
unidad de CD con la función CUSTOM
FILE.
2 Presione (MENU) y, a continuación, M
o m varias veces hasta que ap arezca
“Name Edit”.
3 Presione (ENTER).
La unidad repetirá el dis co durante el
procedimiento de asignación de nombres.
4 Ingrese los ca racteres.
1Presione M o m varias veces para
seleccionar el carácter deseado.
A y B y C ... y 0 y 1 y 2 ...
y + y – y
*1 (espacio en blanco)
2Presione , después de localizar el
carácter deseado.
... y *1 y A
*
12
Si presiona <, podrá desplazarse hacia
atrás a la izquierda .
3Repita los pasos 1 y 2 para
ingresar el nombre completo.
5 Presione (MENU) dos veces.
La unidad vuelve al modo de reproducción
normal de CD.
Page 69

Sugerencias
• Para corregir o borrar un nombre, sobrescríbalo o
ingrese “ ”.
• Existe otro método para comenzar a asignar un
nombre al CD: Presione (LIST) durante 2 segundos
en lugar de seguir los pasos 2 y 3. También puede
completar la operaci ón presionando (LIST) durante
2 segundos en lugar de seguir el paso 5.
• Podrá asignar nombres a discos compactos en una
unidad sin la función CUSTOM FILE, si la unidad
está conectada junto con una unidad de CD que
tenga dicha función. El memorando del disco se
almacenará en la memoria de la unidad de CD con
la función CUSTOM FILE.
Nota
REP····Track o aleatoria se suspende hasta
completarse la edición de nombres.
Presentación del memorando del disco
Como elemento de pantalla, el memorando del
disco siempre tie ne prioridad sobre cualquier
informa ción CD TEXT original.
Para Presione
Ver (DSPL) durante la
reproducción de di scos CD/
CD TEXT
Sugerencia
Para conocer otros elementos que pueden verse en
pantalla, consulte la página 11.
Notas
• Cuando se borra el memorando de un disco CD
TEXT, aparece la información CD TEXT original.
• Si no encuentra el memorando que desea borrar,
inténtelo seleccionando una unidad de CD diferente
en el paso 2.
• Si ya borró todos los Memorandos de disco, la
unidad vuelve al modo de reproducción normal de
CD en el paso 4.
Borrado del memorando del disco
1 Presione (SOURCE) varias veces para
seleccionar “CD”.
2 Presione (MODE) varias veces para
seleccionar la unidad de CD que
contenga el memorando.
3 Presione (MENU) y, a continuación, M
o m varias veces hasta que aparezca
“Name Delete”.
4 Presione (ENTER).
Aparecen los nombres almacenados.
5 Presione M o m varias veces para
seleccionar el nombre de disco que
desee borrar.
Aparecen los nombres almacenados.
6 Presione (ENTER) durante 2
segundos.
El nombre se bo rr a.
Si desea borrar otros nombres, repita los
pasos 5 y 6.
7 Presione (MENU) dos veces.
La unidad vuelve al modo de reproducción
normal de CD.
13
Page 70

Localización de discos por
nombre
— Listado (Para una unidad de CD con la
función CD TEXT/CUSTOM FILE o una unidad
de MD)
Esta función puede usarse con discos a los que se
han asignado nombr es personalizados *
discos CD TEXT*
*1 Localización de discos por su nombre
personalizado: al asignar un nombre a un CD
(página 12,13) o MD.
*2 Localización de discos por la información CD
TEXT: cuando reproduce un disco CD TEXT en
una unidad de CD con la función CD TEXT .
2
.
1 Presione (LIST).
El nombre asignado al disco aparece en la
pantalla.
2 Presione M o m varias veces hasta que
encuentre el disco deseado.
3 Presione (ENTER) para reproducir el
disco.
Nota
No es posible ver ciertas letras (excepto memorando
de discos).
1
o con
Radio
La unidad puede almacenar hasta 6 emisoras por
banda (FM1, FM2, FM3, AM1 y AM2).
Precaución
Para sintonizar em isoras mientra s conduce, use
la función Memor ia de emisoras con mejor
sintonía para evitar accidentes.
Almacenamiento automático
de emisoras
— Memoria de la mejor sintonía (BTM)
La unidad seleccion a la s emisoras de señal más
intensa dentro de la banda seleccionada y las
almacena por or den de frecuenci a.
1 Presione (SOURCE) varias veces para
seleccionar “TUNER ” .
2 Presione (MODE) varias veces para
seleccionar la banda.
3 Presione (MENU) y, a continuación, M
o m varias veces hasta que ap arezca
“BTM”.
4 Presione (ENTER).
La unidad emite un tono al almacenar el
ajuste.
Notas
• Si se reciben pocas emisoras debido a que las
señales son débiles, algunos botones numéricos
conservarán sus valores anteriores.
• Si la pantalla muest ra un número, la unidad
comienza a almacenar emisoras a partir del número
que se muestra en el momento.
14
Page 71

Recepción de las emisoras
almacenadas
1 Presione (SOURCE) varias veces para
seleccionar “TUNER”.
2 Presione (MODE) varias veces para
seleccionar la banda.
3 Presione el botón numérico ((1) a (6))
en el que esté almacenada la emisora
deseada.
Sugerencia
M o m para recibir las emisoras en el orden
Presione
en el que están almacenadas en la memoria (Función
de búsqueda programada).
Si la sintonización programada no
funciona
Presione < o , para buscar la
emisora (sintonizac ió n aut om át i ca) .
La exploración se det i ene cuando la unidad
recibe una emisora. Repita la operación hasta
recibir la emis ora deseada.
Sugerencias
• Si la sintonización automática se detiene con
demasiada frecuencia, active la búsqueda local para
buscar solamente emisoras de señal más intensa
(consulte “Cambio de los ajustes de sonido y de la
pantalla” en la página 18).
• Si conoce la frecuencia de la emisora que desea
escuchar, presione y mantenga presionado
, para localizar la frecuencia aproximada. A
continuación, presione
ajustar con precisión la frecuencia deseada
(sintonización manual).
< o , varias veces para
< o
Sugerencias
• Para escuchar siempre las em isi o ne s est é re o de FM
en estéreo, puede cambiar el ajuste IF Auto y ampliar
la recepción de la señal de la frecuencia (consulte
“Cambio de los ajustes de sonido y de la pantalla” en
la página 18). Tenga en cuenta que pueden
producirse ciertas interferencias con este ajuste.
• Si tiene dificultades para escuchar las emisiones de
FM, desactive DSO (página 20).
Almacenamiento de las
emisoras deseadas
Puede memorizar manualmente las emisoras que
desee en cualquier botón numérico.
1 Presione (SOURCE) varias veces para
seleccionar “TUNER”.
2 Presione (MODE) varias veces para
seleccionar la banda.
3 Presione < o , para sintonizar la
emisora que desee alma cenar.
4 Presione el botón numéric o deseado
((1) a (6)) durante 2 segundos hasta
que aparezca “MEM” en la pantalla de
la fuente.
La indicación de botó n numérico aparece en
la pantalla.
Nota
Si intenta almacenar otra emisora en el mismo botón
numérico, se borra la emisora antes almacenada.
Si la recepción de FM en estéreo es de
mala calidad
Seleccione el modo d e re cepción
monofónica
(consulte “Cambio de los ajustes de sonido y
de la pantalla” en la página 18).
El sonido mejora, aunque es monofónic o
(“ST” desapa rece).
Nota
Si se producen interferencias, esta unidad estrechará
automáticamente la frecuencia de recepción para
eliminar el ruido (función IF Auto). En tales casos, es
posible que algunas emisiones de FM en estéreo se
escuchen en monofónico mientras se encuentra en el
modo de recepción estéreo.
15
Page 72

Almacenamiento de nombres
de emisoras
— Memorando de emisor as
Es posible asignar un nombre a cada em is or a de
radio y almacenarlo en la memoria. El nombre de
la emisora actualmente sintonizada aparece en la
pantalla. Es posibl e asignar un nombre co n un
máximo de 8 caracteres por emisora.
Almacenamiento de nombres de
emisoras
1 Sintonice la emisora cuyo nombre
desee almacenar.
2 Presione (MENU) y, a continuación, M
o m varias veces hasta que aparezca
“Name Edit”.
3 Presione (ENTER).
4 Ingrese los caractere s.
1 Presione M o m varias veces para
seleccionar el carácter deseado.
A y B y C ... y 0 y 1 y 2 ...
y + y – y
*1 (espacio en blanco)
2 Presione , después de localizar el
carácter deseado.
... y *1 y A
*
Borrado del nombre de emisoras
1 Durante la recepción de la radio,
presione (MENU) y, a continuación, M
o m varias veces hasta que ap arezca
“Name Delete”.
2 Presione (ENTER).
3 Presione M o m varias veces par a
seleccionar la emiso ra c u yo nombr e
desee borrar.
4 Presione (ENTER) durante 2
segundos.
El nombre se borra.
Si desea borrar otros nombres, r ep i t a los
pasos 3 a 4.
5 Presione (MENU) dos veces.
La unidad vuelve al mod o normal de
recepción de radio.
Nota
Si ya ha borrado todos los nombres de emisoras, la
unidad regresará al modo de recepción de radio
normal en el paso 2.
Sintonización de emisoras
mediante una lista
— Listado
1 Durante la recepción de la radio,
presione (LIST) momentáneamente.
La frecuencia o el nom br e asignado a la
emisora actual aparece en la pantalla.
Si presiona <, podr á desplazarse hacia
atrás a la izquierda.
3 Repita los pasos 1 y 2 para
ingresar el nombre com p leto.
5 Presione (MENU) dos veces.
La unidad vuelve al modo normal de
recepción de radi o.
Sugerencias
• Para corregir o borrar un nombre, sobrescríbalo o
ingrese “ ”.
• E xiste otr o méto do para comen zar a alm ace na r
nombres de emisoras: Presione (LIST) durante 2
segundos en lugar de seguir los pasos 2 y 3.
También puede completar la operación presionando
(LIST) durante 2 segundos en lugar de seguir el
paso 5.
16
2 Presione M o m varias veces hasta que
encuentre la emisora deseada.
Si la emisora seleccionada no tiene un
nombre asignado, l a pa ntalla mostrará la
frecuencia correspondiente.
3 Presione (ENTER) para sintonizar la
emisora deseada.
Page 73

Otras funciones
También puede controlar la unidad (y unidades
opcionales de CD/M D ) con un mando rotativo.
Uso del mando rotatorio
En primer lugar, coloque la pila de litio CR2032
suministrada en el mando rotatorio.
Consulte “Sustitución de la pila de litio” en la
página 24 y “Notas sobre la pila de litio” en la
página 25, para obtener más información acerca
de la instalación de la pila de litio.
1
3
3
4
2
6
5
A
a Botón ATT
Atenuar el sonido.
b Botón OFF*
1
Detener la reproducción o la recepci ón de la
radio.
c A Control VOL (volumen)
Gírelo para ajustar el volumen.
B Control SOURCE
Presiónelo para cambiar la fuente.
(radio/CD/MD*
2
/AUX*3)
C Control ./>
Presione para:
– sintonizar emisor as en forma
automática.
– omitir pistas del disco.*
2
Presiónelo y manténgalo presionado para:
– buscar una emisora en forma manual.
– avanzar o retroceder rápi damente una
pista.
D Control DISC +/–
Presione para:
– recibir emisoras memorizadas.
– cambiar el disc o. *
Presiónelo y manténgalo presionado para:
– cambiar el álbum.*
2
4
d Botón MODE
Cambiar el func i onamiento (banda de rad io/
unidad de CD/unidad d e M D*
2
)
e Emisor de infrarrojos
El mando rotatorio emite rayos in frarrojos e n
la dirección del ajuste del selector.
f Selector de rayos infrarrojos
Gire el selector para cambiar la dirección de
los rayos infrarrojos.
+
B
C
DISC
PUSH
.>
mM
SOURCE
DISC
-
D
AB
C
D
*1 Si su automóvil no dispone de una posición ACC
(accesorios) en el interruptor de la llave de
encendido, presione (OFF) durante
2 segundos para que la indicación del reloj se
desactive al apagar el motor.
*2 Sólo si el equipo opcional correspondiente está
conectado.
*3 Disponible únicamente si se conecta un dispositivo
portátil opcional de Sony a la toma BUS AUDIO IN
de la unidad. No es posible conectar unidades de
CD/MD opcionales simultáneamente.
*4 Disponible solamente cuando hay conectada una
unidad de CD opcional con la función de control de
archivos MP3 y se reproduce un archivo MP3.
17
Page 74

Ajuste de las características
del sonido
Es posible ajustar los graves, los agudos, el
balance, el equilibrio y el volumen del alta voz
potenciador de graves.
1 Seleccione el elemento que desee
ajustar presionando (SOUND) varias
veces.
Cada vez que pr esione (SOUND), el
elemento cambiará de la siguiente forma:
BAS (graves) t TRE (agudos) t
BAL (izquierdo-derecho) t
FAD (frontal-posteri o r) t
SUB (volumen del altavoz potenciador
de graves)
2 Ajuste el elemento selecci onado
presionando < o ,.
Nota
Realice el ajuste dentro de los 3 segundos posteriores
a la selección del elemento.
Atenuación rápida del sonido
(Con el mando rotatorio o el control remoto
de tarjeta)
Presione (ATT).
“ATT·······on” aparece momentáneamente en
la pantalla.
Para recuperar el nivel ante ri or de volumen,
presione (ATT) de nuevo.
Sugerencia
Si el cable de interfaz de un teléfono para automóvil
está conectado al cable ATT, la unidad disminuirá el
volumen automáticamente cuando se reciba una
llamada telefónica (función ATT de teléfono).
Cambio de los ajustes de
sonido y de la pantalla
— Menú
Es posible ajustar los siguientes elementos:
(Configuración)
• Clock (reloj) (página 9)
• Beep (piti do) — para activar o desactivar los
pitidos.
• AUX-A (página 23) — para encender o apagar
la pantalla de fuente AUX.
(Pantalla)
• D.Info (in formación dual) — para mostrar
simultáneamente el reloj y el modo de
reproducción (activado).
• SA (analizador de espectros)
(página 22) — para cambiar el patrón de
visualización del nivel de señal del sonido.
• Dimmer (atenuador) — para cambiar el brillo
de la pantalla.
– Seleccione “Auto” para que la pant al l a s e
atenúe sólo al encender las luces.
– Seleccione “on” para que la pantalla se
atenúe.
– Seleccione “off” para desactivar el atenuador.
• Contrast (contraste) — para ajustar el contraste
cuando las indicaciones de la pantalla no
pueden reconocerse debido a la po si ción de
instalación de la uni dad.
• A.Scroll (de splazamiento automático)
– Seleccione “on” para que se desp la cen
automáticamente todos los nombres
mostrados de más de 12 caracteres.
– Si el desplazamiento automático está
desactivado y se cambia el nombre del disco/
álbum/pista, dich o nombre o indicador ID3
no se desplaza.
•Demo
– Seleccione “on” para activar la pantalla
Demo.
La pantalla Demo ap ar ecerá
aproximadament e 10 segundos después de
que se apague la unidad.
18
(Modo de reproducción)
• Local on/off (modo de búsqueda local)
(página 15)
– Seleccione “on” para que se sintonicen
solamente emisoras de señal más intensa.
• Mono on/off (modo monofónico) (página 15)
– Seleccione “on” para escuchar emisiones
estéreo de FM en modo monofónico.
Seleccione “off” para recuperar el modo
normal.
• IF Auto/Wide (página 15)
Page 75

(Sonido)
• EQ7 Tune (página 20) — para ajustar la curva
del ecualizador .
• HPF (Filtro de paso alto) (página 21)
• LPF (Filtro de paso bajo) (pági na 21)
• Loudness (Sonoridad) — para dis frutar de
graves y agudos incluso con el volumen bajo.
Los graves y los agudos se po te nciarán.
• AUX Level (página 22) — para ajustar el nivel
de volumen del equipo auxiliar que estuviera
conectado.
1 Presione (MENU).
Para ajustar A.Scrol l, pr esione (MENU)
durante la reproducción de CD/MD.
2 Presione M o m varias veces hasta que
aparezca el element o deseado.
3 Presione < o , para selecc io nar el
ajuste que desee (ejemplo: “on” u
“off”).
4 Presione (MENU).
Al finalizar el ajuste del modo, la pantalla
vuelve al modo de reproducción normal.
Nota
El elemento mostrado varía en función de la fuente.
Sugerencia
Puede cambiar de categoría fácilmente presionando
M o m durante 2 segundos.
Ajuste del ecualizador (EQ7)
Puede seleccionar una curva de ecualizado r para
7 tipos de música (Vocal, Club, Jazz, New Age,
Rock, Custom , X plod y off (ecualizador
apagado)).
Puede almace nar y definir los ajustes de
frecuencia y el nivel del ecualizador.
Puede almacenar el ajuste EQ7 para ca da fuente.
Selección de la curva de ecualizador
1 Presione (SOURCE) para seleccionar
la fuente deseada.
2 Presione (EQ7) varias veces hasta
que aparezca la curva de ecualizador
deseada.
Cada vez que presione (EQ7), el elemento
cambiará.
Para cancelar el efecto de ecualización,
seleccione “off”. Transcurridos 3 segundos, la
pantalla vuelve al modo de reproducción
normal.
continúa en la página siguiente t
19
Page 76

Ajuste de la curva de ecualizador
1 Presione (MENU).
2 Presione M o m varias veces hasta que
aparezca “EQ7 Tune” y luego presione
(ENTER).
3 Presione < o , para seleccionar la
curva de ecualizador que desee y
luego presione (ENTER).
Cada vez que pr esione < o ,, el elemento
cambiará.
4 Seleccione la frecuencia y el nivel que
desee.
1 Presione < o , para seleccionar
la frecuencia que desee.
Cada vez que presione < o ,, la
frecuencia cambiará.
62Hz y 157Hz y 396Hz y 1.0kHz
y 2.5kHz y 6.3kHz y 16kHz
2 Presione M o m para ajustar el nivel
de volumen deseado.
El nivel de volumen puede ajustarse en
intervalos de 1 dB entre –10 dB y +10 dB.
Para restaurar la curva de ecualizador
ajustada en fábrica, presione (ENTER)
durante 2 segundos.
5 Presione (MENU) dos veces.
Una vez completado el aj uste de efecto, la
pantalla vuelve al modo de reproducción
normal.
Ajuste del Organizador de
sonido de baja frecuencia
dinámico (DSO)
Si los altavoces están instala dos en la parte
inferior de las puertas, el sonido se recibirá desde
abajo y puede no ser nítido.
La función DSO (O rgani za dor de sonido de baja
frecuencia dinám ico) crea un sonido m ás
ambiental como si hubiera altavoces en el tablero
(altavoces virtuales).
Puede almacenar el ajuste DSO para cada fuente.
Modo DSO e imagen de los altavoces
virtuales
*3
*2
*4
*1 DSO 1
*2 DSO 2
*3 DSO 3
*4 DSO OFF
1 Presione (SOURCE) para seleccionar
la fuente deseada.
2 Presione (DSO) varias veces hasta
que aparezca el ajuste DSO deseado.
Cada vez que pr es io ne (DSO), el ajuste DSO
cambiará del siguiente modo: “DSO··· ·····1-3 ”
y “off”.
*3
*1
*1
*2
*4
20
Para cancelar la funci ón DSO, seleccione
“DSO······off”. Transcurridos 3 segundos, la
pantalla vuelve al modo de reproducción
normal.
Notas
• Según el tipo de interior del automóvil o el tipo de
música, DSO puede no tener el efecto deseado.
• Si tiene dificultades para escuchar las emisiones de
FM, apague la función DSO.
Page 77

Ajuste del volumen frontal y
posterior
1 Presione (SOURCE) para seleccionar
la fuente deseada.
2 Presione (SOUND) varias veces hasta
que aparezca “FAD”.
3 Presione < o , varias veces par a
ajustar el volumen de los altavoces
frontales y posteriores.
Transcurridos 3 segundos, la pantalla vuelve
al modo de reproducción normal.
Ajuste de la frecuencia de corte para
los altavoces frontales y posteriores
Con el fin de adaptarse a las caracterí st ic a s del
sistema de altavoces instalado, puede seleccionar
la frecuencia d e corte de los altavoces.
Frecuencia de corte
Nivel
off
Frecuencia (Hz)
1 Durante la reproducción o la
recepción de radio, presione (MENU).
2 Presione M o m varias veces hasta que
aparezca “HPF”.
Ajuste del volumen de los
altavoces potenciadores de
graves
1 Presione (SOURCE) para seleccionar
la fuente deseada.
2 Presione (SOUND) varias veces hasta
que aparezca “SUB”.
3 Presione < o , varias veces para
ajustar el volumen.
Transc urridos 3 segu nd os, la pantalla vuelve
al modo de reproducción normal.
Sugerencia
El nivel de volumen puede ajustarse entre –10 dB y
+10 dB. (Menos de –10 dB, aparece “–∞ dB”.)
Ajuste de la frecuencia d e corte p ara el
o los altavoces potenciadores de
graves
Con el fin de adaptarse a las características del
altavoz o altavoces potenciadores de graves
conectados, puede eliminar las señales de alta y
media frecuencia que no desee que reciben
dichos alta v oce s. Al ajus tar la fr ecue ncia d e c orte
(consulte el diagrama que aparec e a
continuación), el altavoz o altavoces
potenciadores de graves sólo emitirán señales de
baja frecuenci a de forma que pueda ob te nerse
una imagen de son id o más nítida.
Frecuencia de corte
Nivel
off
3 Presione < o , para selecc io nar la
frecuencia de corte.
Cada vez que presione < o ,, la frecuencia
cambiará de la siguiente forma:
off (ajuste predetermina d o) y 78Hz y
125Hz
4 Presione (MENU).
Una vez completa do el ajuste de frecuen ci a,
la pantalla vuelve al m odo de reproducción
normal.
Frecuencia (Hz)
continúa en la página siguiente t
21
Page 78

1 Durante la reproducción o la
recepción de radio, presione (MENU).
2 Presione M o m varias veces hasta que
aparezca “LPF”.
3 Presione < o , para seleccionar la
frecuencia de corte.
Cada vez que presione < o ,, la frecuencia
cambiará de la siguiente forma:
off (ajuste predetermin ado) y 125Hz y
78Hz
4 Presione (MENU).
Una vez completado el aj uste de frecuencia,
la pantalla vuelve al modo de reproducción
normal.
Selección del analizador de
espectros (SA)
El nivel de señal de sonido se muestra en un
analizador de espectros. Puede seleccionar una
visualización para 10 patrones (SA·········1-9),
una visualizaci ón desactivada (analizador de
espectros desa ct ivado) o el modo de
visualización automática en el que aparecen
todos los p atrones.
1 Presione (SOURCE) para seleccionar
la fuente deseada.
2 Presione (MENU).
3 Presione M o m varias veces hasta que
aparezca “SA”.
Conexión de equipos
auxiliares de audio
El terminal AUX IN (entrada de audio externo)
de la unidad tambié n se usa como terminal BUS
AUDIO IN (entrada de audio).
Puede escuchar el sonido desde los altavoces del
automóvil si conecta los dispositivos portátiles
opcionales de Sony.
Nota
Si conecta una unidad de CD/MD opciona l de Sony,
no podrá conectar ningún dispositivo portátil ni
seleccionar “AUX”.
Selección del equipo auxiliar
Presione (SOURCE) varias veces para
seleccionar “AUX”.
Ajuste del nivel de volumen
Puede ajustar el volumen de cada uno de los
equipos de audio conectados.
1 Presione (MENU) y, a continuación, M
o m varias veces hasta que ap arezca
“AUX Level”.
2 Presione (ENTER).
3
Presione M o m varias veces para
seleccionar el nivel de volumen deseado.
El nivel de volumen puede ajustarse en
intervalos de 1 dB entre –6 dB y +6 dB.
4 Presione (MENU) dos veces.
Una vez compl etado el ajuste, la pantalla
vuelve al modo de repr oducción normal.
4 Presione < o , para seleccionar el
ajuste que desee.
5 Presione (MENU).
Una vez completado el ajuste, la pantalla
vuelve al modo de reproducción normal.
22
Page 79

Para desactiv ar el equi po auxi liar en la
pantalla de la fuente de música
1 Presione (OFF).
La reproducci ón de CD/MD o l a rec epci ón de
la radio se detiene (la iluminación de las
teclas y la pant alla permanece n activadas).
2 Presione (MENU).
3 Presione M o m varias veces hasta que
aparezca “AUX-A·····on”.
4 Presione , para seleccionar
“AUX-A····off”.
5 Presione (MENU).
Para restaurar la in dicación, selecci one
“AUX-A·····on”.
Información
complementaria
Mantenimiento
Sustitución del fusible
Al reemplazar el fusible, aseg ú r ese de utilizar
uno cuyo amper aj e sea idéntico al especi fica do
en el original. Si el fusible se funde, compruebe
la conexión de alimentación y sustitúyalo. Si el
fusible se funde de nuevo después de sustituirlo,
es posible que exista alguna falla interna de
funcionamiento. En tal caso, comuníquese con el
proveedor Sony más cercano.
Fusible (10 A)
Advertencia
Nunca use un fusible cuyo amperaje supere al del
suministrado co n l a unidad, ya que ésta pod ría
dañarse.
Limpieza de los conectores
La unidad pue de no funcionar corr ectamente si
los conectores ent re di cha unidad y el panel
frontal están suc io s. Para evitar lo , extraiga el
panel frontal (página 8) y limpie los conectores
con un hisopo de alg odón humedecido en
alcohol. No aplique demasiada fuerza. De
hacerlo, podría dañar los conectores.
Unidad principal
continúa en la página siguiente t
23
Page 80

Parte posterior del
panel frontal
Notas
• Por razones de segurida d, apa gue el encendido
antes de limpiar los conectores y extraiga la llav e del
encendido.
• No toque nunca los conectores directamente con los
dedos ni con algún dispositivo metálico.
Sustitución de la pila de litio
En condiciones normales, las pilas du ran
aproximadament e 1 año. (La duración puede ser
menor en función de las condiciones de uso.)
Cuando la pila está a punt o de agot arse, se reduc e
el alcance del mando rotatorio y del control
remoto de tarjeta.
Sustitúyala por una pila de litio nueva. La
utilización de cual quier otra pila pued e pr ovocar
incendios o explosione s.
RM-X112: pila de litio CR2025
RM-X6S: pila de litio CR2032
1 Apertura de la tapa del compartimento
de la pila
Sujete el selector de ajuste de infrarrojos y
abra la tapa del compartimento de la pila
haciéndolo girar en sentido contrario a las
agujas del reloj con l a ayuda de una moneda .
2 Extacción de la pila
Haga presion sobre el lateral de la pila según
se indica y extráigala.
24
x
CR2025
Lado + hacia arriba
3 Inserción de la pila
Inserte la pila como se muestra en la
ilustración. Compruebe que la orientación de
la polaridad de la pila es la cor r ecta.
CR2032
Lado + hacia arriba
Page 81

Notas sobre la pila de litio
• Mantenga la pi la de l itio fuera del alcance de
los niños. Si alguien se traga la pila, póngase en
contacto inmedi at am ente con un médico.
• Limpie la pila con un paño seco para garantizar
un contacto óptimo.
• Asegúrese de observar la polaridad correcta al
instalar la pila.
• No agarre la pila con pinzas met álicas, ya que
si lo hace puede pro ducirse un cortocircu ito.
ADVERTENCIA
La pila puede explotar si no se emplea
adecuadamente.
No recargue la pila; tampoco la desmonte ni
la arroje al fuego.
Extracción de la unidad
1 Extraiga la cubierta frontal
1 Extraiga el panel frontal (pági na 8).
2 Presione el gancho interior de la
cubierta frontal con un
destornillador fino.
3 Repita el paso 2 en el otro lado.
2 Extraiga la unidad
1 Utilice un destornillador fino para
ejercer presión sobre el gancho del
lado izquierdo de la unidad, y
después tire de dicho lado hasta
que el retén libere la fijación.
4 mm
2 Repita el paso 1 en el lado
derecho.
3 Deslice la unidad para extraerla del
marco.
25
Page 82

Especificaciones
Sección del reproductor de CD
Relación señal-ruido 90 dB
Respuesta de frecuencia de 10 a 20 000 Hz
Fluctuación y trémolo Inferior al límit e m edi ble
Sección del sintonizador
FM
Margen de sintonización de 87,5 a 107,9 MHz
Terminal de antena Conector de antena externa
Frecuencia intermedia 10,7 MHz/450 kHz
Sensibilidad útil 8 dBf
Selectividad 75 dB a 400 kHz
Relación señal-ruido 66 dB (estéreo),
Distorsión armónica a 1 kHz
Separación 35 dB a 1 kHz
Respuesta de frecuencia de 30 a 15 000 Hz
72 dB (mono)
0,6 % (estéreo),
0,3 % (mono)
AM
Margen de sintonización de 530 a 1 710 kHz
Terminal de antena Conector de antena externa
Frecuencia intermedia 10,7 MHz/450 kHz
Sensibilidad 30 µV
Sección del amplificador de potencia
Salidas Salidas de altavoz
Impedancia de altavoz de 4 a 8 Ω
Salida máxima de potencia
(conectores de sellado
seguro)
52 W × 4 (a 4 Ω)
Generales
Salidas Salidas de audio (f rontal/
Entradas Terminal de control ATT
Controles de tono Graves ±10 dB a 62 Hz
Sonoridad +8 dB a 100 Hz
Requisitos de alimentación
Dimensiones
Dimensiones de montaje
Peso Aprox. 1,3 kg
Accesorios suministrados Control remoto de tarjeta (1)
Accesorios opcionales Cable BUS (suministrado
Equipo opcional Cambiador de CD (10 discos)
Nota
Esta unidad no puede conectarse a un
preamplificador digital ni a un ecualizador.
El diseño y las especificaciones están sujetos a
cambios sin previo aviso.
posterior)
Salida de altavoz potenci ador
de graves (mono)
Terminal de control de relé
de antena motorizada
Terminal de control del
amplificador de potencia
para teléfono
Terminal d e control de
iluminación
Termi na l de entrad a d e
control BUS
Entrada de audio BUS o
terminal AUX IN
Termi na l de entrad a d e
antena
Agudos ±10 dB a 16 kHz
+2 dB a 10 kHz
Batería de autom óvil de cc
12 V
(tierra negativa)
Aprox. 178 × 50 × 179 mm
(an/al/prf)
Aprox.
182
×
(an/al/prf)
Componentes de instalación
y conexiones (1 juego)
Estuche para el panel front al
(1)
Mando rotatorio (1)
con un cable de pines RCA)
RC-61 (1 m), RC-62 (2 m)
CDX-757MX, CDX-656
Cambiador de CD (6 discos)
CDX-T70MX, CDX-T69
Cambiador de MD (6 discos)
MDX-66XLP
Reproductor MG-MS
System-up
MGS-X1
Sintonizador de radio XM
XT-XM1
Selector de fuente
XA-C30
53 × 162 mm
26
Page 83

Solución de problemas
La siguiente lista de revisión le ayudará a
solucionar los pr oblemas que puedan pr oducirse
con la unidad.
Antes de consu lta rla, compruebe los
procedimientos de conexión y de funcionamiento.
Generales
No se escucha el sonido.
• Presione (VOL) para ajustar el volumen.
• Cancele la función ATT.
• Ajuste el contro l de eq ui librio en la posición
central para un si st ema de 2 altavoces.
El contenido de la memoria se borró.
• Pudo haber presionado el botón RESET.
t Vuelva a almacenar en la memoria.
• Se desconectó el cable de alimentación o la
batería.
• El cable de conexió n de la alimentación no
está conectado correctamente.
No se escuchan los pitidos.
• El sonido de los pitidos está cancela do
(página 18).
• Ha conectado u n am plificador opcional de
potencia y no utiliza el incorporado.
Las indicaciones desaparecen de la
pantalla o no aparecen en ella.
• La indicación del reloj desaparece si presiona
(OFF)
durante 2 segundos (página 5).
• Extraiga el panel frontal y limpie los conectores.
Consulte “Limpieza de los conectores” en la
página 23 para obtener detalles.
Las emisoras almacenadas y la hora
correcta se borraron.
El fusible se fundió.
Se escucha ruido cua ndo la llave d e encendido
se encuentra en la posición ON, ACC u OFF.
Los cables no se han conectado correctamente
con el conector de alimentación auxiliar del
automóvil.
No hay alimentación a la unidad.
• Compruebe la co nexi ón. Si todo está en
orden, compruebe el fusible.
• El automóvil no tiene una posición ACC
(página 5).
t Presione (SOURCE) en la unidad (o
inserte un CD ) para encender la unidad.
La unidad recibe aliment ación de forma
continua.
El automóvil no tiene una posi ción ACC.
La antena motorizada no se e x tiende.
La antena motorizada no tiene una caja de relé.
No es posible desactivar la indicación “--------”.
Ha entrado en el modo de edición de nombres.
t Presione (LIST) durante 2 segundos.
Reproducción de CD/MD
No es posible insertar un disco.
• Ya hay un CD/MD insertado.
• El CD/MD se ha insertado a la fu erza al
revés o de forma inc orrecta.
La reproducción no se inicia.
• MD defectuoso o CD sucio.
• CD-R o CD-RW sin finalizar.
• Ha intentado reproducir un C D -R o CD-RW
no diseñado para u so de audio.
• Ciertos discos CD-R o CD-RW no se
reproducen debi do al equipo de grabación o
al estado del di sco.
El disco se expulsa automáticamente.
La temperatura am biente es superior a 50°C.
Los botones de operación no func ionan.
El CD no se expulsa.
Presione el botón RESE T.
Se producen saltos de so nido debido a
vibraciones.
• La unidad está instalada en un ángulo
superior a 60°.
• La unidad no está instalada en una parte
segura del automóvil.
Se producen saltos de sonido.
Disco sucio o defectuoso.
Recepción de la radio
No es posible utilizar la sintonización
programada.
• Almacene la frecuencia correcta en la
memoria.
• La señal d e emisión es demasiado débil.
No es posible recibir las emisoras.
Hay ruidos que obstaculizan el sonido.
• Conecte un cable de control de antena
motorizada (azul) al cable de suministro de
alimentación del amplificador de antena de l
automóvil. (Sólo si el automóvil dispone de
una antena de FM/AM inc orporada en el
cristal trasero/lateral.)
• Compruebe la conexión de la antena del
automóvil.
• La antena automática no se extiende.
t Com pr uebe la conexión del cable de
control de la antena motorizada.
• Compru ebe la frecuencia.
• Cuando el mo do DSO está activado, el
sonido se escucha ocasionalmente con ruido.
t Ajus te el modo DSO en “off” o cambie
de modo (págin a 20).
continúa en la página siguiente t
27
Page 84

No es posible utilizar la sintonización
automática.
• El modo de búsqueda local está ajustado en
“on”.
t Ajus te el modo de búsqueda local en
“off” (página 18).
• La señal de emisión es demasiado débil.
t Use la sintonización manual.
La indicación “ST” parpadea.
• Sintonice la frecuencia con precisión.
• La señal de emisión es demasiado débil.
t Realice el ajuste en el modo de r ecep c ión
monofónica (página 18).
Un programa emitido en estéreo se escucha
en monofónico.
• La unidad se encuentra en el modo de
recepción mon of ó nica.
t Cancele el modo de recepción
monofónica (página 18).
Se producen interferencias durante la
recepción de FM.
Está seleccionado el modo de ampliación.
t Ajus te el modo IF en “IF Auto”
(página 15).
Mensajes y avisos de error
Avisos de error
(Para esta unidad y cambiadores
opcionales de CD/MD)
Las siguientes indi ca ciones parpadean du r ant e
unos 5 segundo s y se escucha una alarma.
1
Blank*
No hay pistas grabadas en el MD.*
t Reproduzca un MD que tenga pistas
grabadas.
1
Error*
• Uno de los CD insertados está sucio o se
inserto al revés.*
2
t Límpielo o insértelo correctamente.
• No se puede reproducir un CD/MD insertado
debido a algún problema.*
t Inserte otro CD/MD.
High Temp
La temperatur a am biente es superior a 50°C.
t Espere hasta que la temperatura descienda
por debajo de 50°C.
2
2
NO Disc*
1
No hay ning ún disco insertado en la unidad de
CD/MD.
t I nserte discos en la uni dad de CD/MD.
NO Magazine
El cargador de discos no está ins er t ado en la
unidad de CD/MD.
t I nserte el cargador en la uni dad de CD/
MD.
NO Music
Se insertó un CD que no contiene un archivo
de música en la unidad de CD con capacidad
para reproducir MP3.
t I nserte un CD de músi ca en la unidad de
CD con capacidad para reproducir MP 3.
Not Ready
La tapa de la unidad de MD está abierta o los
MD no están inse rtados correctam ente.
t C ierre la tapa o inserte los MD
correctamente.
Push Reset
La unidad de CD/MD no puede utilizarse
debido a algún prob le m a.
t Presione el botón RESET de la uni dad.
*1 Cuando el cambiador de CD/MD está conectado a
la unidad, el número del CD o MD aparece en la
pantalla.
*2 La pantalla muestra el número del disco que causa
el error.
Si estas soluciones no ayudan a mejorar la
situación, comu ní quese con el proveedor Sony
más cercano.
Mensajes
Local Seek +/–
El modo de búsqueda lo cal está activado
durante la sintonización automática (página
15).
“” o “”
Ha llegado al principio o al final del disco y no
es posible avanzar más.
Sony Corporation Printed in Thailand
28
 Loading...