

Page 1
FM/MW/LW
Compact Disc
Player
3-227-675-21 (2)
FM/MW/LW Compact Disc Player
Operating Instructions
Manual de instrucciones
Bruksanvisning
Manual de instruções
Oδηγίες Λειτυργίας
Инструкция по эксплуатации
For installation and connections, see the supplied installation/connections manual.
Para obtener información sobre la instalación y las conexiones, consulte el manual de
instalación/conexiones suministrado.
Vi hänvisar till det medföljande häftet angående montering/anslutningar.
Para a instalação e as ligações, consulte o manual de instalação/ligações fornecido.
Για την εγκατάσταση και τις συνδέσεις, δείτε τ συνδευτικ εγειρίδι Εγκατάσταση/
Συνδέσεις.
Перед установкой и подсоединениями прочитайте прилагаемую инструкцию по
установке и подсоединению.
CDX-CA650X CDX-CA650V
GB
ES
SE
PT
GR
RU
CDX-CA650
© 2001 Sony Corporation
Page 2
Welcome!
Thank you for purchas in g t hi s Sony Compact
Disc Player. You can enjoy its various features
even more with:
• Optional CD/MD units (both changers and
players)*
• CD TEXT information (displayed wh en a CD
TEXT disc*
CD unit with the CD TEXT function).
• Optional controller accessori es
*1 This unit works with Sony products only.
*2 A CD TEXT disc is an audio CD that includes
This label is located on the bottom of the chassis.
1
.
2
is played on a connected optional
Rotary comm ander RM-X4S
Card remote commander RM-X114
information such as the disc name, artist name,
and track names. This information is recorded on
the disc.
CAUTION INVISIBLE
VIEW DIRECTLY WITH OPTICAL INSTRUMENTS
LASER RADIATIONWHEN OPEN
DO NOT STARE INTO BEAM OR
This label is located on the drive unit’s internal
chassis.
2
Page 3

Table of Contents
Location of controls. . . . . . . . . . . . . . . . . . . . 4
Precautions . . . . . . . . . . . . . . . . . . . . . . . . . . 6
Notes on discs . . . . . . . . . . . . . . . . . . . . . . . . 6
Getting Started
Resetting the unit. . . . . . . . . . . . . . . . . . . . . . 7
Detaching the front panel . . . . . . . . . . . . . . . 8
Setting the clock . . . . . . . . . . . . . . . . . . . . . . 9
CD Player
CD/MD Unit (optional)
Playing a disc. . . . . . . . . . . . . . . . . . . . . . . . . 9
Display items. . . . . . . . . . . . . . . . . . . . . . . . 10
Playing tracks repeatedly
— Repeat Play . . . . . . . . . . . . . . . . . . . . 11
Playing tracks in ra ndom order
— Shuffle Play . . . . . . . . . . . . . . . . . . . . 11
Labelling a CD
— Disc Memo*. . . . . . . . . . . . . . . . . . . . 11
Locating a di sc by name
— List-up* . . . . . . . . . . . . . . . . . . . . . . . 12
Selecting specific tracks for playback
— Bank*. . . . . . . . . . . . . . . . . . . . . . . . . 13
* Functions available with optional CD/MD unit
Radio
Storing stations automatically
— Best Tuning Memory (BTM). . . . . . . 14
Receiving the stored stations. . . . . . . . . . . . 14
Storing only the desired stations . . . . . . . . . 15
Tuning in a station through a list
— List-up . . . . . . . . . . . . . . . . . . . . . . . . 15
RDS
Overview of RDS . . . . . . . . . . . . . . . . . . . . 16
Automatic retuning for best reception results
— AF function . . . . . . . . . . . . . . . . . . . . 1 6
Receiving traffic an nouncements
— TA/TP . . . . . . . . . . . . . . . . . . . . . . . . 17
Presetting RDS stations with AF and TA
setting. . . . . . . . . . . . . . . . . . . . . . . . . . . 1 8
Tuning in stations by programme type
— PTY . . . . . . . . . . . . . . . . . . . . . . . . . . 18
Setting the clock automatically
— CT . . . . . . . . . . . . . . . . . . . . . . . . . . . 19
Other Functions
Using the rotary commander. . . . . . . . . . . . 20
Adjusting the sound characteristics . . . . . . 21
Quickly attenuating the sound . . . . . . . . . . 21
Changing the sound and display settings
— Menu . . . . . . . . . . . . . . . . . . . . . . . . . 2 2
Selecting the sound position
— My Best sound Position (MBP). . . . 23
Setting the equalizer . . . . . . . . . . . . . . . . . . 23
Additional Information
Maintenance . . . . . . . . . . . . . . . . . . . . . . . . 24
Removing the unit. . . . . . . . . . . . . . . . . . . . 25
Specifications . . . . . . . . . . . . . . . . . . . . . . . 26
Troubleshooting . . . . . . . . . . . . . . . . . . . . . 27
Error displays/Messages. . . . . . . . . . . . . . . 2 8
3
Page 4
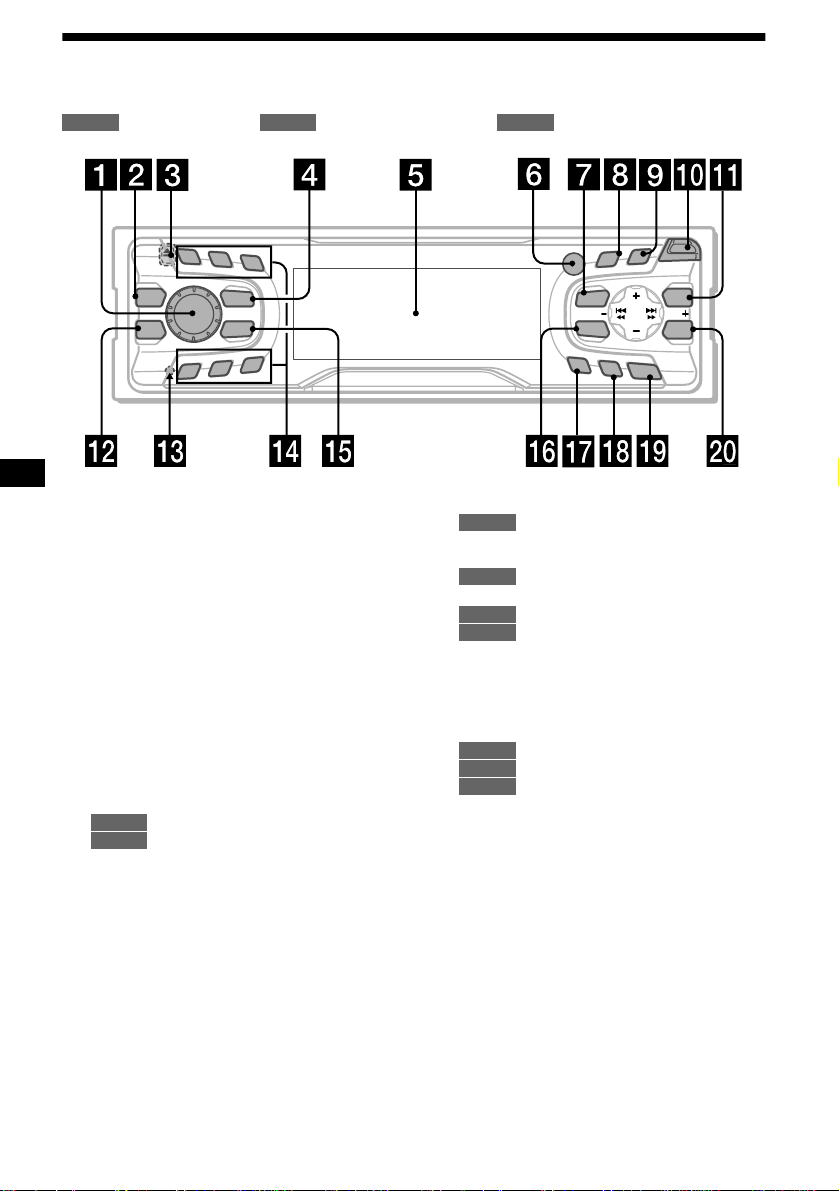
Location of controls
Refer to the pages listed for details.
: During Playback : During radio reception : During menu mode
CD/MD
RADIO MENU
1
2
3
REP
MBP
EQ 7
SOURCE
MODE
SHUF
6
5
4
a Volume control dial 17
b MBP button 23
c Z (eject) button (located on the front sid e
of the unit, behind the front panel) 9
d SOURCE (Power on/Radio/CD/MD)
button 8, 9, 10, 12, 14, 15, 17, 23
e Display window
f Receptor for the card remote
commander
g MENU button 9, 11, 12, 13, 14, 18, 19,
22, 23, 24
h DISPLAY/PTY (display mode change/
programme type) button 10, 12, 16, 19
i S (SCROLL) button 10
j OPEN button 8, 9
k LIST button
12
CD/MD
15
RADIO
l EQ7 button 23
m RESET button (located on the front side of
the unit, behind the fr ont panel) 7
PTY
S
D
LL
O
R
C
S
DISPLAY
R
E
P
/
C
S
I
D
MENU
SOUND
AF
TA
O
CDX-CA650X/CA650V/CA650
n Number buttons
CD/MD
(3) REP 11
(6) SHUF 11
14, 15, 17, 18
RADIO
o MODE button
10, 12
CD/MD
14, 15, 17
RADIO
p SOUND button 21, 23
q AF button 16, 18
r TA button 17, 18
s OFF (Stop/Power off) button* 8, 9
t ENTER button
12
CD/MD
15, 19
RADIO
9, 11, 12, 13, 14, 18, 19, 22, 23,
MENU
24
* Warning when installing in a car without
an ACC (accessory) position on the
ignition switch
After turning off the ignition, be sure to press
(OFF) on the unit for 2 seconds to turn off the
clock d ispla y.
Otherwise, the clock display does not turn off
and this causes battery drain.
O
P
EN
S
E
T
LIST
SEEKSEEK
ENTER
F
F
4
Page 5

PTY
S
AF
(SEEK)
(–): to select
leftwards/
.
D
DISPLAY
MENU
SOUND
TA
(+): to select upwards
(–): to select downwards
O
P
E
N
LL
O
R
SC
R
E
P
/
S
C
E
S
T
I
D
LIST
SEEKSEEK
ENTER
O
FF
(DISC/PRESET)
(DISC/PRESET)
(SEEK)
(+): to select
rightwards/
>
In menu mode, the currently selectable button (s)
of these four are indicated with a “ M” in the display.
u DISC/PRESET buttons (+/–)
10, 12
CD/MD
14, 15, 19
RADIO
9, 11, 12, 13, 14, 18, 19, 22, 23,
MENU
24
v SEEK buttons (–/+)
9
CD/MD
14, 15, 16
RADIO
9, 11, 13, 19, 21, 22, 23
MENU
Card remote commander RM-X114
(optional)
DSPL MODE
+
PRESET
LIST
+
DISC
MENU
–
SEEK
SOUND
SOURCE
DISC
PRESET –
+
VOL
+
SEEK
R
–
TE
N
E
ATTOFF
–
The corresponding buttons of the card
remote commander control the same
functions as those on this unit.
a DSPL button
b MENU button
c SOURCE button
d SEEK (</,) buttons
e SOUND button
f OFF button
g VOL (–/+) buttons
h MODE button
i LIST button
j DISC/PRESET(M/m) buttons
k ENTER button
l ATT button
Note
If the unit is turned off by pressing (OFF) for 2
seconds, it cannot be operated with the card remote
commander unless (SOURCE) on the unit is pressed,
or a disc is inserted to activate the unit first.
Tip
Refer to “Replacing the lithium battery” for details on
how to replace the batteries (page 25).
5
Page 6
Precautions
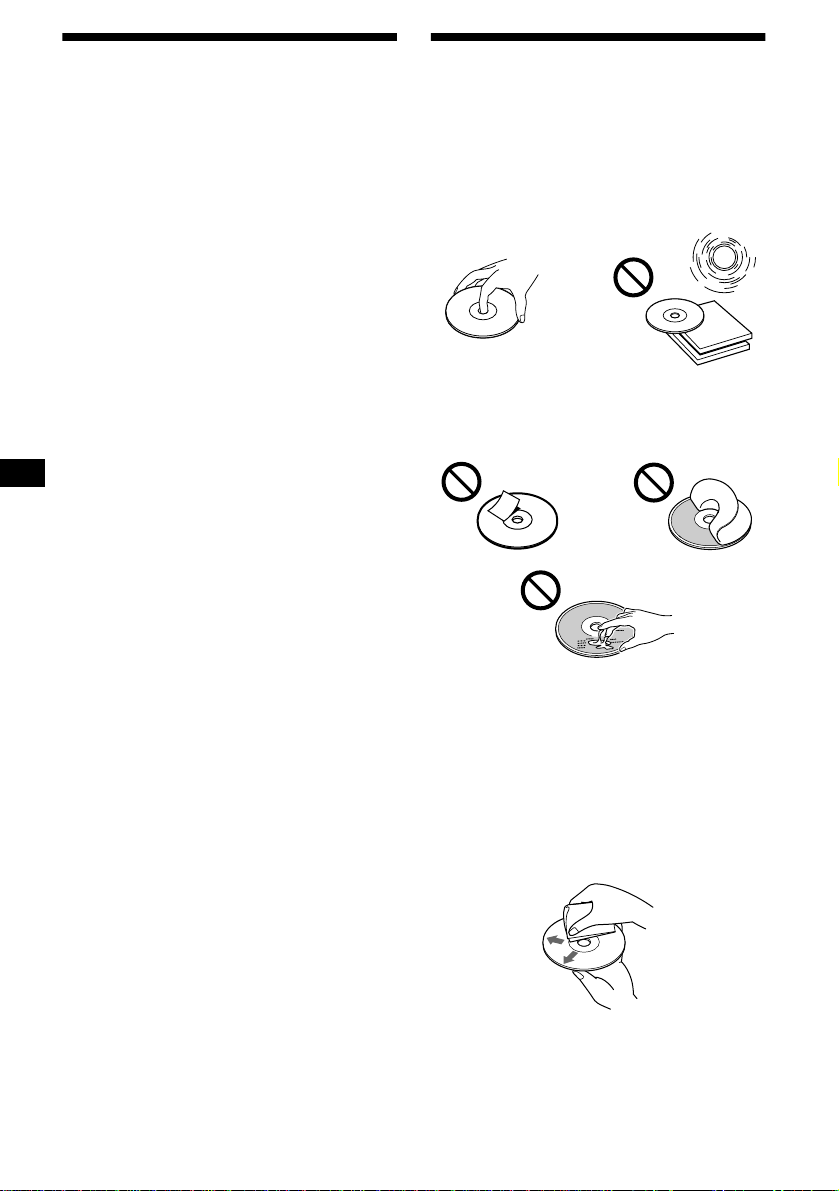
Notes on discs
• If your car was parked in direct sunlight, al l ow
the unit to cool off before operating it.
• Power aerials will extend automatically while
the unit is operating.
If you have any quest ions or problems
concerning your unit that are not covered in this
manual, please co nsult your nearest Sony dealer.
Moisture condensation
On a rainy day or in a very damp area, moisture
condensation ma y occur inside the lense s and
display of the unit. Should this occur, the unit
will not operate properly. In such a case, remove
the disc and wait for about an hour until the
moisture has evaporated.
To maintain high sound quality
Be careful not to splash juice or other soft drinks
onto the unit or discs.
• To keep the disc clean, do not touch the surface.
Handle the disc by its ed ge.
• Keep your discs in th eir cases or disc
magazines when not in use.
Do not subject the discs to heat/hig h
temperature. Avoid leaving them in parked ca rs
or on dashboards/rear trays.
• Do not attach labels, or use discs with stic ky
ink/residue. Such discs may stop spinning
when used, caus in g a m alfunction, or may ruin
the disc.
• Discs with non-standard shapes (e.g., heart,
square, star) c annot be played on this unit.
Attempting to do so may damage the unit. Do
not use such discs.
• You cannot play 8cm CDs.
• Before playin g, cl ean the discs with a
commercially available cleaning cloth. Wipe
each disc from the centre out. Do not use
solvents such as benzi ne, thinner , commerc ially
available cleaners, or antistatic spray intended
for analog discs.
6
Page 7
Notes on CD-R discs
• You can play CD-Rs (recordable CDs)
designed for audio use on this unit.
Look for this mark to distinguish CD-Rs for
audio use.
This mark denotes that a disc is not for
audio use.
• Some CD-Rs (depending on the equipment
used for its recording or the condition of the
disc) may not play on this unit.
• You cannot play a CD-R that is not
finalized*.
* A process necessary for a recorded CD-R disc to
be played on the au dio CD player.
Getting Started
Resetting the unit
Before operating the unit for the first time or
after replacing the car battery, you must reset
the unit.
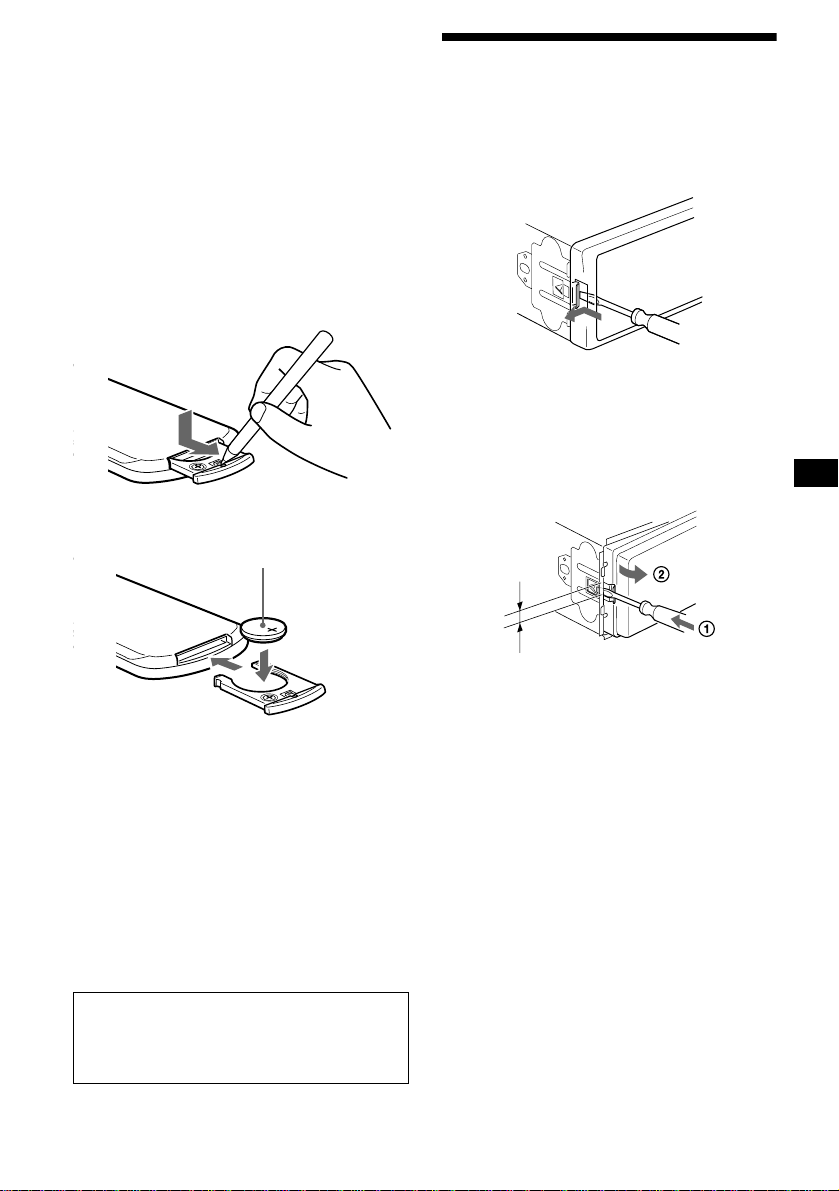
Remove the front panel and press the
RESET button with a pointed object, such as
a ballpoint pen.
RESET button
Note
Pressing the RESET button will erase the clock setting
and some stored contents.
7
Page 8
Detaching the front panel
You can detach the front pa nel of th is uni t to
protect the unit from being stolen.
Caution alarm
If you turn the ignition switch to the OFF
position without removing the front panel, the
caution alarm wi ll beep for a few seconds.
If you connect an optional amplifier and do not
use the built-in amplifier, the beep sound will be
deactivated.
1 Press (OFF)*.
CD/MD playback or radio reception stops
(the key illumination and display remain on).
* If your car has no ACC position on the ignition
switch, be sure to turn the unit off by pressing
(OFF) for 2 seconds to avoid car battery drain.
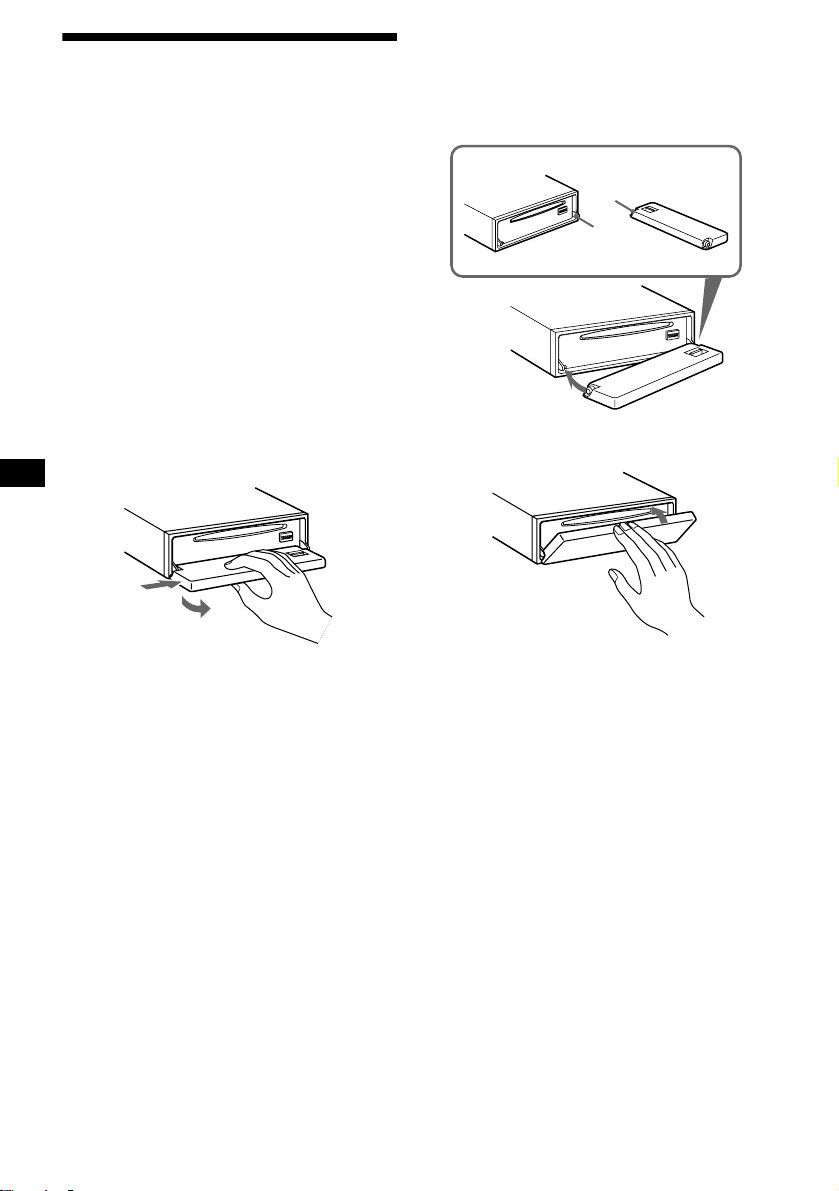
2 Press (OPEN), then slide the front
panel to the right, and gently pull out
the left end of the front panel.
1
2
Notes
• If you detach the panel while the unit is still turned
on, the power will turn off automatically to prevent
the speakers from being damaged.
• Do not drop or put excessive pressure on the front
panel and its display window.
• Do not subject the front panel to heat/high
temperature or moisture. Avoid leaving it in parked
cars or on dashboards/rear trays.
Tip
When carrying the front panel with you, use the
supplied front panel case.
Attaching the front panel
Place hole A of the front panel onto the spindle
B on the unit, then lightly push the left side in.
Press (SOURCE) (or insert a CD) to operate the
unit.
A
B
x
Note
Do not put anything on the inner surface of the front
panel.
8
Page 9
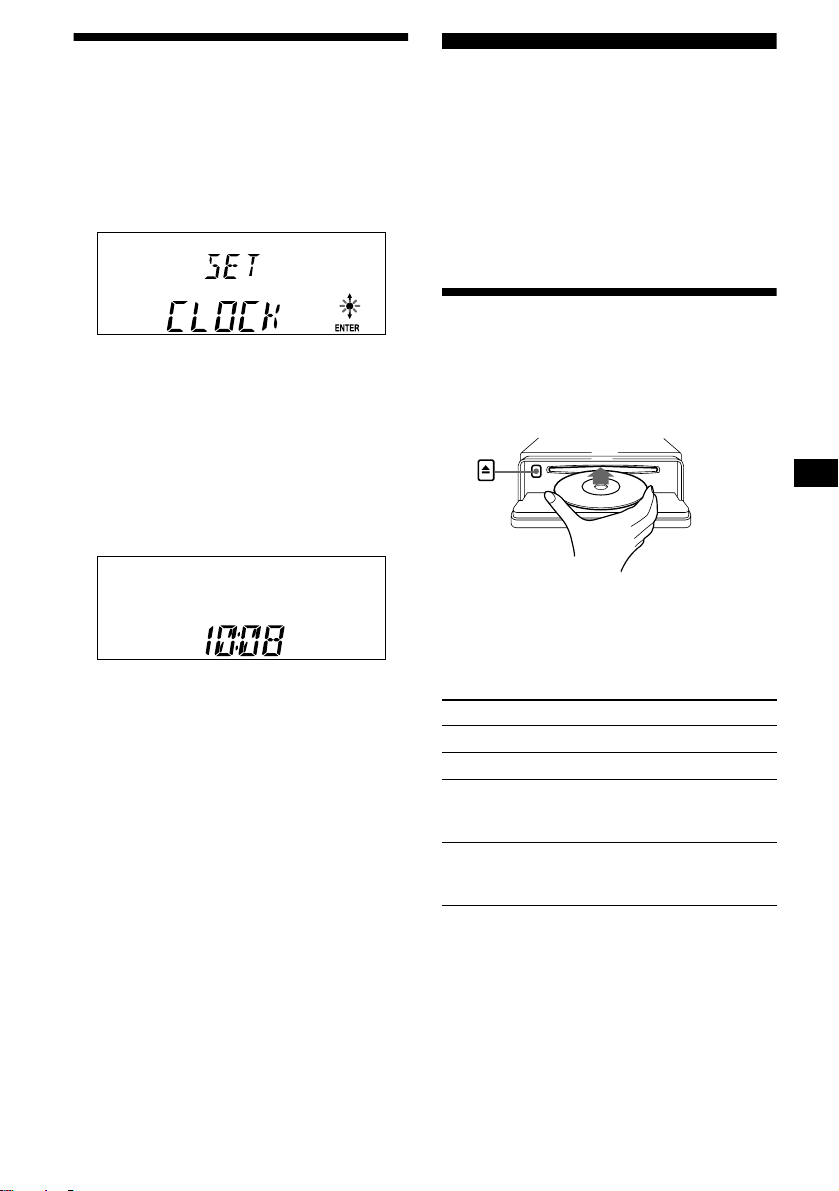
Setting the clock
The clock uses a 24-ho ur di gi t al indication.
Example: To set the clock to 10:08
1 Press (MENU), then press either side
of (DISC/PRESET) repeatedly until
“CLOCK” appears.
1 Press (ENTER).
The hour indication flashes.
2 Press either sid e of (DISC/PRESET)
to set the hour.
3 Press the (+) side of (SEEK).
The minute indication flashes.
4 Press either sid e of (DISC/PRESET)
to set the minute.
2 Press (ENTER).
CD Player CD/MD Unit (optional)
In addition to playing a CD with this unit, you
can also control external CD/MD un i ts.
Note
If you connect an optional CD unit with the CD TEXT
function, the CD TEXT information will appear in the
display when you play a CD TEXT disc.
Playing a disc
(With this unit)
1 Press (OPEN) and inse r t the disc
(labelled side up).
2 Close the front panel.
Playback starts automatically.
The clock starts. After the clock setting is
completed, the display return s to normal play
mode.
Tips
• You can set the clock automatically with the RDS
feature (page 19).
• When D.INFO mode is set to ON, the time is always
displayed (page 22).
If a disc is already inserted, press (SOURCE)
repeatedly until “CD” appears to start playback .
To Press
Stop playback (OFF)
Eject the disc (OPEN) then Z
Skip tracks
– Automatic
Music Sensor
Fast-forward/
reverse
– Manual Search
Notes
• When the last track on the disc is over, playback
restarts from the first track of the disc.
• With optional unit connected, playback of the same
source will continue on to the optional CD/MD unit.
continue to next page t
(SEEK) (./>)
[once for each track]
(SEEK) (m/M)
[hold to desired point]
9
Page 10
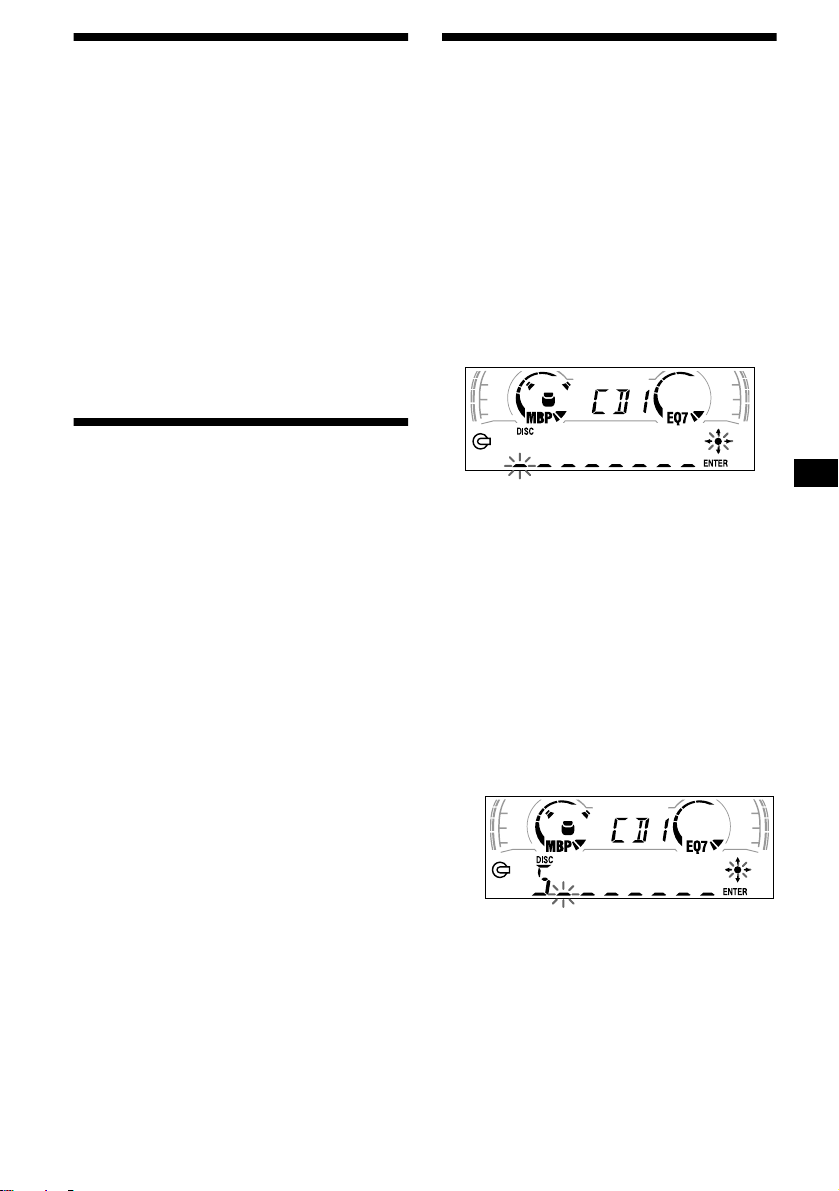
(With optional unit)
1 Press (SOURCE) repeatedly to select
“CD” or “MD.”
2 Press (MODE) repeatedly until the
desired unit appears.
Playback starts.
To Press
Skip discs
–Disc selecti on
(DISC/PRESET) (+/–)
Display items
When the disc/tra ck changes, any prerecor ded
1
title*
of the new disc/track is automatically
displayed (if the Auto Scroll function is set to
“ON,” names exceeding 8 characters will be
scrolled (page 22)).
Displayable ite m s
• Music source
• Clock
• Function
Displayable items
• Elapsed pl ayba ck t ime
• Disc name*
• Track title*
To Press
Switch display
item
Scroll display item (S) (SCROLL)
1
/artist name*
1
(DISPLAY/PTY)
2
10
*1 “NO NAME” indicates there is no Disc Memo
(page 11) or prerecorded name to display.
*2 Only for CD TEXT discs with the artist name.
Notes
• Some characters cannot be displayed.
• For some CD TEXT discs with very many
characters, information may not scroll.
• This unit cannot display the artist name for each
track of a CD TEXT disc.
Tip
When Auto scroll is set to OFF and the disc/track
name is changed, the disc/track name does not scroll.
Page 11
Playing tracks repeatedly
— Repeat Play
The disc in the main unit will repeat a track or
the entire d isc wh en it reac hes the end. For r epe at
play, you can select:
• REP-1 — to repeat a t rack.
• REP-2* — to repeat a disc.
* Available only when one or more optional CD/MD
units are connected.
During playback, press (3) (REP)
repeatedly until the desired setting
appears in the display.
Repeat Play starts .
To return to normal play mode, select “REPOFF.”
Playing tracks in random
order
— Shuffle Play
You can select:
• SHUF-1 — to pla y t h e t racks on the curren t
disc in random order.
• SHUF-2*
optional CD (MD) un i t in random order.
• SHUF-ALL*
connected CD (MD) units (including this unit)
in random order.
*1 Available only when one or more optional CD (MD)
*2 Available only when one or more optional CD units,
1
— to play the tracks in the current
2
— to play all the tracks in al l the
units are connected.
or two or more optional MD units are connected.
During playback, press (6) (SHUF)
repeatedly until the desired setting
appears in the display.
Shuffle Play starts.
Labelling a CD
— Disc Memo (For a CD unit with the
CUSTOM FILE function)
You can label each disc with a custom name
(Disc Memo). You can enter up to 8 characters
for a disc. If you label a CD, you can locate the
disc by name (page 12).
1 Start playing the disc you want to
label.
2 Press (MENU), then press either side
of (DISC/PRESET) repeatedly until
“NAMEEDIT” appears.
3 Press (ENTER).
The unit will repeat the disc during the
labellin g procedure.
4 Enter the characters.
1
1 Press the (+) *
(DISC/PRESET) repeatedly to select
the desired character.
A t B t C ... t 0 t 1 t 2 ... t +
t – t
*1 For reverse order, press the (–) side of
(DISC/PRESET).
*2 (blank space)
2 Press the (+) side of (SEEK) after
locating the desired character.
side of
... t _*2 t A
*
To return to normal play mode, select “SHUFOFF.”
Note
“SHUF-ALL” will not shuffle tracks between a CD
player and an MD player.
If you press the (–) side of (SEEK), you
can move back to the left.
3 Repeat steps 1 and 2 to enter the
entire name.
5 To return to normal CD play mode,
press (ENTER).
continue to next page t
11
Page 12
Tips
• Simply overwrite or enter “_” to correct or erase a
name.
• There is another way to start labelling a CD: Press
(LIST) for 2 seconds instead of performing steps 2
and 3. You can also complete the operation by
pressing (LIST) for 2 seconds instead of step 5.
• You can label CDs on a unit without the CUSTOM
FILE function if that unit is connected along with a
CD unit that has the function. The Disc Memo will be
stored in the memory of the CD unit with the
CUSTOM FILE function.
Note
REP-1/shuffle play is suspended until the Name Edit is
complete.
Viewing the Disc Memo
As a display item, the Disc Memo always takes
priority over any orig in al CD TEXT information.
To Press
View (DISPLAY/PTY) during CD/
CD TEXT disc playback
Tip
To find out about other items that can be displayed,
see page 10.
Erasing the Disc Memo
1 Press (SOURCE) repeatedly to select
“CD.”
2 Press (MODE) repeatedly to select the
CD unit storing the Disc Memo.
3 Press (MENU), then press either side
of (DISC/PRESET) repeatedly until
“NAME DEL” appears.
4 Press (ENTER).
The stored names w il l appear in order from
the earliest en tered.
5 Press either side of (DISC/PRESET)
repeatedly to select the disc name you
want to erase.
The stored names will appear from the
earliest ones entered.
6 Press (ENTER) for 2 seconds.
The name is erased.
Repeat steps 5 and 6 if you want to erase
other names.
7 Press (MENU) twice.
The unit returns to no rmal CD play mode.
Notes
• When the Disc Memo for a CD TEXT dis c is er a s ed,
the original CD TEXT information is displayed.
• If you cannot find the Disc Memo you want to erase,
try selecting a different CD unit in step 2.
Locating a disc by name
— List-up (For a CD unit with the CD TEXT/
CUSTOM FILE function, or an MD unit)
Y ou can use this function for discs that have been
assigned custom names*
2
discs*
.
*1 Locating a disc by its custom name: when you
assign a name for a CD (page 12) or an MD.
*2 Locating discs by the CD TEXT information: when
you play a CD TEXT disc on a CD unit with the CD
TEXT function.
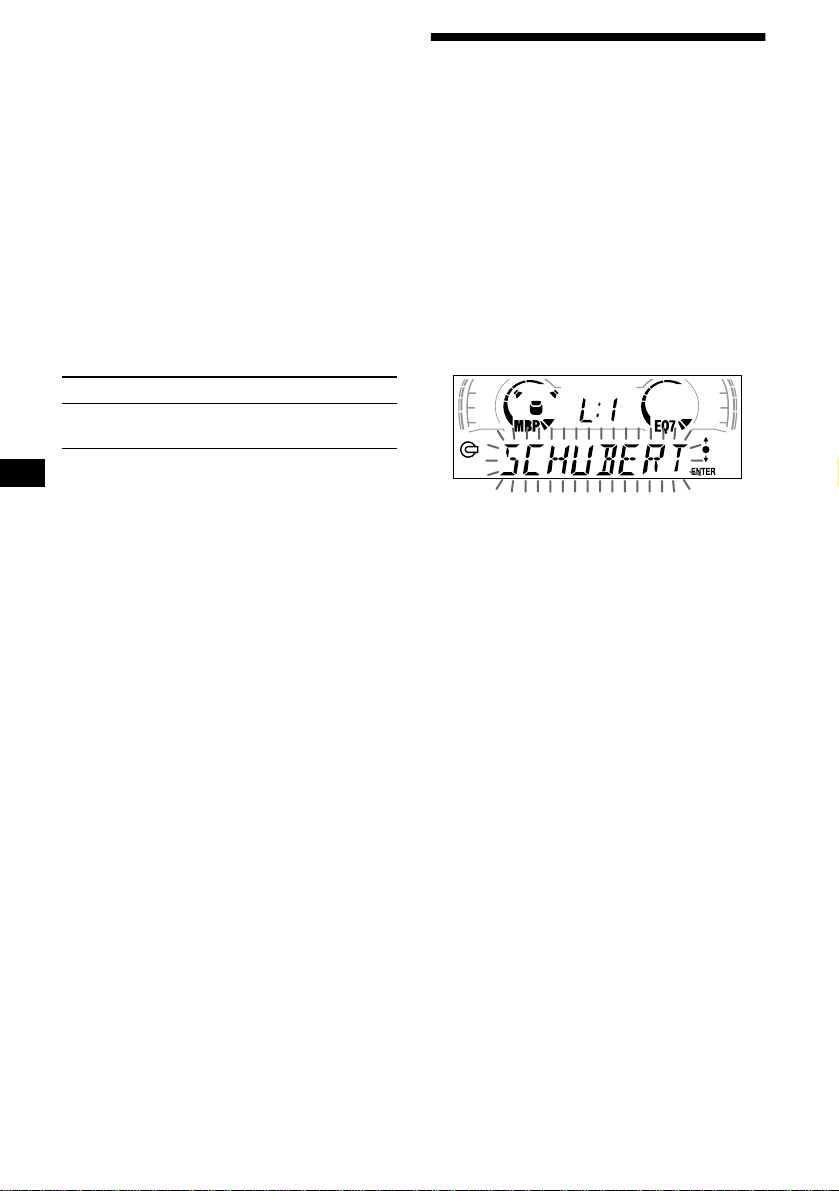
1 Press (LIST).
The name assigned to the current disc appears
in the display.
2 Press either side of (DISC/PRESET)
repeatedly until you find the desired
disc.
3 Press (ENTER) to play the disc.
Note
Some letters cannot be displayed (exception: Disc
Memo).
1
or for CD TEXT
12
Page 13
Selecting specific tracks for playback
— Bank (For a CD unit with the CUSTO M FILE
function)
If you label the disc, you can set the unit to skip
or play the tracks of your choice.
1 Start playing the disc you want to
label.
2 Press (MENU), then press either side
of (DISC/PRESET) repeatedly until
“BANK SEL” appears.
3 Press (ENTER).
Playing specific tracks only
You can select:
•“BANK-ON” — to play the tracks with the
“PLAY” setting.
•“BANK-INV” (Inverse) — to play the tracks
with the “SKIP” setting.
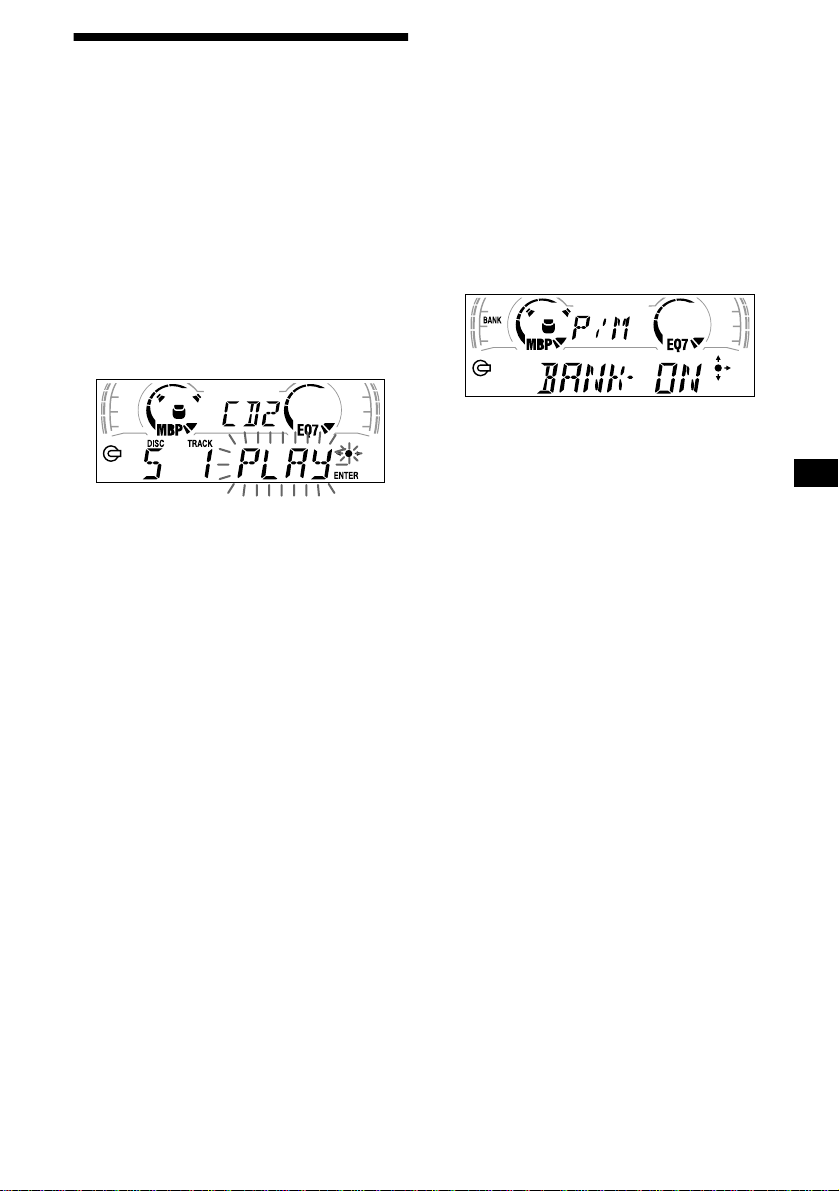
1 During playback, press (MENU), then
press either side of (DISC/PRESET)
repeatedly until “BANK-ON,” “BANKINV,” or “BANK-OFF” appears.
2 Press the (+) side of (SEEK) repeatedly
until the desired setting appears.
3 Press (ENTER).
Playback starts from the track following the
current one.
4 Label the tracks.
1 Press either sid e of (SEEK)
repeatedly to select the track you
want to label.
2 Press (ENTER) repeate dly to se l ect
“PLAY” or “SKIP.”
5 Repeat step 4 to set “PLAY” or “SKIP”
for all the tracks.
6 Press (MENU) twice.
The unit returns to normal CD play mode.
Notes
• You c an set “PLAY” and “SKIP” for up to 24 tracks.
• You cannot set “SKIP” for all the tracks on a CD.
To return to normal play mode, select “BANKOFF” in step 2.
13
Page 14

Radio
The unit can stor e up to 6 stations pe r band
(FM1, FM2, FM3, MW, and LW).
Caution
When tuning in stations while driving, use Best
Tuning Memory to prevent accidents.
Storing stations
automatically
— Best Tuning Memory (BTM)
The unit selects the stations with the strongest
signals within the selected band, and stores them
in the order of their frequency.
1 Press (SOURCE) repeatedly to select
the radio.
2 Press (MODE) repeatedly to select the
band.
3 Press (MENU), then press either side
of (DISC/PRESET) repeatedly until
“BTM” appears.
4 Press (ENTER).
A beep sounds when the setting is stored.
Notes
• If only a few stations can be received due to weak
signals, some number buttons will retain their former
settings.
• When a number is indicated in th e display, the unit
starts storing stations from the one currently
displayed.
Receiving the stored stations
1 Press (SOURCE) repeatedly to select
the radio.
2 Press (MODE) repeatedly to select the
band.
3 Press the number button ((1) to (6))
on which the desired station is stored.
Tip
Press either side of (DISC/PRESET) to receive the
stations in the order they are stored in the memory
(Preset Search function).
If preset tuning does not work
Press either side of (SEEK) to search for
the station (automatic tuning).
Scanning stops when the unit receives a
station. Repeat until the desired station is
received.
Tips
• If automatic tuning stops too frequently, turn on the
Local Seek to limit seek to stations with stronger
signals (page 22).
• If you know the frequency of the statio n you want to
listen to, press and hold either side of (SEEK) to
locate the approximate frequency, then press
(SEEK) repeatedly to fine adjust to the desired
frequency (manual tuning).
If FM stereo reception is poor
Select monaural reception mode (page
22).
The sound improves, but become s monaura l
(“ST” disappears).
14
Page 15

Storing only the desired stations
You can manually prese t the desired stations on
any chosen number button.
1 Press (SOURCE) repeatedly to select
the radio.
2 Press (MODE) repeatedly to select the
band.
3 Press either side of (SEEK) to tune in
the station that you want to store.
4 Press the desired numb er button ((1)
to (6)) for 2 seconds until “MEM”
appears.
The number button in di cation appears in the
display.
Note
If you try to store another station on the same number
button, the previously stored station will be erased.
Tuning in a station through a
list
— List-up
1 During radio reception, press (LIST)
momentarily.
The frequency or the nam e assigned to the
station currently tuned in flashes.
2 Press either side of (DISC/PRESET)
repeatedly until you find the desired
station.
If no name is assigned to the selected station,
the frequency appears in the display.
3 Press (ENTER) to tune in the desired
station.
15
Page 16
RDS
Overview of RDS
FM stations with Radio Data System (RDS)
service send in audible digital info rm ation along
with the regular radio programme signal. For
example, one of the fol lowing will be displayed
upon receiving a station with RDS capability.
Displayable ite m s
• Music source
• Clock
• Function
Displayable ite m s
•
Station name (freque ncy)
• Programme type
To Press
Switch display
item
(DISPLAY/PTY)
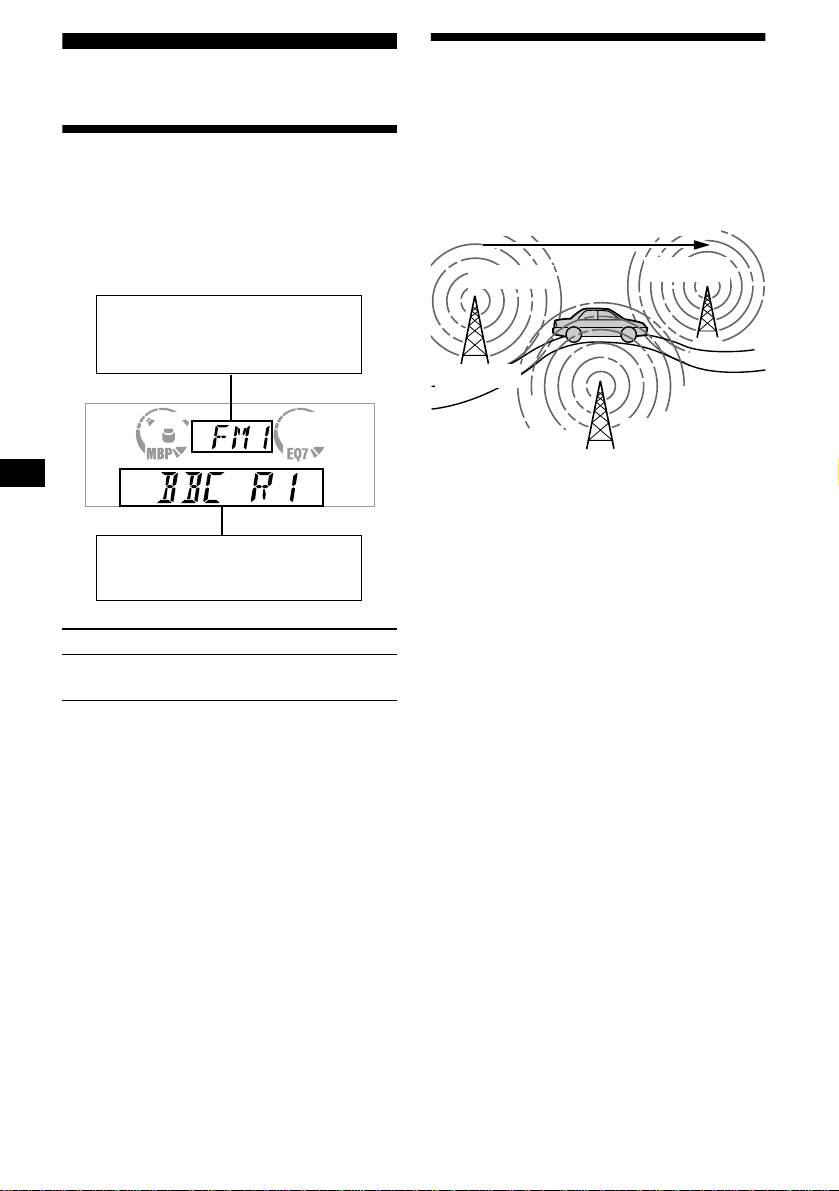
Automatic retuning for best
reception results
— AF function
The alternative frequencies (AF) function allows
the radio to always tune into the area’s strongest
signal for the station you are listening to.
Frequencies change automatically.
98.5 MHz
Station
1 Select an FM station (pag e 14) .
2 Press (AF) repeatedly until “AF-ON”
appears.
The unit starts searching for an alternative
frequency with a stronger signal in the same
network.
If “NO AF” flashes, th e currently tuned into
station does not have an alternative frequency.
Note
When there is no alternative frequency in the area or
when you do not need to search for one, turn the AF
function off by selecting “AF-OFF.”
96.0 MHz
102.5 MHz
RDS services
RDS data offers you other conveniences, such as:
• Automatic retuni ng of a programme, h elpful
during long-distance drives. — AF t page 16
• Receiving traffic announcements, even
when enjoying an ot her programme/s ource. —
TA t page 17
• Selecting stations by the typ e of pr ogramme
it broadcasts. — PTY t page 18
• Automatic clock time setting. — CT t page
19
Notes
• Depending on the country or region, not all of the
RDS functions are available.
• RDS may not work properly if the signal strength is
weak or if the station you are t uned to is not
transmitting RDS data.
16
For stations without alternative
frequencies
Press either side of (SEEK) while the
station name is flashing (within 8
seconds).
The unit starts searching for anothe r
frequency with the same PI (Programme
Identification) data (“PI SEEK” appears).
If the unit cannot find the same PI, the unit
returns to the previously selected frequency.
Staying with one regional programme
When AF function is on: this unit’s factory-set
setting restr ic ts reception to a spec ific regi on, so
you won’t be switched to an othe r re gion al st ati on
with a stronger fr equency.
If you leave this regional programm e’s reception
area or would like to take advantage of the whole
AF function, select “REG-OFF” from the MENU
(page 22).
Page 17

Note
This function does not work in the United Kingdom
and in some other areas.
Local Link function
(United Kingdom only)
This function enables you to select other loca l
stations in the area, even if they are not stored on
your number buttons.
1 Press a number button ((1) to (6))
that has a local station stored on it.
2 Within 5 seconds, press the number
button of t he local station agai n.
3 Repeat this procedure until the
desired local station is received.
Receiving traffic
announcements
— TA/TP
By activating the Traffic Announcement (TA)
and Traffic Programme (TP), you can
automatically tune in an FM statio n broadca sting
traffic announcements. Th ese settings function
regardless of the cu rrent FM programm e/source,
CD/MD; the unit switches back to the original
source when the bulletin is over.
Press (TA) repeatedl y until “TA-ON”
appears.
The unit starts sear ching for traffic
information stations.
“TP” indicates reception of such stations, and
“TA” flashes during an actual traffic
announcement. The unit will continue
searching for stations available with TP if
“NO TP” is indicated.
To cancel all traffic announcements, select “TAOFF.”
To Press
Cancel current
announcement
(TA)
Tip
You can also cancel the current announcement by
pressing (SOURCE) or (MODE).
Presetting the volume of traffic
announcements
You can preset the volume level of the traffic
announcements so you won’t miss hearing them.
1 Turn the volume control dial to adjust
the desired volume level.
2 Press (TA) for 2 seconds.
“TA” appears and the set t i ng is stored.
Receiving emergency announcements
If either AF or TA is on, the unit will switch to
emergency announcements, if one co me s in
while listening to an FM station or CD/MD.
17
Page 18

Presetting RDS stations with AF and TA setting
When you preset RDS stations, the unit st ores
each station’s AF/TA setting (on/off) as well as
its frequency. You can select a different setting
(for AF, TA, or bo th ) for individual preset
stations, or the same setting for all preset
stations. If you preset stations with “AF-ON” the
unit automatically stores stations with the
strongest radio signal.
Presetting the same setting for all preset
stations
1 Select an FM band (page 14).
2 Press (AF) and/or (TA) to select “AF-
ON” and/or “TA-ON.”
Note that selecting “AF-OFF” or “TA-OFF”
stores not only RDS statio ns, but also nonRDS stations.
3 Press (MENU), then press either side
of (DISC/PRESET) repeatedly until
“BTM” appears.
4 Press (ENTER) until “BTM” flashes.
Presetting different settings f or eac h
preset station
1 Select an FM band, and tune in the
desired station (page 1 5).
2 Press (AF) and/or (TA) to select “AF-
ON” and/or “TA-ON.”
3 Press the desired number button ((1)
to (6)) until “MEM” appears.
Repeat from ste p 1 to preset other st at ions.
Tuning in stations by
programme type
— PTY
You can tune in a station by selecting the type of
programme you w ould like to li sten to.
Programme types Display
News NEWS
Current Affairs AFFAIRS
Information INFO
Sports SPORT
Education EDUCATE
Drama DRAMA
Culture CULTURE
Science SCIENCE
Varie d VARIED
Popular Musi c POP M
Rock Music ROCK M
Easy Listening EASY M
Light Classical LIGHT M
Classical CLASSICS
Other Music Type OTHER M
Weather WEATHER
Finance FINANCE
Children’s Programmes CHILDREN
Social Affairs SOCIAL A
Religion RELIGION
Phone In PHONE IN
Travel TRAVEL
Leisure LEISURE
Jazz Music JAZZ
Country Music COUNTRY
National Music NATION M
Oldies Music OLDIES
Folk Music FOLK M
Documentary DOCUMEN T
18
Note
You cannot use this function in some countries where
no PTY (Programme Type selection) data is available.
Page 19
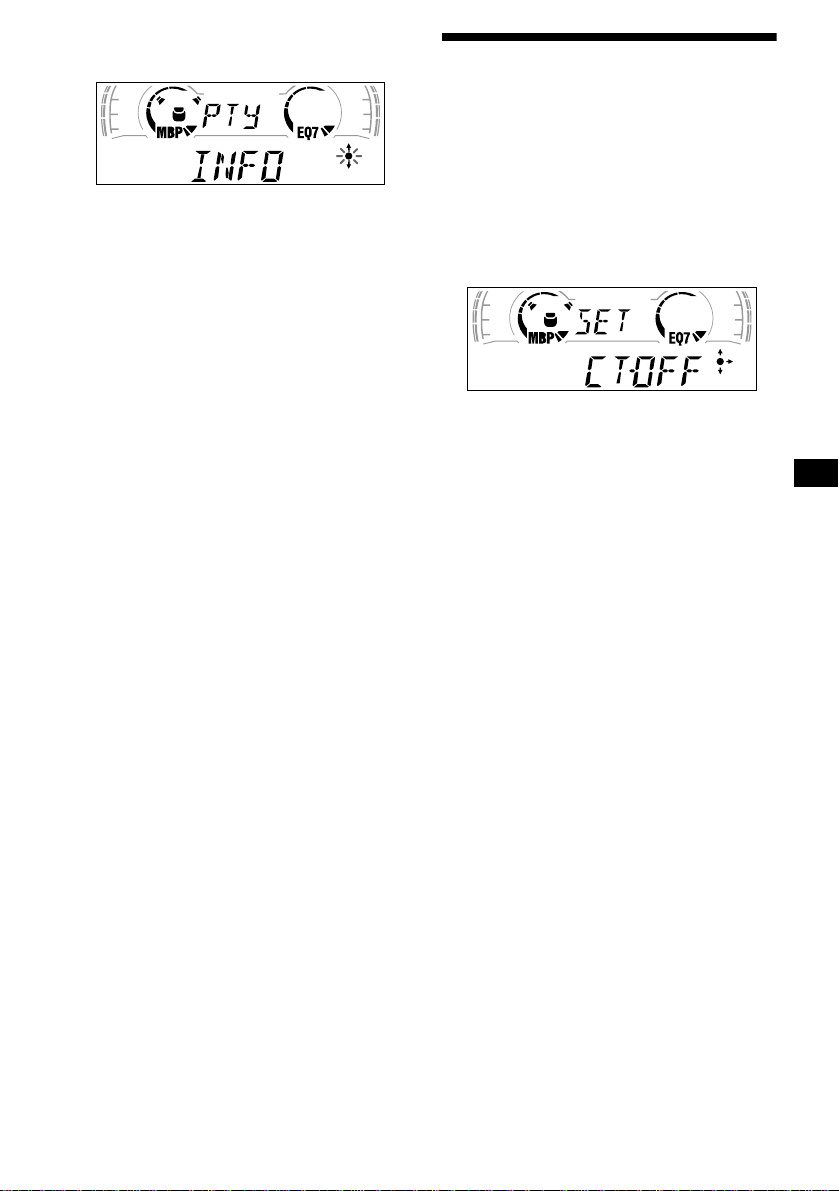
1 Press (DISPLAY/PTY) during FM
reception until “PTY” appears.
The current programme type name appears if
the station is transmitting the PTY data.
“--------” appears if the received station is not
an RDS station, or if the RDS data is not
received.
2 Press (DISC/PRESET) repeatedly until
the desired programme type appears.
The programme types appear in the order
shown in the table.
“--------” appears if the programme type is not
specified in the RDS data.
3 Press (ENTER).
The unit starts searching for a station
broadcasting the selected programme type.
Setting the clock
automatically
— CT
The CT (Clock Time) data from the RDS
transmission sets the clock automatically.
1 During radio reception, press (MENU),
then press either side of (DISC/
PRESET) repeatedly until “CT-OFF”
appears.
2 Press the (+) side of (SEEK) repeatedly
until “CT-ON” appears.
The clock is set.
3 Press (ENTER) to return to the normal
display.
To cancel the CT function, select “CT-OFF” in
step 2.
Notes
• The CT function may not work even though an RDS
station is being received.
• There might be a difference between the time set by
the CT function and the actual time.
19
Page 20
Other Functions
You can also control the unit (and optional CD/
MD units) with a rotary commander (optional).
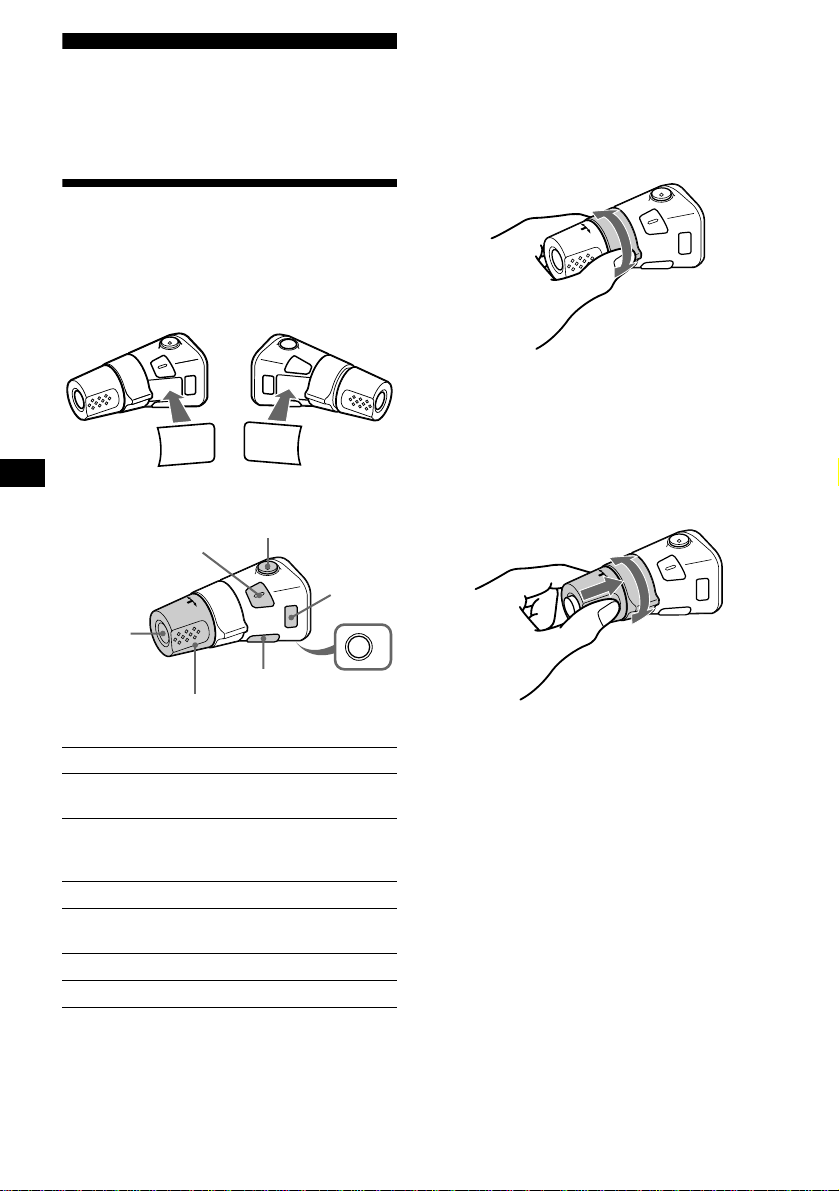
Using the rotary commander
First, attach the appropriate label depending on
how you want to mount the rotary commander.
The rotary commander works by pressing
buttons and/or rotatin g con tro ls.
SOUND
MODE
DSPL
MODE
SOUND
DSPL
*1 Only if the corresponding optional equipment is
connected.
*2 If your car has no ACC (accessory) position on the
ignition key switch, be sure to press (OFF) for 2
seconds to turn off the clock indication after turning
off the ignition.
By rotating the control
SEEK/AMS
control
Rotate and release to:
– Skip tracks.
– Tune in stations automatically.
Rotate , h old, and re l ease to:
– Fast-forward /reverse a track.
– find a station manually.
By pressing buttons
(SOUND)
(SOURCE)
Rotate the VOL control
to adjust the volume.
Press To
(SOURCE)
(ATT)
(DSPL)
Change source
(radio/CD/MD*
(MODE)
1
)
Change operation
(MODE)
(radio band/CD unit/ MD*
unit)
(ATT) Attenuate sound
(OFF)*
2
Stop playback or radio
reception
(SOUND) Adjust the sound menu
(DSPL) Change the display item
(OFF)
By pushing in and rotating the control
OFF
PRESET/
DISC control
Push in and rotate the control to:
– Receive preset stations.
– Change the disc*.
* When an optional CD/MD unit is connected.
1
20
Page 21
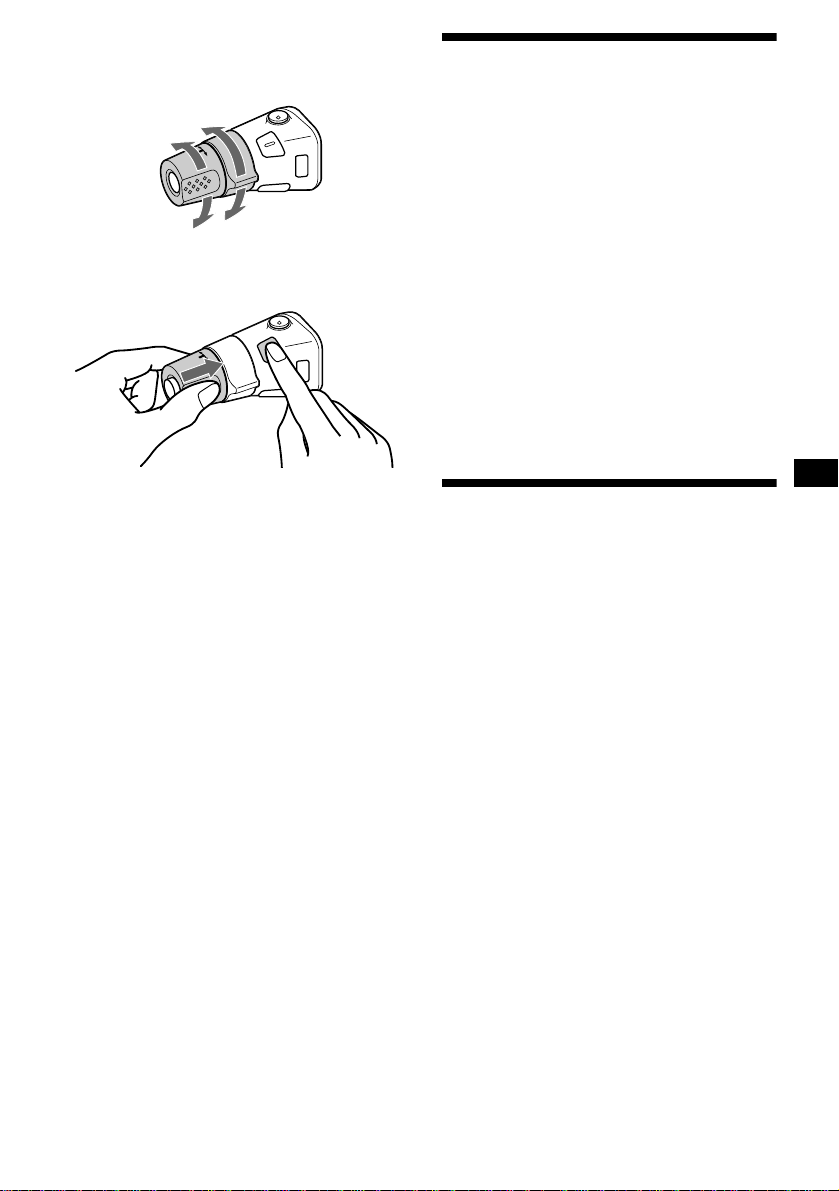
Changing the operative direction
The operative direction of controls is factory-set
as shown below.
To increase
Adjusting the sound characteristics
You can adjust the bass, treble, balance, an d
fader.
The bass and treble levels can be stored
independently for each source.
To decrease
If you need to mount the rotary commander on
the right hand side of the steering column, you
can rev erse the operative direction.
Press (SOUND) for 2 seconds while
pushing the VOL control.
Tip
You can also change the operative direction of these
controls with the unit (page 22).
1 Select the item you want to adjust by
pressing (SOUND) repeatedly.
Each time you press (SOUND), the item
changes as follows:
BAS (bass) t TRE (treble) t BAL (leftright)
t FAD (front-rear)
2 Adjust the selected ite m by pressing
either side of (SEEK).
When adjusting with the rotary commander,
press (SOUND) and rotate the VOL contro l.
Note
Adjust within 3 seconds after selecting the item.
Quickly attenuating the sound
(With the rota ry commander or the card
remote commander)
Press (ATT) on the rotary commander
or card remote commande r.
After “ATT-ON” momentarily appears, the
“ATT” appears in the display.
To restore the previous volume level, press
(ATT) again.
Tip
When the interface cable of a car telephone is
connected to the ATT lead, the unit decreases the
volume automatically when a telephone call comes in
(Telephone ATT function).
21
Page 22

Changing the sound and
display settings
— Menu
The following items can be set:
SET (Set Up)
• CLOCK (page 9)
• CT (Clock Time) (pag e 19)
• BEEP — to turn the beeps on or off.
• RM (Rotary Comm ander) — to change the
operative direction of th e controls of the rota ry
commander.
– Select “NORM” to use the rotary commander
as the factory-se t position.
– Select “REV” when you m ount the rotary
commander on the right side of the steering
column.
DSPL (Display)
• D.INFO (Dual Informa tion) — to display t he
clock and the play mode at the same time (on).
• AMBER/GREEN — to chang e t h e
illumination co lo ur to amber or green (CDXCA650 only).
• DIM (Dimmer) — to change the brightness of
the display (CDX-CA650V only).
– Select “ON” to dim the display.
– Select “OFF” to deactivate the Dimmer.
• M.DSPL (Motion Display) — to select the
Motion Display mo de fro m “1,” “2,” and
“OFF.”
– Select “1” to show decoration lines in the
display and ac t ivate Demo display.
– Select “2” to show decoration lines in the
display and de activate Demo displ ay.
– Select “OFF” to deactivate the Motion
Display.
• A.SCRL (Auto Scroll)
– Select “ON” to scroll all automatically
displayed names exceeding 8 characters.
– When Auto scroll is set to off and the disc/
track name is changed, the disc/track name
does not scrol l.
P/M (Play Mode)
• LOCAL-ON/OFF (Local seek mode) (page 14)
– Select “ON” to only tune into stations with
stronger signals.
• MONO-ON/OFF (Monaural mode) (page 14)
– Select “ON” to hear FM stereo broadcast in
monaural. Select “OFF” to return to normal
mode.
• REG-ON/OFF (Regional) (page 16)
1 Press (MENU).
To set A.SCRL, press (MENU) during CD/
MD Playback.
2 Press either side of (DISC/PRESET)
repeatedly until the desired item
appears.
3 Press the (+) side of (SEEK) to select
the desired setting (Example: ON or
OFF).
4 Press (ENTER).
After the mode setting is completed, the
display returns to n ormal play mode.
Note
The displayed item will differ depending on the source.
Tip
You can easily switch among categories (“SET,”
“DSPL,” “SND,” “P/M,” and “EDIT”) by pressing either
side of (DISC/PRESET) for 2 seconds.
SND (Sound)
• LOUD (Loudness) — to enjoy bass and treble
even at low v olumes . The bass and treble will
be reinforced.
22
Page 23

Selecting the sound position
— My Best sound Position (MBP)
When you drive without passe ngers, you can
enjoy the most comf or table sound environment
with “My Best sound Position.”
“My Best sound Pos ition ” has two presets, which
adjust the sound l evel of balance and fader. You
can select one very easily with the MBP button.
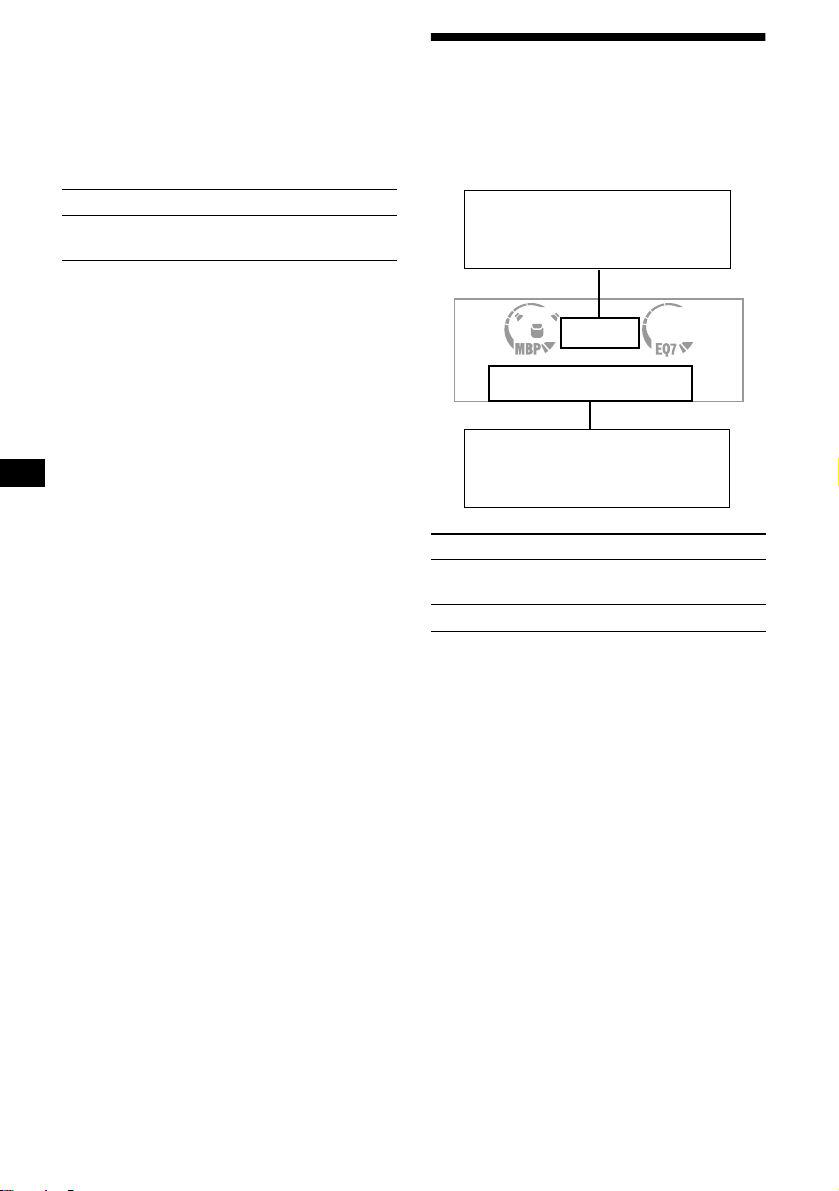
Setting the equalizer
You can select an equalizer curv e for seven
music types (VOCAL, CLUB, JAZZ, NEW
AGE, ROCK, CUSTOM, and XPLOD).
You can store and adju st the equalizer settin gs
for frequency an d level.
Selecting the equalizer curve
Display
window
MBP-A
MBP-B 0 – 4dB 0 – 4dB
MBP-OFF
Press (MBP) repeatedly for the desired
listening position.
The mode of “My Best sound Position” is
shown in the display in order of t he table.
After one second, the display goes back to the
normal playba ck m ode.
If you want to adjust th e sound level of
balance and fader more precisely, you can do
it using the (SOUND) button (page 21).
Notes
• When the BAL (balan ce) or FAD (fader) in “Adjusting
the sound characteristics” (page 21) is adjusted, the
MBP setting returns OFF.
• When MBP is set to OFF , the BAL and F AD setting is
activated.
Balance Level Fader Level
Right Left Front Rear
– 4dB 0 0 – 4dB
0000
1 Press (SOURCE) to select a source
(radio, C D/MD).
2 Press (EQ7) repeatedly until the
desired equalizer curve.
Each time you press (EQ7), the item
changes.
.
T o cancel the equalizing effect, select “OFF.”
After three seconds, the d is pla y returns to the
normal playback mode.
Adjusting the equalizer curve
1 Press (MENU).
2 Press either side of (DISC/PRESET)
repeatedly until “EQ7 TUNE” appears,
then press (ENTER).
3 Press either side of (SEEK) to select
the desired equalizer curve, then
press (ENTER).
Each time you press (SEEK), the item
changes.
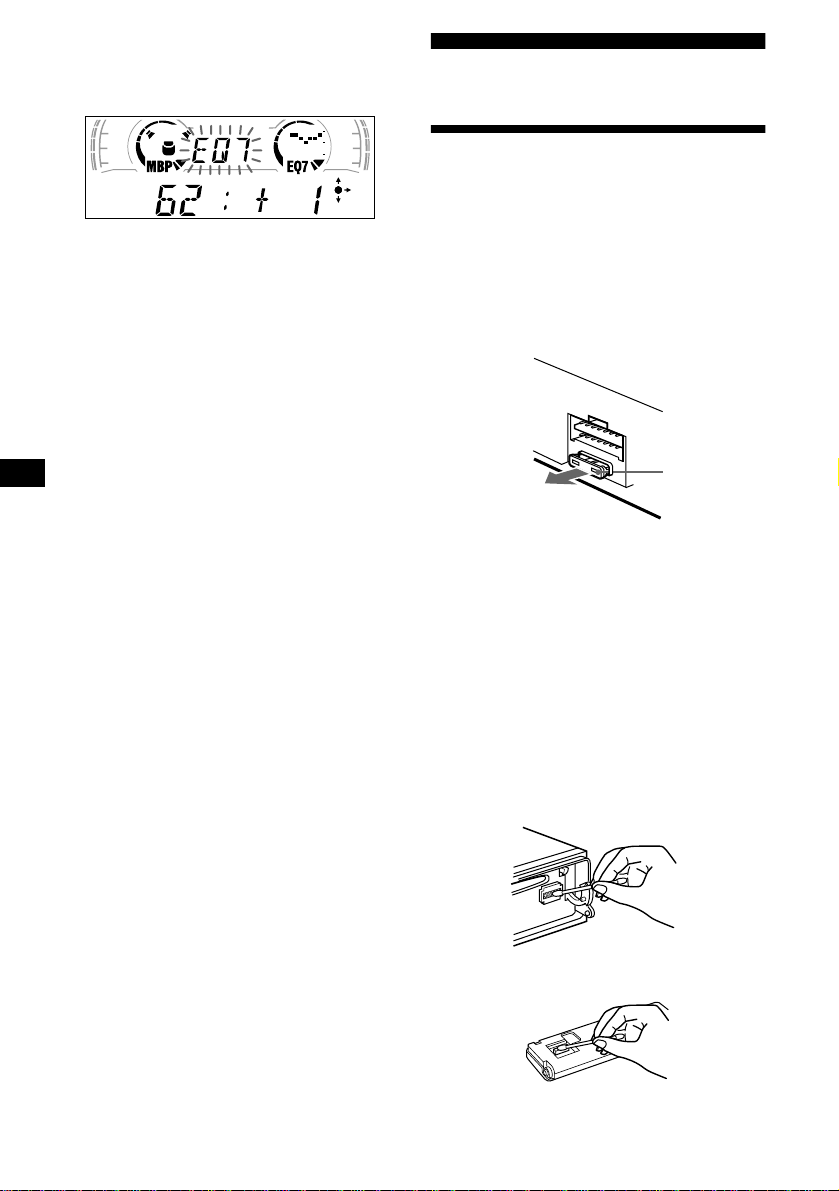
4 Select the desired frequency and level.
1 Press either side of (SEEK) to select
the desired frequency.
Each time you press (SEEK), the
frequency changes.
62 (Hz) y 157 (Hz) y 396 (Hz) y
1k (Hz) y 2.5k (Hz) y 6.3k (Hz) y
16k (Hz)
continue to next page t
23
Page 24
2 Press either side of (DISC/PRESET)
to adjust the desired volume level.
The volume level is adjustable by 1 dB
steps from –10 dB t o + 10 dB.
To restore the factory-set equalizer curve,
press (ENTER) for 2 seconds.
5 Press (MENU) twice.
When the effect setting is complete, the
normal playback mode appears.
Additional Information
Maintenance
Fuse replacement
When replacing the fuse, be sure to use one
matching the amperage rating stat ed on the
original fuse. If the fuse blows, check the power
connection and replace the fuse. If the fuse blows
again after replacement, there may be an internal
malfunction. In su ch a case, consult your neares t
Sony dealer.
Fuse (10 A)
Warning
Never use a fuse with an am perage rating
exceeding the one supplied with the unit as this
could damage the uni t.
24
Cleaning the connectors
The unit may not function properly if the
connectors betw een the unit and the fr ont panel
are not clean. In order to prevent this, detach the
front panel (page 8) and clean the connectors
with a cotton swab dipped in alcohol. Do not
apply too much force. Otherwise, the connectors
may be damaged.
Main unit
Back of the front panel
Page 25
Notes
• For safety, turn off the ignition before cleaning the
connectors, and remove the key from the ignition
switch.
• Never touch the connectors directly with your fingers
or with any metal device.
Replacing the lithium battery
Under normal conditions, batteries will last
approximately 1 year. (The service life may be
shorter, depending on the co ndi tions of use.)
When the batt ery bec omes wea k, th e rang e of the
card remote commander becomes shorter.
Replace the battery with a new CR2025 lithium
battery.
Removing the unit
1 Remove the front cover
1 Detach the front panel (page 8).
2 Press the clip insid e th e front cover
with a thin screwdriver.
x
+ side up
Notes on lithium battery
• Keep the lithium battery out of the reach of
children. Should the battery be swallowed,
immediately consult a doctor .
• Wipe the battery with a dry cloth to assure a
good contact .
• Be sure to observe the correct polarity when
installing the battery.
• Do not hold the battery with metallic tweezers,
otherwise a short-circuit may occur.
3 Repeat step 2
for the other side.
2 Remove the unit
1 Use a thin screwdriver to push in
the clip on the left side of the unit,
then pull out the left side of the unit
until the catch clears the mounting.
4mm
2 Repeat step 1 for the right side.
3 Slide the unit out of its mounting.
WARNING
Battery may explode if m ist reated.
Do not recharge, disassemble, or dispose of
in fire.
25
Page 26

Specifications
CD Player section
Signal-to-noise ratio 90 dB
Frequency response 10 – 20,000 Hz
Wow and flutter Below measurable limit
Tuner section
FM
Tuning range 87. 5 – 108.0 MHz
Aerial terminal External aerial connector
Intermediate frequency 10. 7 MHz/450 kHz
Usable sensitivity 8 dBf
Selectivity 75 dB at 400 kHz
Signal-to-noise ratio 66 dB (stereo),
Harmonic distortion at 1 kHz
Separation 35 dB at 1 kHz
Frequency response 30 – 15,000 Hz
72 dB (mono)
0.6 % (stereo),
0.3 % (mono)
MW/LW
Tuning range MW: 531 – 1,602 kHz
Aerial terminal External aerial connector
Intermediate frequency 10. 7 MHz/450 kHz
Sensitivity MW: 30 µV
LW: 153 – 279 kHz
LW: 40 µV
Power amplifier section
Outputs Speaker outputs
Speaker impedance 4 – 8 ohms
Maximum power output 50 W × 4 (at 4 ohms)
(sure seal connectors)
General
Outputs Audio outputs
Inputs Telephone ATT control le ad
Tone controls Bass ±8 dB at 100 Hz
Power requirements 12 V DC car battery
Dimensions Approx. 178 × 50 × 177 mm
Mounting dimensions Approx. 182 × 53 × 161 mm
Mass Approx. 1.2 kg
Supplied accessories Parts for installation and
Optional accessories Rotary commander
Optional equipment CD changer (10 discs)
Power aerial relay control
lead
Power amplifier co ntro l lead
Remote controller imput
connector
Aerial input connector
Treble ±8 dB at 10 kHz
(negativ e eart h )
(w/h/d)
(w/h/d)
connections (1 set)
Front panel case (1)
RM-X4S
Card remote commander
RM-X114
BUS cable (supplied with
an RCA pin cord)
RC-61 (1 m), RC-62 (2 m)
CDX-848X, CDX-646
CD changer (6 discs)
CDX-T68X, CDX-T67
MD changer (6 discs)
MDX-65
Source selector
XA-C30
26
Note
This unit cannot be connected to a digital preamplifier
or an equalizer.
Design and specifications are subject to chan ge
without notice.
Page 27

Troubleshooting
The following checklist will help you remedy
problems you may encounter with your unit.
Before going t hrough the checkl ist belo w, check
the connection and operating procedur es.
General
No sound.
• Rotate the volume control dial clockwise to
adjust the volume.
• Cancel the ATT function.
• Set the fader control to the cen tre position f or
a 2-speaker system.
The contents of the memory have been
erased.
• The RESET button has been pressed.
t Store again into the memory.
• The power cord or battery has been
disconnected.
• The power connecting cord is not connec te d
properly.
No beep sound.
The beep sound is cancelled (page 22).
Indications disappear from/do not appear in
the display.
• The clock dis pl ay disappears if you pres s
(OFF) for 2 seconds.
t Press (OFF) again for 2 secon d s to
display the clock.
• Remove the front panel and clean the
connectors. See “Cleaning the con nectors”
(page 24) for details.
Stored stations and correct time are erased.
The fuse has blown.
Makes noise when the ignition key is in the
ON, ACC, or OFF position.
The leads are not matched correctly with the
car’s accessory power connec to r.
No power is being supplied to the unit.
• Check the co nnection. If everything is in
order, check the fuse.
• The car does not have an ACC position.
t Press (SOURCE) (or insert a disc) to turn
on the unit.
The power is continuously supplied to the
unit.
The car does not have an ACC position.
The power aerial does not extend.
The power aerial does not have a relay box.
CD/MD playback
A disc cannot be loaded.
• Another CD is already loaded.
• The CD is forcibly inserted upside down or
in the wrong way.
Playback doe s not begin.
• Defective MD or dirty CD .
• CD-R that is not finalized.
• You tried to playback a CD-R not designed
for audio use.
• Some CD-Rs m a y not play due to its
recording equipment or the disc condition.
A disc is automatically ejected.
The ambient temp erature exceeds 50°C.
CD will not be ejected.
The operation buttons do not function.
Press the RESET button.
The sound skips from vibration.
• The unit is installed at an angle of more than
60°.
• The unit is not installed in a sturdy part of
the car.
The sound skips.
Dirty or defective disc.
Cannot turn off the “--------” indication.
You entered the name edit mode.
t Press (LIST) for 2 seconds.
Radio reception
Preset tuning is not possible.
• Store the correct frequency in the memory.
• The broadcas t si gnal is too weak.
The stations cannot be received.
The sound is hampered by noises.
• Connect a power aerial control lead (blue) or
accessory power supply lead (red) to the
power supply lead of a car ’s aerial booster.
(Only when your car ha s built-in FM/MW/
LW aerial in the rear/side glass.)
• Check the connection of the car aerial.
• The auto aerial will not go up.
t Check the connection of the power aerial
control lead.
• Check the frequ ency.
Automatic tuning is not possible.
• The local seek mode is set to “ON.”
t Set the local seek mode to “OFF.” (page
22)
• The broadcas t si gnal is too weak.
t Perform manual tuning.
continue to next page t
27
Page 28

The “ST” indication flashes.
• Tune in the frequency accurat ely.
• The broadcast signal is too weak.
t Set to the monaural reception mode (page
22).
A programme broadcast in stereo is heard
in monaural.
The unit is in monaural reception mode.
t Canc el monaural reception m ode (page
22).
RDS
The SEEK starts after a few seconds of
listening.
The station is non- TP or has weak signal.
t Press (AF) or (TA) repeatedly until “AF-
OFF” or “TA-OFF” appears.
No traffic announcements.
• Activate “TA.”
• The station does not broadcast any traffic
announcements de spite being TP.
t Tune in another station.
PTY displays “--------.”
• The current station is not an RDS station.
• RDS data has not been received.
• The station does not specify the program me
type.
Error displays/Messages
Error displays
(For this unit and optional CD/MD changers)
The following indications will flash for about 5
seconds, and an ala rm sound will be hear d.
BLANK*
ERROR*
HI TEMP
NO DISC
NO MAG
NOTREADY
RESET
1
No tracks have been recor ded on an MD.*
2
t Play an MD with recor ded tracks on it.
1
• A CD is dirty or inserted upside down.*
2
t Cl ean or insert the CD co rrectly.
• A CD/MD cann ot p l ay because of some
problem.*
2
t Insert another CD/MD.
The ambient temperature is more than 50°C.
t Wait until the temperature goes down
below 50°C.
No disc is inserted in the CD/MD unit.
t Insert discs in the CD/MD unit.
The disc magazine is not inserted in the CD/
MD unit.
t Insert the magazine in the CD/MD unit.
The lid of the MD unit is open or the MDs are
not inserted properly.
t Close the lid or insert the MDs properly.
The CD/MD unit ca nnot be operated because
of some problem.
t Press the R ESET button on the unit.
28
*1 When an error occurs during playback of a CD or
MD, the disc number of the CD or MD does not
appear in the display.
*2 The disc number of the disc causing the error
appears in the display.
If these solutions do not help improve the
situation, consult your nearest Sony dealer.
Messages
L.SEEK +/–
The Local Seek mode is on during automatic
tuning (page 14 ).
NO AF
There is no alternat ive frequ ency f or the
current station.
“” or “”
You have reached the beginning or th e end of
the disc and you cann ot go any further.
Page 29

Page 30
¡Bienvenido!
Gracias por adquir ir este reproductor de dis cos
compactos Sony. Disfrutará incluso más de sus
distintas funciones con:
• Unidades opcionales de CD/MD (ca m biadores
y reproductores)*
• Información CD TEXT (mostrada al reproducir
discos CD TEXT*
CD conectada con la función CD TEXT).
• Accesorios de controlador opcionales
Mando rotativo RM-X4S
Mando a distancia de tarjeta RM-X114
*1 Esta unidad funciona solamente con productos
Sony.
*2 Un disco CD TEXT es un CD de audio que incluye
información, como el nombre del disco, el nombre
del artista y los nombres de las pistas. Esta
información está grabada en el disco.
Esta etiqueta está situada en la parte inferior del
chasis.
1
.
2
en una unidad opcional de
CAUTION INVISIBLE
VIEW DIRECTLY WITH OPTICAL INSTRUMENTS
LASER RADIATIONWHEN OPEN
DO NOT STARE INTO BEAM OR
Esta etiqueta está situada en el chasis interno de
la unidad de activación.
2
Page 31

Índice
Ubicación de los controles. . . . . . . . . . . . . . . 4
Precauciones . . . . . . . . . . . . . . . . . . . . . . . . . 6
Notas sobre discos. . . . . . . . . . . . . . . . . . . . . 6
Procedimientos iniciales
Restauración de la unidad . . . . . . . . . . . . . . . 7
Extracción del panel frontal. . . . . . . . . . . . . . 8
Ajuste del reloj . . . . . . . . . . . . . . . . . . . . . . . 9
Reproductor de CD
Unidad de CD/MD (opcional)
Reproducción de discos. . . . . . . . . . . . . . . . . 9
Elementos del visor. . . . . . . . . . . . . . . . . . . 10
Reproducción repetida de pistas
— Reproducción repetida . . . . . . . . . . . . 11
Reproducción de pistas en orden ale at orio
— Reproducción aleatoria . . . . . . . . . . . 11
Etiquetado de CD
— Memorando de discos* . . . . . . . . . . . 11
Localización de discos por nom br e
— Listado* . . . . . . . . . . . . . . . . . . . . . . . 12
Selección de pistas específicas para su
reproducción
— Banco* . . . . . . . . . . . . . . . . . . . . . . . . 13
* Funciones disponibles con una unidad opcional de
CD/MD.
Radio
Almacenamiento automático de emisoras
— Memoria de la mejor sintonía
(BTM). . . . . . . . . . . . . . . . . . . . . . . . . . . 14
Recepción de las emisoras almacenadas. . . 14
Almacenamiento de las emisoras
deseadas . . . . . . . . . . . . . . . . . . . . . . . . . 15
Sintonización de emisoras mediante lista
— Listado . . . . . . . . . . . . . . . . . . . . . . . . 15
RDS
Descripción general de RDS. . . . . . . . . . . . 16
Resintonización automática para mejorar la
recepción
— Función AF . . . . . . . . . . . . . . . . . . . . 16
Recepción de anunc io s de tr áfico
— TA/TP . . . . . . . . . . . . . . . . . . . . . . . . 17
Memorización de emisoras RDS con los
ajustes AF y TA . . . . . . . . . . . . . . . . . . . 18
Sintonización de emisoras mediante tipo de
programa
— PTY . . . . . . . . . . . . . . . . . . . . . . . . . . 18
Ajuste automático del reloj
— CT . . . . . . . . . . . . . . . . . . . . . . . . . . . 19
Otras funciones
Uso del mando rotativo. . . . . . . . . . . . . . . . 20
Ajuste de las características de sonido . . . . 21
Atenuación rápida del sonido . . . . . . . . . . . 21
Cambio de los ajustes de sonido y
visualización
— Menú . . . . . . . . . . . . . . . . . . . . . . . . . 22
Selección de la posición del sonido
— Posición óptima de sonido
(MBP). . . . . . . . . . . . . . . . . . . . . . . . . . . 2 3
Ajuste del ecualizador. . . . . . . . . . . . . . . . . 23
Información complementaria
Mantenimiento . . . . . . . . . . . . . . . . . . . . . . 24
Extracción de la unidad. . . . . . . . . . . . . . . . 25
Especificaciones . . . . . . . . . . . . . . . . . . . . . 26
Solución de problemas . . . . . . . . . . . . . . . . 27
Indicaciones de error/Mensajes . . . . . . . . . 28
3
Page 32

Ubicación de los controles
Consulte las páginas indicadas para obtener inform ación detallada.
: Durante la reprod ucción : Durante la recepc ión de la radio : Durante el
CD/MD
modo de menú
RADIO MENU
1
2
3
REP
MBP
EQ 7
SOURCE
MODE
SHUF
6
5
4
1 Dial de control de volumen 17
2 Botón
3
MBP 23
Botón Z (expulsión) (situado en la part e
frontal de la unidad, detrás del panel fr ontal)
9
4
Botón SOURCE (Activación de la
alimentación/Radio/CD/MD)
8, 9, 10,
12, 14, 15, 17, 23
5 Visor
6 Receptor pa ra el mando a distancia
de tarjeta
7
Botón MENU 9, 11, 12, 13, 14, 18, 19,
22, 23, 24
8
Botón DISPLAY/PTY (cambio del modo
de indicación/tipo de progr ama )
10, 12,
16, 19
9 Botón S (SCROLL) 10
q; Botón OPEN 8, 9
qa Botón LIST
12
CD/MD
15
RADIO
qs
Botón EQ7 23
qd
Botón RESET (situado en la parte fron tal
de la unidad, detrás del panel frontal) 7
PTY
D
C
S
DISPLAY
C
S
I
D
MENU
SOUND
AF
TA
CDX-CA650X/CA650V/CA650
qf Botones numéricos
CD/MD
(3) REP 11
(6)
SHUF 11
14, 15, 17, 18
RADIO
qg Botón MODE
10, 12
CD/MD
14, 15, 17
RADIO
qh
Botón SOUND 21, 23
qj
Botón AF 16, 18
qk Botón TA 17, 18
ql
Botón OFF (Parada/Desactivación de la
alimentación)
* 8, 9
w; Botón ENTER
12
CD/MD
15, 19
RADIO
9, 11, 12, 13, 14, 18, 19, 22, 23,
MENU
24
*
Advertencia sobre la instalación en un
automóvil que no disponga de posición
ACC (auxiliar) en el interruptor de
encendido
Después de apagar el encendido, asegúrese
de pulsar
(OFF) en la unidad durante 2
segundos para desactivar la indicación del
reloj.
En caso contrari o, la indicación del reloj no se
desactivará y causará el desgaste de la batería.
S
O
P
EN
L
L
O
R
R
E
P
/
S
E
T
LIST
SEEKSEEK
ENTER
O
FF
4
Page 33

PTY
S
(SEEK)
(–): para
seleccionar
hacia la
izquierda/
.
D
DISPLAY
MENU
SOUND
AF
TA
(+): para seleccionar hacia arriba
(–): para seleccionar hacia abajo
O
P
E
N
LL
O
R
SC
R
E
P
/
S
C
E
S
T
I
D
LIST
SEEKSEEK
ENTER
O
FF
(DISC/PRESET)
(DISC/PRESET)
(SEEK)
(+): para
seleccionar
hacia la
derecha/
>
En el modo de menú, el botón o botones de estos
cuatro que pueden seleccionarse actualmente se
indican con “ M” en el visor.
wa Botones DISC/PRESET (+/–)
10, 12
CD/MD
14, 15, 18
RADIO
9, 11, 12, 13, 14, 18, 19, 22, 23,
MENU
24
ws B o to nes SE EK (–/+)
9
CD/MD
14, 15, 16
RADIO
9, 11, 13, 19, 21, 22, 23
MENU
Mando a distancia de tarjeta RMX114 (opcional)
DSPL MODE
+
PRESET
LIST
+
DISC
MENU
SOURCE
–
SEEK
SOUND
DISC
PRESET –
+
VOL
–
Los botones correspondientes del mando a
distancia de tarjeta controlan las mismas
funciones que los de esta unidad.
1 Botón DSPL
2 Botón MENU
3 Botón SOURCE
4 Botones SEEK (</,)
5 Botón SOUND
6 Botón OFF
7 Botones VOL (–/+)
8 Botón MODE
9 Botón LIST
q; Botones DISC/PRESET(M/m)
qa Botón ENTER
qs Botón ATT
Nota
Si la unidad se apaga pulsando (OFF) durante 2
segundos, no podrá utilizarse con el mando a
distancia de tarjeta a menos que se pulse (SOURCE)
en la unidad, o que se inserte un disco para que dicha
unidad se active primero.
Sugerencia
Consulte “Sustitución de la pila de litio” para obtener
información detallada sobre cómo sustituir las pilas
(página 25).
+
SEEK
R
–
TE
N
E
ATTOFF
5
Page 34

Precauciones
Notas sobre discos
• Si aparca el automóvil bajo la luz solar dire cta,
permita que la unidad se enfríe antes de
utilizarla.
• Las antenas m o t orizadas se extenderán
automáticamente al encender la unidad.
Si desea realizar alguna consulta o solucionar
algún problema relativo a la unidad que este
manual no trate, consulte con el proveedor Sony
más próximo.
Condensación de humedad
En días lluviosos o en zonas muy húmedas, es
posible que se condense humedad dentro de las
lentes y viso r de la un idad . Si est o ocur re, ésta no
funcionará correctamente. En este caso, extraiga
el disco y espere una hora aproximadamente
hasta que se haya evaporado la hu medad.
Para mantener una alta cal idad de
sonido
Asegúrese de que no salpica zumos ni demás
bebidas suaves sobre la unidad o los discos.
• Para mantener los discos limpios, no toque la
superficie. Agarre los discos por lo s b ordes.
• Guarde los discos en sus cajas o en los
cargadores de discos cuando no los utilice.
No someta los discos al calor ni a altas
temperaturas. Evite dejarlos en automóviles
aparcados o en salpicaderos o bandejas
traseras.
• No adhiera eti quetas, ni utilice discos con
residuos/tint a pegaj osos. Tales discos pueden
dejar de girar durant e el uso, c ausand o fa llos de
funcionamiento, o pueden dañarse.
• Los discos con formas no estándar (p.ej.,
corazón, cuadrado, estrella) no pueden
reproducirse en esta unidad. Si lo intenta,
puede dañar la unidad. No utilice tales discos.
• No es posible reproducir discos compactos de 8
cm.
• Antes de realizar la reproducción, limpie los
discos con un paño de limpieza disponible en el
mercado. Hága lo desde el centro hacia los
bordes. No utilice disolventes como bencina,
diluyente, limpiadores disponibles en el
mercado ni ae rosoles antiestát i cos para discos
analógicos.
6
Page 35

Notas sobre discos CD-R
• Puede reproducir discos CD-R (di scos
compactos grabables) diseñados para uso de
audio en esta unidad.
Busque esta marc a con el fin de distinguir los
discos CD-R para uso de audio.
Esta marca indica que el disco no es para uso
de audio.
Procedimientos iniciales
Restauración de la unidad
Antes de utilizar la unidad por primera vez o
después de sustituir la batería del automóvil, es
preciso rest aurar dicha uni dad.
Extraiga el panel frontal y pulse el botón RESET
con un objeto punt ia gudo, como un bolígrafo.
• Determinados discos CD-Rs (dependiendo del
equipo utilizado para su grabación o la
condición del disco) pueden no reproducirse en
esta unidad.
• No es posible reproducir discos CD-R que no
estén final izados*.
* Proceso necesari o para reproducir en el
reproductor de CD de audio discos CD-R
grabados.
Botón RESET
Nota
Al pulsar el botón RESET , se borrará el ajuste del reloj
y algunos contenidos memorizados.
7
Page 36

Extracción del panel frontal
Puede extraer el panel frontal de esta unidad para
evitar su r obo.
Alarma de precaución
Si gira el interruptor de encendido hast a la
posición OFF sin haber extraído el panel frontal,
la alarma de pr ecaución emitirá pitidos durante
unos segundos.
Si conecta un amplificador opcional de potencia
y no utiliza el incorporado, los pitidos se
desactivarán.
1 Pulse (OFF)*.
La reproducci ón de CD/MD o l a rece pción de
la radio se detiene (la iluminación de las
teclas y el visor permanecen activados).
* Si el automóvil no dispone de posición ACC en
el interruptor de encendido, asegúrese de
apagar la unidad pulsando (OFF) durante 2
segundos para evitar el desgaste de la batería
del automóvil.
2 Pulse (OPEN)y, a continuación,
deslice el panel frontal a la derecha y
tire del extremo izquierdo de dicho
panel con suavidad.
Fijación del panel frontal
Coloque e l orificio A de l p anel frontal sobre el
eje
B de la unidad y presione ligeramente sobre
el lado izquierdo para insertar l o.
Pulse (SOURCE) (o inserte un CD) para utiliza r
la unidad.
A
B
x
1
2
Notas
• Si extrae el panel con la unidad encendida, la
alimentación se desactivará automáticamente para
evitar que los altavoces se dañen.
• No deje caer ni ejerza excesiva presión sobre el
panel frontal ni sobre su visor.
• No someta el panel frontal al calor ni a altas
temperaturas o humedad. Evite dejarlo en
automóviles aparcados o en salpicaderos o
bandejas traseras.
Sugerencia
Cuando lleve el panel frontal consigo, utilice el
estuche suministrado para el mismo.
8
Nota
No coloque nada sobre la superficie interior del panel
frontal.
Page 37

Ajuste del reloj
El reloj utiliza una indicación digital de 24 horas.
Ejemplo: Para ajustar el reloj a las 10:08
1 Pulse (MENU)y, a continuación,
cualquier lado de (DISC/PRESET)
varias veces hasta que apar ezca
“CLOCK”.
Reproductor de CD Unidad de CD/MD (opcional)
Además de reproducir el CD con esta unidad,
también puede controlar las unidades externas de
CD/MD.
Nota
Si conecta una unidad opcional de CD con función CD
TEXT, la información CD TEXT aparecerá en el visor
al reproducir discos CD TEXT.
1 Pulse (ENTER).
La indicación de hora parpadea.
2 Pulse cualquier lado de
(DISC/PRESET) para ajustar la hora.
3 Pulse el lado (+) de (SEEK).
La indicación de minutos parpadea.
4 Pulse cualquier lado de
(DISC/PRESET) para ajustar los
minutos.
2 Pulse (ENTER).
El reloj se pone en funcionamiento. Al
finalizar el ajus te de l reloj, el visor vuel ve al
modo de reproducción normal.
Sugerencias
• Pue de aj ust ar el reloj auto máticamente con la
función RDS (página 19).
• Si el modo D.INFO está ajustado en ON, la hora
siempre se mostrará (página 22).
Reproducción de discos
(Con esta unidad)
1 Pulse (OPEN) e inserte el disco (cara
etiquetada hacia arriba).
2 Cierre el panel frontal.
La reproducc i ón se inicia automáticamente.
Si ya hay un disco insertado, pulse (SOURCE)
varias veces hasta que aparezca “CD” para
iniciar la reproducción.
Para Pulse
Detener la
reproducción
Expulsar el disco (OPEN) y, a continuación,
Omitir pistas
–Sensor de
música
automático
Avanzar/retroceder
rápidamente
–Búsqueda
manual
(OFF)
Z
(SEEK) (./>)
[una vez por pista]
(SEEK) (m/M)
[manténgalo pu l sa do hasta
alcanzar el punto deseado]
Continúa en la página siguiente t
9
Page 38

Notas
• Cuando finalice la última pista del disco, la
reproducción se reiniciará a partir de la primera
pista del disco.
• Con una unidad opcional conectada, la
reproducción de la misma fuente continuará en la
unidad opcional de CD/MD.
(Con unidad opcional)
1 Pulse (SOURCE) varias veces para
seleccionar “CD” o “MD”.
2 Pulse (MODE) varias veces hasta que
aparezca la unidad deseada.
Se inici a la reprodu cción.
Para Pulse
Omitir discos
–Selección de
discos
(DISC/PRESET) (+/–)
Elementos del visor
Al cambiar el dis co/pista, el título pregrabado*1
del nuevo disco/pista apar ece automáticamente
(si la función de desplazamiento automático está
ajustada en “ON”, los nombres con más de 8
caracteres se desplazarán (página 22)).
Elementos visual i zables
• Fuente de música
• Reloj
• Función
Elementos visual i zables
• Tiem po de reproducci ón
transcurrido
• Nombre del disco*
• Título de la pista*
Para Pulse
Cambiar el
elemento del visor
que se desplace el
elemento del visor
1
/artista*
1
(DISPLAY/PTY)
(S) (SCROLL)
2
10
*1 “NO NAME” indica que no hay ningún memorando
de discos (página 11) o nombre pregrabado para
mostrarse.
*2 Sólo para discos CD TEXT con nombre del artista.
Notas
• Algunos caracteres no pueden mostrarse.
• Con algunos discos CD TEXT que contengan
muchos caracteres, la información puede no
desplazarse.
• Esta unidad no puede mostrar el nombre del artista
de cada pista de un disco CD TEXT.
Sugerencia
Con el desplazamiento automático ajustado en OFF y
al cambiar el nombre del disco/pista, dicho nombre no
se desplaza.
Page 39

Reproducción repetida de
pistas
— Reproducción repetida
Se repetirá una pista o el disco comple to de l a
unidad principal cuando llegue al final. Para la
reproducción repetida, es posible seleccionar:
• REP-1 — para repetir una pista.
• REP-2* — para repetir un disco.
* Disponible solamente cuando hay conectada una o
más unidades opcionales de CD/MD.
Durante la reproducción, pulse (3)
(REP) varias veces hasta que el ajuste
deseado aparezca en el visor.
Se inicia la reproducción repe t ida.
Para recupera r el modo de reproducción normal,
seleccione “REP-OFF”.
Reproducción de pistas en
orden aleatorio
— Reproducción aleatoria
Es posible seleccionar:
• SHUF-1 — para reproducir las pistas del disco
actual en orden aleatorio.
• SHUF-2*
unidad opcional de CD (MD) actual en orden
aleatorio.
• SHUF-ALL*
pistas de todas las unidades de CD (MD)
conectadas (incluida esta unidad ) en orden
aleatorio.
*1 Disponible solamente cuando hay conectada una o
*2 Disponible solamente cuando hay conectada una o
1
— para reproducir las pistas de la
2
— para reproducir todas las
más unidades opcionales de CD (MD).
más unidades opcionales de CD, o dos o más
unidades opcionales de MD.
Durante la reproducción, pulse (6)
(SHUF) varias veces hasta q ue el
ajuste deseado aparezca en el visor.
Se inicia la reproducción aleatoria.
Etiquetado de CD
— Memorando de discos (Para una unidad de
CD con función CUSTOM FILE)
Puede etiquetar los discos con un n om bre
personalizado (Memorando de discos). Puede
introducir hast a 8 caracteres por disc o. Si asi gna
título a un CD, podrá localizar el disco mediante
dicho título (página 12).
1 Inicie la reproducción del di sco que
desee etiq uetar.
2 Pulse (MENU)y, a continuación,
cualquier lado de (DISC/PRESET)
varias veces hasta que aparezc a
“NAMEEDIT”.
3 Pulse (ENTER).
La unidad repetirá el disco durant e el
procedimiento de asignación de título.
4 Introduzca los c aracteres.
1 Pulse el lado (+)*
varias veces para selecc ionar el
carácter deseado.
A t B t C ... t 0 t 1 t 2 ... t +
t – t
*1 Para el orden inverso, pulse el lado (–) de
*2 (espacio en blanco)
2 Pulse el lado (+) de (SEEK) una vez
localizado el carácter deseado.
... t _*2 t A
*
(DISC/PRESET).
1
de (DISC/PRESET)
Para recupera r el modo de reproducción normal,
seleccione “SHUF-OFF”.
Nota
“SHUF-ALL” no establecerá el orden aleatorio de las
pistas entre un reproductor de CD y uno de MD.
Si pulsa el lado (–) de (SEEK), podrá
desplazarse hacia atrás a la izquierda.
3 Repita los pasos 1 y 2 para
introducir el nombre completo.
5 Para recuperar el modo normal de
reproducción de CD, pulse (ENTER).
Continúa en la página siguiente t
11
Page 40

Sugerencias
• Para corregir o borrar un nombre, sobrescríbalo o
introduzca “_”.
• Existe otr o método para comenzar a asignar títulos
al CD: Pulse (LIST) durante 2 segundos en lugar de
realizar los pasos 2 y 3. También puede completar la
operación pulsando (LIST) durante 2 segundos en
lugar de realizar el paso 5.
• Podrá etiquetar discos compactos en una unidad sin
función CUSTOM F ILE, si está conectada junto con
una unidad de CD que disponga de dicha función. El
memorando de discos se almacenará en la memoria
de la unidad de CD con la función CUSTOM FILE.
Nota
La reproducción REP-1/aleatoria se suspende hasta
completarse la edición de nombres.
Visualización del memorando de
discos
Como elemento de vi sualizaci ón, el memorando
de discos si em pre ti ene p rio rida d s obr e c ua lqui er
información CD TEXT original.
Para Pulse
Ver (DISPLAY/PTY) durante la
reproducción de discos CD/
CD TEXT
Sugerencia
Para conocer otros elementos que pueden
visualizarse, consulte la página 10.
Borrado del memorando de discos
7 Pulse (MENU) dos veces.
La unidad vuelve al modo de reproducción
normal de CD.
Notas
• Cuando se borra el memorando de un disco CD
TEXT, aparece la información CD TEXT original.
• Si no puede encontrar el memorando que desea
borrar, inténtelo seleccionando una unidad diferente
de CD en el paso 2.
Localización de discos por
nombre
— Listado (Para una unidad de CD con la
función CD TEXT/CUSTOM FILE o una unidad
de MD)
Esta función puede utilizarse con discos a los que
se han asignado nombres personalizados*
discos CD TEXT*
*1 Localización de discos por su nombre
personalizado: al asignar un nombre a un CD
(página 11) o MD.
*2 Localización de discos por la información CD
TEXT: si reproduce un disco CD TEXT en una
unidad de CD con la función CD TEXT.
2
.
1 Pulse (LIST).
El nombre asignado al disco actual aparece en
el visor.
1
o con
1 Pulse (SOURCE) varias veces para
seleccionar “CD”.
2 Pulse (MODE) varias veces para
seleccionar la unidad de C D que
contenga el memorando .
3 Pulse (MENU)y, a continuación,
cualquier lado de (DISC/PRESET)
varias veces hasta que apar ezca
“NAME DEL”.
4 Pulse (ENTER).
Los nombres almacenados se mostrarán por
orden a partir de los primeros i ntroducidos.
5 Pulse cualqui er lad o de (DISC/PRESET)
varias veces para seleccio nar el
nombre del disco que desee borrar.
Los nombres almacenados se mostrarán a
partir de los primero s introducidos.
6 Pulse (ENTER) durante 2 segundos.
El nombre se borra.
Si desea borrar ot ros nombres, repit a los
pasos 5 y 6.
12
2 Pulse cualquier lado de (DISC/PRESET)
varias veces hasta que encuentre el
disco deseado.
3 Pulse (ENTER) para reproducir el
disco.
Nota
No es posible visualizar ciertas letras (excepción:
memorando de discos).
Page 41

Selección de pistas
específicas para su
reproducción
— Banco (Para una unid ad de CD con fun ción
CUSTOM FILE)
Si asigna nombres a los discos, podrá programar
la unidad para que omita pista s o repro duzca sólo
las que desee.
1 Inicie la reproducción del disco que
desee etiquetar.
2 Pulse (MENU)y, a continuación,
cualquier lado de (DISC/PRESET)
varias veces hasta que apar ezca
“BANK SEL”.
3 Pulse (ENTER).
Reproducción sólo de pistas
específicas
Es posible selec ci o nar:
•“BANK-ON” — para reproducir las pistas con
el ajuste “PLAY”.
•“BANK-INV” (Inverso) — para reproducir las
pistas con el ajuste “SKIP”.
1 Durante la reproducción, pulse
(MENU)y, a continuación, cualquier
lado de (DISC/PRESET) varias veces
hasta que aparezca “BANK-ON”,
“BANK-INV” o “BANK-OFF”.
2 Pulse el lado (+) de (SEEK) va rias
veces hasta que aparezca el ajuste
deseado.
3 Pulse (ENTER).
La reproducc i ón se inicia a partir de la pista
siguiente a la actual.
4 Asigne nom bre a las pistas.
1 Pulse cualquier lado de (SEEK)
varias veces para seleccio nar la
pista a la que desee asignar
nombre.
2 Pulse (ENTER) varias vec es p ar a
seleccionar “PLAY” o “SKIP”.
5 Repita el paso 4 par a establecer el
modo “PLAY” (reproducción) o “SKIP”
(omisión) en todas las pistas.
6 Pulse (MENU) dos veces.
La unidad vuelve al modo de reproducción
normal de CD.
Notas
• Pue de esta blecer “PLAY” y “SKIP” para un máximo
de 24 pistas.
• No es posible establecer “SKIP” para todas las
pistas de un CD.
Para volver al modo de reproducción normal,
seleccione “BANK-OFF” en el paso 2.
13
Page 42

Radio
La unidad puede almace nar hasta 6 emisoras por
banda (FM1, FM2, FM3, MW y LW).
Precaución
Para sintonizar emisoras mientras conduce,
utilice la función Memoria de la mejor sintonía
para evitar accidentes.
Almacenamiento automático
de emisoras
— Memoria de la mejor sintonía (BTM)
Recepción de las emisoras almacenadas
1 Pulse (SOURCE) varias veces para
seleccionar la radio.
2 Pulse (MODE) varias veces para
seleccionar la banda.
3 Pulse el botón numérico ((1) a (6)) en
el que esté almacenada la emisora
deseada.
Sugerencia
Pulse cualquier lado de (DISC/PRESET) para recibir
las emisoras en el orden en el que están
almacenadas en la memoria (F unción de búsqueda
programada).
La unidad selecciona las emisoras de señal más
intensa dentro de la ba nda seleccionada y la s
almacena por orde n de frecuencia.
1 Pulse (SOURCE) varias veces para
seleccionar la radio.
2 Pulse (MODE) varias veces para
seleccionar la banda.
3 Pulse (MENU)y, a continuación,
cualquier lado de (DISC/PRESET)
varias veces hasta que apar ezca
“BTM”.
4 Pulse (ENTER).
La unidad emite un pi tido al almacenar el
ajuste.
Notas
• Si se reciben pocas emisoras debido a que las
señales son débiles, algunos botones numéricos
conservarán sus valores anteriores.
• Si el visor muestra un número, la unidad comenzará
a almacenar emisoras a partir del actualmente
mostrado.
Si la sintonización prog rama da no
funciona
Pulse cualquier lado de (SEEK) para
buscar la emisora (sintonización
automática).
La exploración se detien e cuando la unidad
recibe una em i sora. Repit a l a operación hasta
recibir la emisor a deseada.
Sugerencias
• Si la sintonización automática se detiene con
demasiada frecuencia, active la búsqueda local para
buscar solamente emisoras de señal más intensa
(página 22).
• Si sabe cuál es la frecuencia de la emisora que
desea escuchar, pulse y mantenga pulsando
cualquier lado de (SEEK) para localizar la
frecuencia aproximada. A continuación, pulse
(SEEK) varias veces para ajustar con precisión la
frecuencia deseada (sintoniza ción manual).
Si la recepción de FM en estéreo es de
mala calidad
Seleccione el modo de recepción
monofónica (página 22).
El sonido mejorará, aunque será monofónico
(“ST” desaparece).
14
Page 43

Almacenamiento de las emisoras deseadas
Puede memorizar manualmente la s emisoras que
desee en cualquier botón numérico.
1 Pulse (SOURCE) varias veces para
seleccionar la radio.
2 Pulse (MODE) varias veces para
seleccionar la banda.
3 Pulse cualquier la do de (SEEK) par a
sintonizar la emisora que desee
almacenar.
4 Pulse el botón numér ico que desee
((1) a (6)) durante 2 segundos hasta
que aparezca “MEM”.
La indicación de botón numérico aparece en
el visor.
Nota
Si intenta almacenar otra emisora en el mismo botón
numérico, se borrará la emisora anteriormente
almacenada.
Sintonización de emisoras
mediante lista
— Listado
1 Durante la recepción de la radio, pulse
(LIST) momentáneamente.
Parpadea la frecuenc ia o el nombre asignado
a la emisora actual m ente sintonizada.
2 Pulse cualquier lado de (DISC/PRESET)
varias veces hasta que encuen tr e l a
emisora deseada.
Si la emisora selecci onada no tiene un
nombre asignado , e l visor mostrará la
frecuencia correspondiente.
3 Pulse (ENTER) para sintonizar la
emisora deseada.
15
Page 44

RDS
Resintonización automática
para mejorar la recepción
— Función AF
Descripción general de RDS
Las emisoras de FM con servicio RDS (Sistema
de datos de radio) envían información digital
inaudible junto con la señal normal de programa
de radio. Por ejempl o, aparecerá una de las
siguientes indica ciones al recibirse una emisora
con capacidad RD S.
Elementos visual i zables
• Fuente de música
• Reloj
• Función
Elementos visual i zables
• nombre de la emisora
(frecuencia)
• tipo de programa
Para Pulse
Cambiar el
elemento
del visor
(DISPLAY/PTY)
La función de frecuencias alternativas (AF)
permite que la radi o sintonice siempr e la señal
más intensa de la emisora que escuche dentro de
una zona.
Las frecuencias cambian automáticamente.
98,5 MHz
Emisora
96,0 MHz
102,5 MHz
1 Seleccione una emisora de FM (página
14).
2 Pulse (AF) varias vece s hasta que
aparezca “AF-ON”.
La unidad comienza a busca r una frecuencia
alternativa con la señal más intensa de la
misma red.
Si “NO AF” parpadea, significa que la
emisora actualmente sintonizada no dispone
de frecuencia alternativa.
Nota
Si no hay frecuencias alternativas en la zona o si no
es necesario buscar una, desactive la función AF
seleccionando “AF-OFF”.
Servicios RDS
Los datos RDS ofrecen otras funciones útiles,
como:
•
Resintonización automática de un
programa, que resulta útil durante un l argo
viaje. — AF
• Recepción de
mientras se recibe otro programa/fuente. — TA
t página 17
• Selección de emisoras mediante el
programa
• Ajuste automático
19
Notas
• La disponibilidad de todas las funciones RDS
depende del país o región.
• RDS puede no funcionar correctamente si la señal
es débil o si la emisora que sintoniza no transmite
datos RDS.
t página 16
anuncios de tráfico, inclus o
que se emita. — PTY t página 18
del reloj. — CT t página
16
tipo de
Para emisoras sin frecuencias
alternativas
Pulse cualquier lado de (SEEK)
mientras el nombre de la emisora
parpadea (antes de 8 segund os) .
La unidad comienza a buscar otra frecuencia
con los mismos datos PI (Identificación de
programa) (aparece “PI SEEK”).
Si la unidad no puede encontrar los mismos
datos PI, volverá a la frecue ncia
anteriormente seleccionada.
Permanencia en un programa regional
Cuando la función AF está activada: el ajuste de
fábrica de esta unidad limita la recepción a una
región específica, por lo que no cambiará a otra
emisora regional de fr ecuencia más intensa.
Page 45

Si desea permane cer en la zona de recepci ón de
este programa regi onal o si desea obtener el
máximo rendimi ento de la función AF,
seleccione “RE G-OFF” en el MENU (página
22).
Nota
Esta función no se activa en el Reino Unido ni en
algunas zonas.
Función Enlace local
(sólo Reino Unido)
Esta función permite seleccionar otras emisoras
locales de la zona, aunque no estén alma cenadas
en los botones nu m éricos.
Recepción de anuncios de
tráfico
— TA/TP
La activación de las funciones Anuncios de
tráfico (TA) y Programas de tráfico (TP) permite
sintonizar automáticamente anuncios de tráfico
de una emisora de FM que los emita. Estos
ajustes funcio nan independientemente de la
fuente (CD/MD) o programa de FM actual; la
unidad vuelve a la fuente original al finalizar el
anuncio.
1 Pulse el botón numérico ((1) a (6)) en
el que haya almacenado una emisora
local.
2 Antes de 5 segundos , pu lse de nuevo
el botón numérico de la emisora local.
3 Repita este procedimiento hasta
recibir la emisora local deseada.
Pulse (TA) varias veces hasta que
aparezca “TA-ON”.
La unidad comienza a buscar emisoras de
información sobre el tráfico.
“TP” indica la recepción de tales emisoras, y
“TA” parpadea durant e el anuncio de tráfico
existente. La unidad conti nua rá buscando
emisoras disponibles con TP si se indica “NO
TP”.
Para cancelar todos los anuncios de tráfico,
seleccione “TA- OFF”.
Para Pulse
Cancelar el
anuncio actu al
Sugerencia
También puede cancelar el anuncio actual pulsando
(SOURCE) o (MODE).
(TA)
Programación del volumen de los
anuncios de tráfico
Puede programar el nivel de volumen de los
anuncios de tráfico para que no pasen
inadvertidos.
1 Gire el dial de control de volumen para
ajustar el nivel de volumen que desee.
2 Pulse (TA) durante 2 segund os.
Aparece “TA” y el ajuste se al m acena.
Recepción de avisos de emergencia
Si AF o TA está activado, la unidad ca m bi ará a
los avisos de emergencia, si se produce uno
mientras escu cha una emisora de FM o un CD /
MD.
17
Page 46

Memorización de emisoras RDS con los ajustes AF y TA
Al memorizar emisoras RDS, la unidad almac ena
el ajuste AF/TA (activado/desactivado) de cada
emisora, as í como su frecuencia. Puede
seleccionar un aj uste diferente (par a A F, TA o
ambos) para determinadas emisoras
memorizadas, o el mismo ajuste para todas. Si
memoriza emisoras con “AF-ON”, la unid ad
almacenará automáticamente las emisoras de
señal más intensa.
Memorización del mismo ajuste para
todas las emisoras memorizadas
1 Seleccione una banda de FM (página
14).
2 Pulse (AF) y/o (TA) para seleccionar
“AF-ON” y/o “TA-ON”.
T enga en cue nta que al sel ecciona r “AF-OFF”
o “TA-OFF” se al macenarán no sólo las
emisoras RDS, sino tam bién las que no lo
son.
3 Pulse (MENU)y, a continuación,
cualquier lado de (DISC/PRESET)
varias veces hasta que apar ezca
“BTM”.
4 Pulse (ENTER) hasta que “BTM”
parpadee.
Memorización de ajustes diferentes
para cada emisora memorizada
1 Seleccione una banda de FM y
sintonice la emisora deseada (página
15).
2 Pulse (AF) y/o (TA) para seleccionar
“AF-ON” y/o “TA-ON”.
3 Pulse el botón numér ic o que desee
((1) a (6)) hasta que aparezca “MEM”.
Repita la operación a partir del paso 1 para
programar ot ras emisoras.
Sintonización de emisoras
mediante tipo de programa
— PTY
Puede sintonizar emisoras media nt e l a selección
del tipo de programa que desee escuchar.
Tipos de programa Indicación
Noticias NEWS
Temas de actualidad AFFAIRS
InformaciónINFO
Deportes SPORT
Educación EDUCATE
Drama DRAMA
Cultura CULTURE
Ciencia SCIENCE
Variedades VARIED
Música popular POP M
Música “rock” ROCK M
Música fácil de escuchar EASY M
Clásica ligera LIGHT M
Clásica CLASSICS
Otro tipo de música OTHER M
Información
meteorológica
Finanzas FINANCE
Programas infantiles CHILDREN
Temas sociales SOCIAL A
Religión RELIGION
Conversación telefónica PHONE IN
Viajes TRAVEL
Ocio LEISURE
Música “jazz” JAZZ
Música “country” COUNTRY
Música del paísNATION M
Melodías de ayer OLDIES
Música folklórica FOLK M
Documentales DOCUMENT
WEATHER
18
Nota
No es posible utili zar esta función en países en los
que no haya datos PTY (selección de tipo de
programa) disponibles.
Page 47

1 Pulse (DISPLAY/PTY) durante la
recepción de FM hasta que aparezca
“PTY”.
El nombre del tipo de programa actual
aparecerá si la emisora transmite datos PTY.
Aparecerá “--------” si la emisora r ec ibida no
es RDS o si los datos RDS no se reciben.
2 Pulse (DISC/PRESET) varias ve ces
hasta que aparezca el tipo de
programa deseado.
Los tipos de programa aparecen en el orden
mostrado en la tabla.
Aparecerá “--------” si el tipo de programa no
se especifica en los datos RDS.
3 Pulse (ENTER).
La unidad comienza a buscar una emisora que
emita el tipo de programa selecciona do.
Ajuste automático del reloj
— CT
Los datos CT (Hora del reloj) de las
transmisiones RDS ponen el reloj en hora
automáticamente.
1 Durante la recepción de la radio, pulse
(MENU) y, a continuación, cualquier
lado de (DISC/PRESET) varias veces
hasta que aparezca “CT-OFF”.
2 Pulse el lado (+) de ( SEEK) varias
veces hasta que aparezca “CT-ON”.
El reloj se pone en ho ra.
3 Pulse (ENTER) para recup e rar la
indicación normal.
Para cancelar la función CT, seleccione “CTOFF” en el paso 2.
Notas
• La función CT puede no activarse aunque se reciba
una emisora RDS.
• Puede haber cierta diferencia entre la hora ajustada
mediante la función CT y la hora real.
19
Page 48

Otras funciones
También puede controlar la uni dad (y unidades
opcionales de CD/MD) con un mando rotativ o
(opcional).
Uso del mando rotativo
En primer lugar, adhiera la etiqueta apro piada
dependie ndo de cómo desee montar el mando
rotativo.
El mando rotativo funciona pulsando los botones
y/o los controles giratorios.
SOUND
MODE
DSPL
MODE
SOUND
DSPL
*1 Sólo si el equipo opcional correspondiente está
conectado.
*2 Si el automóv il no dispo ne de posi ción ACC
(auxiliar) en el interruptor de la llave de encendido,
asegúrese de pulsar (OFF) durante 2 segundos
para desactivar la indicación del relo j después de
apagar el encendido.
Giro del control
Control
SEEK/AMS
Gírelo y suéltelo para:
– Omitir pistas.
– Sintonizar emisoras automáticamente.
Gírelo, manténgalo en esa posición y
suéltelo para:
– Avanzar/retroceder rápidamente una pista.
– Encontrar una emisora manualmente.
Pulsación de botones
(SOUND)
(SOURCE)
Gire el control VOL para
ajustar el volumen.
Pulse Para
(SOURCE)
(ATT)
(DSPL)
Cambiar la fuente
(radio/CD/MD*
1
(MODE)
(OFF)
)
Cambiar el funciona m iento
(MODE)
(banda de radio/unidad de
CD/MD*
1
)
(ATT) Atenuar el sonido
(OFF)*
2
Detener la re produc ción o la
recepción de la radi o
(SOUND) Ajustar el menú de sonido
(DSPL)
Cambiar el elemento del
visor
Presión y giro del control
OFF
Presione y gire el control para:
–Recibir emisoras memorizadas.
–Cambiar el disco*.
*Con una unidad opcional de CD/MD conectada.
Control
PRESET/DISC
20
Page 49

Cambio del sentido de funcionamiento
El sentido de funcionamiento de los cont roles
está ajustado de fábrica como se muestra a
continuación.
Para aumentar
Para disminuir
Si necesita montar el mando rotativo en el lado
derecho de la colum na de dirección, puede
invertir el sentido de funcionamiento.
Pulse (SOUND) durante 2 segundos
mientras presiona el co ntrol VOL.
Sugerencia
También puede cambiar el sentido de funcionamiento
de estos controles con la unidad (página 22).
Ajuste de las características de sonido
Puede ajustar los graves, los agudos, el balance y
el equilibrio entre los altavoces.
Los niveles de graves y agudos pueden
almacenarse por separado para cada fuente.
1 Seleccione el element o que desee
ajustar pulsando (SOUND) varias
veces.
Cada vez que pulse (SOUND), el elemento
cambiará de la siguie n t e forma:
BAS (graves) t TRE (agudos) t BAL
(izquierdo-derecho)
posterior)
t FAD (frontal-
2 Ajuste el elem ento seleccionado
pulsando cualquier lado de (SEEK).
Al realizar el ajuste con el mando rotativo,
pulse (SOUND) y gire el control VOL.
Nota
Realice el ajuste antes de que transcurran 3
segundos después de seleccionar el elemento.
Atenuación rápida del sonido
(Con el mando ro tativo o el mando a
distancia de tar jeta)
Pulse (ATT) en el mando rotativo o en
el mando a distancia de tarjeta.
Después de aparecer “ATT-ON”
momentáneamente, el visor muestra “ATT”.
Para recuperar el nivel anterior de volumen,
pulse (ATT) de nuevo.
Sugerencia
Si el cable de interfaz de un teléfono para automóvil
está conectado al cable ATT, la unidad disminuirá el
volumen automáticamente cuando se reciba una
llamada telefónica (Función ATT de teléfono).
21
Page 50

Cambio de los ajustes de
sonido y visualización
— Menú
Es posible ajus tar los siguient es elementos:
SET (Configuración)
• CLOCK (página 9)
• CT (Hora del reloj) (página 19)
• BEEP — para activar o desactivar los pitido s.
• RM (Mando rotativo) — para c ambiar el
sentido de funcionamiento de los co nt roles del
mando rotativo.
– Seleccione “NORM” par a utilizar el mando
rotativo en la posición ajustada en fábrica.
– Seleccione “REV” si monta el mando rotati vo
en el lado derecho de la col umna de
dirección.
DSPL (Indicación)
• D.INFO (Inf ormación dual) — para mostrar
simultáneamente el reloj y el modo de
reproducción (activado).
• AMBER/GREEN — para cambiar el colo r de
iluminación a ámbar o verde (sólo CDXCA650).
• DIM (Atenuador) — para cambiar el brillo del
visor (sólo CDX-CA650V).
– Seleccione “ON” para que el visor se atenúe.
– Seleccione “OFF” para desactivar el
atenuador.
• M.DSPL (Desp la zamiento de indicaciones) —
para seleccionar el modo de desplazamiento de
indicaciones entr e “1”, “2” y “OFF”.
– Seleccione “1” para visualizar líneas
decorativas en el visor y ac tivar la indi cación
de demostración.
– Seleccione “2” para visualizar líneas
decorativas en el visor y desactivar la
indicación de demostración.
– Seleccione “OFF” para desactivar el
desplazamiento de indica ciones.
• A.SCRL (Desplazamiento automático)
– Seleccione “ON” para que se desplacen
automáticamente todos los nombres
mostrados de m ás de 8 caracteres.
– Con el desplazamie nt o automático
desactivado y al cambiar el nom bre del disco/
pista, dicho nombre no se despl aza.
P/M (Modo de reproducción)
• LOCAL-ON/OFF (Modo de búsqueda local)
(página 14)
– Seleccione “ON” para que se sintonicen
solamente emisoras de señal más intensa.
• MONO-ON/OFF (Modo monofónico) (página
14)
– Seleccione “ON” para escuchar emisiones
estéreo de FM en mo nofónico. Seleccione
“OFF” para recuperar el modo normal.
• REG-ON/OFF (Regional) (página 16)
1 Pulse (MENU).
Para ajustar A.SCRL, pulse (MENU) durante
la reproducción de CD/MD.
2 Pulse cualquier lado de (DISC/PRESET)
varias veces hasta que apare zca el
elemento deseado.
3 Pulse el lado (+) de (SEEK) para
seleccionar el ajuste dese ado (por
ejemplo: ON u OFF).
4 Pulse (ENTER).
Al finali zar el ajuste del modo, el visor
volverá al modo de reproducc i ón normal.
Nota
El element o mostrado varía en función de la fuente.
Sugerencia
Puede cambiar fácilmente entr e cate gor ías (“SET”,
“DSPL”, “SND”, “P/M” y “EDIT”) pulsando cualquier
lado de (DISC/PRESET) du rante 2 segundos.
SND (Sonido)
• LOUD (Sonoridad) — para disfrutar de graves
y agudos incluso co n el volumen bajo. Los
graves y los agudos se poten ci arán.
22
Page 51

Selección de la posición del
sonido
— Posición óptima de sonido (MBP)
Cuando conduzca sin pasajeros, podrá disfrutar
del entorno de sonido más cómodo con “Posición
óptima de sonido”.
“Posición óptima de son i do” dispone de dos
valores que ajustan el nivel de sonido del balance
y el equilibrio entre los altavoces. Puede
seleccionar uno de ellos fácilment e con el botón
MBP.
Nivel de
Nivel de
Visor
MBP-A – 4dB 0 0 – 4dB
MBP-B 0 – 4dB 0 – 4dB
MBP-OFF 0000
Pulse (MBP) varias veces pa ra
seleccionar la posición de audición
deseada.
El modo de “Posición óptima de sonid o” se
muestra en el visor en el orden de la tabla.
Transcurrido un segundo, el visor vuelve al
modo de reproducción normal.
Si desea ajus ta r el ni vel de sonido del balance
y el equilibri o con mayor precis i ón, puede
realizarlo con el botón (SOUND) (página
21).
Notas
• Al ajustar el elemento BAL (balance) o FAD
(equilibrio entre altavoces) de “Ajuste de las
características de sonido” (página 21), MBP
recupera el valor OFF.
• Cuando MBP se ajusta en OFF, el valor de BAL y
FAD se activa.
balance
DerechoIzquier
do
equilibrio
entre los
altavoces
Frontal
Posteri
or
Ajuste del ecualizador
Puede seleccionar una curva de ecualizado r para
siete tipos de música: (VOCAL, CLUB, JAZZ,
NEW AGE, ROCK, CUSTOM, y XPLOD).
Puede almace nar y definir los ajustes de l
ecualizador de fre cuencia y nivel.
Selección de la curva de ecualizador
1 Pulse (SOURCE) para seleccionar una
fuente (radio, CD/MD).
2 Pulse (EQ7) varias veces has ta
seleccionar la curva de ecua liz ador
que desee.
Cada vez que pulse
cambiará.
Para cancelar el efecto de ecualiza ción,
seleccione “OFF”. Transcurridos tres
segundos, el visor vuelve al modo de
reproducción normal.
Ajuste de la curva de ecualizador
1 Pulse (MENU).
2 Pulse cualquier lado de (DISC/PRESET)
varias veces hasta que aparezca “EQ7
TUNE” y, a continuación, pulse
(ENTER).
3 Pulse cualquier lado de (SEEK) para
seleccionar la curva de ecua liz ador
que desee y, a continuación, pulse
(ENTER).
Cada vez que pulse (SEEK), el elemento
cambiará.
4 Seleccione la frecuencia y nivel que
desee.
1 Pulse cualquier lado de (SEEK) para
seleccionar la frecuen ci a deseada.
Cada ve z que pulse (SEEK), la frecuencia
cambiará.
(EQ7)
, el elemento
62 (Hz) y 157 (Hz) y 396 (Hz) y
1k (Hz) y 2.5k (Hz) y 6.3k (Hz) y
16k (Hz)
Continúa en la página siguiente t
23
Page 52

2 Pulse cualquier lado de
(DISC/PRESET) para ajust a r el nivel
de volumen que desee.
El nivel de volumen puede ajustarse en
intervalos de 1 dB entre –10 dB y +10 dB.
Información complementaria
Mantenimiento
Para restaura r l a curva de ecualizador
ajustada e n fábrica, pulse (ENTER) durante 2
segundos.
5 Pulse (MENU) dos veces.
Una vez completado el aj uste de efecto,
aparece el modo de reproducción normal.
Sustitución del fusible
Cuando sustitu ya el fusible, asegúrese de utili za r
uno cuyo ampera j e sea el mismo al especi fica do
en el fusible orig i nal. Si el fusible se fu nde,
compruebe la conexión de alimentación y
sustitúyalo. Si el fusible se funde de nuevo
después de susti tuirlo , es posi ble que e xist a algún
fallo de funcionamiento interno. En tal caso,
consulte con el proveedor Sony m ás próximo.
Fusible (10 A)
Advertencia
No utilice nunca un fusible c uyo ampera je supe re
al del suministrad o con la unidad, ya que ésta
podría dañarse.
Limpieza de los conectores
La unidad puede no funcionar co rrectamente si los
conectores entre dicha unidad y el panel frontal
están sucios. Con el fin de evitarlo, extraig a el
panel frontal (página 8) y limpie los conectores
con un bastoncillo de algodón humedecido en
alcohol. No aplique dem asiada fuerza. En caso
contrario, los conectores podrían dañarse.
24
Unidad
Parte trasera del panel
Page 53

Notas
• Por razones de seguridad, apague el encendido
antes de limpiar los conectores y extraiga la llave del
interruptor de encend id o.
• No toque nunca los conectores directamente con los
dedos o con algún dispositivo metálico.
Sustitución de la pila de litio
En condicione s normales, las pil a s duran
aproximadamente 1 año. (La dura ci ón puede ser
menor en función de las condiciones de uso.)
Cuando la pila disp one de poca energía, el
alcance del mand o a di stancia de tarjeta se
reduce. Sustituya la pila por una nueva de litio
CR2025.
x
Lado + hacia arriba
Extracción de la unidad
1 Extraiga la cubierta frontal
1 Extraiga el panel frontal (página 8).
2 Presione el clip del interior de la
cubierta frontal con un
destornillador fino.
3 Repita el paso 2 en el otro lado.
2 Extraiga la unidad
1 Utilice un destornillador fino para
ejercer presión sobre el clip del lado
izquierdo de la unidad y despué tire
de dicho lado hasta que el retén
libere la fijación.
Notas sobre la pila de litio
• Mantenga la pila de l iti o f uera del alcance de
los niños. Si la pila se ingiere, póngase en
contacto inmedi at am ente con un médico.
• Limpie la pila con un paño seco para garantizar
un contacto óptimo.
• Asegúrese de observar la polaridad correcta
cuando instale la pila.
• No agarre la pil a con pinzas metálicas, ya que
si lo hace puede pro ducirse un cortocircu ito.
ADVERTENCIA
La pila puede explotar si no se emplea
adecuadamente.
No recargue la pila; tampoco la desmonte ni
la arroje al fuego.
4 mm
2 Repita el paso 1 en el lado
derecho.
3 Deslice la unidad para extraerla del
marco.
25
Page 54

Especificaciones
Sección del reproductor de CD
Relación señal-ruido 90 dB
Respuesta de frecuencia 10 – 20.000 Hz
Fluctuación y trémolo Inferior al límite medible
Sección del sintonizador
FM
Margen de sintonización 87,5 – 108,0 MHz
Terminal de antena Conector de antena externa
Frecuencia intermedia 10,7 MHz/450 kHz
Sensibilidad útil 8 dBf
Selectividad 75 dB a 400 kHz
Relación señal-ruido 66 dB (estéreo),
Distorsión armónica a 1 kHz 0,6 % (estéreo),
Separación 35 dB a 1 kHz
Respuesta de frecuencia 30 – 15.000 Hz
72 dB (mono)
0,3 % (mono)
MW/LW
Margen de sintonización MW: 531 – 1.602 kHz
Terminal de antena Conector de antena externa
Frecuencia intermedia 10,7 MHz/450 kHz
Sensibilidad MW: 30 µV
LW: 153 – 279 kHz
LW: 40 µV
Sección del amplificador de
potencia
Salidas Salidas de altavoz
Impedancia de altavoz 4 – 8 ohmios
Salida máxima de potencia 50 W × 4 (a 4 ohmios)
(conectores de sellado seguro)
Generales
Salidas Salidas de audio
Entradas Cable de control ATT para
Controles de tono Graves ±8 dB a 100 Hz
Requisitos de alimentación Batería de automóvil de 12 V
Dimensiones Aprox. 178 × 50 × 177 mm
Dimensiones de montaje Aprox. 182 × 53 × 161 mm
Peso Aprox. 1,2 kg
Accesorios suministrados Componentes de instalación y
Accesorios opcionales Mando rotativ o
Equipo opcional Cambiador de CD (10 discos)
Cable de control de relé de
antena motorizada
Cable de control de
amplificador de potencia
teléfono
Conector de entrada de
controlador remoto
Conector de entrada de antena
Agudos ±8 dB a 10 kHz
CC
(tierra negativa)
(an/al/prf)
(an/al/prf)
conexiones (1 juego)
Estuche para el panel frontal
(1)
RM-X4S
Mando a distancia de tarjeta
RM-X114
Cable BUS (suministrado con
un cable de pines RCA)
RC-61 (1 m), RC-62 (2m)
CDX-848X, CDX-646
Cambiador de CD (6 discos)
CDX-T68X, CDX-T67
Cambiador de MD (6 discos)
MDX-65
Selector de fuente
XA-C30
26
Nota
Esta unidad no puede conectarse a un
preamplificador digital o a un ecualizador.
El diseño y las especificaciones están sujetos a
cambios sin previo aviso.
Page 55

Solución de problemas
La siguiente lista de comprobaciones le ayudará
a solucionar los problemas que puedan
producirse con la uni dad.
Antes de consult ar la siguiente lista, compruebe
los procedimientos de conexión y empleo.
Generales
No se oye el sonido.
• Gire el dial de control de volumen en el
sentido de las agujas del reloj para ajustar el
volumen.
• Cancele la función ATT.
• Ajuste el control de equilibrio en la posición
central para un si st ema de 2 altavoces.
El contenido de la memoria se ha borrado.
• Ha pulsado el botón RESET.
t Realice el al macenami ento de nue vo en la
memoria.
• Ha desconectado el cable de alimentación o
la batería.
• El cable de con exió n de la alimentación no
está correctam ente conectado.
No se oyen los pitidos.
El sonido de los pitidos está cancelado (página
22).
Las indicaciones desaparecen del visor o
no aparecen en éste.
• La indicación del reloj desaparecerá si pulsa
(OFF) durante 2 segundos.
t Pulse (OFF) de nuevo durante 2
segundos para visualizar el reloj.
• Extraiga el panel frontal y limpie los
conectores. Consulte “Limpieza de los
conectores” (pági n a 24) para obtener
información detallada.
Las emisoras almacenadas y la hora
correcta se han borrado.
El fusible se ha fundido.
Se oye ruido cuando la llave de encendido
se encuentra en la posición ON, ACC u OFF.
Los cables no coinci den correctamente con el
conector de alimentación auxiliar del
automóvil.
No se suministra alimentación a la unidad.
• Compruebe l a co nexión. Si todo está en
orden, compruebe el fusible.
• El automóvil no dispone de posición ACC.
t Pulse (SOURCE) (o inserte un disco)
para que se encienda la unidad.
Se suministra alimentación a la unidad de
forma continua.
El automóvil no dispone de pos i ci ón ACC.
La antena motorizada no se e x tiende.
La antena motorizada no dispone de caja de
relé.
Reproducción de CD/MD
No es posible insertar un disco.
• Ya hay un CD insertado.
• El CD se ha insertado a la fuerza al revés o
de forma inco rr ecta.
La reproducción no se inicia.
• MD defectuoso o CD sucio.
• CD-R no finalizado.
• Ha intentado r eproducir un CD-R no
diseñado para uso de audio.
• Ciertos discos CD-R pueden no reproducirse
debido al equ ipo de graba ción o al est ado de l
disco.
El disco se expulsa automáticamente.
La temperatura am biente es superior a 50°C.
El CD no se expulsa.
Los botones de operación no func ionan.
Pulse el botón RE SET.
Se producen pérdidas de sonido debido a
vibraciones.
• La unidad está instalada en un ángulo
superior a 60°.
• La unidad no es t á instalada en una pa rt e
segura del automóvil.
Se producen saltos de sonido.
Disco sucio o defectuoso.
No es posible desactivar la indicación
“--------”.
Ha entrado en el modo de edición de nombres.
t Pulse (LIST) durante 2 segundo s .
Recepción de la radio
No es posible utilizar la sintonización
programada.
• Almacene la frecuencia correcta en la
memoria.
• La señal de emi sión es demasiado d ébi l.
No es posible recibir las emisoras.
Los ruidos obstaculizan el sonido.
• Conecte un ca bl e de control de antena
motorizada (a zul) o un cable de fuent e de
alimentación auxiliar (rojo) al cable de
suministro de alimentación del amplif ic ad or
de antena del au to m óvil. (Sólo si el
automóvil disp one de una antena de FM /
MW/LW incorporada en el cristal trasero/
lateral.)
• Compruebe la conexión de la antena del
automóvil.
• La antena automática no se extiende.
t Compruebe la co nexi ón del cable de
control de antena motorizada.
• Compruebe la fr ecuencia.
Continúa en la página siguie nte t
27
Page 56

No es posible utilizar la sintonización
automática.
• El modo de búsqueda local está ajustado en
“ON”.
t Ajuste el modo de búsqueda local en
“OFF”. (página 22)
• La señal de emisión es demasiado débil.
t Utilice la sintonización manual.
La indicación “ST” parpadea.
• Sintonice la frec ue ncia con precisión.
• La señal de emisión es demasiado débil.
t Rea li ce e l aj ust e en el modo de r ecep c ión
monofónica (página 22).
Un programa emitido en estéreo se oye en
monofónico.
La unidad se encu entra en el modo de
recepción monofónica.
t Cancele el modo de recepción monofónica
(página 22).
RDS
La función SEEK se inicia tras unos
segundos de audición.
La emisora no es TP o su señal es débil.
t Pulse (AF) o (TA) varias veces hasta que
aparezca “AF-OFF” o “TA-OFF”.
No se oyen los anuncios de tráfico.
• Active “TA”.
• La emisora no emite anuncios de tráfico a
pesar de ser TP.
t Sintonice otra emisora.
PTY muestra “--------.”
• La emisora actual no es RDS.
• No se reciben dato s RD S.
• La emisora no espe ci fica el t ip o de
programa.
Indicaciones de erro r/ Mensajes
Indicaciones de error
(Para esta unidad y cambiadores
opcionales de CD/MD)
Las siguientes indicaciones parpadearán durante
unos 5 segundos y se oir á una alarma.
BLANK*
ERROR*
HI TEMP
NO DISC
NO MAG
NOTREADY
RESET
*1 Cuando se produce algún error durante la
*2 El visor muestra el número del disco que causa el
Si estas soluciones no ayudan a mejorar la
situación, consulte con el proveedor Sony más
próximo.
1
No hay pistas grabadas en el MD.*
t Reproduzca un MD que tenga pi stas
2
grabadas.
1
• El CD está sucio o insert ado al revés.*
t Límpielo o insértelo correct am ente.
• El CD/MD no se reprod uce debido a algún
problema.*
t Inserte otro CD/MD.
2
2
La temperatura ambiente es superior a 50°C.
t Espera hasta que la temper at ura descienda
por debajo de 50°C.
No hay ningún disco insertado en la unidad de
CD/MD.
t Inserte discos en la unidad de CD/MD.
El cargador de discos no está insertado en la
unidad de CD/MD.
t Inserte el cargador en la unidad de CD /
MD.
La tapa de la unidad de M D est á abierta o los
minidiscos no están ins ertados correctamente.
t Cierre la tapa o inserte los minidiscos
correctamente.
La unidad de CD/MD no puede utilizarse
debido a algún problema.
t Pulse el botón de restauración de la unidad.
reproducción de un CD o MD, el número de disco
del CD o MD no aparece en el visor.
error.
28
Page 57

Mensajes
L.SEEK +/–
El modo de búsqueda local está activado
durante la sinton i zación automática (página
14).
NO AF
No hay frecuencia s alternativas para la
emisora actual.
“” o “”
Ha llegado al principio o al final del disco y no
es posible a vanzar más.
29
Page 58

Välkommen!
Tack för att du valde denna CD-spelare från
Sony. Du kan ta del av ännu fler funktioner om
du har följande tillval:
• CD/MD-enhet er (både CD-växl ar e och CDspelare)*
• CD TEXT-information (visas när en skiva med
CD-TEXT*
enhet med funktionen CD TEXT ).
• Valfria kontrolltillbehör
Rotary commander RM-X4S
Fjärrkontroll RM-X114
*1 Denna enhet fungerar bara tillsammans med andra
*2 En CD TEXT-skiva är en audio-CD som bl.a.
Den här etiketten finner du på undersidan av
enhetens chassi.
1
.
2
spelas på en ansluten valfri CD-
Sony-produkter.
innehåller information om namnen på skivan,
artisten och de olika spåren. Uppgifterna är
inspelade på skivan.
CAUTION INVISIBLE
VIEW DIRECTLY WITH OPTICAL INSTRUMENTS
LASER RADIATIONWHEN OPEN
DO NOT STARE INTO BEAM OR
Den här etiketten finner du på enheten s interna
chassi.
2
Page 59

Innehållsförteckning
Kontrollernas placering. . . . . . . . . . . . . . . . . 4
Säkerhetsföreskrifter . . . . . . . . . . . . . . . . . . . 6
Råd om skivor . . . . . . . . . . . . . . . . . . . . . . . . 6
Komma igång
Återställa enheten . . . . . . . . . . . . . . . . . . . . . 7
Ta bort frontpanelen . . . . . . . . . . . . . . . . . . . 8
Ställa klockan . . . . . . . . . . . . . . . . . . . . . . . . 9
CD-spelaren
CD/MD-enhet (tillval)
Spela en skiva . . . . . . . . . . . . . . . . . . . . . . . . 9
Visningsalternativ i teckenfönstret . . . . . . . 10
Spela spår upprepade gånger
— Repeat Play . . . . . . . . . . . . . . . . . . . . 11
Spela spår i slumpvis ordningsföljd
— Shuffle Play . . . . . . . . . . . . . . . . . . . . 11
Namnge en CD
— Disc Memo*. . . . . . . . . . . . . . . . . . . . 11
Söka skivor efter namn
— List-up* . . . . . . . . . . . . . . . . . . . . . . . 12
Välja att spela upp vissa spår
— Bank*. . . . . . . . . . . . . . . . . . . . . . . . . 13
* Funktioner i valfria CD/MD-enheter
Radio
Lagra stationer automatiskt
— BTM (Best Tuning Memory). . . . . . . 14
Ta emot lagrade stationer . . . . . . . . . . . . . . 14
Lagra endast önskade stationer . . . . . . . . . . 15
Ta in en station från en lista
— List-up . . . . . . . . . . . . . . . . . . . . . . . . 15
RDS
Översikt av RDS. . . . . . . . . . . . . . . . . . . . . 16
Automatisk sökning för bästa
mottagningsresultat
— AF-funktion. . . . . . . . . . . . . . . . . . . . 16
Ta emot trafikinformation
— TA/TP . . . . . . . . . . . . . . . . . . . . . . . . 17
Förinställa RDS-stationer med AF/TA-
inställning. . . . . . . . . . . . . . . . . . . . . . . . 18
Ta in stationer efter pr ogramtyp
— PTY . . . . . . . . . . . . . . . . . . . . . . . . . . 18
Ställa klocka n automatiskt
— CT . . . . . . . . . . . . . . . . . . . . . . . . . . . 19
Andra funktioner
Använda fjärrkontrollen Rotary
Commander . . . . . . . . . . . . . . . . . . . . . . 20
Justera tonkontrollerna . . . . . . . . . . . . . . . . 21
Snabbdämpa ljudet . . . . . . . . . . . . . . . . . . . 21
Ändra inställningarna för ljud och
teckenfönster
— Meny . . . . . . . . . . . . . . . . . . . . . . . . . 2 2
Välja ljudmiljö
— Min favoritposition (MBP). . . . . . . . 23
Ställa in equalizer . . . . . . . . . . . . . . . . . . . . 23
Ytterligare information
Underhåll . . . . . . . . . . . . . . . . . . . . . . . . . . 24
Ta ut enheten. . . . . . . . . . . . . . . . . . . . . . . . 25
Tekniska data . . . . . . . . . . . . . . . . . . . . . . . 26
Felsökning. . . . . . . . . . . . . . . . . . . . . . . . . . 27
Felindikationer/felmeddelanden . . . . . . . . 2 8
3
Page 60

Kontrollernas placering
Se angivna sidor för mer i nformation.
: Under uppspeln in g : Under radiomottagning : Under menyläget
CD/MD
RADIO MENU
1
2
3
REP
MBP
EQ 7
SOURCE
MODE
SHUF
6
5
4
1 Volymkontroll 17
Knappen MBP 23
2
3 Z
utmatningsknapp (finns på enhetens
framsida, bakom frontpanelen) 9
4
Knappen SOURCE (Power on/Radio/CD/
8, 9, 10, 12, 14, 15, 17, 23
MD)
5 Teckenfönstret
6 Mottagare för fjärrkontrollen
7
Knappen MENU 9, 11, 12, 13, 14, 18,
19, 22, 23, 24
8
Knappen DISPLAY/PTY (visa ändrade
lägen /progra m typ)
10, 12, 16, 19
9 Knappen S (SCROLL) 10
q; Knappen OPEN 8, 9
qa Knappen LIST
12
CD/MD
15
RADIO
qs
Knappen EQ7 23
qd Knappen RESET (finns på enhetens
framsida, bakom frontpanelen) 7
PTY
D
R
C
S
DISPLAY
/
C
S
I
D
MENU
SOUND
AF
TA
CDX-CA650X/CA650V/CA650
qf Nummerknappar
CD/MD
(3) REP 11
(6)
SHUF 11
14, 15, 17, 18
RADIO
qg Knappen MODE
10, 12
CD/MD
14, 15, 17
RADIO
qh
Knappen SOUND 21, 23
qj
Knappen AF 16, 18
qk Knappen TA 17, 18
ql
Knappen OFF (Stopp/Power off)* 8, 9
w; Knappen ENTER
12
CD/MD
15, 19
RADIO
9, 11, 12, 13, 14, 18, 19, 22, 23,
MENU
24
*
Tänk på följande om du installerar enheten
i en bil som inte har ACC-läge (tillbeh ör) i
tändningslåset
När du stänger av tändningen ska du hålla
knappen
(OFF) på enheten nedtryckt under
2 sekunder så att klockan i teckenfönstret
försvinner.
Om klockan inte stängs av kan batteriet ladd as
ur.
S
O
P
EN
LL
O
R
E
P
S
E
T
LIST
SEEKSEEK
ENTER
O
F
F
4
Page 61

PTY
S
MENU
SOUND
AF
(SEEK)
(–): om du vill
välja åt
vänster/
.
D
DISPLAY
TA
(+): om du vill välja uppåt
(–): om vill välja nedåt
O
P
E
N
LL
O
R
SC
R
E
P
/
S
C
E
S
T
I
D
LIST
SEEKSEEK
ENTER
O
FF
(DISC/PRESET)
(DISC/PRESET)
(SEEK)
(+): om du vill
välja åt
höger/>
I menyläget visas de knappar som går att välja för
dessa fyra alternativ med ett “ M” i teckenfönstret.
wa Knapparna DISC/PRESET (+/–)
10, 12
CD/MD
14, 15, 19
RADIO
9, 11, 12, 13, 14, 18, 19, 22, 23,
MENU
24
ws Kn ap parna SEE K (–/+)
9
CD/MD
14, 15, 16
RADIO
9, 11, 13, 19, 21, 22, 23
MENU
Fjärrkontroll RM-X114 (tillval)
DSPL MODE
+
PRESET
LIST
+
DISC
MENU
–
SEEK
SOUND
SOURCE
DISC
PRESET –
+
VOL
+
SEEK
R
–
TE
N
E
ATTOFF
–
Fjärrkontrollens knappar styr samma
funktioner som motsvarande knappar på
enheten.
1 Knappen DSPL
2 Knappen MENU
3 Knappen SOURCE
4 Knapparna SEEK (</,)
5 Knappen SOUND
6 Knappen OFF
7 Knapparna VOL (–/+)
8 Knappen MODE
9 Knappen LIST
q; Knapparna DISC/PRESET (M/m)
qa Knappen ENTER
qs Knappen ATT
Obs!
Om du stänger av enheten genom att hålla knappen
(OFF) intryckt under 2 sekunder, går den inte att styra
med fjärrkontrollen såvida du inte trycker på knappen
(SOURCE) på enheten, eller aktiverar den genom att
mata in en skiva.
Tips!
Information om hur du byter batterier finns i “Byta
litiumbatterier” (sidan 25).
5
Page 62

Säkerhetsföreskrifter
Råd om skivor
• Om bilen har stått i direkt solsken ska du låta
CD-spelaren svalna innan den tas i bruk.
• Elantenner skjuts ut automatiskt när enheten
slås på.
Om du har några frågor, eller om några problem
kvarstår sedan du har gått igenom
bruksanvisningen, kontaktar du närmaste Sonyåterförsäljare.
Fuktbildning
Vid regn, eller om det är mycket fuktigt, kan
imma uppstå på insidan av enhetens linser och
teckenfönster. Om detta inträffar fungerar inte
enheten tillfredsställande. Ta då ut skivan och
vänta en timme tills imman har försvunnit.
Så här bibehåller du hög ljudkv alite t
Var noga med att inte spilla drycker av olika slag
på enheten eller skivorna.
• Undvik att ta på skivans spelyta. Håll skivan
runt kanten.
• Förvara skivorna i fodralen eller i skivmagasin
när de inte spelas.
Utsätt inte skivorna för höga temperaturer.
Lämna inte skivorna i parkerade bilar eller
ovanpå bilens instrument panel.
• Sätt inte på etiketter och använd inte skivor so m
har rester av klibbi g t usch. Sådana skivor kan
sluta snurra när de används, orsaka andra fel
eller förstöras.
• Specialformade skivor (t ex hjärtformade,
fyrkantiga eller stjärnformade skivor) går inte
att spela på denna enhet. Om du försöke r spela
sådana skiv or kan enheten skadas. Använd
därför inte sådana skivor.
• Det går inte att spela CD-skivor med måttet 8
cm.
• Torka av skivan med en rengöringsduk innan
du spelar den. Torka från skivans centrum och
ut mot kanten. Använd inte lösningsmedel s om
tvättbensin, thinner, i handeln förekommande
rengöringsmedel eller antistatspray avsedd för
vinylskivor.
6
Page 63

Råd om CDR-skivor
• Du kan spela CDR-skivor (inspelningsbara
CD-skivo r) avsedda för audiobruk på denna
enhet.
Försäkra dig om a tt skivorna är märkta på
följande sätt.
Denna märkning innebär att en skiva inte är
avsedd för audiobruk.
Komma igång
Återställa enheten
Innan du an vänder enheten f örsta gången (eller
om du har kopplat ifrån bilbatteriet) måste du
återställ a de n.
Ta bort frontpanelen och tryck på knappen
RESET med ett spetsigt föremål, t.ex. en
kulspetspenna.
• Vissa CDR-skivor (beroende på utrustni ngen
som använts vid inspelningen eller sk ivans
skick) går inte att spela på denna enhet.
• Det går inte att spela en CDR-ski va som inte är
slutbehandlad*.
* En inspelad CDR-skiva måste slutbeha ndla s
(finalized) på CD-brännaren innan den kan spelas
på andra CD-spelare.
Knappen RESET
Obs!
När du trycker på knappen RESET raderas klockans
inställning och viss lagrad information.
7
Page 64

Ta bort frontpanelen
Du kan ta bort fron tp anelen på denna enhet för
att stöldskydda den.
Varningslarm
Om du ställer tändningslåset i läget OFF utan att
ta bort frontpanelen piper varningslarmet i några
sekunder.
Om du ansluter en förstärkare (tillval) och inte
använder den inbyggda förstärkaren in aktiveras
larmet.
1 Tryck på (OFF)*.
CD/MD-uppspeln in g el l er rad i om ot t agning
stoppas (belysni ngen och teckenfönstret är
fortfarande på).
* Om bilen saknar ACC-läge i tändningslåset ska
du stänga av enheten genom att trycka på
(OFF) under 2 sekunder för att undvika att
bilbatteriet tar slut.
2 Tryck på (OPEN), dra sedan
frontpanel till höger och dra försiktigt
ut vänstersidan av frontpanelen.
1
2
Obs!
• Om du tar bort panelen medan enhete n är påslagen
stängs strömmen av automatiskt för att undvika att
högtalarna skadas.
• Frontpanelen och teckenfönstret får inte utsättas för
tryck eller stötar.
• Utsätt inte frontpanelen för höga temperaturer eller
fukt. Lämna den inte i parkerade bilar eller ovanpå
bilens instrumentpanel.
Tips!
När du tar med dig frontpanelen ska du använda
medföljande förvaringslåda.
Ansluta frontpanelen
Placera front panelens hål A på uttag B på
enheten och tryck för si ktigt in den vänstra sida n.
Tryck på (SOURCE) (eller lägg i en skiva) när
du vill sätta på enheten.
A
B
x
Obs!
Lägg inte något på frontpanelens inneryta.
8
Page 65

Ställa klockan
Klockan har 24-timmars digital indiker ing.
Exempel: Så här ställer du klockan till 10:08
1 Tryck på (MENU), och tryck sedan på
någon av sidorna på (DISC/PRESET)
upprepade gånger tills “CLOCK”
visas.
1 Tryck på knappen (ENTER).
Timindikatorn blinkar i tecken fönstret.
2 Tryck på någon av sidorna av
(DISC/PRESET) när du vill välja
önskad timme.
3 Tryck på (+ )-si dan av (SEEK).
Minutindikatorn bl i nkar i teckenfönstret.
4 Tryck på någon av sidorna av
(DISC/PRESET) när du vill välja
önskad minut.
2 Tryck på knappen (ENTER).
CD-spelaren CD/MD-enhet (tillval)
Förutom att du k an spela CD-skivor med denna
enhet kan du ock så st yra externa CD/MDenheter.
Obs!
Om du ansluter en annan CD-enhet med CD TEXTfunktionen visas CD TEXT-informationen när du spelar
en CD TEXT-skiva.
Spela en skiva
(Med denna enhet)
1 Tryck på (OPEN) och stoppa in skivan
(med etiketten uppåt).
2 Stäng frontpanelen.
Uppspelningen startas automatiskt.
Klockan startas. N är inställningen är utförd
återgår teckenfönstret ti ll normal t spelläge.
Tips!
• Du kan ställa klockan automatiskt med RDS-
funktionen (sidan 19).
• När D.INFO-läget är ställt till ON, visas tidan alltid
(sidan 22).
Om det redan ligger en skiva i spelaren trycker
du på (SOURCE) upprepade gånger tills “CD”
visas för att starta uppspelnin gen.
Om du vill …… trycker du på
Stoppa
uppspelning
Ta ut skiv an (OPEN) s eda n Z
Hoppa över spår
– Automatic
Music Sensor
Snabbspela framåt
eller bakåt
– Manuell sökning
Obs!
• När skivans sista spår har spelats, spelas skivan om
från början.
• När en tillvalsenhet är ansluten går uppspelningen
av samma källa över till denna CD/MD-enhet.
(OFF)
(SEEK) (
[en gång för varje spår]
(SEEK) (m/M)
[håll till önskad punkt]
./>)
fortsätt till nästa sida t
9
Page 66

(Med tillvalsenhet)
1 Tryck på knappen (SOURCE)
upprepade gånger om du vill välja
“CD” eller “MD”.
2 Tryck på knappen (MODE) upprepade
gånger tills den önskade enheten
visas.
Uppspelninge n st ar tar.
Om du vill …… trycker du på
Hoppa över skivo r
–Skivsortiment
(DISC/PRESET) (+/–)
Visningsalternativ i teckenfönstret
När disc/track ändras kan vilken förinspelad titel
som helst*
automatiskt visas (om funktionen Auto Scroll är
inställd på “ON”, visas namn med fler än 8
tecken (sidan 22)).
1
på den nya skiv an elle r det n ya s påret
Information som kan visas i
teckenfönstret
• Musikkälla
• Klocka
• Funktion
Information som kan visas i
teckenfönstret
• Elapsed playback time
• Skivans namn*
namn*
2
• Spårets titel*
1
/artistens
1
10
Om du vill …… trycker du på
Växla
visningsalternativ
(DISPLAY/PTY) upprepade
gånger
rulla info rmationen (S) (SCROLL)
*1 “NO NAME” anger att det inte finns Disc Memo
(sidan 11) eller något förinspelat namn att visa.
*2 Endast för CD TEXT-skivor med artistens namn.
Obs!
• Vissa tecken kan inte visas.
• För vissa CD TEXT-skivor med många tecken visas
ingen information
• Den här enheten kan inte visa artistens namn för
vart och ett av spåren på en CD TEXT-skiva.
Tips!
När Auto Scroll är inställd på OFF och disc/tracknamnet är ändrat, visas inte disc/track-namnet.
Page 67

Spela spår upprepade gånger
— Repeat Play
Ett spår på skivan eller hela skivan spela s ig en.
Du kan välja mellan:
• REP-1 – om du vill spela om ett spår.
• REP-2* – om du vill spela om hela ski van.
* Fungerar endast om en eller flera valfria CD/MD-
enheter är anslutna.
Tryck upprepade gånger på (3) (REP)
under uppspelningen tills den
önskade inställningen visas i
teckenfönstret.
Repeat Play starta r.
När du vill återgå till normal uppspelning väljer
du REP-OFF.
Spela spår i slumpvis
ordningsföljd
— Shuffle Play
Du kan välja:
• SHUF-1 – om du vi l l spela skivans spår i
slumpmässig ordningsföljd.
• SHUF-2*
enhetens spår i slumpmässig ordningsföljd.
• SHUF-ALL*
samtliga inkopplade enheter i slu mpmässig
ordningsföljd.
*1 Fungerar endast om en eller flera valfria CD- eller
*2 Fungerar endast om en eller flera valfria CD-
1
– om du vill spela CD- el ler MD-
2
– om du vill spela a lla spår i
MD-enheter är anslutna.
enheter, eller om två eller fler va lfria MD- enhet er är
anslutna.
Tryck upprepade gånger på (6)
(SHUF) under uppspelningen tills den
önskade inställningen visas i
teckenfönstret.
Shuffle Play startar.
Namnge en CD
— Disc Memo (För CD-spelare med
funktionen CUSTOM FILE)
Du kan ge varje skiva ett eget namn (D i sc
Memo). Du kan skr iva in upp till 8 tecken för en
skiva. Om du namnger en skiva kan du söka efter
den på namnet (sidan 12).
1 Börja spela skivan du vill namnge.
2 Tryck på (MENU), och tryck sedan på
någon av sidorna på (DISC/PRESET)
upprepade gånger tills NAMEEDIT
visas.
3 Tryck på knappen (ENTER).
Skivan spelas om under namng ivning en.
4 Ange tecknen.
1 Tryck på (+)*
(DISC/PRESET) upprepade gånger
för att välja önskat tecken.
A t B t C ... t 0 t 1 t 2 ... t +
t – t
*1 För motsatt riktning, tryck på (–)-sidan av
(DISC/PRESET).
*2 (mellanslag)
2 Tryck på (+)-sidan av (SEEK) när du
har hittat önskat tecken.
1
-sidan av
... t _*2 t A
*
När du vill återgå till normal uppspelning väljer
du SHUF-OFF .
Obs!
SHUF-ALL blandar inte spår mellan en CD-spelare
och en MD-spelare.
Om du trycker på (–)-sidan av (SEEK)
kan du flytta bakåt till vänster.
3 Om du vill skriva in hela namnet
repeterar du steg
1 och 2.
5 Tryck på (ENTER) om du vi ll återgå till
normal uppspelning.
fortsätt till nästa sida t
11
Page 68

Tips!
• Skriv över eller ange _ om du vill rätta till eller radera
ett namn.
• Det finns ett annat sätt att starta namngivningen av
en CD: Tryck på (LIST) under 2 sekunder istället för
att utföra steg 2 och 3. Du kan även slutföra
namngivningen genom att trycka på (LIST) under 2
sekunder istället för att utföra steg 5.
• Du kan namnge CD-skivor på en enhet som i nt e ha r
funktionen CUSTOM FILE om enheten är ansluten
tillsammans med en CD-enhet som har denna
funktion. Disc Memo lagras i minnet i den CD-enhet
som har funktionen CUSTOM FILE.
Obs!
REP-1/shuffle play fungerar inte förrän Name Edit är
utfört.
Överblicka Disc Memo
Disc Memo är ett visningsalternativ i
teckenfönstret och har därmed företräde framför
all CD TEXT-information.
Om du vill …… trycker du på
Överblicka (DISPLAY/PTY) under
uppspelning av CD/CD
TEXT-skivor
Tips!
Gå till sidan 10 om du vill veta mer om
visningsalternativ i teckenfönstret.
Radera Disc Memo
7 Tryc k på knappen (MENU) två gånger.
CD-spelaren återgår då till normal
uppspelning.
Obs!
• När Disc Memo för en CD TEXT-skiva har raderats
visas den ursprungliga CD TEXT-informationen.
• Om du inte kan hitta det Disc Memo du vill radera
kan du välja en annan CD-enhet i steg 2.
Söka skivor efter namn
— List-up (För en CD-enhet med funktionen
CD TEXT/CUSTOM FILE eller en MD-enhet)
Den här funktionen kan du använda för skivor
som du har namngivit*
2
skivor*
.
*1 Söka efter skivor på namnet: När du namnger en
CD (sidan 11) eller en MD.
*2 Söka efter skivor på CD TEXT-informationen: När
du spelar en CD TEXT-skiva på en CD-enhet som
har funktionen CD TEXT.
1 Tryck p å knappen (LIST).
Det angivna namnet visas i teckenfönstret .
1
eller för CD TEXT-
1 Tryck på knappen (SOURCE)
upprepade gånger om du vill välja
“CD”.
2 Tryck på knappen (MODE) upprepade
gånger om du vill välja den CD-enhet
som lagrar Disc Memo.
3 Tryck på knappen (MENU), och tryck
sedan på någon av sidorna på
(DISC/PRESET) upprepade gånger tills
NAME DEL visas.
4 Tryck på knappen (ENTER).
De lagrade na mnen visas i den or dning de
skrevs in.
5 Tryck upprepade gånger på någon av
sidorna av (DISC/PRESET) för att få
fram det skivnamn som du vill radera.
De lagrade na mnen visas i den or dning de
skrevs in.
6 Håll knappen (ENTER) intryckt under 2
sekunder.
Namnet raderas.
Upprepa steg 5 och 6 om du vill radera andra
namn.
12
2 Tryc k på någon av sidorna av
(DISC/PRESET) upprepade gånger tills
du hittar den önskade skivan.
3 Tryc k på knappen (ENTER) när du vill
spela skivan.
Obs!
Vissa bokstäver kan inte visas (undantag: Disc
Memo).
Page 69

Välja att spela upp vissa spår
— Bank (För en CD-enhet med funktionen
CUSTOM FILE)
Om du namnger skivan kan du ställa in CDspelaren så att de n spelar de spår du vill höra.
1 Börja spela skivan du vill na m nge.
2 Tryck på knappen (MENU), och tryck
sedan på någon av sidorna på
(DISC/PRESET) upprepade gånger tills
BANK SEL visas.
3 Tryck på knappen (ENTER).
Spela utvalda spår
Du kan välja:
• BANK-ON – om du vill sp el a spåren med
inställningen PLAY.
• BANK-INV (Inverse) – om du vill sp el a s påren
med inställningen SKIP.
1 Tryck på knapp en (MENU) under
uppspelningen, och tryck sedan på
någon av sidorna på (DISC/PRESET)
upprepade gånger tills BANK-ON,
BANK-INV eller BANK-OFF visas.
2 Tryck på (+) sidan av (SEEK)
upprepade gånger tills önskad
inställning visas.
4 Namnge spåren.
1 Tryck upprepade gånger på någon
av sidorna av (SEEK) för att få fr a m
det spår som du vill namnge.
2 Tryck på knappen (ENTER)
upprepade gånger om du vill välja
PLAY eller SKIP.
5 Upprepa steg 4 om du vill ställa in
PLAY eller SKIP för al la spår.
6 Tryck på knappen (MENU) två gånger.
CD-spelaren återgår då till normal
uppspelning.
Obs!
• Du kan ställa in PLAY och SK IP för upp till 24 spår.
• Det går inte att ställa in SKIP för alla spår på en CD.
3 ryck på knappen (ENTER).
Uppspelningen startar efter det pågående
spåret.
När du vill återgå till normal uppspelning väljer
du BANK-OFF i steg 2
13
Page 70

Radio
Radioenheten kan lagra upp till 6 stationer per
band (FM1, FM2, FM3, MW och LW).
Tänk på att
Använd dig av BTM (Best Tuning Memory)
under körning för att undvika olyckor.
Lagra stationer automatiskt
— BTM (Best Tuning Memory)
Ta emot lagrade stationer
1 Tryck p å knappen (SOURCE)
upprepade gånger om du vill välja
radio.
2 Tryc k på knappen (MODE) upprepade
gånger om du vill välja band.
3 Tryck på nummerknappen ((1) till (6))
där den önskade stationen är lagrad.
Tips!
Tryck på någon av sidorna av (DISC/PRESET) när du
vill ta emot stationerna i den ordning de är lagrade i
minnet (Funktionen Preset Search).
Radioenheten väljer ut de stationer som har
starkast signal in om valt band och lagrar dem
efter frekvens.
1 Tryck på knappen (SOURCE)
upprepade gånger om du vill välja
radio.
2 Tryck på knappen (MODE) upprepade
gånger om du vill välja band.
3 Tryck på (MENU), och sedan på någon
av sidorna på (DISC/PRESET)
upprepade gånger tills BTM visas.
4 Tryck på knappen (ENTER).
När inställningen är lagrad hörs ett pip.
Obs!
• Om svaga signaler medger att endast ett fåtal
stationer kan tas emot, behåller vissa
nummerknappar sina ursprungliga inställningar
• När ett nummer anges i teckenfönstret börjar
radioenheten lagra stationer från det nummer som
för tillfället visas.
Om den förinställda inställningen inte
fungerar
Tryc k på någon av sidorna av (SEEK)
när du vill söka efter stationen
(automatisk inställning).
Sökningen avbryts när radioenheten hittar en
station. Fortsätt tills den önskade stationen
hittas.
Tips!
• Gå till Local Seek för att begränsa sökningen till
stationer med starkare signaler om den automatiska
inställningen stannar för ofta (sidan 22).
• Om du känner till frekvensen på den station som du
vill lyssna på ska du hålla någon av sidorna på
(SEEK) intryckt för att hitta den ungefärliga
frekvensen och sedan trycka på knappen (SEEK)
upprepade gånger för att fininställa den önskade
frekvensen (manuell inställning).
Om FM-stereomottagningen är dålig
Välj monomottagning (sidan 22).
Ljudet förbättras men återges i mono (“ST”
försvinner).
14
Page 71

Lagra endast önskade
stationer
Du kan förinställa önskade stationer manuellt på
alla valda nummerknappar.
1 Tryck på knappen (SOURCE)
upprepade gånger om du vill välja
radio.
2 Tryck på knappen (MODE) upprepade
gånger om du vill välja band.
3 Tryck upprepade gånger på någon av
sidorna av (SEEK) för att ställa in
stationen du vill lagra.
4 Håll önskad nummerknapp ((1) till
(6)) intryckt under 2 sekund er til ls
MEM visas.
Nummerknappen visas i teckenfönstret.
Obs!
Om du försöker lagra en annan station på samma
nummerknapp raderas den tidigare lagrade stationen.
Ta in en station från en lista
— List-up
1 Håll knappen (LIST) intryckt under
radiomottagning.
Frekvensen eller nam net på stationen som
tagits in blinkar.
2 Tryck på någon av sidorna av
(DISC/PRESET) upprepade gånger tills
du hittar den önskade stationen.
Om den valda stationen inte har namngivits,
visas frekvensen i teckenfönstret.
3 Tryck på knappen (ENTER) när du vill
ta in önskad station.
15
Page 72

RDS
Automatisk sökning för bästa
mottagningsresultat
— AF-funktion
Översikt av RDS
FM-stationer med tjänsten RDS (Radio Data
System) sänder ohörbar digital information
tillsammans med den reguljära
radioprograms ignalen. Exempelvis kommer en
av följan d e att visas n är en station med RDS tas
in.
Information som kan visas i
teckenfönstret
• Musikkälla
• Klocka
• Funktion
Information som kan visas i
teckenfönstret
• stationsnamn (frekvens)
• programtyp
Om du vill …… trycker du på
Ändra
teckenfönstrets
visningsalternativ
RDS-tjänster
RDS-informationen ger dig också tillgång till
bl.a:
•
Automatisk sökning av kanaler – praktiskt
under långa bilfärder. – AF
• Ta emot
• Välja station efter
• Automatisk
Obs!
• Vissa av RDS-tjänsterna finns inte i alla länder.
• RDS fungerar inte om signalstyrkan är för dålig eller
trafikmeddelanden, även när du
lyssnar på andra program/källor. – TA
17
sänder. – PTY
sidan 19
om den inställda stationen inte har RDS-tjänster.
(DISPLAY/PTY)
t sidan 16
t sidan
typen av program den
t sidan 18
inställning av klockan. – CT t
Funktionen AF (A l t ernative Frequencies) gör att
radion hela ti den tar in den starkaste s i gnalen för
stationen du lyssnar på.
Frekvenserna ändras automatiskt.
98,5 MHz
Station
96,0 MHz
102,5 MHz
1 Välja en FM-station (sidan 14).
2 Tryc k på knappen (AF) upprepade
gånger tills AF- O N vi sas.
Radion börjar då söka efter en alternativ
frekvens med starkare signal i samma
sändarnät.
Om NO AF börjar blinka finns inge n
alternativ frekvens för stationen.
Obs!
Om det inte finns alternativa frekvenser, eller om du
inte behöver söka efter någon, stänger du av AFfunktionen genom att välja AF-OFF.
Stationer som saknar alternativa
frekvenser
Tryck på någon sida av (SEEK) medan
stationsnamnet blinka r ( ino m 8
sekunder).
Radion börjar då söka efter en annan frekvens
med samma PI-information (PI –
Programidentifikation) (PI SEEK visas).
Om radion inte hittar samma PI, återgår den
till den senast valda frekvens en.
Lyssna på en och samma
regionalkanal
När AF-funkt io nen är på: Fabriksinställningen
för radion gör att mottagningen begränsas till en
specifik region. Radion tar då inte in någon
annan regionalstation med starkare signa l.
16
Page 73

När du lämnar region al st ationens
sändningsområde, eller om du vill utnyttja hela
AF-funktionen, ska du välja REG-OFF på menyn
(sidan 22).
Obs!
Funktionen går inte använda i Storbritannien och i
vissa andra områden.
Funktionen Local Link
(Endast i Storbritannien)
Funktione n gör at t du kan välja andra lokala
stationer i området även om de inte är lagrade på
dina nummerknappar.
1 Tryck på en nummerknapp ((1) till
(6)) som har en lokal station lagrad.
2 Tryck på nummerknappen med
lokalstationen igen inom 5 sekunder.
3 Fortsätt tills den önskade
lokalstationen hittas.
Ta emot trafikinformation
— TA/TP
Genom att aktivera TA (Traffic Announcement)
och TP (Traffic Programme) kan du automatiskt
ställa in en FM-station som sänder
trafikmeddelanden. Dessa inställningar fungerar
oberoende av vilken FM- kanal/källa eller CD/
MD-enhet som du lyssnar på. Efter
trafikmeddelandet återgår enheten till källan du
lyssnar på.
Tryck på knappen (TA) upprepade
gånger tills TA-ON visas.
Enheten börjar nu söka efter stati oner med
trafikinformation.
“TP” indikerar mottagning av sådana
stationer, medan “TA” blinkar un der ett
trafikm eddelande. Så länge NO TP indikeras
fortsätter enheten att söka efter statio ne r med
TP.
Välj TA-OFF om du inte vill ha
trafikinformation.
Om du vill …… trycker du på
Avbryta pågående
meddelande
Tips!
Du kan också avbryta pågående meddelanden genom
att trycka på knappen (SOURCE) eller (MODE).
(TA)
Förinställa volymen för
trafikmeddelanden
Du kan förinställa volymnivån för
trafikmeddelande n så att du inte riskerar att
missa dem.
1 Vrid volymkontrollen till önskad nivå.
2 Håll knappen (TA) intryckt under 2
sekunder.
TA visas och inställningen lagras.
Ta emot brådskande meddelanden
Om det kommer ett brådskande meddelande när
du lyssnar på en FM-stati on elle r CD/MD och
inte har AF eller TA på, växlar enheten till
brådskande meddelande.
17
Page 74

Förinställa RDS-stationer
med AF/TA-inställning
När du förinställer RDS-stationer lagrar enheten
varje statio n s AF/TA-inställning (on/off) oc h
frekvens. Du kan välja olika inställn ing (för AF,
TA, eller båda) för individuellt förinställda
stationer, eller samma inställning för alla
förinställda stationer. Om d u förinställer stat ioner
med AF-ON lagrar enheten automatiskt de
stationer som ger starkast radiosignal.
Förinställa alla stationer med samma
inställning
1 Välja ett FM-band (sidan 14).
2 Tryck på (AF) och/eller (TA) för att
välja AF-ON och/ eller TA-ON.
Observera att när du väljer AF-OFF eller TAOFF, lagras både stationer som har RDS och
stationer som saknar RDS.
3 Tryck på (MENU), och sedan på någon
av sidorna av (DISC/PRESET)
upprepade gånger tills BTM visas.
4 Tryck på (ENTER) tills BTM börjar
blinka.
Förinställa olika inställningar för varje
förinställd station
1 Välj ett FM-band och ta in önskad
station (sidan 15).
2 Tryck på (AF) och/eller (TA) för att
välja AF-ON och/ eller TA-ON.
3 Håll önskad nummerknapp ((1) till
(6)) intryckt tills MEM visas.
Upprepa från steg 1 när du ska ställa in andra
stationer.
Ta in stationer efter
programtyp
— PTY
Du kan ta in en station genom att välja den typ av
program du vill lyssna på.
Programtyper Teckenfönster
Nyheter NEWS
Aktuella frågor AFFAIRS
Information INFO
Sport SPORT
Utbildning EDUCATE
Radioteater DRAMA
Kultur CULTURE
Ve tenskap SCIENCE
Diverse VARIED
Populärmusik POP M
Rockmusik ROCK M
Lättlyssnat EASY M
Lättlyssnat klassiskt LIGHT M
Klassiskt CLASSICS
Andra typer av musik OTHER M
Väder WEATHER
Ekonomi FINANCE
Barnprogram CHILDREN
Sociala frågor SOCIAL A
Religion RELIGION
Ring till programmet PHONE IN
Resor TRAVEL
Fritid LEISURE
Jazz JAZZ
Countrymusik COUNTRY
“Lokal musik” musik NATION M
Gamla godingar OLDIES
Folkmusik FOLK M
Dokumentärer DOCUMENT
18
Obs!
Funktionen kan inte användas i länder där PTY
(Programme Type) saknas.
Page 75

1 Tryck på (DISPLAY/PTY) under FM-
mottagning tills PTY visas.
Om stationen sänder PTY-information visas
den aktuella programtypens namn.
Om den mottagna stationen inte har RDS
eller om RDS-informationen inte tas emot,
visas -------- i teckenfönstret.
2 Tryck på kanppen (DISC/PRESET)
upprepade gånger tills den önskade
programtypen visas.
Programtyperna visas i den ordning de står i
tabellen.
Om programtype n i nte är specificerad i RDSinformationen, visas -------- i teckenfönstret.
3 Tryck på knappen (ENTER).
Enheten börjar nu söka efter en station som
sänder den valda programtypen.
Ställa klockan automatiskt
— CT
Information om CT (Clock Time) från RD Ssändningen ställer klockan automatiskt.
1 Tryck på knapp en (MENU) medan
radion är på och tryck sedan på någon
av sidorna av (DISC/PRESET)
upprepade gånger till s C T-OFF visas.
2 Tryck på (+)-sidan av (SEEK)
upprepade gånger tills CT-ON visas.
Klockan är nu ställd.
3 Tryck på knappen (ENTER) när du vill
återgå till normalt teckenfönster.
Välj CT-OFF i ste g 2 om du vill ta bort CTfunktionen.
Obs!
• Ibland går det inte att använda CT-funktionen trots
att en RDS-station tas emot.
• Det kan föreligga skillnader mellan tidsinställningen
för CT-fun ktion en och verk lig ti d.
19
Page 76

Andra funktioner
Du kan styra enheten (och valfria CD/MDenheter) med en Rotary Commander,
fjärrkontroll,
Använda fjärrkontrollen
Rotary Commander
Sätt först på en passande etikett, beroende på hur
du vill montera fjärrko ntrollen Rotary
Commander.
Du använder fjärrkontrollen Rotary Commander
genom att trycka på kn appar och/eller vrida på
reglage.
(tillval).
*1 Endast om motsvarande tillvalsutrustning är
inkopplad.
*2 I bilar som inte har ACC-läge (tillbehör) läge i
tändningslåset ska knappen (OFF) hållas intryckt
under 2 sekunder så att klockan försvinner från
teckenfönstret efter att tändningen har slagits av.
Genom att vrida på reglaget
Reglage för
SEEK/AMS
Vrid och släpp om du vill:
– Hoppa över spår.
– Ta in stationer automatiskt.
Vrid, håll och s läpp om du vill:
– Snabbspela ett spår framåt eller bakåt.
– söka efter en station manuellt.
SOUND
MODE
DSPL
MODE
SOUND
DSPL
Genom att trycka på knappar
(SOUND)
(SOURCE)
Vrid på VOL-kontrollen när
du vill justera volymen.
… Try ck på om du vill …
(SOURCE)
(ATT)
(DSPL)
Byta källa
(radio/CD/MD*
Byta funktionssätt
(MODE)
(radio band/CD-enhe t /
1
MD-*
enhet)
(ATT) Dämpa ljudet
(OFF)*
2
Stoppa uppspelning el l er
radio- mottagning
(SOUND) Justera ljudmenyn
(DSPL)
Ändra teckenfönstrets
visningsalternativ
(MODE)
1
)
(OFF)
Genom att skjuta in och vrida reglaget
Kontroll för
PRESET/DISC
OFF
Skjut in och vrid reglaget om du vill:
–Ta emot förinställda stationer.
–Växla skiva*.
*När valfri CD/MD-enhet är inkopplad.
20
Page 77

Ändra manöverriktningen
Reglagets manöverriktning är fabriksinställd
enligt bilden nedan .
Om du vill öka
Om du vill minska
Om du måste montera reglaget på rattstångens
högra sida kan du kasta om manöverriktningen.
Håll knappen (SOUND) intryckt under
2 sekunder samtidigt som du trycker
på VOL-kontrollen.
Tips!
Du kan även ändra manöverriktningen för dessa
kontroller med enheten (sidan 22).
Justera tonkontrollerna
Du kan justera b as , di s kant, balans och fader.
Bas- och diskantn ivåerna kan lagras var för sig
för varje källa.
1 Välj funktionen du vill justera genom
att trycka på (SOUND) upprepade
gånger.
Varje gång du trycker på (SOUND) ändras
visningsalternativen enligt följande:
BAS (bas) t TRE (diskant) t BAL
(vänster-höger)
t FAD (framåt-bakåt)
2 Justera de valda visning sal t ernativen
genom att trycka på någon av sidorna
av (SEEK).
Om du justerar med hjälp av fjärrkontrollen
Rotary Commander,ska du trycka på
(SOUND) och vrida VOL-kontrollen.
Obs!
Justera inom 3 sekunder efter att du valt
visningsalternativ.
Snabbdämpa ljudet
(Med hjälp av Ro tary Commander eller den
vanliga fjärrkontrollen)
Tryck på (ATT) på Rotary Commander
eller fjärrkontrollen.
Nu visas ATT-ON helt kort i teckenfönstret
innan ATT visas.
Om du vill återställa den tidigare v olymni vån ska
du trycka på (ATT) igen.
Tips!
När du kopplar en biltelefons gränssnittskabel till ATTkabeln, höjer enheten volymen automatiskt när ett
telefonsamtal kommer in (Telephone ATT-funktion).
21
Page 78

Ändra inställningarna för ljud
och teckenfönster
— Meny
Följande visningsalternativ kan ställas in:
SET (Set Up)
• CLOCK (sidan 9)
• CT (Clock Time) (sidan 19)
• BEEP – om du vill sätta på eller stänga av
pipsignalen.
• RM (Rotary Comm ander) – om du vill ändra
manöverriktningen för Rotary Commanders
kontroller.
– Välj NORM om du vill använda Rot ar y
Commander i det fabriksinställda läget.
– Välj REV när du monterar Rotary
Commander på höger sida av ratt stången.
DSPL (Teckenfönster)
• D.INFO (Dual Informa tion) – om du vill visa
klocka och spelläge samtidigt (på).
• AMBER/GREEN – om du vill ändra
belysningsfärgen till gul eller grön (endast
CDX-CA650).
• DIM (Dimmer) – om du vill ändra
teckenfönstrets ljusstyrka (endast CDXCA650V).
– Välj ON om du vill tona ned tec kenfönstret.
– Välj OFF om du vill inaktivera funktionen
Dimmer.
• M.DSPL (Motion Display) – om du vill välja
läget Motion Dis pl ay från 1, 2 och OFF.
– Välj 1 om du vill visa dekorationslinjer i
teckenföns tret och aktivera Demo di splay.
– Välj 2 om du vill visa dekorationslinjer i
teckenfönstr et och inak tivera Demo display.
– Välj OFF om du vill inaktivera funktionen
Motion Display.
• A.SCRL (Auto Scroll)
– Välj ON om du vill gå i genom samtliga
automatiskt visade namn som har fler än 8
tecken.
– När Auto är inställd på fr ån och disc/track-
namnet är ändrat, visas inte disc/tracknamnet.
P/M (Play Mode)
• LOCAL-ON/OFF (Local seek mode) (sidan
14)
– Välj ON o m du bara vi ll ta in stationer med
starkare signaler.
• MONO-ON/OFF (Mono-läge) (sidan 14)
– Välj ON om du vill höra FM-utsändningar i
mono. Välj OFF om du vill återgå till
normalläge.
• REG-ON/OFF (Regional) (sidan 16)
1 Tryck p å knappen (MENU).
Om du vill ställa in A.SCRL ska du trycka på
(MENU) unde r uppspelning av CD/MD.
2 Tryc k på någon av sidorna av
(DISC/PRESET) upprepade gånger tills
det önskade alternativet visas.
3 Tryck på (+)-sidan av (SEEK) om du vill
välja önskad inställning (Exempelvis:
ON eller OFF).
4 Tryc k på knappen (ENTER).
När inställningen är utförd återgår
teckenfönstret till normalt spelläge.
Obs!
Visningsalternativet kan variera beroende på vilken
typ av källa som används.
Tips!
Du kan smidigt växla mellan kategorierna (SET,
DSPL, SND, P/M och EDIT) genom att trycka på
någon av sidorna av (DISC/PRESET) under 2
sekunder.
SND (Sound)
• LOUD (Loudness) – om du höra ba s och
diskant även vid låga ljudnivåer. Såväl bas som
diskant förstärks
22
Page 79

Välja ljudmiljö
— Min favoritposition (MBP)
När du är ensam i bilen kan MBP ge dig den
bästa ljudmiljön.
MBP har två förinställda lägen som justerar
balans och fader. Du kan lätt välja någon av med
hjälp av MBP-knappen.
Teckenföns
tret
MBP-A – 4 dB 0 0 – 4 dB
MBP-B 0 – 4 dB 0 – 4 dB
MBP-OFF 0000
Tryck på (MBP) upprepade gånger för
att få önskat lyssningsläge.
Läget för MBP visas i teckenfönstret i den
ordning de står i tabellen.
Teckenfönstret återgår till normalt
uppspelningsläge efter en sekund.
Du kan justera balans och fader mer exakt
genom att trycka på knappen (SOUND)
(sidan 21).
Obs!
• När du ställer in BAL (balans) eller FAD (toning) i
“Justera tonkont rollerna” (sidan 21) återställs
inställningen för MBP till OFF (av).
• När MBP är ställd på OFF, aktiveras inställningarna
för BAL och FAD.
Balansnivå Fadernivå
Höger
Vänster
Främre Bakre
Ställa in equalizer
Du kan välja en equalizer-kurva för sju olika
musiktyper (VOCAL, CLUB, J AZZ, NEW AGE,
ROCK, CUSTOM, och XPLOD).
Du kan lagra och justera equalizerns inställningar
för frekvens och nivå.
Välja equalizerns kurva
1 Tryck på (SOURCE) om du vill välja en
källa (radio, CD/MD).
2 Tryck på knappen (EQ7) upprepade
gånger tills du får fram den önskade
kurvan.
Varje g ång du trycker på
visningsalternativen.
Om du vill ta bort equa lizer-effekten ska du
välja OFF. Teckenfönstret återgår till normalt
uppspelningsläge efter tre sekunder.
Justera equalizerns kurva
1 Tryck på knapp en (MENU).
2 Tryck på någon sida av ( DISC/PRESET)
upprepade gånger tills EQ7 TUNE
visas. Tryck sedan på (ENTER).
3 Tryck på någon av sidorna av (SEEK)
om du vill välja önskad equalizerkurva och tryck sedan på (ENTER).
Varje gång du trycker på (SEEK) ändras
visningsalternativet.
4 Välja önskad frekvens och nivå.
1 Tryck på någon av sidorna av
(SEEK) när du vill välja önskad
frekvens.
Varje gång du trycker på (SEEK) ändras
frekvensen.
(EQ7)
ändras
62 (Hz) y 157 (Hz) y 396 (Hz) y
1k (Hz) y 2.5k (Hz) y 6.3k (Hz) y
16k (Hz)
fortsätt till nästa sida t
23
Page 80

2 Tryck på någon av sidorna av
(DISC/PRESET) när du vill justera
volymnivån.
Volymnivån kan justeras st eg vi s 1 dB i
taget från -10 dB till +10 dB.
Om du vill återställa den förinställda
equalizer-kurvan ska du h ålla (ENTER)
intryckt under 2 sekunder.
5 Tryck på knappen (MENU) två gånger.
När effektinställningarna är utförda visas
normalt uppspel ni ngs läge.
Ytterligare information
Underhåll
Byta säkringar
Se till att de nya säkringarna har samma amperetal som de ursprungliga. Om en säkring går ska
du kontrollera strömkontakten och byta ut
säkringen. Om säkringen går igen kan det
föreligga fel i enheten. Då kontaktar du närmaste
Sony-återförsäljare.
Säkring (10 A)
Varning!
Enheten kan ta skada om du använder en säkring
vars ampere-tal är högre än den säkring som
medföljde enheten.
Rengöra kontakterna
Om kontakterna mellan enheten och frontpanelen
inte är rena kan enhet ens funktionsduglighet
försämras. Detta kan du för hi ndra genom att ta
bort frontpanelen (sidan 8) och r engöra
kontakterna med en bomullspinne doppad i
alkohol. Rengör förs iktigt uta n att trycka alltför
hårt. I annat fall kan kontakterna skadas.
24
Huvudenheten
Frontpanelens
baksida
Page 81

Obs!
• Av säkerhetsskäl ska du slå av tändningen och ta ut
nyckeln ur tändningslåset innan du rengör
kontakterna.
• Vidrör aldrig kontakterna med fingrarna eller med
metallföremål.
Byta litiumbatterier
Under normala förhålla nde n håller batterierna i
ca 1 år. (Livslängden kan vara kortare än så,
beroende på hur de används.) När batterierna
börjar bli svaga minskar fjärrkontrollens
räckvidd. Byt ut batteriet m ot et t nytt CR 2025
litiumbatteri.
x
+-sidan ska vara uppåt
Ta ut enheten
1 Ta bort fronthöljet
1 Ta bort frontpanelen (sidan 8).
2 Tryck in klämman på fronthöljet
med en skruvmejs el .
3 Upprepa steg 2 på den andra sidan.
2 Ta ut enheten
1 Använd en liten skruvmej sel och
tryck in klämman på enhetens
vänstra sida. Dra sedan ut den
vänstra sidan tills spärren släpper.
Att tänka på när det gäller
litiumbatterier
• Barn ska inte komma i kontakt med
litiumbatterier. Kontakta omedelbart läkare om
ett barn skulle råka svälja ett batteri.
• Tork a av batteriet med en torr trasa så att
kontakten blir god.
• Var noga med att batteripolerna ligger rätt när
du sätter i batter iet.
• Undvik att hålla batteriet med en metallpincett,
då det kan leda till kortslut ni ng.
VARNING!
Batteriet kan explodera om det hanter as
felaktigt.
Batteriet får inte laddas om, plockas isär eller
kastas i öppen eld.
VARNING!
Explosionsfara vid felaktigt batteribyte.
Använd samma batterityp eller en likvärdig typ som
rekommenderas av apparattillverkaren.
Kassera använt batteri enligt gällande föreskrifter.
4 mm
2 Uppre p a steg 1 på höger sida.
3 Skjut ut enheten.
25
Page 82

Tekniska data
CD-spelardelen
Signal/brusförhållande 90 dB
Frekvensomfång 10–20 000 Hz
Svaj och brum Ej mätbart
Radiodelen
FM
Mottagningsområde 87,5–108,0 MHz
Antennuttag Extern antennanslutning
Mellanfrekvens 10,7 MHz/450 kHz
Brukbar känslighet 8 dBf
Selektivitet 75 dB vid 400 kHz
Signal/brusförhållande 66 dB (stereo),
Harmonisk distorsion vid 1 kHz
Separation 35 dB vid 1 kHz
Frekvensomfång 30–15 000 Hz
72 dB (mono)
0,6 % (stereo),
0,3 % (mono)
MW/LW
Mottagningsområde MW: 531–1 602 kHz
Antennuttag Extern antennanslutning
Mellanfrekvens 10,7 MHz/450 kHz
Känslighet MW: 30 µV
LW: 153–279 kHz
LW: 40 µV
Förstärkardelen
Utgångar Högtalarutgångar
Högtalarimpedans 4–8 ohm
Maximal utgångseffekt 50 W × 4 (vid 4 ohm)
(Sure Seal-anslutningar)
Allmänt
Utgångar Ljudutgångar
Ingångar Styrkabel till telefon ATT
Tonkontroller Bas ±8 dB vid 100 Hz
Strömförsörjning bilbatteri för 12 V likström
Mått Cirka 178 × 50 × 177 mm (b/
Monteringsmått Cirka 182 × 53 × 161 mm (b/
Vikt Cirka 1,2 kg
Medföljande tillbehör Installationsdelar och
V alfria tillbehörFjärrkontrollen Rotary
Tillvalsutrustning CD-växlare (10 skivor)
Styrkabel till elantennens relä
Styrkabel till förstärkaren
Ingång för fjärrkontroll
Antenningång
Diskant ±8 dB vid 10 kHz
(minusjordad strömkrets)
h/d)
h/d)
anslutningar (1 förpackning)
Förvaring för frontpanelen (1)
Commander
RM-X4S
Fjärrkontroll
RM-X114
BUSS-kabel (försedd med en
RCA pin-kabel)
RC-61 (1 m), RC-62 (2m)
CDX-848X, CDX-646
CD växlare (6 skivor)
CDX-T68X, CDX-T67
MD-växlare (6 skivor)
MDX-65
Källväljare
XA-C30
26
Obs!
Denna enhet kan inte anslutas till en digital
förförstärkare eller equalizer.
Rätt till ändringar av utförande och tekniska data
förbehålles.
Page 83

Felsökning
Med hjälp av följande kontrollista kan du vidta
lämpliga åtgärder om det uppstår problem me d
enheten.
Kontro llera a nslut ningen o ch dri ftruti nerna i nnan
du börjar läsa kontrollistan.
Allmänt
Inget ljud.
• Vrid på volymkontrollen i klockans riktning
när du vill justera volymen.
• Stäng av ATT-funktionen.
• Ställ in fader-kontrollen till mittläget för
system med 2 högtalare.
Innehållet i minnet ha r raderats.
• RESET-knappen har tryckts in.
t Lagra i minnet igen.
• Strömkabel n el l er batteriet har kopplats
ifrån.
• Strömkabeln är inte korrekt ansluten.
Inget pip-ljud.
Pip-ljudet har tagits bort (sidan 22).
Visningsalternativen i teckenfönstret
försvinner eller visas inte.
• Klockan försvinner från teckenfönstret om
du håller (OFF) intryckt under 2 sekunder.
t Håll (OFF) intryckt under 2 sekunde r
igen om du vill visa kl oc kan.
• Ta bort frontpanelen och rengör kontakterna.
Mer information finns i avsnittet “Rengöra
kontakterna” (sid an 24).
Lagrade stationer och korrekt tid har
raderats.
Säkringen har gått.
Enheten ger ifrån sig missljud när
tändningsnyckeln är i TILL-, ACC- eller
FRÅN-läge.
Kablarna är inte korrekt kopplade till bilens
strömanslutning.
Enheten saknar strömförsörjning.
• Kontrollera anslut ni ngen. Kontrollera
säkringen om anslu tn i ngen är OK.
• Bilen saknar ACC-läge.
t Tryck på (SOURCE) (eller lägg i en
skiva) när du vill sätta på en heten.
Strömmen till enheten är på hela tiden.
Bilen saknar ACC-läge.
Elantennen skjuts inte ut.
Elantennen saknar reläbox.
Uppspelning av CD/MD
Det går inte att lägga in en skiva i spelaren.
• Det finns redan en skiv a i spelaren.
• Skiva n har l ag ts in upp oc h ne r e ll er på a nnat
felaktigt sätt.
Uppspeln ingen star tar inte.
• Skadad MD elle r smutsig CD.
• Ej slutbehandlad CDR-skiva.
• Du har försökt spela en CDR-skiva som inte
är avsedd för audio-bruk.
• Vissa CDR-skivor kan inte spelas beroende
på utrustninge n som använts vid
inspelningen, eller skicket på skiva n.
Skivan stöts ut av sig själv.
Den omgivande temperatur en är högre än
50°C.
CD-skivan matas inte ut.
Manöverknapparna fungerar inte.
Tryck på RESET-knappen.
Ljudet hoppar vid vibrationer.
• Enheten är installerad i en vinkel so m
överskrider 60°.
• Enheten är installerad på ett instabilt ställe i
bilen.
Ljudet hoppar.
Smutsig eller skadad skiva.
Det går inta att stänga av indikationen -------i teckenfönstret.
Du har angett namnet Edit mode.
t Håll knappen (LIST) intryck t un der 2
sekunder.
Radiomottagning
Det går inte att göra några förinställningar.
• Lagra korrekt frekvens i minnet.
• Sändningssignalen är för svag.
Det går inte att ta emot stationerna.
Missljud hörs.
• Anslut styr kabe ln fr ån en e la nten n ( bl å) el l er
en strömkabel (röd) till en antennförstä rkares
strömkabel. (Endast när det finns en inbyggd
FM/MW/LW-antenn i bilen.)
• Kontr ollera bilens antennansl utning.
• Elantennen kom m er inte upp.
t Kontrollera anslutni ngen för elantennens
styrkabel.
• Kontrollera frekvensen.
fortsätt till nästa sida t
27
Page 84

Det går inte att utföra automatisk
inställning.
• Läget lokalsökning är inställt på ON.
t Ställ in läget lokal sökning på OFF.
(sidan 22)
• Sändningssignalen är för svag.
t Utföra manuell inställning.
“ST” blinkar i teckenfönstret.
• Ställ in rätt frekvens.
• Sändningssignalen är för svag.
t Ändra till monomottagning (sidan 22).
Ett program som sänds i stereo hörs i
mono.
Enheten är inställd på läget mono.
t Ta bort läget monomottagning (sidan 22).
RDS
Funktionen SEEK startar efter några
sekunders lyssning.
Stationen är inte TP eller har för svag signal.
t Tryck på (AF) eller (TA) upprepade
gånger tills AF-OFF eller TA-OFF visas.
Inga trafikmeddelanden hörs.
• Aktivera TA.
• Stationen har TP m en skickar ändå inte ut
trafikmeddelanden.
t Ta in en annan station.
PTY visar “--------”.
• Stationen är ingen RD S-station.
• RDS-information har inte tagits emot.
• Stationen anger i nt e programtypen.
Felindikationer/ felmeddelanden
Felindikationer
(För den här enheten och valfria CD/M Dväxlare)
Följande indika tioner blinkar i ungef är 5
sekunder och ett larmljud hörs.
BLANK*
ERROR*
HI TEMP
NO DISC
NO MAG
NOTREADY
RESET
*1 När ett fel uppstår under uppspelning av en CD
*2 Numret på skivan som orsakar felet visas i
Kontakta närmaste Sony-återförsäljare om
problemen kvarst år efter att du har vidtagit dessa
åtgärder.
L.SEEK +/–
NO AF
1
En oinspelad MD sp elas.*
t Spela en inspelad MD.
1
• CD-skivan är smutsig eller ha r lagts in upp
och ner.*
t Rengör skivan eller lägg in den korrekt.
2
2
• Det går inte att spela en CD/MD-skiva.*
t Lägg in en annan CD/MD.
Den omgivande tempe raturen är högre än
50°C.
t Vänta tills temperaturen har sjunk it till
under 50°C.
Det finns ingen skiva i CD/MD-enhete n.
t Lägg i en skiva i CD/MD-enheten.
Skivmagasinet har inte lagts in i CD/MDenheten.
t Lägg in magasinet i CD/MD-enheten.
Antingen är MD-enhetens lucka öpp en el ler så
har MD-skivorna lagts in på ett felaktigt sätt.
t Stäng luckan eller lägg in skivorna korrekt.
CD/MD-enheten fungerar inte.
t Tryck in enhetens återställningsknapp.
eller MD visas inte skivnumret i teckenfönstret.
teckenfönstret.
Meddelanden
Läget lokalsökning är på under automatisk
inställning (sidan 14).
Det finns ingen alterna tiv frekvens för
stationen.
2
28
Page 85

“” eller “”
Du har kommit till början eller slutet av en
skiva och kan inte gå vidare.
29
Page 86

Bem-vindo!
Obrigado por ter adquirido este leitor de CD da
Sony. Pode tirar ainda maior partido de todas as
funções deste leitor utilizando:
• Unidades de CD/MD opcionais (carregadores e
leitores)*
• Informação CD TEXT (q ue apar ece se esti v er a
ouvir um disco CD TEXT *
CD opcional ligada que suporte a função CD
TEXT ).
• Acessórios de comando opcionais
Comando rotativo RM-X4S
Comando tipo cartã o de crédito RM-X114
*1 Este leitor só funciona com produtos Sony.
*2 Um disco CD TEXT é um CD de música que
Esta etiqueta está localiz ada na part e inferior do
chassis.
1
.
2
numa unidade de
contém informações, como o nome do disco, o
nome do artista e os nomes das faixas. Estas
informações estão gravadas no disco.
CAUTION INVISIBLE
VIEW DIRECTLY WITH OPTICAL INSTRUMENTS
Esta etiqueta está localizada no c hassi s inter no da
unidade de accionamento.
LASER RADIATIONWHEN OPEN
DO NOT STARE INTO BEAM OR
2
Page 87

Índice
Localização dos controlos . . . . . . . . . . . . . . . 4
Precauções. . . . . . . . . . . . . . . . . . . . . . . . . . . 6
Notas sobre os discos. . . . . . . . . . . . . . . . . . . 6
Preparativos
Reiniciar o aparelho. . . . . . . . . . . . . . . . . . . . 7
Retirar o painel frontal. . . . . . . . . . . . . . . . . . 8
Acertar o relógio . . . . . . . . . . . . . . . . . . . . . . 9
Leitor de CD
Unidade de CD/MD (opcional)
Reproduzir um disco . . . . . . . . . . . . . . . . . . . 9
Elementos do visor . . . . . . . . . . . . . . . . . . . 10
Reproduzir faixas repetidamente
— Reprodução repetitiva . . . . . . . . . . . . 11
Reproduzir as fai xas por ordem aleatória
— Reprodução alea t ória . . . . . . . . . . . . . 11
Identificar um CD
— Info do disco* . . . . . . . . . . . . . . . . . . 11
Localizar um disco pelo nome
— Listagem*. . . . . . . . . . . . . . . . . . . . . . 12
Seleccionar faixas específicas
para reprodução
— Banco* . . . . . . . . . . . . . . . . . . . . . . . . 13
* Funções disponiveis com a unidade de CD/MD
opcional.
Rádio
Memorizar a s estações manualmente
— Memória da melhor sintonização
(BTM). . . . . . . . . . . . . . . . . . . . . . . . . . . 14
Ouvir as estações memorizadas. . . . . . . . . . 14
Memorizar a penas as estações desejadas. . . 15
Sintonizar uma estação através de uma lista
— Listagem. . . . . . . . . . . . . . . . . . . . . . . 15
RDS
Descrição geral da função RDS . . . . . . . . . 16
Resintonização automática
para uma melhor recepção
— Função AF (Frequências
alternativas) . . . . . . . . . . . . . . . . . . . . . . 16
Ouvir as informações de trânsito
— TA/TP . . . . . . . . . . . . . . . . . . . . . . . . 17
Pré-programar os dados
AF e TA nas estações RDS . . . . . . . . . . 18
Sintonizar as estações por tipo de programa
— PTY . . . . . . . . . . . . . . . . . . . . . . . . . . 18
Acerto automático do relógio
— CT . . . . . . . . . . . . . . . . . . . . . . . . . . . 19
Outras funções
Utilizar o comando rotativo . . . . . . . . . . . . 2 0
Regular as características do som. . . . . . . . 21
Reduzir rapidamente o som . . . . . . . . . . . . 21
Alterar as programações do som e do visor
— Menu . . . . . . . . . . . . . . . . . . . . . . . . . 2 2
Seleccionar a posição de som
— A melhor posição de som (MBP) . . . 23
Programar o equalizador. . . . . . . . . . . . . . . 23
Informações adicionais
Manutenção. . . . . . . . . . . . . . . . . . . . . . . . . 24
Desmontar o aparelho. . . . . . . . . . . . . . . . . 25
Características técnicas. . . . . . . . . . . . . . . . 26
Resolução de problemas . . . . . . . . . . . . . . . 27
Visores/mensagens de erro. . . . . . . . . . . . . 28
3
Page 88

Localização dos controlos
Para obter informações, consulte as páginas indicadas.
: Durante a reprodução : Se es t iver a ouvir rádio : Se estiver no modo de
CD/MD
menus
RADIO MENU
1
2
3
REP
MBP
EQ 7
SOURCE
MODE
SHUF
6
5
4
1 Botão de controlo do volume 17
2 Botão M B P 23
3 Botão Z (ejectar)
(localizado na parte
da frente do aparelho, atrás do painel
frontal)
9
4 Botão SOURCE (Ligação/Rádio/CD/MD)
8, 9, 10, 12, 14, 15, 17, 23
5 Visor
6 Receptor para o comando tipo cartão de
crédito
7 Botão MENU 9, 11, 12, 13, 14, 18, 19, 22,
23, 24
8 Botão DISPLAY/PTY (mudar modo do
visor/tipo do programa) 10, 12, 16, 19
9 Botão S (SCROLL) 10
q; Botão OPEN 8, 9
qa Botão L IST
12
CD/MD
15
RADIO
qs Botão EQ 7 23
qd Botão RESET
frente do leitor, atrás do painel frontal)
(localizado na parte da
7
PTY
S
D
L
L
O
R
C
S
DISPLAY
R
E
P
/
S
C
E
S
T
I
D
MENU
SOUND
AF
TA
O
FF
CDX-CA650X/CA650V/CA650
qf Botões numéricos
CD/MD
(3) REP 11
(6) SHUF 11
14, 15, 17, 18
RADIO
qg Botão MODE
10, 12
CD/MD
14, 15, 17
RADIO
qh Botão SOUND 21, 23
qj Botão AF 16, 18
qk Botão TA 17, 18
ql Botão OFF (Parar/Desligar)* 8, 9
w; Botão ENTER
12
CD/MD
15, 19
RADIO
9, 11, 12, 13, 14, 18, 19, 22, 23,
MENU
24
*Avi so que aparece se instalar o leitor num
automóvel sem posição ACC (acessórios)
na chave de ignição
Depois de desligar a ignição, tem de carregar
em
(OFF) no aparelho durante 2 segundos
para desactivar o visor do relógio.
Se não o fizer, o visor do relógio não se desliga
e descarrega a bateria.
O
P
LIST
SEEKSEEK
ENTER
EN
4
Page 89

PTY
S
(SEEK)
(–): para
seleccionar
para a
esquerda/
.
D
DISPLAY
MENU
SOUND
AF
TA
(+): para seleccionar
(–): para seleccionar para
O
P
E
N
LL
O
R
SC
R
E
P
/
S
C
E
S
T
I
D
LIST
SEEKSEEK
ENTER
O
FF
(DISC/PRESET)
para cima
(DISC/PRESET)
baixo
(SEEK)
(+): para
seleccionar
para a
direita/>
No modo de menus, o(s) botão(ões) que pode
seleccionar, de entre os quatro indicados,
aparece(m) assinalado(s) no visor com uma “ M” .
wa Botões DISC/PRESET (+/–)
10, 12
CD/MD
14, 15, 19
RADIO
9, 11, 12, 13, 14, 18, 19, 22, 23,
MENU
24
ws Botões SEEK (–/+)
9
CD/MD
14, 15, 17
RADIO
9, 11, 13, 19, 21, 22, 23
MENU
Comando tipo cartão de crédito RMX114 (opcional)
DSPL MODE
+
PRESET
LIST
+
DISC
MENU
SOURCE
–
SEEK
SOUND
DISC
PRESET –
+
VOL
–
Os botões do comando tipo cartão de
crédito têm as mesmas funções dos botões
correspondentes do leitor.
1 Botão DSPL
2 Botão MENU
3 Botão SOURCE
4 Botões SEEK (</,)
5 Botão SOUND
6 Botão OFF
7 Botões VOL (–/+)
8 Botão MODE
9 Botão LIST
q; Botões DISC/PRESET(M/m)
qa Botão ENTER
qs Botão ATT
Nota
Se carregar em (OFF) durante 2 segundos para
desligar o leitor, não pode comandá-lo com o
comando tipo cartão de crédito, excepto se carregar
em (SOURCE) no leitor ou introduzir um disco para
activar primeiro o leitor.
Sugestão
Consulte “Substituir a pilha de lítio”, para obter mais
informações sobre como substituir as pilhas (página
25).
+
SEEK
R
–
TE
N
E
ATTOFF
5
Page 90

Precauções
Notas sobre os discos
• Se o carro estava estacionado ao sol, deixe o
leitor arrefecer antes de o ligar.
• A antena eléctrica sobe automaticamente
quando ligar o leitor.
Se tiver problemas ou dúvidas relativas ao
aparelho que não estejam descritos neste manual,
entre em contacto co m o agente Sony mais
próximo.
Condensação de humidade
Em dias de chuva ou em locais muito húmidos, a
humidade pode condensar-se no interio r das
lentes e no visor do aparelho. Se isso acontecer, o
leitor não funciona bem. Nes se caso, retire o
disco e espere cerca de uma hora até a humidade
se evaporar.
Para manter um som de alta qualidade
Não deixe cair sumo ou outras bebidas dentro do
aparelho ou em cima dos discos.
• Não toque na superfície do disc o para não o
sujar. Segure no disco pelas extremidades.
• Quando não estiver a utilizar os discos, guardeos dentro das caixas respectivas ou deixe-os
dentro do carregador.
Não exponha os discos a calor ou temperaturas
altas. Não deixe os discos num automóvel
estacionad o ao sol ou no tablier/prateleira
traseira do me sm o.
• Não cole etiquetas nem utilize discos com
resíduos de cola/tinta pegaj osos. Os discos
nestas condições podem não rodar, ficando
danificados ou dando origem a uma avaria.
• Não pode reproduzir neste leitor disc os com
formatos não standard (ex: coração, quadrado,
estrela). Se tent ar fazê-lo, pode dani ficar o
leitor. Não utilize esse tipo de discos.
• Não pode reproduzir CDs de 8 cm.
• Antes de reproduzir o disco, limpe-o com um
pano de limpeza à venda no mercado. Limpe o
disco do centro para fora. Não utilize solventes,
como benzina, diluente, produtos de limpeza à
venda no mercado ou um spray anti-estático
destinado aos discos analógicos.
6
Page 91

Notas sobre os discos CD-R
• Pode reproduzir discos CD-R (CDs graváveis)
de música neste leitor.
Para distinguir os CD-Rs de música procure
esta marca.
Esta marca indica que o disco não é de música.
• Pode não conseguir reproduzir alguns discos
CD-R neste leitor (dependendo do
equipamento uti lizado para a gravação ou das
condições do disco).
• Não pode repro duz ir um disco CD-R que não
tenha sido finalizado*.
* A finalização é uma condição essencial para que
seja possível reproduzir um disco CD-R gravado
no leitor de CD.
Preparativos
Reiniciar o aparelho
Antes de utilizar o aparelho pela prime ira v ez ou
depois de substituir a bateria do automóvel, tem
de reiniciar o aparelho.
Retire o painel frontal e carregue no botão
RESET com um objecto pontiagudo, como a
ponta de uma esferográfica.
Botão RESET
Nota
Se carregar no botão RESET desactiva o relógio e
algumas das funções memorizadas.
7
Page 92

Retirar o painel frontal
Pode retirar o painel fr ontal do aparelho par a
impedir que seja roubado.
Alarme de aviso
Se colocar a chave de ignição na posição OFF
sem retirar o pa inel front al, ou ve um si nal so noro
de alarme durante alguns segundos.
Se ligar um amplificador opcional e não utilizar o
do próprio aparelho, o som do sinal de alarme é
desactivado.
1 Carregue em (OFF)*.
O CD/MD ou o rádio pára (a luz da chave e o
visor continu a m ac esos).
* Se o automóvel não tiver posição ACC na chave
de ignição, desligue o leitor carregando em
(OFF) durante 2 segundos para evitar que a
bateria se descarregue.
2 Carregue em (OPEN), faça deslizar o
painel frontal para a direita e puxe, com
cuidado, o lado esquer do do painel para
fora.
1
2
Notas
• Se retirar o painel frontal com o aparelho ligado,
este desliga-se automaticamente para não avariar
as colunas.
• Não deixe cair nem faça demasiada pressão sobre o
painel e o visor respectivo.
• Não exponha o painel frontal a calor/temperaturas
altas ou humidade. Não deixe o painel num
automóvel estacionado ao sol ou no tablier/
prateleira traseira do mesmo.
Sugestão
Se levar o painel frontal consigo, coloque-o na caixa
de transporte fornecid a.
Colocar o painel frontal
Encaixe o orifício B do painel frontal no eixo A
do aparelho e empu rre o lado esquerdo para
dentro.
Carregue em (SOURCE) (ou coloque um CD)
para ligar o aparelho.
A
B
x
Nota
Não coloque nada sobre o lado de dentro do painel
frontal.
8
Page 93

Acertar o relógio
O relógio utiliza a indicação digital de 24 horas.
Exemplo: Para acertar o relógio para as 10:08
1 Carregue em (MENU) e depois carregue
várias vezes num dos lados de
(DISC/PRESET) até aparecer a indicação
“CLOCK”.
Leitor de CD Unidade de CD/MD (opcional)
Para além da reprodução de um CD neste leitor,
também pode comandar unidades de CD/MD
externas.
Nota
Se ligar uma unidade de CD opcional que suporte a
função CD-TEXT, quando reproduzir um disco com
CD-TEXT aparecem as informações sobre o CD (CDTEXT) no visor.
1 Carregue em (ENTER).
A indicação da hora c om eça a piscar.
2 Carregue num dos lados de
(DISC/PRESET) para acertar a hora.
3 Carregue no lado (+) de (SEEK).
A indicação dos minutos começa a piscar.
4 Carregue num dos lados de
(DISC/PRESET) para acertar os
minutos.
2 Carregue em (ENTER).
O relógio começa a funcionar. Depois de ter
acertado o relógio, o visor volta ao modo de
reprodução normal.
Sugestões
• Pode acertar automaticamente o relógio com a
função RDS (página 19).
• Se o modo D.INFO estiver programado para ON, a
hora aparece sempre (página 22).
Reproduzir um disco
(Com este leitor)
1 Carregue em (OPEN) e coloque o disco
(com o lado da etiqueta voltado para
cima).
2 Feche o painel frontal
A reprodução co m eça automaticamente.
Se já tiver introduzido um disco, carregue várias
vezes em (SOURCE) até aparecer a indicação
“CD” e inicie a reprodução.
Para Carregue em
Parar a reprodução (OFF)
Ejectar o disco (OPEN) e depo i s em Z
Saltar faixas
– Sensor de música
automático
Avanço rápido/
rebobinagem
– Procurar
manualmente
(SEEK) (./>)
[uma vez para cada faixa]
(SEEK) (m/M)
[mantenha carregado no
ponto deseja do]
Continua na página seguinte t
9
Page 94

Notas
• Quando a última faixa do disco chegar ao fim, a
reprodução recomeça a partir da primeira faixa do
disco.
• Se estiver ligada uma unidade opcional, a
reprodução da mesma fonte de som passa para a
unidade de CD/MD opcional.
(Com a unidade opcional)
1 Carregue várias vezes em (SOURCE)
para seleccionar “CD” ou “MD.”
2 Carregue várias vezes em (MODE ) até
aparecer a unidade desejada.
A reprodução começa.
Para Carregue em
Saltar discos
–Seleccionar o
disco
(DISC/PRESET) (+/–)
Elementos do visor
Quando o disco/fa ixa muda, todos os títulos*1
pré-gravados do novo disco/faixa aparecem
automaticam ente (se a função Auto Scroll
(Desfile automático) estiver progra mada para
“ON”; os nomes com mais de 8 caracteres
passam no visor (página 22)).
Elementos que pode ver
• Fonte de música
• Relógio
• Função
Elementos que pode ver
• Tempo de reprodução
decorrido
• Nome do disco*
artista*
2
• Título da faixa*
Para Carregue em
Activ ar o el emento
do visor
Fazer desfilar o
item no visor
1
/nome do
1
(DISPLAY/PTY) várias
vezes
(S) SCRO LL
10
*1 “NO NAME” indica que não existe Info do disco
(Disc Memo) (p ági n a 11) ou u m no me p ré-gravado.
*2 Apenas para discos com CD TEXT com o nome do
artista.
Notas
• Alg uns caracteres não são visualizados.
• No caso de alguns discos CD TEXT com muitos
caracteres, as informações podem não passar no
visor.
• Este leitor não permite ver o nome do artista de
cada faixa de um disco CD-TEXT.
Sugestão
Se mudar o nome do disco/faixa com a função Auto
scroll (Desfile automático) programada para OFF, o
nome do disco/faixa não passa no visor.
Page 95

Reproduzir faixas
repetidamente
— Reprodução repet itiv a
Quando o disco colocado na unidade princ ip al
chegar ao fim, é repetida um a faixa ou todo o
disco. Na reprodução repetitiva pode seleccionar:
• REP-1 — para repetir uma faixa.
• REP-2* — para repetir um disco.
* Apenas disponível se estiverem ligadas uma ou
mais unidades opcionais de CD/MD.
Durante a reprodução, carregue várias
vezes em (3) (REP) até aparecer a
programação desejada no visor.
A reprodução repe titiva começa.
Para voltar ao modo de reprodução normal ,
seleccione “REP-OFF.”
Reproduzir as faixas por
ordem aleatória
— Reprodução alea t ória
Pode seleccionar:
• SHUF-1 — para r epr oduzir as faixas do disco
actual por ordem al eatória.
• SHUF-2*
unidade do CD (MD) opcional actual por
ordem aleatória.
• SHUF-ALL*
faixas de todas as unidades de CD (MD) ligadas
(incluindo este leitor) por ordem aleatória.
*1 Apenas disponível se estiverem ligadas uma ou
*2 Apenas disponível se estiverem ligadas uma ou
Para voltar ao modo de reprodução normal,
seleccione “SHUF-OFF”.
Nota
“SHUF-ALL” não reproduz a s faixas de um leitor de
CD e de um leitor de MD simultaneamente.
1
— para reproduzir as faixas da
2
— para reproduzir todas as
mais unidades opcio n ais de CD (MD).
mais unidades de CD opcionais ou duas ou mais
unidades de MD opcionais.
Durante a reprodução, carregue várias
vezes em (6) (SHUF) até aparecer a
programação desejada no visor.
A reprodução al eatória começa.
Identificar um CD
— Info do disco (Disc Memo) (Para uma
unidade de CD com a função CUSTOM FILE)
Pode identificar os discos com um nome
personalizado (Info do disco). Pode introduzir
um máximo de 8 caracteres para cada disco. Se
identificar um CD, pode localizar o disco pelo
nome (página 12).
1 Comece a reproduzir o disco que quer
identificar.
2 Carregue em (MENU) e depois várias
vezes num dos lados de (DISC/PRESET)
até aparecer a indicação “NAMEEDIT”.
3 Carregue em (ENTER).
Durante a identificação, a unidade repete o
disco.
4 Introduza os caracteres.
1
1 Carregue várias vezes no lado (+)*
(DISC/PRESET) para seleccionar o
carácter desejado.
A t B t C ... t 0 t 1 t 2 ... t +
t – t
*1 Para inverter a ordem, carregue no lado (–)
*2 (espaço em branco)
2 Carregue no lado (+) de (SEEK).depois
de localizar o carácter desejado.
Se carregar no lado (–) de ( SEEK), pode
mover-se para a esquerda.
3 Repita os passos 1 e 2 para
introduzir o nome completo.
... t _*2 t A
*
de (DISC/PRESET).
5 Para voltar ao modo de reprodução de
CD normal, carregue em (ENTER).
de
Continua na página seguinte t
11
Page 96

Sugestões
• Para corrigir ou apagar um nome, basta escrever
por cima ou introduzir “_” .
• Existe outra maneira de identificar um CD: Carregue
em (LIST) durante 2 segundos, em vez de executar
os passos 2 e 3. T ambém pode terminar a operação
carregando em (LIST) durante 2 segundos, em vez
de executar o passo 5.
• Pode identificar os CDs de uma unidade que não
suporte a função CUSTOM FILE, se essa unidade
estiver ligada a uma unidade de CD com essa
função. A Info do disco (Disc Memo) será guardada
na memória da unidade de CD equipada com a
função CUSTOM FILE.
Nota
A reprodução aleatória/REP-1 é interrompida até a
edição do nome estar terminada.
Ver a Info do disco (Disc Memo)
Como elemento do visor, a Info do disco (Disc
Memo) tem sempre prioridade sobre as
informações CD-TEXT originais.
Para Carregue em
Ver (DISPLAY/PTY) durante a
reprodução de um disco CD
TEXT/CD
Sugestão
Para saber informações sobre os outros elementos
que pode ver, consulte a página 10.
Apagar a Info do disco (Disc Memo)
7 Carregue duas vezes em (MENU).
O leitor volta ao modo de re produção de CD
normal.
Notas
• Se apagar a Info do disco (Disc Memo) de um disco
CD TEXT, aparecem as informações de CD TEXT
originais.
• Se não conseguir encontrar a Info do disco (Disc
Memo) que quer apagar, experimente seleccionar
uma unidade de CD diferente no passo 2.
Localizar um disco pelo
nome
— Listagem (Para uma unidade de CD com a
função CD TEXT/CUSTOM FILE ou uma
unidade de MD)
Pode utilizar esta função com discos a que tenha
atribuído nomes personalizados *
CD TEXT*
*1 Localizar um disco pelo nome personalizado
quando atribuir um nome a um CD (página 11) ou
um MD.
*2 Localizar discos através das informações CD
TEXT: quando reproduzir um disco CD TEXT
numa unidade de CD com a função CD TEXT.
2
.
1 Carregue em (LIST).
O nome que atribuiu ao disco actual aparece
no visor .
1
ou com discos
1 Carregue várias vezes em (SOURCE)
para seleccionar “CD”.
2 Carregue várias vezes em (MODE ) para
seleccionar a unidade de CD em que está
guardada a Info do disco (Disc Memo).
3 Carregue em (MENU) e depois várias
vezes num dos lados de (DISC/PRESET)
até aparecer a indicação “NAME DEL”.
4 Carregue em (ENTER).
Os nomes guardados aparecem po r ordem,
começando no primeiro nome in troduzido.
5 Carregue várias vezes num dos lados de
(DISC/PRESET) para seleccionar o nome
do disco que quer apagar.
Os nomes guardados aparecem po r ordem,
começando no primeiro nome in troduzido.
6 Carregue em (ENTER) durante 2
segundos.
O nome é apagado.
Se quiser apagar mais nomes, rep ita os passos
5 e 6.
12
2 Carregue várias vezes num dos lados de
(DISC/PRESET) até localizar o disco
desejado.
3 Carregue em (ENTER) para ouvir o disco.
Nota
Algumas letras não são visualizadas (excepção: Info
do disco (Disc Memo)).
Page 97

Seleccionar fai xa s
específicas para reprodução
— Banco (Para uma unidade de CD com a
função CUSTOM FILE)
Se identificar o disco, po de programar a unidad e
para que salte ou reproduza as faixas que
escolher.
1 Comece a reproduzir o disco que quer
identificar.
2 Carregue em (MENU) e depois várias
vezes num dos lados de (DISC/PRESET)
até aparecer a indicação “BANK SEL”.
3 Carregue em (ENTER).
4 Identificar as faixas.
1 Carregue várias vezes num dos lados
de (SEEK) para seleccionar a faixa
que quer identificar.
2 Carregue várias vezes em (ENTER)
para seleccionar “PLAY” ou “SKIP”.
5 Repita o passo 4 para programar “PLAY”
ou “SKIP” para todas as faixas.
6 Carregue duas vezes em (MENU).
O leitor volta ao modo de reprodução de CD
normal.
Notas
• Pode programar “PLAY” e “SKIP” para um máximo
de 24 faixas.
• Não pode programar “SKIP” para todas as faixas de
um CD.
Reproduzir apenas determinadas
faixas
Pode sele c cionar:
•“BANK-ON” — para reproduzir as faixas com
a programação “PLAY”.
•“BANK-INV” (Inverso) — para reproduzir as
faixas com a program ação “SKIP”.
1 Durante a reprodução, carregue em
(MENU) e depois várias vezes num dos
lados de (DISC/PRESET) até aparecer a
indicação “BANK-ON” “BANK-INV” ou
“BANK-OFF”.
2 Carregue várias vezes no lado (+) de
(SEEK) até aparecer a programação
desejada.
3 Carregue em (ENTER).
A reprodução começa na faixa a seguir à faixa
actual.
Para voltar ao modo de reprodução normal ,
seleccione “BANK-OFF” no passo 2.
13
Page 98

Rádio
O leitor pode memoriz ar um máximo de 6
estações por banda (FM1, FM2, FM3, MW e
LW).
Cuidado
Se quiser sintonizar estações enquanto conduz,
utilize a Memória da melhor sintonização par a
evitar acidentes.
Memorizar as esta ções
manualmente
— Memória da melhor sintoni za ção (BTM)
O leitor selecciona as estações com os sinais
mais fortes dentro da banda seleccionada e
memoriza-as por ordem de frequência.
1 Carregue várias vezes em (SOURCE)
para seleccionar o rádio.
2 Carregue várias vezes em (MODE ) para
seleccionar a banda.
3 Carregue em (MENU) e depois várias
vezes num dos lados de (DISC/PRESET)
até aparecer a indicação “BTM”.
4 Carregue em (ENTER).
Quando a program ação estiver memorizada
ouve-se um sinal sonoro.
Notas
• Se só for possível sintonizar um pequeno número
de estações, por os sinais serem muito fracos,
alguns botões numéricos mantêm as prog ram ações
anteriores.
• Quando aparecer um número no visor o leitor
começa a memorizar as estações a partir desse
número.
Ouvir as estações memorizadas
1 Carregue várias vezes em (SOURCE)
para seleccionar o rádio.
2 Carregue várias vezes em (MODE) para
seleccionar a banda.
3 Carregue no botão numérico ((1) a (6))
onde está memorizada a estação
desejada.
Sugestão
Carregue num dos lados de (DISC/PRESET) para
ouvir as estações pela ordem com que estão
memorizadas (Função Procura pré-programada).
Se a sintonização pré-programada não
funcionar
Carregue num do s la dos de (SEEK) para
procurar a estação (sintonização
automática).
O varrimento pára quando o leitor sintoniz a
uma estação. Repita até sintonizar a estação
desejada.
Sugestões
• Se a sintonização automática parar com demasiada
frequência, active a função Procura local para limitar
a procura às estações com sinais mais fortes
(página 22).
• Se souber a frequência da estação que quer ouvir,
carregue sem soltar um dos lados de (SEEK) para
localizar a frequência aproximada e depois carregue
várias vezes em (SEEK) para sintonizar com maior
precisão a frequência desejada (sintonização
manual).
Se a recepção de FM estéreo for má
Seleccione o modo de recepção mono
(página 22).
O som melhora, mas fica mono (“ST”
desaparece).
14
Page 99

Memorizar apenas as estações desejadas
Pode programar manualmente as estações
desejadas num bot ão numérico à sua escolha.
1 Carregue várias vezes em (SOURCE)
para seleccionar o rádio.
2 Carregue várias vezes em (MODE) para
seleccionar a banda.
3 Carregue num dos lados de (SEEK) par a
sintonizar a estação que quer memorizar.
4 Carregue no botão numérico ((1) a (6))
desejado durante 2 segundos até
aparecer a indicação “MEM”.
A indicação do botão numérico aparece no
visor.
Nota
Se tentar memorizar outra estação no mesmo botão
numérico, apaga a estação memorizada
anteriormente.
Sintonizar uma estação
através de uma lista
— Listagem
1 Enquanto está a ouvir rádio, carre gue
levemente em (LIST).
A frequência ou o nome atribuído à estação
que está sintonizada começa a piscar.
2 Carregue várias vezes num dos lados de
(DISC/PRESET) até localizar a estação
desejada.
Se a estação se leccionada não tiver um nome
atribuído, a frequência aparec e no visor.
3 Carregue em (ENTER) para sintonizar a
estação desejada.
15
Page 100

RDS
Descrição geral da função RDS
As estações de FM com o serviço Radio Data
System (RDS) enviam inf ormações digitais
imperceptíveis, juntamente com o sinal de rádio
normal. Se, por exemplo, si nt onizar uma estação
com RDS, aparec e um a das indicações
apresentadas abaixo.
Elementos que pode ver
• Fonte de música
• Relógio
• Função
Elementos que pode ver
• nome da estação (frequência)
• tipo de programa
Para Carregue em
Mudar o elemento
do visor
(DISPLAY/PTY)
Resintonização automática
para uma melhor recepção
— Função AF (Frequências alternativas)
A função de frequências alternativas (AF)
selecciona e volta a sintonizar automaticamente o
sinal mais forte numa rede para a estação que
estiver a ouvir.
A frequência muda
automaticamente.
98,5 MHz
Estação
1 Seleccione uma estação de FM (página
14).
2 Carregue várias vezes em (AF) até
aparecer a indicação “AF-ON”.
O aparelho começa a procurar a frequência
alternativa com o sinal mais forte na mesma
rede.
Se a indicação “NO AF” piscar isso significa
que não há frequência alternativa para a
estação sintonizada.
Nota
Se não existir uma frequência alternativa na área ou
não precisar de procurar uma, desactive a função AF
seleccionando “AF-OFF.”
96,0 MHz
102,5 MHz
Serviços RDS
Os dados RDS oferecem-lhe outras
comodidades, tai s como:
• Resintonização automática de um
programa, o que é muito útil em viagens
longas. — AF t página 16
• Ouvir informações sobre o trânsito
mesmo que esteja a o uvir outro programa/
fonte. — TA t página 17
• Seleccionar as es tações pelo tipo de
programa que estão a transmitir. — PTY t
página 18
• Acerto automático da hora. — CT t página
19
Notas
• Dep end en do do país ou região, podem não estar
disponíveis todas as funções RDS.
• O serviço RDS pode não funcionar correctamente,
se o sinal for fraco ou se a estação sintonizada não
transmitir dados RDS.
16
 Loading...