

Page 1

3-227-675-11 (2)
FM/MW/LW
Compact Disc Player
FM/MW/LW Compact Disc Player
Operating Instructions
Bedienungsanleitung
Mode d’emploi
Istruzioni per l’uso
Gebruiksaanwijzing
Wichtig!
Bitte nehmen Sie sich etwas Z eit, um den Ger äte-Pass vollstän dig
auszufüllen. Wo sich dieser befindet, en tnehm en Sie bitt e dem in de r
hinteren Umshlagseite diese r Bed ien un gsan leitun g.
Si dichiara che l’apparecchio è stato fabbricato in conformità all’art. 2, Comma 1 del D.M. 28.08.
1995 n. 548.
For installation and connections, see the supplied installation/connections manual.
Zur Installation und zum Anschluß siehe die mitgelieferte Installa ti ons- /Ans chlußa nle i tung.
En ce qui concerne l’installation et les connexions, consulter le manuel d’installation/
raccordement fourni.
Per l’installazione e i collegamenti, fare riferim e nto al manu ale di istruz ioni per
l’installazione e i collegamenti in dotazione.
Zie voor het monteren en aansluiten van het apparaat de bijgeleve rde handleiding “Installatie
en aansluitingen”.
GB
DE
FR
IT
NL
CDX-CA650X CDX-CA650V
CDX-CA650
© 2001 Sony Corporation
Page 2

Welcome!
Thank you for purchas in g t hi s Sony Compact
Disc Player. You can enjoy its various features
even more with:
• Optional CD/MD units (both changers and
players)*
• CD TEXT information (displayed when a CD
TEXT disc*
CD unit with the CD TEXT function).
• Optional controller accessori es
*1 This unit works with Sony products only.
*2 A CD TEXT disc is an audio CD that inclu des
1
.
2
is played on a connected optional
Rotary comm ander RM-X4S
Card remote commander RM-X114
information such as the disc name, artist name,
and track names. This information is recorded on
the disc.
2
Page 3

Table of Contents
Location of controls. . . . . . . . . . . . . . . . . . . . 4
Precautions . . . . . . . . . . . . . . . . . . . . . . . . . . 6
Notes on discs . . . . . . . . . . . . . . . . . . . . . . . . 6
Getting Started
Resetting the unit. . . . . . . . . . . . . . . . . . . . . . 7
Detaching the front panel . . . . . . . . . . . . . . . 8
Setting the clock . . . . . . . . . . . . . . . . . . . . . . 9
CD Player
CD/MD Unit (optional)
Playing a disc. . . . . . . . . . . . . . . . . . . . . . . . . 9
Display items. . . . . . . . . . . . . . . . . . . . . . . . 10
Playing tracks repeatedly
— Repeat Play . . . . . . . . . . . . . . . . . . . . 11
Playing tracks in ra ndom order
— Shuffle Play . . . . . . . . . . . . . . . . . . . . 11
Labelling a CD
— Disc Memo*. . . . . . . . . . . . . . . . . . . . 11
Locating a di sc by name
— List-up* . . . . . . . . . . . . . . . . . . . . . . . 12
Selecting specific tracks for playback
— Bank*. . . . . . . . . . . . . . . . . . . . . . . . . 13
* Functions available with optional CD/MD unit
Radio
Storing stations automatically
— Best Tuning Memory (BTM). . . . . . . 14
Receiving the stored stations. . . . . . . . . . . . 14
Storing only the desired stations . . . . . . . . . 15
Tuning in a station through a list
— List-up . . . . . . . . . . . . . . . . . . . . . . . . 15
RDS
Overview of RDS . . . . . . . . . . . . . . . . . . . . 16
Automatic retuning for best reception results
— AF function . . . . . . . . . . . . . . . . . . . . 16
Receiving traffic an nouncements
— TA/TP . . . . . . . . . . . . . . . . . . . . . . . . 17
Presetting RDS stations with AF and TA
setting. . . . . . . . . . . . . . . . . . . . . . . . . . . 1 8
Tuning in stations by programme type
— PTY . . . . . . . . . . . . . . . . . . . . . . . . . . 18
Setting the clock automatically
— CT . . . . . . . . . . . . . . . . . . . . . . . . . . . 1 9
Other Functions
Using the rotary commander. . . . . . . . . . . . 20
Adjusting the sound characteristics . . . . . . 21
Quickly attenuating the sound . . . . . . . . . . 21
Changing the sound and display setting s
— Menu . . . . . . . . . . . . . . . . . . . . . . . . . 22
Selecting the sound position
— My Best sound Position (MBP). . . . 23
Setting the equalizer . . . . . . . . . . . . . . . . . . 23
Additional Information
Maintenance . . . . . . . . . . . . . . . . . . . . . . . . 24
Removing the unit. . . . . . . . . . . . . . . . . . . . 25
Specifications . . . . . . . . . . . . . . . . . . . . . . . 26
Troubleshooting . . . . . . . . . . . . . . . . . . . . . 27
Error displays/Messages. . . . . . . . . . . . . . . 2 8
3
Page 4
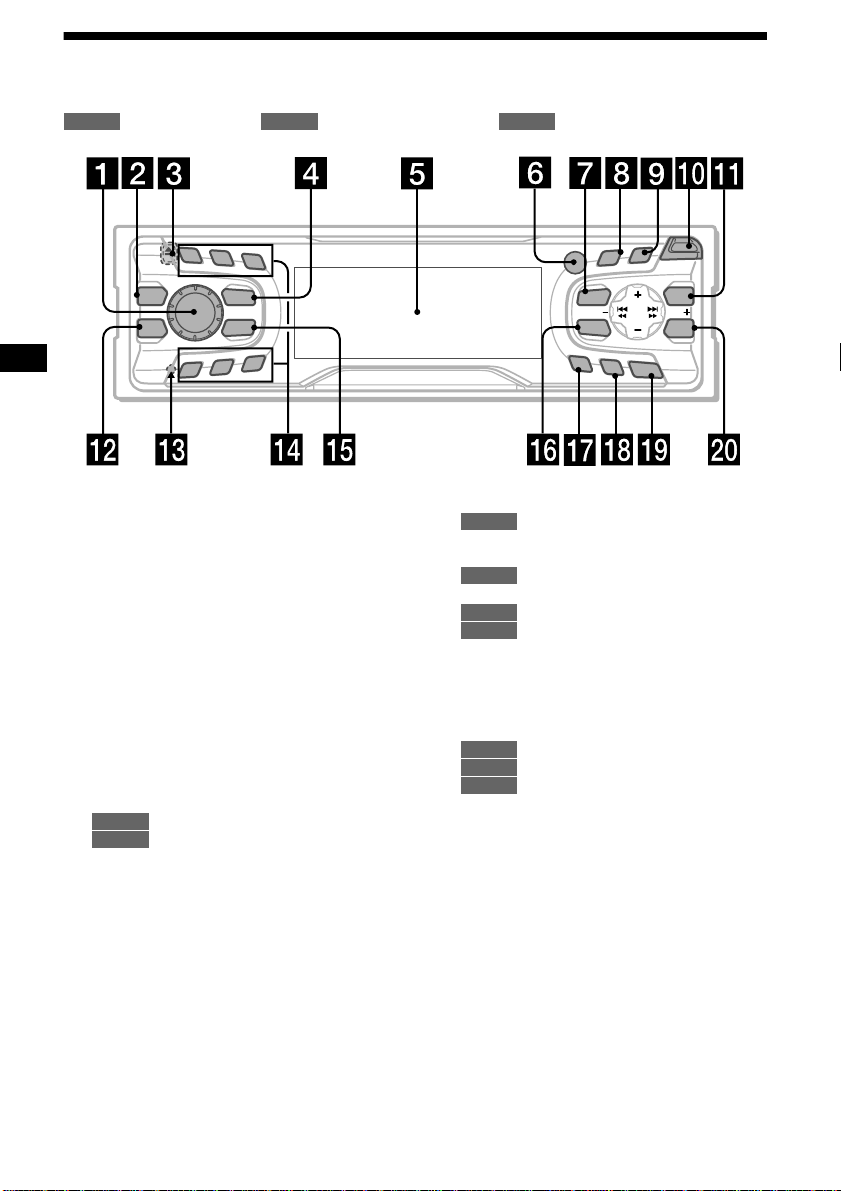
Location of controls
Refer to the pages listed for details.
: During Playback : During radio reception : During menu mode
CD/MD
RADIO MENU
1
2
3
REP
MBP
EQ 7
SOURCE
MODE
SHUF
6
5
4
a Volume control dial 17
b MBP button 23
c Z (eject) button (located on the front side
of the unit, behind the front panel) 9
d SOURCE (Power on/Radio/CD/MD)
button 8, 9, 10, 12, 14, 15, 17, 23
e Display window
f Receptor for the card remote
commander
g MENU button 9, 11, 12, 13, 14, 18, 19,
22, 23, 24
h DISPLAY/PTY (display mode change/
programme type) button 10, 12, 16, 19
i S (SCROLL) button 10
j OPEN button 8, 9
k LIST button
12
CD/MD
15
RADIO
l EQ7 button 23
m RESET button (located on the front side of
the unit, behind the fr ont panel) 7
PTY
S
D
LL
O
R
C
S
DISPLAY
R
E
P
/
C
S
I
D
MENU
SOUND
AF
TA
O
CDX-CA650X/CA650V/CA650
n Number buttons
CD/MD
(3) REP 11
(6) SHUF 11
14, 15, 17, 18
RADIO
o MODE button
10, 12
CD/MD
14, 15, 17
RADIO
p SOUND button 21, 23
q AF button 16, 18
r TA button 17 ,18
s OFF (Stop/Power off) button* 8, 9
t ENTER button
12
CD/MD
15, 19
RADIO
9, 11, 12, 13, 14, 18, 19, 22, 23,
MENU
24
* Warning when installing in a car without
an ACC (accessory) position on the
ignition switch
After turning off the ignition, be sure to press
(OFF) on the unit for 2 seconds to turn off the
clock d ispla y.
Otherwise, the clock display does not turn off
and this causes battery drain.
O
P
E
N
S
E
T
LIST
SEEKSEEK
ENTER
FF
4
Page 5
PTY
S
AF
(SEEK)
(–): to select
leftwards/
.
D
DISPLAY
MENU
SOUND
TA
(+): to select upwards
(–): to select downwards
O
PE
N
LL
O
R
SC
R
E
P
/
S
C
E
S
T
I
D
LIST
SEEKSEEK
ENTER
O
F
F
(DISC/PRESET)
(DISC/PRESET)
(SEEK)
(+): to select
rightwards/
>
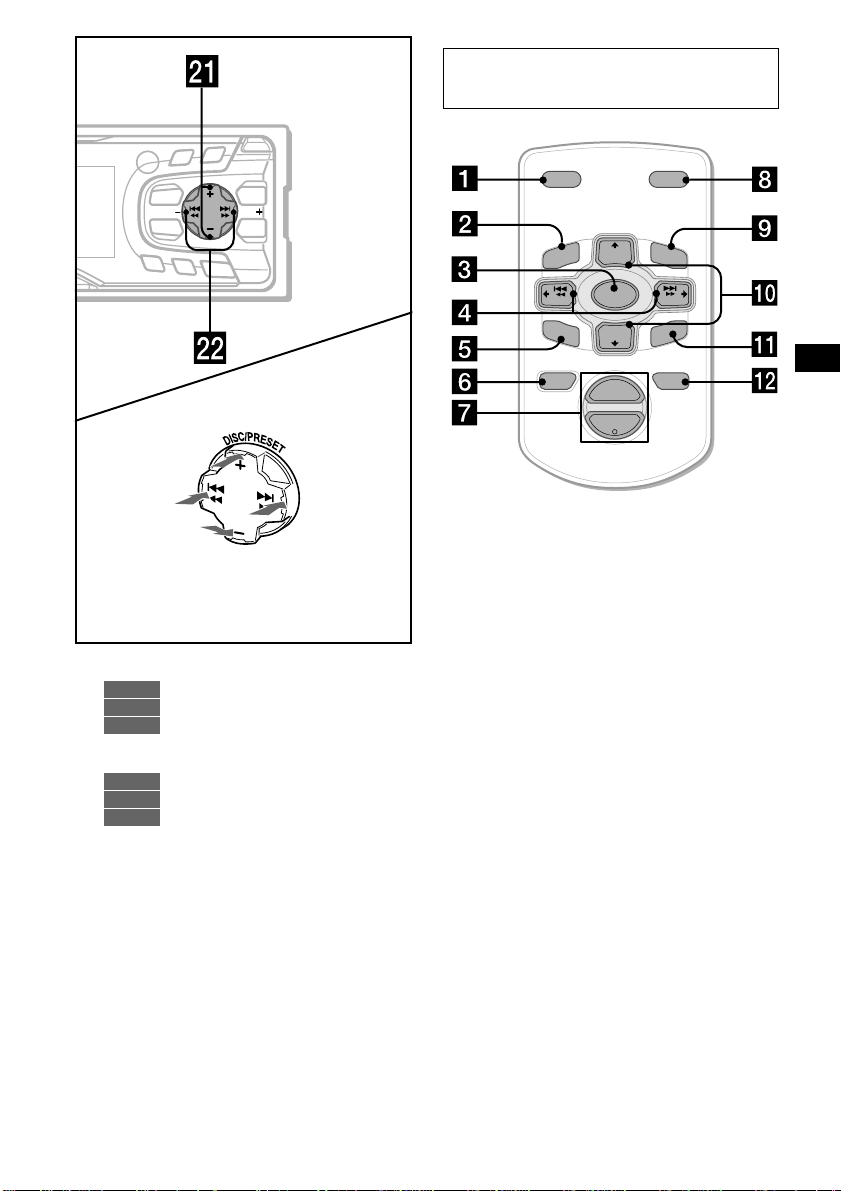
In menu mode, the currently selectable button (s)
of these four are indicated with a “ M” in the display.
u DISC/PRESET buttons (+/–)
10, 12
CD/MD
14, 15, 19
RADIO
9, 11, 12, 13, 14, 18, 19, 22, 23,
MENU
24
v SEEK buttons (–/+)
9
CD/MD
14, 15, 16
RADIO
9, 11, 13, 19, 21, 22, 23
MENU
Card remote commander RM-X114
(optional)
DSPL MODE
+
PRESET
LIST
+
DISC
MENU
–
SEEK
SOUND
SOURCE
DISC
PRESET –
+
VOL
+
SEEK
R
–
TE
EN
ATTOFF
–
The corresponding buttons of the card
remote commander control the same
functions as those on this unit.
a DSPL button
b MENU button
c SOURCE button
d SEEK (</,) buttons
e SOUND button
f OFF button
g VOL (–/+) buttons
h MODE button
i LIST button
j DISC/PRESET(M/m) buttons
k ENTER button
l ATT button
Note
If the unit is turned off by pressing (OFF) for 2
seconds, it cannot be operated with the card remote
commander unless (SOURCE) on the unit is pressed,
or a disc is inserted to activate the unit first.
Tip
Refer to “Replacing the lithium battery” for details on
how to replace the batteries (page 25).
5
Page 6
Precautions
Notes on discs
• If your car was parked in direct sunlight, all ow
the unit to cool off before operating it.
• Power aerials will extend automatically while
the unit is operating.
If you have any questi ons or proble m s
concerning your unit that are not covered in this
manual, please co nsult your nearest Sony dealer.
Moisture condensation
On a rainy day or in a very damp area, moisture
condensation ma y occur inside the lense s an d
display of the unit. Should this occur, the unit
will not operate properly. In such a case, remove
the disc and wait for about an hour until th e
moisture has evaporated.
To maintain high sound quality
Be careful not to splash juice or other soft drinks
onto the unit or discs.
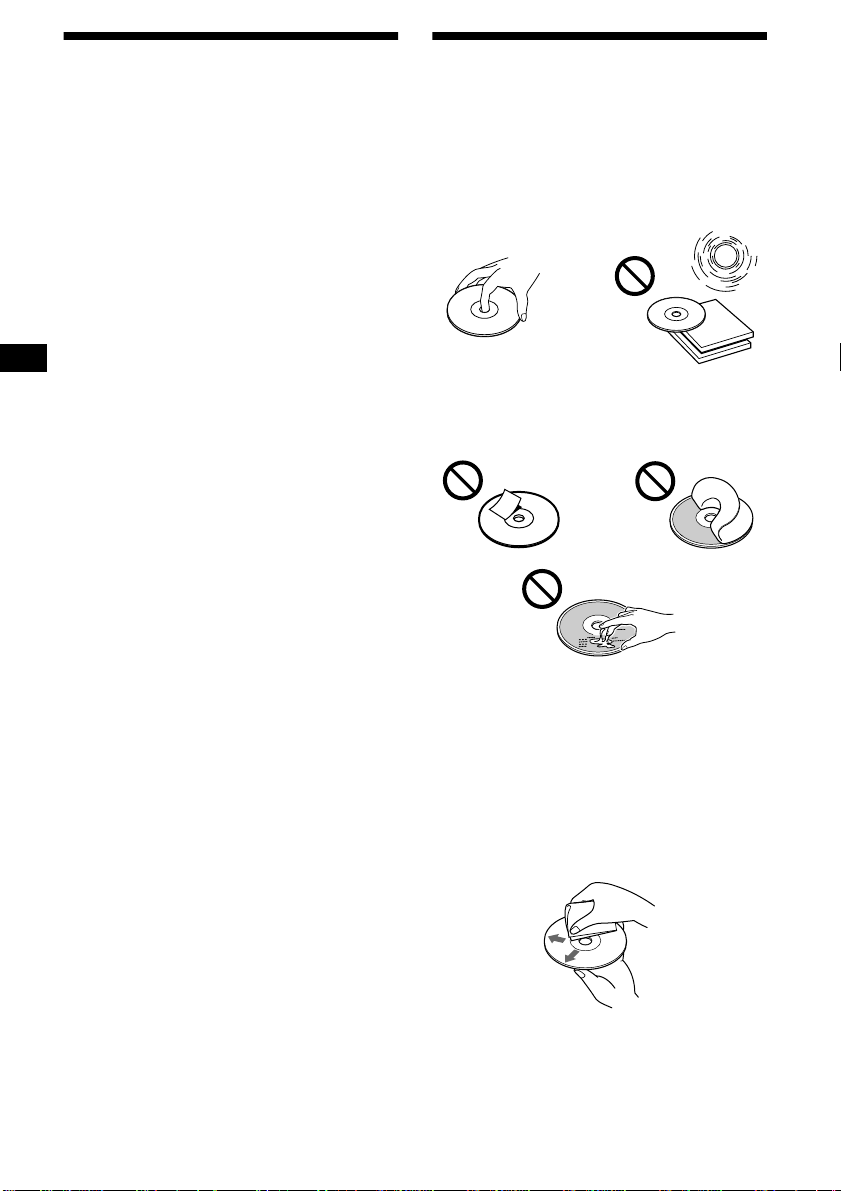
• To keep the disc clean, do not touch the surface.
Handle the disc by its ed ge.
• Keep your discs in th eir cases or disc
magazines when not in use.
Do not subject the discs to heat/hig h
temperature. Avoid leaving them in parked ca rs
or on dashboards/rear trays.
• Do not attach labels, or use discs with sticky
ink/residue. Such discs may stop sp inning
when used, caus in g a m alfunction, or may ruin
the disc.
• Discs with non-standard shapes (e.g., heart,
square, star) c annot be played on this u ni t .
Attempting to do so may damage the unit. Do
not use such discs.
• You cannot play 8cm CDs.
• Before playin g, cl ean the discs with a
commercially available cleaning cloth. Wipe
each disc from the centre out. Do not use
solvents such as benzi ne, thinner , commerc ially
available cleaners, or antistatic spray intended
for analog discs.
6
Page 7
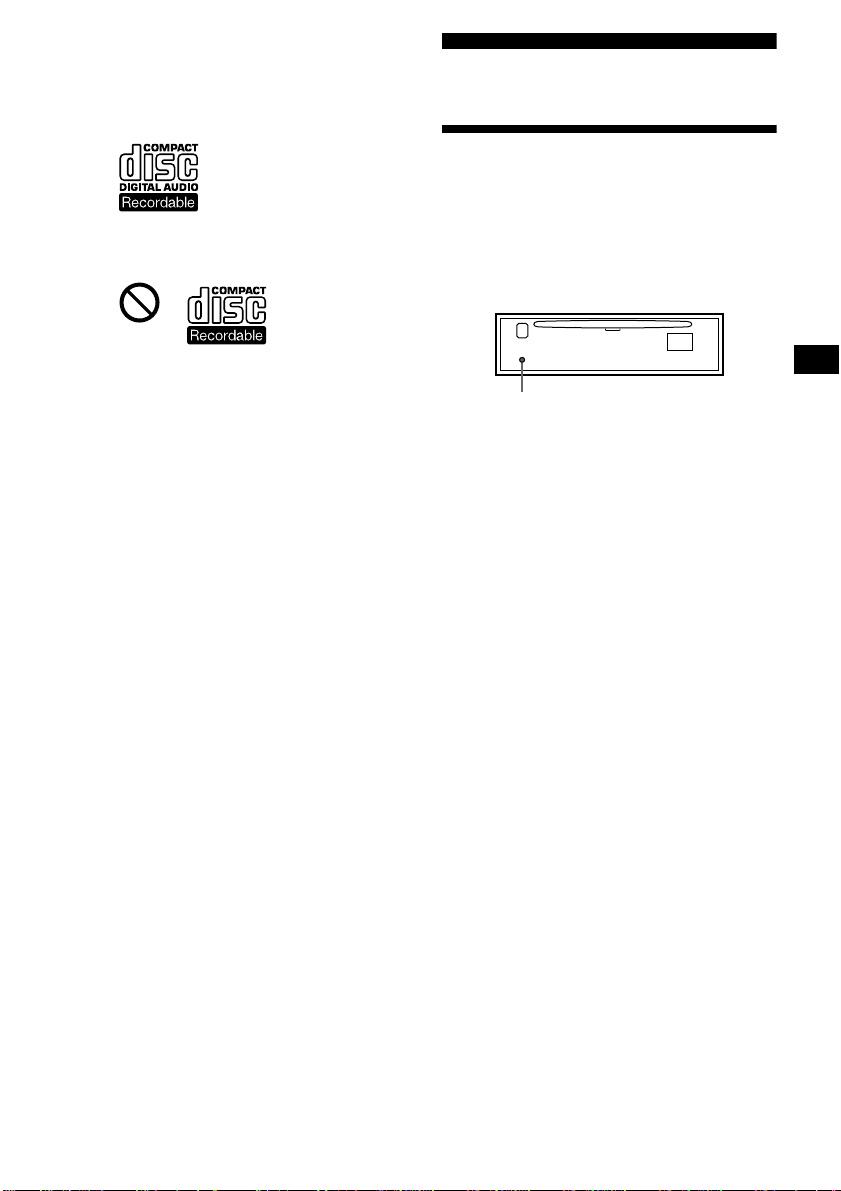
Notes on CD-R discs
• You can play CD-Rs (recordable CDs)
designed for audio use on this unit.
Look for this mark to distinguish CD-Rs for
audio use.
This mark denotes that a disc is not for
audio use.
• Some CD-Rs (depending on the equipment
used for its recording or the condition of the
disc) may not play on this unit.
• You cannot play a CD-R that is not
finalized*.
* A process necessary for a recorded CD-R disc to
be played on the audio CD player.
Getting Started
Resetting the unit
Before operating the unit for the first time or
after replacing the car battery, you must reset
the unit.
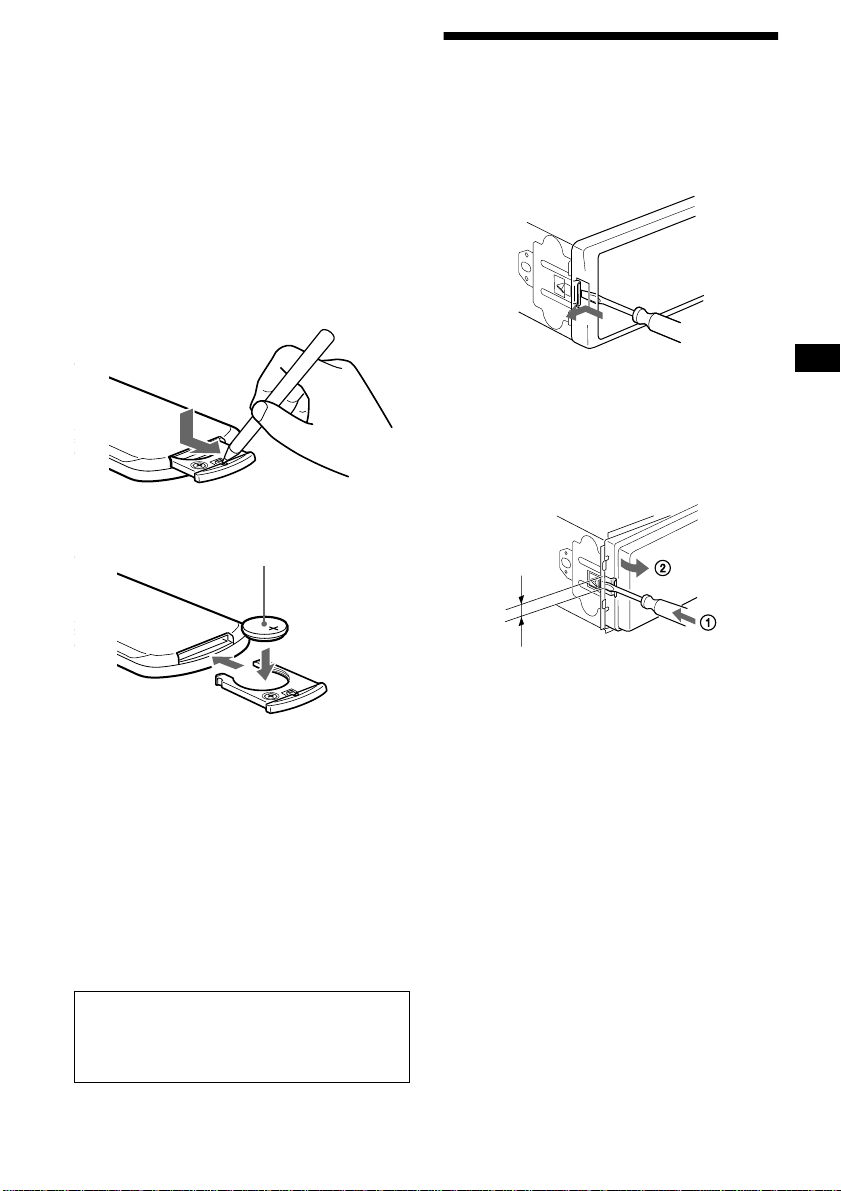
Remove the front panel and press the
RESET button with a pointed object, such as
a ballpoint pen.
RESET button
Note
Pressing the RESET button will erase the clock setting
and some stored contents.
7
Page 8
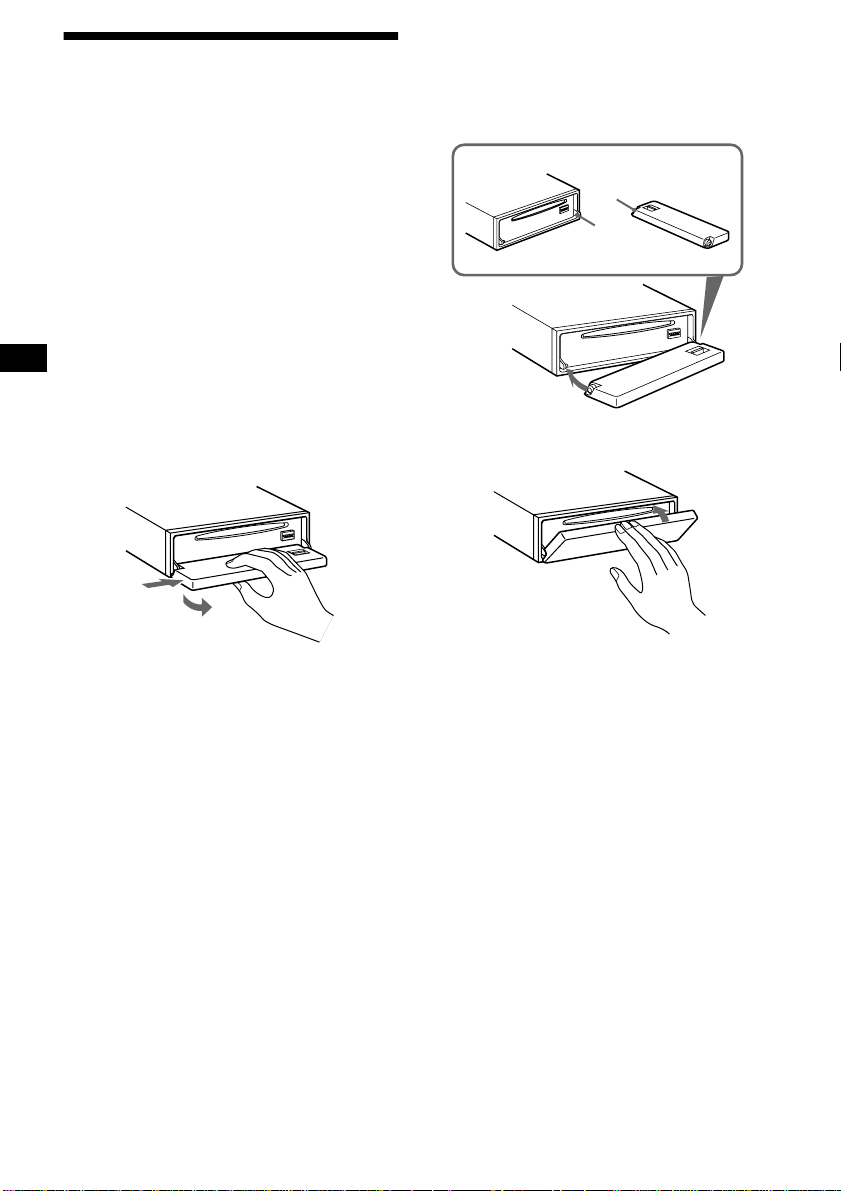
Detaching the front panel
You can detach the front panel of this unit to
protect the unit from being stolen.
Caution alarm
If you turn the ignition switch to the OFF
position without removing the front panel, the
caution alarm wi ll beep for a few seconds.
If you connect an optional amplifier and do not
use the built-in amplifier, the beep sound will be
deactivated.
1 Press (OFF)*.
CD/MD playback or radio reception stops
(the key illumination and display remain on).
* If your car has no ACC position on the ignition
switch, be sure to turn the unit off by pressing
(OFF) for 2 seconds to avoid car battery drain.
2 Press (OPEN), then slide the fro nt
panel to the right, and gently pull out
the left end of the front panel.
1
2
Notes
• If you detach the panel while the unit is still turned
on, the power will turn off automatically to prevent
the speakers from being damaged.
• Do not drop or put excessive pressure on the front
panel and its display window.
• Do not subject the front panel to heat/high
temperature or moisture. Avoid leaving it in parked
cars or on dashboards/rear trays.
Tip
When carrying the front panel with you, use the
supplied front panel case.
Attaching the front panel
Place hole A of the front panel onto the spindle
B on the unit, then lightly push the left side in.
Press (SOURCE) (or insert a CD) to operate the
unit.
A
B
x
Note
Do not put anything on the inner surface of the front
panel.
8
Page 9
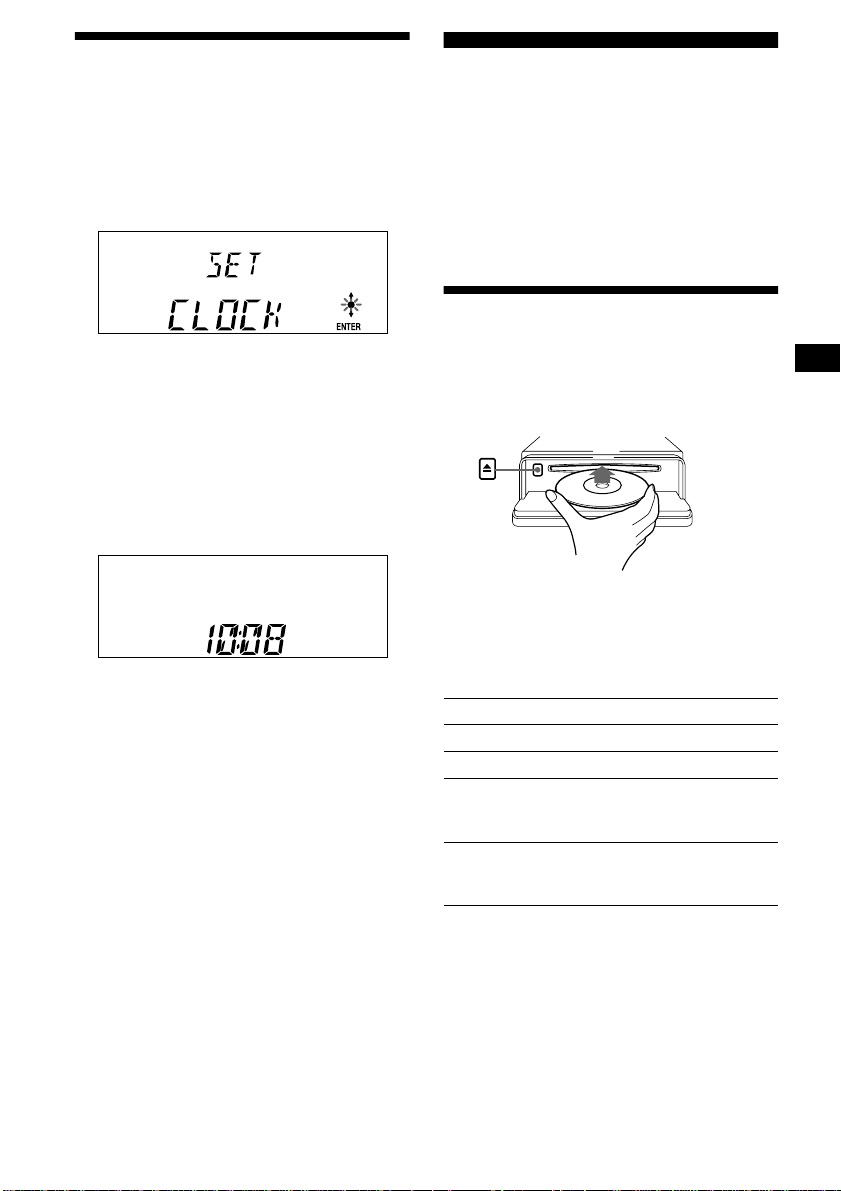
Setting the clock
The clock uses a 24-ho ur di gi t al indication.
Example: To set the clock to 10:08
1 Press (MENU), then press either side
of (DISC/PRESET) repeatedly until
“CLOCK” appears.
1 Press (ENTER).
The hour indication flashes.
2 Press either sid e of (DISC /PRESET)
to set the hour.
3 Press the (+) side of (SEEK).
The minute indication flashes.
4 Press either sid e of (DISC /PRESET)
to set the minute.
2 Press (ENTER).
CD Player CD/MD Unit (optional)
In addition to playing a CD with this unit, you
can also control external CD/MD un its.
Note
If you connect an optional CD unit with the CD TEXT
function, the CD TEXT information will appear in the
display when you play a CD TEXT disc.
Playing a disc
(With this unit)
1 Press (OPEN) and insert th e di sc
(labelled side up).
2 Close the front panel.
Playback starts automatically.
The clock starts. After the clock setting is
completed, the display return s to normal play
mode.
Tips
• You can se t the clock automatically with the RDS
feature (page 19).
• When D.INFO mode is set to ON, the time is always
displayed (page 22).
If a disc is already inserted, press (SOURCE)
repeatedly until “CD” appears to start playback .
To Press
Stop playback (OFF)
Eject the disc (OPEN) then Z
Skip tracks
–Automatic
Music Sensor
Fast-forward/
reverse
–Manual Search
Notes
• When the last track on the disc is over, playback
restarts from the first track of the disc.
• With optional unit connected, playback of the same
source will continue on to the optional CD/MD unit.
continue to next page t
(SEEK) (./>)
[once for each track]
(SEEK) (m/M)
[hold to desired point]
9
Page 10
(With optional unit)
1 Press (SOURCE) repeatedly to select
“CD” or “MD.”
2 Press (MODE) repeatedly until the
desired unit appears.
Playback starts.
To Press
Skip discs
–Disc selection
(DISC/PRESET) (+/–)
Display items
When the disc/tra ck changes, any prerecorded
1
title*
of the new disc/track is automatically
displayed (if the Auto Scroll function is set to
“ON,” names exceeding 8 characters will be
scrolled (page 22)).
Displayable ite m s
• Music source
• Clock
• Function
Displayable items
• Elapsed pl ayba ck t ime
• Disc name*
• Track title*
To Press
Switch display
item
Scroll display item (S) (SCROLL)
1
/artist name*
1
(DISPLAY/PTY)
2
10
*1 “NO NAME” indicates there is no Disc Memo
(page 11) or prerecorded name to display.
*2 Only for CD TEXT discs with the artist name.
Notes
• Some characters cannot be displayed.
• For some CD TEXT discs with very many
characters, information may not scroll.
• This unit cannot display the artist name for each
track of a CD TEXT disc.
Tip
When Auto scroll is set to OFF and the disc/track
name is changed, the disc/track name does not scroll.
Page 11
Playing tracks repeatedly
— Repeat Play
The disc in the main unit will repeat a track or
the entire d isc wh en it reac hes the end. For r epe at
play, you can select:
• REP-1 — to repeat a track.
• REP-2* — to repeat a disc.
* Available only when one or more optional CD/MD
units are connected.
During playback, press (3) (REP)
repeatedly until the desired setting
appears in the display.
Repeat Play starts .
To return to normal play mode, select “REPOFF.”
Playing tracks in random
order
— Shuffle Play
You can select:
• SHUF-1 — to play the tracks on the current
disc in random order.
• SHUF-2*
optional CD (MD) un i t in random order.
• SHUF-ALL*
connected CD (MD) units (including this unit)
in random order.
*1 Available only when one or more optional CD (MD)
*2 Available only when one or more optional CD units,
1
— to play the tracks in the current
2
— to play all the tracks in al l the
units are connected.
or two or more optional MD units are connect ed.
During playback, press (6) (SHUF)
repeatedly until the desired setting
appears in the display.
Shuffle Play starts.
Labelling a CD
— Disc Memo (For a CD unit with the
CUSTOM FILE function)
You can label each disc with a custom name
(Disc Memo). You can enter up to 8 characters
for a disc. If you label a CD, you can locate the
disc by name (page 12).
1 Start playing the disc you want to
label.
2 Press (MENU), then press either side
of (DISC/PRESET) repeatedly until
“NAMEEDIT” appears.
3 Press (ENTER).
The unit will repeat the disc during the
labellin g procedure.
4 Enter the characters.
1
1 Press the (+)*
(DISC/PRESET) repeatedly to select
the desired character.
A t B t C ... t 0 t 1 t 2 ... t +
t – t
*1 For reverse order, press the (–) side of
(DISC/PRESET).
*2 (blank space)
2 Press the (+) side of (SEEK) after
locating the desired character.
side of
... t _*2 t A
*
To return to normal play mode, select “SHUFOFF.”
Note
“SHUF-ALL” will not shuffle tracks between a CD
player and an MD player.
If you press the (–) side of (SEEK), you
can move back to the left.
3 Repeat steps 1 and 2 to enter the
entire name.
5 To return to normal CD play mode,
press (ENTER).
continue to next page t
11
Page 12
Tips
• Simply overwrite or enter “_” to correct or erase a
name.
• There is another way to start labelling a CD: Press
(LIST) for 2 seconds instead of performing steps 2
and 3. You can also complete the operation by
pressing (LIST) for 2 seconds instead of step 5.
• You can label CDs on a unit without the CUSTOM
FILE function if that unit is connected along with a
CD unit that has the function. The Disc Memo will be
stored in the memory of the CD unit with the
CUSTOM FILE function.
Note
REP-1/shuffle play is suspended until the Name Edit is
complete.
Viewing the Disc Memo
As a display item, the Disc Memo always takes
priority over any orig in al CD TEXT information.
To Press
View (DISPLAY/PTY) during CD/
CD TEXT disc playback
Tip
To find out about other items that can be displayed,
see page 10.
Erasing the Disc Memo
1 Press (SOURCE) repeatedly to select
“CD.”
2 Press (MODE) repeatedly to select the
CD unit storing the Disc Memo.
3 Press (MENU), then press either side
of (DISC/PRESET) repeatedly until
“NAME DEL” appears.
4 Press (ENTER).
The stored names w il l appear in order from
the earliest en tered.
5 Press either side of (DISC/PRESET)
repeatedly to select the disc name you
want to erase.
The stored names will appear from the
earliest ones entered.
6 Press (ENTER) for 2 seconds.
The name is erased.
Repeat steps 5 and 6 if you want to erase
other names.
7 Press (MENU) twice.
The unit returns to no rmal CD play mode.
Notes
• When the Disc Memo for a CD TEXT disc is eras ed,
the original CD TEXT information is displayed.
• If you cannot find the Disc Memo you want to erase,
try selecting a different CD unit in step 2.
Locating a disc by name
— List-up (For a CD unit with the CD TEXT/
CUSTOM FILE function, or an MD unit)
Y ou can use this function for discs that have been
assigned custom names*
2
discs*
.
*1 Locating a disc by its custom name: when you
assign a name for a CD (page 11) or an MD.
*2 Locating discs by the CD TEXT information: when
you play a CD TEXT disc on a CD unit with the CD
TEXT function.
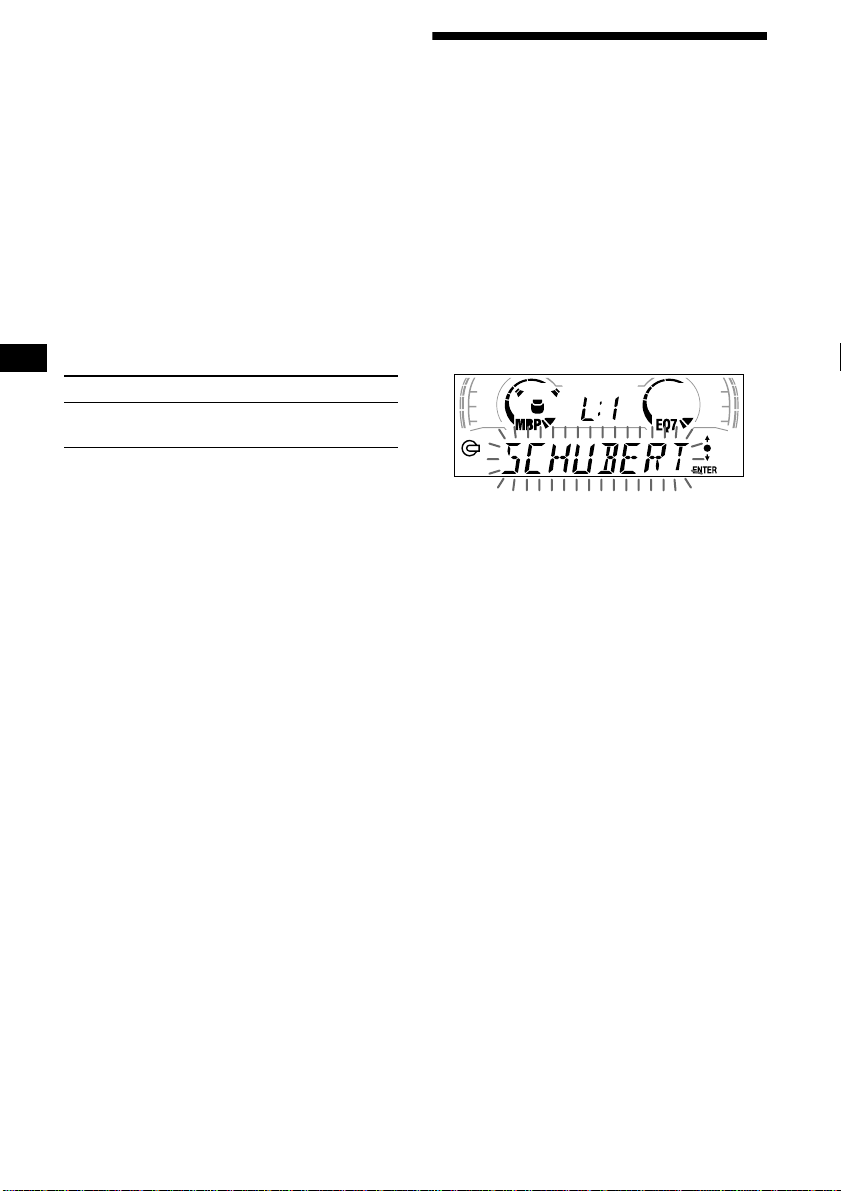
1 Press (LIST).
The name assigned to the current disc appears
in the display.
2 Press ei ther side of (DISC/PRESET)
repeatedly until you find the desired
disc.
3 Press (ENTER) to play the disc.
Note
Some letters cannot be displayed (exception: Disc
Memo).
1
or for CD TEXT
12
Page 13
Selecting specific tracks for
playback
— Bank (For a CD unit with the CUSTO M FILE
function)
If you label the disc, you can set the unit to skip
or play the tracks of your choice.
1 Start playing the disc you want to
label.
2 Press (MENU), then press either side
of (DISC/PRESET) repeatedly until
“BANK SEL” appears.
3 Press (ENTER).
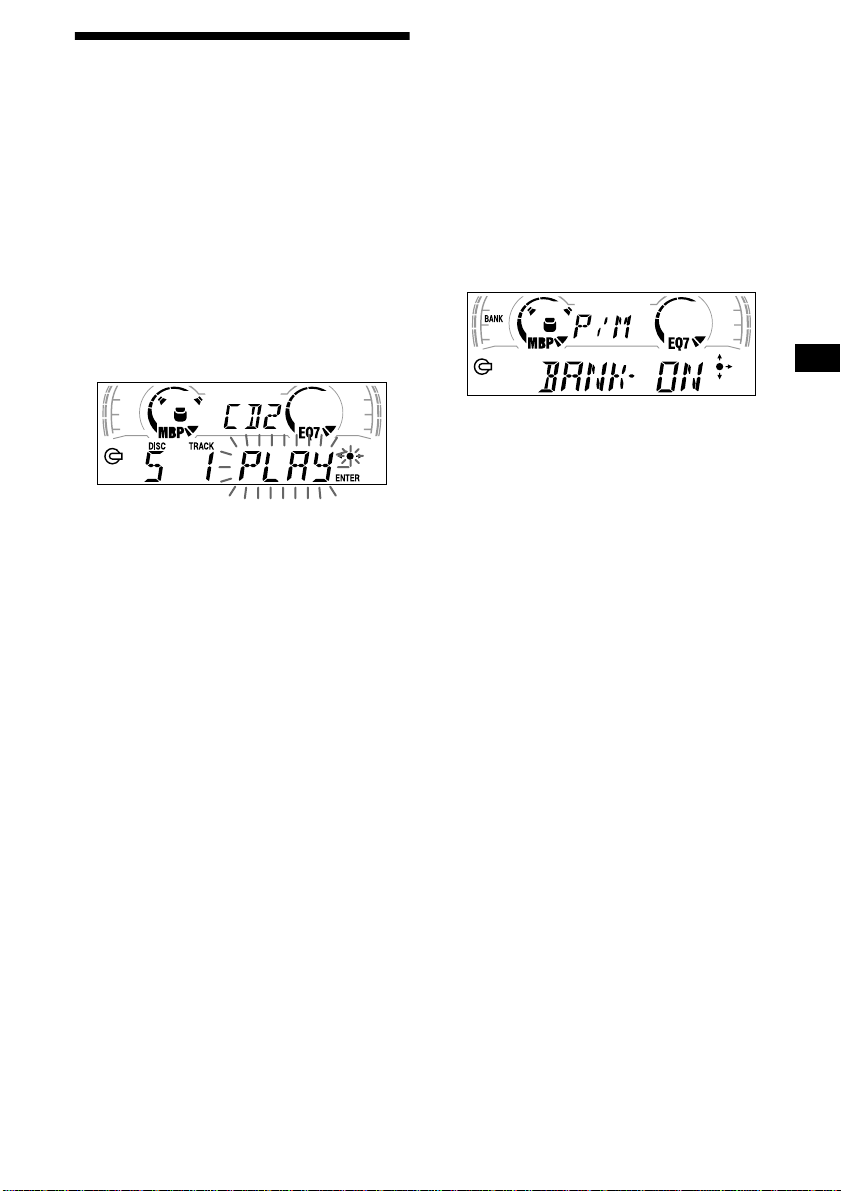
Playing specific tracks only
You can select:
•“BANK-ON” — to play the tracks with the
“PLAY” setting.
•“BANK-INV” (Inverse) — to play the tracks
with the “SKIP” setting.
1 During playback, press (MENU), then
press either side of (DISC/PRESET)
repeatedly until “BANK-ON,” “BANKINV,” or “BANK-OFF” appears.
2 Press the (+) side of (SEEK) repeatedly
until the desired setting appears.
3 Press (ENTER).
Playback starts from the track following the
current one.
4 Label the tracks.
1 Press either sid e of (SEEK)
repeatedly to select the track you
want to label.
2 Press (ENTER) repeated ly to sel ect
“PLAY” or “SKIP.”
5 Repeat step 4 to set “PLAY” or “SKIP”
for all the tracks.
6 Press (MENU) twice.
The unit returns to normal CD play mode.
Notes
• You can se t “PLAY” and “SKIP” for up to 24 tracks.
• You cannot set “SKIP” for all the tracks on a CD.
To return to normal play mode, select “BANKOFF” in step 2.
13
Page 14

Radio
The unit can stor e up to 6 stations pe r ba nd
(FM1, FM2, FM3, MW, and LW).
Caution
When tuning in stations while driving, use Best
Tuning Memory to prevent accidents.
Storing stations
automatically
— Best Tuning Memory (BTM)
The unit selects the stations with the strongest
signals within the selected band, and stores them
in the order of their frequency.
1 Press (SOURCE) repeatedly to select
the radio.
2 Press (MODE) repeatedly to select the
band.
3 Press (MENU), then press either side
of (DISC/PRESET) repeatedly until
“BTM” appears.
4 Press (ENTER).
A beep sounds when the setting is stored.
Notes
• If only a few stations can be received due to weak
signals, some number buttons will retain their former
settings.
• When a number is indicated in the displa y, the unit
starts storing stations from the one currently
displayed.
Receiving the stored stations
1 Press (SOURCE) repeatedly to select
the radio.
2 Press (MODE) repeatedly to select the
band.
3 Press the number button ((1) to (6))
on which the desired station is stored.
Tip
Press either side of (DISC/PRESET) to receive the
stations in the order they are stored in the memory
(Preset Search function).
If preset tuning does not work
Press either side of (SEEK) to search for
the station (automatic tuning).
Scanning stops when the unit receives a
station. Repeat until the desired station is
received.
Tips
• If automatic tuning stops too frequently, turn on the
Local Seek to limit seek to stations with stronger
signals (page 22).
• If you know the frequency of the station you want to
listen to, press and hold either side of (SEEK) to
locate the approximate frequency, then press
(SEEK) repeatedly to fine adjust to the desired
frequency (manual tuning).
If FM stereo reception is poor
Select monaural reception mode (page
22).
The sound improves, but become s monaura l
(“ST” disappears).
14
Page 15

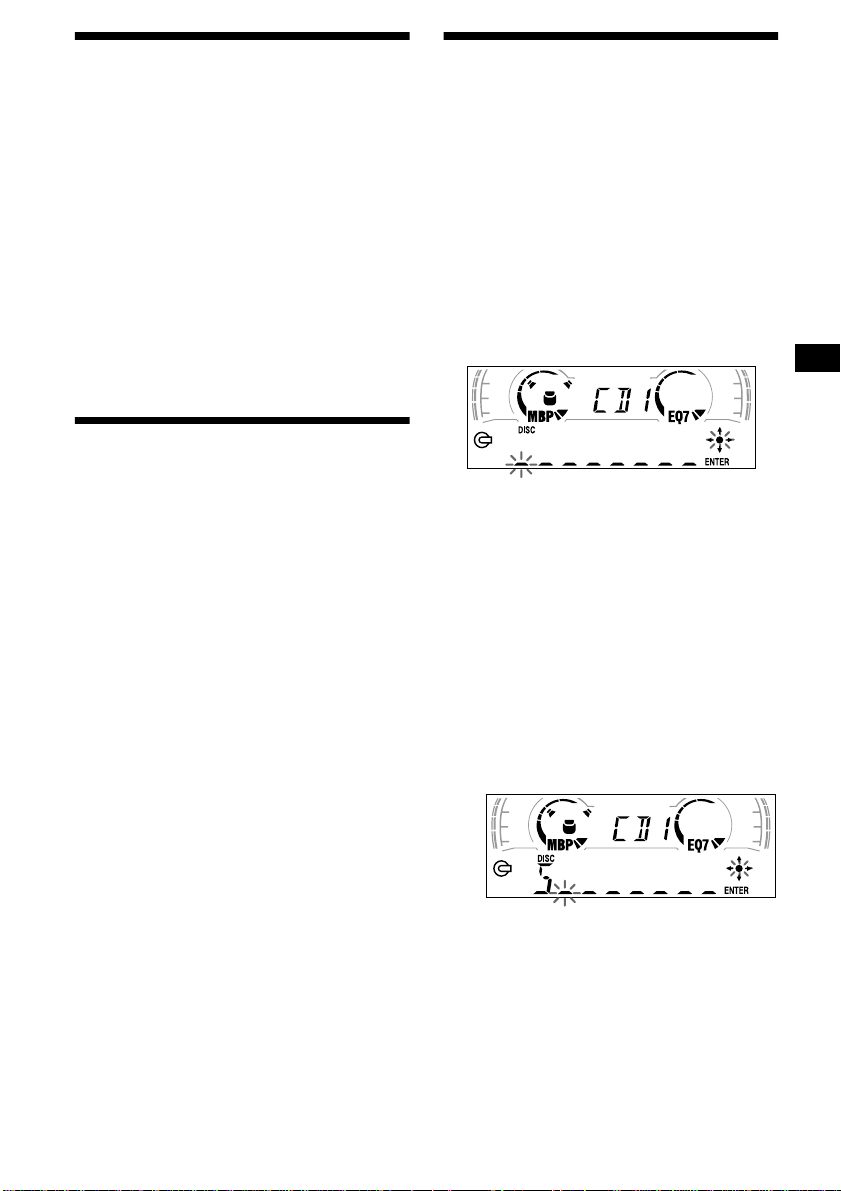
Storing only the desired stations
Yo u can manually preset the desired stations on
any chosen number button.
1 Press (SOURCE) repeatedly to select
the radio.
2 Press (MODE) repeatedly to select the
band.
3 Press either side of (SEEK) to tune in
the station that you want to store.
4 Press the desired numb er button ((1)
to (6)) for 2 seconds until “MEM”
appears.
The number button in di cation appears in the
display.
Note
If you try to store another station on the same number
button, the previously stored station will be erased.
Tuning in a station through a
list
— List-up
1 During radio reception, press (LIST)
momentarily.
The frequency or the nam e assigned to the
station currently tuned in flashes.
2 Press either side of (DISC/PRESET)
repeatedly until you find the desired
station.
If no name is assigned to the selected station,
the frequency appears in the display.
3 Press (ENTER) to tune in the desired
station.
15
Page 16
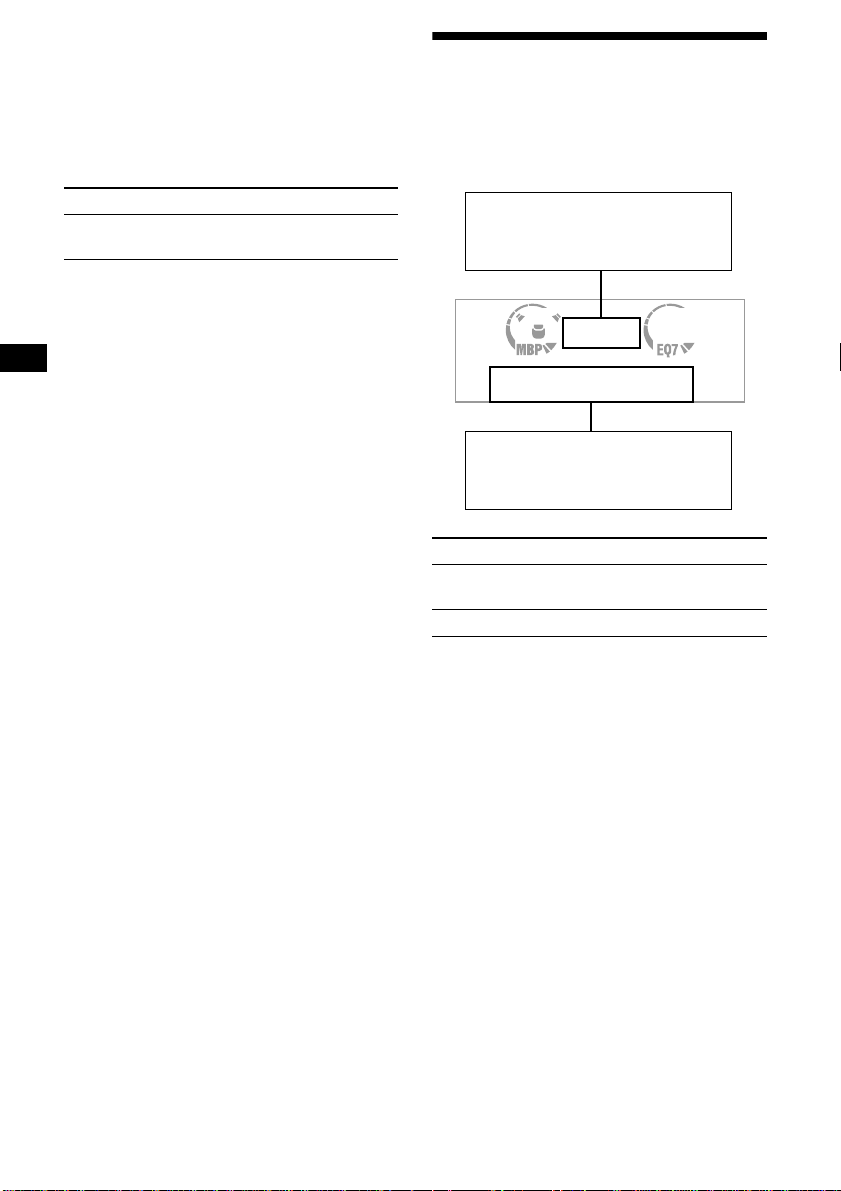
RDS
Overview of RDS
FM stations with Radio Data System (RDS)
service send in audible digital information along
with the regular radio programme signal. For
example, one of the fol lowing will be displayed
upon receiving a station with RDS capability.
Displayable ite m s
• Music source
• Clock
• Function
Displayable ite m s
•
Station name (frequency)
• Programme type
To Press
Switch display
item
(DISPLAY/PTY)
Automatic retuning for best
reception results
— AF function
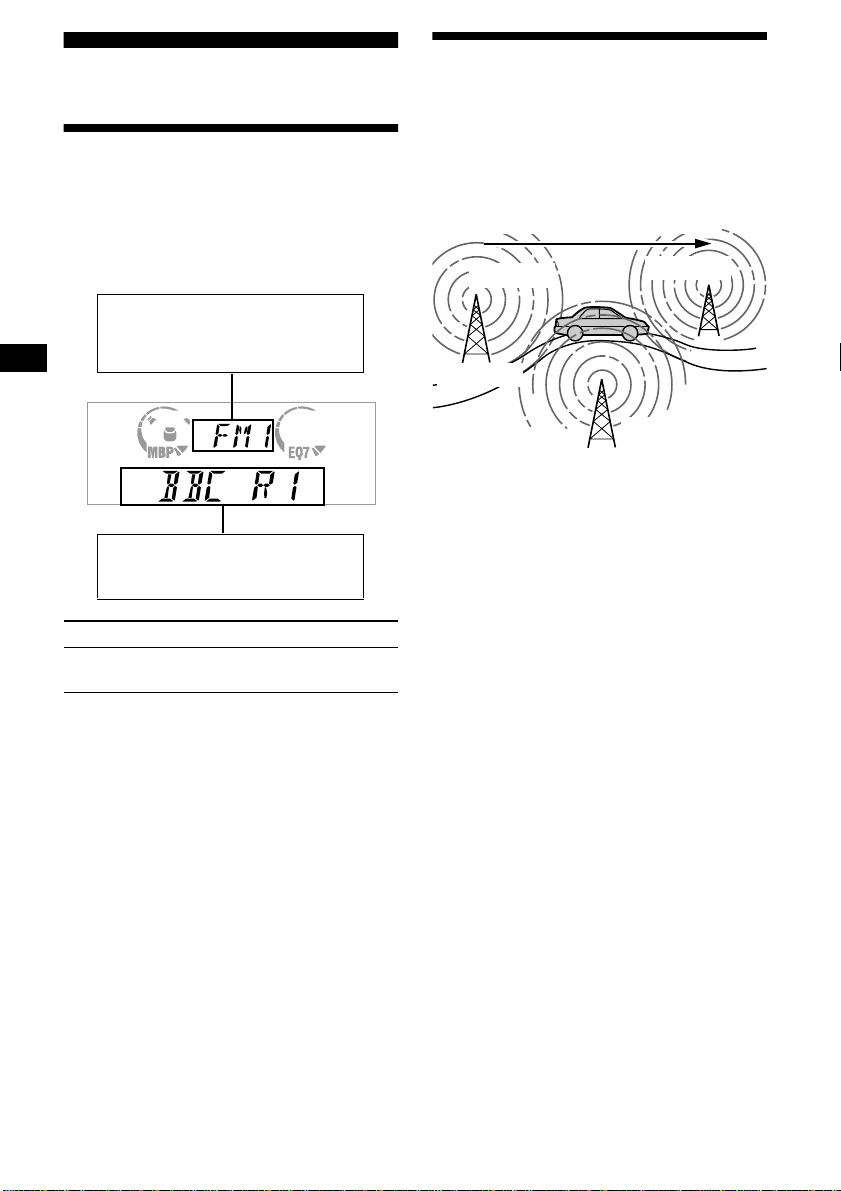
The alternative frequencies (AF) function allows
the radio to always tune into the area’s strongest
signal for the station you are listening to.
Frequencies change automatically.
98.5 MHz
Station
1 Select an FM station (page 14).
2 Press (AF) repeatedly until “AF-ON”
appears.
The unit starts searching for an alternative
frequency with a stronger signal in the same
network.
If “NO AF” flashes, th e currently tuned into
station does not have an alternative frequency.
Note
When there is no alternative frequency in the area or
when you do not need to search for one, turn the AF
function off by selecting “AF-OFF.”
96.0 MHz
102.5 MHz
RDS services
RDS data offers you other conveniences, such as:
• Automatic retuni ng of a programme, h elpful
during long-distance drives. — AF t page 16
• Receiving traffic announcements, even
when enjoying an ot her programme/s ource. —
TA t page 17
• Selecting stations by the typ e of pr ogramme
it broadcasts. — PTY t page 18
• Automatic clock time setting. — CT t page
19
Notes
• Depending on the country or region, not all of the
RDS functions are available.
• RDS may not work properly if the signal strength is
weak or if the station you are tuned to is not
transmitting RDS data.
16
For stations without alternative
frequencies
Press either side of (SEEK) while the
station name is flashing (within 8
seconds).
The unit starts searching for another
frequency with the same PI (Programme
Identification) data (“PI SEEK” appears).
If the unit cannot find the same PI, the unit
returns to the previously selected frequency.
Staying with one regional programme
When AF function is on: this unit’s factory-set
setting restr ic ts reception to a specific regi on, so
you won’t be switched to an othe r re gion al st ati on
with a stronger fr equency.
If you leave this regional programm e’s reception
area or would like to take advantage of the whole
AF function, select “REG-OFF” from the MENU
(page 22).
Page 17

Note
This function does not work in the United Kingdom
and in some other areas.
Local Link function
(United Kingdom only)
This function enables you to select other local
stations in the area, even if they are not stored on
your number buttons.
1 Press a number button ((1) to (6))
that has a local station stored on it.
2 Within 5 seconds, press the number
button of t he local station again.
3 Repeat this procedure until the
desired local station is received.
Receiving traffic
announcements
— TA/TP
By activating the Traffic Announcement (TA)
and Traffic Programme (TP), you can
automatically tune in an FM statio n broadca sting
traffic announcements. Th ese settings function
regardless of the cu rrent FM programm e/source,
CD/MD; the unit switches back to the original
source when the bulletin is over.
Press (TA) repeatedl y until “TA-ON”
appears.
The unit starts sear ching for traffic
information stations.
“TP” indicates reception of such stations, and
“TA” flashes during an ac tual traffic
announcement. The unit will continue
searching for stations available with TP if
“NO TP” is indicated.
To cancel all traffic announcements, select “TAOFF.”
To Press
Cancel current
announcement
(TA)
Tip
You can also cancel the current announcement by
pressing (SOURCE) or (MODE).
Presetting the volume of traffic
announcements
You can preset the volume lev e l of the traffic
announcements so you won’t miss hearing them.
1 Turn the volume control dial to adjust
the desired volume level.
2 Press (TA) for 2 seconds.
“TA” appears and the setting is stored .
Receiving emergency announcements
If either AF or TA is on, the unit will switch to
emergency announcements, if one com es in
while listening to an FM station or CD/MD.
17
Page 18

Presetting RDS stations with AF and TA setting
When you preset RDS stations, the unit st or es
each station’s AF/TA setting (on/off) as well as
its frequency. You can select a different setting
(for AF, TA, or bo th ) for individual preset
stations, or the same setting for all preset
stations. If you preset stations with “AF-ON” the
unit automatically stores stations with the
strongest radio signal.
Presetting the same setting for all preset
stations
1 Select an FM band (page 14).
2 Press (AF) and/or (TA) to select “AF-
ON” and/or “TA-ON.”
Note that selecting “AF-OFF” or “TA-OFF”
stores not only RDS statio ns, but also nonRDS stations.
3 Press (MENU), then press either side
of (DISC/PRESET) repeatedly until
“BTM” appears.
4 Press (ENTER) until “BTM” flashes.
Presetting different settings f or eac h
preset station
1 Select an FM band, and tune in the
desired station (page 1 5).
2 Press (AF) and/or (TA) to select “AF-
ON” and/or “TA-ON.”
3 Press the desired number button ((1)
to (6)) until “MEM” appears.
Repeat from ste p 1 to preset other st at ions.
Tuning in stations by
programme type
— PTY
You can tune in a station by selecting the type of
programme you w ould like to li sten to.
Programme types Display
News NEWS
Current Affairs AFFAIRS
Information INFO
Sports SPORT
Education EDUCATE
Drama DRAMA
Culture CULTURE
Science SCIENCE
Varie d VAR IED
Popular Musi c POP M
Rock Music ROCK M
Easy Listening EASY M
Light Classical LIGHT M
Classical CLASSICS
Other Music Type OTHER M
Weather WEATHER
Finance FINANCE
Children’s Programmes CHILDREN
Social Affairs SOCIAL A
Religion RELIGION
Phone In PHONE IN
Travel TRAVEL
Leisure LEISURE
Jazz Music JAZZ
Country Music COUNTRY
National Music NATION M
Oldies Music OLDIES
Folk Music FOLK M
Documentary DOCUMEN T
18
Note
You cannot use this function in some countries where
no PTY (Programme Type selection) data is available.
Page 19
1
Press (DISPLAY/PTY) during FM
reception until “PTY” appears.
The current programme type name appears if
the station is transmitting the PTY data.
“--------” appears if the received station is not
an RDS station, or if the RDS data is not
received.
2 Press (DISC/PRESET) repeatedly until
the desired programme type appears.
The programme types appear in the order
shown in the table.
“--------” appears if the programme type is not
specified in the RDS data.
3 Press (ENTER).
The unit starts searching for a station
broadcasting the selected programme type.
Setting the clock
automatically
— CT
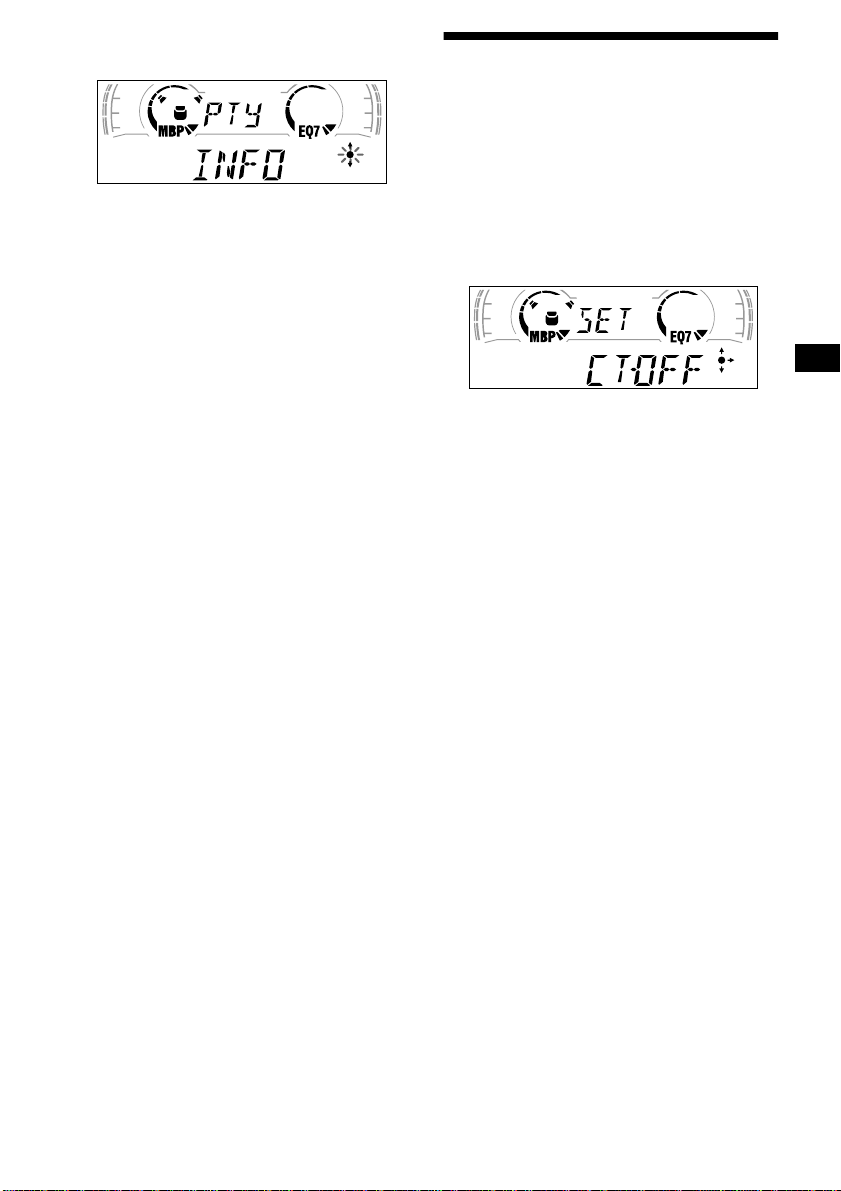
The CT (Clock Time) data from the RDS
transmission sets the clock automatically.
1 During radio reception, press (MENU),
then press either side of
(DISC/PRESET) repeatedly until “CTOFF” appears.
2 Press the (+) side of (SEEK) repeatedly
until “CT-ON” appears.
The clock is set.
3 Press (ENTER) to return to the normal
display.
To cancel the CT function, select “CT-OFF” in
step 2.
Notes
• The CT function may not work even though an RDS
station is being received.
• There might be a difference between the time set by
the CT function and the actual time.
19
Page 20
Other Functions
You can also control the unit (and optional CD/
MD units) with a rotary commander (optional).
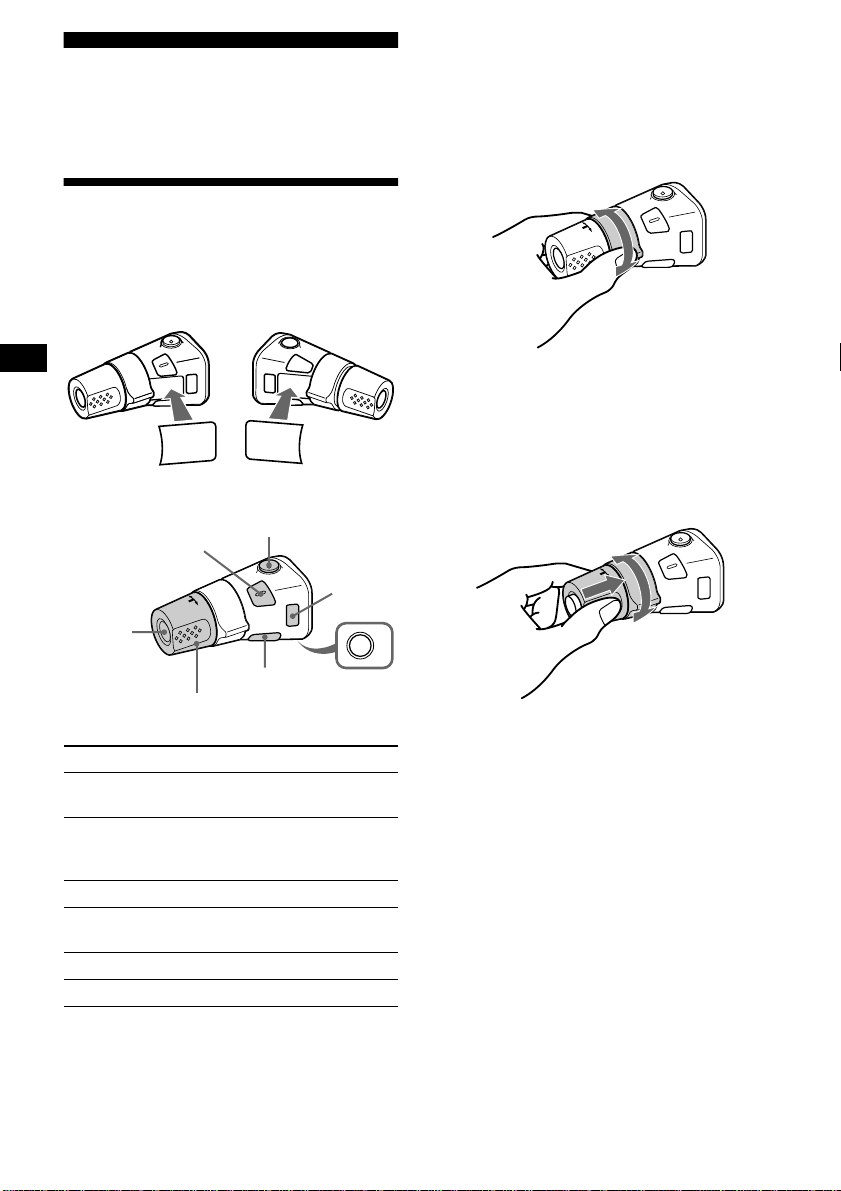
Using the rotary commander
First, attach the appropriate label depending on
how you want to mount the rotary commander.
The rotary commander works by pressing
buttons and/or rotatin g con tro ls.
SOUND
MODE
DSPL
MODE
SOUND
DSPL
*1 Only if the corresponding optional equipment is
connected.
*2 If your car has no ACC (accessory) position on the
ignition key switch, be sure to press (OFF) for 2
seconds to turn off the clock indication after turning
off the ignition.
By rotating the control
SEEK/AMS
control
Rotate and release to:
– Skip tracks.
– Tune in stations automatically.
Rotate , h old, and release to:
– Fast-forward /reverse a track.
– find a station manually.
By pressing buttons
(SOUND)
(SOURCE)
Rotate the VOL control
to adjust the volume.
Press To
(SOURCE)
(ATT)
(DSPL)
Change source
(radio/CD/MD*
(MODE)
1
)
Change operation
(MODE)
(radio band/CD unit/ MD*
unit)
(ATT) Attenuate sound
(OFF)*
2
Stop playback or radio
reception
(SOUND) Adjust the sound menu
(DSPL) Change the display item
(OFF)
By pushing in and rotating the control
OFF
PRESET/
DISC control
Push in and rotate the control to:
– Receive preset stations.
– Change the disc*.
* When an optional CD/MD unit is connected.
1
20
Page 21
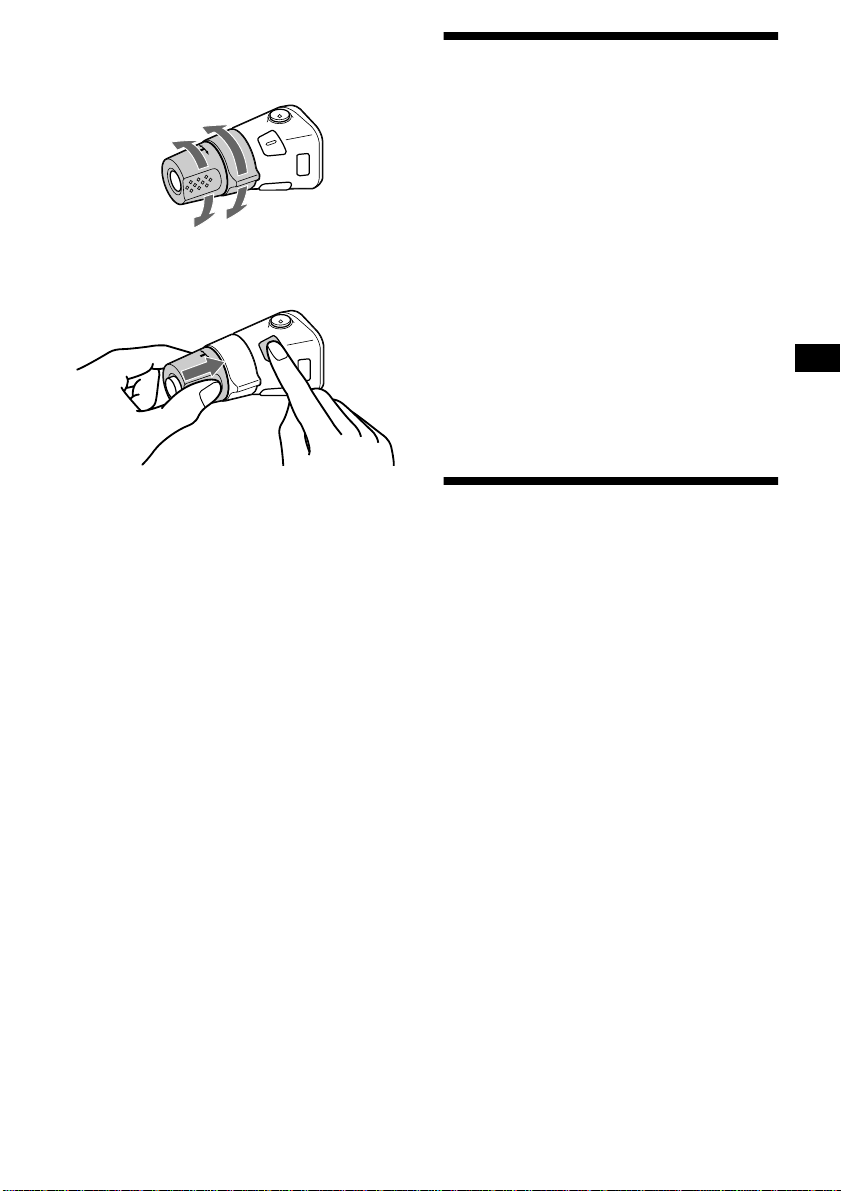
Changing the operative direction
The operative direction of controls is factory-set
as shown below.
To increase
Adjusting the sound characteristics
You can adjust the bass, treble, balance, an d
fader.
The bass and treble levels can be stored
independently for each source.
To decrease
If you need to mount the rotary commander on
the right hand side of the steering column, you
can rev erse the operative direction.
Press (SOUND) for 2 seconds while
pushing the VOL control.
Tip
You can also change the operative direction of these
controls with the unit (page 22).
1 Select the item you want to adjust by
pressing (SOUND) repeatedly.
Each time you press (SOUND), the item
changes as follows:
BAS (bass) t TRE (treble) t BAL (leftright)
t FAD (front-rear)
2 Adjust the selected item by pressing
either side of (SEEK).
When adjusting with the rotary commander,
press (SOUND) and rotate the VOL control.
Note
Adjust within 3 seconds after selecting the item.
Quickly attenuating the sound
(With the rota ry commander or the card
remote commander)
Press (ATT) on the rotary commander
or card remote commande r.
After “ATT-ON ” momentarily appears, the
“ATT” app ears in the display.
To restore the previous volume level, press
(ATT) again.
Tip
When the interface cable of a car telephone is
connected to the ATT lead, the unit decreases the
volume automatically when a telephone call comes in
(Telephone ATT function).
21
Page 22

Changing the sound and
display settings
— Menu
The following items can be set:
SET (Set Up)
• CLOCK (page 9)
• CT (Clock Time) (pag e 19)
• BEEP — to turn the beeps on or off.
• RM (Rotary Comm ander) — to change the
operative direction of th e controls of the rota ry
commander.
– Select “NORM” to use the rotary commander
as the factory-se t position.
– Select “REV” when you mo unt the rotary
commander on the right side of the steering
column.
DSPL (Display)
• D.INFO (Dual Informa ti on) — to display the
clock and the play mode at the same time (on).
• AMBER/GREEN — to chang e t h e
illumination co lo ur to amber or green (CDXCA650 only).
• DIM (Dimmer) — to change the brightness of
the display (CDX-CA650V only).
– Select “ON” to dim the display.
– Select “OFF” to deactivate the Dimmer.
• M.DSPL (Motion Display) — to select the
Motion Display mo de fro m “1,” “2,” and
“OFF.”
– Select “1” to show decoration lines in the
display and ac t ivate Demo display.
– Select “2” to show decoration lines in the
display and de activate Demo displ ay.
– Select “OFF” to deactivate the Motion
Display.
• A.SCRL (Auto Scroll)
– Select “ON” to scroll all automatically
displayed names exceeding 8 charac ters.
– When Auto scroll is set to off and the disc/
track name is changed, the disc/track name
does not scrol l.
P/M (Play Mode)
• LOCAL-ON/OFF (Local seek mode) (page 14)
– Select “ON” to only tune into stations with
stronger signals.
• MONO-ON/OFF (Monaural mode) (page 14)
– Select “ON” to hear FM stereo broadcast in
monaural. Select “OFF” to return to normal
mode.
• REG-ON/OFF (Regional) (page 16)
1 Press (MENU).
To set A.SCRL, press (MENU) during CD/
MD Playback.
2 Press ei ther side of (DISC/PRESET)
repeatedly until the desired item
appears.
3 Press the (+) side of (SEEK) to select
the desired setting (Example: ON or
OFF).
4 Press (ENTER).
After the mode setting is completed, the
display returns to n ormal play mode.
Note
The displayed item will differ depending on the source.
Tip
You can easily switch among categories (“SET,”
“DSPL,” “SND,” “P/M,” and “EDIT”) by pressing either
side of (DISC/PRESET) for 2 seconds.
SND (Sound)
• LOUD (Loudness) — to enjoy bass and treble
even at low v olumes . The bass and treble will
be reinforced.
22
Page 23
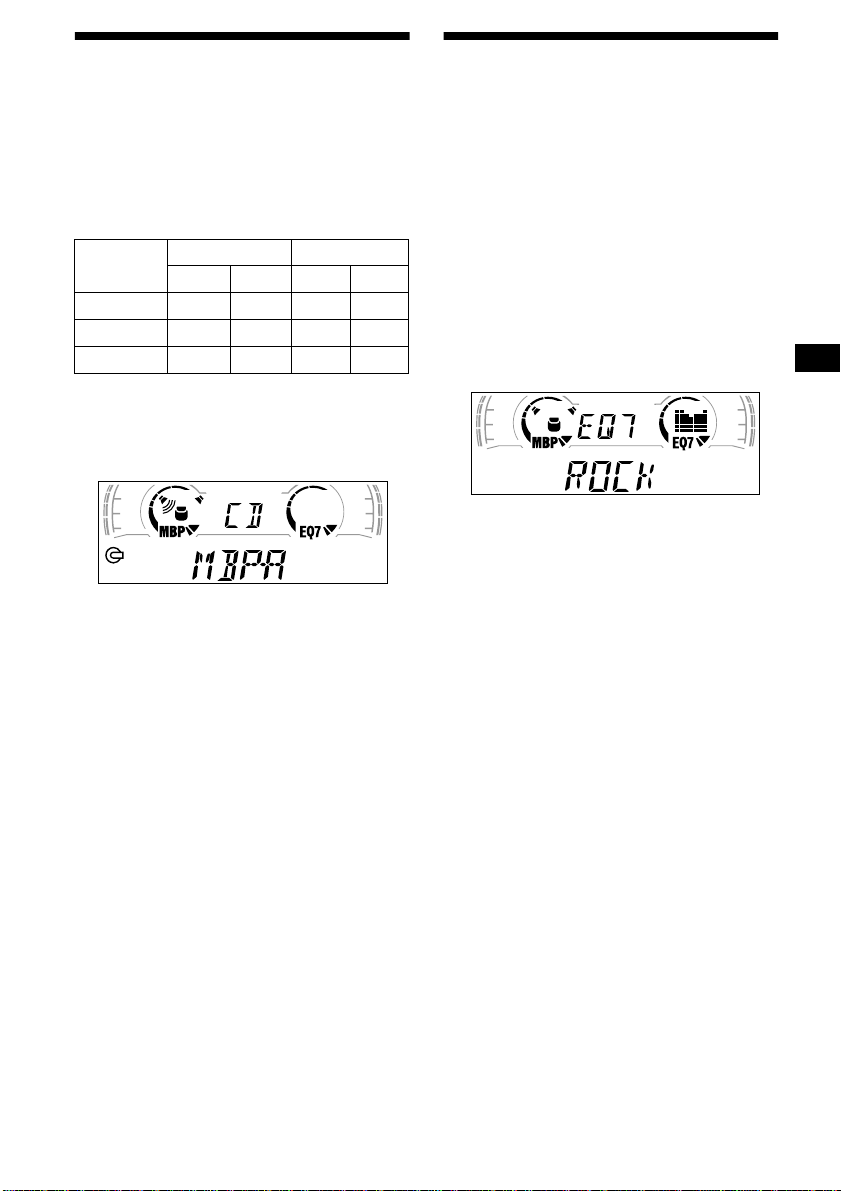
Selecting the sound position
— My Best sound Position (MBP)
When you drive without passe ngers, you can
enjoy the most comf or table sound environment
with “My Best sound Position.”
“My Best sound Pos ition ” has two presets, which
adjust the sound l evel of balance and fader. You
can select one very easily with the MBP button.
Setting the equalizer
You can select an equalizer curve for seve n
music types (VOCAL, CLUB, JAZZ, NEW
AGE, ROCK, CUSTOM, and XPLOD).
You can store and adju st the equalizer settin gs
for frequency an d level.
Selecting the equalizer curve
Display
window
MBP-A – 4dB 0 0 – 4dB
MBP-B
MBP-OFF 0000
Press (MBP) repeatedly for the desired
listening position.
The mode of “My Best sound Position” is
shown in the display in order of t he table.
After one second, the display goes back to the
normal playba ck m ode.
If you want to adjust th e sound level of
balance and fader more precisely, you can do
it using the (SOUND) button (page 21).
Notes
• Wh en t he B AL (ba lanc e) o r FAD (fader) i n “Adjusting
the sound characteristics” (page 21) is adjusted, the
MBP setting returns OFF.
• When MBP is set to OFF, the BAL and FAD setting is
activated.
Balance Level Fader Level
Right Left Front Rear
0 – 4dB 0 – 4dB
1 Press (SOURCE) to select a source
(radio, C D/MD).
2 Press (EQ7) repeatedly until the
desired equalizer curve.
Each time you press (EQ7), the item
changes.
.
T o cancel the equalizing effect, select “OFF.”
After three seconds, the d is pla y returns to the
normal playback mode.
Adjusting the equalizer curve
1 Press (MENU).
2 Press either side of (DISC/PRESET)
repeatedly until “EQ7 TUNE” appears,
then press (ENTER).
3 Press either side of (SEEK) to select
the desired equalizer curve, then
press (ENTER).
Each time you press (SEEK), the item
changes.
4 Select the desired frequency and level.
1 Press either side of (SEEK) to select
the desired frequency.
Each time you press (SEEK), the
frequency changes.
62 (Hz) y 157 (Hz) y 396 (Hz) y
1k (Hz) y 2.5k (Hz) y 6.3k (Hz) y
16k (Hz)
continue to next page t
23
Page 24
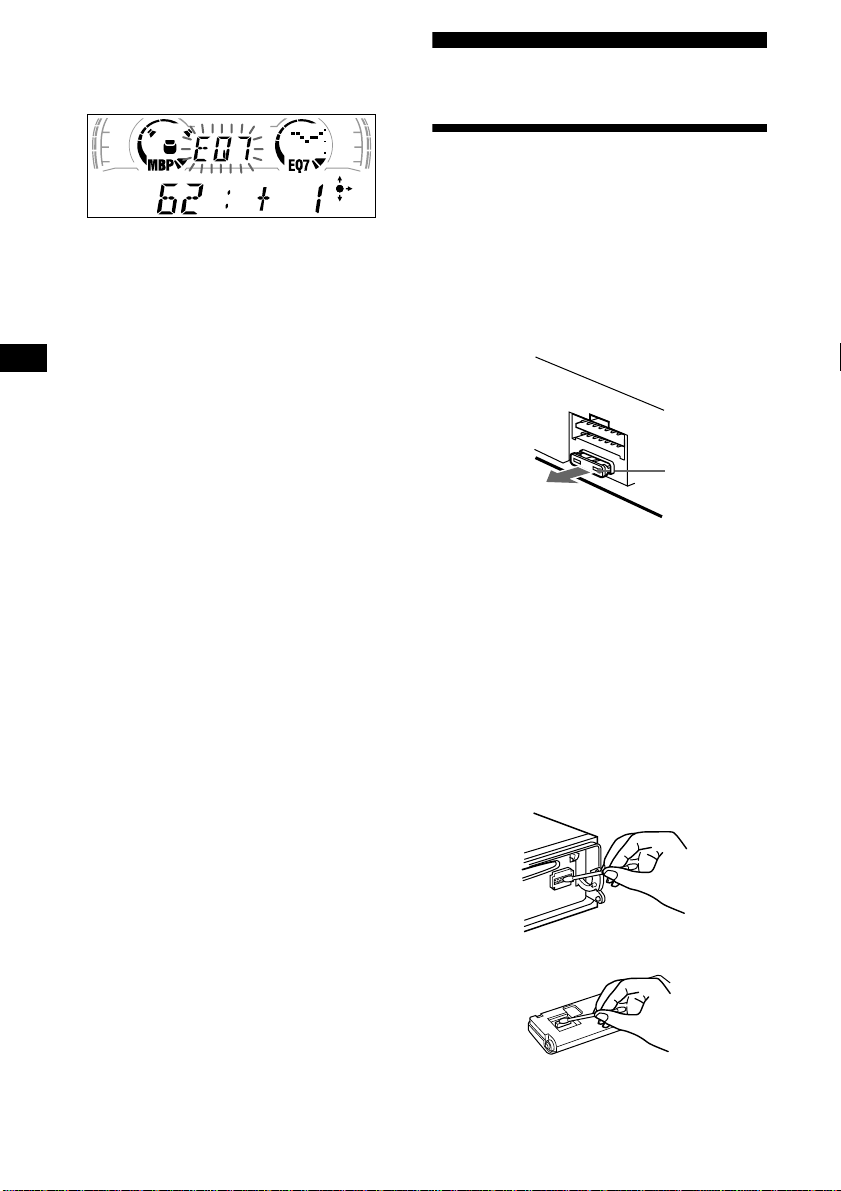
2Press either side of (DISC/PRESET)
to adjust the desired volume level.
The volume level is adjustable by 1 dB
steps from –10 dB t o + 10 dB.
To restore the factory-set equalizer curve,
press (ENTER) for 2 seconds.
5 Press (MENU) twice.
When the effect setting is complete, the
normal playback mode appears.
Additional Information
Maintenance
Fuse replacement
When replacing the fuse, be sure to use one
matching the amperage rating stat ed on the
original fuse. If the fuse blows, check the power
connection and replace the fuse. If the fuse blows
again after replacement, there may be an internal
malfunction. In su ch a case, consult your neares t
Sony dealer.
Fuse (10 A)
Warning
Never use a fuse with an am perage rating
exceeding the one supplied with the unit as th is
could damage the uni t.
24
Cleaning the connectors
The unit may not function properly if the
connectors betw een the unit and the front panel
are not clean. In order to prevent this, detach the
front panel (page 8) and clean the connectors
with a cotton swab dipped in alcohol. Do no t
apply too much force. Otherwise, the connectors
may be damaged.
Main unit
Back of the front panel
Page 25
Notes
• For safety, turn off the ignition before cleaning the
connectors, and remove the key from the ignition
switch.
• Ne ver touch the connectors directly with your fingers
or with any metal device.
Replacing the lithium battery
Under normal conditions, batteries will last
approximately 1 year. (The service life may be
shorter, depending on the co ndi tions of use.)
When the batt ery bec omes wea k, th e rang e of the
card remote commander becomes shorter.
Replace the battery with a new CR2025 lithium
battery.
Removing the unit
1 Remove the front cover
1 Detach the front panel (page 8).
2 Press the clip inside the front cover
with a thin screwdriver.
x
+ side up
Notes on lithium battery
• Keep the lithium battery out of the reach of
children. Should the battery be swallowed,
immediately consult a doctor .
• Wipe the battery with a dr y cl oth to assure a
good contact .
• Be sure to observe the correct polarity when
installing the battery.
• Do not hold the battery with metallic tweezers,
otherwise a short-circuit may occur.
3 Repeat step 2
for the other side.
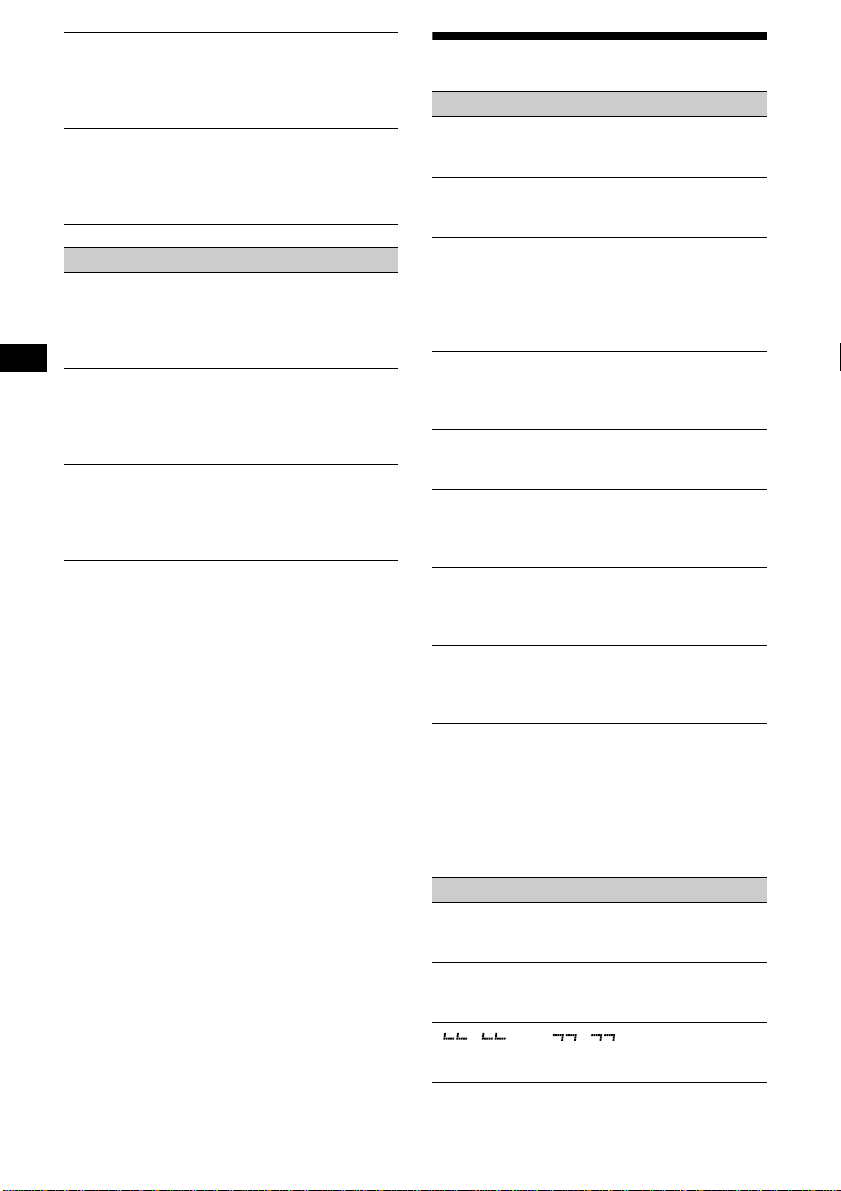
2 Remove the unit
1 Use a thin screwdriver to push in
the clip on the left side of the unit,
then pull out the left side of the unit
until the catch clears the mounting.
4mm
2 Repeat step 1 for the right side.
3 Slide the unit out of its mounting.
WARNING
Battery may explode if m ist reated.
Do not recharge, disassemble, or dispose of
in fire.
25
Page 26

Specifications
CD Player section
Signal-to-noise ratio 90 dB
Frequency response 10 – 20,000 Hz
Wow and flutter Below measurable limit
Tuner section
FM
Tuning range 87.5 – 108.0 MHz
Aerial terminal External aerial connector
Intermediate frequency 10.7 MHz/450 kHz
Usable sensitivity 8 dBf
Selectivity 75 dB at 400 kHz
Signal-to-noise ratio 66 dB (stereo),
Harmonic distortion at 1 kHz
Separation 35 dB at 1 kHz
Frequency response 30 – 15,000 Hz
72 dB (mono)
0.6 % (stereo),
0.3 % (mono)
MW/LW
Tuning range MW: 531 – 1,602 kHz
Aerial terminal External aerial connector
Intermediate frequency 10.7 MHz/450 kHz
Sensitivity MW: 30 µV
LW: 153 – 279 kHz
LW: 40 µV
Power amplifier section
Outputs Speaker outputs
Speaker impedance 4 – 8 ohms
Maximum power output 50 W × 4 (at 4 ohms)
(sure seal connectors)
General
Outputs Audio outputs
Inputs Telephone ATT control lead
Tone controls Bass ±8 dB at 100 Hz
Power requirements 12 V DC car battery
Dimensions Approx. 178 × 50 × 177 mm
Mounting dimensions Approx. 182 × 53 × 161 mm
Mass Approx. 1.2 kg
Supplied accessories Parts for installation and
Optional accessories Rotary commander
Optional equipment CD changer (10 discs)
Power aerial relay control
lead
Power amplifier co ntro l lead
Remote controller imput
connector
Aerial input connector
Treble ±8 dB at 10 kHz
(negativ e eart h )
(w/h/d)
(w/h/d)
connections (1 set)
Front panel case (1)
RM-X4S
Card remote commander
RM-X114
BUS cable (supplied with
an RCA pin cord)
RC-61 (1 m), RC-62 (2 m)
CDX-848X, CDX-646
CD changer (6 discs)
CDX-T68X, CDX-T67
MD changer (6 discs)
MDX-65
Source selector
XA-C30
26
Note
This unit cannot be connected to a digital preamplifier
or an equalizer.
Design and specifications are subject to chan ge
without notice.
Page 27

Troubleshooting
The following checklist will help you remedy
problems you may encounter with your unit.
Before going t hrough the checkl ist below, check
the connection and operating procedur es .
General
No sound.
• Rotate the volume control dial clockwise to
adjust the volume.
• Cancel the ATT function.
• Set the fader control to the cen tre position f or
a 2-speaker system.
The contents of the memory have been
erased.
• The RESET button has been pressed.
t Store again into the memory.
• The power cord or battery has been
disconnected.
• The power connecting cord is not connecte d
properly.
No beep sound.
The beep sound is cancelled (page 22).
Indications disappear from/do not appear in
the display.
• The clock dis pl ay disappears if you pres s
(OFF) for 2 seconds.
t Press (OFF) again for 2 secon ds to
display the clock.
• Remove the front panel and clean the
connectors. See “Cleaning the con nectors”
(page 24) for details.
Stored stations and correct time are erased.
The fuse has blown.
Makes noise when the ignition key is in the
ON, ACC, or OFF position.
The leads are not matched correctly with the
car’s accessory power connec to r.
No power is being supplied to the unit.
• Check the co nnection. If everything is in
order, check the fuse.
• The car does not have an ACC position.
t Press (SOURCE) (or insert a disc) to turn
on the unit.
The power is continuously supplied to the
unit.
The car does not have an ACC position.
The power aerial does not extend.
The power aerial does not have a relay box.
CD/MD playback
A disc cannot be loaded.
• Another CD is already loaded.
• The CD is forcibly inserted upside down or
in the wrong way.
Playback doe s not begin.
• Dirty or defective disc.
• CD-R that is not finalized.
• You tried to playback a CD -R not designed
for audio use.
• Some CD-Rs m a y not play due to its
recording equipment or the disc condition.
A disc is automatically ejected.
The ambient temp erature exceeds 50°C.
CD will not be ejected.
The operation buttons do not function.
Press the RESET button.
The sound skips from vibration.
• The unit is installed at an angle of more than
60°.
• The unit is not installed in a sturdy part of
the car.
The sound skips.
Dirty or defective disc.
Cannot turn off the “--------” indication.
You entered the name edit mode.
t Press (LIST) for 2 seconds.
Radio reception
Preset tuning is not possible.
• Store the correct frequency in the memory.
• The broadcas t si gnal is too weak.
The stations cannot be received.
The sound is hampered by noises.
• Connect a power aerial control lead (blue) or
accessory power supply lead (red) to the
power supply lead of a car ’s aerial booster.
(Only when your car ha s built-in FM/MW/
LW aerial in the rear/side glass.)
• Check the connection of the car aerial.
• The auto aerial will not go up.
t Check the connection of t he power aerial
control lead.
• Check the frequ ency.
Automatic tuning is not possible.
• The local seek mode is set to “ON.”
t Set the local seek mode to “OFF.” (page
22)
• The broadcas t si gnal is too weak.
t Perform manual tuning.
continue to next page t
27
Page 28
The “ST” indication flashes.
• Tune in the frequency accurat ely.
• The broadcast signal is too weak.
t Set to the monaural reception mode (page
22).
A programme broadcast in stereo is heard
in monaural.
The unit is in monaural reception mode.
t Ca ncel monaural recept io n m ode (page
22).
RDS
The SEEK starts after a few seconds of
listening.
The station is non- TP or has weak signal.
t Press (AF) or (TA) repeatedly until “AF-
OFF” or “TA-OFF” appears.
No traffic announcements.
• Activate “TA.”
• The station does not broadcast any traffic
announcements de spite being TP.
t Tune in another station.
PTY displays “--------.”
• The current station is not an RDS station.
• RDS data has not been received.
• The station does not specify the program me
type.
Error displays/Messages
Error displays
(For this unit and optional CD/MD changers)
The following indications will flash for about 5
seconds, and an ala rm sound will be heard.
BLANK*
ERROR*
HI TEMP
NO DISC
NO MAG
NOTREADY
RESET
1
No tracks have been recor ded on an MD.*
2
t Play an MD with recorded tracks on it.
1
• A CD is dirty or inserted upside down.*
2
t Clea n or insert the CD correctly.
• A CD/MD cann ot p l ay because of some
problem.*
2
t Insert another CD/MD.
The ambient temperature is more than 50°C.
t Wait until the temperature goes down
below 50°C.
No disc is inserted in the CD/MD unit.
t Insert discs in the CD/MD unit.
The disc magazine is not inserted in the CD/
MD unit.
t Insert the magazine in the CD/MD unit.
The lid of the MD unit is open or the MDs are
not inserted properly.
t Close the lid or insert the MDs properly.
The CD/MD unit ca nnot be operated because
of some problem.
t Press the RESET button o n the unit.
28
*1 When an error occurs during playback of a CD or
MD, the disc number of the CD or MD does not
appear in the display.
*2 The disc number of the disc causing the error
appears in the display.
If these solutions do not help improve the
situation, consult your nearest Sony dealer.
Messages
L.SEEK +/–
The Local Seek mode is on during automatic
tuning (page 14 ).
NO AF
There is no alternat ive frequ ency f or the
current station.
“” or “”
Yo u have reached the beginning or the end of
the disc and you cann ot go any further.
Page 29

Page 30

Willkommen!
Danke, daß Sie sich für diesen CD-Player von
Sony entschieden habe n. Si e haben folgende
zusätzliche Möglichkeiten, um die vielfältigen
Funktionen des Ge räts noch besser nutzen zu
können:
• Gesondert er hältliche CD/MD -Geräte
(Wechsler und Player)*
• CD TEXT-Informationen (werden an gezeigt,
wenn eine CD mit CD TEXT*
angeschlossenen, gesondert erhältlichen CDGerät mit CD TEXT-Funktion wiedergegeben
wird).
• Gesondert erhältl iches
Bedienungszubehör
Joystick RM-X4S
Kartenfernbedienung RM-X114
*1 Dieses Gerät arbeitet nur zusammen mit Sony-
Produkten.
*2 Eine CD mit CD TEXT ist eine Audio-CD, die
Informationen wie den Namen der CD, den Namen
des Interpreten und die Namen der Titel enthält.
Diese Daten sind auf der CD aufgezeichnet.
1
.
2
auf einem
2
Page 31

Inhalt
Lage und Funktion der Tei l e und
Bedienelemente. . . . . . . . . . . . . . . . . . . . . 4
Sicherheitsmaßnahmen . . . . . . . . . . . . . . . . . 6
Hinweise zu CDs. . . . . . . . . . . . . . . . . . . . . . 6
Vorbereitungen
Zurücksetzen des Geräts . . . . . . . . . . . . . . . . 7
Abnehmen der Frontplatte. . . . . . . . . . . . . . . 8
Einstellen der Uhr . . . . . . . . . . . . . . . . . . . . . 9
CD-Player
CD/MD-Gerät (gesondert erhältlich)
Wiedergeben einer CD . . . . . . . . . . . . . . . . . 9
Anzeigen im Display. . . . . . . . . . . . . . . . . . 10
Wiederholtes Wiederge ben von Titeln
— Repeat Play . . . . . . . . . . . . . . . . . . . . 10
Wiedergeben von Tit el n i n w i ll kürlicher
Reihenfolge
— Shuffle Play . . . . . . . . . . . . . . . . . . . . 10
Benennen einer CD
— Disc Memo*. . . . . . . . . . . . . . . . . . . . 11
Ansteuern eine r C D / MD anhand des Nam ens
— List-up* . . . . . . . . . . . . . . . . . . . . . . . 12
Auswählen bestimmter Titel für die
Wiedergabe
— Bank*. . . . . . . . . . . . . . . . . . . . . . . . . 12
* Funktionen, wenn ein zusätzlich erhältliches CD/
MD-Gerät angeschlossen ist
Radio
Automatisches Speichern von Radiosen dern
— BTM-Funktion (Best Tuning Memory -
Speicherbelegungsautomatik). . . . . . . . . 13
Einstellen gespeicherter Sender. . . . . . . . . . 14
Speichern bestim m te r Radiosender . . . . . . . 14
Einstellen eines Senders anhand einer Liste
— List-up . . . . . . . . . . . . . . . . . . . . . . . . 15
RDS
Übersicht über RDS . . . . . . . . . . . . . . . . . . 15
Automatische s N eueinstellen von Sendern für
optimale Empfangs qualität
— AF-Funktion . . . . . . . . . . . . . . . . . . . 16
Empfangen von Ve rkehrsdurch sagen
— TA/TP . . . . . . . . . . . . . . . . . . . . . . . . 17
Speichern von RDS -S endern zusammen mit
der AF- und TA-Einstellung . . . . . . . . . 17
Einstellen von Sendern nach Programmtyp
— PTY . . . . . . . . . . . . . . . . . . . . . . . . . . 18
Automatisches Einstellen der Uhr
— CT . . . . . . . . . . . . . . . . . . . . . . . . . . . 1 9
Weitere Funktionen
Der Joystick . . . . . . . . . . . . . . . . . . . . . . . . 19
Einstellen der Klangeigenschaften . . . . . . . 21
Schnelles Dämpfen des Tons . . . . . . . . . . . 21
Wechseln der Kla ng- und
Anzeigeeinstellungen
— Menü . . . . . . . . . . . . . . . . . . . . . . . . . 21
Auswählen der Klangposition
— Beste Klangposition (MBP) . . . . . . . 22
Einstellen des Equalizers . . . . . . . . . . . . . . 22
Weitere Informationen
Wartung . . . . . . . . . . . . . . . . . . . . . . . . . . . 23
Ausbauen des Geräts. . . . . . . . . . . . . . . . . . 24
Technische Daten . . . . . . . . . . . . . . . . . . . . 25
Störungsbehebung. . . . . . . . . . . . . . . . . . . . 26
Fehleranzeigen/Meldungen. . . . . . . . . . . . . 27
3
Page 32

Lage und Funktion der Teile und Bedienelemente
Näheres finden Sie auf den angegebenen Seiten.
: Während der Wiedergabe : Beim Radioempfang : Im Menümodus
CD/MD
RADIO MENU
1
2
3
REP
MBP
EQ 7
SOURCE
MODE
SHUF
6
5
4
1 Lautstärkeregler 17
2 Taste MBP 22
3 Taste Z (Auswerfen)
(befindet sich an der
V order seite des Geräts hi nter der Fro ntplatte)
9
4 Taste SOURCE (Einschalten/Radio/CD/
MD) 8, 9, 10, 12, 13, 14, 17, 22
5 Display
6 Empfänger für die Kartenfernbedienung
7 Taste MENU 9, 11, 12, 13, 17, 19, 22, 23
8 Taste DISPLAY/PTY (Ändern des
Anzeigemodus/Programmtypauswahl)
10, 11, 15, 18
9 Taste S (SCROLL) 10
q; Taste OPEN 8, 9
qa Taste LIST
11, 12
CD/MD
15
RADIO
qs Taste EQ7 23
qd Taste RESET
(befindet sich an d er
V order seite des Geräts hi nter der Fro ntplatte)
7
PTY
S
D
LL
O
R
C
S
DISPLAY
R
E
P
/
S
C
E
S
T
I
D
MENU
SOUND
AF
TA
O
FF
CDX-CA650X/CA650V/CA650
qf Zahlentasten
CD/MD
(3) REP 10
(6) SHUF 11
14, 16, 17
RADIO
qg Taste MODE
10, 12
CD/MD
13, 14, 17
RADIO
qh Taste SOUND 21, 22
qj Taste AF 16, 17
qk Taste TA 17
ql Taste OFF (Stop/Ausschalten)* 8, 9
w; Taste ENTER
12
CD/MD
15, 18
RADIO
9, 11, 12, 13, 17, 19, 22, 23
MENU
*Warnhinweis zur Installation des Geräts in
einem Auto mit Zündschloß oh ne
Zubehörposition ACC oder I
Nachdem Sie die Zündung ausgeschaltet
haben, drücken Sie am Gerät unbedingt 2
Sekunden lang
(OFF), um die
Uhrzeitanzeige auszuschalten.
Andernfalls wird die Uhrzeitanzeige nicht
ausgeschaltet, und der Autobatte rie wird Strom
entzogen.
O
P
LIST
SEEKSEEK
ENTER
E
N
4
Page 33

PTY
S
MENU
SOUND
AF
(SEEK)
(–): Nach links/
.
DISPLAY
D
TA
O
PE
N
LL
O
R
SC
R
E
P
/
S
C
E
S
T
I
D
LIST
SEEKSEEK
ENTER
O
F
F
(DISC/PRESET)
(+): Nach oben
(DISC/PRESET)
(–): Nach unten
(SEEK)
(+): Nach
rechts/>
Im Menümodus wird mit der Markierung „M“ im
Display angezeigt, welche der vier Tasten Sie
gerade auswählen können.
wa Tasten DISC/PRESET (+/–)
10, 12
CD/MD
14, 15, 18
RADIO
9, 11, 12, 13, 17, 19, 22, 23
MENU
ws Tasten SEEK (–/+)
9
CD/MD
14, 16
RADIO
9, 11, 13, 19, 21, 22, 23
MENU
Kartenfernbedienung RM-X114
(gesondert erhältlich)
DSPL MODE
+
PRESET
LIST
+
DISC
MENU
SOURCE
–
SEEK
SOUND
DISC
PRESET –
+
VOL
–
Die entsprechenden Tasten auf der
Kartenfernbedienung haben dieselbe
Funktion wie die Tasten an diesem Gerät.
1 Taste DSPL
2 Taste MENU
3 Taste SOURCE
4 Tasten SEEK (</,)
5 Taste SOUND
6 Taste OFF
7 Tasten VOL (–/+)
8 Taste MODE
9 Taste LIST
q; Tasten DISC/PRESET(M/m)
qa Taste ENTER
qs Taste AT T
Hinweis
Wenn Sie das Gerät ausschalten, indem Sie (OFF) 2
Sekunden lang drücken, können Sie es nicht mit der
Kartenfernbedienung bedienen. Drücken Sie zunächst
(SOURCE) am Gerät, oder legen Sie eine CD/MD ein,
um das Gerät zu aktivieren.
Tip
Informationen zum Auswechseln der Batterien finden
Sie im Abschnitt „Austauschen der Lithiumbatterie“
(Seite 24).
+
SEEK
R
–
TE
EN
ATTOFF
5
Page 34

Sicherheitsmaßnahmen
Hinweise zu CDs
• Wenn das Fahrzeug längere Zeit in direktem
Sonnenlicht geparkt war, lassen Sie das Gerät
etwas abkühlen, bevor Sie es einschalten.
• Motorantenne n w erden automati sc h
ausgefahren, w enn das Gerät einges chaltet
wird.
Sollten an Ihrem Gerät Probleme auftreten oder
sollten Sie Fragen haben, auf die in dieser
Anleitung ni cht eingegangen wird, wenden Sie
sich bitte an Ihren Sony-Händler.
Feuchtigkeitskondensation
Bei Regen oder bei sehr hoher Luftfeuchtigkeit
kann sich auf den Linsen im Inneren des Geräts
und auf dem Display F euchtigkeit
niederschlagen. In diesem Fall funktion iert das
Gerät nicht mehr richtig. Nehmen Sie die CD/
MD heraus, und wa rten Sie etw a eine S tunde, bis
die Feuchtigkeit verdunstet ist.
So bewahren Sie die hohe Tonqualität
Achten Sie darauf, kein e Säfte oder andere
zuckerhaltige Getränke auf das Gerät oder die
CDs/MDs zu verschütten.
• Berühren Sie nicht die Oberfläche, damit die
CDs nicht verschm utzt werden. Fassen Si e di e
CDs nur am Rand an.
• Bewahren Sie CDs in ihrer Hülle oder in den
CD-Magazinen auf, wenn sie nicht abgespielt
werden.
Schützen Sie CDs vor Hitze bzw. hohen
Temperaturen. Lassen Sie sie nicht in
geparkten Autos, auf dem Armaturenbrett oder
auf der Hutablage liegen.
• Bringen Sie keine A ufkleber auf den CDs an,
und verwen den Sie k eine C Ds mit Rückständen
von Tinte oder Klebstoffen. Solche CDs drehen
sich beim Betrieb möglicherweise nicht mehr
und führen zu einer Fehlfunktion oder können
beschädigt werden.
• CDs mit außergewöhnlichen Formen (z . B.
herzförmige, quadratische oder sternförmige
CDs) können mit diesem Gerät nicht
wiedergegeben werden. Falls Sie es doch
versuchen, kann das Gerät beschädigt werden.
Verwenden Sie solche CD s nicht.
• Single-CDs (8-cm-CDs) können ebenfalls nicht
verwendet werd en.
• Reinigen Sie die CDs vor dem Abspielen mit
einem handelsüblichen Reinigungstuch .
Wischen Sie dabei von der Mitte nach außen.
Verwenden Sie keine Lösungsmittel wie
Benzin oder Verdünner und keine
handelsüblichen Reinig ungsmittel oder
Antistatik-Sprays für Schallplatten.
6
Page 35

Hinweise zu CD-Rs
• Mit diesem Gerät kön nen Sie CD-Rs
(beschreibbare CDs), die als Audio-CDs
konzipiert sind, wiedergeben lassen.
An dieser Markierung können Sie CD-Rs, die
als Audio-CDs konzip i er t s in d, er kennen.
Diese Markierung kennzeichnet Dat enträger,
die nicht für die Audiowiedergabe geeignet
sind.
Vorbereitungen
Zurücksetzen des Geräts
Bevor Sie das Gerät zum er sten Mal benutzen
oder wenn Sie die Autobatterie ausgetauscht
haben, müssen Sie das Gerät zurückset zen.
Nehmen Sie die Fr ontplatte ab, und drücken Sie
die Taste RESET mit einem spitzen Gegenstand,
wie z. B. einem Kugelschreiber.
• Je nach dem Gerä t, m it de m die CD-R bespielt
wurde, oder dem Zustand der CD-R selb st is t
eine Wieder ga be mit d iese m Gerät je doch nic ht
in jedem Fall möglich.
• Eine noch nicht abgeschlossene* CD-R kann
nicht wiedergegeben we rden.
* Dieser Vorgang ist notwendig, damit eine bespielte
CD-R auf einem Audio-CD-Player abgespielt
werden kann.
Taste RESET
Hinweis
Wenn Sie die Taste RESET drücken, werden die
eingestellte Uhrzeit und einige weitere gespeicherte
Einstellungen gelöscht.
7
Page 36

Abnehmen der Frontplatte
Um einem Diebsta hl des Geräts vorzubeugen,
kann die Frontplatte abgenommen werden.
Warnton
Wenn Sie den Zündschlüssel in die Position OFF
stellen, ohne die Frontplatte abzunehme n, ertönt
einige Sekunden lang ein Warnton.
W enn Sie einen ge sonde rt erhältlic hen Verstärker
anschließen und den integrier ten Verstärker ni cht
benutzen, wird der Signalton deaktiviert.
1 Drücken Sie (OFF)*.
Die CD/MD-Wiedergabe bzw. der
Radioempfang wir d be endet. Die
Tastenbeleuchtung und das Display bleiben
eingeschaltet.
* Wenn Ihr Fahrzeug nicht über ein Zündschloß
mit Zubehörposition (ACC oder I) verfügt, halten
Sie am Gerät unbedingt 2 Sekunden lang (OFF)
gedrückt, um das Gerät vollständig
auszuschalt en. A ndernf alls w ird der A utob atte rie
weiterhin Strom entzogen.
2 Drücken Sie (OPEN), schiebe n Sie dann
die Frontplatte nach rechts, und ziehen
Sie sie an der linken Seite vorsichtig
heraus.
Anbringen der Frontplatte
Setzen Sie die Aussparung A an der Frontplatte
am Stift B am Gerät an, und drücken Sie dann
die linke Seite behutsam hinein.
Drücken Sie (SOURCE), bzw. legen Sie eine CD
ein, um das Gerät ein zuschalten.
A
B
x
1
2
Hinweise
• Wenn Sie die Frontplatte bei eingeschaltetem Gerät
abnehmen, schaltet sich das Gerät automatisch aus,
um eine Beschädigung der Lautsprecher zu
vermeiden.
• Lassen Sie die F rontplatte nicht fallen, und drücken
Sie nicht zu stark auf die Frontplatte und das
Display.
• Schützen Sie die Frontplatte vor Hitze bzw. hohen
Te mp eratu re n und vor Feuchtigkeit. Lassen Sie sie
nicht in geparkten Autos, auf dem Armaturenbrett
oder auf der Hutablage liegen.
Tip
Bewahren Sie die Frontplatte im mitgelieferten
Behälter auf, wenn Sie sie bei sich tragen.
8
Hinweis
Legen Sie auf der Innenseite der Frontplatte nichts ab.
Page 37

Einstellen der Uhr
Die Uhr zeigt die Uhrzeit im 24-Stunden-Format
digital an.
Beispiel: Einstellen de r Uh r auf 10:08
CD-Player CD/MD-Gerät (gesondert erhältlich)
1 Drücken Sie (MENU), und drücken Sie
anschließend eine Seite von
(DISC/PRESET) so oft, bis „CLOCK“
erscheint.
1 Drücken Sie (ENTER).
Die Stundenanzei ge blinkt.
2 Stellen Sie mit einer der Seiten von
(DISC/PRESET) die Stunde n e i n.
3 Drücken Sie die Seite (+) von (SEEK).
Die Minutenanzeige blinkt.
4 Stellen Sie mit einer der Seiten von
(DISC/PRESET) die Minut e n ein.
2 Drücken Sie (ENTER).
Die Uhr beginnt zu laufen. Wenn Sie die
Uhreinstellung vorgenommen haben,
erscheint im Dis p l ay wieder die Anzeig e für
den normalen Wiedergabemodus.
Tips
• Mit Hilfe der RDS-Funktion können Sie die Uhr auch
automatisch einstellen lassen (Seite 19).
• Wenn der Modus D.INFO auf ON gesetzt ist, wird
die Uhrzeit immer angezeigt (Seite 21).
Sie können mit diesem Gerät nicht nur CDs
wiedergeb en, sondern auch externe CD/MDGeräte steuern.
Hinweis
Wenn Sie ein gesondert erhältliches CD-Gerät mit CD
TEXT-Funktion anschließen, erscheinen bei der
Wiedergabe einer CD mit CD TE XT di e CD TEX TInformationen im Display.
Wiedergeben einer CD
(Mit diesem Gerät)
1 Drücken Sie (OPEN), und legen Sie eine
CD mit der beschriftete n Seite nach obe n
ein.
2 Schließen Sie die Frontplatte.
Die Wiederg abe beginnt automatisch.
Wenn bereits eine CD eingelegt ist, drücken Sie
zum Starten der Wiedergabe (SOURCE) so oft,
bis „CD“ erscheint.
Funktion Taste
Stoppen der
Wiedergabe
Auswerfen de r CD ( O PEN ) un d dann Z
Überspringen von
Titeln
–Automatischer
Musiksensor
Vorw ärts-/
Rückwärtssuchen
–Manuelle Suche
(OFF)
(SEEK) (./>)
[pro Titel einmal drücken]
(SEEK) (m/M)
[bis zur gewünschten Stelle
gedrückt halten]
Fortsetzung siehe nächste Seite t
9
Page 38

Hinweise
• Wenn der letzte Titel auf der CD abgespielt wurde,
startet die Wiedergabe wieder mit dem ersten Titel
der CD.
• Wenn ein gesondert erhältlich es Gerät
angeschlossen ist, wird die Wiedergabe derselben
Tonquelle auf dem gesondert erhältlichen CD/MDGerät fortgesetzt.
(Mit dem gesondert erhältlichen Gerät)
1 Drücken Sie mehrmals (SOURCE), um
„CD“ bzw. „MD“ auszuwählen.
2 Drücken Sie (MODE) so oft, bis das
gewünschte Gerät angezeigt wird.
Die Wiedergabe beginnt.
Funktion Taste
Überspringen von
(DISC/PRESET) (+/–)
CDs/MDs
–CD/MD-Auswahl
Anzeigen im Display
Wenn die CD/MD bzw. der Titel wechselt, wird
der gespeicherte N ame*
neuen CD/MD b zw . des neue n T itels autom atisch
angezeigt. (Wenn die Funktion Auto Scroll auf
„ON“ gesetzt ist, laufen Namen mit mehr als 8
Zeichen im Displa y durch und werden a uf diese
Weise ganz angezeigt (Seite 21)).
Anzeigbare Informationen
• Musikquelle
• Uhr
• Funktion
1
, falls vorhanden, der
*1 „NO NAME“ zeigt an, daß kein Disc Memo (Seite
11) oder gespeicherter Name zum Anzeigen
vorhanden ist.
*2 Nur bei CDs, bei denen die CD TEXT-
Informationen den Namen des Interpreten
enthalten.
Hinweise
• Einige Zeichen können nicht angezeigt werden.
• Bei einigen CDs mit außergewöhnlich langem CD
TEXT laufen die Informationen unter Umständen
nicht im Display durch und werden daher nicht ganz
angezeigt.
• Mit diesem Gerät kann der Name des Interpreten
nicht einzeln für jeden Titel einer CD mit CD TEXT
angezeigt werden.
Tip
Wenn die Funktion Auto Scroll auf OFF gesetzt ist und
der Name der CD/MD bzw. des Titels wechselt, läuft
der Name nicht im Display durch und wird daher nicht
ganz angezeigt.
Wiederholtes Wiedergeben
von Titeln
— Repeat Play
Ein Titel oder alle Titel auf der CD/MD im
Hauptgerät werden automatisch wiederholt
wiedergegeben, wenn da s Ende erreicht ist. Sie
haben folgende Möglichkeiten für die
wiederholte Wiedergabe:
• REP-1 — zum wiederholten Wiedergeben
eines Titels.
• REP-2* — zum wiederholten Wiedergeben
einer CD/MD.
* Nur verfügbar, w enn mindestens ein gesondert
erhältliches CD/MD-Gerät angeschlossen ist.
Drücken Sie während der Wiedergabe
(3) (REP) so oft, bis die gewünschte
Einstellung im Display erscheint.
Repeat Play beginnt.
Wenn Sie wieder in den normalen
Wieder ga bemo dus scha lten möchten, wählen Sie
„REP-OFF“.
Anzeigbare Informationen
• Verstrichene Spieldauer
• CD/MD-Name*
Interpretenname*
• Name des Titels*
Zum Drücken Sie
Wechseln der
(DISPLAY/PTY)
angezeigten
Information
Scrollen der
(S) (SCROLL)
Anzeige im
Display
10
1
/
2
1
Wiedergeben von Titeln in
willkürlicher Reihenfolge
— Shuffle Play
Sie haben folgende Möglichkeiten:
• SHUF-1 — zum Wiedergeben der Titel auf de r
aktuellen CD/MD in willkürlicher Reihenfolge.
• SHUF-2*
1
— zum Wiedergeben der T itel im
aktuellen gesondert erhältlichen CD/MD-Gerät
in willkürlicher Reihenfolge.
• SHUF-ALL*
2
— zum Wiedergeben alle r Titel
in allen angeschlossenen CD/MD-Geräten
(einschließlich dieses Geräts) in willkürlicher
Reihenfolge.
Page 39

*1 Nur verfügbar, wenn mindestens ein gesondert
erhältliches CD/MD-Gerät angeschlossen ist.
*2 Nur verfügbar, wenn mindestens ein gesondert
erhältliches CD-Gerät bzw. mi ndestens zwei
gesondert erhältliche MD-Geräte angeschlossen
sind.
Drücken Sie während der Wiedergabe
(6) (SHUF) so oft, bis die gewünschte
Einstellung im Display erscheint.
Shuffle Play beginnt.
Wenn Sie wieder in den normalen
Wiedergabemodus schalten möchten, wählen Sie
„SHUF-OFF“.
Hinweis
Bei „SHUF-ALL“ werden nic ht die Titel von einem CDPlayer und einem MD-Player gemischt
wiedergegeben.
Benennen einer CD
— Disc Memo (bei einem CD-Gerät mit
CUSTOM FILE-Funktion)
Sie können für jede CD einen individuellen
Namen speicher n (D i sc Memo). Pro CD können
Sie bis zu 8 Zeichen eingeben. Wenn Sie für eine
CD einen Namen gespeichert haben, können Sie
die CD anhand des Namens ansteuern (Seite 12) .
1 Starten Sie die Wiedergabe der CD, die
Sie benennen wollen.
2 Drücken Sie (MENU), und drücken Sie
anschließend eine Seite von
(DISC/PRESET) so oft, bis „NAMEEDIT“
erscheint.
3 Drücken Sie (ENTER).
2 Drücken Sie die Seite (+) von (SEEK),
wenn Sie das gewünschte Zeichen
gefunden haben.
Wenn Sie die Seite (–) von (SEEK)
drücken, schalten Sie eine Stelle nach
links.
3 Wiederholen Sie Schritt 1 und 2, bis
Sie den ganzen Namen eingegeben
haben.
5 Wenn Sie wieder in den norm a len CD-
Wiedergabemodus schalten wollen,
drücken Sie (ENTER).
Tips
• Sie können einen Namen korrigieren oder löschen,
indem Sie ihn einfach überschreiben oder „_“
eingeben.
• Es gibt noch eine andere Möglichkeit, mit dem
Benennen einer CD zu beginnen: Halten Sie (LIST)
zwei Sekunden lang gedrückt, statt Schritt 2 und 3
auszuführen. Sie können das Benennen auch
abschließen, indem Sie (LIST) zwei Sekunden lang
gedrückt halten, statt Schritt 5 auszuführen.
• Sie können CDs in einem Gerät ohne CUSTOM
FILE-Funktion benennen, wenn dieses in
Kombination mit einem CD-Gerät angeschlossen ist,
das über diese Funktion verfügt. Das Disc Memo
wird in diesem Fall in dem CD-Gerät mit CUSTOM
FILE-Funktion gespeich ert.
Hinweis
Der Wiedergabemodus REP-1 bzw. Shuffle Play wird
unterbrochen, bis das Eingeben des Namens
abgeschlossen ist.
Während Sie die CD benennen, wird sie vom
Gerät wiederholt wiedergegeben.
4 Geben Sie die Zeichen ein.
1
1 Drücken Sie die Seite (+)*
(DISC/PRESET) meh rmals, u m das
gewünschte Zeichen auszuwählen.
A t B t C ... t 0 t 1 t 2 ... t + t
– t
... t _*2 t A
*
*1 Die Zeichen erscheinen in umgekehrter
Reihenfolge, wenn Sie die Seite (–) von
(DISC/PRESET) drücken.
*2 (Leerzeichen)
von
Anzeigen des Disc Memo
Beim Anzeigen von Informationen hat das Disc
Memo immer Priorität vor einer ursprünglichen
CD TEXT-Information.
Funktion Taste
Anzeigen (DISPLAY/PTY) während
der Wiedergabe einer CD
bzw. CD mit CD TEXT
Tip
Welche Informationen Sie noch anzeigen lassen
können, ist auf Seite 10 erläutert.
Fortsetzung siehe nächste Seite t
11
Page 40

Löschen des Disc Memo
1 Drücken Sie mehrmals (SOURCE), um
„CD“ auszu w ählen.
2 Drücken Sie mehrmals (MODE), um das
CD-Gerät auszuwählen, in dem das Disc
Memo gespeichert ist.
3 Drücken Sie (MENU), und drücken Sie
anschließend eine Seite von
(DISC/PRESET) so oft, bis „NAME DEL“
erscheint.
4 Drücken Sie (ENTER).
Die gespeicherten Namen werden, beginnend
mit den zuerst eingegebenen, angezeigt .
5 Drücken Sie eine Seite von
(DISC/PRESET) mehrmals, um den zu
löschenden CD-Namen auszuwählen.
Die gespeicherten Namen werden, beginnend
mit den zuerst eingegebenen, angezeigt .
6 Drücken Sie 2 Sekunden lang (ENTER).
Der Name wird gelöscht.
Gehen Sie wie in Schritt 5 und 6 erläutert vor,
wenn Sie weitere Namen löschen wollen.
7 Drücken Sie zweimal (MENU).
Das Gerät schaltet wieder in den normalen
CD-Wiedergabemodus.
Hinweise
• Wenn das Disc Memo einer CD mit CD TEXT
gelöscht wird, werden die ursprünglichen CD TEXTInformationen angezeigt.
• Wenn Sie das zu löschende Disc Memo nicht finden
können, wählen Sie in Schritt 2 ein anderes CDGerät aus.
Ansteuern einer CD/MD
anhand des Namens
— List-up (bei einem CD-Gerät mit CD TEXT-/
CUSTOM FILE-Funktion oder einem MDGerät)
Sie können diese Fun kt io n bei CDs/MDs
benutzen, für die S ie ei nen Namen eingegeben
1
haben*
, oder bei CDs mit CD TEXT*2.
1 Drücken Sie (LIST).
Der Name der aktuellen CD/MD erscheint im
Display.
2 Drücken Sie eine Seite von
(DISC/PRESET) mehrmals, bis Sie die
gewünschte CD/MD gefunden haben .
3 Drücken Sie (ENTER), um die
Wiedergabe der CD/MD zu starten.
Hinweis
Einige Zeichen können nicht angezeigt werden
(Ausnahme: Disc Memo).
Auswählen bestimmter Titel
für die Wiedergabe
— Bank (bei einem CD-Gerät mit der
CUSTOM FILE-Fu nk tio n)
Wenn Sie eine CD ent sprechend definieren,
können Sie das Ger ät so einstellen, daß
bestimmte Titel übersprungen und nur die
gewünschten Titel wiedergegeben werden.
1 Starten Sie die Wiedergabe der CD, die
Sie definieren wollen.
2 Drücken Sie (MENU), und drücken Sie
anschließend eine Seite von
(DISC/PRESET) so oft, bis „BANK SEL“
erscheint.
3 Drücken Sie (ENTER).
*1 Ansteuern einer CD/MD anhand des
eingegebenen Namens: wenn ein Name für eine
CD (Seite 11) bzw. eine MD gespeichert wurde.
*2 Ansteuern von CDs anhand der CD TEXT-
Informationen: wenn Sie eine CD mit CD TEXT auf
einem CD-Gerät mit CD TEXT-Funktion
wiedergeben.
12
Page 41

4
Legen Sie die Titel fest, die
wiedergegeben bzw. übersprungen
werden sollen.
1 Drücken Sie eine Seite von (SEEK)
mehrmals, um den entsprechenden
Titel auszuwählen.
2 Drücken Sie mehrmals (ENTER), um
„PLAY“ oder „SKIP“ auszuwählen.
5 Wen n Sie „PLAY“ oder „SKIP“ für
weitere Titel festlegen wollen, gehen Sie
wie in Schritt 4 erläutert vor.
6 Drücken Sie zweimal (MENU).
Das Gerät schaltet wieder in den normalen
CD-Wiedergabemodus.
Hinweise
• Sie können „PLAY“ und „SKIP“ für bis zu 24 Titel
einstellen.
• Sie können „SKIP“ nicht für alle Titel auf einer CD
definieren.
Wiedergeben bestimmter Titel
Sie haben folgende Möglichkeiten:
•„BANK-ON“ — Alle Titel mit de r Einstell ung
„PLAY“ werden wiedergegeben.
•„BANK-INV“ (Inverse) — Alle Titel mit der
Einstellung „SKIP“ werden wiedergegeben.
1 Drücken Sie während der Wiedergabe
(MENU), und drücken Sie anschließend
eine Seite von (DISC/PRESET) so oft, bis
„BANK-ON“, „BANK-INV“ oder „BANKOFF“ erscheint.
2 Drücken Sie die Seite (+) von (SEEK) so
oft, bis die gewünschte Einstellung
erscheint.
3 Drücken Sie (ENTER).
Die Wiedergabe startet ab dem Titel nach
dem aktuellen Titel.
Radio
Für jeden Frequenzbe reich (FM1, FM2, FM3,
MW und LW) können Sie bis zu 6 Se nder
speichern.
Vorsicht
Wenn Sie während der Fahrt Sender einstellen,
sollten Sie die BTM-Funktion verwenden.
Andernfalls besteht Unfallgefahr.
Automatisches Speichern
von Radiosendern
— BTM-Funktion (Best Tuning Memory Speicherbelegungsautomatik)
Das Gerät wählt im ausgewählten
Frequenzbere ich die Sender mit den st ärksten
Signalen aus un d s p ei chert diese in der
Reihenfolge ihrer Frequenzen.
1 Drücken Sie mehrmals (SOURCE), um
das Radio auszuwählen.
2 Drücken Sie mehrmals (MODE), um den
Frequenzbereich auszuwählen.
3 Drücken Sie (MENU), und drücken Sie
anschließend eine Seite von
(DISC/PRESET) so oft, bis „BTM“
erscheint.
4 Drücken Sie (ENTER).
Ein Signalton ist zu hören, und die
Einstellung wird gespeichert.
Hinweise
• Wenn aufgrund schwacher Signale nur wenige
Sender in guter Qualität zu empfangen sind, bleiben
auf einigen Stationstasten die vorher gespeicherten
Sender erhalten.
• Wird im Display eine Nummer angezeigt, beginnt
das Gerät beim Speichern von Sendern mit der
angezeigten Nummer.
Wenn Sie wieder in den normalen
Wiedergabemodus schalten möchten, wählen Sie
in Schritt 2 „BANK-OFF“.
13
Page 42

Einstellen gespeicherter Sender
Speichern bestimmter Radiosender
1 Drücken Sie mehrmals (SOURCE), um
das Radio auszuwählen.
2 Drücken Sie mehrmals (MODE), um den
Frequenzbereich a us zuwählen.
3 Drücken Sie die Stationstaste ((1) bis
(6)), auf der der gewünschte Sender
gespeichert ist.
Tip
Drücken Sie eine Seite von (DISC/PRESET), um die
Sender in der gespeicherten Reihenfolge zu
empfangen (Senderspeichersuchfunktion).
Wenn das Einstellen gespeicherter
Sender nicht funktioniert
Drücken Sie eine Seite von (SEEK), um
den Sender zu suchen (automatischer
Sendersuchlauf).
Der Suchlauf stoppt, wenn ein Sender
empfangen wird . Wiederhol en Sie diesen
Vorgang, bi s das Gerät den gewünschten
Sender empfängt.
Tips
• Wenn der automatische Sendersuchlauf zu oft
stoppt, aktivieren Sie den lokalen Suchmodus, so
daß die Suche auf Sender mit stärkeren Signalen
beschränkt wird (Seite 22).
• Wenn Sie die Frequenz des gewünschten Senders
kennen, halten Sie eine Seite von (SEEK) gedrückt,
bis die Frequenz in etwa erreicht ist, und drücken
Sie (SEEK) dann so oft, bis die gewünschte
Frequenz genau eingestellt ist (manuelle
Sendersuche).
Sie können die gewünschten Sender manuell
unter einer bel i ebigen Stationstaste spei chern.
1 Drücken Sie mehrmals (SOURCE), um
das Radio auszuwählen.
2 Drücken Sie mehrmals (MODE), um den
Frequenzbereich auszuw ählen.
3 Drücken Sie eine Seite von (SEEK), um
den Sender ei nzustellen, den S ie
speichern wollen.
4 Drücken Sie 2 Sekunden lang die
gewünschte Stationstaste ((1) bis (6)),
bis „MEM“ erscheint.
Die Stationstastenanzeige erscheint im
Display.
Hinweis
Wenn Sie auf der gleichen Stationstaste eine n
anderen Sender speichern, wird der zuvor
gespeicherte Sender gelöscht.
Bei schlechtem UKW-Stereoempfang
Wählen Sie den monauralen
Empfangsmodus (Seite 22).
Die Tonqualität wird dadurch besser, der Ton
wird zugleich aber monaural (die An zei ge
„ST“ wird ausgeblendet).
14
Page 43

Einstellen eines Senders
anhand einer Liste
— List-up
RDS
1 Drücken Sie während des
Radioempfangs kurz (LIST).
Die Frequenz oder der Name des momentan
eingestellten Senders blinkt.
2 Drücken Sie eine Seite von
(DISC/PRESET) mehrmals, bis Sie den
gewünschten Sender gefunden haben.
Wenn für den ausgewählten Sender kein
Name eingegeben wurde, erscheint d ie
Frequenz im Display.
3 Stellen Sie mit (ENTER) den
gewünschten Sender ein.
Übersicht über RDS
UKW-Sender, die RDS (Radiodatensystem)
unterstützen, strahlen zusammen mit den
normalen Radi oprogramms ignalen ni cht hörbare,
digitale Informationen aus. Beim Empfang ei nes
RDS-Senders könn en beispielsweise folgende
Informationen angezeigt werden.
Anzeigbare Informationen
• Musikquelle
• Uhr
• Funktion
Anzeigbare Informationen
• Sendername (Frequenz)
• Programmtyp
Funktion Taste
Wechseln der
angezeigten
Information
(DISPLAY/PTY)
RDS-Funktionen
Mit RDS-Daten stehen Ihnen weitere nützliche
Funktionen zur Verfügung, z. B.:
• Automatisches Neueinstellen eines
Senders, was vor allem bei langen Fahrten
über große Entfernungen hinweg hilfreich ist.
— AF t Seite 16
• Empfangen von Verkehrsdurchsagen, auch
wenn Sie einen anderen Sender oder eine
andere Tonquelle eingestellt haben. — TA t
Seite 17
• Auswählen von Se ndern nach Programmtyp
der Sendungen. — PTY t Seite 18
• Automatisches Einstellen der Uhrzeit. — CT
t Seite 19
Hinweise
• Je nach Land oder Region stehen nicht alle RDSFunktionen zur Verfügung.
• Die RDS-Funktion arbeitet möglicherweise nicht
korrekt, wenn die Sendesignale zu schwach sind
oder wenn der eingestellte Sender keine RDS-Daten
ausstrahlt.
15
Page 44

Automatisches Neueinstellen
von Sendern für optimale
Empfangsqualität
— AF-Funktion
Mit der AF-Funktion (Alternativfrequenzen)
wird für den Sender, den Sie gerade hören,
automatisch die Frequenz mit den stärksten
Sendesignalen eingestellt.
Die Frequenzen werden also
automatisch gewechselt.
98,5 MHz
Sender
1 Wählen Sie einen UKW-Sender aus (Seite
14).
2 Drücken Sie (AF) so oft, bis „AF-ON“
angezeigt wird.
Das Gerät beginnt, im selben Netz w erk nach
einer Alternati vf re qu enz mit stärkeren
Signalen zu suchen.
Wenn „NO AF“ blinkt, gibt es für den gerade
eingestellten Sender keine
Alternativfrequenz.
Hinweis
Wenn im Sendebereich keine Alternativfrequenzen
vorhanden sind oder Sie nicht nach einem
Alternativsender zu suchen brauchen, schalten Sie
die AF-Funktion aus, indem Sie „AF-OFF“ auswählen.
96,0 MHz
102,5 MHz
Bei Sendern ohne
Alternativfrequenzen
Drücken Sie eine Seite von (SEEK),
während der Sendername blinkt (ca. 8
Sekunden lang).
Das Gerät beginnt dann mit der Suche nach
einer Frequenz mit denselben PI-Daten
(Programme Identifica tio n Programmkennung). „PI SEEK“ wird
angezeigt.
Wenn das Gerät keine Frequenz mit
denselben PI-Daten finden kann, wechselt das
Gerät wieder zur zuvor eingestellten
Frequenz zurück.
Unveränderter Empfang eines
Regionalsenders
Wenn die AF-Funktion aktiviert ist, wird der
Empfang dieses Geräts werkseitig auf eine
bestimmte Region beschränkt, so daß nicht zu
einem anderen Regionalsender mit einer
stärkeren Frequenz gewechsel t w ir d.
Wenn Sie den Empfangsbereich dieses
Regionalprogramms verlassen oder lieber die
gesamte AF-Funktion nutzen wollen, wählen Sie
„REG-OFF“ aus dem Menü (Seite 22).
Hinweis
Diese Funktion steht in Großbritannien und in einigen
anderen Regionen nicht zur Verfügung.
Lokalsenderfunktion
(nur Großbritannien)
Mit Hilfe dieser Funktion können Sie andere
Lokalsender au sw ählen, auch wenn dies e zuvor
nicht unter eine r St ationstaste gespei chert
wurden.
1 Drücken Sie eine der Stationstasten ((1)
bis (6)), auf der ein Lokalsender
gespeichert ist.
2 Drücken Sie innerhalb von 5 Sekunden
erneut die Stationstaste des
Lokalsenders.
3 Wiederholen Sie diesen Vorgang, bis das
Gerät den gewünschten Lokalsender
empfängt.
16
Page 45

Empfangen von
Verkehrsdurchsagen
— TA/TP
Wenn Sie die TA- (Traffic Announcement Ve rkehrsdurchsagen) und die TP-Funktion
(Traffic Programme - Verkehrsfunk) aktivieren,
können Sie automatisch einen UKW-Sender
einstellen, der Verkehrsdurchsagen ausstrahlt.
Dabei ist es unerhebl i ch, w el ches UKWProgramm bzw. welche Tonquelle (CD oder MD)
Sie gerade hören. Das Gerät we c hselt nach der
Durchsage zurück zur vorherigen Tonquelle.
Drücken Sie (TA) so oft, bis „TAON“ angezeigt wird.
Das Gerät beginnt, nach Verkehrsfunksendern
zu suchen.
„TP“ zeigt an, daß ein solcher Sender
empfangen wird , und „TA“ blinkt während
einer Verkehrsdurchsage. Das Gerät setzt die
Suche nach Verkehrsfunksendern fort, wenn
„NO TP“ angezeigt wird.
W enn Sie alle Verkehrsdurchs agen ausschalt en
wollen, wählen Sie „TA-OFF“.
Funktion Taste
Ausschalten de r
aktuellen
Verkehrsdurchsage
Tip
Eine laufende Verkehrsdurchsage können Sie auch
mit der Taste (SOURCE) oder (MODE) abbrechen.
Speichern der Lautstärke von
Verkehrsdurchsagen
Sie können die Lautstärke für die
Verkehrsdurchsagen voreinstellen, so daß Sie sie
nicht überhören.
1 Stellen Sie mit dem Lautstärkeregler die
gewünschte Lautstärke ein.
2 Drücken Sie 2 Sekunden lang (TA).
„TA“ erschein t, und die Einstellung wird
gespeichert.
Empfangen von
Katastrophenwarnungen
Wenn die AF- oder die TA-Funktion aktiviert ist
und während des Empfangs eines UKW-Senders
oder der Wiedergabe einer CD/MD eine
Katastrophenwarnung ausg estraht wird, wechselt
das Gerät automatisch zur Katastrophenwarnung.
(TA)
Speichern von RDS-Sendern zusammen mit der AF- und TA-Einstellung
Wenn Sie RDS-Sender speichern, speichert das
Gerät zusammen mit der Frequenz auch die AF-/
TA-Einstellung (on/off) für jeden Sender. Sie
können für die einzelnen gespeicherten Sender
unterschiedliche Einstellungen (AF, TA oder
beides) oder f ür alle gespeicherten Sender
dieselbe Einstellung wählen. Wenn Sie Sender
mit „AF-ON“ speich ern, w erde n auto mat isc h die
Sender mit den stärksten Ra diosignalen
gespeichert.
Speichern derselben Einstellung für alle
gespeicherten Sender
1 Wählen Sie einen UKW-Frequenzbere ich
(Seite 13).
2 Drücken Sie (AF) und/oder (TA), um
„AF-ON“ und/oder „TA-ON“
auszuwählen.
Bitte beachten Sie, daß mit „AF-OFF“ bzw .
„TA-OFF“ nicht nur RDS-Sender, sondern
auch andere Sende r gespeichert werden.
3 Drücken Sie (MENU), und drücken Sie
anschließend eine Seite von
(DISC/PRESET) so oft, bis „BTM“
erscheint.
4 Drücken Sie (ENTER), bis „BTM“ blinkt.
Speichern unterschiedlicher
Einstellungen für die einzelnen
gespeicherten Sender
1 Wählen Sie einen UKW-Frequenzbere ich
aus, und stellen Sie den gewünschten
Sender ein (Seite 14).
2 Drücken Sie (AF) und/oder (TA), um
„AF-ON“ und/oder „TA-ON“
auszuwählen.
3 Drücken Sie die gewünschte
Stationstaste ((1) bis (6)), bis „MEM“
erscheint.
Weitere Sender können Sie wie in den Schritten
oben erläutert speichern.
17
Page 46

Einstellen von Sendern nach
Programmtyp
— PTY
Sie können einen Send er einstellen, indem Sie
den Programmtyp auswählen, den Sie hören
möchten.
Programmtypen An zeige
Nachrichten NEWS
Aktuelles Zeitgeschehen AFFAIRS
Informationen INFO
Sport SPORT
Erziehun g und Bildung EDUCATE
Hörspiele DRAMA
Kultur CULTURE
Wissenschaft SCIENCE
Verschiedenes VARIED
Pop-Musik POP M
Rock-Musik ROCK M
Leichte Unterhaltung EASY M
Leichte Klassik LIGHT M
Klassik CLASSICS
Sonstige Musik OTHER M
Wetter WEATHER
Finanzberichte FINANCE
Kinderprogramme CHILDREN
Magazinsendunge n SOCIAL A
Religion RE LIGION
Hörer-Telefon PHONE IN
Reiseinformationen TRAVEL
Freizeitprogramm LEISURE
Jazz JAZZ
Country-Musik COUNTRY
Volksmusik NATION M
Oldies OLDIES
Folk FOLK M
Dokumentarbeiträge DOCUMENT
1 Drücken Sie während des UKW-
Empfangs (DISPLAY/PTY), bis „PTY“
erscheint.
Der Name des aktuellen Programmtyps
erscheint, wenn der Sender PTY-Daten
ausstrahlt.
„--------“ erscheint, wenn der eingestellte
Sender kein RDS-Sender ist oder wenn keine
RDS-Daten empfangen werden.
2 Drücken Sie (DISC/PRESET) so oft, bis
der gewünschte Programmtyp angezeigt
wird.
Die Programmtypen erscheinen in der
Reihenfolge, die in der T abe lle angege ben ist.
„--------“ wird ange zeigt, wenn der
Programmtyp in den RD S- D aten nicht
angegeben wird.
3 Drücken Sie (ENTER).
Das Gerät beginnt, nach einem Sender zu
suchen, der den au sgewählten Programmtyp
ausstrahlt.
Hinweis
Sie können diese Funktion in Ländern, in denen keine
PTY-Daten (Programmtypauswahl) zur Verfügung
stehen, nicht verwenden.
18
Page 47

Automatisches Einstellen der
Uhr
— CT
Mit den CT-Daten (Clock Time - Uhrzeit), die
von RDS-Sendern ausge strahlt werden, läßt sich
die Uhr automatisch einstellen.
1 Drücken Sie während des
Radioempfangs (MENU), und drücken
Sie anschließend eine Seite von
(DISC/PRESET) so oft, bis „CT-OFF“
erscheint.
Weitere Funktionen
Sie können das Gerät sowie gesondert erhältliche
CD/MD-Geräte mit einem Joystick (gesondert
erhältlich) steuern.
Der Joystick
Bringen Sie zunächst je nach der Mont age des
Joysticks den ent sprechenden Aufkl eber an.
Der Joystick wird über Tasten und/oder
Drehregler bedien t.
2 Drücken Sie die Seite (+) von (SEEK) so
oft, bis „CT-ON“ erscheint.
Die Uhr wird eingestellt.
3 Schalten Sie mit (ENTER) zur normalen
Anzeige zurück.
Wenn Sie die CT-Funktion deaktivieren wollen,
wählen Sie in Schritt 2 „CT-OFF“.
Hinweise
• Die CT-Funktion steht möglicherweise nicht zur
Verfügung, auch wenn ein RDS-Sender empfangen
wird.
• Die mit der CT-Funktion eingestellte Uhrzeit ist nicht
immer korrekt.
SOUND
MODE
DSPL
MODE
SOUND
DSPL
Drücken der Tasten
(SOUND)
(SOURCE)
Stellen Sie durch Drehen des
Reglers VOL die Lautstärke ein.
Taste Funktion
(SOURCE)
(ATT)
(MODE)
(DSPL)
Wechseln der Tonquelle
(Radio/CD/MD*
(OFF)
1
)
Wechseln des Modus
(MODE)
(Radiofrequenzbereich/CDGerät/MD*
1
-Gerät)
(ATT) Dämpfen des Tons
(OFF)*
1
Stoppen der Wiedergabe
bzw. des Radioempfangs
(SOUND) Einstellen des Klangmod us
(DSPL)
Einstelle n der angezeigt en
Informationen
OFF
Fortsetzung siehe nächste Seite t
19
Page 48

*1 Nur wenn die entsprechenden gesondert
erhältlichen Geräte angeschlossen sind.
*2 Wenn Ihr Fahrzeug nicht über ein Zündschloß mit
Position ACC oder I verfügt, drücken Sie am Gerät
unbedingt 2 Sekunden lang (OFF), um die
Uhrzeitanzeige au szuschalten, nachdem Sie die
Zündung ausgeschaltet haben.
Drehen des Reglers
Regler
SEEK/AMS
Wenn Sie den Regler drehen und
loslassen, können Sie:
– Titel überspringen.
– Sender automatisch einstellen.
Wenn Sie den Regler drehen, halten und
loslassen, können Sie:
– in einem Titel vorwärts-/rückwärtssuchen.
– einen Sender manuell einst el len.
Drücken und Drehen des Reglers
Wechseln der Dr ehrichtung
Die Drehrichtung der Regler ist werkseitig wie in
der folgenden Abbildung zu sehen eingestellt.
Erhöhen
Verringern
Wenn Sie den Joystick rechts von der Lenksäule
anbringen, können Sie die Drehrichtung der
Regler ändern.
Halten Sie den Regler VOL gedrückt, und
drücken Sie (SOUND) 2 Sekunden lang.
Tip
Sie können die Drehrichtung der Regler auch mit dem
Gerät ändern (Seite 21).
Wenn Sie den Regler gl e ichzeitig
drücken und drehen, können Sie:
– gespeicherte Sender einstellen.
– die CD/MD wechseln*.
*Wenn ein gesondert erhältliches CD/MD-Gerät
angeschlossen ist.
20
Regler
PRESET/DISC
Page 49

Einstellen der Klangeigenschaften
Sie können die Bässe, die Höhen, die Balance
und den Fader einstellen .
Die Einstellungen für Bässe und Höhen können
getrennt für jede Tonquelle gespeichert werden.
1 Wählen Sie die einzustellende Option
aus, indem Sie (SOUND) wiederholt
drücken.
Mit jedem Tastendruck auf (SOUND)
wechselt die Anzeige folgende rmaßen:
BAS (Bässe) t TRE (Höhen) t BAL
(links-rechts)
t FAD (vorne-hinten)
2 Stellen Sie die ausgewählte Option ein,
indem Sie eine Seite von (SEEK)
drücken.
Beim Einstellen mit dem Joystick d rücken Si e
(SOUND) und drehen am Regler VOL.
Hinweis
Nachdem Sie eine Klangoption ausgewählt haben,
müssen Sie innerhalb von 3 Sekunden den
Einstellvorgang beginnen.
Schnelles Dämpfen des Tons
(mit dem Joystic k od er de r
Kartenfernbedienung)
Drücken Sie (ATT) auf dem Joystick oder
der Kartenfernbedienung.
„ATT-ON“ erscheint kurz im Display, und
danach wird „ATT“ angezeigt.
Wenn Sie wieder die vorherige Lautstärke
einstellen wollen, drücken Sie erneut (ATT).
Tip
Wenn das Schnittstellenkabel eines Autotelefons mit
der ATT-Leitung verbunden ist und ein Telefonanruf
eingeht, senkt das Gerät die Lautstärke automatisch
(Stummschaltfunktion zum Telefonieren).
Wechseln der Klang- und
Anzeigeeinstellungen
— Menü
Sie können folgende Optionen einstellen:
SET (Konfiguration)
• CLOCK (Uhrzeit) (Seite 9)
• CT-Daten (Uhrzei t ) (S eite 19)
• BEEP — Dient zum Ein- oder Auss chalten des
Signaltons.
• RM (Joystick) — Dient zum Wechseln der
Drehrichtung der Regler am Joystick.
– Wählen Sie „NORM“, wenn die werkseitig
voreingestellte Drehrichtung der Regler
beibehalten we rden soll.
– Wählen Sie „REV“, wenn Sie den Joystick
auf der rechten Seite der Lenksäule
anbringen.
DSPL (Display)
• D.INFO (Dual Information) — Uhrzeit und
Wiedergabemodus werden gleichzeitig
angezeigt (on).
• AMBER/GREEN — Sie können die
Beleuchtungsfarbe zwischen gelb und grün
umschalten (nur CDX-CA650).
• DIM (Dimmer) — Zum Einstellen der
Helligkeit im Display (nur CDX-CA650V).
– Mit „ON“ wird das Display dunkler.
– Mit „OFF“ wird der Dimmer deaktiviert.
• M.DSPL (Motion Display = Bewe gt e Anzeige)
— Dient zum Auswählen des Modus für die
bewegte Anzeige („1“, „2“ oder „OFF“).
– Wenn Sie „1“ wählen, werden im D isplay
Dekorationslinien angezeigt und die DemoAnzeige aktiviert.
– Wenn Sie „2“ wählen, werden im D isplay
Dekorationslinien angezeigt und die DemoAnzeige deaktiviert.
– Mit „OFF“ wird die bewegte Anzeige
deaktiviert.
• A.SCRL (Auto Scroll)
– Wenn Sie „ON“ wählen, laufen alle
angezeigten Namen mit mehr als 8 Zeichen
automatisch im Display durch und werden
auf diese Weise ganz angezeigt.
– Wenn die Funktion Auto Scroll auf OFF
gesetzt ist und der N ame der CD/MD bzw.
des Titels wechselt, läuft der Name nicht im
Display durch und wird daher nicht ganz
angezeigt.
Fortsetzung siehe nächste Seite t
21
Page 50

SND (Klang)
• LOUD (Loudness) — für eine gute
Klangqualität der Bässe und Höhen auch bei
geringer Lautst ärke. Die Bässe und Höhen
werden verstärkt.
P/M (Wiedergabemodus)
• LOCAL-ON/OFF (lo ka le r Su chmodus) (Seite
14)
– Wählen Sie „ON“, wenn Sie nur Sender mit
starken Signalen einstellen wollen.
• MONO-ON/OFF (monauraler Modus) (Seite
14)
– Wenn Sie „ON“ wählen, werden UKW-
Stereosender monaural wiedergegeben. Mit
„OFF“ schalten Sie in de n normalen Modus
zurück.
• REG-ON/OFF (Regional) (Seite 16)
Display
MBP-A – 4dB 0 0 – 4dB
MBP-B 0 – 4dB 0 – 4dB
MBP-OFF 0000
Drücken Sie (MBP) so oft, bis die
gewünschte Hörposition erscheint.
Der Modus von „Beste Klangposition“
erscheint im Display in derselben
Reihenfolge wie in der Tabelle.
Balance-Pegel Fader-Pegel
Rechts Links Vorne Hinten
1 Drücken Sie (MENU).
Zum Einstellen von A.SCRL drücken Sie
(MENU) während der Wiedergabe einer CD /
MD.
2 Drücken Sie eine Seite von
(DISC/PRESET) so oft, bis die gewünschte
Option erscheint.
3 Wählen Sie mit der Seite (+) von (SEEK)
die gewünschte Ei nstellung aus (z. B. O N
oder OFF).
4 Drücken Sie (ENTER).
Wenn Sie die Einstellung vorgenommen
haben, erschein t im Display wieder die
Anzeige für den normalen Wiedergabemodus.
Hinweis
Je nach aktueller Programmquelle werden
unterschiedliche Optio ne n ange zeigt.
Tip
Sie können problemlos zwischen den Kategorien
(„SET“, „DSPL“, „SND“, „P/M“ und „EDIT“) wechseln,
indem Sie eine Seite von (DISC/PRESET) 2 Sekunden
lang gedrückt halten.
Auswählen der Klangposition
— Beste Klangposition (MBP)
Wenn Sie alleine im Auto sitzen, können Sie mit
„Beste Klangpositi on“ eine optimale
Klangumgebung einstellen.
Für „Beste Klangposition“ gibt es zwei
Voreins te l lu ngen für den Tonpege l von Balance
und Fader. Mit der Taste MBP können Sie
mühelos eine davon ausw ählen.
Nach einer Sekunde erscheint im Displ a y
wieder die Anzeige für den normalen
Wiedergabemodus.
Wenn Sie den Tonp egel von Bala nc e und
Fader genauer einstellen wollen, können Sie
dazu die Taste (SOUND) verwenden (Seite
21).
Hinweise
• Wenn Sie BAL (Balance) oder FAD (Fader)
einstellen („Einstellen der Klangeigenschaften“ auf
Seite 21), gilt für MBP wieder die Einstell u ng OF F.
• Wenn MBP auf OFF gesetzt ist, werden BAL und
FAD aktiviert.
Einstellen des Equalizers
Sie können für sieben Musiktypen (VOCAL,
CLUB, JAZZ, NEW AGE, ROCK, CUSTOM,
und XPLOD) eine s pezielle Equalizer-Kurve
auswählen.
Sie können die Equalizer-Einstellungen für
Frequenz und Lautstärke auswählen und
speichern.
Auswählen der Equalizer-Kurve
1 Drücken Sie (SOURCE), um eine
Tonquelle (Radio, CD/MD) zu wählen.
22
Page 51

2
Drücken Sie (EQ7) so oft, bis die
gewünschte Equalizer-Kurve angezeigt
wird.
Mit jedem Tastendruck auf
die Einstellung.
Um den Equalizer-Effekt auszuschalten,
wählen Sie „OFF“. Nach drei Sekunden
erscheint im Dis p l ay wieder die Anzeig e für
den normalen Wiedergabemodus.
(EQ7)
wechselt
Einstellen der Equalizer-Kurve
1 Drücken Sie (MENU).
2 Drücken Sie eine Seite von
(DISC/PRESET) so oft, bis „EQ7 TUNE“
erscheint. Drücken Sie dann (ENTER).
3
Drücken Sie eine Seite v on
gewün sch te E qu alizer-Kurve
auszuwählen. Drüc ken Sie dann
Mit jedem Tastendruck auf (SEEK) wechselt
die Einstellung.
(SEEK)
, um die
(ENTER)
4 Wählen Sie die gewünschte Frequenz
und Lautstärke aus.
1 Drücken Sie eine Seite von (SEEK),
um die gewünschte Frequenz
auszuwählen.
Mit jedem Tastendruck auf (SEEK)
wechselt die Freq ue nz.
62 (Hz) y 157 (Hz) y 396 (Hz) y
1k (Hz) y 2.5k (Hz) y 6.3k (Hz) y
16k (Hz)
2 Drücken Sie eine Seite von
(DISC/PRESET), um die gewünschte
Lautstärke einzustellen.
Der Lautstärkepegel läßt sich in Schritten
von 1 dB auf einen Wert zwischen –10 dB
und +10 dB einstelle n.
Weitere Informationen
Wartung
Austauschen der Sic herung
We nn Sie ei ne Siche rung au stausc hen, acht en Si e
darauf, eine Ersatzsicherung mit dem gleichen
Ampere-Wert wie die Originalsicherung zu
verwenden. Diese r i st auf der Originalsicherung
angegeben. Wenn die Sicherung durchbrennt,
überprüfen Si e de n Stromanschluß und ta uschen
die Sicherung aus . Bre nnt die neue Sicherung
ebenfalls durch, kann eine interne Fehlfunktion
vorliegen. Wenden Sie sich in einem solchen Fall
an Ihren Sony-Händler.
.
Achtung
Verwenden Sie unter keinen Umständen eine
Sicherung mit einem höheren Ampere-Wert als
dem der Sicherung, die ursprünglich mit dem
Gerät geliefert wurde. Andernfalls kann es zu
Schäden am Gerät kommen.
Reinige n der Anschlüsse
Das Gerät funktioniert möglicherweise nicht
ordnungsgemäß, wenn die Anschlüsse zwische n
dem Gerät und der Frontplatte versc hmutzt sind.
Um dies zu vermeiden, nehmen Sie die Frontplatte
ab (Seite 8), und reinige n Sie die Anschlüsse mit
einem mit Alk oh ol ange fe uch tet en Wattestäbchen.
Drücken Sie dabei nicht zu fes t auf die Ansch lüsse.
Andernfalls können sie beschädigt werden.
Sicherung
(10 A)
Wenn Sie die werkseitig eingeste llte
Equalizer-Kurve wiederherstellen wollen,
drücken Sie 2 Sekunden lang (ENTER).
5 Drücken Sie zweimal (MENU).
Wenn die Klangfeldeinstellung abgeschlossen
ist, erscheint im Display die Anzeige für den
normalen Wiedergabemodus.
Hauptgerät
Rückseite der Frontplatte
Fortsetzung siehe nächste Seite t
23
Page 52

Hinweise
• Schalten Sie aus Sicherheitsgründen vor dem
Reinigen der Anschlüsse die Zündung aus, und
ziehen Sie den Schlüssel aus dem Zündschloß.
• Berühren Sie die Anschlüsse unter keinen
Umständen direkt mit den Händen oder einem
Metallgegenstand.
Austauschen der Lithiumbatterie
Unter normalen Bedingungen halten die
Batterien etwa ein Jahr. Die Lebens dauer der
Batterien kann je nach Gebrauch des Geräts
jedoch auch kürzer sein. (Wenn die Batterie
schwächer wird, verkürzt sich die Reichweite der
Kartenfernbedienung.) Tauschen Sie die Batterie
gegen eine neue CR2025-Lithiumbatterie aus.
x
Mit der Seite + nach oben
Entsorgungshinwei s: Bitte werfen Sie nur
entladene Batterien in die Sammelboxen beim
Handel oder den Kommu nen. Entladen sind
Batterien i n der Regel dann , we nn das Gerät
abschaltet und s ig nalisiert „Batterie leer“ oder
nach längerer Gebrauchsdauer der Batterien
nicht mehr einwan dfrei funktioniert. Um
sicherzugehen, kleben Sie die Batteriepole z.B.
mit einem Klebestreifen ab, oder geben Sie die
Batterien einzeln in ei nen Plastikbeutel.
Ausbauen des Geräts
1 Nehmen Sie die vordere Abdeckung ab
1 Nehmen Sie dazu die Frontplatte ab
(Seite 8).
2 Drücken Sie mit einem kleinen
Flachschraubenzieher auf die
Federlasche an der Innenseite der
vorderen Abdeckung.
Hinweise zur Lithiumbatterie
• Bewahren Sie die Lithiumbatterie außerhalb
der Reichweite von Kindern auf. Sollte eine
Lithiumbatterie verschluckt werd e n, ist
umgehend ein Arzt aufzusuchen.
• Wischen Sie die Batterie mit einem trockenen
Tuch ab, um einen guten Kontakt zwischen den
Batteriepolen und -anschlüssen sicherzu st ellen.
• Achten Sie beim Ei n l egen der Batterie auf die
richtige Polarität.
• Halten Sie die Batterie nicht mit einer
Metallpinzette. Dies könnte zu ei nem
Kurzschluß führen.
ACHTUNG
Die Lithiumbatterie kann bei
unsachgemäßem Umgang explodieren.
Laden Sie sie ni cht auf, zerle gen Si e sie nich t,
und werfen Sie sie nicht i ns Feuer.
24
3
Gehen Sie wie in Schritt 2 erläutert auch
an der anderen Seite vor.
2 Nehmen Sie das Gerät heraus
1 Drücken Sie mit einem kleinen
Flachschraubenzieher auf die
Federlasche an der linken Seite des
Geräts, und ziehen Sie die linke Seite
heraus, bis sich die Lasche nicht mehr
in der Halterung befindet.
4 mm
2 Gehen Sie wie in S ch r itt 1 erläutert
auch an der rechten Seite vor.
3 Ziehen Sie das Gerät aus seiner
Halterun g heraus.
Page 53

Technische Daten
CD-Player
Signal-Rauschabstand 90 dB
Frequenzgang 10 – 20.000 Hz
Gleichlaufschwankungen
Unterhalb der Meßgrenze
Tuner
UKW
Empfangsbereich 87,5 – 108,0 MHz
Antennenanschluß Anschluß für externe
Zwischenfrequenz 10,7 MHz/450 kHz
Nutzbare Empfindlichkeit
Trennschärfe 75 dB bei 400 kHz
Signal-Rauschabstand 66 dB (stereo),
Harmonische Verzerrung bei 1 kHz
Kanaltrennung 35 dB bei 1 kHz
Frequenzgang 30 – 15.000 Hz
MW/LW
Empfangsbereich MW: 531 – 1.602 kHz
Antennenanschluß Anschluß für externe
Zwischenfrequenz 10,7 MHz/450 kHz
Empfindlichkeit MW: 30 µV
Antenne
8 dBf
72 dB (mono)
0,6 % (stereo),
0,3 % (mono)
LW: 153 – 279 kHz
Antenna
LW: 40 µV
Endverstärker
Ausgänge Lautsprecherausgänge
Lautsprecherimpedanz 4 – 8 Ohm
Maximale Leistungsabgabe
(versiegelte Anschlüsse)
×
4 (an 4 Ohm)
50 W
Allgemeines
Ausgänge Audioausgänge
Eingänge Steuerleitung für
Klangregler Bässe ±8 dB bei 100 Hz
Betriebsspannung 12 V Gleichstrom,
Abmessungen c a . 17 8 × 50 × 177 mm (B/
Einbaumaß ca. 182 × 53 × 161 mm (B/
Gewicht ca. 1,2 kg
Mitgeliefertes Zubehör Montageteile und
SonderzubehörJoystick
Zusätzliche Geräte CD-Wechsler (10 CDs)
MotorantennenSteuerleitung
Steuerleitung für
Endverstärker
Stummschaltung beim
Telefonieren
Fernbedienungseingang
Antenneneingang
Höhen ±8 dB bei 10 kHz
Autobatterie
(negative Erdung)
H/T)
H/T)
Anschlußzubehör
(1 Satz)
Behälter für Frontplatte (1 )
RM-X4S
Kartenfernbedienung
RM-X114
BUS-Kabel (mit einem
Cinchkabel geliefert)
RC-61 (1 m), RC-62 (2m)
CDX-848X, CDX-646
CD-Wec hsl er (6 CDs)
CDX-T68X, CDX-T67
MD-Wech sler (6 MDs)
MDX-65
Signalquellenwähler
XA-C30
Hinweis
Dieses Gerät kann nicht an einen digitalen
Vorverstärker oder an einen Equalizer angeschlossen
werden.
Änderungen, die dem technischen Fortschritt dienen,
bleiben vorbehalten.
25
Page 54

Störungsbehebung
Anhand der folgenden Checkliste können Sie die
meisten Probleme, die möglicherweise an Ihrem
Gerät auftreten, selbst beheben.
Bevor Sie die folgende Checkliste durchgehen,
überprüfen Sie bit t e zunächst, ob Sie das G erät
richtig angeschlossen und bedient hab en.
Allgemeines
Es ist kein Ton zu hören.
• Stellen Sie durch Drehen des
Lautstärkereglers im Uhrzeigersinn die
Lautstärke ein.
• Schalten Sie die ATT-Funktion aus.
• Stellen Si e den Fader-Regler bei einem
Zweilautsprechersystem in die mittlere
Position.
Der Speicherinhalt wurde gelöscht.
• Die Taste RESET wurde gedrückt.
t Speichern Sie die Ei nstellungen erneut.
• Das Netzkabel wurde gelöst, oder die
Verbindung zur Batterie besteht nicht mehr.
• Das Stromversorgungskabel ist nicht richtig
angeschlossen.
Kein Signalton ertönt.
Der Signalton ist deaktiviert (Seite 21).
Anzeigen werden ausgeblendet bzw.
erscheinen nicht im Display.
• Die Uhrzeitanzeige wird ausgeblendet, wenn
Sie 2 Sekunden lang (OFF) drücken.
t Drücken Sie (OFF) erneut 2 Sekunden
lang, um die Uhrzeit anzuzeigen.
• Nehmen Sie die Fr ontplatte ab, und reini gen
Sie die Anschlüsse. Einzelheiten dazu finden
Sie unter „Reinig en der Anschlüsse“ ( Sei te
23).
Gespeicherte Sender und die korrekte
Uhrzeit werden gelöscht.
Die Sicherung ist durchgebrannt.
Es kommt zu Störgeräuschen, wenn sich
der Zündschlüssel in der Position EIN, AUS
oder ACC bzw. I (Zubehö r po s ition) befindet.
Die Leitungen si nd nicht korrekt an den
Hilfsstromanschluß im Auto angeschlossen.
Das Gerät wird nicht mit Strom versorgt.
• Überprüfen Si e die Kabelverbindungen.
Wenn die Anschlüsse in Ordnung sind,
überprüfen Sie die Si cherung.
• Das Auto hat keine Zubehörposition (ACC
bzw. I).
t Drücken Sie (SOURCE), bzw. legen Sie
eine CD/MD ein, um das Gerät
einzuschalten.
Das Gerät wird permanent mit Strom
versorgt.
Das Auto hat keine Zubehörposition (ACC
bzw. I).
Die Motorantenne wird nicht ausgefahren.
26
Die Motorante nne hat kein Relaiskästchen.
CD/MD-Wiedergabe
Es läßt sich keine CD einlegen.
• Es ist bereits eine C D ei ngelegt.
• Die CD wird falsch herum bzw. falsch
eingelegt.
Die Wiedergabe startet nicht.
• Die MD ist beschädigt, bzw. die CD ist
verschmutzt.
• Die CD-R ist nicht a bgeschlossen.
• Sie haben versucht, eine CD-R wiederzugeben,
die nicht als Audio-CD konzipiert ist.
• Einige CD-Rs werden je nach dem Gerät,
mit dem sie bespielt wurden, oder dem
Zustand der CD-R s el bst unter Umständen
nicht wiedergegeben.
Die CD/MD wird automatisch ausgeworfen.
Die Umgebungstemperatur ist höher als 50 °C.
Die CD wird nicht ausgeworfen.
Die Funktionstasten funktionieren nicht.
Drücken Sie die Taste RESET.
Aufgrund von Vibrationen kommt es zu
Tonsprüngen.
• Das Gerät ist in einem Winkel von mehr als
60° installiert.
• Das Gerät wurde nicht an einem stab ilen Teil
des Fahrzeu gs installiert .
Tonsprünge treten auf.
Die CD/MD ist schmutzig oder defekt.
Die Anzeige „--------“ läßt sich nicht
ausschalten.
Sie befinden sich im Benen nungsmodus.
t Drücken Sie (LIST) 2 Seku nden lang.
Radioempfang
Gespeicherte Sender lassen sich nicht
einstellen.
• Speichern Sie den/die Sender unter der
korrekten Frequenz ab.
• Das Sendesigna l i st zu schwach.
Sender lassen sich nicht empfangen.
Der Ton ist stark gestört.
• Schließen Sie ein Motorant ennenSteuerkabel (blau) oder ein
Stromvers orgungskabel für Zubehörgeräte
(rot) an das Stromversorgungskabel für den
Antennenverstärker eines Fahrzeugs an (nur,
wenn das Fahrzeug mit einer in der Heck-/
Seitenfensterscheibe integrierten UKW/
MW/LW-Antenne ausgestattet ist).
• Prüfen Sie die Verbindung der Autoantenne.
• Die Autoan te nne wird nicht ausgefahren.
t Prüfen Sie die Verbindung des
Motorantennen-Steuerkabels.
• Überprüfen Sie di e Fr equenz.
Page 55

Der automatische Sendersuchlauf
funktioniert nicht.
• Der lokale Sendersuchlauf ist auf „ON“
eingestellt.
t Setzen Sie den lokalen Suchmod us auf
„OFF“ (Seite 22).
• Das Sendesignal ist zu schwach.
t Stellen Sie die Sender manuell ein .
Die Anzeige „ST“ blinkt.
• Stellen Sie die Frequ en z genau ein.
• Das Sendesignal ist zu schwach.
t Schalten Sie in den Mono-
Empfangsmodus (Seite 22).
Eine Stereosendung ist nur monaural zu
hören.
Das Gerät ist in den monauralen
Empfangsmodus geschaltet.
t Beenden Sie den monauralen
Empfangsmodus (Seite 22).
RDS
Der Sendersuchlauf (SEEK) startet nach ein
paar Sekunden Radioempfang.
Der Sender ist kein Verkehrsfunksender, oder
die Sendesignale sind zu schwach.
t Drücken Sie (AF) oder (TA) so oft, bis
„AF-OFF“ oder „TA-OFF“ erscheint.
Es sind keine Verkehrsdurchsagen zu
hören.
• Aktivieren Sie „TA“.
• Der Sender sendet keine
Ver kehr sdurchsagen, obwoh l e s si ch um
einen TP-Sender handelt.
t Stellen Sie einen anderen Sender ein.
Bei der PTY-Funktion wird „--------“
angezeigt.
• Der aktuelle Se nder ist kein RDS - S ender .
• Es wurden keine RD S-Daten empfangen.
• Der Sender gibt de n Pr ogrammtyp nicht an.
Fehleranzeigen/Meldungen
Fehleranzeigen
(Für dieses Gerät und für gesondert
erhältliche CD/MD-Wechsler)
Folgende Anzeigen blinken etwa 5 Sekunden
lang, und ein Alarmton ist zu hören.
BLANK*
ERROR*
HI TEMP
NO DISC
NO MAG
NOTREADY
RESET
*1 Wenn während der Wiedergabe einer CD oder MD
*2 Die Nummer der CD/MD, die den Fehler
Wenn sich das Problem mit diesen
Abhilfemaßnahmen nicht beheben läßt, wenden
Sie sich an einen Sony-H ändler.
1
Die MD enthält keine Titel.*
t Geben Sie eine MD wieder, auf der Titel
2
aufgezeichn et si n d.
1
• Eine CD ist verschmutzt oder falsch herum
eingelegt.*
t Reinigen Sie die CD, bzw. legen Sie sie
2
korrekt ein .
• Eine CD/MD kann aufgrund einer Störung
nicht abgespielt werden.*
t Legen Sie eine andere CD/MD ein.
2
Die Umgebungstemperatur ist höher als 50 °C.
t Warten Sie, bis die Temperatur unter 50 °C
sinkt.
Es befindet sich keine CD/ M D i m CD/MDGerät.
t Legen Sie CDs/MDs in das CD/MD- G er ät
ein.
Das CD/MD-Magazin ist nicht i n das CD/MDGerät eingelegt.
t Setzen Sie ein Magazin in das CD/MD-
Gerät ein.
Der Deckel des MD-G eräts ist offen, oder die
MDs wurden nicht korrekt eingelegt.
t Schließen Sie den Deckel, bzw. legen Sie
die MDs korrekt ei n.
Das CD/MD-Gerät kann wege n ei ner Störung
nicht bedient wer den.
t Drücken Sie die Taste RESET am G erät.
ein Fehler auftritt, erscheint die Nummer der CD
bzw. MD nicht im Display.
verursacht, erscheint im Display.
27
Page 56

Meldungen
L.SEEK +/–
Der lokale Suchmodus ist beim au tomatisc hen
Sendersuchlauf aktiviert (Seite 14).
NO AF
Für den aktuellen Sender gibt es keine
Alternativfrequenz.
„“ oder „“
Sie sind am Anfang bzw. Ende der CD/MD
angelangt und können nicht w eiter vorwärtsoder rückwärtssuchen.
28
Page 57

Page 58

Félicitations !
Nous vous remercions d’avoir fait l’acquisition
d’un lecteur de disqu es com pacts Sony. Vous
pourrez exploiter les multiples fonctions
d’utilisation de cet appareil à l’aide des
accessoires ci-des sous:
• Appareils CD/MD en option (chang eurs et
lecteurs)*
• Informations CD TEXT (affichées lorsqu’un
disque CD TEXT*
CD en option raccordé disposant de la fonction
CD TEXT).
• Accessoires de commande en option
Satellite de commande RM-X4S
Mini-télécommande RM-X114
*1 Cet appareil fonctionne uniquement avec des
*2 Un disque CD TEXT est un CD audio contenant
1
.
2
est écouté sur un lecteur
produits Sony.
des informations comme le nom du disque, le nom
de l’artiste et le nom des pistes. Ces informations
sont enregistrées sur le disque.
2
Page 59

Table des matières
Emplacement des commandes. . . . . . . . . . . . 4
Précautions . . . . . . . . . . . . . . . . . . . . . . . . . . 6
Remarques sur les disques. . . . . . . . . . . . . . . 6
Préparation
Réinitialisation de l’appareil . . . . . . . . . . . . . 7
Dépose de la façade. . . . . . . . . . . . . . . . . . . . 8
Réglage de l’horloge . . . . . . . . . . . . . . . . . . . 9
Lecteur CD
Lecteur CD/MD (en option)
Lecture d’un disque. . . . . . . . . . . . . . . . . . . . 9
Rubriques d’affichage . . . . . . . . . . . . . . . . . 10
Lecture répétée de p i st es
— Lecture répétée . . . . . . . . . . . . . . . 10
Lecture des pistes dans un ordre arbitraire
— Lecture aléatoire . . . . . . . . . . . . . . 10
Identification d’un CD
— Disc Memo*. . . . . . . . . . . . . . . . . . . 11
Localisation d’un d is que par son nom
— List-up*. . . . . . . . . . . . . . . . . . . . . . . 12
Sélection de pistes spécifiques pour la le ct ur e
— Bank*. . . . . . . . . . . . . . . . . . . . . . . . . 12
* Fonctions disponibles avec le lecteur de CD/MD en
option
Radio
Mémorisation automatique des stations
— Mémorisation du meilleur accord
(BTM). . . . . . . . . . . . . . . . . . . . . . . . . . . 13
Réception des stations mémorisées. . . . . . . 14
Mémorisation des stations souhaitées
uniquement . . . . . . . . . . . . . . . . . . . . . . . 14
Syntonisation d’un e s ta tion via une liste
— List-up. . . . . . . . . . . . . . . . . . . . . . 15
RDS
Aperçu de la fonction RDS. . . . . . . . . . . . . 15
Resyntonisation automatique pour une
meilleure réception
— Fonction AF . . . . . . . . . . . . . . . . . . . 16
Ecoute des messages de radioguidage
— TA/TP . . . . . . . . . . . . . . . . . . . . . . 17
Présélecti on des s tations RDS ave c les donn ées
AF et TA . . . . . . . . . . . . . . . . . . . . . . . . 17
Localisation d’une station en fonction du type
d’émission
— PTY . . . . . . . . . . . . . . . . . . . . . . . . 18
Réglage automati que de l’heure
— CT . . . . . . . . . . . . . . . . . . . . . . . . . 19
Autres fonctions
Utilisation du satellite de commande . . . . . 19
Réglage des caractéristiques du son . . . . . . 21
Coupure rapide du son . . . . . . . . . . . . . . . . 21
Modificatio n des réglages du son et d e
l’affichage
— Menu . . . . . . . . . . . . . . . . . . . . . . . 21
Sélection de la position du son
— My Best sound Position
(MBP)
Réglage de l’égaliseur. . . . . . . . . . . . . . . . . 22
. . . . . . . . . . . . . . . . . . . . . . . . . . 22
Informations complémentaires
Entretien . . . . . . . . . . . . . . . . . . . . . . . . . . . 23
Démontage de l’appareil. . . . . . . . . . . . . . . 24
Spécifications . . . . . . . . . . . . . . . . . . . . . . . 25
Dépannage . . . . . . . . . . . . . . . . . . . . . . . . . 26
Affichage des erreurs/Messages . . . . . . . . . 2 7
3
Page 60

Emplacement des commandes
Pour plus de détails, reportez-vous aux pages indiquées.
: En cours de lecture : En cours de réception radio : Dans le mode menu
CD/MD
RADIO MENU
1
2
3
REP
MBP
EQ 7
SOURCE
MODE
SHUF
6
5
4
1 Molette de contrôle du volume 17
2 Touche MBP 22
3 Touche Z (eject)
l’appareil derr i ère la façade)
(située à l’avant de
9
4 Touche SOURCE (Mise sous tension/
Radio/CD/MD) 8, 9, 10, 11, 13, 14, 17, 22
5 Fenêtre d’affichage
6 Récepteu r pour la mini-télécommande
7 Touche MENU 9, 11, 12, 13, 17, 19, 22, 23
8 Touche DISPLAY/PTY (Modification du
mode d’affichage/type d’émission) 10,
11, 15, 18
9 Touche S (SCROLL) 10
q; Touche OPEN 8, 9
qa Touche LIST
11, 12
CD/MD
15
RADIO
qs Touche EQ7 22
qd Touche RESET
l’appareil derr i ère la façade)
(située à l’avant de
7
PTY
S
D
LL
O
R
C
S
DISPLAY
R
E
P
/
S
C
S
I
D
MENU
SOUND
AF
TA
O
F
CDX-CA650X/CA650V/CA650
qf Touches numériques
CD/MD
(3) REP 10
(6) SHUF 10
14, 16, 17
RADIO
qg Tou che MODE
10, 11
CD/MD
13, 14, 17
RADIO
qh Touche SOUND 21, 22
qj Tou che AF 16, 17
qk Tou che TA 17
ql Touche OFF (Arrêt/Mise hors tension)*
8, 9
w; Touche ENTER
12
CD/MD
15, 18
RADIO
9, 11, 12, 13, 17, 19, 22, 23
MENU
*Avertissemen t en cas d’installation de
l’appareil dans une voiture dont le contact
ne comporte pas de position ACC
(Accessoires)
Après avoir coupé le moteur, n’oubliez pas
d’appuyer sur
(OFF) pendant deux secondes
pour désactiver l’affichage de l’horloge.
Sinon l’affichage n’est pa s désactivé et cela
risque de décharger la batterie.
O
P
EN
E
T
LIST
SEEKSEEK
ENTER
F
4
Page 61

PTY
S
(SEEK)
(–): pour
effectue r une
sélection
vers la
gauche/.
D
DISPLAY
MENU
SOUND
AF
TA
(+): pour effectuer une
sélection vers le haut
(–): pour effectuer une
sélection vers le bas
O
P
E
N
LL
O
R
SC
R
E
P
/
S
C
E
S
T
I
D
LIST
SEEKSEEK
ENTER
O
FF
(DISC/PRESET)
(DISC/PRESET)
(SEEK)
(+): pour
effectuer
une
sélection
vers la
droite/>
En mode menu, la/les touche(s) pouvant être
sélectionnée(s) sont indiquée(s) par le symbole
“ M” dans la fenêtre d’affichage.
wa Touches DISC/PRESET (+/–)
10, 12
CD/MD
14, 15, 18
RADIO
9, 11, 12, 13, 17, 19, 22, 23
MENU
ws Touches SEEK (–/+)
9
CD/MD
14, 16
RADIO
9, 11, 12, 13, 19, 21, 22, 23
MENU
Mini-télécommande RM-X114
(en option)
DSPL MODE
+
PRESET
LIST
+
DISC
MENU
SOURCE
–
SEEK
SOUND
DISC
PRESET –
+
VOL
–
Les touches corresponda ntes de la minitélécommande pilotent les mêmes
fonctions que celles de l’appareil.
1 Touche DSPL
2 Touche MENU
3 Touche SOURCE
4 Touches SEEK (</,)
5 Touche SOUND
6 Touche OFF
7 Touches VOL (–/+)
8 Touche MODE
9 Touche LIST
q; Touches DISC/PRESET(M/m)
qa Touche ENTER
qs Touche ATT
Remarque
Si vous désactivez l’appareil en appuyant sur (OFF)
pendant deux secondes, il ne peut plus être utilisé
avec la mini-télécommande sauf si la touche
(SOURCE) de l’appareil est enfoncée ou si un disque
est d’abord inséré dans le lecteur pour activer
l’appareil.
Conseil
Pour obtenir des informations détaillées sur la façon
de remplacer la pile, reportez-vous à “Remplacement
de la pile au lithium” (page 24).
+
SEEK
R
–
TE
N
E
ATTOFF
5
Page 62

Précautions
Remarques sur les disques
• Si votre voitu re est g arée en plein soleil, laissez
refroidir l’appareil avant de l’utiliser.
• Les antennes électriques se déploient
automatiquement lorsque l’appareil est mis en
marche.
Si vous avez des questions ou des problèmes
concernant le fonctionnement de c et a ppa re il qui
ne sont pas abordés dans ce manuel, consul t ez
votre revendeur Sony le plus proche.
Condensation d’humidité
Par temps de pluie ou dans des régions très
humides, de l’humidité risque de se condenser
sur les lentilles et dans la fenêtre d’affichage de
l’appareil. Si cela se produit, l’appare il ne
fonctionne pas correctement. En pareil cas,
retirez le disque et attendez environ une heure
que l’humidité se soit évaporée.
Pour conserver un s on de hau te qualité
Veillez à ne pas re nverser d e jus de fruit ou de
boissons sucr ées sur l’appareil ou sur les disques.
• Pour que les disques restent propres, n’en
touchez par la surface. Saisiss ez le disqu e par
les bords.
• Gardez vos disques dans leur boîtier ou d ans leur
étui de rangement lorsqu’ils ne sont pas utilisés.
N’exposez pas les disques à la chaleur ou à des
températures élevées. Evitez de les la isser dans
une voiture en stationnement, sur le tableau de
bord ou la piste arr ière.
• Ne collez pas d’étiquettes sur les disques et
n’utilisez pas de disques rendus collants par de
l’encre/des résidus. De tels disques risquent de
s’arrêter en cours de lect ure, créant un
dysfonctionne m ent, ou ils peuvent
endommage r vos disques.
• Les disques de forme non standard (par ex. en
forme de cœur, de carré, d’étoile) ne peuvent
pas être lus sur cet appareil. Vous risquez
d’endommager votre appareil si vous essayez
de le faire. N’utilisez pas de tels disq ue s.
• Vous ne pouvez pas écouter de CD de 8 cm sur
ce lecteur.
• Avant la lecture, nettoyez les disques avec un
chiffon de nettoyage di sponible dans le
commerce. Essuyez chaque disque en partant
du centre. N’utilisez pas de solvants tels que la
benzine, du diluant, des produits de nett oyage
vendus dans le comm erce ou des sprays
antistatiques destinés aux disques analogiques.
6
Page 63

Remarques sur les disques CD-R
• Vous pouvez lire des CD-R audio (CD
enregistrables) avec cet appareil.
Repérez cette marque pour distinguer les CD-R
à usage audio.
Cette marque indi que que le CD n’est pas à
usage audio.
• Il est possible que ce lecteur ne puisse pas lire
certains CD-R (selon l’équipement utilisé pour
l’enregistrement ou l’état du disque).
• Vous ne pouvez pas lire un CD-R qui n’ est pas
finalisé*.
* Processus nécessaire pour qu’un disque CD-R
puisse être lu sur un lecteur CD audio.
Préparation
Réinitialisation de l’appareil
Avant la première mise en service de l’ appareil
ou après avoir remplac é la batterie de la voiture,
vous devez réini tia liser l’appareil.
Retirez la façade et appuyez sur la touc he
RESET avec un objet pointu, comme par
exemple un stylo à bille.
To uche RESET
Remarque
Une pression sur la touche RESET efface l’heure et
certaines fonctions mémorisées.
7
Page 64

Dépose de la façade
Vous pouvez retirer la façade de cet appareil pour
le protéger contre le vol.
Avertisseur
Si vous mettez la clé de contact en position OFF
sans ôter la façade, l’alarme retentit pendant
quelques secondes.
Si vous raccordez un amplificateur en option et
que vous n’utilisez pas l’amplificateur intégré, le
bip sonore est désactivé.
1 Appuyez sur (OFF)*.
La lecture CD/MD ou l’écoute de la radio
s’arrête (l’éclairage des touches et l’affichage
restent apparents).
* Si votre voiture ne dispose pas de position ACC,
assurez-vous que vous désactivez l’appareil en
appuyant sur (OFF) pendant 2 secondes pour
éviter que la batterie ne se décharge.
2 Appuyez sur (OPEN), puis faites
légèrement glisser la façade vers la
droite et dégagez le c ôté gauche.
1
2
Remarques
• Si vous retirez la façade alors que l’appareil est
toujours sous tension, l’alimentation est
automatiquement coupée de manière à éviter
d’endommager les enceintes.
• N’exercez pas de pression excessive sur la façade
et sur la fenêtre d’affichage.
• N’exposez pas la façade à la chaleur, à des
températures élevées ou à l’humidité. Evitez de la
laisser dans une voiture en stationnement, sur le
tableau de bord ou la piste arrière.
Conseil
Lorsque vous transportez la façade, glissez-la dans
l’étui fourni à cet effet.
Fixation de la façade
Placez l’orifice A de la façade sur la broche B
de l’appareil, puis poussez doucement la façade
vers le côté gauche en exerçant une pression.
Appuyez sur (SOURCE) (ou insérez un CD)
pour faire fonctionner l’appareil.
A
B
x
Remarque
Ne posez rien sur la partie interne de la façade.
8
Page 65

Réglage de l’horloge
L’horloge fonct ionne suivant un cycle de 24
heures.
Exemple: pour régler l’horloge sur 10:08
Lecteur CD Lecteur CD/MD (en option)
1 Appuyez sur (MENU), puis appuyez
plusieurs fois sur l’un des côtés de
(DISC/PRESET) jusqu’à ce que l’indication
“CLOCK” apparaisse.
1 Appuyez sur (ENTER).
L’indication des heures clignote.
2 Appuyez sur l’un des côtés de
(DISC/PRESET) pour régler l’heure.
3 Appuyez sur le côté (+) de (SEEK).
L’indication des minutes clignote.
4 Appuyez sur l’un des côtés de
(DISC/PRESET) pour régler les
minutes.
2 Appuyez sur (ENTER).
L’horloge comm ence à fonctionner. Une fois
le réglage de l’horloge termin é, l’affichage
revient au mode de lecture normal.
Conseils
• Vous pouvez régler l’horloge automatiquement au
moyen de la fonction RDS (page 19).
• Lorsque le mode D.INFO est activé, l’heure est
toujours affichée (page 21).
Cet appareil vous permet, en plus de la lecture
d’un CD, de commander des lecteurs CD/MD
externes.
Remarque
Si vous raccordez le lecteur CD en option avec la
fonction CD TEXT, les informations CD TEXT
apparaissent dans la fenêtre d’affichage lorsque vous
écoutez un disque CD TEXT.
Lecture d’un disque
(Avec cet appareil)
1 Appuyez sur (OPEN) et insérez le disque
(avec l’étiquette vers le haut).
2 Refermez la façade.
La lecture commence automatiquement.
Si un disque se tro uve déjà dans l’appareil,
appuyez plusieurs fois sur (SOURCE) jusqu’à ce
que “CD” apparaisse afin de commencer la
lecture.
Pour Appuyez sur
interrompre la
lecture
éjecter le disque (OPEN) puis Z
sauter des pistes
– Capteur de
musique
automatique
Avance rapide/
retour
– Recherche
manuelle
(OFF)
(SEEK) (./>)
[une fois pour chaque plage]
(SEEK) (m/M)
[maintenir jusqu’à l’endroit
souhaité]
page suivante t
9
Page 66

Remarques
• Lorsque la dernière piste du disque est terminée, la
lecture reprend à partir de la première piste du CD.
• Avec un appareil en option raccordé, la lecture de la
même source continue sur le lecteur CD/MD en option.
(Avec l’appareil en option)
1 Appuyez plusieurs fois sur (SOURCE)
pour sélectionner “CD” ou “MD.”
2 Appuyez plusieurs fois sur (MODE)
jusqu’à ce que l’appareil souhaité
apparaisse.
La lecture commen ce .
*1 “NO NAME” indique qu’il n’y a pas de Disc Memo
(page 11) ou de nom préenregistré à afficher.
*2 Uniquement pour les disques CD TEXT
comprenant le nom de l’artiste.
Remarques
• Certains caractères ne peuvent pas être affichés.
• Pour certains disques CD TEXT contenant
beaucoup de caractères, le défilement automatique
peut être inopérant.
• Cet appareil ne peut pas afficher le nom de l’artiste
de chaque piste d’un disque CD TEXT.
Conseil
Lorsque la f onc tion A uto s crol l est désactivée et qu e le
nom du disque ou de la piste est modifié, le nom du
disque ou de la piste ne défile pas.
Pour Appuyez sur
passer d’un disque
(DISC/PRESET) (+/–)
à l’autre
–Sélection d’un
disque
Rubriques d’affichage
Lorsque le disque/la piste change, tout titre
préenregistré*
piste est automat iq uement affiché (si la fonction
de défilement automatique, Auto Scroll, est
réglée sur “ON”, les noms dépassant 8 c arac tères
défilent dans la fenêtre d’affichage (pag e 21)).
Pour Appuyez sur
passer d’une
rubrique d’affichage
à l’autre
faire défiler l’objet
affiché
1
du nouveau disque/de la nouvelle
Rubriques affichables
• Source de musique
• Horloge
• Fonction
Rubriques affichables
• Temps de lecture écoulé
• Nom du disque*
l’artiste*
• Titre de la pistes*
1
2
/Nom de
1
(DISPLAY/PTY)
(S) (SCROLL)
10
Lecture répétée de pistes
— Lecture répétée
Le lecteur de l’appareil principal répète une piste
ou tout le disque lorsqu’il arrive à la fin. Pour
répéter la lecture, vous pouvez sélectionner:
• REP-1 — pour répéter un e piste.
• REP-2* — pour répéter un disque.
* Disponible uniquement lorsqu’un ou plusieurs
lecteurs CD/MD en option sont raccordés.
En cours de lecture, appuyez plusieurs
fois sur (3) (REP), jusqu’à ce que le
réglage souhaité apparaisse dans la
fenêtre d’affichage.
La lecture est répétée.
Pour revenir au mode de lecture normal,
sélectionnez “REP-OFF”.
Lecture des pistes dans un
ordre arbitraire
— Lecture aléatoire
Vous p ouvez sélectionner:
• SHUF-1 — pour écouter les p istes du di sque en
cours de lecture dans un ordre aléatoire.
• SHUF-2*
CD (MD) dans un ordre aléatoire.
• SHUF-ALL*
des appareils CD (MD) (y compris celles de cet
appareil) dans un or dre aléatoire.
*1 Disponible uniq ue men t lors qu ’un ou plusi e urs
*2 Disponible uniq ue men t lors qu ’un ou plusi e urs
Pour revenir au mode de lecture normal,
sélectionnez “SHUF-OFF”.
1
— pour écouter les pistes du lecteur
2
— pour écouter toutes les pistes
lecteurs CD (MD) en option sont raccordés.
lecteurs CD ou deux ou plusieurs lecteurs MD sont
raccordés.
En cours de lecture, appuyez plusieurs
fois sur (6) (SHUF), jusqu’à ce que le
réglage souhaité apparaisse dans la
fenêtre d’affichage.
La lecture aléatoire commence.
Page 67

Remarque
“SHUF-ALL” ne passera pas d’une piste à l’autre d’un
lecteur CD à une piste de lecteur MD dans ordre
aléatoire.
Identification d’un CD
— Disc Memo (pour un lecteur CD disposant
de la fonction CUSTOM FILE)
Vous po uvez identifier chaque disque avec un
nom personnal i sé (Disc Memo). Vous pouvez
saisir jusqu’à 8 caractères pour un disque. Si
vous identifiez un CD, vous pouvez le loc al i se r
par son nom (page 12).
1 Commencez à écouter le disque que
vous souhaitez identifier.
2 Appuyez sur (MENU), puis appuyez
plusieurs fois sur l’un des côtés de
(DISC/PRESET) jusqu’à ce que l’indication
“NAMEEDIT” apparaisse.
3 Appuyez sur (ENTER).
L’appareil répéte la le ctur e du di sque au co urs
de la procédure d’identification.
4 Saisissez les caractères.
1 Appuyez plusieurs fois sur le côté
1
(+)*
de (DISC/PRESET) pour
sélectionner le caractère souhaité.
A t B t C ... t 0 t 1 t 2 ... t +
t – t
*1 Pour l’ordre inversé, appuyez sur le côté
*2 (espace)
2 Appuyez sur le côté (+) de (SEEK)
après avoir repéré le caractère
souhaité.
Si vous a ppu yez su r l e c ôté (–) de(SEEK),
vous pouvez revenir vers la gauche.
3 Répétez les étapes 1 et 2 pour saisir
la totalité du nom.
... t _*2 t A
*
(–) de (DISC/PRESET).
5 Pour revenir au mode de lecture CD
normal, appuyez sur (ENTER).
Conseils
• Procédez par écrasement ou saisissez “_” pour
corriger ou effacer un nom.
• Il existe une autre méthode pou r identifier un CD:
Appuyez sur (LIST) pendant deux secondes au lieu
d’effectuer les étapes 2 et 3. Vous pouvez
également achever l’opération en appuyant sur
(LIST) pendant 2 secondes au lieu d’effectuer
l’étape 5.
• Vous pouvez identifier des CD d’un appareil ne
disposant pas de la fonction CUSTOM FILE si cet
appareil est raccordé à un lecteur CD disposant de
cette fonction. La Disc Memo est enregistrée dans la
mémoire du lecteur CD avec la fonction CUSTOM
FILE.
Remarque
REP-1/la lecture aléatoire est interrompu(e) jusqu’à ce
que l’édition du nom soit terminée.
Affichage de Disc Memo
En tant que rubrique d’affichage, Disc Memo est
toujours prioritaire sur toutes les informations
CD TEXT d’origine.
Pour Appuyez sur
afficher (DISPLAY/PTY) au cours de
Conseil
Pour en savoir plus sur les autres rubriques qui
peuvent être affichées, reportez-vous à la page 10.
la lecture du disque CD/CD
TEXT
Suppression de Disc Memo
1 Appuyez sur (SOURCE) plusieurs fois
pour sélectionner “CD”.
2 Appuyez plusieurs fois sur (MODE) pour
sélectionner le lecteur contenant la Disc
Memo.
3 Appuyez sur (MENU), puis appuyez
plusieurs fois sur l’un des côtés de
(DISC/PRESET) jusqu’à ce que l’indication
“NAME DEL” apparaisse.
4 Appuyez sur (ENTER).
Les noms mémorisés apparaissent du plus
récent au plus ancien.
5 Appuyez plusieurs fois sur l’un des
côtés de (DISC/PRESET) pour
sélectionner le nom du disque que vous
voulez effacer.
Les noms mémorisés apparaissent du plus
récent au plus ancien.
page suivante t
11
Page 68

6 Appuyez sur (ENTER) pendant 2
secondes.
Le nom est effacé.
Répétez les étapes 5 et 6 si vous voulez
effacer d’autres noms.
7 Appuyez deux fois sur (MENU).
Le lecteur revient au mo de de lecture CD
normal.
Remarques
• Lorsque la Disc Memo d’un CD TEXT est effacée,
les informations CD TEXT d’origine apparaissent.
• Si vous ne pouvez pas trouver la Disc Memo que
vous voulez effacer, essayez de sélectionner un
autre lecteur CD à l’étape 2.
Localisation d’un disque par
son nom
— List-up (Pour un lecteur CD disposant de la
fonction CD TEXT/CUSTOM FILE ou pour un
lecteur MD)
Vous po uvez ut iliser cette fonction pour les
disques dont vous avez personn al isé les noms*
ou pour les disques CD T E X T*
*1 Localiser un disque par son nom: lorsque vous
attribuez un nom au CD (page 11) ou au MD.
*2 Localiser des disques grâce aux informations CD
TEXT lorsque vous écoutez un disque CD TE XT
sur un lecteur CD équipé de la fonction CD TEXT.
1 Appuyez sur (LIST).
Le nom attribué au disque en cours de lecture
apparaît dans la fenêtre d’affichage.
2 Appuyez plusieurs fois sur l’un des
côtés de (DISC/PRESET) jusqu’à ce que
vous ay ez trouvé le disque souhaité.
3 Appuyez sur (ENTER) pour écouter le
disque.
Remarque
Certaines lettres ne peuvent pas être affichées
(exception: Disc Memo).
2
.
Sélection de pistes
spécifiques pour la lecture
— Bank (Pour un l ecteur CD disposant de la
fonction CUSTOM FILE)
Si vous identifiez le disque, vous po uvez régler
l’appareil pour passer d’une piste à l’autre ou
pour écouter les pistes de votre choix.
1 Commencez à écouter le disque que
vous souhaitez identifier.
2 Appuyez sur (MENU), puis appuyez
plusieurs fois sur l’un des côtés de
(DISC/PRESET) jusqu’à ce que l’indication
“BANK SEL” apparaisse.
3 Appuyez sur (ENTER).
1
4 Identification des pistes.
1 Appuyez plusieurs fois sur l’un des
côtés de (SEEK) pour sélectionner la
piste que vous voulez identifier.
2 Appuyez plusieurs fois sur (ENTER)
pour sélectionner “PLAY” or “SKIP.”
5 Répétez l’étape 4 pour sélectionner
“PLAY” ou “SKIP” pour toutes les pistes.
6 Appu yez d e ux fois sur (MENU).
Le lecteur revient au mode de lecture CD
normal.
Remarques
• Vous pouvez sélectionner “PLAY” et “SKIP” pour 24
pistes maximum.
• Vous ne pouvez pas sélectionner “SKIP” pour toutes
les pistes d’un CD.
12
Page 69

Ecoute de pistes spécifiques
uniquement
Vous po uvez sélectionner :
•“BANK-ON” — pour écouter les pistes avec le
réglage “PLAY”.
•“BANK-INV” (Inverse) — pour écouter les
pistes avec le réglage “SKIP”.
Radio
L’appareil peut mémoriser jusqu’à 6 stations
pour chaque bande (FM1, FM2, FM3, MW et
LW).
1 En cours de lecture appuyez sur (MENU),
puis appuyez plusieurs fois sur l’un des
côtés de (DISC/PRESET) jusqu’à ce que
l’indication “BANK-ON”, “BANK-INV” ou
“BANK-OFF” apparaisse.
2 Appuyez plusieurs fois sur le côté (+) de
(SEEK) jusqu’à ce que le réglage
souhaité apparaisse.
3 Appuyez sur (ENTER).
La lecture recomm ence à partir de la piste
suivant celle qui est en cours de lecture.
Pour rev enir au mode de lect ure normal,
sélectionnez “BANK-OFF” à l’étape 2.
Attention
Pour syntoniser des stations pendant que vous
conduisez, nous vous conseillons d’utiliser la
fonction de mémorisation du meilleur accord
(Best Tuning Memory) de façon à éviter les
accidents.
Mémorisation automatique
des stations
— Mémorisation du meilleur accord (BTM)
L’appareil sélectionne les stations émettant avec
les signaux les p lu s puissants pour la bande
sélectionnée et les mémorise selon l’ordre des
fréquences.
1 Appuyez plusieurs fois sur (SOURCE)
pour sélectionner la radio.
2 Appuyez plusieurs fois sur (MODE) pour
sélectionne r la bande.
3 Appuyez sur (MENU), puis appuyez
plusieurs fois sur l’un des côtés de
(DISC/PRESET) jusqu’à ce que l’indication
“BTM” apparaisse.
4 Appuyez sur (ENTER).
Un bip sonore retentit lorsque le réglage est
mémorisé.
Remarques
• Si quelques stations seulement peuvent être
captées en raison de faibles signaux, certaines
touches numériques conserveront leur réglage
préalable.
• Si un n uméro est i ndiqu é dans la fenêtre d’affichage,
l’appareil c omm en c e la mémorisation des stations à
partir de la station affichée.
13
Page 70

Réception des stations mémorisées
Mémorisation des stations souhaitées uniquement
1 Appuyez plusieurs fois sur (SOURCE)
pour sélectionner la radio.
2 Appuyez plusieurs fois sur (MODE) pour
sélectionner la bande.
3 Appuyez sur la touche numérique ((1) à
(6)) sur laquelle la station souhaitée est
mémorisée.
Conseil
Appuyez sur l’un des côtés de (DISC/PRESET) pour
écouter les stations dans l’ordre où elles sont
stockées dans la mémoire (Fonction de recherche de
présélection).
Si la syntonisation de la station
présélectionnée ne fonctionne pas
Appuyez sur l’un des côtés de (SEEK)
pour rechercher la station (syntonisation
automatique).
Le balayage s’arrête lorsque l’appareil ca pte
une station. Répétez l’opération jusqu’à ce
que la station souhaitée soit captée.
Conseils
• Si la syntonisation automatique s’arrête trop
fréquemment, activez la recherche locale pour
limiter la recherche aux stations avec les signaux les
plus puissants (page 22).
• Si vous connaissez la fréquence de la station que
vous désirez écouter, appuyez et maintenez enfoncé
l’un des côtés de (SEEK) pour localiser la fréquence
approximative, puis appuyez plusieurs fois sur
(SEEK) pour trouver la fréquence souhaitée
(syntonisation manuelle).
Vous p ouvez présélectionner les stations
souhaitées manuellement sur n’importe quelle
touche de votre choix.
1 Appuyez plusieurs fois sur (SOURCE)
pour sélectionner la radio.
2 Appuyez plusieurs fois sur (MODE) pour
sélectionne r la bande.
3 Appuyez sur l’un des côtés de (SEEK)
pour syntoniser la station que vous
voulez mémoriser.
4 Appuyez sur la touche numérique
souhaitée ((1) to (6)) pendant deux
secondes jusqu’à ce que l’indication
“MEM” apparaisse.
L’indication de la touch e nu mérique apparaît
dans la fenêtre d’affichage.
Remarque
Si vous essayez de mémoriser une aut re s ta tion sur la
même touche, la station mémorisée précédemment
est supprimée.
Si la réception stéréo FM est mauvaise
Sélectionnez le mode de réception
monaural (page 22).
La qualité sonore es t améliorée mais le son
est diff u s é en mode monaural (l’indication
“ST” disparaît).
14
Page 71

Syntonisation d’une station
via une liste
— List-up
RDS
1 Au cours de la réception radio, appuyez
brièvement sur (LIST).
La fréquence ou le nom attribué à la station
que vous acco rd ez clignote.
2 Appuyez plusieurs fois sur
(DISC/PRESET) jusqu’à ce que la station
souhaitée soit trouvée.
Si aucun nom n’est attribué à la station
sélectionnée, la fréquence apparaît dans
l’affichage.
3 Appuyez sur (ENTER) pour syntoniser la
station souhaitée.
Aperçu de la fonction RDS
Les stations FM du système RDS (Radio Data
System) envoient des informations numériques
inaudibles a vec l e sign al normal de leurs émissions
radiophoniques. Par exemple, l’une des
informations suivantes s’af fiche lors de la
réception d’une stati on disposant de la fonction
RDS.
Rubriques affichables
• Source de musique
• Horloge
• Fonction
Rubriques affichables
• Nom de la station (fréquence)
• Type d’émission
Pour Appuyez sur
passer d’une
rubrique d’affichage
à une autre
(DISPLAY/PTY)
Services RDS
Les données RDS vous proposent d’autres
services comme:
• La resyntonisation automatique d’une
émission, très pratique sur les trajets de longue
distance. — AF t page 16
• La réception des messages de
radioguidage, même si vous écoutez une
autre émission ou une autre source. — TA t
page 17
• La sélection de stations selon le type
d’émission diffusé. — PTY t page 18
• Le réglage automatique de l’horloge. — CT
t page 19
Remarques
• S elon le pays ou la région où vous vous trouvez,
toutes les fonctions RDS peuvent ne pas être
accessibles.
• La fonction RDS peut ne pas fonctionner
correctement si le signal de retransmission est faible
ou si la station syntonisée ne transmet pas de
données RDS.
15
Page 72

Resyntonisation automatique
pour une meilleure réception
— Fonction AF
La fonction Fréquences alternatives (AF)
sélectionne et resyntonise automati quement la
station que vous voulez écouter émettant le
signal le plus puissant.
Les fréquences changent
automatiquement.
Pour les stations sans fréquence
alternative
Appuyez sur l’un des côtés de (SEEK)
tandis que le nom de la station clignote
(pendant 8 secondes).
L’appareil comm ence à rechercher une
fréquence alternative avec les mêmes données
d’identification de programme (PI) (“PI
SEEK” apparaît).
Si l’appareil ne pa r vi ent pas à trouver la
même PI, il revient à la fréquence
sélectionnée précédemment.
98,5 MHz
Station
96,0 MHz
102,5 MHz
1 Sélectionnez une station FM (page 13).
2 Appuyez plusieurs fois sur (AF) jusqu’à
ce que l’indication “AF-ON” apparaisse.
L’appareil enta m e la recherche d’une sta t ion
alternative émetta nt un signal plus puissant
dans le même réseau de rad i odiffusion.
Si “NO AF” clignote, la station captée ne
dispose pas de fr équence alternative.
Remarque
S’il n’existe pas de fréquence alternative dans la
région ou si vous n’avez pas besoin d’effectuer une
recherche, désactivez la fonction AF en sélectionnant
“AF-OFF”.
Ecoute continue d’une émission
régionale
Lorsque la fonc tion AF est activée: ce réglage
effectué en usine restreint la réception à une
région spécifique, de façon à ce qu’une autre
station régionale avec une f réquence plus
puissante ne soit pas captée.
Si vous quittez la zone de réception de cette
émission régionale ou si vous voulez profiter
pleinement de la fonction AF, sélectionnez
“REG-OFF” à partir du M E N U (page 22).
Remarque
Cette fonction est inopérante au Royaume-Uni et dans
certaines régions.
Fonction de liaison locale
(Royaume-Uni uniquement)
Cette fonction vous permet de sélectionner
d’autres stations locales de la région, même si
elles ne sont pas associées à vos touches
numériques.
1 Appuyez sur une touche numérique ((1)
to (6)) associée à une station
mémorisée.
2 Dans les 5 secondes, appuyez à nouveau
sur la touche num éri que de la station
locale.
3 Répétez l’opération jusqu’à ce que vous
captiez la station locale souhaitée.
16
Page 73

Ecoute des messages de
radioguidage
— TA/TP
Présélection des stations RDS avec les données AF et TA
En activant Traffic Announcement (TA) et
Traffic Programme (TP), vous pouvez
automatiquement écouter une station FM
diffusant des messages de radioguidage. Ces
fonctions ne tie nnent pas compte de l’émission,
de la source FM ou du CD écouté(e) ; l’appareil
revient à l’émission de départ lorsque le bulletin
d’information est terminé.
Appuyez plusieurs fois sur (TA)
jusqu’à ce que “TA-ON” apparaisse.
L’appareil comm ence à rechercher les
stations diffusant des messages de
radioguidage.
“TP” indique la réce pt ion de stations de ce
type et “TA” clignote au cours du bulletin
d’information. L’appareil continue à
rechercher l es st at ions d if f us an t de s me ss age s
de radioguidage si l’indication “NO TP”
apparaît.
Pour annuler la réception de messages de
radioguidage, sélectionnez “TA-OFF.”
Pour Appuyez sur
interrompre le
bulletin en cours
Conseil
Vous pouvez également interrompre le bulletin en
cours en ap puyant sur (SOURCE) ou (MODE).
(TA)
Lorsque vous présélectionnez des stations RDS,
l’appareil mémorise chaque réglage AF/TA (on/
off) des stations ainsi qu e l eur fréquence. Vo us
pouvez effectuer un réglage différent (pour A F,
TA ou les deux) po ur chaque station
présélectionnée ou vous pouvez effectuer le
même réglage pour toutes les stations
présélectionnées. Si vous présélectionnez de s
stations avec “AF-ON”, l’appareil mémorise
automatiquement les statio ns d o nt le signal radio
est le plus puissant.
Présélection du même réglage pour
toutes les stations présélectionnées
1 Sélectionnez une bande FM (page 13).
2 Appuyez sur (AF) et/ou (TA) pour
sélectionner “AF-ON” et/ou “TA-ON.”
Notez que la sélection de “AF-OFF” ou “TAOFF” permet de mémoriser des stations RDS,
mais aussi des stations ne disposant pas de
cette fonction.
3 Appuyez sur (MENU), puis appuyez
plusieurs fois sur l’un des côtés de
(DISC/PRESET) jusqu’à ce que l’indication
“BTM” apparaisse.
4 Appuyez sur (ENTER)jusqu’à ce que
“BTM” clignote.
Présélection de réglages différents
pour chaque station présélectionnée
Présélection du volume des messages
de radioguidage
Vous po uvez présélection ner le volum e des
messages radio guidage de façon à ne ma nquer
aucune informat i on.
1 Tournez la molette de contrôle du
volume pour régler le niveau de volume
souhaité.
2 Appuyez sur (TA) pendant 2 secondes.
L’indication “TA” appara ît et le réglage est
mémorisé.
Réception de messages urgents
Si AF ou TA est activé, l’appareil passe aux
messages urgents s i l ’un d’entre e ux est diffusé
pendant que vous écoute z une station FM ou un
CD/MD.
1 Sélectionnez une bande FM et
syntonisez la station souhaitée (page
14).
2 Appuyez sur (AF) et/ou (TA) pour
sélectionner “AF-ON” et/ou “TA-ON.”
3 Appuyez sur la touche numérique
souhaitée ((1) à (6)) jusqu’à ce que
“MEM” apparaisse.
Reprenez à pa rt ir de l’étape 1 pour la
présélection d’autres stations.
17
Page 74

Localisation d’une station en
fonction du type d’émission
— PTY
Vous po uvez l ocaliser une station en
sélectionnant le type d’émission que vous v o ulez
écouter.
Types d’émission Affichage
ActualitésNEWS
Dossiers d’actualité AFFAIRS
Informations INFO
Sports SPORT
Education EDUCATE
Théâtre DRAMA
Culture CULTURE
Science SCIENCE
Divers VARIED
Musique populair e POP M
Musique rock ROCK M
Musique Variée EASY M
Musique classique légère LIGHT M
Musique classi que CLASSICS
Autres types de musique OTHER M
Météo WEATHER
Finance FINANCE
Emissions pour enfants CHILDREN
Affaires sociales SOCIAL A
Religion RELIGION
Programes à ligne
ouverte
Voyages TRAVEL
Loisirs LEISURE
Jazz Musique JAZZ
Musique country COUNTRY
Musique nati onale NATION M
Vieux succès musicaux OLDIES
Musique folk FOLK M
Documentaires DOCUMENT
PHONE IN
1 Appuyez sur (DISPLAY/PTY) au cours de
la réception FM jusqu’à ce que
l’indication “PTY” apparaisse.
Le nom du type d’émission diffus é appara ît si
la station transmet des données PTY.
“--------” apparaît si la station ca ptée n’est pas
une station RDS ou si aucune donnée RDS
n’est captée.
2 Appuyez sur (DISC/PRESET) plusieurs
fois jusqu’à ce que le type d’émission
souhaité apparaisse.
Les types d’émission apparais sent dans
l’ordre du tableau ci- contre.
“--------” apparaît si le type d’émission n’est
pas spécifié dans les données RDS.
3 Appuyez sur (ENTER).
L’appareil commence à rechercher une station
diffusant le type d’émission sélectionné.
Remarque
Vous ne pouvez pas utiliser cette fonction dans
certains pays où les données PTY (sélection du type
d’émission) ne sont pas disponibles.
18
Page 75

Réglage automatique de
l’heure
— CT
Les données CT (C lo ck Time) accompagnant la
transmission RDS assurent un réglage
automatique de l’horloge.
1 En cours de récep tion radio, appuyez sur
(MENU), puis appuyez plusieurs fois sur
l’un des côtés de (DISC/PRESET) jusqu’à
ce que l’indication “CT-OFF” apparaisse.
2 Appuyez plusieurs fois sur le côté (+) de
(SEEK) jusqu’à ce que l’indication “CTON” apparaisse.
L’horloge est réglée.
3 Appuyez sur(ENTER) pour revenir au
mode d’affichage normal.
Pour annuler la fonction CT, sélectionnez “CTOFF” à l’étape 2.
Remarques
• Il se peut que la fonction CT ne fonctionne pas
même si une station RDS est captée.
• Il peut y avoir une différence entre l’heure réglée par
la fonction CT et l’heure réelle.
Autres fonctions
Vous pouvez également commande r l ’appareil
(et les appareils CD /MD en option) au moyen
d’un satellite de commande (en option).
Utilisation du satellite de
commande
Commencez par apposer l’étiquette appropriée
suivant la position de montage du satellite de
commande.
Le satellite de commande fonctionne en appuyant
sur les touches et/ou en tou rnant les commandes
SOUND
MODE
DSPL
En appuyant sur les touches
(SOUND)
(SOURCE)
Tournez la commande VOL
pour régler le volume.
DSPL
MODE
SOUND
(ATT)
(DSPL)
(MODE)
(OFF)
OFF
Appuyez sur Pour
(SOURCE)
changer de source
(radio/CD/MD*
1
changer le mode de
(MODE)
fonctionnement
(fréquence radio / lecteur
CD/ lecteur MD*
(ATT) couper le son
(OFF)*
2
interrompre la lecture d’un
disque ou la réception de la
radio réception
(SOUND) régler le menu son
(DSPL)
changer de rubrique
d’affichage
page suivante t
)
1
)
19
Page 76

*1 Uniquement si l’appareil en option est raccordé.
*2 Si votre voiture n’est pas équipée d’une position
ACC (accessoire) au niveau du barillet de contact,
appuyez sur (OFF) pendant 2 secondes pour
désactiver l’affichage de l’horloge après avoir
coupé le moteur.
Modification du sens de
fonctionnement
Le sens de fonctionnement des commandes est
réglé par défaut comme indiqué sur l’illustration
ci-dessous.
En tournant la commande
Commande
SEEK/AMS
Tournez la commande et relâchez-la
pour :
– sauter des pistes
– syntoniser au t omatiquement des statio ns de
radio.
Maintenez la commande e n la tournant et
relâchez-la pour:
– avancer rapidement/ revenir au début d’une
plage;
– trouver manuellement une station radio.
En exerçant une pression sur la
commande et en la tournant
Commande
PRESET/DISC
Pour augmenter
Pour diminuer
Si vous devez monter le satellite de commande
du côté droit de la col onne de direct i on, vous
pouvez inverser le sens de fonctionnement des
commandes.
Appuyez sur (SOUND) pendant 2
secondes tout en maintenant la
commande VOL enfoncée.
Conseil
Vous pouvez également modifier le sens de
fonctionnement de ces commandes au moyen de
l’appareil (page 21).
Exercez une pression sur la commande
et tournez-la pour:
–recevoir les stations mémorisées;
–changer le disque*.
* Lorsqu’un appareil de CD/MD en option est
raccordé.
20
Page 77

Réglage des caractéristiques du son
Vous po uvez régler les graves, les aig uës ainsi
que la balance gauche -droite et la balance avantarrière.
Vous po uvez m émoriser les niveaux de graves et
d’aigus pour chaque source.
1 Sélectionnez le paramètre que vous
voulez régler en appuyant plusieurs fois
de suite sur (SOUND).
Chaque fois que vous appuyez sur (SOUND),
la source change comme suit:
BAS (graves) t TRE (aiguës) t BAL
(balance gauche-droite)
avant-arrière)
t FAD (balance
2 Ajustez le paramètre sélectionné en
appuyant sur l’un des côtés de (SEEK).
Pour effectuer le réglage à l’aide du satellite
de commande , a ppuyez sur (SOUND) et
tournez la commande VOL.
Remarque
Effectuez ce réglage dans les 3 secondes après avoir
sélectionné le paramètre.
Coupure rapide du son
(via le satellite de commande ou la minitélécommande)
Appuyez sur la touche (ATT) du satellite
de commande ou de la minitélécommande.
Après l’affich ag e mo m entané de “ATT-ON ”,
l’indication “ATT” apparaît.
Pour restaurer le niveau précédent du volume,
appuyez à nouveau sur (ATT) .
Conseil
Lorsque le câble d’interface d’un téléphone de voiture
est raccordé au fil ATT, l’appareil diminue le volume
automatiquement lors d’un appel téléphonique
(fonction Telephone ATT).
Modification des réglages du
son et de l’affichage
— Menu
Les paramètres suivants peuvent être réglés:
SET (réglage)
• CLOCK (page 9)
• CT (signal d’horloge) (page 19)
• BEEP — pour activer ou désactiver le bip
sonore.
• RM (satellite de commande) — pour modifier
le sens de fonction nement des comma ndes du
satellite.
– Sélectionnez “NORM” pour utiliser le
satellite de commande dans la p osition définie
par défaut.
– Sélectionnez “REV” si vous montez le
satellite de commande du côté droit de la
colonne de directio n.
DSPL (affichage)
• D.INFO (double information) — pour afficher
simultanément l’horloge et le m ode de lecture
(on).
• AMBER/GREEN — pour changer la couleur
de l’éclairage en am bre ou en vert (CDXCA650 uniquement).
• DIM (atténuateur) — pour changer la
luminosité de l’affi ch age (CDX-CA650V
uniquement).
– Sélectionnez “ON” pour atténuer l’affichage.
– Sélectionnez “OFF” po ur désactiver
l’atténuateur.
• M.DSPL (affichage animé) — pour
sélectionner le mode d’affichage animé à partir
de “1,” “2,” et “OFF.”
– Sélectionnez “1” pour que les lignes
décorative s ap paraissent sur l’affichage et
pour activer l’affichage Demo .
– Sélectionnez “2” pour que les lignes
décorative s ap paraissent sur l’affichage et
pour désactiver l’affichage Demo.
– Sélectionnez “OFF” po ur désactiver
l’affichage animé.
• A.SCRL (défilement automatique)
– Sélectionnez “ON” pour faire défiler
automatiquement tous les noms affichés
composés de plus de 8 caractères.
– Lorsque le défilement automatique est réglé
sur off et que le nom du disque/de la piste est
modifié, celui-ci ne défile pas.
SND (son)
• LOUD (force sonore) — pour apprécier les
graves et les aiguës même à des volumes pe u
élevés. Les graves et les aiguës sont renforcés.
page suivante t
21
Page 78

P/M (mode lecture)
• LOCAL-ON/OFF (mode de recherche local)
(page 14)
– Sélectionnez “ON” pour syntoni ser
uniquement les st ations radio avec des
signaux plus élevés.
• MONO-ON/OFF (mode monaural) (page 14)
– Sélectionnez “ON” pour écouter l’émission
FM stéréo en monaur al . Sélectionnez “OFF”
pour revenir au mode normal.
• REG-ON/OFF (régional) (page 16)
Appuyez plusieurs fois de suite sur
(MBP) pour obtenir la position d’écoute
souhaitée.
Le mode de “My Best sound Position” est
indiqué sur l’affichage selo n l ’ordre indiqué
dans le tableau.
1 Appuyez sur (MENU).
Pour régler sur A.SCRL, appuyez sur
(MENU) pendant la lecture du CD/du MD.
2 Appuyez plusieurs fois de suite sur l’un
des côtés de (DISC/PRESET) jusqu’à ce
que l’option désirée apparaisse.
3 Appuyez sur le côté (+) de (SEEK) pour
sélectionner le réglage souhaité
(Exemple: ON ou OFF).
4 Appuyez sur (ENTER).
Une fois que le réglage de mode est terminé,
la fenêtre d’affichage revient au mode de
lecture normale.
Remarque
Le paramètre affiché diffère selon la source.
Conseil
Vous pouvez facilement basculer entre les catégories
(“SET,” “DSPL,” “SND,” “P/M,” et “EDIT”) en
maintena nt l’un des côtés de (DISC/PRESET) enfoncé
pendant 2 secondes.
Sélection de la position du
son
— My Best sound Position (MBP)
Lorsque vous conduisez sans passager, vous
pouvez profiter de l’environnement sonore le
plus agréable avec “My Best sound Position.”
“My Best sound Position” dispose de deux
réglages qui permettent d’ajuster le niveau sonore
de la balance gauche-droite et de la balance
avant-arrière. V ous pouvez en sélectionner un très
facilement avec la touche MBP.
Niveau de la
Fenêtre
d’affichage
MBP-A – 4dB 0 0 – 4dB
MBP-B 0 – 4dB 0 – 4dB
MBP-OFF 0000
balance
gauche-droite
Gauche
Droite
Niveau de la
balance
avant-arrière
Avant Arrière
Après une seconde, l’affichage revient en
mode de lecture no rm ale.
Si vous souhaitez régler plus précisément le
niveau sonore de la balance gauche-droite et
de la balance avant-arrière, utilisez la touche
(SOUND) (page 21).
Remarques
• Lorsque BAL (balance) ou FAD (équilibreur) dans
“Réglage des c ara c t éristiques du son” (page 21) est
réglé, le réglage MBP revient sur OFF.
• Lorsque MBP est réglé sur OFF, le réglage BAL et
FA D est activé.
Réglage de l’égaliseur
Il est possible de sélectionner une courbe de
l’égaliseur pour sept types de musique (musique
VOCAL, CLUB JAZZ, NEW AGE, ROCK,
CUSTOM, et XPLOD)
Vous p ouvez mémoriser les réglages de
fréquence et de niveau de l’égaliseur.
Sélection de la courbe de l’égaliseur
1 Appuyez su r (SOURCE) pour
sélectionner une source (radio, CD, ou
MD).
2 Appuyez plusieurs fois de suite sur
(EQ7) pour sélectionner la courbe de
l’égaliseur souhaitée.
Chaque fois que vous appuyez sur
source change.
Pour annuler l’effet de l’égaliseur,
sélectionnez “OFF.” Après trois secondes,
l’affichage revient en mode de le ct ure
normale.
(EQ7)
, la
22
Page 79

Réglage de la courbe de l’égaliseur
1 Appuyez sur (MENU).
2 Appuyez plusieurs fois de suite sur l’un
des côtés de (DISC/PRESET) jusqu’à ce
que “EQ7 TUNE” apparaisse, puis
appuyez sur (ENTER).
3 Appuyez sur l’un des côtés de (SEEK)
pour sélectionner la courbe de
l’égaliseur souhaitée, puis appuyez sur
(ENTER).
Chaque fois que vous appuyez sur (SEEK),
le paramètre change.
4 Sélectionnez la fréquence et le niveau
souhaités.
1 Appuyez sur l’un des côtés de (SEEK)
pour sélectionner la fréquence
souhaitée.
Chaque fois que vous appuyez sur
(SEEK), la fréquence change.
62 (Hz) y 157 (Hz) y 396 (Hz) y
1k (Hz) y 2.5k (Hz) y 6.3k (Hz) y
16k (Hz)
2 Appuyez sur l’un des côtés de
(DISC/PRESET) pour régler le volume
souhaité.
Le volume peut être réglé par pas de 1 dB,
de –10 à +10 dB.
Informations complémentaires
Entretien
Remplacement du fusible
En cas de remplacement du fusible, veillez à
utiliser un fusible dont l’intensité correspond à
celle inscrite sur le f usible d’origin e. Si le fus ible
grille, vérifiez le branchemen t de l’alimentation
et remplacez-le. Si le fusible grille une nouvelle
fois après avoir été remplacé, cela peut révéler
une défaillance interne de l’appareil. Le cas
échéant, consul t ez un revendeur Sony.
Fusible (10 A)
Avertissement
N’utilisez jamais de fusible dont l’intensité
dépasse celle du fusible fourni avec l’appareil car
vous risquez d’endommager l’appareil.
Pour restaur er la courbe de l’égaliseur réglée
par défaut, appuyez sur (ENTER) pendant 2
secondes.
5 Appuyez deux fois sur (MENU).
Lorsque le réglage de l’effet est terminé, le
mode de lecture no rm ale apparaît.
Nettoyage des connecteurs
L’appareil ne peut pas fonctionner cor rectement
si les connecteu rs entre l’appareil et la façade
sont souillés. Pour éviter cela, enlevez la façade
(page 8) et nettoyez les connecteurs à l’aide d’un
coton-tige imbibé d’alcool. N’exercez pas un e
pression trop forte. Vous risquez sinon
d’endommager les connecteurs.
Appareil principal
Arrière de la façade
page suivante t
23
Page 80

Remarques
• Pour plus de sécurité, coupez le moteur avant de
nettoyer les connecteurs et retirez la clé de contact.
• Ne touchez jamais les connecteurs directement
avec les doigts ou avec un outil métallique.
Remplacement de la pile au lithium
Dans des conditions d’utilisation normale, les
piles durent environ 1 an. (La durée de vie peut
être plus courte, selon les conditions
d’utilisation.) Lo rsque la pile est déchargée, la
portée de la mini-télécommande diminue.
Remplacez la pile avec une nouvelle pile au
lithium CR2025.
x
+ vers le haut
Démontage de l’appareil
1 Démontez la façade
1 Enlevez la façade (page 8).
2 A p pu yez sur l’attache du couvercle
frontal à l’aide d’un tournevis fin.
3 Répétez l’étape 2 pour l’autre côté.
2 Démontez l’appareil
1 Utilisez un tournevis fin pour enfoncer
l’attache du côté gauche de l’appareil,
puis tirez le côté gauche de l’ap p areil
jusqu’à ce que le cranse dégage du
support.
Remarques sur la pile au lithium
• Conservez la pile au lithium à l’écart des
enfants. En cas d’avalement de la pile,
consultez immédiatement un médecin.
• Essuyez la pile avec un chiffon sec pour assurer
un bon contact .
• Veillez à respecter la polarité lors de
l’installation de la pile.
• Ne tenez pas l a pil e a v ec des pinc es métalliques
car cela pourra it entraîner un court-ci rcuit.
AVERTISSEMENT
La pile peut exploser en ca s de mauvais
traitement.
Ne rechargez pas, n e démontez pas la pile et
ne la jetez pas dans le feu.
24
4mm
2 Répétez l’étape 1 du côté droit.
3 Faites glisser l’appareil en dehors de
en dehors de son support.
Page 81

Spécifications
Lecteur CD
Rapport signal-bruit 90 dB
Réponse en fréquence 10 – 20.000 Hz
Pleurage et scintillement
En dessous du seuil
Radio
FM
Piste de syntonisation 87,5 – 108,0 MHz
Borne d’antenne Connecteur d’antenne
Fréquence intermédiaire
Sensibilité utile 8 dBf
Sélectivité 75 dB à 400 kHz
Rapport signal-bruit 66 dB (stéréo),
Distorsion harmonique à 1 kHz
Séparation 35 dB à 1 kHz
Réponse en fréquence 30 – 15.000 Hz
MW/LW
Piste de syntonisation MW : 531 – 1.602 kHz
Borne d’antenne Connecteur d’antenne
Fréquence intermédiaire
Sensibilité MW : 30 µV
externe
10,7 MHz/450 kHz
72 dB (mono)
0,6 % (stéréo),
0,3 % (mono)
LW : 153 – 279 kHz
externe
10,7 MHz/450 kHz
LW : 40 µV
Amplificateur de puissance
Sorties Sortie s pour haut-parleurs
Impédance de haut-parleurs
Puissanc e ut il is ée maximale
(connecteurs de sécurité)
4 – 8 ohms
×
4 (à 4 ohms)
50 W
Caractéristiques générales
Sorties Sorties audio
Entrées Fi l de comman de de mise en
Commandes de tonalité Graves ±8 dB à 100 Hz
Puissance de raccordement
Dimensions Environ 178 × 50 × 177 mm
Dimensions de montage
Poids E nviron 1,2 kg
Accessoires fournis Eléments d’installation et de
Accessoires en option Satellite de commande
Appareils en option Chargeur de CD (10
Fil de commande de relais
d’antenne électrique
Fil de commande
d’amplificateur de
puissance
sourdine téléphone
Connecteur d’entrée du
contrôleur distant
Connecteur d’entrée de
l’antenne
Aiguës ±8 dB à 10 kHz
batterie de voiture 12 V DC
(masse négative )
(l/h/p)
Environ 182 × 53 × 161 mm
(l/h/p)
raccordement
(1 jeu)
Etui pour la façade (1)
RM-X4S
Mini-télécommande
RM-X114
Câble BUS (fourni avec un
cordon RCA)
RC-61 (1 m), RC-62 (2m)
disques)
CDX-848X, CDX-646
Changer de CD (6 disques)
CDX-T68X, CDX-T67
Chargeur de MD (6 disques)
MDX-65
Sélecteur de source
XA-C30
Remarque
Cet appareil ne peut pas être branché sur un
préamplificateur ou un égaliseur numérique.
La conception et les spécifications sont sujettes à
modifications sans préavis.
25
Page 82

Dépannage
La liste de contrôle suivante vous aidera à
remédier aux problèmes que vous pourri ez
rencontrer avec cet ap pareil.
Avant de passer en revue la li st e de contrôle cidessous, vérifiez les procédures de raccordement
et d’utilisation.
Généralités
Pas de son.
• Faites tourner la molette dans le sens horaire
pour régler le volume.
• Annulez la fonction ATT.
• Réglez la commande de balance avant/
arrière sur la position médiane pour le
système à deux haut -parleurs.
Le contenu de la mémoire a été effacé.
• La touche de réinitialisation (RESET) a été
enfoncée.
t Recommencez la procédure
d’enregistrement sur la mémoire.
• Le cordon d’alimentation ou la batterie a été
déconnecté(e).
• Le raccordemen t de l ’a limentation n’est pas
réalisé correctement.
Aucun bip sonore.
Le bip sonore a été désactivé (page 21).
Aucune indica tion n’apparaî t dans la fenêt re
d’affichage.
• L’affichage de l’horloge disparaît si vous
appuyez sur (OFF) pendant 2 secondes.
t Appuyez à nouveau sur (OFF) pendant 2
secondes pour afficher l’horloge.
• Enlevez la façade et nettoyez les
connecteurs. Pour plus de détails, voir la
procédure “Nettoya ge des connecteurs”
(page 23).
Les stations mémorisées et l’heure correcte
sont effacées.
Le fusible est grillé.
Emission de bruit lorsque la clé de contact
est en position ON, ACC ou OFF.
Les fils ne sont pas raccordés correc te m e nt au
connecteur d’alimentation de l’ac cessoire de la
voiture.
L’appareil n’est pas alimenté.
• Vérifiez le raccordement. Si tout est en
ordre, vérifiez le fusible .
• La voiture n’est pas équ i pée d’une position
ACC.
t Appuyez sur (SOURCE) (ou insé rez un
disque) pour mettre l’appareil sous
tension.
L’appareil est alimenté en continu.
La voiture n’est pas équipé e d’une positio n
ACC.
L’antenne électrique ne se déploie pas.
L’antenne électrique n’est pas équipée d’un
relais.
26
Lecture de CD/MD.
Impossible d’introduire un disque.
• Un autre disque est déjà en place.
• Le CD est intr oduit à l’envers en forçant ou
dans le mauvais sens .
La lecture ne démarre pas.
• MD défectueux ou CD encrassé.
• CD-R non terminé.
• Vous avez essayé de lire un CD-R qui n’est
pas conçu pour une ut ilisation audio.
• Certains CD-R ne peuvent pas être lus en
raison de l’appareil d’enregistrem ent ou de
l’état du disque.
Un disque est éjecté automatiquement.
La température ambiante dépasse 50°C.
Le CD n’est pas éjecté.
Les touches de commande sont
inopérantes.
Appuyez sur la touche RESET.
Le son saute à la suite de vibrations.
• L’appareil est installé suivant un angle de
plus de 60°.
• L’appareil n’est pas installé à un endroit
suffisamment sta b le de la v o iture.
Le son saute.
Le disque est encrassé ou défectueux.
Impossible d’éteindre l’indication “--------”.
Vous avez saisi le mode d’édition du nom.
t Appuyez sur (LIST) pendant 2 secondes.
Réception radio
Impossible de syntoniser une présélection.
• Enregistrez la fréquence correcte sur la
mémoire.
• Le signal d’ém i ss ion est trop faible.
Impossible de recevoir les stations.
Le son comporte des parasites.
• Raccordez un fil de co m m ande d’antenne
électrique (bleu) ou un fil d’alimentation
d’accessoire (rouge) au câble d’alimentation
de l’amplificateur d’ antenne de la voiture.
(Uniquement si votre voiture est équipée
d’une antenne FM/MW/LW intégrée dans la
vitre arrière/latérale.)
• Vérifiez le raccordement de l’antenne de la
voiture.
• L’antenne automatique ne se lève pas.
t Vérifiez le raccordement du fil de la
commande de l’antenne électrique.
• Vérifiez la fréquence.
Page 83

La syntonisation automatique est
impossible.
• Le mode de recherche local est réglé sur
“ON.”
t Réglez le mode de recherche local sur
“OFF.” (page 22)
• Le signal d’émission est trop faible.
t Utilisez la syntonisation manuelle.
L’indication “ST” clignote.
• Syntonisez la fréquence correctement.
• Le signal d’émission est trop faible.
t Activez le mode de réception monaural
(page 22).
Une émission de programme en stéréo est
écoutée en monaural.
L’appareil est en mode de réception monaural.
t Désactivez le mode de réception monaural
(page 22).
Fonctions RDS
Une recherche (SEEK) commence après
quelques secondes d’écoute.
La station ne diffuse pas de m es sages de
radioguidage ou émet avec un faible signal.
t Appuyez plusieurs fois de suite s u r (AF)
ou (TA) jusqu’à ce que “AF-OFF” ou
“TA-OFF” a pparaisse.
Aucun message de radioguidage.
• Activez “TA.”
• La station n’émet pas d’informations
routières malgré le message TP.
t Recherchez une autre stati o n.
PTY affiche “--------.”
• La station n’es t pas une station RDS.
• Les données RDS n’ont pas été reçues.
• La station ne spécifie p as le type de
programme.
Affichage des erreurs/ Messages
Affichage des erreurs
(Pour cet appareil et les chargeurs de CD/
MD en option)
Les indications suivantes clignotent au bout de 5
secondes et une al arme retentit.
BLANK*
ERROR*
HI TEMP
NO DISC
NO MAG
NOTREADY
RESET
*1 Lorsqu’une erreur survient pendant la lecture d’un
*2 Le numéro du disque qui a provoqué l’erreur
Si ces solutions ne permettent pas d’améliorer la
situation, cons ul te z votr e revend eur Sony le plus
proche.
L.SEEK +/–
NO AF
“” ou “”
1
Aucune piste n’a été enregistrée sur un MD.*
t Effectuez la lecture d’un MD avec des
pistes enregistrées.
1
• Le CD est encras sé ou est inséré à l’envers.*
t Nettoyez ou insérez-le correctement.
• Un CD/MD ne peut pas être lu en raison de
certains prob l èmes.*
t Insérez-en un autre.
La température ambi ante est supérieure à 50°C.
t Patientez jusqu’à ce qu’elle descende en-
2
dessous de 50°C.
Aucun disque n’a été inséré dans l’appareil de
CD/MD.
t Insérez des disques dans l’appareil de CD/
MD.
L’étui de disque n’a pas été inséré dans
l’appareil de CD/MD.
t Insérez-le dans l’appareil de CD/MD.
Le couvercle du lecteur de MD est ouvert ou
les MD ne sont pas i nsérés correctement.
t Fermez le couvercle ou insérez
correctemen t l es MD.
Le lecteur de CD/MD ne peut pas fonctio nner
en raison de certains problèmes.
t Appuyez sur la touche RESET de
l’appareil.
CD ou d’un MD, le numéro du CD ou du MD
n’apparaît pas sur l’affichage.
apparaît sur l’affichage.
Messages
Le mode de recherch e lo cal est activé pendant
la syntonisation automatique (page 14).
Il n’y a pas d’autre fréquence pour la sta t ion
choisie.
Vous avez atteint le début ou la fin du disque et
vous ne pouvez pas aller plus loin.
2
2
27
Page 84

Congratulazioni!
Grazie per l’acquisto del lettore di compact disc
Sony Utilizzando i seguenti accessori sarà inoltre
possibile usufruire di ulteriori funzioni:
• Unità CD/MD opzionali (lettori e cambia CD/
1
.
MD)*
• Informazioni CD TEXT (visualizzat e quando
viene riprodotto un di sc o CD TEXT*
lettore CD opzionale collegato con la funzione
CD TEXT).
• Accessori di controllo opzionali
Comando a rotazione RM-X4S
Telecomando a scheda RM-X114
*1 Questo apparecchio funziona unicamente con
prodotti Sony.
*2 Un disco CD TEXT è un CD audio che contiene
informazioni quali il nome del disco, dell’autore e
dei brani. Tali informazioni sono registrate sul
disco.
2
su un
2
Page 85

Indice
Posizione dei comandi. . . . . . . . . . . . . . . . . . 4
Precauzioni . . . . . . . . . . . . . . . . . . . . . . . . . . 6
Note sui dischi. . . . . . . . . . . . . . . . . . . . . . . . 6
Operazioni preliminari
Azzeramento dell’apparecchio . . . . . . . . . . . 7
Estrazione del pannello frontale . . . . . . . . . . 8
Impostazione dell’orologio . . . . . . . . . . . . . . 9
Lettore CD
Unità CD/MD (opzionale)
Riproduzione di un disco. . . . . . . . . . . . . . . . 9
Voci del display. . . . . . . . . . . . . . . . . . . . . . 10
Riproduzione ripetut a dei brani
— Riproduzione ripetuta . . . . . . . . . . . . 10
Riproduzione dei brani in ordine casuale
— Riproduzione in ordi ne casuale . . . . . 10
Assegnazione di un nome a un CD
— Funzione di promemoria disco* . . . . 11
Ricerca di un disco in b ase al nome
— Funzione di elenco*. . . . . . . . . . . . . . 12
Selezione di brani specifici per la riproduzione
— Funzione di mem oria programma* . . 12
* Funzioni disponibili con apparecchio CD/MD
opzionale
Radio
Memorizzazione automatica delle staz i oni
— Best Tuning Memory (BTM). . . . . . . 13
Ricezione delle sta zi o ni memorizzate . . . . . 14
Memorizzazione delle stazioni desiderate. . 14
Sintonizzazione di una stazione da un elen co
— Funzione di elenco . . . . . . . . . . . . 15
RDS
Presentazione della funzione RDS . . . . . . . 15
Risintonizzazione automatica per la ricezione
ottimale
— Funzione AF . . . . . . . . . . . . . . . . . . . 16
Ascolto dei notiziari sul traffico
— TA/TP . . . . . . . . . . . . . . . . . . . . . . . . 17
Preselezione di stazioni RDS con
l’impostazione AF e TA. . . . . . . . . . . . . 17
Sintonizza zione d elle st azioni in base al t ipo di
programma
— PTY . . . . . . . . . . . . . . . . . . . . . . . . . . 18
Impostazione automatica dell’orologio
— CT . . . . . . . . . . . . . . . . . . . . . . . . . . . 1 9
Altre funzioni
Uso del comando a rotazione . . . . . . . . . . . 19
Regolazione delle car att eristiche
dell’audio . . . . . . . . . . . . . . . . . . . . . . . . 21
Attenuazione dell’audio . . . . . . . . . . . . . . . 21
Modifica delle impostazioni dell’audio e del
display
— Menu . . . . . . . . . . . . . . . . . . . . . . . . . 21
Selezione della posizione dell’audio
— Posizione ottimale dell’audio
(MBP). . . . . . . . . . . . . . . . . . . . . . . . . . . 2 2
Impostazione dell’equalizzatore. . . . . . . . . 22
Informazioni aggiuntive
Manutenzione . . . . . . . . . . . . . . . . . . . . . . . 23
Estrazione dell’apparecchio . . . . . . . . . . . . 24
Caratteristiche tecniche. . . . . . . . . . . . . . . . 25
Guida alla soluzione dei problemi . . . . . . . 26
Messaggi e indicazioni di errore. . . . . . . . . 27
3
Page 86

Posizione dei comandi
Per ulteriori dettagli fare riferimento alle pagine indicate.
: Durante la riproduzione : D ur ante la ricezione radi o : Nel modo menu
CD/MD
RADIO MENU
1
2
3
REP
MBP
EQ 7
SOURCE
MODE
SHUF
6
5
4
1 Manopola del comando del volume 17
2 Tasto MBP 22
3 Tasto Z (espulsione)
(situato sul lato
anteriore dell’apparecchio, dietro al pannello
frontale)
9
4 Tasto SOURCE (Accensione/Radio/CD/
MD) 8, 9, 10, 11, 13, 14, 17, 22
5 Finestra del display
6 Ricettore del telecomando a scheda
7 Tasto MENU 9, 11, 12, 13, 17, 19, 22, 23
8 Tasto DISPLAY/PTY (modifica modo di
visualizzazione/tipo di programma) 10,
11, 15, 18
9 Tasto S (SCROLL) 10
q; Tasto OPEN 8, 9
qa Tasto LIST
11, 12
CD/MD
15
RADIO
qs Tasto EQ7 23
qd Tasto RESET (situato sul lato anteriore
dell’apparecchio , di et ro al pannello frontale) 7
PTY
S
D
LL
O
R
C
S
DISPLAY
R
E
P
/
C
S
I
D
MENU
SOUND
AF
TA
O
CDX-CA650X/CA650V/CA650
qf Tasti numerici
CD/MD
(3) REP 10
(6) SHUF 10
14, 16, 17
RADIO
qg Tasto MODE
10, 11
CD/MD
13, 14, 17
RADIO
qh Tasto SOUND 21, 22
qj Tasto AF 16, 17
qk Tasto TA 17
ql Tasto OFF (Arresto/Spegnimento)* 8, 9
w; Tasto ENTER
12
CD/MD
15, 18
RADIO
9, 11, 12, 13, 17, 19, 22, 23
MENU
*Informazioni importanti per quando si
effettua l’installazione su un’auto
sprovvista della posizione ACC
(accessorio) sull’interruttore di
accensione
Assicurarsi di premere
(OFF)
sull’apparecchio per 2 secondi per spegnere il
display dell’orologio dopo che si è spento il
motore.
Diversamente, il display dell’orologio non si
spegne causando lo scaricamento della bat t eria.
O
P
EN
S
E
T
LIST
SEEKSEEK
ENTER
F
F
4
Page 87

PTY
S
D
DISPLAY
MENU
SOUND
AF
TA
(+): per selezionare
(SEEK)
(–): per
selezionare
verso
sinistra/
.
(–): per selezionare verso il basso
O
P
E
N
LL
O
R
SC
R
E
P
/
S
C
E
S
T
I
D
LIST
SEEKSEEK
ENTER
O
FF
(DISC/PRESET)
verso l’alto
(DISC/PRESET)
(SEEK)
(+): per
selezionare
verso
destra/>
Nel modo menu, i tasti che è possibile selezionare,
fra questi quattro, sono indicati con il simbolo “ M”
nel display.
wa Tasti DISC /PRESET(+/ –)
10, 12
CD/MD
14, 15, 18
RADIO
9, 11, 12, 13, 17, 19, 22, 23
MENU
ws Tasti SEEK (–/+)
9
CD/MD
14, 16
RADIO
9, 11, 12, 13, 19, 21, 22, 23
MENU
Telecomando a scheda RM-X114
(opzionale)
DSPL MODE
+
PRESET
LIST
+
DISC
MENU
SOURCE
–
SEEK
SOUND
DISC
PRESET –
+
VOL
–
I tasti del telecomando a scheda
corrispondenti a quelli dell’apparecchio
controllano le stesse funzioni.
1 Tasto DSPL
2 Tasto MENU
3 T asto SOURCE
4 Tasti SEEK (</,)
5 Tasto SOUND
6 Tasto OFF
7 Tasti VOL (–/+)
8 Tasto MODE
9 Tasto LIST
q; Tasti DISC/PRESET (M/m)
qa Tasto ENTER
qs Tasto ATT
Nota
Se l’apparecchio viene spento premendo (OFF) per 2
secondi, non sarà possibile farlo funzionare con il
telecomando a scheda a meno che non sia premuto
(SOURCE) sull’apparecchio o venga prima inserito un
disco per attivare il lettore.
Suggerimento
Per i dettagli su come sostituire le batterie, fare
riferimento alla sezione relativa alla “Sostituzione della
batteria al litio” (pagina 24).
+
SEEK
R
–
TE
N
E
ATTOFF
5
Page 88

Precauzioni
Note sui dischi
• Se l’auto rimane parcheggiata direttamente
sotto la luce del sole attendere che
l’apparecchio si r affred di prima di utilizzarlo.
• L’antenna elettrica si estende automaticamente
quando l’apparecchio viene acceso.
Per eventuali domande o problemi riguardanti
l’apparecchio non trattati in questo manuale,
rivolgersi al più vicino rivenditore Sony.
Formazione di conde nsa
Nei giorni di pioggia o in zone molto umide,
l’umidità può condensarsi sulle lenti all’interno
del lettore e sul display. Se ciò dovesse avvenire,
l’apparecchio potrebbe non funzionare
correttamente. In tale caso, rimuovere il disco e
attendere per cir ca un’ora in modo che l’umidità
evapori comp letamente .
Per mantenere una qualità elevata del
suono
Fare attenzione a non versare succhi di frutt a o
altre bibite sull’a pparecchio o sui dischi.
• Per mantenere pulito il disco non toccarne la
superficie. Afferrare i dischi dal bordo.
• Riporre i dischi nella loro custodia o ne l
contenitore apposito quando non vengono
utilizzati.
Non esporre i di schi a calore o a tempe rature
elevate. Evitare di lasciarli in un’auto
parcheggiata, sul cr uscotto/ripiano post eriore.
• Non incollare et ichette e non us are dischi con
residui di colla o inc hi ostro. Se vengono
utilizzati questi tipi di dischi, i residui possono
causare l’arr esto del disco, provoca ndo
problemi di funzionament o o rovinando il
disco.
• Non riprodurre dischi dalla forma irregolare
quali CD a forma di cuore o di stella con questo
apparecchio, onde evitare problemi di
funzionamento al lettore. Non u tilizzare questo
genere di dischi .
• Non è possibile riprodurre CD da 8 cm.
• Prima della riproduzione, pulire il disco con un
panno apposi t o reperibile i n commercio. Pulire
il disco partendo dal centro. Non usare solventi
come benzene, ac quar ag ia, pul ito ri re peri bil i in
commercio o spray antistatici per dischi
analogici.
6
Page 89

Note sui dischi CD-R
• Su questo apparecchio è possibile riprodurre
CD-R (CD registrabili) concep iti p er uso audio.
Ricercare questo marchio per riconoscere i CDR per uso audio.
Operazioni preliminari
Azzeramento dell’apparecchio
Questo marchio i ndica che il disc o non è per
uso audio.
• È possibile ch e alcuni CD-R (in base
all’attrezzatura utilizzata per la registrazione o
alle condizioni del disco) non possan o es sere
riprodotti su questo lettore.
• Non è possibile riprodurre un CD-R che non sia
finalizzato*.
* Processo necessario ai CD-R registrati per poter
essere riprodotti sul lettore CD audio.
Se si utilizza l’apparecchio per la prima volt a o si
è sostituita la batteria dell’auto, è necessario
azzerare l’appar ecchio.
Rimuovere il pannello frontale e premere il tasto
RESET con un ogge tto appuntito, ad esempi o
una penna a sfera.
Tasto RESET
Nota
Premendo il tasto RESET verranno cancellate le
impostazioni dell’orologio e alcune funzioni
memorizzate.
7
Page 90

Estrazione del pannello frontale
Il pannello frontale può essere estratto per evitare
il furto dell’apparecchio.
Segnale di avvertimento
Se la chiave di accensione si tr ova nella
posizione OFF senza che il pannello frontale sia
stato rimosso, viene emesso per alcun i s econdi
un segnale acustico di avvertime nt o.
Se si collega un amplificatore di potenza
opzionale e non si uti lizza l’amplificatore
incorporato, il segnale di avvertimento viene
disattivato.
1 Premere (OFF)*.
La riproduzione d i CD/ MD o la ricezione
radio si interr ompe (l’illu minazione dei tasti e
il display rimangono accesi).
* Se la chiave di accensione dell’auto non è dotata
di posizione ACC, assicurarsi di spegnere
l’apparecchio premendo (OFF) per 2 secondi
per evi tare di scaricare la bat teria.
2 Premere (OPEN), quindi far scorrere il
pannello frontale verso destra e tirare
verso di sé il lato sinistro del pannello.
Applicazione del pannello frontale
Allineare il foro A del pannello frontale con il
mandrino B dell’apparecchio, quindi spingere il
lato sinistro in avanti.
Premere (SOURCE) (o inserire un CD) per
attivare l’apparecchio.
A
B
x
1
2
Note
• Se si estrae il pannello quando l’apparecchio è
acceso, l’aliment azione viene disattivata
automaticamente per evitare di danneggiare i
diffusori.
• Non lasciar cadere e non esercitare una pressione
eccessiva sul pannello frontale e sul suo display.
• Non esporre il pannello frontale a calore,
temperature elevate o umidità. Evitare di lasciarlo
all’interno di auto parcheggiate, sul cruscotto/ripiano
posteriore.
Suggerimento
Durante il trasporto inserire il pannello frontale
nell’apposita custodia in dotazione.
8
Nota
Non collocare nulla sulla superficie interna del
pannello frontale.
Page 91

Impostazione dell’orologio
L’orologio mostra l’indicazione digitale dell’ora
in base al sistema delle 24 ore.
Lettore CD Unità CD/MD (opzionale)
Esempio: Per i mpostare l’ora sulle 10:08
1 Premere (MENU), quindi premere più
volte uno dei lati di (DISC/PRESET) fino a
visualizzare “CLOCK”.
1 Premere (ENTER).
Le cifre dell’ora lampeggiano.
2 Premere uno dei lati di (DISC/PRESET)
per impostare l’ora.
3 Premere il lato (+) di (SEEK).
Le cifre dei minuti lampeggiano.
4 Premere uno dei lati di (DISC/PRESET)
per impostare i minuti.
2 Premere (ENTER).
L’orologio viene at tivato. Quand o
l’impostazione dell’orologio è completata, il
display ritorna a visualizzare il normale modo
di riproduzione.
Suggerimenti
•È pos sibile impostare l’orologio automaticamente
tramite la funzione RDS (pagina 19).
• Qu an do il mod o D.INFO è impostato su ON, l’ora
viene sempre visualizzata (pagina 21).
Oltre a riprodurre CD questo apparec chi o può
controllare unità CD/MD esterne.
Nota
Quando si collega un apparecchio CD opzionale
provvisto della funzione CD TEXT, le informazioni CD
TEXT vengono visualizzate nel display durante la
riproduzione di un disco CD TEXT.
Riproduzione di un disco
(Con questo apparecchio)
1 Premere (OPEN) e inserire il disco
(etichetta verso l’alto).
2 Chiudere il pannello frontale.
La riproduzione inizia automaticamente.
Se è già inserito un disco, premere (SOURCE)
più volte fino a visualizzare “CD” per iniziare la
riproduzione.
Per Premere
Interrompere la
riproduzione
Espellere il disco (OPEN) quindi Z
Saltare brani
– Sensore
musicale
automatico
Avanzamento
veloce/
riavvolgimento
– Ricerca manuale
(OFF)
(SEEK) (./>)
[una volta per ogni brano]
(SEEK) (m/M)
[tenere premuto fino al
punto deside rato]
continua alla pagina sequente t
9
Page 92

Note
• Quando finisce l’ultimo brano del disco, la
riproduzione ricomincia dal primo brano del CD.
• Quando è collegato un apparecchio opzionale, la
riproduzione della stessa sorgente continua
sull’apparecchio CD/MD opzi o na le.
(Con apparecchio opzionale)
1 Premere (SOURCE) più volte per
selezionare “CD” o “MD.”
2 Premere (MODE) più volte fino a
visualizzare l’apparecchio desiderato.
La riproduzione h a in i zi o .
Per Premere
Saltare dischi
(DISC/PRESET) (+/–)
–Selezione dischi
Voci del display
Quando il disco/br ano cambia, i titoli
preregistrati*
visualizzati automaticamente (se la funzione di
scorrimento automatico è impostata su “ON”, i
nomi più lunghi di 8 caratteri vengono fatti
scorrere (pagina 21)).
Per Premere
Cambiare la voce
visualizzata
fare scorrere le voci
da visualizzare
*1 “NO NAME” indica che non ci sono la funzione di
promemoria disco (pagina 11) o un nome
preregistrato da visualizzare.
10
*2 Solo per dischi CD TEXT con il nome dell’autore.
1
del nuovo disco/brano vengono
Informazioni visualizzate
• Sorgente musicale
• Orologio
• Funzione
Informazioni visualizzat e
• Tempo di riproduzione
trascorso
• Nome del disco*
dell’autore*
• Titolo del brano*
1
/nome
2
1
(DISPLAY/PTY)
(S) (SCROLL)
Note
• Certi caratteri non possono essere visualizzati.
• Le informazioni di alcuni dischi CD TEXT con molti
caratteri potrebbero non essere visualizzate.
• Questo apparecchio non può visualizzare il nome
dell’autore di ogni brano del disco CD TEXT.
Suggerimento
Quando lo scorrimento automatico è impostato su
OFF e il disco/nome del brano cambiano, il disco/
nome del brano non vengono visualizzati.
Riproduzione ripetuta dei
brani
— Riproduzione r ipetuta
Quando raggiunge la fine, il disco nell’apparecchio
principale ripete un brano o l’in tero disc o. Per la
riproduzio ne ripetuta, è possibile selezionare:
• REP-1 — per ripetere un brano.
• REP-2* — per r ipetere un disco.
* Disponibile solo quando sono collegati uno o più
apparecchi CD/MD opzionali.
Durante la riproduzione, premere (3)
(REP) più volte fino a visualizzare
l’impostazione desiderata nel display.
La riproduzione ripetuta ha inizio.
Per ritornare all a ri produzione normal e,
selezionare “REP-OFF.”
Riproduzione dei brani in
ordine casuale
— Riproduzione in ordine casuale
È possibile sele zi onare:
• SHUF-1 — per riprodurre i br ani del disco
corrente in ordine cas uale.
• SHUF-2*
CD (MD) opzionale in ordine cas uale.
• SHUF-ALL*
tutti i lettori CD (MD) collegati (inclusa questa
unità) in ordine casuale.
*1 Disponibile solo quando uno o più apparecchi CD
*2 Disponibile solo quando uno o più lettori CD, o due
Per ritornare al m odo di riproduzione n o r m ale,
selezionare “SHUF-OFF.”
Nota
“SHUF-ALL” non mischia i brani del lettore CD e del
lettore MD.
1
— per riprodurre i brani del lettore
2
— per riprodur re tutti i brani in
(MD) opzionali sono collegati.
o più lettori MD opzionali sono collegati.
Durante la riproduzione, premere (6)
(SHUF) più volte fino a visualizzare
l’impostazione desiderata nel display.
La riproduzione in ordine casuale ha inizio.
Page 93

Assegnazione di un nome a
un CD
— Funzione di promemoria disco (Per un
lettore CD con la funzione CUSTO M FIL E)
È possibile assegnare un nome a un disco
(Funzione di prom emoria disco). È possibile
inserire fino a 8 caratt er i p er ogni disco. Se si
assegna un nome a un CD, è possibile
indivi duarlo per nome (pag ina 12).
1 Iniziare la riproduzione del disco al quale
si desidera assegnare un nome.
2 Premere (MENU), quindi premere un lato
di (DISC/PRESET) più volte fino a
visualizzare “NAMEEDIT”.
3 Premere (ENTER).
Suggerimenti
• Per correggere o cancellare un nome basta
riscrivere o inserire “_”.
• Esiste un altro modo per assegnare un nome a un
CD: Premere (LIST) per 2 secondi invece di
eseguire i passi 2 e 3. Inoltre l’operazione può
essere completata premendo (LIST) per 2 secondi
inv ece di eseguire il pas so 5.
•È possibile assegnare un nome a un CD in un
apparecchio sprovvisto della funzione CUSTOM
FILE se tale apparecchio è collegato ad un lettore
CD dotato di tale funzione. Il promemoria disco verrà
conservato nella memoria del letto re CD provvisto
della funzione CUSTOM FILE.
Nota
Le funzioni REP-1/riproduzione casuale sono sospese
fino al termine della pro cedura di modifica del nome.
Visualizzazione del promemoria disco
In quanto voce del disp l ay, la funzione di
promemoria di sco ha sempre la priorità sulle
informazioni originali CD TEXT.
Per Premere
Visualizzare (DISPLAY/PTY) durante la
riproduzione del disco CD/
CD TEXT
L’apparecchio ripete la riproduzione del disco
durante la proc edura di asseg nazione del
nome.
4 Inserire i caratteri.
1 Premere il lato (+)*
più volte per selezionare il carattere
desiderato.
A t B t C ... t 0 t 1 t 2 ... t +
t – t
*1 Per tornare indietro, premere il lato (–) di
*2 (spazio vuoto)
2 Premere il lato (+) di (SEEK) dopo
avere trovato il carattere desiderato.
Premendo il lato (–) di (SEEK), è
possibile retr ocedere verso sinistr a.
3 Ripetere i passi 1 e 2 per inserire
l’intero nome.
... t _*2 t A
*
(DISC/PRESET).
1
di (DISC/PRESET)
5 Per ritornare al modo normale di
riproduzion e CD, premere(ENTER).
Suggerimento
Per sapere quali altre voci possono essere
visualizzate, fare riferimento a pagina 10.
Cancellazione della funzione
promemoria disco
1 Premere (SOURCE) più volte per
selezionare “CD.”
2 Premere (MODE) più volte per
seleziona r e il le ttore CD con la funzione
di promemoria disco.
3 Premere (MENU), quindi premere un lato
di (DISC/PRESET) più volte fino a
visualizzare “NAME DEL”.
4 Premere(ENTER).
I nomi memorizzati appaiono in ordine
partendo dal prim o nome inserito.
5 Premere un lato di (DISC/PRESET) più
volte per selezionare il nome del disco
che si desidera cancellare.
I nomi memorizzati appaiono in ordine
partendo dal prim o nome inserito.
6 Premere (ENTER) per 2 secondi.
Il nome viene canc ellato.
Ripetere i passi 5 e 6 per cancellare altri
nomi.
continua alla pagina sequente t
11
Page 94

7 Premere (MENU) due volte.
L’apparecchio ritorna al modo normale di
riproduzione CD.
Note
• Quando viene cancellata la funzione di promemoria
di un disco CD TEXT, vengono visualizzate le
informazioni originali del CD TEXT.
• Se non si trova il promemoria disco che si desidera
cancellare, selezionare un diverso lettore CD al
passo 2.
Selezione di brani specifici
per la riproduzione
— Funzione di memoria programma (per un
lettore CD dotato della funzione CUSTOM
FILE)
Se è stato asse gna to un n ome al di sco, è possi bile
impostare l’apparecchio in modo che salti o
riproduca de i brani a scelta.
Ricerca di un disco in base al
nome
— Funzione di elen co (per un lettore CD con
la funzione CD TE XT/CUSTOM FILE o un
lettore MD)
Questa funzione è possibile per i dischi cui sono
stati assegnati dei nomi*
*1 Individuazione di un disco in base al nome
assegnato: quando si assegna un nome a un CD
(pagina 11) o a un MD.
*2 Individuazione di un disco tramite le informazioni
CD TEXT: quando si riproduce un disco CD TEXT
su un lettore CD con la funzione CD TEXT.
1 Premere (LIST).
Il nome assegnato al disco corrente appare nel
display .
2 Premere un lato di (DISC/PRESET) più
volte fino a individuare il disco
desiderato.
3 Premere (ENTER) per riprodurre il disco.
Nota
Non è possibile visualizzare alcune lettere (ad
eccezione di: promemoria disco).
1
o per dischi CD TEXT*2.
1 Iniziare a ri produrre il disco cui si
desidera assegnare un nome.
2 Premere (MENU), quindi premere un lato
di (DISC/PRESET) più volte fino a
visualizzare “BANK SEL”.
3 Premere (ENTER).
4 Assegnazione di nomi ai brani.
1 Premere un lato di (SEEK) più volte
per selezionare il brano cui si desidera
assegnare un nome.
2 Premere (ENTER) più volte per
selezionare “PLAY” o “SKIP.”
5 Ripetere il passo 4 per impostare “PLAY”
o “SKIP” per tutti i brani.
6 Premere (MENU) due volte.
Il lettore ritorna al mo do normale di
riproduzione CD.
Note
•È possibile impostare “PLAY” e “SKIP” per 24 brani
al massimo.
• Non è possibile impostare “SKIP” per tutti i brani di
un CD.
12
Page 95

Riproduzione di brani specifici
È possibile selezionare:
•“BANK-ON” — per riprodurre i brani con
l’impostazione “PLAY”.
•“BANK-INV” (Inverse) — per riprodurre i
brani con l’impostazione “SKIP”.
1 Durante la riproduzione, premere
(MENU), quindi premere un lato di
(DISC/PRESET) più volte fino a
visualizzare “BANK-ON”, “BANK-INV” o
“BANK-OFF”.
2 Premere il lato (+) di (SEEK) più volte
fino a visualizzare l’impostazione
desiderata.
3 Premere (ENTER).
La riproduzione inizia dal brano successivo al
brano corrente.
Per ritornare al modo di riproduzione normale,
selezionare “BANK-OFF” al passo 2.
Radio
Questo apparec chio può memorizzare fino a 6
stazioni per ba nd a (FM1, FM2, FM3, MW, e
LW).
Avvertenza
Quando si sintoni zzano le stazioni mentre si
guida, usare la funzione Best Tuning Memory
per evitare incidenti.
Memorizzazione autom ati ca
delle stazioni
— Best Tuning Memory (BTM)
Questa funzione seleziona le stazioni che
trasmettono i segnali più forti nella banda
selezionata e le memorizza nell’ordine di
frequenza.
1 Premere (SOURCE) più volte per
selezionare la radio.
2 Premere (MODE) più volte per
selezionare la banda.
3 Premere (MENU), quindi premere un lato
di (DISC/PRESET) più volte fino a
visualizzare “BTM”.
4 Premere (ENTER).
Quando l’impostazione è stata memorizzata
viene emesso un segnale acustico.
Note
• Se a causa di segnali deboli si ricevono solo poche
stazioni, alcuni tasti numerici manterranno la loro
impostazione iniziale.
• Se il display visualizza un numero, l’apparecchio
inizia a memorizzare le stazioni a partire da quella
correntemente selezionata.
13
Page 96

Ricezione delle stazioni
memorizzate
Memorizzazione delle
stazioni desiderate
1 Premere (SOURCE) più volte per
selezionare la radio.
2 Premere (MODE) più volte per
selezionare la banda.
3 Premere il tasto numerico ((1) a (6)) su
cui è memorizzata la stazione desiderata.
Suggerimento
Premere un lato di (DISC/PRESET) per ricevere le
stazioni nell’ordine in cui sono state memorizzate
(Funzione di ricerca preselezionata).
Se non è possibile sintonizzare una
stazione preselezionata
Premere un lato di (SEEK) per ricercare
la stazione (sintonizzazione automatica).
La ricerca si arresta non appena l’apparecchio
riceve una stazione. Ripetere fino a che la
stazione desiderata non viene ric evuta.
Suggerimenti
• Se la sintonizzazione automatica si arresta troppo
frequentemente, attivare la funzione di ricerca locale
per limitare la ricerca alle stazioni con i segnali più
forti (pagina 22).
• Se si conosce la frequenza della stazione che si
vuole ascoltare, premere e tenere premuto un lato di
(SEEK) per trovare la frequenza approssimativa,
quindi premere (SEEK) più volte per sintonizzarsi
esattamente sulla frequenza desiderata
(sintonizzazione manuale) .
Se la ricezione FM stereo è scadente
Selezionare il modo di ricezione
monofonica(pagina 22).
Il suono migliora, m a diventa mo nofonico
(“ST” scompare).
È possibile pres el ezionare manualm ente le
stazioni desiderate su q ualsiasi numero prescelto.
1 Premere (SOURCE) più volte per
selezionare la radio.
2 Premere (MODE) più volte per
selezionare la band a .
3 Premere un lato di (SEEK) per
sintonizzare la stazione che si desidera
memorizzare.
4 Premere il tasto numerico desiderato (da
(1) a (6)) per 2 secondi fino a
visualizzare “MEM”.
L’indicazione del ta sto numerico appare nel
display.
Nota
Se si memorizza un’altra stazione sullo stesso tasto
numerico, la stazione memorizzata precedentemente
viene cancellata.
14
Page 97

Sintonizzazione di una
stazione da un elenco
— Funzione di elenco
RDS
1 Durante la ricezione, premere(LIST) per
un momento.
La frequenza o i l no m e assegnato alla
stazione correntemente sintonizzata
lampeggia.
2 Premere un lato di (DISC/PRESET) più
volte fino a individuare la stazione
desiderata.
Se non è stato assegnato un nome alla
stazione selez io nata, nel display vien e
visualizzata la frequenza .
3 Premere (ENTER) per sintonizzare la
stazione desiderata.
Presentazione della funzione
RDS
L’RDS (sistema dati ra di o) è un servizio che
consente alle stazioni radio FM di trasmettere
informazioni digitali aggiuntive oltre al normale
segnale in r adiofreq uenza. Quan do viene ric evuta
una stazione con la f unzione RDS viene
visualizzata, ad esempio, una delle seguenti voci.
Voci visualizzate
• Sorgente musicale
• Orologio
• Funzione
Voci visualizzate
• Nome della stazione (frequenza)
• Tipo di programma
Per Premere
Cambiare voce
del display
(DISPLAY/PTY)
Servizi RDS
I dati RDS offrono altre funzi oni quali:
• La risintonizzazione autom at ica di un
programma, funzione utile durante lunghi
viaggi in auto. — Funzione AF (f requenza
alternativa) t pagina 16
• Ascolto dei notiziari sul traffico, anche
durante l’ascolto di un programma/sorgente
diversi. — TA t pagina 17
• Selezione de lle stazioni per tipo di
programma trasmesso. — Funzione P T Y t
pagina 18
• Impostazione automatic a dell’orologio. —
CT t pagina 19
Note
• In funzione del paese o della zona geografica, non
tutte le funzioni RDS potrebbero essere disponibili.
• La funzione RDS potrebbe non funzionare
correttamente quando il segnal e è debole o se la
stazione sintonizzata non trasmette dati RDS.
15
Page 98

Risintonizzazione automatica
per la ricezione ottimale
— Funzione AF
La funzione AF (frequenza alternativa) consente
la sintonizzazion e sulla stazione con il segnale
più forte.
Le frequenze cambiano
automaticamente.
98,5 MHz
Stazione
1 Selezionare una stazione FM (pagina 13).
2 Premere (AF) più volte fino a
visualizzare “AF-ON”.
L’apparecchio inizia a ricercare una
frequenza alternativa con un segnale più forte
nella stessa rete.
Se “NO AF” lampeggia, significa che la
stazione attualmente sintonizzata non ha una
frequenza alternativa.
Nota
Quando nell’area non esiste una frequenza alternativa
o quando non ne viene ricercata una, disattivare la
funzione AF selezionando “AF-OFF.”
96,0 MHz
102,5 MHz
Per le stazioni prive di frequenza
alternativa
Premere un lato di (SEEK) mentre il
nome della stazione lampeggia (entro 8
secondi).
L’apparecchio ini zi a a ricercare un’altra
frequenza con gli stessi dati PI
(identificazione programma) (appare “PI
SEEK”).
Se l’apparecchio no n t rova gli stessi dati PI,
ritorna alla frequenza selezionata in
precedenza.
Mantenimento del programma
regionale
Quando la funzio ne AF è attivata: le
impostazioni predefinite di questo apparec chi o
limitano la ricezione alla regione specifica, in
modo che la stazione sintonizzata non venga
cambiata con un a st azione regionale dal segnale
più potente.
Quando ci si allontana dall'area regionale di
ricezione di programmi o quando si vuole
usufruire di tutti i servizi della funzione AF,
selezionare “REG-OFF” dal MENU (pagina 22).
Nota
Questa funzione non è disponibile nel Regno Unito e
in altre aree.
Funzione Local Link
(Solo per il Regno Unito)
Questa funzione consente di seleziona r e al tre
stazioni local i della stessa area, anche se non
sono memorizzate sui tasti numerici.
1 Premere un tasto numerico ((1) a (6)) su
cui è memorizzata una stazione locale.
2 Entro 5 secondi, premere nuovamente il
tasto numerico della stazione locale.
3 Ripetere questa procedura fino alla
ricezione della stazione locale
desiderata.
16
Page 99

Ascolto dei notiziari sul
traffico
— TA/TP
Attivando la f unzione TA (notiziari sul traf f ico ) e
TP (programma sul traffico), è possibile
sintonizzarsi automaticamente su una stazione
FM che trasmette not iz iari sul traffico. Queste
impostazioni funzionano a prescindere dal
programma FM/s orgente o dal CD/MD corren te
al termine del notiz iario l’apparecchio ritorna
alla sorgente originale.
Premere (TA) più volte fino a
visualizzare “TA-ON.”
L’apparecchio inizia a ricercare le stazioni
con le informazioni sul traffico.
“TP” indica la ricez i one di tali stazioni e
“TA” lampeggia durante un notiziario sul
traffico. L’apparecchio continua a ricercare le
stazioni disponibili con TP se viene
visualizzato “NO TP.
Per annullare tutti i notiziari sul traffico,
selezionare “TA-OFF.”
Per Premere
Annullare il
notiziario corrente
Suggerimento
È inoltre possibile cancellare il notiziario corrente
premendo (SOURCE) o (MODE).
Preimpostazione del volume dei
notiziari sul traffico
È possibile preimpostare il livello del volume dei
notiziari sul traffico in modo da poterli udire
chiaramente.
1 Girare la manopola di controllo del
volume per regolare il volume sul livello
desiderato.
2 Premere (TA) per 2 secondi.
Appare “TA” e l’im postazione viene
memorizzata.
(TA)
Preselezione di stazioni RDS
con l’impostazione AF e TA
Quando si preselezionano st azioni RDS,
l’apparecchio memorizza l’impostazione AF/TA
di ogni stazione (on/off) oltre che la loro
frequenza. È po ssibile selezionar e una
impostazione diversa (per AF, TA o per
entrambe) per singole stazioni preselezionate o la
stessa impostazione per tutte le stazioni
preselezionate. Se si pre selezionano stazioni con
“AF-ON” l’apparecchio memorizza
automaticamente le stazioni con il segnale radio
più forte.
Preselezione della stessa impostazione
per tutte le stazioni preselezionate
1 Selezionare una banda FM (pagina 13).
2 Premere (AF) e/o (TA) per selezionare
“AF-ON” e/o “TA-ON.”
Notare che la sel ezione di “AF-OFF” o di
“TA-OFF” non solo memorizza stazioni RDS,
ma anche stazion i no n RDS.
3 Premere (MENU), quindi premere un lato
di (DISC/PRESET) più volte fino a
visualizzare “BTM.”
4 Premere (ENTER) finché “BTM ” non
lampeggia.
Preselezione di impostazioni diverse
per ogni stazione preselezionata
1 Selezionare una banda FM e
sintonizzarsi sulla stazione
desiderata(pagina 14).
2 Premere (AF) e/o (TA) per selezionare
“AF-ON” e/o “TA-ON.”
3 Premere il tasto numerico desiderato
((1) a (6)) fino a visualizzare “MEM”.
Ripetere dal passo 1 per preselezionare alt r e
stazioni.
Ascolto di notiziari di emergenza
Se la funzione AF o TA è attivata, l’apparecchio
riceve un notiziari o di em ergenza, se ne viene
trasmesso uno du rante l’ascolto di una stazione
FM o di un CD/MD.
17
Page 100

Sintonizzazione delle
stazioni in base al tipo di
programma
— PTY
È possibile sintonizzarsi su una stazio ne
selezionando il ti po di programma che si
desidera ascoltare.
Tipi di programma Display
Giornale radio NEWS
Attualità AF FAIRS
Informazioni INFO
Sport SPORT
Istruzione EDUCATE
Teatro DRAMA
Cultura CULTURE
Scienza SCIENCE
Vario VARIED
Musica pop POP M
Musica rock ROCK M
Musica leggera EASY M
Classica leggera LIGHT M
Classica CLASSICS
Altri tipi di musica OTHER M
Bollettino meteorologico WEATHER
Finanza FINANCE
Programmi per bambini C H I LD REN
Sociale SOCIAL A
Religione RELIGION
Chat show PHONE IN
Viaggi TRAVEL
Diversivi LEISURE
Musica Jazz JAZZ
Musica Country COUNTRY
Musica nazionale NATION M
Musica degli anni ‘50/’60 OLDIES
Musica folk FOLK M
Documentari DOCUMENT
1 Premere (DISPLAY/PTY) durante la
ricezione FM fino a visualizzare “PTY”.
Se la stazione sta trasmettendo dati PTY
appare il nome del tipo di progra m m a
corrente.
“--------” appare se la stazione ricevuta non è
una stazione RDS o se i d at i RDS non
vengono ricevuti.
2 Premere (DISC/PRESET) più volte fino a
visualizzare il programma desiderato.
I tipi di programm a appaiono nell’ordine
indicato dalla tabella.
“--------” appare se il tipo di programma non è
specificato nei dati RDS.
3 Premere (ENTER).
L’apparecchio ini zi a a r icercare una stazione
che trasmette il tipo di programma
selezionato.
Nota
Questa funzione non è disponibile in alcune nazioni
dove i dati PTY (selezione tipo di programma) non
sono disponibili.
18
 Loading...