

Page 1
3-866-304-21 (1)
Operating Instructions
Mode d’emploi
Manual de instrucciones
BruksanvisningFRFR
GB
FR
ES
SE
CDP-CE535
1999 by Sony Corporation
Page 2
WARNING
Welcome!
To prevent fire or shock
hazard, do not expose
the unit to rain or
moisture.
To avoid electrical shock,
do not open the cabinet.
Refer servicing to
qualified personnel only.
This appliance is classified as a CLASS 1
LASER product.
The CLASS 1 LASER PRODUCT
MARKING is located on the rear
exterior.
Thank you for purchasing the Sony
Compact Disc Player. Before operating
the unit, please read this manual
thoroughly and retain it for future
reference.
About This Manual
The instructions in this manual are for
model CDP-CE535.
Conventions
• Instructions in this manual describe
the controls on the player.
You can also use the controls on the
remote if they have the same or
similar names as those on the player.
• The following icons are used in this
manual:
Indicates that you can do the
task using the remote.
For the customers in Canada
CAUTION
TO PREVENT ELECTRIC SHOCK,
DO NOT USE THIS POLARIZED AC
PLUG WITH AN EXTENSION
CORD, RECEPTACLE OR OTHER
OUTLET UNLESS THE BLADES
CAN BE FULLY INSERTED TO
PREVENT BLADE EXPOSURE.
Indicates hints and tips for
making the task easier.
GB
2
Page 3

Getting Started
TABLE OF CONTENTS
Getting Started
Unpacking............................................................................................................................. 4
Hooking Up the System...................................................................................................... 4
Connecting Another CD Player ......................................................................................... 6
Playing a CD............................................................................................................................. 8
Playing CDs
Using the Display .............................................................................................................. 10
Replacing Discs While Playing a Disc ............................................................................ 12
Locating a Specific Disc .................................................................................................... 13
Locating a Specific Track .................................................................................................. 14
Locating a Particular Point in a Track ............................................................................ 14
Playing Repeatedly............................................................................................................ 14
Playing in Random Order (Shuffle Play) ....................................................................... 15
Creating Your Own Program (Program Play)............................................................... 16
Controlling Another CD Player (Advanced Mega Control) ....................................... 18
Playing Alternately (No-Delay Play/X-Fade Play) ...................................................... 20
GB
Recording From CDs
Recording Your Own Program........................................................................................ 21
Recording a CD by Specifying Tape Length (Time Edit)............................................. 21
Fading In or Out................................................................................................................. 22
Adjusting the Recording Level (Peak Search) ............................................................... 23
Storing Information About CDs (Custom Files)
What You Can Do With the Custom Files ..................................................................... 24
Labeling Discs (Disc Memo)............................................................................................. 24
Storing Specific Tracks (Delete Bank) ............................................................................. 26
Additional Information
Precautions ......................................................................................................................... 27
Notes on CDs...................................................................................................................... 27
Troubleshooting ................................................................................................................. 28
Specifications ...................................................................................................................... 28
Index
Index .................................................................................................................................... 29
GB
3
Page 4
Getting Started
Getting Started
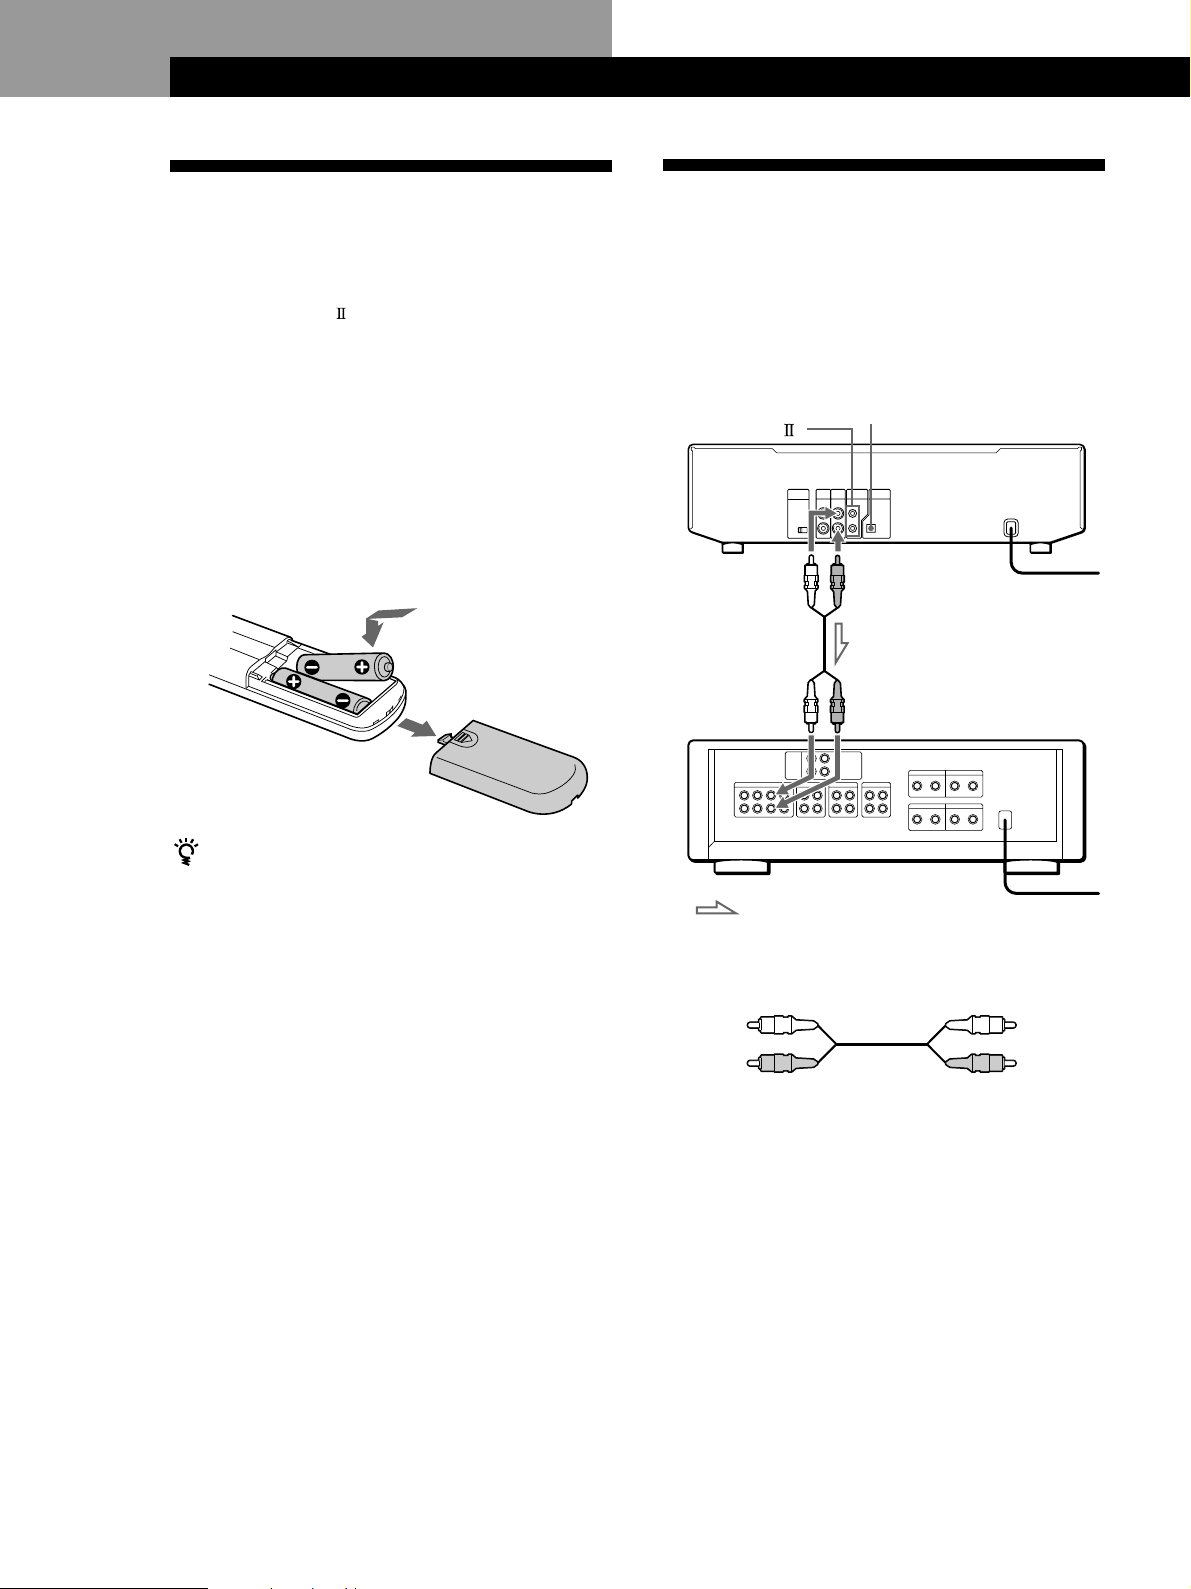
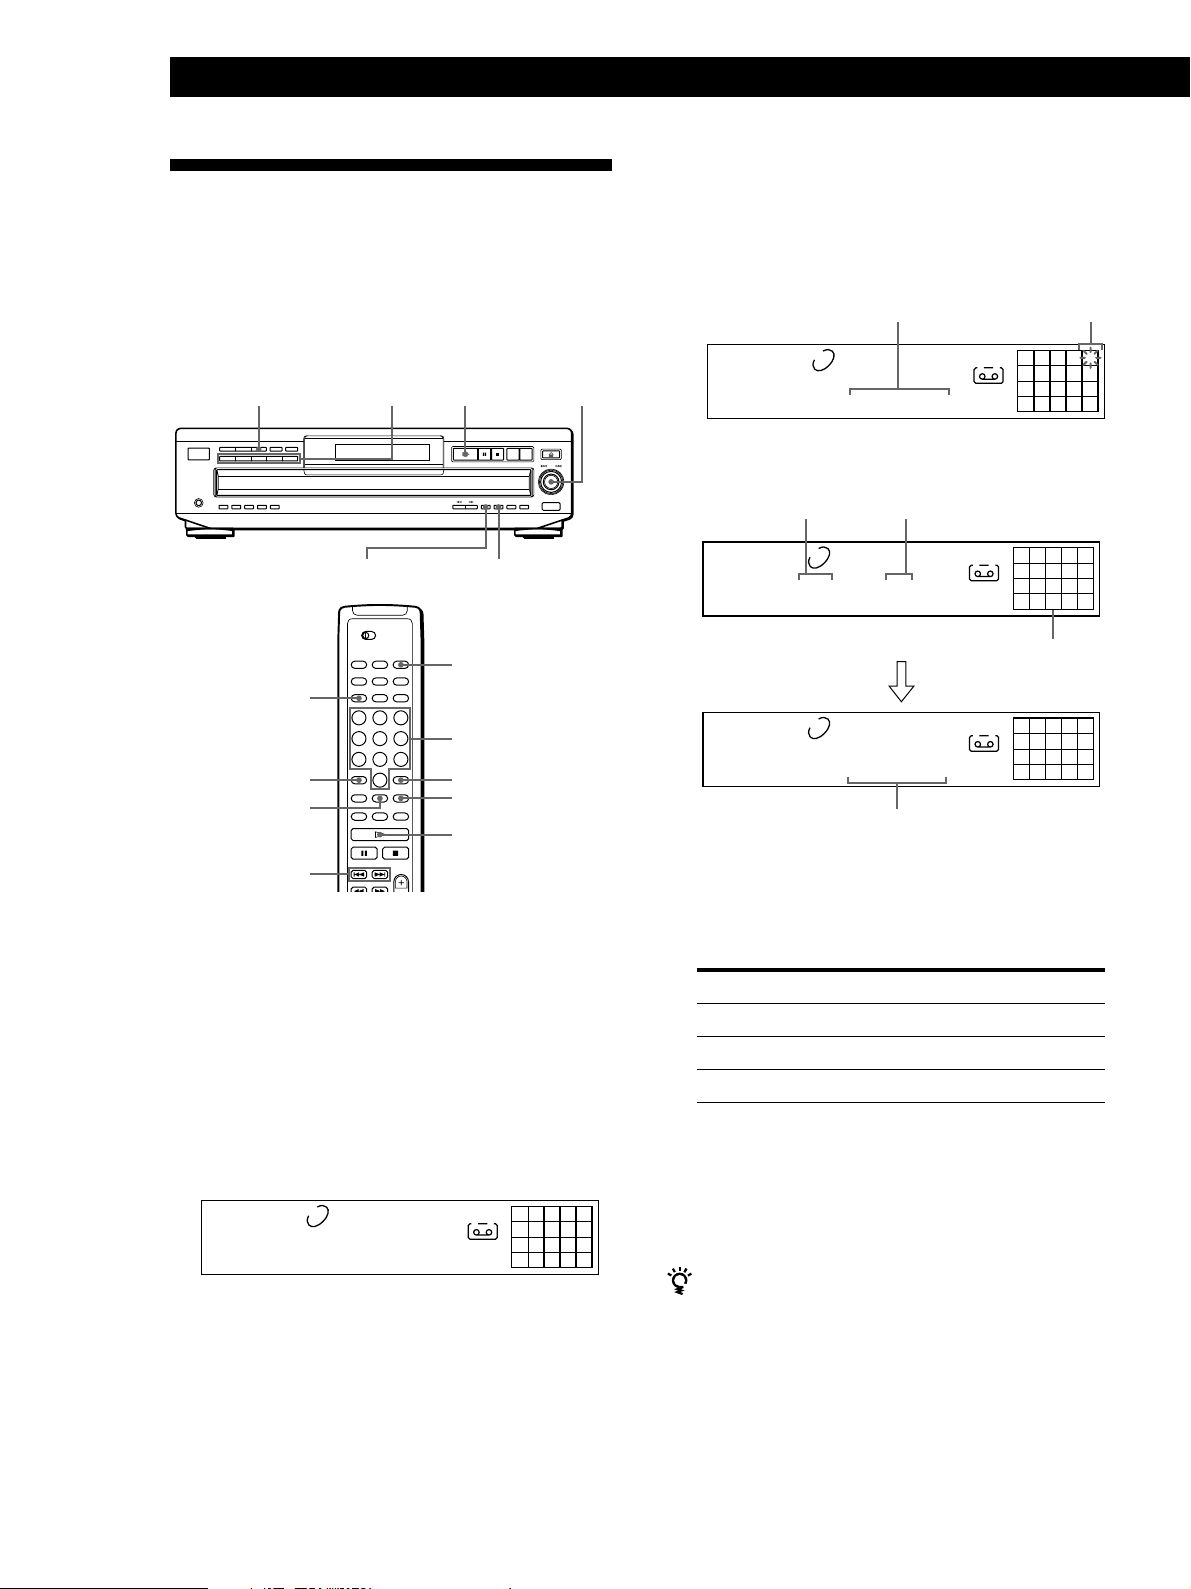
Unpacking
Check that you received the following items:
• Audio cord (1)
• Monaural (2P) mini-plug cord (1) (Connecting cord
for CONTROL A1
only)
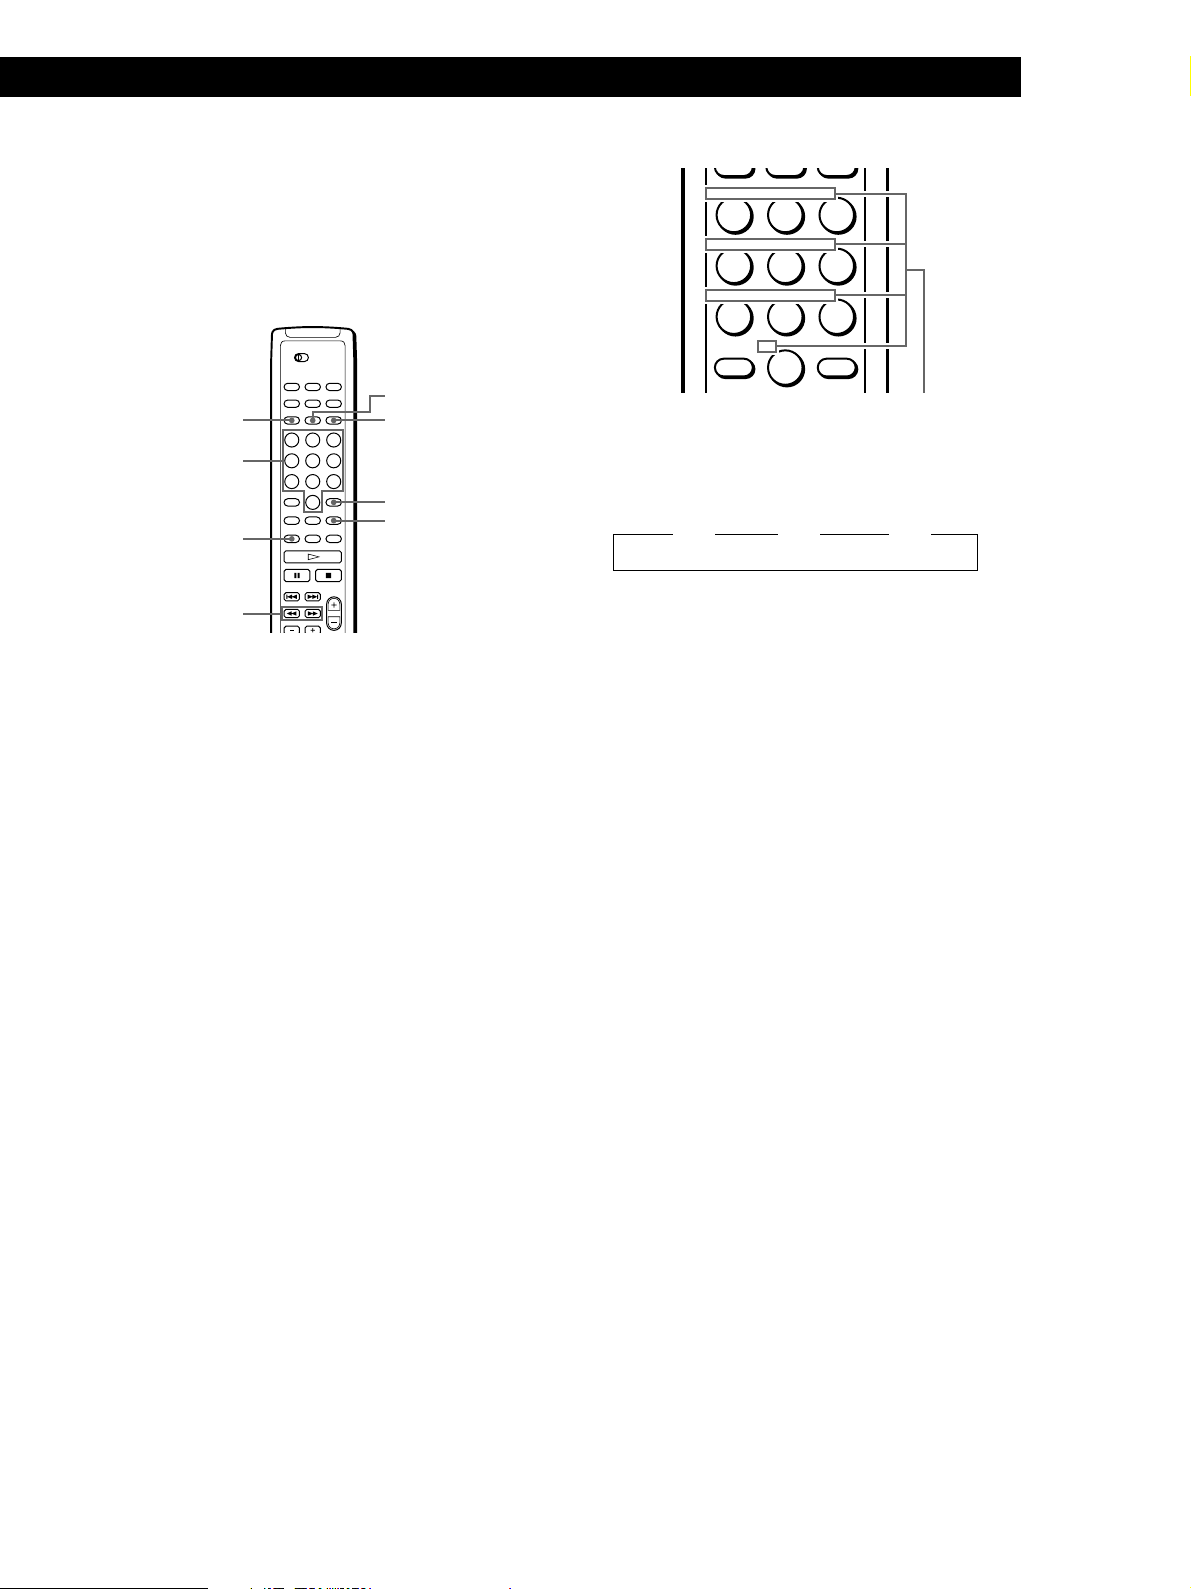
• Remote commander (remote) (1)
• R6 (size AA) batteries (2)
Inserting batteries into the remote
You can control the player using the supplied remote.
Insert two size AA (R6) batteries by matching the +
and – on the batteries. When using the remote, point it
at the remote sensor g on the player.
) (supplied for Canadian models
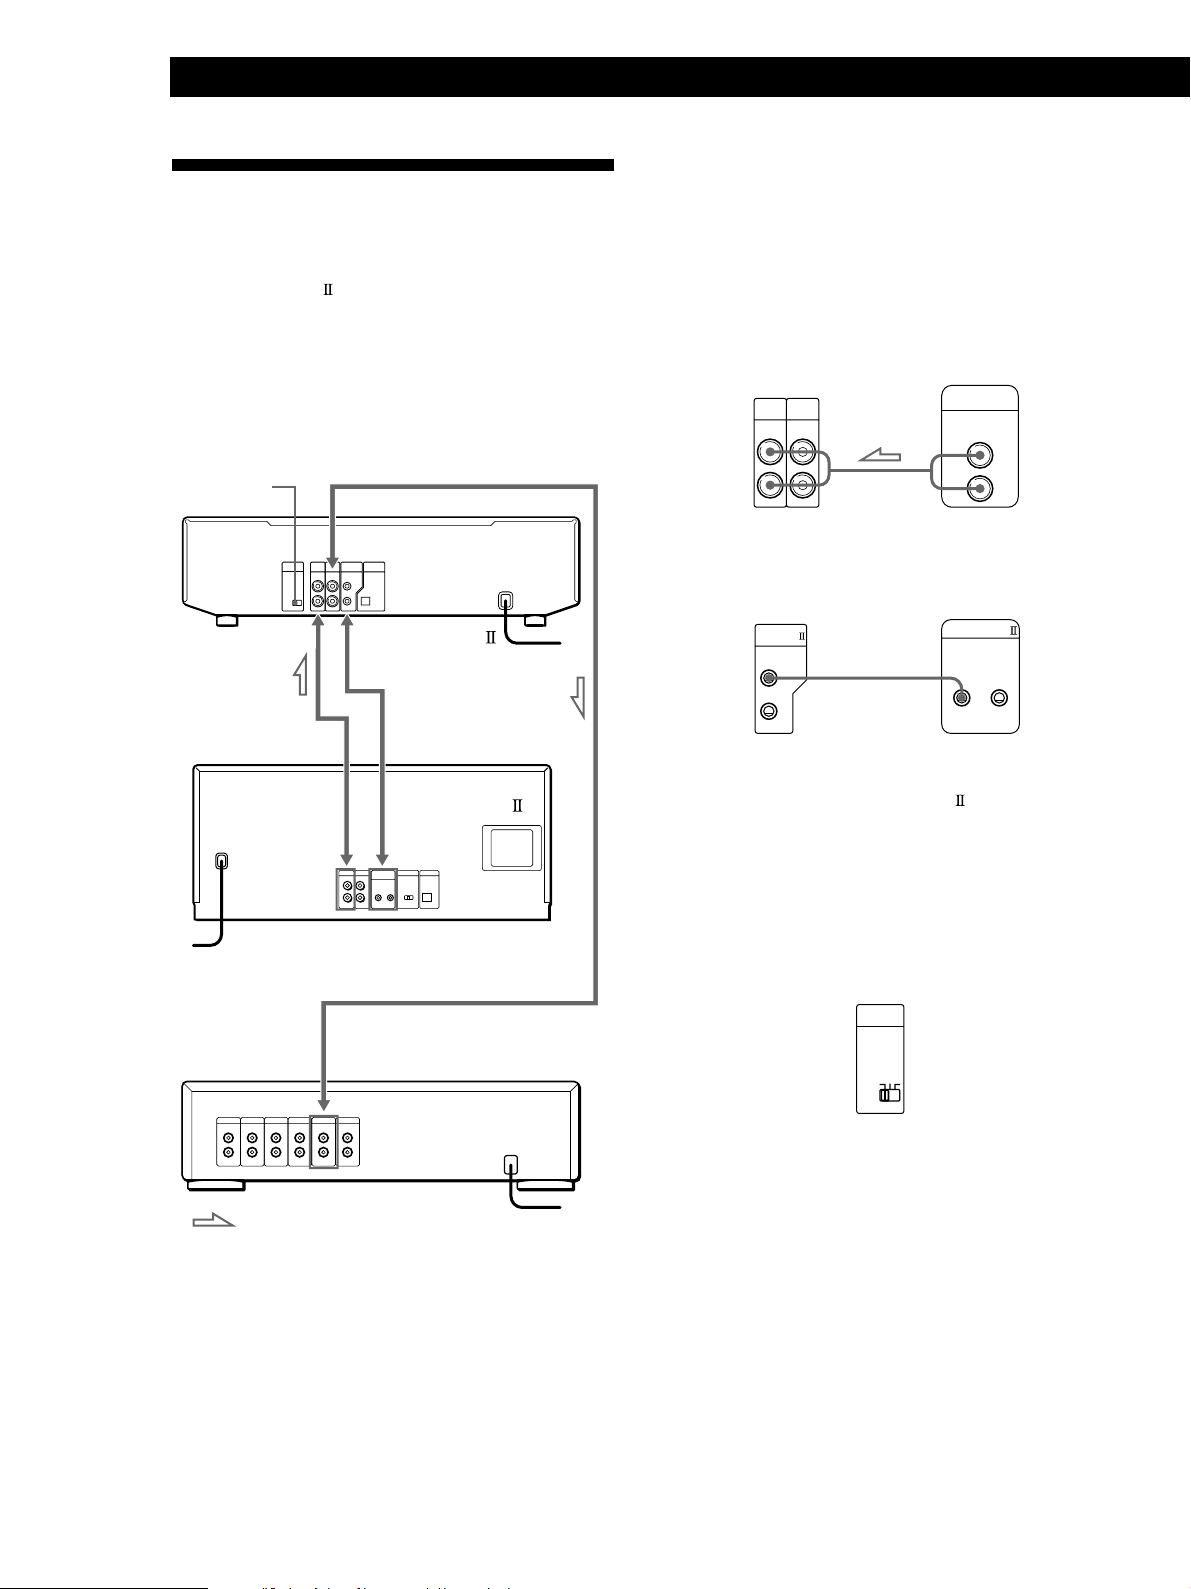
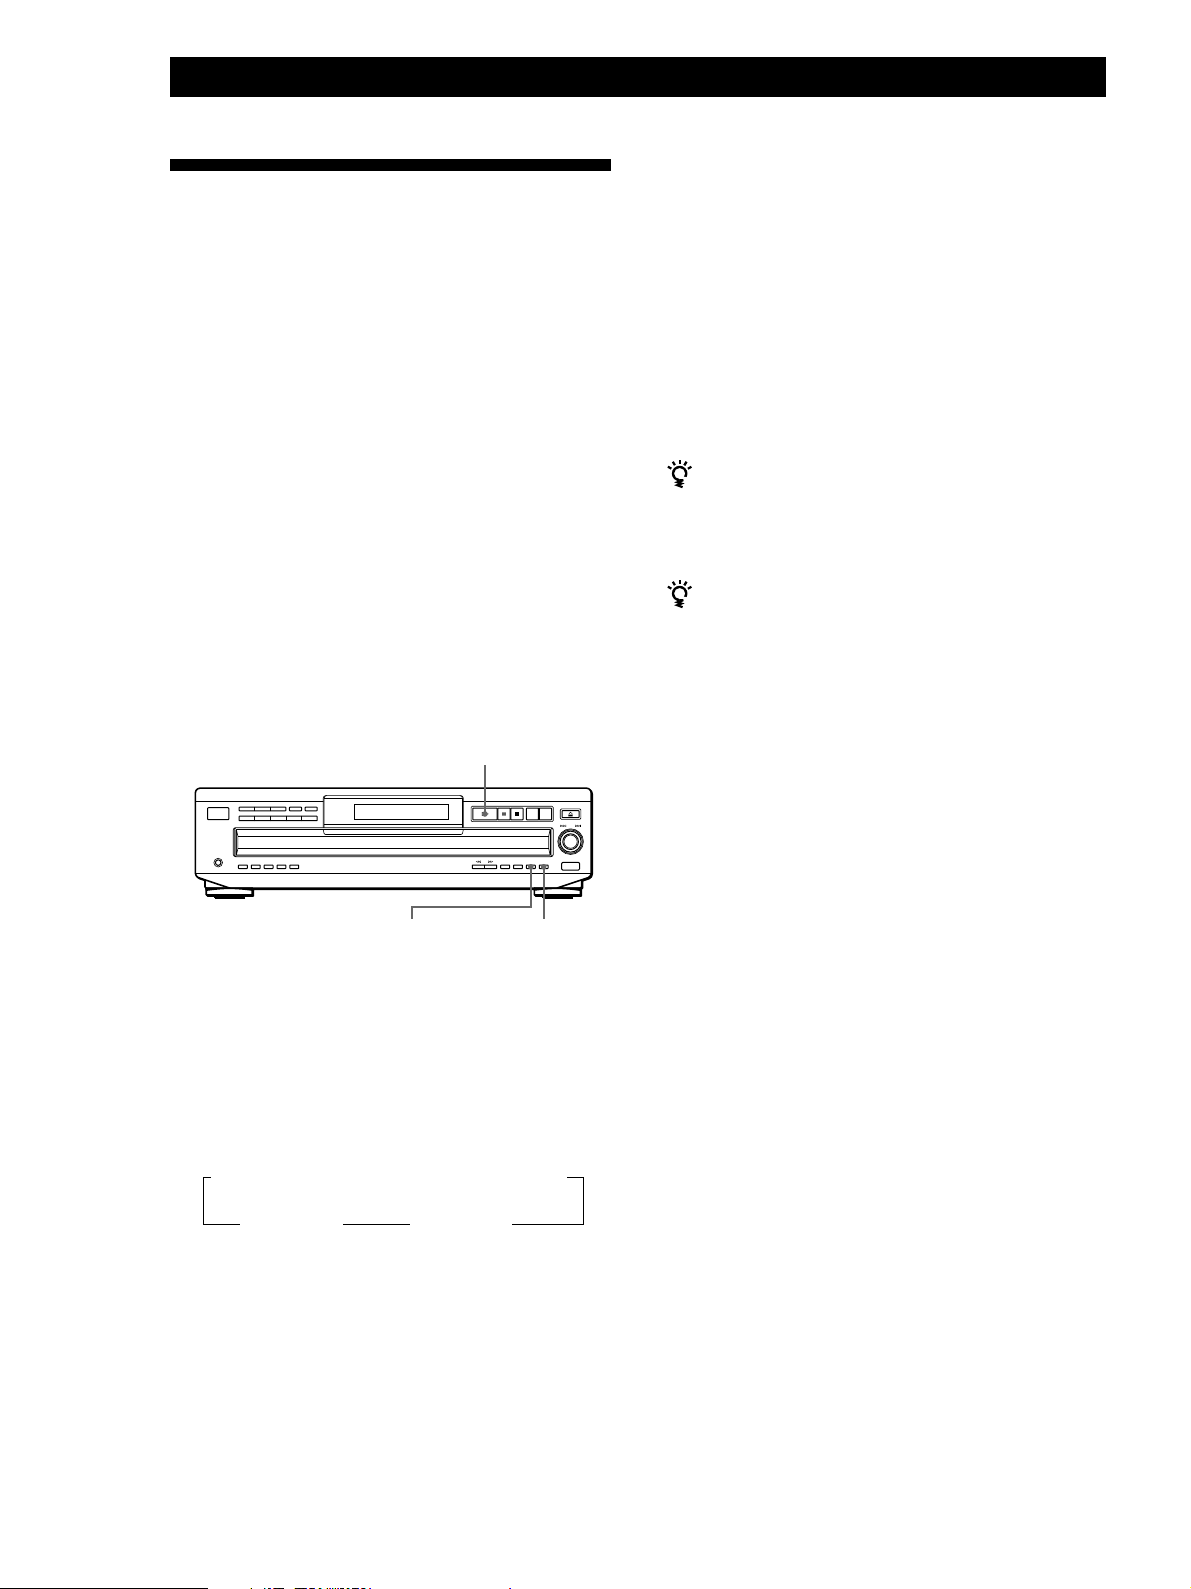
Hooking Up the System
Overview
This section describes how to hook up the CD player to
an amplifier. Be sure to turn off the power of each
component before making the connections.
DIGITAL OUT
CONTROL A1
LINE OUT
(L)
Audio input
(L)
(OPTICAL)
LINE OUT
(R)
Audio input
(R)
CD player
To an AC outlet
Amplifier
When to replace batteries
With normal use, the batteries should last for about six
months. When the remote no longer operates the player,
replace all the batteries with new ones.
Notes
• Do not leave the remote near an extremely hot or humid
place.
• Do not drop any foreign object into the remote casing,
particularly when replacing the batteries.
• Do not expose the remote sensor to direct sunlight or
lighting apparatuses. Doing so may cause a malfunction.
• If you don’t use the remote for an extended period of time,
remove the batteries to avoid possible damage from battery
leakage and corrosion.
: Signal flow
What cords will I need?
Audio cord (supplied) (1)
White
(L)
Red
(R)
To an AC outlet
White
(L)
Red
(R)
GB
4
Page 5
Getting StartedGetting Started
Hookups
When connecting an audio cord, be sure to match the
color-coded cord to the appropriate jacks on the
components: Red (right) to Red and White (left) to
White. Be sure to make connections firmly to avoid
hum and noise.
AmplifierCD player
2ND
LINE
CD
IN OUT
L
R
You can adjust the output level to the amplifier
Press LINE OUT LEVEL +/– on the remote. You can
reduce the output level up to –20 dB.
When you reduce the output level, “
the display.
Note
If you press the LINE OUT LEVEL +/– buttons on the
remote while recording, the recording level will change
even when it is preset on the tape deck, etc.
INPUT
CD
FADE
L
R
” appears in
If you have a Sony component with the CONTROL
A1 (or CONTROL A1) jack
Connect the component via the CONTROL A1 (or
CONTROL A1) jack. You can simplify the operation of
audio systems composed of separate Sony components.
For details, refer to the supplementary “CONTROL-A1
Control System” instructions.
When using another Sony CD player together with
this player
You can make the supplied remote effective only for this
player.
• When using a player equipped with the COMMAND
MODE selector:
Leave the COMMAND MODE selector of this player
to CD 1 which is set at the factory and set that of
another player to CD 2 or CD 3. Then set the CD 1/2/3
switch on the remote supplied for each player
accordingly.
• When using a player not equipped with the
COMMAND MODE selector:
The command mode of the player without the
COMMAND MODE selector is set to CD 1. Set the
COMMAND MODE selector of this player and the
CD 1/2/3 switch on the remote to CD 2 or CD 3.
• If you have a digital component such as a digital
amplifier, D/A converter, DAT or MD
Connect the component via the DIGITAL OUT (OPTICAL)
connector using the optical cable (not supplied). Take off
the cap and plug in the optical cable.
Note that you cannot use fading in or out (page 22) and
Time Fade (page 23) functions when making this
connection.
POC-15
Optical cable (not supplied)
CD player Digital component
DIGITAL
OUT
OPTICAL
DIGITAL
INPUT
OPTICAL
Note
When you connect via the DIGITAL OUT (OPTICAL)
connector, noise may occur when you play CD software other
than music, such as a CD-ROM.
Connecting the AC power cord
Connect the AC power cord to a wall outlet.
Transporting the player
Before transporting the player, follow the procedure
below to return the internal mechanisms back to their
original position.
1 Remove all the discs from the disc tray.
2 Press § OPEN/CLOSE to close the disc tray.
“–NO DISC–” appears in the display.
3 Wait for 10 seconds, then press 1/u to turn off the
player.
GB
5
Page 6
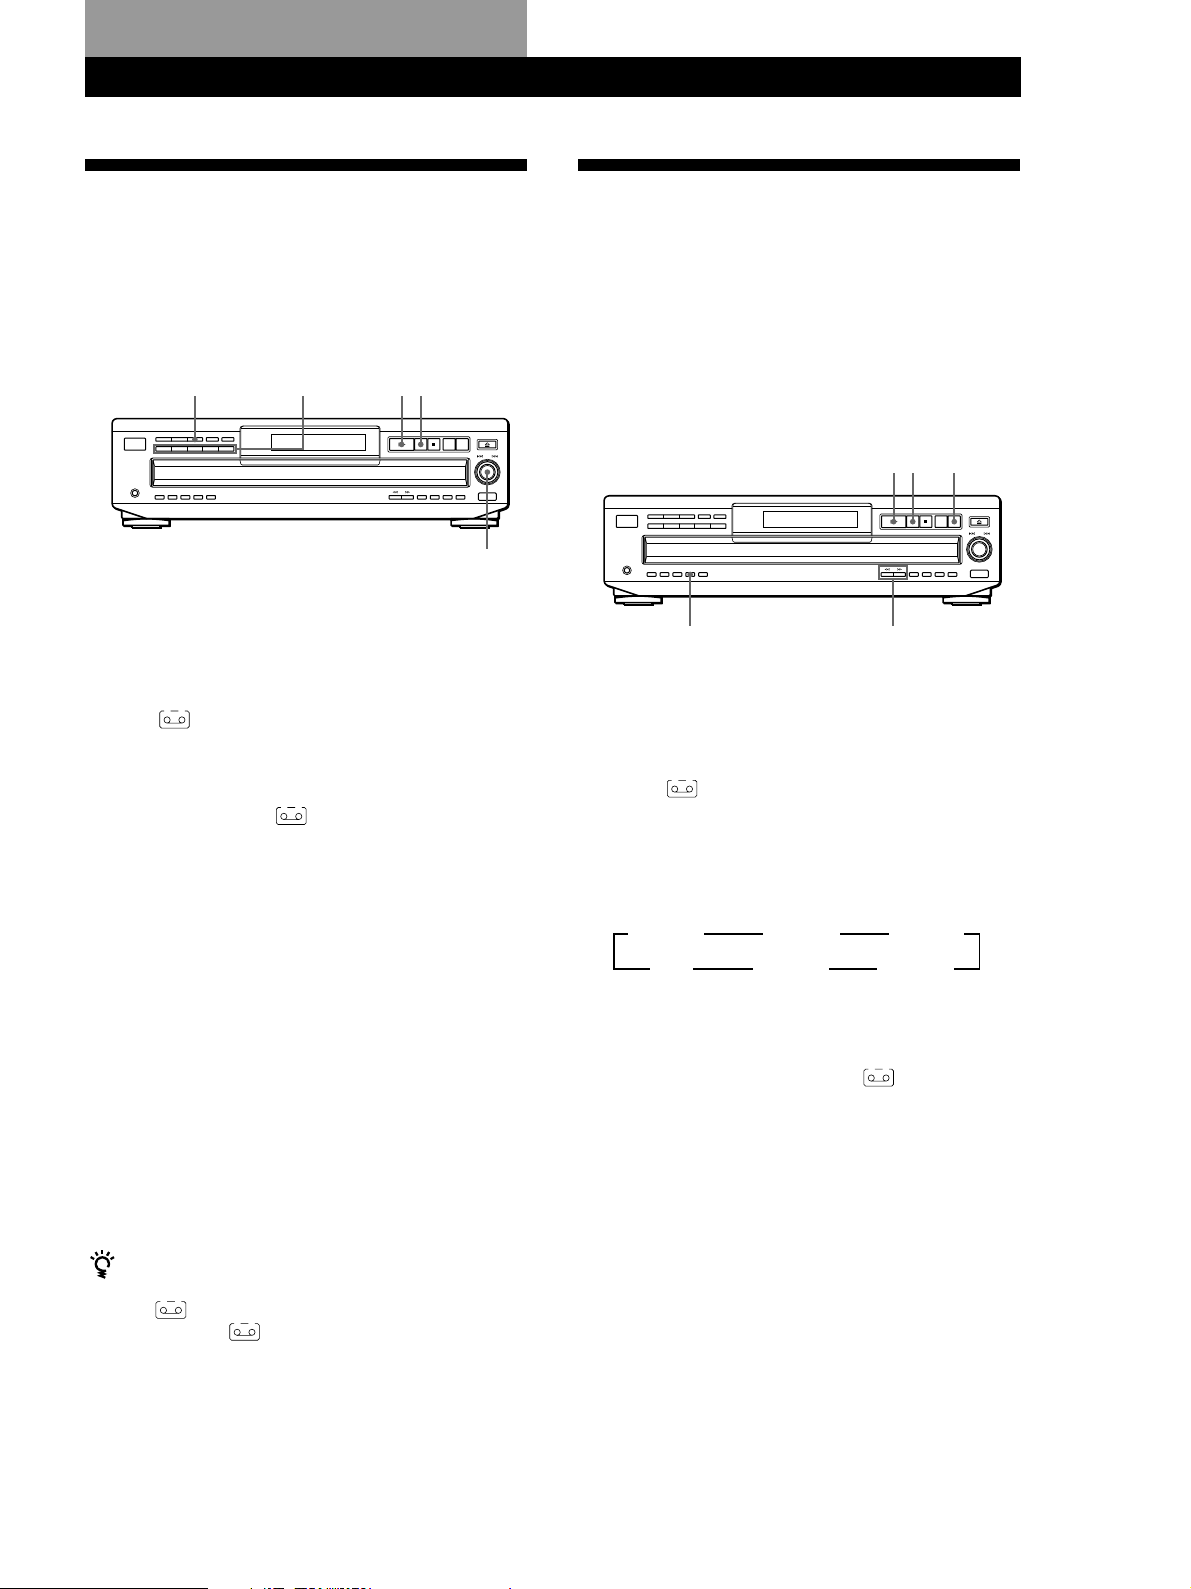
Getting Started
Connecting Another CD Player
If you have a Sony CD player in which 5, 50, 200, or
300 discs can be inserted and which is equipped with
the CONTROL A1
command mode of that player can be set to CD 3, you
can control that player as the second player with this
player. After connecting this player and an amplifier,
follow the procedure below.
Be sure to turn off the power of each player before
making this connection.
COMMAND
MODE
To 2ND CD IN
(or CONTROL A1) jack and the
To LINE OUT
CDP-CE535
To CONTROL A1
To an AC outlet
What cords will I need?
• Audio cord (1) (Use the cord supplied with the player to be
connected.)
• Monaural (2P) mini-plug cord (1) (supplied for Canadian
models only)
1 Connect the players with an audio cord (see also
“Hookups” on page 5).
CDP-CE535
2ND
LINE
CD
IN OUT
L
R
CDP-CX300, etc.
LINE OUT
L
R
2 Connect the players with a monaural (2P) mini-
plug cord.
CDP-CX300, etc.CDP-CE535
CONTROL A1
CONTROL A1
To audio output
To an AC outlet
To CONTROL A1
To audio input
CDP-CX300, etc.
Amplifier
To an AC outlet: Signal flow
For details on this connection, refer to the
supplementary “CONTROL-A1
Control
System” instructions.
3 Set the COMMAND MODE selector of each
player.
Set the COMMAND MODE selector of this player
to CD 1 or CD 2, and set that of the second player
to CD 3.
COMMAND
MODE
CD
132
For details on how to operate the second player,
see “Controlling Another CD Player” on page 18
and “Playing Alternately” on page 20.
GB
6
Page 7

4 Connect the AC power cord of both players to AC
outlets.
Notes
• Do not connect a player other than that you use as the
second player to the 2ND CD IN jacks of this player.
• When connecting a second CD player, do not connect the
DIGITAL OUT (OPTICAL) connector of this player to the
amplifier.
Getting StartedGetting Started
GB
7
Page 8
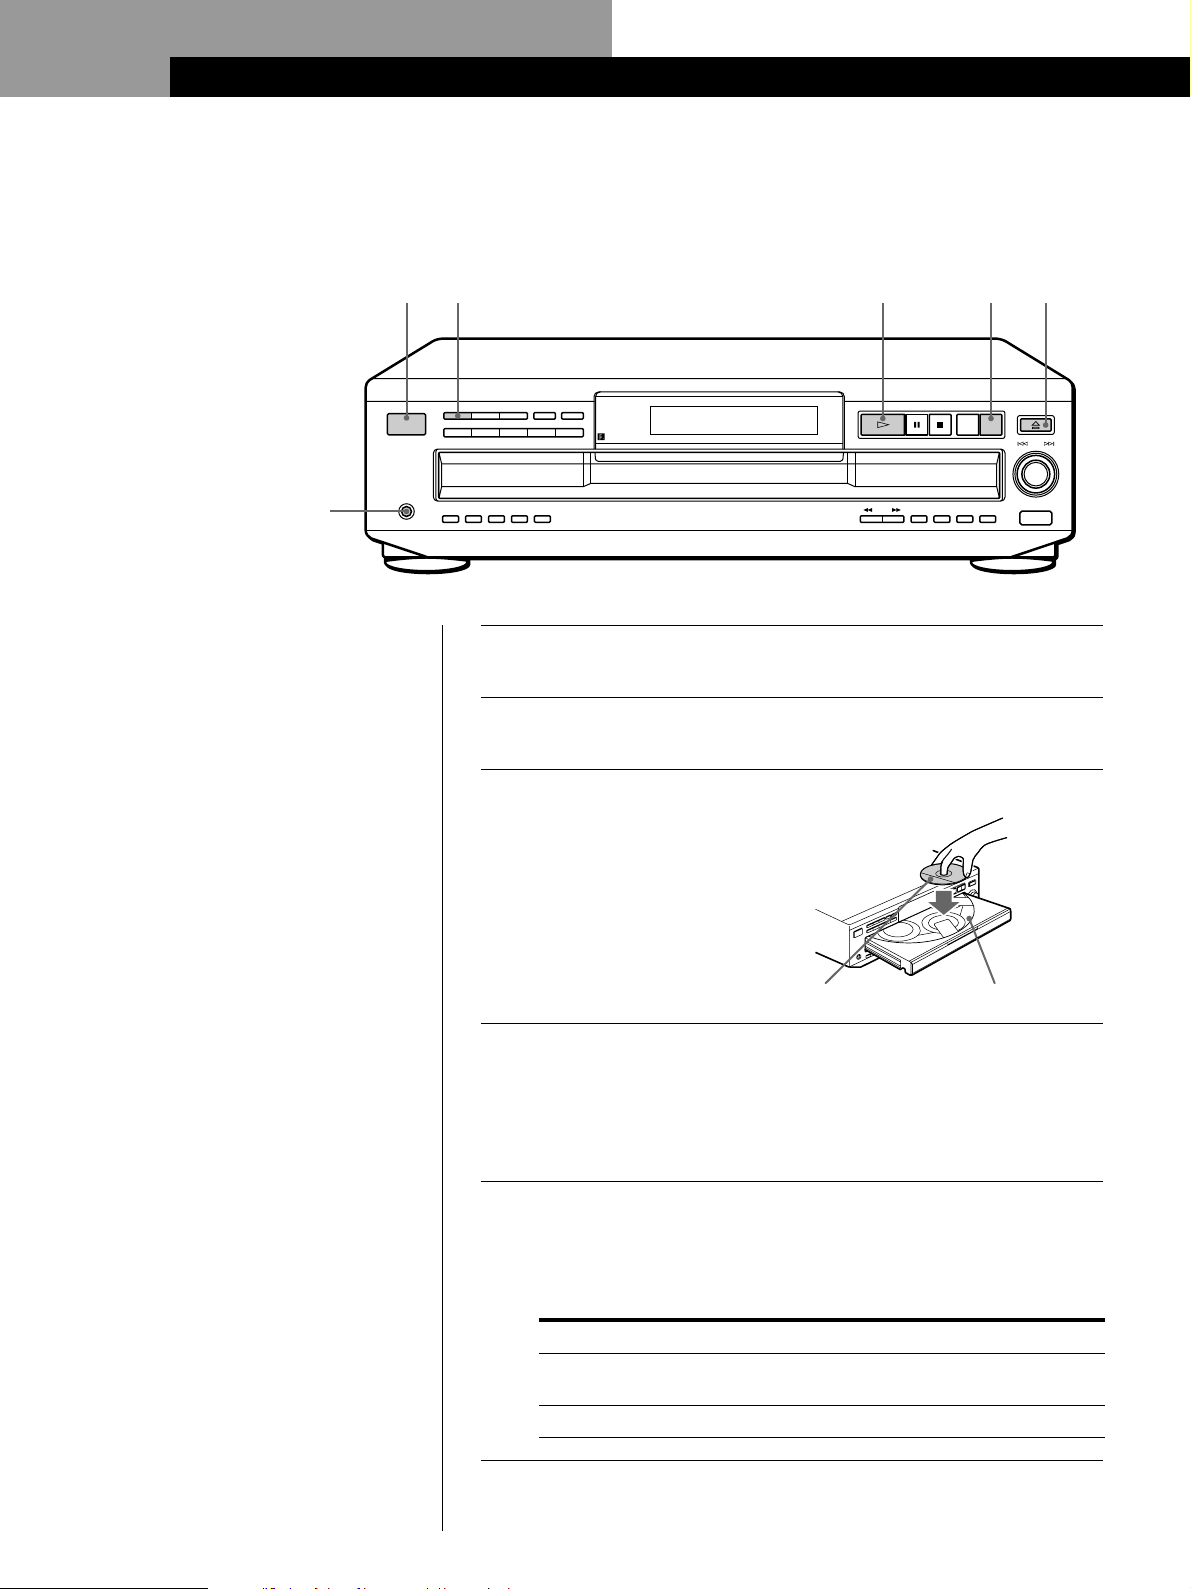
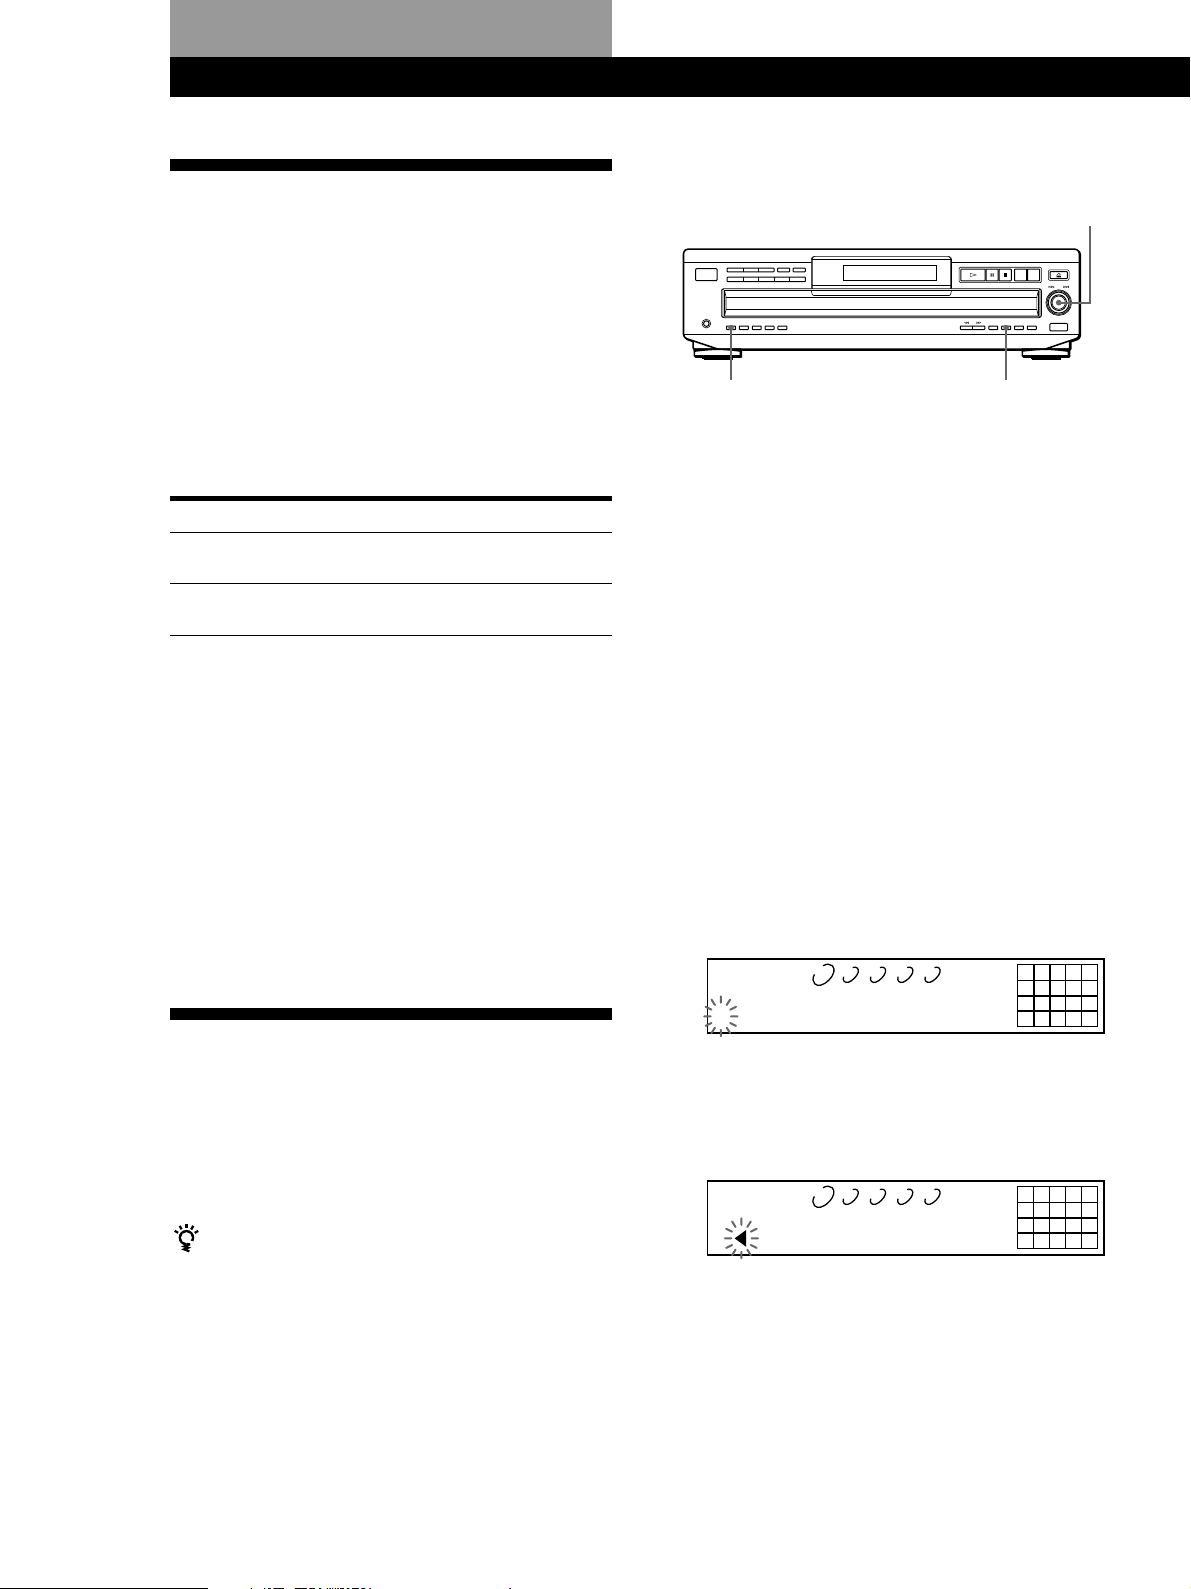
Basic Operations
Playing a CD
25
Connect the
headphones.
• See pages 4 – 5 for the hookup
information.
CONTINUE SHUFFLE PROGRAM
I / u
DISC 1 DISC 2 DISC 3 DISC 4 DISC 5
PHONES
INPUT
FADER
634
REPEAT
DISC CHECK
EDIT/
PEAK
TIME/
TIME FADE
SEARCH
TEXT
(-AMS+)
Turn on the amplifier and select the CD player position so that
1
you can listen to the sound from this player.
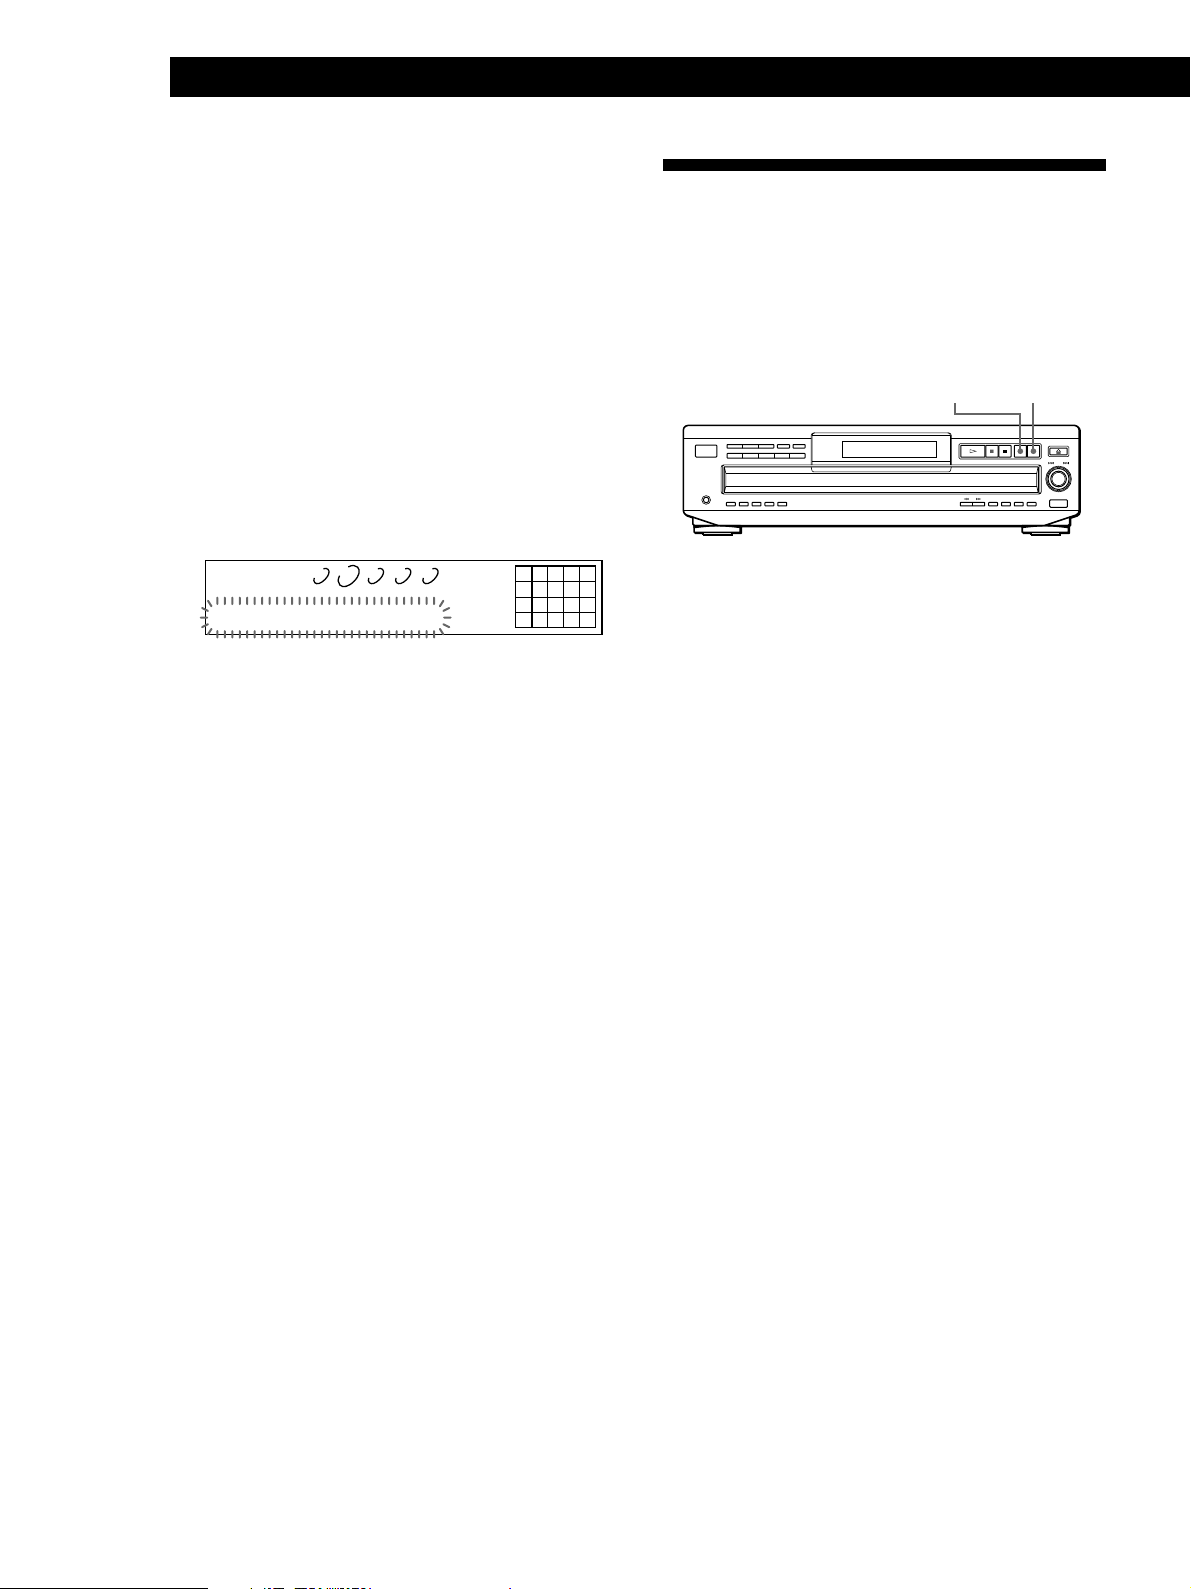
Press 1/u to turn on the player.
2
Press § OPEN/CLOSE, and place a disc on the disc tray.
3
CHANGE
OPEN/CLOSE
DISC
EX-
SKIP
AMS
(DISC)
PUSH ENTER
X-FADENO DELAYCLEARCHECK
MEGA
CONTROL
With the label side up
Disc number
To place other discs, press DISC SKIP and place the discs in the
order you want to play.
4
Each time you press the button, the disc tray turns and you can
place the discs in the empty disc compartments. The player
plays the disc in front of you first.
Press CONTINUE to select ALL DISCS or 1 DISC Continuous
Play mode.
5
Each time you press the CONTINUE button, “ALL DISCS” or
“1 DISC” appears in the display.
When you select
ALL DISCS
1 DISC
GB
8
The player plays
All discs in the player consecutively in the order of
disc number
Only the disc you’ve selected
Page 9
Basic Operations
You can select the disc you
want to start playing first
Press one of the DISC 1 – 5
buttons.
You can adjust the output
level to the amplifier Z
Press LINE OUT LEVEL +/–
on the remote. You can
reduce the output level up to
–20 dB.
When you reduce the output
level, “
FADE
” appears in the
display.
The headphones volume
will also change when you
adjust the output level.
Note
If you press the LINE OUT
LEVEL +/– buttons on the
remote while recording, the
recording level will change
even when it is preset on the
tape deck, etc.
Press ·.
6
The disc tray closes and the player plays all the tracks once
(Continuous Play). Adjust the volume on the amplifier.
To stop play
Press p.
DISC 1 – 5
CONTINUE SHUFFLE PROGRAM REPEAT
I / u
DISC 1 DISC 2 DISC 3 DISC 4 DISC 5
PHONES
INPUT
FADER
DISC CHECK
EDIT/
PEAK
TIME/
TIME FADE
SEARCH
TEXT
To
Pause
Resume play after pause
Go to the next track
Go back to the preceding track
Go to the next disc
Select a disc directly
Stop play and remove the CD
≠ AMS ±
You need to
Press P
Press P or ·
Turn ≠ AMS ± clockwise
Turn ≠ AMS ± counterclockwise
Press DISC SKIP
Press DISC 1 – 5
Press § OPEN/CLOSE
·pP
(-AMS+)
DISC SKIP
OPEN/CLOSE
DISC
EX-
SKIP
CHANGE
AMS
(DISC)
PUSH ENTER
X-FADENO DELAYCLEARCHECK
MEGA
CONTROL
§ OPEN/CLOSE
Basic Operations
GB
9
Page 10
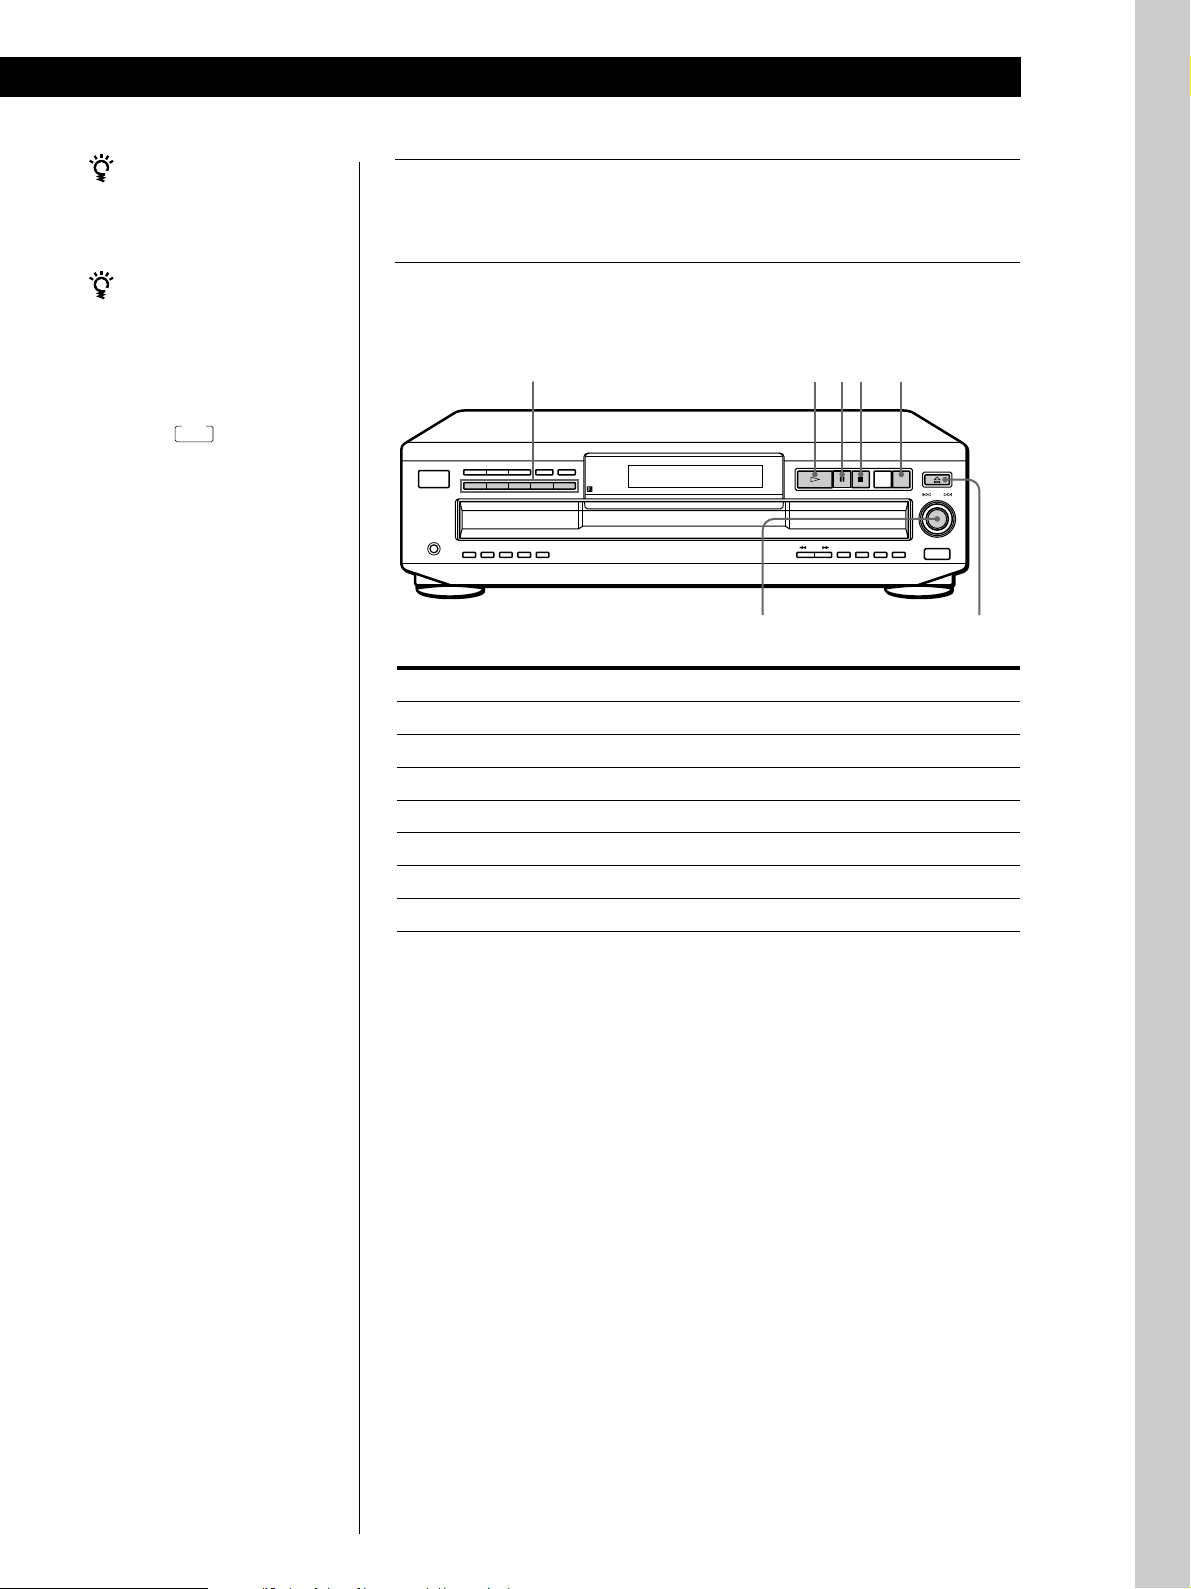
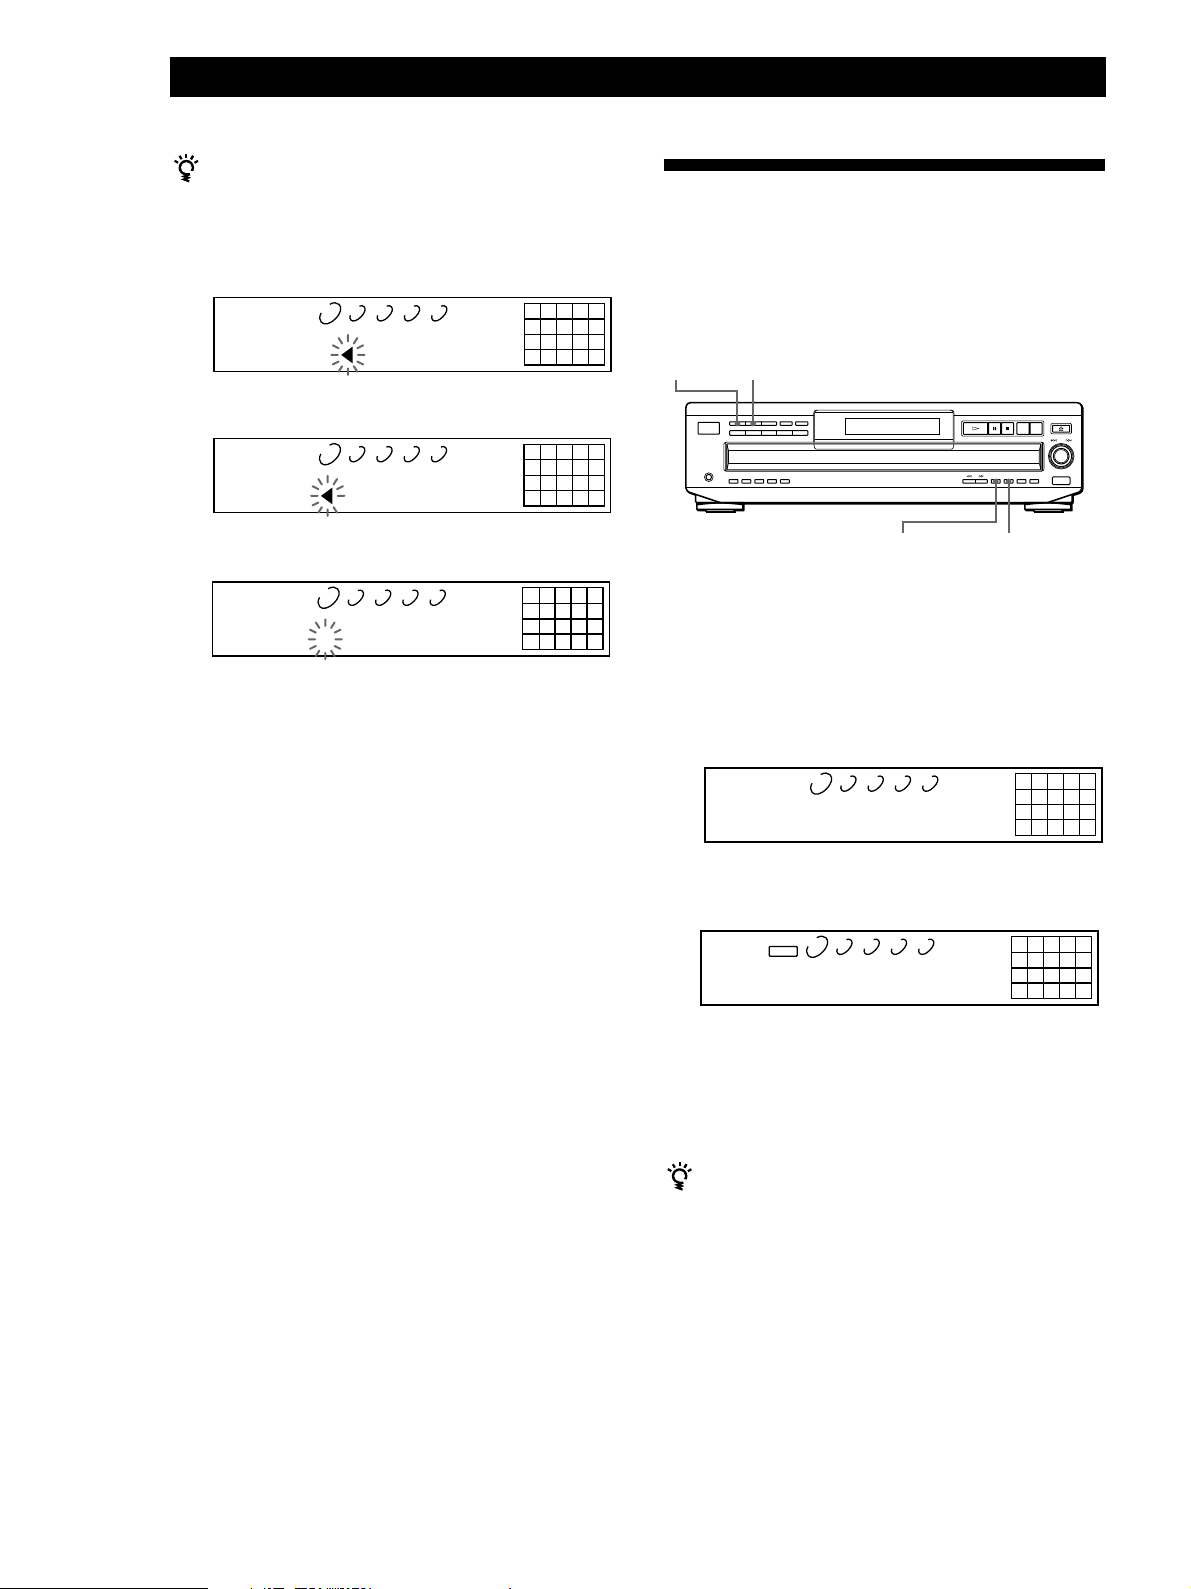
Playing CDs
Playing CDs
Using the Display
You can check information about the disc using the
display.
Display information while playing a disc
While playing a disc, the display shows the current
disc number, current track number, playing time of the
track and the music calendar.
Current disc number Playing time
INPUT
TIME/TEXT ≠ AMS ±
Checking the total number and playing
time of the tracks
Press TIME/TEXT before you start playing.
The display shows the current disc number, the total
number of tracks, total playing time and music
calendar.
Total playing timeCurrent disc number
DISCSALL
DISC TRACK
1 1O 45.28
1 2 3 4 5
MIN SEC
CD1
Total number of tracks Music calendar
The information also appears when you press the
§ OPEN/CLOSE button to close the disc tray.
The tracks numbered over 20 cannot be displayed in
the music calendar.
12345
678910
DISCSALL
DISC TRACK
1 2 3 4 5
MIN SEC
1 1 1.56
CD1
12345
678910
Music calendarCurrent track number
The track numbers in the music calendar disappear
after they are played.
Checking the remaining time
Each time you press the TIME/TEXT button while
playing a disc, the display changes as shown in the
chart below.
Playing time of
the current track
Remaining time
on the current
track
DISCSALL
1 2 3 4 5
DISC TRACK
MIN SEC
1 1 1.56
Press TIME/TEXT.
DISCSALL
1 2 3 4 5
DISC TRACK
MIN SEC
1 1 -1.57
If the track number exceeds 24,
“– – – –” appears instead of the
remaining time.
12345
678910
CD1
12345
678910
CD1
10
GB
Notes on the disc number indications
• The red circle around a disc number indicates the disc is
ready to be played.
• When all the tracks on a disc have been played, the semicircle around the disc number disappears.
• When a disc compartment is recognized as empty, the semicircled disc number disappears.
Remaining time
on the disc
Press TIME/TEXT.
DISCSALL
1 2 3 4 5
DISC TRACK
1 -43.32
MIN SEC
CD1
This information is available only in
Continuous Play mode.
Press TIME/TEXT.
12345
678910
Page 11
Playing CDsPlaying CDs
Checking the information of CD TEXT discs
CD TEXT discs have information, such as the disc titles
or artist names, memorized in a blank space on the
discs where there is no information on normal discs.
The display shows the CD TEXT information of the
disc so that you can check the current disc title, artist
name and track title. When the player detects CD TEXT
discs, the “CD-TEXT” indication lights up in the
display. Each time you press the TIME/TEXT button,
the display changes as shown in the charts below.
• Before you start playing
CD1
CD1
CD-TEXT
CD-TEXT
12345
678910
12345
678910
DISCSALL
Disc title
DISC
1 2 3 4 5
SONYHITS
Press TIME/TEXT.
DISCSALL
Artist name
1 2 3 4 5
ART.
Sony Band
Press TIME/TEXT.*
* The display shows the current disc number, total number of
tracks and total playing time of the disc for a few seconds
before returning to the disc title indication.
• While playing a disc
Track title
HitechBlues
This information also appears when
the player locates the track.
Press TIME/TEXT.
Playing time
2 1 1.56
Press TIME/TEXT.
Remaining time
on the current
track
Remaining time
on the disc
2 1 -1.57
If the track number exceeds 24,
“– – – –” appears instead of the
remaining time.
Press TIME/TEXT.
2 -58.5‚
This information is available only in
Continuous Play mode.
DISCSALL
DISCSALL
DISC TRACK
DISCSALL
DISC TRACK
DISCSALL
DISC TRACK
1 2 3 4 5
TRACK
1 2 3 4 5
MIN SEC
1 2 3 4 5
MIN SEC
1 2 3 4 5
MIN SEC
CD1
CD1
CD1
CD1
CD-TEXT
CD-TEXT
CD-TEXT
CD-TEXT
12345
678910
12345
678910
12345
678910
12345
678910
Press TIME/TEXT.
If each CD TEXT information has more than 12
characters, the first 12 characters light up after all the
characters scrolled in the display.
Note
This player can only display the disc titles, track titles and
artist names from CD TEXT discs. The other CD TEXT
information cannot be displayed.
To play disc highlights Z
Some CD TEXT discs have a feature to play only the
highlights of the discs. When you select such a disc, “HIGH
LIGHT” appears in the display.
Press HIGH-LIGHT on the remote to start playing disc
highlights in the stop mode.
“HIGH LIGHT” flashes in the display while playing disc
highlights.
11
GB
Page 12
Playing CDs
Selecting the language of the CD TEXT
information
You can select the language used to display the CD
TEXT information when you select a CD TEXT disc
with multi-language information.
Once you select the language, the display shows the
information in the selected language until you turn off
the player. If the player cannot read the language
memorized in a CD TEXT disc, the player shows
“(other lang).”
1 Press INPUT in stop mode.
2 Turn ≠ AMS ± until “SELECT LANG.”
appears in the display.
Replacing Discs While Playing
a Disc
You can open the disc tray while playing a disc so that
you can check what discs are to be played next and
replace discs without interrupting play of the current
disc.
EX-CHANGE
DISC SKIP
CD1
CD-TEXT
12345
678910
DISCSALL
DISC
1 2 3 4 5
SELECT LANG.
3 Push ≠ AMS ±.
4 Turn ≠ AMS ± until the language you want
appears in the display.
5 Push ≠ AMS ± to select the language.
“Reading Text” appears momentarily, then the
display shows the information in the selected
language.
To check the current language
1 Press INPUT while playing a CD TEXT disc.
2 Turn ≠ AMS ± until “SHOW LANG.” appears in the
display, then push ≠ AMS ±.
The current language appears momentarily.
You can also check the current language while selecting a CD
TEXT disc without multi-language information.
Note
If you select a CD TEXT disc which does not contain the
information of the selected language, the display shows the
information in another language according to the disc‘s
preference.
1 Press EX-CHANGE.
The disc tray opens and two disc compartments
appear. Even if the player is playing a disc, it
doesn’t stop playing.
2 Replace discs in the compartments with new ones.
The player plays the disc on the left side
compartment after the current disc, and then the
one on the right side compartment.
3 Press DISC SKIP.
The disc tray turns and other two disc
compartments appear.
4 Replace discs in the compartments with new ones.
5 Press EX-CHANGE.
The disc tray closes.
While the disc tray is open by pressing the EX-CHANGE
button
• If the play of the current disc ends, the player stops
playing. If the disc is played in 1 DISC Repeat Play mode
(see page 15), the current disc starts playing again.
• In ALL DISCS Shuffle Play mode (see page 15), tracks are
reshuffled on the current disc.
• In Program Play mode (see page 16), only the tracks on the
current disc are played.
• Do not push the disc tray to close it in Step 5, as you may
damage the player.
12
GB
Page 13

Locating a Specific Disc
You can locate any disc before or while playing a disc.
DISC 1 – 5 DISC CHECK · DISC SKIP
DISC
Number
buttons
ENTER
Playing CDsPlaying CDs
You can extend the playing time during scanning the
discs
Press DISC CHECK repeatedly until the playing time
you want (10, 20 or 30) appears in the display. Each time
you press the button, the playing time changes cyclically.
Notes
• When you press the DISC CHECK button, the play mode
automatically changes to ALL DISCS Continuous Play
mode.
• When you’ve opened the disc tray by pressing the
EX-CHANGE button, you cannot use the DISC CHECK
function.
• Even if you press the DISC CHECK button while
“REPEAT” appears in the display (see page 14), the player
stops after scanning all the discs once.
DISC SKIP +/–
To locate
The next disc
The next or succeeding
discs Z
The current or preceding
discs Z
A specific disc directly
A disc while checking the
labels
A disc by scanning the first
track of each disc for 10
seconds
·
Press
DISC SKIP while playing a disc
DISC SKIP + repeatedly until
you find the disc
DISC SKIP – repeatedly until
you find the disc
DISC 1 – 5.
When using the remote, follow
the procedure below.
1 Press DISC.
2 Press the number button of
the disc.
3 Press ENTER.
DISC CHECK while the disc
tray is open. The disc tray turns
to show you each disc label.
When the disc you want comes
in front of you, press · to
continue playing.
DISC CHECK before you start
playing while the disc tray is
closed. When you find the disc
you want, press · to continue
playing.
13
GB
Page 14
Playing CDs
Locating a Specific Track
You can quickly locate any track while playing a disc
using the AMS (Automatic Music Sensor) control or
number buttons on the remote.
≠ AMS ±
Number buttons
>10
MUSIC SCAN
=/+
·
Locating a Particular Point in a
Track
You can also locate a specific point in a track while
playing a disc.
0/)
To locate
A point while
monitoring the sound
A point quickly by
observing the display
during pause
Note
If “OVER” appears in the display, the disc has reached the
end while you were pressing the ) button. Press 0 or
turn ≠ AMS ± counterclockwise to go back.
Press
) (forward) or 0 (backward) and
hold down until you find the point
) (forward) or 0 (backward) and
hold down until you find the point.
You will not hear the sound during the
operation.
To locate
The next or
succeeding tracks
The current or
preceding tracks
A specific track
directly Z
A track by scanning
each track for 10
seconds Z
(Music Scan)
You need to
Turn ≠ AMS ± clockwise until
you find the track. When using the
remote, press + repeatedly until you
find the track.
Turn ≠ AMS ± counterclockwise
until you find the track. When using
the remote, press =repeatedly until
you find the track.
Press the number button of the track
on the remote
Press MUSIC SCAN on the remote
before you start playing. When you
find the track you want, press · to
start playing.
When you directly locate a track numbered over 10 Z
Press >10 first, then the corresponding number buttons
on the remote. To enter “0,” use button 10/0.
Example: To play track number 30
Press >10 first, then 3 and 10/0.
You can extend the playing time during Music Scan
Press MUSIC SCAN repeatedly until the playing time
you want (10, 20 or 30) appears in the display. Each time
you press the button, the playing time changes cyclically.
Playing Repeatedly
You can play discs/tracks repeatedly in any play
mode.
REPEAT
Press REPEAT while playing a disc.
“REPEAT” appears in the display. The player repeats
the discs/tracks as follows:
14
GB
Page 15
Playing CDsPlaying CDs
When the disc is played in
ALL DISCS Continuous
Play (page 8)
1 DISC Continuous Play
(page 8)
ALL DISCS Shuffle Play
(page 15)
1 DISC Shuffle Play
(page 15)
Program Play (page 16)
To cancel Repeat Play
Press REPEAT repeatedly until “REPEAT OFF” appears in the
display.
The player repeats
All the tracks on all discs
All the tracks on the current
disc
All the tracks on all discs in
random orders
All the tracks on the current
disc in random orders
The same program
Repeating the current track
You can repeat only the current track while the disc is
played in any play mode.
While the track you want is being played, press
REPEAT repeatedly until “REPEAT 1” appears in the
display.
To cancel Repeat 1
Press REPEAT.
Playing in Random Order
(Shuffle Play)
You can have the player “shuffle” tracks and play in a
random order. The player shuffles all the tracks on all
discs or on the disc you’ve specified.
SHUFFLE
DISC 1 – 5 ·
To cancel Shuffle Play
Press CONTINUE.
You can start Shuffle Play while playing
Press SHUFFLE, and Shuffle Play starts from the current
track.
You can specify discs during Shuffle Play (Select
Shuffle Play)
You can specify discs during ALL DISCS Shuffle Play
mode, and the tracks on the specified discs are played in
a random order.
Press DISC 1 – 5 to specify the discs after Step 1.
Semi-circles appear around the specified disc numbers in
the display. To cancel the selected discs, press DISC 1 – 5
again. The semi-circles disappear.
To return to ALL DISCS Shuffle Play, press SHUFFLE
twice.
Shuffle Play on one disc
You can play all tracks on the specific disc in a random
order.
1 Press SHUFFLE repeatedly until “1 DISC” appears
in the display.
2 Press DISC 1 – 5 to start 1 DISC Shuffle Play on the
selected disc.
The indication appears while the player is
“shuffling” the tracks.
To cancel Shuffle Play
Press CONTINUE.
You can start Shuffle Play while playing
Press SHUFFLE, and Shuffle Play starts from the current
track.
Shuffle Play on all discs
You can play all tracks on all discs in a random order.
1 Press SHUFFLE repeatedly until “ALL DISCS”
appears in the display.
2 Press · to start ALL DISCS Shuffle Play.
The
“shuffling” the tracks.
indication appears while the player is
15
GB
Page 16
Playing CDs
Creating Your Own Program
(Program Play)
You can arrange the order of the tracks on the discs
and create your own program. The program can
contain up to 32 “steps” — one “step” may contain a
track or a whole disc.
PROGRAM
DISC 1 – 5
·
≠ AMS ±
3 Turn ≠ AMS ± until the track number you
want appears in the display.
The track number being programmed flashes and
the total playing time including the track appears
in the display.
Total playing time
PROGRAM
DISC TRACK
1 2 3 4 5
MIN SEC
1 5 13.18
Track number
being programmed
A
CD1
25
8
4 Push ≠ AMS ± to select the track.
CHECK
DISC
>10
CHECK
=/+
CLEAR
PROGRAM
Number
buttons
ENTER
CLEAR
·
Creating a program on the player
1 Press PROGRAM.
“PROGRAM” appears in the display.
If a program is already stored, the last step of the
program appears in the display. When you want to
erase the whole program, hold down CLEAR until
“CLEAR” appears in the display (see page 18).
2 Press DISC 1 – 5 to select the disc.
Last programmed
track
PROGRAM
DISC TRACK STEP
1 2 3 4 5
1 5 3
After one second
PROGRAM
DISC TRACK
1 2 3 4 5
1 5 13.18
Playing order
CD1
MIN SEC
CD1
Total playing time
A
Programmed tracks
A
25
8
25
8
If you’ve made a mistake
Press CLEAR, then repeat Steps 3 and 4.
5 To program other discs or tracks, do the following:
To program
All tracks on other discs
Other tracks on the same disc
Other tracks on other discs
Repeat Step(s)
2
3 and 4
2 through 4
6 Press · to start Program Play.
16
GB
PROGRAM
DISC TRACK
1 2 3 4 5
MIN SEC
1 AL 45.28
CD1
A
12345
678910
“AL” in the display stands for “all” tracks.
When you want to program the whole disc as one
step, skip Steps 3 to 4, and go to Step 5.
To cancel Program Play
Press CONTINUE.
You can create your program while checking the disc
labels
While the disc tray is open, follow Steps 1 to 6 with
pressing the DISC SKIP button to check the disc labels. If
you close the disc tray before Step 6, the total playing
time appears in the display after a while.
Note that, if the programmed track number isn’t found
on the disc, that step is automatically erased.
Page 17

Playing CDsPlaying CDs
The program remains even after the Program Play
ends
When you press the · button, you can play the same
program again.
The program remains until you erase it or turn off the
player
If you replace discs, the programmed disc and track
numbers remain. So, the player plays only the existing
disc and track numbers. However, the disc and track
numbers that aren’t found in the player or on the disc are
deleted from the program, and the rest of the program is
played in the programmed order.
Note
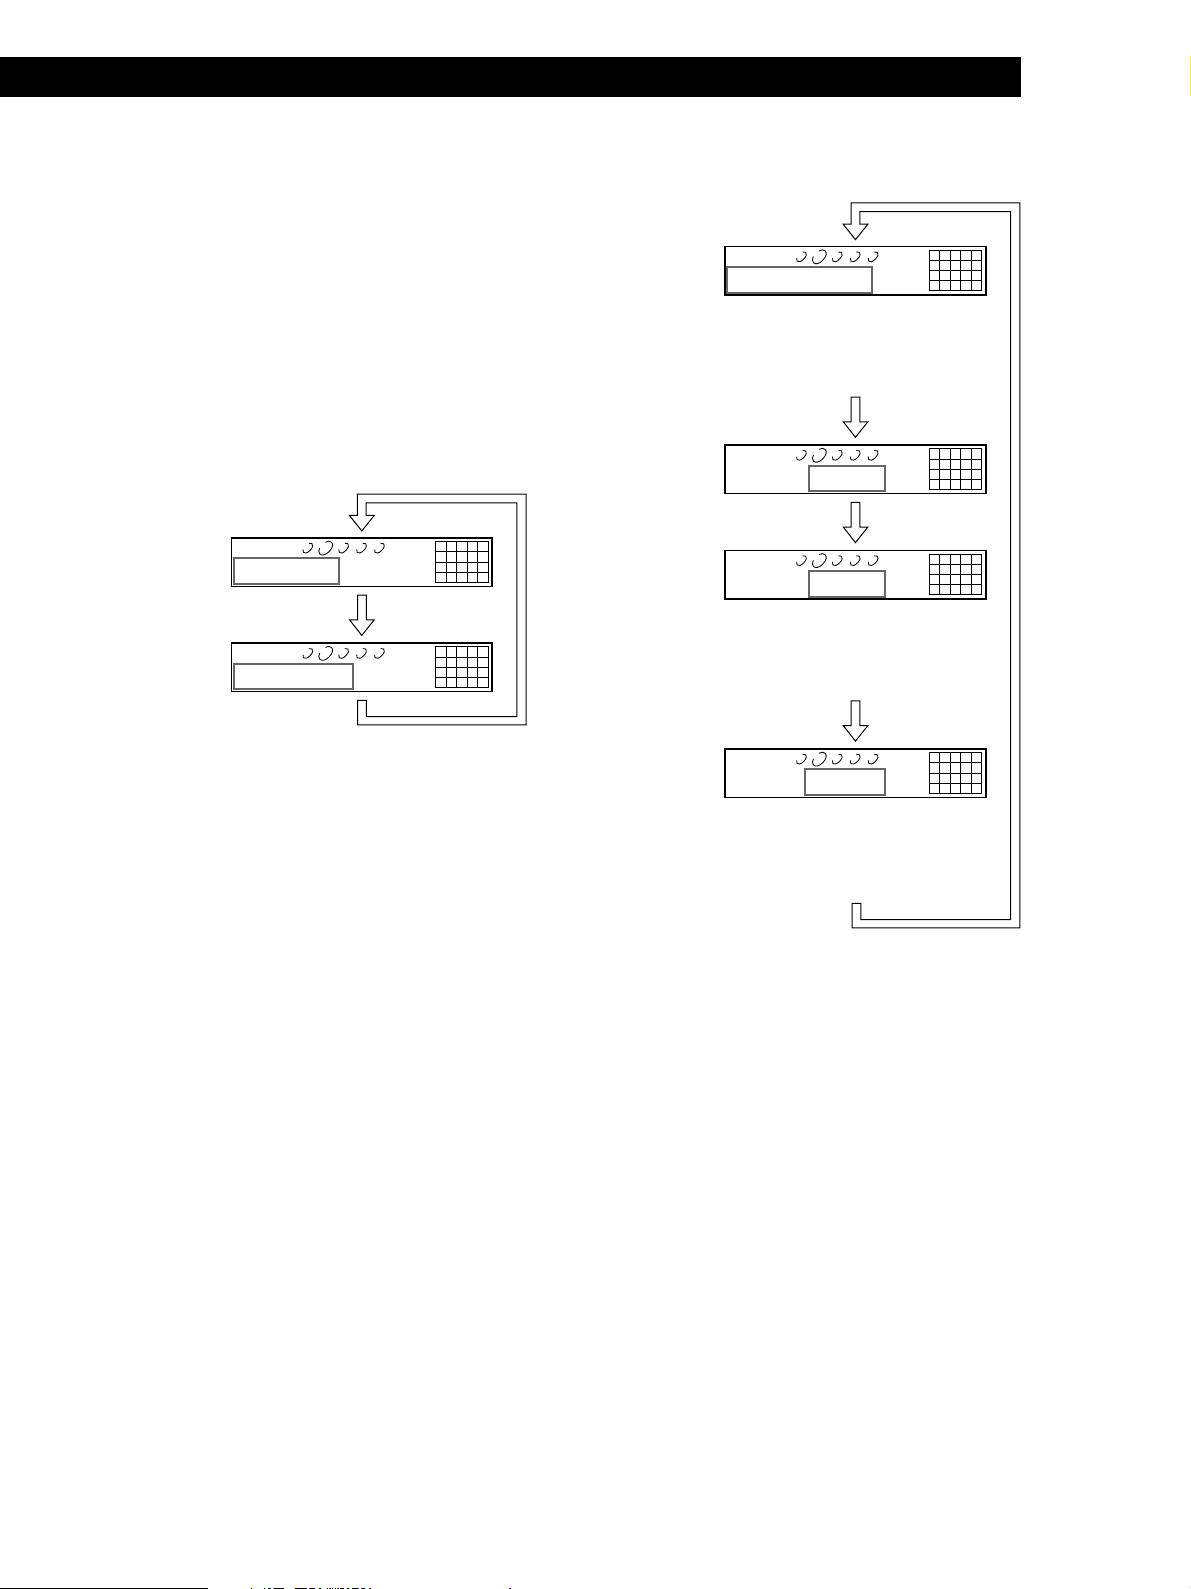
The total playing time doesn’t appear when:
—You have programmed a track whose number exceeds 20.
—The total playing time of the program exceeds 200 minutes.
Creating a program using the remote Z
1 Press PROGRAM.
“PROGRAM” appears in the display.
2 Press DISC.
6 Press ENTER to select the track.
Last programmed
track
PROGRAM
DISC TRACK STEP
1 2 3 4 5
1 5 3
After one second
PROGRAM
DISC TRACK
1 2 3 4 5
1 5 13.18
Playing order
CD1
MIN SEC
CD1
Total playing time
A
25
8
Programmed tracks
A
25
8
7 To program other discs or tracks, do the following:
To program
All tracks on other discs
Other tracks on the same disc
Other tracks on other discs
Repeat Steps
2 through 4
5 and 6
2 through 6
PROGRAM
1 2 3 4 5
DISC-[_]
A
CD1
2
8
3 Press the number button of the disc.
PROGRAM
1 2 3 4 5
DISC-[1]
A
CD1
2
8
4 Press ENTER to select the disc.
PROGRAM
DISC TRACK
1 AL 45.28
1 2 3 4 5
MIN SEC
CD1
When you want to program the whole disc as one
step, skip Steps 5 to 6, and go to Step 7.
A
12345
678910
5 Press =/+ until the track number you want
appears in the display.
Total playing time
Track number
being programmed
8 Press · to start Program Play.
To cancel Program Play
Press CONTINUE.
You can select a track directly using the number
buttons
Press the number button of the track in Step 5. To select a
track numbered over 10, use the >10 button (see page 14).
You can create your program while checking the disc
labels
While the disc tray is open, follow Steps 1 to 8 with
pressing the DISC SKIP button to check the disc labels. If
you close the disc tray before Step 8, the total playing
time appears in the display after a while.
Note that, if the programmed track number isn’t found
on the disc, that step is automatically erased.
Note
The total playing time doesn’t appear when:
—You have programmed a track whose number exceeds 20.
—The total playing time of the program exceeds 200 minutes.
PROGRAM
DISC TRACK
1 2 3 4 5
MIN SEC
1 5 13.18
CD1
A
25
8
17
GB
Page 18

Playing CDs
Checking the track order
You can check your program before or after you start
playing.
Controlling Another CD Player
(Advanced Mega Control)
Press CHECK.
Each time you press this button, the display shows the
track (the disc and track numbers) or the disc (the disc
number and “AL” indication) of each step in the
programmed order. After the last step in the program,
the display shows “END” and returns to the original
display. If you check the order after you start playing,
the display shows only the remaining steps.
Changing the track order
You can change your program before you start playing.
To
Erase a track
Erase the last track in the
program
Add tracks to the end of the
program
Erase the whole program
completely
You need to
Press CHECK until the track
you don’t want appears in
the display, then press
CLEAR
Press CLEAR. Each time you
press the button, the last
track will be cleared.
Follow the programming
procedure
Hold down CLEAR until
“CLEAR” appears in the
display. Create a new
program following the
programming procedure.
This unit can control a second CD player (see
“Connecting Another CD Player” on pages 6 and 7).
Even when a second CD player is connected, the
controls on both of the units will function. When you
press the play button on either unit, the operating
player stops and the resting player starts.
Note that depending on the player, you may not be
able to operate all the functions of the second CD
player.
The controls indicated in the illustration below are effective
while the MEGA CONTROL button is lit.
AMS
Play mode buttons (CONTINUE/
SHUFFLE/PROGRAM/REPEAT)
INPUT CLEAR
≠
pP·
MEGA CONTROL0 (–AMS+) )
(DISC)
±
Playing discs of the second CD player
1 Press MEGA CONTROL.
The MEGA CONTROL button lights up and the
display shows the current disc number of the
second player.
18
GB
Current disc number
DISCSALL
DISC
*DISC-1*
CD1
2 Select the play mode you want.
To program tracks, use the controls on the second
player.
3 Press · to start playing.
The play starts and the display shows the current
disc and track numbers and the playing time of the
track.
While the MEGA CONTROL button is lit, you can
control the second player with the controls on this
player as follows:
Page 19

Playing CDsPlaying CDs
To
Pause
Stop play
Locate a disc while
the second player is
set to Continuous
Play mode
Locate a track
• To do other operations, use the controls on the second
player or the supplied remote.
• The AMS buttons (=/+) and search buttons
(0/)) on the remote operate the second player as
indicated on the remote.
You need to
Press P
Press p
AMS
(DISC)
AMS
± until the
(DISC)
±
Turn ≠
display shows the disc number
you want, then push
≠
Press 0 (–AMS+) ) until the
display shows the track number
you want
To control the second player directly using the supplied
remote
Set CD 1/2/3 on the remote to CD 3 which is the same
position as the COMMAND MODE selector on the rear panel
of the second player.
To control this player again
Press MEGA CONTROL. The MEGA CONTROL button goes
off and you can control this player.
3 Push ≠ AMS ±.
This player starts loading. (Loading takes about
one minute.)
Note
If each Disc Memo of the second CD player has more than 12
characters, the first 12 characters of each are loaded to this
player.
Labeling discs of the second CD player
You can label discs of the second CD player or change
the Disc Memos loaded from the second CD player.
1 Press MEGA CONTROL.
The MEGA CONTROL button lights up.
2 Press CONTINUE.
3 Turn ≠
then push ≠
AMS
± to select the disc you want,
(DISC)
AMS
±.
(DISC)
4 Press INPUT.
5 Turn ≠
appears in the display, then push ≠
AMS
± until “ DISC MEMO”
(DISC)
AMS
(DISC)
±.
Notes
• You cannot locate a particular point in a track of the second
player using the controls on this player.
• Some controls on this player work on the second player
differently from they do to this player.
Loading the Disc Memos of the second CD
player
If the second CD player has the Disc Memo function
(see page 24), you can load the Disc Memos of the
second CD player to this player’s memory and display
them on this player.
1 Press INPUT.
2 Turn ≠ AMS ± until “LOADING MEMO”
appears in the display.
DISCSALL
DISC TRACK
1 2 3 4 5
MIN SEC
LOADING MEMO
CD1
12345
678910
6 Input the new Disc Memo following the procedure
in “Labeling Discs” on pages 24 to 26.
Note
The new Disc Memos are stored on this player’s memory, so
you cannot display them on the second CD player.
19
GB
Page 20
Playing CDs
Playing Alternately (No-Delay
Play/X-Fade Play)
3 Press · to start playing.
The MEGA CONTROL button lights up while the
track in the second player is selected.
When you connect the second player, you can play
tracks in this player and those in the second player
alternately in any play mode (see “Connecting Another
CD Player” on pages 6 and 7).
Select one of the following methods:
• No-Delay Play: The current player changes at each
track. Each time the current player changes to the
other player, the other player starts play without a
break in sound immediately after the current player
ends play. The other player skips the lead-in portion
and starts playing from where the sound actually
begins.
• X-Fade Play: The current player changes at each
track or at the specified interval. You can select the
interval among 30, 60 and 90 seconds. Each time the
current player changes to the other player, the sound
from both players is mixed. The current player ends
play by fading out, and the other player starts play
by fading in.
·
To check the X-Fade mode status
Press X-FADE once.
The X-Fade mode status appears momentarily.
To cancel No-Delay/X-Fade Play
Press the corresponding button repeatedly until the button
goes off. The current player continues playing.
You can change the method (No-Delay or X-Fade)
during play
Press the corresponding button (NO DELAY or X-FADE)
following the procedure in Step 2.
You can start X-Fade whenever you like
Press FADER during X-Fade Play.
Even after you have set the X-Fade mode and started XFade Play, you can start X-Fade manually at the point
you like. Note that you cannot do this operation while the
sound from both players is mixed.
Notes
• The play starts from the second player if you start play
while the MEGA CONTROL button is lit.
• When one player has played all the discs/tracks in the
player ahead of the other player, the play stops.
• Do not use the controls on the second player during
No-Delay/X-Fade Play. They may not work correctly.
NO DELAY
X-FADE
1 Select the play mode you want on each player.
2 When you select No-Delay Play
Press NO DELAY.
The NO DELAY button lights up.
When you select X-Fade Play
Each time you press the X-FADE button, the
indication (X-Fade mode) appears as follows:
nX-FADE off n at track end n after 30 sec
after 90 sec N after 60 sec N
To change the current player each time a whole
track is finished, select “at track end.”
To change the current player at the specified
interval, press X-FADE repeatedly until the
interval you want appears in the display.
20
GB
Page 21
Recording From CDs
Recording From CDsRecording From CDs
Recording From CDs
Recording From CDsRecording From CDsRecording From CDsRecording From CDs
Recording Your Own Program
You can record the program you’ve created on a tape,
etc. The program can contain up to 32 steps.
By inserting a pause during programming, you can
divide the program into two for recording on both
sides of a tape.
P
PROGRAM DISC 1 – 5
1 Create your program (for side A when recording
on a tape) while checking the total playing time
indicated in the display.
Follow Steps 1 through 5 in “Creating a program
on the player” on page 16.
A
The
indication appears in the display.
2 When you record on both sides of the tape, press
P to insert a pause.
The “PAUSE” and
display and the playing time is reset to “0.00.”
When you record on one side of the tape, skip this
step and go to Step 4.
A pause is counted as one step
You can program up to 31 steps when you insert a pause.
A B
indications appear in the
3 Repeat Steps 2 through 5 in “Creating a program
on the player” to create the program for side B.
4 Start recording on the deck and then press · on
the player.
When you record on both sides of the tape, the player
pauses at the end of the program for side A.
5 When you record on side B, reverse the tape and
press · or P on the player to resume playing.
You can check and change your program
See page 18.
The A indication appears while checking the program
for side A and B while checking the program for side
B.
·
≠ AMS ±
Recording a CD by Specifying
Tape Length (Time Edit)
The player automatically creates a program that will fit
the length of the tape, keeping the original order of the
disc.
The program can contain up to 32 steps (a pause
inserted between steps is counted as one step).
Note that tracks numbered over 20 cannot be
programmed automatically.
P
·
DISC SKIP
EDIT/TIME FADE
1 Press DISC SKIP to select the disc.
2 Press EDIT/TIME FADE repeatedly before you
start playing until “TIME EDIT” appears and “A”
in the
A
indication flashes in the display.
3 Press 0 or ) to specify the tape length.
Each time you press these buttons, the display
changes as shown below with the tape length of
one side.
n C-46 23.00 N
n - -. - - N
n C-54 27.00 N
n C-90 45.00 N
4 Press EDIT/TIME FADE to have the player create
the program.
The music calendar shows the tracks to be
recorded for side A. “B” in the
flashes in the display.
5 When you record on both sides of the tape, press
EDIT/TIME FADE again.
The player inserts a pause, then creates the
program for side B. The music calendar shows the
programmed tracks.
When you record on one side of the tape, skip this
step.
6 Start recording on the deck and then press · on
the player.
When you record on both sides of the tape, the
player pauses at the end of the program for side A.
0/)
n C-60 30.00 N
n C-74 37.00 N
B
indication
(Continued)
21
GB
Page 22

Recording From CDs
7 When you record on side B, reverse the tape and
press · or P on the player to resume playing.
Fading In or Out
To cancel Time Edit
Press CONTINUE.
You can program the tracks you want in advance
Select the tracks before doing the above procedure. The
player creates a program from the remaining tracks.
You can freely specify the tape length
Set the tape length using the ≠ AMS ± control in
Step 3.
Example: When the tape length of one side is 30 minutes
and 15 seconds
1 To set the minutes, turn ≠ AMS ± until
“30” appears in the display, then push ≠
AMS ±.
2 To set the seconds, turn ≠ AMS ± until
“15” appears in the display, then push
≠ AMS ±.
You can check and change the program
See page 18.
You can manually fade the sound in or out to prevent
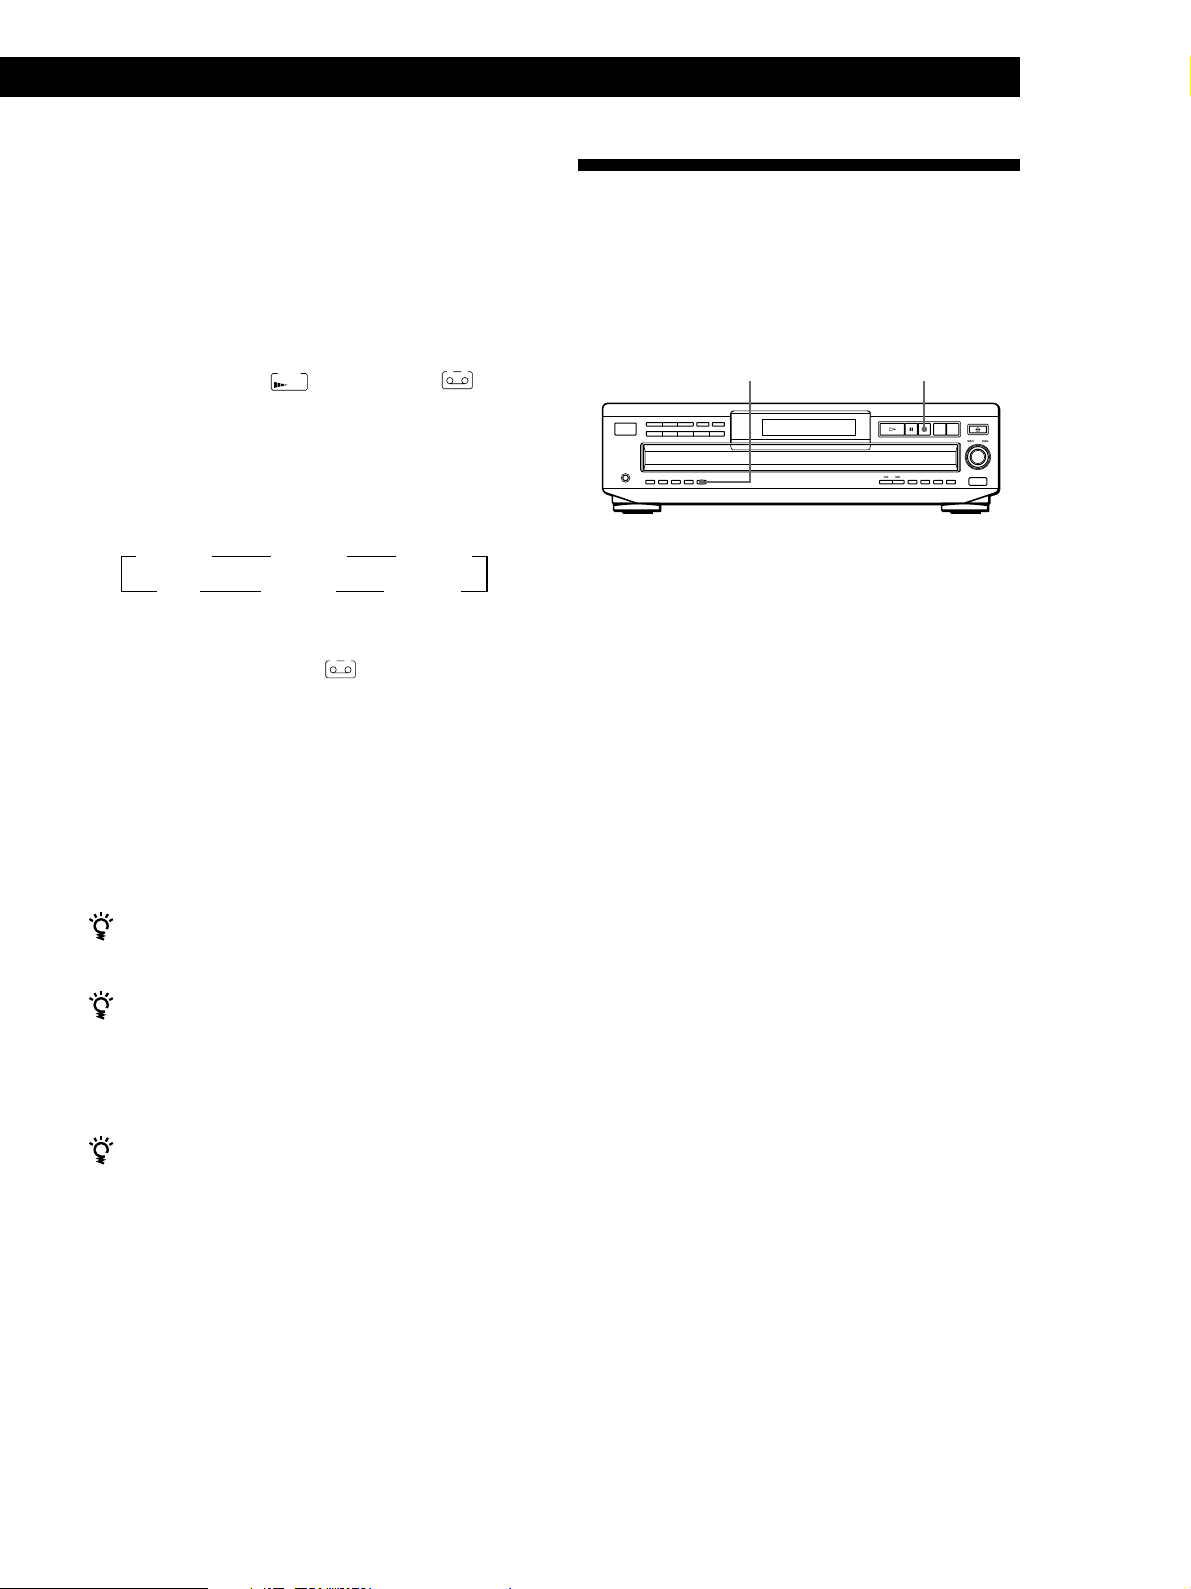
tracks from starting or ending abruptly.
Note that you cannot use this effect when you use the
DIGITAL OUT (OPTICAL) connector.
·
P
FADER
To
Start play fading in
End play fading out
EDIT/TIME FADE
0/)
Press FADER
During pause.
the display and the Q indication
flashes. The play fades in.
When you want to start fading out.
FADE
lights up in the display and
the q indication flashes. The play
fades out and the player pauses.
FADE
lights up in
Note
Fading lasts for about 5 seconds. However, when you press
the FADER button during Music Scan (see page 14), the play
fades out for about 2 seconds.
Changing the fading time
You can change the fading time from 2 to 10 seconds
before fading in or out. If you don’t change it, fading
lasts for 5 seconds.
1 Press FADER before you start playing.
“FADE 5 SEC” appears in the display.
2 Press 0/) to specify the fading time.
22
GB
Page 23
Fading out at the specified time
(Time Fade)
You can have the player fade out automatically by
specifying the playing time. Once you set the Time
Fade, it works twice, that is, the play fades out at the
end of both sides of a tape.
1 Press EDIT/TIME FADE repeatedly before you
start playing until
indication appear in the display.
TIME
FADE
and “A” in the
A
2 Press 0 or ) to specify the playing time.
Each time you press these buttons, the display
changes as shown below with the playing time of
one side.
n C-46 23.00 N
n - -. - - N
n C-54 27.00 N
n C-90 45.00 N
n C-60 30.00 N
n C-74 37.00 N
3 Press · to start playing.
At the specified time the play fades out and the
player pauses. “B” in the
in the display.
B
indication appears
Recording From CDsRecording From CDs
Recording From CDs
Recording From CDsRecording From CDsRecording From CDsRecording From CDs
Adjusting the Recording Level
(Peak Search)
The player locates the highest level among the tracks to
be recorded to let you adjust the recording level before
you start recording.
PEAK SEARCH
1 Before you start playing, press PEAK SEARCH.
“PEAK” flashes in the display and the player starts
scanning the disc searching for the highest peak
level.
After scanning all the tracks, the player repeats the
portion with the highest peak level.
p
4 To record on side B, reverse the tape and press ·
or P on the player to resume playing.
Again, the play fades out at the specified time.
To cancel Time Fade
Press EDIT/TIME FADE.
You can freely specify the playing time
See “You can freely specify the tape length” on page 22.
You can change discs during Time Fade
The specified fade-out time is counted only during
playing. So, you can change discs if the play ends before
the specified fade-out time (for example, when you
record CD-singles on a tape).
You can fade in to resume playing in Step 4
After you reverse the tape, press FADER.
Note
If you press the 0 or ) button during Time Fade Play,
Time Fade will be canceled.
2 Adjust the recording level on the deck.
3 Press p on the player to stop Peak Search.
“PEAK” disappears from the display.
Notes
• The portion with the highest level may differ every time
you try the adjustment on the same disc. The difference is,
however, so slight that you won’t find any problem in
adjusting the recording level precisely.
• Peak Search does not operate while you open the disc tray
by pressing the EX-CHANGE button.
23
GB
Page 24
Storing Information About CDs (Custom Files)
Storing Information About CDs (Custom Files)
Labeling discs on the player
What You Can Do With the
Custom Files
The player can store two types of information called
“Custom Files” for each disc. Once you have stored
Custom Files for a disc, the player automatically recalls
what you have stored whenever you select the disc.
Note that Custom Files will be erased if you do not use
the player for about one month.
1 Insert or select the disc.
You can store this information:
When you use
Disc Memo (page 24)
Delete Bank (page 26)
You can
Label discs using up to 12
characters
Delete unwanted tracks and store
only the tracks you want
Where are Custom Files stored?
Custom Files are stored not on the disc, but in the
player’s memory. It means you cannot use Custom
Files when you play the disc on other players.
2 Press INPUT.
3 Turn ≠ AMS ± until “DISC MEMO” appears
in the display, then push ≠ AMS ±.
The flashing cursor (“) appears.
4 Turn ≠ AMS ± until the character you want
appears in the display.
The cursor disappears and the first space for the
Disc Memo flashes.
As you turn ≠ AMS ± clockwise, the
characters appear in the following order. Turn
≠ AMS ± counterclockwise to go back to the
previous character.
INPUT
≠ AMS ±
CLEAR
Erasing all Custom Files of all discs
Turn off the player. While holding down CLEAR, press
1/u to turn on the player. “ALL ERASE” appears in
the display, and all Custom Files will be erased.
Labeling Discs (Disc Memo)
You can label discs using up to 12 characters and have
the player display the Disc Memo each time you select
the disc. The Disc Memo can be anything you like, such
as a title, musician’s name, category or date of
purchase.
When you select a CD TEXT disc
The disc title is stored as the Disc Memo automatically.
If the disc title has more than 12 characters, the first 12
characters of the disc title are stored (see page 11).
Note that you cannot change the Disc Memo of the CD
TEXT disc.
(space) A B C D E F G H I J K L M N O P Q R S T U
V W X Y Z a b c d e f g h i j k l m n o p q r s t u v w
x y z 0 1 2 3 4 5 6 7 8 9 ! " # $ % & ' ( ) * + , – . / : ; <
= > ? @ [ \ ] ^ _ { | }
DISCSALL
DISC
S
-
1 2 3 4 5
CD1
12345
678910
5 Push ≠ AMS ± to select the character.
The selected character lights up, and the flashing
cursor appears to indicate the next space to be
input.
DISCSALL
DISC
S
To insert a space
Press ).
If you have made a mistake
Press CLEAR and begin again by inputting the correct
characters.
1 2 3 4 5
CD1
12345
678910
24
6 Repeat Steps 4 and 5 to input more characters.
GB
Page 25
7 Press INPUT to store the Disc Memo.
Repeat Steps 1 to 7 to assign Disc Memos to other
discs.
Storing Information About CDs (Custom Files)
Storing Information About CDs (Custom Files)
Storing Information About CDs (Custom Files)
Storing Information About CDs (Custom Files)
Locating a Scene or Track You Want
Locating a Scene or Track You Want
ABC DEF&!?
JKL MNOGHI
Labeling discs using the remote Z
SPACE
DISC/CAPS
Number
buttons
MEMO INPUT
0/)
DEL
ENTER
CLEAR
1 Press DISC/CAPS.
2 Press the number button of the disc you want to
assign a Disc Memo, and then ENTER.
3 Press MEMO INPUT.
The flashing cursor (“) appears.
4 Press DISC/CAPS to find the letter type you want.
Each time you press the button, the letter type
changes cyclically among capital letters (ABC),
small letters (abc) and numbers (123). To select a
symbol, you have to select the capital or small
letter type.
TUV WXYPRS
QZ
>
10
Example: To select the letter E
Press the number button 3 twice.
n D n E n F
Press 3. Press 3.
To insert a space, press SPACE once.
To input a number, press the number button you
want.
ENTER
Characters assigned to
each number button
Press 3.
6 Press ENTER to select the character.
The selected character lights up, and the flashing
cursor appears to indicate the next space to be
input.
You can also go to the next space by pressing other
number buttons.
7 Repeat Steps 4 through 6 to input more characters.
8 Press MEMO INPUT to store the Disc Memo.
Repeat Steps 1 through 8 to assign Disc Memos to
other discs.
5 To input a letter, press the number button
corresponding to the letter you want (indicated
beside each number button).
The cursor disappears and the first space for the
Disc Memo flashes.
Each time you press the button, the letter changes
cyclically among the ones indicated beside the
button.
To input symbols, press the number button 1
repeatedly until the symbol you want appears in
the display.
25
GB
Page 26
Storing Information About CDs (Custom Files)
If you have made a mistake while inputting the
character
To correct the character which has been input
1 Press 0 or ) until the cursor moves next to the
incorrect character.
DISCSALL
DISC
Symphe y No1
2 Press DEL to delete the incorrect character.
1 2 3 4 5
CD1
12345
678910
Storing Specific Tracks
(Delete Bank)
You can delete unwanted tracks and store only the
tracks you want. When you select the disc containing a
Delete Bank, you can play only the remaining tracks.
CONTINUE
SHUFFLE
DISCSALL
DISC
1 2 3 4 5
Symph y No1
3 Input the correct character.
DISCSALL
DISC
1 2 3 4 5
Symphony No1
CD1
CD1
12345
678910
12345
678910
To correct the character currently being input
1 Press DEL to delete the incorrect character.
2 Input the correct character.
To insert a character between the input characters
Press 0 or ) until the cursor moves next to the point
you want to insert, and enter the character.
Erasing the Disc Memo
1 Follow Steps 1 and 3 in “Labeling discs on the
player” on page 24 to select the Disc Memo you
want to erase.
CHECK
CLEAR
1 Insert or select the disc.
2 Press CONTINUE or SHUFFLE before you start
playing.
3 Press CHECK repeatedly until the track you want
to delete appears in the display.
DISCSALL
DISC TRACK
1 2 3 4 5
1 1 ON
CD1
12345
678910
4 Press CLEAR.
“DELETE” and “OFF” appear in the display.
DISCSALL
DISC TRACK
1 2 3 4 5
DELETE
1 1 OFF
CD1
2345
678910
26
GB
2 Press CLEAR.
The Disc Memo disappears.
3 Press INPUT.
If you want to recover the track, press CLEAR
again.
5 Repeat Steps 3 and 4 to delete more tracks.
You can recover all the tracks you have deleted
Hold down CLEAR until “ALL SELECT” appears in the
display.
Note
The deleted tracks are skipped even in the Shuffle or Program
Play mode (when the whole disc containing a Delete Bank is
programmed as one step).
Page 27
Additional Information
Additional InformationAdditional Information
Additional Information
Precautions
On safety
• Caution — The use of optical instruments with this product
will increase eye hazard.
• Should any solid object or liquid fall into the cabinet,
unplug the player and have it checked by qualified
personnel before operating it any further.
On power sources
• Before operating the player, check that the operating
voltage of the player is identical with your local power
supply. The operating voltage is indicated on the nameplate
at the rear of the player.
• The player is not disconnected from the AC power source
(mains) as long as it is connected to the wall outlet, even if
the player itself has been turned off.
• If you are not going to use the player for a long time, be
sure to disconnect the player from the wall outlet. To
disconnect the AC power cord (mains lead), grasp the plug
itself; never pull the cord.
• AC power cord must be changed only at the qualified
service shop.
On placement
• Place the player in a location with adequate ventilation to
prevent heat build-up in the player.
• Do not place the player on a soft surface such as a rug that
might block the ventilation holes on the bottom.
• Do not place the player in a location near heat sources, or in
a place subject to direct sunlight, excessive dust or
mechanical shock.
On operation
• If the player is brought directly from a cold to a warm
location, or is placed in a very damp room, moisture may
condense on the lenses inside the player. Should this occur,
the player may not operate properly. In this case, remove
the disc and leave the player turned on for about an hour
until the moisture evaporates.
On adjusting volume
• Do not turn up the volume while listening to a portion with
very low level inputs or no audio signals. If you do, the
speakers may be damaged when a peak level portion is
played.
On cleaning
• Clean the cabinet, panel and controls with a soft cloth
slightly moistened with a mild detergent solution. Do not
use any type of abrasive pad, scouring powder or solvent
such as alcohol or benzine.
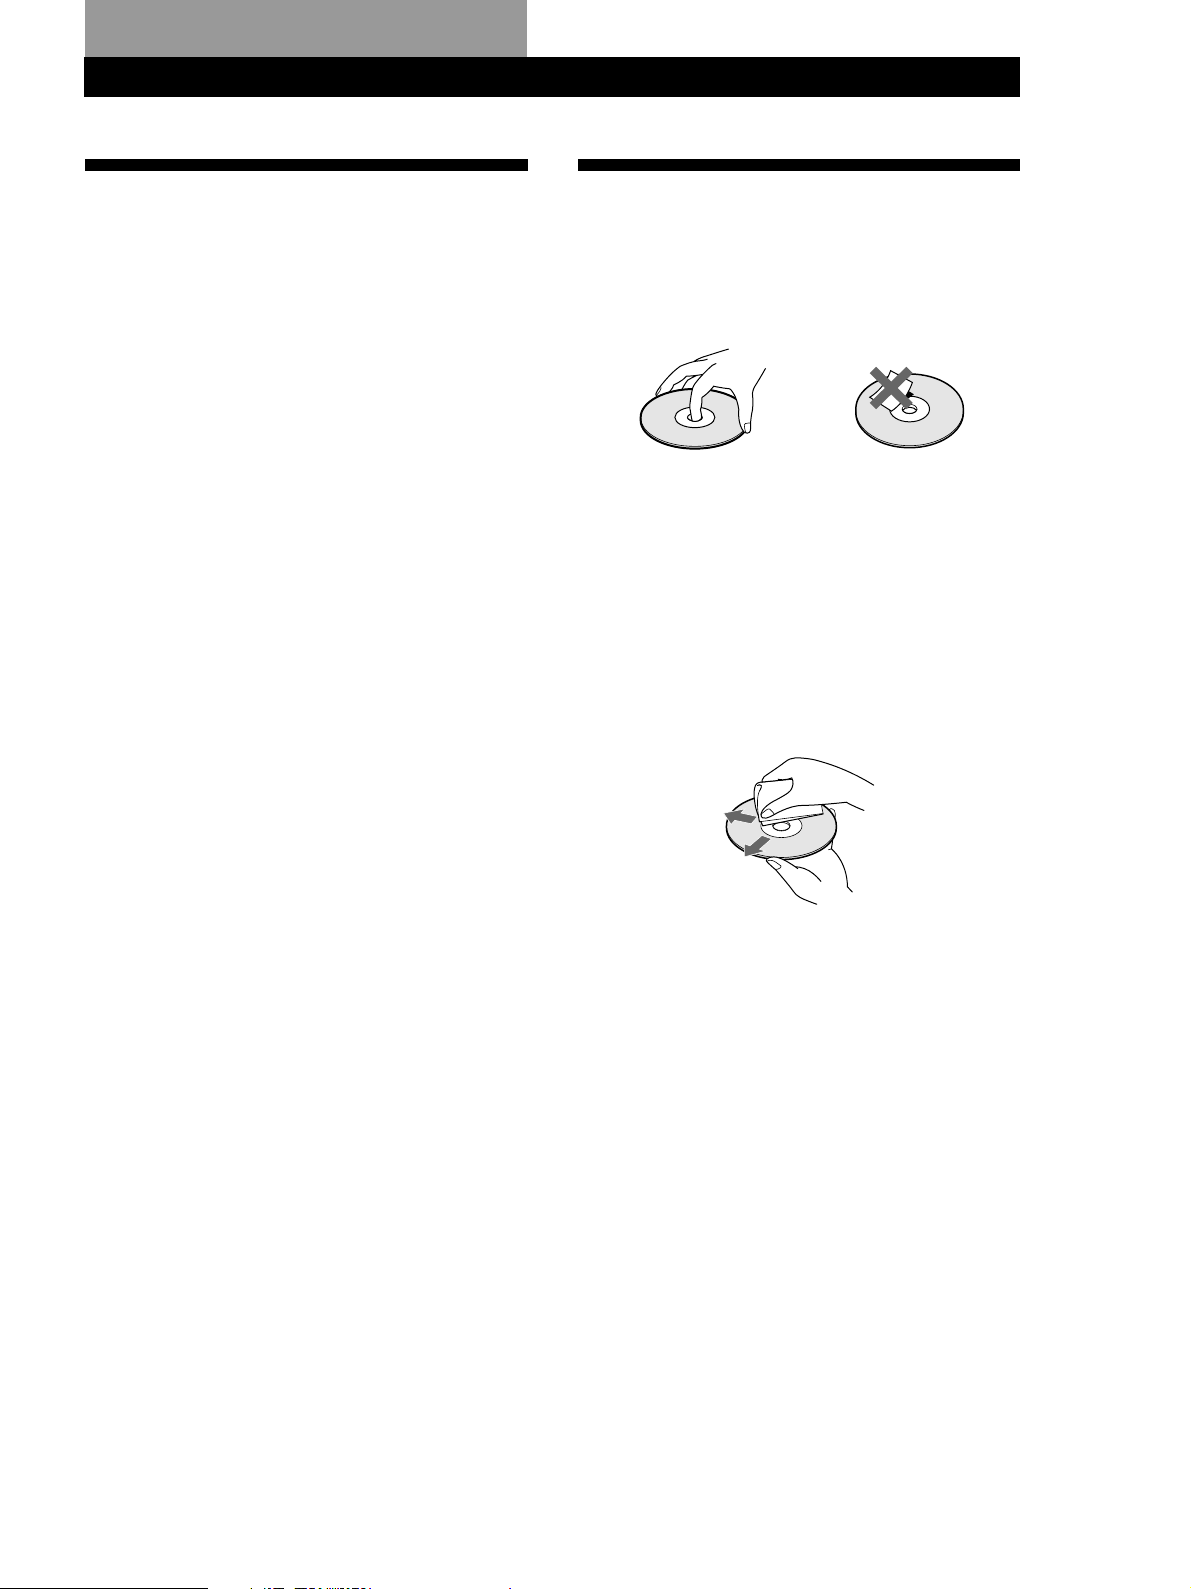
Notes on CDs
On handling CDs
• To keep the disc clean, handle the disc by its edge. Do not
touch the surface.
• Do not stick paper or tape on the disc.
• Do not expose the disc to direct sunlight or heat sources
such as hot air ducts, nor leave it in a car parked in direct
sunlight as there can be considerable rise in temperature
inside the car.
• Do not use any commercially available stabilizer. If you do,
the disc and the player may be damaged.
• After playing, store the disc in its case.
On cleaning
• Before playing, clean the disc with a cleaning cloth. Wipe
the disc from the center out.
• Do not use solvents such as benzine, thinner, commercially
available cleaners or anti-static spray intended for vinyl
LPs.
If you have any questions or problems concerning your
player, please consult your nearest Sony dealer.
27
GB
Page 28

Additional Information
Troubleshooting
If you experience any of the following difficulties while
using the player, use this troubleshooting guide to help
you remedy the problem. Should any problem persist,
consult your nearest Sony dealer.
There’s no sound.
/Check that the player is connected securely.
/Make sure you operate the amplifier correctly.
/Adjust the output level using the LINE OUT
LEVEL +/– buttons on the remote.
The CD does not play.
/There’s no CD inside the player (“–NO DISC–”
appears). Insert a CD.
/Place the CD with the label side up on the disc
tray correctly.
/Clean the CD (see page 27).
/Moisture has condensed inside the player.
Remove the disc and leave the player turned on
for about an hour (see page 27).
/Place the CD in the correct position on the disc
tray.
The remote does not function.
/Remove the obstacles in the path of the remote
and the player.
/Point the remote at the remote sensor g on the
player.
/Replace all the batteries in the remote with new
ones if they are weak.
/Set the CD 1/2/3 switch on the remote
according to the position of the COMMAND
MODE selector at the rear panel of the player.
The player functions incorrectly.
/The microcomputer chips may be operating
incorrectly. Turn the power off, then turn it
back on to reset the player.
Specifications
Compact disc player
Laser Semiconductor laser (λ = 780 nm)
Laser output Max 44.6 µW*
Frequency response 2 Hz to 20 kHz ±0.5 dB
Signal-to-noise ratio More than 107 dB
Dynamic range More than 98 dB
Harmonic distortion Less than 0.0040%
Channel separation More than 100 dB
Output
Jack
type
LINE OUT
DIGITAL OUT
(OPTICAL)
PHONES
Phono
jacks
Optical
output
connector
Stereo
phone jack
General
Power requirements
Where purchased
Canada
Europe
Power consumption 14 W
Dimensions (approx.) 430 × 120 × 393 mm
(w/h/d) (17 × 4 3/4 × 15 1/2 in.) incl. projecting
Emission duration: continuous
* This output is the value measured at
a distance of 200 mm from the
objective lens surface on the Optical
Pick-up block with 7 mm aperture.
Maximum
output
level
2 V
(at 50 kilohms)
–18 dBm
10 mW
Power requirements
120 V AC, 60 Hz
220 V - 230 V AC, 50/60 Hz
parts
Load
impedance
Over 10 kilohms
Wave length: 660 nm
32 ohms
28
Mass (approx.) 5.4 kg (11 lbs 15 oz)
Supplied accessories
Audio cord (2 phono plugs – 2 phono plugs) (1)
Monaural (2P) mini-plug cord (1) (supplied for Canadian
models only)
Remote commander (remote) (1)
R6 (size AA) batteries (2)
Design and specifications are subject to change without notice.
GB
Page 29

Index
Index
A, B
Advanced Mega Control 18
AMS 14
Automatic Music Sensor. See
AMS
C, D
CD TEXT 11
Changing the Disc Memos 19
Connecting 4
another CD player 6
Continuous Play 8
Controlling another CD
player 18
Custom Files
Delete Bank 26
Disc Memo 24
what you can do with 24
E
Editing. See Recording
Erasing
Custom Files 24
Delete Bank 26
Disc Memo 26
F, G
Fading 22
Time Fade 23
H, I, J, K
Handling CDs 27
Hookups 4
overview 4
L
Labeling a disc 24
Loading the Disc Memos 19
Locating
by monitoring 14
by observing the
display 14
by scanning 13, 14
directly 13, 14
using AMS 14
while checking the
labels 13
M
Music Scan 14
N, O
No-Delay Play 20
P, Q
Peak Search 23
Playback
Continuous Play 8
X-Fade Play 20
No-Delay Play 20
Playing alternately 20
Program Play 16
Repeat Play 14
Shuffle Play 15
Program 16
changing 18
checking 18
for recording 21
R
Recording 21
a program 21
using Time Edit 21
Remaining time 10
Remote control 4
Repeating 14
Replacing discs while playing
a disc 12
S
Scanning. See Music Scan
Searching. See Locating
Select Shuffle Play 15
Selecting the language 12
Shuffle Play 15
Storing
information about CDs 24
specific tracks 26
T
Time Edit 21
Time Fade 23
Total playing time 10
Troubleshooting 28
U, V, W
Unpacking 4
X, Y, Z
X-Fade Play 20
Names of controls
Buttons
CHECK 18
CLEAR 18
CONTINUE 8
DISC 13
DISC 1 – 5 13
DISC/CAPS 25
DISC CHECK 13
DISC SKIP 12, 13
EDIT/TIME FADE 21, 23
ENTER 13
EX-CHANGE 12
FADER 22
HIGH-LIGHT 11
INPUT 12, 24
LINE OUT LEVEL +/– 5
MEGA CONTROL 18
MEMO INPUT 25
MUSIC SCAN 14
NO DELAY 20
Number 14
§ OPEN/CLOSE 8
PEAK SEARCH 23
PROGRAM 16
REPEAT 14
SHUFFLE 15
TIME/TEXT 10
X-FADE 20
· 9
P 9
p 9
0/) 14
0 (–AMS+) ) 18
=/+ 14
> 10 14
Control
AMS
≠
± 14, 18
(DISC)
Jack
PHONES 8
Switch
1/u 8
Others
Disc tray 8
Display 10
g 4
29
GB
Page 30
AVERTISSEMENT
Bienvenue !
Pour prévenir tout risque
d’incendie ou
d’électrocution, gardez
cet appareil à l’abri de la
pluie ou de l’humidité.
Pour prévenir tout risque
d’électrocution, abstenezvous d’ouvrir le boîtier.
Confiez l’entretien de
votre lecteur
exclusivement à un
personnel qualifié.
Cet appareil entre dans la catégorie des
produits LASER DE CLASSE 1.
L’ETIQUETTE INDIQUANT
L’APPARTENANCE DE CE LECTEUR
A LA CLASSE 1 est apposée à l’arrière
du boîtier.
Nous vous remercions d’avoir fait
l’acquisition de ce lecteur de disques
compacts Sony. Avant de faire
fonctionner cet appareil, nous vous
recommandons de lire attentivement le
présent mode d’emploi et de le conserver
pour toute référence ultérieure.
A propos de ce
manuel
Les instructions contenues dans le
présent mode d’emploi concernent le
modèle CDP-CE535.
Conventions
• Les instructions fournies dans ce
manuel portent sur les commandes du
lecteur.
Vous pouvez également utiliser les
commandes que comporte votre
télécommande si celles-ci portent le
même nom ou un nom similaire à
celles de votre lecteur de disques
compacts.
• Les symboles suivants apparaissent
dans ce mode d’emploi:
Pour les utilisateurs au Canada
ATTENTION
POUR PREVENIR LES CHOCS
ELECTRIQUES, NE PAS UTILISER
CETTE FICHE POLARISEE AVEC
UN PROLONGATEUR, UNE PRISE
DE COURANT OU UNE AUTRE
SORTIE DE COURANT, SAUF SI
LES LAMES PEUVENT ETRE
INSEREES A FOND SANS EN
LAISSER AUCUNE PARTIE A
DECOUVERT.
Indique que vous pouvez
effectuer l’opération à l’aide
de la télécommande.
Ce symbole indique un conseil
ou une astuce facilitant
l’opération envisagée.
FR
2
Page 31

Getting Started
TABLE DES MA TIERES
Préparation
Déballage.............................................................................................................................. 4
Raccordement du système................................................................................................. 4
Connexion d’un autre lecteur CD .................................................................................... 6
Lecture d’un disque compact........................................................................................ 8
Lecture de disques compacts
Utilisation de la fenêtre d’affichage ............................................................................... 10
Remplacement des disques pendant la lecture d’un disque ...................................... 12
Localisation d’un disque déterminé...............................................................................13
Localisation d’une plage déterminée ............................................................................. 14
Localisation d’un passage particulier sur une plage ................................................... 14
Lecture de plages répétée ................................................................................................ 14
Lecture dans un ordre quelconque (lecture aléatoire) ................................................ 15
Création de programmes musicaux personnalisés (lecture programmée) .............. 16
Contrôle d’un autre lecteur CD (fonction Mega Control avancée) ........................... 18
Lecture alternée (Lecture sans transition/Lecture enchaînée)...................................20
FR
Enregistrement de disques compacts
Enregistrement de votre programme musical.............................................................. 21
Enregistrement d’un CD en spécifiant la longueur de bande
(montage programmé) ..................................................................................................... 21
Fondu enchaîné d’entrée et de sortie ............................................................................. 22
Réglage du niveau d’enregistrement (recherche du niveau de crête) ...................... 23
Enregistrement d’informations relatives aux disques compacts
(fichiers personnalisés)
Emploi des fichiers personnalisés .................................................................................. 24
Identification des disques (mémo de disque)............................................................... 24
Mémorisation de plages spécifiques (bloc de suppression) ....................................... 26
Informations complémentaires
Précautions ........................................................................................................................ 27
Remarques sur les disques compacts.............................................................................27
Dépannage ......................................................................................................................... 28
Spécifications ..................................................................................................................... 28
Index
Index ................................................................................................................................... 29
FR
3
Page 32

Préparation
Préparation
Déballage
Assurez-vous que les accessoires suivants vous ont été
livrés:
• Câble audio (1)
• Cordon de minifiche monaural (2P) (1) (câble de
connexion pour CONTROL A1
modèle pour le Canada uniquement)
• Télécommande (1)
• Piles R6 (AA) (2)
Installation des piles dans la télécommande
La télécommande fournie vous permet de commander
le lecteur à distance.
Introduisez deux piles R6 (AA) en faisant correspondre
les pôles + et – des piles. Lorsque vous utilisez la
télécommande, orientez-la vers le capteur de
télécommande g du lecteur.
) (fourni avec le
Raccordement du système
Vue d’ensemble
Cette section décrit le raccordement du lecteur de
disques compacts à un amplificateur. Avant de réaliser
la connexion, n’oubliez pas de mettre hors tension
chacun des appareils concernés.
CONTROL A1
LINE OUT
(L)
Entrée audio
(L)
DIGITAL OUT
(OPTICAL)
LINE OUT
(R)
Entrée audio
(R)
Lecteur de disques
compacts
Vers le secteur
Amplificateur
Quand remplacer les piles
Dans des conditions d’utilisation normales, les piles
devraient durer environ six mois. Si la télécommande
n’agit plus sur le lecteur, remplacez simultanément les
deux piles.
Remarques
• N’abandonnez pas la télécommande à proximité d’une
source de chaleur importante ou d’un endroit humide.
• Ne laissez tomber aucun corps étranger dans le boîtier de la
télécommande en particulier lors du remplacement des
piles.
• N’exposez pas le capteur de télécommande à la lumière
directe du soleil ou d’un luminaire. Cela risque de
provoquer un dysfonctionnement.
• Si vous n’utilisez pas la télécommande pendant une
période prolongée, retirez les piles afin de prévenir tout
risque de détérioration engendrée par la corrosion ou une
fuite éventuelle des piles.
: Sens du signal
Câbles de connexion requis
Câble audio (fourni) (1)
Blanc
(L)
Rouge
(R)
Vers le secteur
Blanc
(L)
Rouge
(R)
FR
4
Page 33

Préparation
Préparation
Raccordement
Lors du raccordement d’un câble audio, assurez-vous
que le code de couleur du câble correspond à celui des
prises appropriées sur les différents appareils
raccordés. Rouge (droit) sur rouge et blanc (gauche)
sur blanc. Assurez-vous de la qualité des connexions
afin de prévenir les bruits de souffle et les parasites.
Lecteur de disques
compacts
2ND
LINE
CD
IN OUT
L
R
Vous pouvez régler le niveau de sortie sur
l’amplificateur
Appuyez sur la touche LINE OUT LEVEL +/– de la
télécommande. Vous pouvez réduire le niveau de sortie
jusqu’à –20 dB.
Lorsque vous réduisez le niveau de sortie, l’indication
FADE
“
” apparaît dans la fenêtre d’affichage.
Remarque
Si vous appuyez sur les touches LINE OUT LEVEL +/–
de la télécommande pendant un enregistrement, le
niveau d’enregistrement change même s’il est
présélectionné sur la platine à cassettes, etc.
Amplificateur
INPUT
CD
L
R
Si vous disposez d’un appareil Sony doté d’une prise
CONTROL A1 (ou CONTROL A1)
Raccordez l’appareil via la prise CONTROL A1 (ou
CONTROL A1). Vous pouvez simplifier l’utilisation de
systèmes audio constitués de composants Sony séparés.
Pour plus de détails, reportez-vous aux instructions
complémentaires “CONTROL-A1 Control System”.
Si vous utilisez un autre lecteur CD Sony en même
temps que ce lecteur
Vous pouvez uniquement rendre la télécommande
opérante sur ce lecteur.
• Si vous utilisez un lecteur doté d’un sélecteur
COMMAND MODE:
Laissez le sélecteur COMMAND MODE de ce lecteur
sur la position CD 1, qui est le réglage par défaut, et
réglez celui de l’autre lecteur CD sur CD 2 ou CD 3.
Réglez ensuite le commutateur CD 1/2/3 de la
télécommande fournie en fonction du lecteur utilisé.
• Pour utiliser un lecteur sans sélecteur
COMMAND MODE:
Le mode de commande du lecteur sans sélecteur
COMMAND MODE est réglé sur CD 1. Réglez le
sélecteur COMMAND MODE de ce lecteur et le
commutateur CD 1/2/3 de la télécommande sur
CD 2 ou CD 3.
Branchement du cordon d’alimentation
• Si vous disposez d’un appareil numérique comme un
amplificateur numérique, un convertisseur N/A, une
platine DAT ou MD
Raccordez le composant via le connecteur DIGITAL OUT
(OPTICAL) à l’aide du câble optique (non fourni). Retirez le
capuchon et branchez le câble optique.
Faites attention que, si vous établissez ce raccordement,
vous ne pouvez pas utiliser les fonctions de fondu enchaîné
d’entrée et de sortie (page 22) ni de fondu programmé
(page 23).
POC-15
Câble optique (non fourni)
Lecteur de disques
compacts
DIGITAL
OUT
OPTICAL
Appareil
numérique
DIGITAL
INPUT
OPTICAL
Remarque
Si vous effectuez le raccordement via le connecteur
DIGITAL OUT (OPTICAL), des parasites peuvent se
manifester lorsque vous activez la lecture d’un disque
compact autre que musical, comme un CD-ROM.
Branchez le cordon d’alimentation sur une prise
murale.
Transport du lecteur
Avant de transporter le lecteur, appliquez la procédure
ci-dessous pour ramener les mécanismes internes dans
leur position de départ.
1 Retirez tous les disques du plateau de lecture.
2 Appuyez sur § OPEN/CLOSE pour refermer le
plateau de lecture.
L’indication “–NO DISC–” apparaît dans la fenêtre
d’affichage.
3 Attendez 10 secondes et appuyez sur 1/u pour
mettre le lecteur hors tension.
FR
5
Page 34

Préparation
Connexion d’un autre lecteur
CD
Si vous disposez d’un lecteur CD Sony dans lequel
vous pouvez introduire 5, 50, 200 ou 300 disques et
doté d’une prise CONTROL A1
et si le mode de commande de ce lecteur peut être réglé
sur CD 3, alors vous pouvez commander ce lecteur
comme le second lecteur à l’aide de ce lecteur. Après
avoir branché ce lecteur et un amplificateur, suivez la
procédure ci-dessous.
Mettez les deux lecteurs hors tension avant d’effectuer
les connexions.
(ou CONTROL A1)
Cordons nécessaires
• Câble audio (1) (Utilisez le cordon fourni avec le lecteur à
raccorder.)
• Cordon de minifiche monaural (2P) (1) (fourni avec le
modèle pour le Canada uniquement)
1 Raccordez les lecteurs au moyen d’un câble audio
(voir également “Raccordement” à la page 5).
CDP-CE535
2ND
LINE
CD
IN OUT
L
R
CDP-CX300, etc.
LINE OUT
L
R
COMMAND
MODE
Vers 2ND CD IN
Vers la sortie audio
Vers une prise
secteur
Vers LINE OUT
Vers CONTROL A1
Vers CONTROL A1
CDP-CE535
Vers une prise
secteur
CDP-CX300, etc.
2 Raccordez les lecteurs au moyen d’un cordon de
minifiche monaural (2P).
CDP-CE535
CONTROL A1
CDP-CX300, etc.
CONTROL A1
Pour plus de détails sur cette connexion,
reportez-vous aux instructions supplémentaires
“CONTROL-A1
Control System”.
3 Réglez le sélecteur COMMAND MODE de chaque
lecteur.
Mettez le sélecteur COMMAND MODE de ce
lecteur sur CD 1 ou CD 2 et mettez celui du second
lecteur sur CD 3.
COMMAND
MODE
CD
132
Vers l’entrée
audio
Amplificateur
Pour plus de détails sur l’utilisation du second
lecteur, reportez-vous à “Contrôle d’un autre
lecteur CD” à la page 18 et “Lecture alternée” à la
page 20.
: Sens du signal
FR
6
Vers une prise
secteur
Page 35

4 Branchez le cordon d’alimentation des deux
lecteurs aux prises secteur.
Remarques
• Ne branchez pas d’autre lecteur que celui que vous utilisez
comme second lecteur aux prises 2ND CD IN de ce lecteur.
• Si vous raccordez un second lecteur CD, ne branchez pas le
connecteur DIGITAL OUT (OPTICAL) de ce lecteur à
l’amplificateur.
Préparation
Préparation
FR
7
Page 36

Opérations de base
Lecture d’un disque compact
23564
REPEAT
CONTINUE SHUFFLE PROGRAM
I / u
DISC 1 DISC 2 DISC 3 DISC 4 DISC 5
DISC CHECK
CHANGE
OPEN/CLOSE
DISC
EX-
SKIP
AMS
(DISC)
Raccordez le
casque d’écoute.
• Voir pages 4 et 5 pour des
informations sur le
raccordement.
PHONES
EDIT/
PEAK
TIME/
INPUT
FADER
TIME FADE
SEARCH
TEXT
(-AMS+)
PUSH ENTER
X-FADENO DELAYCLEARCHECK
MEGA
CONTROL
Mettez l’amplificateur sous tension et sélectionnez la position
1
du lecteur CD de manière à pouvoir écouter le son provenant
de ce lecteur.
Appuyez sur 1/u pour mettre le lecteur sous tension.
2
Appuyez sur § OPEN/CLOSE et placez un disque sur le
3
plateau de lecture.
La face imprimée vers le haut
Numéro de disque
Pour placer d’autres disques, appuyez sur DISC SKIP et placez
4
les disques dans l’ordre de votre choix.
Chaque fois que vous appuyez sur cette touche, le plateau de
lecture tourne et vous pouvez placer les disques dans les
compartiments vides. Le lecteur reproduit d’abord le disque
situé en face de vous.
Appuyez sur CONTINUE pour sélectionner le mode de lecture
5
continue ALL DISCS ou 1 DISC.
Chaque fois que vous appuyez sur la touche CONTINUE,
l’indication “ALL DISCS” ou “1 DISC” apparaît dans la fenêtre
d’affichage.
Si vous sélectionnez
ALL DISCS
1 DISC
FR
8
Le lecteur reproduit
Consécutivement tous les disques contenus dans le
lecteur et dans l’ordre numérique des disques
Uniquement le disque que vous avez sélectionné
Page 37

Opérations de base
Vous pouvez sélectionner le
disque que vous voulez
écouter en premier lieu
Appuyez sur l’une des
touches DISC 1 – 5.
Vous pouvez régler le niveau
de sortie sur l’amplificateur
Appuyez sur la touche
LINE OUT LEVEL +/– de la
télécommande. Vous pouvez
réduire le niveau de sortie
jusqu’à –20 dB.
Lorsque vous réduisez le
niveau de sortie, l’indication
FADE
” apparaît dans la
“
fenêtre d’affichage.
Le volume du casque
d’écoute change également
lorsque vous réglez le
niveau de sortie.
Remarque
Si vous appuyez sur les
touches LINE OUT LEVEL
+/– de la télécommande
pendant un enregistrement,
le niveau d’enregistrement
change même s’il est
présélectionné sur la platine
à cassettes, etc.
Appuyez sur ·.
6
Le plateau de lecture se referme et le lecteur reproduit toutes les
plages une fois (Lecture continue). Réglez le volume sur
l’amplificateur.
Pour arrêter la lecture
Appuyez sur p.
DISC 1 – 5
CONTINUE SHUFFLE PROGRAM REPEAT
I / u
DISC 1 DISC 2 DISC 3 DISC 4 DISC 5
PHONES
INPUT
FADER
DISC CHECK
EDIT/
PEAK
TIME/
TIME FADE
SEARCH
TEXT
Si vous voulez
Activer la pause
Reprendre la lecture après la pause
Passer à la plage suivante
Revenir à la plage précédente
Passer au disque suivant
Sélectionner un disque directement
Arrêter la lecture et retirer le disque
compact
·pP
(-AMS+)
≠ AMS ±§ OPEN/CLOSE
Vous devez
Appuyer sur P
Appuyer sur P ou ·
Tourner ≠ AMS ± dans le sens
horaire
Tourner ≠ AMS ± dans le sens
antihoraire
Appuyer sur DISC SKIP
Appuyer sur DISC 1 – 5
Appuyer sur § OPEN/CLOSE
DISC SKIP
EX-
CHANGE
X-FADENO DELAYCLEARCHECK
OPEN/CLOSE
DISC
SKIP
AMS
(DISC)
PUSH ENTER
MEGA
CONTROL
Opérations de base
FR
9
Page 38

Lecture de disques compacts
Lecture de disques compacts
Utilisation de la fenêtre
d’affichage
La fenêtre d’affichage vous permet de vérifier les
informations relatives au disque.
Informations affichées pendant la lecture
d’un disque
Pendant la lecture d’un disque, la fenêtre d’affichage
indique le numéro du disque en cours, le numéro de la
plage en cours, la durée de lecture de la plage et le
calendrier musical.
Numéro de disque en cours Temps de lecture
INPUT ≠ AMS ±
TIME/TEXT
Vérification du nombre et de la durée
totale de lecture des plages
Appuyez sur TIME/TEXT avant de lancer la lecture.
La fenêtre d’affichage indique le numéro de disque en
cours, le nombre total de plages, la durée totale de
lecture et le calendrier musical.
Numéro de disque en cours
DISCSALL
DISC TRACK
1 2 3 4 5
1 1O 45.28
Nombre total de plages
Les informations s’affichent également lorsque vous
appuyez sur la touche § OPEN/CLOSE pour refermer
le plateau de lecture.
Les plages dont le numéro est supérieur à 20 ne
peuvent être affichées dans le calendrier musical.
Remarques sur les indications de numéro de disque
• Le cercle rouge autour d’un numéro de disque indique que
le disque est prêt à la lecture.
• Lorsque toutes les plages d’un disque ont été reproduites, le
demi-cercle autour du numéro de disque disparaît.
• Lorsqu’un compartiment à disque est détecté comme étant
vide, le demi-cercle autour du numéro de disque disparaît.
Durée totale de lecture
MIN SEC
CD1
Calendrier musical
12345
678910
DISCSALL
DISC TRACK
1 2 3 4 5
MIN SEC
1 1 1.56
Numéro de la plage en cours
CD1
12345
678910
Calendrier musical
Les numéros de plages disparaissent du calendrier
musical dès que la lecture en est terminée.
Vérification de la durée résiduelle
Chaque fois que vous appuyez sur la touche
TIME/TEXT pendant la lecture d’un disque, l’affichage
change selon la séquence indiquée dans le schéma
ci-dessous.
Temps de lecture
de la plage en
cours
Durée restante de
la plage en cours
Durée restante du
disque
DISCSALL
1 2 3 4 5
DISC TRACK
MIN SEC
1 1 1.56
Appuyez sur
TIME/TEXT.
DISCSALL
1 2 3 4 5
DISC TRACK
MIN SEC
1 1 -1.57
Si le numéro de plage dépasse 24,
l’indication “– – – –” apparaît au lieu
de la durée restante.
Appuyez sur
TIME/TEXT.
DISCSALL
1 2 3 4 5
DISC TRACK
MIN SEC
1 -43.32
Cette information est uniquement
disponible en mode de lecture
continue.
12345
678910
CD1
12345
678910
CD1
12345
678910
CD1
10
Appuyez sur
TIME/TEXT.
FR
Page 39

Lecture de disques compacts
Vérification des informations des disques
CD TEXT
Les disques CD TEXT comportent des informations
telles que le titre du disque ou le nom des artistes. Elles
sont enregistrées dans une zone libre sur laquelle ne se
trouve aucune information sur un disque normal. La
fenêtre d’affichage indique les informations CD TEXT
du disque de façon à ce que vous puissiez vérifier le
titre du disque en cours, de la plage en cours et le nom
de l’artiste. Lorsque le lecteur identifie un disque
CD TEXT, l’indication “CD-TEXT” s’allume dans la
fenêtre d’affichage. Chaque fois que vous appuyez sur
la touche TIME/TEXT, l’indication affichée change
comme dans le tableau ci-dessous.
• Avant de démarrer la lecture
CD1
CD1
CD-TEXT
CD-TEXT
12345
678910
12345
678910
DISCSALL
Titre du disque
DISC
1 2 3 4 5
SONYHITS
Appuyez sur
TIME/TEXT.
DISCSALL
Nom de l’artiste
1 2 3 4 5
ART.
Sony Band
Appuyez sur
TIME/TEXT.*
* La fenêtre d’affichage indique le numéro du disque en
cours, le nombre total de plage et la durée totale de lecture
du disque pendant quelques secondes avant de revenir à
l’indication du titre du disque.
• Pendant la lecture d’un disque
DISCSALL
Titre de la plage
1 2 3 4 5
TRACK
HitechBlues
Cette information s’affiche
également lorsque le lecteur localise
la plage.
Appuyez sur
TIME/TEXT.
DISCSALL
Durée de lecture
DISC TRACK
1 2 3 4 5
2 1 1.56
Appuyez sur
TIME/TEXT.
DISCSALL
Durée restante de
la plage en cours
Durée restante du
disque
2 1 -1.57
Si le numéro de plage dépasse 24,
l’indication “– – – –” apparaît au lieu
de la durée restante.
2 -58.5‚
Cette information est uniquement
accessible en mode de lecture
continue.
1 2 3 4 5
DISC TRACK
Appuyez sur
TIME/TEXT.
DISCSALL
1 2 3 4 5
DISC TRACK
Appuyez sur
TIME/TEXT.
MIN SEC
MIN SEC
MIN SEC
CD1
CD1
CD1
CD1
CD-TEXT
CD-TEXT
CD-TEXT
CD-TEXT
12345
678910
12345
678910
12345
678910
12345
678910
Si une information CD TEXT compte plus de 12
caractères, les 12 premiers caractères s’allument après
avoir défilé dans la fenêtre d’affichage.
Remarque
Ce lecteur peut uniquement afficher les titres de disque, les
titres de plage et les noms d’artistes de disques CD TEXT. Les
autres informations CD TEXT ne peuvent être affichées.
Pour reproduire les thèmes du disque
Certains disques CD TEXT sont doté d’une fonction de lecture
des thèmes du disque. Si vous choisissez un tel disque,
“HIGH LIGHT” apparaît dans la fenêtre d’affichage.
Appuyez sur la touche HIGH-LIGHT de la télécommande
pour démarrer la lecture des thèmes du disque en mode
d’arrêt.
L’indication “HIGH LIGHT” clignote dans la fenêtre
d’affichage pendant la lecture des thèmes du disque.
11
FR
Page 40

Lecture de disques compacts
Sélection de la langue d’affichage des
informations CD TEXT
Vous pouvez sélectionner la langue d’affichage des
informations CD TEXT lorsque vous sélectionnez un
disque CD TEXT qui comporte des informations
multilingues.
Lorsque vous avez sélectionné la langue, la fenêtre
d’affichage indique les informations dans la langue
sélectionnée jusqu’à ce que vous mettiez le lecteur hors
tension. Si le lecteur ne peut lire la langue mémorisée
sur un disque CD TEXT, le lecteur affiche le message
“(other lang)”.
1 Appuyez sur INPUT en mode d’arrêt.
2 Tournez ≠ AMS ± jusqu’à ce que l’indication
“SELECT LANG.” apparaisse dans la fenêtre
d’affichage.
DISCSALL
DISC
1 2 3 4 5
SELECT LANG.
CD-TEXT
CD1
12345
678910
Remplacement des disques
pendant la lecture d’un disque
Vous pouvez ouvrir le plateau de lecture pendant la
reproduction d’un disque de façon à vérifier quels
disques doivent encore être reproduits et à remplacer
des disques sans pour cela devoir interrompre la
lecture du disque en cours.
DISC SKIPEX-CHANGE
1 Appuyez sur EX-CHANGE.
Le plateau de lecture s’ouvre et deux
compartiments à disque apparaissent. Même si le
lecteur est en cours de lecture, la reproduction
n’est pas interrompue.
3 Poussez sur ≠ AMS ±.
4 Tournez ≠ AMS ± jusqu’à ce que la langue
voulue apparaisse dans la fenêtre d’affichage.
5 Poussez sur ≠ AMS ± pour sélectionner la
langue.
L’indication “Reading Text” apparaît brièvement
et la fenêtre d’affichage indique ensuite les
informations dans la langue sélectionnée.
Pour vérifier la langue en cours
1 Appuyez sur INPUT pendant la lecture d’un disque
CD TEXT.
2 Tournez ≠ AMS ± jusqu’à ce que “SHOW LANG.”
apparaisse dans la fenêtre d’affichage et poussez ensuite
sur ≠ AMS ±.
La langue en cours apparaît brièvement.
Vous pouvez également vérifier la langue en cours en
sélectionnant un disque CD TEXT sans informations
multilingues.
Remarque
Si vous sélectionnez un disque CD TEXT qui ne contient pas
d’informations dans la langue sélectionnée, la fenêtre
d’affichage indique les informations dans une autre langue en
fonction des préférences du disque.
2 Remplacez les disques dans les compartiments.
A la fin du disque en cours, le lecteur reproduira le
disque du compartiment de gauche et, ensuite,
celui du compartiment de droite.
3 Appuyez sur DISC SKIP.
La plateau de lecture tourne et deux
compartiments à disque apparaissent.
4 Remplacez les disques des compartiments.
5 Appuyez sur EX-CHANGE.
Le plateau de lecture se referme.
Si le plateau de lecture est ouvert par une pression sur la
touche EX-CHANGE
• Lorsque la lecture du disque en cours se termine, le lecteur
interrompt la lecture. Si le disque est reproduit en mode de
lecture répétée 1 DISC (voir page 15), la lecture du disque
en cours recommence.
• En mode de lecture aléatoire ALL DISCS (voir page 15), les
plages du disque en cours sont remélangées.
• En mode de lecture programmée (voir page 16), seules les
plages du disque en cours sont reproduites.
• Ne poussez pas sur le plateau de lecture pour le refermer à
l’étape 5, car vous risquez sinon d’endommager le lecteur.
12
FR
Page 41

Localisation d’un disque
déterminé
Vous pouvez localiser un disque avant ou pendant la
lecture d’un disque.
Lecture de disques compacts
Vous pouvez prolonger le temps de lecture pendant
l’exploration des disques
Appuyez plusieurs fois de suite sur DISC CHECK
jusqu’à ce que le temps de lecture voulu (10, 20 ou 30)
apparaisse dans la fenêtre d’affichage. Chaque pression
sur la touche change le temps de lecture suivant une
progression cyclique.
DISC 1 – 5 DISC SKIP·DISC CHECK
DISC
DISC SKIP +/–
Pour localiser
Le disque suivant
Le ou les disques
suivants Z
Le disque en cours
ou le précédent Z
Directement un
disque déterminé
Un disque en
vérifiant les
étiquettes
Un disque en
reproduisant
pendant 10 secondes
la première plage de
chaque disque
Remarques
• Lorsque vous appuyez sur la touche DISC CHECK, le mode
de lecture passe automatiquement en mode de lecture
continue ALL DISCS.
• Si vous avez ouvert le plateau de lecture en appuyant sur la
touche EX-CHANGE, vous ne pouvez pas utiliser la
fonction DISC CHECK.
• Même si vous appuyez sur la touche DISC CHECK pendant
que l’indication “REPEAT” apparaît dans la fenêtre
d’affichage (voir page 14), le lecteur s’arrête après avoir
balayé une fois toutes les intros.
Touches
numériques
ENTER
·
Appuyez sur
DISC SKIP pendant la lecture d’un
disque
DISC SKIP + plusieurs fois jusqu’à ce
que vous ayez trouvé le disque
DISC SKIP – plusieurs fois jusqu’à ce
que vous ayez trouvé le disque
DISC 1 – 5.
Si vous utilisez la télécommande,
appliquez la procédure suivante.
1 Appuyez sur DISC.
2 Appuyez sur la touche numérique
correspondant au disque.
3 Appuyez sur ENTER.
DISC CHECK pendant que le plateau
de lecture est ouvert. Le plateau de
lecture tourne pour vous montrer les
étiquettes de tous les disques. Lorsque
le disque voulu apparaît en face de
vous, appuyez sur · pour
poursuivre la lecture.
DISC CHECK avant de démarrer la
lecture pendant que le plateau de
lecture est fermé. Lorsque vous avez
trouvé le disque voulu, appuyez sur
· pour lancer la lecture.
13
FR
Page 42

Lecture de disques compacts
Localisation d’une plage
déterminée
Vous pouvez localiser rapidement une plage pendant
la lecture d’un disque à l’aide de la commande AMS
(détecteur automatique de musique) ou des touches
numériques de la télécommande.
≠ AMS ±
Touches
numériques
>10
MUSIC SCAN
=/+
Pour localiser
L’une des plages
suivantes
La plage en cours
ou l’une des
précédentes
Directement une
plage spécifique
Z
Une plage en
explorant les 10
premières secondes
de chaque plage Z
(balayage des intros)
Vous devez
Tourner ≠ AMS ± dans le sens
horaire jusqu’à ce que vous ayez localisé
la plage de votre choix. Si vous utilisez
la télécommande, appuyez plusieurs fois
de suite sur + jusqu’à ce que vous
ayez localisé la plage de votre choix.
Tourner ≠ AMS ± dans le sens
antihoraire jusqu’à ce que vous ayez
localisé la plage de votre choix. Si vous
utilisez la télécommande, appuyez
plusieurs fois de suite sur = jusqu’à
ce que vous ayez localisé la plage de
votre choix.
Appuyer sur la touche numérique de la
télécommande correspondant à la plage
voulue
Appuyer sur la touche MUSIC SCAN
de la télécommande avant de démarrer
la lecture. Lorsque vous avez trouvé la
plage de votre choix, appuyez sur
· pour démarrer la lecture.
·
Vous pouvez allonger le temps de lecture pendant le
balayage des intros
Appuyez plusieurs fois de suite sur MUSIC SCAN
jusqu’à ce que le temps de lecture voulu (10, 20 ou 30)
apparaisse dans la fenêtre d’affichage. Chaque fois que
vous appuyez sur cette touche, le temps de lecture
change suivant une séquence cyclique.
Localisation d’un passage
particulier sur une plage
Vous pouvez également localiser un passage déterminé
sur une plage pendant la lecture d’un disque.
0/)
Pour localiser
Un passage en
contrôlant le son
Un passage
rapidement en
observant la fenêtre
d’affichage en mode
de pause
Appuyez sur
) (avant) ou 0 (arrière) et
maintenez-la enfoncée jusqu’à ce que
vous ayez localisé le passage
) (avant) ou 0 (arrière) et
maintenez-la enfoncée jusqu’à ce que
vous ayez localisé le passage. Vous
n’entendez aucun son durant cette
opération.
Remarque
Si l’indication “OVER” apparaît dans la fenêtre d’affichage,
cela signifie que le disque est arrivé à la fin pendant que vous
appuyiez sur la touche ). Appuyez sur 0 ou tournez la
commande ≠ AMS ± dans le sens antihoraire pour
revenir en arrière.
Lecture de plages répétée
Vous pouvez activer la lecture répétée de
disques/plages dans n’importe quel mode.
REPEAT
14
Pour localiser directement une plage portant un numéro
supérieur à 10
Appuyez d’abord sur >10 et ensuite sur les touches
numériques correspondantes de la télécommande. Pour
taper “0”, utilisez la touche 10/0.
Exemple: Pour sélectionner la plage 30
Appuyez d’abord sur >10 et ensuite sur 3 et
sur 10/0.
FR
Appuyez sur REPEAT pendant la lecture d’un disque.
L’indication “REPEAT” apparaît dans la fenêtre
d’affichage. Le lecteur répète la lecture des
disques/plages de la façon suivante :
Page 43

Lecture de disques compacts
Lorsque le disque
Le lecteur répète la lecture
est reproduit en
Lecture continue
ALL DISCS (page 8)
Lecture continue
1 DISC (page 8)
Lecture aléatoire
ALL DISCS (page 15)
Lecture aléatoire
1 DISC (page 15)
Lecture programmée
(page 16)
De toutes les plages de tous les
disques
De toutes les plages du disque
en cours
De toutes les plages de tous les
disques dans un ordre aléatoire
De toutes les plages du disque
en cours dans un ordre aléatoire
Du même programme
Pour annuler la lecture répétée
Appuyez plusieurs fois de suite sur REPEAT jusqu’à ce que
l’indication “REPEAT OFF” apparaisse dans la fenêtre
d’affichage.
Répéter la lecture de la plage en cours
Vous pouvez activer la lecture répétée de la plage en
cours uniquement pendant la lecture d’un disque dans
n’importe quel mode de lecture.
Pendant la lecture de la plage voulue, appuyez
plusieurs fois de suite sur REPEAT jusqu’à ce que
l’indication “REPEAT 1” apparaisse dans la fenêtre
d’affichage.
Pour annuler la lecture répétée 1
Appuyez sur REPEAT.
Lecture aléatoire de tous les disques
Vous pouvez reproduire toutes les plages de tous les
disques dans un ordre aléatoire.
1 Appuyez plusieurs fois de suite sur SHUFFLE
jusqu’à ce que l’indication “ALL DISCS”
apparaisse dans la fenêtre d’affichage.
2 Appuyez sur · pour lancer la lecture aléatoire
ALL DISCS.
L’indication s’affiche pendant que le lecteur
“mélange” les plages.
Pour annuler la lecture aléatoire
Appuyez sur CONTINUE.
Vous pouvez activer la lecture aléatoire en cours de
lecture
Appuyez sur SHUFFLE et la lecture aléatoire démarre à
partir de la plage en cours.
Vous pouvez spécifier des disques pendant la lecture
aléatoire (sélection de lecture aléatoire)
Vous pouvez spécifier des disques en mode de lecture
aléatoire ALL DISCS et les plages des disques spécifiés
sont reproduites dans un ordre aléatoire.
Appuyez sur DISC 1 – 5 pour spécifier les disques après
l’étape 1.
Les demi-cercles apparaissent autour des numéros des
disques spécifiés. Pour annuler les disques sélectionnés,
appuyez à nouveau sur DISC 1 – 5. Les demi-cercles
disparaissent.
Pour revenir au mode de lecture aléatoire ALL DISCS,
appuyez deux fois sur SHUFFLE.
Lecture dans un ordre
quelconque (lecture aléatoire)
Vous pouvez régler le lecteur pour qu’il “mélange” les
plages musicales et les reproduise dans un ordre
quelconque. Le lecteur lit dans un ordre aléatoire
toutes les plages de tous les disques ou du disque que
vous avez spécifié.
SHUFFLE
·DISC 1 – 5
Lecture aléatoire d’un seul disque
Vous pouvez reproduire toutes les plages du disque
spécifié dans un ordre aléatoire.
1 Appuyez plusieurs fois de suite sur SHUFFLE
jusqu’à ce que l’indication “1 DISC” apparaisse
dans la fenêtre d’affichage.
2 Appuyez sur DISC 1 – 5 pour lancer la lecture
aléatoire 1 DISC du disque sélectionné.
L’indication s’affiche pendant que le lecteur
“mélange” les plages.
Pour annuler la lecture aléatoire
Appuyez sur CONTINUE.
Vous pouvez activer la lecture aléatoire en cours de
lecture
Appuyez sur SHUFFLE et la lecture aléatoire démarre à
partir de la plage en cours.
15
FR
Page 44

Lecture de disques compacts
Création de programmes
musicaux personnalisés
(lecture programmée)
Vous pouvez ordonner la succession des plages d’un
disque et ainsi créer un programme musical
personnalisé. Le programme peut contenir jusqu’à
32 “phases” — une “phase” pouvant contenir une
plage ou un disque entier.
PROGRAM DISC 1 – 5
≠ AMS ±
·
3 Tournez ≠ AMS ± jusqu’à ce que le numéro
de la plage voulue apparaisse dans la fenêtre
d’affichage.
Le numéro de la plage en cours de programmation
et la durée totale de lecture avec cette plage
apparaissent dans la fenêtre d’affichage.
Numéro de la plage en
cours de programmationDurée totale de lecture
PROGRAM
DISC TRACK
1 2 3 4 5
MIN SEC
1 5 13.18
A
CD1
25
8
4 Poussez sur ≠ AMS ± pour sélectionner la
plage.
Dernière plage
programmée
Ordre de lecture
16
25
8
25
8
DISC
>10
CHECK
=/+
CHECK
CLEAR
PROGRAM
Touches
numériques
ENTER
CLEAR
·
PROGRAM
DISC TRACK STEP
1 5 3
Après une seconde
PROGRAM
DISC TRACK
1 5 13.18
1 2 3 4 5
CD1
Plages programmées
1 2 3 4 5
MIN SEC
CD1
Durée totale de lecture
A
A
Si vous avez fait une erreur
Appuyez sur CLEAR et répétez ensuite les étapes 3 et 4.
5 Pour programmer d’autres disques ou d’autres
Création d’un programme musical sur le
lecteur
1 Appuyez sur PROGRAM.
L’indication “PROGRAM” apparaît dans la fenêtre
d’affichage.
Si un programme a déjà été mémorisé, la dernière
phase du programme apparaît dans la fenêtre
d’affichage. Si vous voulez effacer le programme en
entier, maintenez la touche CLEAR enfoncée
jusqu’à ce que l’indication “CLEAR” apparaisse
dans la fenêtre d’affichage (voir page 18).
2 Appuyez sur l’une des touches DISC 1 – 5 pour
sélectionner le disque de votre choix.
PROGRAM
DISC TRACK
1 AL 45.28
1 2 3 4 5
MIN SEC
CD1
L’indication “AL” dans la fenêtre d’affichage
désigne l’ensemble des plages (“all”).
Si vous voulez programmer la totalité du disque
comme une seule phase, sautez les étapes 3 et 4 et
FR
passez directement à l’étape 5.
A
12345
678910
plages, procédez comme suit :
Pour programmer
Toutes les plages d’autres
disques
d’autres plages du même disque
d’autres plages d’autres disques
Répétez les étapes
2
3 et 4
2 à 4
6 Appuyez sur · pour démarrer la lecture
programmée.
Pour annuler la lecture programmée
Appuyez sur CONTINUE.
Vous pouvez créer votre programme de lecture en
vérifiant la face imprimée des disques
Lorsque le plateau de lecture est ouvert, appliquez les
étapes 1 à 6 en appuyant sur la touche DISC SKIP pour
vérifier la face imprimée des disques. Si vous refermez le
plateau de lecture avant l’étape 6, la durée totale de lecture
apparaît dans la fenêtre d’affichage au bout d’un moment.
Faites attention que, si le lecteur ne trouve pas le numéro
de la plage programmée sur le disque, cette étape est
automatiquement supprimée.
Page 45

Lecture de disques compacts
Le programme de lecture reste en mémoire même
lorsque la lecture programmée se termine
Vous pouvez à nouveau écouter le même programme de
lecture en appuyant sur la touche ·.
Le programme reste en mémoire jusqu’à ce que vous
l’effaciez ou que vous mettiez le lecteur hors tension
Si vous remplacez des disques, le disque programmé et
les numéros de plage restent. Ainsi, le lecteur reproduit
uniquement les numéros de disque et de plage existants.
Cependant, les numéros de disque et de plage que le
lecteur ne trouve pas sur le plateau ou sur les disques
sont effacés du programme et le reste du programme est
reproduit dans l’ordre de la programmation.
Remarque
Le temps de lecture total n’apparaît pas dans les cas suivants:
—Vous avez programmé une plage dont le numéro est au-
delà de 20.
—La durée totale de lecture du programme dépasse
200 minutes.
Création d’un programme à l’aide de la
télécommande
1 Appuyez sur PROGRAM.
L’indication “PROGRAM” apparaît dans la fenêtre
d’affichage.
6 Appuyez sur ENTER pour sélectionner la plage.
Dernière plage
programmée
PROGRAM
DISC TRACK STEP
1 5 3
Après une seconde
PROGRAM
DISC TRACK
1 5 13.18
Durée totale de lecture
Ordre de lecture
1 2 3 4 5
1 2 3 4 5
MIN SEC
A
CD1
25
8
Plages programmées
A
CD1
25
8
7 Pour programmer d’autres disques ou d’autres
plages, procédez comme suit:
Pour programmer
Toutes les plages d’autres
disques
D’autres plages du même disque
D’autres plages sur d’autres
disques
Répétez les étapes
2 à 4
5 et 6
2 à 6
8 Appuyez sur · pour démarrer la lecture
programmée.
2 Appuyez sur DISC.
PROGRAM
1 2 3 4 5
DISC-[_]
A
CD1
2
8
3 Appuyez sur la touche numérique correspondant
au disque voulu.
PROGRAM
1 2 3 4 5
DISC-[1]
A
CD1
2
8
4 Appuyez sur ENTER pour sélectionner le disque.
PROGRAM
DISC TRACK
1 AL 45.28
1 2 3 4 5
MIN SEC
CD1
Si vous voulez programmer le disque complet
comme une seule phase, sautez les étapes 5 à 6 et
passez directement à l’étape 7.
A
12345
678910
5 Appuyez sur =/+ jusqu’à ce que le numéro
de la plage voulue apparaisse dans la fenêtre
d’affichage.
Durée totale de lecture
PROGRAM
DISC TRACK
1 2 3 4 5
1 5 13.18
Numéro de la plage en
cours de programmation
MIN SEC
A
CD1
25
8
Pour annuler la lecture programmée
Appuyez sur CONTINUE.
Vous pouvez sélectionner une plage directement à
l’aide des touches numériques
Appuyez sur la touche numérique correspondant à la
plage voulue à l’étape 5. Pour sélectionner une plage
portant un numéro supérieur à 10, utilisez la touche >10
(voir page 14).
Vous pouvez créer votre programme de lecture en
contrôlant la face imprimée des disques
Lorsque le plateau de lecture est ouvert, appliquez les
étapes 1 à 8 tout en maintenant la touche DISC SKIP
enfoncée de manière à pouvoir vérifier la face imprimée
des disques. Si vous refermez le plateau de lecture avant
l’étape 8, la durée totale de lecture apparaît dans la
fenêtre d’affichage au bout d’un moment.
Faites attention que si l’appareil ne trouve pas le numéro
de la plage programmée sur le disque, cette étape est
automatiquement annulée.
Remarque
La durée totale de lecture ne s’affiche pas si:
—Vous avez programmé une plage portant un numéro
supérieur à 20.
—La durée totale de lecture du programme musical dépasse
200 minutes.
17
FR
Page 46

Lecture de disques compacts
Vérification de l’ordre des plages
Vous pouvez vérifier votre programme avant ou après
que vous avez activé la lecture.
Contrôle d’un autre lecteur CD
(fonction Mega Control
Appuyez sur CHECK.
Chaque pression sur cette touche fait apparaître dans
la fenêtre d’affichage la plage (les numéros de disque et
de plage) ou le disque (numéro de disque et indication
“AL”) de chaque étape dans l’ordre programmé. Après
la dernière étape du programme, la fenêtre d’affichage
indique “END” et revient à l’indication de départ. Si
vous vérifiez l’ordre des plages après avoir activé la
lecture, la fenêtre d’affichage indique uniquement les
étapes restantes.
Changer l’ordre des plages
Vous pouvez modifier votre programme avant de
lancer la lecture.
Pour
Supprimer une plage
Supprimer la dernière plage
du programme
Ajouter des plages à la fin du
programme
Effacer complètement le
programme
Vous devez
Appuyer sur CHECK jusqu’à
ce que la plage jugée inutile
apparaisse dans la fenêtre
d’affichage et appuyez
ensuite sur CLEAR
Appuyer sur CLEAR. Chaque
fois que vous appuyez sur
cette touche, la dernière plage
est supprimée.
Appliquer la procédure de
programmation
Maintenir la touche CLEAR
enfoncée jusqu’à ce que
“CLEAR” apparaisse dans la
fenêtre d’affichage. Créez un
nouveau programme en
appliquant la procédure de
programmation.
avancée)
Cet appareil peut commander un second lecteur CD
(voir “Connexion d’un autre lecteur CD” aux
pages 6 et 7).
Même lorsqu’un second lecteur CD est raccordé, les
commandes des deux appareils seront opérantes.
Lorsque vous appuyez sur la touche de lecture de l’un
des deux lecteurs, le lecteur en cours de
fonctionnement s’arrête et le lecteur au repos se met en
route.
Notez qu’en fonction du lecteur, il est possible que
vous ne pouviez pas utiliser toutes les fonctions du
second lecteur de CD.
Les commandes indiquées dans l’illustration ci-dessous sont
opérantes pendant que la touche MEGA CONTROL est
allumée.
Touches de mode de lecture
(CONTINUE/SHUFFLE/
PROGRAM/REPEAT)
INPUT CLEAR
0 (–AMS+) )
·Pp
Lecture de disques sur le second lecteur CD
1 Appuyez sur MEGA CONTROL.
La touche MEGA CONTROL s’allume et la fenêtre
d’affichage indique le numéro du disque en cours
du second lecteur.
Numéro du disque en cours
AMS
≠
MEGA CONTROL
(DISC)
±
18
DISCSALL
DISC
*DISC-1*
CD1
2 Sélectionnez le mode de lecture que vous désirez.
Pour programmer des plages, utilisez les
commandes du second lecteur.
3 Appuyez sur · pour démarrer la lecture.
La lecture commence et la fenêtre d’affichage
indique les numéros du disque en cours et de la
plage ainsi que la durée de lecture de la plage.
Pendant que la touche MEGA CONTROL est
allumée, vous pouvez commander le second
lecteur de la façon suivante à l’aide des
FR
commandes de ce lecteur:
Page 47

Lecture de disques compacts
Pour
Activer une pause
Arrêter la lecture
Localiser un disque alors
que le second lecteur est
en mode de lecture
continue
Localiser une plage
• Pour effectuer d’autres opérations, utilisez les commandes
du second lecteur ou de la télécommande fournie.
• Les touches AMS (=/+) et les touches de recherche
(0/)) de la télécommande commandent le second
lecteur comme indiqué sur la télécommande.
Vous devez
Appuyer sur P
Appuyer sur p
±
AMS
(DISC)
± jusqu’à
Tourner ≠
ce que la fenêtre d’affichage
indique le numéro du disque
voulu et pousser ensuite sur
AMS
≠
(DISC)
Appuyer sur 0 (–AMS+) )
jusqu’à ce que la fenêtre
d’affichage indique le numéro de
la plage voulue
Pour contrôler le second lecteur directement à l’aide de la
télécommande fournie
Réglez CD 1/2/3 de la télécommande sur CD 3, qui
coorespond à la position du sélecteur COMMAND MODE
situé sur le panneau arrière du second lecteur.
Pour à nouveau commander ce lecteur
Appuyez sur MEGA CONTROL. La touche
MEGA CONTROL s’éteint et vous pouvez commander ce
lecteur.
Remarques
• Vous ne pouvez pas localiser un passage déterminé sur une
plage sur le second lecteur en utilisant les commandes de ce
lecteur.
• Certaines commandes de ce lecteur agissent différemment
sur le second lecteur que sur ce lecteur.
3 Poussez sur ≠ AMS ±.
Ce lecteur démarre le chargement. (Le chargement
prend environ une minute.)
Remarque
Si les mémos des disques du second lecteur CD comportent
plus de 12 caractères, seuls les 12 premiers caractères de
chacun d’entre eux sont chargés sur ce lecteur.
Identification des disques du second
lecteur CD
Vous pouvez identifier les disques du second lecteur
CD ou changer les mémos de disque chargés depuis le
second lecteur CD.
1 Appuyez sur MEGA CONTROL.
La touche MEGA CONTROL s’allume.
2 Appuyez sur CONTINUE.
±.
AMS
± pour sélectionner le
(DISC)
3 Tournez ≠
disque voulu et poussez ensuite sur
AMS
≠
(DISC)
4 Appuyez sur INPUT.
±.
AMS
± jusqu’à ce que
(DISC)
5 Tournez ≠
l’indication “DISC MEMO” apparaisse dans la
fenêtre d’affichage et poussez ensuite sur
AMS
≠
(DISC)
6 Introduisez le nouveau mémo de disque en
appliquant la procédure d’ “Identification des
disques” des pages 24 à 26.
Chargement des mémos de disque du
second lecteur CD
Si le second lecteur CD est doté de la fonction
mémo de disque (voir page 24), vous pouvez charger
les mémos des disques du second lecteur CD dans la
mémoire de ce lecteur et les afficher sur ce lecteur.
1 Appuyez sur INPUT.
2 Tournez ≠ AMS ± jusqu’à ce que l’indication
“LOADING MEMO” apparaisse dans la fenêtre
d’affichage.
DISCSALL
DISC TRACK
1 2 3 4 5
MIN SEC
LOADING MEMO
CD1
12345
678910
Remarque
Comme les nouveaux mémos de disque sont enregistrés dans
la mémoire de ce lecteur, vous ne pouvez pas les afficher sur
le second lecteur CD.
19
FR
Page 48

Lecture de disques compacts
Lecture alternée (Lecture sans
transition/Lecture enchaînée)
3 Appuyez sur · pour entamer la lecture.
La touche MEGA CONTROL s’allume pendant
que la plage du second lecteur est sélectionnée.
Lorsque vous raccordez le second lecteur, vous pouvez
reproduire alternativement les plages de ce lecteur et
celles du second lecteur dans n’importe quel mode de
lecture (voir “Connexion d’un autre lecteur CD” aux
pages 6 et 7).
Sélectionnez l’une des méthodes suivantes:
• Lecture sans transition (No-Delay Play): le lecteur en
cours change à chaque plage. Chaque fois que le
lecteur en cours passe au lecteur suivant, l’autre
lecteur commence la lecture sans interruption du
son, immédiatement après que le lecteur en cours
s’est arrêté de reproduire la plage. L’autre lecteur
saute la portion d’introduction et commence la
lecture là où commence réellement le son.
• Lecture enchaînée (X-Fade Play): le lecteur en cours
change à chaque plage ou à l’intervalle spécifié. Vous
pouvez sélectionner l’intervalle parmi 30, 60 et 90
secondes. Chaque fois que le lecteur en cours passe à
l’autre lecteur, le son des deux lecteurs est mixé. La
plage du lecteur en cours se termine en fondu et la
plage de l’autre lecteur commence en fondu.
·
X-FADENO DELAY
Pour vérifier le statut du mode enchaînée
Appuyez une fois sur X-FADE.
Le statut du mode enchaînée apparaît brièvement.
Pour annuler la lecture sans transition/enchaînée
Appuyez plusieurs fois de suite sur la touche correspondante
jusqu’à ce que la touche s’éteigne. Le lecteur en cours poursuit
la lecture.
Vous pouvez changer de méthode (lecture sans
transition ou lecture enchaînée) pendant la lecture
Appuyez sur la touche correspondante (NO DELAY ou
X-FADE) en suivant la procédure décrite à l’étape 2.
Vous pouvez démarrer la lecture enchaînée quand
vous le voulez
Appuyez sur FADER en cours de lecture enchaînée.
Même après que vous avez défini le mode enchaînée et
démarré la lecture enchaînée, vous pouvez lancer
manuellement la lecture enchaînée à l’endroit que vous
désirez. Faites attention que vous ne pouvez pas effectuer
cette opération pendant que le son des deux lecteurs est
mixé.
Remarques
• La lecture démarre sur le second lecteur si vous entamez la
lecture lorsque la touche MEGA CONTROL est allumée.
• Lorsqu’un lecteur a reproduit tous les disques/plages du
lecteur avant l’autre lecteur, la lecture s’arrête.
• N’utilisez pas les commandes du second lecteur pendant la
lecture sans transition/lecture enchaînée. Il se peut qu’elles
ne fonctionnent pas correctement.
20
1 Sélectionnez le mode de lecture que vous désirez
sur chaque lecteur.
2 Lorsque vous sélectionnez la lecture sans transition
Appuyez sur NO DELAY.
La touche NO DELAY s’allume.
Lorsque vous sélectionnez la lecture enchaînée
Chaque fois que vous appuyez sur la touche
X-FADE, l’indication (mode enchaînée) apparaît
comme suit:
X-FADE off n at track end n after 30 sec
after 90 sec N after 60 sec N
Pour permuter de lecteur chaque fois qu’une plage
entière est terminée, sélectionnez “at track end”.
Pour permuter de lecteur après un intervalle
spécifié, appuyez plusieurs fois sur X-FADE
jusqu’à ce que l’intervalle désiré apparaisse dans la
FR
fenêtre d’affichage.
Page 49

Enregistrement de disques compacts
Enregistrement de votre
programme musical
Vous pouvez enregistrer le programme musical que
vous venez de créer sur une cassette, etc. Le
programme peut contenir jusqu’à 32 phases.
En insérant une pause dans la programmation, vous
pouvez diviser le programme en deux parties de
manière à pouvoir l’enregistrer sur les deux faces
d’une cassette.
Enregistrement de disques compacts
Enregistrement de disques compacts
Vous pouvez vérifier et modifier le programme
Voir page 18.
L’indication A s’affiche pendant que vous contrôlez le
programme pour la face A et B pendant la
vérification du programme de la face B.
Enregistrement d’un CD en
spécifiant la longueur de
bande (montage programmé)
PROGRAM DISC 1 – 5
P
·
≠ AMS ±
1 Créez votre propre programme (pour la face A lors
de l’enregistrement sur une cassette) en contrôlant
la durée totale de lecture indiquée dans la fenêtre
d’affichage.
Appliquez les étapes 1 à 5 de la procédure
“Création d’un programme musical sur le lecteur”
à la page 16.
L’indication
d’affichage.
A
apparaît dans la fenêtre
2 Si vous enregistrez sur les deux faces de la cassette,
appuyez sur P pour insérer une pause.
Les indications “PAUSE” et
dans la fenêtre d’affichage et le temps de lecture
est ramené à “0.00”.
Si vous enregistrez sur une seule face de la
cassette, sautez cette étape et passez directement à
l’étape 4.
Une pause est comptée comme une phase
Lorsque vous insérez une pause, vous pouvez
programmer jusqu’à 31 phases.
A B
apparaissent
3 Répétez les étapes 2 à 5 de la procédure “Création
d’un programme musical sur le lecteur” pour créer
le programme de lecture pour la face B.
4 Lancez l’enregistrement sur la platine et appuyez
ensuite sur la touche · du lecteur.
Si vous enregistrez sur les deux faces de la cassette,
le lecteur passe en mode de pause à la fin du
programme pour la face A.
5 Si vous enregistrez sur la face B, retournez la
cassette et appuyez sur la touche · ou P du
lecteur pour reprendre la lecture.
Le lecteur crée automatiquement un programme
adapté à la durée de la cassette en respectant l’ordre
original des plages du disque.
Le programme peut contenir jusqu’à 32 phases (une
pause insérée entre deux phases est comptée comme
une phase).
Faites attention que les plages portant un numéro
supérieur à 20 ne peuvent être programmées suivant la
procédure automatique.
DISC SKIP
P
·
EDIT/TIME FADE
0/)
1 Appuyez sur DISC SKIP pour sélectionner le
disque.
2 Appuyez plusieurs fois de suite sur
EDIT/TIME FADE avant de lancer la lecture
jusqu’à ce que “TIME EDIT” apparaisse et que le
“A” de l’indication
d’affichage.
A
clignote dans la fenêtre
3 Appuyez sur 0 ou sur ) pour spécifier la
longueur de bande.
Chaque fois que vous appuyez sur ces touches,
l’affichage change comme indiqué ci-dessous avec
la longueur de bande pour une face.
n C-46 23.00 N
n - -. - - N
n C-54 27.00 N
n C-90 45.00 N
n C-60 30.00 N
n C-74 37.00 N
4 Appuyez sur EDIT/TIME FADE pour lancer la
création du programme par le lecteur.
Le calendrier musical indique les plages à
enregistrer sur la face A. Le “B” de l’indication
B
clignote dans la fenêtre d’affichage.
(suite page suivante)
21
FR
Page 50

Enregistrement de disques compacts
5 Si vous enregistrez sur les deux faces de la cassette,
appuyez à nouveau sur EDIT/TIME FADE.
Le lecteur insère une pause, et crée le programme
pour la face B. Le calendrier musical indique les
plages programmées.
Si vous enregistrez sur une seule face de la
cassette, sautez cette étape.
6 Lancez l’enregistrement sur la platine et appuyez
ensuite sur · du lecteur.
Si vous enregistrez sur les deux faces de la cassette,
le lecteur passe en mode de pause à la fin du
programme pour la face A.
7 Si vous enregistrez également sur la face B,
retournez la cassette et appuyez sur · ou P du
lecteur pour reprendre la lecture.
Pour annuler le montage programmé
Appuyez sur CONTINUE.
Vous pouvez programmer en avance les plages de
votre choix
Sélectionnez les plages avant d’appliquer la procédure
ci-dessus. Le lecteur crée un programme avec les plages
restantes.
Vous pouvez déterminer librement la durée de la
cassette
Réglez la longueur de bande à l’étape 3 à l’aide de la
commande ≠ AMS ±.
Exemple: Si la durée d’une face est de 30 minutes et 15
secondes
1 Pour régler les minutes, tournez
≠ AMS ± jusqu’à ce que “30”
apparaisse dans la fenêtre d’affichage et
poussez ensuite sur ≠ AMS ±.
2 Pour régler les secondes, tournez
≠ AMS ± jusqu’à ce que “15”
apparaisse dans la fenêtre d’affichage et
poussez ensuite sur ≠ AMS ±.
Vous pouvez vérifier et modifier le programme
Voir page 18.
Fondu enchaîné d’entrée et de
sortie
Vous pouvez réaliser manuellement un fondu enchaîné
d’entrée ou de sortie pour éviter que les plages
commencent et s’arrêtent brusquement.
Attention que vous ne pouvez appliquer cet effet si
vous utilisez le connecteur DIGITAL OUT (OPTICAL).
·
P
FADER
Pour
Créer un fondu
enchaîné d’entrée
Créer un fondu
enchaîné de sortie
EDIT/TIME FADE
Appuyez sur FADER
Pendant la pause.
dans la fenêtre d’affichage et
l’indication Q clignote. Un fondu
enchaîné d’entrée est intégré.
Lorsque vous voulez commencer le
fondu enchaîné de sortie.
s’allume dans la fenêtre d’affichage
et l’indication q clignote. Un fondu
enchaîné de sortie est intégré et le
lecteur passe en mode de pause.
Remarque
Le fondu enchaîné dure environ 5 secondes. Cependant, si
vous appuyez sur la touche FADER durant le balayage des
intros (voir page 14), la lecture intègre un fondu enchaîné de
sortie d’environ 2 secondes.
Changement de la durée du fondu enchaîné
Vous pouvez changer la durée du fondu enchaîné
entre 2 et 10 secondes avant un fondu enchaîné
d’entrée ou de sortie. Si vous ne la changez pas, cette
durée est de 5 secondes.
0/)
FADE
s’allume
FADE
22
1 Appuyez sur FADER avant de démarrer la lecture.
L’indication “FADE 5 SEC” apparaît dans la
fenêtre d’affichage.
2 Appuyez sur 0/) pour spécifier la durée du
fondu enchaîné.
FR
Page 51

Fondu enchaîné de sortie à l’instant spécifié
(fondu programmé)
Vous pouvez programmer le lecteur pour qu’il intègre
automatiquement un fondu enchaîné de sortie en
spécifiant le temps de lecture. Une fois défini, le fondu
programmé est activé deux fois, en ce sens que la
lecture se termine par un fondu enchaîné de sortie à la
fin de chacune des faces de la cassette.
1 Appuyez plusieurs fois sur EDIT/TIME FADE
avant de lancer la lecture jusqu’à ce que
“A” de l’indication
fenêtre d’affichage.
A
apparaissent dans la
TIME
FADE
et
2 Appuyez sur 0 ou sur ) pour spécifier le
temps de lecture.
Chaque fois que vous appuyez sur ces touches,
l’affichage change comme indiqué ci-dessous avec
la durée de lecture d’une face.
n C-46 23.00 N
n - -. - - N
n C-54 27.00 N
n C-90 45.00 N
n C-60 30.00 N
n C-74 37.00 N
3 Appuyez sur · pour lancer la lecture.
Au moment spécifié, la lecture se termine par un
fondu enchaîné de sortie et le lecteur passe en
mode de pause. Le “B” de l’indication
apparaît dans la fenêtre d’affichage.
B
4 Pour enregistrer sur la face B, retournez la cassette
et appuyez sur · ou P du lecteur pour reprendre
la lecture.
Dans ce cas-ci également, la lecture se termine par
un fondu enchaîné de sortie au moment spécifié.
Enregistrement de disques compacts
Enregistrement de disques compacts
Réglage du niveau
d’enregistrement (recherche
du niveau de crête)
Le lecteur recherche le niveau maximal parmi toutes
les plages à enregistrer pour vous permettre de régler
le niveau d’enregistrement avant le début de
l’enregistrement.
PEAK SEARCH p
1 Avant de lancer la lecture, appuyez sur
PEAK SEARCH.
L’indication “PEAK” clignote dans la fenêtre
d’affichage et le lecteur commence à balayer le
disque pour trouver le niveau maximal.
Après avoir balayé toutes les plages, le lecteur
reproduit le passage qui présente le niveau
maximal.
2 Réglez le niveau d’enregistrement sur la platine.
3 Appuyez sur p du lecteur pour stopper la
recherche du niveau de crête.
L’indication “PEAK” disparaît de la fenêtre
d’affichage.
Pour annuler le fondu programmé
Appuyez sur EDIT/TIME FADE.
Vous pouvez déterminer le temps de lecture de votre
choix
Reportez-vous à la section “Vous pouvez déterminer
librement la durée de la cassette” à la page 22.
Vous pouvez changer de disque lors d’un fondu
programmé
La durée du fondu enchaîné est uniquement comptée
pendant la lecture. De cette façon, vous pouvez changer
des disques si la lecture se termine avant la durée de
fondu spécifiée (par exemple, lors de l’enregistrement de
CD singles sur une cassette).
Vous pouvez intégrer un fondu enchaîné d’entrée
pour la reprise de la lecture à l’étape 4
Après avoir retourné la cassette, appuyez sur FADER.
Remarque
Si vous appuyez sur la touche 0 ou ) en cours de lecture
en fondu programmé, le fondu programmé est désactivé.
Remarques
• Le passage qui comporte le niveau de crête peut changer
chaque fois que vous procédez au réglage d’un même
disque. Cette différence est cependant négligeable, de telle
sorte que vous n’aurez aucun problème à régler le niveau
d’enregistrement avec précision.
• La fonction de recherche du niveau de crête est inopérante
si vous ouvrez le plateau de lecture en appuyant sur la
touche EX-CHANGE.
23
FR
Page 52

Enregistrement d’informations relatives aux disques compacts (fichiers personnalisés)
Enregistrement d’informations relatives aux disques compacts (fichiers personnalisés)
Lorsque vous sélectionnez un disque CD TEXT
Emploi des fichiers
personnalisés
Le lecteur peut mémoriser pour chaque disque deux
types d’informations désignées “Fichiers
personnalisés”. Lorsque vous avez mémorisé des
fichiers personnalisés pour un disque, le lecteur
rappelle automatiquement ce que vous avez mémorisé
chaque fois que vous sélectionnez le disque. Faites
attention que les fichiers personnalisés s’effacent si
vous n’utilisez pas le lecteur pendant environ un mois.
Le titre du disque est mémorisé automatiquement
comme le mémo du disque.
Si le titre du disque comporte plus de 12 caractères, ce
sont les 12 premiers caractères du titre qui sont
mémorisés (voir page 11).
Faites attention que vous ne pouvez pas changer le
mémo d’un disque CD TEXT.
Identification de disques sur le lecteur
≠ AMS ±
Vous pouvez enregistrer les informations
suivantes:
Lorsque vous activez
Mémo de disque
(page 24)
Bloc de suppression
(page 26)
Vous pouvez
Identifier des disques au moyen de
12 caractères
Supprimer des plages indésirables et
ne mémoriser que les plages voulues
Support d’enregistrement des fichiers
personnalisés
Les fichiers personnalisés ne sont pas enregistrés sur le
disque, mais dans la zone de mémoire du lecteur. En
d’autres termes, vous ne pouvez utiliser les fichiers
personnalisés si vous jouez ce disque sur un autre
lecteur.
Suppression de tous les fichiers
personnalisés de tous les disques
Mettez le lecteur hors tension. Tout en maintenant la
touche CLEAR enfoncée, appuyez sur 1/u pour mettre
le lecteur sous tension. L’indication “ALL ERASE”
apparaît dans la fenêtre d’affichage et tous les fichiers
personnalisés sont effacés.
INPUT CLEAR
1 Introduisez ou sélectionnez un disque.
2 Appuyez sur INPUT.
3 Tournez ≠ AMS ± jusqu’à ce que l’indication
“DISC MEMO” apparaisse dans la fenêtre
d’affichage et poussez ensuite sur ≠ AMS ±.
Le curseur clignotant (Z) apparaît.
4 Tournez la commande ≠ AMS ± jusqu’à ce
que le caractère voulu apparaisse dans la fenêtre
d’affichage.
Le curseur disparaît et le premier espace pour le
mémo de disque clignote.
En tournant la commande ≠ AMS ± dans le
sens horaire, les caractères apparaissent dans
l’ordre suivant. Tournez la commande
≠ AMS ± dans le sens antihoraire pour
revenir au caractère précédent.
(espace) A B C D E F G H I J K L M N O P Q R S T
U V W X Y Z a b c d e f g h i j k l m n o p q r s t u v
w x y z 0 1 2 3 4 5 6 7 8 9 ! " # $ % & ' ( ) * + , – . / : ;
< = > ? @ [ \ ] ^ _ { | }
-
24
Identification des disques
DISCSALL
DISC
S
1 2 3 4 5
CD1
12345
678910
(mémo de disque)
5 Poussez sur ≠ AMS ± pour sélectionner le
Vous pouvez identifier les disques au moyen de
12 caractères et faire afficher le mémo de disque par le
lecteur chaque fois que vous sélectionnez le disque. Le
mémo de disque peut être une appellation au choix,
par exemple un titre, le nom d’un musicien, une
catégorie ou encore la date d’achat.
FR
caractère.
Le caractère sélectionné s’allume et le curseur
clignotant apparaît pour indiquer l’espace suivant
à compléter.
DISCSALL
DISC
S
1 2 3 4 5
CD1
12345
678910
Page 53

Enregistrement d’informations relatives aux disques compacts (fichiers personnalisés)
Pour insérer un espace
Appuyez sur ).
Si vous avez fait une erreur
Appuyez sur CLEAR et introduisez les caractères
corrects.
6 Répétez les étapes 4 et 5 pour introduire d’autres
caractères.
7 Appuyez sur INPUT pour mémoriser le mémo de
disque.
Répétez les étapes 1 à 7 pour attribuer des mémos
à d’autres disques.
Identification de disques à l’aide de la
télécommande Z
SPACE
DISC/CAPS
Touches
numériques
MEMO INPUT
0/)
DEL
ENTER
CLEAR
1 Appuyez sur DISC/CAPS.
2 Appuyez sur la touche numérique du disque
auquel vous voulez attribuer mémo de disque et
appuyez ensuite sur ENTER.
3 Appuyez sur MEMO INPUT.
Le curseur clignotant (Z) apparaît.
4 Appuyez sur DISC/CAPS pour sélectionner la
police de caractères de votre choix.
Chaque fois que vous appuyez sur cette touche, la
police de caractères change selon la séquence
suivante: majuscules (ABC), minuscules (abc) et
chiffres (123). Pour choisir un symbole, il faut
sélectionner les majuscules ou les minuscules.
5 Pour introduire un caractère, appuyez sur la
touche numérique correspondant au caractère
voulu (indiqué à côté de chaque touche
numérique).
Le curseur disparaît et le premier espace pour le
mémo de disque clignote.
Chaque fois que vous appuyez sur cette touche, les
caractères indiqués à côté de la touche s’affichent
alternativement.
Pour introduire des symboles, appuyez plusieurs
fois de suite sur la touche numérique 1 jusqu’à ce
que le symbole apparaisse dans la fenêtre
d’affichage.
ABC DEF&!?
JKL MNOGHI
TUV WXYPRS
QZ
>
10
Caractères attribués à chaque touche numérique
Example: Pour sélectionner la lettre E
Appuyez deux fois sur la touche
numérique 3.
n D n E n F
Appuyez sur 3. Appuyez sur 3.
Appuyez sur 3.
Pour insérer un espace, appuyez une fois sur
SPACE.
Pour introduire un nombre, appuyez sur la touche
numérique voulue.
ENTER
6 Appuyez sur ENTER pour sélectionner le caractère.
Le caractère sélectionné s’allume et le curseur
clignotant apparaît pour indiquer l’espace suivant
à compléter.
Vous pouvez également passer à l’espace suivant
en appuyant sur d’autres touches numériques.
7 Répétez les étapes 4 à 6 pour introduire d’autres
caractères.
8 Appuyez sur MEMO INPUT pour enregistrer le
mémo de disque.
Répétez les étapes 1 à 8 pour attribuer des mémos
de disque à d’autres disques.
25
FR
Page 54

Enregistrement d’informations relatives aux disques compacts (fichiers personnalisés)
Si vous avez fait une erreur lors de la saisie des
caractères
Pour corriger un caractère qui a été introduit
1 Appuyez sur 0 ou ) jusqu’à ce que le curseur se
place en regard du caractère incorrect.
Mémorisation de plages
spécifiques (bloc de
suppression)
DISCSALL
DISC
Symphe y No1
2 Appuyez sur DEL pour effacer le caractère incorrect.
DISCSALL
DISC
Symph y No1
3 Introduisez le caractère correct.
DISCSALL
DISC
Symphony No1
1 2 3 4 5
CD1
1 2 3 4 5
CD1
1 2 3 4 5
CD1
12345
678910
12345
678910
12345
678910
Pour corriger le caractère pendant la saisie
1 Appuyez sur DEL pour effacer le caractère incorrect.
2 Introduisez le caractère correct.
Pour insérer un caractère entre les caractères
introduits
Appuyez sur 0 ou ) jusqu’à ce que le curseur se
place à l’endroit où vous voulez insérer un caractère et
introduisez-le.
Suppression du mémo de disque
1 Suivez les étapes 1 et 3 de “Identification de
disques sur le lecteur” à la page 24 pour
sélectionner le mémo de disque que vous désirez
supprimer.
2 Appuyez sur CLEAR.
Le mémo de disque disparaît.
3 Appuyez sur INPUT.
Vous pouvez supprimer les plages indésirables et
mémoriser uniquement les plages que vous voulez
écouter. Lorsque vous sélectionnez un disque
comprenant un bloc de suppression, vous ne pouvez
reproduire que les plages restantes.
SHUFFLECONTINUE
CLEARCHECK
1 Introduisez ou sélectionnez un disque.
2 Appuyez sur CONTINUE ou SHUFFLE avant de
démarrer la lecture.
3 Appuyez plusieurs fois de suite sur CHECK
jusqu’à ce que la plage à supprimer apparaisse
dans la fenêtre d’affichage.
DISCSALL
DISC TRACK
1 2 3 4 5
1 1 ON
CD1
12345
678910
4 Appuyez sur CLEAR.
”DELETE” et “OFF” apparaissent dans la fenêtre
d’affichage.
DISCSALL
DISC TRACK
1 1 OFF
1 2 3 4 5
DELETE
CD1
Si vous souhaitez restaurer la plage, appuyez à
nouveau sur CLEAR.
2345
678910
26
5 Répétez les étapes 3 et 4 pour supprimer d’autres
plages.
Vous pouvez restaurer toutes les plages que vous
avez supprimées
Maintenez la touche CLEAR enfoncée jusqu’à ce que
“ALL SELECT” apparaisse dans la fenêtre d’affichage.
Remarque
Les plages supprimées sont omises dans les modes de lecture
aléatoire ou programmée (si la totalité du disque comprenant
un bloc de suppression a été programmé comme une seule
FR
phase).
Page 55

Mémorisation d’informations sur les disques compacts (fichiers de lecture personnalisée) (CDP-CE505 uniquement)
Informations complémentaires
Précautions
Sécurité
• Attention — L’utilisation d’instruments optiques avec ce
produit augmente les risques de blessures aux yeux.
• Si un objet ou un liquide quelconque pénètre à l’intérieur
du boîtier, débranchez le lecteur et ne l’utilisez plus avant
de l’avoir fait contrôler par un personnel qualifié.
Alimentation
• Avant d’utiliser le lecteur, assurez-vous que la tension
d’utilisation de l’appareil est identique à celle de
l’alimentation secteur locale. La tension d’utilisation est
indiquée sur la plaque signalétique fixée au dos du lecteur.
• Le lecteur reste branché sur l’alimentation secteur tant qu’il
est raccordé à la prise murale, même si l’appareil a
préalablement été mis hors tension.
• Si vous prévoyez de ne pas utiliser le lecteur pendant une
période prolongée, débranchez-le de la prise murale. Pour
déconnecter le cordon d’alimentation, tirez sur la fiche; ne
tirez jamais sur le cordon proprement dit.
• Le cordon d’alimentation peut uniquement être remplacé
par un centre de service après-vente agréé.
Installation
• Installez le lecteur dans un lieu suffisamment ventilé afin
de prévenir tout risque de surchauffe à l’intérieur du
boîtier.
• Ne pas installer le lecteur sur une surface souple comme un
tapis qui risquerait d’obstruer les ouïes de ventilation
situées sur la base de l’appareil.
• Ne pas installer le lecteur à proximité de sources de chaleur
ou dans un endroit excessivement poussiéreux, soumis à la
lumière directe du soleil ou à des vibrations ou des chocs
mécaniques importants.
Utilisation
• Si vous transportez soudainement le lecteur d’une pièce
froide dans une pièce chaude ou si vous l’installez dans une
pièce particulièrement humide, de la condensation peut se
former sur les lentilles montées à l’intérieur du lecteur. Le
fonctionnement du lecteur risque d’en être affecté. En pareil
cas, retirez le disque du plateau de lecture et laissez le
lecteur sous tension pendant environ une heure pour
permettre à l’humidité de s’évaporer.
Réglage du volume
• N’augmentez pas le volume lorsque vous écoutez un
passage offrant un niveau d’entrée très faible ou aucun
signal sonore. Vous risquez en effet d’endommager les
haut-parleurs lors de la lecture d’un passage présentant un
niveau d’entrée très élevé.
Entretien
• Nettoyez le boîtier, la console et les commandes à l’aide
d’un chiffon doux imprégné d’une solution détergente
neutre. N’utilisez pas de tampon abrasif, de poudre à
récurer ou de solvant tel que l’alcool ou le benzène.
Remarques sur les disques
compacts
Manipulation des disques compacts
• Pour que les disques restent propres, saisissez-les par le
bord sans en toucher la surface.
• Ne collez pas de papier ni de ruban adhésif sur les disques.
• N’exposez pas les disques à la lumière directe du soleil ou à
des sources de chaleur telles que des conduites d’air chaud
et ne les laissez pas dans une voiture parquée au soleil car
la température est susceptible d’atteindre un niveau élevé à
l’intérieur de l’habitacle.
• N’utilisez pas de stabilisateurs disponibles dans le
commerce. Sinon, vous risquez d’endommager les disques
et le lecteur.
• Après lecture, rangez les disques dans leur boîtier de
protection.
Entretien
• Avant la lecture d’un disque, nettoyez-le à l’aide d’un
chiffon prévu à cet effet. Essuyez les disques en allant du
centre vers la périphérie.
• N’utilisez pas de solvants tels que le benzène, les diluants
pour peinture, les détergents disponibles dans le commerce
ou les bombes antistatiques destinées aux disques noirs en
vinyle.
Si vous éprouvez la moindre difficulté concernant
votre lecteur, n’hésitez pas à consulter votre revendeur
Sony.
27
FR
Page 56

Informations complémentaires
Dépannage
Si vous éprouvez l’une des difficultés suivantes lors de
l’utilisation de ce lecteur, consultez ce guide de
dépannage pour résoudre le problème rencontré. Si
une défaillance quelconque persiste, demandez conseil
auprès de votre revendeur Sony.
Pas de son.
/Vérifiez si le lecteur est correctement raccordé.
/Assurez-vous que vous utilisez correctement
l’amplificateur.
/Réglez le niveau de sortie à l’aide des touches
LINE OUT LEVEL +/– de la télécommande.
La lecture du disque ne démarre pas.
/Il n’y a pas de disque compact dans le lecteur
(“–NO DISC–” apparaît). Introduisez un disque
compact.
/Placez correctement le disque sur le plateau de
lecture avec la face imprimée vers le haut.
/Nettoyez le disque (voir page 27).
/De l’humidité s’est condensée à l’intérieur du
lecteur. Retirez le disque et laissez le lecteur
sous tension pendant environ une heure (voir
page 27).
/Placez correctement le CD sur le plateau de
lecture.
La télécommande est inopérante.
/Ecartez les obstacles situés entre la
télécommande et le lecteur.
/Dirigez la télécommande vers le capteur de
télécommande g du lecteur.
/Remplacez les deux piles de la télécommande si
elles sont épuisées.
/Réglez le commutateur CD 1/2/3 de la
télécommande sur la position du sélecteur
COMMAND MODE situé sur le panneau
arrière du lecteur.
Spécifications
Lecteur de disques compacts
Laser Laser à semi-conducteurs (λ = 780 nm)
Sortie laser 44,6 µW* max.
Réponse en fréquence 2 Hz à 20 kHz ±0,5 dB
Rapport signal/bruit Plus de 107 dB
Plage dynamique Plus de 98 dB
Distorsion harmonique Moins de 0,0040%
Bande de séparation Plus de 100 dB
Sorties
Type de prise
LINE OUT
DIGITAL OUT
(OPTICAL)
PHONES
Prises phono
Connecteur
de sortie
optique
Prise
phono
stéréo
Caractéristiques générales
Puissance de raccordement
Lieu d’achat
Canada
Europe
Consommation électrique 14 W
Durée d’émission: continu
* Cette puissance est la valeur mesurée
à une distance de 200 mm de la
surface de la lentille de l’objectif du
bloc optique avec une ouverture de
7 mm.
Niveau de sortie
maximal
2 V
(à 50 kilohms)
–18 dBm
10 mW
Puissance de raccordement
120 V CA, 60 Hz
220 – 230 V CA, 50/60 Hz
Impédance de
charge
Plus de 10 kilohms
Longueur d’onde:
660 nm
32 ohms
28
Le lecteur ne fonctionne pas correctement.
/La puce du micro-ordinateur peut ne pas
fonctionner correctement. Mettez
Dimensions (approx.) 430 × 120 × 393 mm
(l/h/p) (17 × 4 3/4 × 15 1/2 pouces) parties
saillantes comprises
Masse (approx.) 5,4 kg (11 livres 15 onces)
successivement le lecteur hors et sous tension
pour réinitialiser.
FR
Accessoires fournis
Câble audio (2 fiches phono – 2 fiches phono) (1)
Cordon de minifiche monaural (2P) (1) (fourni avec le
modèle pour le Canada uniquement)
Télécommande (1)
Piles R6 (AA) (2)
La conception et les spécifications sont sujettes à modifications
sans préavis.
Page 57

Mémorisation d’informations sur les disques compacts (fichiers de lecture personnalisée) (CDP-CE505 uniquement)
Index
Index
A
AMS 14
B
Balayage des intros 14
C
CD TEXT 11
Changement de mémos de
disque 19
Chargement de mémos de
disque 19
Connexion 4
d’un autre lecteur CD 6
Contrôle d’un autre lecteur
CD 18
D
Déballage 4
Dépannage 28
Détecteur automatique de
musique. Voir AMS.
Durée résiduelle 10
Durée totale de lecture 10
E
Effacer
bloc de suppression 26
fichiers personnalisés 24
mémo de disque 26
Enregistrement 21
d’un programme 21
montage programmé 21
Exploration. Voir Balayage des
intros.
F, G, H
Fichiers personnalisés
bloc de suppression 26
mémo de disque 24
que pouvez-vous faire
avec 24
Fonction Mega Control
avancée 18
Fondu enchaîné 22
Fondu programmé 23
I, J, K
Identification des disques 24
L
Lecture
lecture aléatoire 15
lecture alternée 20
lecture alternée en fondu
enchaîné 20
lecture alternée en fondu sans
transition 20
lecture continue 8
lecture programmée 16
lecture répétée 14
Lecture continue 8
Localisation
à l’aide de l’AMS 14
directement 13, 14
en balayant 13, 14
en contrôlant le son 14
en contrôlant les
étiquettes 13
en observant la fenêtre
d’affichage 14
M, N, O
Manipulation des CD 27
Mémorisation
d’informations sur les
CD 24
de plages spécifiques 26
Montage. Voir Enregistrement.
Montage programmé 21
P, Q
Programme 16
modifier 18
pour l’enregistrement 21
vérifier 18
R
Raccordements 4
vue d’ensemble 4
Recherche. Voir Localisation.
Recherche du niveau de
crête 23
Remplacement des disques
pendant la lecture d’un
disque 12
Répéter 14
S
Sélection de la langue 12
Sélection de lecture
aléatoire 15
T, U, V, W, X, Y, Z
Télécommande 4
Désignation des commandes
Touches
CHECK 18
CLEAR 18
CONTINUE 8
DISC 13
DISC 1 – 5 13
DISC/CAPS 25
DISC CHECK 13
DISC SKIP 12, 13
EDIT/TIME FADE 21, 23
ENTER 13
EX-CHANGE 12
FADER 22
HIGH-LIGHT 11
INPUT 12, 24
LINE OUT LEVEL +/– 5
MEGA CONTROL 18
MEMO INPUT 25
MUSIC SCAN 14
NO DELAY 20
Numériques 14
§ OPEN/CLOSE 8
PEAK SEARCH 23
PROGRAM 16
REPEAT 14
SHUFFLE 15
TIME/TEXT 10
X-FADE 20
· 9
P 9
p 9
0/) 14
0 (–AMS+) ) 18
=/+ 14
> 10 14
Commande
≠
AMS
± 14, 18
(DISC)
Prise
PHONES 8
Commutateur
1/u 8
Autres
Fenêtre d’affichage 10
Plateau de lecture 8
g 4
29
FR
Page 58

ADVERTENCIA
¡Bienvenido!
Para evitar incendios y el
riesgo de electrocución,
no exponga la unidad a
la lluvia ni a la humedad.
Para evitar descargas
eléctricas, no abra la
unidad. Solicite asistencia
únicamente a personal
cualificado.
Este aparato está clasificado como un
producto LASER DE CLASE 1. La
etiqueta que lo indica está situada en el
exterior de la parte trasera.
Felicitaciones por la adquisición del
reproductor de discos compactos Sony.
Antes de utilizar la unidad, lea
completamente este manual y consérvelo
para realizar consultas en el futuro.
Acerca de este manual
Las instrucciones de este manual
corresponden al modelo CDP-CE535
Convenciones
• En las instrucciones de este manual se
describen los controles del
reproductor.
También es posible utilizar los
controles del mando a distancia si los
nombres coinciden o son similares a
los del reproductor.
• En este manual se emplean los
siguientes iconos:
Indica que es posible realizar
la tarea mediante el mando a
distancia.
Indica las sugerencias y
consejos para realizar la tarea
más fácilmente.
ES
2
Page 59

INDICE
Procedimientos iniciales
Desembalaje ......................................................................................................................... 4
Conexión del sistema ......................................................................................................... 4
Conexión de otro reproductor de CD .............................................................................. 6
Reproducción de un CD.................................................................................................... 8
Reproducción de discos compactos
Uso del visor ...................................................................................................................... 10
Sustitución de discos durante la reproducción de un disco....................................... 12
Localización de un disco determinado .......................................................................... 13
Localización de temas específicos .................................................................................. 14
Localización de un punto determinado de un tema.................................................... 14
Reproducción repetida..................................................................................................... 14
Reproducción en orden aleatorio (Reproducción aleatoria) ...................................... 15
Creación de un programa propio (Reproducción de programa)............................... 16
Control de otro reproductor de CD (Mega Control avanzado) ................................. 18
Reproducción alternativa (Reproducción sin demora/X-Fade) ................................ 20
ES
Grabación a partir de discos compactos
Grabación de un programa propio ................................................................................ 21
Grabación de un CD especificando la longitud de cinta
(Edición sincronizada) ..................................................................................................... 21
Aparición y desaparición gradual del sonido ..............................................................22
Ajuste del nivel de grabación (Búsqueda del nivel pico)............................................ 23
Almacenamiento de información acerca de los discos compactos
(archivos personalizados)
Funciones de los archivos personalizados .................................................................... 24
Etiquetado de discos (Memo de disco).......................................................................... 24
Almacenamiento de temas específicos (Banco de borrado) ....................................... 26
Información adicional
Precauciones ...................................................................................................................... 27
Notas sobre discos compactos ........................................................................................ 27
Solución de problemas ..................................................................................................... 28
Especificaciones ................................................................................................................ 28
Indice alfabético
Indice alfabético ................................................................................................................ 29
ES
3
Page 60

Procedimientos iniciales
Procedimientos iniciales
Desembalaje
Compruebe que se incluyen los siguientes
componentes:
• Cable de audio (1)
• Mando a distancia (1)
• Pilas R6 (tamaño AA) (2)
Inserción de pilas en el mando a distancia
Es posible controlar el reproductor mediante el mando
a distancia suministrado.
Inserte dos pilas R6 (tamaño AA) haciendo coincidir
las polaridades + y – de las pilas. Cuando utilice el
mando a distancia, apunte al sensor remoto g del
reproductor.
Conexión del sistema
Descripción general
En esta sección se describe cómo conectar el
reproductor de discos compactos a un amplificador.
Asegúrese de desconectar la alimentación de cada
componente antes de realizar las conexiones.
CONTROL A1
LINE OUT
(L)
Entrada de
audio (L)
DIGITAL OUT
(OPTICAL)
LINE OUT
(R)
Entrada de
audio (R)
Reproductor de
discos compactos
A una toma de CA
Amplificador
Cuándo deben sustituirse la pilas
Con una frecuencia de uso normal, las pilas deben durar
seis meses aproximadamente. Cuando no pueda
controlar el reproductor con el mando a distancia,
sustituya todas las pilas por unas nuevas.
Notas
• No deje el mando a distancia cerca de un lugar
extremadamente caliente o húmedo.
• No deje caer ningún objeto extraño dentro del mando a
distancia; tenga especial cuidado al sustituir las pilas.
• No exponga el sensor remoto a la luz directa del sol ni a
aparatos de iluminación, ya que podría no funcionar
correctamente.
• Si no va a utilizar el mando a distancia durante varios días,
retire las pilas para evitar posibles daños derivados de
fugas y corrosión.
: Flujo de señal
¿Qué cables necesita?
Cable de audio (suministrado) (1)
Blanco
(L)
Rojo
(R)
A una toma de CA
Blanco
(L)
Rojo
(R)
ES
4
Page 61

Procedimientos iniciales
Conexiones
Al conectar un cable de audio, asegúrese de que el
color coincide con el de las tomas de los componentes:
rojo (derecha) con rojo, y blanco (izquierda) con blanco.
Compruebe que las conexiones se han realizado
firmemente con el fin de evitar ruidos y zumbido.
Reproductor de
discos compactos
2ND
LINE
CD
IN OUT
L
R
Es posible ajustar el nivel de salida al amplificador
Pulse LINE OUT LEVEL +/– en el mando a distancia.
Puede reducir el nivel de salida hasta –20 dB.
Al reducir el nivel de salida, aparece “
Nota
Si pulsa los botones LINE OUT LEVEL +/– del mando a
distancia durante una grabación, el nivel de grabación
cambiará aunque esté predefinido en la platina, etc.
• Si dispone de un componente digital, como un
amplificador digital, un convertidor D/A, DAT o MD
Conecte el componente mediante el conector DIGITAL
OUT (OPTICAL) utilizando el cable óptico (no
suministrado). Retire el bloqueador y enchufe el cable
óptico.
Observe que no puede utilizar las funciones de aparición y
desaparición gradual del sonido (página 22) ni de aparición
y desaparición sincronizada (página 23) al realizar esta
conexión.
Amplificador
INPUT
CD
L
R
FADE
” en el visor.
Si tiene un componente Sony con la toma CONTROL
A1 (o CONTROL A1)
Conecte el componente mediante la toma CONTROL
A1 (o CONTROL A1). Puede simplificar el uso de los
sistemas de audio formados por distintos componentes
Sony. Para información más detallada, consulte las
instrucciones complementarias “CONTROL-A1
Control System”.
Al utilizar otro reproductor de CD Sony junto con este
reproductor
Puede hacer que el mando a distancia suministrado sólo
funcione con este reproductor.
• Si emplea un reproductor equipado con el selector
COMMAND MODE:
Deje el selector COMMAND MODE de este
reproductor en CD 1, tal como viene de fábrica, y sitúe
el del otro aparato en CD 2 o CD 3. A continuación,
ponga el interruptor CD 1/2/3 del mando a distancia
suministrado con cada reproductor en la posición
apropiada.
• Al utilizar un reproductor no equipado con el selector
COMMAND MODE:
El modo de mando del reproductor sin el selector
COMMAND MODE se define como CD 1. Sitúe el
selector COMMAND MODE de este aparato y el
interruptor CD 1/2/3 del mando a distancia en la
posición CD 2 o CD 3.
Conexión del cable de alimentación de CA
Conecte el cable de alimentación de CA a una toma
mural.
Transporte del reproductor
POC-15
Cable óptico (no suministrado)
Reproductor de
discos compactos
DIGITAL
OUT
OPTICAL
Componente
digital
DIGITAL
INPUT
OPTICAL
Nota
Al realizar la conexión mediante el conector DIGITAL OUT
(OPTICAL), puede producirse ruido si reproduce otro tipo de
software de CD que no sea música, como un CD-ROM.
Antes de transportar el reproductor, realice el siguiente
procedimiento con el fin de devolver los mecanismos
internos a su posición original.
1 Retire todos los discos de la bandeja de discos.
2 Pulse § OPEN/CLOSE para cerrar la bandeja de
discos.
Aparece “–NO DISC–” en el visor.
3 Espere durante 10 segundos y, a continuación,
pulse 1/u para desactivar el reproductor.
ES
5
Page 62

Procedimientos iniciales
Conexión de otro reproductor
de CD
Si dispone de un reproductor de CD Sony en el que
puedan insertarse 5, 50, 200 o 300 discos y equipado
con la toma CONTROL A1
modo de mando de dicho reproductor pueda ajustarse
en CD 3, podrá controlarlo como segundo reproductor
con esta unidad. Una vez conectados esta unidad y un
amplificador, siga el procedimiento que aparece a
continuación.
Asegúrese de desactivar la alimentación de los
reproductores antes de realizar esta conexión.
(o CONTROL A1) y el
Cables necesarios
• Cable de audio (1) (emplee el cable suministrado con el
reproductor que vaya a conectar)
• Cable de minienchufe monofónico (2P) (1) (no
suministrado)
1 Conecte los reproductores con un cable de audio
(consulte también “Conexiones” en la página 5).
CDP-CE535
2ND
LINE
CD
IN OUT
L
R
CDP-CX300, etc.
LINE OUT
L
R
COMMAND
MODE
A 2ND CD IN
A salida de audio
A una toma de CA
A LINE OUT
A CONTROL A1
A CONTROL A1
CDP-CE535
A una toma de CA
CDP-CX300, etc.
2 Conecte los reproductores con un cable de
minienchufe monofónico (2P).
CDP-CE535
CONTROL A1
CDP-CX300, etc.
CONTROL A1
Para obtener más información sobre esta conexión,
consulte las instrucciones complementarias
“CONTROL-A1
Control System”.
3 Ajuste el selector COMMAND MODE de cada
reproductor.
Ajuste el selector COMMAND MODE de este
reproductor en CD 1 o CD 2, y el del segundo en
CD 3.
COMMAND
MODE
CD
132
A entrada de audio
Amplificador
Para obtener más información sobre cómo utilizar
el segundo reproductor, consulte “Control de otro
reproductor de CD” en la página 18 y
“Reproducción alternativa” en la página 20.
: Flujo de señales
ES
6
A una toma de CA
Page 63

4 Conecte el cable de alimentación de CA de ambos
reproductores a tomas de CA.
Notas
• No conecte un reproductor que no sea el que utiliza como
secundario a las tomas 2ND CD IN de este reproductor.
• Cuando conecte un segundo reproductor de CD, no conecte
el conector DIGITAL OUT (OPTICAL) de esta unidad al
amplificador.
Procedimientos iniciales
ES
7
Page 64

Operaciones básicas
Operaciones básicas
Reproducción de un CD
23564
REPEAT
CONTINUE SHUFFLE PROGRAM
I / u
DISC 1 DISC 2 DISC 3 DISC 4 DISC 5
DISC CHECK
CHANGE
OPEN/CLOSE
DISC
EX-
SKIP
AMS
(DISC)
Conecte los
auriculares.
• Consulte las páginas 4 y 5 para
obtener información sobre la
conexión.
PHONES
EDIT/
PEAK
TIME/
INPUT
FADER
TIME FADE
SEARCH
TEXT
(-AMS+)
PUSH ENTER
X-FADENO DELAYCLEARCHECK
MEGA
CONTROL
Encienda el amplificador y seleccione la posición de reproductor
1
de CD, de forma que obtenga el sonido del reproductor.
Pulse 1/u para activar el reproductor.
2
Pulse § OPEN/CLOSE y sitúe un CD en la bandeja.
3
Con la etiqueta hacia arriba
Para colocar otros discos, pulse DISC SKIP y sitúelos en el
4
orden en que desee reproducirlos.
Número de disco
Cada vez que pulse el botón, la bandeja de discos gira para que
coloque los discos en los compartimientos libres de la bandeja.
Primero se reproducirá el disco situado en la parte delantera.
Pulse CONTINUE para seleccionar ALL DISCS o 1 DISC
5
(Reproducción continua).
Cada vez que pulsa el botón CONTINUE, aparece
“ALL DISCS” o “1 DISC” en el visor.
Al seleccionar
ALL DISCS
1 DISC
ES
8
Se reproducen
Todos los discos del reproductor consecutivamente
por orden de número de disco
Sólo el disco seleccionado
Page 65

Getting Started
Operaciones básicas
Es posible seleccionar el disco
que desee reproducir en
primer lugar
Pulse uno de los botones
DISC 1 – 5.
Es posible ajustar el nivel de
salida al amplificador
Pulse LINE OUT LEVEL
+/– en el mando a distancia.
Puede reducir el nivel de
salida hasta –20 dB.
Al reducir el nivel de salida,
aparece “
FADE
” en el visor.
El volumen de los
auriculares también cambia
al ajustar el nivel de salida.
Nota
Si pulsa los botones LINE
OUT LEVEL +/– del mando
a distancia durante una
grabación, el nivel de
grabación cambiará aunque
esté predefinido en la
platina, etc.
Pulse ·.
6
La bandeja de discos se cierra y el reproductor reproduce todos
los temas una vez (Reproducción continua). Ajuste el volumen
del amplificador.
Para detener la reproducción
Pulse p.
DISC 1 – 5
CONTINUE SHUFFLE PROGRAM REPEAT
I / u
DISC 1 DISC 2 DISC 3 DISC 4 DISC 5
PHONES
INPUT
FADER
DISC CHECK
EDIT/
PEAK
TIME/
TIME FADE
SEARCH
TEXT
Para
Realizar una pausa
Reanudar la reproducción después
de la pausa
Ir al siguiente tema
Volver al tema anterior
Ir al siguiente disco
Seleccionar un disco directamente
Detener la reproducción y retirar el CD
≠ AMS ±
·pP DISC SKIP
EX-
CHANGE
(-AMS+)
Realice lo siguiente
Pulse P
Pulse P o ·
Gire ≠ AMS ± en el sentido de
las agujas del reloj
Gire ≠ AMS ± en sentido
contrario a las agujas del reloj
Pulse DISC SKIP
Pulse DISC 1 – 5
Pulse § OPEN/CLOSE
OPEN/CLOSE
DISC
SKIP
AMS
(DISC)
PUSH ENTER
X-FADENO DELAYCLEARCHECK
MEGA
CONTROL
§ OPEN/CLOSE
Operaciones básicas
ES
9
Page 66

Reproducción de discos compactos
Reproducción de discos compactos
Uso del visor
Visualización de información mientras se
reproduce un CD
Es posible obtener información acerca del disco
mediante el visor.
INPUT ≠ AMS ±
TIME/TEXT
Comprobación del número total de temas y
del tiempo de reproducción de los mismos
Pulse TIME/TEXT antes de iniciar la reproducción.
El visor muestra el número de disco actual, el número
total de temas, el tiempo completo de reproducción y el
calendario musical.
Número de disco actual
DISCSALL
DISC TRACK
1 1O 45.28
Número total de temas
La información también aparece al pulsar el botón
§ OPEN/CLOSE para cerrar la bandeja de discos.
Los temas con un número superior a 20 no pueden
mostrarse en el calendario musical.
Notas sobre las indicaciones de número de disco
• El círculo rojo que rodea un número de disco indica que
puede iniciarse la reproducción del mismo.
• Una vez reproducidos todos los temas de un disco,
desaparece el semicírculo que rodea el número de disco.
• Cuando se detecta un compartimiento de disco vacío,
desaparece el número de disco rodeado por el semicírculo.
Tiempo
1 2 3 4 5
MIN SEC
total
de reproducción
CD1
Calendario musical
12345
678910
Mientras se reproduce un disco, el visor muestra el
número de disco actual, número de tema actual, el
tiempo de reproducción del tema y el calendario
musical.
Número de disco actual
DISCSALL
DISC TRACK
1 2 3 4 5
1 1 1.56
Número de tema actual
Tiempo de reproducción
12345
MIN SEC
CD1
678910
Calendario musical
Los números de tema del calendario musical
desaparecen una vez se han reproducido.
Comprobación del tiempo restante
Cada vez que pulsa el botón TIME/TEXT durante la
reproducción de un disco, el visor cambia como se
muestra en el siguiente gráfico.
Tiempo de
reproducción del
tema actual
Tiempo restante
del tema actual
Tiempo restante
del disco
DISCSALL
1 2 3 4 5
DISC TRACK
MIN SEC
1 1 1.56
Pulse TIME/TEXT.
DISCSALL
1 2 3 4 5
DISC TRACK
MIN SEC
1 1 -1.57
Si el número de tema excede de 24,
aparece “– – – –” en lugar del tiempo
restante.
Pulse TIME/TEXT.
DISCSALL
1 2 3 4 5
DISC TRACK
MIN SEC
1 -43.32
12345
678910
CD1
12345
678910
CD1
12345
678910
CD1
10
Esta información sólo está
disponible en el modo de
reproducción continua.
Pulse TIME/TEXT.
ES
Page 67

Reproducción de discos compactosReproducción de discos compactos
Comprobación de la información de los
discos CD TEXT
Los discos de tipo CD TEXT incluyen información,
como títulos de disco y nombres de artistas,
memorizada en un espacio en blanco donde los discos
normales no contienen ninguna información. El visor
muestra la información de CD TEXT del disco para que
pueda comprobar el título del disco actual, el nombre
del artista y el título del tema. Cuando el reproductor
detecta discos CD TEXT, se ilumina la indicación
“CD-TEXT” en el visor. Cada vez que se pulsa el botón
TIME/TEXT, el visor cambia tal como se muestra a
continuación.
• Antes de iniciar la reproducción
CD1
CD1
CD-TEXT
CD-TEXT
12345
678910
12345
678910
Título del disco
DISCSALL
DISC
1 2 3 4 5
SONYHITS
Pulse TIME/TEXT.
DISCSALL
Nombre del
artista
Sony Band
Pulse TIME/TEXT.*
* El visor muestra el número del disco actual, el número total
de temas y el tiempo total de reproducción del disco
durante unos segundos antes de volver a la indicación del
título del disco.
1 2 3 4 5
ART.
• Mientras se reproduce un disco
DISCSALL
Título del tema
1 2 3 4 5
TRACK
HitechBlues
Esta información también aparece
cuando el reproductor localiza el
tema.
Pulse TIME/TEXT.
DISCSALL
Tiempo de
reproducción
Tiempo restante
del tema actual
Tiempo restante
del disco
2 1 1.56
Pulse TIME/TEXT.
2 1 -1.57
Si el número de tema es superior a
24, aparece “– – – –” en lugar del
tiempo restante.
Pulse TIME/TEXT.
2 -58.5‚
Esta información sólo está disponible
en el modo de reproducción
continua.
Pulse TIME/TEXT.
DISC TRACK
DISCSALL
DISC TRACK
DISCSALL
DISC TRACK
1 2 3 4 5
1 2 3 4 5
1 2 3 4 5
MIN SEC
MIN SEC
MIN SEC
CD1
CD1
CD1
CD1
CD-TEXT
CD-TEXT
CD-TEXT
CD-TEXT
12345
678910
12345
678910
12345
678910
12345
678910
Si la información de CD TEXT contiene más de 12
caracteres, se iluminan los 12 primeros después de
mostrarse todos los caracteres en el visor.
Nota
Este reproductor sólo puede mostrar los títulos de disco,
títulos de tema y nombres de artistas de los discos CD TEXT.
No puede presentar otra información de CD TEXT.
Para reproducir los estribillos de los temas Z
Algunos discos CD TEXT cuentan con una función que
permite reproducir sólo los estribillos de los temas del disco.
Al seleccionar este tipo de discos, “HIGH LIGHT” aparece en
el visor.
Pulse HIGH-LIGHT en el mando a distancia para iniciar la
reproducción de los estribillos en el modo de parada.
“HIGH LIGHT” parpadea en el visor mientras se reproducen
los estribillos de los temas.
11
ES
Page 68

Reproducción de discos compactos
Selección del idioma para la información de
CD TEXT
Es posible elegir el idioma utilizado para mostrar la
información de CD TEXT al seleccionar un disco
CD TEXT con información multilingüe.
Una vez seleccionado el idioma, el visor muestra la
información en el idioma elegido hasta que se apague
el reproductor. Si el reproductor no puede leer el
idioma memorizado en un disco CD TEXT, mostrará
“(other lang)”.
1 Pulse INPUT en el modo de parada.
2 Gire ≠ AMS ± hasta que aparezca
“SELECT LANG.” en el visor.
Sustitución de discos durante
la reproducción de un disco
Es posible abrir la bandeja de discos durante la
reproducción para comprobar los discos que van a
reproducirse a continuación y sustituirlos sin
necesidad de interrumpir la reproducción del disco
actual.
EX-CHANGE DISC SKIP
DISCSALL
DISC
1 2 3 4 5
SELECT LANG.
CD-TEXT
CD1
12345
678910
3 Pulse ≠ AMS ±.
4 Gire ≠ AMS ± hasta que aparezca en el visor
el idioma que desee.
5 Pulse ≠ AMS ± para seleccionar el idioma.
Aparece momentáneamente la indicación
“Reading Text” y, a continuación, el visor muestra
la información en el idioma seleccionado.
Para comprobar el idioma actual
1 Pulse INPUT mientras se reproduce un disco CD TEXT.
2 Gire ≠ AMS ± hasta que aparezca “SHOW LANG.”
en el visor y, a continuación, pulse ≠ AMS ±.
El idioma actual aparece momentáneamente.
También es posible comprobar el idioma actual al seleccionar
un disco CD TEXT sin información multilingüe.
Nota
Si selecciona un disco CD TEXT que no contiene información
en el idioma elegido, el visor muestra la información en otro
idioma, según las preferencias establecidas para el disco.
1 Pulse EX-CHANGE.
La bandeja de discos se abre y aparecen dos
compartimientos de disco. El reproductor no
interrumpe la reproducción de un disco, si la está
efectuando.
2 Sustituya los discos de los compartimientos por
otros.
Después del disco actual, se reproduce el disco del
compartimiento situado a la izquierda y, a
continuación, el de la derecha.
3 Pulse DISC SKIP.
La bandeja de discos gira y aparecen otros dos
compartimientos de discos.
4 Sustituya los discos de los compartimientos por otros.
5 Pulse EX-CHANGE.
La bandeja de discos se cierra.
Cuando la bandeja de discos se abre pulsando el botón
EX-CHANGE
• Si la reproducción del disco actual finaliza, el reproductor
detiene la reproducción. Si el disco se reproduce en modo
de reproducción repetida 1 DISC (consulte la página 15), el
disco actual comienza a reproducirse de nuevo.
• En el modo de reproducción aleatoria ALL DISCS (consulte
la página 15), los temas del disco actual vuelven a
reproducirse en orden aleatorio.
• En el modo de reproducción de programa (consulte la
página 16), sólo se reproducen los temas del disco actual.
• No empuje la bandeja de discos para cerrarla en el paso 5,
ya que puede dañar el reproductor.
12
ES
Page 69

Localización de un disco
determinado
Es posible localizar cualquier disco antes o durante la
reproducción de un disco.
DISC CHECKDISC 1 – 5 DISC SKIP·
DISC
Botones numéricos
Reproducción de discos compactosReproducción de discos compactos
Es posible ampliar el tiempo de reproducción durante
la exploración de discos
Pulse DISC CHECK varias veces hasta que el tiempo de
reproducción que desee (10, 20 o 30) aparezca en el visor.
Cada vez que pulse el botón, el tiempo de reproducción
cambia cíclicamente.
Notas
• Al pulsar el botón DISC CHECK, el modo de reproducción
cambia automáticamente al modo de reproducción
continua ALL DISCS.
• Si se ha abierto la bandeja de discos pulsando el botón
EX-CHANGE, no es posible utilizar la función DISC
CHECK.
• Incluso si pulsa el botón DISC CHECK mientras aparece
“REPEAT” en el visor (consulte la página 14), el
reproductor se detiene después de explorar todos los discos
una vez.
DISC SKIP +/–
Para localizar
El disco siguiente
El disco siguiente o
posterior Z
El disco actual o anterior
Z
Un disco determinado
directamente
Un disco mientras
comprueba las etiquetas
Un disco explorando el
primer tema de cada
disco durante 10
segundos
ENTER
·
Pulse
DISC SKIP mientras se reproduce
un disco
DISC SKIP + varias veces hasta
que encuentre el disco
DISC SKIP – varias veces hasta
que encuentre el disco
DISC 1 – 5.
Si emplea el mando a distancia,
siga este procedimiento.
1 Pulse DISC.
2 Pulse el botón numérico del
disco.
3 Pulse ENTER.
DISC CHECK mientras está
abierta la bandeja de discos. La
bandeja de discos muestra cada
etiqueta de disco. Cuando el disco
que desee se desplace a la
posición frontal, pulse · para
continuar con la reproducción.
DISC CHECK antes de comenzar
la reproducción con la bandeja de
discos cerrada. Cuando encuentre
el disco que desee, pulse · para
iniciar la reproducción.
13
ES
Page 70

Reproducción de discos compactos
Localización de temas
específicos
Puede localizar cualquier tema rápidamente al
reproducir un disco con el control AMS (Sensor de
música automático) o los botones numéricos del
mando a distancia.
≠ AMS ±
Botones numéricos
>10
MUSIC SCAN
=/+
Para localizar
El tema siguiente o
posteriores
El tema actual o
anteriores
Un tema específico
directamente Z
Un tema explorando
cada tema durante 10
segundos Z
(exploración musical)
Realice lo siguiente
Gire ≠ AMS ± en el sentido de
las agujas del reloj hasta que encuentre
el tema. Si utiliza el mando a distancia,
pulse + varias veces hasta que
encuentre el tema.
Gire ≠ AMS ± en sentido
contrario a las agujas del reloj hasta
que encuentre el tema. Si utiliza el
mando a distancia, pulse = varias
veces hasta que encuentre el tema.
Pulse el botón numérico del tema en el
mando a distancia
Pulse MUSIC SCAN en el mando a
distancia antes de iniciar la
reproducción. Cuando encuentre el
tema que busca, pulse · para
reproducirlo.
Para localizar directamente un tema con un número
superior a 10 Z
Pulse >10 primero y, a continuación, los botones
numéricos correspondientes del mando a distancia. Para
introducir “0”, utilice el botón 10/0.
Ejemplo: Para reproducir el tema número 30
Pulse >10 primero y, a continuación, 3 y 10/0.
·
Localización de un punto
determinado de un tema
También es posible localizar un punto específico de un
tema al reproducir un disco.
0/)
Para localizar
Un punto mientras
controla el sonido
Un punto
rápidamente
mientras observa el
visor durante una
pausa
Pulse
) (hacia delante) o 0 (hacia atrás)
y sujételo hasta que encuentre el punto
buscado
) (hacia delante) o 0 (hacia atrás)
y sujételo hasta que encuentre el punto
buscado. No escuchará el sonido
durante la operación.
Nota
Si aparece “OVER” en el visor, el disco ha llegado al final
mientras pulsaba el botón ). Pulse 0 o gire
≠ AMS ± en el sentido contrario a las agujas del reloj
para retroceder.
Reproducción repetida
Es posible reproducir discos/temas de forma repetida
en cualquier modo de reproducción.
REPEAT
Pulse REPEAT mientras reproduce un disco.
“REPEAT” aparece en el visor. El reproductor repite
los discos/temas como sigue:
14
Es posible ampliar el tiempo de reproducción durante
la exploración musical
Pulse MUSIC SCAN varias veces hasta que aparezca en
el visor el tiempo de reproducción que desee (10, 20 o 30).
Cada vez que pulsa el botón, el tiempo de reproducción
ES
cambia cíclicamente.
Page 71

Reproducción de discos compactosReproducción de discos compactos
Cuando se reproduce el disco en
Reproducción continua ALL DISCS
(página 8)
Reproducción continua 1 DISC
(página 8)
Reproducción aleatoria ALL DISCS
(página 15)
Reproducción aleatoria 1 DISC
(página 15)
Reproducción de programa
(página 16)
Para cancelar la reproducción repetida
Pulse REPEAT repetidamente hasta que aparezca
“REPEAT OFF” en el visor.
El reproductor repite
Todos los temas de
todos los discos
Todos los temas del
disco actual
Todos los temas de
todos los discos en
orden aleatorio
Todos los temas del
disco actual en orden
aleatorio
El mismo programa
Repetición del tema actual
Es posible repetir solamente el tema actual mientras el
disco se reproduce en cualquier modo de
reproducción.
Mientras se reproduce el tema que desea, pulse
REPEAT varias veces hasta que aparezca “REPEAT 1”
en el visor.
Para cancelar la reproducción repetida 1
Pulse REPEAT.
Reproducción aleatoria de todos los discos
Es posible reproducir todos los temas de todos los
discos en orden aleatorio.
1 Pulse SHUFFLE varias veces hasta que aparezca
“ALL DISCS” en el visor.
2 Pulse · para iniciar la reproducción aleatoria
ALL DISCS.
Aparece la indicación
reproduce aleatoriamente los temas.
Para cancelar la reproducción aleatoria
Pulse CONTINUE.
Es posible iniciar la reproducción aleatoria durante la
reproducción
Pulse SHUFFLE; de este modo, se iniciará la
reproducción aleatoria a partir del tema actual.
Es posible especificar discos durante la reproducción
aleatoria (Selección de reproducción aleatoria)
Es posible especificar discos durante el modo de
reproducción aleatoria ALL DISCS y los temas de los
discos especificados se reproducirán en orden arbitrario.
Pulse DISC 1 – 5 para especificar los discos después del
paso 1.
En el visor, aparecen semicírculos alrededor de los
números de disco especificados. Para cancelar los discos
seleccionados, vuelva a pulsar DISC 1 – 5. Los
semicírculos desaparecen.
Para volver a la reproducción aleatoria ALL DISCS, pulse
dos veces SHUFFLE.
mientras el reproductor
Reproducción en orden
aleatorio
(Reproducción aleatoria)
Es posible indicar al reproductor que reproduzca los
temas en orden aleatorio. Se reproducen en orden
aleatorio todos los temas de todos los discos o del disco
especificado.
·DISC 1 – 5SHUFFLE
Reproducción aleatoria de un disco
Es posible reproducir todos los temas de un disco
determinado en orden aleatorio.
1 Pulse SHUFFLE varias veces hasta que aparezca
“1 DISC” en el visor.
2 Pulse DISC 1 – 5 para iniciar la reproducción
aleatoria 1 DISC del disco seleccionado.
Aparece la indicación mientras el reproductor
reproduce aleatoriamente los temas.
Para cancelar la reproducción aleatoria
Pulse CONTINUE.
Es posible iniciar la reproducción aleatoria durante la
reproducción
Pulse SHUFFLE; de este modo, se iniciará la
reproducción aleatoria a partir del tema actual.
15
ES
Page 72

Reproducción de discos compactos
Creación de un programa
propio (Reproducción de
programa)
3 Gire ≠ AMS ± hasta que aparezca el número
de tema que desea en el visor.
El número del tema que se está programando
parpadea y el tiempo de reproducción total,
incluido el tema, aparece en el visor.
Es posible establecer el orden de los temas de los discos
y crear un programa propio. El programa puede
contener un máximo de 32 “pasos” y un “paso” puede
contener un tema o un disco entero.
PROGRAM
CHECK
DISC
>10
CHECK
=/+
·DISC 1 – 5
≠ AMS ±
CLEAR
PROGRAM
Botones numéricos
ENTER
CLEAR
·
Tiempo total de
reproducción
PROGRAM
DISC TRACK
1 2 3 4 5
MIN SEC
1 5 13.18
Número del tema
que se programa
A
CD1
25
8
4 Pulse ≠ AMS ± para seleccionar el tema.
Ultimo tema
programado
PROGRAM
DISC TRACK STEP
1 2 3 4 5
1 5 3
Después de un segundo
PROGRAM
DISC TRACK
1 2 3 4 5
1 5 13.18
Tiempo total de reproducción
Si ha cometido un error
Pulse CLEAR y, a continuación, repita los pasos 3 y 4.
Orden de
reproducción
MIN SEC
A
CD1
Temas programados
A
CD1
25
8
25
8
16
5 Para programar otros discos o temas, realice lo
Creación de un programa con el
siguiente:
reproductor
1 Pulse PROGRAM.
Aparece “PROGRAM” en el visor.
Si ya se ha almacenado un programa, aparece el
último paso del programa en el visor. Para borrar
todo el programa, mantenga pulsado CLEAR hasta
que aparezca “CLEAR” en el visor (consulte la
página 18).
Para programar
Todos los temas de otros discos
Otros temas del mismo disco
Otros temas de otros discos
6 Pulse · para empezar la reproducción del
programa.
Repita los pasos
2
3 y 4
2 a 4
2 Pulse DISC 1 – 5 para seleccionar el disco.
Para cancelar la reproducción del programa
Pulse CONTINUE.
Es posible crear el programa mientras comprueba las
etiquetas de disco
Con la bandeja de discos abierta, siga los pasos 1 a 6
pulsando el botón DISC SKIP para comprobar las
etiquetas de disco. Si cierra la bandeja antes del paso 6,
aparece el tiempo total de reproducción en el visor
transcurridos unos segundos.
Observe que, si el número de tema programado no se
encuentra en el disco, el paso correspondiente se borra
automáticamente.
PROGRAM
DISC TRACK
1 2 3 4 5
MIN SEC
1 AL 45.28
CD1
A
12345
678910
La indicación “AL” del visor significa “todos” los
temas.
Para programar todo el disco en un paso, omita los
pasos 3 y 4, y vaya directamente al paso 5.
ES
Page 73

Reproducción de discos compactosReproducción de discos compactos
El programa se mantiene incluso después de terminar
la reproducción del mismo
Pulsando el botón ·, es posible volver a reproducir el
mismo programa.
El programa se conserva hasta que lo borre o
desactive el reproductor
Si sustituye discos, se conservan los números de tema y
disco programados. De este modo, sólo se reproducen los
números de disco y tema existentes. No obstante, los
números de disco o tema que no se encuentren en el
reproductor o en el disco se borran del programa y el
resto del programa se reproducirá en el orden
programado.
Nota
El tiempo completo de reproducción no aparece si:
—Ha programado un tema superior a 20.
—El tiempo completo de reproducción del programa es
superior a 200 minutos.
Creación de un programa con el mando a
distancia Z
1 Pulse PROGRAM.
Aparece “PROGRAM” en el visor.
6 Pulse ENTER para seleccionar el tema.
Ultimo tema
programado
PROGRAM
DISC TRACK STEP
1 2 3 4 5
1 5 3
Pasado un segundo
PROGRAM
DISC TRACK
1 2 3 4 5
1 5 13.18
Tiempo total de reproducción
Orden de
reproducción
MIN SEC
A
CD1
25
8
Temas programados
A
CD1
25
8
7 Para programar otros discos o temas, siga este
procedimiento:
Para programar
Todos los temas de otros discos
Otros temas del mismo disco
Otros temas de otros discos
Repita los pasos
2 a 4
5 y 6
2 a 6
2 Pulse DISC.
PROGRAM
1 2 3 4 5
DISC-[_]
A
CD1
2
8
3 Pulse el botón numérico del disco.
PROGRAM
1 2 3 4 5
DISC-[1]
A
CD1
2
8
4 Pulse ENTER para seleccionar el disco.
PROGRAM
DISC TRACK
1 AL 45.28
1 2 3 4 5
MIN SEC
CD1
Si desea programar todo el disco como un paso,
omita los pasos 5 y 6 y continúe con el paso 7.
A
12345
678910
5 Pulse =/+ hasta que aparezca el número del
tema apropiado en el visor.
Tiempo total de
reproducción
Número del tema
que se programa
8 Pulse · para iniciar la reproducción de
programa.
Para cancelar la reproducción de programa
Pulse CONTINUE.
Puede seleccionar un tema directamente con los
botones numéricos
Pulse el botón numérico correspondiente al tema en el
paso 5. Para seleccionar un tema con un número superior
a 10, utilice el botón >10 (consulte la página 14).
Puede crear el programa mientras comprueba las
etiquetas de los discos
Con la bandeja de discos abierta, siga los pasos 1 a 8,
pulsando el botón DISC SKIP para consultar las etiquetas
de los discos. Si cierra la bandeja de discos antes del paso
8, el tiempo total de reproducción aparece en el visor
pasado algún tiempo.
Tenga presente que si el número de tema programado no
está en el disco, ese paso se borra de forma automática.
Nota
El tiempo total de reproducción no aparece cuando:
—Se ha programado un tema con un número superior a 20.
—El tiempo total de reproducción sobrepasa los 200 minutos.
PROGRAM
DISC TRACK
1 2 3 4 5
MIN SEC
1 5 13.18
CD1
A
25
8
17
ES
Page 74

Reproducción de discos compactos
Comprobación del orden de los temas
Es posible comprobar el programa antes o después de
iniciar la reproducción.
Control de otro reproductor
de CD (Mega Control
Pulse CHECK.
Cada vez que pulse este botón, el visor muestra el tema
(los números de disco y tema) o el disco (el número de
disco y la indicación “AL”) de cada paso en el orden
programado. Después del último paso del programa, el
visor muestra “END” y devuelve la pantalla original.
Si comprueba el orden después de iniciar la
reproducción, el visor muestra sólo los pasos restantes.
Cambio del orden de temas
Es posible cambiar el programa antes de iniciar la
reproducción.
Para
Borrar un tema
Borrar el último tema del
programa
Añadir temas al final del
programa
Borrar todo el programa
completamente
Realice lo siguiente
Pulse CHECK hasta que
aparezca el tema que no
desea en el visor y, a
continuación, pulse CLEAR
Pulse CLEAR. Cada vez que
pulsa este botón, se borra el
último tema.
Siga el procedimiento de
programación
Mantenga pulsado CLEAR
hasta que aparezca
“CLEAR” en el visor. Cree
un programa nuevo
siguiendo el procedimiento
de programación.
avanzado)
Esta unidad puede controlar un segundo reproductor
de CD (consulte “Conexión de otro reproductor de
CD” en las páginas 6 y 7).
Aunque un segundo reproductor de CD se encuentre
conectado, los controles de ambas unidades
funcionarán. Al pulsar el botón de reproducción de
cualquier unidad, el reproductor que se encuentre en
funcionamiento se detendrá y se activará el que no se
encuentre activo.
Tome en cuenta que, dependiendo del reproductor, es
posible que no puede utilizar todas las funciones del
segundo reproductor de CD.
Los controles indicados en la siguiente ilustración son
efectivos mientras el botón MEGA CONTROL se encuentre
iluminado.
Botones de modo de
reproducción (CONTINUE/
SHUFFLE/PROGRAM/REPEAT)
INPUT CLEAR
·Pp
Reproducción de discos con el segundo
reproductor de CD
≠
MEGA CONTROL0 (–AMS+) )
AMS
(DISC)
±
18
1 Pulse MEGA CONTROL.
El botón MEGA CONTROL se ilumina y el visor
muestra el número de disco actual del segundo
reproductor.
Número de disco actual
DISCSALL
DISC
*DISC-1*
CD1
2 Seleccione el modo de reproducción que desee.
Para programar temas, utilice los controles del
segundo reproductor.
3 Pulse · para iniciar la reproducción.
La reproducción se inicia y el visor muestra los
números de tema y disco actuales y el tiempo de
reproducción del tema.
Mientras el botón MEGA CONTROL se encuentra
iluminado, puede controlar el segundo
reproductor con los controles de este aparato de la
ES
siguiente forma:
Page 75

Reproducción de discos compactosReproducción de discos compactos
Para
Introducir una pausa
Detener la reproducción
Localizar un disco
mientras el segundo
reproductor se encuentra
en modo de reproducción
continua
Localizar un tema
• Para realizar otras operaciones, utilice los controles del
segundo reproductor o del mando a distancia
suministrado.
• Los botones AMS (=/+) y de búsqueda
(0/)) del mando a distancia controlan el segundo
reproductor, tal como se indica en el mando a
distancia.
Es necesario
Pulsar P
Pulsar p
Girar ≠
que aparezca el número del
disco apropiado en el visor
y pulsar ≠
Pulsar 0 (–AMS+) )
hasta que el visor muestre
el número del tema que
desee
AMS
(DISC)
± hasta
AMS
(DISC)
±
Para controlar directamente el segundo reproductor con
el mando a distancia suministrado
Ajuste CD 1/2/3 del mando a distancia en CD 3, que es la
misma posición que la del selector COMMAND MODE del
panel posterior del segundo reproductor.
Para volver a controlar este reproductor
Pulse MEGA CONTROL. El botón MEGA CONTROL se
apaga y será posible controlar este reproductor.
Notas
• No es posible localizar un determinado punto de un tema
del segundo reproductor con los controles de este aparato.
• Algunos controles de este reproductor funcionan de forma
distinta en el segundo reproductor.
3 Pulse ≠ AMS ±.
Se inicia la carga en este reproductor (con una
duración de un minuto aproximadamente).
Nota
Si cada etiqueta de disco del segundo reproductor de CD tiene
más de 12 caracteres, se cargan los 12 primeros caracteres de
cada etiqueta en este reproductor.
Etiquetado de los discos del segundo
reproductor de CD
Es posible asignar etiquetas a los discos del otro
reproductor de CD o modificar las etiquetas de disco
cargadas desde el segundo reproductor.
1 Pulse MEGA CONTROL.
Se ilumina el botón MEGA CONTROL.
2 Pulse CONTINUE.
3 Gire ≠
desee y pulse ≠
AMS
± para seleccionar el disco que
(DISC)
AMS
(DISC)
±.
4 Pulse INPUT.
AMS
(DISC)
AMS
± hasta que aparezca
(DISC)
±.
5 Gire ≠
“DISC MEMO” en el visor y, a continuación, pulse
≠
6 Introduzca la nueva etiqueta de disco, siguiendo el
procedimiento descrito en el apartado “Etiquetado
de discos” en las páginas 24 a 26.
Carga de las etiquetas de disco del
segundo reproductor de CD
Si el segundo reproductor de CD cuenta con la función
de etiquetado (memo) de discos (consulte la página 24),
es posible cargar las etiquetas de disco del otro
reproductor en la memoria de éste y mostrarlas en el
visor de este reproductor.
1 Pulse INPUT.
2 Gire ≠ AMS ± hasta que aparezca
“LOADING MEMO” en el visor.
DISCSALL
DISC TRACK
1 2 3 4 5
MIN SEC
LOADING MEMO
CD1
12345
678910
Nota
Las nuevas etiquetas de disco se almacenan en la memoria de
este reproductor, de modo que no es posible verlas con el
segundo reproductor de CD.
19
ES
Page 76

Reproducción de discos compactos
Reproducción alternativa
(Reproducción sin demora/
X-Fade)
Al conectar el segundo aparato, puede reproducir los
temas de este reproductor y del segundo de forma
alterna en cualquier modo de reproducción (consulte
“Conexión de otro reproductor de CD” en las páginas 6
y 7).
Seleccione uno de los siguientes métodos:
• Reproducción sin demora: El reproductor actual cambia
en cada tema. Cada vez que dicho reproductor cambie
al otro, éste inicia la reproducción sin interrupción del
sonido inmediatamente después de que el
reproductor actual finalice la reproducción. El otro
reproductor omite el espacio en blanco entre temas e
inicia la reproducción a partir del punto en el que
realmente comienza el sonido.
• Reproducción X-Fade: El reproductor actual cambia en
cada tema o en el intervalo especificado. Es posible
seleccionar el intervalo entre 30, 60 y 90 segundos.
Cada vez que el reproductor actual cambie al otro, el
sonido de ambos se mezclará. El reproductor actual
finaliza la reproducción disminuyendo el sonido
gradualmente, mientras que el otro la inicia
aumentando el sonido gradualmente.
·
X-FADENO DELAY
3 Pulse · para iniciar la reproducción.
El botón MEGA CONTROL se ilumina mientras el
tema del segundo reproductor se encuentra
seleccionado.
Para comprobar el estado del modo X-Fade
Pulse X-FADE una vez.
El estado del modo X-Fade aparece momentáneamente.
Para cancelar la reproducción sin demora/X-Fade
Pulse varias veces el botón correspondiente hasta que se
apague. El reproductor actual continúa reproduciendo.
Es posible cambiar el método (sin demora o X-Fade)
durante la reproducción
Pulse el botón correspondiente (NO DELAY o X-FADE)
siguiendo el procedimiento del paso 2.
Puede iniciar la reproducción X-Fade en cualquier
momento
Pulse FADER durante la reproducción X-Fade.
Incluso después de ajustar el modo X-Fade e iniciar la
reproducción X-Fade, puede iniciar X-Fade de forma
manual en el punto que desee. Tenga presente que no es
posible realizar esta operación mientras el sonido de
ambos reproductores está mezclado.
Notas
• La reproducción se realizará a partir del segundo
reproductor si la inicia mientras el botón MEGA
CONTROL se encuentra iluminado.
• Cuando un reproductor ha reproducido todos los discos o
temas y el otro reproductor también, la reproducción se
detiene.
• No utilice los controles del segundo reproductor durante la
reproducción sin demora/X-Fade, ya que es posible que no
funcionen correctamente.
20
1 Seleccione el modo de reproducción que desee en
cada reproductor.
2 Si selecciona la reproducción sin demora
Pulse NO DELAY.
Se ilumina el botón NO DELAY.
Si selecciona la reproducción X-Fade
Cada vez que pulse el botón X-FADE, la indicación
(de modo X-Fade) aparecerá de la siguiente forma:
n X-FADE off n at track end n after 30 sec
after 90 sec N after 60 sec N
Para cambiar el reproductor actual cada vez que
finalice un tema completo, seleccione
“at track end”.
Para que el reproductor actual cambie en el
intervalo especificado, pulse X-FADE varias veces
hasta que el intervalo que desee aparezca en el
ES
visor.
Page 77

Grabación a partir de discos compactos
Grabación a partir de discos compactos
Grabación a partir de discos compactos
Grabación de un programa
propio
Puede grabar el programa que haya creado en una
cinta, etc. El programa puede contener un máximo de
32 pasos.
Si inserta una pausa durante la programación, puede
dividir el programa en dos partes para grabar en
ambas caras de una cinta.
PROGRAM
DISC 1 – 5
1 Cree su programa (para la cara A durante la
grabación de una cinta) mientras comprueba el
tiempo total de reproducción indicado en el visor.
Siga los pasos 1 a 5 de “Creación de un programa
con el reproductor” en la página 16.
Aparece la indicación
A
en el visor.
2 Al grabar en ambas caras de una cinta, pulse P
para insertar una pausa.
Las indicaciones “PAUSE” y
visor y el tiempo de reproducción vuelve a “0.00”.
Si realiza la grabación en una cara de la cinta,
omita este paso y continúe en el paso 4.
Una pausa se contabiliza como un paso
Si inserta una pausa, podrá programar un máximo de 31
pasos.
P·
≠ AMS ±
A B
aparecen en el
Grabación de un CD
especificando la longitud de
cinta (Edición sincronizada)
El reproductor crea un programa automáticamente que
pueda incluirse en la longitud de la cinta, manteniendo
el orden original del disco.
El programa puede contener un máximo de 32 pasos
(una pausa insertada entre dos pasos se contabiliza
como un paso).
Observe que los temas con un número superior a 20 no
pueden programarse automáticamente.
DISC SKIP
·
P
EDIT/TIME FADE
1 Pulse DISC SKIP para seleccionar el disco.
2 Pulse EDIT/TIME FADE varias veces antes de
iniciar la reproducción hasta que aparezca
“TIME EDIT” y la letra “A” de la indicación
parpadee en el visor.
3 Pulse 0 o ) para especificar la longitud de
cinta.
Cada vez que se pulsan estos botones, el visor
cambia tal como se muestra a continuación con la
longitud de una cara de la cinta.
n C-46 23.00 N
n C-54 27.00 N
0/)
A
n C-60 30.00 N
3 Repita los pasos 2 a 5 de “Creación de un
programa con el reproductor” para crear el
programa para la cara B.
4 Inicie la grabación en la platina y, a continuación,
pulse · en el reproductor.
Al grabar en ambas caras de una cinta, el
reproductor realiza una pausa al final del
programa de la cara A.
5 Para grabar en la cara B, dele la vuelta a la cinta y
pulse · o P en el reproductor para reanudar la
reproducción.
Es posible comprobar y cambiar el programa
Consulte la página 18.
La indicación A aparece durante la comprobación del
programa de la cara A, y B durante la comprobación
del programa de la cara B.
n - -. - - N
n C-90 45.00 Nn C-74 37.00 N
4 Pulse EDIT/TIME FADE para que el reproductor
cree el programa.
El calendario musical muestra los temas que van a
grabarse en la cara A. En el visor parpadea la letra
“B” de la indicación
B
.
5 Al grabar en ambas caras de la cinta, vuelva a
pulsar EDIT/TIME FADE.
El reproductor inserta una pausa y, a continuación,
crea el programa para la cara B. El calendario
musical muestra los temas programados.
Si va a grabar en una cara de la cinta, omita este
paso.
(continúa)
21
ES
Page 78

Grabación a partir de discos compactos
FADE
6 Inicie la grabación en la platina y, a continuación,
pulse · en el reproductor.
Al grabar en ambas caras de la cinta, el
reproductor realiza una pausa al final del
programa de la cara A.
7 Para grabar en la cara B, dele la vuelta a la cinta y
pulse · o P en el reproductor para reanudar la
reproducción.
Para cancelar la edición sincronizada
Pulse CONTINUE.
Es posible programar los temas que desee con
antelación
Seleccione los temas antes de realizar el procedimiento
anterior. El reproductor crea un programa con los temas
restantes.
Aparición y desaparición
gradual del sonido
Es posible ajustar manualmente la aparición y
desaparición gradual de sonido para evitar que los
temas comiencen y finalicen bruscamente.
Observe que no es posible utilizar este efecto cuando
emplee el conector DIGITAL OUT (OPTICAL).
·
P
FADER
EDIT/TIME FADE
0/)
Es posible especificar la longitud de la cinta
Defina la longitud de la cinta mediante el control
≠ AMS ± en el paso 3.
Ejemplo: Si la longitud de una cara de la cinta es de 30
minutos y 15 segundos.
1 Para definir los minutos, gire ≠ AMS ±
hasta que aparezca “30” en el visor y, a
continuación, pulse ≠ AMS ±.
2 Para definir los segundos, gire
≠ AMS ± hasta que aparezca “15” en
el visor y, a continuación, pulse
≠ AMS ±.
Es posible comprobar y cambiar el programa
Consulte la página 18.
Para
Iniciar la reproducción
gradualmente
Finalizar la
reproducción
gradualmente
Pulse FADER
Durante el modo de pausa.
ilumina en el visor y la indicación
Q parpadea. Se inicia la
reproducción gradual del sonido.
Para iniciar la finalización gradual
del sonido.
visor y la indicación q parpadea.
La reproducción finaliza
gradualmente y el reproductor
introduce el modo de pausa.
FADE
se enciende en el
Nota
La aparición y desaparición gradual del sonido dura unos 5
segundos. No obstante, al pulsar FADER durante la
exploración musical (consulte la página 14), el sonido
desaparece gradualmente en 2 segundos.
Cambio del tiempo de aparición/
desaparición gradual del sonido
Puede cambiar el tiempo de aparición/desaparición
gradual de 2 a 10 segundos antes de la aparición o
desaparición. Si no se modifica, la aparición y
desaparición gradual del sonido dura 5 segundos.
se
22
1 Pulse FADER antes de iniciar la reproducción.
Aparece “FADE 5 SEC” en el visor.
2 Pulse 0/) para especificar el tiempo de
aparición/desaparición gradual del sonido.
ES
Page 79

Desaparición gradual del sonido en un
momento determinado (Aparición y
desaparición sincronizada)
El reproductor puede finalizar gradualmente el sonido
de forma automática especificando el tiempo de
reproducción. Una vez ajustada la aparición y
desaparición sincronizada, esta función se aplica dos
veces, es decir, al final de ambas caras de una cinta.
Grabación a partir de discos compactos
Grabación a partir de discos compactos
Ajuste del nivel de grabación
(Búsqueda del nivel pico)
El reproductor localiza el nivel más alto de los temas
que van a grabarse de forma que es posible ajustar el
nivel de grabación antes de que se inicie la misma.
PEAK SEARCH
p
1 Pulse EDIT/TIME FADE varias veces antes de
iniciar la reproducción hasta que
“A” de la indicación
A
aparezcan en el visor.
TIME
FADE
y la letra
2 Pulse 0 o ) para especificar el tiempo de
reproducción.
Cada vez que pulsa estos botones, el visor cambia
tal como se muestra a continuación con el tiempo
de reproducción de una cara.
n C-46 23.00 Nn C-54 27.00 N
n - -. - - N
n C-90 45.00 N
n C-60 30.00 N
n C-74 37.00 N
3 Pulse · para iniciar la reproducción.
A la hora especificada, la reproducción finaliza
gradualmente y el reproductor se detiene. En el
visor, aparece la letra “B” de la indicación
B
.
4 Para grabar en la cara B, dele la vuelta a la cinta y
pulse · o P en el reproductor para reanudar la
reproducción.
De nuevo, la reproducción finaliza gradualmente a
la hora especificada.
Para cancelar la desaparición gradual sincronizada
Pulse EDIT/TIME FADE.
Es posible especificar el tiempo de reproducción
Consulte “Es posible especificar la longitud de la cinta”
en la página 22.
1 Antes de iniciar la reproducción, pulse
PEAK SEARCH.
“PEAK” parpadea en el visor y el reproductor
empieza a explorar el disco para buscar el nivel
pico más alto.
Después de explorar todos los temas, el
reproductor repite la parte con el nivel pico más
alto.
2 Ajuste el nivel de grabación en la platina.
3 Pulse p en el reproductor para detener la
búsqueda del nivel más alto.
“PEAK” desaparece del visor.
Notas
• La parte de nivel más alto puede variar cada vez que se
intente realizar el ajuste del mismo disco. No obstante, la
diferencia es tan sutil que no tendrá ningún problema para
ajustar el nivel de grabación con precisión.
• La búsqueda del nivel de pico no funciona cuando se abre
la bandeja pulsando el botón EX-CHANGE.
Es posible cambiar los discos durante la desaparición
gradual sincronizada
La hora de desaparición gradual especificada sólo se
contabiliza durante la reproducción. Por tanto, es posible
cambiar el disco si la reproducción finaliza antes de la
hora de desaparición gradual especificada (por ejemplo,
al grabar CD sencillos en una cinta).
Puede realizar una aparición gradual para reanudar la
reproducción en el paso 4
Después de darle la vuelta a la cinta, pulse FADER.
Nota
Si pulsa el botón 0 o ) durante el modo de aparición o
desaparición sincronizada, éste se cancelará.
23
ES
Page 80

Almacenamiento de información acerca de los discos compactos (archivos personalizados)
Almacenamiento de información acerca de los discos compactos (archivos personalizados)
Etiquetado de discos en el reproductor
Funciones de los archivos
personalizados
≠ AMS ±
El reproductor puede almacenar dos tipos de
información, denominada “archivos personalizados”,
para cada disco. Una vez almacenados éstos para los
discos, el reproductor recupera automáticamente la
información almacenada cuando seleccione el disco.
Tenga en cuenta que los archivos personalizados se
borrarán si no utiliza el reproductor durante un mes
aproximadamente.
INPUT
1 Inserte o seleccione el disco.
CLEAR
Es posible almacenar esta información:
Si emplea
Memo de disco
(página 24)
Banco de borrado
(página 26)
Es posible
Asignar etiqueta a los discos
empleando un máximo de 12
caracteres
Eliminar los temas que no desee y
almacenar sólo los que desee
¿Dónde se almacenan los archivos
personalizados?
Los archivos personalizados no se almacenan en los
discos, sino en la memoria del reproductor. Esto significa
que no es posible utilizar archivos personalizados si
reproduce el disco en otros reproductores.
Borrado de todos los archivos
personalizados de todos los discos
Desactive el reproductor. Mientras mantiene pulsado
CLEAR, pulse 1/u para activar dicho reproductor.
“ALL ERASE” aparecerá en el visor y todos los
archivos personalizados se borrarán.
2 Pulse INPUT.
3 Gire ≠ AMS ± hasta que aparezca
“DISC MEMO” en el visor y, a continuación, pulse
≠ AMS ±.
Aparece el cursor parpadeante (Z).
4 Gire ≠ AMS ± hasta que aparezca el carácter
apropiado en el visor.
El cursor desaparece y el primer espacio del memo
de disco parpadea.
Conforme gira ≠ AMS ± en el sentido de las
agujas del reloj, los caracteres aparecen en el
siguiente orden. Gire ≠ AMS ± en el sentido
contrario a las agujas del reloj para volver al
carácter anterior.
(espacio) A B C D E F G H I J K L M N O P Q R S T
U V W X Y Z a b c d e f g h i j k l m n o p q r s t u v
w x y z 0 1 2 3 4 5 6 7 8 9 ! " # $ % & ' ( ) * + , – . / : ;
< = > ? @ [ \ ] ^ _ { | }
DISCSALL
DISC
S
-
1 2 3 4 5
CD1
12345
678910
24
5 Pulse ≠ AMS ± para seleccionar el carácter.
Etiquetado de discos (Memo
de disco)
Es posible asignar etiquetas a los discos empleando un
máximo de 12 caracteres y hacer que el reproductor
muestre el memo de disco cada vez que seleccione el
disco. Dicho memo puede ser lo que desee, como un
título, el nombre del cantante, la categoría o la fecha de
adquisición.
Si selecciona un disco CD TEXT
El título del disco se almacena automáticamente como
memo de disco.
Si dicho título tiene más de 12 caracteres, se almacenarán
los primeros 12 caracteres de éste (consulte la página 11).
Observe que no es posible cambiar el memo del disco
ES
CD TEXT.
El carácter seleccionado se ilumina y el cursor
parpadeante aparece para indicar el espacio
siguiente que va a introducirse.
DISCSALL
DISC
S
Para insertar un espacio
Pulse ).
Si comete un error
Pulse CLEAR y vuelva a comenzar la operación
introduciendo los caracteres correctos.
1 2 3 4 5
CD1
6 Repita los pasos 4 y 5 para introducir más
caracteres.
12345
678910
Page 81

Grabación a partir de discos compactos
Almacenamiento de información acerca de los discos compactos (archivos personalizados)
Grabación a partir de discos compactos
Grabación a partir de discos compactos
7 Pulse INPUT para almacenar el memo de disco.
Repita los pasos 1 a 7 para asignar memos de disco
a otros discos.
Etiquetado de discos con el mando a
distancia
SPACE
DISC/CAPS
Botones
numéricos
MEMO INPUT
0/)
DEL
ENTER
CLEAR
1 Pulse DISC/CAPS.
2 Pulse el botón numérico del disco al que desee
asignar un memo de disco y, a continuación,
ENTER.
3 Pulse MEMO INPUT.
Aparece el cursor parpadeante (Z).
4 Pulse DISC/CAPS para localizar el tipo de letra
que desee.
Cada vez que pulse el botón, el tipo de letra
cambiará cíclicamente entre letras mayúsculas
(ABC), minúsculas (abc) y números (123). Para
seleccionar un símbolo, debe elegir entre letras
mayúsculas o minúsculas.
ABC DEF&!?
JKL MNOGHI
TUV WXYPRS
QZ
>
10
Ejemplo: Para seleccionar la letra E
Pulse dos veces el botón numérico 3.
n D n E n F
Pulse 3. Pulse 3.
Para insertar un espacio, pulse SPACE una vez.
Para introducir un número, pulse el botón
numérico que desee.
ENTER
Caracteres asignados a cada
botón numérico
Pulse 3.
6 Pulse ENTER para seleccionar el carácter.
El carácter seleccionado se ilumina y el cursor
parpadeante aparece para indicar el espacio
siguiente que va a introducirse.
También es posible pasar al espacio siguiente
pulsando otros botones numéricos.
7 Repita los pasos 4 a 6 para introducir más
caracteres.
8 Pulse MEMO INPUT para almacenar el memo de
disco.
Repita los pasos 1 a 8 para asignar memos a otros
discos.
5 Para introducir una letra, pulse el botón numérico
correspondiente a la letra que desee (indicada
junto a cada botón numérico).
El cursor desaparece y el primer espacio del memo
de disco parpadea.
Cada vez que pulse el botón, la letra cambiará
cíclicamente entre las que se indican junto al botón.
Para introducir símbolos, pulse el botón numérico
1 varias veces hasta que el visor muestre el símbolo
que desee.
25
ES
Page 82

Almacenamiento de información acerca de los discos compactos (archivos personalizados)
Si comete un error mientras introduce el carácter
Para corregir el carácter introducido
1 Pulse 0 o ) hasta que el cursor se sitúe junto al
carácter incorrecto.
Almacenamiento de temas
específicos (Banco de borrado)
DISCSALL
DISC
Symphe y No1
2 Pulse DEL para eliminar el carácter incorrecto.
DISCSALL
DISC
Symph y No1
3 Introduzca el carácter correcto.
DISCSALL
DISC
Symphony No1
1 2 3 4 5
CD1
1 2 3 4 5
CD1
1 2 3 4 5
CD1
12345
678910
12345
678910
12345
678910
Para corregir el carácter que introduce actualmente
1 Pulse DEL para eliminar el carácter incorrecto.
2 Introduzca el carácter correcto.
Para insertar un carácter entre los introducidos
Pulse 0 o ) hasta que el cursor se sitúe junto al
punto que desee insertar e introduzca el carácter.
Es posible eliminar los temas que no desee y almacenar
sólo los que desee. Si selecciona un disco que contenga
un banco de borrado, podrá reproducir sólo los temas
restantes.
CONTINUE
SHUFFLE
CHECK
CLEAR
1 Inserte o seleccione el disco.
2 Pulse CONTINUE o SHUFFLE antes de iniciar la
reproducción.
3 Pulse CHECK varias veces hasta que el visor
muestre el tema que desee eliminar.
DISCSALL
DISC TRACK
1 2 3 4 5
1 1 ON
CD1
12345
678910
Borrado del memo de disco
1 Realice los pasos 1 y 3 de “Etiquetado de discos en
el reproductor” en la página 24 para seleccionar el
memo de disco que desee eliminar.
2 Pulse CLEAR.
El memo desaparecerá.
3 Pulse INPUT.
4 Pulse CLEAR.
“DELETE” y “OFF” aparecen en el visor.
DISCSALL
DISC TRACK
1 2 3 4 5
DELETE
1 1 OFF
CD1
2345
678910
Si desea recuperar el tema, vuelva a pulsar
CLEAR.
5 Repita los pasos 3 y 4 para eliminar más temas.
Es posible recuperar todos los temas eliminados
Mantenga pulsado CLEAR hasta que “ALL SELECT”
aparezca en el visor.
Nota
Los temas eliminados se omitirán aunque realice la
reproducción en los modos aleatorio o de programa (si el
disco completo que contenga un banco de borrado se
programa como un paso).
26
ES
Page 83

Información adicional
Información adicional
Información adicional
Precauciones
Seguridad
• Precaución — El uso de instrumentos ópticos con este
producto aumentará el peligro para los ojos.
• Si cae algún objeto sólido o se vierte líquido dentro de la
unidad, desenchufe el reproductor y haga que sea revisado
por personal cualificado antes de utilizarlo de nuevo.
Fuentes de energía
• Antes de utilizar el reproductor, compruebe que la tensión
de alimentación sea idéntica al suministro de alimentación
local. La tensión se indica en la placa de identificación
situada en la parte trasera del reproductor.
• El reproductor no se desconecta de la fuente de
alimentación CA (enchufe de pared) mientras esté
conectado a la toma mural, incluso si se encuentra apagado.
• Si no va a utilizar el reproductor durante varios días,
asegúrese de desconectarlo de la toma mural. Para
desconectar el cable de alimentación CA (conductor de
alimentación), tire del propio enchufe, nunca del cable.
• El cable de alimentación CA sólo debe sustituirse en un
taller de asistencia cualificado.
Colocación
• Sitúe el reproductor en un lugar con ventilación adecuada
para prevenir la acumulación de calor en su interior.
• No coloque el reproductor sobre una superficie inestable,
como tela, que pueda bloquear los orificios de ventilación
de la parte inferior.
• No sitúe el reproductor en un lugar cercano a fuentes de
calor, ni lo exponga a la luz directa del sol, polvo excesivo o
vibraciones mecánicas.
Notas sobre discos compactos
Utilización de discos compactos
• Para mantener limpio el disco, agárrelo por los bordes. No
toque la superficie.
• No pegue papel o cinta adhesiva en el disco.
• No exponga el disco a la luz directa del sol ni lo deje dentro
de un automóvil aparcado al sol, ya que puede producirse
un considerable aumento de la temperatura en el interior
del mismo.
• No utilice ningún estabilizador disponible comercialmente.
En caso contrario, el disco y el reproductor pueden sufrir
daños.
• Después de reproducir el disco, guárdelo en su caja.
Limpieza
• Antes de reproducir el disco, límpielo con un paño desde el
centro hacia afuera.
Funcionamiento
• Si se traslada el reproductor directamente de un lugar frío a
uno cálido, o se sitúa en una habitación muy húmeda,
puede condensarse humedad en las lentes contenidas en el
reproductor. Si esto ocurre, el reproductor puede no
funcionar correctamente. En este caso, retire el disco y deje
el reproductor activado durante una hora
aproximadamente hasta que se evapore la humedad.
Ajuste del volumen
• No aumente el volumen mientras escucha una parte con un
nivel muy bajo de entradas o sin señales de audio. En caso
contrario, los altavoces pueden dañarse cuando se
reproduzca la parte de nivel más alto.
Limpieza
• Limpie la unidad, el panel y los controles con un paño
suave humedecido en una solución detergente poco
concentrada. No utilice ningún tipo de estropajo o
limpiador en polvo abrasivos, ni disolvente, como alcohol o
bencina.
Si tiene alguna duda o le surge algún problema en
relación al reproductor, póngase en contacto con el
proveedor Sony más cercano.
• No emplee disolventes, como bencina, diluyentes,
limpiadores comercialmente disponibles o aerosoles
antiestáticos para LPs de vinilo.
27
ES
Page 84

Información adicional
Solución de problemas
Si le surge cualquiera de las siguientes dificultades
mientras utiliza el reproductor, emplee esta guía de
solución de problemas para resolver el problema. Si
éste no desaparece, póngase en contacto con el
proveedor Sony más cercano.
Ausencia de sonido.
/Compruebe que el reproductor está firmemente
conectado.
/Compruebe que está utilizando el amplificador
correctamente.
/Ajuste el nivel de salida mediante los botones
LINE OUT LEVEL +/– del mando a distancia.
No es posible reproducir el CD.
/No se ha insertado ningún CD en el reproductor
(aparece “–NO DISC–”). Inserte uno.
/Sitúe un CD correctamente con la etiqueta hacia
arriba en la bandeja de discos.
/Limpie el CD (consulte la página 27).
/Se ha condensado humedad en el reproductor.
Retire el disco y deje el reproductor encendido
durante una hora aproximadamente (consulte la
página 27).
/Coloque el CD en la posición correcta sobre la
bandeja de discos.
El mando a distancia no funciona.
/Retire los obstáculos que se interpongan entre el
mando a distancia y el reproductor.
/Apunte el mando a distancia al sensor remoto
g del reproductor.
/Sustituya todas las pilas del mando a distancia
por unas nuevas si se han agotado.
/Sitúe el interruptor CD 1/2/3 del mando a
distancia según la posición del selector
COMMAND MODE en el panel posterior del
reproductor.
El reproductor no funciona correctamente.
/Es posible que los chips del microordenador no
estén funcionando correctamente. Desactive la
alimentación y vuelva a activarla para restaurar
el reproductor.
Especificaciones
Reproductor de discos compactos
Láser Semiconductor (λ = 780 nm)
Salida de láser Máx. 44,6 µW*
Respuesta de frecuencia De 2 Hz a 20 kHz ±0,5 dB
Relación señal-ruido Superior a 107 dB
Rango dinámico Superior a 98 dB
Distorsión armónica Inferior a 0,0040%
Separación de canales Superior a 100 dB
Salida
Tipo de
toma
LINE OUT
DIGITAL OUT
(OPTICAL)
PHONES
Tomas de
fono
Conector
de salida
óptico
Toma de
fono
estéreo
General
Requisitos de alimentación
Lugar de adquisición
Canadá
Europa
Consumo de alimentación 14 W
Dimensiones (aprox.) 430 × 120 × 393 mm
(an/al/f) incluidas partes salientes
Masa (aprox.) 5,4 kg
Accesorios suministrados
Cable de audio (2 enchufes de fono – 2 enchufes de fono) (1)
Mando a distancia (control remoto) (1)
Pilas R6 (tamaño AA) (2)
El diseño y las especificaciones están sujetos a cambio sin previo
aviso.
Duración de la emisión: continua
* Esta salida es el valor medido a una
distancia de 200 mm de la superficie
de la lente del objetivo del bloque de
recogida óptico con una apertura de
7 mm.
Nivel máximo
de salida
2 V
(a 50 kiloohmios)
–18 dBm
10 mW
Requisitos de alimentación
120 V CA, 60 Hz
220 V – 230 V CA, 50/60 Hz
Impedancia de carga
Superior a
10 kiloohmios
Longitud de onda:
660 nm
32 ohmios
28
ES
Page 85

Indice alfabético
Información adicional
Información adicional
Indice alfabético
A
Aleatoria, reproducción 15
Almacenamiento
información sobre CD 24
temas específicos 26
AMS 14
Aparición y desaparición
gradual del sonido 22
aparición y desaparición
sincronizada 23
Archivos personalizados
Banco de borrado 26
Memo de discos 24
usos 24
Asignación de etiquetas a los
discos 24
B
Borrado
Archivos personalizados 24
Banco de borrado 26
Memo de discos 26
Búsqueda. Consulte Localización
Búsqueda del nivel pico 23
C
Cambio de las etiquetas de
disco 19
Carga de las etiquetas de
disco 19
CD-TEXT 11
Conexión 4
otro reproductor de CD 6
Conexiones 4
descripción general 4
Continua, reproducción 8
Control de otro reproductor de
CD 18
D
Desembalaje 4
E, F
Edición. Consulte Grabación
Edición sincronizada 21
Exploración. Consulte
Exploración musical
Exploración musical 14
L
Localización
control 14
directamente 13, 14
exploración 13, 14
mediante comprobación de
etiquetas 13
observación del visor 14
utilizando AMS 14
M, N, O
Mando a distancia 4
Mega Control avanzado 18
P, Q
Programa 16
cambio 18
comprobación 18
para grabar 21
R
Repetición 15
Reproducción
aleatoria 15
continua 8
de programa 16
repetida 14
Reproducción alterna 20
Reproducción X-Fade 20
Reproducción sin demora 20
S
Selección de reproducción
aleatoria 15
Selección del idioma 12
Sensor de música automático.
Consulte AMS
Sincronizada, aparición y
desaparición 23
Solución de problemas 28
Sustitución de discos mientras
se reproduce un disco 12
T
Tiempo completo de
reproducción 10
Tiempo restante 10
U, V, W, X, Y, Z
Utilización de discos
compactos 27
Nombres de controles
Botones
CHECK 18
CLEAR 18
CONTINUE 8
DISC 13
DISC 1 – 5 13
DISC/CAPS 25
DISC CHECK 13
DISC SKIP 12, 13
EDIT/TIME FADE 21, 23
ENTER 13
EX-CHANGE 12
FADER 22
HIGH-LIGHT 11
INPUT 12, 24
LINE OUT LEVEL +/– 5
MEGA CONTROL 18
MEMO INPUT 25
MUSIC SCAN 14
NO DELAY 20
Número 14
§ OPEN/CLOSE 8
PEAK SEARCH 23
PROGRAM 16
REPEAT 14
SHUFFLE 15
TIME/TEXT 10
X-FADE 20
· 9
P 9
p 9
0/) 14
0 (–AMS+) ) 18
=/+ 14
> 10 14
Control
AMS
≠
± 14, 18
(DISC)
Tomas
PHONES 8
Interruptor
1/u 8
Otros
Bandeja de discos 8
Visor 10
g 4
G, H, I, J, K
Grabación 21
un programa 21
uso de edición
sincronizada 21
29
ES
Page 86

VARNING
Välkommen!
Utsätt inte CD-spelaren
för regn eller fukt
eftersom det kan
medföra risk för brand
och/eller elektriska
stötar. Öppna inte höljet.
Det kan resultera i risk
för elektriska stötar.
Överlåt allt underhållsoch reparationsarbete till
fackkunniga tekniker.
Denna produkt är klassificerad som en
KLASS 1 LASER-produkt. KLASS 1
LASER-märkningen finns på enhetens
baksida.
Gratulerar till ditt köp av Sonys CDspelare. Innan du börjar använda CDspelaren bör du läsa igenom bruksanvisningen noggrant. Spara bruksanvisningen för framtida bruk.
Om bruksanvisningen
Instruktionerna i denna bruksanvisning
gäller för modell CDP-CE535.
Konventioner
• Instruktionerna i bruksanvisningen
beskriver kontrollerna på CDspelaren.
Du kan även använda kontrollerna på
fjärrkontrollen om de har samma eller
liknande namn som på CD-spelaren.
• Följande symboler används i bruks-
anvisningen:
Anger att uppgiften kan
utföras med hjälp av
fjärrkontrollen.
Anger tips och råd som
underlättar uppgiften.
SE
2
Page 87

INNEHÅLLSFÖRTECKNING
Komma igång
Packa upp............................................................................................................................. 4
Ansluta systemet................................................................................................................. 4
Ansluta en annan CD-spelare ........................................................................................... 6
Spela upp en CD-skiva ...................................................................................................... 8
Spela CD-skivor
Teckenfönstret ................................................................................................................... 10
Byta ut en CD-skiva under uppspelning....................................................................... 12
Hitta en bestämd CD-skiva ............................................................................................. 13
Hitta ett visst spår ............................................................................................................. 14
Hitta en viss punkt i ett spår ........................................................................................... 14
Spela upp spår flera gånger ............................................................................................ 14
Uppspelning i slumpmässig ordning (Shuffle Play) ................................................... 15
Skapa egna program (Programmerad uppspelning) .................................................. 16
Styra en annan CD-spelare (Avancerad mega-kontroll)............................................. 18
Spela växelvis (No-Delay Play/X-Fade Play)............................................................... 20
Spela in från CD-skivor
Spela in ett eget program................................................................................................. 21
Spela in en CD-skiva genom att ange bandlängd (tidsredigering) ........................... 21
In- och uttoning................................................................................................................. 22
Ställa in inspelningsnivå (toppnivåsökning) ................................................................ 23
Lagra information om CD-skivor (eget minne)
Vad du kan göra med det egna minnet ......................................................................... 24
Namnge skivor (Eget minne) .......................................................................................... 24
Lagra vissa bestämda spår (Utelämna spår)................................................................. 26
Ytterligare information
Försiktighetsåtgärder ....................................................................................................... 27
Om CD-skivor ................................................................................................................... 27
Felsökning.......................................................................................................................... 28
Tekniska data .................................................................................................................... 28
SE
Register
Register ............................................................................................................................... 29
SE
3
Page 88

Komma igång
Komma igång
Packa upp
Kontrollera att du har fått följande delar:
• Ljudkabel (1)
• Fjärrkontroll (1)
• R6-batterier (storlek AA) (2)
Sätta i batterier i fjärrkontrollen
Du kan styra CD-spelaren med den medföljande
fjärrkontrollen.
Sätt i två R6-batterier (storlek AA) enligt polanvisningarna + och –. När du använder fjärrkontrollen ska du peka mot fjärrsensorn g på CDspelaren.
Ansluta systemet
Översikt
I det här avsnittet beskrivs hur du ansluter CDspelaren till en förstärkare. Stäng av alla komponenter
innan du gör några anslutningar.
DIGITAL OUT
CONTROL A1
LINE OUT
(L)
Ljudingång
(L)
(OPTICAL)
LINE OUT
(R)
Ljudingång
(R)
CD-spelare
Till ett vägguttag
Förstärkare
När behöver batterierna bytas?
Vid normal användning räcker batterierna i cirka sex
månader. Ersätt alla batterier med nya när fjärrkontrollen
inte längre fungerar.
Observera
• Placera inte fjärrkontrollen på en extremt varm eller fuktig
plats.
• Se till att du inte tappar några främmande föremål inuti
fjärrkontrollen, särskilt när du byter batterier.
• Utsätt inte fjärrsensorn för direkt solljus eller annat starkt
ljus. Det kan få mekanismen att fungera dåligt.
• Om du inte använder fjärrkontrollen under en längre tid
bör du, för att undvika batteriläckage och korrosion, ta ur
batterierna.
: Signalflöde
Vilka kablar behövs?
Ljudkabel (medföljer) (1)
Röd (R)
Till ett vägguttag
Vit (L)Vit (L)
Röd (R)
SE
4
Page 89

Komma igång
Anslutningar
Anslut ljudkabeln korrekt enligt färgmarkeringarna:
Röd (höger) till röd och vit (vänster) till vit. Se till att
kontakterna sitter i ordentligt eftersom det annars kan
uppstå ett störande surrande ljud eller brus.
CD-spelare
2ND
LINE
CD
IN OUT
L
R
Du kan anpassa utnivån till förstärkaren
Tryck på LINE OUT LEVEL +/– på fjärrkontrollen. Du
kan minska utnivån med upp till –20 dB.
När du minskar utnivån visas “
Observera
Trycker du på någon av knapparna LINE OUT LEVEL
+/– på fjärrkontrollen under inspelning ändras
inspelningsnivån även om du ställt in den på t ex
kassettdäcket.
• Om du har en digital komponent, t ex en digital
förstärkare, en D/A-konverterare, eller en DAT- eller
MD-spelare
Anslut komponenten via DIGITAL OUT (OPTICAL)uttaget med den optiska kabeln (tillval). Ta av
skyddshatten och sätt i den optiska kabeln.
Observera att du inte kan använda in- och uttoning (sid 22)
eller tidsinställd toning (sid 23) om du gör denna
anslutning.
POC-15
Optisk kabel (medföljer inte)
CD-spelare Digital komponent
DIGITAL
OUT
OPTICAL
Förstärkare
INPUT
CD
FADE
” i teckenfönstret.
DIGITAL
INPUT
OPTICAL
L
R
Om du har en Sony-enhet med CONTROL A1 -utgång
(eller CONTROL A1)
Anslut enheten via CONTROL A1 -uttaget (eller
CONTROL A1). Du kan förenkla användningen av
ljudsystem bestående av separata Sony-enheter. Mer
information finns i anvisningarna till “CONTROL-A1
Control System”.
Om annan CD-spelare än Sonys används tillsammans
med CD-spelaren
Du kan göra så att den medföljande fjärrkontrollen bara
fungerar med denna CD-spelare.
• Om du använder en CD-spelare med COMMAND
MODE-väljare:
Låt den här CD-spelarens COMMAND MODE-väljare
vara ansluten till CD 1 (detta är fabriksinställningen)
och ställ in den andra CD-spelarens COMMAND
MODE-väljare till CD 2 eller CD 3. Ställ sedan in
respektive fjärrkontrolls CD 1/2/3-omkopplare på
motsvarande sätt.
• Om du använder en CD-spelare utan COMMAND
MODE-väljare:
Kommandoläget för en CD-spelare utan COMMAND
MODE-väljare är inställt till CD 1. Ställ in denna CDspelares COMMAND MODE-väljare och
fjärrkontrollens CD 1/2/3-omkopplare till CD 2 eller
CD 3.
Ansluta nätkabeln
Anslut nätkabeln till elnätet.
Transportera CD-spelaren
Innan du transporterar CD-spelaren följer du
proceduren nedan för att återställa spelaren till
ursprungsläget.
1 Ta ur alla CD-skivor ur skivfacket.
2 Tryck på § OPEN/CLOSE för att stänga facket.
“–NO DISC–” visas i teckenfönstret.
3 Vänta i 10 sekunder och slå sedan av CD-spelaren
genom att trycka på 1/u.
Observera
När du ansluter något via DIGITAL OUT (OPTICAL)-uttaget
kan ljud uppstå när du spelar andra CD-skivor än
musikskivor, t ex CD-ROM-skivor.
SE
5
Page 90

Komma igång
Ansluta en annan CD-spelare
Om du har en Sony CD-spelare som du kan sätta i 5,
50, 200 eller 300 skivor i och den är utrustad med
CONTROL A1
kommandoläget för denna spelare kan ställas in på CD
3 är det möjligt att styra den spelaren som spelare två
med denna enhet. När enheten anslutits till en
förstärkare, följer du nedanstående instruktioner.
Stäng av strömmen till båda spelarna innan du gör
anslutningen.
COMMAND
MODE
-uttag (eller CONTROL A1), och
Till LINE OUT
CDP-CE535
Vilka kablar behövs?
• Ljudkabel (1) (Använd kabeln som medföljer den spelare
som ska anslutas.)
• Enkanalig (2P) minikontaktkabel (1) (medföljer inte)
1 Anslut spelarna med en ljudkabel (se även
“Anslutningar” på sid 5).
CDP-CE535
2ND
LINE
CD
IN OUT
L
R
CDP-CX300, etc.
LINE OUT
L
R
2 Anslut spelarna med en enkanalig (2P)
minikontaktkabel.
Till 2ND CD IN
Till en ljudutgång
Till ett vägguttag
Till CONTROL A1
CDP-CX300, etc.
Till CONTROL A1
Till en ljudingång
Till ett vägguttag
Förstärkare
CDP-CE535
CONTROL A1
CDP-CX300, etc.
CONTROL A1
Mer information om anslutningen finns i
anvisningarna till “CONTROL-A1
Control
System”.
3 Ställ in COMMAND MODE-väljaren för spelarna.
Låt COMMAND MODE-väljaren på denna spelare
vara inställd på CD 1 eller CD 2, och den andra
spelarens på CD 3.
COMMAND
MODE
CD
132
För information om hur man använder den andra
spelaren, se “Styra en annan CD-spelare” på sid 18
och “Spela växelvis” på sid 20.
Till ett vägguttag: Signalflöde
SE
6
Page 91

4 Anslut spelarnas nätkablar till ett vägguttag.
Observera
• Anslut inte någon annan spelare än den som används som
den andra spelaren till 2ND CD IN-uttagen på den här
spelaren.
• Vid anslutning av en andra CD-spelare ska du inte ansluta
DIGITAL OUT (OPTICAL)-kontakten på denna enhet till
förstärkaren.
Komma igång
SE
7
Page 92

Grundfunktioner
Spela upp en CD-skiva
2
REPEAT
CONTINUE SHUFFLE PROGRAM
I / u
DISC 1 DISC 2 DISC 3 DISC 4 DISC 5
DISC CHECK
CHANGE
4
EX-
356
OPEN/CLOSE
DISC
SKIP
AMS
(DISC)
Anslut hörlurarna.
• Mer information om hur du
ansluter finns på sid 4 – 5.
PHONES
EDIT/
PEAK
TIME/
INPUT
FADER
TIME FADE
SEARCH
TEXT
(-AMS+)
PUSH ENTER
X-FADENO DELAYCLEARCHECK
MEGA
CONTROL
Slå på förstärkaren och ställ in den på CD-spelaren så att du kan
1
lyssna på ljudet från denna spelare.
Slå på CD-spelaren genom att trycka på 1/u.
2
Tryck på § OPEN/CLOSE och lägg en skiva på skivtallriken.
3
SkivnummerMed textsidan uppåt
Om du vill fylla på med ytterligare skivor trycker du på
4
DISC SKIP och lägger dem i den ordning du vill spela dem.
Varje gång du trycker på knappen vrids skivfacket så att du kan
lägga skivorna på de tomma skivtallrikarna. CD-spelaren spelar
först upp den CD-skiva som är mitt framför dig.
Välj ALL DISCS eller 1 DISC (kontinuerlig uppspelning genom)
5
att trycka på CONTINUE.
Varje gång du trycker på knappen CONTINUE visas
“ALL DISCS” eller “1 DISC” i teckenfönstret.
När du väljer
ALL DISCS
1 DISC
SE
8
Spelar CD-spelaren
Alla skivor i nummerordning
Endast den valda CD-skivan
Page 93

Grundfunktioner
Du kan välja den skiva du vill
spela först
Tryck på en av knapparna
DISC 1 – 5.
Du kan anpassa utnivån till
förstärkaren
Tryck på LINE OUT LEVEL
+/– på fjärrkontrollen. Du
kan minska utnivån med
upp till –20 dB.
När du minskar utnivån
visas “
FADE
” i
teckenfönstret.
Volymen i hörlurarna
ändras också när du justerar
utnivån.
Observera
Trycker du på någon av
knapparna LINE OUT
LEVEL +/– på
fjärrkontrollen under
inspelning ändras
inspelningsnivån även om
du ställt in den på t ex
kassettdäcket.
Tryck på ·.
6
Skivfacket stängs och alla spår spelas upp en gång (kontinuerlig
uppspelning).
Justera volymen på förstärkaren.
Avbryta uppspelning
Tryck på p.
·
pPDISC 1 – 5 DISC SKIP
CONTINUE SHUFFLE PROGRAM REPEAT
I / u
DISC 1 DISC 2 DISC 3 DISC 4 DISC 5
PHONES
INPUT
FADER
För att
Göra paus
Fortsätta spela efter paus
Gå till nästa spår
Gå till föregående spår
Gå till nästa CD-skiva
Välja en CD-skiva direkt
Avbryta uppspelningen och ta ut CD-skivan
DISC CHECK
EDIT/
PEAK
TIME/
TIME FADE
SEARCH
TEXT
(-AMS+)
EX-
CHANGE
X-FADENO DELAYCLEARCHECK
≠ AMS ±
Gör så här
Tryck på P
Tryck på P eller ·
Vrid ≠ AMS ± medsols
Vrid ≠ AMS ± motsols
Tryck på DISC SKIP
Tryck på DISC 1 – 5
Tryck på § OPEN/CLOSE
OPEN/CLOSE
DISC
SKIP
AMS
(DISC)
PUSH ENTER
MEGA
CONTROL
§ OPEN/CLOSE
Grundfunktioner
SE
9
Page 94

Spela CD-skivorSpela CD-skivor
Teckenfönstret
I teckenfönstret kan du visa information om skivan.
Visa information medan en skiva spelas
När du spelar en skiva, visas i teckenfönstret aktuellt
skivnummer, aktuellt spårnummer och spårets speltid
och musikkalendern.
Aktuellt skivnummer Speltid
INPUT TIME/TEXT ≠ AMS ±
Visa information om totalt antal spår och
total speltid
Tryck på TIME/TEXT innan du påbörjar
uppspelningen.
I teckenfönstret visas aktuellt skivnummer, totalt antal
spår, total speltid samt en musikkalender.
Aktuellt skivnummer Total speltid
DISCSALL
DISC TRACK
1 1O 45.28
1 2 3 4 5
MIN SEC
CD1
Totalt antal spår Musikkalender
Dessa uppgifter visas även när du trycker på
§ OPEN/CLOSE för att stänga skivfacket.
Spår med nummer över 20 kan inte visas i
musikkalendern.
Viktigt om skivnummerindikering
• Den röda cirkeln runt ett skivnummer visar att CD-skivan
är klar för uppspelning.
• När alla spår på en CD-skiva har spelats upp försvinner
halvcirkeln runt skivnumret.
• När en skivtallrik är tom försvinner skivnumret med
halvcirkeln.
12345
678910
DISCSALL
DISC TRACK
1 2 3 4 5
MIN SEC
1 1 1.56
CD1
12345
678910
Aktuellt spårnummer Musikkalender
Spårnumren i musikkalendern försvinner när spåren
har spelats.
Visa information om återstående speltid
Varje gång du trycker på TIME/TEXT medan du spelar
upp en skiva ändras informationen i teckenfönstret
enligt tabellen nedan.
Speltid på det
aktuella spåret
Tryck på TIME/TEXT.
Återstående
speltid för det
aktuella spåret
Tryck på TIME/TEXT.
Återstående tid
av skivan
DISCSALL
1 2 3 4 5
DISC TRACK
MIN SEC
1 1 1.56
DISCSALL
1 2 3 4 5
DISC TRACK
MIN SEC
1 1 -1.57
Om spårnumret är högre än 24 visas
“– – – –” i stället för återstående
speltid.
DISCSALL
1 2 3 4 5
DISC TRACK
MIN SEC
1 -43.32
12345
678910
CD1
12345
678910
CD1
12345
678910
CD1
10
Denna information visas endast i
kontinuerligt uppspelningsläge.
Tryck på TIME/TEXT.
SE
Page 95

Spela CD-skivor
Kontrollera information på CD TEXT-skivor
CD TEXT-skivorna innehåller information, t ex
skivtitlar eller artistnamn. Informationen finns sparad
på ett tomt utrymme, där vanliga skivor saknar
information. I teckenfönstret visas CD TEXTinformationen så att du kan se aktuell skivtitel,
artistnamn och namn på spåret. När du väljer en CD
TEXT-skiva, tänds “CD-TEXT” i teckenfönstret. Varje
gång du trycker på TIME/TEXT-knappen ändras
informationen i teckenfönstret på följande sätt:
• Innan du påbörjar uppspelningen
CD1
CD1
CD-TEXT
CD-TEXT
12345
678910
12345
678910
Skivtitel
DISCSALL
DISC
1 2 3 4 5
SONYHITS
Tryck på TIME/TEXT.
Artistnamn
DISCSALL
1 2 3 4 5
ART.
Sony Band
Tryck på TIME/TEXT.*
* I teckenfönstret visas under några sekunder aktuellt
skivnummer, totalt antal spår och skivans totala speltid.
Sedan visas skivtiteln igen.
• Under uppspelning av en CD-skiva
DISCSALL
Spårtitel
1 2 3 4 5
TRACK
HitechBlues
Denna information visas också när
spelaren söker efter spåret.
Tryck på TIME/TEXT.
DISCSALL
Speltid
DISC TRACK
1 2 3 4 5
MIN SEC
2 1 1.56
Tryck på TIME/TEXT.
Återstående tid
av det aktuella
spåret
Tryck på TIME/TEXT.
Återstående tid av
skivan
DISCSALL
1 2 3 4 5
DISC TRACK
MIN SEC
2 1 -1.57
Om spårets nummer är högre än 24
visas “– – – –” i stället för
återstående tid.
DISCSALL
1 2 3 4 5
DISC TRACK
MIN SEC
2 -58.5‚
Information visas endast i läget
kontinuerlig uppspelning.
CD1
CD1
CD1
CD1
CD-TEXT
CD-TEXT
CD-TEXT
CD-TEXT
12345
678910
12345
678910
12345
678910
12345
678910
Tryck på TIME/TEXT.
Om en sträng av CD TEXT-information har fler än 12
tecken tänds de första 12 tecknen när alla tecknen har
visats i teckenfönstret.
Observera
Denna CD-spelare kan endast visa skivtitel, spårtitel och
artistnamn från CD TEXT-skivor. Övrig CD TEXTinformation kan inte visas.
Spela höjdpunkter på skivan Z
Vissa CD TEXT-skivor har en funktion som gör att du kan
spela endast höjdpunkterna på en skiva. När du väljer en
sådan skiva visas “HIGH LIGHT” i teckenfönsret.
Tryck på HIGH-LIGHT på fjärrkontrollen för att börja
uppspelningen av skivans höjdpunkter i stoppläget.
“HIGH LIGHT” blinkar i teckenfönstret medan
höjdpunkterna spelas.
11
SE
Page 96

Spela CD-skivor
Val av språk för CD TEXT-informationen
Du kan välja språk för CD TEXT-informationen om du
väljer en CD TEXT-skiva som har flerspråkig
information.
När du valt språk visas informationen på detta språk i
teckenfönstret tills du stänger av spelaren. Om
spelaren inte kan läsa språket som ligger inlagt på en
CD TEXT-skiva visas “(other lang)”.
Byta ut en CD-skiva under
uppspelning
Du kan öppna skivfacket under uppspelning av en
skiva för att kontrollera vilka skivor som därefter
kommer att spelas och byta skivor utan att avbryta
uppspelningen av den aktuella skivan.
1 Tryck på INPUT i stoppläge.
2 Vrid ≠ AMS ± tills “SELEC LANG.” visas i
teckenfönstret.
CD1
CD-TEXT
12345
678910
DISCSALL
DISC
1 2 3 4 5
SELECT LANG.
3 Tryck på ≠ AMS ±.
4 Vrid ≠ AMS ± tills önskat språk visas i
teckenfönstret.
5 Tryck på ≠ AMS ± för att välja språk.
“Reading Text” (“Läser text”) visas tillfälligt och
sedan visas informationen på valt språk i
teckenfönstret.
Kontrollera valt språk
1 Tryck på INPUT samtidigt som du spelar en CD TEXT-
skiva.
2 Vrid ≠ AMS ± tills “SHOW LANG.” visas i
teckenfönstret. Tryck sedan på ≠ AMS ±.
Aktuellt språk visas tillfälligt.
Du kan även kontrollera aktuellt språk då du valt en CD
TEXT-skiva som inte har flerspråkig information.
Observera
Om du väljer en CD TEXT-skiva som inte har informationen
på valt språk, visas i teckenfönstret informationen på ett annat
språk enligt skivans preferens.
DISC SKIPEX-CHANGE
1 Tryck på EX-CHANGE.
Skivfacket öppnas och två skivtallrikar visas. Även
om en CD-skiva spelas avbryts inte uppspelningen.
2 Byt ut CD-skivorna mot nya skivor.
CD-spelaren spelar CD-skivan på den vänstra
skivtallriken efter den aktuella CD-skivan och
sedan skivan på den högra.
3 Tryck på DISC SKIP.
Skivfacket vrids och två andra skivtallrikar visas.
4 Byt ut CD-skivorna mot nya skivor.
5 Tryck på EX-CHANGE.
Skivfacket stängs.
När skivtallriken är öppen och du trycker på knappen
EX-CHANGE
• Om uppspelningen av den aktuella CD-skivan tar slut
avbryts uppspelningen. Om du spelar upp i läget 1 DISC
upprepad uppspelning (se sid 15) spelas den aktuella CDskivan upp igen.
• I uppspelningsläget ALL DISCS (slumpmässig ordning) (se
sid 15) spelas spåren på den aktuella skivan upp i
slumpmässig ordning.
• Vid programmerad uppspelning (se sid 16) spelas endast
spåren på den aktuella CD-skivan upp.
• Skjut inte in skivfacket när du stänger det i steg 5. Det kan
skada CD-spelaren.
12
SE
Page 97

Hitta en bestämd CD-skiva
Du kan hitta en CD-skiva innan du påbörjar
uppspelningen eller under uppspelningen.
DISC 1 – 5
Spela CD-skivor
Du kan utöka speltiden när du söker efter skivorna
Tryck på DISC CHECK flera gånger tills önskad speltid
(10, 20 eller 30) visas i teckenfönstret. Varje gång du
trycker på knappen ändras speltiden cykliskt.
DISC SKIP·DISC CHECK
Observera
• När du trycker på DISC CHECK ändras spelsättet
automatiskt till ALL DISCS (kontinuerlig uppspelning).
• När du har öppnat skivfacket genom att trycka på
EX-CHANGE kan du inte använda funktionen DISC
CHECK.
• Även om du trycker på DISC CHECK medan “REPEAT”
visas i teckenfönstret (se sid 14) stannar CD-spelaren när
den har sökt av alla CD-skivor en gång.
DISC
DISC SKIP +/–
För att hitta
Nästa CD-skiva
Nästa skiva eller
efterföljande skivor Z
Aktuell skiva eller
föregående skivor Z
En bestämd CD-skiva
direkt
En CD-skiva medan du
kontrollerar etiketterna
En CD-skiva genom att
avsöka första spåret på
varje CD-skiva i 10
sekunder
Sifferknappar
ENTER
·
Tryck på
DISC SKIP under uppspelning
av en CD-skiva
DISC SKIP + upprepade gånger
tills du hittar skivan
DISC SKIP – upprepade gånger
tills du hittar skivan
DISC 1 – 5.
Om du använder
fjärrkontrollen följer du
proceduren nedan:
1 Tryck på DISC.
2 Tryck på den sifferknapp
som motsvarar skivan.
3 Tryck på ENTER.
DISC CHECK då skivfacket är
öppet. Skivfacket vrids så du
får se alla skivetiketter. När
önskad CD-skiva är mitt
framför dig trycker du på ·
för att fortsätta uppspelningen.
DISC CHECK innan du startar
uppspelningen när skivfacket
är stängt. När du har hittat CDskivan trycker du på · för att
påbörja uppspelningen.
13
SE
Page 98

Spela CD-skivor
Hitta ett visst spår
Du kan snabbt hitta ett spår när du spelar en skiva med
hjälp av AMS (Automatic Music Sensor). Du kommer
åt funktionen med AMS-knappen eller med
fjärrkontrollens sifferknappar.
≠ AMS ±
Sifferknappar
>10
MUSIC SCAN
=/+
·
Hitta en viss punkt i ett spår
Du kan även söka efter en bestämd punkt i ett spår när
du spelar en CD-skiva.
0/)
När du vill hitta
en viss punkt när du
justerar ljudet
en viss punkt snabbt
genom att leta i
teckenfönstret under
paus
Observera
Om “OVER” visas i teckenfönstret har skivan spelats till slutet
medan du har tryckt ned knappen ). Tryck på 0 eller
vrid ≠ AMS ± motsols för att gå till början av skivan.
Tryck på
) (framåt) eller 0 (bakåt) och
håll ned knappen tills du hittar den
punkt i spåret som du söker.
) (framåt) eller 0 (bakåt) och
håll ned knappen tills du hittar den
punkt i spåret som du söker. Inget
ljud hörs medan du gör detta.
14
För att hitta
Nästa eller efterföljande spår
Aktuellt eller
föregående spår
Ett bestämt spår
direkt
Ett spår genom att
söka av varje spår
under 10 sekunder
(musiksökning)
Gör så här
Vrid ≠ AMS ± medsols tills du
hittar spåret. Om du använder
fjärrkontrollen trycker du på + flera
gånger tills du hittar spåret.
Vrid ≠ AMS ± motsols tills du
hittar spåret. Om du använder
fjärrkontrollen trycker du på = flera
gånger tills du hittar spåret.
Tryck på sifferknappen med spårets
nummer på fjärrkontrollen
Tryck på MUSIC SCAN på
fjärrkontrollen innan du påbörjar
uppspelningen. När du hittat önskat
spår trycker du på · för att påbörja
uppspelningen.
Spela upp spår flera gånger
Du kan spela upp skivorna/spåren flera gånger i
valfritt uppspelningsläge.
REPEAT
Tryck på REPEAT medan en skiva spelas upp.
“REPEAT” visas i teckenfönstret. Skivorna/spåren
repeteras på följande sätt:
Gå direkt till spår med nummer högre än 10
Tryck först på >10, och sedan på motsvarande
sifferknappar på fjärrkontrollen. Du matar in “0” med
knappen 10/0.
Exempel: Du vill spela upp spår nummer 30
Tryck först på >10 och sedan på 3 och 10/0.
Du kan förlänga speltiden under musiksökning
Tryck upprepade gånger på MUSIC SCAN tills önskad
uppspelningstid (10, 20 eller 30) visas i teckenfönstret.
Varje gång du trycker på knappen ändras speltiden
SE
cykliskt.
Page 99

Spela CD-skivor
Vid detta spelsätt
ALL DISCS Kontinuerlig
uppspelning (sidan 8)
1 DISC Kontinuerlig
uppspelning (sidan 8)
ALL DISCS Slumpmässig
uppspelning (sidan 15)
1 DISC Slumpmässig
spelning (sidan 15)
Programmerad spelning
(sidan 16)
Avbryta uppspelning med repetition
Tryck på REPEAT upprepade gånger tills “REPEAT OFF”
visas i teckenfönstret.
Upprepar CD-spelaren
Alla spår på alla skivor
Alla spår på den aktuella CDskivan
Alla spår på alla skivor i
slumpmässig ordning
Alla spår på den aktuella CDskivan i slumpmässig ordning
Samma program
Repetera aktuellt spår
Du kan repetera enbart aktuellt spår medan skivan
spelas upp oavsett uppspelningsläge.
Medan det spår du vill repetera spelas trycker du på
REPEAT flera gånger tills “REPEAT 1” visas i
teckenfönstret.
2 Tryck på · för att starta ALL DISCS
(slumpmässig uppspelning).
Indikatorn
“blandar” spåren.
Avbryta den slumpmässiga uppspelningen
Tryck på CONTINUE.
Du kan starta slumpmässig uppspelning medan skivan
spelas
Tryck på SHUFFLE. Den slumpmässiga uppspelningen
börjar från aktuellt spår.
Du kan ange CD-skivor under slumpmässig
uppspelning (välj slumpmässig uppspelning)
Du kan ange skivor medan du spelar upp i läget ALL
DISCS (slumpmässig ordning) och spåren på valda CDskivor spelas upp i slumpmässig ordning.
Tryck på DISC 1 – 5 för att ange önskade CD-skivor efter
steg 1.
Halvcirklar visas runt skivnumren i teckenfönstret. Om
du vill annullera de valda skivorna trycker du på
DISC 1 – 5 igen. Halvcirklarna försvinner.
Om du vill återgå till ALL DISCS (slumpmässig
uppspelning) trycker du på SHUFFLE två gånger.
visas medan CD-spelaren
Avbryta Repeat 1
Tryck på REPEAT.
Uppspelning i slumpmässig
ordning (Shuffle Play)
CD-spelaren kan “blanda” och spela upp spåren i
slumpmässig ordning. CD-spelaren spelar upp alla
spår slumpmässigt på alla skivor eller på en bestämd
CD-skiva.
SHUFFLE
DISC 1 – 5
Slumpmässig uppspelning på alla skivor
Du kan spela alla spår på alla skivor i slumpmässig
ordning.
·
Slumpmässig uppspelning på en CD-skiva
Du kan spela alla spår på en bestämd CD-skiva i
slumpmässig ordning.
1 Tryck på SHUFFLE flera gånger tills “1 DISC”
visas i teckenfönstret.
2 Tryck på DISC 1 – 5 för att starta 1 DISC
(slumpmässig uppspelning) på den valda CDskivan.
Indikatorn
“blandar” spåren.
Avbryta den slumpmässiga uppspelningen
Tryck på CONTINUE.
Du kan starta slumpmässig uppspelning medan skivan
spelas
Tryck på SHUFFLE. Den slumpmässiga uppspelningen
börjar från aktuellt spår.
visas medan CD-spelaren
1 Tryck på SHUFFLE flera gånger tills “ALL DISCS”
visas i teckenfönstret.
15
SE
Page 100

Spela CD-skivor
Skapa egna program
(Programmerad uppspelning)
Du kan ordna spåren på en skiva i valfri ordning och
skapa egna program. Programmet kan innehålla upp
till 32 “steg” — ett “steg” kan innehålla ett spår eller en
hel skiva.
PROGRAM DISC 1 – 5
·≠ AMS ±
3 Vrid ≠ AMS ± tills önskat spårnummer visas
i teckenfönstret.
Det spårnummer som programmeras blinkar, och
den totala uppspelningstiden, inklusive det nya
spårets, blinkar i teckenfönstret.
Programmerade
spårnummerTotal uppspelningstid
PROGRAM
DISC TRACK
1 2 3 4 5
MIN SEC
1 5 13.18
A
CD1
25
8
4 Välj spåret genom att trycka på ≠ AMS ±.
CHECK CLEAR
PROGRAM
DISC
Sifferknappar
>10
CHECK
=/+
ENTER
CLEAR
·
Skapa ett program på CD-spelaren
1 Tryck på PROGRAM.
“PROGRAM” visas i teckenfönstret.
Om det redan finns ett lagrat program visas det
sista steget av det i teckenfönstret. Om du vill ta
bort hela programmet håller du CLEAR nedtryckt
tills “CLEAR” visas i teckenfönstret
(se sid 18).
Det sist inprogrammerade spåret
PROGRAM
DISC TRACK STEP
1 2 3 4 5
1 5 3
Efter en sekund
PROGRAM
DISC TRACK
1 2 3 4 5
1 5 13.18
Spelordning
MIN SEC
Total speltid
A
CD1
Programmerade spår
A
CD1
25
8
25
8
Om du vill ändra dig
Tryck på CLEAR och upprepa sedan steg 3 och 4.
5 Gör på följande sätt för att programmera övriga
skivor eller spår:
För att programmera
Alla spår på andra skivor
Andra spår på samma skiva
Andra spår på andra skivor
Upprepa steg
2
3 och 4
2 till 4
16
2 Tryck på DISC 1 – 5 för att välja CD-skiva.
PROGRAM
DISC TRACK
1 AL 45.28
1 2 3 4 5
MIN SEC
CD1
“AL” i teckenfönstret betyder “alla” spår.
Om du vill programmera hela CD-skivan i ett steg
hoppar du över steg 3 och 4 och går till steg 5.
SE
A
12345
678910
6 Tryck på · för att starta programspelningen.
Avbryta programspelningen
Tryck på CONTINUE.
Du kan skapa egna program medan du kontrollerar
skivetiketterna
När skivfacket är öppet följer du steg 1 till 6 och trycker
på knappen DISC SKIP för att kontrollera skivetiketterna.
Om du stänger skivfacket före steg 6 visas den totala
speltiden efter en stund.
Observera att om det inprogrammerade spårnumret inte
finns på CD-skivan tas det bort automatiskt.
 Loading...