


0459
Audéo YES
User Guide

2
Contents
Welcome 5
Description 6
Preparation 9
Replacing the battery 9
Identifying left and right Audéo YES 12
Inserting Audéo YES with xReceiver
and dome into your ear 13
Closed domes 15
Inserting Audéo YES with Shell 17
Operation 20
Switching On/Off 20
myPilot (optional) 22
Fine tuning based on your personal preferences 24
iCom (optional) 25
EasyAudio and EasyBluetooth 26

3
Maintenance 27
Microphone Protector 27
Important points 29
Warning 32
Service and Warranty 33
Phonak distributors worldwide 34

4

5
Congratulations on choosing Audéo YES, the most
sophisticated wireless communication device currently
available. It uses the latest advances in digital sound
processing to automatically adjust to your listening
needs. Audéo YES provides the highest sound quality,
speech understanding, listening comfort and wireless
connectivity for all your personal communication
situations. Its modern design is inconspicuous when worn
and ensures optimal placement on the ear for best
performance.
Audéo YES is a quality product developed by the Swiss
company Phonak, a world leader in communication
technology, innovation and reliability. Please read
this manual carefully to benefit from all the features
of Audéo YES. With proper care, Audéo YES will support
your hearing and communication needs for many years.
If you want additional information about Audéo YES,
please visit www.phonak.com
Phonak - life is on!
Welcome

6
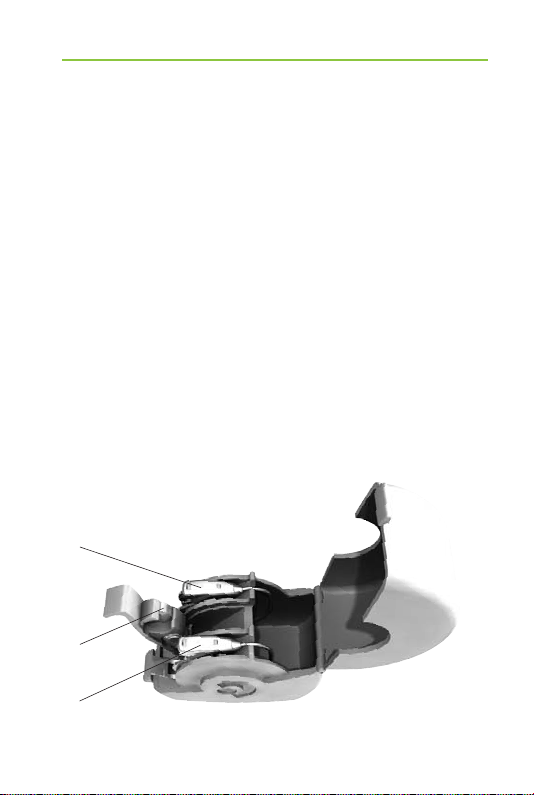
Description
Audéo YES with xReceiver and dome
햲 Microphone inputs with
Microphone Protector
햳 Battery compartment with
On/Off switch
햴 xReceiver Unit
햵 Retention (optional)
햶 Dome
햳
햴
햶
햲
햵

Audéo YES
with xReceiver
and SlimTip
햲 – 햴 See below
햵 Individual
SlimTip
햶 Removal handle
Audéo YES
with xReceiver Shell
for custom fit
햲 Microphone inputs with
Microphone Protector
햳 Battery compartment
with ON/OFF switch
햴 xReceiver Unit
(sound output)
햵 xReceiver Shell
7
햶
햲
햴
햳
햴
햵
햳
햲
햵
8
Protective case
A special protective case is provided to securely
store your Audéo YES instruments and batteries.
Store your Audéo YES in their protective case when
not in use and leave the battery compartment in
the OFF position (as described on page 20) to allow
any moisture to evaporate. Remove the batteries
if you will not be using them for an extended period
of time.
햲 Left Audéo YES 햴 Spare batteries
햳 Right Audéo YES
햲
햳
햴
Description

9
Preparation
Replacing the battery
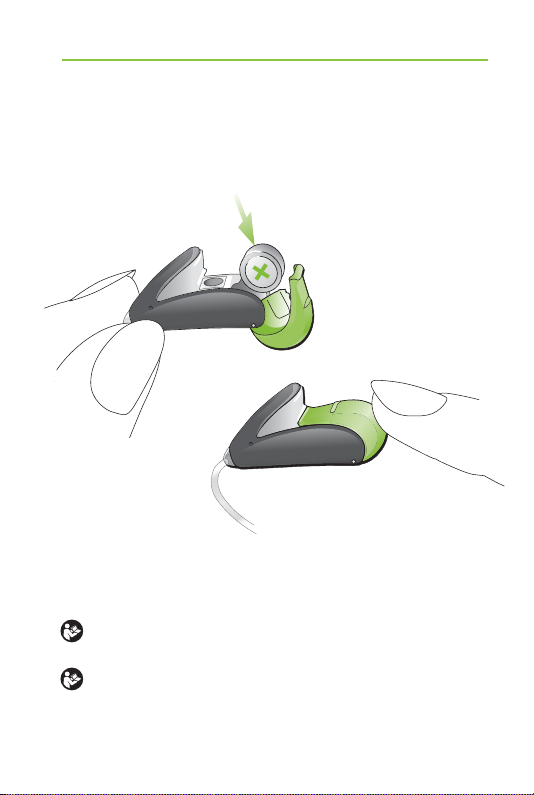
Using the nail grip, open the battery compartment
completely and remove the old battery.
Remove the
protective foil
from the new
battery. Wait for
two minutes
before inserting it.
10
Preparation
Insert the new battery with the “+” sign (flat side of
the battery) in line with the correct battery orientation
marked in the battery compartment and close it.
Replacing the battery
Handle the battery compartment with care and
do not use excessive force.
If there is any resistance when shutting the
compartment, ensure that the battery is inserted
correctly.

11
The compartment may not close properly if the
battery is upside down and the instrument will
not work.
When your Audéo YES is not in use, leave the
battery compartment open to allow any moisture
to evaporate.
Low battery warning
An acoustic signal gives you an early warning
that the battery is approaching exhaustion.
Usually you have at least 30 minutes to replace
the battery. With very high quality batteries,
this reserve may be much higher and Audéo YES will
repeat the low battery warning approximately
every 30 minutes.
Please note that the battery consumption increases
with regular use of the myPilot command center or
the iCom communication interface.
12
Preparation
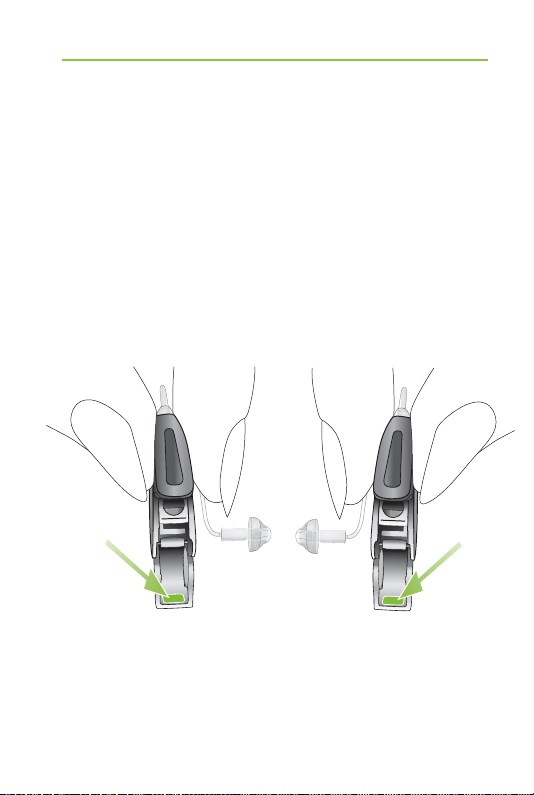
Identifying left and right Audéo YES
It is important to use the correct Audéo YES for each ear.
Your hearing care professional can mark them for you
with a color code placed in the battery compartment.
The color code is visible when the battery compartment
is opened.
It will identify left and right instruments as follows:
blue = red =
left Audéo YES right Audéo YES
 Loading...