

Page 1
DE
AT
GB
IE
NI
NL
DE
MONDDOUCHE
NL
IE
GB
IE
NI
NL
Gebruiksaanwijzing
NI
DENTAL WATER JET NMD 3.7 B2
GB
CH
DENTAL WATER JET
Operating instructions
MUNDDUSCHE
Bedienungsanleitung
HOYER Handel GmbH
Tasköprüstraße 3
DE-22761 Hamburg
__291789_Munddusche_B6.book Seite 1 Montag, 9. Oktober 2017 4:50 16
DEUTSCHLAND
Status of information · Stand van de informatie · Stand der Informationen:
10/2017 ID: NMD 3.7 B2_17_V1.4
IAN 291789 IAN 291789
Page 2
__291789_Munddusche_B6.book Seite 2 Montag, 9. Oktober 2017 4:50 16
English..................................................................................... 2
Nederlands............................................................................ 14
Deutsch....... ........................................................................... 26
Page 3
18
2012 19
__291789_Munddusche_B6.book Seite 3 Montag, 9. Oktober 2017 4:50 16
Overview / Overzicht / Übersicht
1
2
13
A
0/1
mode
jet
normal
soft
charge
10
11
12
3
14
4
5
15
6
7
8
9
B
19
C
16
15
17
D
Page 4
__291789_Munddusche_B6.book Seite 2 Montag, 9. Oktober 2017 4:50 16
Contents
1. Overview ........................................................................................ 3
2. Intended purpose ............................................................................ 3
3. Safety information ........................................................................... 4
4. Items supplied ................................................................................. 6
5. Battery charger ............................................................................... 6
6. Charging the battery ....................................................................... 6
7. Nozzle attachments .............. ... ............................. ........................... 7
8. Operation ........................ .......................................... ...................... 7
8.1 Filling the water tank............................................................................. 7
8.2 Setting the water jet intensity .................................................................. 8
8.3 Before initial use................................................................................... 8
8.4 Using the dental water jet ...................................................................... 8
8.5 After every use ..................................................................................... 9
9. Cleaning / Hygiene requirements ..................................................... 9
10.Storage ......................................................................................... 10
11.Disposal ........................................................................................ 10
12.Troubleshooting ............ ..................................... ............................ 11
13.Ordering accessories ..................................................................... 11
14.Technical specifications .................................................................. 12
15.Warranty of the HOYER Handel GmbH ........................................... 12
2
GB
Page 5
__291789_Munddusche_B6.book Seite 3 Montag, 9. Oktober 2017 4:50 16
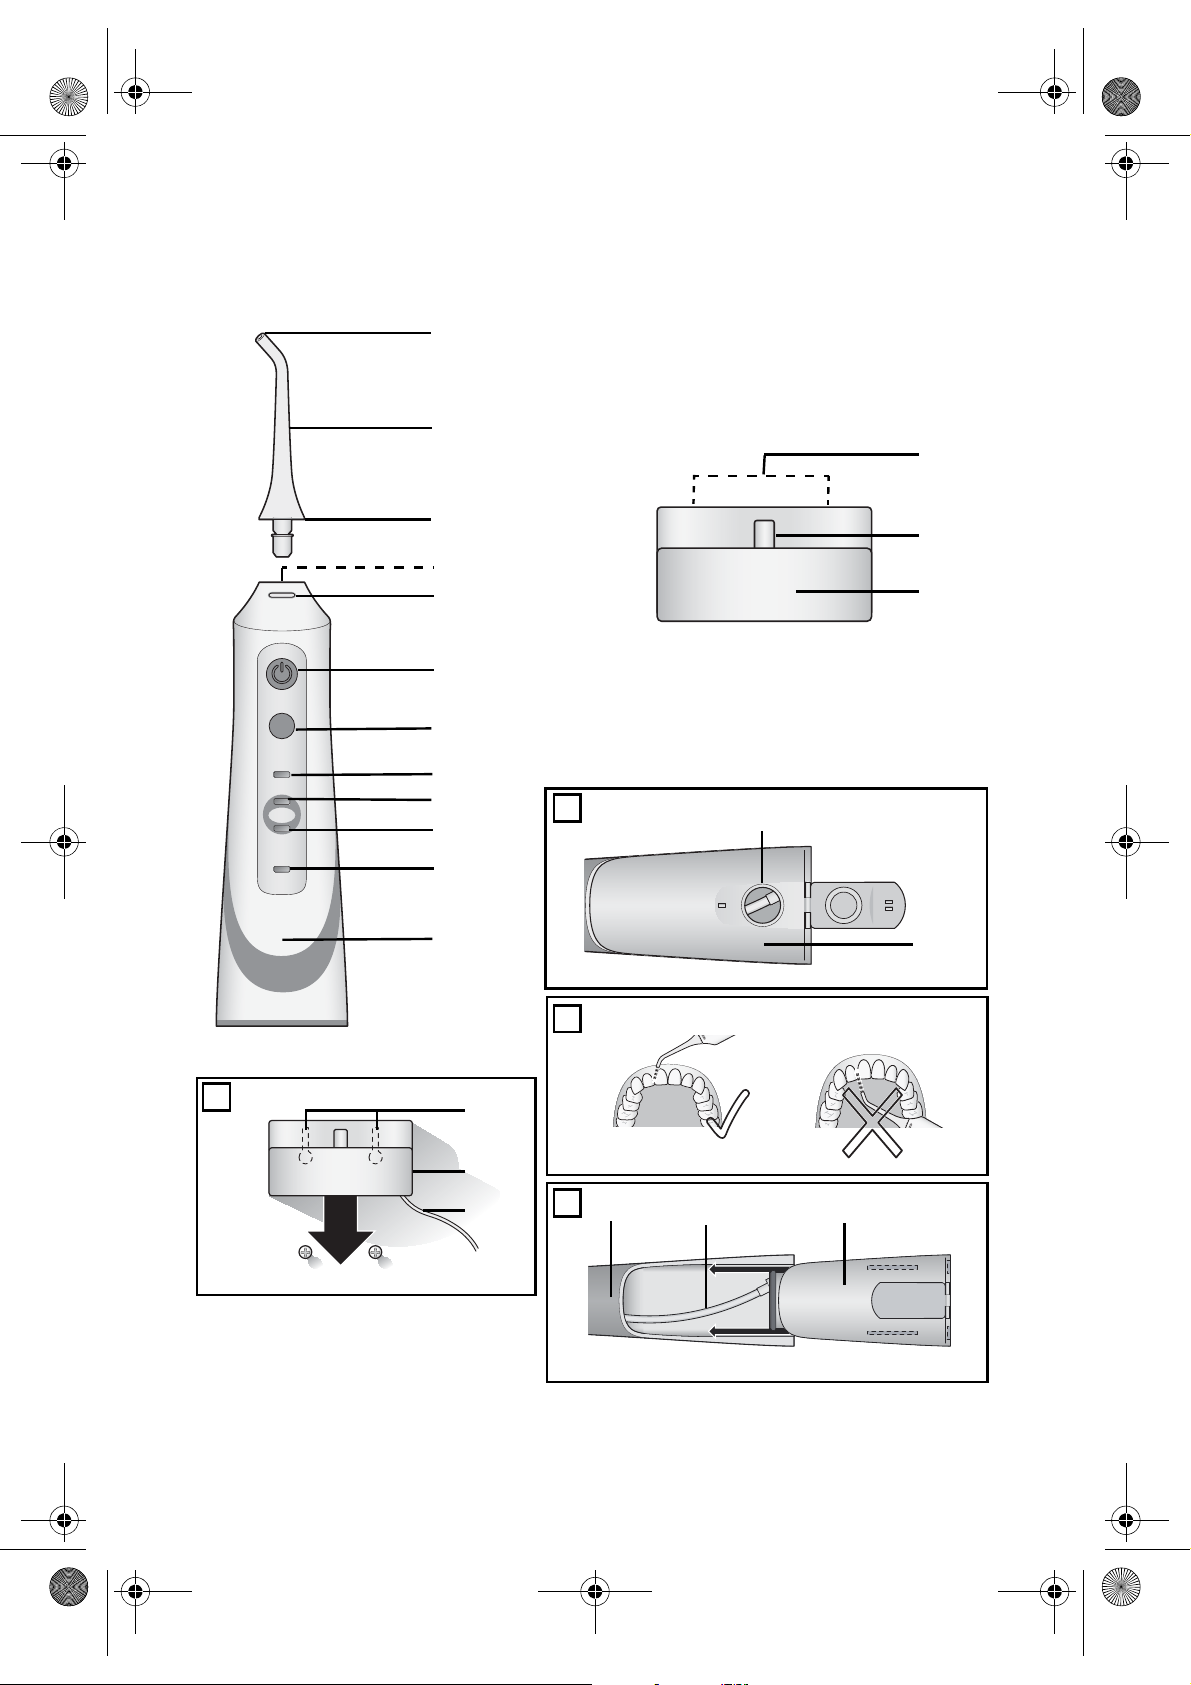
1. Overview
1 Nozzle
2 Nozzle attachment (replaceable)
3 Marking ring
4 Holder (for nozzle attachment)
5 Release button (for nozzle attachment)
6 On/off switch
7 mode Select water jet intensity
8jet LED: setting: strong water jet
9normal LED: setting: normal water jet
10 soft LED: setting: soft water jet
11 charge Charging indicator light
12 Dental water jet
13 Holders (for storing the nozzle attachments)
14 Peg of the battery charger
15 Battery charger
16 Holes for wall mounting (on the back)
17 Mains power cable and mains plug
18 Filling opening
19 Water tank
20 Suction hose (in the water tank)
(2 rawlplugs and 2 screws without image)
Thank you for your trust!
Congratulations on the purchase of your
new dental water jet.
For a safe handling of the device and in order to get to know the entire scope of features:
• Thoroughly read these user instructions prior to initial use.
• Above all, observe the safety information!
• The device should only be used
as described in these user instructions.
• Keep these user instructions for
reference.
• If you pass the device on to
someone else, please include this
copy of the user instructions. The
user instructions are a part of
the product.
We hope you enjoy using your new dental
water jet!
2. Intended purpose
The dental water jet is intended to be used
exclusively for cleaning teeth and oral hygiene.
The device is designed for private, domestic
use. This device must not be used for commercial purposes.
GB
3
Page 6
__291789_Munddusche_B6.book Seite 4 Montag, 9. Oktober 2017 4:50 16
3. Safety information
Warnings
If necessary, the following warnings will be
used in these user instructions:
DANGER! High risk: failur e to observe this warning may result in injury to life and limb.
WARNING! Moderate risk: failure to observe this warning may result in injury or serious material damage.
CAUTION: low risk: failure to observe this
warning may result in minor injury or material damage.
NOTE: circumstances and specifics that
must be observed when handling the device.
Instructions for safe operation
~
This device can be used by childr en fr om the age of 8 and people
with restricted physical, sensory or intellectual abilities or people
without adequate experience and/or understanding if they are supervised.
~
Cleaning and user maintenance must not be performed by children
unless they are supervised.
~
The dental water jet may only be used with cold or warm water.
Use only clear tap water without additives.
~
Children must not play with the device.
~
The mains power cable of this device cannot be replaced. If the cable should become damaged, the device itself must be disposed of.
DANGER as small parts
may be swallowed
~ The marking rings on the nozzle attach-
ments are small parts which can be
swallowed. Keep away from children
under 36 months of age.
DANGER for children
~
Children must not play with packing material. Do not allow children to pla y with plastic bags. There is a risk of suffo cation.
DANGER to and from pets
and livestock
~ Electrical devices can represent a haz-
ard to pets and livestock. In addition,
animals can also cause damage to the
device. For this reason you should keep
4
GB
animals away from electrical devices at
all times.
DANGER! Risk of electric
shock due to moisture
~ The dental water jet, the battery charg-
er, the mains power cable and the
mains plug must not be immersed in water or any other liquids.
~ If the battery charger has fallen into wa-
ter, pull out the mains plug immediately,
and only then remove the battery charger from the water. I n this case do not use
the battery charger again, but have it
checked by a specialist workshop.
Page 7
__291789_Munddusche_B6.book Seite 5 Montag, 9. Oktober 2017 4:50 16
DANGER! Risk of electric
shock
~ The battery charger is connect-
ed to the mains voltage, and
must therefore not be used in
the shower, in the bath, or over
wash basins filled with water.
~ The installation of a residual current de-
vice with a nominal trip current not exceeding 30 mA in the building wiring
offers additional protection.
Contact a skilled electrician in this regard.
Do not start using the device if the device,
~
the battery charger or the mains power
cable shows visible damage, or if the device has previously been dropped.
~ The mains power cable of this device
cannot be replaced. If the cable should
become damaged, the device itself must
be disposed of.
Only connect the mains plug to a proper-
~
ly installed and easily accessible wall
socket whose voltage corr esponds to the
specifications on the rating plate. The
wall socket must continue to be easily ac cessible after the device is plugged in.
~ Ensure that the mains power cable can-
not be caught or crushed, and that it
cannot be damaged by sharp edges or
hot points.
~ To fully disconnect the battery charger
from the mains power supply, pull out
the mains plug.
~ When removing the mains plug from the
wall socket, always pull the plug and
never the cable.
~ Disconnect the mains plug from the wall
socket.
… if there is a fault,
… when you are not using the device,
… before you clean the device and
… during thunderstorms.
~ To avoid any risk, do not make modifi-
cations to the device. Repairs must be
carried out by a specialist workshop or
the Service Centre.
~ When using an extension cable, this
must correspond to the applicable safety regulations.
DANGER from battery
~ Do not expose the device to direct sun-
shine or heat. The ambient temperatu r e
should not be lower than 0 °C or higher
than +40 °C.
~ Charge the hand unit of the dental wa-
ter jet only with the original battery
charger.
~ Protect the battery against mechanical
damages. Fire hazard!
~ Should the electrolyte s olu tion leak out
of the battery, avoid contact with eyes,
mucous membranes and skin. Rinse immediately with plenty of clean water
and consult a doctor. The electrolyte
solution can cause irritation.
~ The device is provided with a lithium-
ion battery.
- The battery cannot be removed!
- This device must not be opened!
- The device with the installed battery
must be disposed of properly.
WARNING! Risk of material
damage
~ If you wish to attach the battery charger
to the wall, check what fixing material
is suitable. If in doubt, have the assembly performed by an expert.
~ Before drilling, check that there are no
water pipes or power cables in the wall
at the relevant point.
~ The battery charger is fitted with non-slip
silicon feet. As furniture is coated with a
variety of different varnishes and acrylics, and treated with different cleaning
agents, it cannot be completely ruled out
that components are contained in some
of these substances that could damage
and soften the plastic feet. If necessary,
GB
5
Page 8
__291789_Munddusche_B6.book Seite 6 Montag, 9. Oktober 2017 4:50 16
place a non-slip mat under the battery
charger.
~ Never place the devic e on hot surfaces
(e.g. hot plates) or near heat sources or
open fire.
~ Do not use any astringent or abrasive
cleaning agents.
CAUTION
~ In the first few days of use of a dental
water jet, some users may experience
slight gum bleeding. If the bleeding lasts
longer than 14 days, a dentist should
be consulted.
~ If you suffer from severe periodontitis,
have injuries or ulcers in the oral mucosa or have had dental surgery during
the last two months, please consult a
dentist before using the dental water
jet.
4. Items supplied
1 dental water jet|12
2 nozzle attachments|2
1 battery charger|15
2 rawlplugs, diameter 5 mm
screws 3 x 25 mm
1 copy of the user instructions
• Remove all packing material.
• Check whether all accessories are present and undamaged.
5. Battery charger
The battery charger|15 can either be
placed on a surface or attached to a wall.
• Insert the mains power cable|17
through one of the 3 rec esses in the
housing of the battery charger|15.
Wall mounting
NOTES:
• Please note the rawlplug size when selecting the drill.
• If your wall material requires it, replac e
the fixing material supplied with a suitable one.
• Figure A: mount the battery charger|15 to a wall according to the
holes|16 on the back as shown in the illustration.
6. Charging the battery
NOTES:
• Fully charge the battery before using it
for the first time. This takes 14 - 16|hours.
• Place the dental water jet|12 on the
peg|14 of the battery charger|15 after
use. This ensures that the dental water
jet|12 always works at full power. Th e
battery is not damaged by regular
charging.
6
1. Plug the mains plug|17 of the battery
charger|15 into a suitable wall socket.
The wall socket must continue to be easily accessible after the device is plugged
in.
2. Place the switched-off dental water
jet|12 on the peg|14 of the battery
charger|15.
The charging indicator light charge|11
is lit in red throughout the entir e charging process. When the optimal charging
GB
Page 9
__291789_Munddusche_B6.book Seite 7 Montag, 9. Oktober 2017 4:50 16
state has been reached, the charging indicator light charge|11 is lit green.
Battery signals: charging
indicator light charge
- Dental water jet|12 on battery charger|15:
charging indicator light
green: the battery is fully charged.
12
- Dental water jet|
charging indicator light
red: the battery is being charged.
- Dental water jet|12 switches itself off:
charging indicator light charge|11
flashes red. Charge the battery.
- The battery becomes weak during use:
charging indicator light charge|11
flashes red. Charge the battery.
on battery charger|15:
|11
charge|11
charge|11
is lit
is lit
7. Nozzle attachments
The items supplied include 2 nozzle attachments|2.
The various marking rings|3 allow you to assign the nozzle attachments|2 to different
family members.
The nozzle attachments|2 can be inserted
into the holders|13 of the battery charger|15 for storage.
Attaching/removing the nozzle
attachment
• T ake a nozzle attachment|2 and insert it
from above into the holder|4 of the dental water jet|12 so that it clicks into
place.
• To remove it, hold down the release button|5 and carefully pull the nozzle attachment|2 upwards.
NOTE: it is advisable to replace the nozzle
attachments|2 every 12 months (see “Ordering accessories” on page 11).
8. Operation
CAUTION:
~ In the first few days of use of a dental
water jet, some users may experience
slight gum bleeding. If the bleeding lasts
longer than 14 days, a dentist should
be consulted. Please also note the remarks on the water jet intensity (see
“Setting the water jet intensity” on
page 8).
~ If you suffer from severe periodontitis,
have injuries or ulcers in the oral mucosa or have had dental surgery during
the last two months, please consult a
dentist before using the dental water
jet.
8.1 Filling the water tank
Y ou can fill the water tank with water without
removing it from the device.
WARNING! Risk of material damage!
~ Use only clean tap water without addi-
tives to fill the water tank. Additives
(such as mouthwashes) or other liquids
can damage the device.
~ The water should have a pleasant tem-
perature. Do not use water that is hotter
than 40 °C.
1. Hold the switched-off dental water
jet|12 horizontally.
2. Figure B: open the cover over the filling opening|18.
3. F ill the water tank|19 through the filling
opening|18.
4. Close the cover over the filling opening|18.
GB
7
Page 10
__291789_Munddusche_B6.book Seite 8 Montag, 9. Oktober 2017 4:50 16
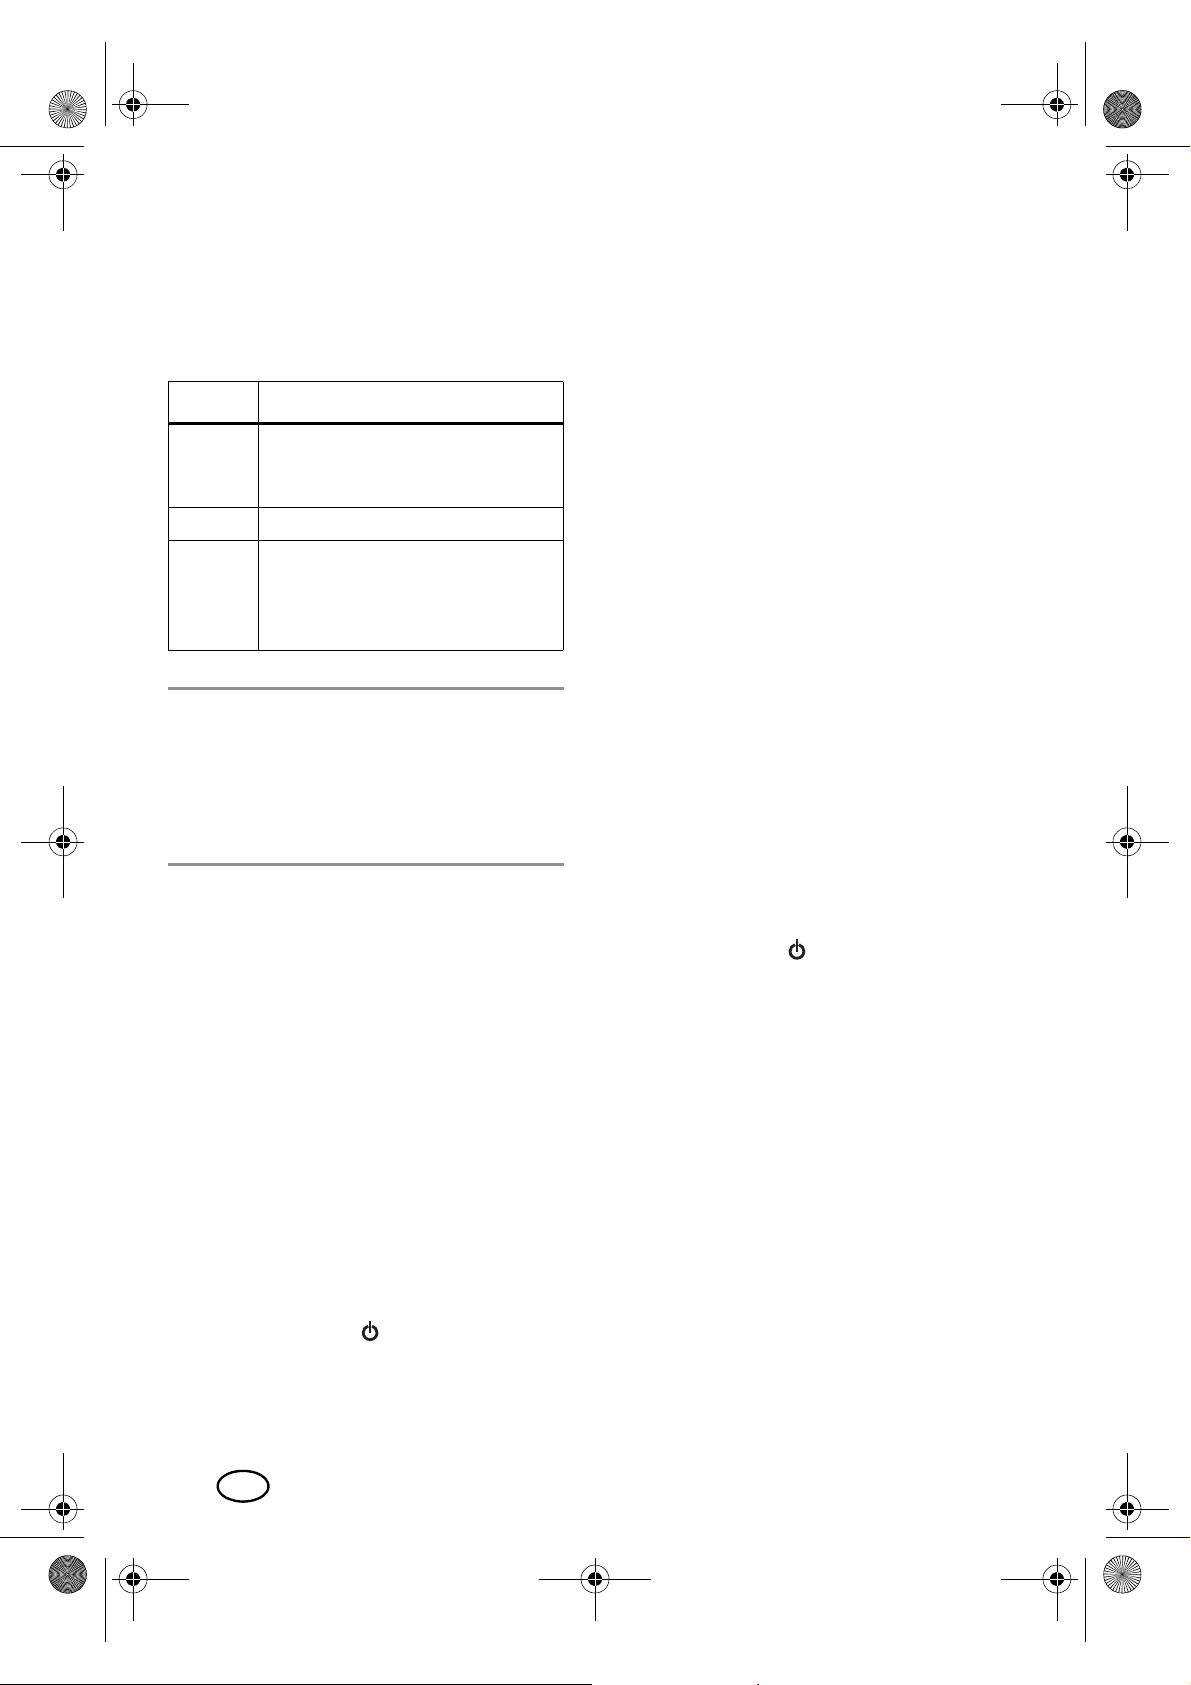
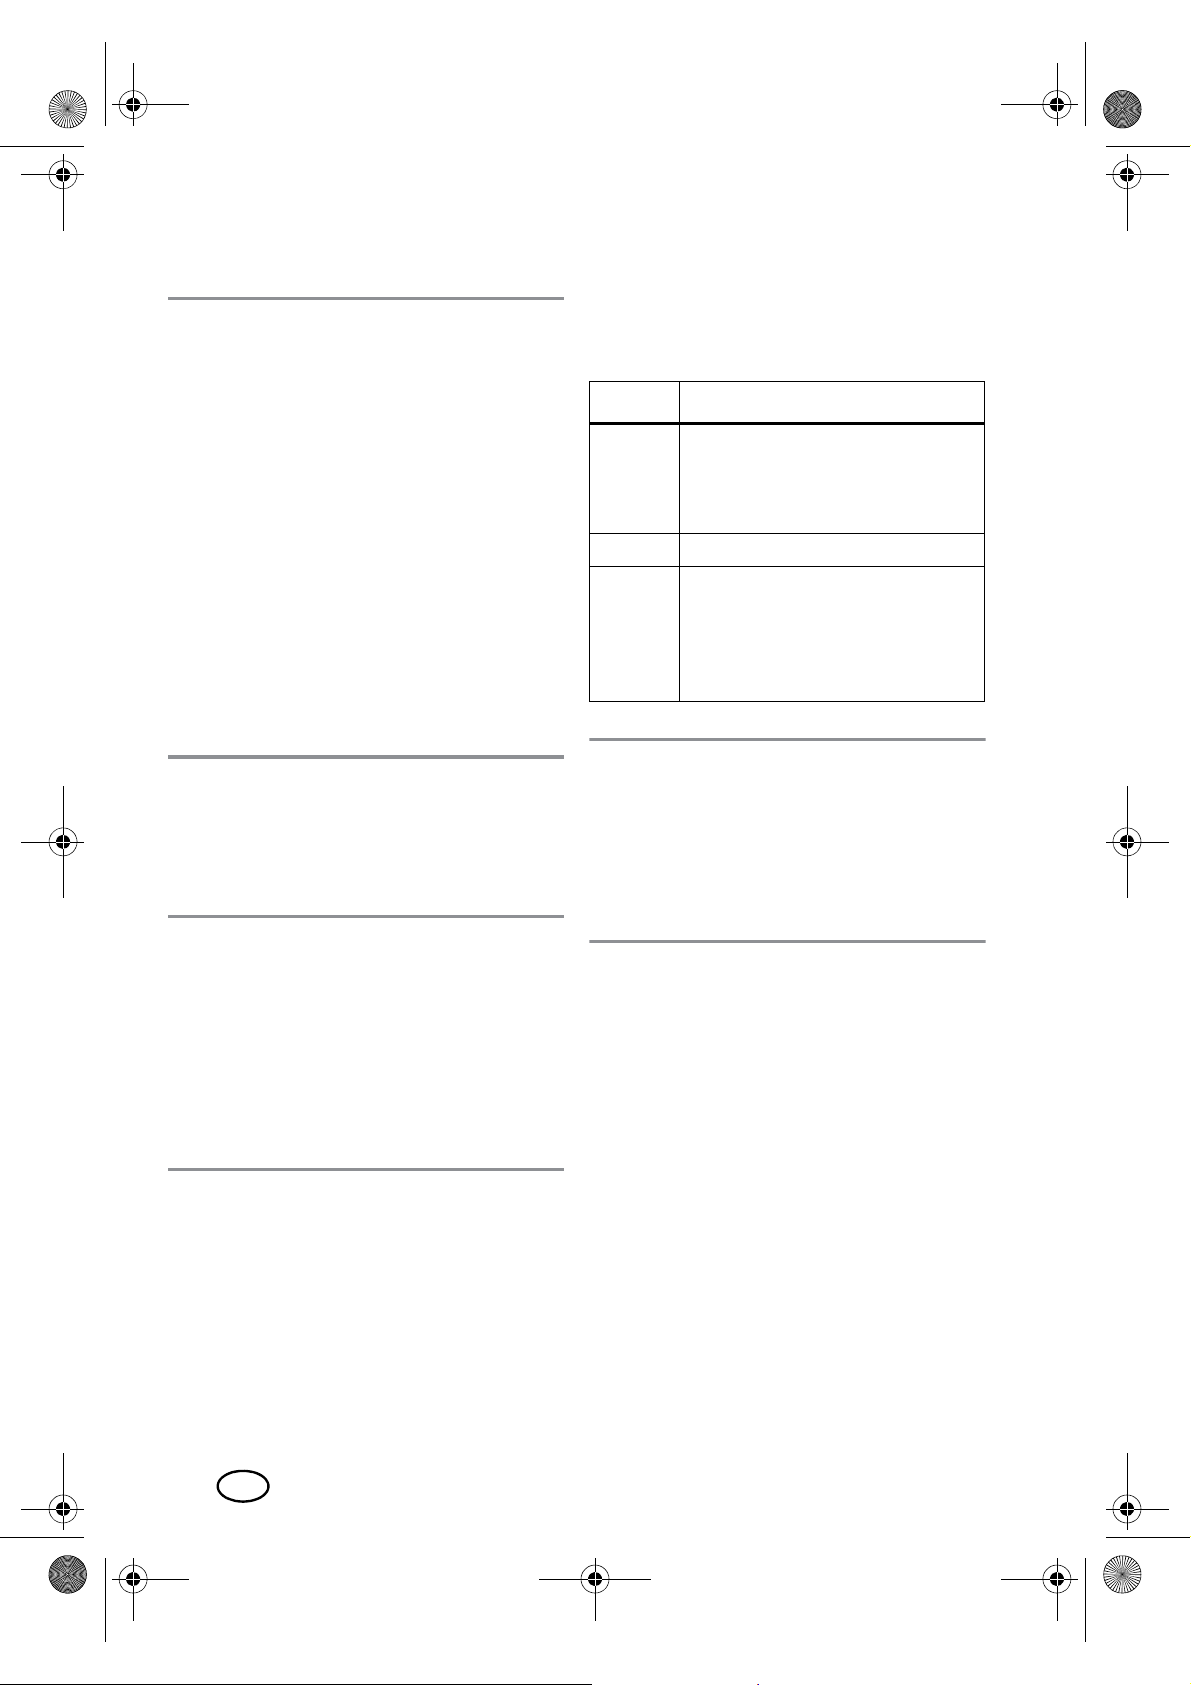
8.2 Setting the water jet intensity
You can set three different water jet intensities on the dental water jet:
LED Jet intensity
soft water jet:
soft
normal normal water jet
jet
NOTE: if you have not used a dental water
jet before, please start on the soft setting so
that your gums can get used to the water jet.
At a later time you can increase the water jet
intensity to normal and jet. The pressure
should always remain pleasant.
• Press the mode|7 button repeatedly
at the beginning, for sensitive
gums, for gentle gum massage
strong water jet:
for advanced users, strong
gums, intensive cleaning of the
spaces between the teeth
until the desired LED|10,|9 or|8 is lit.
8.3 Before initial use
1. Rinse the nozzle attachments|2 under
running water.
2. Clean the water tank|19 and the dental
water jet|12 (see “Cleaning / Hygiene
requirements” on page 9).
3. Fill the water tank|19 with clean tap
water (see “Filling the water tank” on
page 7).
4. Insert a nozzle attachment|2 into the
holder|4 so that it clicks into place.
5. Point the nozzle|1 at a washbasin and
12
switch the dental water jet|
the on/off switch |
6. Let the dental water jet|12 run until the
water tank|19 is empty in order to rinse
6
.
on with
through the pipes inside. The de ntal water jet is now ready for use.
8.4 Using the dental water
jet
1. Take the dental water jet|12 off the bat-
tery charger|15.
2. Insert a nozzle attachment|2 into the
holder|4 if necessary so that it clicks
into place.
3. F ill the water tank|19 with fresh tap wa-
ter.
4. To set the water jet intensity, press the
mode|7 button repeatedly until the de-
sired LED is lit:
-LED soft|10:
soft water jet
-LED normal|9:
normal water jet
-LED jet|8:
strong water jet
5. Insert the nozzle|1 into your slightly
open mouth and lean over a washbasin
so that water and rinsed-out food particles can flow out.
6. Switch on the dental water jet|12 with
the on/off switch |6.
7. To start the cleaning process, direct the
water jet at the spaces between your
teeth and the edges of the teeth.
Figure C: hold the nozzle|1 in such a
way that the water jet can flush the
food residues away from your gums.
8. Move the nozzle|1 slowly from one
space between two teeth to the next.
Use this method to clean all of the external and internal surfaces.
9. To massage your gums, direct the water
jet at your gums.
10.When no more water is coming out of
the nozzle|1, the water tank|19 is empty. Switch off the dental water jet|12
and replenish the water tank. When the
device is switched on again, the device
8
GB
Page 11
__291789_Munddusche_B6.book Seite 9 Montag, 9. Oktober 2017 4:50 16
will automatically start on the last selected water jet setting.
11.To switch off the dental water jet|12,
press the on/off switch |6. Do not
take the nozzle|1 out of your mouth until the dental water jet has been
switched off.
8.5 After every use
1. Open the cover over the filling opening|18, pour out the remaining water
from the water tank|19 and close the
cover again.
2. Switch on the dental water jet |12
few seconds with the on/off switch |
remove any remaining water from the pipes
inside the dental water jet.
3. Hold down the release button|5 and
gently pull the nozzle attachment|2 upwards.
4. Rinse the nozzle attachment|2 under
running water and insert it into a holder|13.
5. Place the dental water jet|12 on the
battery charger|15.
NOTE: it is advisable to replace the nozzle
attachments|2 every 12 months (see “Ordering accessories” on page 11).
for a
6
to
9. Cleaning / Hygiene
requirements
DANGER! Risk of electric
shock!
~ Before cleaning the battery charger|15,
pull the mains plug|17 out from the
mains socket.
~ Do not immerse the dental water jet|12
and/or the battery charger|15 in water!
The battery charger|15 must be completely dry before you reconnect it to the
wall socket.
Nozzle attachments
1. Hold down the release button|5 and
gently pull the nozzle attachment|2 upwards.
2. Rinse the nozzle attachment|2 under
running water and insert it into a holder|13.
Water tank
Clean the water tank|19 once a week or before you are not going to use the device for
more than one week.
1. Figure D: push the water tank|19
downwards off the dental water jet|12.
2. Rinse the water tank|19 thoroughly
both inside and out with warm water.
3. Dry the water tank|19 on the outside
and pour out the remaining water.
NOTE: if you are not going to use the dental
water jet|12 for more than one week, allow
the water tank|19 to dry completely before
you put it back into the dental water jet.
4. Push the water tank|19 fr om below into
the dental water jet|12. Make sure that
- the suction hose|20 is located in the
water tank|19,
GB
9
Page 12
__291789_Munddusche_B6.book Seite 10 Montag, 9. Oktober 2017 4:50 16
- the water tank|19 is positioned in the
recesses on both sides and
- the water tank|19 is firmly in place so
that the seal provides a tight fit.
Dental water jet and battery
charger
• Rinse off the dental water jet|12 and
rub it dry.
• Wipe the battery charger|15 with a
damp cloth if necessary, and rub it dry.
10. Storage
• Remove any excess water from the device and let all of the parts dry completely before you store them away.
• Disconnect the device from the mains
and store it in a dry location.
11. Disposal
DANGER from the battery!
~ The device contains a lithium-ion bat-
tery.
- The battery cannot be removed!
- This device must not be opened!
- The device with the installed battery
must be disposed of properly.
The lithium-ion battery used
for this device may not be
treated as household waste.
The battery must be disposed of properly, together
with the device. Contact local waste disposal points for
this.
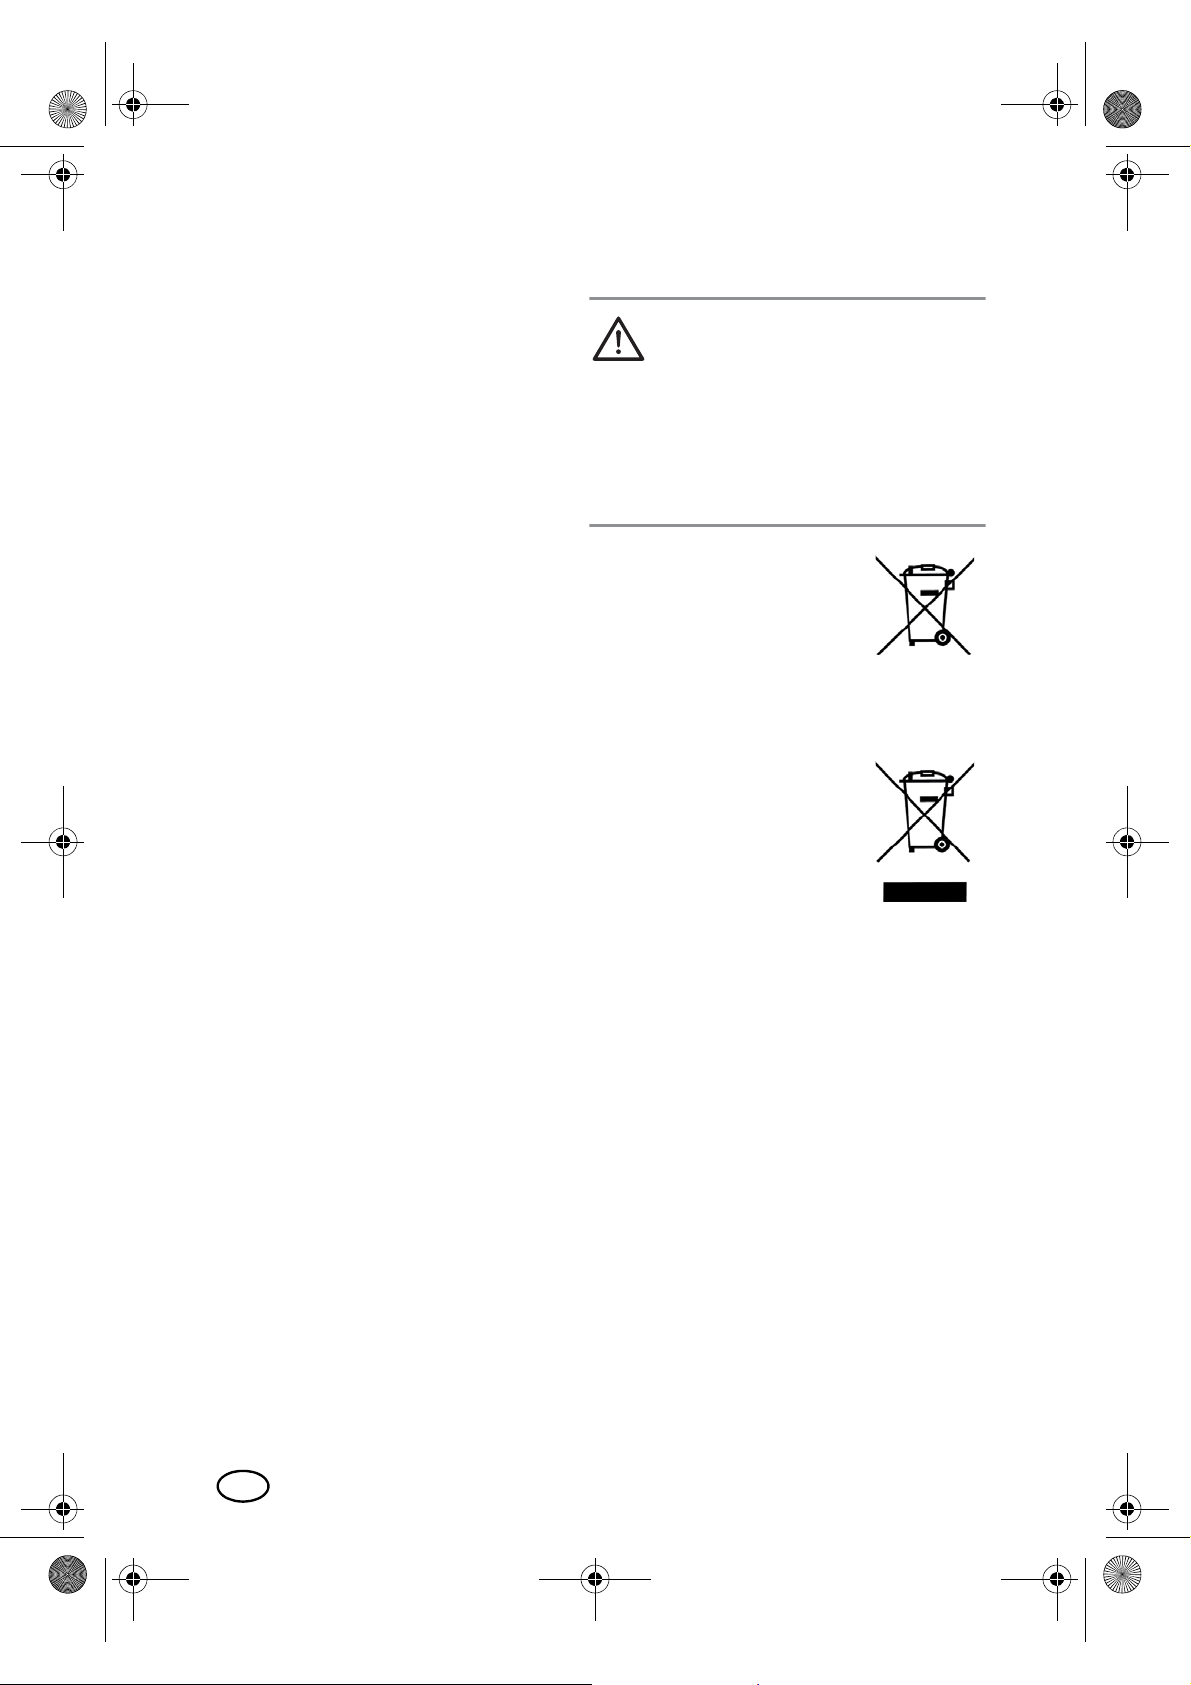
This product is subject to the
provisions of Eur opean Direc tive 2012/19/EC.
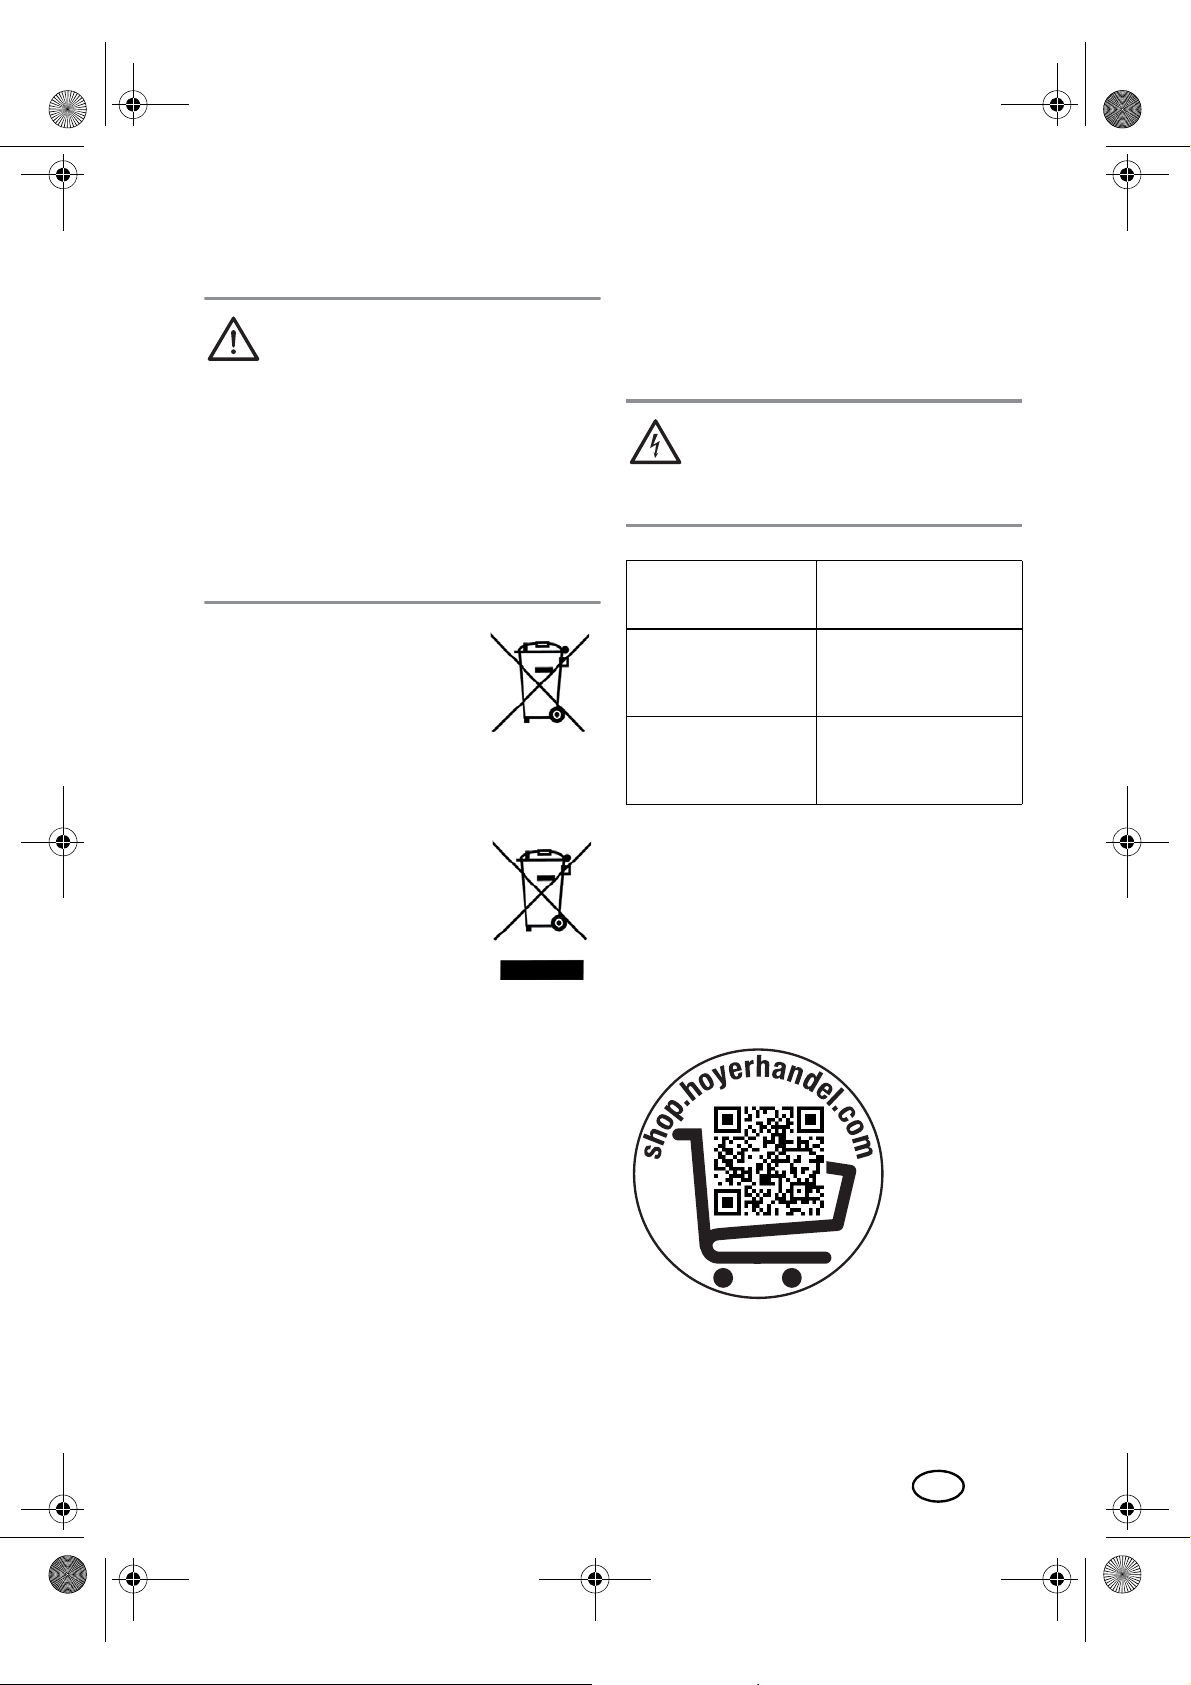
The symbol showing a wheelie bin crossed through indicates that the product
requires separate refuse collection in the European Union. This applies
to the product and all accessories marked
with this symbol. t Products identified with
this symbol may not be discarded with normal household waste, but must be taken to a
collection point for recycling electric and
electronic appliances. Recycling helps to reduce the consumption of raw materials and
protect the environment.
Li-ions
10
Packaging
When disposing of the packaging, make
sure you comply with the environmental re gulations applicable in your country.
GB
Page 13

__291789_Munddusche_B6.book Seite 11 Montag, 9. Oktober 2017 4:50 16
12. Troubleshooting
If your device fails to function as required,
please try this checklist first. Perhaps there is
only a minor problem, and you can solve it
yourself.
DANGER! Risk of electric
shock!
~ Do not attempt to repair the device your-
self under any circumstances.
Fault
The device cannot be switched
on.
Charging indicator light
charge|11 is
not lit.
Possible causes / Ac-
tion
• Is the battery empty?
• Is the battery charger|15 connected to
the mains?
13. Ordering accessories
Accessories for the dental water jet
NMD 3.7 B2 can be reordered.
Order online
shop.hoyerhandel.com
1. Scan the QR code with your smartphone/ tablet.
2. With the QR code you will access a
website where you can submit your reorder.
GB
11
Page 14

__291789_Munddusche_B6.book Seite 12 Montag, 9. Oktober 2017 4:50 16
14. Technical
specifications
Model: NMD 3.7 B2
Mains voltage:
Protection
class:
Power rating: 1.4 W
Battery: 1x3.7 V (DC voltage)
Charging time
(first charging): 14-16 hours
Protection class
of battery
charger:
Protection class
of hand unit:
LEDs: RG 0
Ambient condi-
tions:
Technical Symbols
Double insulation
Certified Safety. Devices must
comply with the generally acknowledged rules of technology
and the German Product Safety
Act (Produktsicherheitsgesetz ProdSG).
With the CE marking, HOYER
Handel GmbH declares the conformity with EU guidelines.
Subject to technical modifications.
100-240 V ~ 50/60 Hz
II
Li-lon 800 mAh 2.96 Wh
IPX7
(protected against the effects of temporary immersion)
IPX4
(protected against water
splashes)
10 °C to 40 °C
Relative humidity 40 to
85 %
15. Warranty of the
HOYER Handel GmbH
Dear Customer,
your device is provided with a 3 year warranty starting with the purchase date. In the
event of product defects, you are entitled to
statutory rights against the vendor. These
statutory rights are not restricted by our warranty presented in the following.
Warranty conditions
The warranty period starts with the purchas e
date. Please keep the original purchase receipt in a safe place. This document is required to verify the purchase.
If within three years from the purchase date
of this product a material or factory defect
occurs, the product will be repaired or replaced by us – at our discretion – free of
charge to you. This warranty implies that
within the period of three years the defective
device and the purchase receipt are pr esented, including a brief written description of
the defect and the time it occurred.
If the defect is covered by our warranty, the
repaired or a new product will be returned
to you. No new warranty period starts with
a repair or replacement of the product.
Warranty period and statutory
claims for defects
The warranty period is not extended when
the warranty has been claimed. This also applies to replaced and repaired parts. Any
damages and defects already existing at the
time of purchase must be reported immediately upon unpacking. Repairs arising after
the expiration of the warranty period are
subject to a charge.
Warranty coverage
The device was produced car efully according
to strict quality guidelines and tested diligently prior to delivery.
The warranty applies to material or factory
defects.
12
GB
Page 15

GB
IE
MT
CY
__291789_Munddusche_B6.book Seite 13 Montag, 9. Oktober 2017 4:50 16
Excluded from the warranty are
wear parts subject to normal wear
and damages to fragile parts, e.g.
switches, batteries, lamps or other
parts manufactured from glass.
This warranty expires if the pr oduct is dam-
Tel.: 0871 5000 720 (£ 0.10/Min.)
E-Mail: hoyer@lidl.co.uk
aged, not used as intended or not serviced.
For the proper oper ation of the product, all instructions listed in the operating instructions
must be observed carefully. Any form of use
and handling that is advised against in the
operating instructions or warned against
Tel.: 1890 930 034
(0,08 EUR/Min., (peak))
(0,06 EUR/Min., (off peak))
E-Mail: hoyer@lidl.ie
must always be avoided.
The product is only intended for pr ivate and
not for commercial use. In the case of incorrect and improper treatment, use of for ce and
Tel.: 80062230
E-Mail: hoyer@lidl.com.mt
interventions not performed by our authorised Service Centre, the warranty shall cease.
Handling in case of a warranty
claim
In order to ensure prompt pr ocessing of your
Tel.: 8009 4409
E-Mail: hoyer@lidl.com.cy
IAN: 291789
matter, please observe the following notes:
• Please keep the article number
IAN: 291789
as a purchase verification for all inquiries.
• The article number can be found on the
rating plate, an engraving, the title
page of your instructions (in the bottom
left), or as a label on the rear or underside of the device.
• If faulty operation or other defects occur ,
first contact the Service Centre listed in
and the purchase receipt
Please note that the following address is no
service address. First contact the aforementioned Service Centre.
HOYER Handel GmbH
Tasköprüstraße 3
DE-22761 Hamburg
GERMANY
the following by telephone or email.
• Then, you are able to send a product reported as defective free of charge to the
service address specified to you, including the purchase receipt and the information on the defect and when it
occurred.
Please visit www .lidl-service.com to
download this and many other
manuals, product videos and software.
Service Centre
Service Great Britain
Service Ireland
Service Malta
Service Cyprus
Supplier
GB
13
Page 16

__291789_Munddusche_B6.book Seite 14 Montag, 9. Oktober 2017 4:50 16
Inhoud
1. Overzicht .................... ............................................... ..................15
2. Correct gebruik ............................................................................15
3. Veiligheidsinstructies ...................................................................16
4. Leveringsomvang ........................................................................18
5. Laadstation ..................................................................................18
6. Accu opladen ..................................... ... .......................... .............19
7. Opzetmondstukken .....................................................................19
8. Bediening ....................................................................................20
8.1 Waterreservoir vullen ....................................................................... 20
8.2 Sterkte van de waterstraal instellen..................................................... 20
8.3 Voor het eerste gebruik..................................................................... 20
8.4 Monddouche gebruiken.................................................................... 21
8.5 Na elk gebruik ................................................................................ 21
9. Schoonmaken / Hygiëne-eisen ....................................................22
10. Opbergen .................................................................................... 22
11.Weggooien ......... ....................................... .................................. 23
12.Problemen oplossen ................................................ ....................23
13.Accessoires bestellen .................... ...............................................23
14.Technische gegevens ....................................................................24
15.Garantie van HOYER|Handel GmbH ........................... ... ............... 24
14
NL
Page 17

__291789_Munddusche_B6.book Seite 15 Montag, 9. Oktober 2017 4:50 16
1. Overzicht
1 Mondstuk
2 Opzetmondstuk (vervangbaar)
3 Markeringsring
4 Houder (voor opzetmondstuk)
5 Ontgrendelingsknop (voor opzetmondstuk)
6 In-/uitschakelaar
7 modus Sterkte van de waterstraal selecteren
8jet LED: instelling: krachtige waterstraal
9normal LED: instelling: normale waterstraal
10 soft LED: instelling: zachte waterstraal
11 charge Oplaadcontrolelampje
12 Monddouche
13 Houders (voor het bewaren van de opzetmondstukken)
14 Doorn van het laadstation
15 Laadstation
16 Openingen voor de wandbevestiging (aan de achterzijde)
17 Netaansluitsnoer en stekker
18 Vulopening
19 Waterreservoir
20 Zuigslang (in het waterreservoir)
(2 pluggen en 2 schroeven zonder afbeelding)
Hartelijk dank voor uw
vertrouwen!
Wij feliciteren u met uw nieuwe monddouche.
Om het apparaat veilig te gebruiken en om
alle functies van het apparaat te leren kennen:
• Lees deze handleiding vóór de
eerste ingebruikname grondig
door.
• Neemt u steeds de veiligheidsinstructies in acht!
• Het apparaat mag alleen worden bediend zoals in deze handleiding wordt beschreven.
• Bewaar deze handleiding goed.
• Wanneer u het apparaat ooit
aan iemand doorgeeft, dient u
deze handleiding bij te voegen.
De handleiding maakt deel uit
van het product.
Wij wensen u veel plezier met uw nieuwe
monddouche!
2. Correct gebruik
De monddouche is uitsluitend voorzien voor
het reinigen van de tanden en voor de
mondhygiëne bij mensen.
Het apparaat is ontworpen voor particuliere
huishoudens. Dit apparaat mag niet voor
commerciële doeleinden worden gebruikt.
NL
15
Page 18

__291789_Munddusche_B6.book Seite 16 Montag, 9. Oktober 2017 4:50 16
3. Veiligheidsinstructies
Waarschuwingen
Indien nodig, worden de volgende waarschuwingen in deze handleiding vermeld:
GEVAAR! Hoog risico: het niet in
acht nemen van de waarschuwing
kan tot letsel leiden.
WAARSCHUWING! Matig risico: het niet
in acht nemen van de waarschuwing kan
verwondingen of ernstige materiële schade
veroorzaken.
LET OP: gering risico: het niet in acht nemen van de waarschuwing kan lichte verwondingen of materiële schade
veroorzaken.
AANWIJZING: toedrachten en bijzonderheden waarop tijdens het gebruik van het
apparaat moet worden gelet.
Instructies voor een veilig gebruik
~
Dit apparaat kan worden gebruikt door kinderen vanaf 8 jaar en
door personen met verminderde fysieke, sensorische of mentale capaciteiten of een gebrek aan ervaring en/of kennis, wanneer zij
onder toezicht staan.
~
Reiniging en onderhoud mogen niet door kinder en uitgevoer d worden, tenzij ze onder toezicht staan.
~
De monddouche mag alleen worden gebruikt met koud of warm
water. Gebruik alleen schoon kr aanwater zonder toevoegingen.
~
Kinderen mogen niet met het apparaat spelen.
~
Het netaansluitsnoer van dit apparaat kan niet worden vervangen.
Wanneer het snoer beschadigd is, moet het apparaat worden
weggegooid.
GEVAAR door kleine
onderdelen die kunnen
worden ingeslikt
~ De markeringsringen op de opzetmond-
stukken zijn kleine onderdelen die kunnen worden ingeslikt. Houd de
smartwatch buiten het bereik van kinderen jonger dan 36 maanden.
GEVAAR voor kinderen
~
V erpa kkingsmateriaal is geen kinderspeelgoed. Kinderen mogen niet met de plastic
zakken spelen. Er bestaat verstikkingsgevaar.
NL
16
GEVAAR voor en door
huis- en gebruiksdieren
~ Er kunnen gevaren voor huis- en ge-
bruiksdieren van elektrische apparaten
uitgaan. Verder kunnen dieren ook
schade aan het apparaat veroorzaken.
Houd dieren daarom altijd uit de buurt
van elektrische apparaten.
GEVAAR van een
elektrische schok door
vocht
~ De monddouche, het laadstation, het
netaansluitsnoer en de stekker mogen
niet in water of andere vloeistoffen worden gedompeld.
Page 19

__291789_Munddusche_B6.book Seite 17 Montag, 9. Oktober 2017 4:50 16
~ Als het laadstation toch een keer in het
water gevallen is, dient u de stekker onmiddellijk los te koppelen en daarna
pas het laadstation te verwijderen. Gebruik het laadstation in dat geval niet
meer, maar laat het door een gespecialiseerd bedrijf controleren.
GEVAAR door een
elektrische schok
~ Het laadstation wordt op de
netspanning aangesloten en
mag daarom niet worden gebruikt in de douche, in de badkuip of boven met water
gevulde wastafels.
~ De inbouw van een aardlekbeveiliging
met een nominale activeringsstroom van
niet meer dan 30 mA in de huisinstallatie biedt extra bescherming.
Wendt u zich daarvoor tot een erkend
elektricien.
Neem het apparaat niet in gebruik, wan-
~
neer het apparaat, het laadstation of het
netaansluitsnoer zichtbaar beschadigd is
of wanneer het apparaat voorheen is gevallen.
~ Het netaansluitsnoer van dit apparaat
kan niet worden vervangen. Wanneer
het snoer beschadigd is, moet het apparaat worden weggegooid.
~
Sluit de stekker alleen aan op een op de
juiste wijze geïnstalleerd, gemakk elijk toegankelijk stopcontact, waarvan de spanning overeenkomt met de gegevens op
het typeplaatje. Het stopcontact moet ook
na het aansluiten gemakkelijk toegankelijk blijven.
~ Let erop dat het netaansluitsnoer niet in-
geklemd wordt of bekneld raakt en niet
kan worden beschadigd door scherpe
randen of hete plaatsen.
~ Om de stroomtoevoer naar het laadsta-
tion volledig te onderbreken, dient u de
stekker uit het stopcontact te trekken.
~ Trek de stekker altijd aan de stekker uit
het stopcontact en nooit aan het snoer.
~ Trek de stekker uit het stopcontact, ...
… wanneer er zich een storing voor-
doet,
… wanneer u het apparaat niet ge-
bruikt,
… voordat u het apparaat reinigt en
… bij onweer.
~ Breng geen veranderingen aan het ap-
paraat aan, dit om gevaar te voorkomen. Laat reparaties alleen door een
gespecialiseerd bedrijf c.q. in het servicecenter uitvoeren.
~ Wanneer een verlengsnoer wordt ge-
bruikt, moet dit voldoen aan de geldige
veiligheidsbepalingen.
GEVAAR door accu
~ Stel het apparaat niet bloot aan direct
zonlicht of hitte. De omgevingstemperatuur dient niet minder dan 0 °C en niet
meer dan +40 °C te bedragen.
~ Laad het handdeel van de monddouche
uitsluitend met het originele laadstation.
~ Bescherm de accu tegen mechanische
beschadigingen. Brandgevaar!
~ Wanneer uit de accu elektrolytoplos-
sing lekt, dient u contact met ogen,
slijmvliezen en huid te vermijden. Spoel
de desbetreffende plaatsen direct met
veel schoon water af en raadpleeg een
arts. De elektrolytoplossing kan irritaties
veroorzaken.
~ Het apparaat bevat een lithium-ion-ac-
cu.
- De accu kan niet uit het apparaat
worden verwijderd!
- Dit apparaat mag niet worden geopend!
- Het apparaat moet met de ingebouwde accu professioneel worden afgevoerd.
NL
17
Page 20
__291789_Munddusche_B6.book Seite 18 Montag, 9. Oktober 2017 4:50 16
WAARSCHUWING voor
materiële schade
~ W anneer u het laadstation op de wand
wilt bevestigen, controleer dan welk bevestigingsmateriaal geschikt is. Laat, in
geval van twijfel, de montage door een
vakman uitvoeren.
~ Controleer voor het boren of er zich
geen waterleidingen of elektriciteitsleidingen op de betreffende plek in de
wand bevinden.
~ Het laadstation is voorzien van siliconen
antislippootjes. Omdat meubels zijn gecoat met een grote verscheidenheid van
lakken en kunststoffen en worden behandeld met verschillende onderhoudsmiddelen, kan niet volledig worden
uitgesloten dat sommige van deze stoffen bestanddelen bevatten die de kunststof voeten aantasten en zacht m aken.
Leg indien nodig een antislipmatje onder het laadstation.
~ Leg het apparaat nooit op hete opper-
vlakken (bijv. fornuisplaten) of in de
buurt van warmtebronnen of open vuur.
~ Gebruik geen scherpe of schurende
schoonmaakmiddelen.
LET OP
~ In de eerste paar dagen van het gebruik
van een monddouche kan het tandvlees
van sommige gebruikers licht bloeden.
Als het bloeden meer dan 14 dagen
aanhoudt, moet u een tandarts raadplegen.
~ Als u ernstige parodontitis hebt, letsel of
zweren in de mondslijmhuid of wanneer gedurende de laatste twee maanden een chirurgische ingreep in de
mond heeft plaatsgevonden, dient u
een tandarts te raadplegen alvorens de
monddouche te gebruiken.
4. Leveringsomvang
1 monddouche|12
2 opzetmondstukken|2
1 laadstation|15
2 pluggen met Ø van 5 mm
schroeven 3 x 25 mm
1 handleiding
• Verwijder al het verpakkingsmateriaal.
• Controleer of alle accessoires voorhanden en onbeschadigd zijn.
5. Laadstation
Het laadstation|15 kan worden opgesteld
of op een wand worden bevestigd.
• Leid het netaansluitsnoer|17 door één
van de drie uitsparingen in de behuizing van het laadstation|15.
Wandbevestiging
AANWIJZINGEN:
• Let bij de keuze van het boortje op de
maat van de plug.
• Vervang het meegeleverde bevesti-
gingsmateriaal door uw eigen, als dat
voor het wandmateriaal nodig is.
• Afbeelding A: bevestig het laadstati-
on|15 volgens de afbeelding van de
openingen|16 aan de achterzijde op
een wand.
18
NL
Page 21
__291789_Munddusche_B6.book Seite 19 Montag, 9. Oktober 2017 4:50 16
6. Accu opladen
AANWIJZINGEN:
• Laad de accu vóór het eerste gebruik
volledig op. Dit duurt 14 - 16 uur.
• Zet de monddouche|12 na gebruik op
de doorn|14 van het laadstation|15.
Zo beschikt de monddouche|12 altijd
over het volledige prestatievermogen.
De accu wordt door het regelmatige opladen niet beschadigd.
1. Steek de stekker|17 van het laadstation|15
in een geschikt stopcontact. Het stopcontact
moet ook na het aansluiten altijd goed toegankelijk zijn.
2. Plaats de uitgeschakelde monddou-
che|12 op de doorn|14 van het laadstation|15.
Het oplaadcontrolelampje charge|11
brandt tijdens het gehele oplaadproces
rood. Als de optimale oplaadstatus is bereikt, brandt het oplaadcontrolelampje charge|11 groen.
7. Opzetmondstukken
Er zijn 2 opzetmondstukken|2 meegeleverd.
Met behulp van de verschillend gekleurde
markeringsringen|3 kunt u de opzetmondstukken|2 aan verschillende gezinsleden
toewijzen.
De opzetmondstukken|2 kunnen in de houders|13 van het laadstation|15 worden gestoken om te worden bewaard.
Opzetmondstuk opsteken/
afnemen
• Pak een opzetmondstuk|2 en steek het
van bovenaf in de houder|4 van de
monddouche|12, zodat deze vastklikt.
• Voor het verwijderen houdt u de ontgrendelingsknop|5 ingedrukt en trekt u het
opzetmondstuk|2 voorzichtig naar boven eraf.
AANWIJZING: het is raadzaam om de
opzetmondstukken|2 om de 12 maanden te
vervangen (zie “Accessoire s bestellen” op
pagina 23).
Accusignalen:
oplaadcontrolelampje charge
- Monddouche|12 op laadstation|15:
oplaadcontrolelampje charge|11
brandt groen: de accu is volledig opgeladen.
- Monddouche|12 op laadstation|15:
oplaadcontrolelampje charge|11
brandt rood: de accu wordt opgeladen.
- De monddouche|12 schakelt uit: oplaadcontrolelampje charge|11 knippert rood. Laad de accu op.
De accu wordt tijdens het gebruik zwak:
oplaadcontrolelampje
pert rood. Laad de accu op.
charge|11 knip-
|11
NL
19
Page 22

__291789_Munddusche_B6.book Seite 20 Montag, 9. Oktober 2017 4:50 16
8. Bediening
VOORZICHTIG:
~ In de eerste paar dagen van het ge-
bruik van een monddouche kan het
tandvlees van sommige gebruikers licht
bloeden. Als het bloeden meer dan
14|dagen aanhoudt, moet u een tandarts raadplegen. Let ook op de aanwijzingen over de sterkte van de
waterstraal (zie “Sterkte van de waterstraal instellen” op pagina 20).
~ Als u ernstige parodontitis hebt, letsel of
zweren in de mondslijmhuid of wanneer gedurende de laatste twee maanden een chirurgische ingreep in de
mond heeft plaatsgevonden, dient u
een tandarts te raadplegen alvorens de
monddouche te gebruiken.
8.1 Waterreservoir vullen
U kunt het waterreservoir met water vullen
zonder dit van het apparaat af te nemen.
WAARSCHUWING voor materiële
schade!
~ Gebruik voor het vullen van het water-
reservoir alleen schoon kraanwater
zonder toevoegingen. Toevoegingen
(zoals mondspoelmiddelen) of andere
vloeistoffen kunnen het apparaat beschadigen.
~ Het water dient een prettige tempera-
tuur te hebben. Gebruik geen water dat
heter is dan 40 °C.
1. Houd de uitgeschakelde monddouche|12 horizontaal.
2. Afbeelding B: open de afdekking via
de vulopening|18.
3. Vul het waterreservoir|19 door de vulopening|18.
4. Sluit de afdekking via de vulopening|18.
8.2 Sterkte van de waterstraal instellen
Op de monddouche kunt u drie verschillende sterktes van de waterstraal instellen:
LED Straalsterkte
zachte waterstraal:
soft
normal normale waterstraal
jet
AANWIJZING: wanneer u tot dusver
geen monddouche hebt gebruikt, begint u
eerst met de instelling soft, zodat uw tandvlees aan de waterstraal kan wennen. Verhoog de sterkte van de waterstraal later
naar normal en jet. Let erop dat de druk
dan altijd prettig blijft.
• Druk zo vaak op de knop modus|7
Aan het begin, bij gevoelig
tandvlees, voor de zachte massage van het tandvlees
krachtige waterstraal:
Voor gevorderden, bij robuust
tandvlees, voor de intensieve reiniging van de ruimte tussen de
tanden
totdat de gewenste LED|10,|9 of|8
brandt.
8.3 Voor het eerste gebruik
1. Spoel de opzetmondstukk en|2 af onder
stromend water.
2. Reinig het waterreservoir|19 en de
monddouche|12 (zie “Schoonmaken /
Hygiëne-eisen” op pagina 22).
3. Vul het waterreservoir|19 met schoon
kraanwater (zie “Waterreservoir vullen” op pagina 20).
4. Steek een opz etmondstuk|2 in de hou-
der|4, zodat deze vastklikt.
20
NL
Page 23

__291789_Munddusche_B6.book Seite 21 Montag, 9. Oktober 2017 4:50 16
5.
Richt het mondstuk|1 op een wastafel en
schakel de monddouche|
uitschakelaar |6.
6. Laat de monddouche|12 lopen tot het
waterreservoir|19 leeg is om de inwendige leidingen door te spoelen. Nu is
de monddouche gereed voor gebruik.
12
in met de in-/
11.Druk op de in-/uitschakelaar |6 om
8.4 Monddouche gebruiken
1. Pak de monddouche|12 uit het laadstation|15.
2. Steek evt. een opzetmondstuk|2 in de
houder|4, zodat deze vastklikt.
3. Vul het waterreservoir|19 met schoon
kraanwater.
4. Druk zo vaak op de knop modus|7
totdat de gewenste LED brandt om de
sterkte van de waterstraal in te stellen:
-LED soft|10:
zachte waterstraal
-LED normal|9:
normale waterstraal
-LED jet|8:
krachtige waterstraal
5. Steek het mondstuk|1 in de enigszins
geopende mond en buig u over een
wastafel, zodat water en uitgespoelde
voedselresten kunnen uitstromen.
6. Schakel de monddouche|12 in met de
in-/uitschakelaar |6.
7. Richt de waterstraal op de tussenruimten van de tanden en op de tandranden
om te reinigen.
Afbeelding C: houd het mondstuk|1
op een wijze vast, zodat de waterstraal
de voedselresten van het tandvlees k an
afspoelen.
8. Verplaats het mondstuk|1 langzaam
van tussenruimte naar tussenruimte. Op
deze wijze reinigt u alle buiten- en binnenkanten.
9. Richt de waterstraal op het tandvlees
om dit te masseren.
10.Wanneer er geen water meer uit het
mondstuk|1 komt, dan is het waterreser-
8.5 Na elk gebruik
1. Open de afdekking via de vulope-
2. Schak el de monddouche|12
3. Houd de ontgrendelingsknop |5 inge-
4. Spoel het opzetmondstuk|2 onder stro-
5. Plaats de monddouche|12 op het laad-
AANWIJZING: het is raadzaam om de
opzetmondstukken|2 om de 12 maanden te
vervangen (zie “Accessoire s bestellen” op
pagina 23).
voir|19 leeg. Schakel de monddouche|12 uit en vul het waterreservoir bij.
Wanneer het apparaat opnieuw wordt
ingeschakeld, start het automatisch in
de als laatste gekozen waterstraalinstelling.
de monddouche|
Haal het mondstuk|1 pas uit de mond
wanneer de monddouche is uitgeschakeld.
ning|18, giet het resterende water uit
het waterreservoir|19 en sluit de afdekking weer.
enkele seconden in met de in-/uit schake -
6
laar |
gen binnenin de monddouche te
verwijderen.
drukt en trek het opzetmondstuk|2 voorzichtig naar boven eraf.
mend water af en steek deze in een
houder|13.
station|15.
om resterend water uit de leidin-
12 uit te schakelen.
gedurende
NL
21
Page 24

__291789_Munddusche_B6.book Seite 22 Montag, 9. Oktober 2017 4:50 16
9. Schoonmaken /
Hygiëne-eisen
GEV AAR door een elektrische
schok!
~ T rek vóór elke schoonmaakbeurt van het
laadstation|15 de stekker|17 uit het
stopcontact.
~ Dompel de monddouche|12 en het
laadstation|15 niet in water!
Het laadstation|15 moet helemaal
droog zijn, voordat het weer op het
stopcontact wordt aangesloten.
Opzetmondstukken
1. Houd de ontgrendelingsknop|5 inge-
drukt en trek het opzetmondstuk|2 voorzichtig naar boven eraf.
2. Spoel het opzetmondstuk|2 onder stro-
mend water af en steek deze in een
houder|13.
Waterreservoir
Reinig het waterreservoir|19 één keer per
week of voordat u het apparaat langer dan
een week niet gebruikt.
1. Afbeelding D: schuif het waterreser-
voir|19 naar onder van de monddouche|12 af.
2. Spoel het waterreservoir|19 met warm
water grondig uit en spoel het aan de
buitenkant af.
3. Droog het waterreservoir|19 aan de
buitenkant en giet het resterende water
eruit.
4. Schuif het waterreservoir|19 van onderaf in de monddouche|12. Let erop
dat
- de zuigslang|20 in het waterreser-
voir|19 ligt,
- het waterreservoir|19 aan beide zij-
den in de uitsparingen zit en
- het waterreservoir|19 vastzit, zodat
de afdichting goed afdicht.
Monddouche en laadstation
• Spoel de monddouche|12 af en wrijf
deze droog.
• Veeg het laadstation|15 evt. af met een
vochtige doek en wrijf het daarna
droog.
10. Opbergen
• Verwijder het overtollige water uit het ap-
paraat en laat alle onderdelen volledig
drogen, voordat u het opbergt.
• Onderbreek de stroomtoevoer naar het
apparaat en berg het droog op.
AANWIJZING: wanneer u de monddouche|12 langer dan een week niet gebruikt,
laat u het waterreservoir|19 volledig dro-
gen, voordat u dit weer in de monddouche
plaatst.
NL
22
Page 25
__291789_Munddusche_B6.book Seite 23 Montag, 9. Oktober 2017 4:50 16
11. Weggooien
GEVAAR door de accu!
~ Het apparaat bevat een lithium-ion-ac-
cu.
- De accu kan niet uit het apparaat
worden verwijderd!
- Dit apparaat mag niet worden geopend!
- Het apparaat moet met de ingebouwde accu professioneel worden afgevoerd.
De lithium-ion-accu van dit
apparaat mag niet bij het
huisvuil worden gegooid. De
accu moet samen met het apparaat op de juiste wijze
worden afgevoerd. Neem
daarvoor contact op met de
gemeentelijke inzamelpunten.
Dit product valt onder de Europese richtlijn 2012/19/EU.
Het symbool van de doorgestreepte afvalton op wieltjes
betekent dat het product in
de Europese Unie gescheiden moet worden weggegooid. Dat geldt voor het product en alle
met dit symbool aangeduide accessoires.
Aldus aangeduide producten mogen niet
met het normale huisvuil worden weggegooid, maar moeten bij een innamepunt
voor recycling van elektrische en elektronische apparaten worden afgegeven. Recycling help het verbruik van grondstoffen te
reduceren en het milieu te ontlasten.
Li-ionen
12. Problemen oplossen
W anneer uw apparaat een k eer niet functioneert zoals gewenst, doorloopt u eerst deze
checklist. Misschien is het een klein probleem
dat u zelf kunt oplo ssen.
GEVAAR door een elektrische
schok!
Probeer in geen geval het apparaat zelf te
~
repareren.
Storing
Het apparaat kan
niet worden ingeschakeld.
Oplaadcontrolelampje charge|11
brandt niet.
Mogelijke oorza-
ken/maatregelen
• Is de accu leeg?
• Is het laadstation|15
niet met het elektriciteitsnet verbonden?
13. Accessoires bestellen
Accessoires voor de monddouche
NMD 3.7 B2 kunt u nabestellen.
Bestelling online
shop.hoyerhandel.com
Verpakking
Als u de verpakking wilt weggooien, houdt
u dan aan de betreffende milieuvoorschriften in uw land.
1. Scan de QR-code met uw smartphone/
tablet.
2. Met de QR-code komt u op een website terecht waar u de nabestelling kunt plaatsen.
NL
23
Page 26

__291789_Munddusche_B6.book Seite 24 Montag, 9. Oktober 2017 4:50 16
14. Technische gegevens
Model: NMD 3.7 B2
Netspanning:
Beschermings-
klasse: II
Vermogen: 1,4 W
Accu: 1 x 3,7 V (gelijkspan-
Oplaadtijd
(eerste keer opladen): 14-16 uur
Type bescherming van het
laadstation:
Type bescherming handdeel:
LED's: RG 0
Omgevings-
voorwaarden:
Technische symbolen
Randaarde
100-240 V ~ 50/60 Hz
ning)
Li-ion 800 mAh 2,96 Wh
IPX7
(beschermd tegen de effecten bij het tijdelijk onderdompelen)
IPX4
(beschermd tegen spatwater)
10 °C tot 40 °C
Relatieve luchtvochtigheid 40 tot 85 %
15.Garantie van
HOYER|Handel GmbH
Geachte klant,
U heeft op dit apparaat 3 jaar garantie vanaf de koopdatum. Wanneer dit product onvolkomenheden vertoont, heeft u wettelijke
rechten ten opzichte van de verkoper van
het product. Deze wettelijke r echten worden
niet beperkt door onze hiernavolgend beschreven garantie.
Garantievoorwaarden
De garantietermijn begint op de koopdatum.
Bewaar de originele kassabon goed. Deze
bon is nodig als bewijs dat u het apparaat
heeft gekocht.
W anneer zich binnen drie jaar na de koopdatum van dit product een materiaal- of fabricagefout voordoet, wordt het pro duct door
ons – naar onze keus – gratis voor u gerepareerd of vervangen. Deze garantie stelt als
voorwaarde, dat het defecte apparaat en het
koopbewijs (kassabon) binnen de termijn van
drie jaar wordt overlegd en dat er kort schriftelijk wordt beschreven, waaruit de onvolkomenheid bestaat en wanneer deze zich heeft
voorgedaan.
W anneer het defect door onze garantie
wordt gedekt, ontvangt u het gerepareerde
product terug of u krijgt een nieuw exemplaar .
Met reparatie of vervanging van het product
begint geen nieuwe garantieperiode.
G
eteste veiligheid. Apparaten
moeten aan de algemeen erkende
regels van de techniek voldoen en
zijn conform de Wet betreffende
productveiligheid (ProdSG).
Met het CE-keurmerk verklaart
HOYER Handel GmbH de EUconformiteit.
Technische wijzigingen voorbehouden.
NL
24
Garantieperiode en wettelijke
garantieaanspraken wegens
gebreken
De garantieperiode wordt door de vrijwaring niet verlengd. Dat geldt ook voor vervange n en gere pareerde onderdelen.
Schades en onvolkomenheden die eventueel
al bij de koop aanwezig waren, moeten direct na het uitpakken worden gemeld. Aan
reparaties die zich voordoen na het verstrijken van de garantieperiode zijn kosten verbonden.
Page 27

NL
BE
__291789_Munddusche_B6.book Seite 25 Montag, 9. Oktober 2017 4:50 16
Omvang van de garantie
Het apparaat werd zorgvuldig gepr oduceerd
volgens strenge kwaliteitsrichtlijnen en nauwgezet gecontroleerd vóór l evering.
De garantie geldt voor materiaal- of fabricagefouten.
Van de garantie uitgesloten zijn slijtonderdelen die onderhevig zijn aan
normale slijtage en beschadigingen
van breekbare onderdelen, bijv.
schakelaars, accu's, lichtbronnen of
andere onderdelen die van glas zijn
gemaakt.
Deze garantie vervalt, wanneer het product
werd beschadigd of ondeskundig werd gebruikt of onderhouden. Vo or een juist gebruik
van het product moeten alle instructies die in
de handleiding staan vermeld, nauwkeurig
worden nageleefd. Gebruiksdoeleinden en
handelingen die in de handleiding worden
afgeraden of waarvoor wordt gewaarschuwd, moeten beslist worden vermeden.
Het product is uitsluitend bedoeld voor particulier gebruik en niet voor commercieel gebruik. Bij een oneigenlijke of ondeskundige
behandeling, bij gebruikmaking van geweld
en bij ingrepen die niet werden uitgevoerd
door ons erkende servicecenter, vervalt de
garantie.
Afhandeling in geval van
garantie
Om een snelle behandeling van uw verzoek
te waarborgen, dient u de volgende aanwijzingen te volgen:
• Houd voor alle aanvragen het artikelnummer IAN: 291789 en de kassabon als bewijs voor de koop bij de
hand.
• Het artikelnummer vindt u op het typeplaatje, ingegraveerd, op de titelpagina
van uw handleiding (linksonder) of als
sticker op de achter- of onderkant van
het apparaat.
• Wanneer zich functiestoringen of andere onvolkomenheden voordoen, neemt u
eerst telefonisch of per e-mail contact op met het hierna genoemde servicecenter.
• Een product dat geregistreerd staat als
defect, kunt u dan met bijvoeging van
de aankoopnota (kassabon) en de vermelding waaruit de onvolkomenheid bestaat en wanneer deze zich heeft
voorgedaan, franco naar het serviceadres sturen dat u is meegedeeld.
Op www.lidl-service.com kunt u
deze en nog veel meer handleidingen, productvideo's en software
downloaden.
Servicecenters
Service Nederland
Tel.: 0900 0400223 (0,10 EUR/Min.)
E-Mail: hoyer@lidl.nl
Service België
Tel.: 070 270 171 (0,15 EUR/Min.)
E-Mail: hoyer@lidl.be
IAN: 291789
Leverancier
Let erop, dat het onderstaande adres geen
serviceadres is. Neem eerst contact op
met het bovengenoemde servicecenter.
HOYER Handel GmbH
Tasköprüstraße 3
DE-22761 Hamburg
DUITSLAND
NL
25
Page 28

__291789_Munddusche_B6.book Seite 26 Montag, 9. Oktober 2017 4:50 16
Inhalt
1. Übersicht ....................................................................................... 27
2. Bestimmungsgemäßer Gebrauch .................................................... 27
3. Sicherheitshinweise ....................................................................... 28
4. Lieferumfang ................................................................................. 30
5. Ladestation ......................... ............................... ............................ 30
6. Akku laden ................................................................................... 31
7. Düsen-Aufsätze ........................ ..... ..... ... ..... ... ..... ... ..... ..... ... ..... ... .... 31
8. Bedienung ..................................................................................... 32
8.1 Wassertank füllen ........................................................ ....... ....... .........3 2
8.2 Wasserstrahlstärke einstellen ................................................................ 32
8.3 Vor der ersten Verwendung .................................................................. 32
8.4 Munddusche benutzen .........................................................................33
8.5 Nach jedem Benutzen ......................................................................... 33
9. Reinigen / Hygieneanforderungen ................................................. 34
10.Lagern ............. .......................................... .................................... 34
11.Entsorgen ...................................................................................... 35
12.Problemlösungen .......... ........................... ............................. ......... 3 5
13.Zubehörteile bestellen ....................... ............................. ............... 36
14.Technische Daten ........................................................................... 36
15.Garantie der HOYER|Handel GmbH ................................................ 37
26
DE
Page 29

__291789_Munddusche_B6.book Seite 27 Montag, 9. Oktober 2017 4:50 16
1. Übersicht
1 Düse
2 Düsen-Aufsatz (austauschbar)
3 Markierungsring
4 Aufnahme (für Düsen-Aufsatz)
5 Entriegelungstaste (für Düsen-Aufsatz)
6 Ein-/Aus-Schalter
7 mode W asserstrahlstärke auswählen
8jet LED: Einstellung: starker Wasserstrahl
9normal LED: Einstellung: normaler Wasserstrahl
10 soft LED: Einstellung: sanfter Wasserstrahl
11 charge Ladekontrollleuchte
12 Munddusche
13 Halterungen (zur Aufbewahrung der Düsen-Aufsätze)
14 Dorn der Ladestation
15 Ladestation
16 Löcher für die Wandbefestigung (auf der Rückseite)
17 Netzanschlussleitung und Netzstecker
18 Einfüllöffnung
19 Wassertank
20 Ansaugschlauch (im Wassertank)
(2 Dübel und 2 Schrauben ohne Abbildung)
Herzlichen Dank für Ihr
Vertrauen!
Wir gratulieren Ihnen zu Ihrer neuen Munddusche.
Für einen sicheren Umgang mit dem Gerät
und um den ganzen Leistungsumfang
kennenzulernen:
• Lesen Sie vor der ersten Inbetriebnahme diese Bedienungsanleitung gründlich durch.
• Befolgen Sie vor allen Dingen die
Sicherheitshinweise!
• Das Gerät darf nur so bedient
werden, wie in dieser Bedienungsanleitung beschrieben.
• Bewahren Sie diese Bedienungsanleitung auf.
• Falls Sie das Gerät einmal weitergeben, legen Sie bitte diese
Bedienungsanleitung dazu. Die
Bedienungsanleitung ist Bestandteil des Produktes.
Wir wünschen Ihnen viel Freude mit Ihrer
neuen Munddusche!
2. Bestimmungsgemäßer
Gebrauch
Die Munddusche ist ausschließlich zur Zahnreinigung und Mundhygiene beim Menschen vorgesehen.
Das Gerät ist für den privaten Haushalt konzipiert. Dieses Gerät darf nicht für gewerbliche Zwecke eingesetzt werden.
DE
27
Page 30

__291789_Munddusche_B6.book Seite 28 Montag, 9. Oktober 2017 4:50 16
3. Sicherheitshinweise
Warnhinweise
Falls erforderlich, werden folgende Warnhinweise in dieser Bedienungsanleitung verwendet:
GEFAHR! Hohes Risiko: Missachtung der Warnung kann Schaden
für Leib und Leben verursachen.
WARNUNG! Mittleres Risiko: Missachtung
der Warnung kann Verletzungen oder
schwere Sachschäden verursachen.
VORSICHT: geringes Risiko: Missachtung
der Warnung kann le ichte Verletzungen
oder Sachschäden verursachen.
HINWEIS: Sachverhalte und Besonderheiten, die im Umgang mit dem Gerät beachtet
werden sollten.
Anweisungen für den sicheren Betrieb
~
Dieses Gerät kann von Kindern ab 8 Jahren und von Personen mit
reduzierten physischen, sensorischen oder mentalen F ä higk e iten
oder Mangel an Erfahrung und/oder Wissen benutzt werden,
wenn sie beaufsichtigt werden.
~
Reinigung und Benutzer-Wartung dürfen nicht durch Kinder durchgeführt werden, es sei denn, sie sind beaufsichtigt.
~
Die Munddusche darf nur mit kaltem oder warmem W asser benutzt
werden. Verwenden Sie nur klares Leitungswasser ohne Zusätze.
~
Kinder dürfen nicht mit dem Gerät spielen.
~
Die Netzanschlussleitung dieses Gerä tes kann nicht ersetzt werden.
Bei Beschädigungen der Leitung muss das Gerät verschrottet werden.
GEFAHR durch
verschluckbare Kleinteile
~ Die Markierungsringe an den Düsen-
Aufsätzen sind verschluckbare Kleinteile. Halten Sie sie von Kindern unter
36|Monaten fern.
GEFAHR für Kinder
~
V e rpack ungsmaterial ist k ein Kinderspielzeug. Kinder dürfen nicht mit den Kunststoffbeuteln spielen. Es besteht
Erstickungsgefahr.
GEFAHR für und durch
Haus- und Nutztiere
~ V on Elektrogeräten können G efahren für
Haus- und Nutztiere ausgehen. Des
Weiteren können Tiere auch einen
Schaden am Gerät verursachen. Halten
28
DE
Sie deshalb Tiere grundsätzlich von
Elektrogeräten fern.
GEFAHR von Stromschlag
durch Feuchtigkeit
~ Die Munddusche, die Ladestation, die
Netzanschlussleitung und der Netzstecker dürfen nicht in Wasser oder andere Flüssigkeiten getaucht wer den.
~ Sollte die Ladestation doch einmal ins
Wasser gefallen sein, ziehen Sie sofort
den Netzstecker und nehmen Sie erst
danach die Ladestation heraus. Benutzen Sie die Ladestation in diesem Fall
nicht mehr, sondern lassen Sie diese
von einer Fachwerkstatt überprüfen.
Page 31

__291789_Munddusche_B6.book Seite 29 Montag, 9. Oktober 2017 4:50 16
GEFAHR durch
Stromschlag
~ Die Ladestation wird an die
Netzspannung angeschlossen
und darf deshalb nicht in der
Dusche, in der Badewanne
oder über mit Wasser gefüllten
W aschbecken benutzt werden.
~ Der Einbau einer Fehlerstromschutzein-
richtung mit einem Nennauslösestrom
von nicht mehr als 30 mA in der Hausinstallation bietet zusätzlichen Schutz.
W enden Sie sich dazu an Ihren Elektroinstallateur.
Nehmen Sie das Gerät nicht in Betrieb,
~
wenn das Gerät, die Ladestation oder
die Netzanschlussleitung sichtbare Schäden aufweist oder wenn das Gerät zuvor
fallen gelassen wurde.
~ Die Netzanschlussleitung dieses Gerä-
tes kann nicht ersetzt werden. Bei Beschädigungen der Leitung muss das
Gerät verschrottet werden.
Schließen Sie den Netzstecker nur an
~
eine ordnungsgemäß installierte, leicht
zugängliche Steckdose an, deren Spannung der Angabe auf dem Typenschild
entspricht. Die Steckdose muss auch nach
dem Anschließen weiterhin leicht zugänglich sein.
~ Achten Sie darauf, dass die Netzan-
schlussleitung nicht eingeklemmt oder
gequetscht und nicht durch scharfe Kanten oder heiße Stellen beschädigt werden kann.
~ Um die Ladestation vollständig vom
Netz zu trennen, ziehen Sie den Netzstecker.
~ Um den Netzstecker aus der Steckdose
zu ziehen, immer am Stecker, nie am
Kabel ziehen.
~ Ziehen Sie den Netzstecker aus der
Steckdose, ...
… wenn eine Störung auftritt,
… wenn Sie das Gerät nicht benutzen,
… bevor Sie das Gerät reinigen und
… bei Gewitter.
~ Um Gefährdungen zu vermeiden, neh-
men Sie keine V eränderungen am Gerät
vor. Lassen Sie Reparaturen nur von einer Fachwerkstatt bzw. im Service-Center durchführen.
~ Bei V erwendung eines Verlängerungska-
bels muss dieses den gültigen Sicherheitsbestimmungen entsprechen.
GEFAHR durch Akku
~ Setzen Sie das Gerät nicht direkter Son-
ne oder Hitze aus. Die Umgebungstemperatur soll 0|°C nicht unter- und
+40|°C nicht überschreiten.
~ Laden Sie das Handteil der Mund-
dusche ausschließlich mit der OriginalLadestation auf.
~ Schützen Sie den Akku vor mechani-
schen Beschädigungen. Brand-
gefahr!
~ Sollte aus dem Akku Elektrolytlösung
auslaufen, vermeiden Sie den Kontakt
mit Augen, Schleimhäuten und Haut.
Spülen Sie betroffene Stellen sofort mit
reichlich klarem W asser und suchen Sie
einen Arzt auf. Die Elektrolytlösung
kann Reizungen hervorrufen.
~ Das Gerät enthält einen Lithium-Ionen-
Akku.
- Der Akku kann nicht entnommen werden!
- Dieses Gerät darf nicht geöffnet werden!
- Das Gerät muss mit dem eingebauten
Akku fachgerecht entsorgt werden.
WA RNUNG vor Sachschäden
~ W enn Sie die Ladestation an der W and
befestigen wollen, prüfen Sie, welches
Befestigungsmaterial geeignet ist. Im
29
DE
Page 32

__291789_Munddusche_B6.book Seite 30 Montag, 9. Oktober 2017 4:50 16
Zweifel lassen Sie die Montage einen
Fachmann durchführen.
~ Prüfen Sie vor dem Bohren, dass sich
keine W asserrohr e oder Stromleitungen
an der entsprechenden Stelle in der
Wand befinden.
~ Die Ladestation ist mit rutschfesten Sili-
konfüßen ausgestattet. Da Möbel mit einer Vielfalt von Lacken und K unststoffen
beschichtet sind und mit unterschiedlichen Pflegemitteln behandelt werden,
kann nicht völlig ausgeschlossen werden, dass manche dieser Stoffe Bestandteile enthalten, die die K un sts toff füße
angreifen und aufweichen. Legen Sie
ggf. eine rutschfeste Unterlage unter die
Ladestation.
~ Legen Sie das Gerät niemals auf heiße
Oberflächen (z.|B. Herdplatten) oder in
die Nähe von Wärmequellen oder offenem Feuer.
~ Verwenden Sie keine scharfen oder
kratzenden Reinigungsmittel.
VORSICHT
~ In den ersten Tagen der Verwendung ei-
ner Munddusche kann es bei manchen
Anwendern zu leichtem Zahnfleischbluten kommen. Falls das Bluten länger als
14 Tage andauert, ist ein Zahnarzt aufzusuchen.
~ Falls Sie unter starker Parodontitis lei-
den, Verletzungen oder Geschwüre in
der Mundschleimhaut haben oder in
den letzten zwei Monaten einen zahnchirurgischen Eingriff hatten, fragen Sie
einen Zahnarzt vor der Benutzung der
Munddusche.
4. Lieferumfang
1 Munddusche|12
2 Düsen-Aufsätze|2
1 Ladestation|15
2 Dübel 5 mm Ø
Schrauben 3 x 25 mm
1 Bedienungsanleitung
• Entfernen Sie sämtliches Verpackungsmaterial.
• Überprüfen Sie, ob alle Zubehörteile
vorhanden und unbeschädigt sind.
5. Ladestation
Die Ladestation|15 kann entweder aufgestellt werden oder an einer Wand hängend
befestigt werden.
• Führen Sie die Netzanschlussleitu ng|17
durch eine der 3 Aussparungen im Gehäuse der Ladestation|15.
Wandbefestigung
HINWEISE:
• Beachten Sie bei der Auswahl des Boh-
rers die Dübelgröße.
• Falls Ihr Wandmaterial es erfordert, er-
setzen Sie ggf. das mitgelieferte Befestigungsmaterial durch geeignetes.
• Bild A: Befestigen Sie die Ladestati-
on|15 entsprechend der Abbildung an
den Löchern|16 auf der Rückseite an einer Wand.
30
DE
Page 33
__291789_Munddusche_B6.book Seite 31 Montag, 9. Oktober 2017 4:50 16
6. Akku laden
HINWEISE:
• Laden Sie den Akku vor dem ersten Gebrauch vollständig auf. Dies dauert 14 16 Stunden.
• Stellen Sie die Munddusche|12 nach
dem Gebrauch auf den Dorn|14 der
Ladestation|15. So haben Sie immer
die volle Leistungsfähigkeit der Munddusche|12. Der Akku wird durch das
regelmäßige Laden nicht geschädigt.
1. Stecken Sie den Netzstecker|17 der La-
destation|15 in eine geeignete Steckdo-
se. Die Steckdose muss auch nach dem
Anschließen jederzeit gut zugänglich
sein.
2. Stellen Sie die ausgeschaltete Mund-
dusche|12 auf den Dorn|14 der Ladestation|15.
Die Ladekontrollleuchte charge|11
leuchtet während des gesamten Ladevorgangs rot. Ist der optimale Ladezustand
erreicht, so leuchtet die Ladekontrollleuchte charge|11 grün.
7. Düsen-Aufsätze
Im Lieferumfang sind 2 Düsen-Aufsätze|2
enthalten.
Über die verschiedenfarbigen Markierungsringe|3 können Sie die Düsen-Aufsätze|2
unterschiedlichen Familienmitgliedern zuordnen.
Die Düsen-Aufsätze|2 können zum Aufbewahren in die Halterungen|13 der Ladesta-
tion|15 gesteckt werden.
Düsen-Aufsatz aufstecken/
abnehmen
• Nehmen Sie einen Düsen-Aufsatz|2 und
stecken ihn von oben in die Aufnahme|4 der Munddusche|12, sodass er
einrastet.
• Zum Entfernen halten Sie die Entriegelungstaste|5 gedrückt und ziehen Sie
den Düsen-Aufsatz|2 vorsichtig nach
oben ab.
HINWEIS: Es empfiehlt sich, die Düsen-Aufsätze|2 alle 12|Monate auszutauschen (siehe “Zubehörteile bestellen” auf Seite 36).
Akku-Signale:
Ladekontrollleuchte charge
-Munddusche|12 auf Ladestation|15:
Ladekontrollleuchte charge|11 leuchtet
grün: Der Akku ist voll geladen.
-Munddusche|12 auf Ladestation|15:
Ladekontrollleuchte charge|11 leuchtet
rot: Der Akku wird geladen.
-Munddusche|12 schaltet sich aus: Lade-
kontrollleuchte charge|11 blinkt rot.
Laden Sie den Akku auf.
- Der Akku wird während der Benutzung
schwach: Ladekontrollleuchte char-
ge|11 blinkt rot. Laden Sie den Akku
auf.
|11
DE
31
Page 34
__291789_Munddusche_B6.book Seite 32 Montag, 9. Oktober 2017 4:50 16
8. Bedienung
VORSICHT:
~ In den ersten Tagen der Verwendung ei-
ner Munddusche kann es bei manchen
Anwendern zu leichtem Zahnfleischbluten kommen. Falls das Bluten länger als
14 Tage andauert, ist ein Zahnarzt aufzusuchen. Beachten Sie auch die Hinweise zur Wasserstrahlstärke (siehe
“Wasserstrahlstärke einstellen” auf
Seite 32).
~ Falls Sie unter starker Parodontitis lei-
den, Verletzungen oder Geschwüre in
der Mundschleimhaut haben oder in
den letzten zwei Monaten einen zahnchirurgischen Eingriff hatten, fragen Sie
einen Zahnarzt vor der Benutzung der
Munddusche.
8.1 Wassertank füllen
Den Wassertank können Sie mit Wasser füllen, ohne ihn vom Gerät abzunehmen.
WARNUNG vor Sachschäden!
~ Verwenden Sie zum Füllen des Wasser-
tanks nur reines Leitungswasser ohne
Zusätze. Zusätze (wie z.|B. Mundspülungen) oder andere Flüssigkeiten können das Gerät beschädigen.
~ Das Wasser soll eine angenehme Tem-
peratur haben. Verwenden Sie kein
Wasser, das heißer als 40|°C ist.
1. Halten Sie die ausgeschaltete Munddusche|12 waagerecht.
2. Bild B: Öffnen Sie die Abdeckung
über der Einfüllöffnung|18.
3. Füllen Sie den Wassertank|19 durch
die Einfüllöffnung|18.
4. Verschließen Sie die Abdeckung über
der Einfüllöffnung|18.
8.2 Wasserstrahlstärke einstellen
Sie können an der Munddusche drei verschiedene Wasserstrahlstärken einstellen:
LED Strahlstärke
sanfter Wasserstrahl:
soft
normal normaler Wasserstrahl
jet
HINWEIS: Wenn Sie bisher keine Munddu-
sche verwendet haben, beginnen Sie zunächst mit der Einstellung soft, damit sich
Ihr Zahnfleisch an den W asserstr ahl gewöhnen kann. Steigern Sie später die W asserstrahlstärke auf normal und jet. Der Druck
soll dabei immer angenehm bleiben.
• Drücken Sie die Taste mode|7 so oft,
zu Beginn, bei empfindlichem
Zahnfleisch, zur sanften Massage des Zahnfleisches
starker Wasserstrahl:
für Fortgeschrittene, bei robustem Zahnfleisch, zur intensiven
Reinigung der Zahnzwischenräume
bis die gewünschte LED|10,|9 oder|8
leuchtet.
8.3 Vor der ersten Verwendung
1. Spüle n Sie die Düsen-Aufsätze|2 unter
fließendem Wasser ab.
2. Reinigen Sie den Wassertank|19 und
die Munddusche|12 (siehe “Reinigen /
Hygieneanforderungen” auf Seite 34).
3. Füllen Sie den Wassertank|19 mit kla-
rem Leitungwasser (siehe “Wassertank
füllen” auf Seite 32).
4. Stecken Sie einen Düsen-Aufsatz|2 in
die Aufnahme|4, sodass er einrastet.
32
DE
Page 35

__291789_Munddusche_B6.book Seite 33 Montag, 9. Oktober 2017 4:50 16
5. Richten Sie die Düse|1 auf ein Waschbecken und schalten Sie die Munddu-
12
sche|
ein.
6. Lass en Sie die Munddus che|12 laufen,
bis der Wassertank|19 leer ist, um die
Leitungen im Inneren durchzuspülen.
Nun ist die Munddusche für die Benutzung bereit.
mit dem Ein-/Aus-Schalter||6
8.4 Munddusche benutzen
1. Nehmen Sie die Munddusche |12 aus
der Ladestation|15.
2. Steck en Sie ggf. einen Düsen-Aufsatz|2
in die Aufnahme|4, sodass er einrastet.
3. Füllen Sie den Wassertank|19 mit frischem Leitungswasser.
4. Zum Einstellen der Wasserstrahlstärke
drücken Sie die Taste mode|7 so oft,
bis die gewünschte LED leuchtet:
-LED soft|10:
sanfter Wasserstrahl
-LED normal|9:
normaler Wasserstrahl
-LED jet|8:
starker Wasserstrahl
5. Führen Sie die Düse|1 in den leicht geöffneten Mund und beugen Sie sich
über ein W aschbecken, damit Wasser
und ausgespülte Speisereste herausfließen können.
6. Schalten Sie die Munddusche|12 mit
dem Ein-/Aus-Schalter |6 ein.
7. Zum Reinigen richten Sie den Wasserstrahl auf die Zahnzwischenräume und
die Zahnränder.
Bild C: Halten Sie die Düse|1 so, dass
der Wasserstrahl die Speisereste vom
Zahnfleisch weg abspülen kann.
8. Bewegen Sie die Düse|1 langsam von
Zwischenraum zu Zwischenraum. Reinigen Sie auf diese W eise alle Außenseiten und Innenseiten.|
9. F ür die Massage des Zahnfleisches richten Sie den Wasserstrahl auf das Zahnfleisch.
10.Wenn kein Wasser mehr aus der Düse|1 austritt, ist der Wassertank|19
leer. Schalten Sie die Munddusche|12
aus und füllen Sie den Wassertank
nach. Beim Wiedereinschalten startet
das Gerät automatisch in der zuletzt gewählten W asserstrahl-Einstellung.
11.Um die Munddusche|12 auszuschalten, drücken Sie den Ein-/Aus-Schalter
|6. Nehmen Sie die Düse|1 erst
dann aus dem Mund, wenn die Munddusche ausgeschaltet ist.
8.5 Nach jedem Benutzen
1. Öffnen Sie die Abdeck ung über der
Einfüllöffnung|18, gießen Sie das restliche Wasser aus dem Wassertank|19
aus und schließen Sie die Abdeckung
wieder.
Schalten Sie die Munddusche|12 für eini-
2.
ge Sekunden mit dem Ein-/Aus-Schalter
6 ein, um restliches Wasser aus den
|
Leitungen im Inneren der Munddusche
zu entfernen.
3. Halten Sie die Entriegelungstaste|5 ge-
drückt und ziehen Sie den Düsen-Aufsatz|2 vorsichtig nach oben ab.
4. Spülen Sie den Düsen-Aufsatz|2 unter
fließendem Wasser ab und stecken ihn
in eine Halterung|13.
5. Stellen Sie die Munddusche |12 auf die
Ladestation|15.
HINWEIS: Es empfiehlt sich, die Düsen-Aufsätze|2 alle 12|Monate auszutauschen (siehe “Zubehörteile bestellen” auf Seite 36).
DE
33
Page 36

__291789_Munddusche_B6.book Seite 34 Montag, 9. Oktober 2017 4:50 16
9. Reinigen / Hygieneanforderungen
GEFAHR durch Stromschlag!
~ Ziehen Sie vor jeder Reinigung der La-
destation|15 den Netzstecker|17 aus
der Netzsteckdose.
~ Die Munddusche|12 und die Ladestati-
on|15 nicht ins Wasser tauchen!
Die Ladestation|15 muss komplett trocken sein, ehe sie wieder an die Steckdose angeschlossen wird.
Düsen-Aufsätze
1. Halten Sie die Entriegelungstaste|5 ge-
drückt und ziehen Sie den Düsen-Aufsatz|2 vorsichtig nach oben ab.
2. Spülen Sie den Düsen-Aufsatz|2 unter
fließendem Wasser ab und stecken ihn
in eine Halterung|13.
Wassertank
Einmal pro Woche oder bevor Sie das Gerät länger als eine Woche nicht benutzen,
reinigen Sie den Wassertank|19.
1. Bild D: Schieben Sie den Wasser-
tank|19 nach unten von der Munddusche|12 ab.
2. Spülen Sie den Wassertank|19 mit
warmem Wasser gründlich aus und von
außen ab.
3. Trocknen Sie den Wassertank|19 von
außen ab und gießen Sie restliches
Wasser aus.
4. Schieben Sie den Wassertank|19 von
unten in die Munddusche|12. Achten
Sie dabei darauf, dass
- der Ansaugschlauch|20 im Wasser-
tank|19 liegt,
- der Wassertank|19 auf beiden Seiten
in den Vertiefungen sitzt und
- der Wassertank|19 fest sitzt, sodass
die Dichtung gut abdichtet.
Munddusche und Ladestation
• Spülen Sie die Munddusche|12 ab und
reiben Sie diese trocken.
• Die Ladestation|15 ggf. mit einem
feuchten Tuch abwischen und trockenreiben.
10. Lagern
• Entfernen Sie überschüssiges Wasser
aus dem Gerät und lassen Sie alle Te ile
vollständig trocknen, bevor Sie sie zum
Lagern wegräumen.
• Trennen Sie das Gerät vom Netz und la-
gern Sie es trocken.
HINWEIS: Wenn Sie die Munddusche|12
länger als eine Woche nicht benutzen, lassen Sie den Wassertank|19 vollständig
trocknen, bevor Sie ihn wieder in die Munddusche einsetzen.
34
DE
Page 37

__291789_Munddusche_B6.book Seite 35 Montag, 9. Oktober 2017 4:50 16
11. Entsorgen
GEFAHR durch den Akku!
~ Das Gerät enthält einen Lithium-Ionen-
Akku.
- Der Akku kann nicht entnommen werden!
- Dieses Gerät darf nicht geöffnet werden!
- Das Gerät muss mit dem eingebauten
Akku fachgerecht entsorgt wer den.
Der mit diesem Gerät verwendete Lithium-Ionen-Akku
darf nicht in den Hausmüll.
Der Akku muss zusammen
mit dem Gerät sachgerecht
entsorgt werden. Wenden
Sie sich dazu an die kommunalen Sammelstellen.
Dieses Produkt unterliegt der
europäischen Richtlinie
2012/19/EU.
der durchgestrichenen Abfalltonne auf Rädern bedeutet,
dass das Produkt in der Europäischen Union einer getrennten Müllsammlung zugeführt werden muss.
Dies gilt für das Produkt und alle mit diesem
Symbol gekennzeichneten Zubehörteile. Gekennzeichnete Produkte dürfen nicht über den
normalen Hausmüll entsorgt werden, sondern
müssen an einer Annahmestelle für das Recycling von elektrischen und elektronischen Geräten abgegeben werden. Recycling hilft, den
Verbrauch von Rohstoffen zu reduzieren und
die Umwelt zu entlasten. Informationen zur
Entsorgung und der Lage des nächsten Recyclinghofes erhalten Sie z.|B. bei Ihrer Stadtreinigung oder in den Gelben Seiten.
Das Symbol
Li-Ionen
Verpackung
Wenn Sie die Verpackung entsorgen möchten, achten Sie auf die entsprechenden Umweltvorschriften in Ihrem Land.
12. Problemlösungen
Sollte Ihr Gerät einmal nicht wie gewünscht
funktionieren, gehen Sie bitte erst diese
Checkliste durch. Vielleicht ist es nur ein kleines Problem, das Sie selbst beheben können.
GEFAHR durch Stromschlag!
~ Versuchen Sie auf keinen Fall, das Ge-
rät selbstständig zu reparieren.
Fehler
Das Gerät lässt
sich nicht einschalten.
Ladekontrollleuchte
charge|11
leuchtet nicht.
Mögliche Ursachen /
Maßnahmen
• Ist der Akku leer?
• Ist die Ladestation|15
nicht mit dem Netz
verbunden?
DE
35
Page 38

__291789_Munddusche_B6.book Seite 36 Montag, 9. Oktober 2017 4:50 16
13. Zubehörteile
bestellen
Zubehörteile für die Munddusche
NMD 3.7 B2 können Sie nachbestellen.
Bestellung online
shop.hoyerhandel.com
1. Scannen Sie den QR-Code mit Ihrem
Smartphone/Tablet.
2. Mit dem QR-Code gelangen Sie auf
eine W ebseite, wo Sie die Nachbestellung vornehmen können.
14. Technische Daten
Modell: NMD 3.7 B2
Netzspannung:
Schutzklasse: II
Leistung: 1,4 W
Akku: 1x3,7 V (Gleichspan-
Ladezeit (erstes Aufladen): 14-16 Stunden
Schutzart
Ladestation:
Schutzart
Handteil:
LEDs: RG 0
Umgebungs-
bedingungen:
100-240 V ~ 50/60 Hz
nung)
Li-lon 800 mAh 2.96 Wh
IPX7
(geschützt gegen die Wirkungen beim zeitweiligen
Untertauchen)
IPX4
(geschützt gegen
Spritzwasser)
10 °C bis 40 °C
Luftfeuchtigkeit 40 bis 85 %
relativ
36
Technische Symbole
Schutzisolierung
Geprüfte Sicherheit. Geräte müssen den allgemein anerkannten
Regeln der Technik genügen und
gehen mit dem Produktsicherheitsgesetz (ProdSG) konform.
Mit der CE-Kennzeichnung erklärt
die HOYER Handel GmbH die
EU-Konformität.
Technische Änderungen vorbehalten.
DE
Page 39

__291789_Munddusche_B6.book Seite 37 Montag, 9. Oktober 2017 4:50 16
15. Garantie der
HOYER|Handel GmbH
Sehr geehrte Kundin, sehr geehrter Kunde,
Sie erhalten auf dieses Gerät 3|Jahre Garantie ab Kaufdatum. Im Falle von Mängeln
dieses Produkts stehen Ihnen gegen den Verkäufer des Produkts gesetzliche Rechte zu.
Diese gesetzlichen Rechte werden durch unsere im Folgenden dargestellte Garantie
nicht eingeschränkt.
Garantiebedingungen
Die Garantiefrist beginnt mit dem Kaufdatum. Bitte bewahren Sie den Original Kassenbon gut auf. Diese Unterlage wird als
Nachweis für den Kauf benötigt.
Tritt innerhalb von drei Jahr en ab dem K aufdatum dieses Produkts ein Material- oder
Fabrikationsfehler auf, wir d das Produkt von
uns – nach unserer Wa hl – für Sie k ostenlos
repariert oder ersetzt. Diese Garantieleistung
setzt voraus, dass innerhalb der Dreijahresfrist das defekte Gerät und der Kaufbeleg
(Kassenbon) vorgelegt und schriftlich kurz beschrieben wird, worin der Mangel besteht
und wann er aufgetreten ist.
Wenn der Defekt von unser er Gar antie gedeckt ist, erhalten Sie das reparierte oder ein
neues Produkt zurück. Mit Reparatur oder
Austausch des Produkts beginnt kein neuer
Garantiezeitraum.
Garantiezeit und gesetzliche
Mängelansprüche
Die Garantiezeit wird dur ch di e Gewähr leistung nicht verlängert. Dies gilt auch für ersetzte und reparierte Teile. Eventuell schon beim
Kauf vorhandene Schäden und Mängel müssen sofort nach dem Auspacken gemeldet
werden. Nach Ablauf der Garantiezeit anfallende Reparaturen sind k ostenpƃic hti g.
Garantieumfang
Das Gerät wurde nach strengen Qualitätsrichtlinien sorgfältig produziert und vor Auslieferung gewissenhaft geprüft.
Die Garantieleistung gilt für Material- oder
Fabrikationsfehler.
Von der Garantie ausgeschlossen
sind Verschleißteile, die normaler
Abnutzung ausgesetzt sind und Beschädigungen an zerbrechlichen
Teilen, z. B. Schalter, Akkus,
Leuchtmittel oder andere Teile, die
aus Glas gefertigt sind.
Diese Garantie verfällt, wenn das Produkt
beschädigt, nicht sachgemäß benutzt oder
gewartet wurde. Für eine sachgemäße Benutzung des Produkts sind alle in der Bedienungsanleitung aufgeführten Anweisungen
genau einzuhalten. Verwendungszwecke
und Handlungen, von denen in der Bedienungsanleitung abgeraten oder vor denen
gewarnt wird, sind unbedingt zu vermeiden.
Das Produkt ist lediglich für den privaten und
nicht für den gewerblichen Gebrauch bestimmt. Bei missbräuchlicher und unsachgemäßer Behandlung, Gewaltanwendung und
bei Eingriffen, die nicht von unserem autorisierten Service-Center vorgenommen wurden, erlischt die Garantie.
Abwicklung im Garantiefall
Um eine schnelle Bearbeitung Ihres Anliegens zu gewährleisten, folgen Sie bitte den
folgenden Hinweisen:
• Bitte halten Sie für alle Anfragen die Artikelnummer IAN:|291789 und den
Kassenbon als Nachweis für den Kauf
bereit.
• Die Artikelnummer finden Sie auf dem
Typenschild, einer Gravur, auf dem Titelblatt Ihrer Anleitung (unten links) oder
als Aufkleber auf der Rück- oder Unterseite des Gerätes.
• Sollten Funktionsfehler oder sonstige Mängel auftreten, kontaktieren Sie zunächs t
das nachfolgend benannte Service-Center
telefonisch oder per E-Mail.
DE
37
Page 40
DE
AT
CH
__291789_Munddusche_B6.book Seite 38 Montag, 9. Oktober 2017 4:50 16
• Ein als defekt erfasstes Produkt können
Sie dann unter Beifügung des Kaufbelegs (Kassenbon) und der Angabe, worin der Mangel besteht und wann er
aufgetreten ist, für Sie portofrei an die
Ihnen mitgeteilte Service Anschrift übersenden.
Auf www.lidl-service.com können
Sie diese und viele weitere Handbücher, Produktvideos und Software
herunterladen.
Service-Center
Service Deutschland
Tel.: 0800 5435 111
(kostenfrei)
E-Mail: hoyer@lidl.de
Service Österreich
Tel.: 0820 201 222
(0,15 EUR/Min.)
E-Mail: hoyer@lidl.at
Service Schweiz
Tel.: 0842 665566
(0,08 CHF/Min.,
Mobilfunk max. 0,40 CHF/Min.)
E-Mail: hoyer@lidl.ch
IAN: 291789
Lieferant
Bitte beachten Sie, dass die folgende An-
keine Serviceanschrift
schrift
Kontaktieren Sie zunächst das genannte
Service-Center.
HOYER Handel GmbH
Tasköprüstraße 3
DE-22761 Hamburg
DEUTSCHLAND
ist.
38
DE
Page 41

__291789_Munddusche_B6.book Seite 39 Montag, 9. Oktober 2017 4:50 16
DE
39
 Loading...