

Page 1

s
Be inspired
Page 2

Contents
Contents
Safety precautions . . . . . . . . . . . . . . . . . . . . . . . . . . . 3
Getting started . . . . . . . . . . . . . . . . . . . . . . . . . . . . . . 4
Pack contents . . . . . . . . . . . . . . . . . . . . . . . . . . . . . . . . . . . . . . . . . . . . . . . . . . . . . . . . . 4
Notes on installation . . . . . . . . . . . . . . . . . . . . . . . . . . . . . . . . . . . . . . . . . . . . . . . . . . . 4
Use as desktop unit . . . . . . . . . . . . . . . . . . . . . . . . . . . . . . . . . . . . . . . . . . . . . . . . . . . . 4
Mounting the base as a wall unit . . . . . . . . . . . . . . . . . . . . . . . . . . . . . . . . . . . . . . . . . 5
Connecting the base . . . . . . . . . . . . . . . . . . . . . . . . . . . . . . . . . . . . . . . . . . . . . . . . . . . 6
Connecting auxiliary equipment . . . . . . . . . . . . . . . . . . . . . . . . . . . . . . . . . . . . . . . . . . 7
Setting and operating the base . . . . . . . . . . . . . . . . . . . . . . . . . . . . . . . . . . . . . . . . . . . 8
Registering handsets . . . . . . . . . . . . . . . . . . . . . . . . . . . . . . . . . . . . . . . . . . . . . . . . . . . 9
De-registering handsets . . . . . . . . . . . . . . . . . . . . . . . . . . . . . . . . . . . . . . . . . . . . . . . 14
Locating a handset (paging) . . . . . . . . . . . . . . . . . . . . . . . . . . . . . . . . . . . . . . . . . . . . 14
Supported handsets . . . . . . . . . . . . . . . . . . . . . . . . 15
Features . . . . . . . . . . . . . . . . . . . . . . . . . . . . . . . . . . . . . . . . . . . . . . . . . . . . . . . . . . . . 15
The quick way into the world of ISDN . . . . . . . . . 19
Answering Machine . . . . . . . . . . . . . . . . . . . . . . . . 20
Operation using a registered handset . . . . . . . . . . . . . . . . . . . . . . . . . . . . . . . . . . . . . 20
Remote control of answering machines . . . . . . . . . . . . . . . . . . . . . . . . . . . . . . . . . . . 22
Connecting devices . . . . . . . . . . . . . . . . . . . . . . . . 26
Connecting cord-based analogue devices . . . . . . . . . . . . . . . . . . . . . . . . . . . . . . . . . 26
Making calls with devices on the analogue connection (TAE connection) . . . . . . . . 28
Defining the device type . . . . . . . . . . . . . . . . . . . . . . . . . . . . . . . . . . . . . . . . . . . . . . . 29
Connecting PC via USB . . . . . . . . . . . . . . . . . . . . . . . . . . . . . . . . . . . . . . . . . . . . . . . . 30
Gigaset Repeater . . . . . . . . . . . . . . . . . . . . . . . . . . . . . . . . . . . . . . . . . . . . . . . . . . . . . 30
Operation of entrance telephone . . . . . . . . . . . . . 31
Connecting entrance telephones . . . . . . . . . . . . . . . . . . . . . . . . . . . . . . . . . . . . . . . . 31
Appendix . . . . . . . . . . . . . . . . . . . . . . . . . . . . . . . . . 33
Care . . . . . . . . . . . . . . . . . . . . . . . . . . . . . . . . . . . . . . . . . . . . . . . . . . . . . . . . . . . . . . . 33
Contact with liquid . . . . . . . . . . . . . . . . . . . . . . . . . . . . . . . . . . . . . . . . . . . . . . . . . . . 33
Questions and Answers . . . . . . . . . . . . . . . . . . . . . . . . . . . . . . . . . . . . . . . . . . . . . . . . 33
Service (Customer Care) . . . . . . . . . . . . . . . . . . . . . . . . . . . . . . . . . . . . . . . . . . . . . . . 34
Specifications . . . . . . . . . . . . . . . . . . . . . . . . . . . . . . . . . . . . . . . . . . . . . . . . . . . . . . . 36
Accessories . . . . . . . . . . . . . . . . . . . . . . . . . . . . . . . 37
1
Page 3

Contents
ISDN glossary . . . . . . . . . . . . . . . . . . . . . . . . . . . . . . 40
Index . . . . . . . . . . . . . . . . . . . . . . . . . . . . . . . . . . . . . 48
2
Page 4
Safety precautions
Safety precautions
Use only the power unit supplied, as indicated on the underside of the base
$
station.
The operation of medical appliances may be affected. Be aware of the technical conditions within the particular environment (e.g. doctor's practice).
Do not install the base in bathrooms or shower rooms. The handset and base
are not watertight.
Do not use the phone in environments subject to explosion hazard (e .g. auto
paint shops).
If you give your Gigaset to someone else, make sure you also give them the
ƒ
operating manual.
Dispose of the batteries and phone in accordance with environmental regulations.
!
3
Page 5

Getting started
Getting started
Pack contents
◆ 1 base
◆ 1 power supply cord with power unit
◆ 1 ISDN connection cable
◆ 1 USB cable
◆ 1 wall holder
◆ Operating instructions
Notes on installation
◆ The installation location must have a 220/230V~ mains outlet and an ISDN tele-
phone connection.
◆ For optimum radio reception, you should install the base at a central point wherever
possible.
◆ The installation location should not be in the immediate vicinity of other equipment,
e. g. hi-fi, television, office or microwave equipment, in order to prevent mutual
interference. Minimum distance (including to base power unit): 1.5 metres.
In case of picture and sound interference on satellite reception equipment, please
contact your retailer to have your satellite reception system checked for a lack of
screening.
◆ Avoid direct contact with sources of heat (e .g. radiators).
◆ Do not expose the base to direct sunlight.
◆ The base can also be wall mounted, using the wall holder included in the pack.
◆ If you are not using wall mounting, install the base on a level, non-slip surface. The
feet of the device do not normally leave any marks on the installation surface. However, in view of the variety of paints and polishes available, it cannot be ruled out,
that contact may cause marks on the installation surface.
◆ The range between the base and the handsets is up to 300 m in the open air. Inside
buildings, ranges of up to 50 m can be achieved.
Use as desktop unit
Your telephone can be used as a space-saving desktop unit. Before connecting the base,
please read the notes on installation (page 3, page 4).
4
Page 6
Getting started
Mounting the base as a wall unit
Before mounting the base, please read the notes on installation (page 3, page 4).
1. Drill two holes (∅ 5 mm) 80 mm apart next to one an-
other in the wall.
2. Use appropriate rawlplugs.
3. Screw in two round screws (
4. Before attaching the wall holder and tightening the
screws, place the connection cable through the holder from the back to the front. Ensure that the connection cable lies freely in the back recess.
5. Now plug the connection cable into the base (see
Connecting the base).
6. Using slight vertical pressure from the top centre,
press the base onto the retaining catches on the wall
holder.
∅ 4mm).
5
Page 7
Getting started
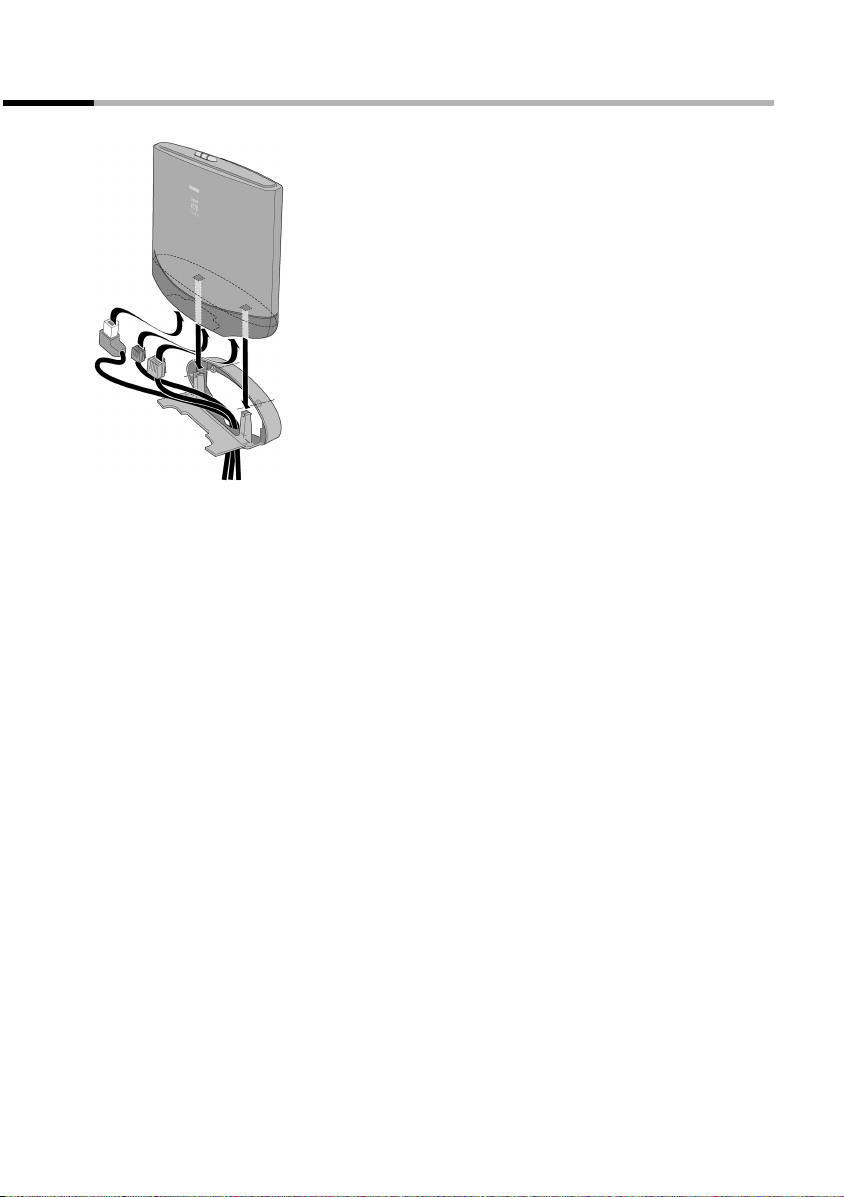
Connecting the base
5.
1.
Front of unit
4.
3.
2.
Schematic illustration
1. -S0 jack: Insert ISDN connection cable until connector clicks into place.
2. Insert ISDN connection cable into ISDN connection until connector clicks into place.
3. For NTBA with self-mounting, plug in the cable between the NTBA and the TAE (old
telephone outlet) or Mini-Western connector until both connectors click into place.
4. jack: Plug in the power supply cord, until the connector clicks into place and plug
into the mains outlet.
!
i
Use only the power unit supplied, as indicated on the underside of the
base station.
Power failure:
Your base and the handsets registered on it, as well as wire-based termi-
nals cannot operate in case of power failure. However, all the settings
and stored information (messages, phonebook entries etc.) are retained
indefinitely.
6
Page 8

Getting started
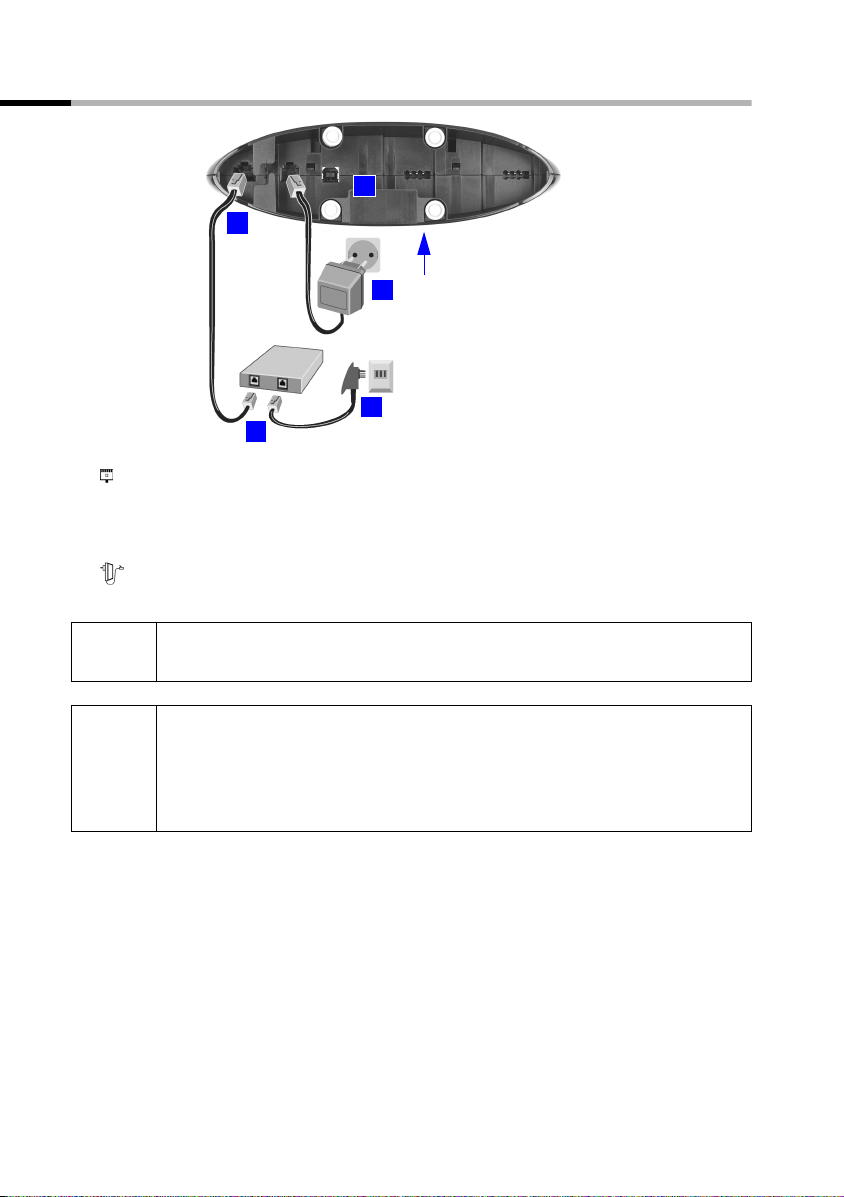
Connecting auxiliary equipment
You can connect the following auxiliary equipment to your base:
◆ up to eight wireless devices (handsets see page 9, Gigaset data modules see
page 30, Gigaset Repeater see page 30)
◆ up to two analogue, wire-based devices (e.g. telephone, answering machine, fax
machine, entrance telephone – see page 26)
◆ a PC via USB port (USB V1.1 – see page 30)
Connection in Germany
Connection for the wirebased terminal with internal number 22
USB
ISDN
Schematic illustration
Connection in other countries
Connection for the wirebased terminal with internal number 22
USB
Connection for the wirebased terminal with internal number 21
The connections are provided for the
use of analogue terminals using TAE
connectors.
Connection for the wirebased terminal with internal number 21
ISDN
The connections are provided for the
use of standard terminals using MiniWestern connectors.
Schematic illustration
7
Page 9
Getting started
Setting and operating the base
Preparing the base for use and making settings
In order to be able to use your base, certain settings are required, e. g. the ISDN phone
number (MSN). To do this, you need a handset or a PC. More details can be found in the
operating instructions for your handset or your PC software.
If you have an S1 or SL1 added-feature handset, a Getting started wizard is available to
assist you in making the settings. More details can be found in the operating instructions for your added-feature handset.
Operating the base from a handset
Operating instructions for the S1, SL1, C1 and C2 handsets are enclosed.
The current version of the operating instructions is available on the Internet at
www.my-siemens.com/gigaset.
Below, examples of operating the base from an S1 or SL1 handset and a C1 or C2 handset are presented for "Assigning an MSN a ringer melody".
Operating the base from an S1 or SL1 handset
The central operator control on the S1 and SL1 handsets is a control key p, which has
four black direction arrows with the associated symbols. Pressing the various icons (up,
down, right, or left) opens a different function. The side you have to press is shown by
a black triangle in the operating instructions, e.g.: v key for right = open menu.
Example: "Assigning an MSN a ringer melody"
v
s Set base
s Settings
OK
~
s ISDN settings
s Set up MSN
s
v
r Ringer Melody: 5
Open the menu.
Select the menu item and confirm.
OK
Select the menu item and confirm.
OK
Enter system PIN if required (page 10).
Select the menu item and confirm.
OK
Select the menu item and confirm.
OK
Select MSN, e.g. MSN1: Anna.
Open the submenu.
Select melody and confirm, e.g. Ringer Melody: 5
OK
(
‰ = activated).
Operating the base from a C1 or C2 handset
The C1 and C2 handsets each have a rocker key, which has two functions.
On the Gigaset C1, the upper half of the rocker key has the function of the Talk key
the lower half the Phonebook key h.
On the Gigaset C2, the upper half of the rocker key has the function of the Talk key c,
the lower half the Handsfree key d.
c,
8
Page 10
Getting started
Example: "Assigning an MSN a ringer melody"
MENU
s Set base OK
s Settings OK
~ OK
s ISDN settings OK
s Set up MSN OK
s
MENU
s Ringer Melody: 5 OK
Open the menu.
Select the menu item and confirm.
Select the menu item and confirm.
Enter system PIN if required (page 10).
Select the menu item and confirm.
Select the menu item and confirm.
Select MSN, e.g. MSN1: Anna.
Open the submenu.
Select melody and confirm, e.g. Ringer Melody: 5
(‰ = set).
Registering handsets
You can register a maximum of eight wireless devices on your base (including
Gigaset data modules (page 30) and Gigaset Repeater (page 30)). The internal numbers 11-18 are set aside for this purpose. Wire-based analogue devices do not have to
be registered (page 26).
If the internal numbers Int.11 to Int.18 on your telephone have already been assigned,
please de-register another handset you no longer require before registering a new one
(see handset operating instructions).
If necessary, keep the handset operating instructions to hand with their description of
the registration process.
You must initiate handset registration on the handset and on the base.
1. On the base
Press the registration/paging key on the base for about 3 seconds. This starts the registration. The base is ready for registering for 30 seconds.
Press the lit Registration/Paging key
2. On the handset (within 30 sec.)
Register your handset (see handset operating instructions).
i
If the handset cancels base paging, e. g. because the registration time has
been exceeded, repeat the process.
9
Page 11
Getting started
Manually registering a Gigaset S1 / SL1 handset
v
s Settings
s Register H/Set
s Base 1
OK
~
s Int.11
After registration the handset reverts to idle status. The handset's internal number is
shown in the display.
Open the menu.
Select the menu item and confirm.
OK
Select the menu item and confirm.
OK
Select base (1–4) and confirm, e. g. Base 1.
OK
Enter the system PIN of the base (factory setting:
0000) and confirm. In the display are Regstr.Procedure and the name of the base, e. g. Base 1.
Once the handset has located the base, the list of
free internal numbers is shown in the display.
Press lit Register key on the base (page 9), key
flashes. The base is only ready for registering while
the key is flashing.
Select internal number and confirm, e. g. Int.11 .
OK
Manually registering a Gigaset C1 / C2 handset
MENU
s Handset Settings OK
s Register Handset OK
s Base 1 OK
~ OK
s Int.11 OK
Open the menu.
Select the menu item and confirm.
Select the menu item and confirm.
Select base (1–4) and confirm, e. g. Base 1.
Enter the system PIN of the base (factory setting:
0000) and confirm. In the display are Registering
and the name of the base, e. g. Base 1.
Once the handset has located the base, the list of
free internal numbers is shown in the display.
Press lit Register key on the base (page 9), key
flashes. The base is only ready for registering while
the key is flashing.
Select internal number and confirm, e. g. Int.11 .
After registration the handset reverts to idle status. The handset's internal number is
shown in the display.
10
Page 12
Registering a Gigaset 4000 Comfort/Micro handset
Getting started
a
either ...
OK
or ...
G Settings OK
G Register H/Set OK
G Base 1 OK
... then
~ OK
s Int.11 OK
Hold down, to turn on the handset.
Confirm the prompt.
Select the menu item and confirm.
Select the menu item and confirm.
Select base (1–4) and confirm, e. g. Base 1.
Enter the system PIN of the base (factory setting:
0000) and confirm.
Press lit Register key on the base (page 9), key
flashes. The base is only ready for registering while
the key is flashing.
Select internal number and confirm, e. g. Int.11 . The
successful registration is confirmed on the display.
Registering a Gigaset 4000 Classic handset
i
a
YES
~ OK
You can register a maximum of four Gigaset 4000 Classic handsets.
Register Gigaset 4000 Classic handsets before other handsets.
Press lit Register key on the base (page 9), key
flashes. The base is only ready for registering while
the key is flashing.
Hold down, to turn on the handset.
Confirm the prompt.
Enter the system PIN of the base (factory setting:
0000) and confirm.
The handset is registered.
The next unassigned internal number between Int.11 and Int.18 is automatically
assigned to the handset as it is registered.
11
Page 13
Getting started
Registering a Gigaset 3000 Comfort/Micro handset
−
either ...
OK
or ...
.
s Stations OK
s Station 1
s Registration OK
... then
~ OK
s Int.11 OK
The next unassigned internal number between Int.11 and Int.18 is automatically
assigned to the handset as it is registered.
Hold down, to turn on the handset.
Confirm the prompt.
Open the menu.
Select the menu item and confirm.
Í
Select the base (1-4) and open the sub-menu.
Select the menu item and confirm.
Enter the system PIN of the base (factory setting:
0000) and confirm.
Press lit Register key on the base (page 9), key
flashes. The base is only ready for registering while
the key is flashing.
Select internal number and confirm, e. g. Int.11 . The
successful registration is confirmed on the display.
Registering a Gigaset 3000 Classic handset
−
¦¨«
~ OK
~ OK
s Int.11 OK
Hold down, to turn on the handset.
Press in turn.
Enter the number of the base (normally 1) and confirm. The Standby symbol C
up constantly when the connection to the base has
been established.
Enter the system PIN of the base (factory setting:
0000) and confirm.
Press lit Register key on the base (page 9), key
flashes. The base is only ready for registering while
the key is flashing.
Select internal number and confirm, e. g. Int.11 . The
Standby symbol is extinguished after successful registration.
C flashes and then lights
CC
12
Page 14

Registering a Gigaset 2000 C handset
Getting started
h
.
s Settings OK
s Registration OK
s Station 1 OK
Í
s Registration OK
~ OK
s Int.11 OK
Press to turn on the handset.
Open the menu.
Select the menu item and confirm.
Select the menu item and confirm.
Select base (1-4) and confirm.
Open the submenu.
Select the menu item and confirm.
Enter the system PIN of the base (factory setting:
0000) and confirm.
Press lit Register key on the base (page 9), key
flashes. The base is only ready for registering while
the key is flashing.
Select internal number and confirm, e. g. Int.11 . The
successful registration is confirmed on the display.
Registering a Gigaset 2000S / Gigaset 1000 C/S handset
For the registration procedure described below:
You can register a maximum of four other handsets (e. g. Gigaset 2000S, GAP handsets)
or wireless devices (e. g. Gigaset 1000 TAE, STA). Register these devices first.
Registering a Gigaset 2000S handset
h
oh
o
Press h (off).
Simultaneously press the number of the base station
and
h (on).
Enter system code.
Press lit Register key on the base (page 9), key
flashes. The base is only ready for registering while
the key is flashing.
The lowest free internal number is assigned. It is not possible to select a free internal
number.
Registering a Gigaset 1000 C/S handset
For the registration procedures, please refer to the corresponding operating instructions.
13
Page 15

Getting started
De-registering handsets
Handsets are de-registered using a handset (see handset operating instructions). Example:
Open the menu.
s Base Settings OK
s Settings OK
~ OK
s Setup user OK
s De-reg. device OK
s Int.16 OK
The other registered devices retain their previous internal numbers.
Select the menu item and confirm.
Select the menu item and confirm.
Enter system PIN if required.
Select the menu item and confirm.
Select the menu item and confirm.
Select the handset that you wish to de-register and
confirm, e.g. Int.16.
Locating a handset (paging)
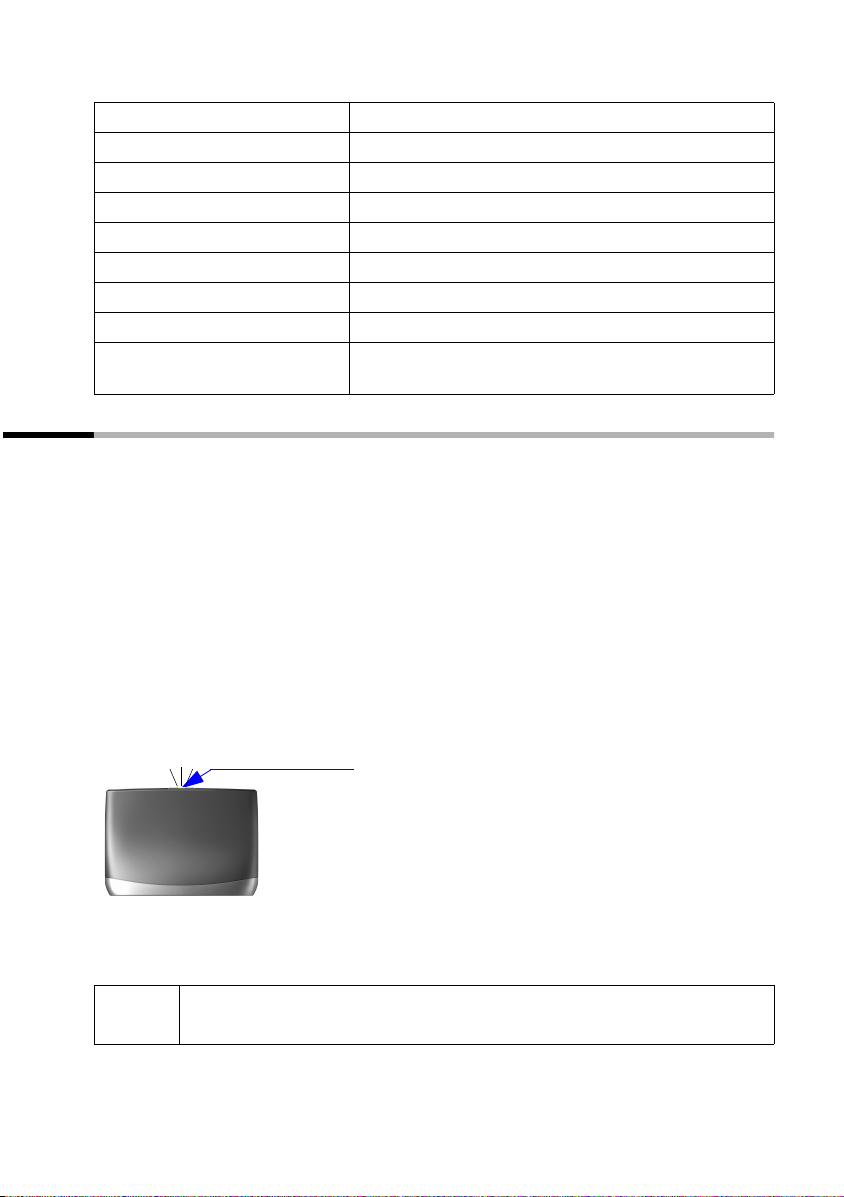
If you have mislaid your handset you can page it with the help of the base. The Registration/Paging key is located on the top of the base (page 9).
Paging:
Press the Registration/Paging key on the base for 1 second. All handsets will ring
together ("Paging").
End paging:
Press the Registration/Paging key on the base for a maximum of 1 second or the Talk key
on the handset.
14
Page 16

Supported handsets
Supported handsets
The SX205isdn and SX255isdn bases support the S1, SL1, C1 and C2 handsets. Operating instructions for these handsets are enclosed. The current version of the operating
instructions is available on the Internet at www.my-siemens.com/gigaset or contact the
hotline (page 34).
Features
When used in conjunction with a Gigaset handset, your SX205isdn or SX255isdn base
offers you a variety of features. Depending on the handset used, you have access to a
particular range of these features. The table below tells you which features can be used
with which handsets. The table is based on the table of contents of the handset operating instructions.
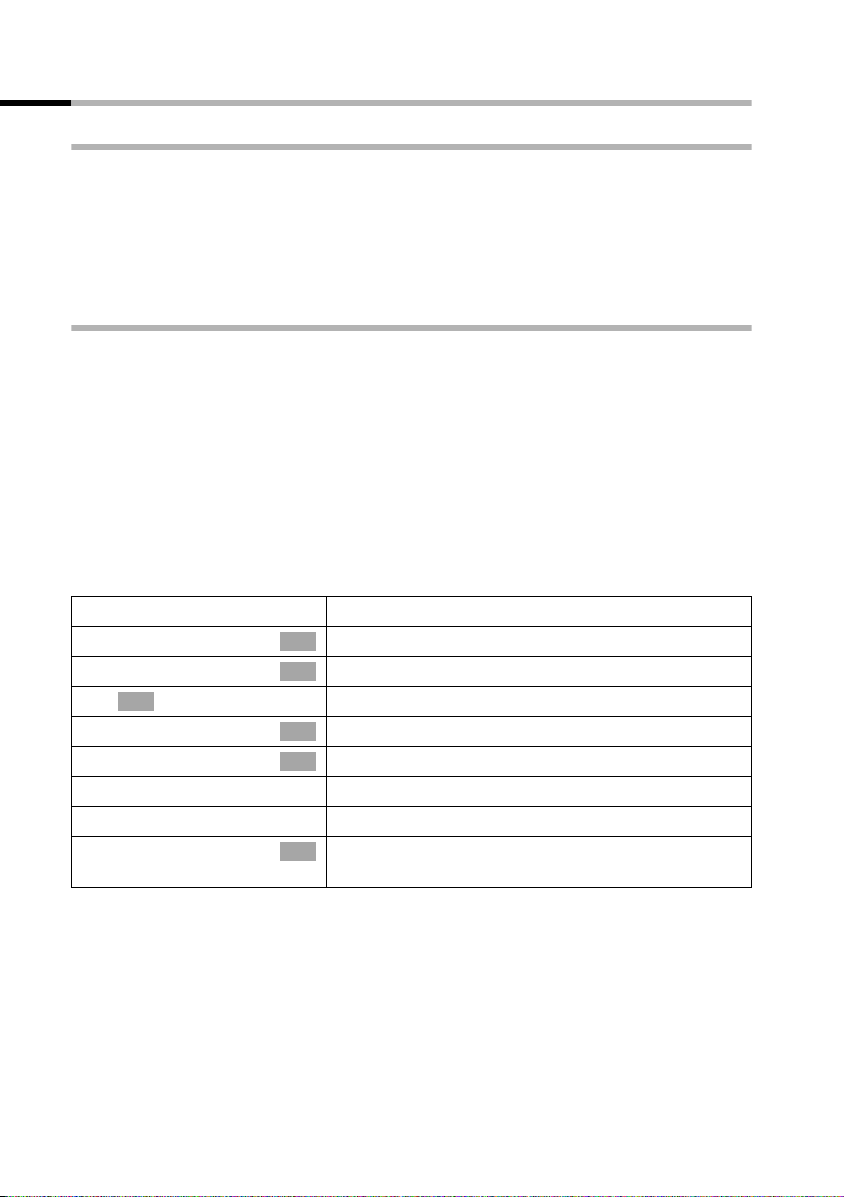
Feature S1 SL1 C2 C1
Making the handset ready for service
Operating the handset – Menu system
Control key Yes Yes No No
Preparing base for use – Getting started wizard Yes Yes No No
Making calls
Handsfree Yes Yes Yes Yes
Reserving a line Yes Yes No No
Defining the send MSN for the next call Yes Yes No No
Callback when busy (CCBS) / when the call is not
answered (CCNR)
Identify caller Yes Yes No No
Functions during a call
Muting the handset Yes Yes No No
Making a call to several users Yes Yes Yes Yes
External / Internal enquiry Yes Yes Yes Yes
Toggling Yes Yes Yes Yes
Conference call Yes Yes Yes Yes
Forwarding an incoming call – CD (Call Deflection) Yes Yes No No
Working with external call waiting – CW (Call Waiting) Yes Yes Yes
Using the phonebook and other lists
Phonebook and speed dial list
Dialling with the phonebook/speed dial list Yes Yes Yes Yes
Copying and changing a phonebook entry Yes Yes Yes No
Marking a phonebook entry as VIP Yes Yes Yes No
Adding a displayed telephone number to the phone-
book
Sending a single entry or complete list to a handset Yes Yes Yes No
Saving an anniversary for a phone number Yes Yes No No
Voice dialling Yes Yes No No
2
Yes Yes Yes Ye s
1
Yes
Yes Yes Yes Ye s
Yes Yes Yes Ye s
1
15
Page 17

Supported handsets
Feature S1 SL1 C2 C1
Announcing the caller's name Yes Yes No No
email directory Yes Yes No No
Last number redial list Yes Yes Yes Yes
Caller lists Yes Yes Yes Yes
Making cost-effective calls
Linking a call-by-call number with a phone number Yes Yes Yes Yes
Displaying the call duration Yes Yes No No
Displaying call charges Yes Yes No No
Setting up the charge calculation Yes Yes No No
SMS (text messages)
Sending text messages and outgoing message list Yes Yes Yes Yes
Saving t ext me ssages Yes Yes Yes Yes
Inserting pre-written text or an email address in an
SMS
Sending a text message to an email address Yes Yes Yes Yes
Receiving text messages and incoming message list Yes Yes Yes Yes
Replying to or forwarding text messages Yes Yes Yes Yes
Calling back the text message sender Yes Yes Yes Yes
Copying a phone number from SMS text into the
phonebook
Adding the telephone number of a text message to the
phonebook
Using new ringer tones and logos for the handset Yes Yes No No
Direct operation of answering machine (on Gigaset 255isdn)
Recording memos Yes Yes Yes Yes
Two - w ay record i n g Yes Ye s Yes Yes
Returning a call during playback
Playing a message to another caller Yes Yes Yes Yes
Setting the playback speed Yes Yes No No
Marking an old message or memo as "new" Yes Yes Yes Yes
Adding a number to the phonebook Yes Yes Yes Yes
Setting the answering machine (on Gigaset 255isdn)
Deactivating/activating spoken date and time Yes Yes Yes Yes
Setting the recording time and recording quality Yes Yes Yes Yes
Locking the answering machine, defining AM PIN Yes Yes Yes Yes
Setting the time control Yes Yes No No
Activating/deactivating automatic listen in on the hand-
set
Activating/deactivating listen in Yes Yes Yes Yes
Activating/deactivating automatic call pick up Yes Yes Yes Yes
Activating/deactivating automatic notification via text
message
Yes Yes No No
Yes Yes No No
Yes Yes Ye s Ye s
Yes Yes Ye s Ye s
Yes Yes Ye s Ye s
16
Page 18

Supported handsets
Feature S1 SL1 C2 C1
Using several handsets
Using a handset as a room monitor Yes Yes Yes No
Setting walkie talkie mode Yes Yes Yes No
Date and time
Setting the date and time Yes Yes Yes Yes
Setting the alarm clock Yes Yes Yes No
Setting an appointment Yes Yes Yes No
Displaying unaccepted appointments, anniversaries Yes Yes Yes No
Night service Yes Yes No No
Security settings
Changing the system PIN Yes Yes Yes Yes
Defining authorisation Yes Yes No No
Emergency numbers Yes Yes Yes Yes
System settings
Changing the name for an internal user Yes Yes Yes Yes
Assigning a phone number (MSN)
Assigning a receive MSN Yes Yes Yes Yes
Assigning a send MSN Yes Yes Yes Yes
Setting up a send MSN list for the next call Yes Yes No No
Setting up a busy signal when the MSN is being used
(Busy on Busy)
Assigning an MSN a ringer melody Yes Yes Yes Yes
Setting up rejecting for the entire MSN group Yes Yes No No
Diverting calls
Forwarding internal calls Yes Yes No No
Diverting external calls – CF (Call Forwarding) Yes Yes Yes Yes
Pre-assigning the call deflection destination – CD (Call
Deflection)
Setting up automatic call divert when a handset is not
available
Setting up an internal group call group Yes Yes No No
Setting up ring delay Yes Yes No No
Activating/deactivating call waiting – CW Yes Yes Yes Yes
Setting an external/internal enquiry call Yes Yes No No
Setting up the waiting melody Yes Yes No No
Activate/deactivate call before data Yes Yes No No
Changing the long distance prefix Yes Yes No No
Checking the software version Yes Yes No No
Individual handset settings
Change display language Yes Yes Yes Yes
Activate/deactivate automatic call acceptance Yes Yes Yes Yes
Changing the name of the base Yes Yes No No
Adjusting the loudspeaker volume Yes Yes Yes Yes
Yes Yes No No
Yes Yes No No
Yes Yes No No
17
Page 19

Supported handsets
Feature S1 SL1 C2 C1
Ringer echo Yes Yes No No
Changing the ringer tone Yes Yes Yes Yes
Activating/deactivating the ringer Yes Yes Yes Yes
Activating/deactivating the alert tone Yes Yes No No
Vibration alarm No Yes No No
Activating/deactivating advisory tones Yes Yes Yes Yes
Restoring the handset factory settings Yes Yes Yes Yes
Operating with other devices
Defining the device type Yes Yes Yes Yes
Activating/deactivating Repeater mode Yes Yes Yes Yes
Operating when connected to a PABX
Activating/deactivating call transfer – ECT (Explicit Call
Transf er )
Dialling options Yes Yes Yes Yes
Activating/deactivating the keypad during a call Yes Yes No No
Activating the keypad for the next connection Yes Yes No No
Operation of entrance telephone
Assigning internal users to the entrance telephone call
group
Making calls with the entrance telephone Yes Yes Yes Yes
Call from the entrance telephone Yes Yes Yes Yes
Entrance telephone call waiting Yes Yes Yes Yes
Internal call with entrance telephone Yes Yes Yes Yes
Divert entrance telephone externally Yes Yes No No
Appendix
Predictive text Yes Ye s Yes No
Yes Yes No No
Yes Yes No No
1
"Divert call waiting internally" is only available on the S1 and SL1 handsets.
2
The maximum number of entries in the speed dial list and the phonebook can vary.
The C1 handset has memory for a maximum of 50 entries, the C2 handset for a maximum of 100 entries, while you can store a maximum of 200 entries in the S1 and SL1
handsets.
18
Page 20

The quick way into the world of ISDN
The quick way into the world of ISDN
What is an MSN?
MSN = Multiple Subscriber Number. You can apply for up to ten different telephone
numbers for one multiple ISDN connection. An MSN is one of the phone numbers
assigned to you without an area code.
Your telephone uses the MSN entirely as you require. The following differentiation is
made:
◆ Receive MSN: Phone numbers you may be called on. You can assign the receive
MSN's to specific internal users (terminals). Incoming calls are only forwarded to the
terminals to which the relevant receive MSN has been assigned. Terminals can be
handsets or answering machines.
◆ Send MSN: Phone numbers that are assigned to the person you are calling. The net-
work operator calculates charges based on the send MSN's. You can assign a fixed
send MSN to each internal user.
Potential internal users are:
◆ Handsets, to which you can assign the internal numbers 11 to 18.
◆ Data modules (page 30), to which you can assign the internal numbers 41 to 48.
◆ The integrated answering machines (on SX255isdn), which are assigned the inter-
nal phone numbers 91 to 93.
◆ PC via USB interface, for which the internal number 40 is set aside.
◆ Analogue terminals, to which you can assign the internal numbers 21 or 22.
Example of how to assign an MSN:
You have applied for four MSN's, two for business use (MSN1, MSN2) and two for private
purposes (MSN3, MSN4). Four handsets are connected to a base. Two handsets (Int.11
and 12) and the answering machine AM 91 are intended for business use, and two
handsets (Int.13 and 14) and the answering machine AM 92 are intended for private
use.
Internal users Use Receive MSN Send MSN
handsets Int.11, 12 Business
Answering
machine
Handset Int.13 Private MSN3 MSN3
Handset Int.14 MSN4 MSN4
Answering
machine
AM 91
AM 92
MSN1, MSN2 MSN1
MSN1, MSN2 ---
MSN3, MSN4 ---
Further information for dealing with MSNs, e. g. setting the ring delay for each MSN,
can be found in the handset operating instructions.
19
Page 21

Answering Machine
Answering Machine
Your ISDN telephone has three answering machines (AM1, AM2, AM3). Once you have
connected your telephone, answering machine AM1 is shown and activated. By default,
answering machines AM2 and AM3 are hidden. To use them, they must be shown and
all shown answering machines must be assigned their own receive MSN. You can configure AM1, AM2 and AM3 separately.
You can operate the answering machines
◆ either directly using a registered handset (in the menu) or
◆ by remote control (internal or external call to answering machine).
Remote control is a convenient option, allowing you day-to-day use of an answering
machine wherever you are. To configure the answering machines, you will need a handset that is registered on the base (see handset operating instructions).
Definitions of terms used below:
Message Message that a caller leaves on the answering machine.
Memos "Spoken notes" that you can record on the answering machine for mem-
AM mode Recording or announcement.
Answer and record
mode
Announce only mode The caller hears your announcement but cannot leave a message.
If an answering machine is currently being used by one user (directly or
i
by remote control), then no other user can access the answering machine
during this time.
bers of your family or colleagues, for example.
The caller hears an announcement and may then leave a message.
Operation using a registered handset
Which answering machine you can operate directly using your handset depends on the
assignment of the receive MSNs:
No MSN is assigned to the answering machines (factory setting):
◆ AM1 answers all calls.
◆ Each answering machine can be set, operated and played back from each handset/
terminal.
One or more MSNs are assigned to each answering machine:
Each answering machine can only be set and played back using handsets/terminals with
the same receive MSN.
Exception: If a receive MSN is assigned exclusively to one answering machine, and not
to any other handset/terminal, then this answering machine can be operated by all
internal users.
20
Page 22

Answering Machine
Range of functions
Using a handset registered on the base, the following functions are available (see the
handset operating instructions for more details):
Configuration of answering machine
◆ Assigning a receive MSN
◆ Hiding/showing an answering machine
◆ Specifying the number of rings before the answering machine starts
◆ Deactivating/activating spoken date and time
◆ Setting the recording time and recording quality
◆ Activating/deactivating automatic pause
◆ Locking the answering machine, defining AM PIN
◆ Setting time control (only using S1 and SL1)
◆ Activating/deactivating automatic listen in on the handset
◆ Activating/deactivating automatic call pick up
◆ Activating/deactivating automatic notification via text message
Operating the answering machines
◆ Selecting an answering machine
◆ Activating/deactivating the answering machine
◆ Selecting announce only and AB mode
◆ Recording/changing announcements
◆ Playing back/deleting announcements
◆ Recording memos
◆ Two - w ay record i n g
◆ Picking up a call while the answering machine is in operation
◆ Playing back messages
◆ Returning a call during playback
◆ Playing a message to another caller
◆ Playing back memos
◆ Setting the playback speed (only using S1 and SL1)
◆ Deleting messages/memos
◆ Marking an old message or memo as "new"
◆ Adding a number to the phonebook
◆ Checking the status of an answering machine
21
Page 23

Answering Machine
Remote control of answering machines
With the remote control option, you can operate your answering machine, e.g. listen to
and delete messages
◆ from a registered handset, a connected cord telephone or
◆ from external telephones and handsets.
Apart from the first step, the procedure is the same for both kinds of remote control.
The following functions are available when using remote control:
◆ Activating/deactivating the answering machine
◆ Messages and memos
–Play
–Skip
–Delete
◆ Announcement
–Record
–Play
– Select
◆ Recording internal memos
◆ Help
Precondition:
◆ For external operation, you must change the answering machine PIN for your
own security (factory setting: 0000).
◆ In order to be able to use the full range of functions of this mode, you must enable
"Remote control" and "Remote delete" on the base (see handset operating instructions).
Starting remote control
Operating the answering machine while you are away from home
For remote control you need a telephone that transmits DTMF tones (tone dialling). It is
important to enter the AM PIN immediately while the announcement is being played. In
addition
Operating the answering machine from the handset (internal)
There is a voice-controlled help for the two-key functions;
Remote control and, if required, Remote delete must be activated.
~
~
0;
:;
F;
9;
Dial your own telephone number.
When the announcement starts, enter the AM PIN at
once.
Help with deleting
Help with new messages/phrases
Help with recording
Help with modes
22
Page 24

Added-feature and standard handset
Answering Machine
u INT
~
~
Handset made by another manufacturer (GAP mode)
~
~
Cordless phone adapter and normal telephone
i
Automatic line seizure must be deactivated (see handset operating
instructions). As supplied, automatic line seizure is activated!
~
~
Open list of internal users.
Enter internal phone number for the answering
machine: 91 or 92 or 93.
Enter AM PIN if required.
Lift the receiver. If necessary, press another key to
initiate an internal call.
Enter internal phone number for the answering
machine: 91 or 92 or 93.
Enter AM PIN if required.
Lift the receiver.
Enter internal phone number for the answering
machine: 91 or 92 or 93.
Enter AM PIN if required.
Key sequences for remote control
Once you have initiated remote control of the answering machine, the functions of the
keys are the same for all telephones.
AB3
Pause/Stop Record
DEF
Announce-
ment On/Off Operating mode
GH9
New Delete Status/Help
:0;
23
Page 25

Answering Machine
Activating/deactivating the answering
machine
Activate/deactivate
Playing back messages and memos
All messages
H
B
New messages only
Pause/Stop
Continue playback
End playback
Skipping messages and memos
To start of message
To previous message
To next mess a g e
Deleting messages and memos
Single message during playback
All messages after playback
Recording an announcement
Announcement 1
Announcement 2
Announcement
Concluding announcement
:B
E
B
E E
A
AA
3
0B
0B
FGA
FGB
FG3
FGD
Playing back an announcement
Announcement 1
Announcement 2
Announcement
Concluding announcement
24
GA
GB
G3
GD
Page 26

Selecting an announcement
Announcement 1
Announcement 2
Answering Machine
9A
9B
Announcement
Concluding announcement
Recording internal memos
Begin recording
End recording
Help
Check settings
Check one-key functions
Check two-key functions
End check
93
9D
FB
E
;
;;
see page 22
E
25
Page 27

Connecting devices
Connecting devices
Connecting cord-based analogue devices
The internal phone numbers Int.21/Int.22 are pre-assigned to the TAE connections.
Devices connected to them must
◆ not be registered on the base.
◆ be set to tone (DTMF) dialling (pulse dialling not supported).
In addition, the corresponding device type must be set and device-specific additional
settings made.
No costs are displayed on the connected devices. However, accumulated costs are
recorded on the base and can be checked using an added-feature handset or on a PC.
Device types
The following settings are possible (Defining the device type, see Page 29).
◆ Telephone
◆ Fax
◆ Modem
◆ Answering mach.
◆ Neutral
◆ Door type1
◆ Doortype2(DTMF)
◆ No function
i
Note the explanations below for the device types and their additional
device-specific settings.
see Page 26, Connecting telephones
see Page 27, Connecting a fax machine
see Page 27, Connecting a modem
see Page 27, Connecting an answering machine
see Page 27, Connecting a fax machine
see Page 31, Connecting door type 1
see Page 32, Connecting door type 2
see Page 28, No device connected
Connecting telephones
By default, the two TAE connections are set to Telephone.
This means that the base is ready to use with a telephone (with tone dialling/DTMF) con-
nected to Int.21 or Int.22 even without a handset.
If you also want to use this telephone to make internal calls, automatic line seizure for
the associated TAE connection must be deactivated. For external connections, it is then
necessary to dial a zero first.
Information on making calls using devices on the TAE connection can be found in the
handset operating instructions.
26
Page 28

Connecting devices
Connecting a fax machine
To operate a fax machine or a combination device (e.g. fax with telephone), the device
type setting should be changed to Fax or Neutral.
For problem-free fax operation regardless of the settings of the remote terminal, the
device type setting Neutral is recommended (with the Fax setting, a successful fax con-
nection depends on the settings of the remote terminal).
If you only want to make external connections, automatic line seizure for the associated
TAE connection must remain activated. In this case, the fax machine or combination
device should be set to "Operate on main connection".
If, on the other hand, you also want to make internal connections, automatic line seizure for the associated TAE connection must be deactivated. For external connections,
it is then necessary to either dial a zero before each number or set the fax machine or
combination device to "Operation on PABX" (see fax machine or combination device
operating instructions).
Use the opportunity to assign the fax a separate phone number (MSN). Assign the corresponding TAE connection an exclusive receive MSN (see handset operating instructions).
In the device type setting Fax, Call waiting and Hunt group are not supported.
In the device type setting Neutral, Call waiting is not supported. When connecting a
fax only device, Hunt group should be deactivated (see handset operating instructions).
Connecting a modem
To operate a modem, the device type setting must be changed to Modem.
If you only want to make external connections, automatic line seizure for the associated
TAE connection must remain activated (see handset operating instructions). In this case,
the modem should be set to "Operate on main connection".
If, on the other hand, you also want to make internal connections, automatic line seizure for the associated TAE connection must be deactivated. For external connections,
it is then necessary to either dial a zero before each number or set the modem to "Operation on PABX" (see modem operating instructions).
Connecting an answering machine
If you want to operate an answering machine (or a telephone with integrated answering
machine) on the TAE connection, the device type setting Answering mach. is recommended. In this setting, the answering machine can pick up a call.
If a telephone with integrated answering machine is connected and you want to use this
telephone to make internal calls, automatic line seizure for the associated TAE connection must be deactivated (see handset operating instructions). For external calls, it is
then necessary to dial a zero first.
In the device type setting Answering mach., Call waiting and Hunt group are not sup-
ported (see handset operating instructions).
27
Page 29

Connecting devices
No device connected
For each TAE connection, to which no device is connected, the device type must be set
to No function, in order to prevent malfunctioning of the Reject all (see handset oper-
ating instructions) and Busy on busy (see handset operating instructions) ISDN functions.
Making calls with devices on the analogue connection
(TAE connection)
Telephones with tone dialling (DTMF = dual tone multi-frequency dialling) can be operated on the analogue connections. Telephones with pulse dialling are not supported.
Automatic line seizure
With automatic line seizure activated, the external line is seized as soon as the receiver
is lifted. As a consequence, normal internal dialling is no longer possible. However, an
internal call is still possible by way of an internal enquiry using the S key. You can activate automatic line seizure with any added-feature handset (see added-feature handset
operating instructions).
Making external calls
Auto. line seizure inactive Auto. line seizure active
cQ~ c~
Making internal calls
Auto. line seizure inactive
c~
Group call to all internal users
Auto. line seizure inactive
cP/ with GAP
INT P
Call waiting
You hear the call waiting tone during your external call.
either ...
a Call disconnected, wait for ring c
or ...
S Caller 1 on hold.
Switch to waiting caller – Toggling
S
S
Caller 1 on hold.
Caller 2 on hold etc.
28
Page 30

Making an external enquiry
SQ~
S
Making an internal enquiry
Connecting devices
Switch between callers if necessary.
S~
S
Making an internal enquiry
Switch between the callers if necessary.
Transfer call before/after answer
either ...
S~
a
or ...
S~
a
Transfer before answer:
Hold down (return to idle status).
Transfer after answer:
Transfer call after answer.
Making an enquiry call.
Hold down (return to idle status).
Picking up a call while the answering machine is in operation
You can pick up a call, even if the answering machine has already switched itself on on
the second analogue connection, your announcement is running, or the caller is already
leaving a message. When you pick up the call the recording stops.
You can deactivate automatic call pick up (see handset operating instructions) and carry
on an existing call, while the answering machine is switched on.
Automatic line seizure must be deactivated (page 28).
Automatic call pick up (factory setting) Automatic call pick up inactive
ccOS
The requirement for call pick up is that the answering machine and the
i
internal user picking up the call are assigned the same receive MSN
(page 19) and the device type Answering mach. is set for the internal
number of the answering machine (page 27).
Defining the device type
You must define the device type on the handset or PC. You can find more information
in the operating instructions for your handset or PC software.
29
Page 31

Connecting devices
Connecting PC via USB
You can connect a PC with a cable using the USB port on your base and connect one or
more PCs without a cable using the Gigaset M10x data modules.
Your base then offers you the option of using a connected PC to:
◆ Configure your base
◆ Manage phonebooks from the PC, base and handsets.
Using a PC connected with a cable or via a Gigaset M101 Data, you can also fax from the
PC (using fax emulation with no hardware requirements).
In conjunction with the enclosed software (talk&surf 6.0) this offers you the option of
◆ using data transmission and the Internet from the PC using the ISDN network access
on your base (e. g. surfing the Internet, e-mail, home banking).
◆ Transmit data between different PCs.
i
You can find further information in the instructions for the software
(talk&surf 6.0).
Wireless PC connection: Gigaset M101 Data and
Gigaset USB-Adapter DECT/M105 data modules
The Gigaset M101 Data with V24 interface and the Gigaset DECT/M105 USB Adapter
with USB interface give you the option of establishing a wireless connection between
your PC and the base. A connection via a Gigaset M10x Data data module provides you
with a 64 kbit/sec. interface.
The internal phone numbers PC 41 to PC 48 are set aside for this purpose on your base.
For installation, see the installation instructions on the CD-ROM enclosed with the data
module.
Wire-based PC connection: Base USB port
You can establish a wire-based connection to a PC using the USB port on your base
(page 7). The internal phone number PC 40 is set aside for this purpose on your base.
1. Plug the USB cable into the base only first of all (do not connect it with the PC im-
mediately).
2. Only connect the USB cable to the PC when prompted to do so by the PC program
talk&surf 6.0.
A wire-based connection via the USB port on the base provides you with a 128 kbit/sec.
interface.
Gigaset Repeater
You can increase the range of your handsets with the Gigaset Repeater. Your telephone
is set up to use a Gigaset Repeater (accessory). To ensure the Repeater is installed correctly, Repeater mode must be activated on the base (see handset operating instructions).
30
Page 32

Operation of entrance telephone
Operation of entrance telephone
For details of setting up an entrance telephone, refer to the handset operating instructions.
Connecting entrance telephones
In case of questions about the entrance telephones shown here or any other systems,
please contact the respective manufacturers or suppliers.
We ask for your understanding that Siemens AG cannot provide any guarantee of the
currency, completeness and accuracy of the circuit diagrams.
Several examples are illustrated below. Current circuit diagrams are available from your
retailer.
Door type 1
The following examples provide guidance for connecting entrance telephones using a
TFE adapter (door type 1).
Siedle TLM 512/612, TLE 061, CTB 711
Gigaset SX205-255i
Ritto entrance telephone and door opening system
31
Page 33

Operation of entrance telephone
Caution!
!
Ritto TwinBus entrance system
Gigaset SX205-255i
!
Connect base power unit 6573 and additional unit TFV5680 using
enclosed bus connector.
Caution!
Connect base power unit 4753/01 and additional unit TFV4680/00 using
enclosed bus connector.
Door type 2 (DTMF)
For details of connecting entrance telephones with DTMF control (door type 2), refer to
the example below.
Deutsche Telekom DoorLine
Gigaset SX205-255i
32
Page 34

Appendix
Appendix
Care
Wipe the base and handset with a damp cloth (no solvents) or an antistatic cloth. Never
use a dry cloth. This can cause static discharge.
Contact with liquid
!
If the handset should come into contact with liquid, on no account switch the device
on. Remove all batteries immediately.
Allow the liquid to drain out of the device, and then pat all parts of the device dry.
Keep the handset with the batteries removed in a warm, dry place for at least 72 hours.
In many cases, you will then be able to use it again.
Questions and Answers
If you have any questions about the use of your phone, you can contact us 24 hours a
day at www.my-siemens.com/customercare
questions and the corresponding answers below.
What has happened if … Possible Cause Possible solution
… the handset or the base
does not ring?
… the answering machine
says "PIN is incorrect" during
remote control?
… the answering machine
does not record any messages
or has automatically switched
over to 'announce only'?
… there are no incoming
calls?
… the telephone also rings for
fax-PC calls?
The ringer is switched off.
Call forwarding is set to Immedi-
ately.
Night service is active.
The system PIN entered is incorrect or still set to 0000.
Its memory is full. Delete old messages
"Constant" call forwarding is activated.
The MSN has not been assigned
to the internal user.
The "internal" authorisation is
set.
The phone number is in the
phone number list on the base.
. You will find the most frequently asked
Activate the ringer for the
handset or the base.
Switch off call forwarding.
Deactivate night service.
(see handset operating instructions)
Enter the system PIN again or
set a PIN that is different from
0000
(see handset operating instructions).
Play back new messages and
delete.
(see handset operating instructions)
Deactivate "Constant" call forwarding.
Determine the receive MSN.
Change the authorisation.
(see handset operating instructions)
Delete the corresponding
phone number (MSN) in the
list.
(see handset operating instructions)
33
Page 35

Appendix
What has happened if … Possible Cause Possible solution
… you have a PABX and, after
dialling, the wrong connection or no connection is
made?
… some of the ISDN func-
tions do not work as stated?
… another telephone on the
So bus does not ring?
You have entered the wrong prefix.
The ISDN function has not been
enabled.
The same MSN was assigned to
the telephones. One of the telephones also has internal call
divert activated.
Check and correct the prefix
(see handset operating instruc-
tions).
Check with your network provider.
Deactivate internal call divert
or set external call divert
(see handset operating instructions).
Service (Customer Care)
You can get assistance easily when you have technical questions or questions about
how to use your device by using our online support service on the Internet at:
www.my-siemens.com/customercare
or by referring to the section entitled Questions and answers in this manual
(page 33).
34
Page 36

Appendix
If the device needs to be repaired, please contact one of our Customer Care Centers:
Abu Dhabi. . . . . . . . . . . . . . . 0 26 42 38 00
Argentina . . . . . . . . . . . . 0 80 08 88 98 78
Australia . . . . . . . . . . . . . . .18 00 62 24 14
Austria . . . . . . . . . . . . . . . .05 17 07 50 04
Bahrain . . . . . . . . . . . . . . . . . . . . . 40 42 34
Bangladesh . . . . . . . . . . . . . . 0 17 52 74 47
Belgium . . . . . . . . . . . . . . . . 0 78 15 22 21
Bosnia Herzegovina . . . . . . . 0 33 27 66 49
Brazil . . . . . . . . . . . . . . . . 0 80 07 07 12 48
Brunei . . . . . . . . . . . . . . . . . . . 02 43 08 01
Bulgaria. . . . . . . . . . . . . . . . . . 02 73 94 88
Cambodia . . . . . . . . . . . . . . . . 12 80 05 00
Canada . . . . . . . . . . . . . . 1 88 87 77 02 11
China . . . . . . . . . . . . . . . 0 21 50 31 81 49
Croatia . . . . . . . . . . . . . . . . . 0 16 10 53 81
Czech Republic . . . . . . . . . .02 33 03 27 27
Denmark . . . . . . . . . . . . . . . . . 35 25 86 00
Dubai . . . . . . . . . . . . . . . . . .0 43 96 64 33
Egypt. . . . . . . . . . . . . . . . . . .0 23 33 41 11
Estonia . . . . . . . . . . . . . . . . . . 06 30 47 97
Finland . . . . . . . . . . . . . . . .09 22 94 37 00
France. . . . . . . . . . . . . . . . .01 56 38 42 00
Germany . . . . . . . . . . . . . . .01805 333 222
Greece . . . . . . . . . . . . . . 0 80 11 11 11 16
Hong Kong . . . . . . . . . . . . . . . 28 61 11 18
Hungary . . . . . . . . . . . . . . .06 14 71 24 44
Iceland . . . . . . . . . . . . . . . . . . . 5 11 30 00
India . . . . . . . . . . . . . . 01 13 73 85 89 - 98
Indonesia . . . . . . . . . . . . 0 21 46 82 60 81
Ireland . . . . . . . . . . . . . . . .18 50 77 72 77
Italy. . . . . . . . . . . . . . . . . . .02 66 76 44 00
Ivory Coast . . . . . . . . . . . . . . . 80 00 03 33
Jordan. . . . . . . . . . . . . . . . . . 0 64 39 86 42
Kenya . . . . . . . . . . . . . . . . . . . . 2 72 37 17
Kuwait . . . . . . . . . . . . . . . . . . . 2 45 41 78
Latvia . . . . . . . . . . . . . . . . . . . . 7 50 11 14
Lebanon . . . . . . . . . . . . . . . . . 01 44 30 43
Libya . . . . . . . . . . . . . . . . . .02 13 50 28 82
Lithuania. . . . . . . . . . . . . . . . 8 22 74 20 10
Luxembourg . . . . . . . . . . . . . 43 84 33 99
Macedonia. . . . . . . . . . . . . . . . 02 13 14 84
Malaysia. . . . . . . . . . . . . . . 03 21 63 11 18
Malta . . . . . . . . . . . . 00 35 32 14 94 06 32
Mauritius . . . . . . . . . . . . . . . . . . 2 11 62 13
Mexico . . . . . . . . . . . . . .01 80 07 11 00 03
Morocco . . . . . . . . . . . . . . . . . 22 66 92 09
Netherlands. . . . . . . . . . . . 0900-3333102
New Zealand . . . . . . . . . . . 08 00 27 43 63
Norway . . . . . . . . . . . . . . . . . . 22 70 84 00
Oman. . . . . . . . . . . . . . . . . . . . . . 79 10 12
Pakistan . . . . . . . . . . . . . . . 02 15 66 22 00
Philippines . . . . . . . . . . . . . . 0 27 57 11 18
Poland . . . . . . . . . . . . . . . . 08 01 30 00 30
Portugal . . . . . . . . . . . . . . . . 8 00 85 32 04
Qatar . . . . . . . . . . . . . . . . . . . . 04 32 20 10
Romania . . . . . . . . . . . . . . 02 12 04 60 00
Russia. . . . . . . . . . . . . . . . (800) 200 10 10
Saudi Arabia . . . . . . . . . . . . 0 22 26 00 43
Serbia. . . . . . . . . . . . . . . . . 01 13 22 84 85
Singapore . . . . . . . . . . . . . . . . 62 27 11 18
Slovak Republic . . . . . . . . . 02 59 68 22 66
Slovenia . . . . . . . . . . . . . . . . 0 14 74 63 36
South Africa. . . . . . . . . . . . 08 60 10 11 57
Spain . . . . . . . . . . . . . . . . . . 9 02 11 50 61
Sweden . . . . . . . . . . . . . . . . 0 87 50 99 11
Switzerland . . . . . . . . . . . . 08 48 21 20 00
Taiwan . . . . . . . . . . . . . . . . 02 25 18 65 04
Thailand. . . . . . . . . . . . . . . . 0 22 68 11 18
Tunisia . . . . . . . . . . . . . . . . . 0 71 86 19 02
Turkey . . . . . . . . . . . . . . .0 21 65 79 71 00
Ukraine . . . . . . . . . . . . . .8 80 05 01 00 00
United Arab Emirates . . . . . 0 43 31 95 78
United Kingdom . . . . . . .0 87 05 33 44 11
USA . . . . . . . . . . . . . . . . . 1 88 87 77 02 11
Vietnam . . . . . . . . . . . . . . . . . .45 63 22 44
In some countries repair and replace services are impossible where the products are not
sold through our authorised dealers.
Your Gigaset is designed for operation in your country, as indicated on the packaging
and on the device itself. Country-specific conditions have been taken into account. If
you have any questions about the differences between the public phone networks,
please contact your specialist dealer or network provider.
The CE mark attests to the phone's compliance with the essential requirements of the
R&TTE directive.
35
Page 37

Appendix
Excerpt from the original declaration
"We, Siemens AG, declare that the above mentioned product is manufactured according to our Full
Quality Assurance System certified by CETECOM ICT Services GmbH in compliance with ANNEX V
of the R&TTE Directive 99/05/EC. The presumption of conformity with the essential requirements
regarding Council Directive 99/5/EC is ensured"
Senior Approvals Manager
The Declaration of Conformity (DoC) has been signed. In case of need a copy of the original DoC
can be made available via the company hotline.
Specifications
DECT standard supported
GAP standard supported
No. of channels 120 duplex channels
Radio frequency range 1880 MHz to 1900 MHz
Duplex method Time multiplex, 10 ms frame length
Channel grid 1728 kHz
Bit rate 1152 kbit/s
Modulation GFSK
Language code 32 kbit/s (ADPCM)
Transmission power 10 mW, average power per channel
Range
Power supply 220/230 V ~/50 Hz (power unit SNG 8-a)
Power consumption
Environmental conditions for
operation
ISDN connection Euro-ISDN-Multiple Connection IAE
TAE socket (INT 21/22)
Base dimensions approx. 152 x 213 x 61 mm (H x W x D)
Base weight 0.350 kg
Length of cables
up to 300 m in the open air
up to 50 m in buildings
In standby mode approx. 4.6W
In call mode:
with handset approx. 4.6W
with telephone (TAE) approx. 5.2 W
+5 °C to +45 °C
20 % to 75 % humidity
Jack: TAE 6, F/N coding
Dialling mode: DTMF (tone dialling)
Data transmission rate: max. 28.8 kbit/s
Power supply cord approx. 3 m
ISDN connection cable approx. 3 m
USB cable approx. 3 m
36
Page 38

Accessories
Gigaset Handsets
Turn your Gigaset into a cordless telephone system:
Gigaset S1 Handset
◆ Large illuminated graphic display with date and time
◆ Phonebook for around 200 entries
◆ Full duplex grade handsfree
◆ SMS
◆ EATONI predictive text
◆ Caller-specific ringer melody setting
(for VIP calls)
◆ Download options for obtaining melodies via SMS
◆ Room monitor
◆ Walkie talkie
◆ Voice dialling for 29 names
◆ Announce name when calling
Gigaset SL1 Handset
◆ Large illuminated graphic display with date and time
◆ Illuminated keypad
◆ Phonebook for around 200 entries
◆ Full duplex grade handsfree
◆ SMS
◆ EATONI predictive text
◆ Caller-specific ringer melody setting
(for VIP calls)
◆ Download options for obtaining melodies via SMS
◆ Room monitor
◆ Walkie talkie
◆ Voice dialling for 29 names
◆ Announce name when calling
◆ Vibration alarm
◆ Connector jack for headset, PC and MP3 player
Accessories
37
Page 39

Accessories
Gigaset C2 Handset
◆ Graphic display with date and time
◆ Phonebook for around 100 entries
◆ Handsfree
◆ SMS
◆ EATONI predictive text
◆ Caller-specific ringer melody setting
(for VIP calls)
◆ Room monitor
◆ Walkie talkie
Gigaset C1 Handset
◆ Graphic display with date and time
◆ Phonebook for around 50 entries
◆ Handsfree
◆ SMS
Gigaset Repeater
38
The Gigaset Repeater can be used to increase the reception
range of your Gigaset handset to the base.
Page 40

Accessories
Gigaset Data Modules
A Gigaset data module allows you to create a wireless connection between your PC and
your Gigaset.
Gigaset USB Adapter DECT/M105
◆ Data transmission at up to 90 kbit/s
◆ Connection between computer and
Gigaset or between two computers
◆ No external power supply necessary (powered by
the computer)
◆ Range of up to 50 m in buildings
◆ Range of up to 300 m in the open air
Mobile handsfree set with PTT key
With the mobile handsfree set you can make a call while
keeping your hands free.
In addition, conversations can be heard on the handset.
All accessories and batteries are available from your mobile phone retailer. Or you can
order direct online from the my-siemens Online Shop: www.my-siemens.com/shop
.
The Online Shop also has the latest product information.
39
Page 41

ISDN glossary
ISDN glossary
A
Added-feature connection
ISDN connection that offers three more services than the standard connection: Call
forwarding, transfer of charges after the connection, and a T-mailbox.
AOC-D
Advice of Charge: During the Call. Transfers the charge information during the connection.
AOC-E
Advice of Charge: at the End of the Call. Transfers the charge information at the end
of the connection.
Authorisation class
Defines which connections are permitted on a PABX terminal, e.g., internal only,
incoming only, or unlimited call authorisation.
Authorisation for direct outward dialling
Different users may be assigned different levels of authorisation on a base station.
For example, while User A may only take incoming calls, User B may make calls without restriction.
Automatic callback
See "Callback when the number is busy"
Automatic redial
Several attempts to call are made automatically when the line is busy.
B
Block dialling
Also pre-dialling. You may only dial or, if required, correct the phone number. Then
you should lift the receiver or press the loudspeaker key.
C
Call divert
CF, Call forwarding. You want to forward calls to another number permanently. You
can divert calls externally via the exchange or internally in the device itself. Call
divert can be set up individually for each separate phone number (MSN) (to your
mobile phone when on holiday, to the office, to a neighbour etc.).
This is carried out at the network provider's local exchange. This means the call
never reaches the original destination.
There are three kinds of call divert: immediate (CFU, Call Forwarding Unconditional),
when the line is busy (CFB, Call Forwarding Busy), and when the call is not answered
(CFNR, Call Forwarding No Reply).
40
Page 42

ISDN glossary
Call divert (via second B channel) / internal call divert
While external call divert takes place in the local telephone exchange of the network
provider, internal call divert is implemented by your telephone. Your telephone forwards the call via the second line of your ISDN connection. This means both phone
lines are engaged for the duration of the call. You pay the charges for the connection to the forwarding number. However, you save yourself the network provider's
charges for this function.
Call forwarding during the call phase
CD, Call Deflection. Must be explicitly enabled by the network provider for each ISDN
connection. CD enables an incoming call to be forwarded to any phone number
while it is ringing, without having to answer the call. Because the caller cannot
affect on where it is forwarded (for example, to a mobile phone), you will pay the
resulting charges. The caller must only pay the normal telephone charges to the connection he dialled.
Call transfer (e.g., for ISDN PABX's)
ECT, Explicit Call Transfer. User A calls User B. He puts the connection on hold and
calls User C. Rather than connect everyone in a three-party conference, A now transfers User B to C and hangs up.
Call waiting
CW, Call Waiting. Service provided by the network provider. An acoustic signal during a call indicates that another caller is waiting. In addition, ISDN phones indicate
this with a displayed message. You can then decide whether to accept or reject the
second call.
Call waiting protection
Deactivates the call waiting signal.
Callback when the call is not answered
If a user does not respond when called, a caller can arrange an automatic callback.
As soon as the destination phone has completed a call and is free again the caller is
rung back. This service must be supported by the exchange. The ringback request is
automatically cancelled after approximately 2 hours (depending on the telephone
exchange.
Callback when the number is busy
Callback must first be activated on the caller's terminal. A connection is established
automatically as soon as the destination phone is no longer busy. As soon as the
connection is free the caller is rung back. As soon as the caller lifts his receiver the
connection is made automatically.
Caller identification
Displays caller's phone number, name or type of connection (e.g., exchange/internal) on the telephone screen.
Caller list
Depending on the setting, the calls list contains callers you haven't reached, or those
you have spoken to. The last 20 missed calls and the last 20 accepted calls are stored
with their phone number, date and time. If you wish to do so, you can return the call
to these users directly from this list.
41
Page 43

ISDN glossary
Capture
Performance feature "Identify/capture". MCID stands for "Malicious Call Identification". If you receive annoying calls, you can have the telephone exchange store the
caller number. This performance feature must be requested from the network provider.
CCBS (Completion of Calls to Busy Subscriber)
See "Callback when the number is busy"
CCNR (Completion of Calls No Reply)
See "Callback when the call is not answered"
CD (Call Deflection)
See "Call forwarding during the call phase"
CF (Call forwarding)
See "Call divert"
Channel
Like an analogue connection, an ISDN connection enters the building through two
cables, but for ISDN a distinction is made between the two bearer channels called
the B-channels (which have nothing to do with the physical cables!) and the control
channel, otherwise known as the D channel.
Charge detail display
See "AOC-D" and "AOC-E"
CLI (Calling Line Identification)
The caller's phone number is transmitted.
CLIP (Calling Line Identification Presentation)
User A calls User B. A's phone number appears on B's telephone display.
CLIR (Calling Line Identification Restriction)
Stops your personal phone number being displayed.
CNIP (Calling Name Identification Presentation)
User A calls User B. A's name appears on B's telephone screen.
COLP (Connected Line Identification Presentation)
User A calls User B. B's phone number is displayed on A's telephone. If B has programmed call forwarding to C: then the dialled number and transferred number are
not identical, and the phone number of C is displayed if C permits his phone number
to be displayed.
COLR (Connected Line Identification Restriction)
If C has set up COLR, then C's phone number is not displayed on A's phone.
Conference call
See "Three-party conference"
CW (Call Waiting)
See "Call waiting"
42
Page 44

ISDN glossary
D
D channel
Control channel for an ISDN connection. See "Channel"
Digital exchange
Computer controlled switching units allow quick connection and the activation of
such additional services as => enquiry calls, => call waiting, => three-way conference, => call forwarding etc.
Direct call
Block the telephone for all phone numbers except for an individually entered
number. After picking up the handset and pressing any key, the connection to the
saved phone number is established. Ideal for children who cannot yet dial phone
numbers (baby call). Calling an emergency number is always possible. This function
is available on the Gigaset 3000/2000 Comfort handsets.
E
ECT (Explicit Call Transfer)
See "Call transfer"
Electronic code lock
Personal code (=> PIN), used, for example, to protect a phone against unauthorised
use – only calls to emergency numbers may still be made. Incoming calls may be
accepted.
Enquiry calls
You are making a call. Using the "Enquiry call" function, you interrupt the conversation briefly to establish a second internal or external connection to another user. If
you terminate the connection to this user immediately, then this was an enquiry call.
If you switch to and fro between the first and second user, it is called toggling.
Exchange
Nodal point in the public telephone network. A distinction is made, for example,
between local exchanges and long-distance or trunk exchanges.
H
Handsfree
A phone's handsfree set not only permits open listening but also allows you to talk
to the person on the other end without lifting the receiver by means of an integrated
microphone. This means others present in the room can also participate in the conversation.
Hold
(Hold the line). Interrupts and re-instates an existing connection. In particular, it permits enquiry calls and toggling between calls.
43
Page 45

ISDN glossary
I
Internal calls
Connection between the base station and handsets made free of charge.
Internal ringer
Special ringtone on PABX's to distinguish between internal and external calls.
ISDN
Abbreviation for Integrated Services Digital Network, i.e., a digital network for integrating services. This includes the integration of telephone, fax or data transmission.
ISDN abbreviations
CW Call waiting
CF Call divert
3PTY Three-party conference
CCBS Callback when the number is busy
CD Call forwarding during the call phase
K
Keypad
The keypad supports special function keys such as the star (*) and hash (#) keys.
In this way, special functions offered by your network provider can be initiated using
a code, such as "#4711*".
M
MCID (Malicious call identification)
See "Capture"
MSN
Multiple Subscriber Number. The phone numbers belonging to a multiple ISDN connection. Each terminal is addressed separately, e.g., a separate number for a fax
machine. There are three MSN in the basic price for the standard and comfort connection. Up to ten MSN can be assigned to one ISDN connection.
Multiple connection
ISDN connection that has up to ten MSN available, in contrast to the system connection with one call director number block. This is the preferred type of ISDN connection for private customers.
Multiple subscriber number
See "MSN"
Music on hold
See "Wait melody"
Mute
Convenience feature for telephones, which deactivates the built-in microphone (in
handset or handsfree unit).
44
Page 46

ISDN glossary
N
Notebook function
During a phone call you can enter a phone number in the phone's temporary memory to be dialled later.
NT/NTBA
Network terminating device (NT = Network Terminator and NTBA = Network Terminator Basic Access). The public T-ISDN is terminated with an NT. The NT acts as a
bridge to the existing telephone outlet. Only the NT can or may be connected to the
telephone outlet. Under no circumstances should analogue terminals also be connected to the phone outlet. ISDN terminals and additional ISDN outlets are connected to the NT.
O
Open listening
At the touch of a key, all those present in a room can listen in to a phone call via an
integrated loudspeaker. See also "Handsfree talking".
Outgoing MSN, freely selectable
A feature which helps you to individually determine which MSN should be used for
the following call. This is not only important for the phone number display on the
called handset but also for billing charges. This is because call charges, which can be
broken down free of charge according to MSN on the network provider invoice, are
billed according to the MSN used to make the call.
P
Parking
A call is parked when you want to unplug the telephone during a call, or you want
to continue your call from another telephone with the same connection. The connection is retained while it is parked.
Phonebook
An added feature on a phone allowing the name and phone number of several users
to be stored. The phone numbers can quickly be found and dialled.
PIN
Abbreviation for Personal Identification Number. Protects against unauthorised use,
e.g., system PIN, answering machine PIN, handset PIN.
Plugging to bus
TP, Terminal Portability. Also called parking. An incoming call can be held at the local
exchange for up to three minutes to then be accepted, for example, by another
phone, a fax machine or a PC. In the meanwhile the caller hears an appropriate
announcement.
Pre-dialling, see also "Block dialling"
For some telephones with a display you can enter the phone number first, and check
it once more before dialling.
45
Page 47

ISDN glossary
R
Remote activation
Allows the answering machine to be activated and deactivated during a call. This
function is PIN-protected.
Remote check
Answering machine function. Listen to messages remotely, mostly together with
options like delete messages or change announcements.
Repeater
A repeater increases the range of a handset connected to a base station. The device
receives the radio signal from the base station and broadcasts it further.
Ring delay
For each internal party, you can specify how many rings take place before this party
hears the ring. This can also be set for each MSN phone number.
For example, your handset, in addition to the base telephone (which rings on the
first ring) could ring after three rings for the private phone number, and ring on the
first ring for the business phone number.
S
S0 Bus
Four-wire ISDN connection wiring. It provides two B-channels and one D-channel.
Up to twelve ISDN outlets can be connected to it, on which up to eight terminals can
be operated at the same time.
Standard connection
ISDN connection with a series of services such as call waiting, three-party conference, or callback when the number is busy. See also "Comfort connection".
T
Three-party conference
3PTY, three-party. Interconnection with two external users (ISDN or analogue network customers).
Toggling
Toggling allows you to switch between two external callers without allowing the
waiting caller to listen in.
TP
Terminal Portability, see "Plugging to bus".
Two-way recording of phone calls
Answering machine feature which allows you to record a conversation during a
phone call.
46
Page 48

ISDN glossary
W
Wait melody
Music on hold. During an enquiry call or when a call is being transferred, a melody
is played which the waiting person can hear.
Withhold own number (CLIR)
Stops your personal phone number being transferred.
47
Page 49

Index
Index
A
Accessories. . . . . . . . . . . . . . . . . . . . 37
Added-feature connection . . . . . . . . . 40
Analogue
Making calls with analogue
devices
. . . . . . . . . . . . . . . . . . . . 28
Announce only (answering machine) . 20
Announcement (answering machine)
Note
. . . . . . . . . . . . . . . . . . . . . . . 20
Announcement (answering
machine)
Answer and record (answering
machine)
Answering machine
Announcement . . . . . . . . . . . . . . . 20
Connecting
Key sequences for remote control . . 23
Memos
Messages. . . . . . . . . . . . . . . . . . . . 20
Operating from handset
PIN . . . . . . . . . . . . . . . . . . . . . . . . 22
Remote control
Remote delete . . . . . . . . . . . . . . . . 22
AOC-D
AOC-E. . . . . . . . . . . . . . . . . . . . . . . . 40
Authorisation class
Authorisation for direct outward
Automatic callback . . . . . . . . . . . . . . 40
Automatic redial
. . . . . . . . . . . . . . . . . . 27
. . . . . . . . . . . . . . . . . . . . . 20
. . . . . . . . . . . . . . . . . . . . . . . 40
dialling
. . . . . . . . . . . . 20
. . . . . . . . . . . . 20
. . . . . . . . . . . . . . 22
. . . . . . . . . 22
. . . . . . . . . . . . . . . 22
. . . . . . . . . . . . . . 40
. . . . . . . . . . . . . 40
. . . . . . . . . . . . . . . . 40
B
Base
as desktop unit
Connecting . . . . . . . . . . . . . . . . . . . 6
Installation
Installation (notes). . . . . . . . . . . . . . 4
Installation location
Preparing for use . . . . . . . . . . . . . . . 4
Setting
Wall mounting. . . . . . . . . . . . . . . . . 5
Block dialling
. . . . . . . . . . . . . . . . . . . . . . 8
. . . . . . . . . . . . . . . . 4
. . . . . . . . . . . . . . . . . . . 3
. . . . . . . . . . . . . 4
. . . . . . . . . . . . . . . . . . . 40
C
Cable
ISDN connection cable
. . . . . . . . . . . 6
Power supply cord
USB cable
Call
Divert
Call divert . . . . . . . . . . . . . . . . . .40, 41
Call forwarding
Call waiting . . . . . . . . . . . . . . . . . . . .41
Call waiting protection
Callback
When the number is busy
Callback when the call is not
Caller identification . . . . . . . . . . . . . .41
Caller list
Capture . . . . . . . . . . . . . . . . . . . . . . .42
Care of the telephone
CF, see also Call divert
Channel
Charge detail display . . . . . . . . . . . . .42
CLI
. . . . . . . . . . . . . . . . . . . . . . . . . . .42
CLIP. . . . . . . . . . . . . . . . . . . . . . . . . .42
CLIR
. . . . . . . . . . . . . . . . . . . . . . . . . .42
CNIP . . . . . . . . . . . . . . . . . . . . . . . . .42
Conference call
Connecting
Answering machine
Auxiliary equipment . . . . . . . . . . . . .7
Base
Devices. . . . . . . . . . . . . . . . . . . . . .26
Fax machine
Modem . . . . . . . . . . . . . . . . . . . . .27
Tele ph one
Connecting a fax machine . . . . . . . . .27
Connecting a modem
Connecting auxiliary equipment . . . . . .7
Connection
TAE
Connector
Mini-Western
TAE
Contact with liquid . . . . . . . . . . . . . . .33
Customer Care (Service)
Customer service . . . . . . . . . . . . . . . .34
CW see Call waiting
. . . . . . . . . . . . . . . . . . . .30
. . . . . . . . . . . . . . . . . . . . . . .41
answered
. . . . . . . . . . . . . . . . . . . . . .41
. . . . . . . . . . . . . . . . . . . . . . .42
. . . . . . . . . . . . . . . . . . . . . . . . .6
. . . . . . . . . . . . . . . . . . . . . . . .26
. . . . . . . . . . . . . . . . . . . . . . .6, 7
. . . . . . . . . . . . . . .6
. . . . . . . . . . . . . . . . .41
. . . . . . . . . . . .41
. . . . . . . .41
. . . . . . . . . . . .41
. . . . . . . . . . . . .33
. . . . . . . . . . . . . . . . .42
. . . . . . . . . . . .27
. . . . . . . . . . . . . . . . . .27
. . . . . . . . . . . . . . . . . . .26
. . . . . . . . . . . . .27
. . . . . . . . . . . . . . . .6, 7
. . . . . . . . . . .34
48
Page 50

Index
D
D channel . . . . . . . . . . . . . . . . . . . . . 43
Data modules . . . . . . . . . . . . . . . . . . 30
Defining the device type
De-register
Handset
Desktop unit (base) . . . . . . . . . . . . . . . 4
Device type
Defining
Setting
Devices
Connecting
Making calls with analogue
Medical . . . . . . . . . . . . . . . . . . . . . . 3
Digital exchange
Direct call . . . . . . . . . . . . . . . . . . . . . 43
. . . . . . . . . . . . . . . . . . . . 14
. . . . . . . . . . . . . . . . . . . . 29
. . . . . . . . . . . . . . . . . . . . . 26
. . . . . . . . . . . . . . . . . . 26
devices
. . . . . . . . . . . . . . . . . . . . 28
. . . . . . . . . . 29
. . . . . . . . . . . . . . . . 43
E
Electronic code lock . . . . . . . . . . . . . 43
Enquiry calls . . . . . . . . . . . . . . . . . . . 43
Entrance telephone
Exchange . . . . . . . . . . . . . . . . . . . . . 43
. . . . . . . . . . . . . . 31
F
Features (handsets) . . . . . . . . . . . . . 15
G
Getting started . . . . . . . . . . . . . . . . . . 4
Getting started wizard
Gigaset
M101 Data
Repeater . . . . . . . . . . . . . . . . . . . . 30
USB Adapter DECT/M105
. . . . . . . . . . . . . . . . . . 30
. . . . . . . . . . . . . 8
. . . . . . . . 30
H
Handset
De-register
Features . . . . . . . . . . . . . . . . . . . . 15
Paging
Handsfree. . . . . . . . . . . . . . . . . . . . . 43
Hold
. . . . . . . . . . . . . . . . . . . . . . . . . 43
. . . . . . . . . . . . . . . . . . 14
. . . . . . . . . . . . . . . . . . . . . . 14
I
Installation
Base (mounting)
Base (notes) . . . . . . . . . . . . . . . . 3, 4
Installation location (base)
. . . . . . . . . . . . . . . 4
. . . . . . . . . 4
Internal
Calls
. . . . . . . . . . . . . . . . . . . . . . . . 44
Numbers . . . . . . . . . . . . . . . . . . . . 19
Ringer
. . . . . . . . . . . . . . . . . . . . . . 44
Users . . . . . . . . . . . . . . . . . . . . . . . 19
ISDN
. . . . . . . . . . . . . . . . . . . . . . . . . 44
Abbreviations . . . . . . . . . . . . . . . . . 44
Connection cable
Phone number, see MSN
Telephone connection
. . . . . . . . . . . . . . . 6
. . . . . . . . . . . 4
K
Key
Paging
. . . . . . . . . . . . . . . . . . . . . . 14
Keypad . . . . . . . . . . . . . . . . . . . . . . . 44
M
M101 Data . . . . . . . . . . . . . . . . . . . . 30
Mains outlet . . . . . . . . . . . . . . . . . . . . 4
Medical appliances
Memos, see Answering Machine
Messages, see Answering Machine
Mini-Western connector
MSN
. . . . . . . . . . . . . . . . . . . . . . 19, 44
Multiple subscriber number, see MSN
Music on hold
Mute . . . . . . . . . . . . . . . . . . . . . . . . . 44
. . . . . . . . . . . . . . . . 3
. . . . . . . . . . 6, 7
. . . . . . . . . . . . . . . . . . 44
N
Notebook function. . . . . . . . . . . . . . . 45
Notes (spoken) see Memo
NTBA
. . . . . . . . . . . . . . . . . . . . . . . 6, 45
O
Open listening. . . . . . . . . . . . . . . . . . 45
Outgoing MSN, freely selectable
. . . . . 45
P
Pack contents . . . . . . . . . . . . . . . . . . .4
Paging
. . . . . . . . . . . . . . . . . . . . . . . . 14
Paging key. . . . . . . . . . . . . . . . . . . . . 14
Parking
. . . . . . . . . . . . . . . . . . . . . . . 45
Phonebook . . . . . . . . . . . . . . . . . . . . 45
PIN
. . . . . . . . . . . . . . . . . . . . . . . . 8, 45
Plugging to bus . . . . . . . . . . . . . . . . . 45
Power failure
Power supply cord . . . . . . . . . . . . . . . . 6
Power supply unit
. . . . . . . . . . . . . . . . . . . . 6
. . . . . . . . . . . . . . 3, 6
49
Page 51

Index
Pre-dialling
. . . . . . . . . . . . . . . . . 40, 45
Q
Questions and Answers . . . . . . . . . . . 33
R
Radio reception . . . . . . . . . . . . . . . . . . 4
Range
. . . . . . . . . . . . . . . . . . . . . . 4, 30
Remote activation . . . . . . . . . . . . . . . 46
Remote check
Remote delete, see Answering Machine
Repeater
Ring delay. . . . . . . . . . . . . . . . . . . . . 46
. . . . . . . . . . . . . . . . . . 46
. . . . . . . . . . . . . . . . . . . 30, 46
S
S0
Bus . . . . . . . . . . . . . . . . . . . . . . . . 46
Jack
. . . . . . . . . . . . . . . . . . . . . . . . . 6
Safety precautions. . . . . . . . . . . . . . . . 3
Service
Setting
Socket
Specifications
Standard connection . . . . . . . . . . . . . 46
System settings
. . . . . . . . . . . . . . . . . . . . . . . 34
Base
. . . . . . . . . . . . . . . . . . . . . . . . 8
Device type . . . . . . . . . . . . . . . . . . 26
TAE
. . . . . . . . . . . . . . . . . . . . . . . . 36
. . . . . . . . . . . . . . . . . . 36
. . . . . . . . . . . . . . . . . 15
Wall mounting (base) . . . . . . . . . . . . . .5
T
TAE . . . . . . . . . . . . . . . . . . . . . . . . . 6, 7
Connection
Socket . . . . . . . . . . . . . . . . . . . . . . 36
Tel eph one
Care
Connecting
Three-party conference . . . . . . . . . . . 46
Toggling
Tra nsfer . . . . . . . . . . . . . . . . . . . . . . 41
Two-way recording of phone calls
. . . . . . . . . . . . . . . . . . 26
. . . . . . . . . . . . . . . . . . . . . . . 33
. . . . . . . . . . . . . . . . . . 26
. . . . . . . . . . . . . . . . . . . . . . 46
. . . 46
U
USB Adapter DECT/M105 . . . . . . . . . . 30
USB cable
. . . . . . . . . . . . . . . . . . . . . 30
W
Wait melody . . . . . . . . . . . . . . . . . . . 47
Wall holder
50
. . . . . . . . . . . . . . . . . . . . . 4
Page 52

Issued by
Information and Communication mobile
Haidenauplatz 1
D-81667 Munich
© Siemens AG 2003
All rights reserved. Subject to availability.
Right of modification reserved.
Printed in Germany (09/2003).
Siemens Aktiengesellschaft
http://www.my-siemens.com
No.: A31008-X255-B100-1-7619
 Loading...