

Siemens Gigaset 8800 Quick Start Manual
SIEMENS &f&z
I
Gigaset 8800
Quick Start Guide
This guide will help you get started using your Gigaset handset. For
additional information related to your Gigaset 8825 system, please
refer to the User Manual.
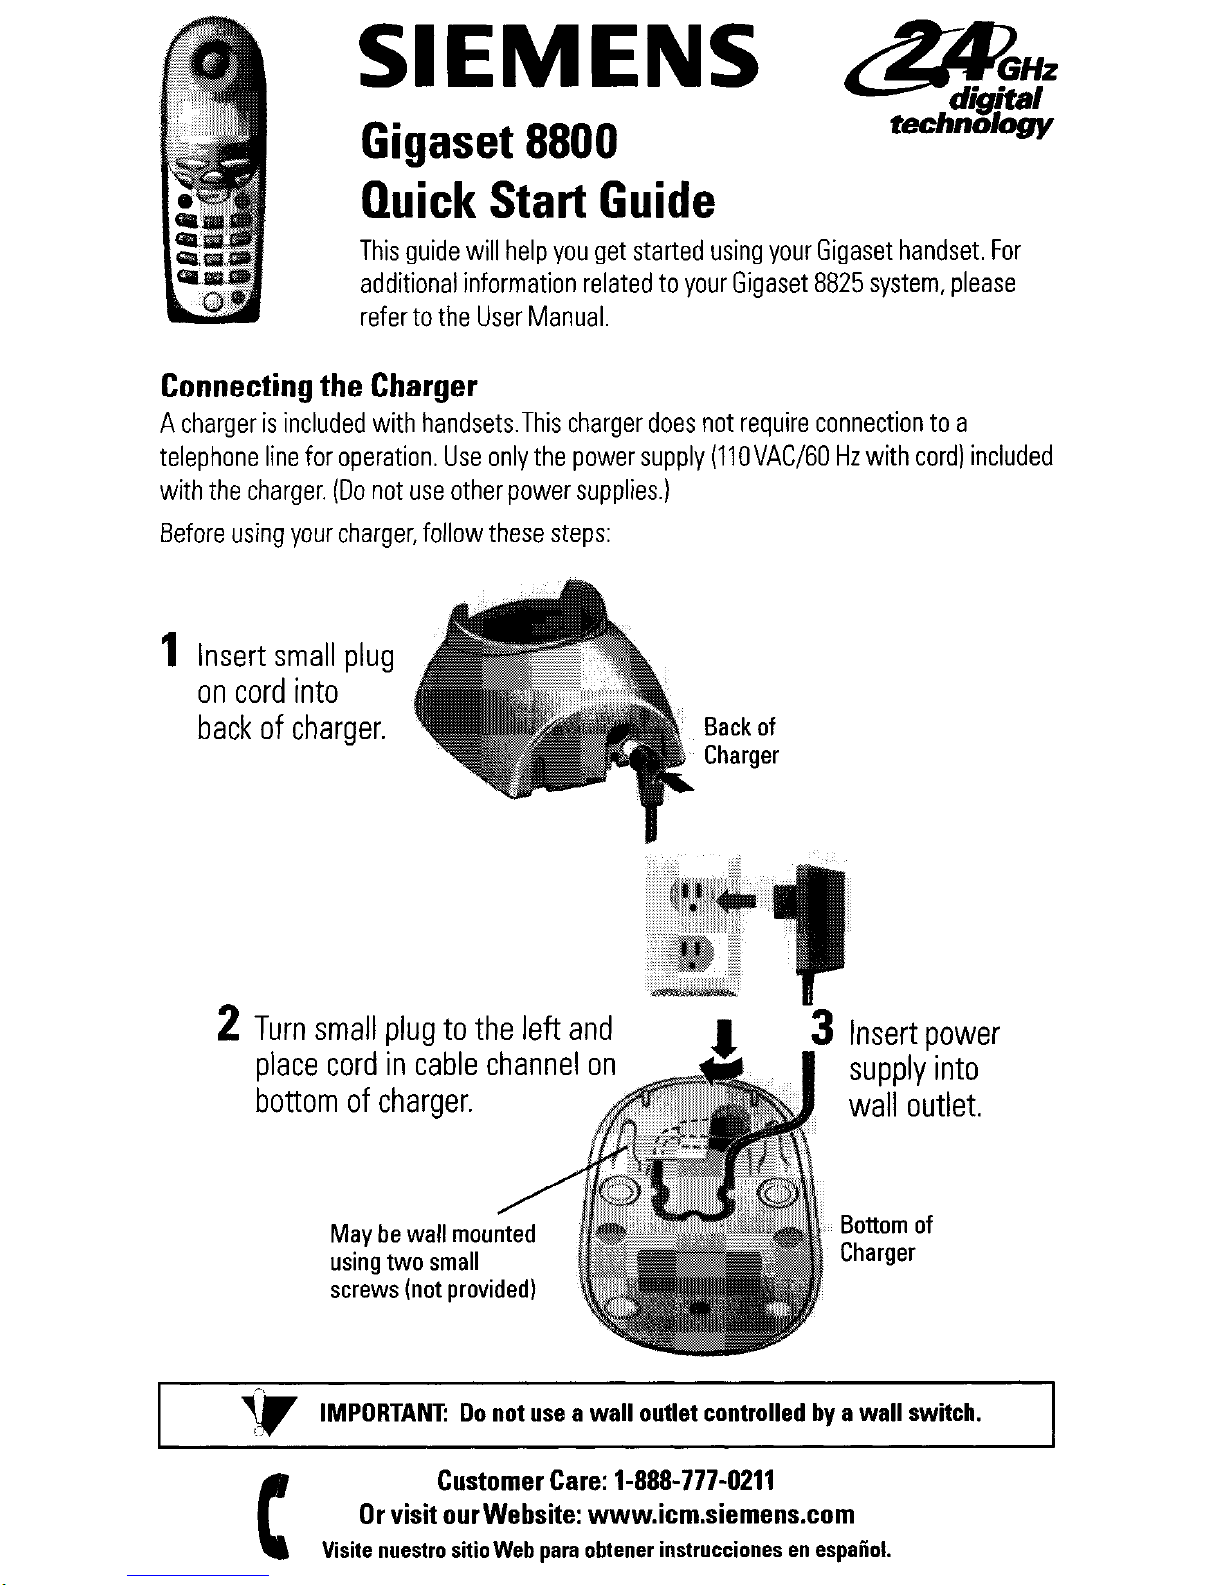
Connecting the Charger
A charger is included with handsets.This charger does not require connection to a
telephone line for operation. Use only the power supply (llOVAC/GO Hz with cord) included
with the charger. (Do not use other power supplies.)
Before using your charger, follow these steps:
1
Insert small plug
on cord into
back of charger.
Back
of
Charger
2 Turn small plug to the left and
place cord in cable channel on
bottom of charger.
May be wall mounted
using two small
screws (not provided)
Insert power
supply into
wall outlet.
Bottom of
Charger
^,
v
IMPORTANT: Do
not usa a wall outlet controlled by a wall switch.
*_
c
Customer Care: I-888-777-0211
Or visit ourwebsite: www.icm.siemens.com
Visite nuestro sitio Web para obtener instrucciones en espaiiol.
Gigaset 8800 Handset
The Gigaset 8800 handset is used exclusively on the Gigaset 8825 system. Up to a total
of eight handsets may be added.
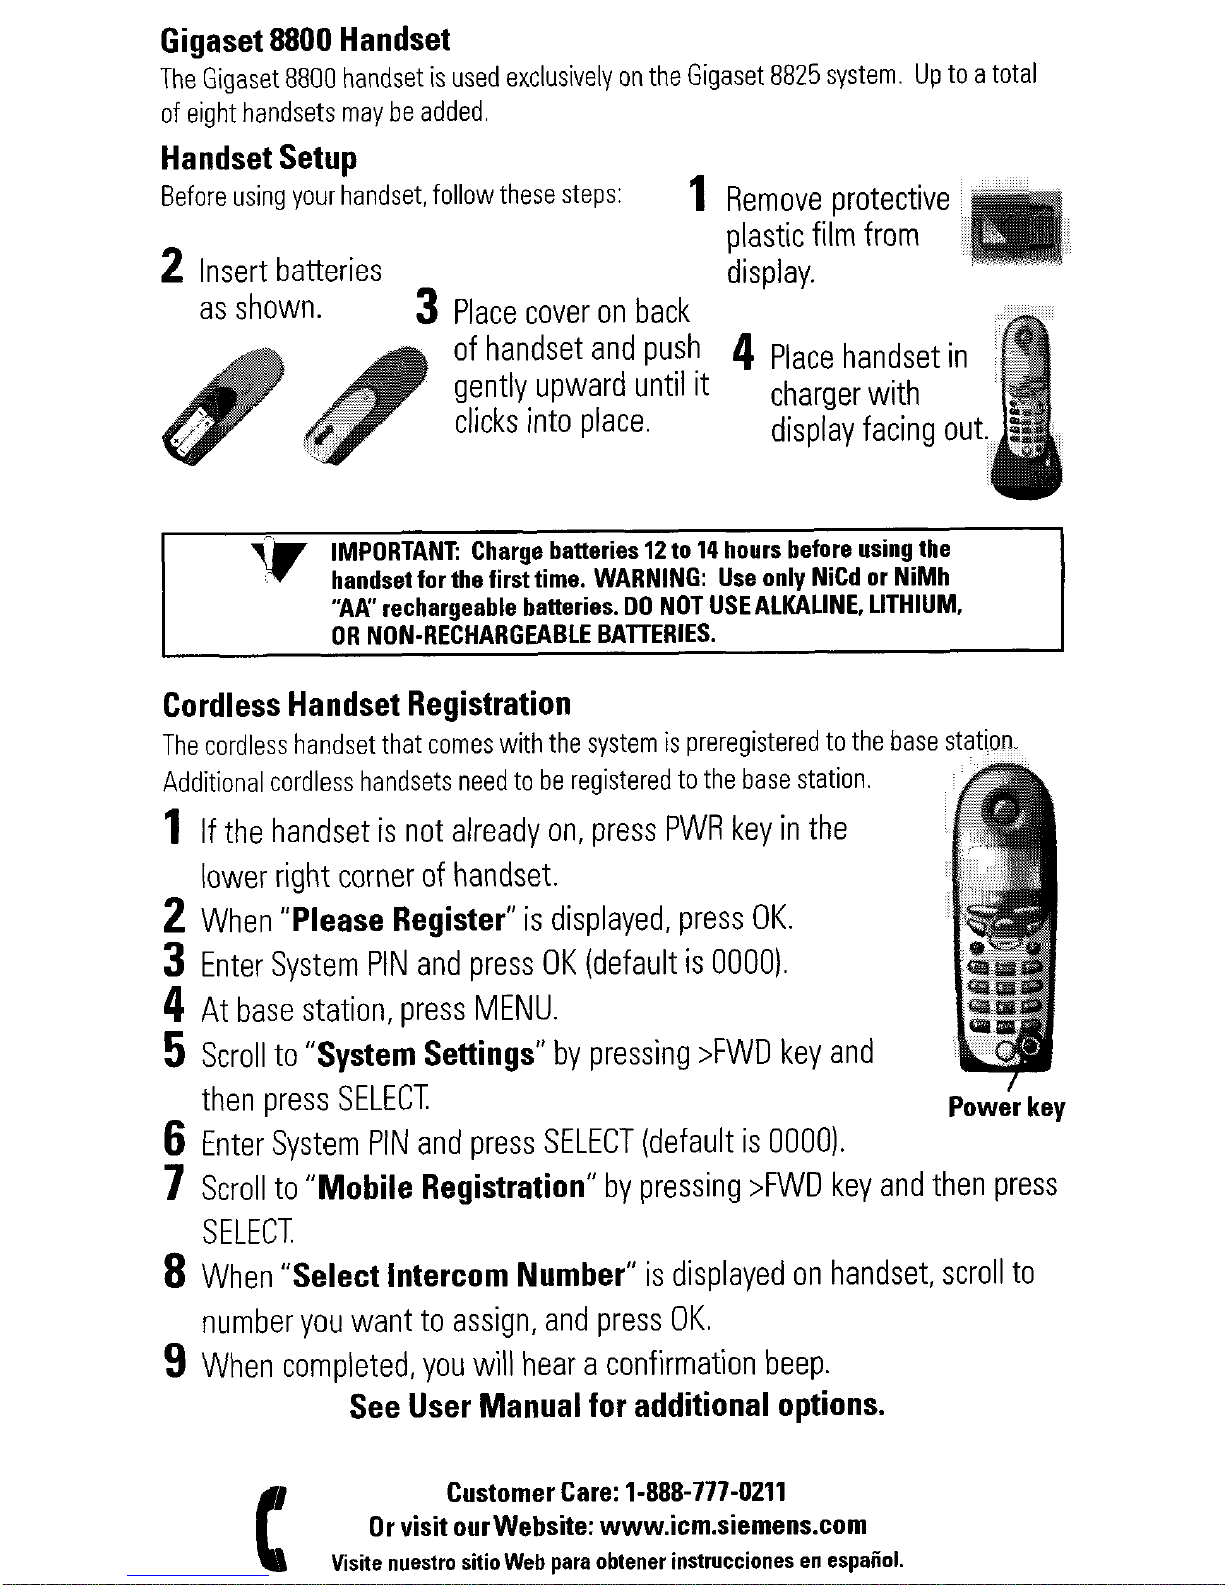
Handset Setup
Before using your handset, follow these steps: 1
Remove protective
plastic film from
display.
2 Insert batteries
as shown.
3
Place cover on back
of handset and push
gently upward until it
clicks into place.
4 Place handset in
charger with
display facing out.
IMPORTANT: Charge batteries 12 to 14 hours before using the
handset for the first time. WARNING: Use only NiCd or NiMh
“AA” rechargeable batteries. DO NOT USEALKALINE, LITHIUM,
OR NON-RECHARGEABLE BATTERIES.
1
Cordless Handset Registration
The cordless handset that comes with the system is preregistered to the base station.
Additional cordless handsets need to be registered to the base station.
If the handset is not already on, press PWR key in the
lower right corner of handset.
When “Please Register” is displayed, press OK.
Enter System PIN and press OK (default is 0000).
At base station, press MENU.
Scroll to “System Settings” by pressing >FWD key and
2
3
4
5
then press SELECT
Powe: key
Enter System PIN and press SELECT (default is 0000).
Scroll to “Mobile Registration” by pressing >FWD key and then press
SELECT
When “Select Intercom Number” is displayed on handset, scroll to
number you want to assign, and press OK.
When completed, you will hear a confirmation beep.
See User Manual for additional options.
c
Customer Care: l-888-777-0211
Or visit ourwebsite: www.icm.siemens.com
Visite nuestro sitio Web para obtener instrucciones en espaiiol.
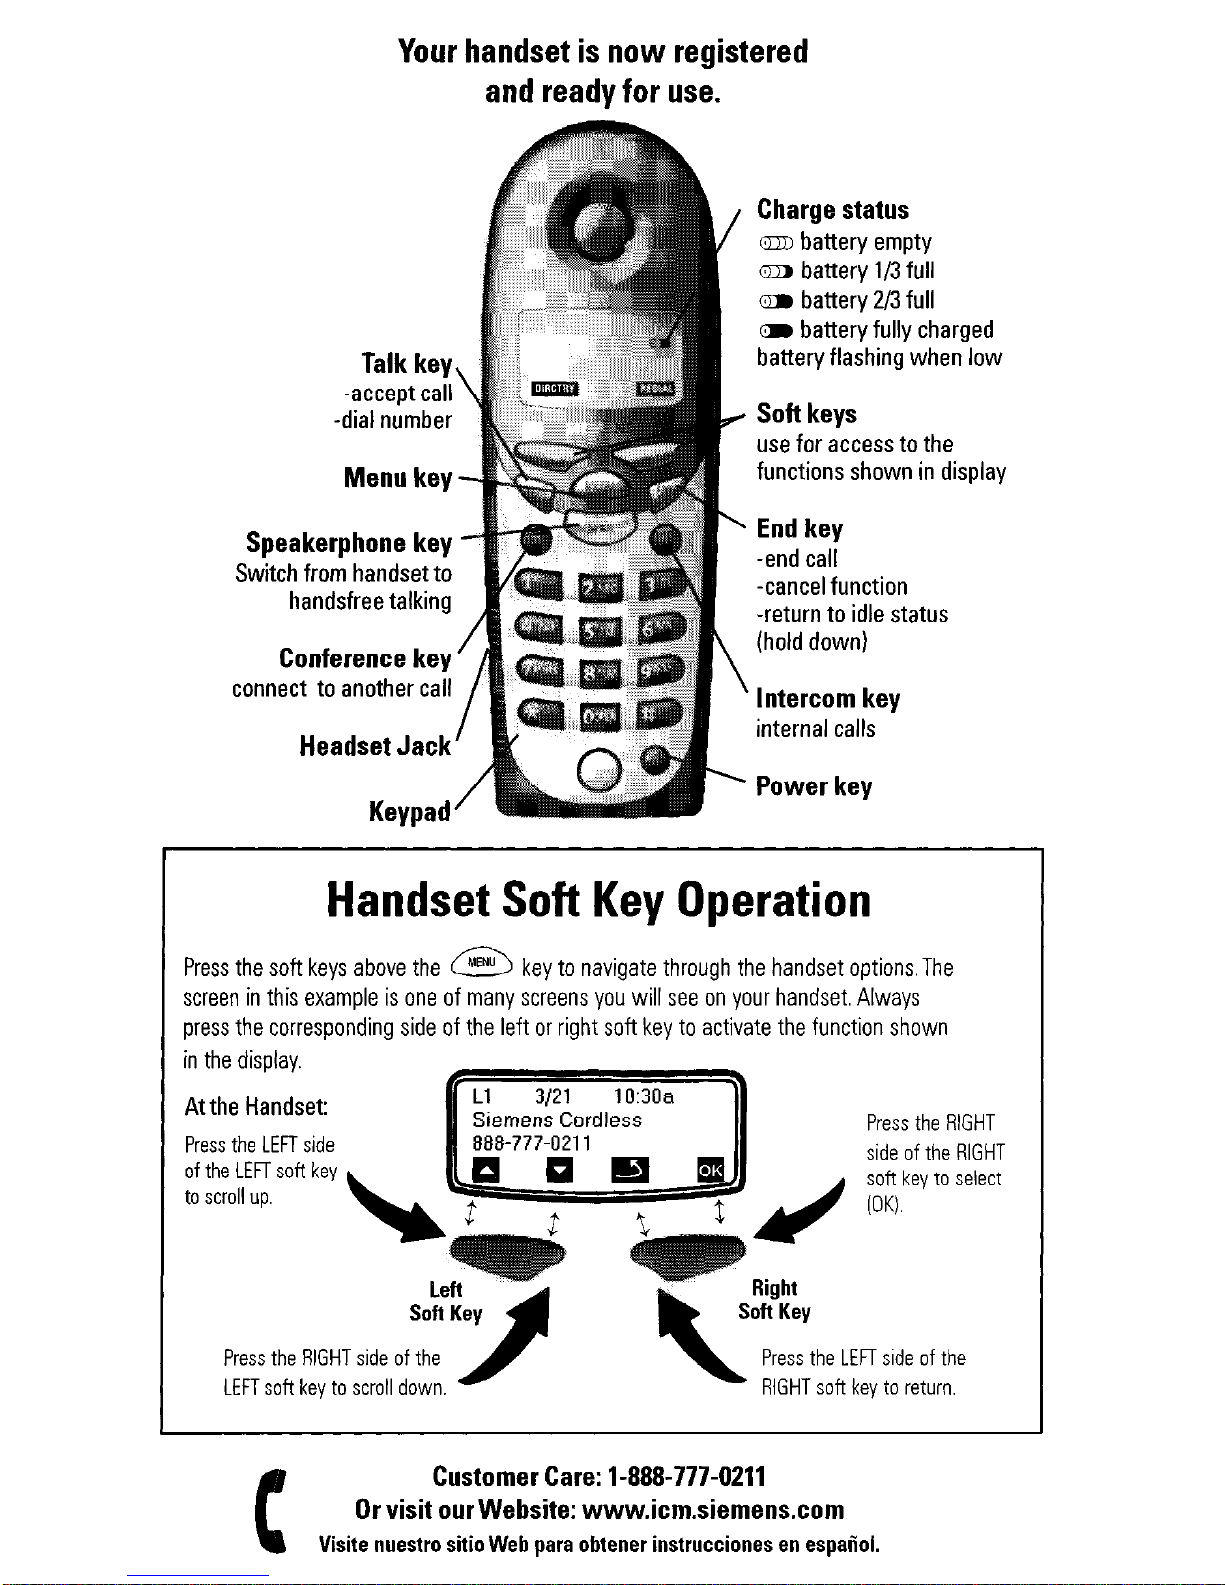
Your handset is now registered
and ready for use.
Talk key
-accept call \
-dial number
Menu key -
Speakerphone key -
Switch from handset to
handsfree talking
Conference key
/
connect to another call
Headset Jack
Keypad
Charge status
CDC battery empty
CD battery l/3 full
CB battery Z/3 full
m battery fully charged
battery flashing when low
Soft keys
use for access to the
functions shown in display
End key
-end call
-cancel function
-return to idle status
(hold down)
Intercom key
internal calls
Power key
Handset Soft Key Operation
Press the soft keys above the @ key to navigate through the handset options.The
screen in this example is one of many screens you will see on your handset. Always
press the corresponding side of the left or right soft key to activate the function shown
in the display.
P
)Oa
_ -.-..-
At the Handset:
h
Ll 3121 10::
Siemens Cordless
II
Ress the HltiH I
Press the LEFT side
888-777-0211
*iA
nf thn !2lCUT
of the LEFT soft key
to scroll
up.
L .
L)I”C “I LI
soft key
IOK).
Press the RIGHT side of the
LEFT soft key to scroll down.
EFT side of the
key to retu
rn.
C
Customer Care: I-888-777-0211
Or visit our Website: www.icm.siemens.com
Visite nuestro sitio Web para obtener instrucciones en espaiiol.
 Loading...