

Sharp XL-DH229N Installation Manual
ENGLISH
MODEL
XL-DH229N
MICRO COMPONENT SYSTEM
OPERATION MANUAL
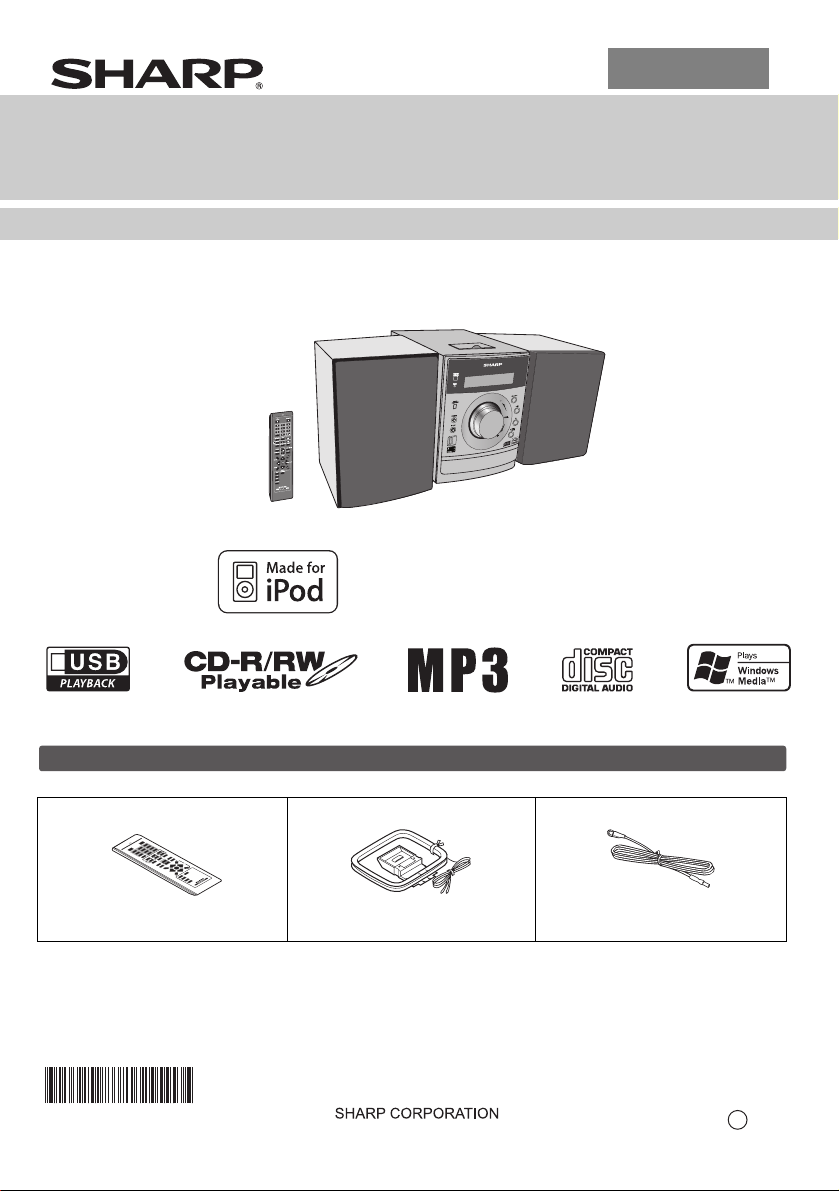
XL-DH229N Micro Component System consisting of XL-DH229N (main unit) and CP-DH229N (speaker system).
D
C
B
S
U
iPod is a trademark of Apple Inc., registered in the
U.S. and other countries.
M
E
T
S
Y
S
T
N
E
N
O
P
M
O
9
C
2
2
H
O
D
L-
R
X
C
I
M
Accessories
Please confirm that only the following accessories are included.
Remote control x 1
(RRMCGA204AWSA)
TINSZA604AWZZ
AM loop antenna x 1
(QANTLA004AWZZ)
FM antenna x 1
(92LFANT1535A)
Printed in Malaysia
09L R AS 2
Special Note
Supply of this product does not convey a license nor imply
any right to distribute content created with this product in
revenue-generating broadcast systems (terrestrial,
satellite, cable and/or other distribution channels),
revenue-generating streaming applications (via Internet,
intranets and/or other networks), other revenue-generating
content distribution systems (pay-audio or audio-ondemand applications and the like) or on revenuegenerating physical media (compact discs, digital versatile
discs, semiconductor chips, hard drives, memory cards
and the like). An independent license for such use is
required. For details, please visit http://mp3licensing.com
MPEG Layer-3 audio coding technology licensed from
Fraunhofer IIS and Thomson.
“Made for iPod” means that an electronic accessory has been designed to connect specifically to iPod and has been
certified by the developer to meet Apple performance standards.
Apple is not responsible for the operation of this device or its compliance with safety and regulatory standards.
ENERGY STAR® Program Information
Products that have earned
the ENERGY STAR
designed to protect the
environment through
superior energy efficiency.
ENERGY STAR® is a U.S. registered mark.
®
are
For U.S. customer only
SHARP ELECTRONICS CORPORATION
Sharp Plaza, Mahwah, New Jersey 07495-1163
E-1
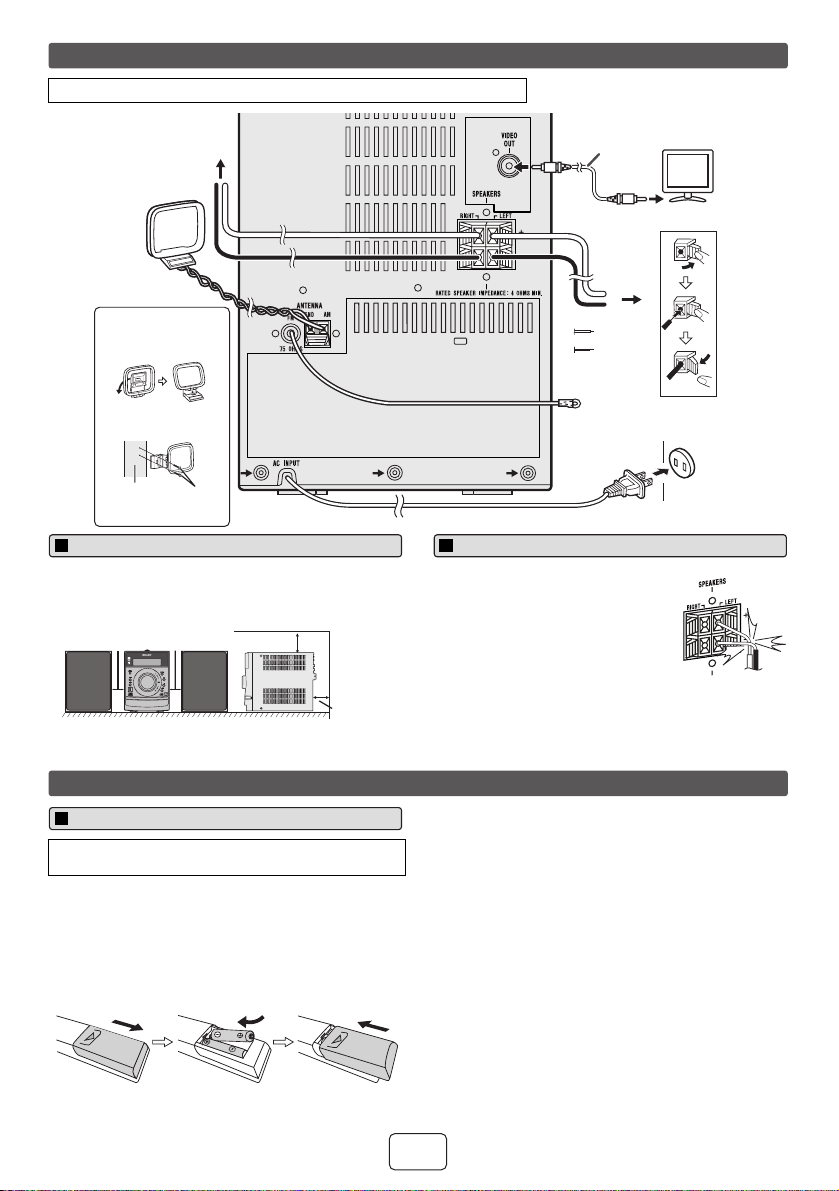
System connections
Make sure to unplug the AC power cord before making any connections.
Right speaker
AM loop
antenna
Installing the AM loop
antenna
< Assembling >
< Attaching to the
wall >
wall
screws
(not supplied)
Precautions
Please ensure that the equipment is positioned in a well
●
ventilated area and ensure that there is at least 4" (10 cm)
of free space along the sides, top and back of the
equipment.
4" (10 cm) 4" (10 cm)
MICRO COMPONENT SYSTEM
XL-DH229
4" (10 cm)
4" (10 cm)
Remote control
Battery installation
Use 2 “AAA” size batteries (UM/SUM-4, R3, HP-16 or
similar). Batteries are not included.
Open the battery cover.
1
Insert the batteries according to the direction indicated in
2
the battery compartment.
When inserting or removing the batteries, push them
toward the (–) battery terminals.
Close the cover.
3
Video cable
(not supplied)
To video input jack
Left
speaker
Red
Black
FM
antenna
TV
AC outlet
(AC 120 V ~ 60 Hz)
Speaker connection
Connect the black wire to the minus (–)
●
terminal, and the red wire to the plus
(+) terminal.
●
Use speakers with an impedance of 4
ohms or more, as lower impedance
speakers can damage the unit.
Do not make a mistake when
●
connecting the right and left speakers.
The right speaker is the one on the
right side when you face the unit.
Do not let the bare speaker wires touch each other.
●
Do not allow any objects to fall into or to be placed in the
●
bass reflex ducts.
Do not stand or sit on the speakers. You may be injured.
●
Caution:
Replace all old batteries with new ones at the same time.
●
Do not mix old and new batteries.
●
Remove the batteries if the unit will not be used for a long
●
period of time. This will prevent potential damage due to
battery leakage.
Do not use rechargeable batteries (nickel-cadmium
●
battery, etc.).
Installing the batteries incorrectly may cause the unit to
●
malfunction.
Batteries (battery pack or batteries installed) shall not be
●
exposed to excessive heat such as sunshine, fire or the
like.
Notes concerning use:
Replace the batteries if the operating distance is reduced
●
or if the operation becomes erratic. Purchase 2 “AAA” size
batteries (UM/SUM-4, R3, HP-16 or similar).
Periodically clean the transmitter on the remote control
●
and the sensor on the unit with a soft cloth.
Exposing the sensor on the unit to strong light may
●
interfere with operation. Change the lighting or the
direction of the unit if this occurs.
Keep the remote control away from moisture, heat, shock,
●
and vibrations.
E-2
Incorrect
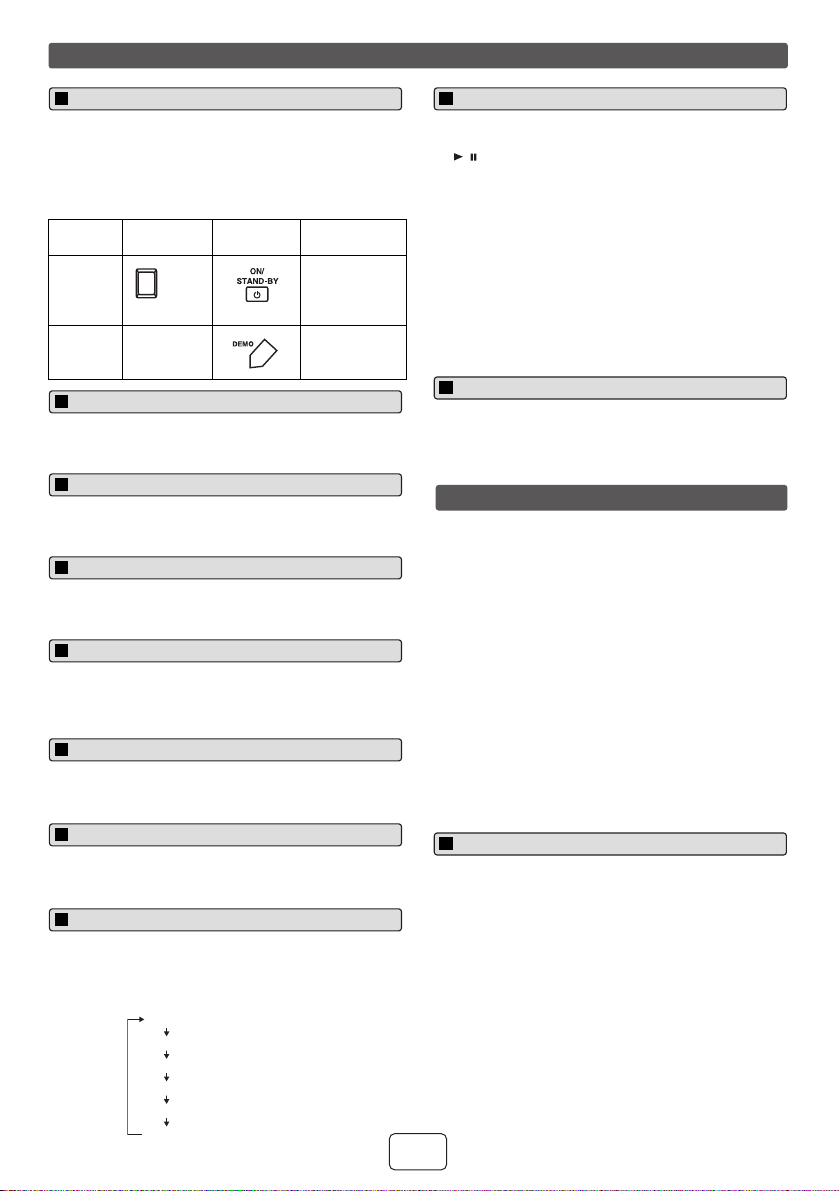
General control
POWER
ON/STAND-BY
To turn the power on
The first time the unit is plugged in, the unit will enter the
demonstration mode. You will see words scroll.
Press the DEMO button to cancel the demonstration
1
mode.
Press the ON/STAND-BY button to turn the power on.
2
Function Main unit Remote
Power on /
off
Demo on /
off
POWER
ON/STAND-BY
____
control
Operation
Press to turn the
power on or to
go to stand-by
mode.
Press to enter to
demonstration
on or off mode.
Display brightness control
To dim the display brightness, hold down the CLEAR/
DIMMER button on the remote control for 2 seconds or
more.
Volume auto fade-in
If you turn off and on the main unit with the volume set to
27 or higher, the volume starts at 16 and fades in to the last
set level.
Volume control
Turn the volume knob toward VOL +/– (on main unit) or
press VOLUME +/– (on remote control) to increase or
decrease the volume.
X-Bass control
When the power is first turned on, the unit will enter the
extra bass mode which emphasizes the bass frequencies,
and “X-BASS” will appear. To cancel the extra bass mode,
press the X-BASS button on the remote control.
Bass control
1
Press the BASS/TREBLE button to select “BASS”.
2
Within 5 seconds, press the VOLUME (+ or –) button to
adjust the bass.
Treble control
Press the BASS/TREBLE button to select “TREBLE”.
1
Within 5 seconds, press the VOLUME (+ or –) button to
2
adjust the treble.
Equalizer
When the EQUALIZER MODE button is pressed, the
current mode setting will be displayed. To change to a
different mode, press the EQUALIZER MODE button
repeatedly until the desired sound mode appears.
No equalization.
FLAT
GAME
CLASSIC
POPS
VOCAL
JAZZ
No equalization.
For rock music.
For game.
For classical music.
For classical music.
For pop music.
For pop music.
Vocals are enhanced.
Vocals are enhanced.
For jazz.
For jazz.
Auto power on function
When you press any of these buttons during stand-by
mode, the unit turns on.
●
/ button on the main unit : The unit turns on and
playback of the last function will start (iPod, CD,
TUNER, USB, AUDIO IN).
●
iPod button on the remote control : The unit turns on
and iPod function is activated.
●
CD button on the remote control : The unit turns on and
CD function is activated.
●
TUNER button on the remote control : The unit turns on
and TUNER function is activated.
●
USB button on the remote control : The unit turns on
and USB function is activated.
●
AUDIO IN button on the remote control : The unit turns
on and AUDIO IN function is activated.
Auto power off function
In the stop mode of disc or USB operation, the main unit
enters the stand-by mode after 15 minutes of inactivity.
Listening to the iPod
Supported iPod models:
●
iPod nano (software 1.2 above)
●
iPod mini (software 1.2 above)
th
●
●
●
●
●
●
●
●
Caution:
Please update your iPod unit to the latest software version
from Apple’s homepage before using it.
generation) (software 1.3 above) (Dock
iPod (5
connector equipped Click Wheel model)
iPod (4th generation) (software 3.0.2 above) (Dock
connector equipped Click Wheel model)
iPod nano (2
iPod nano (3rd generation) (software 1.0.3 above)
iPod nano (4th generation) (software 1.0.3 above)
iPod classic (software 1.0.3 above)
iPod touch (software 1.1 above)
iPod touch (2nd generation) (software 2.1 above)
nd
generation) (software 1.0.0 above)
iPod adaptor connection
Notes:
●
iPhone is not supported by this system.
●
You can use an audio cable to connect your iPod to the
AUDIO IN jack if:
your iPod adaptor does not fit into the iPod dock on
1.
the main unit.
2.
you have an iPod that does not have an iPod
adaptor.
you have an iPod that does not have an iPod 30 pin
3.
connector.
E-3
Listening to the iPod (continued)
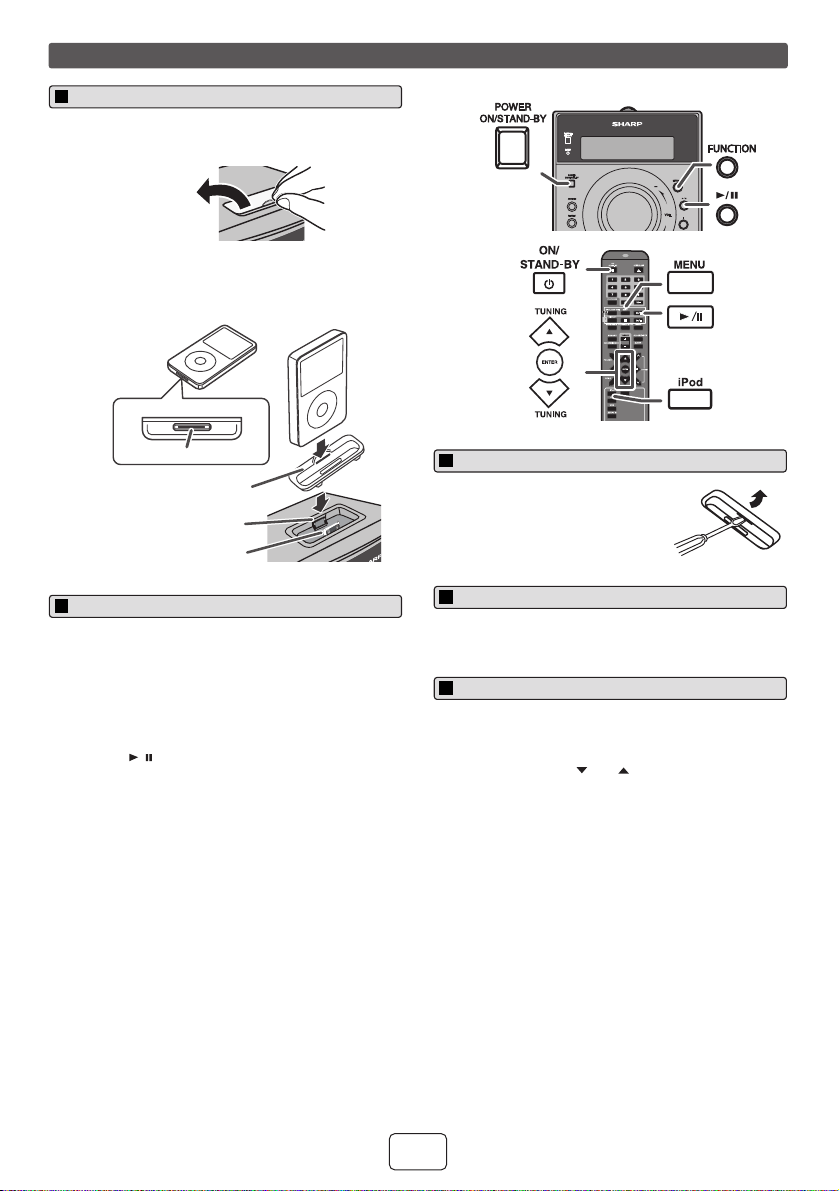
To insert iPod adaptor
Open the iPod cover by pulling up the tip.
1
pull up
2
Insert the iPod adaptor into the iPod dock and connect
your iPod.
iPod (bottom)
iPod
CD
USB
Dock connector
iPod adaptor
(not supplied)
iPod dock
iPod connector
iPod playback
1
Press the ON/STAND-BY button to turn the power on.
2
Press the iPod button on the remote control or
FUNCTION button repeatedly on the main unit to
select iPod function.
3
Insert iPod unit in iPod dock of main unit.
Press the / button to start playback.
4
Notes:
●
Once the iPod is connected to the unit it will begin
charging.
●
The iPod unit cannot be charged while the main unit is
in the stand-by mode or during USB mode.
●
Please make sure to set iPod unit to either NTSC or
PAL to match your TV signal. Please visit Apple’s
homepage for further information.
To remove iPod adaptor
Insert the tip of a screwdriver (“–”
type, small) into the iPod adaptor hole
as shown and lift upward to remove.
To disconnect iPod
Simply remove the iPod from the iPod dock. It is safe to do
so even during playback.
Navigating the iPod menus
Press the MENU button to view the menu on iPod unit.
1
Press it again to go back to previous menu.
Use the TUNING ( or ) button on the remote
2
control to select an item on the menu and then press
ENTER button.
Note:
When navigating the iPod menus with remote control, do
not operate any of the buttons on the iPod unit. The volume
level is adjusted by pressing the VOL (+ or –) button on the
main unit or the remote control. Adjusting the volume on
the iPod unit gives no effect.
iPod operation:
The operations described below depend on the generation
iPod you are using.
System on operation:
When the main unit is powered on, the iPod unit will
automatically power on when docked in the unit (including
TIMER function/exclude USB function).
System off (stand-by operation):
When the main unit is turned to stand-by mode, the docked
iPod unit will automatically turn to stand-by mode.
E-4
 Loading...