

Sharp XG-P25X,XG-P25XL,SAPS Professional Edition Version 1.5 Operation Manual
S
harp
A
dvanced
P
resentation
S
oftware
Professional Edition
Version 1.5
OPERATION MANUAL
Please read operation manual carefully before using your software.
Installing/
Uninstalling
Basic
Operations
Adjusting and
Controlling
Troubleshooting
Glossary/
Services
Saving a
Custom Image
Transferring Images

2
This software operates under the Microsoft Windows 95, 98, NT4.0 Workstation, Me, 2000
Professional, XP Home or Professional Edition operating systems. This manual references
only these Microsoft Windows Operating Systems and compatible mouse devices. For details
please refer to the Microsoft Windows operation manual.
If there are any terms in the manual you do not understand, please refer to “Glossary”
(page 99).
Note that Sharp Advanced Presentation Software Professional Edition is subject to
change without prior notice for upgrading and improvement.
The latest information on this software can be found at the following web site:
http://www.sharp-world.com/projector/
● Microsoft and Windows are registered trademarks of Microsoft Corporation, USA.
● All other brand or product names are trademarks or registered trademarks of
their respective holders.
● Great effort has been expended to ensure that the descriptions in this manual
are correct. Should you, however, come across an inconsistency, a telephone
call or letter to SHARP Corporation noting the questionable area would be highly
appreciated.
● This software is the property of SHARP Corporation and all related copyright and
other rights belong to SHARP Corporation.
● This manual may not be transferred wholly or in part in any form whatsoever
without prior written permission. Uses other than personal use are for copyright
reasons not permitted without the written permission of SHARP Corporation.
● SHARP Corporation shall in no event be liable for damages, loss of revenue or
third party claims arising from the use of the software.
● Software specifications and the contents of the operation manual are subject to
change without prior notice.
● Operating speed may slow down depending on computer operating environment
and processing capability.
● This software is based in part on the work of the Independent JPEG Group.
● The software uses LEAD Tools Pro developed by Bunka Orient Corp. and Lead
Technologies, Inc.

3
Foreword
This software is designed for presentations and for enhancement of
images projected from SHARP projectors. It includes the following
functions:
Projector Control Software:
Network Control
This function allows you to control the projector’s functions/
adjustments from your PC.
A maximum of 250 projectors or grouped projectors can be controlled
from a central PC/CONTROLLER.
The Video Wall function, which normally requires expensive devices,
can be performed without purchasing additional hardware.
When the backup function is used, the projector standing by as the
backup projector automatically turns on if an error occurs in the other
projector(s).
Image Enhancement Software:
Gamma Correction
This function allows you to set the projector’s Gamma values directly
from your PC. The ease of specifying preset values enables precise
custom brightness, contrast and color adjustments.
Please note that this function can only be performed via a Network
(COM and LAN port).
Support Software for Presentations:
Presentation Transfer
This mode transmits BMP and JPEG images to the projector. By
saving presentation slides as BMP or JPEG images, you can do an
entire presentation wirelessly.
Capture & Transfer
This mode allows you to transmit an image currently displayed on
your monitor. As simple as clicking the “Capture & Transfer” button
in the application.
Quick Transfer
This mode is similar to “Capture & Transfer” but it can easily be used
by clicking the “Right” mouse button.
● Wireless image transfer can only be used with the XG-NV5/6/7.
Wireless image transfer cannot be used to transfer images with other
models.
● The following models do not support JPEG image transfer:
XG-P20X, XG-P25X, XG-V10X, XG-V10W.
4
If you want to project your presentation slides saved as BMP or JPEG
files...
Presentation Transfer transfers images quickly &
easily in presentation format. (See page 82)
For Your Reference
There are five functions via the Network (COM and LAN port).
If you want to adjust image colors on the screen...
Gamma Correction controls the image colors via the
Network (COM and LAN port). (See page 76)
If you want to control the projector adjustments from your PC...
Network Control controls the projector adjustments
via the Network (COM and LAN port). (See page 24)
5
If you want to project an image of what is currently displayed on your monitor...
Capture & Transfer captures the image on the PC
monitor and transfers it to the projector. (See page 86)
If you want to project a single image quickly...
Quick Transfer captures the image on the PC monitor
and transfers it to the projector using the mouse as a
shortcut. (See page 88)

6
Contents
Foreword .................................................................................................... 3
For your reference .................................................................................... 4
Installing/Uninstalling
Required Hardware and Software............................................................9
Projector and PC Connections .............................................................. 10
Connecting Multiple Projectors with PC .............................................. 10
Connecting Single Projector with PC .................................................. 11
Installing the Software ............................................................................ 12
Setting up your PC for Infrared Communications (IrCOM) ................. 16
Uninstalling the Software ....................................................................... 19
Operations
Starting and Quitting .............................................................................. 20
Opening Modes ................................................................................... 20
Starting from the “Sharp Advanced Presentation Software
Professional Edition” icon in the Windows task tray ...................... 20
Starting from the Windows “Start” button....................................... 20
Starting from the “Sharp Advanced Presentation Software
Professional Edition” shortcut icon on the Windows desktop ........ 21
Selecting the Main Projector Model ..................................................... 21
Changing the Auto-Launch Setting ...................................................... 22
When “Auto-Launch ON” is selected ............................................. 22
When “Auto-Launch OFF” is selected ........................................... 22
Selecting the Mode .............................................................................. 22
Quitting ................................................................................................23
Help .....................................................................................................23
Setup for Controlling the Projectors .....................................................24
Setup flowchart ..............................................................................24
Selecting the Operation Mode ............................................................. 25
Scan Setting ........................................................................................ 26
Deleting the set IP address ............................................................ 27
Projector Setting .................................................................................. 28
Multiple Projector Operation Mode ................................................ 28
Single Projector Operation Mode (For the connection via
RS-232C or IrCOM) .......................................................................30
Single Projector Operation Mode (For the connection via LAN) .... 31
Controlling Multiple Projectors .............................................................. 32
Multiple Control ................................................................................... 32
Group Setting ...................................................................................... 35
To remove projectors belonging to groups from the group ............ 36
To delete a group ...........................................................................36
Password Setting .................................................................................... 37
Setting the Password .......................................................................... 37
Changing the Password ...................................................................... 39
Selecting the Keylock Level ................................................................... 40
Projector Name and Unique Name Setting ...........................................42

7
E-mail Sending Function ........................................................................44
Sender Setting ..................................................................................... 44
Sender settings .............................................................................. 45
E-mail Address Book Setting ............................................................... 46
E-mail message recipient address setting .....................................46
Registering the recipient’s e-mail address ..................................... 47
Specifying the recipient’s e-mail address ...................................... 48
Changing the registered recipient’s e-mail address....................... 48
Deleting the registered recipient’s e-mail address ......................... 49
Send E-mail Setting ............................................................................. 50
Automatic e-mail sending function settings ................................... 51
Periodic e-mail sending function settings ...................................... 51
Settings for additionally attached files ........................................... 52
Sending the “Projector Condition” e-mail message manually ........ 52
Error Notification Function .................................................................... 53
Projector Timer Control .......................................................................... 54
Backup Function ..................................................................................... 56
Backup Function Settings .................................................................... 56
Interval Time Setting ............................................................................ 57
Resetting after the backup function has been activated ................ 59
Controlling the Projector’s Adjustment ................................................60
Advanced Control for Adjustment ........................................................ 60
Multiple connections ...................................................................... 61
Single connection .......................................................................... 62
Basic Operation of the Adjustment Sheet ............................................ 63
“Set Up” Adjustment ............................................................................ 64
“Input PICT” Adjustment ...................................................................... 65
“Fine Sync” Adjustment ....................................................................... 66
“Audio” Adjustment .............................................................................. 67
“Options” Adjustment ........................................................................... 68
“C.M.S” Adjustment .............................................................................70
Save Control Setting and Load Control Setting ................................... 71
To make “Save Control Setting” ..................................................... 71
To make “Load Control Setting” ..................................................... 71
Video Wall Setting ................................................................................... 72
To fine-adjust the vertical and horizontal position ..........................73
To reset the current assignment settings .......................................73
Projector image assignment with the Video Wall Setting ............... 74
Settings and considerations regarding the Wide Video Wall ......... 75
Adjusting Images .................................................................................... 76
Gamma Correction ..............................................................................76
Adjusting the Gamma Curve ............................................................... 78
Setting the gamma correction area ................................................ 79
Saving the Gamma Correction Settings .............................................. 80
Loading the Gamma Correction Settings ............................................ 80
Resetting Gamma ............................................................................... 80

8
Setup for Transferring Images ............................................................... 81
Changing Compression Rate .............................................................. 81
Transferring Images................................................................................ 82
Presentation Transfer ..........................................................................82
To send a single image (“Send Image”) ......................................... 84
To send all the images (“Self Run”) ............................................... 85
Capture & Transfer .............................................................................. 86
To send another image .................................................................. 87
Quick Transfer .....................................................................................88
To send another image .................................................................. 89
Saving a Custom Image as Startup Image and Background Image ... 90
Appendix
Table of Functions by Model .................................................................. 92
Troubleshooting ...................................................................................... 93
List of Error Messages ........................................................................... 96
Glossary ................................................................................................... 99
Services ................................................................................................. 102

9
Installing/
Uninstalling
Required Hardware and Software
Sharp Advanced Presentation Software Professional Edition
requires the following hardware and software for operation.
PC running under Microsoft Windows 95, 98, NT4.0 Workstation,
Me, 2000 Professional, XP Home or Professional Edition
*
Operations are confirmed with Japanese and English versions of those
Windows operating systems only.
CPU 233 MHz Pentium or higher is recommended.
Display A 800 × 600 dot display capable of displaying
65,536 colors or more
Memory 64 MB or more (Windows 95/98/NT4.0/Me/2000)
128 MB or more (Windows XP)
Hard disk free space
50 MB or more
Interface RS-232C serial port for transferring images and
controlling the projector
CD-ROM drive
Note that this software may not operate normally if the serial port settings,
etc., are not correct when serial equipment other than projectors is also
connected to the computer.
Using infrared communications (IrCOM)
If you use the NV5/6/7 projector, transferring images can be performed
using infrared communications (IrCOM). The PC requires a built-in infrared
communications port or an external infrared communications adapter.
● For Windows 95 users:
Microsoft IrDA 2.0 (Infrared Driver) must be installed on your PC
to use this software. If it is not installed, you can obtain it from
the Microsoft’s site on the Internet.
● For Windows 98 users:
Microsoft Windows 98 supports IrDA communications as a
default program.
Please consult to Microsoft operation manual for more details.
● For Windows NT4.0 Workstation, Me, 2000 Professional , XP Home
or Professional Edition users:
Infrared communications (IrCOM) cannot be used.
● The transmission speed of infrared communications is
dependent on the IrDA version of the PC.
• IrDA 1.0 : 9,600 bps - 115.2 kbps
• IrDA 1.1 : 4 Mbps
Therefore the actual speed depends on the IrDA version your PC
supports.
See the computer’s instruction manual for the IrDA specifications.
We cannot guarantee that the software will operate on computers whose
motherboards have been changed or modified, or on computers that
the users have configured themselves.
10
Projector and PC Connections
This software requires the use of an RS-232C serial cable, LAN cable
or infrared communications. For details on PC connections, refer to the
projector’s operation manual.
CAUTION
Before connecting, be sure to turn both the projector and the computer
off. After making all connections, turn the projector on first. The computer
should always be turned on last.
● Please read the computer’s instruction manual carefully.
● If you use the NV5/6/7 projector, image transfer by using infrared
communications can be available.
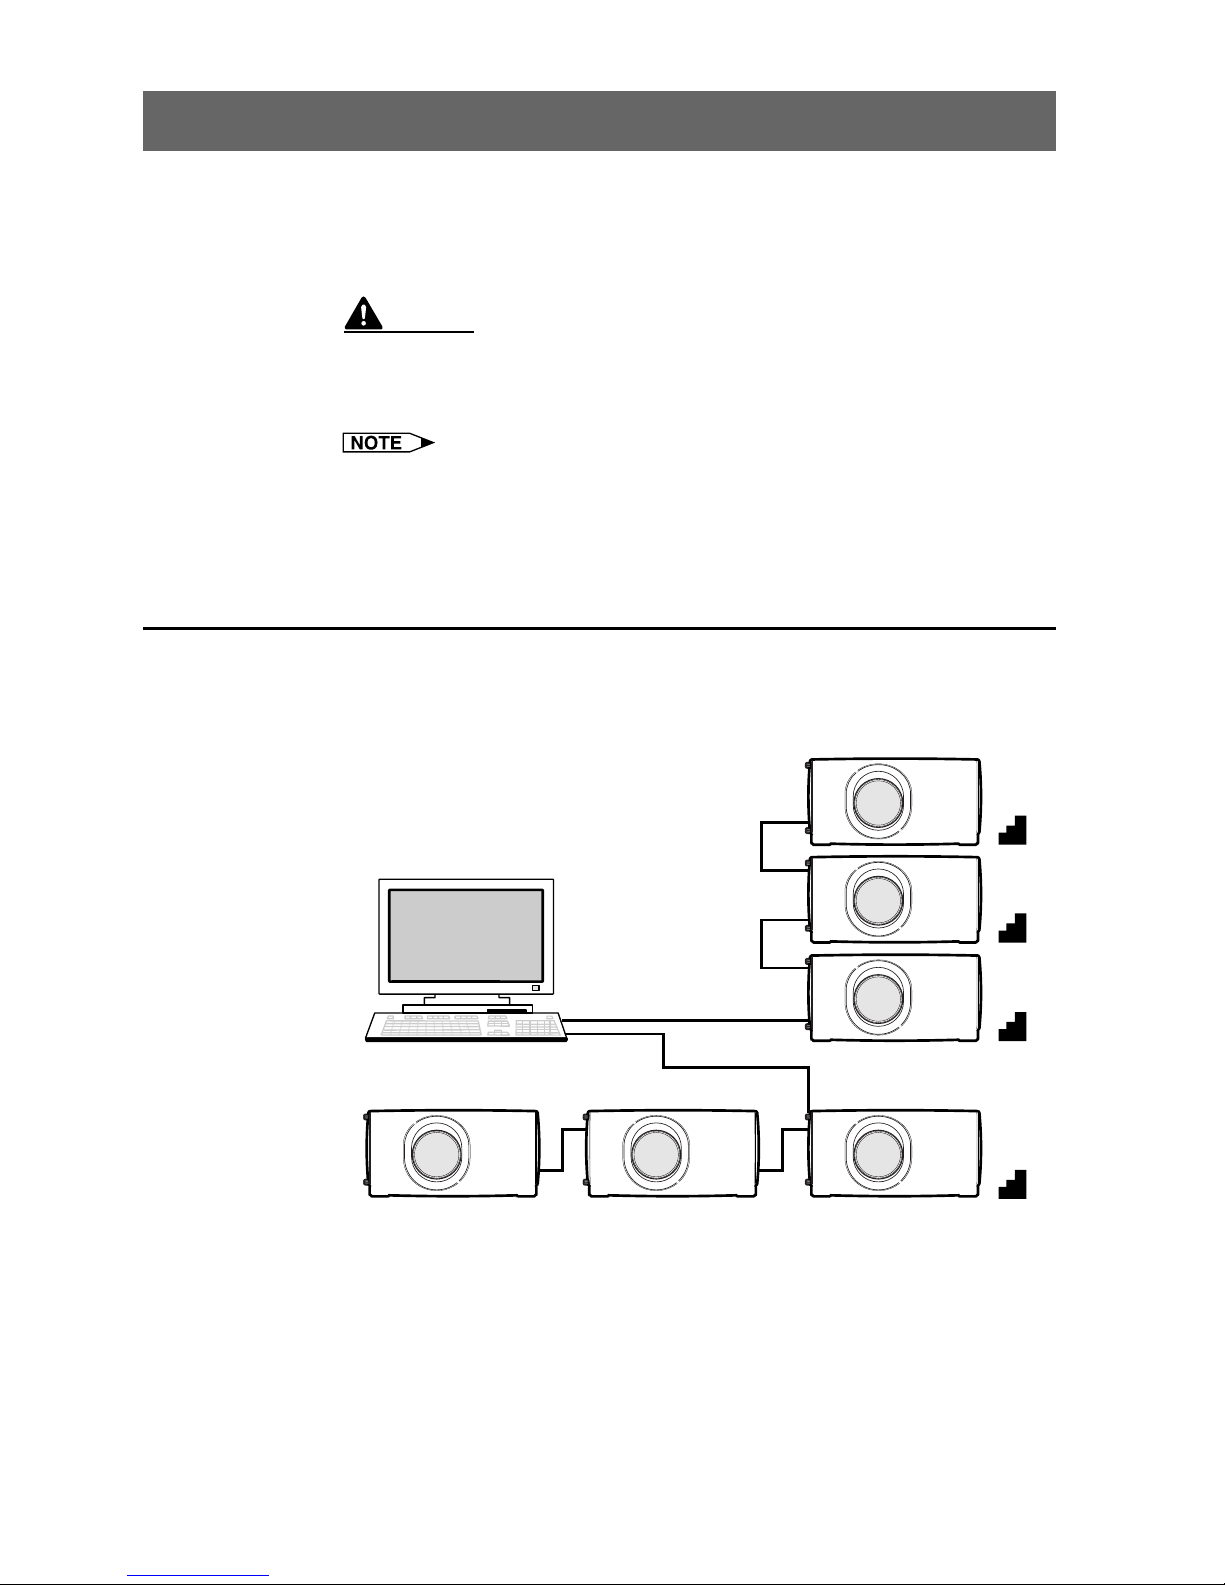
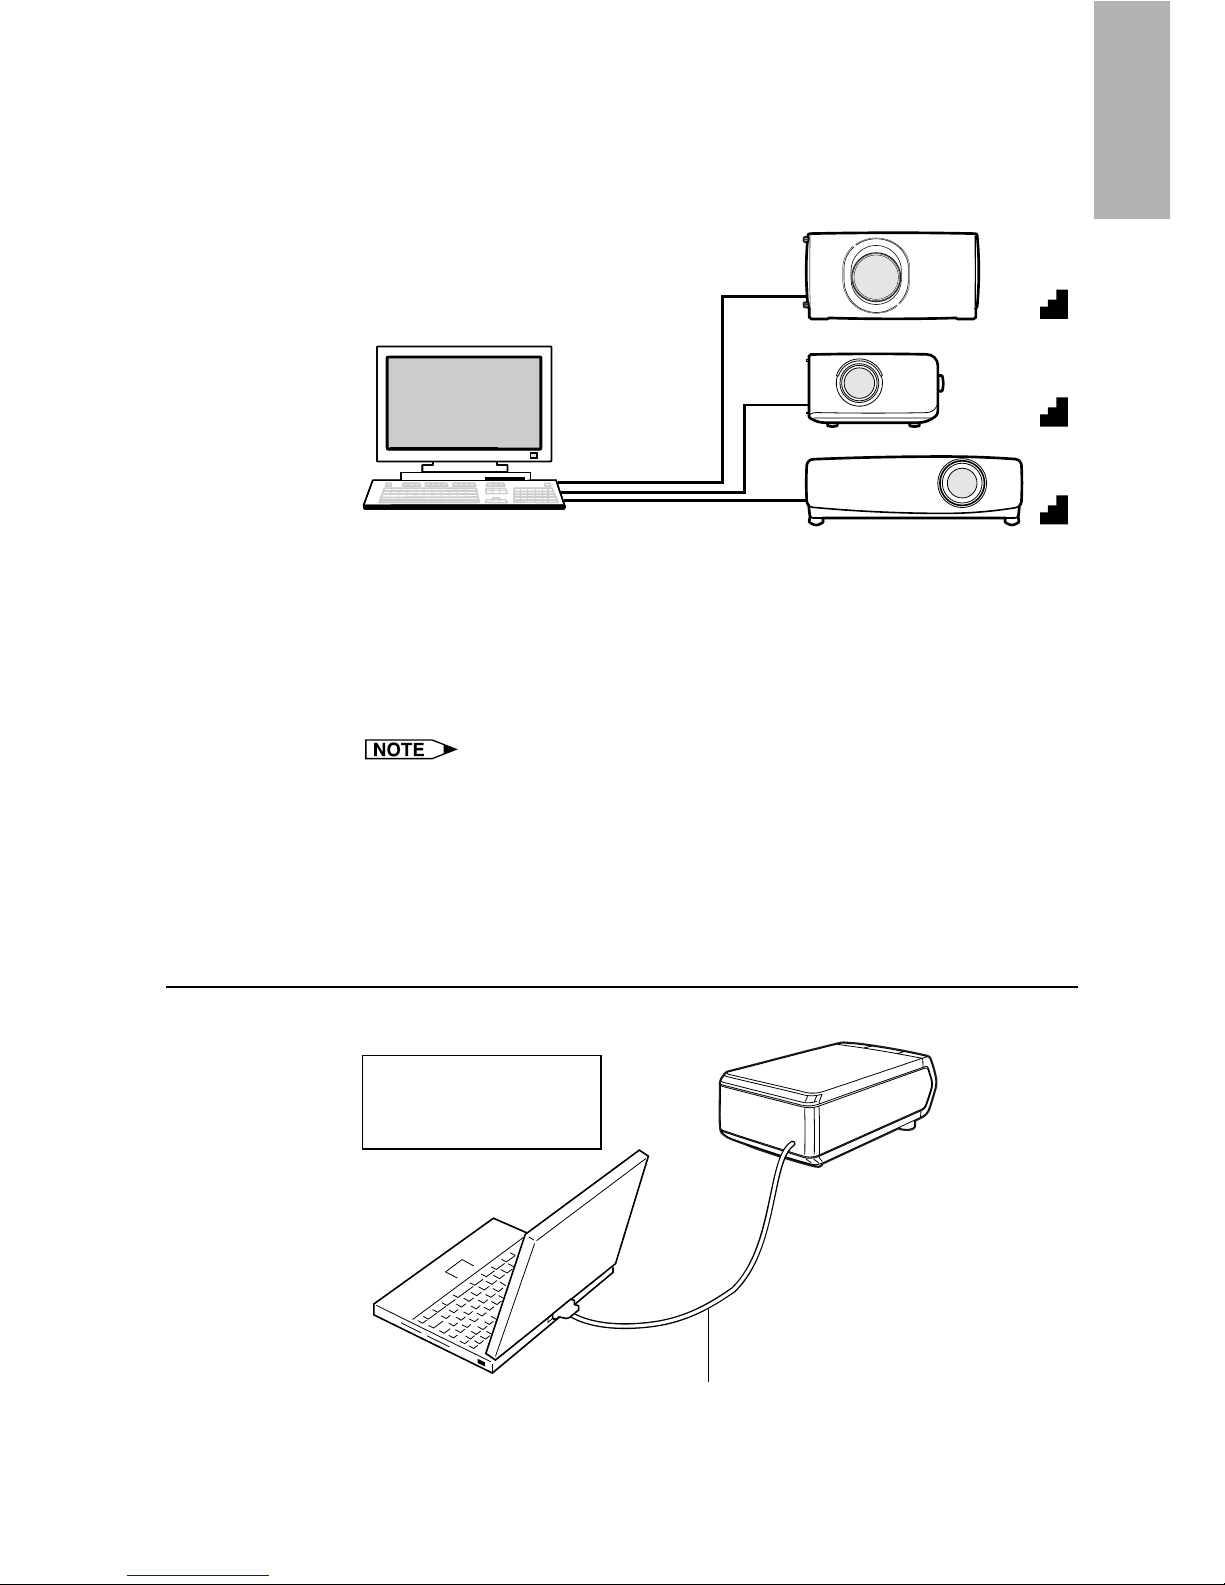
Connecting Multiple Projectors with PC
When connecting multiple projectors using ID numbers
(when forming a network system consisting only of XG-V10
Series and XG-P20X and XG-P25X projectors)
PC
OUT
OUT
OUT
IN
IN
IN
IN
IN
OUT
IN
3F
2F
1F
B1
● The connection between PC and the Projector or the Projector and
the Projector is possible by using the projector’s RS-232C IN/OUT
terminal.
● Up to 250 projectors can be connected.
● Up to 99 COM ports can be used.
● Daisy chain connections are possible.
● LAN connections are possible only with models from the XG-V10
series with the optional extension board (AN-L10T) installed.
● See “Table of Functions by Model” (page 92) about the projector’s
available functions.
11
Installing/
Uninstalling
When connecting multiple projectors without using ID
numbers (When forming a network including projectors other
than the XG-V10 Series and XG-P20X and XG-P25X
projectors)
PC
IN
IN
IN
PCPC
3F
2F
1F
● Up to 99 projectors can be connected.
● Up to 99 COM ports can be used.
● Daisy chain connections are not possible.
● LAN connections are not possible.
● See “Table of Functions by Model” (page 92) about the projector’s
available functions.
Connect one projector per COM port.
If you want to use the connection via the COM ports, the same number
of COM ports as the projectors is needed. If the number of COM ports
built in your PC is less than the number of projectors, purchase the
extension board (commercially available) to add COM ports to your PC.
Connecting Single Projector with PC
RS-232C connection
Refer to the
projector’s operation
manual for details.
Optional RS-232C cable (cross type)

12
Installing the Software
This software can be installed using the installation program supplied
on the “Sharp Advanced Presentation Software Professional Edition
CD-ROM”.
1 Make sure that this software is suited for your computer.
For details, refer to “Required Hardware and Software” (page 9).
2 Quit all running applications before installing this
software.
Be sure to quit all other applications so that no problems occur with
the installer.
3 Delete the previous version of the Sharp Advanced
Presentation Software.
For details, refer to “Uninstalling the Software” (page 19).
4 Insert the “Sharp Advanced Presentation Software
Professional Edition CD-ROM” in the CD-ROM drive.
5 Double click the “My Computer” icon or select Windows
Explorer.
6 Double click the CD-ROM drive icon in the “My Computer”
or in Windows Explorer.
7 Double click the “SAPS_PRO” folder.
8 Double click the “SETUP1.EXE” icon.
| The “Sharp Advanced Presentation Software Professional
Edition” Opening Image will be displayed.
13
Installing/
Uninstalling
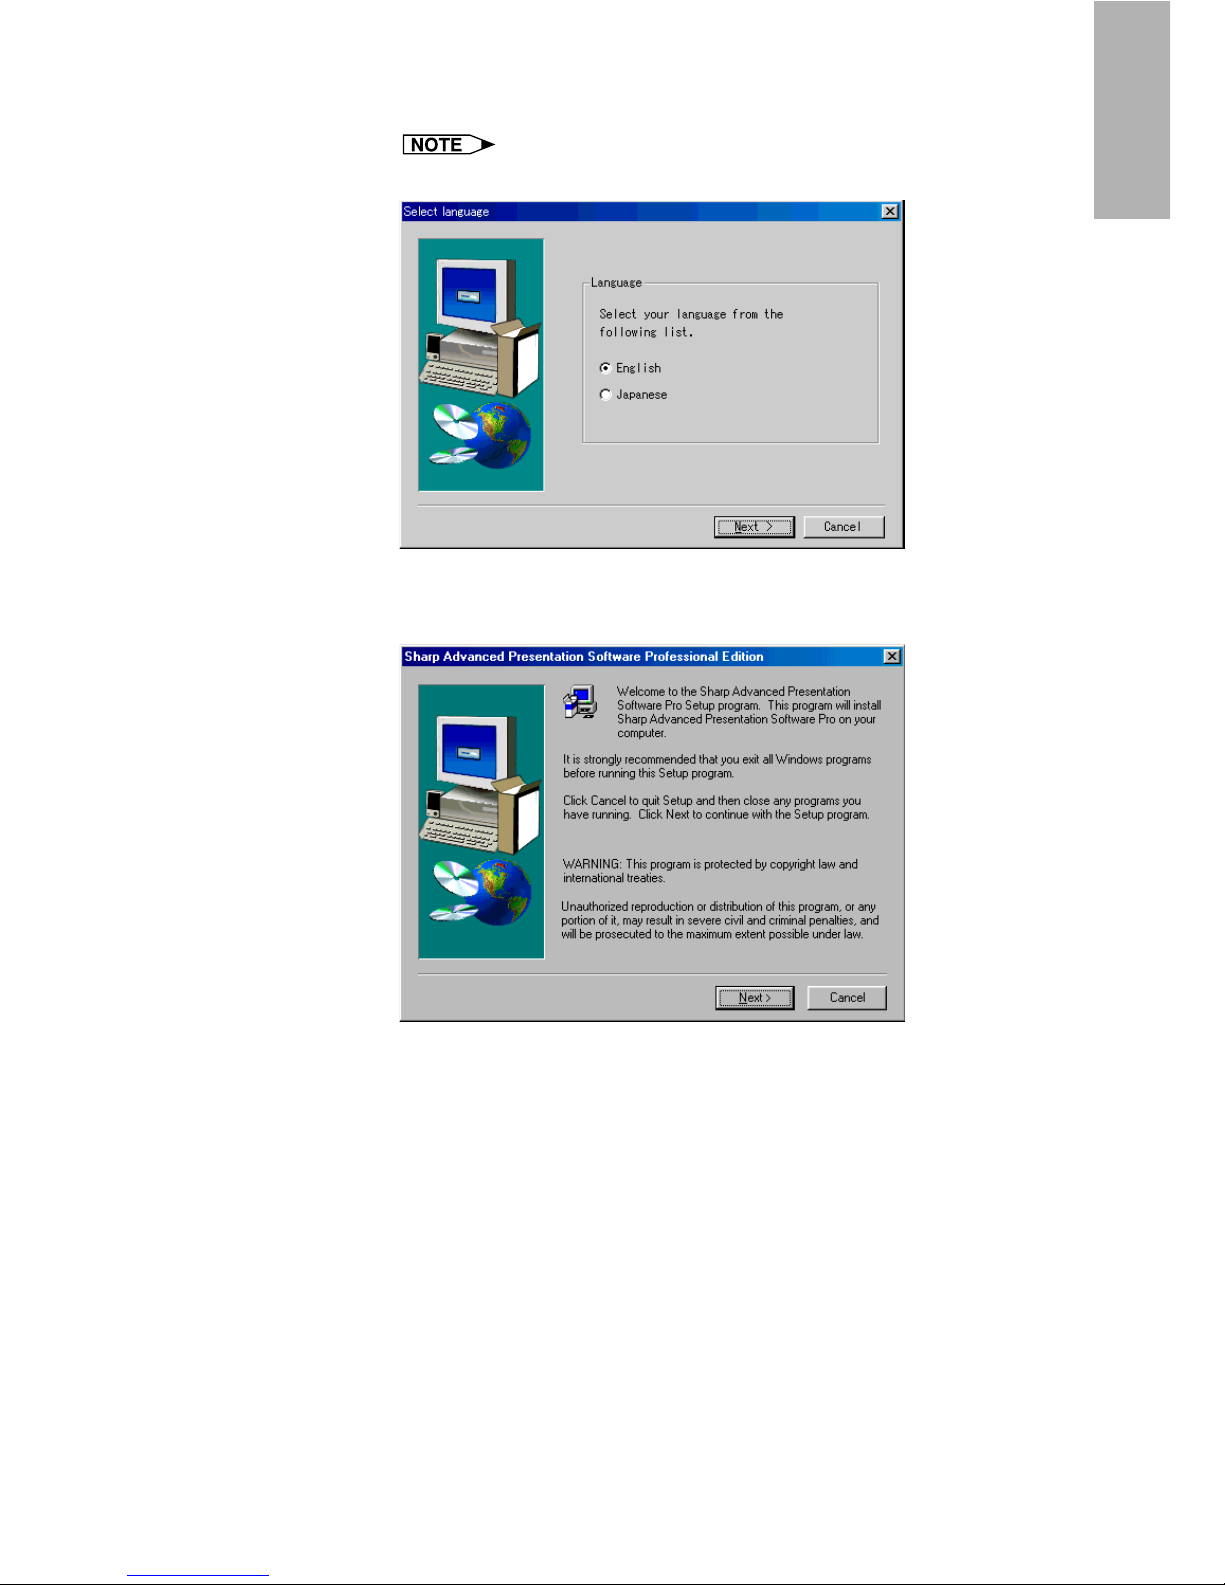
9 Select the language of the software to be installed.
Select a language appropriate for your computer’s environment.
| The “Sharp Advanced Presentation Software Professional
Edition” dialog box will open.
14
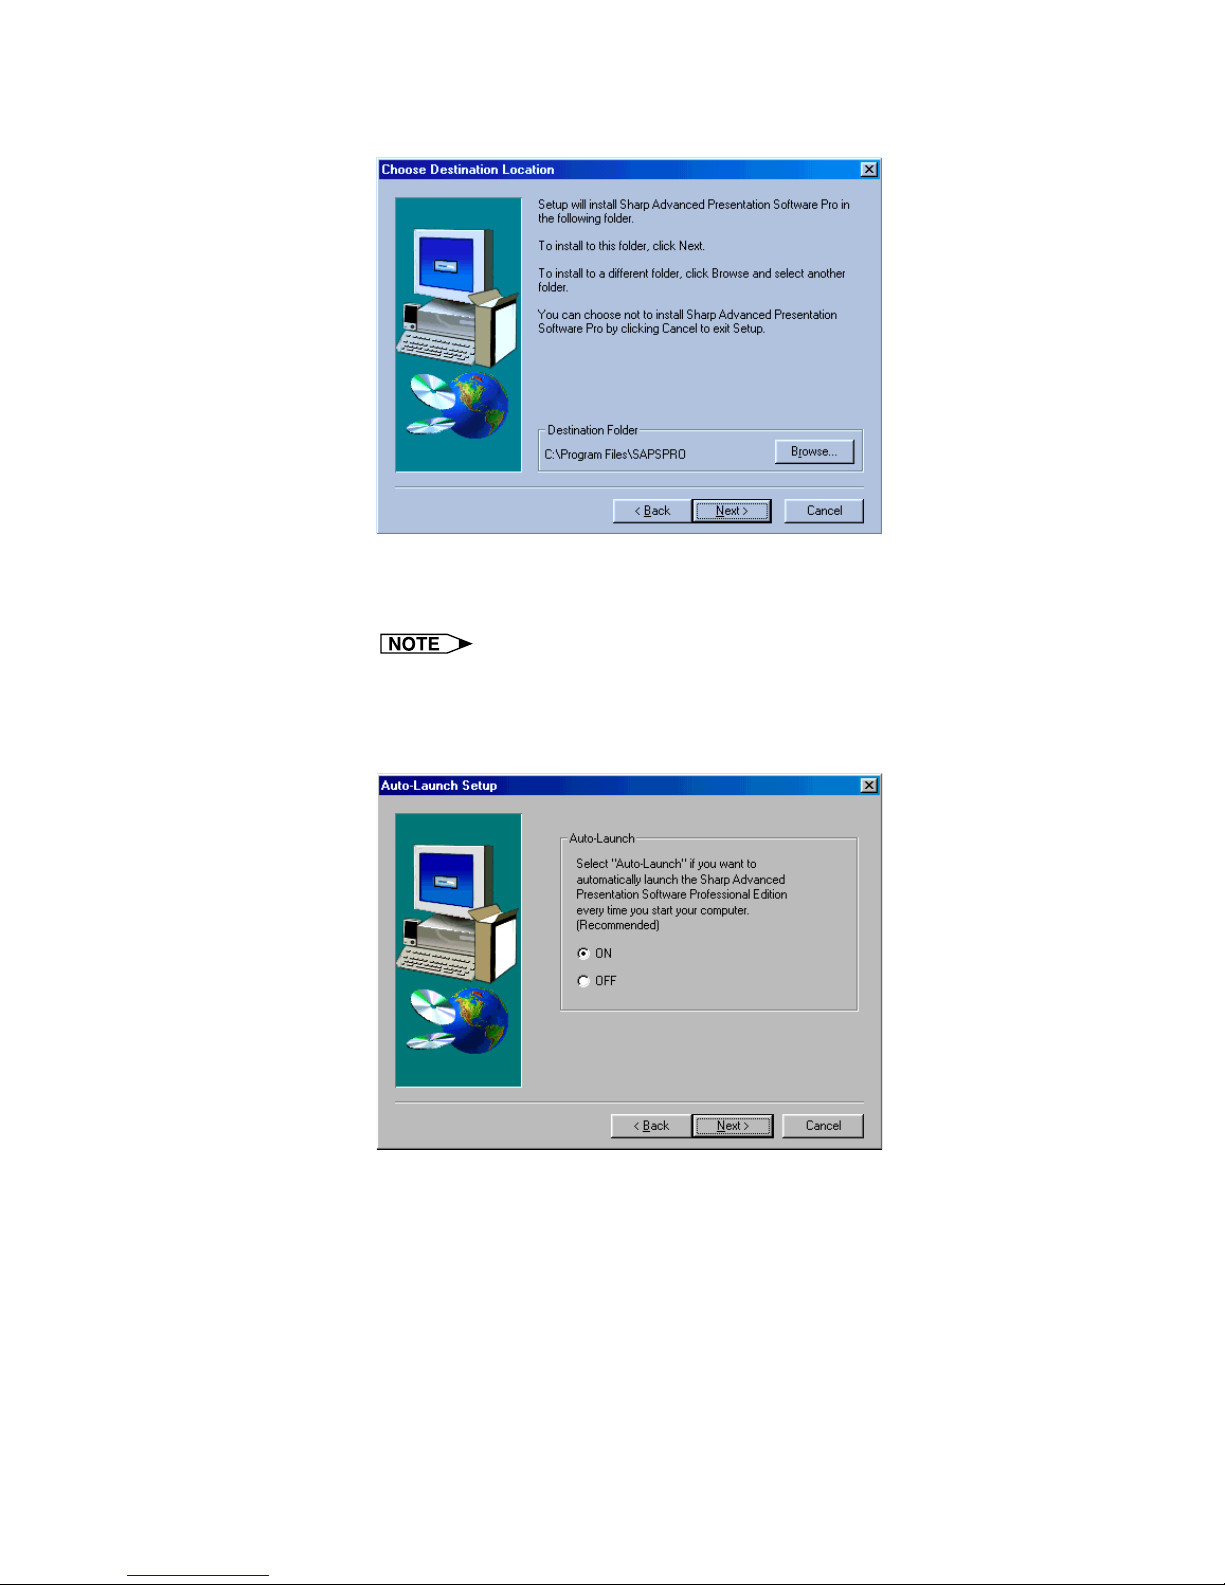
10 Click “Next>”.
| The “Choose Destination Location” dialog box will open.
11 The folder under which the software will be installed is
displayed in “Destination Folder”.
To select another folder, click “Browse...”.
12 Click “Next>”.
| “Auto-Launch Setup” dialog box will open.

15
Installing/
Uninstalling
13 Click “ON” under “Auto-Launch” to automatically launch
the software every time you start your PC. (Recommended)
If you set “Auto-Launch ON”, a “Sharp Advanced Presentation
Software Professional Edition” icon will appear in the Windows
task tray. If not, use the “Sharp Advanced Presentation
Software Professional Edition” shortcut icon on the desktop or
the Windows “Start” menu.
14 Click “Next>”.
| Installation will start.
| When the installation is completed, the “Setup Complete” dialog
box will open. To use the program immediately, please restart
your computer.
15 Click “Finish”.
16
Setting up your PC for Infrared Communications (IrCOM)
If you use the NV5/6/7, image transfer can be performed using infrared
communications (IrCOM).
To use infrared communications, set the PC’s port for infrared
communications according to the following steps.
Infrared communications (IrCOM) cannot be used with Windows NT4.0
Workstation, Me, 2000 Professional, XP Home or Professional Edition.
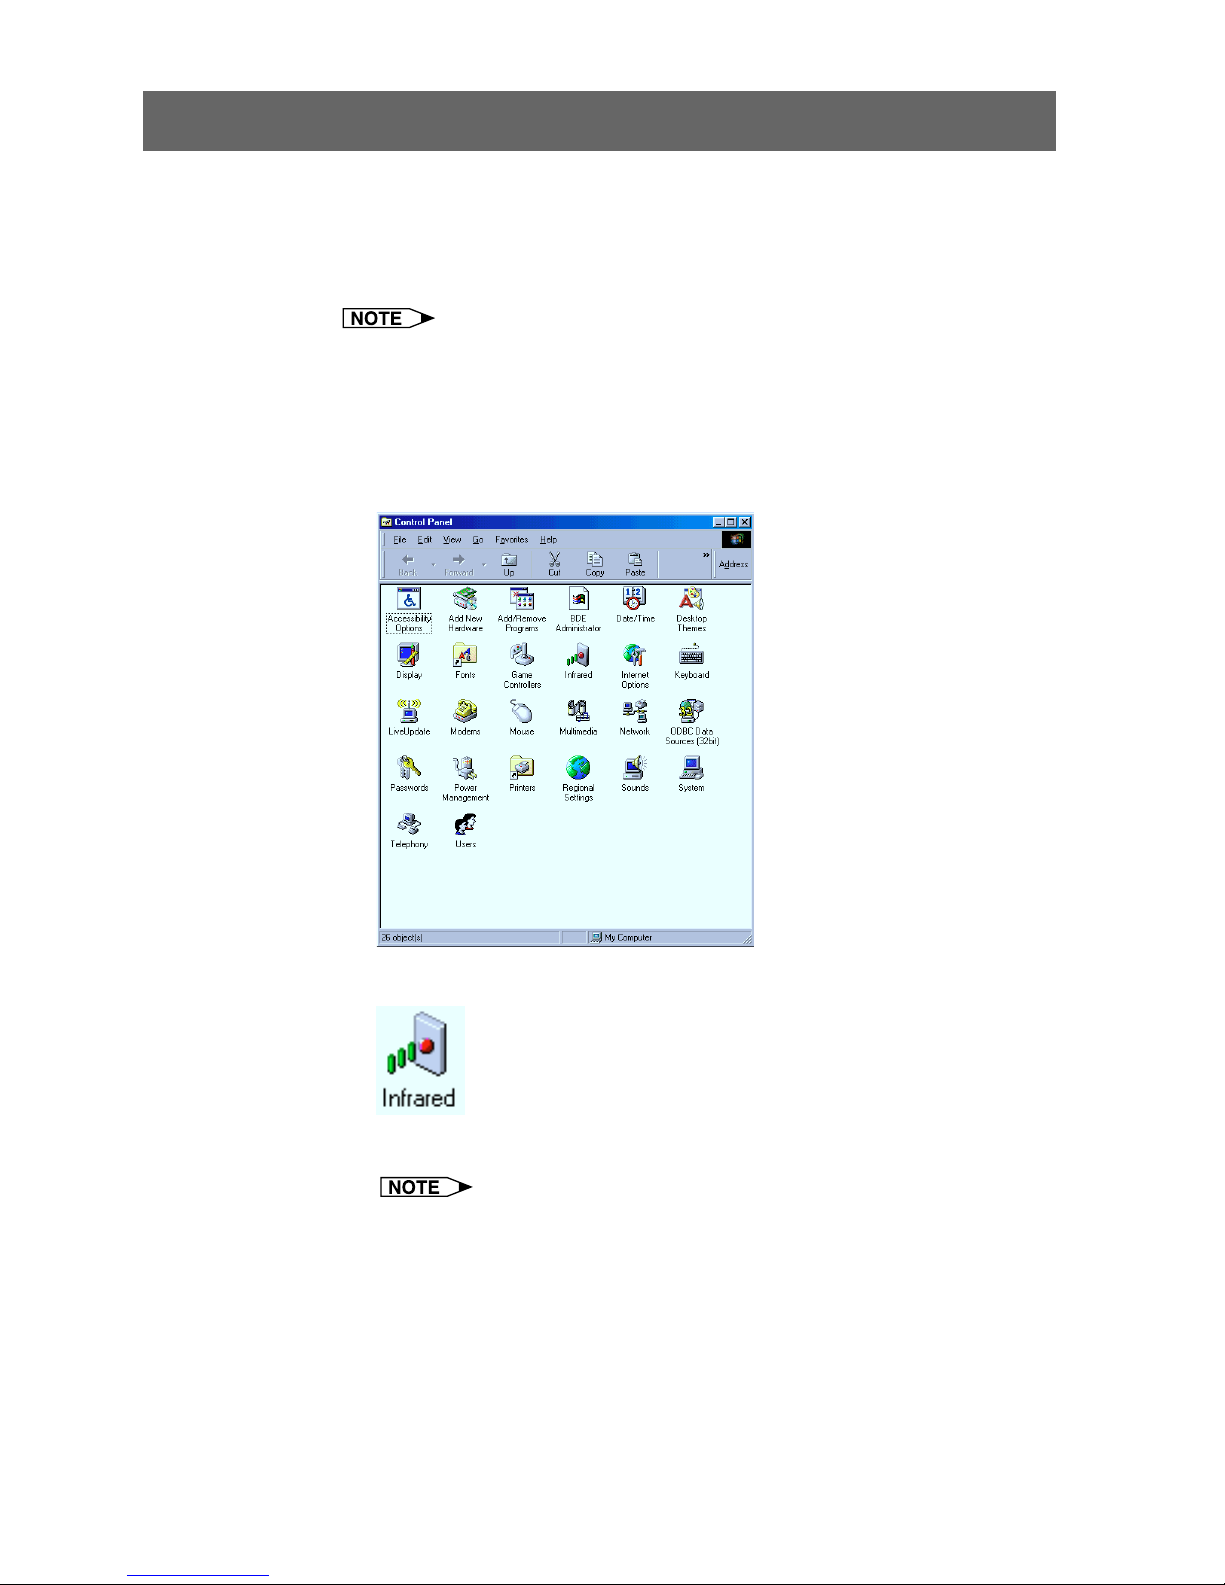
1 Click “Start”, and then click “Settings”, then select
“Control Panel”.
| The “Control Panel” window will open.
2 Double click the “Infrared” icon.
| The “Infrared Monitor” window will open.
For Windows 95 users:
If an “Infrared” icon is not displayed the Microsoft IrDA 2.0 (Infrared
Driver) is not installed on the computer.
You can obtain it from the Microsoft’s site on the Internet.
17
Installing/
Uninstalling
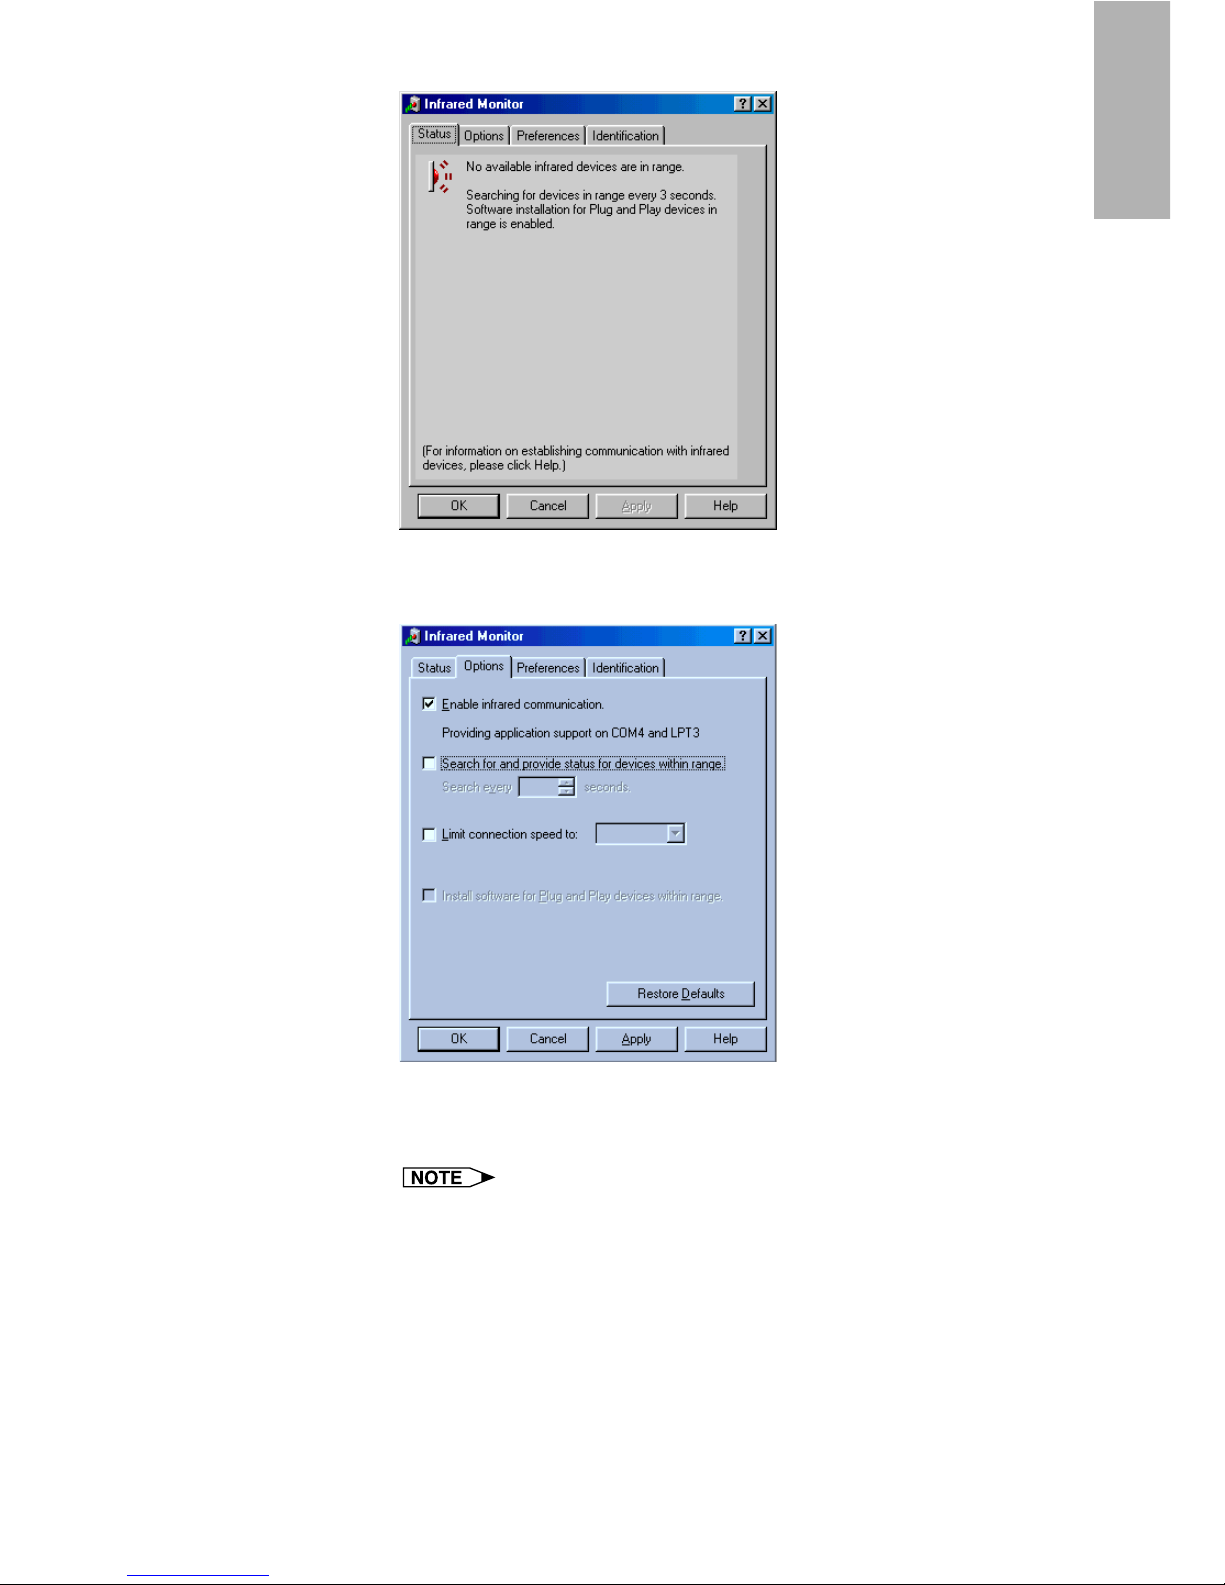
3 Click the “Options” tab.
| The “Options” sheet will open.
4 Check the “Enable infrared communication” check box.
Select the port used for infrared communications.
Refer to the PC’s instruction manual for the appropriate port settings.
Do not check the “Search for and provide status for devices within
range” and “Limit connection speed to” check box.

18
5 Click the “Preferences” tab.
| The “Preferences” sheet will open.
6 Click “Restore Defaults”.
The system will return to standard settings.
7 Click “OK”.
| The “Infrared Monitor” window will close and the “Infrared”
icon will appear in the Windows task tray.
Infrared icon
About the “Infrared” icon
Enable: Ready to transfer
Disable: Not ready to transfer
19
Installing/
Uninstalling
Uninstalling the Software
Always uninstall Sharp Advanced Presentation Software Professional
Edition, when installing a new or updated version.
1 Make sure that the software is closed before proceeding.
Before uninstalling Sharp Advanced Presentation Software
Professional Edition, the “Auto-Launch” setting must be “OFF”.
For details, see page 22.
2 Click “Start”, then click “Settings”, and then select
“Control Panel”.
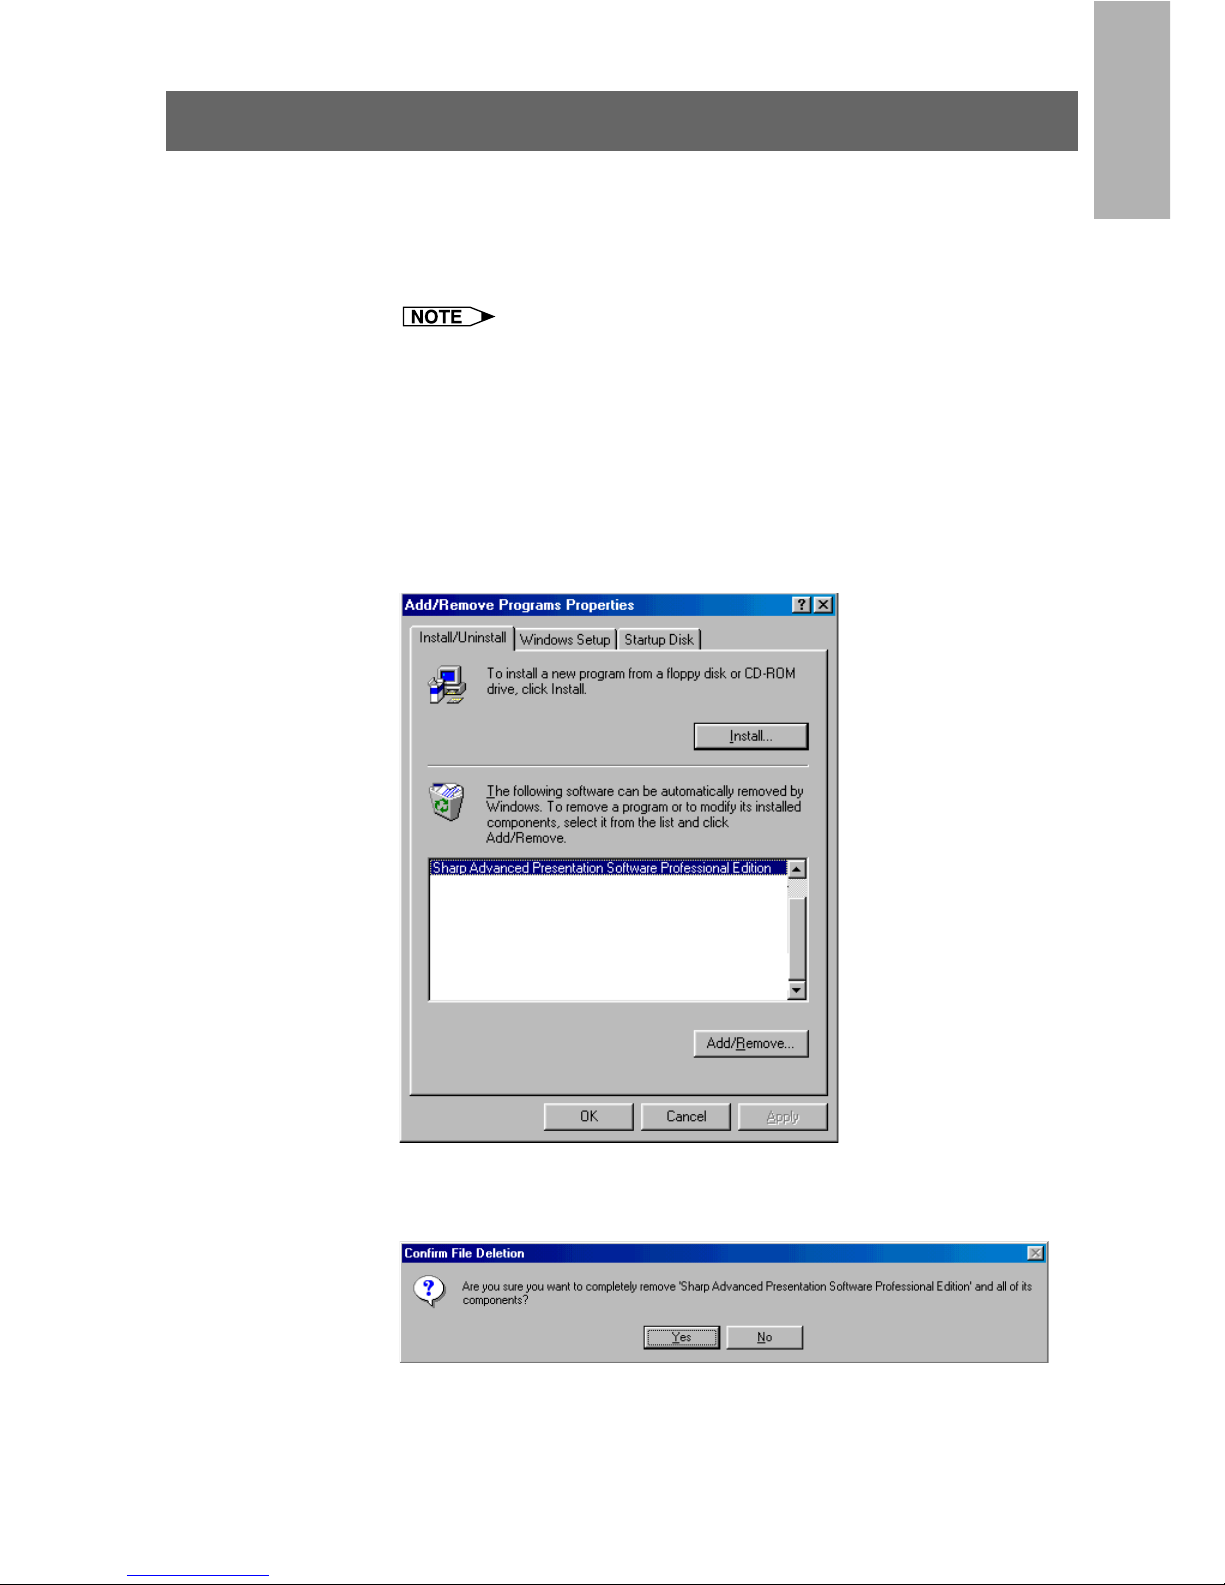
3 Double click the “Add/Remove Programs” icon.
4 Click the “Sharp Advanced Presentation Software
Professional Edition”.
5 Click the “Add/Remove...”.
6 Click the “Yes”.
7 When uninstallation is correctly completed, “Uninstall
successfully completed” will appear. Click “OK”.

20
Starting and Quitting
Opening Modes
Before starting the software, make sure that the projector and the PC are
correctly set up. There are three ways to start up the software.
Starting from the “Sharp Advanced Presentation Software
Professional Edition” icon in the Windows task tray
This icon appears when “Auto-Launch ON” is selected. See page 22
for “Auto-Launch” setting.
1 Start up the projector.
Make sure to turn the projector on first. The computer should always
be turned on last.
The projector must be in IrCOM mode to receive the images. Press
the “IrCOM” button on the projector or the remote control.
For NV5/6/7 users:
To use infrared communications, select the “IrCOM” mode, referring
to the projector operation manual for details.
2 Start up the PC. Click the “Sharp Advanced Presentation
Software Professional Edition” icon in the Windows task
tray.
| The “Sharp Advanced Presentation Software Professional
Edition” window will open.
Starting from the Windows “Start” button
1 Start up the projector.
Make sure to turn the projector on first. The computer should always
be turned on last.
The projector must be in IrCOM mode to receive the images. Press
the “IrCOM” button on the projector or the remote control.
For NV5/6/7 users:
To use infrared communications, select the “IrCOM” mode, referring
to the projector operation manual for details.
21
Basic
Operations
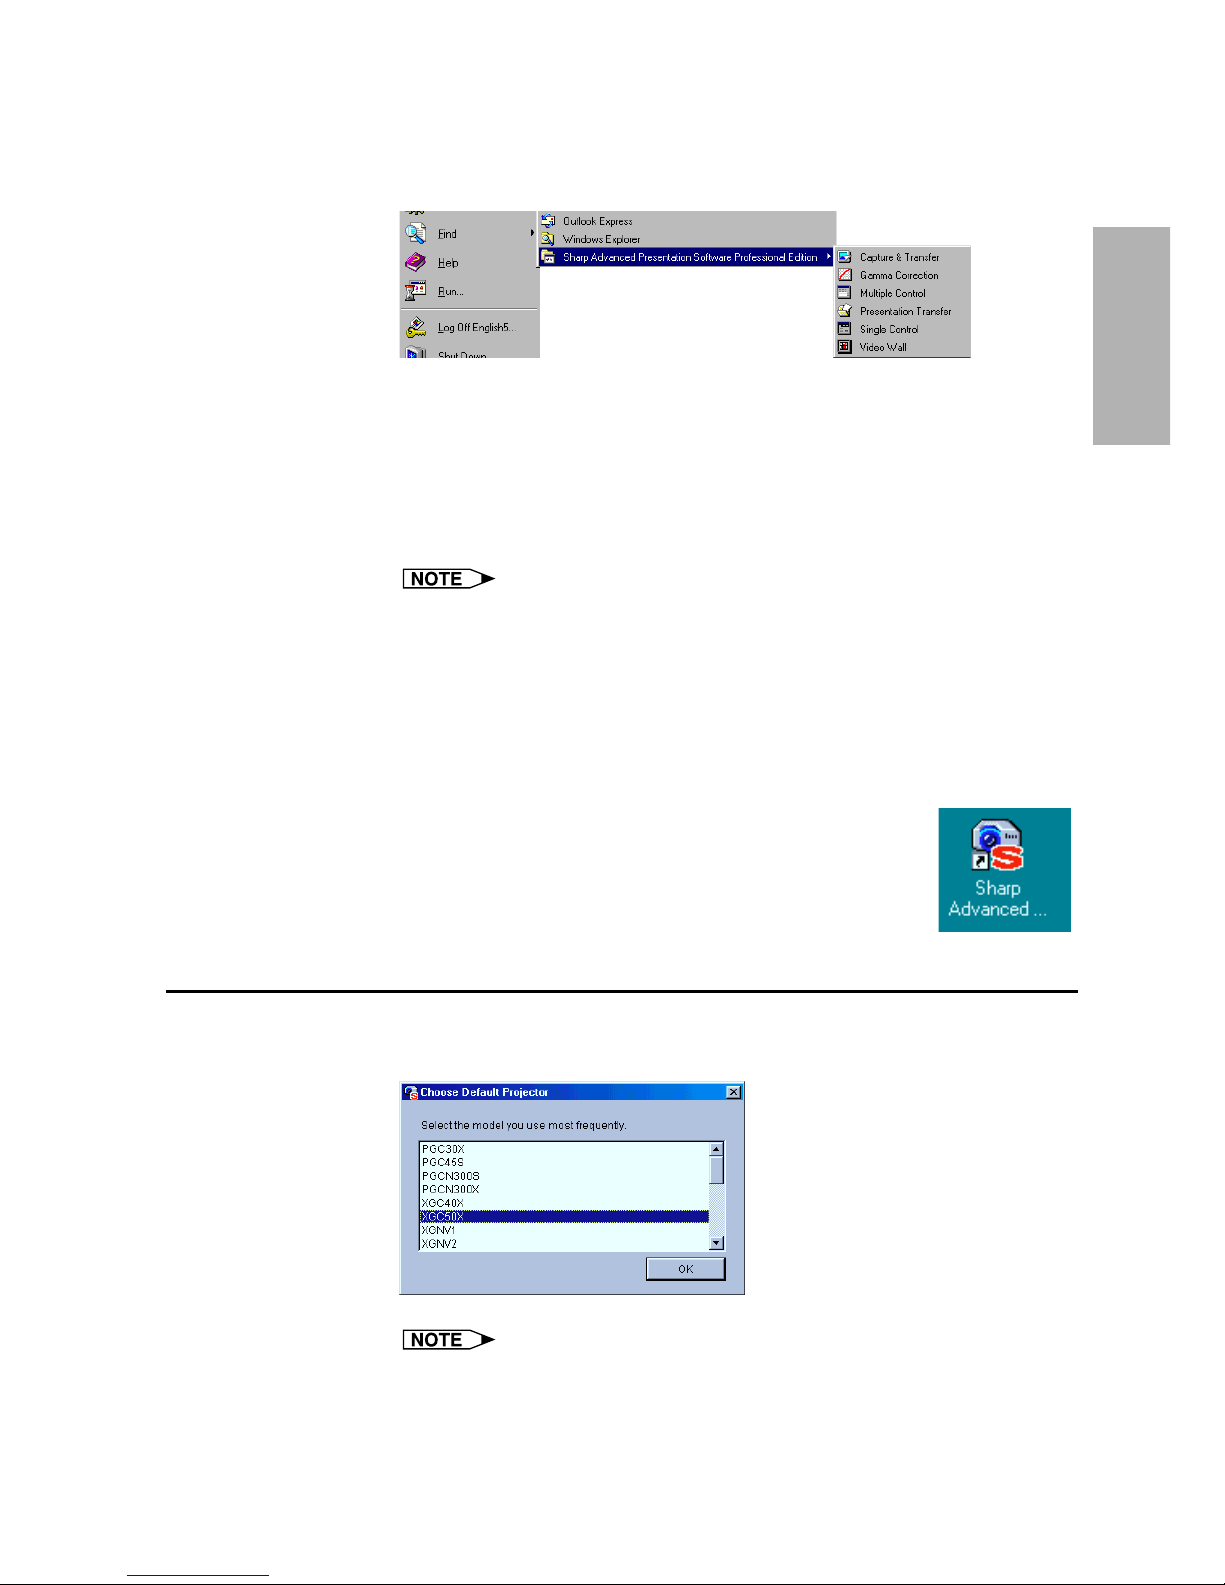
2 Start up the PC. Click the “Start” button, set the pointer
to “Programs” and then “Sharp Advanced Presentation
Software Professional Edition”.
| The mode dialog box will open.
Starting from the “Sharp Advanced Presentation Software
Professional Edition” shortcut icon on the Windows desktop
1 Start up the projector.
Make sure to turn the projector on first. The computer should always
be turned on last.
The projector must be in IrCOM mode to receive the images. Press
the “IrCOM” button on the projector or the remote control.
For NV5/6/7 users:
To use infrared communications, select the “IrCOM” mode, referring
to the projector operation manual for details.
2 Double click the “Sharp Advanced Presentation Software
Professional Edition” shortcut icon on the Windows
desktop.
| The mode dialog box will open.
Selecting the Main Projector Model
1 Select the main projector model you want to use.
This dialog box appears the first time you start the “Sharp Advanced
Presentation Software Professional Edition”.
If you want to change the projector model, you can change it on the
“Projector Setting” dialog box (page 28).
22
Changing the Auto-Launch Setting
The default “Auto-Launch” setting is “ON”. This automatically starts
the software when the PC starts up. You can change the setting as
follows.
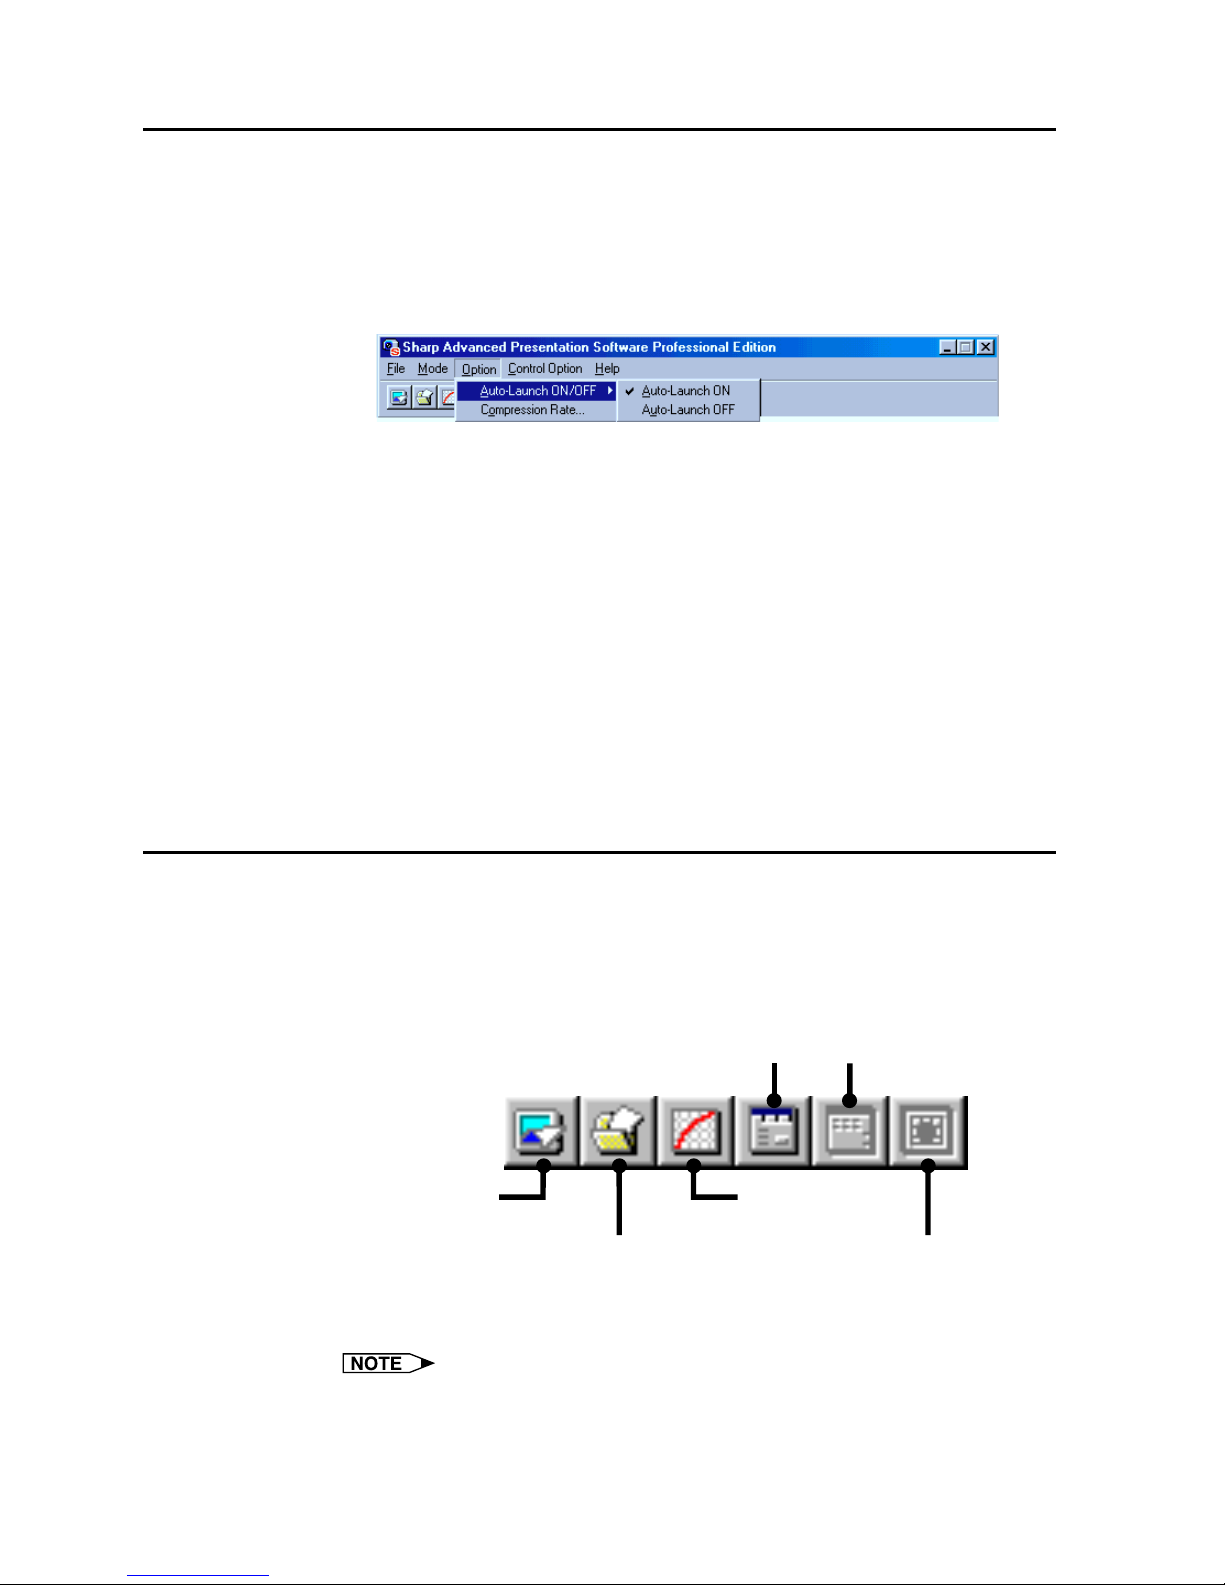
1 Click the “Option” menu, and select “Auto-Launch ON/OFF”.
2 Select the setting as required.
When “Auto-Launch ON” is selected
● The “Sharp Advanced Presentation Software Professional
Edition” icon is displayed in the Windows task tray.
● The software is automatically launched when the PC starts up.
When “Auto-Launch OFF” is selected
● The “Sharp Advanced Presentation Software Professional
Edition” icon is removed from the Windows task tray.
● In this case the software must be started from the “Start” menu or
the “Sharp Advanced Presentation Software Professional
Edition” shortcut icon on the Windows desktop.
Selecting the Mode
1 Start up the projector.
2 Select the mode you require from the “Mode” menu. Or
you can use the shortcut buttons below the menu bar.
Gamma
Correction
Single
Control
Presentation
Transfer
Capture &
Transfer
Multiple
Control
Video Wall
Setting
| The mode dialog box will open.
The selectable modes depend on the operation mode set at “Selecting
the Operation Mode” (page 25).
For details, refer to the “Table of Functions by Model” (page 92).
23
Basic
Operations
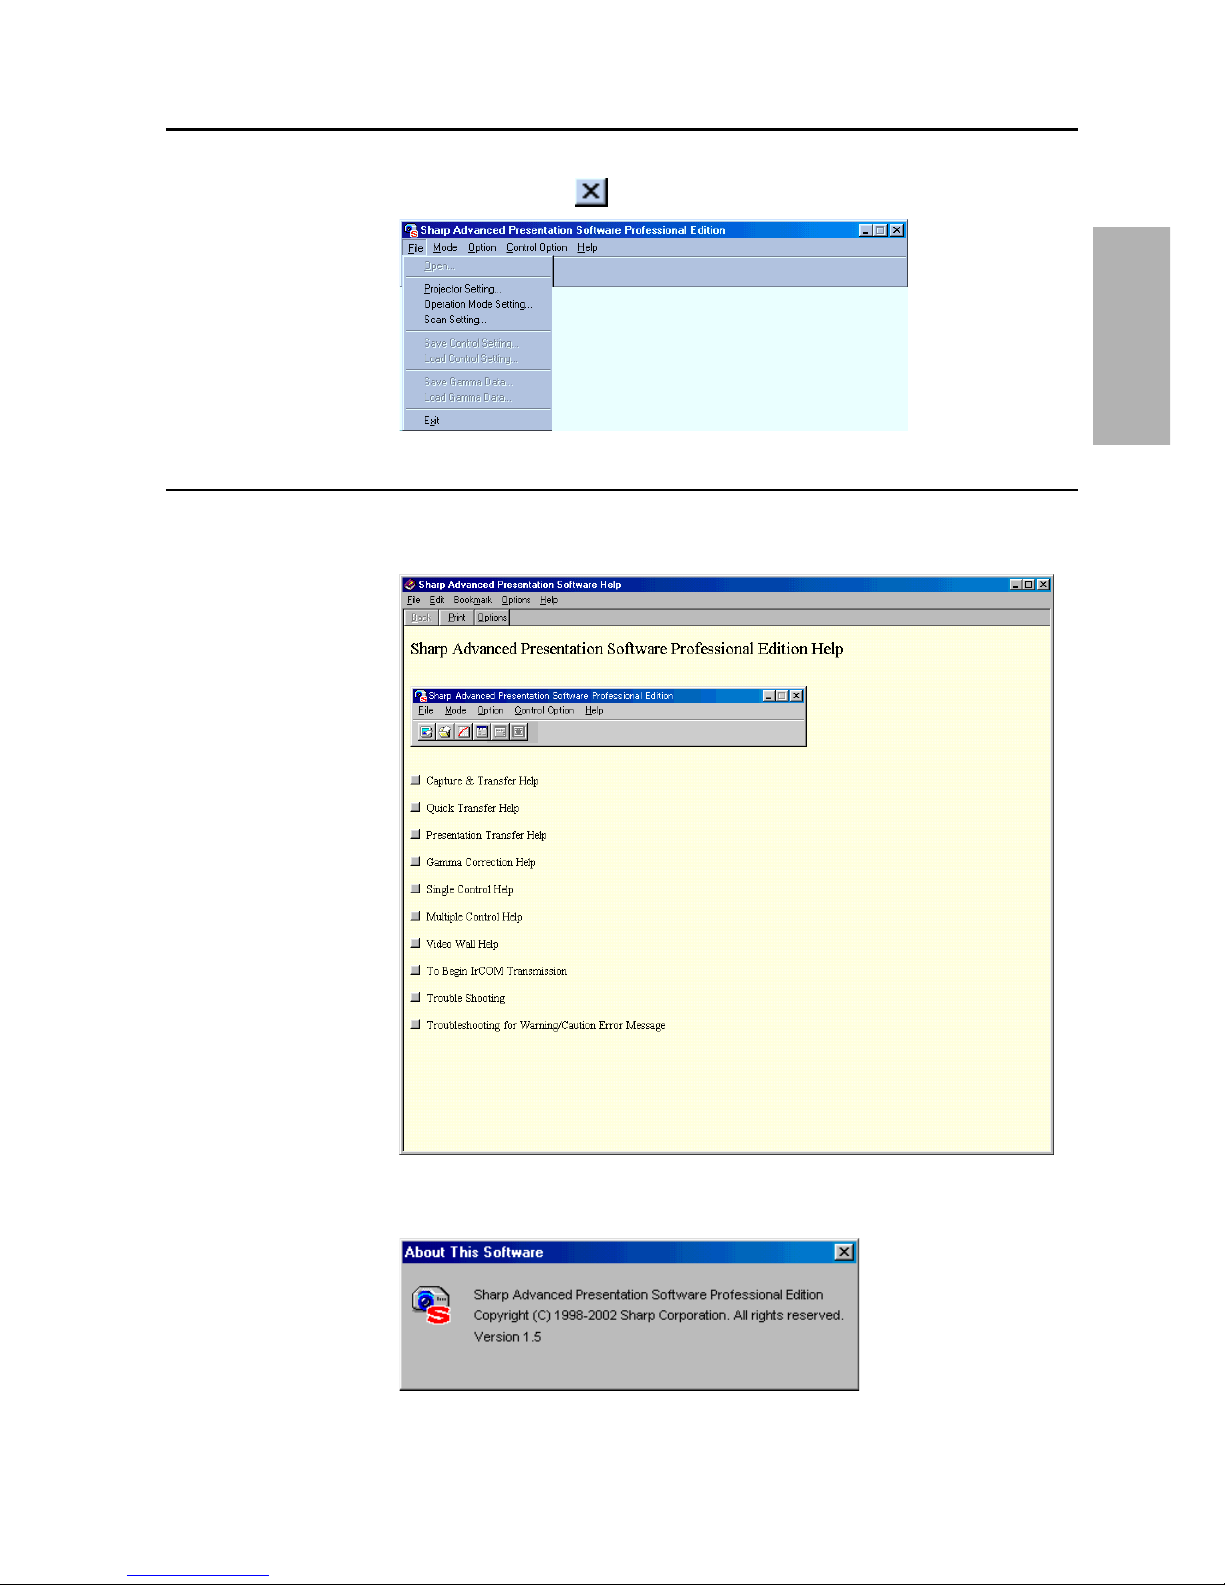
Quitting
Click the “File” menu, and select “Exit”.
Or you can use the
button.
Help
To view Help, click the “Help” menu. When the “Help” window opens,
click the desired item in the Help list.
To check the software version, select “About This Software” from the
“Help” menu.
24
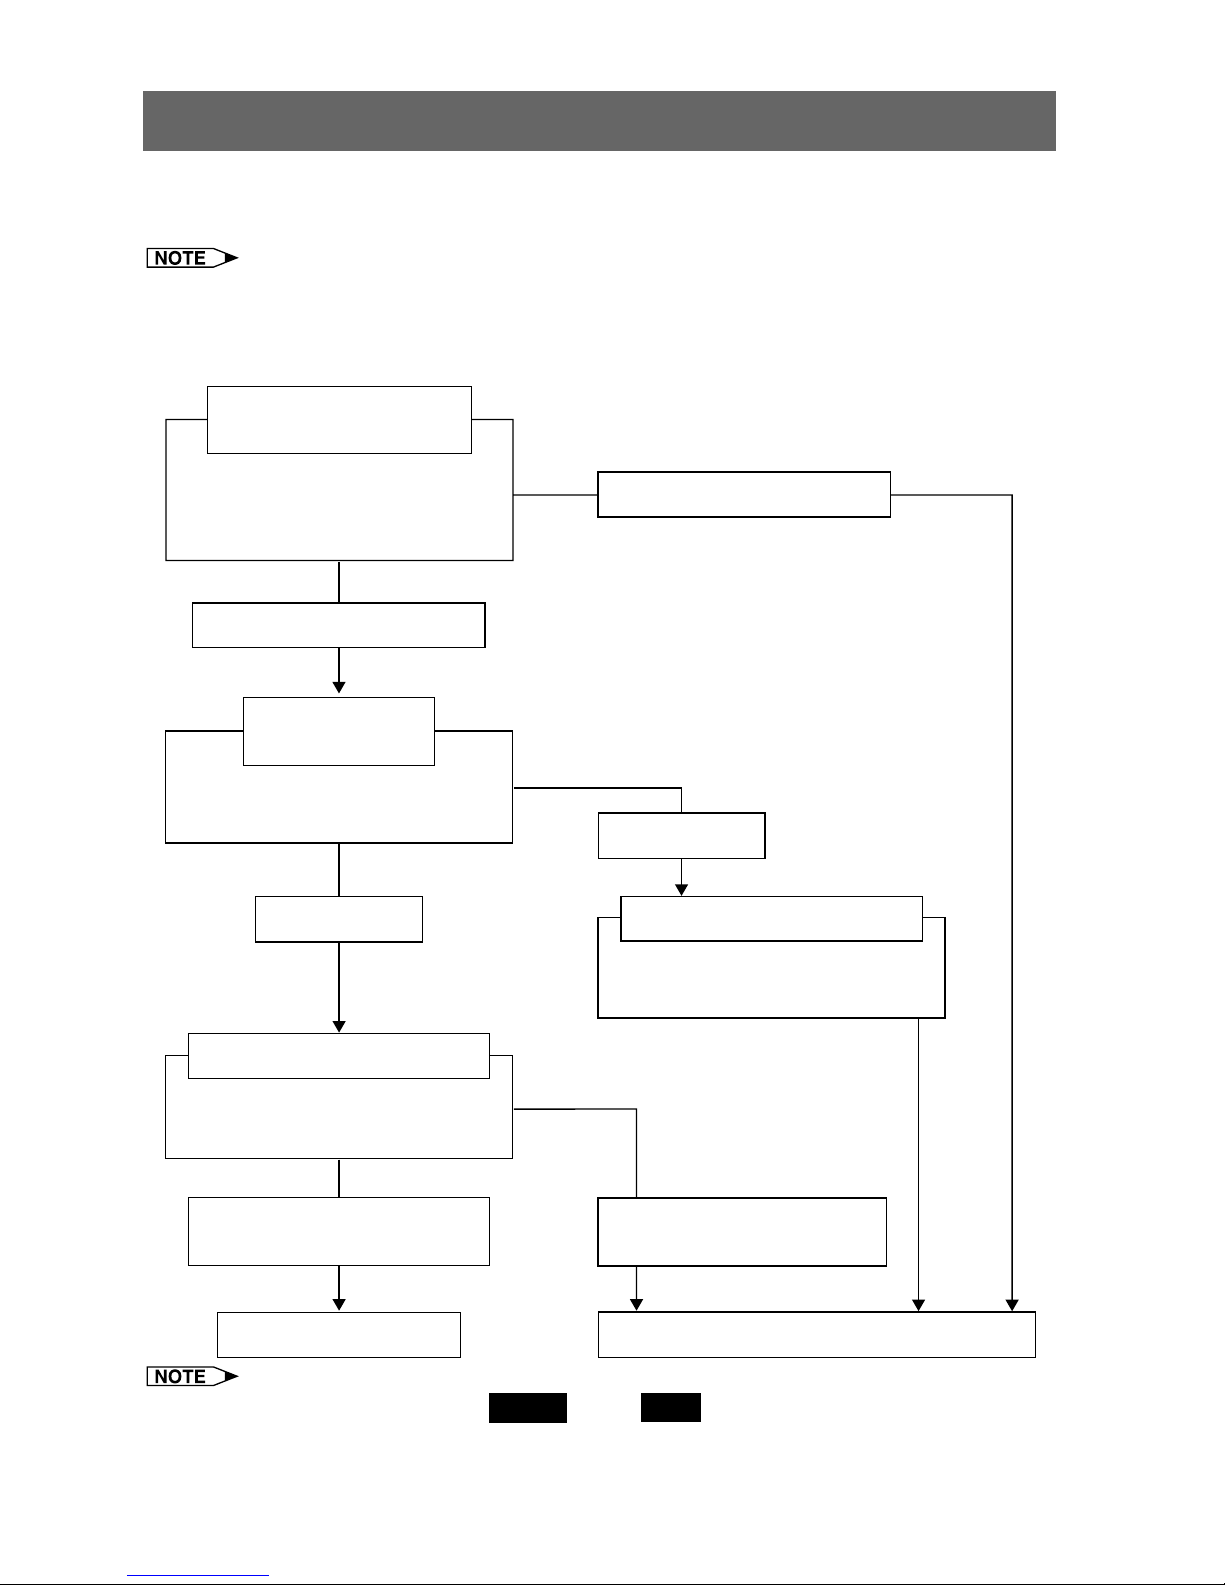
Scan Setting (page 26)
Projector Setting (page 28)
Setting whether to control
a single projector or multiple
projectors (page 25)
Setting whether or not to use
IDs to control projectors (page 25)
Create the “All Projector List”
(list of projectors to be controlled).
Create the “All Projector List”
(list of projectors to be controlled).
To use IDs
To not use IDs
Create the “All Projector List”
automatically.
Create/add to the
“All Projector List” manually.
To control multiple projectors
To control a single projector
Setting the number of
projectors to be controlled
Create the “All Projector List”
Create the “All Projector List”
Setting whether
or not to use IDs
Setup for Controlling the Projectors
The settings for the projectors must first be made in the software before attempting to control
any projector. Settings are made in “Scan Setting” or in “Projector Setting”.
The settings for the ID numbers on the projector are needed to control the projector by
using the ID numbers.
Setup flowchart
From the following pages onwards, Single and/or Multi are displayed at the top of the page.
Single: Functions used when the projector is used in “Single Projector Operation Mode.”
Multi: Functions used when the projectors are used in “Multiple Projector Operation Mode.”
25
Adjusting and
Controlling
Single Multi
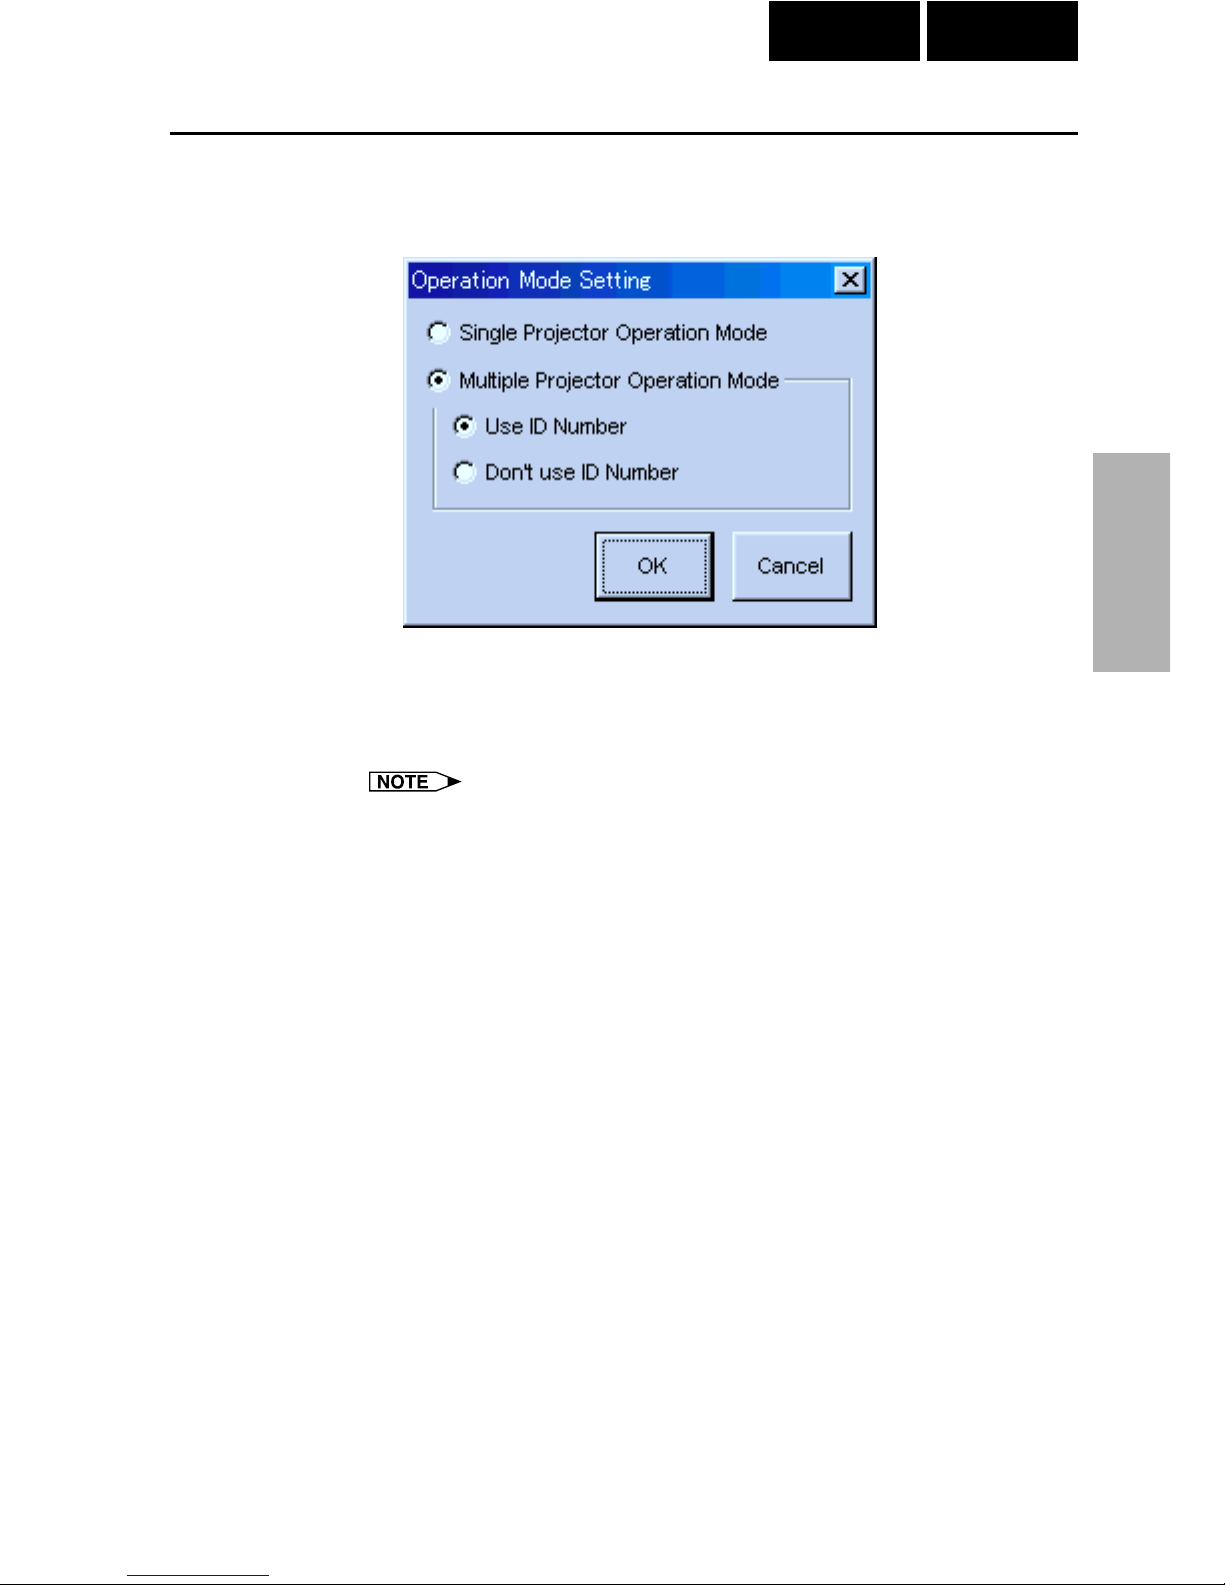
Selecting the Operation Mode
1 Select “Operation Mode Setting” from the “File” menu.
2 Select the Operation Mode.
● To operate a single projector, select “Single Projector Operation
Mode”
● To operate multiple projectors, select “Multiple Projector Operation
Mode”, then choose “Use ID Number” or “Don’t Use ID Number”.
● When “Don’t Use ID Number” is selected for “Multiple Projector
Operation Mode”, up to 99 projectors can be operated at once. Models
other than the XG-V10 Series, the XG-P20X or the XG-P25X projector
can be used.
● When “Use ID Number” is selected for “Multiple Projector Operation
Mode”, up to 250 projectors can be operated at once. If selecting
“Use ID Number”, only the XG-V10 Series, the XG-P20X or the XGP25X projectors can be used.
● A computer with high processing capability is required to use the
“Multiple Projector Operation Mode”. We recommend using the
“Single Projector Operation Mode” to control a single projector.
26
Multi
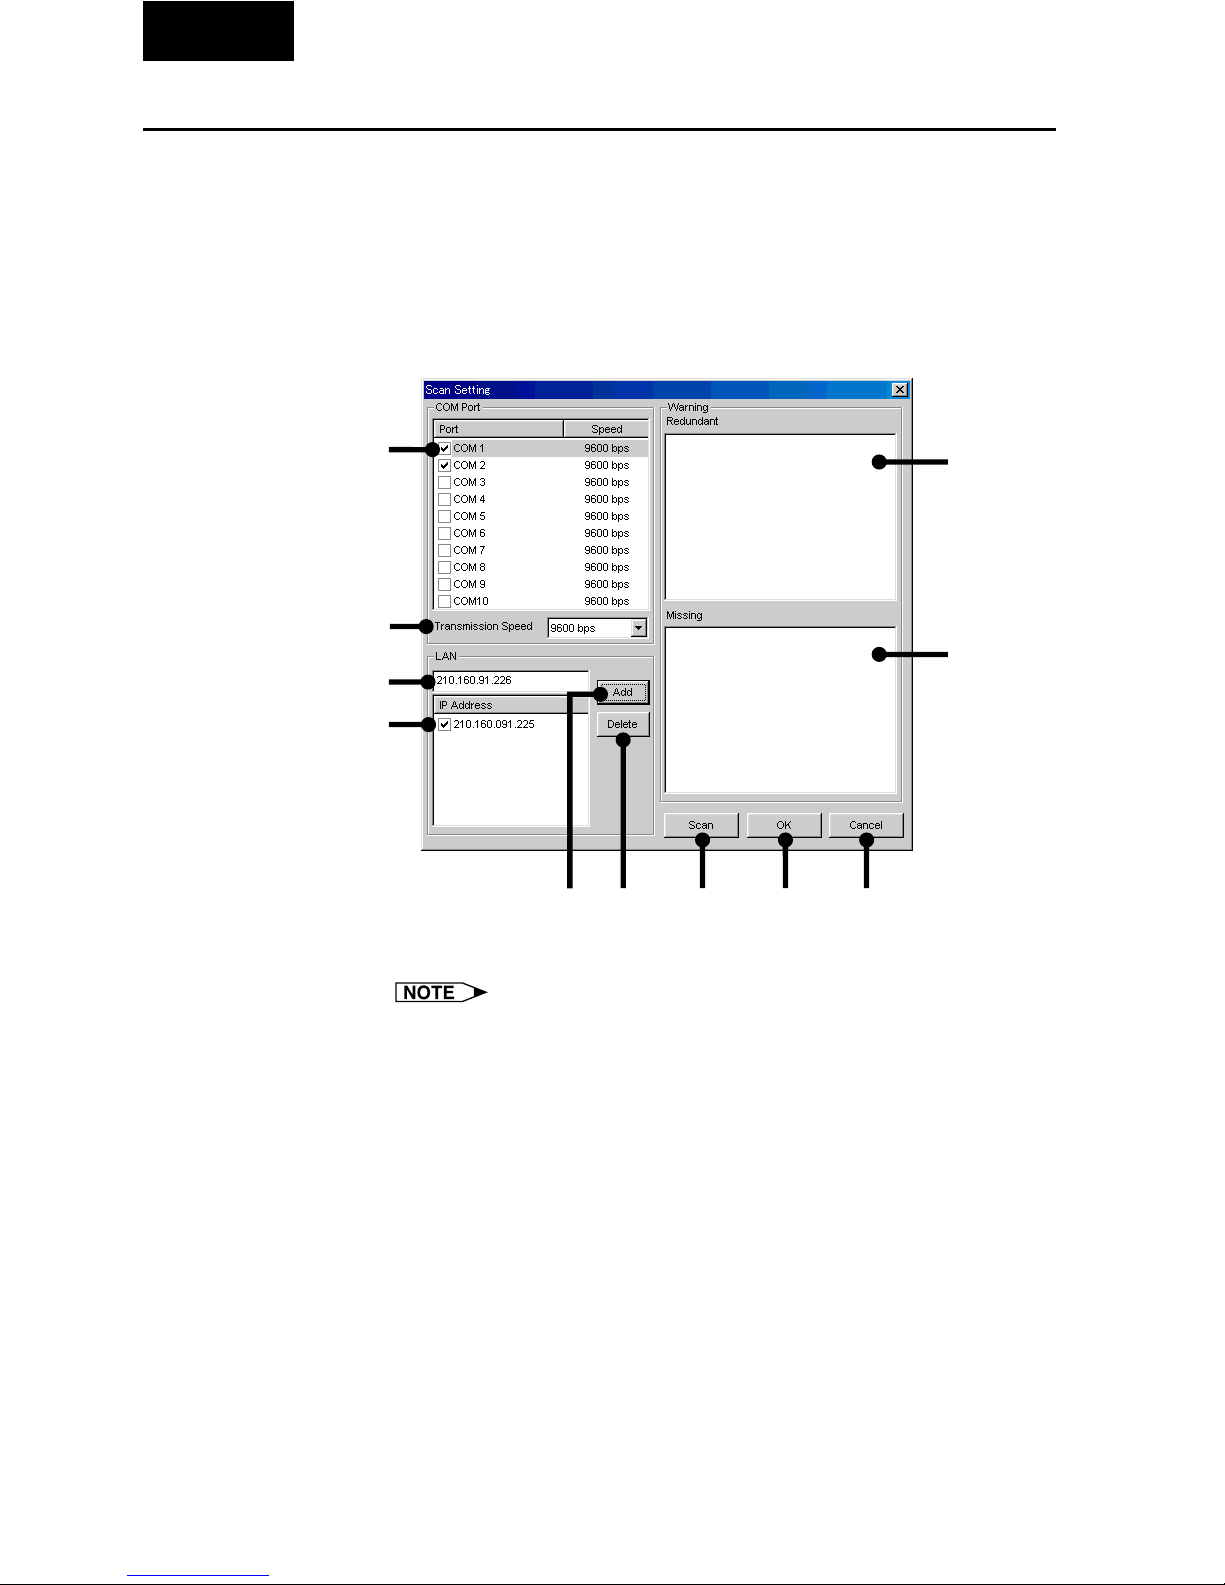
Scan Setting
This function allows the software to automatically identify and control all
the projectors connected to the PC without having to the ports and
models. To use this function, the COM ports and IP address to be scanned
with “Scan Setting” must be set beforehand.
For details and setting of “Scan Setting” see below.
1 Select “Scan Setting” from the “File” menu.
Set the projectors to be scanned here.
1 COM port enable/disable check box
The serial number is assigned when using multiple connections
which do not use IDs.
2 Set the COM port Transmission Speed.
3 IP address input area
4 List of input IP addresses and enable/disable check box
5 Add button
When clicked after inputting the IP address, the address is added to
the list in 4.
6 Delete button
When clicked after selecting the IP address in 4, that address is
deleted.
7 List of projectors whose IDs are redundant.
8 List of projectors whose IDs are missing.
9 Scan button
0 OK button
q Cancel button
1
8
56 9 0 q
7
2
4
3

27
Adjusting and
Controlling
Multi
2 Set the port to which the projector is connected.
● In 1, check the check box of the COM port to which the projector
is connected.
● To use a LAN, input the IP address in 3, click the “Add” button,
then check the check box in 4.
LAN connections are possible only with models from the XG-V10
series with the optional extension board (AN-L10T) installed.
3 Click the “Scan” button.
The connected projectors are identified.
● If projectors with the same IDs are discovered through scanning,
the data for those projectors is displayed in the “Redundant” area.
If this happens, reassign suitable IDs to the projectors.
● The results of scanning are compared with the pre-scanning All
Projector List and the data for projectors that could not be
confirmed as being connected is displayed in the “Missing” area.
4 Click “OK” if you wish to create an “All Projector List”
based on the results of scanning.
If you do not wish to create an “All Projector List”, click “Cancel”.
Deleting the set IP address
1 Select the IP address to be deleted in
44
44
4.
2 Click the “Delete” button.
28
Multi
Projector Setting
When “Multiple Projector Operation Mode (Use ID Number)” is selected
in “Operation Mode Setting”, it is possible to add projectors manually
without using the scan setting automatic identification function. In
addition, when “Multiple Projector Operation Mode (Don’t Use ID
Number)” or “Single Projector Operation Mode” is selected, make the
respective settings at “Projector Setting”.
Multiple Projector Operation Mode
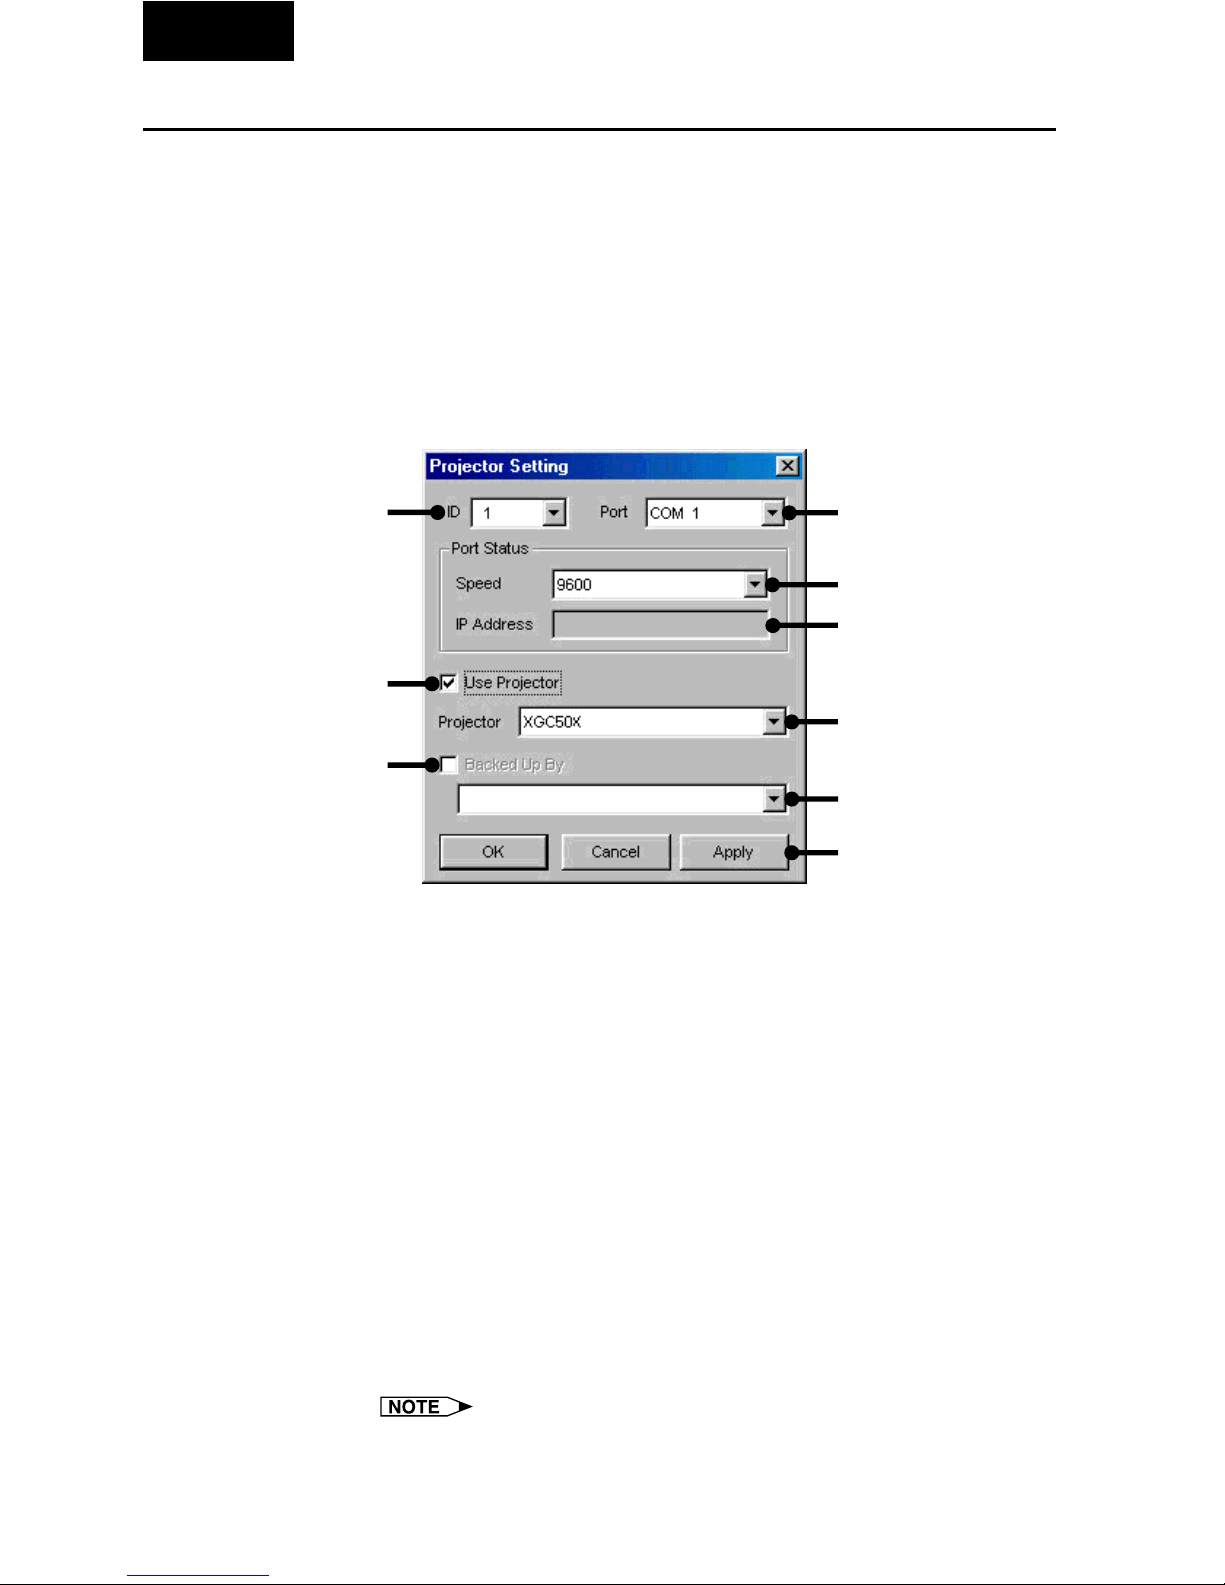
1 From the “File” menu, select “Projector Setting”.
1 Select the ID number.
2 Select the port.
3 Select the transmission speed.
4 Input the IP address.
5 Enable/disable check box
6 Select the projector model.
7 Backup function enable/disable check box
8 Backup projector selection pull-down menu
9 Apply button.
2 Select the ID number.
If selecting “Don’t use ID Number” in “Operation Mode Setting” (page
25), you don’t need to select the ID number here.
3 Select the port to which the projector is connected.
If using the RS-232C connection, select a COM port to be used from
“Port” pulldown menu.
If using the LAN connection, select “LAN”.
LAN connections are possible only with models from the XG-V10
series with the optional extension board (AN-L10T) installed.
1
2
3
4
5
6
8
7
9

29
Adjusting and
Controlling
Multi
4 Set the Port Status.
If using the RS-232C connection, select the transmission speed
between the computer and the projector.
If using a LAN connection, input the projector’s IP address.
● Set the transmission speed here and confirm the transmission speed
on the projector to the same speed.
● For instructions on the projector’s transmission speed setting, refer
to the projector’s operation manual.
5 Select the projector model and check the “Use Projector”
check box.
6 Set the backup projector.
If necessary, set the backup projector. See page 56 for details.
7 Click the “Apply” button.
30
Single
Single Projector Operation Mode
(For the connection via RS-232C or IrCOM)
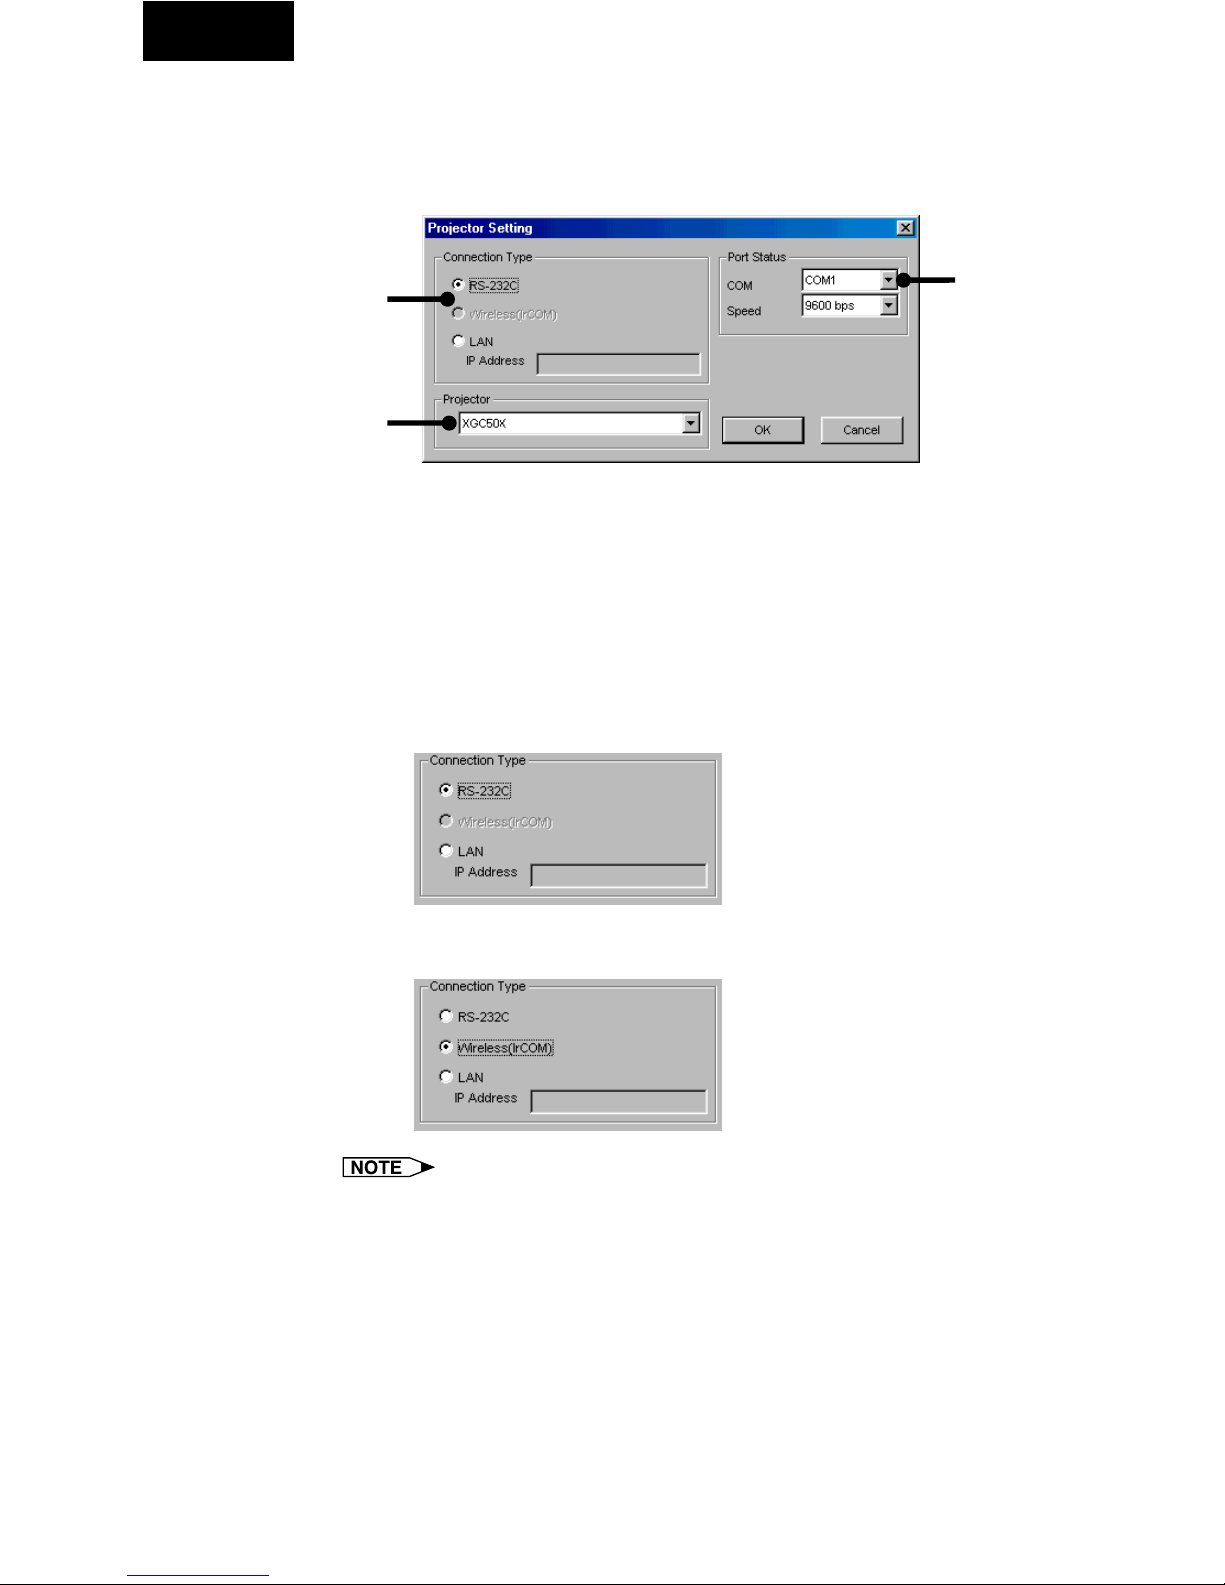
1 From the “File” menu, select “Projector Setting”.
1 Area for selecting the connection type
2 Area for selecting the projector model
3 Area for COM port setup
2 Select the projector model.
3 Select “RS-232C” or “Wireless (IrCOM)” in “Connection
Type”.
● The following image is displayed when the RS-232C connection
is selected.
● The following image is displayed when the Wireless (IrCOM)
connection is selected.
For the connection via IrCOM, only the NV5-7 projectors can be used.
4 Select the “COM” port to which the projector is connected.
2
3
1
 Loading...