

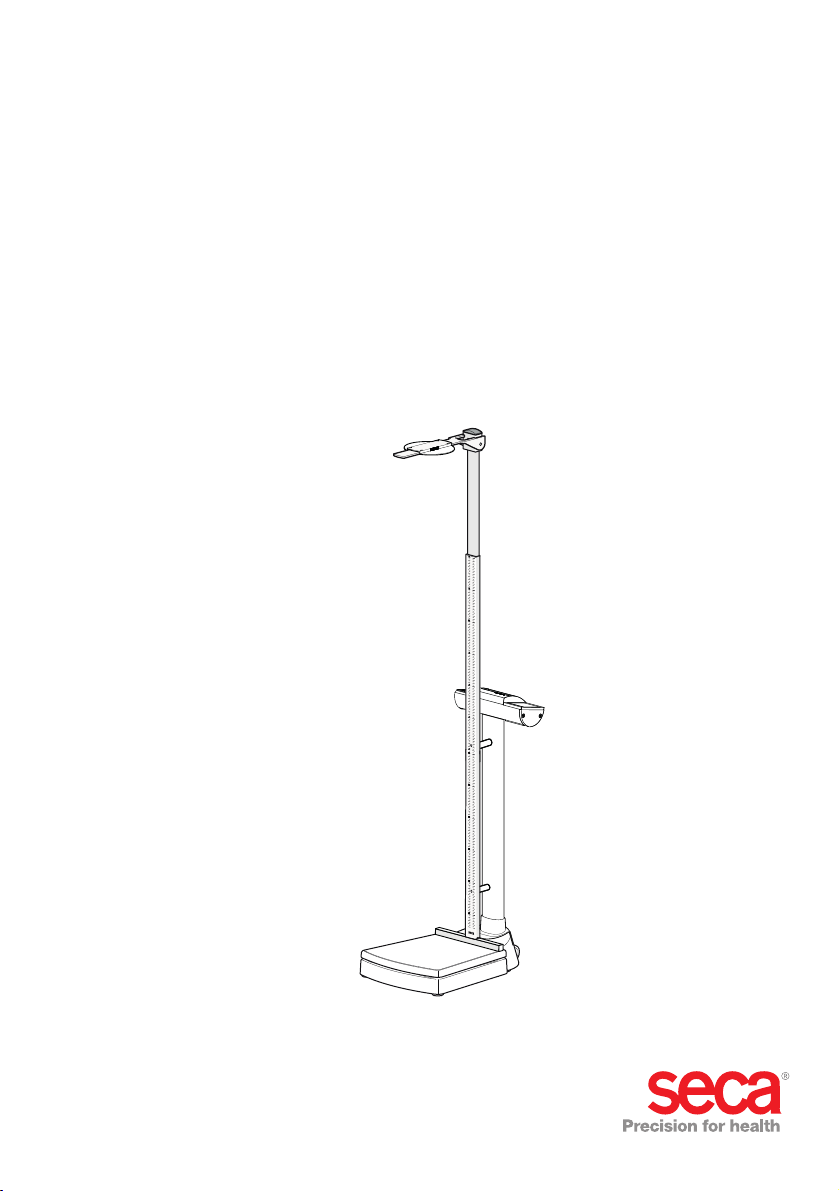
seca 704s/703s
Supplementary instructions
for use for measuring rod


CONTENTS
English
1. About this document . . . . . . . . . 22
2. Device description . . . . . . . . . . . 23
2.1 Intended use . . . . . . . . . . . . . 23
2.2 Description of function . . . . . . 23
Scale . . . . . . . . . . . . . . . . . . . 23
measuring rod . . . . . . . . . . . . 23
2.3 User qualification . . . . . . . . . . 24
Assembly . . . . . . . . . . . . . . . . 24
Operation . . . . . . . . . . . . . . . . 24
3. Safety precautions . . . . . . . . . . . 24
3.1 Safety precautions in these
instructions for use . . . . . . . . . 24
3.2 Basic safety instructions . . . . . 25
4. Overview . . . . . . . . . . . . . . . . . . . 27
4.1 Deviating/additional controls . . 27
4.2 Identification on the device
and on the type plate . . . . . . . 28
4.3 Identification on the
packaging . . . . . . . . . . . . . . . 28
5. Before you really get started... . 29
5.1 Deviating/additional scope of
supply . . . . . . . . . . . . . . . . . . 29
6. Measure height . . . . . . . . . . . . . . 32
7. Weighing . . . . . . . . . . . . . . . . . . . 34
8. Hygiene treatment . . . . . . . . . . . 34
9. Function check . . . . . . . . . . . . . . 36
10. Troubleshooting . . . . . . . . . . . . 36
11. Servicing . . . . . . . . . . . . . . . . . . 36
12. Technical data, measuring rod 37
13. Warranty . . . . . . . . . . . . . . . . . . 38
1. ABOUT THIS DOCUMENT
5.2 Fit column . . . . . . . . . . . . . . . 30
5.3 Fit measuring rod . . . . . . . . . . 30
5.4 Fit measuring flap extension . . 31
6.1 Measuring people less than
130.5 cm tall . . . . . . . . . . . . . 32
6.2 Measuring people more than
130.5 cm tall . . . . . . . . . . . . . 33
8.1 Cleaning . . . . . . . . . . . . . . . . . 35
8.2 Disinfecting . . . . . . . . . . . . . . 35
8.3 Sterilizing . . . . . . . . . . . . . . . . 35
12.1 General technical data . . . . . 37
12.2 Metrological data . . . . . . . . . 37
22 •
This document contains supplementary information
about the assembly and operation of the seca 704s/
models. This information relates in particular to
703s
the measuring rod included in the scope of supply.
In order to use the
to be able to make full use of their functions, you
should also note the standard instructions for use for
seca 704/703 models which are enclosed.
the
Keep both documents safe and ensure that both docu-
ments are available at all times.
seca 704s/703s models safely and

English
2. DEVICE DESCRIPTION
2.1 Intended use
The seca 704s/703s electronic personal scales are
mainly used at hospitals, practices and inpatient care
facilities in accordance with national regulations.
In conjunction with the measuring rod included in the
scope of supply, the
serve as measuring stations. The measuring station is
for conventional determination of weight and height,
establishment of general state of nutrition and assists
the physician supervising treatment in making a diagnosis or deciding on a course of treatment.
To make an accurate diagnosis, however, other specific examinations have to be ordered by the physician
and their results taken into account, in addition to the
determination of weight and height.
The medical measuring rod included in the scope of
supply is not compatible with other variants of
seca 704/703 models or other seca scales.
2.2 Description of function
seca 704s/703s personal scales
Scale The scale functions of the seca 704s model are identi-
cal to those of the seca 704 model. You can find information about this in the instructions for use supplied for
seca 704 model.
the
The scale functions of the
cal to those of the seca 703 model. You can find information about this in the instructions for use supplied for
seca 703 model.
the
seca 703s model are identi-
Measuring rod The measuring rod for the seca 704s/703s models is
attached to the scale in such a way that the patient's
height can be measured while he or she is standing on
the weighing platform.
The measuring rod consists of two telescopic elements:
• lower telescopic element:
measuring range 6 cm -130.5 cm
• upper telescopic element:
measuring range 130.5 cm -230 cm
Device description • 23
The scales are on opposite sides of the telescopic
elements.
The head slide is latched in the upper telescopic element and can be released for measurements on the
lower telescopic element. The measuring flap of the
head slide can be folded down.
2.3 User qualification
Assembly Devices that are shipped partially assembled may only
be mounted by sufficiently qualified persons such as
specialist dealers, hospital technicians or seca service
technicians.
Operation The device may only be operated by healthcare
professionals.
3. SAFETY PRECAUTIONS
3.1 Safety precautions in these instructions for use
CAUTION!
Used to identify a hazardous situation. If you fail
to take note of this information, minor to
moderate injuries may result.
WARNING!
Indicates that the device
may have been operated incorrectly. If you fail
to take note of this information, the device may
be damaged or the measured results may be
incorrect.
NOTE
Contains additional information on how to use
this device.
24 •
English
3.2 Basic safety instructions
► Follow the instructions for use for the seca 704/703.
► Please observe the information in this user manual.
► Keep this user manual in a safe place. This user
manual is part of the product and must be readily
available.
CAUTION!
Patient hazard, damage to device
►
► Fold down the measuring slide after each
► Have the device serviced regularly as de-
► Technical changes to the device are not per-
► Make sure you only use genuine seca acces-
Use the supplied assembly material only.
measurement.
scribed in the respective section of this document.
mitted. The unit contains no user-serviceable
parts. Make sure that maintenance and repair
are only carried out by an authorised seca
service partner. You can find your local service partner at www.seca.com or send an
email to service@seca.com.
sories and spare parts. Otherwise the warranty provided by seca will become null and
void.
CAUTION!
Patient hazard
In order to avoid misinterpretations, test results
for medical use must be displayed and used in
SI units (weight: kilogrammes, length: metres)
only. Some devices offer the ability to display
test results in other units. This is only an additional function.
► Use the results exclusively in SI units.
► The use of measurement results in non-SI
units is the sole responsibility of the user.
Safety precautions • 25

CAUTION!
Incorrect measurement due to force shunt
Operation of the stadiometer affects the weight
display of the scale. Weight values which are
displayed during a height measurement do not
correspond to the patient's actual weight.
► Ensure that you do not touch the scale whilst
weight is being measured.
► Ensure that the patient does not touch either
the stadiometer or the column of the scale
whilst weight is being measured.
► Only read off weight values before or after
measuring height.
26 •

English
4. OVERVIEW
7
6
8
5
9
2
1
4
10
3
4.1 Deviating/additional controls
No. Control Function
1
2
Lower telescopic
3
Upper telescopic
4
5
Measuring flap
Heel stop
Column
element
element
• Permanently fixed to the weighing platform
• Allows patient to be perfectly positioned
• Prepared for attachment of the measuring rod
• Can only be attached in the alignment shown
Scale points to the weighing platform
Measuring range 1: 6 cm - 130.5 cm
Scale points towards display head of scale
Measuring range 2: 130.5 cm to 230 cm
• Head stop for measuring height
• Can be folded down
Overview • 27

No. Control Function
Measuring flap
6
extension
Allows patient to be perfectly positioned
• Latched in upper telescopic element
7
Head slide
• Is released for measurements on the lower telescopic
element
• Latches the head slide for measurements in measuring
8
Latch
range 2
• Can be released to push the head slide onto the lower
telescopic element (measuring range 1)
9
Read-off edge 1 For measured results in measuring range 1
10
Read-off edge 2 For measured results in measuring range 2
4.2 Identification on the device and on the type plate
Text/symbol Meaning
Model Model number
xx/xx Lot number, engraved on rear of device
Follow instructions for use
Device complies with EC directives
0123
• 0123: appointed office for medical devices:
TÜV Süd Product Service
4.3 Identification on the packaging
28 •
Protect from moisture
Arrows indicate top of product.
Transport and store in an upright position.
Fragile
Do not throw or drop.
Permitted min. and max. temperature for transport and
storage
Permitted min. and max. moisture for transport and
storage
Open packaging here
Packaging material can be disposed of through recycling
programs

English
5. BEFORE YOU REALLY GET STARTED...
e
f
c
d
b
a
5.1 Deviating/additional scope of supply
No. Component Pcs.
Set screw 80 mm with thread M5 x 21 mm 2
a
Spacer sleeve 2
b
seca 704s/703s measuring rod 1
c
Measuring flap extension 1
d
seca 704s/703s column, prepared for attaching the measuring rod 1
e
seca 704s/703s weighing platform with permanently-fixed heel step 1
f
Supplementary instructions for use for
Instructions for use for
seca 704/703, no illustration 1
seca 704s/703s, no illustration 1
Before you really get started... • 29

5.2 Fit column
Assembly
bores
173 cm
5.3 Fit measuring rod
1. Place the column on the weighing platform as
shown in the adjacent illustration:
– the display head points away from the
platform
– assembly bores for the measuring rod point
towards the weighing platform
2. Perform all the remaining assembly steps for the
column as described in the instructions for use for
the
seca 704/703:
► Screw column tight
► Connect display cable
► Connect the power supply cable to the
electronics box
3. Set up the scale as described in the instructions for
use for the
4. Provide the power supply for the scale as described in the instructions for use for the seca 704/
703
1. Pull out the upper telescopic element as far as the
173 cm mark.
The assembly bores in the lower telescopic element
are exposed.
seca 704/703.
.
30 •
2. Align the measuring rod as shown in the adjacent
illustration.
3. Put a set screw in the upper bore of the measuring
rod.
4. Align a spacer sleeve as shown in the adjacent
illustration.
5. Put the spacer sleeve on the set screw.
6. Screw the measuring rod hand-tight to the column
using the upper set screw.
7. Repeat steps 3. to 6. for the lower set screw.
8. Tighten up both set screws firmly.

English
5.4 Fit measuring flap extension
Click!
You have the option of increasing the contact area of
the measuring flap by using the measuring flap extension. This enables you to position the patient even better and obtain a more accurate measuring result.
► Push the measuring flap extension onto the
measuring flap until you hear it engage.
► If required, move the measuring flap extension
along the measuring flap in a longitudinal direction.
Before you really get started... • 31

6. MEASURE HEIGHT
CAUTION!
Bodily injury
Perform a function check as described in the
►
section entitled "Function check" on page 36
before using the device each time.
6.1 Measuring people less than 130.5 cm tall
1. Release the head slide by pressing on the latch.
2. Fold up the measuring flap until it engages in a
horizontal position.
3. Ask the patient to position him or herself under the
measuring flap:
– back to the measuring rod
– standing up straight
– heels on the heel stop
– head straight: Frankfurt Line parallel to the
measuring flap
4. Push the head slide on the lower telescopic element down until the measuring flap is in contact
with the patient's head.
5. Read the measured result off the read-off edge
(read-off edge 1) of the head slide (in this case:
113.5 cm).
6. Ask the patient to step away from the measuring
rod.
7. Fold down the measuring flap.
8. Push up the head slide until it engages in the latch.
32 •
113,5 cm

English
6.2 Measuring people more than 130.5 cm tall
1. Fold up the measuring flap until it engages in a
horizontal position.
2. Pull out the upper telescopic element until the pa-
tient can get under the measuring flap comfortably.
3. Ask the patient to position him or herself under the
measuring flap:
– back to the measuring rod
– standing up straight
– heels on the heel stop
– head straight: Frankfurt Line parallel to the
measuring flap
4. Push the upper telescopic element down until the
measuring flap is in contact with the patient's head.
5. Read the measured result off the read-off edge
(read-off edge 2) of the lower telescopic element (in
this case: 141.5 cm).
6. Ask the patient to step away from the measuring
rod.
7. Push the upper telescopic element into the lowest
position.
8. Fold down the measuring flap.
141,5 cm
Before you really get started... • 33

7. WEIGHING
CAUTION!
Incorrect measurement due to force shunt
Operation of the stadiometer affects the weight
display of the scale. Weight values which are
displayed during a height measurement do not
correspond to the patient's actual weight.
► Ensure that you do not touch the scale whilst
weight is being measured.
► Ensure that the patient does not touch either
the stadiometer or the column of the scale
whilst weight is being measured.
► Only read off weight values before or after
measuring height.
The scale functions of the
cal to those of the seca 704 model. You can find information about this in the instructions for use supplied for
seca 704 model.
the
The scale functions of the
cal to those of the
mation about this in the instructions for use supplied for
the seca 703 model.
8. HYGIENE TREATMENT
WARNING!
Electric shock
Set up the device so that the power supply
►
socket is easy to reach and the device can be
disconnected from the power supply quickly.
► Ensure that your local power supply matches
the information on the power supply unit.
► Do not touch the power supply unit with wet
hands.
► Do not use extension cables or power strips.
► Make sure that cables are not pinched or
damaged by sharp edges.
► Make sure that cables do not come into
contact with hot objects.
► Do not operate the device at an altitude of
more than 3000 m above sea level.
seca 704s model are identi-
seca 703s model are identi-
seca 703 model. You can find infor-
34 •

English
8.1 Cleaning
8.2 Disinfecting
NOTICE!
Damage to device
Inappropriate detergents may damage the
sensitive surfaces of the device.
► Use only disinfectants free of chlorine and al-
cohol which are explicitly suitable for acrylic
sheet and other sensitive surfaces (active ingredient: quaternary ammonium compounds, for example).
► Do not use caustic or abrasive detergents.
► Do not use spirits or benzine.
► Use a soft cloth dampened with mild soapsuds to
clean the surfaces of the device.
1. Check that your disinfectant is suitable for sensitive
surfaces and acrylic sheet.
2. Follow the instructions for use for the disinfectant.
3. Disinfect the device:
► moisten a soft cloth with disinfectant and
wipe down the device with it.
► comply with the intervals: see table.
8.3 Sterilizing
Interval Component
Before
Each
measurement
After
Each
measurement
As required
This device may not be sterilised.
• Weighing platform
• Head slide with measuring flap
• Weighing platform
• Head slide with measuring flap
• Column and display head of scale
• Telescopic elements of the stadiometer
• Measuring flap extension (if present)
Hygiene treatment • 35

9. FUNCTION CHECK
► Perform a function check before each use.
A complete function check includes:
• a visual inspection for mechanical damage
• a visual and function check of all moving parts
• a function check of the controls
CAUTION!
Bodily injury
If you find faults or deviations in the function
check, you may not use the device.
► Have the device repaired by seca service or
► Observe the section entitled "Servicing".
10.TROUBLESHOOTING
Problem Cause/solution
Measured result read off incorrectly
- Use the correct read-off edge for the current
... the measurement is
not a plausible height?
measuring range
- Read off decimal places for the current
measuring range in the correct direction
Patient in wrong position/posture
- Correct patient's position/posture
an authorized service partner.
11.SERVICING
36 •
The seca measuring rod does not require any servicing.
However, if anything ever fails to work, contact an
authorized service partner.
You can find a service partner in your area at
www.seca.com or by sending an e-mail to
service@seca.com

English
12.TECHNICAL DATA, MEASURING ROD
12.1 General technical data
General technical data
Dimensions
• Depth (incl. measuring flap extension)
• Width (incl. measuring flap extension)
• Height (retracted)
• Height (extended)
Net weight approx. 1 kg
Temperature range
• Operation
•Storage
• Transport
Air pressure
• Operation
•Storage
• Transport
Humidity
• Operation
•Storage
• Transport
Medical device in accordance with
Directive 93/42/EEC
+10 °C to +40 °C (50 °F to 104 °F)
-10 °C to +65 °C (14 °F to 149 °F)
-10 °C to +65 °C (14 °F to 149 °F)
700 - 1060 hPa
700 - 1060 hPa
700 - 1060 hPa
30 % - 80 %, no condensation
0 % - 95 %, no condensation
0 % - 95 %, no condensation
Class I with measuring function
37.5 mm
120 mm
1300 mm
2300 mm
12.2 Metrological data
Measuring range 1
Measuring range 2
Graduations
Accuracy
Metrological data
Technical data, measuring rod • 37
6 cm - 130.5 cm
2 3/8 inch - 51 3/8 inch
130.5 cm - 230 cm
90 4/8 inch - 51 3/8 inch
1 mm
1/8 inch
Better than ± 5 mm
Better than ± 2/8 inch

13.WARRANTY
We offer a two-year warranty from the date of delivery
for defects attributable to faulty material or poor workmanship. This excludes all moveable parts such as
(rechargeable) batteries, cables, power supply units,
etc. Defects which are covered by the warranty shall be
rectified free of charge for customers on production of
the sales receipt. No further claims can be accepted.
The costs of shipment in both directions shall be borne
by the customer where the device is not located at the
customer's premises. In the event of any damage during shipment warranty claims can only be asserted
where the complete original packaging was used for
shipment and the scales were secured inside in the
same manner as in the original packaging. You should
therefore keep all packaging.
The warranty shall become null and void where the
device is opened by persons not expressly authorised
to do so by seca.
We ask customers based abroad to contact their local
sales agent directly in the case of warranty claims.
38 •
 Loading...