


- 7 -
INSTALLATION
INSTRUCTIONS Built-in grill
Français, 1 English, 7 Deutsch, 13
Italiano, 19 Nederlands
25
MBN 30
FR GB DE
IT NL
Index
Installation instructions, 8
FITTING
ASSEMBLY, 10
THE CAST IRON GRILL
TIMER
Disposal of old electrical appliances
SOME SUGGESTIONS, 10
MAINTENANCE, 11
The cast-iron grill
The heating element
The stainless steel tray
The fitting plate
The volcanic lava
ELECTRICITY CIRCUIT DIAGRAM, 12
GB
- 8 -
Installation
GB
INSTALLATION
• This grill uses 2,500 watts at maximum position.
Therefore, before connection, ensure that your
electricity supply is fitted with a minimum 16ampere fuse. IT IS VITAL that your grill be
connected to earth.
• It is likewise necessary to provide a bipolar cut-off
device in your power supply circuit, where the
opening of the contacts is more than 3 mm.
• The plug must be accessible after installation.
• If the supply lead is damaged, it must be replaced
by an equivalent lead (H07RNF 3x1,5mm²)
available from the after-sales department.
• Cooking with the grill necessarily involves the
emission of fumes. Sometimes, when cooking
meats with a great deal of fat, small flames will
appear, identical to those on a barbecue. It is
necessary to take this feature into account when
choosing a place to build in your grill.
IT IS ABSOLUTELY IMPERATIVE TO LEAVE A
SPACE OF AT LEAST 5 CM BETWEEN THE
BOTTOM OF THE GRILL AND THE FIRST SHELF
OF THE KITCHEN UNIT.
THE DISTANCE BETWEEN THE WALL AND THE
REAR OF THE APPARATUS SHOULD BE 5.5 CM.
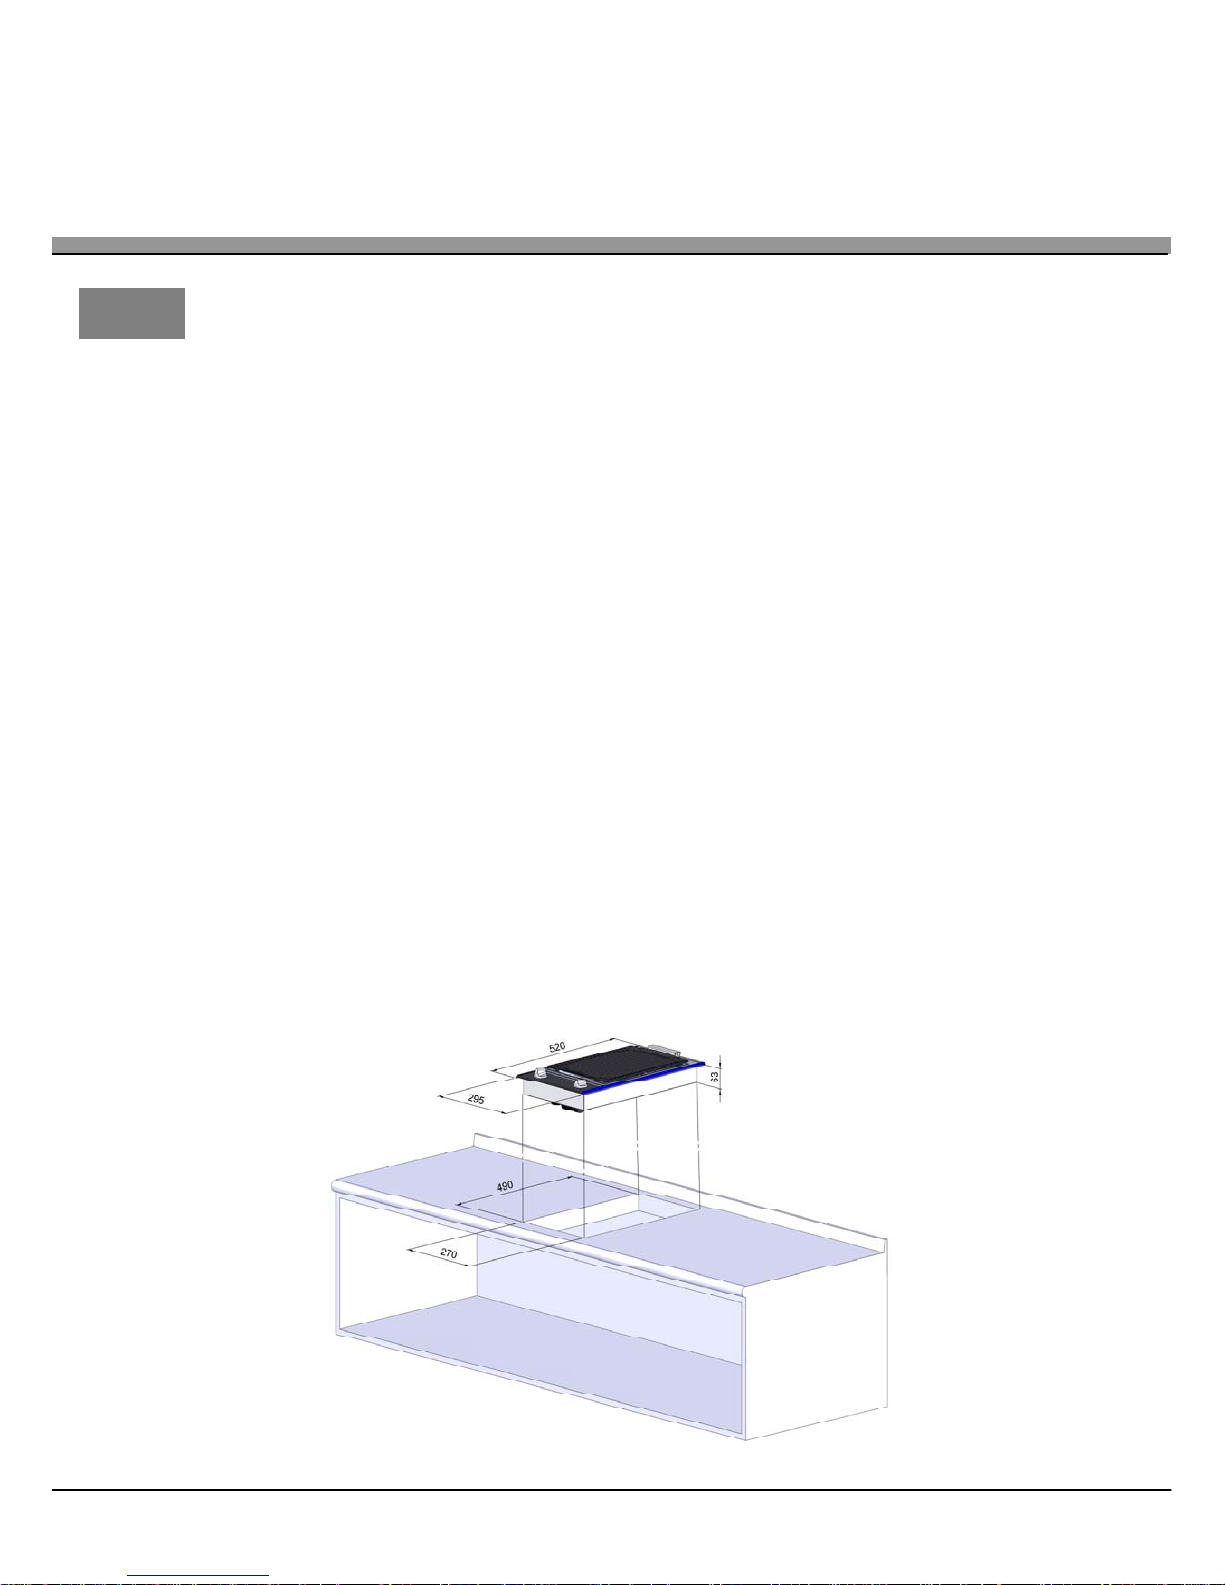
FITTING
This grill is built into a work surface or kitchen unit by
simply cutting a hole the corresponding shape.
Any support may be suitable: brickwork, timber,
metal, granite, laminate, etc.
Dimensions of apparatus: 520 x 295 mm
Dimensions of hole cut in work surface: 490 x 270
mm
 Loading...