

Page 1
00-Cover&Contents 7/16/99 7:37 PM Page 1
LASER PRINTER
ML-5000A
Setup Guide
Page 2
01-Setup 7/20/99 9:25 AM Page 2
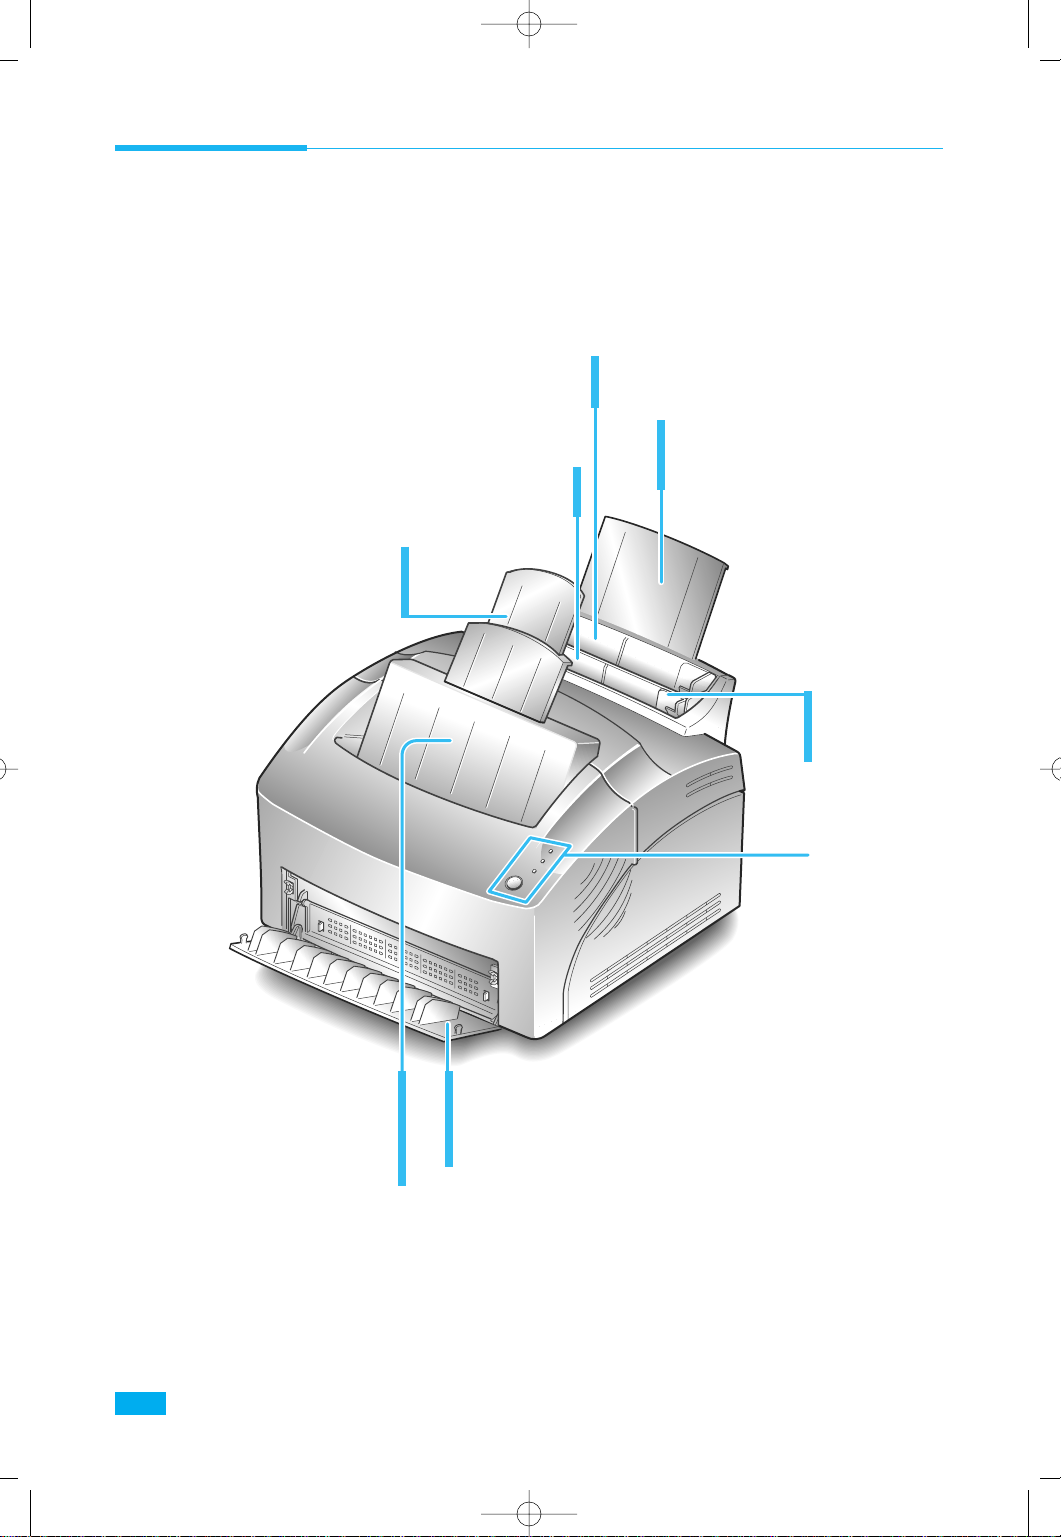
Control Locations and Functions
Front View
Automatic Paper Feeder
Holds 150 sheets of paper.
Manual Paper Feeder
Used to feed a single sheet of paper.
Stacker Extender
Supports paper stacked in the
paper output bin.
Tray Extender
Supports paper stacked in the
automatic paper feeder.
Face-down Stacker
Holds printed documents.
If printed on plain paper,
a maximum of 100 sheets
can be held.
Paper Guides
Adjust to the
width of paper.
Operator Panel
Face-up Stacker
Holds a single sheet of special media (transparency,
label, envelope, and heavy weight paper) with print
side facing up.
4
Set Up
Page 3

02-Printing 7/16/99 6:30 PM Page 2
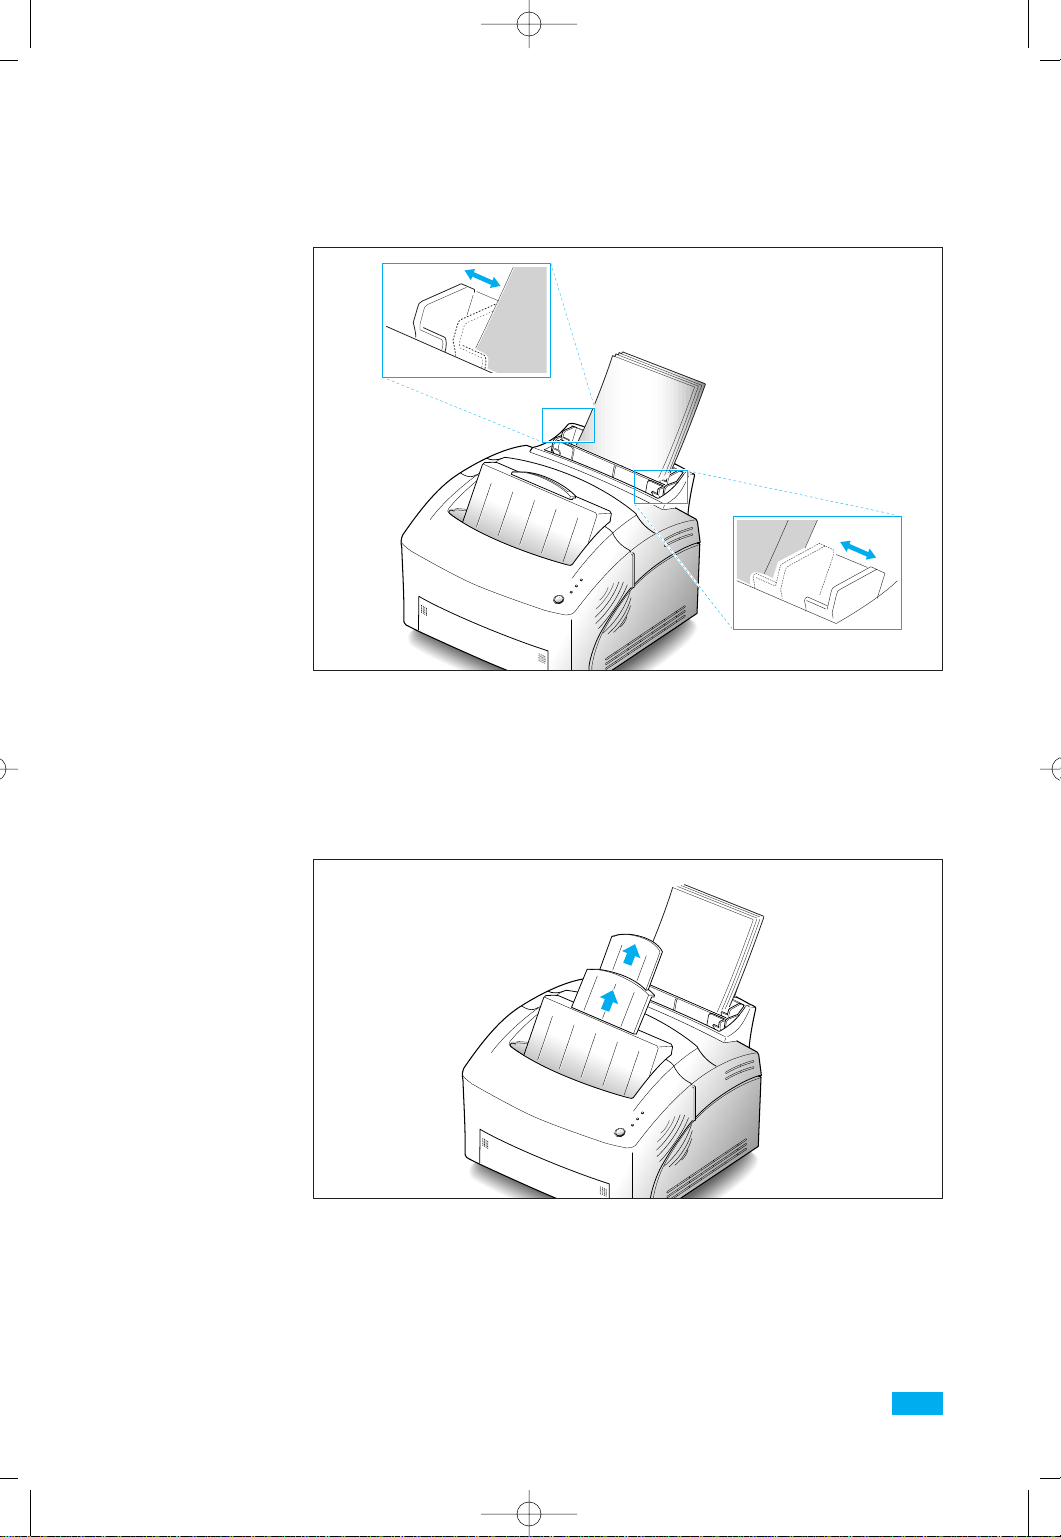
Loading a Stack of Paper
For best results, use high quality 75g/m2 (20 lb) xerographic paper.
1. Pull the extender on the automatic paper feeder up, until it stops.
2. Before loading the paper, flex the sheets back and forth to loosen
them, then fan them. Tap the edges on a table top to straighten
them. Doing this before you load paper helps prevent paper jams.
DonÕt load too much. This feeder holds up to 150 sheets.
3. Insert the paper in the paper feeder.
If the paper has a preferred print side, place the print side facing
you. If you use letterhead paper, load the paper with the letter-head
edge down and facing you.
12
Set Up
Page 4
02-Printing 7/16/99 6:30 PM Page 3
4. Adjust the paper guides to the width of the paper.
5. Pull up the extender on the face-down stacker. The face-down
stacker can hold up to 100 printed pages.
Set Up
13
Page 5
ERROR
PAPER
READY
02-Printing 7/16/99 6:30 PM Page 4
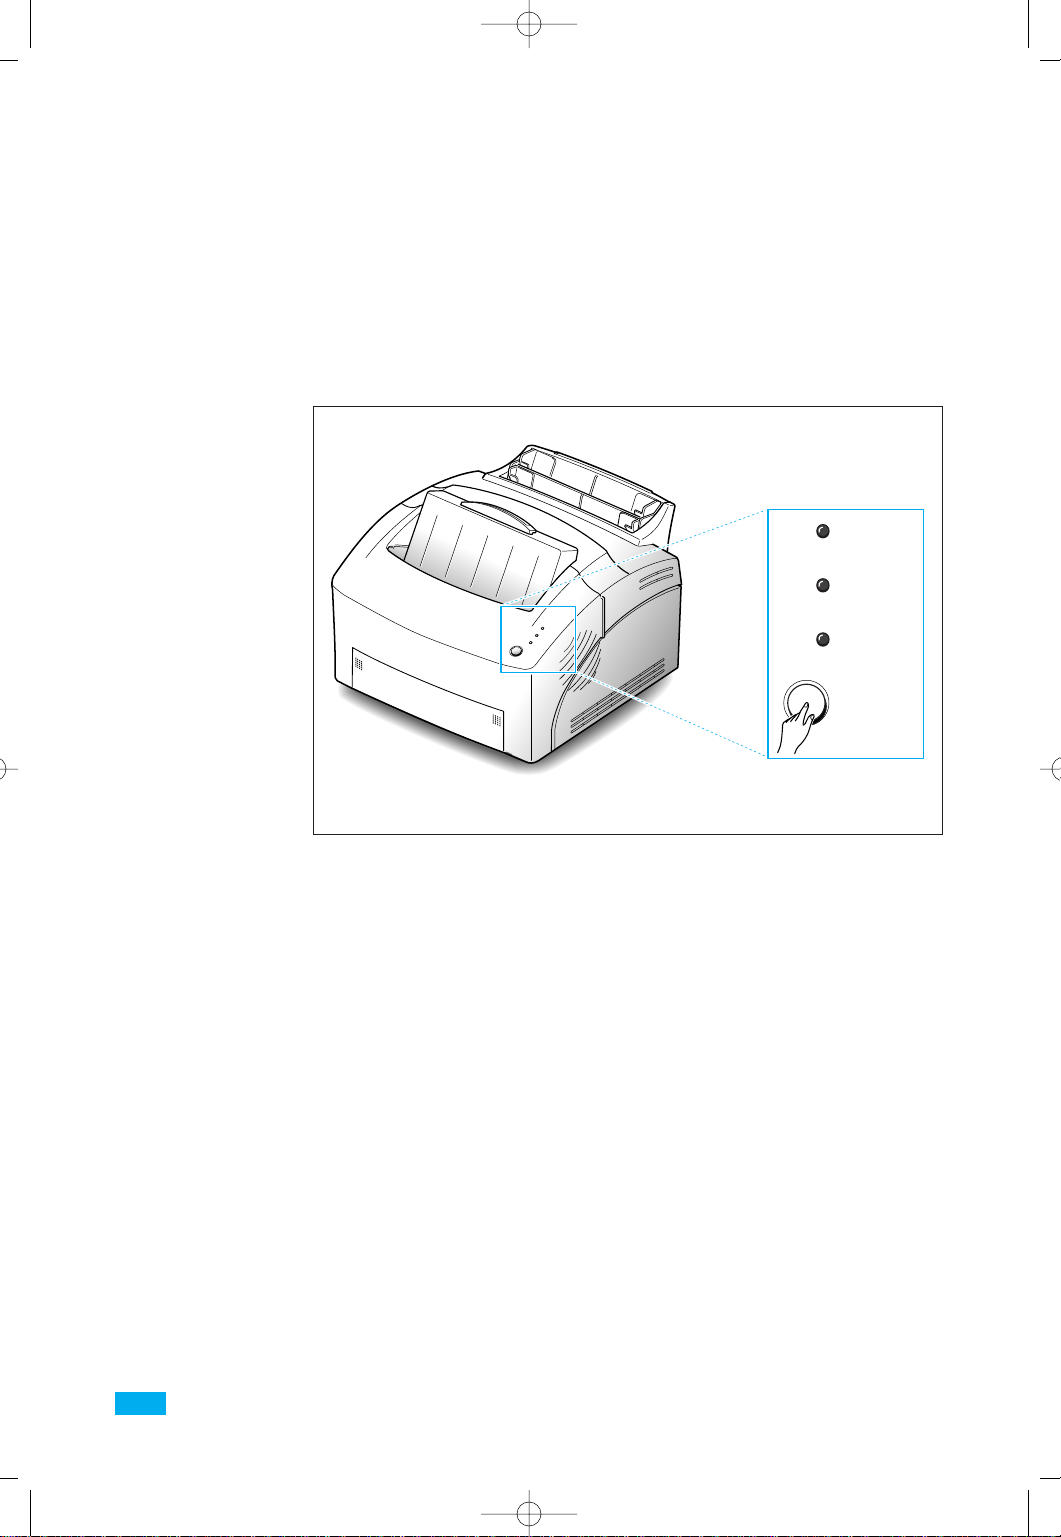
6. ML-5000A users may want to print a self test to check that the
printer is working properly. A self test shows current printer
configuration.
Make sure that the READY light is on. Press and hold the button
for about 3 seconds. All the indicators blink. Release the button
when each indicator starts to blink in turn. Wait until a self test
page prints.
14
Set Up
Page 6
02-Printing 7/16/99 6:30 PM Page 5
Installing Printer Driver
Windows 95/98/NT4.0 Installation
1. Turn on the computer and start Windows.
If Windows 95/98 recognizes the new printer,go to the section
ÒWindows 95/98 Plug and PlayÓ on page 16.
2.Insert the setup CD-ROM into your CD-ROM drive.
If Windows does not automatically run the CD-ROM,go to the
sectionÓIf Windows Does Not Run the CD-ROMÓ on page 16.
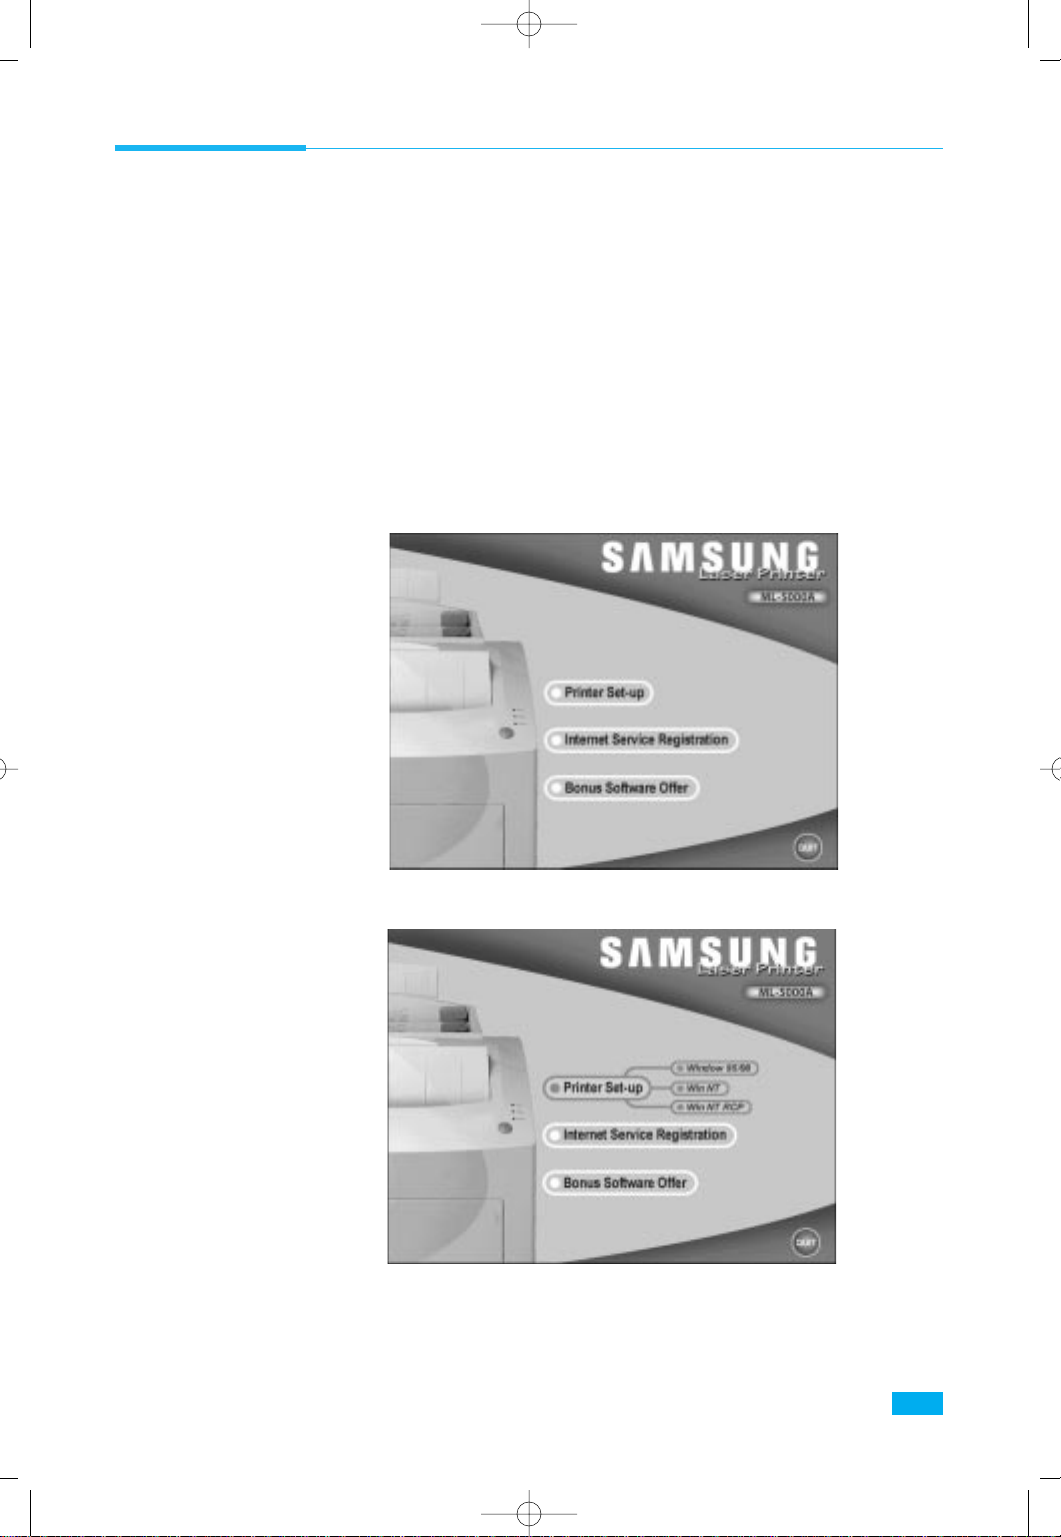
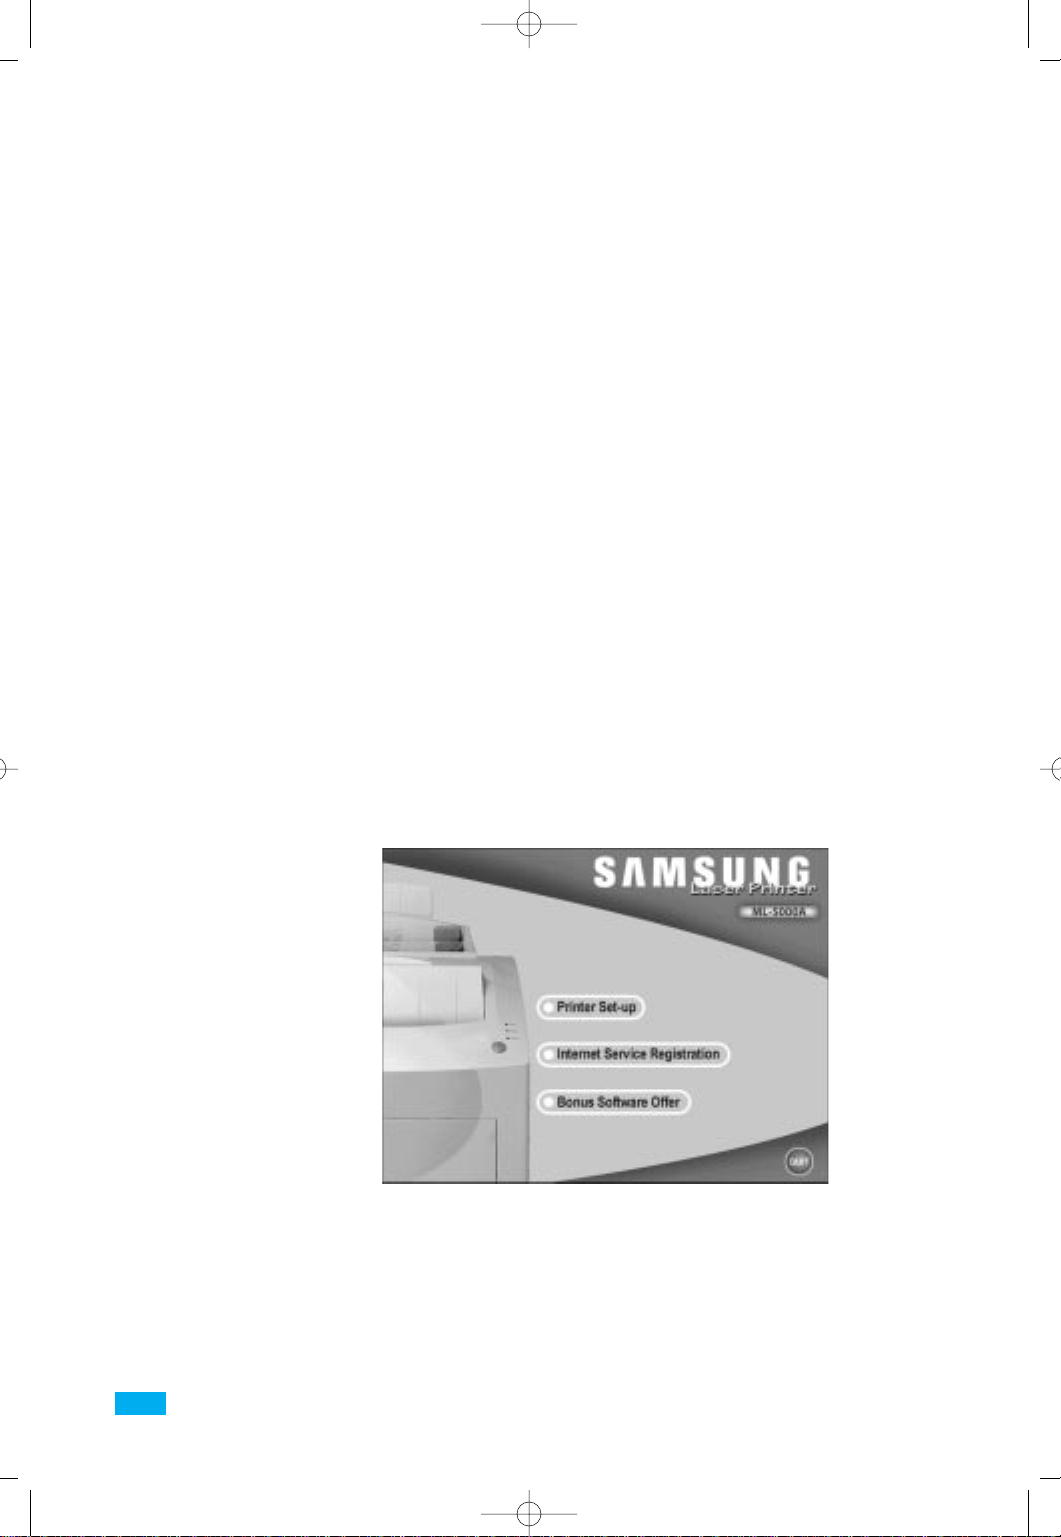
3.Click on the icon ÒPrinter Set-upÓ to install the printer drivers.
4.Click the Item you want to install.
5.Follow the instructions on the screen.
Note : WinNT and WinNTRCP item is supported under Windows NT4.0.
Set Up
15
Page 7
02-Printing 7/16/99 6:30 PM Page 6
Windows 95/98 Plug and Play
1.At the ÔNew Hardware FoundÕ dialog box,click on the OK button.
2.Insert the setup CD-ROM into your CD-ROM drive.
3.Follow the instructions on the screen.
If Windows Does Not Run the CD-ROM
1.Select RUN from the Start menu.
2.Type e:\print32.exe on the command line(Ôe:\Õ is CD-ROM drive),then
click OK.
3.Follow the instructions on the screen.
Windows 3.1x Installation
1.Insert the CD-ROM disk into your CD-ROM drive.
2.From the Program Manager window,double-click Main, and File
Manager
3.From the File Manager window,select your CD-ROM drive, execute
print16.exe.
16
4.Click on the icon ÒPrinter Set-upÓ to install the printer drivers.
5.Follow the instructions on the screen.
Set Up
Page 8

02-Printing 7/16/99 6:30 PM Page 7
Installing DOSRCP Utility
For DOS Users
DOS users should install the Remote Control Panel utility to change
print settings.
1. Insert the setup CD-ROM into your CD-ROM drive.
2. At the DOS prompt, type in:
c:\>XCOPY e:\Driver\English\DosUtil\*.* c:\DOSUTIL ↵
(Ôe:\Õ is CD-ROM drive)
<F=File, D=directory>?
3. Specify directory:
<F=File, D=directory>? D↵
4. To execute batch file, type in:
c:\DOSUTIL\ 5000A.BAT
Set Up
17
Page 9

02-Printing 7/16/99 6:30 PM Page 8
Uninstall Printer Driver
In Windows 95/98
1. From the Start menu, select Settings, then Printers.
2. In the Printers windows, select Samsung ML-5000A PCL5e.
3. From the File menu, select Delete.
In Windows 3.x
1. Double-click the Control Panel icon within the Main program
group.
2. Double-click the Printers icon.
3. Select Samsung ML-5000A PLC5e from the Installed Printers
list, then click the Remove button.
18
Set Up
Page 10

02-Printing 7/16/99 6:30 PM Page 9
Printing a Document
This procedure describes the general steps required for printing from
various Windows applications. The exact steps for printing a
document may vary depending on the application program you are
using. Refer to your software applicationÕs documentation for the
exact printing procedure.
1. Start the program you are using to create the document, and open
the document you want to print.
2. Choose Print or Print Setup from the File menu.
3. Make sure the correct printer is selected as your default printer.
4. Click on Properties, Setup or Options if you want to make any
adjustments as appropriate for printing your document.
5. Select OK to close the Properties dialog box.
6. After making any necessary changes to the printing parameters,
select OK to start the print job.
Set Up
19
Page 11

02-Printing 7/16/99 6:30 PM Page 10
Printing on Network Printer
Setting Up Host PC Printer
1. Start Windows.
2. Click Start, select Control Panel, and double-click on the
Network icon.
3. Click File and Print Sharing, check box(es), then click OK.
Close the window.
4. Click Start and select Printers from Settings, then double-click
your printer name (Samsung ML-5000A PCL5e).
5. Select Properties in Printer menu.
6. Click the Sharing tab, then check Shared As, fill in the Shared
Name field, and click OK.
Client PC Sharing Setup
1. Right-click the Start button, and select Explore.
2. Open your network folder in the left column.
3. Right-click the shared name, and select Capture Printer Port.
4. Select the port you want, click Reconnect at log on check box,
the click OK button.
5. From the Start menu, select Settings, then Printers.
6. Double-click your printer icon (Samsung ML-5000A PCL5e).
7. From the Printer menu, select Properties.
8. Press the Details tab, select the printer port, then press OK
button.
20
Set Up
Page 12

01-Setup 7/20/99 9:25 AM Page 3
Rear View
Printer Cable
Connector
Power Cord
Connector
Toner Cartridge
Front Cover
Power
Switch
Inside
Set Up
5
Page 13

01-Setup 7/20/99 9:25 AM Page 4
Selecting a Location
Place your printer on a flat, stable surface near your workstation.
Leave enough space around the printer, so that you can easily:
¥ open the printer cover
¥ load the paper
¥ retrieve the paper
¥ open the front output tray and retrieve the paper from the front
output tray
¥ allow air circulation around the vents to prevent the printer from
overheating
Do not place the printer:
¥ In direct sunlight
¥ Near heat sources or air conditioners
¥ In dusty or dirty environments
System Requirement
Before you start, make sure you have the following computer setup.
(These are the minimum requirements.)
¥ IBM or compatible with a 386 or higher processor
¥ Windows 95, Windows 98, Windows 3.x, or later
¥ 50 MB of available hard disk space for ML-5000A
¥ 4 MB of RAM for ML-5000A
¥ Centronics-compatible parallel cable (IEEE 1284-compliant)
6
Set Up
Page 14

01-Setup 7/20/99 9:25 AM Page 5
Unpacking
Remove the printer and all accessories from the packing carton. Save
the carton and packing materials in case you need to repack the
printer.
Make sure you have the following items:
Printer Toner cartridgePower cord*
CD-ROM
Printer Cable
UserÕs Manual Setup Guide
* The cord may look different. The appearance varies according to country.
Set Up
7
Page 15

01-Setup 7/20/99 9:25 AM Page 6
Installing the Toner Cartridge
1. To open the printer cover, hold the cover using both hands and
pull it toward you.
2. Unpack the Toner Cartridge. Carefully remove the sealing tape.
3. Rock the Cartridge 5 or 6 times to distribute the toner.
4. Find the cartridge slots inside the printer, one on each side.
8
Set Up
Page 16

01-Setup 7/20/99 9:25 AM Page 7
5. Grasp the handle and slide the Cartridge down between the toner
cartridge slots, until it drops into place.
6. Close the cover.
Set Up
9
Page 17

01-Setup 7/20/99 9:25 AM Page 8
Connecting the Printer to Your Computer
1. Plug the parallel interface cable into the connector on the back of
the printer. Push the clips at each end of the connector into the
notches on the printer cable. The clips snap when pushed into the
notches.
10
2. Attach the other end of the parallel cable to your computer.
Note: Make sure the printer power is off when you connect it to the
computer.
Set Up
Page 18

01-Setup 7/20/99 9:25 AM Page 9
Attaching the Power Cord
1. Plug one end of the power cord into the connector at the back of
the printer, and the other end into a wall outlet.
2. Turn on the printer.
Set Up
11
Page 19

00-Cover&Contents 7/16/99 7:37 PM Page 2
Using Your Documentation
The following documentation is supplied to help you use your new Samsung laser printer.
Setup Guide
This manual describes how to unpack, set up, and start using your printer, including how to
install the printer driver, which you must install to use the printer.
UserÕs Manual
This manual offers detailed information on how to operate your printer.
It includes maintenance, troubleshooting, options, and specifications.
This manual is provided for information purposes only. All information included herein is
subject to change without notice. Samsung Electronics is not responsible for any damages,
direct or indirect, arising from or related to use of this manual.
© 1999 Samsung Electronics Co. Ltd. All rights reserved.
¥ ML-5000A and Samsung logo are trademarks of Samsung Electronics Co. Ltd.
¥ Centronics is a registered trademark of Centronics Data Computer Corporation.
¥ PCL is a registered trademark of Hewlett-Packard Company.
¥ IBM, IBM PC are registered trademarks of International Business Machines Corporation.
¥ True Type is a registered trademark of Apple Computer, inc.
¥ Microsoft, MS-windows, MS-DOS are registered trademarks of Microsoft Corporation.
¥ All other brand or product names are trademarks or registered trademarks of their
respective companies or organizations.
Page 20

00-Cover&Contents 7/16/99 7:37 PM Page 3
Contents
Control Locations and Functions 4
Front View 4
Rear View 5
Inside 5
Selecting a Location 6
System Requirement 6
Unpacking 7
Installing the Toner Cartridge 8
Connecting the Printer to Your Computer 10
Attaching the Power Cord 11
Loading a Stack of Paper 12
Installing Printer Driver 15
Windows 95/98/NT4.0 Installation 15
Windows 95/98 Plug and Play 16
If Windows Does Not Run the CD-ROM 16
Windows 3.1x Installation 16
Installing DOSRCP Utility
17
For DOS Users 17
Uninstall Printer Driver 18
In Windows 95/98 18
In Windows 3.x 18
Printing a Document 19
Printing on Network Printer 20
Setting Up Host PC Printer 20
Client PC Sharing Setup 20
Page 21

ELECTRONICS
00-Cover&Contents 7/16/99 7:37 PM Page 4
Visit us at http://samsungtelecom.com
P/N. JC68-00031B Rev.1.00
 Loading...