

Samsung DVD-R4000 User Manual

DVD VIDEO RECORDER
Operating Instructions
Model No. DVD-R4000
Region number supported by this unit
Region numbers are allocated to DVD players and software
according to where they are sold.
≥The region number of this unit is “1”.
≥The unit will play DVDs marked with labels containing “1” or
“ALL”.
Example:
1
1
This manual was printed with soy based ink.
P
PC
ALL
2
4
Dear customer
Thank you for purchasing this product. For optimum performance
and safety, please read these instructions carefully.
Before connecting, operating or adjusting this product, please read
these instructions completely. Please keep this manual for future
reference.
[For\U.S.A.]only]
The warranty can be found on page 56.
[For\Canada]only]
The warranty can be found on page 57.
Para la instalación y las operaciones básicas del
aparato, existe una guía en español en las
páginas 58 a 63.
RQT6920-P
.
CAUTION!
THIS PRODUCT UTILIZES A LASER.
USE OF CONTROLS OR ADJUSTMENTS OR PERFORMANCE OF PROCEDURES OTHER THAN THOSE SPECIFIED HEREIN MAY RESULT IN HAZARDOUS RADIATION
EXPOSURE.
DO NOT OPEN COVERS AND DO NOT REPAIR YOURSELF. REFER SERVICING TO QUALIFIED PERSONNEL.
THE FOLLOWING APPLIES ONLY IN THE U.S.A.
FCC Note:
This equipment has been tested and found to comply with
the limits for a Class B digital device, pursuant to Part 15 of
the FCC Rules. These limits are designed to provide reasonable protection against harmful interference in a residential
installation. This equipment generates, uses, and can radiate radio frequency energy and, if not installed and used in
accordance with the instructions, may cause harmful interference to radio communications. However, there is no guar-
WARNING:
TO REDUCE THE RISK OF FIRE, ELECTRIC
Getting started
SHOCK OR PRODUCT DAMAGE, DO NOT
EXPOSE THIS APPARATUS TO RAIN, MOISTURE, DRIPPING OR SPLASHING AND THAT
NO OBJECTS FILLED WITH LIQUIDS, SUCH
AS VASES, SHALL BE PLACED ON THE
APPARATUS.
antee that interference will not occur in a particular
installation. If this equipment does cause harmful interference to radio or television reception, which can be determined by turning the equipment off and on, the user is
encouraged to try to correct the interference by one or more
of the following measures:
≥Reorient or relocate the receiving antenna.
≥Increase the separation between the equipment and
receiver.
≥Connect the equipment into an outlet on a circuit different
from that to which the receiver is connected.
≥Consult the dealer or an experienced radio/TV technician
for help.
FCC Caution: To assure continued compliance, follow the
attached installation instructions and use only shielded interface cables when connecting to peripheral devices.
Any changes or modifications not expressly approved by the
party responsible for compliance could void the user’s
authority to operate this equipment.
This device complies with Part 15 of the FCC Rules. Operation is subject to the following two conditions: (1) This device
may not cause harmful interference, and (2) this device must
accept any interference received, including interference that
may cause undesired operation.
CAUTION:
TO PREVENT ELECTRIC SHOCK MATCH
WIDE BLADE OF PLUG TO WIDE SLOT,
FULLY INSERT.
CAUTION!
DO NOT INSTALL OR PLACE THIS UNIT IN A BOOKCASE,
BUILT-IN CABINET OR IN ANOTHER CONFINED SPACE.
ENSURE THE UNIT IS WELL VENTILATED. TO PREVENT RISK
OF ELECTRIC SHOCK OR FIRE HAZARD DUE TO OVERHEATING, ENSURE THAT CURTAINS AND ANY OTHER MATERIALS
DO NOT OBSTRUCT THE VENTILATION VENTS.
THE FOLLOWING APPLIES ONLY IN THE U.S.A.
Note to CATV system installer:
This reminder is provided to call the CATV system installer’s
attention to Article 820-40 of the NEC that provides guidelines for
proper grounding and, in particular, specifies that the cable
ground shall be connected to the grounding system of the building, as close to the point of cable entry as practical.
-
VISIBLE AND INVISIBLE LASER RADIATION WHEN OPEN.
DANGER
AVOID DIRECT EXPOSURE TO BEAM.
-
VISIBLE AND INVISIBLE LASER RADIATION WHEN OPEN.
CAUTION
AVOID EXPOSURE TO BEAM.
-
RAYONNEMENT LASER VISIBLE ET INVISIBLE EN CAS D’OUVERTURE.
ATTENTION
EXPOSITION DANGEREUSE AU FAISCEAU.
-
SYNLIG OG USYNLIG LASERSTRÅLING VED ÅBNING.
ADVARSEL
UNDGÅ UDSÆTTELSE FOR STRÅLING.
-
AVATTAESSA OLET ALTTIINA NÄKYVÄÄ JA NÄKYMÄTÖN
VARO !
LASERSÄTEILYLLE. ÄLÄ KATSO SÄTEESEEN.
-
SYNLIG OCH OSYNLIG LASERSTRÅLNING NÄR DENNA DEL
VARNING
ÄR ÖPPNAD. BETRAKTA EJ STRÅLEN.
-
SYNLIG OG USYNLIG LASERSTRÅLING NÅR DEKSEL ÅPNES.
ADVARSEL
UNNGÅ EKSPONERING FOR STRÅLEN.
-
SICHTBARE UND UNSICHTBARE LASERSTRAHLUNG, WENN ABDECKUNG
VORSICHT
GEÖFFNET. NICHT DEM STRAHL AUSSETZEN.
-
-
Before moving the unit, ensure the disc tray is empty.
Failure to do so will risk severely damaging the disc and the
unit.
Do not place the unit
on amplifiers or equipment that may become
hot.
The heat can damage the unit.
(FDA 21 CFR)
(IEC60825-1)
(Inside of product)
RQLS0233
2
DVD-R4000

IMPORTANT SAFETY INSTRUCTIONS
Read these operating instructions carefully before using the unit. Follow the safety instructions on the unit and the applicable safety instructions
listed below. Keep these operating instructions handy for future reference.
1) Read these instructions.
2) Keep these instructions.
3) Heed all warnings.
4) Follow all instructions.
5) Do not use this apparatus near water.
6) Clean only with dry cloth.
7) Do not block any ventilation openings. Install in accordance
with the manufacturer’s instructions.
8) Do not install near any heat sources such as radiators, heat
registers, stoves, or other apparatus (including amplifiers) that
produce heat.
9) Do not defeat the safety purpose of the polarized or groundingtype plug. A polarized plug has two blades with one wider than
the other. A grounding-type plug has two blades and a third
grounding prong. The wide blade or the third prong are provided for your safety. If the provided plug does not fit into your
outlet, consult an electrician for replacement of the obsolete
outlet.
Features
Protect the power cord from being walked on or pinched partic-
10)
ularly at plugs, convenience receptacles, and the point where
they exit from the apparatus
11) Only use attachments/accessories specified by the manufacturer.
12) Use only with the cart, stand, tripod, bracket,
or table specified by the manufacturer, or sold
with the apparatus. When a cart is used, use
caution when moving the cart/apparatus
combination to avoid injury from tip-over.
13) Unplug this apparatus during lightning storms
or when unused for long periods of time.
14) Refer all servicing to qualified service personnel. Servicing is
required when the apparatus has been damaged in any way,
such as power-supply cord or plug is damaged, liquid has been
spilled or objects have fallen into the apparatus, the apparatus
has been exposed to rain or moisture, does not operate normally, or has been dropped.
.
Getting started
This unit allows recording of high quality video on
DVD-RAM, the compact and durable digital media with
fast random access. This media also out performs past
tape formats in ease of operation.
∫ Exceptional sound and picture quality when
recording
≥Audio is recorded using Dolby Digital stereo, enabling high qual-
ity sound recordings.
≥The encoder system used for recording is called “Hybrid VBR”
and allows high quality recordings.
∫ Fast access to the program you want to watch
➜page 17) [RAM] [DVD-R]
(
Use the Direct Navigator to find a program you have recorded and
start play.
∫ Make your own DVD-Video
≥Finalizing a DVD-R that has been recorded on produces an origi-
nal DVD-Video in accordance with DVD-Video standards.
≥In addition to DVD-Video movie software, this unit can also play
other types of discs including audio CDs and Video CDs. This
means that this unit has the potential to play a central role in your
home entertainment, from high-end home theater through to CD
playback.
∫ Maximum 12 hours on DVD-RAM
≥Using a double sided, 9.4 GB DVD–RAM allows you to record a
maximum of 12 hours (6 hours continuously).
≥You can also use the FR (Flexible Recording) mode to fit record-
ings efficiently onto the available space on the disc.
∫ Editing your recording [RAM]
≥You can divide programs (➜page 32).
≥Use play lists (➜page 28) to select your favorite scenes and rear
range them to play in any order you like.
∫ MP3 disc play (➜page 21)
You can also play MP3 files recorded on CD-R and CD-RW, as well
as DVD-RAM, DVD-R, DVD-Video, Video CDs and CDs.
∫ Progressive Scan
By connecting the component video terminal of this unit to a progressive scan television, it is possible to enjoy the high quality picture rendered by the progressive scan function.
∫ Quick View (➜page 19)
You can speed up play to make checking the contents faster. Both
video and sound are played faster.
∫ The FUNCTIONS menu shows you most of the
features you can use (
The FUNCTIONS menu has most of the features and functions you
are likely to use regularly. Just select the icon for the operation you
want to perform.
➜page 23)
∫ Watch a program while you are recording it
➜page 22) [RAM]
(
Chasing play
You can watch a program from the start while you are still recording it.
Simultaneous recording and play
You can record a program while watching one you recorded
previously.
Time Slip
You can jump back to review a piece of action you missed while
recording by pressing the time slip button.
≥During playback, you can specify a length of time to jump to the
scene you wish to view.
The manufacturer accepts no responsibility and offers no compensation for loss of recorded or edited material due to a problem
with the unit or disc, and accepts no responsibility and offers no compensation for any subsequent damage caused by such
loss.
Examples of causes of such losses are
≥A disc recorded and edited with this unit is played in a DVD recorder or computer disc drive manufactured by another company.
≥A disc used as described above and then played again in this unit.
≥A disc recorded and edited with a DVD recorder or computer disc drive manufactured by another company is played in this unit.
3
DVD-R4000

Table of contents
Getting started
IMPORTANT SAFETY INSTRUCTIONS . . . . . . . . . . . . . . . . . . . . 3
Features. . . . . . . . . . . . . . . . . . . . . . . . . . . . . . . . . . . . . . . . . . . . . 3
Accessories. . . . . . . . . . . . . . . . . . . . . . . . . . . . . . . . . . . . . . . . . . 4
Setting up
STEP 1 Antenna and television connections . . . . . . . . . . . . . . . 5
STEP 2 The remote control . . . . . . . . . . . . . . . . . . . . . . . . . . . . . 6
STEP 3 Plug-in Auto Tuning. . . . . . . . . . . . . . . . . . . . . . . . . . . . . 6
STEP 4 VCR Plusi guide channel settings . . . . . . . . . . . . . . . . 8
STEP 5 Set up to match your television . . . . . . . . . . . . . . . . . . 10
Disc information . . . . . . . . . . . . . . . . . . . . . . . . . . . . . . . . . . . . . 11
Getting started
Control reference guide . . . . . . . . . . . . . . . . . . . . . . . . . . . . . . . 12
Recording
Recording television programs. . . . . . . . . . . . . . . . . . . . . . . . . 14
Inserting discs . . . . . . . . . . . . . . . . . . . . . . . . . . . . . . . . . . . . . 15
Recording modes and approximate recording times in hours 15
Watching the television while recording . . . . . . . . . . . . . . . . . 15
Recording from a video cassette recorder . . . . . . . . . . . . . . . 15
Recording the best quality pictures in the remaining time
—Flexible Recording . . . . . . . . . . . . . . . . . . . . . . . . . . . . . 15
Playing back
Playing discs. . . . . . . . . . . . . . . . . . . . . . . . . . . . . . . . . . . . . . . . 16
When a menu screen appears on the television . . . . . . . . . . . 17
Position Memory . . . . . . . . . . . . . . . . . . . . . . . . . . . . . . . . . . . 17
Using the Direct Navigator . . . . . . . . . . . . . . . . . . . . . . . . . . . 17
To erase a program that is being played back . . . . . . . . . . . . 17
Other methods of play . . . . . . . . . . . . . . . . . . . . . . . . . . . . . . . . 18
Skipping. . . . . . . . . . . . . . . . . . . . . . . . . . . . . . . . . . . . . . . . . . 18
Slow-motion play . . . . . . . . . . . . . . . . . . . . . . . . . . . . . . . . . . . 18
Frame-by-frame viewing . . . . . . . . . . . . . . . . . . . . . . . . . . . . . 18
Starting play from a selected program, title, chapter, or track. 18
Skipping a minute forward—CM Skip . . . . . . . . . . . . . . . . . . . 18
Selecting an amount of time to skip—Time Slip . . . . . . . . . . . 19
Fast forward and rewind—SEARCH . . . . . . . . . . . . . . . . . . . . 19
Quick View. . . . . . . . . . . . . . . . . . . . . . . . . . . . . . . . . . . . . . . . 19
Marking places to play again—MARKER . . . . . . . . . . . . . . . . . 20
Marking positions directly . . . . . . . . . . . . . . . . . . . . . . . . . . . . 20
Using on-screen menus to mark positions . . . . . . . . . . . . . . . 20
Using menus to play MP3 discs . . . . . . . . . . . . . . . . . . . . . . . . 21
Playing while you are recording . . . . . . . . . . . . . . . . . . . . . . . . 22
Playing from the beginning of the program you are recording
—Chasing Play . . . . . . . . . . . . . . . . . . . . . . . . . . . . . . . . . . 22
Simultaneous rec and play . . . . . . . . . . . . . . . . . . . . . . . . . . . 22
Reviewing the recorded images while recording—Time Slip . 22
Changing audio. . . . . . . . . . . . . . . . . . . . . . . . . . . . . . . . . . . . . . 23
Using the FUNCTIONS window . . . . . . . . . . . . . . . . . . . . . . . . . 23
Timer recording
Timer recording. . . . . . . . . . . . . . . . . . . . . . . . . . . . . . . . . . . . . . 24
Specify a time to stop recording . . . . . . . . . . . . . . . . . . . . . . . 24
Using VCR Plus+ codes to make timer recordings. . . . . . . . . 24
Manually programming timer recordings . . . . . . . . . . . . . . . . 25
Check programs . . . . . . . . . . . . . . . . . . . . . . . . . . . . . . . . . . . 26
Change or delete the program . . . . . . . . . . . . . . . . . . . . . . . . 26
Editing
Entering text. . . . . . . . . . . . . . . . . . . . . . . . . . . . . . . . . . . . . . . . .27
Creating play lists . . . . . . . . . . . . . . . . . . . . . . . . . . . . . . . . . . . .28
Playing play lists, Playing play list scenes. . . . . . . . . . . . . . . .29
To erase a play list or a play list scene during playback. . . . .29
Editing play lists . . . . . . . . . . . . . . . . . . . . . . . . . . . . . . . . . . . . .30
Editing programs. . . . . . . . . . . . . . . . . . . . . . . . . . . . . . . . . . . . .32
Disc setting . . . . . . . . . . . . . . . . . . . . . . . . . . . . . . . . . . . . . . . . .34
Advanced operation
Using on-screen menus . . . . . . . . . . . . . . . . . . . . . . . . . . . . . . .36
Common procedures, Disc menu . . . . . . . . . . . . . . . . . . . . . .36
Play menu, Audio menu . . . . . . . . . . . . . . . . . . . . . . . . . . . . .37
Video menu . . . . . . . . . . . . . . . . . . . . . . . . . . . . . . . . . . . . . . .38
On-screen displays . . . . . . . . . . . . . . . . . . . . . . . . . . . . . . . . . . .39
Home Theater. . . . . . . . . . . . . . . . . . . . . . . . . . . . . . . . . . . . . . . .40
Connecting a cable TV box/satellite receiver . . . . . . . . . . . . .41
Connecting an amplifier or system component . . . . . . . . . . .42
Connecting other video equipment . . . . . . . . . . . . . . . . . . . . .43
Other antenna connections . . . . . . . . . . . . . . . . . . . . . . . . . . . .44
Other antenna connection to the unit . . . . . . . . . . . . . . . . . . .44
Other antenna connection from the unit to the television. . . . .44
Changing the remote control code . . . . . . . . . . . . . . . . . . . . . .45
Changing the unit’s settings . . . . . . . . . . . . . . . . . . . . . . . . . . .46
Summary of settings. . . . . . . . . . . . . . . . . . . . . . . . . . . . . . . . .46
Common procedures . . . . . . . . . . . . . . . . . . . . . . . . . . . . . . . .48
Clock settings . . . . . . . . . . . . . . . . . . . . . . . . . . . . . . . . . . . . .49
Reference
Glossary, Disc handling . . . . . . . . . . . . . . . . . . . . . . . . . . . . . . .50
Error messages . . . . . . . . . . . . . . . . . . . . . . . . . . . . . . . . . . . . . .51
Troubleshooting guide . . . . . . . . . . . . . . . . . . . . . . . . . . . . . . . .52
Maintenance. . . . . . . . . . . . . . . . . . . . . . . . . . . . . . . . . . . . . . . . .54
Product Service . . . . . . . . . . . . . . . . . . . . . . . . . . . . . . . . . . . . . .54
Specifications . . . . . . . . . . . . . . . . . . . . . . . . . . . . . . . . . . . . . . .55
Limited Warranty (ONLY FOR U.S.A.) . . . . . . . . . . . . . . . . . . . .56
Limited Warranty (ONLY FOR CANADA). . . . . . . . . . . . . . . . . .57
Español
Instalación básica. . . . . . . . . . . . . . . . . . . . . . . . . . . . . . . . . 58
Conexiones del televisor y de la antena . . . . . . . . . . . . . . 58
Plug-in para Sintonización automática . . . . . . . . . . . . . . . 58
Guía VCR Plus+ para ajuste de canales . . . . . . . . . . . . . 59
Instalación para ajustar su televisor . . . . . . . . . . . . . . . . . 59
Grabación de programas de televisión . . . . . . . . . . . . . . . 60
Introducción de discos . . . . . . . . . . . . . . . . . . . . . . . . . . . 61
Modos de grabación y tiempo de grabación
aproximado en horas . . . . . . . . . . . . . . . . . . . . . . . . . . 61
Visualización del televisor durante la grabación. . . . . . . . 61
Reproducción durante la grabación . . . . . . . . . . . . . . . . . 61
Reproducción de discos . . . . . . . . . . . . . . . . . . . . . . . . . . . 62
Cuando aparece una pantalla de menús en el televisor. . 63
Memoria de posición . . . . . . . . . . . . . . . . . . . . . . . . . . . . 63
Utilización del Navegador directo . . . . . . . . . . . . . . . . . . 63
Para borrar un programa que se está reproduciendo . . . 63
Índice . . . . . . . . . . . . . . . . . . . . . . . . . . . . . . . . . Contraportada
Index . . . . . . . . . . . . . . . . . . . . . . . . . . . . . . . . . . . . . . . Back cover
4
DVD-R4000
Accessories
Please check and identify the supplied accessories. Use numbers indicated in parentheses when asking for replacement parts.
Only for U.S.A.: To order accessories contact 1-800-SAMSUNG(1-800-726-7864)www.samsungsupport.com
Only for Canada: To order accessories, call the dealer from whom you have made your purchase.
1 Remote control
2 Batteries
for remote control
[Note]
The included AC power supply cord is for use with this unit
only. Do not use it with other equipment.
1 AC power supply cord
1 Audio/Video cable
1 75 ≠ coaxial cable

STEP 1 Antenna and television connections
Preparation
≥Refer to the television’s operating instructions.
≥Turn the television off and disconnect its AC power supply cord.
Television
AC power supply cord (included)
Connect last.
Also connect the AC
power supply cords for
the other equipment.
Audio/Video cable
(included)
To household AC outlet
(AC 120 V, 60 Hz)
Cooling fan
AUDIO
R L
Red White Yellow
Red White Yellow
IN
VIDEO
IN
75 ≠ coaxial cable
(included) ➜below
To enjoy sound through other audio equipment (➜page 42)
To enjoy progressive video
Connect to the component video(480P) input terminals on a television compatible with this unit’s copy guard system. (Video will not
be displayed correctly if connected to an incompatible television.)
To the antenna
Cable TV
VHF/UHF
RF IN
Outdoor antenna
If the connector
doesn’t match
➜page 44
Indoor antenna
or
Antenna cable
(usually disconnected from the
television).
This unit
Setting up
R-AUDIO-L
VIDEO
VIDEO
S-VIDEO
S-VIDEO
IN 1 IN 3
R-AUDIO-L
S-VIDEO OUT terminal
The S-VIDEO OUT terminal achieves a more vivid picture than
the VIDEO OUT terminal by separating the chrominance (C)
and luminance (Y) signals. (Actual results depend on the television.)
OUT
R-AUDIO-L
VIDEO
S video cable
(not included)
S-VIDEO
Television
S VIDEO
IN
When making this connection, ensure you connect the audio
cables to the corresponding audio input terminals on the television.
75 ≠ coaxial cable
≥The signal from the antenna passes through this unit and along
the 75 ≠ coaxial cable to the television even when this unit is
turned off. You don’t have to connect the antenna to the television.
≥The picture and sound signal from this unit does not go through
the 75 ≠ coaxial cable to the television. Make sure you connect
one of the following terminals on this unit to the television: the
AUDIO/VIDEO terminal, the S-VIDEO OUT terminal or the COMPONENT VIDEO OUT terminal. If the television has none of
these terminals, consult your local dealer.
Conserving power
This unit consumes a small amount of power, even when it is
turned off (approx. 3.2 W). To save power when the unit is not to
be used for a long time, unplug it from the household AC outlet.
(L1)
OUT
(L3)
RF IN
RF OUT
VHF/UHF
R-AUDIO-L
VIDEO
Television
COMPONENT
VIDEO IN
Y
P
B
S-VIDEO
YPBP
COMPONENT
VIDEO OUT
(480P/480I)
R
OPTICAL
DIGITAL AUDIO OUT
(PCM/BITSTREAM)
COMPONENT VIDEO OUT terminal
These terminals can be used for either
interlace or progressive output and
provide a purer picture than the S-VIDEO
PR
OUT terminal.
Connection using these terminals outputs
the color difference signals (P
B/PR) and
luminance signal (Y) separately in order to
achieve high fidelity in reproducing colors
Video cable
(not included)
≥The description of the component video
input terminals depends on the television or monitor (e.g. Y/P
B/CR). Connect to terminals of the
Y/C
B/PR, Y/B-Y/R-Y,
same color.
≥After making this connect, change the
black level for a better picture
YPBP
OPTICAL
R
(➜page 47, Video–Black Level Control).
When making this connection, ensure you
connect the audio cables to the
COMPONENT
VIDEO OUT
(480P/480I)
DIGITAL AUDIO OUT
(PCM/BITSTREAM)
corresponding audio input terminals on
the television.
Do not connect the unit through a video
cassette recorder
Video signals fed through video cassette recorders will
be affected by copyright protection systems and the picture will not be shown correctly on the television.
.
5
DVD-R4000

STEP 2 The remote control
Batteries
R6/LR6, AA, UM-3
-
+
-
+
≥Insert so the poles (i and j) match those in the remote control.
Setting up
≥Do not use rechargeable type batteries.
Do not:
≥mix old and new batteries.
≥use different types at the same time.
≥heat or expose to flame.
≥take apart or short circuit.
≥attempt to recharge alkaline or manganese batteries.
≥use batteries if the covering has been peeled off.
Mishandling of batteries can cause electrolyte leakage which can
damage items the fluid contacts and may cause a fire.
Remove if the remote control is not going to be used for a long
period of time. Store in a cool, dark place.
STEP 3 Plug-in Auto Tuning
Numbered
buttons
3, 4, 2, 1
ENTER
[Note]
If you cannot operate the unit or television using the remote control
after changing the batteries, please re-enter the codes
(television➜page 10, main unit ➜page 45).
Use
Remote control signal sensor
20x
30x
20x
30x
7 m (23 feet) directly in
front of the unit
POWER, Í/I
After plugging the unit into your household AC outlet and pressing
[Í, DVD POWER] to turn the unit on for the first time, the unit
assists you to set the menu language, and automatically tunes in
all the channels it can receive and sets the clock.
The unit automatically determines the type of transmission (VHF/
UHF or cable) and puts them into channels as follows.
TV Mode
(VHF/UHF)
VHF 2s13
CATV LOW BAND 95s99
CATV Mode
(Cable)
CATV MID/SUPER BAND 14s36
CATV HYPER BAND 37s65
ULTRA BAND
SPECIAL CATV CHANNEL 1
V,WCH
Band Channel
VHF 2s13
UHF 14s69
66s94
100s125
6
DVD-R4000
Preparation
Antenna System
Auto Channel Setting
Channel Caption
Preset Channel Caption
Manual Channel Caption
CATV
Set Up
Channel
SETUP
SETUP
Set Up
Channel
Antenna System
TV
CATV
SETUP
Set Up
Disc
Video
Audio
Channel
Auto Channel Setting
Connect antenna cable and if you use a
cable box, tune it to your local PBS CH
then...
Please push the ENTER key.
CHANNEL 15 DELETED
≥Confirm that the antenna is connected correctly.
≥Turn on the television and select the appropriate video input to
suit the connections to this unit.
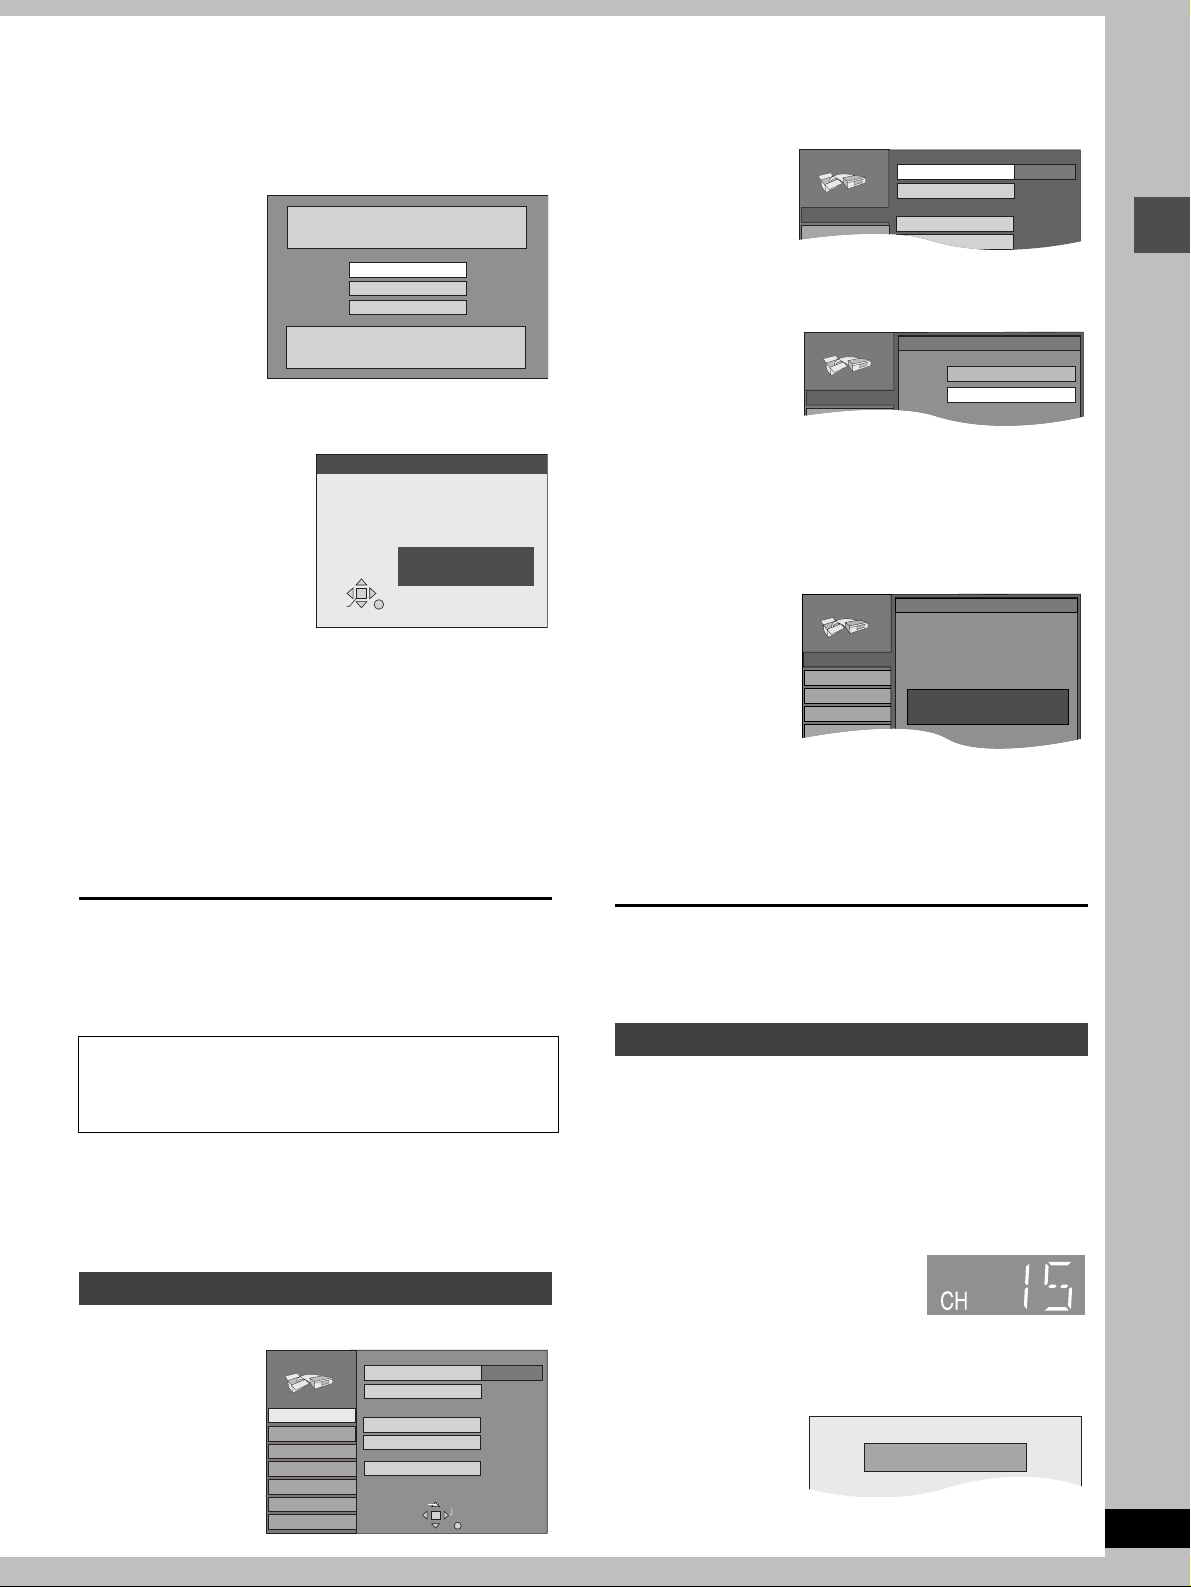
1 Press [Í, DVD POWER] to turn the
unit on.
2
Press [3, 4] to select the menu
language and press [ENTER].
e.g., when you select
English
Select Language
Seleccione la Lengua
Sélection de Langue
English
Español
Français
Press ENTER
Pulse ENTER
Appuyer sur ENTER
Auto Channel/Clock Setting
Connect antenna cable and if you use a
cable box, tune it to your local PBS CH
ENTER
then. . .
Please push the ENTER key.
RETURN
3 Press [ENTER].
Plug-in Auto Tuning starts and the unit puts the stations it
can receive into channels.
The unit then proceeds with Auto Clock Setting. The time is
displayed when finished. If the clock is an hour slower or
faster than the actual time, go to “Time Zone Adjust” to correct it (➜page 49).
4 When the display shows the correct time
Press [ENTER] to complete Plug-in
Auto Tuning.
2 Press [3, 4] to select “Channel” and
press [1].
3 Press [3, 4] to select “Antenna Sys-
tem” and press [ENTER].
Setting up
4 Press [3, 4] to select “TV” or
“CATV” and press [ENTER].
The screen shown in step 2 reappears.
5 Press [3, 4] to select “Auto Channel
Setting” and press [ENTER].
If you have not yet set clock, the “Auto Channel/Clock
Setting” screen appears.
6 Press [ENTER].
Auto setting starts. This takes a few minutes. (To stop auto
channel setting, press [RETURN].) When finished, the Complete screen or time display is shown. Press [ENTER].
If the unit couldn’t set the clock automatically
Press [ENTER] to show the “Manual Clock Setting” screen. Set the
time manually (➜page 49).
To start Plug-in Auto Tuning again (after relocation, for example)
Antenna system, channel caption, and VCR Plusr guide
channel settings all revert to the default values when you
perform the procedure below. Timer recording settings are
also cleared.
When the unit is on and stopped
1 Press and hold [X, CH] and [W, CH] on the main unit for
about five seconds.
The unit turns off.
2 Press [Í, DVD POWER] to turn the unit on.
Follow the above steps 2–4.
If Plug-in Auto Tuning fails
1 Press [SETUP] to show the menus.
SETUP
Channel
Set Up
Disc
Video
Audio
Display
TV Screen
Antenna System
Auto Channel Setting
Channel Caption
Preset Channel Caption
Manual Channel Caption
VCR Plusi CH Setting
TAB
SELECT
RETURN
CATV
To return to the previous screen
Press [RETURN].
When you are finished
Press [SETUP].
Adding and deleting channels
Add or delete channels if necessary channels are not set or
unnecessary channels are set.
While this unit is receiving the antenna signal (but not during
recording):
1 Press the numbered buttons to select
a channel.
e.g., “5”: [0] ➜ [5]
“15”: [1] ➜ [5]
“115”: [100] ➜ [1] ➜ [5]
≥You can also use [W, X, CH]
when you are going to delete a channel.
Unit's display
2 Press [ADD/DLT].
The channel is deleted if it was set or added if it was not set.
e.g.,
Repeat steps 1 and 2 as necessary.
7
DVD-R4000
Setting up
OPEN/CLOSE
SETUP
ERASE
F Rec
POSITION MEMORY
MARKER
AUDIO
INPUT SELECT
CM SKIP
STATUS
FRAME
DISPLAY
S
T
O
P
P
A
U
S
E
P
L
A
Y
DVD
VCR Plus+ TV/VIDEO
REC MODE
REC
CH
VOLUME
TV
TV
DVD
123
789
0
100
4
5
6
SLOW/SEARCH
SKIP
DIRECT NAVIGATOR
TOP
MENU
MENU
RETURN
FUNCTIONS
PROG/CHECK
TIME SLIP
ADD/DLT
ENTER
PLAY LIST
CANCEL
POWER
ÍÍ
8
DVD-R4000
STEP 4 VCR Plusi guide channel settings
3 Press [3, 4] to select “VCR Plusr
CANCEL
4 Press [3, 4] to select the guide
3, 4, 2, 1
ENTER
RETURN
SETUP
Set these guide channels so you can use VCR Plusi codes for
timer recording. Before starting the settings, prepare a chart showing the channels, station names, and guide channels.
e.g.,
Station
name
Guide
channel
Channel
number
Channel setting
(in step 5)
5 Press [3, 4] to select the channel
CBS 04 04 Unnecessary
HBO 33 15
Nickelodeon 38 20
Look up the guide channels
for the stations in magazines.
Enter channel 15 next
to Guide Channel 33.
Enter channel 20 next
to Guide Channel 38.
Write down all the stations you
can receive.
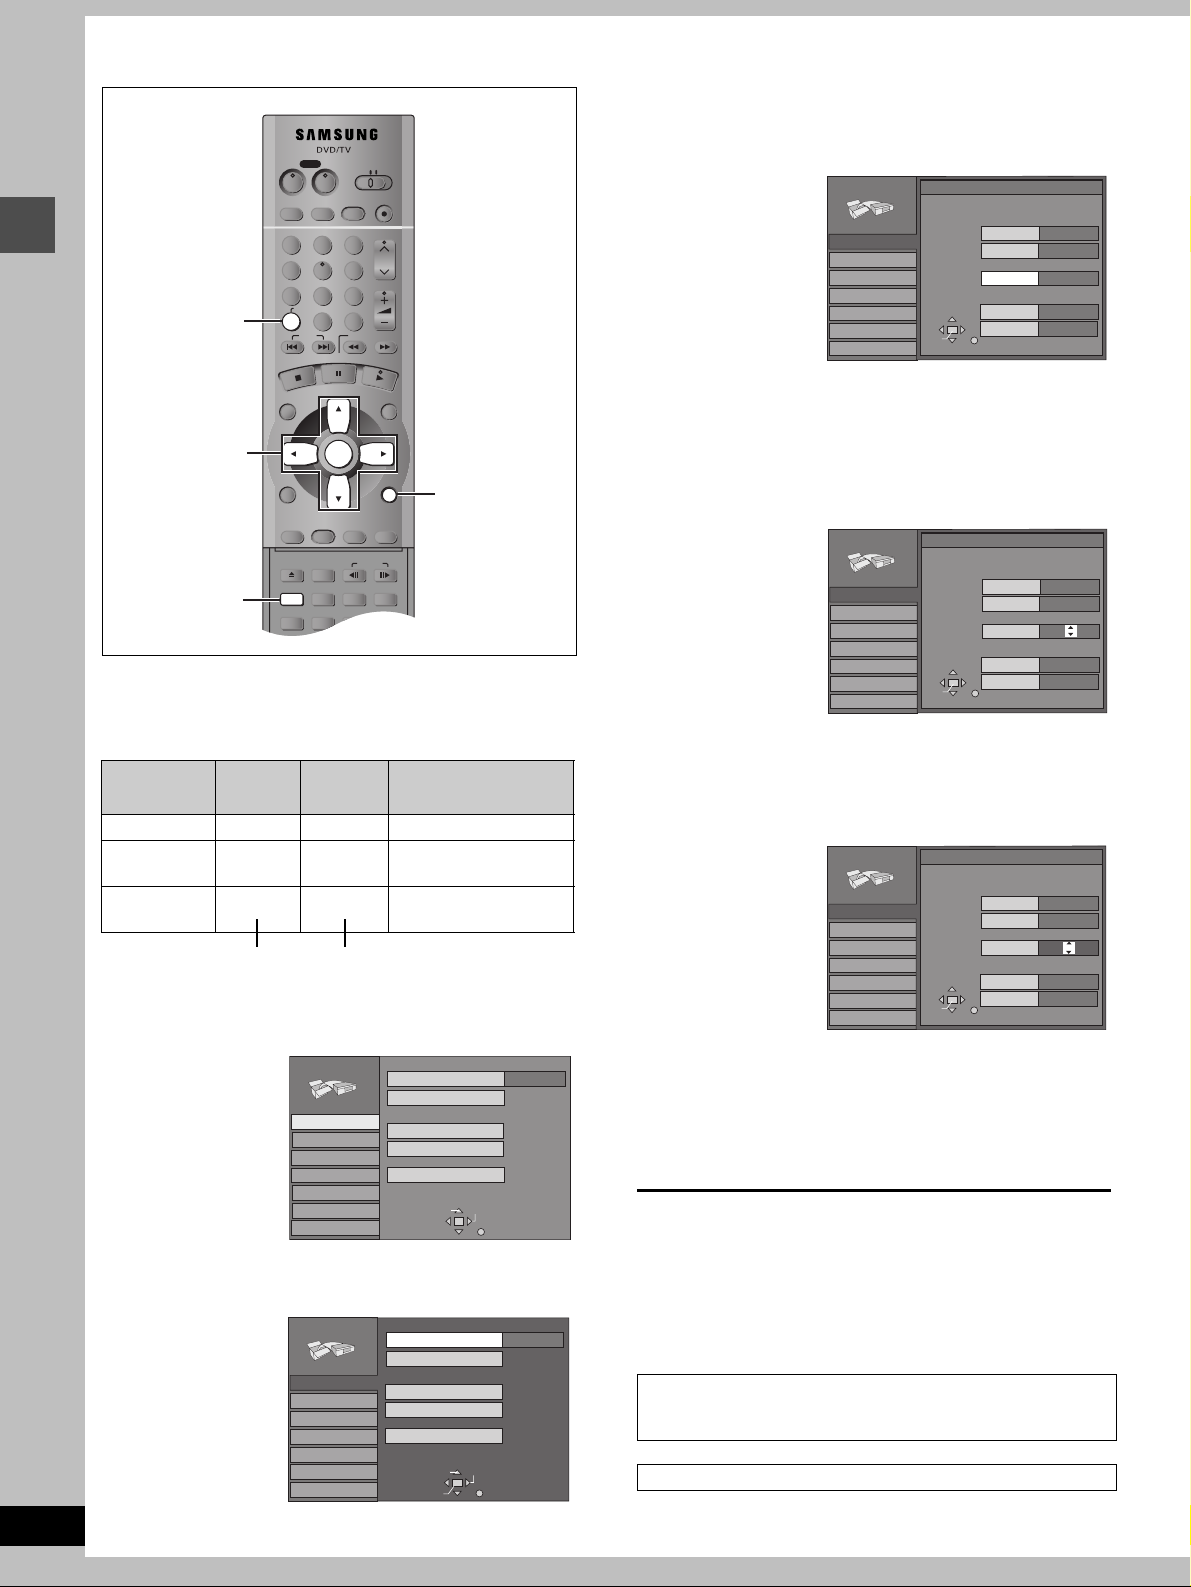
1 Press [SETUP] to show the menus.
SETUP
2 Press [3, 4] to select “Channel” and
press [1].
Channel
Set Up
Disc
Video
Audio
Display
TV Screen
SETUP
Channel
Set Up
Disc
Video
Audio
Display
TV Screen
Antenna System
Auto Channel Setting
Channel Caption
Preset Channel Caption
Manual Channel Caption
VCR Plusi CH Setting
TAB
Antenna System
Auto Channel Setting
Channel Caption
Preset Channel Caption
Manual Channel Caption
VCR Plusi CH Setting
ENTER
SELECT
RETURN
TABSELECT
RETURN
CATV
6 Press [ENTER].
To return to the previous screen
Press [RETURN].
When you are finished
Press [SETUP].
CATV
VCR Plusi and PlusCode are registered trademarks of Gemstar
Development Corporation. The VCR Plusi system is manufactured under license from Gemstar Development Corporation.
Pats. 5,307,173; 5,335,079; 4,908,713; 4,751,578; and 4,706,121
CH Setting” and press [ENTER].
e.g., when the current antenna system is CATV.
SETUP
Channel
Set Up
Disc
Video
Audio
Display
TV Screen
VCR PlusiCH Setting
Guide Channel CATV Channel
SELECT
ENTER
RETURN
125
---
---
1
---
2
---
3
channel you want to set and press
[1].
When selecting the guide channel, press and hold [3, 4]
to scroll the screen up and down.
SETUP
Channel
Set Up
Disc
Video
Audio
Display
TV Screen
VCR PlusiCH Setting
Guide Channel CATV Channel
SELECT
ENTER
RETURN
---
4
5
---
---
6
---
7
---
8
corresponding to the guide channel
and press [2].
SETUP
Channel
Set Up
Disc
Video
Audio
Display
TV Screen
To delete a number, press [CANCEL].
Repeat steps 4 and 5 as necessary.
The “Channel” screen reappears.
VCR PlusiCH Setting
Guide Channel CATV Channel
SELECT
ENTER
RETURN
---
4
5
---
12
6
---
7
---
8
Other channel settings
1 Press [SETUP] to show the menus.
2 Press [3, 4] to select “Channel” and
press [1].
SETUP
Channel
Set Up
Disc
Video
Audio
Display
TV Screen
Antenna System
Auto Channel Setting
Channel Caption
Preset Channel Caption
Manual Channel Caption
VCR Plusi CH Setting
SELECT
ENTER
Preset Channel Caption
CATV
Proceed with
the steps
described
below.
TAB
RETURN
3 Press [3, 4] to select “Preset Chan-
nel Caption” and press [ENTER].
SELECT
ENTER
Preset Caption
RETURN
Caption
GLOB
ABC
PBS
CBS
Channel Number
---
---
---
---
SETUP
Channel
Set Up
Disc
Video
Audio
Display
TV Screen
4 Press [3, 4] to select the caption
and then press [1].
You can choose from the following captions.
ABC, PBS, CBS, CNN, FOX, ESPN, NBC, HBO, A&E, AMC,
FAM, MAX, MTV, SHOW, TBS, USA, TNT, CBC, UPN, CTV,
WB, TSN, DSC, GLOB
≥The screen scrolls a page at a time if you press and hold
[3, 4].
5 Press [3, 4] to select the channel
corresponding to the caption and
then press [2].
≥Channels are not displayed if they do not contain a station
or if captions have been added manually.
≥To delete the channel number, press [CANCEL].
≥Repeat steps 4 and 5 as necessary.
6 Press [ENTER].
The “Channel” screen reappears.
Manual Channel Caption
3
Press [3, 4] to select “Manual
Channel Caption” and press [ENTER].
SELECT
ENTER
Manual Caption
Channel Number
RETURN
125
Caption
----
- - - -
1
2
----
----
3
SETUP
Channel
Set Up
Disc
Video
Audio
Display
TV Screen
4 Press [3, 4] to select the channel
and then press [1].
≥Channels are not displayed if they do not contain a station
or if preset captions have been added.
5
Press [3, 4] to select the first
character and then press [1].
≥You can choose from the following characters:
A–Z, 0–9, -, &, !, /, (space)
≥To delete the caption, press [CANCEL].
≥Repeat step 5 to enter the other characters.
SELECT
ENTER
Manual Caption
Channel Number
RETURN
Caption
----
6
----
8
AAAA
10
12
----
----
23
SETUP
Channel
Set Up
Disc
Video
Audio
Display
TV Screen
6 Press [2, 1] to return to the Channel
Number column when you are
finished.
Repeat steps 4, 5, and 6 as necessary.
7 Press [ENTER].
The “Channel” screen reappears.
Setting up
To return to the previous screen
Press [RETURN].
When you are finished
Press [SETUP].
9
DVD-R4000

SETUP
Set Up
Disc
Video
TV Type
Aspect 4:3 & 480I
Aspect 4:3 & 480P
Channel
Aspect 16:9 & 480P
Aspect 16:9 & 480I
STEP 5 Set up to match your television
To return to the previous screen
Press [RETURN].
When you are finished
Press [SETUP].
Setting up
10
DVD-R4000
Numbered
buttons
3, 4, 2, 1
ENTER
Change the settings if your television is:
≥Widescreen (16:9 aspect ratio)
≥Progressive
– Read your television’s operating instructions for details.
1 Press [SETUP] to show the menus.
SETUP
Channel
Set Up
Disc
Video
Audio
Display
TV Screen
Antenna System
Auto Channel Setting
Channel Caption
Preset Channel Caption
Manual Channel Caption
VCR Plusi CH Setting
TAB
CATV
SELECT
RETURN
2 Press [3, 4] to select “TV Screen”
and press [1].
SETUP
Channel
Set Up
Disc
Video
Audio
Display
TV Screen
TV Type
TV mode(4:3)
4:3 TV Settings for DVD-Video
4:3 TV Settings for DVD-RAM
SELECT
ENTER
4:3 (480I)
Pan&Scan
Letterbox
TAB
RETURN
3 Press [3, 4] to select “TV Type” and
press [ENTER].
4 Press [3, 4] to select the item and
press [ENTER].
≥If you select a progressive output (480P) item, select Video
in the on-screen menu and set “Transfer” to suit the material
(➜page 38).
∫ Regarding Progressive Television Picture
Progressive image aspect (height to width ratio) is set at a standard 16:9. DVD-Video which has been set at 16:9 will be displayed
correctly. However, 4:3 video material will be stretched to the right
and left when displayed.
≥To view the picture at the right aspect
– For televisions that allow the aspect of progressive images to
be adjusted, use the function provided on the television and
adjust as necessary.
– For televisions which do not allow the aspect of progressive
images to be adjusted, please set “Progressive” to “OFF” (➜
page 38).
[Note]
≥If the unit is connected to the TV through VIDEO OUT or S-VIDEO
OUT, output will be interlace only (even if you select progressive
output).
≥When progressive output is on, closed captions can not be dis-
played.
Television operation
You can control televisions by entering the remote control code.
Press and hold [Í, POWER TV] and enter the
two-digit code with the numbered buttons.
e.g., 01: press [0] ➜ [1].
Code No. and Manufacturer
01
Panasonic/National QUASAR
02 12 HITACHI
MAGNAVOX SYLVANIA PHIL-
03
IPS (RC-5)
04 ZENITH 14 SAMSUNG
05 THOMSON RCA GE 15
SHARP
07 17
08 SONY 18
09 TOSHIBA 19
10 SANYO FISHER –
≥Test by turning on the television and changing channels. Repeat
the procedure until you find the code that allows correct operation.
[Note]
If your television brand is not listed or if the code listed for your
television does not allow control of your television, this remote control is not compatible with your television.
∫ Operation
Point the remote control at the television.
Operation Button
On and off [Í, POWER TV]
Video input mode [TV/VIDEO]
(Switch [DVD, TV] to “TV”.)
Channels
Volume [r, s, VOLUME]
[W, X, CH] or
Numbered buttons
e.g., Channel “5”: [0] ➜ [5]
11 JVC
13 MITSUBISHI
GOLDSTAR/LG06
16
SAMSUNG
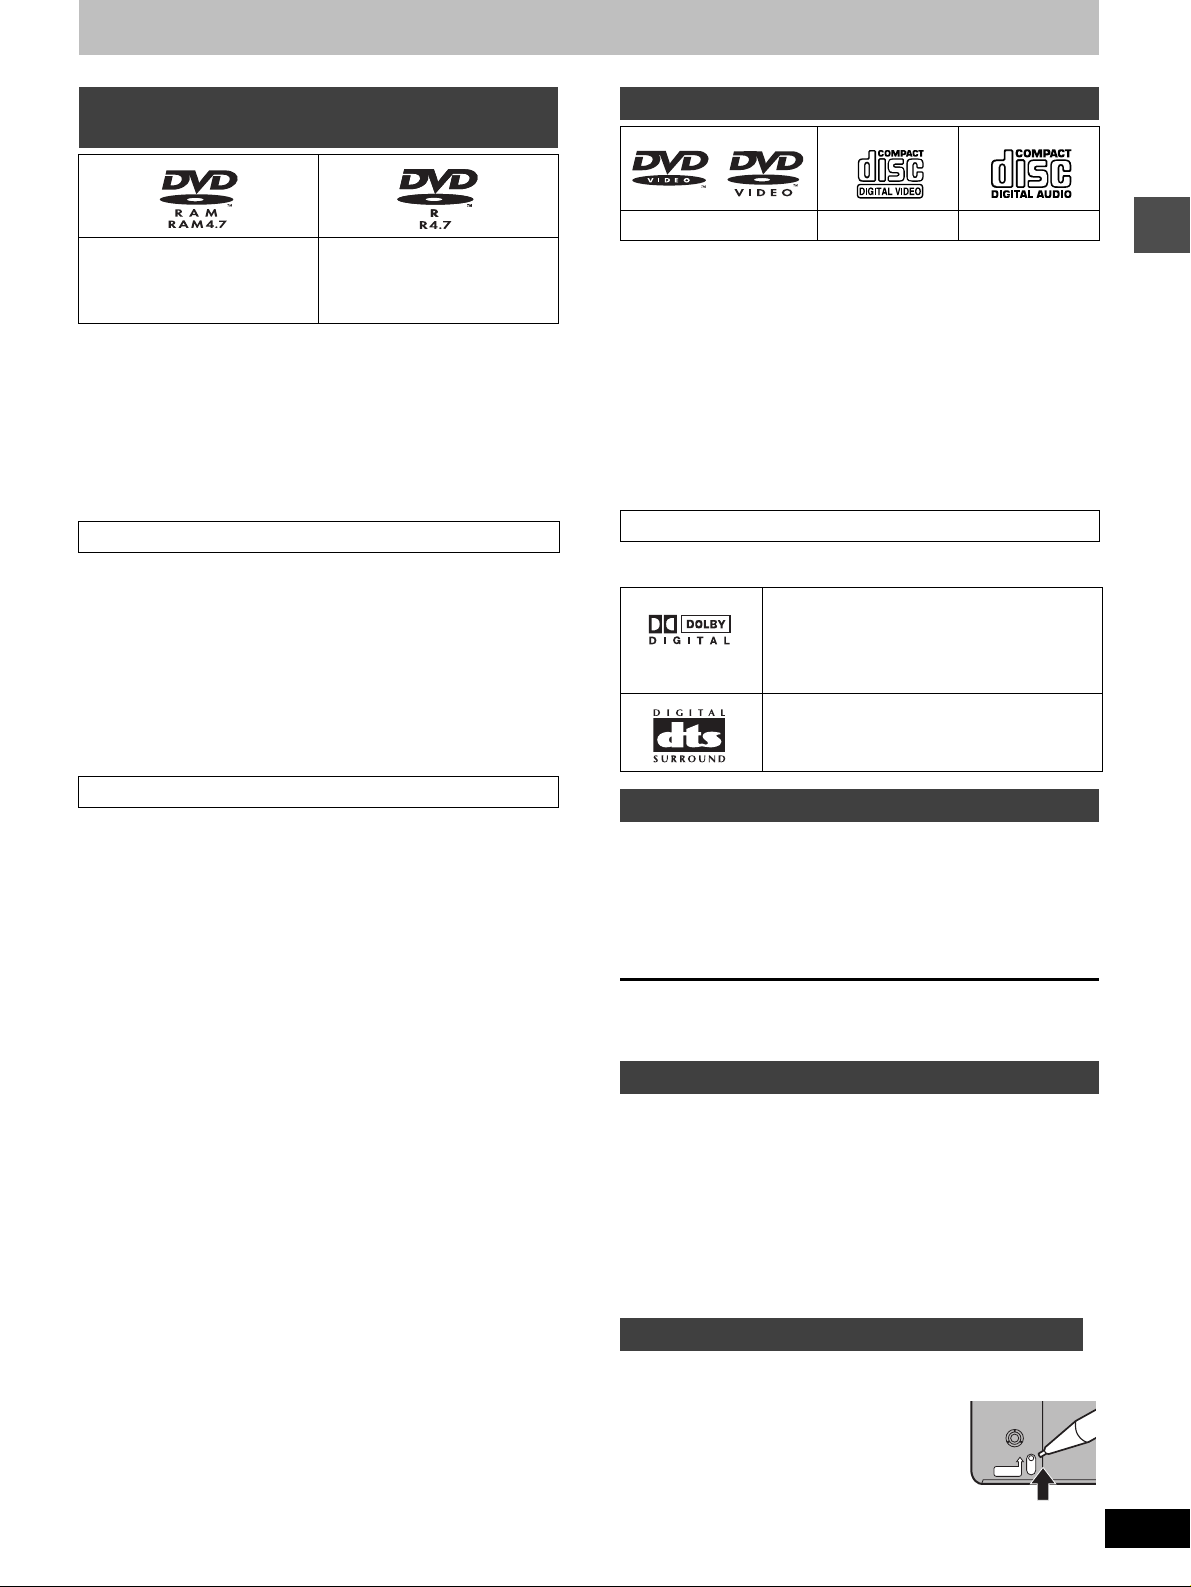
Disc information
Discs you can use for recording and
play
DVD-RAM
4.7 GB/9.4 GB, 12 cm (5z)
2.8 GB, 8 cm (3z)
≥Do not allow the disc to become dirty or scratched. Fingerprints,
dirt, dust, scratches or deposits of cigarette smoke on the recording surface may make it impossible to use the disc for recording.
≥Discs with programs recorded in PAL already cannot be
recorded on using this unit.
DVD-RAM
≥DVD-RAM recorded on this unit may not be compatible with
other DVD players. Consult
the manual for the player to determine compatibility with
these DVD-RAM discs.
≥This unit is compatible with both non-cartridge and cartridge
DVD-RAM, but the write-protect tabs on cartridge-type discs give
better protection to your recordings.
≥Picture aspect ratios, regular 4:3 or widescreen 16:9, are
recorded as they are received.
DVD-R
4.7 GB 12 cm (5z)
1.4 GB, 8 cm (3z)
for General Ver. 2.0
Play-only discs
DVD-Video Video CD Audio CD
§
Including discs recorded with MP3.
≥The producer of the material can control how DVD-Video and
Video CDs are played. This means that you may not be able to
control play of a disc with some operations described in these
operating instructions. Read the disc’s instructions carefully.
≥This unit can play CD-R/CD-RW (audio recording disc) recorded
with CD-DA (digital audio), video CD (video CD format 2.0 or
above) or MP3. Finalize
It may not be able to play some CD-R or CD-RW due to the condition of the recording.
§1
A process that allows play on compatible equipment.
≥This unit cannot record onto CD-R or CD-RW.
§1
the disc after recording.
DVD-Video
≥Audio format
Dolby Digital (➜page 47)
This unit can play Dolby Digital in stereo (2
channels). Connect an amplifier with a built-in
Dolby Digital decoder to enjoy surround
sound.
DTS Digital Surround (➜page 47)
Connect this unit to equipment that has a
DTS decoder to enjoy DVDs with this mark.
§
Setting up
DVD-R
≥In order to play a DVD-R recorded using this unit on another
playback source, the disc must first be finalized (➜page 34).
≥Once a DVD-R is finalized, it becomes DVD-Video.
≥You can record onto the available space on the disc and perform
editing functions, such as giving titles to discs and programs and
erasing programs before finalizing.
≥When programming is erased from a DVD-R, that space does not
become available. Once an area on a DVD-R is recorded on, that
area is no longer available for recording, whether the recording is
erased or not.
≥It takes about 30 seconds for the unit to complete recording man-
agement information after recording finishes.
≥This unit optimizes the DVD-R for each recording. Optimizing is
carried out when you start recording after inserting the disc or
turning on the unit. Recording onto the disc may become impossible if optimizing is carried out too many times.
≥Play may be impossible in some cases due the condition of the
recording.
≥The video is recorded in a 4:3 aspect irrespective of the video
signal input.
Discs you can use
The features you can use with the different types of discs are
indicated as follows.
[RAM] [DVD-R] [DVD-V] [VCD] [CD] [MP3]
|| ||||
DVD-RAM DVD-R DVD-Video Video CD Audio CD MP3 discs
[DVD-R] indicates DVD-R that have not yet been finalized
(➜page 34). DVD-R that have been finalized can use the same features as DVD-Video. (Refer to features indicated [DVD-V].)
Discs that cannot be played
≥DVD-Video with a region number other than “1” or “ALL”
≥12-cm (5z), 2.6- and 5.2-GB DVD-RAM
≥DVD-RAM not recorded following the Video Recording Standard
≥3.95- and 4.7-GB DVD-R for Authoring
≥Unfinalized DVD-R recorded on other equipment
≥PAL discs ≥DVD-ROM ≥DVD-RW ≥DVD-Audio
≥+RW ≥CD-ROM ≥CDV ≥CD-G
≥Photo CD ≥CVD ≥SVCD ≥SACD
≥MV-Disc ≥PD ≥Divx Video Disc, etc.
Protection
[RAM]
You can protect the contents of your discs in the following ways.
≥Cartridge-protect:
With the write-protect tab in the protect position, you cannot record to, edit, or erase
from the disc. (Type 1, 2, and 4 cartridge
discs)
≥Program-protect (➜page 32)
≥Disc-protect (➜page 34)
PROTECT
11
DVD-R4000

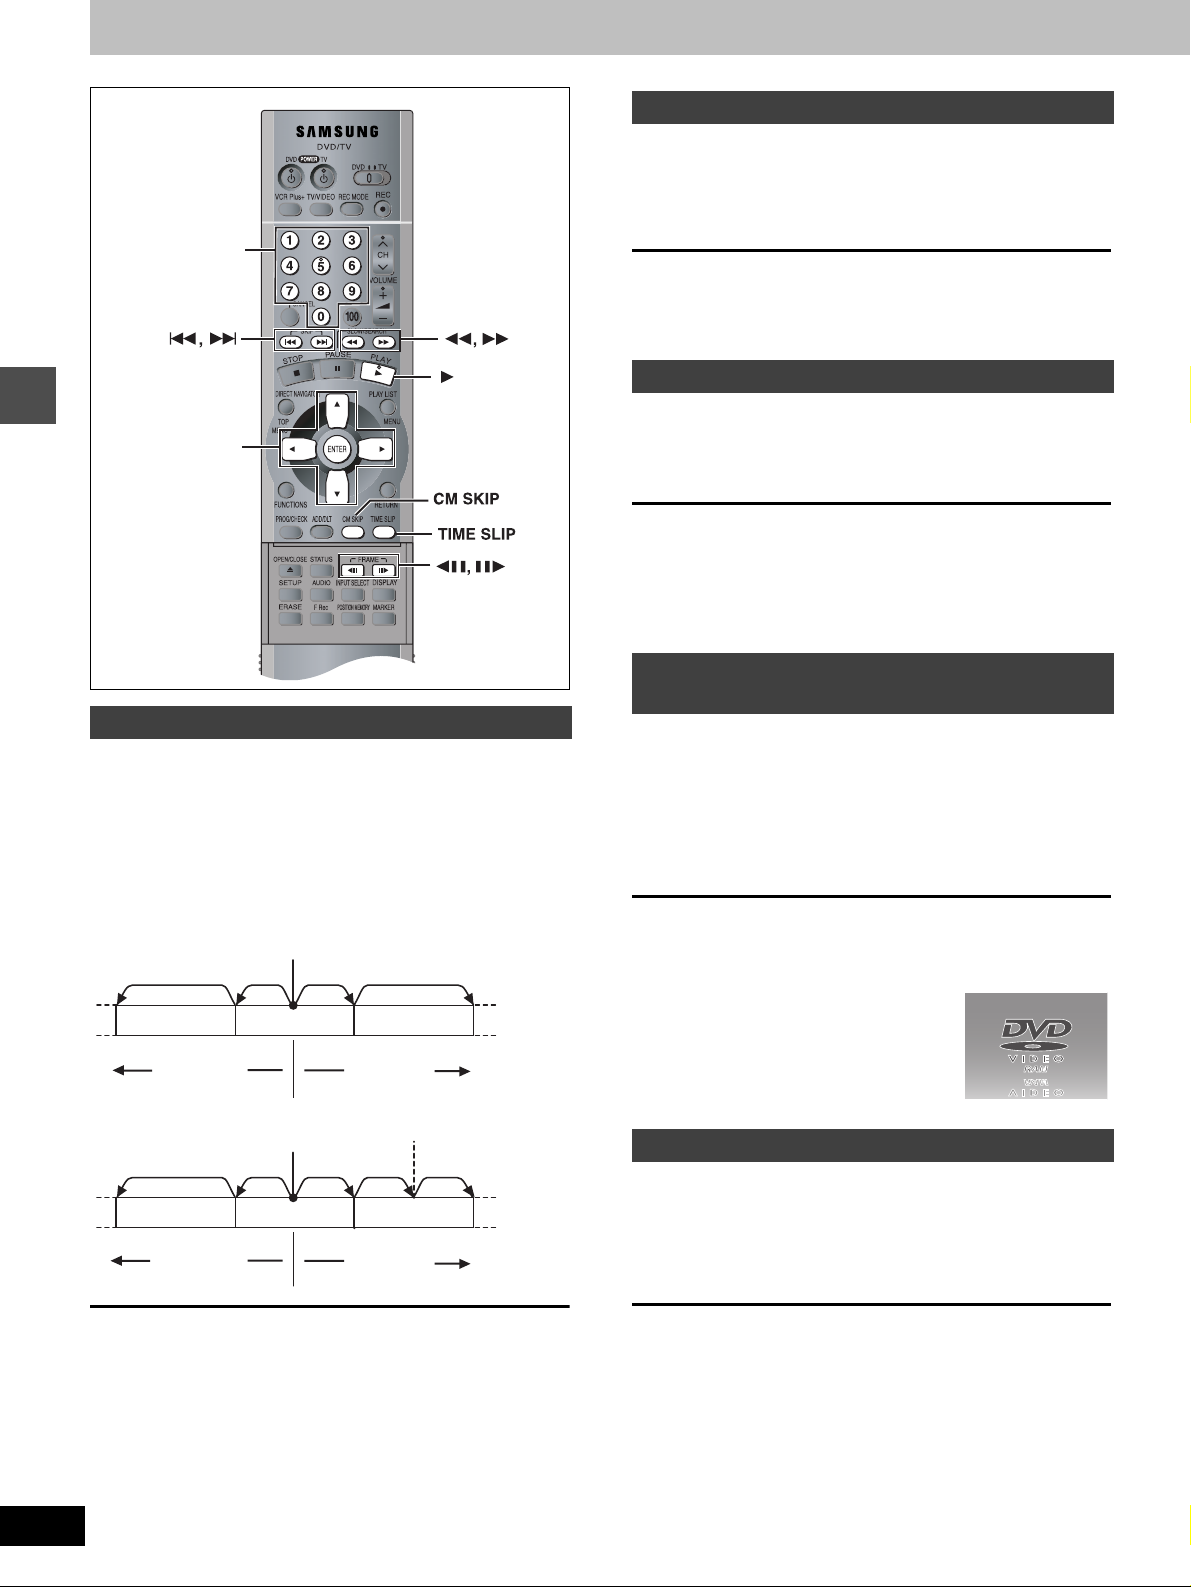
Control reference guide
Remote control
1
2
3
Setting up
4
5
6
7
8
9
:
;
<
=
>
?
@
A
B
C
1 POWER button (Í, DVD (POWER)) . . . . . . . . . . . . . . . . . . 7, 14
Press to switch the unit from on to standby mode or vice versa.
In standby mode, the unit is still consuming a small amount of
power.
D
ÍÍ
E
F
G
H
I
J
K
L
M
N
O
P
Q
R
S
T
2 VCR Plusr button (VCR Plusr) . . . . . . . . . . . . . . . . . . . . . . 24
3 Television input mode selector (TV/VIDEO). . . . . . . . . . . . . 10
4 Numbered buttons (1–9, 0, 100)
5 Cancel button (CANCEL). . . . . . . . . . . . . . . . . . . . . . . . . . . . . 8
6 Skip buttons (:, 9 SKIP) . . . . . . . . . . . . . . . . . . . . . . . 18
7 Stop button (∫ STOP) . . . . . . . . . . . . . . . . . . . . . . . . . . . . . . 14
8 Pause button (; PAUSE) . . . . . . . . . . . . . . . . . . . . . . . . . . . 14
9 Top menu and Direct Navigator button
(TOP MENU, DIRECT NAVIGATOR). . . . . . . . . . . . . . . . . 17, 21
: Cursor buttons (3, 4, 2, 1)/Enter button (ENTER) . . . 7, 15
; Functions button (FUNCTIONS) . . . . . . . . . . . . . . . . . . . . . . 23
< Manual channel adding and deleting button
(ADD/DLT) . . . . . . . . . . . . . . . . . . . . . . . . . . . . . . . . . . . . . . . . . 7
= Manual programming and check button
(PROG/CHECK) . . . . . . . . . . . . . . . . . . . . . . . . . . . . . . . . . . . 25
> On-screen display button (STATUS). . . . . . . . . . . . . . . . . . . 39
? Disc tray open/close button (< OPEN/CLOSE) . . . . . . . . . 14
@ Audio button (AUDIO) . . . . . . . . . . . . . . . . . . . . . . . . . . . . . . 23
A Setup button (SETUP) . . . . . . . . . . . . . . . . . . . . . . . . . . . . . . 48
B Program/play list erase button (ERASE) . . . . . . . . . . . . 17, 29
C Flexible Recording button (F Rec) . . . . . . . . . . . . . . . . . . . . 15
D TV power on/off button (Í, (POWER) TV) . . . . . . . . . . . . . . 10
E DVD/TV switch (DVD, TV) . . . . . . . . . . . . . . . . . . . . . . . . . . . 10
F Recording button (¥, REC) . . . . . . . . . . . . . . . . . . . . . . . . . . 14
G Recording mode button (REC MODE) . . . . . . . . . . . . . . . . . 14
H Channel buttons for recorder and TV (W, X, CH) . . . . . 10, 14
I TV volume buttons (r, s, VOLUME) . . . . . . . . . . . . . . . . . . 10
J Slow/search buttons (6, 5 SLOW/SEARCH) . . . . . . . . 18
K Play/speed play button (1 PLAY). . . . . . . . . . . . . . . . . . 16, 19
L Menu and Play list button (MENU, PLAY LIST) . . . . . . . 17, 28
M Return button (RETURN). . . . . . . . . . . . . . . . . . . . . . . . . . . . . 7
N One-minute skip button (CM SKIP) . . . . . . . . . . . . . . . . . . . 18
O Time slip button (TIME SLIP). . . . . . . . . . . . . . . . . . . . . . 19, 22
P Frame advance and frame reverse buttons
(2;, ;1 FRAME). . . . . . . . . . . . . . . . . . . . . . . . . . . . . . . . . 18
Q Input select button (INPUT SELECT) . . . . . . . . . . . . . . . . . . 15
R On-screen menu button (DISPLAY) . . . . . . . . . . . . . . . . . . . 36
S Marker button (MARKER) . . . . . . . . . . . . . . . . . . . . . . . . . . . 20
T Position memory button (POSITION MEMORY) . . . . . . . . . 17
12
DVD-R4000
How to open the remote control
Hold both sides of the remote control’s cover to open it. (You can
also open it by pressing on the center of it and sliding it down.)
Main unit
U
U Power button. . . . . . . . . . . . . . . . . . . . . . . . . . . . . . . . . . . . 7, 14
V Disc tray . . . . . . . . . . . . . . . . . . . . . . . . . . . . . . . . . . . . . . . . .14
W Channel buttons for recorder (CHANNEL). . . . . . . . . . . . . . 14
X L2 input terminals (L2). . . . . . . . . . . . . . . . . . . . . . . . . . . . . . 43
X
W
V
Y
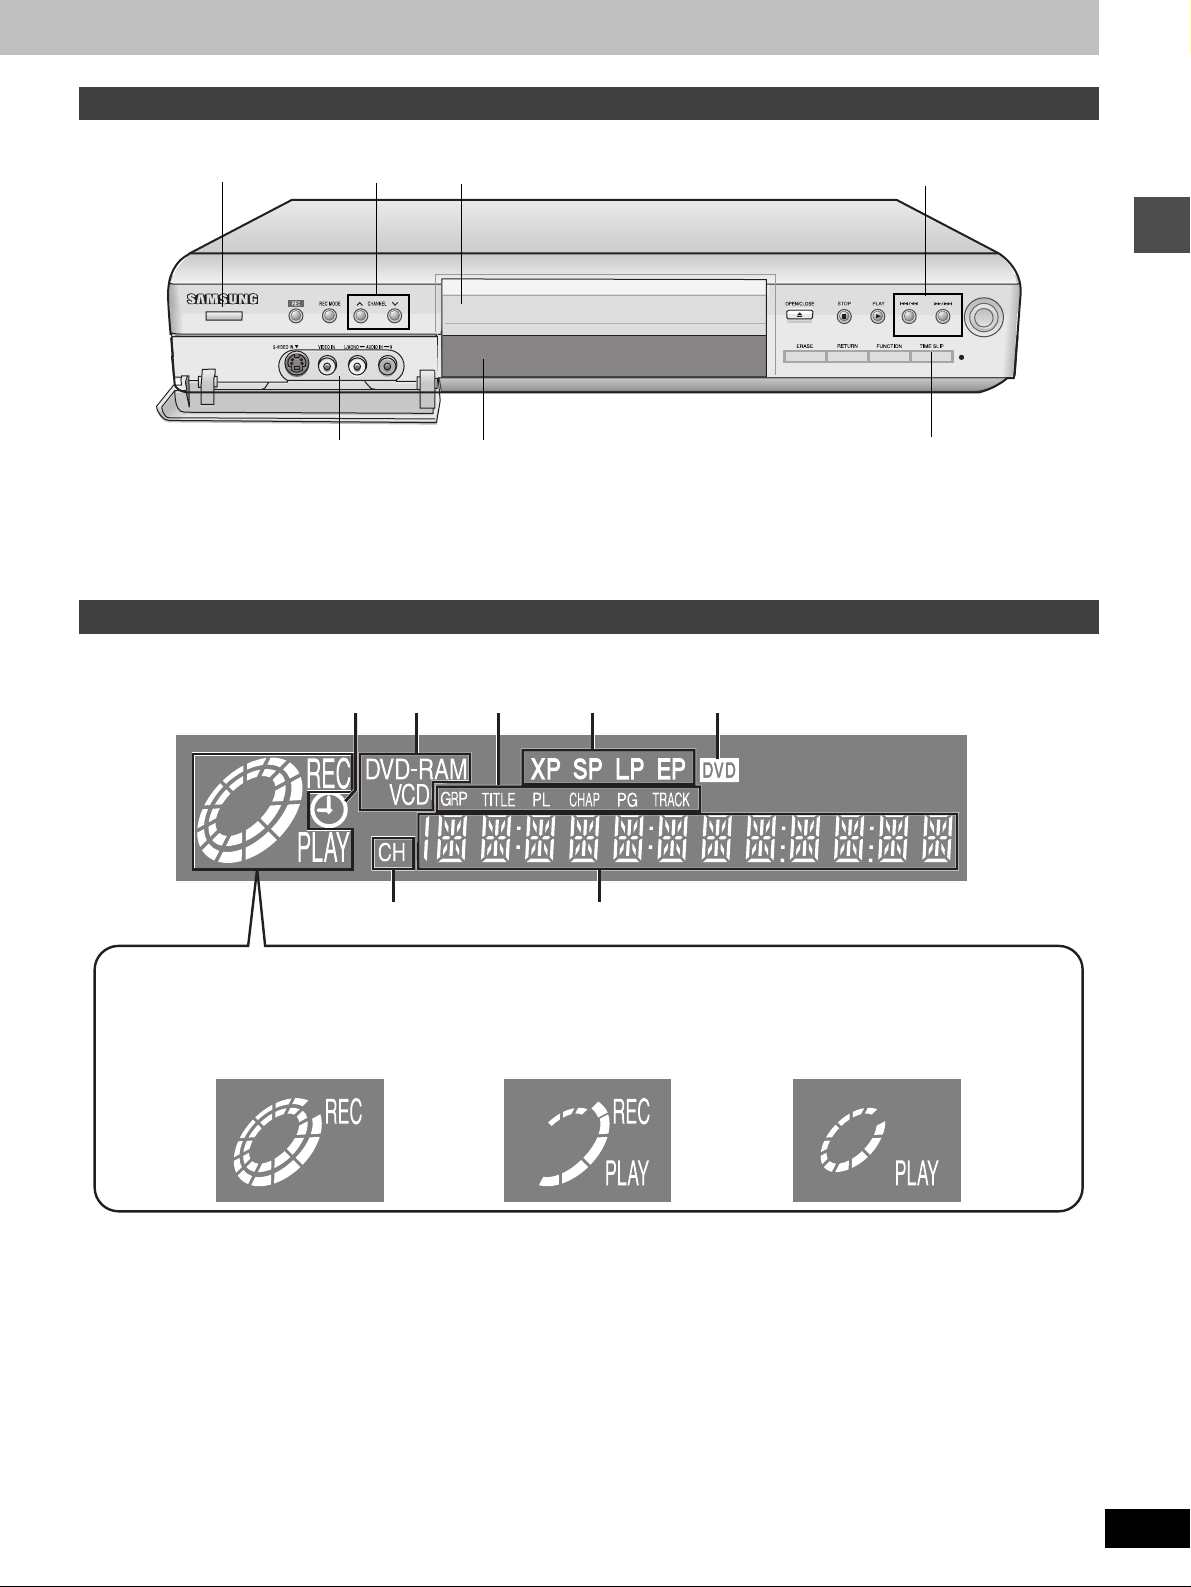
The unit’s display
A
B
C
[
Z
Y Display
Z Time slip indicator (TIME SLIP). . . . . . . . . . . . . . . . . . . . . . .22
[ Skip/Slow/Search buttons (82 /6,5/9) . . . . . . .18, 19
D
E
Setting up
F
Center circle (e.g., DVD-RAM)
Rotating (REC) :Recording
Stopped (REC) :Recording paused
A Timer recording display
On: When timer recording is on standby (➜page 24)
Flashes: When the unit couldn’t go to timer recording standby
B Disc type
C The display mode of the main display section
GRP: Group number
TITLE: Title number
PL: Play list number
CHAP: Chapter number
PG: Program number
TRACK: Track number
Rotating (REC, PLAY) :
G
Chasing play or simultaneous
recording and play is in progress
D Recording mode (➜page 15)
E DVD indicator
Flashes: When you press [Í, DVD POWER] to turn the unit
off until it actually turns off
F Channel
G Main display section
Recording and play counter, and other miscellaneous messages
Rotating (PLAY) : Playing
Stopped (PLAY) : Play paused
“PLAY” flashes :
The resume function (➜page 16,
To stop play) is working
13
DVD-R4000
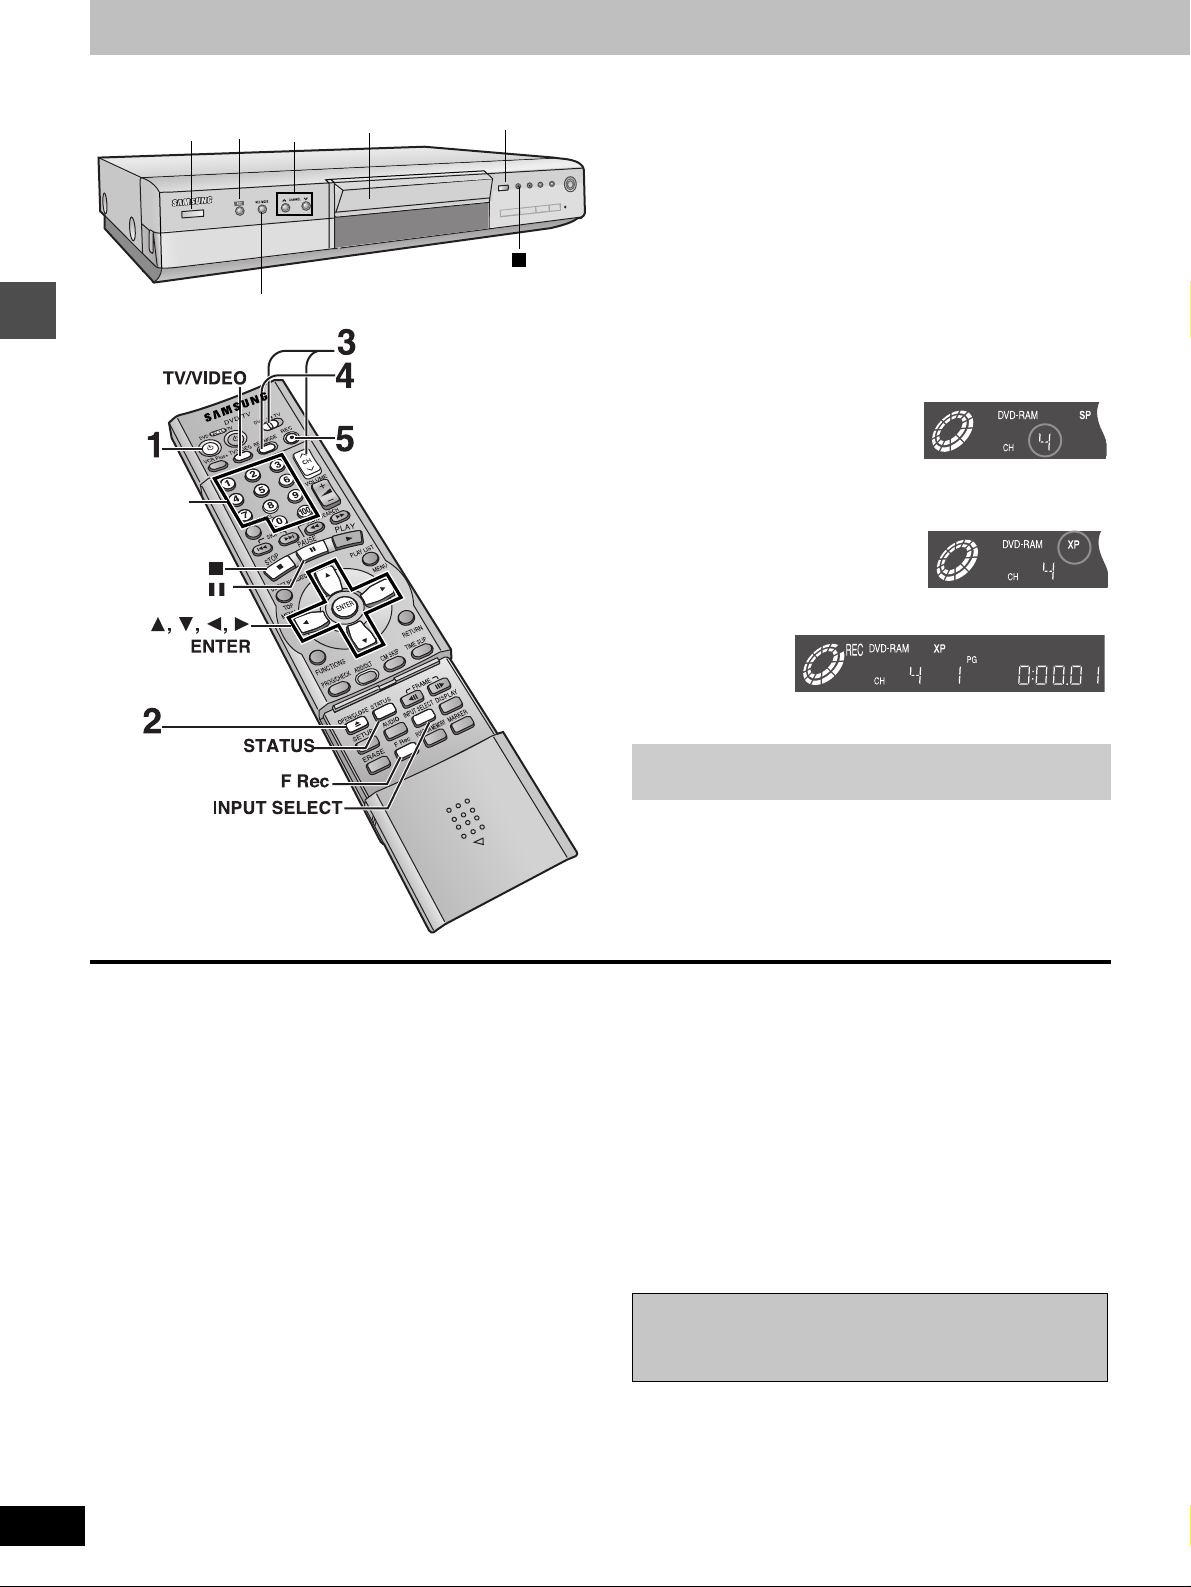
Recording
Recording television programs
1
5
3
Disc tray
4
Numbered
buttons
2
[RAM] [DVD-R]
1 Press [Í, DVD POWER] to turn the
unit on.
2 Press [< OPEN/CLOSE] to open the
tray and insert a disc (➜ next page).
≥Press the button again to close the tray.
≥It is not possible to record continuously from one side of a
double sided disc to the other. You will need to eject the
disc and turn it over.
3 Ensure [DVD, TV] is switched to
“DVD” and press [W, X, CH] to select
the channel.
e.g., when you
select channel 4
4 Press [REC MODE] to select the
recording mode (➜ next page).
e.g., when you
select “XP”
To stop recording
Press [∫].
To pause recording
Press [;]. Press again to restart recording.
Auto power-off
The unit switches to standby after about 6 hours in the stop mode.
You can turn this feature off or change the time to 2 hours
(➜page 46, Set Up—Off Timer).
5 Press [¥, REC] to start recording.
Program information (e.g., time and date) is registered in the
program list (➜page 17).
[DVD-R]
To play DVD-R on compatible equipment, finalize it (➜page 34).
For your reference
≥You can record up to 99 programs on one disc.
≥This unit is compatible with the Content Protection for Record-
able Media (CPRM ➜page 50) system so you can record broad-
casts that allow one copy, such as some CATV broadcasts, onto
4.7 GB/9.4 GB DVD-RAM (these are CPRM compatible). It is not
possible to record onto DVD-R or 2.8 GB DVD-RAM.
≥Recording will take place on open space on disc. Data will not be
overwritten.
14
DVD-R4000
[Note]
≥You cannot change the channel or recording mode during record-
ing.
≥Release protection (cartridge ➜page 11, disc ➜page 34) when
you record. [RAM]
≥When using a DVD-RAM for the first time with this unit, format it to
ensure accurate recording (➜ “Format” , page 34).
≥There are limitations when recording to DVD-R (➜ page 11).
≥When recording MTS sound onto DVD-R, either the main channel
or the sub channel can be recorded, not both. Select at “Select
MTS” (➜ page 47).
Should the AC power supply cord come loose by
accident or for any other reason the power supply is
cut off while recording or editing is taking place, the
contents of the disc may be lost.

Inserting discs
c
[RAM] [DVD-R]
You can insert a cartridge or non-cartridge disc.
Non-cartridge disc
Insert label-up.
Insert label-up with the arrow facing in.
Insert inside the
tray’s guides.
Cartridge dis
[Note]
≥Load double-sided discs so the label for the side you want to
record/play is facing up.
≥When using 8 cm (3″) DVD-RAM, remove the disc from the car-
tridge and insert it, making sure you align it with the groove.
Recording modes and approximate
recording times in hours
Disc DVD-RAM
Mode
XP (High quality) 121
SP (Normal) 242
LP (Long play) 4 8 4
EP (Extra long play) 6 12 6
Single-sided
(4.7 GB)
Double-sided
(9.4 GB)
DVD-R
(4.7 GB)
Recording from a video cassette
recorder
[RAM] [DVD-R]
Preparation
Connect a video cassette recorder to this unit’s input terminals
(➜page 43).
1 While stopped
Press [INPUT SELECT] to select the
input channel for the equipment you
have connected.
Select L1, L2, or L3.
≥
You can also select the input channel by pressing [W, X, CH].
2 Press [REC MODE] to select the
recording mode (XP, SP, LP or EP).
3 Start play on the other equipment.
4 Press [¥, REC] at the point you want
to start recording.
Recording starts.
To skip unwanted parts
Press [;] to pause recording. (Press again to restart recording.)
To stop recording
Press [∫].
[Note]
≥When recording using L1, L2 or L3 terminals, only the sound
received at the time of recording will be recorded.
≥If flexible recording (➜ below) is used instead of steps 2 and 4,
settings can be made so that recording continues to the end of the
video.
Recording
FR (Flexible Recording Mode)
The unit automatically selects a recording rate between XP and EP
that will enable the recordings to fit in the available recording time
on the disc with the best possible recording quality.
You may use FR Mode in either Flexible Recording (➜ right) or in
timer recording (➜page 25).
Watching the television while recording
[RAM] [DVD-R]
Pictures being recorded are unaffected.
Switch [DVD, TV] to “TV”.
1 Press [TV/VIDEO] to change the television’s input mode to
“TV”.
2 Press [W, X, CH] to change channels.
≥You can also select the channel with the numbered buttons.
e.g., “5”: [0] ➜ [5]
“15”: [1] ➜ [5]
“115”: [100] ➜ [1] ➜ [5]
Almost all videos and DVD software on sale have been
treated to prevent illegal copying. Any software that has
been so treated cannot be recorded using this unit.
Recording the best quality pictures in
the remaining time—Flexible Recording
[RAM] [DVD-R]
The unit calculates a recording rate that enables the recording to fit
in the time you set (within the remaining time on the disc) and with
the best possible picture quality.
1 While stopped
Press [F Rec].
2 Press [2, 1] to
select “Hour”
FLEXIBLE REC
Record on FR mode
Maximum rec time
Set up rec time
Start Cancel
SELECT
ENTER
1 Hour 23 Min.
1 Hour 23 Min.
RETURN
and “Min.” and
press [3, 4] to set the recording time.
3 Press [3, 4, 2, 1] to select “Start”
and press [ENTER].
Recording starts.
[Note]
It may not be possible to record to the finish of the program if the
remaining time doesn’t allow.
For your reference
≥Press [STATUS] during recording to show the remaining time.
≥Recording time reduces if you repeatedly pause recording.
15
DVD-R4000
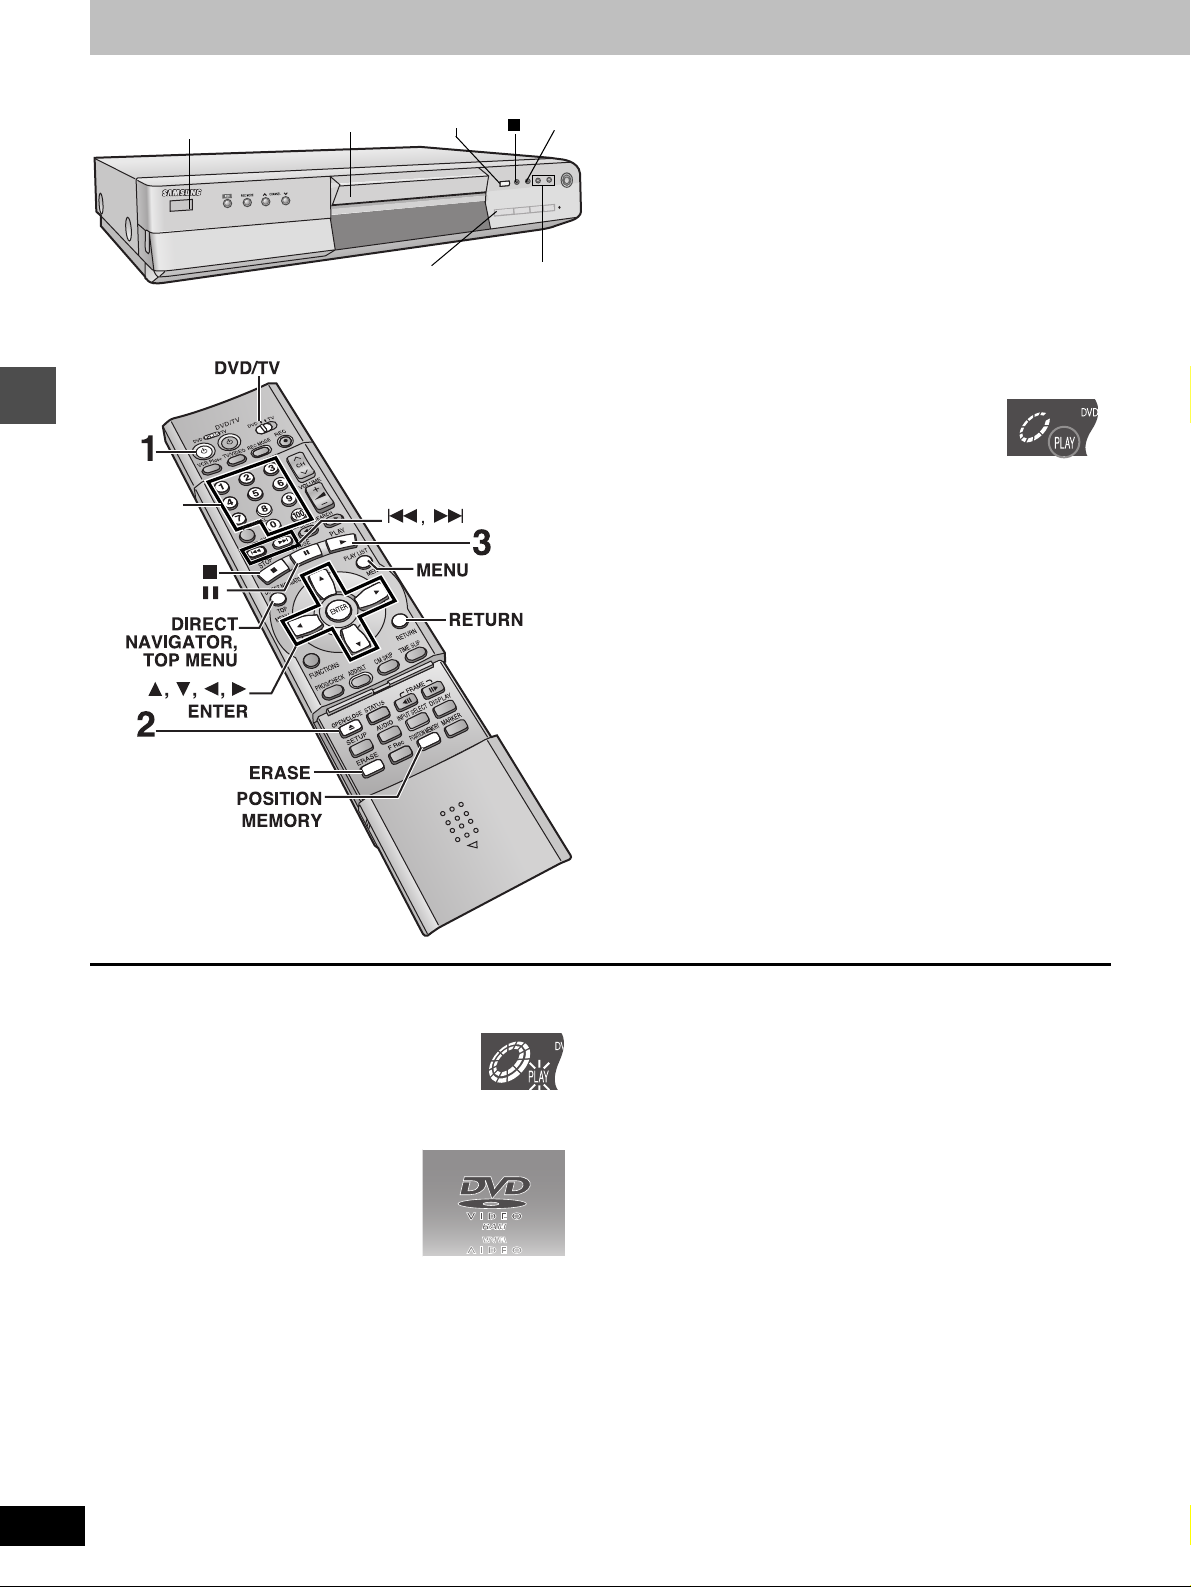
Playing discs
Playing back
Numbered
buttons
1
Disc tray
ERASE
2
:/
22,11
3
/
9
[RAM] [DVD-R] [DVD-V] [VCD] [CD] [MP3]
1 Press [Í, DVD POWER] to turn the
unit on.
2 Press [< OPEN/CLOSE] to open the
tray and insert a disc (➜ page 15).
≥Press the button again to close the tray.
≥If cartridge protection is activated (➜page 11), play begins
automatically when you close the tray. [RAM]
≥You cannot play continuously from one side of a double-
sided disc to the other. Eject the disc and turn it over.
3 Press [1] (PLAY).
The unit takes some time to read the disc
before play starts. (When a menu screen
appears on the television ➜ next page).
≥If the resume function (➜ below, to stop play) is not active,
playback will begin from the most recently recorded program. To play from the beginning of a disc, select “PLAY
FROM TOP” in the FUNCTIONS window (➜page 23).
16
DVD-R4000
To stop play
Press [∫].
≥When “PLAY” flashes on the display, resume func-
tion is active. Press [1] (PLAY) to start play from
where you stopped it.
To cancel, press [∫] until “PLAY” goes out. (The
position is also cleared when you turn the unit off
or open the disc tray.)
≥The screen saver may appear when you
stop play. Press [∫] again and you can
use this unit’s tuner to watch television.
To pause play
Press [;]. (Press again to restart play.)
Auto power-off
The unit switches to standby after about 6 hours in the stop mode.
You can turn this feature off or change the time to 2 hours
(➜page 46, Set Up—Off Timer).
[Note]
≥If a disc is loaded, the unit will come on and play will start when
you press [1] (PLAY).
≥When you play a disc with an audio-only track, the video from the
previous disc may continue to be shown on the television.
≥Actual sound levels for DVD-Video are lower compared to televi-
sion broadcast or playback of other discs. To avoid a sudden
increase in volume level when switching from DVD-Video, reduce
the volume setting before playing other sources or switching to
television broadcast.

When a menu screen appears on the
~
N
E
0
0
0
1
2
television
[VCD]
Switch [DVD, TV] to “DVD” and
Press the numbered buttons (0, 1j9) to select an item.
e.g., “5”: [0] ➜ [5]
“15”: [1] ➜ [5]
[DVD-V]
Press [3, 4, 2, 1] to select an item and press
[ENTER].
≥You may also be able to use the numbered buttons (0, 1j9) to
select an item.
Other buttons used to operate menus
Read the disc’s instructions for further details about operation.
[17 ] [5/ 17 ]: Shows the next menu.
[
82
] [
82 /22 ]: Shows the previous menu.
[RETURN]: Shows the menu screen. [VCD]
[TOP MENU]: Shows the first menu screen. [DVD-V]
[MENU]: Shows the menu screen. [DVD-V]
[Note]
≥Discs continue to rotate while menus are displayed. Press [∫]
when you have finished viewing to preserve the unit’s motor and
your television screen.
≥If “ ” appears on the television, the operation is prohibited by
the unit or disc.
≥Functions available vary from disc to disc.
Position Memory
[RAM] [DVD-R] [DVD-V] [VCD] [CD] [MP3]
You can start play from a memorized position even after turning the
unit off.
(When the elapsed play time is displayed)
1 During play
Press [POSITION MEMORY].
The message “Position Memorized” appears on the
television.
2 After switching the unit to standby and back on
Press [1] (PLAY).
Play starts from the memorized position. (The position is
cleared.)
Using the Direct Navigator
[RAM] [DVD-R]
A list of programs is created as you record them. You can use this
list to find programs to watch.
1 Press [DIRECT NAVIGATOR].
The highlighted program plays in the background.
DIRECT NAVIGATOR
No DATECH TIME EDITTITLE
3
01
6/20 WED410 : 00 AM
6/20 WED
6/20 WED
No
0 ~ 9
9 : 00 PM
11 : 00 PM
SELECT
ENTER
Dinosaur
Auto action
USJ
RETURN
3
02
03
TOTAL 3
6
13
1
1
1
1
1
2 Press [3, 4] to select the program
and press [ENTER].
≥You can also select programs with the numbered buttons.
e.g., “5”: [0]➜ [5]
Play of the images that were playing in the background
continues.
To stop play
Press [∫].
To clear the program list
Press [DIRECT NAVIGATOR].
About the program list
Write-protected
Displayed when you have protected
the program.
Copy-protected
Displayed when you have recorded
a program that has copy protection,
from CATV broadcasts, for example.
Unable to play
Displayed if you cannot play the program.
Currently recording
Displayed when the program is being
recorded.
“15”: [1] ➜ [5]
3
3
N
X
¥
TOTAL 5
o
01 6/2
02 6/2
03
04
05
POS
4
6
13
2
8
F
6/2
6/2
6/2
0
Playing back
[Note]
[DVD-R] [DVD-V] [VCD] [CD] [MP3]
≥The position is cleared when you open the disc tray.
[RAM]
≥Positions remain memorized even after the disc tray is opened.
≥You cannot mark positions if the disc is write-protected.
For your reference
If you press [∫] before switching the unit to standby after pressing
[POSITION MEMORY] to memorize a position, play will resume
from the position you pressed [∫] when you press [1] (PLAY).
To erase a program that is being played back
Since the program and any play lists (➜page 28) created
from it are erased irretrievably by this procedure, you
should be certain you wish to erase before carrying it out.
1 Press [ERASE].
A confirmation screen will be displayed.
2 Press [2] to select “Erase” and press
[ENTER].
≥On the main unit, press [82 /6] and [ERASE].
[Note]
≥It is not possible to erase the program when you are carrying out
simultaneous rec and play (➜page 22). [RAM]
≥The amount of space remaining on the disc does not increase
even if you erase programs. [DVD-R]
≥If the confirmation screen disappears before you complete the
operation, start from the beginning again.
17
DVD-R4000
Other methods of play
Numbered
buttons
Slow-motion play
[RAM] [DVD-R] [DVD-V] [VCD]
While paused
Press [6] or [5].
Press and hold [82 /6] or [5/9] on the main unit.
[Note]
≥The speed increases up to 5 steps.
≥Press [1] (PLAY) to restart play.
≥Backward ([6] [82 /6]) does not work with Video CDs.
3, 4, 2, 1
ENTER
Playing back
Skipping
[RAM] [DVD-R] [DVD-V] [VCD] [CD] [MP3]
During play or while paused
Press [:] or [9].
≥Press [82 /6] or [5/9] on the main unit.
≥Each press increases the number of skips.
[DVD-V] [VCD] [CD] [MP3]
Play position
Once
Once TwiceTwice
PLAY
Frame-by-frame viewing
[RAM] [DVD-R] [DVD-V] [VCD]
While paused
Press [2;] or [;1].
[Note]
≥Each press shows the next frame.
≥Press [1] (PLAY) to restart play.
≥Cursor buttons [2, 1] are also effective while paused for frame-
by-frame viewing.
≥Backward ([2;]) does not work with Video CDs.
Starting play from a selected program,
title, chapter, or track
[RAM] [DVD-R] [DVD-V] [VCD] [CD] [MP3]
During play or while stopped
Press the numbered buttons to select the
item.
e.g., “5”: [0] ➜ [5] [MP3] “5” : [0] ➜[0] ➜[5]
“15”: [1] ➜ [5] “15” : [0] ➜[1] ➜[5]
[Note]
≥This may not work with some discs.
≥This works only when stopped with some discs (the screen saver
is on the television).
18
DVD-R4000
Chapter/track
[:]
[:/6]
[RAM] [DVD-R]
Program Program Program
[:]
[:/6]
For your reference
Pressing [82] [82 /6] or [9] [5/9] while the playback
control feature on Video CDs (➜page 50) is working may take you
to a menu screen.
Chapter/track Chapter/track
[9]
[5/9]
Play position
Once
Once TwiceTwice
Marker
[9]
[5/9]
Three times
Skipping a minute forward—CM Skip
[RAM] [DVD-R]
During play
Press [CM SKIP].
Play restarts from approximately a minute later.
[Note]
If the start of the next program is within one minute of the point you
skipped from, play restarts from the beginning of that program.
Selecting an amount of time to skip—
Time Slip
[RAM] [DVD-R]
1 During play
Press [TIME SLIP].
2 Within 5 seconds
Press [3, 4] to enter the time and
then press [ENTER].
e.g., Go back to 5 minutes
0 min
–5 min
Playing back
Press to change in one-minute units. Press and hold to
change in 10-minute units.
Fast forward and rewind—SEARCH
[RAM] [DVD-R] [DVD-V] [VCD] [CD] [MP3]
During play
Press [6] or [5].
≥Press and hold [:/22]] or [
[Note]
≥The speed increases up to 5 steps.
≥Press [1] (PLAY) to restart play.
≥Audio will be heard during search. You can turn this audio off if
you want to (➜page 47, Audio—PLAY & Audio during Search).
11
/
9] on the main unit.
19
DVD-R4000
Playing back
2
Marking places to play again—MARKER
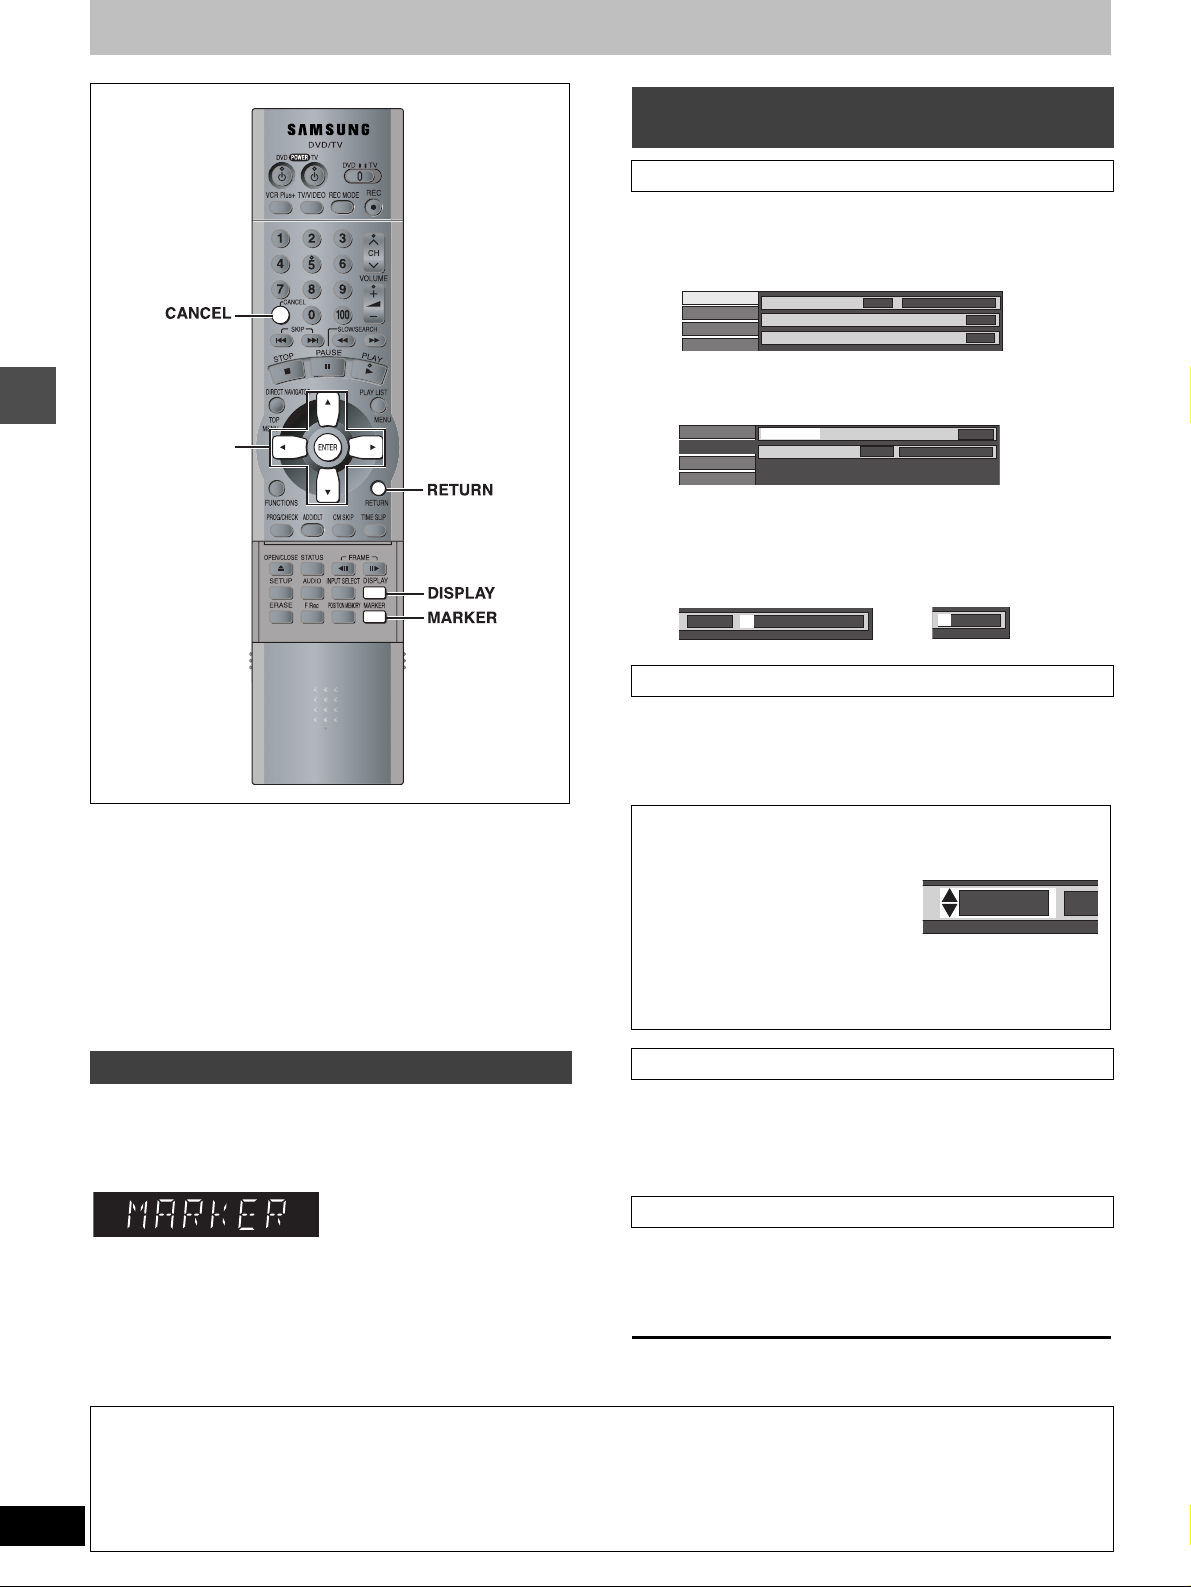
Using on-screen menus to mark
positions
Displaying the marker icon
1 During play
2 Press [3, 4] to select the “Play”
3, 4, 2, 1
ENTER
3 Press [3, 4] to select “Marker”
Press [DISPLAY].
The on-screen menus appear. (e.g., DVD-RAM)
Disc
Play
Video
Audio
Sound track
Subtitle
Audio channel
1
Î Digital 2/0ch
OFF
L R
and press [1].
Disc
Play
Video
Audio
Repeat play
Marker
1s10
††††††††††
OFF
and press [1] to highlight the first
asterisk (¢).
[RAM] [DVD-R] [DVD-V] [VCD] [CD] [MP3]
1s10
††††††††††
†††††
You can mark positions by pressing [MARKER]. Also use onscreen menus to mark, recall, and clear positions.
[RAM] [DVD-R]
Mark up to 999 positions. The unit records the markers directly onto
the disc and they remain intact even if you remove the disc.
[DVD-V] [VCD] [CD] [MP3]
Mark up to 5 positions. The markers clear when you open the disc
tray.
Marking positions directly
During play
Press [MARKER].
One marker is added.
Marking positions
Press [2, 1] to select an asterisk (¢) and
press [ENTER].
One marker is added.
When marking positions 11 and above
[RAM] [DVD-R]
1 Press [2, 1] to highlight “1–
10”.
2 Press [3, 4] to select “11–20”.
You can select the next group of
10 when the current group is full.
3 Press [1].
The first asterisk is highlighted.
4 Press [ENTER] to mark a position.
Playing from a marked position
1s10
1
Press [2, 1] to select a marker number
and press [ENTER].
Play starts from the marked position.
Clearing markers
20
DVD-R4000
[Note]
≥You cannot use this feature if:
– the disc’s elapsed play time is not shown in the display.
– you are using a play list. [RAM]
– protection (cartridge ➜page 11, disc ➜page 34) is set
(you can still recall the markers to play a position).
Press [2, 1] to select a marker number
and press [CANCEL].
An asterisk replaces the number and the position is cleared.
To clear the on-screen menus
Press [RETURN].
≥Subtitles around markers may fail to appear.
≥Markers are cleared when you finalize DVD-R (➜page 34).
≥Markers on DVD-RAM and DVD-R are ordered by time, so
marker numbers can change when you add and delete
them.
 Loading...