

Page 1
instructions and guarantee
3 tier steamer
RH_10969_Amap_IB_7-7-05 7/7/05 6:34 PM Page 1
Page 2
2
RH_10969_Amap_IB_7-7-05 7/7/05 6:34 PM Page 2
Page 3
Read these instructions before use and keep them safe. If you pass the steamer
on, pass on the instructions too. Remove all packaging, but keep it till you’re
satisfied the steamer is working.
important safeguards
Take basic safety precautions, including:
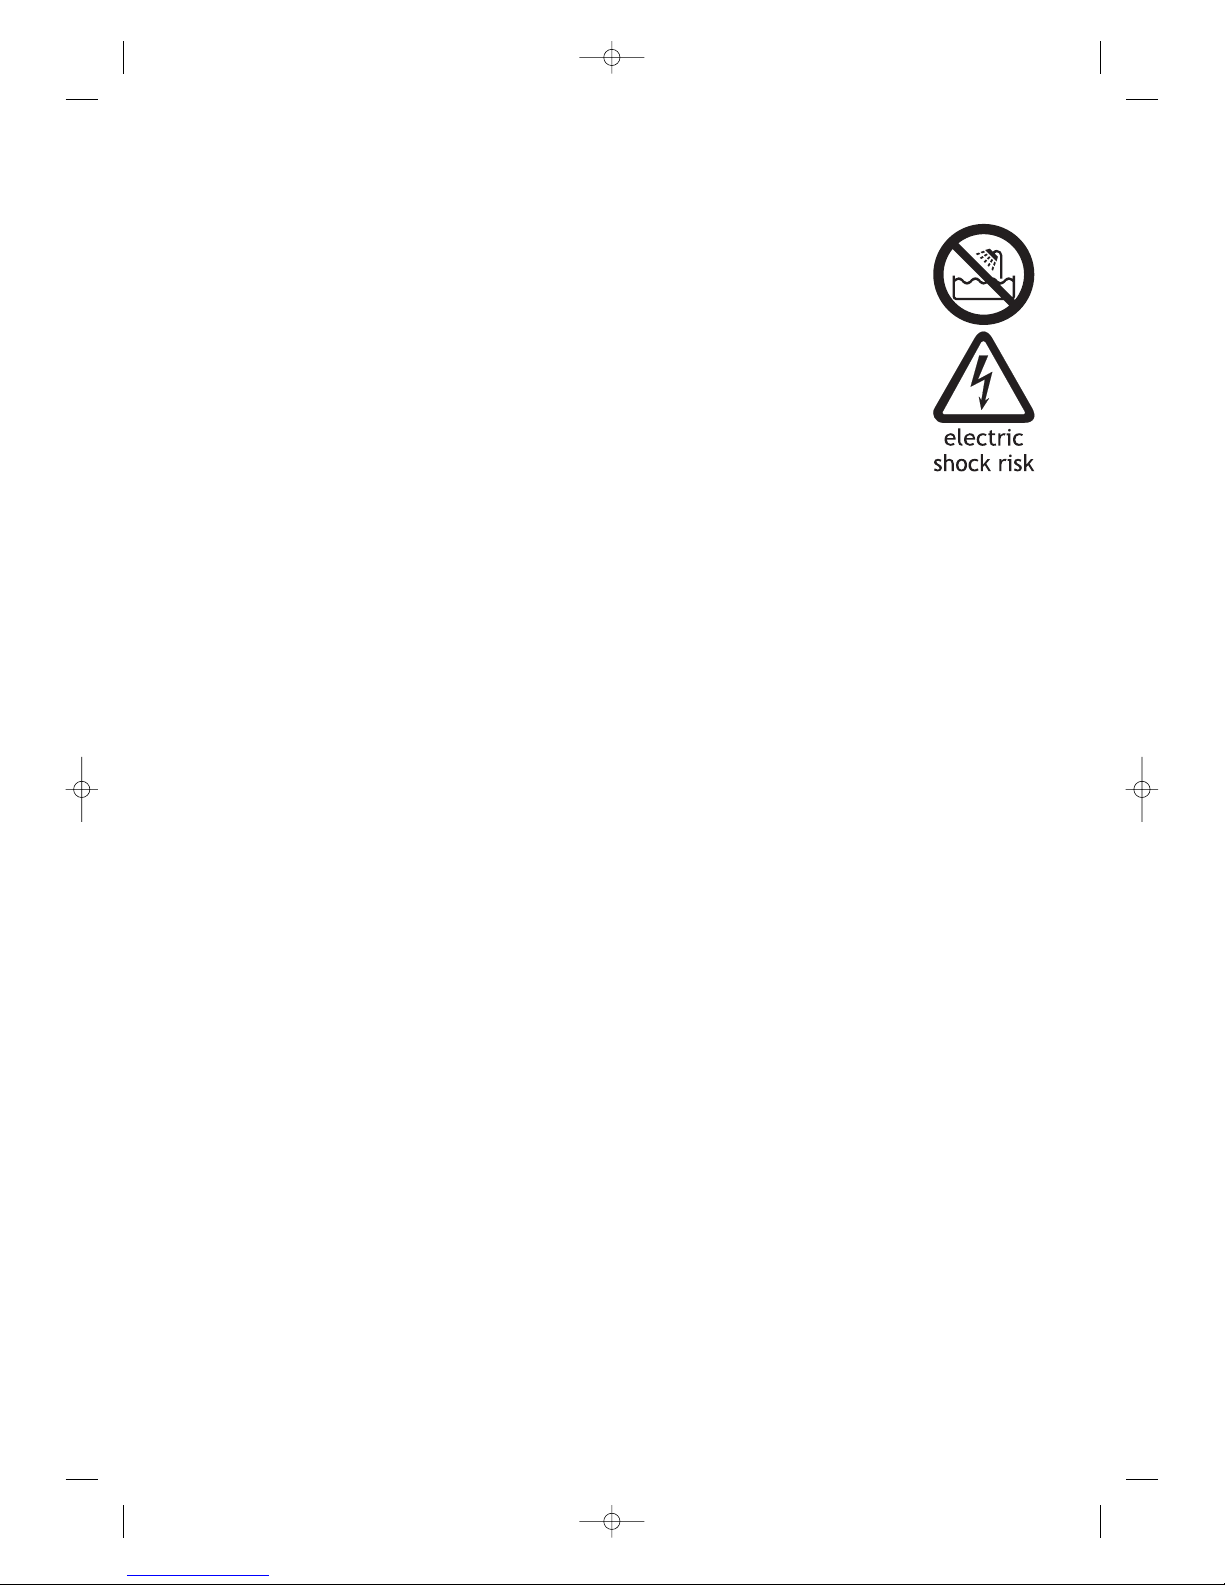
1.Don’t put the cable, plug, or steamer in water or any other
liquid. Don’t use it in a bathroom, near water, or outdoors.
2.The steamer should only be used by or under the direct
supervision of a responsible adult.
3.Don’t put frozen meat or poultry in the steamer — defrost fully
before use.
4.Don’t fill the reservoir above the top of the Max mark. If you overfill, it
may spit boiling water and you may damage the steamer.
5.Fill the reservoir with fresh cold water — don’t put anything in the water.
6.Don’t touch the hot surfaces of the steamer, lid, baskets, rice bowl, or
diffuser.
7.Use oven gloves or a cloth when lifting the lid, baskets, diffuser, or rice
bowl, and lift them only by the handles.
8.Don’t reach over the top of the steamer. Steam will escape from the vents,
the baskets, and the steamer.
9.Keep hands, arms, face, etc. clear of the escaping steam when lifting the
lid, baskets, diffuser, or rice bowl.
10.Sit the steamer on a stable, level, heat-resistant surface, near a power
socket, and out of reach of children.
11.Route the cable so that it doesn’t overhang and can’t be tripped over or
caught accidentally.
12.Don’t use the steamer near or below curtains, shelves, or cupboards, as the
escaping steam may damage them.
13.Don’t line the baskets with paper, foil, etc. — you’ll block the steam holes.
14.Don’t cover the steamer during use.
15.Keep the steamer and the cable away from hotplates, hobs and burners.
16.Unplug the steamer when not in use, before moving and before cleaning.
Let it cool down fully before cleaning and storing away.
17.Don’t use accessories or attachments other than those we supply.
18.Don’t use the steamer for any purpose other than those described in these
instructions.
19.Don’t use the steamer if it’s damaged or malfunctions. If the cable or plug
is damaged, the steamer must be returned in order to avoid hazard.
household use only
3
RH_10969_Amap_IB_7-7-05 7/7/05 6:34 PM Page 3
Page 4

preparation
1.Put the steamer on a stable, level, heat-resistant surface, near a power
socket, and out of reach of children.
2.Steam will escape, so don’t put it near curtains, under shelves or
cupboards, or near anything that might be damaged by the escaping steam.
3.Have dinner plates or a tray handy to put the baskets on afterwards, as
they’ll drip. This would be a good time to set out serving spoons, tongs,
etc. for emptying the baskets. Don’t forget the oven gloves.
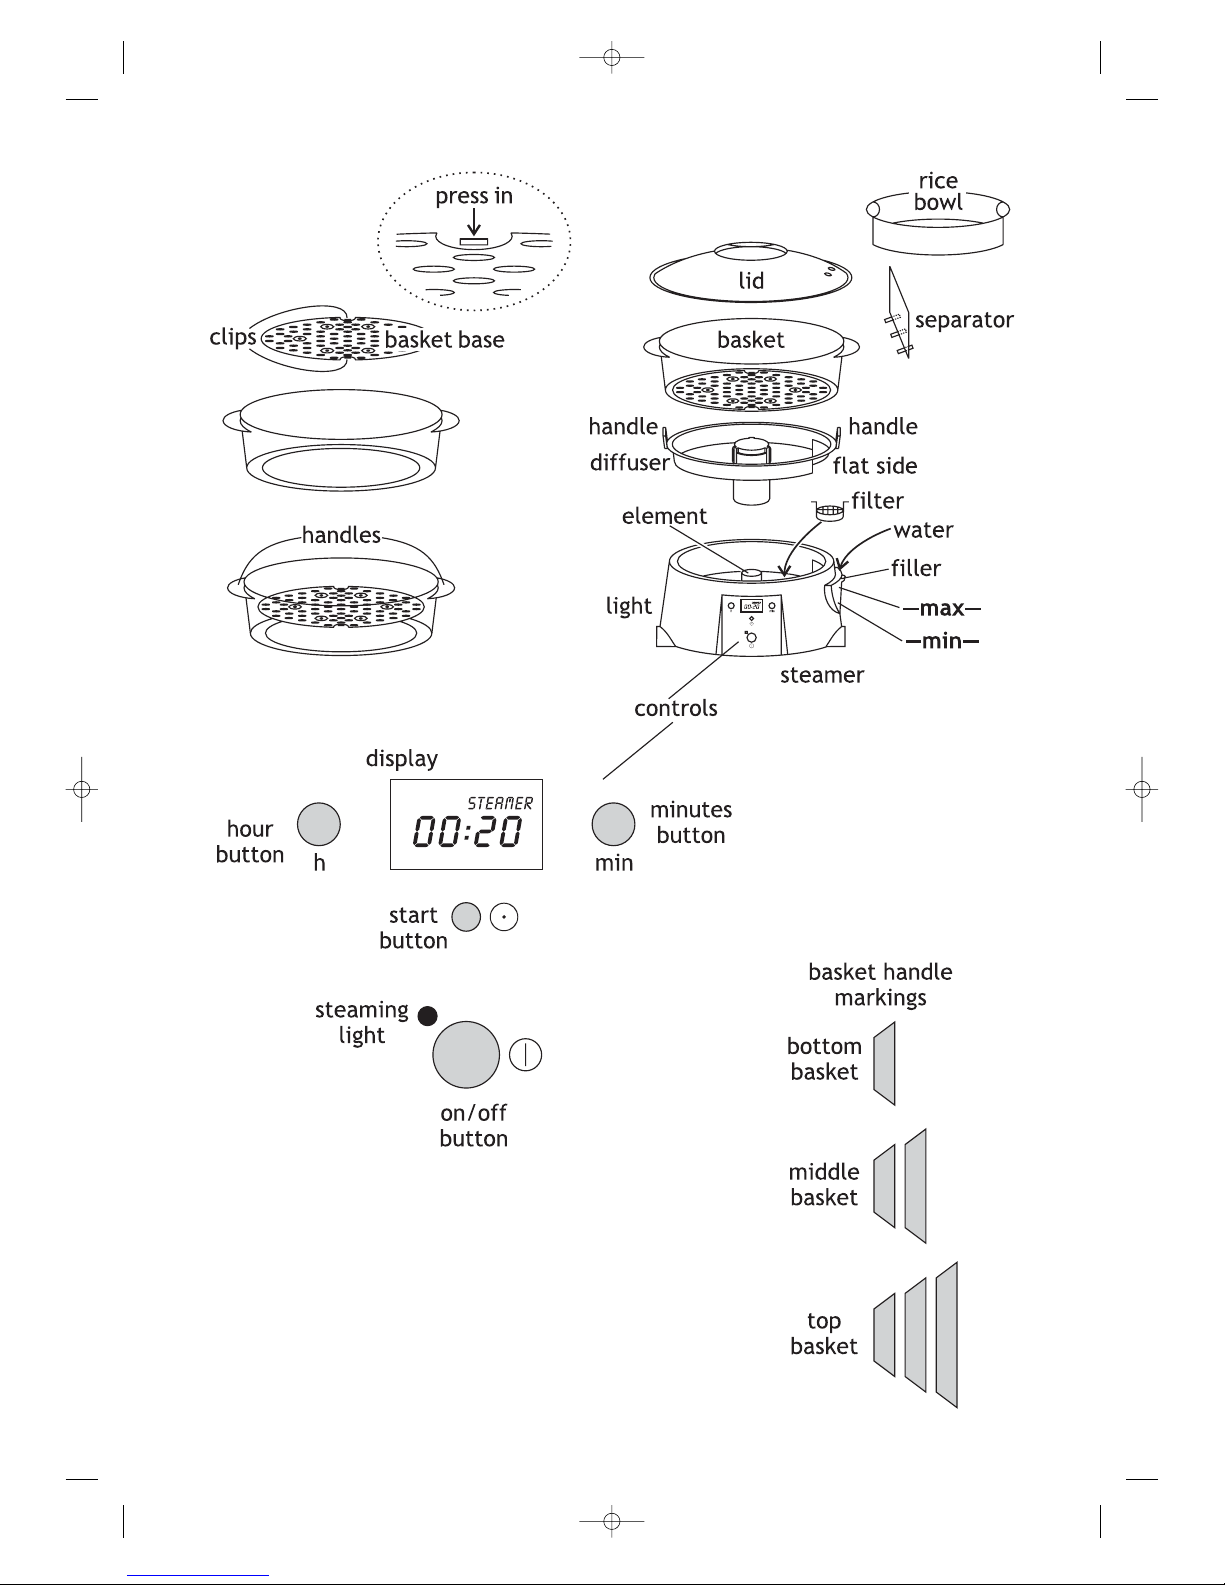
4.Check that the filter is in place inside the steamer.
fit the diffuser
5.Sit the diffuser on top of the steamer. It has a flat side and a round side.
The flat side fits over the corresponding flat bit inside the steamer.
6.The diffuser directs the steam through the steam holes in the bottom
basket. It also prevents the heater and steamer being overwhelmed by
juices from the cooking foods.
water fill
7.Firstly, prior to fitting the basket (s), fill the water directly into the water
reservoir to the first line in the bottom of the reservoir. The water level
should reach the MAX line marked on the indicator on the side of the
steamer. This will allow for 60 minutes of steaming, which is enough time
for steaming most foods.
8.Should the need arise to top-up the reservoir before the steam cycle is
completed, use a thumb to pull the top of the filler out till it clicks into
place - it opens about a centimetre.
9.Pour water into the filler up to the MAX mark. This will allow for extra
steaming without disrupting the steaming cycle.
NOTE: It takes a few minutes for the water to trickle into the water reservoir,
so this process will need to be repeated a number of times in order to
increase the water level.
10.Push the top of the filler back into place on the side of the steamer.
11.Don’t add anything to the water. Add seasoning, marinades, etc. to the
food, NOT the water. They won’t circulate, they’ll concentrate in the
steamer, possibly damaging the internal surfaces and the element.
assemble the basket (s)
The basket handles are marked with one (Bottom), two (Middle) or three (Top)
markings.
12.Put the diffuser on top of the reservoir, then for:
1 basket sit the bottom basket on top of the diffuser
2 baskets put the middle basket on top of the bottom one
3 baskets put the top basket on top of the middle one
steam room
13.To allow the steam to circulate
a) pack food loosely in the baskets
b) whenever possible, use single layers of food
c) leave spaces between the pieces
d) when layering food in a basket, leave spaces between the pieces in each
layer to let the steam circulate through the layers
uniformity
14.For uniform cooking
a) try to cut all pieces of food in a basket to roughly the same size
b) put larger pieces, or food with long cooking times, nearest the reservoir
c) put smaller pieces, or food with short cooking times, furthest from it
4
RH_10969_Amap_IB_7-7-05 7/7/05 6:34 PM Page 4
Page 5

overcooking
15.Don’t worry too much about overcooking — steaming is a relatively gentle
cooking method and a few minutes extra generally won’t matter
16.Don’t overcook fish — it’ll chew like rubber and taste like cardboard
nb Juices from the upper basket(s) will drip into the basket(s) below. Don’t
put delicate flavours below strong ones, or vegetables below greasy foods.
fit the lid
17.Put the lid on top of the topmost basket.
18.Don’t try to steam without the lid in place. The food won’t cook, the water
won’t last, and you’ll fill the kitchen with steam.
whole chicken? — no problem!
19. To steam a bulky item, like a whole chicken, at point 10 on page 4:
a) sit the chicken in the bottom basket
b) look at the base inside the second basket
c) press the retaining clips in towards the centre of the base
d) lift the base out
e) fit the second basket on top of the first
f) fit the lid to the second basket
nb Don’t remove the base from the bottom basket. Putting food in the diffuser
is a definite no-no!
steaming
20.Plug the steamer into the power socket, and switch the socket on, if it’s
switchable.
21.Press the on/off button — everything will now be followed by a beep.
22.The display will show 00:00
23.Press the start button
24.The display will change to 00:20, and STEAMER will flash on the top left.
25.This is the default steaming time of 20 minutes.
26.If you want to steam for 20 minutes, just leave it. After 6 seconds, the
steaming light will come on, and cooking will start.
27.If you want to set another time, use the minutes (min) button to increase
the time up to 59 minutes — after that, it reverts to 00:00.
28.If you really want to set a time less than 20 minutes, you can do this from
here, but you shouldn’t — 20 minutes should be the minimum.
29.If you want to steam for an hour, simply press the hour (h) button, the
display will change to 1:00.
30. When the display shown the time you want, leave it. After 6 seconds, the
steaming light will come on, and cooking will start.
31.If you want to change anything after the 6 seconds, you’ll have to press the
on/off button and start again.
32.The timer will count down to 00:00, beep 5 times, then it’ll start to count
up again, and show KEEP WARM at the bottom of the display.
nb If you’re not going to empty it right away, check the water level, and top
up if necessary.
5
RH_10969_Amap_IB_7-7-05 7/7/05 6:34 PM Page 5
Page 6

keep warm time
If your plans change, and you don’t need the food right away, just leave the
food in the steamer. The keep warm feature will switch the element on and
off, just to keep it ticking over. It’ll do this for an hour, before switching off.
The keep warm feature is vary gentle, and shouldn't overcook other then the
most delicate of foods.
emptying
33.Press the on/off switch , and unplug the steamer from the power socket
(switch the socket off first, if it’s switchable).
34.Everything will be hot — use oven gloves or a cloth — use the handles.
35.Steam will escape from the baskets — keep hands, face, etc. away from the
area above the steamer. Don’t lean over it.
36.When lifting the lid, angle it to direct steam away from your body.
37.Lay the lid on a plate or tray.
38.Lift off the baskets and set them down on plates or a tray before serving.
39.Take care when removing the diffuser — apart from being very hot, the
juices are likely to stain if spilt.
40. Any water remaining in the steamer should be left to cool, then poured
from the side of the steamer, to avoid getting the controls wet.
boiling dry
41.Don’t worry — we thought of this and fitted a thermostat.
42.It’s still not a good idea, as you lose control of the cooking process, but it
needn’t be a disaster (more of an “Oops — I hope no-one’s looking”).
43.In the event of a boil-dry occurring (that sounds much better than “if you
forget and let it boil dry”, doesn’t it) the thermostat will cut off power to
the element, the steaming light will flash, and the beeper will sound a
continuous note.
44.Press the on/off switch , let the steamer cool for a few minutes, then
top up with water and start again.
45.When calculating the time needed, allow for the whole of the time already
spent steaming, and part of the time between running dry and restarting,
as the cooking process won’t have stopped immediately it ran dry.
46.If you watch the cooking process, there’s no reason why the rescue
operation shouldn’t be 100% successful.
47.If it isn’t 100% successful, then a piquant sauce should do the trick.
48.Try something with lemon or lime in it first.
49.If all else fails, ginger, garlic, or chilli will hide absolutely anything.
the rice bowl
When cooking rice, add water to the rice bowl in addition to the water in the
reservoir. The volume of water added to the rice bowl should be roughly one
and a quarter times the volume of the rice.
Put the rice bowl in the topmost basket. Juices from other foods will alter the
flavour of the rice, and the additional liquid may make the rice mushy.
6
RH_10969_Amap_IB_7-7-05 7/7/05 6:34 PM Page 6
Page 7

the separator
This is designed to fit across the centre of the smallest basket, although you
can use it in any of the baskets, if you want to, to keep different foods apart.
timing
The times given in the cooking guide on page 9 are for a single layer of food in
the bottom basket, used on its own.
You’ll need to extend these times
a) if two or three baskets are used, as the same amount of steam is having
to heat a greater volume of food
b) if a particular food is cooked in the second or third basket. Generally
speaking, the further the food is from the element, the longer it’ll take
to cook
c) if food is layered within a basket
You’ll need to experiment to find the times and positions which suit your
favourite foods and food combinations.
Fish is cooked when it appears opaque and can be flaked easily.
Cook meat until the juices run clear.
Leaf vegetables should be cooked as little as possible, to keep them green and
crisp. Plunging into iced water will stop the cooking process (plunging the veg,
that is).
over 60 minutes?
If you intend to steam for more than 60 minutes
a) keep an eye on the water level and/or the timer, top up the steamer
with water at about the half way mark, and reset the timer
or b) set the timer for half the steaming time, then the beeping will alert you
to top up the steamer — don’t forget to reset the timer
topping up
See points 8 to 11 on page 4 – when you’re topping up, make sure you don’t
accidentally press the buttons and upset the timing.
Remember it will take some time for the water to empty from the filler to the
reservoir, as such you may need to top up a few times to increase the water
level.
care and maintenance
Unplug the steamer from the power socket and let it cool down fully.
cleaning
Wash the lid, rice bowl, baskets, separator, filter, and diffuser in warm, soapy
water, then rinse thoroughly and dry.
We don’t recommend using a dishwasher, as this may affect the surface finish
of the baskets, etc.
Wipe the steamer, inside and out, with a clean damp cloth. Stubborn stains
may be removed with a little washing-up liquid, but make sure you remove all
trace of it before using the steamer.
Don’t put the steamer in water or any other liquid.
Don’t use harsh or abrasive cleaning agents or solvents.
7
RH_10969_Amap_IB_7-7-05 7/7/05 6:34 PM Page 7
Page 8

descaling
In time, scale deposits may build up on the interior surfaces of the steamer
and element. These deposits will impair the efficiency of the steamer, and may
shorten its working life.
To descale the steamer and element, fill the steamer with 600ml (1pt) white
vinegar, plug it into the power socket, and set the timer to 20 minutes.
Ensure the kitchen is well ventilated while doing this, as heating the vinegar
will give off an unpleasant smell.
Don’t fit the filter, diffuser, baskets, rice bowl, or lid.
After the 20 minutes is up, leave it to cool completely, then pour out the
vinegar and rinse the steamer several times with cold water, to remove all
trace of the vinegar.
Pour from the end of the steamer, to prevent liquid getting to the controls.
Dry the steamer thoroughly.
Don’t use any liquid other than white vinegar, and don’t use a proprietary
descaler.
stacking and storing
The baskets have been designed to stack, to occupy less storage space than
conventional steamers.
Reverse the order of the baskets. Put the middle basket inside the largest one,
then put the smallest basket inside the middle one. Now put the rice bowl
inside the smallest basket, turn the separator on its side and lay it on the rice
bowl, then put the lid on top of the lot.
8
RH_10969_Amap_IB_7-7-05 7/7/05 6:34 PM Page 8
Page 9

cooking times
These cooking times are given as a guide only. Check that food is properly
cooked before serving. If in doubt, cook it a bit more.
Fish is cooked when it appears opaque and can be flaked easily. Cook meat till
the juices run clear.
9
recipes
RH_10969_Amap_IB_7-7-05 7/7/05 6:34 PM Page 9
Page 10

10
RH_10969_Amap_IB_7-7-05 7/7/05 6:34 PM Page 10
Page 11

11
RH_10969_Amap_IB_7-7-05 7/7/05 6:34 PM Page 11
Page 12

12
RH_10969_Amap_IB_7-7-05 7/7/05 6:34 PM Page 12
Page 13

13
RH_10969_Amap_IB_7-7-05 7/7/05 6:34 PM Page 13
Page 14

14
RH_10969_Amap_IB_7-7-05 7/7/05 6:34 PM Page 14
Page 15

15
RH_10969_Amap_IB_7-7-05 7/7/05 6:34 PM Page 15
Page 16

16
RH_10969_Amap_IB_7-7-05 7/7/05 6:34 PM Page 16
Page 17

17
RH_10969_Amap_IB_7-7-05 7/7/05 6:34 PM Page 17
Page 18

notes
18
RH_10969_Amap_IB_7-7-05 7/7/05 6:34 PM Page 18
Page 19

changing the fitted/molded plug
Should the need arise to change the fitted/molded plug, follow these
instructions:
mains (AC) operation
This unit is designed to operate on 230V- 240V current only. Connecting to
other power sources may damage the unit.
connect three-pin plug as follows:
The wires in this mains lead are coloured in accordance with the following
code: Green/Yellow = Earth Blue = Neutral Brown = Live
serivce
There are no user serviceable parts in this appliance. If the appliance is not
operating correctly, please check that:
1You have followed the instructions correctly.
2. Is the plug or cord damaged in any way?
3. Are the mains power supply On.
If the appliance still does not work:
In the first instance, consult your retailer for possible repair or replacement. If
your retailer fails to solve your problem and you need to return the appliance,
make sure that:
1. The unit is packed carefully back into its original packaging.
2. Proof of purchase is attached.
3. Give the reason why you are returning it.
If the supply cord is damaged, it must be replaced by the manufacturer or its
service agents in order to avoid a hazard. If service becomes necessary within
the warranty period the appliance should be returned to an approved
Amalgamated Appliances (Pty) Ltd service centre. Servicing outside the
warranty period is still available, however it will be chargeable.
19
(N)
Neutral
(E)
Earth
(L)
Live
(E) Green and Yellow
(N) Blue
(L) Brown
RH_10969_Amap_IB_7-7-05 7/7/05 6:34 PM Page 19
Page 20

20
PLEASE AFFIX YOUR PROOF OF PURCHASE/RECEIPT HERE.
IN THE EVENT OF A CLAIM UNDER WARRANTY, THIS RECEIPT MUST BE PRODUCED.
W A R R A N T Y
Amalgamated Appliances (Pty) Limited ("the Supplier") warrants to the original purchaser
of this product ("the Customer") that this product will be free of defects in material and
workmanship which under normal, personal, family or household purpose manifest
themselves within a period of 365 days from the date of purchase or in respect of
commercial or professional purposes, manifest themselves within a period of 90 days from
the date of purchase. Any claim in terms of the warranty must be supported by a proof
of purchase. If such proof is not available, then notwithstanding anything to the contrary
herein, the Supplier’s normal charge for service and/or spares will be payable by the
Customer upon collection of the repaired product. If a claim is made in terms of the
aforesaid warranty within the first 7 days from the date of purchase, the faulty product
will be exchanged (provided that the product is in its original packaging with all
accessories). Failing return of the product within 7 days, the Supplier’s liability shall be
limited on return to the Supplier of the product or parts thereof, to the replacement or
repair (in the sole discretion of the Supplier, or its duly authorised service dealer) of the
product to eliminate any defect in workmanship or materials found to be due exclusively
to any acts or omissions on the parts of the Suppliers, of which defects the Supplier shall
have been notified in writing by the Customer within the aforesaid warranty period. The
warranty provided herein and the obligations of the Supplier as aforesaid are in lieu of,
and the Customer waives, all other warranties, guarantees, conditions or liabilities,
express or implied, arising by law or otherwise, including without limitation, any
obligation of the Supplier in respect of any injury, loss or damage (direct, indirect or
consequential) arising out of the use of, or inability to use, this product and whether or
not occasioned by the Supplier’s negligence (gross or otherwise) or any act or omission on
its part. The warranty does not include and will not be construed to cover products
damaged as a result of disaster, misuse, abuse or any non-authorised modification of the
product. The warranty does not include replacement of light bulbs, heater bars, paper
bags or any glass, plastic bowl or jug or other expendables. During the warranty period
the product should be taken to a service centre of the Supplier or one of its duly
authorised service agents. The Supplier neither assumes nor authorises any other person
to assume for it, any additional liability in connection with the sale or servicing of its
products.
AMALGAMATED APPLIANCES (PTY) LTD.
29, HERONMERE ROAD P O BOX 39186
BOOYSENS, JOHANNESBURG BOOYSENS
2016 JOHANNESBURG
2016
TEL NO. (011) 490 9000
FAX NO. (011) 490 9399
CAPE TOWN TEL NO. (021) 535-0600
DURBAN TEL NO. (031) 792-6000
Win prizes on line: www.russellhobbs.co.za
436-579
RH_10969_Amap_IB_7-7-05 7/7/05 6:34 PM Page 20
 Loading...