

Page 1
®ÂØÒňÎ
®
Workshop
GR-20 Guitar Synthesizer
Using the GR-20 with a Sequencer
© 2006 Roland Corporation U.S.
All rights reserved. No part of this publication may be reproduced in any form without the
written permission of Roland Corporation U.S.
GR20WS03
Page 2
About the Workshop Booklets
Hot Links
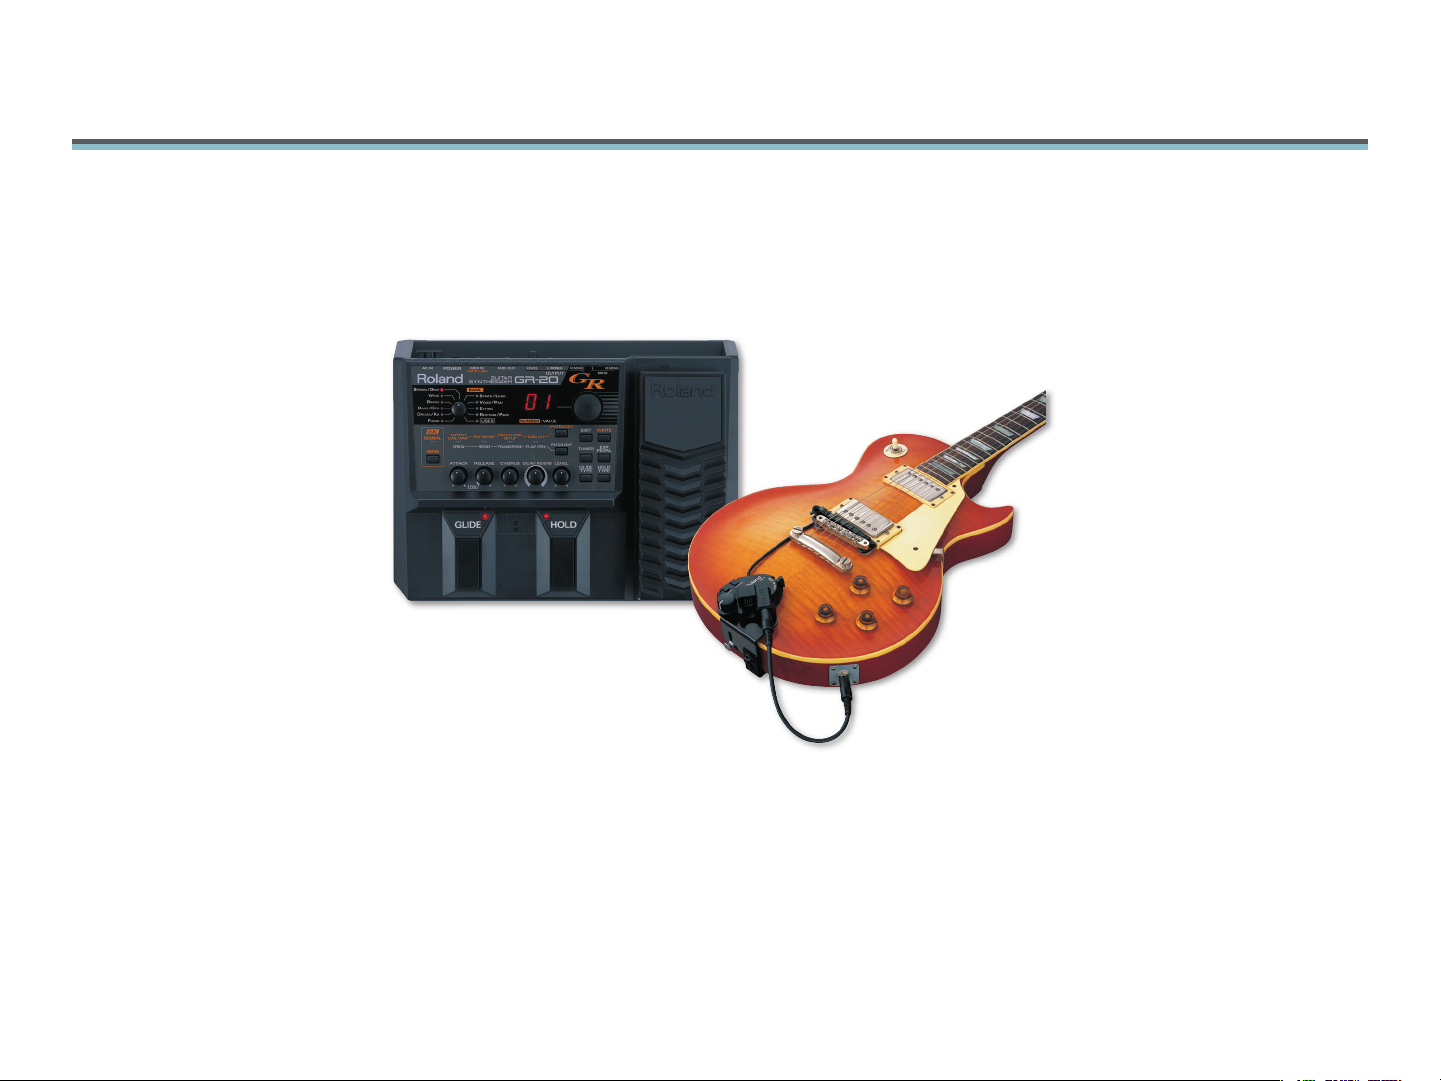
Roland’s GR-20 Guitar Synthesizer opens up spectacular new sonic
possibilities for the electric guitarist. With the included GK-3 Divided
Pickup installed, any six-string electric guitar can play the GR-20’s amazing
collection of synthesizer sounds and sampled real-world instruments. You
can also mix your guitar’s own sound with those in the GR-20 to create new
timbres that are all your own.
Each GR-20 Workshop Series booklet focuses on one GR-20 topic, and is
intended as a companion to the GR-20 Owner’s Manual.
This booklet requires GR-20 O.S. Version 2.00 or higher. You can download
the latest GR-20 O.S. for free from www.RolandUS.com.
About This Booklet
A MIDI sequencer captures and plays back MIDI performances. It’s a powerful
tool that allows you to layer multiple performances, and do all sorts of things
to hone your sequenced music to perfection. The GR-20 provides a way for
you to record MIDI data into a MIDI sequencer from your guitar, using the
GR-20’s own sounds or any other MIDI sounds you like. This booklet explains
how to sequence with the GR-20.
Understanding the Symbols in This Booklet
Throughout this booklet, you’ll come across information that deserves
special attention—that’s the reason it’s labeled with one of the following
symbols.
A note is something that adds information about the topic at hand.
Each Workshop booklet is meant to be read in order from beginning
to end. However, if we mention an upcoming section—and you see
this arrow—you can click the arrow to jump there immediately.
About MIDI, Sequencers, and the GR-0
If you’re experienced with MIDI and sequencers, feel free to skip this
section.
A full discussion of MIDI is beyond the scope of this booklet—in fact, we
have an InFocus booklet devoted entirely to MIDI called An Introduction to
MIDI. You can download this booklet from the Support Documents section of
the Roland US website.
Meanwhile—if you just want to get started—there are three basic things
you really need to know about MIDI, sequencing, and the GR-20:
MIDI isn’t sound, it’s instructions—When you play a MIDI instrument,
•
your performance is converted into instructions that tell a soundproducing MIDI device what notes to play, and how to play them. These
instructions are called “MIDI messages.”
A sequencer—captures MIDI data, and can play it back. This can make a
•
sequencer seem like an audio recorder, but it’s not: it’s just playing back
instructions that cause a sound-producing MIDI device to recreate your
performance. A sequencer, by the way, can be a software program on a
computer, part of a keyboard workstation such as the Roland Fantom-X,
or a standalone hardware device.
Your GK-3 and the GR-20—convert your playing to MIDI data, which can
•
play the GR-20 sounds and/or be transmitted to another device, such as
a sequencer, from the GR-20’s MIDI OUT jack.
A tip offers suggestions for using the feature being discussed.
Warnings contain important information that can help you avoid
possible damage to your equipment, your data, or yourself.
Many sequencers offer standard audio tracks in addition to MIDI tracks.
You can, of course, easily record standard audio from the GR-20 into
this kind of sequencer by simply connecting the GR-20’s OUTPUT jacks
to the sequencer’s audio inputs. To learn about the GR-20 OUTPUT
jacks, see the Getting Started with the GR-20 Workshop booklet.
Page 3
Connecting the GR-0 to a Sequencer
SEQUENCER
Preparing the GR-0 for Sequencing
On the Sequencer Side of Things
To connect your sequencer to the GR-20, the sequencer has to have a MIDI
IN jack and a MIDI OUT jack. If you’re using a:
hardware, standalone sequencer—you’ll typically find a MIDI IN jack and
•
a MIDI OUT jack on its rear panel.
keyboard workstation—you’ll typically find a MIDI IN jack and a MIDI
•
OUT jack on its rear panel.
sequencing program on a computer—MIDI connectivity has to be added
•
to the computer in either of two ways. You can use a:
MIDI interface —which is usually a rack-mounted or tabletop box
•
that connects to the computer via USB or FireWire, and provides
MIDI ports you can connect to your other MIDI devices.
sound card—that offers MIDI jacks, or a game port to which you
•
connect a special cable that provides MIDI jacks.
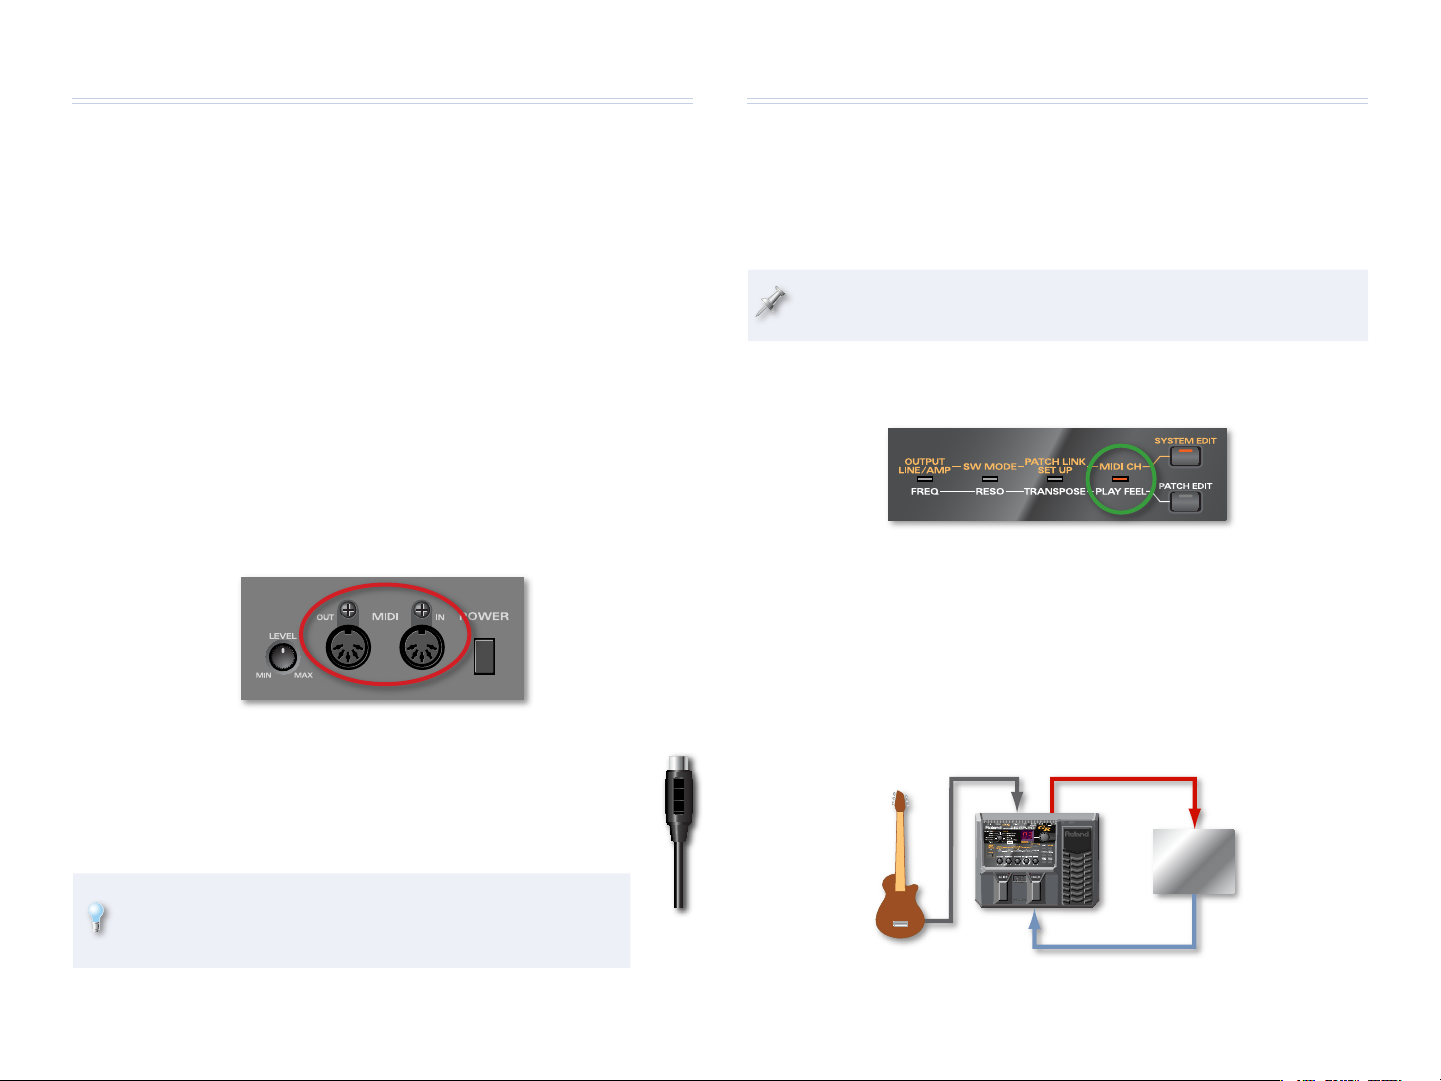
On the GR-0 Side of Things
Using a MIDI cable:
Connect the GR-20’s MIDI OUT jack to the sequencer’s
�
MIDI IN jack.
Connect the sequencer’s MIDI OUT jack to the GR-20’s
�
MIDI IN jack.
MIDI Channel
Select the basic MIDI channel on which you want the GR-20 to send and
receive data. (As we’ll see, this channel also acts as the first channel the
GR-20 uses in its Mono transmission mode.)
Unless you have a MIDI system that provides each MIDI device its own
set of 16 MIDI channels, select a channel no other device is using.
To set the GR-20’s basic MIDI channel:
Press SYSTEM EDIT repeatedly until the MIDI CH indicator lights.
�
Turn the Number/Value dial to select a basic MIDI channel, from 1-11.
�
Press EXIT—the GR-20 stores your settings.
�
Local Off
When you’re using a GR-20 patch while sequencing, notes can play twice:
once from your guitar, and once more from the output of your sequencer.
1 The guitar plays the GR-20 note.
2 The GR-20 sends a note event to the sequencer via MIDI.
If you don’t intend to use the GR-20’s own sounds, you don’t
need to connect the sequencer’s MIDI OUT jack to the GR-20’s
MIDI IN jack.
3 The sequencer plays the GR-20 note again.
Page 4

The best way to solve this problem is to temporarily turn off the GR-20’s own
response to your guitar by activating the GR-20’s Local Control Off feature.
Here’s how:
Power off the GR-20.
�
While holding down the GR-20’s SYSTEM EDIT
�
button, turn the GR-20 back on—the display briefly
shows “Lo,” for “Local off.”
To switch local control back on, turn the GR-20 off and then back on.
Mono Mode
In Mono mode, each of your guitar’s strings sends its data on its own MIDI
channel. This allows you to do a couple of interesting things. In Mono mode,
you can:
control six different sounds at once—with each sound being played by
•
one string on your guitar.
sequence realistic guitar parts that involve string bending—since each
•
string’s bending data is transmitted on its own MIDI channel.
In Mono mode, the basic MIDI channel carries the data for the high E string.
The B string uses the next MIDI channel, the G the channel above that, and
so on.
The GR-0’s Transmission Modes
For maximum flexibility, the GR-20 offers two different modes for sequencing:
poly and mono mode.
Poly Mode
In poly mode, everything you play on your guitar is sent from the GR-20 to
the sequencer on the basic MIDI channel. This is the most straightforward
way to sequence.
E
B
G
D
A
E
If You’re Bending Notes
Because the notes from all of your strings are being sent on a single MIDI
channel, the GR-20 automatically disables the sending of pitch bend data
when more than one note is playing. If it didn’t do this, bending one note
would cause all of the currently playing notes to bend, not something a
guitarist always wants to hear happening. If you’re bending notes, therefore,
it’s best to use Mono mode.
Basic MIDI Channel
E
B
G
D
A
E
This is why you can select only MIDI Channels 1-11 as the basic channel:
To make sure you always have a full set of five MIDI channels—counting
upwards from the basic channel—you need for Mono mode.
To select a transmission mode:
Power off the GR-20.
�
While holding down the GR-20’s EXIT button, turn the
�
GR-20 back on.
Turn the Number/Value dial to select the desired mode:
�
Mono mode
Press EXIT to store your new setting.
�
Poly mode•
•
>
Basic MIDI Channel
>
Basic MIDI Channel +1
>
Basic MIDI Channel +2
>
Basic MIDI Channel +3
>
Basic MIDI Channel +4
>
Basic MIDI Channel +5
Setting Up Your Sequencer
Here’s a list of things to set up before sequencing—see your sequencer’s
documentation for specific instructions on performing these tasks.
Page 5

Select and Arm a Sequencer
Track for Recording
Select the sequencer track you want to use for
your GR-20 MIDI data, and arm it for recording.
(Sequencers receive MIDI data from all 16
MIDI channels all the time, so they require no
setting of a MIDI channel for recording.)
In a workstation keyboard like
the Fantom-X, you select the
track in a setup window.
Record Track Monitoring
Your sequencer may be able to send MIDI
data from a track being recorded to its output
destination as you record, so you can hear
what you’re doing. You may need to turn this
feature—sometimes called “soft thru”—on.
(In some sequencers, simply arming the track
for recording automatically switches on the
soft thru.)
In a computer sequencing
program, click a track’s Record
button so it turns red.
Recording GR-0 Patch Changes
When you’re recording a sequencer track that plays a GR-20 sound, you may
want to set your sequencer to record MIDI Bank Select and Program Change
messages. Here’s why.
When you select a new patch on the GR-20, the GR-20 transmits MIDI Bank
Select and Program Change values that identify the patch. You can record
these values into a sequencer track so that when the track is played back,
it sends these values back to the GR-20, and the patch is automatically reselected.
This spares you having to remember the GR-20 patch you want to use, and
is especially handy in situations where you want to change GR-20 patches
over the course of a song.
Set the Sequencer Recording Track’s Output
In a sequencer, each track sends its MIDI data to a soundproducing device that actually causes the recorded notes to
play. You therefore need to point the track’s output at this
device.
When you’re in Poly mode on the GR-20, you can use:
the GR-20’s current sound—by sending the track’s output
•
to the GR-20.
a sound in another MIDI device—by sending the track’s
•
output to that device.
In a device like the Fantom-X, Tracks 1-16 send data out on
MIDI Channels 1-16, respectively, by default.
The complexity of your MIDI setup determines the actual track output
settings you need. In a:
simple MIDI setup with no MIDI patchbay—set the track’s output to the
•
MIDI channel on which the sound-producing device is set to receive
data, as shown above.
complex MIDI setup with a patchbay that allows each device its own set
•
of 16 MIDI channels—select the desired device, and then select its MIDI
reception channel.
If you want your sequencer to use a GR-20 patch, set the track’s output
to the GR-20’s basic MIDI channel, which we described on Page 3.
If the MIDI channel you need is different from the track’s default
output channel—as might be the case on a workstation such as the
Fantom-X—you can usually change the track’s output channel to
anything you like. See the workstation’s documentation for details.
To capture a patch’s Bank Select and Program Change values, start recording
in the sequencer, and then select the desired patch on the GR-20 a few
seconds before you start playing—during a countoff, for example.
We recommend setting up your output routing for Mono mode
recordings after playback.
Page 6

Sequencing
Once you’ve got everything set up, you can record a sequencer track, punch
in, or record additional tracks from the GR-20 the same way you’d record
from a MIDI keyboard—again, your sequencer’s documentation is the best
source for specific instructions n recording.
What the GR-0 Sends Out
MIDI has a set of “Control Change” messages that represent common
behaviors in a MIDI instrument.
When you move the GR-20 Expression pedal—the GR-20 sends
•
out MIDI Control Change messages, depending on the pedal’s
configuration. If it’s set to:
Vo—the GR-20 sends out volume change (Control
•
Change #7) values as you rock the pedal.
Fl or EF—the GR-20 sends out foot pedal (Control Change
•
#4) values when you rock the pedal.
When the patch’s RELEASE knob is set to E FLW—the
•
GR-20 sends out General Purpose Controller (Control
Change #18) values. If your sequencer’s playing a
GR-20 sound, these values set the GR-20’s Release
parameter to E FLW.
Here’s a bit more detail on what the GR-20 does during sequencing:
When you start to play each note on your guitar—the
•
GR-20 sends out a MIDI note-on message for that note.
When you stop playing a note—the GR-20 sends out a
•
note-off message.
When you bend strings—the GR-20 sends out pitch bend
•
messages that mimic the behavior of your string bends.
When you press the GR-20 GLIDE pedal—the GR-20 sends
•
out pitch bend messages that mimic the way your notes’
pitches change when GLIDE is pressed.
When you press the GR-20 HOLD pedal—the GR-20 sends
•
out MIDI messages that describe what the pedal does to
your notes. If the HOLD pedal is set to:
H1, H2, or H3—the GR-20 stops sending out note-off
•
messages until you release the pedal.
H4—the GR-20 sends out a sustain pedal-on (Control Change #64)
•
value for as long as you press the HOLD pedal down.
Sustain pedal messages sent from the GR-20’s HOLD pedal work best
when you’re sequencing in Mono mode.
Tips for Successful Sequencing
Here are some tips for sequencing with the GR-20:
Play as cleanly as possible—as always with the GR-20. If you do wind up
•
with extra or unwanted notes in the recorded sequencer track, you can
always delete them, thanks to the ease with which MIDI data can be
edited in a sequencer.
If you’re having trouble playing in time with the sequencer—slow the
•
sequencer’s tempo down. You can speed it back up on playback. (One
of the advantages of MIDI is that you can change a performance’s
tempo even after recording.)
If you’re having trouble playing a complex part—break the part up into
•
simpler components you can record separately on different tracks.
Your sequencer will allow you to merge them into a single track after
recording.
If you’re recording notes you didn’t actually play—
•
set up your sequencer to ignore the unintended
notes. In MIDI, the force with which you play a
note is measured as a “velocity” value. Higher
velocity values, up to 127, mean louder notes,
while lower velocity values mean quieter notes.
Most often, unwanted notes are played softly. You
may be able to set up your sequencer so it ignores
notes with a velocity value of 25 or less.
Playing softly
=low velocity
Playing hard
=high velocity
Page 7

Playing Back a Mono Mode-Recorded Track
Depending on your sequencer, when you sequence using Mono mode,
�
one track may wind up with the data for all six strings’ MIDI channels.
The best way to work with all this data to split it out onto six separate
tracks. (See your sequencer’s documentation to learn how to do this.)
Set each of the six tracks’ output to the desired sound source. The tracks
�
can play six sounds in a multitimbral sound module, plug-in soft synths,
a bunch of single-sound modules, or a combination of these.
You can also send the outputs of your mono-mode-recorded tracks to
the GR-20 when it’s in Mono mode, and all of the tracks will play the
same currently selected GR-20 sound.
When you’re sequencing realistic guitar parts with string bending, set
the sequencer to play six copies of the same guitar sound—one for each
string. Use a multitimbral module for all of the sounds, or six copies of
the same soft synth plug-in.
Storing the GR-0’s Memory in an External Device
You can store the GR-20’s SysEx data onto a sequencer track from
where it can be reloaded it into the GR-20 by simply playing the track.
(Make sure your sequencer is set to receive SysEx data.)
Before proceeding, check your MIDI device’s documentation to learn its
procedure for receiving, storing, and transmitting SysEx data.
Transmitting the GR-0’s Memory as a Bulk Dump
Making sure the GR-20’s MIDI OUT is connected to the MIDI IN of the
�
external MIDI device, power down the GR-20.
While holding down the GR-20’s PATCH EDIT button,
�
turn on the GR-20—the GR-20 powers up with “dP,”
for “dump,” on the display.
Begin recording data on the MIDI device.
�
If you’re recording onto a sequencer track, make sure to wait until the
sequencer’s countoff is finished before proceeding to Step 4.
When the GR-20 is connected to a MIDI device that can store data
internally—on a floppy disk, memory card, or hard drive—you can use the
device for storing the contents of the GR-20’s internal memory.
Using a special form of MIDI messages called “System Exclusive”—or
“SysEx”—data, the GR-20 can transmit the entire contents of its memory,
including all of your settings and User patches, as well as the GR-20’s system
settings, as a “bulk dump” for storage on an external MIDI device.
To learn more about SysEx data, see the InFocus booklet An
Introduction to MIDI.
When a storage-capable MIDI device receives the GR-20’s SysEx data, it saves
it, and can then retransmit the data at a later date to the GR-20 for reloading.
This allows you to keep a safety copy of the GR-20’s data, or to save different
GR-20 setups—including patches—for different situations.
On the GR-20, press the WRITE button to transmit the
�
GR-20’s SysEx data—during the transmission, the display
shows “t..”
When “dP” returns to the display, the GR-20’s done, so stop recording
�
on the MIDI device and save the data as you would any other data on
the device.
Power down the GR-20, and then turn it on again to return to normal
�
operation.
Page 8

Reloading the GR-0’s Memory from a Bulk Dump
Making sure that the external MIDI device’s MIDI OUT is connected to
�
the MIDI IN of the GR-20, power down the GR-20.
While holding down the GR-20’s PATCH EDIT button, turn
�
on the GR-20—the GR-20 powers up with “dP,” for “dump,”
on the display.
Turn the Number/Value dial so the GR-20 display reads
�
“Ld,” for “Load.”
Send out the SysEx data from the MIDI device—as the
�
GR-20 receives the data, its display shows “r..”
When “Ld” returns to the display, press the GR-20’s WRITE button to
�
store the received SysEx data.
Power down the GR-20, and then turn it on again to return to normal
�
operation.
The End
We hope you’ve found this workshop helpful. Keep an eye out for other
GR-20 Workshop booklets for downloading at www.RolandUS.com.
 Loading...