


FANTOM-6/7/8
Version 2.5 or later
Plug-In Usage Guide
Contents
Controlling Logic/MainStage.......................2
: Introduction ............................................2
: Preparing to Use the Plug-In .........................2
: Using the DAW Control Plug-In ......................2
: Controlling Logic Pro X................................4
: Controlling MainStage ................................9
02
© 2019 Roland Corporation
Controlling Ableton Live............................11
: Getting Ready .........................................11
: Operating Ableton Live ..............................11
Controlling Logic/MainStage
Introduction
By using the Logic/MainStage plug-in, you can control Logic Pro X or
MainStage from the FANTOM.
The main operations of Logic Pro X/MainStage can be performed
directly from the FANTOM., and you can use numerous controllers
including the FANTOM’s screen, sliders/knobs, buttons, and pads.
NOTE
This document explains procedures for the following versions of Logic Pro X
and MainStage.
Logic Pro X: 10.4.4
MainStage: 3.4.2
Menus and other aspects might differ for other versions.
In this document, we refer to “the Logic/MainStage plug-in,” but in the case
of MainStage, this functionality is actually provided not as a plug-in but by
installing a dedicated profile. If you are using MainStage, any references in this
document to “plug-in” should be read as “profile.”
Preparing to Use the Plug-In
Preparing the FANTOM
Specify the FANTOM's USB drive.
1.
Press the [MENU] button.
2.
Touch <SYSTEM>.
3.
Touch the <GENERAL> tab.
4.
Select “USB Driver,” and set it to “VENDOR.”
Using the DAW Control Plug-In
Logic Pro X users
1.
Use a USB cable to connect the FANTOM to your
Mac.
2.
Start Logic Pro X.
3.
In Logic Pro X, open the project that you want to
use.
4.
From the [Logic Pro X] menu, select [Control
Surfaces] 0 [Setup] to open the setting screen.
5.
From the list, choose “FANTOM-6 7 8.”
6.
As the input port and output port, specify
“FANTOM-6 7 8 DAW CTRL.”
7.
Press the FANTOM’s [DAW CTRL] burron to make it
light.
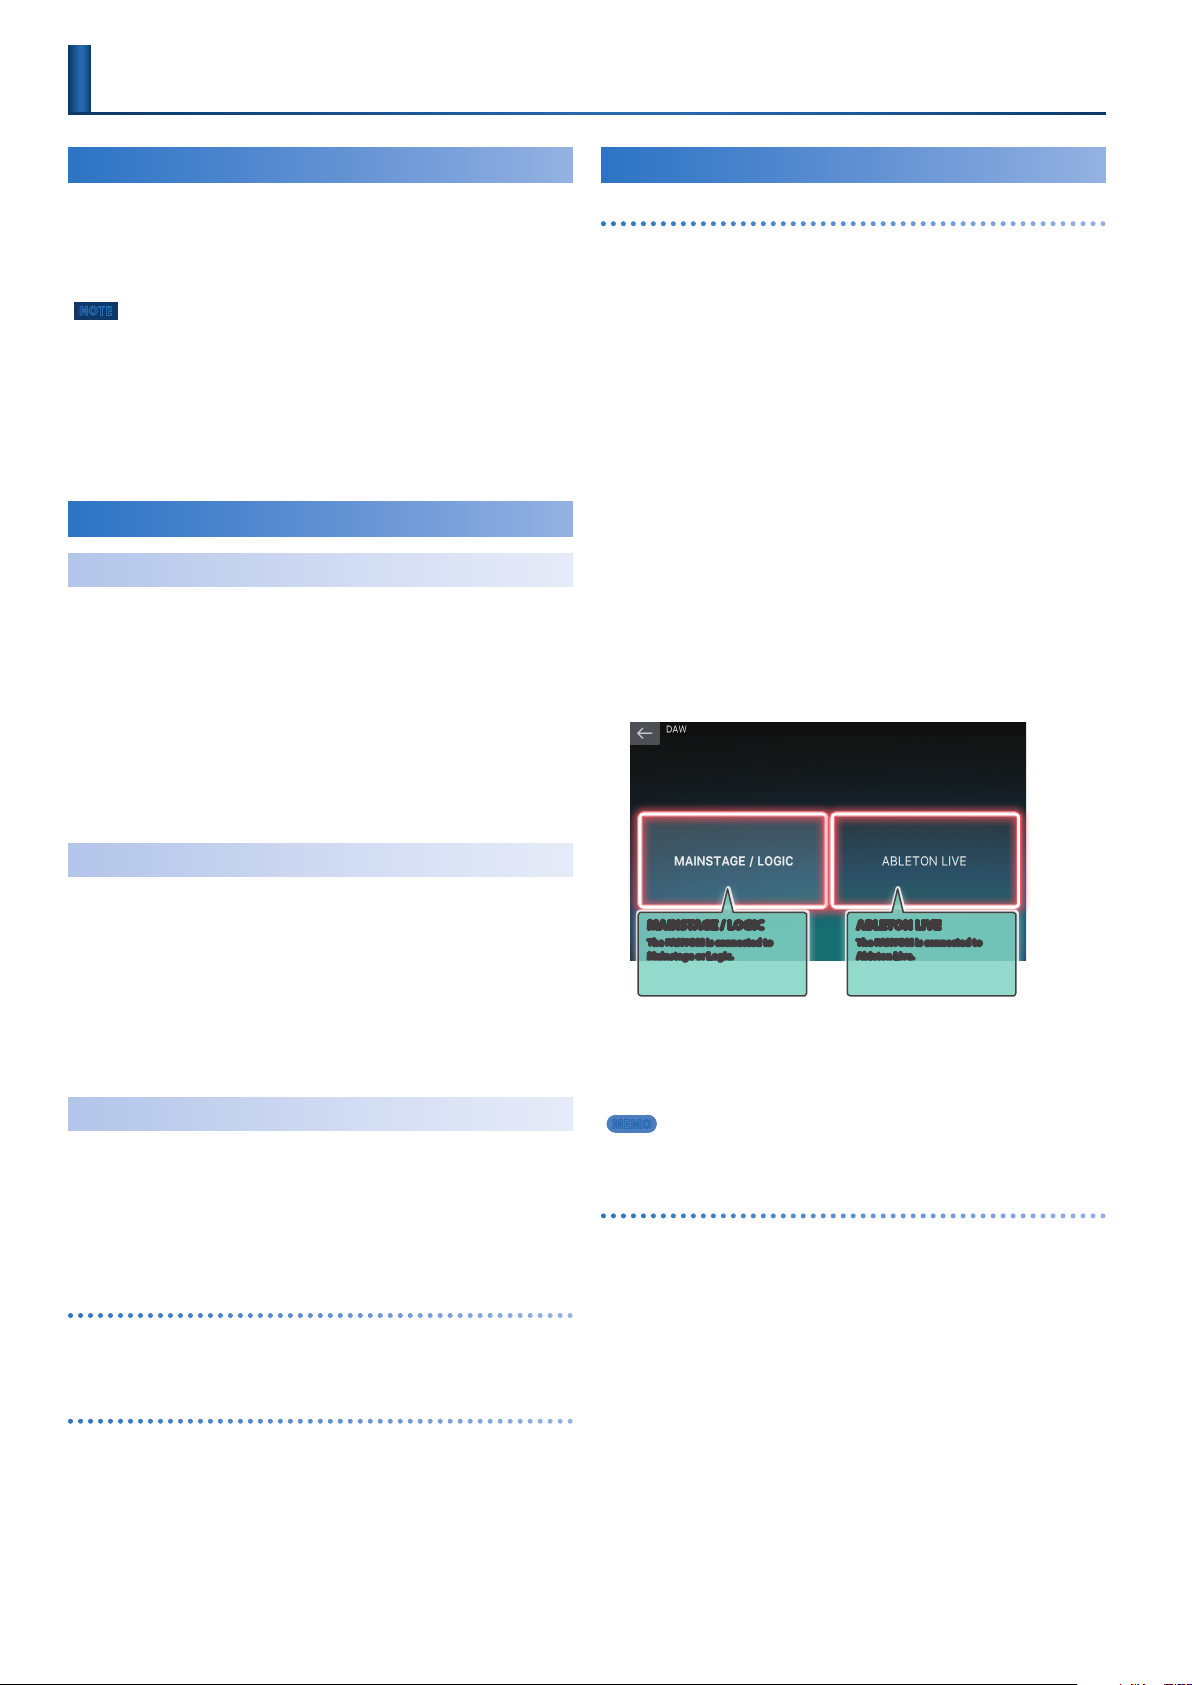
If the connection is successful, the DAW CTRL function is enabled
and the following screen is shown on the FANTOM’s display.
8.
Select the “type” to connect using DAW CTRL.
In this example, tap <MAINSTAGE / LOGIC>.
5.
Press the [WRITE] button to save the system settings.
6.
Turn the FANTOM’s power off and on again.
Installing the USB Driver
Install the USB driver on your Mac.
1.
From the product support page, download the
FANTOM Driver.
To obtain the latest USB driver, access the following URL and download
the driver for the model you’re using.
https://www.roland.com/support/
2.
Install the driver as directed by the procedure
given on the download page.
Installing the Plug-In
Install the Logic/MainStage plug-in on your Mac.
1.
Download the plug-in from the product support page.
Access the following URL and download the plug-in.
https://www.roland.com/support/
2.
Decompress the downloaded ZIP file.
Logic Pro X users
3.
Double-click “FantomLogicCSPlugin_1.0.0.pkg.”
Installation begins.
MainStage users
3.
Double-click “Fantom_MainStageProfile_1.0.0.pkg.”
Installation begins.
4.
Proceed with installation as directed by the screen.
MAINSTAGE / LOGIC
The FANTOM is connected to
Mainstage or Logic.
9.
When you want to stop using DAW control, press
ABLETON LIVE
The FANTOM is connected to
Ableton Live.
the lit [DAW CTRL] button to turn off the DAW CTRL
function.
MEMO
Control Surface port selection is available only if show Advanced Tool is
selected and “Additional Option”0”Control Surface” is selected.
MainStage users
1.
Use a USB cable to connect the FANTOM to your
Mac.
2.
Start MainStage.
3.
In MainStage, open the concert that you want to
use.
4.
Press the FANTOM’s [DAW CTRL] button to make it
light.
If the connection is successful, the DAW CTRL function is enabled
and the following screen is shown on the FANTOM’s display.
5.
When the indication “Installation is completed”
appears, click the [Close] button.
2

5.
Select the “type” to connect using DAW CTRL.
In this example, tap <MAINSTAGE / LOGIC>.
Controlling Logic/MainStage
MAINSTAGE / LOGIC
The FANTOM is connected to
Mainstage or Logic.
6.
When you want to stop using DAW control, press
ABLETON LIVE
The FANTOM is connected to
Ableton Live.
the lit [DAW CTRL] button to turn off the DAW CTRL
function.
MEMO
When you turn on the DAW CTRL function, there might be cases in
which sound cannot be produced for a short time. This is due to the
processing needed to load the Concert data for MainStage, and is not a
malfunction.
NOTE
If the connection is not correct, a screen like the following appears.
5 Verify that the USB cable is correctly connected.
5 Check whether the driver is correctly installed.
3
Controlling Logic/MainStage
Controlling Logic Pro X
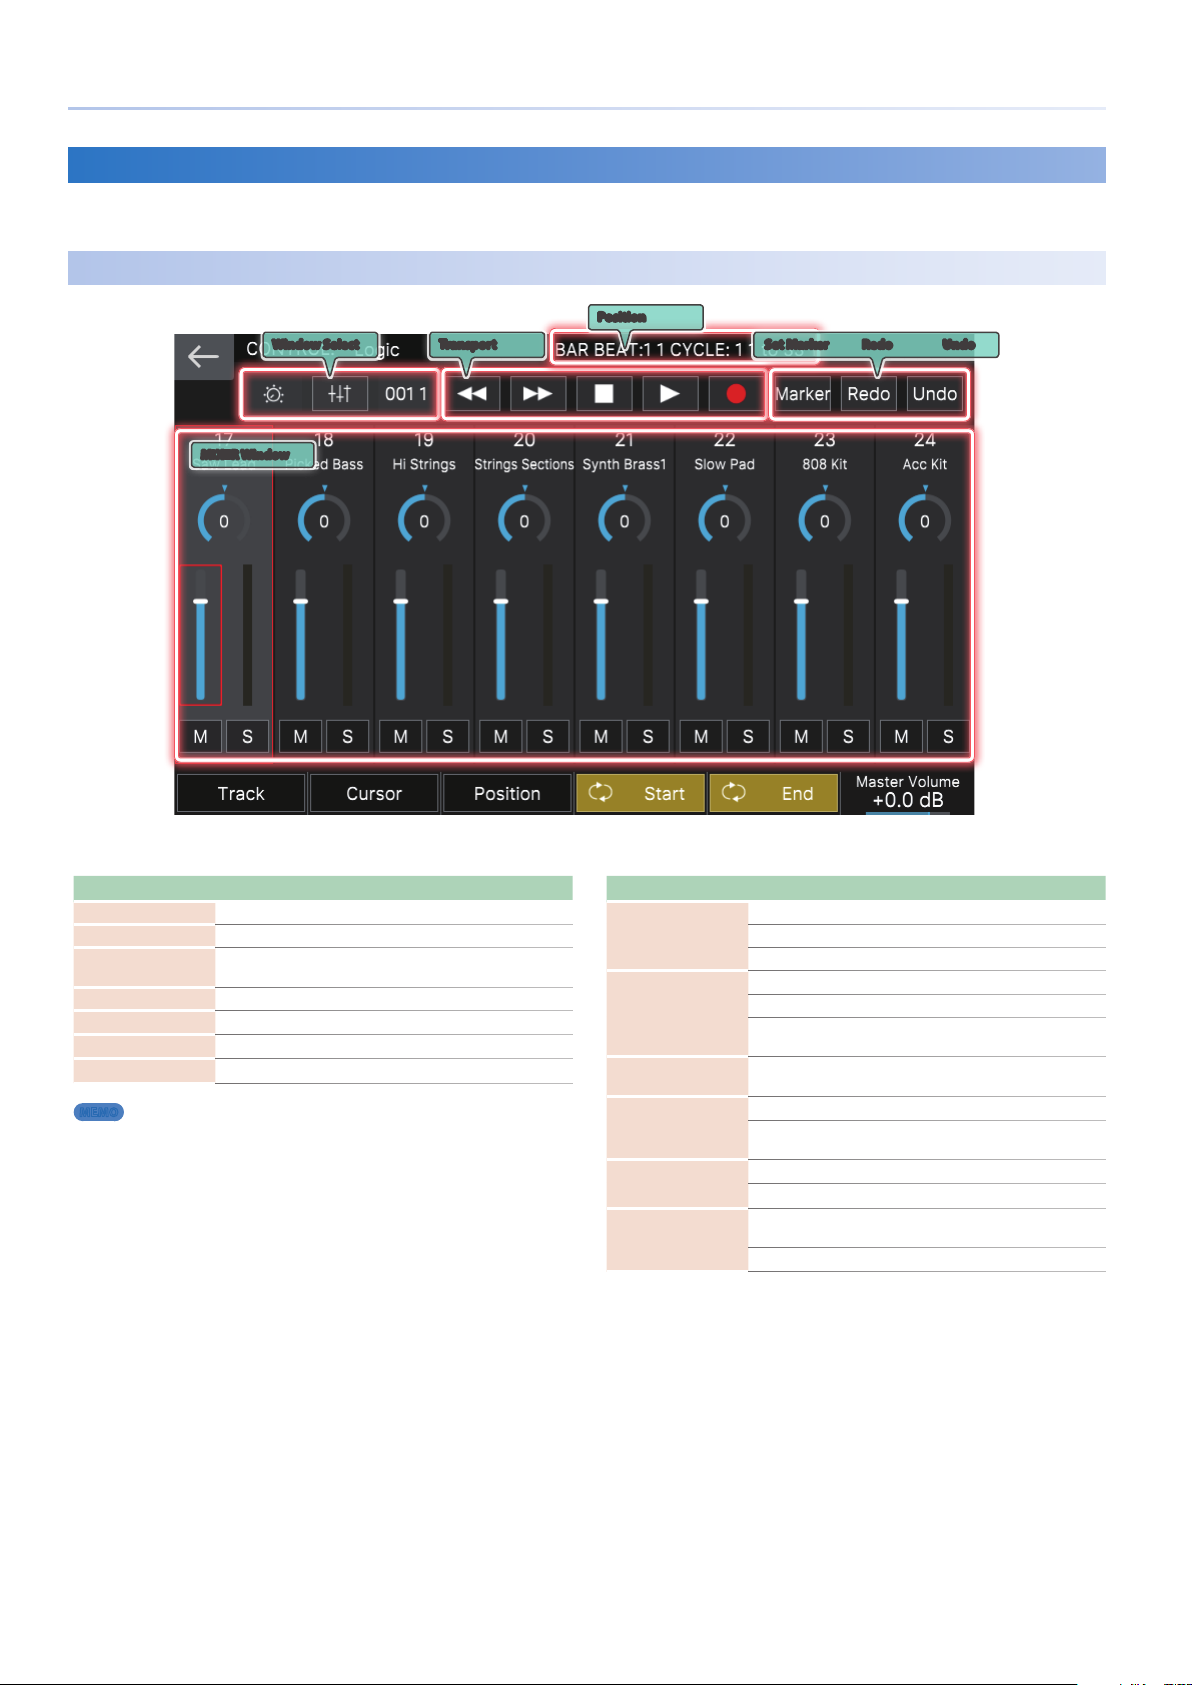
When controlling Logic Pro X, you’ll switch between three screens: the Mixer screen, the Track Edit screen, and the Transport screen.
In addition to using the [E1]–[E6] knobs, you can perform operations by directly touching or dragging icons and sliders in the screen.
Mixer Screen
Position
Window Select Transport
MIXER Window
Set Marker Redo Undo
Icon Explanation
Window Select Switches screens.
Position Indicates the locator position.
Transport
Set Marker Sets a marker.
Redo Executes redo.
Undo Executes undo.
MIXER Window Specifies each track’s volume, pan, and solo/mute settings.
MEMO
Performs play, stop, fast-forward, rewind, and record
operations on Logic Pro X.
Depending on the track that’s selected, some parameters might not be
shown. Changes made in Logic such as the track name might not be
immediately reflected in the FANTOM’s screen.
Knob Explanation
[E1] knob Press the knob to switch between Track/Bank.
Track Turn the knob to switch tracks.
Bank Turn the knob to switch banks.
[E2] knob Press the knob to switch between Cursor/Value.
Cursor Turn the knob to move the cursor position.
Turn the knob to specify the value of the parameter
Value
selected by the cursor.
[E3] knob
Position
[E4] knob Press the knob to switch cycle on/off.
[E5] knob Press the knob to switch cycle on/off.
[E6] knob
Master Volume Turn the knob to set the master volume.
Turn the knob to specify the locate position.
Turn the knob to specify the start position of the cycle
Start
region.
End Turn the knob to specify the end point of the cycle region.
Press the knob to lock/unlock the master volume. If this is
locked, turning the [E6] knob will not change the value.
4
 Loading...