

Page 1
Bulletin 1102C 600A Vacuum Contactor
Vacuum Interrupter Phase Assembly
Replacement Instructions
(Cat 1102-VD6)
ATTENTION: To prevent electrical shock, disconnect from power source before installing or servicing.
Vacuum Interrupter Phase Assembly Replacement (Used with Vacuum Contactors: 1102C-DOA93,
-DOB93, -DOD93, -DOG93, -DOH93, -DON93)
1. Disconnect all power cables (or bus work) and all control wiring to the contactor.
2. Remove the contactor from its mounted location. The contactor is best serviced in the tabletop position.
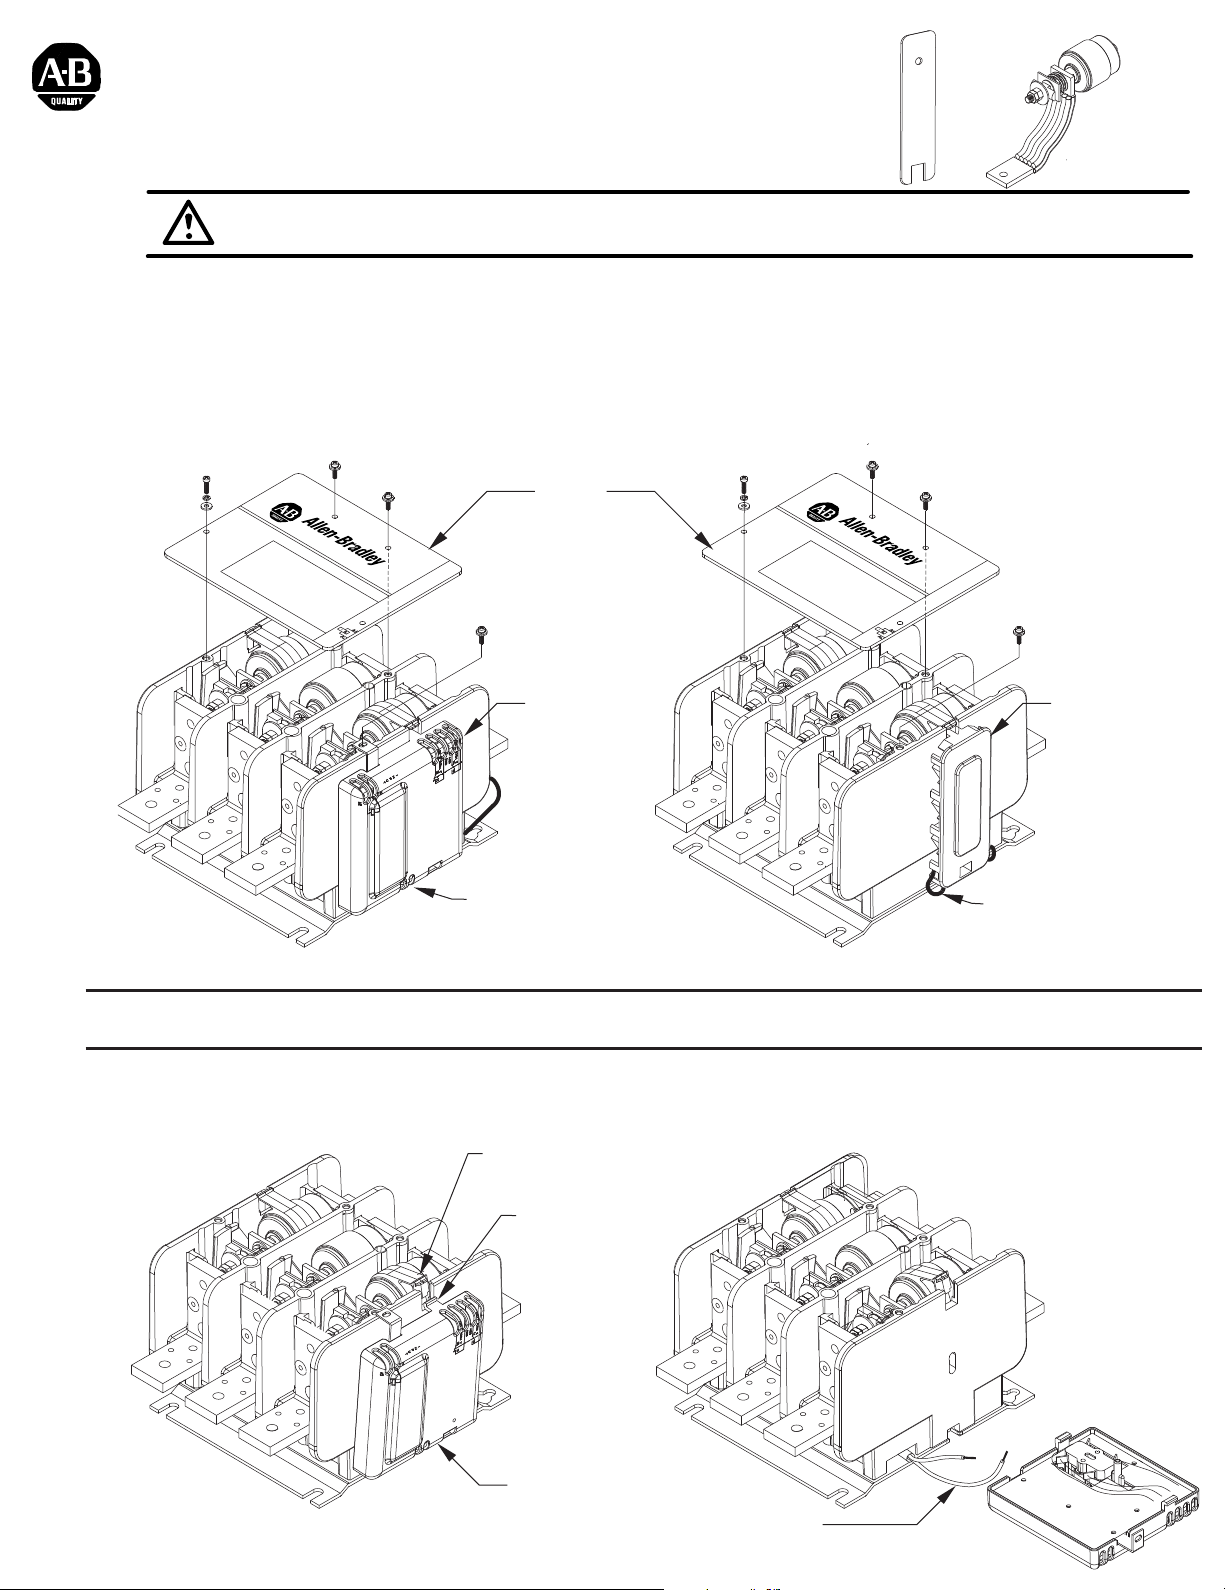
3. Remove the cover attachment hardware from the contactor and remove the cover (Figure 1).
4. Disconnect the coil wire leads from the Control-Pak or Auxiliary (Figure 2B).
Cover
V
A
CUUM CONT
A
C
T
O
R
V
A
CUUM
C
ON
T
A
CTO
R
AC Coil (With Control-Pak)
Control-Pak
Disconnect Coil Wires
from Control-Pak
Figure 1
Disconnect Coil Wires
from Auxiliary
DC Coil (With 1195C-N5)
Auxiliary
Note: The following instructions pertaining to the removal and reinstallation of the Control-Pak are
applicable to the Auxiliary.
5. Remove the Control-Pak from the contactor by first rotating the retainer to release the top of the Control-Pak.
Then pull out the top of the Control-Pak (the tab must clear the notch) and then push Control-Pak slightly
downward to release lower tab that holds the Control-Pak to the housing (Figures 2A & 2B).
Rotate retainer to
release Control-Pak
This tab must
clear notch prior
to pushing
Control-Pak
downward.
Control-Pak
Coil Leads
Figure 2A Figure 2B
Page 2
Vacuum Interrupter Phase Assembly Replacement (Cont'd)
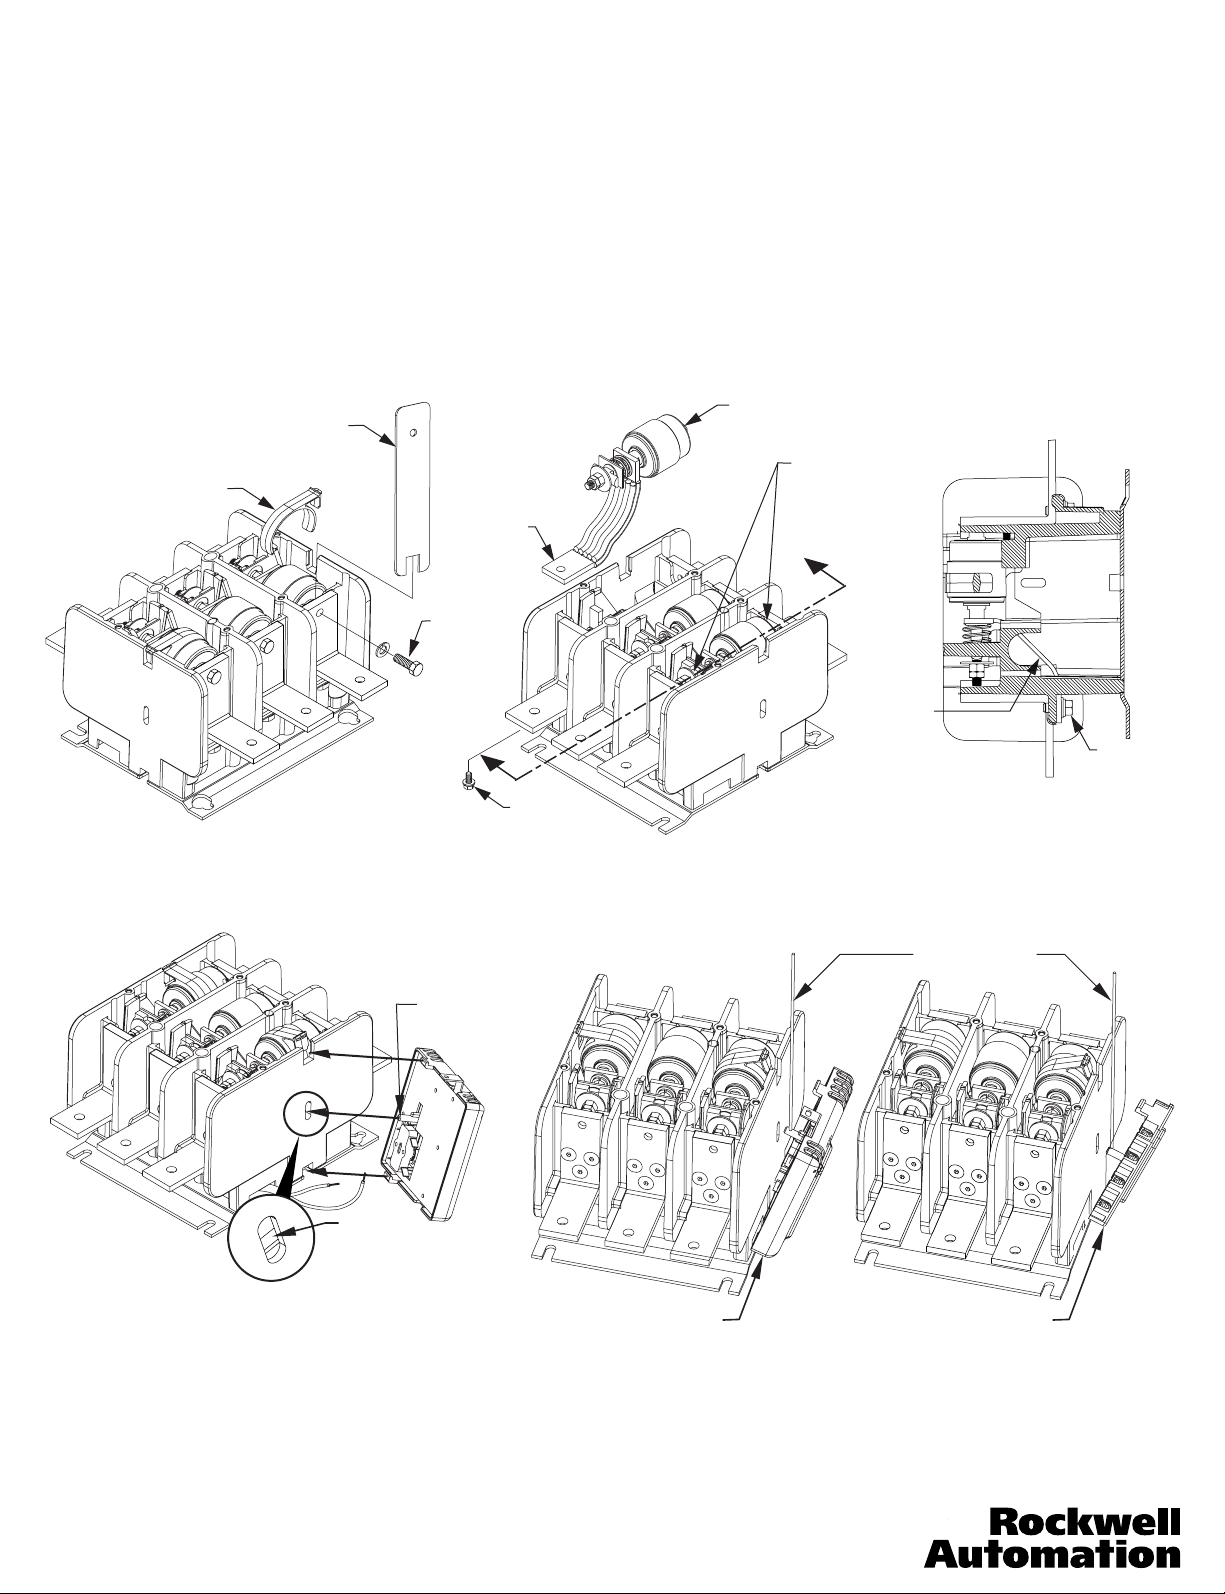
6. Locate the replacement Interrupter Phase Assembly that needs to be replaced. It is recommended that all three
interrupters be replaced at the same time.
7. For the outer interrupters, remove the Retainer. While holding the Interrupter in position with the provided wrench,
remove the screw from the line side terminal (Figure 3).
8. Remove the shunt screw from the load side terminal (See Section A-A). This will free the shunt. Carefully remove
the interrupter assembly (Figure 4).
9. The replacement interrupter is factory set for contact gap and does not require adjustment. The flexible shunt will
feed through the flexible shunt path in the molding of the contactor and the assembly can be pushed firmly back into
place (See Figure 4 showing locations for applying hand pressure to snap interrupter into plastic molding), observe the
adjacent phases to see precisely how this is positioned. While holding the Interrupter in position with the provided
wrench, replace the line terminal screw (Figure 3). Replace the shunt connection hardware (Figure 4). Torque screw
to 60 - 80 lb-inches.
Special wrench
supplied with kit
Retainer
Shunt
Terminal
Screw
Interrupter
Phase Assembly
Pressure points
for interrupter
installation
A
Shunt
A
Shunt
Figure 3 Figure 4
Screw
SECTION A-A
Shunt
Screw
10. Reinstall the Control-Pak (Figures 5A & 5B). First, insert the lower tab into the recess on the side of the contactor
base. With proper installation, the Actuator will fit into the hole in the slot in the side of the contactor housing. Using a
thin rod or flat blade, lift the Actuator up as necessary to insert it into the slot mentioned.
Thin rod or
flat blade
Control-Pak
Actuator
Actuator
must fit into
slot shown
Figure 5A Figure 5B
Auxiliary Auxiliary
11. Reinstall the cover and secure it with the original mounting hardware. NOTE: Cover must fit under metal bracket
on Control-Pak. Tighten the four screws in a diagonal pattern to 12 lb-inches. (Figure 1).
12. Reattach the coil wire leads and any auxiliary control wires to the Control-Pak (tighten to 7 lb-inches).
13. Reinstall the contactor. Torque mounting screws to 50 - 75 lb-inches.
14. Reconnect the line and load conductors and tighten the main terminal hardware and bolts to 180 - 210 lb-inches.
42052-095-01 (1)
Printed in U.S.A.
 Loading...