

Page 1
34
R
AUDIO VIDEO
CD/MP3 PLAYER WITH TURNTABLE,
STEREO RADIO, CASSETTE TAPE AND
USB/SD ENCODING
Instruction manual
HIF-9088TUMP
R
AUDIOVIDEO
is a registered Trademark of Roadstar S.A. - Switzerland All rights reserved
Page 2
English Page 1
Fig.
Fig.
HIF-9088TUMPN
INDEX
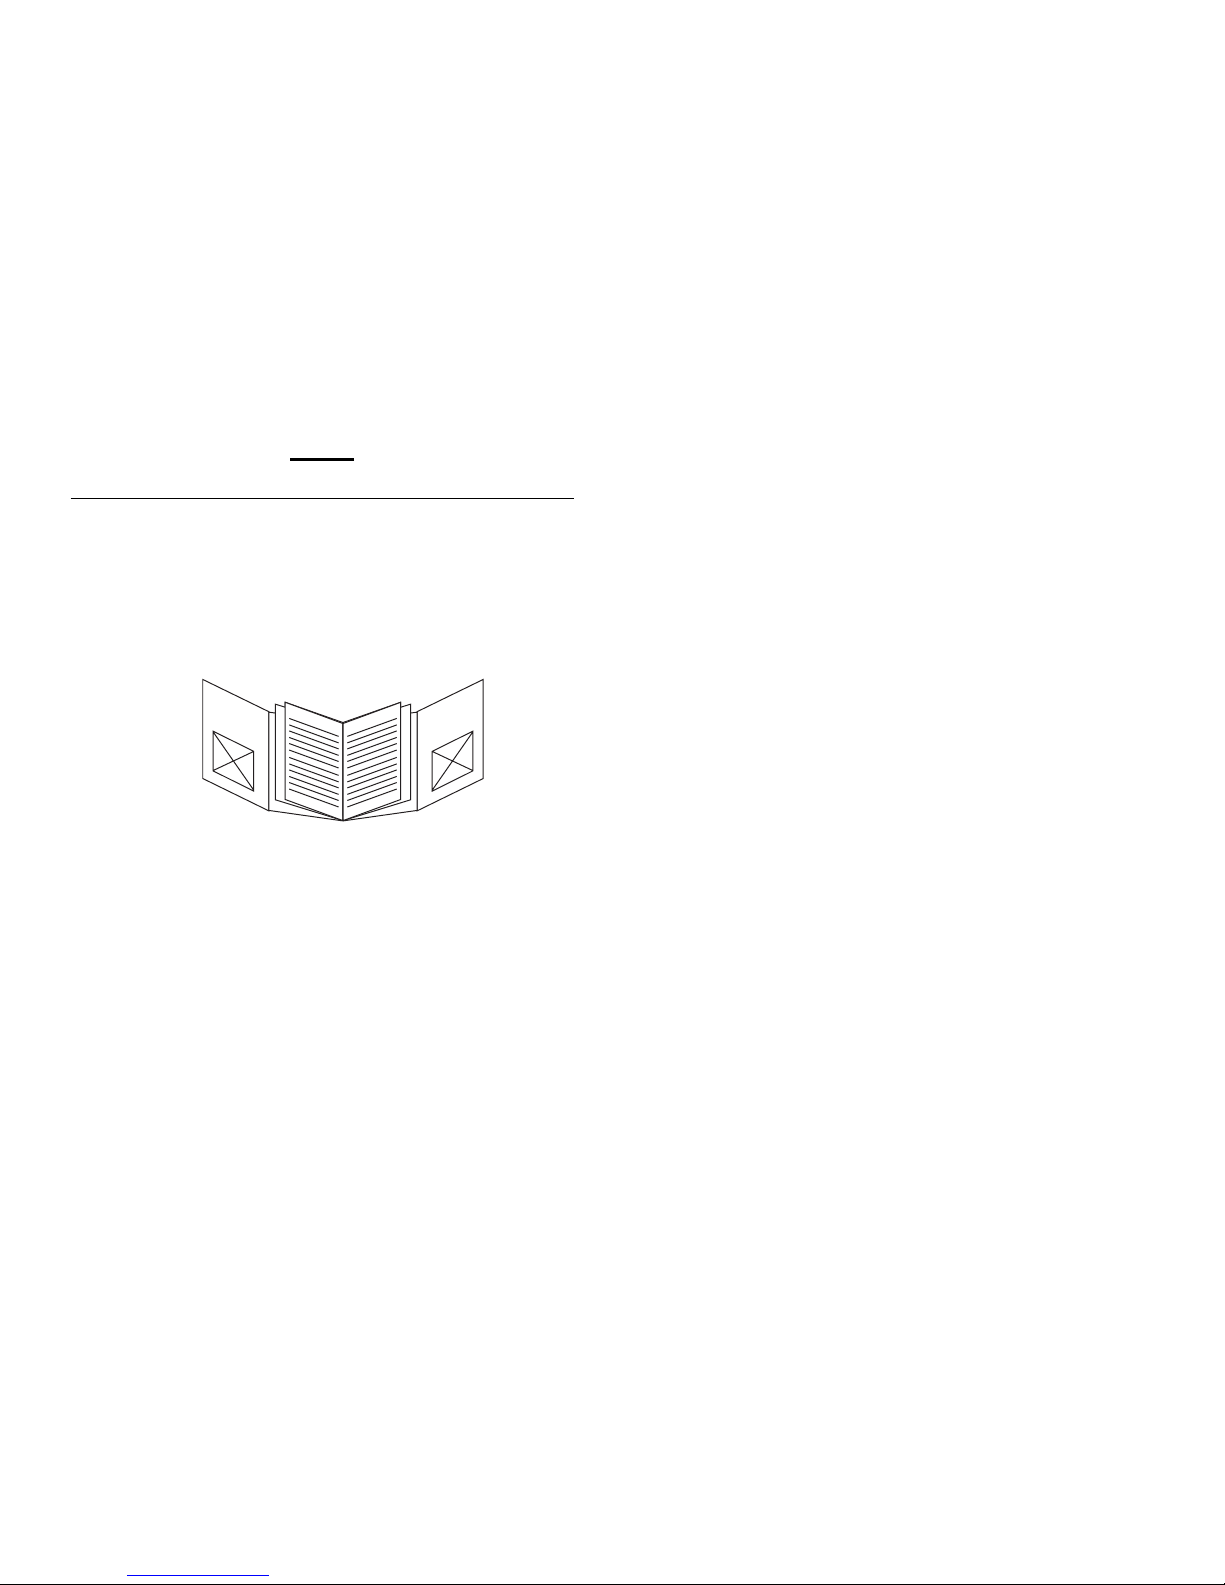
• Your new unit was manufactured and assembled
under strict ROADSTAR quality control.
Thank you for purchasing our product.
Before operating the unit, please read this instruction manual carefully. Keep it also handy for further
future references.
• Votre nouvel appareil a été fabriqué et monté en
étant soumis aux nombreaux tests ROADSTAR. Nous
espérons que cet appareil vous donnera entière satisfaction.
Avant de vous adonner à ces activités, veuillez lire
attentivement ce manuel d’instructions. Conservezle
à portée de main à fin de référence ultérieure.
• Vuestro nuevo sistema ha sido construido según las
normas estrictas de control de calidad ROADSTAR.
Le felicitamos y le damos las gracias por su elección
de este aparado. Por favor leer el manual antes de
poner en funcionamiento el equipo y guardar esta
documentación en case de que se necesite
nuevamente.
• Ihr neues Gerät wurde unter Beachtung der strengen
ROADSTAR-Qualitätsvorschriften gefertigt.
Wir danken Ihnen für den Kauf unseres Produktes.
Bitte lesen Sie diese Bedienungsanleitung durch,
und heben Sie sie auf, um jederzeit darin
nachschlagen zu können.
• Il vostro nuovo apparecchio è stato prodotto ed
assemblato sotto lo stretto controllo di qualitá
ROADSTAR.
Vi ringraziamo di aver acquistato un nostro prodotto.
Prima di procedere all'utilizzo dell'apparecchio,
leggete attentamente il manuale d’istruzioni e
tenetelo sempre a portata di mano per futuri
riferimenti.
• Seu novo aparelho foi construido e montado sob o
estrito controle de qualidade da ROADSTAR.
Agradecemos por ter comprado nosso produto para
a sua diversão.
Antes de usar esta unidade é necessário ler com
atençâo este manual de instruções pare que possa
ser usada apropriadamente; mantenha o manual
ao seu alcance para outras informações.
Page 3
EnglishEnglish
12
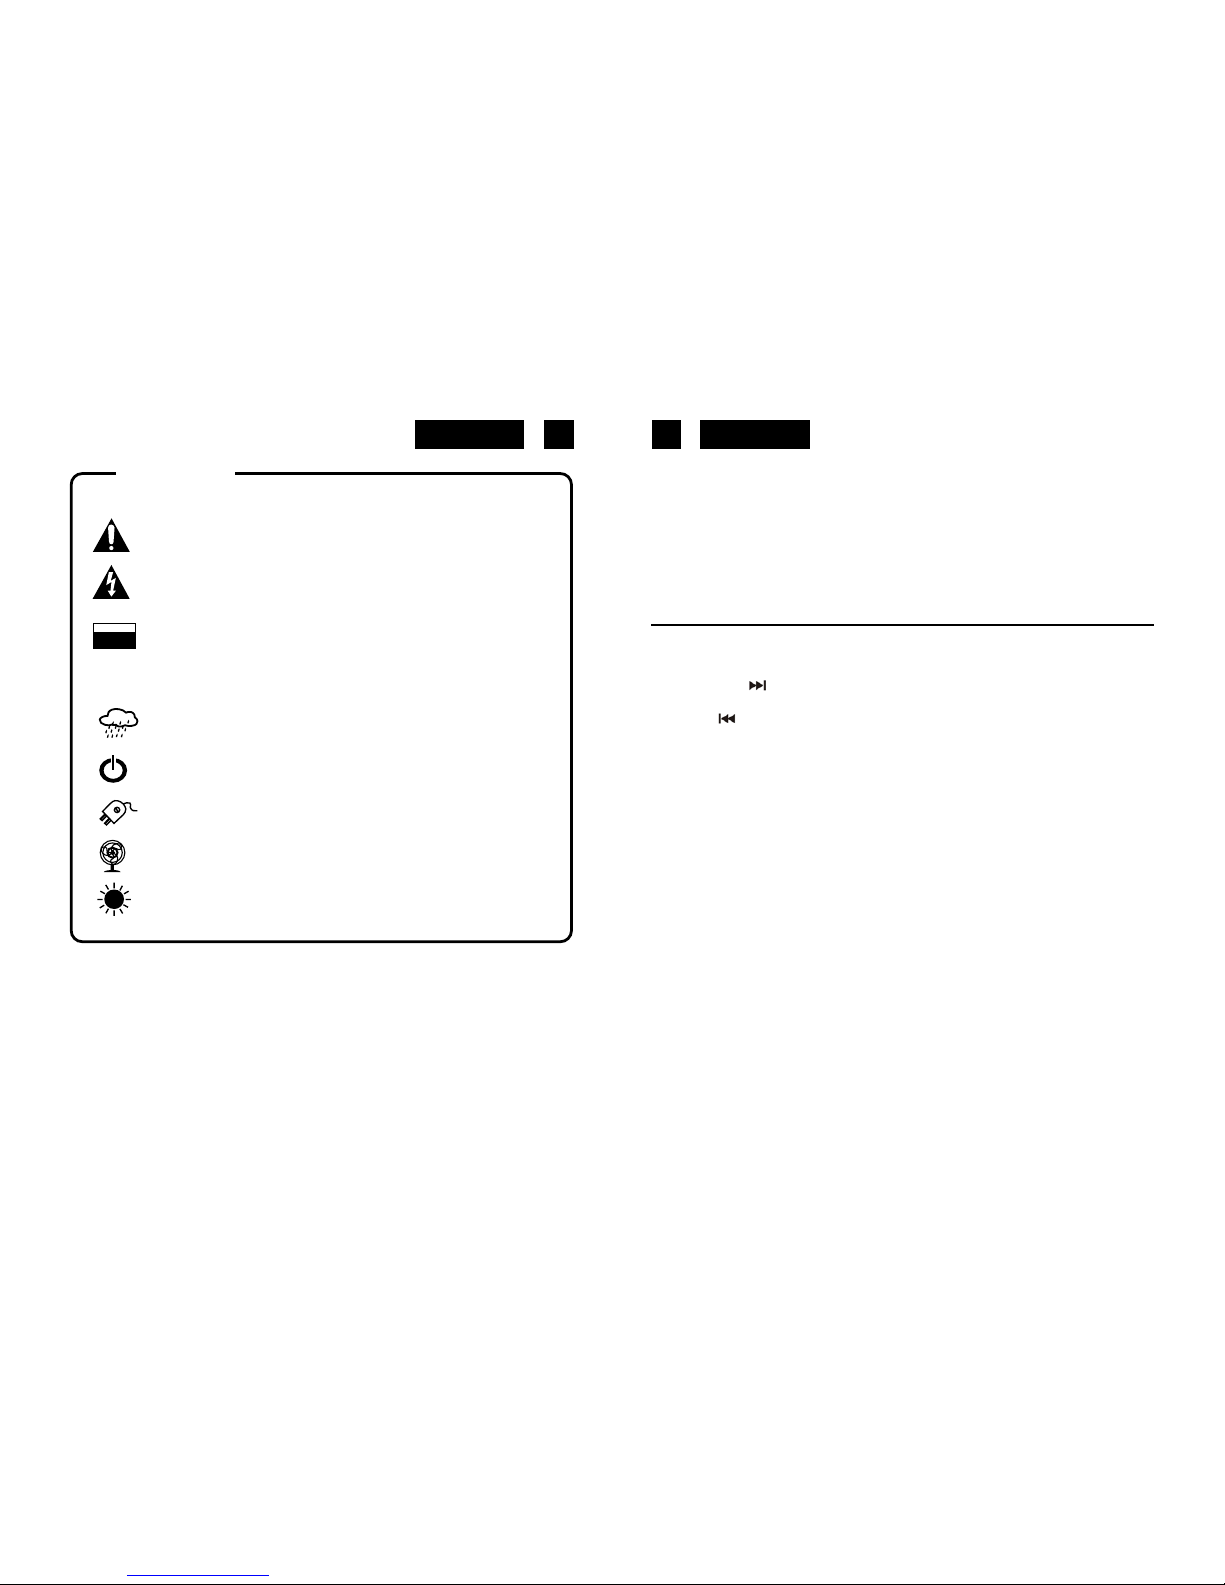
WARNINGS
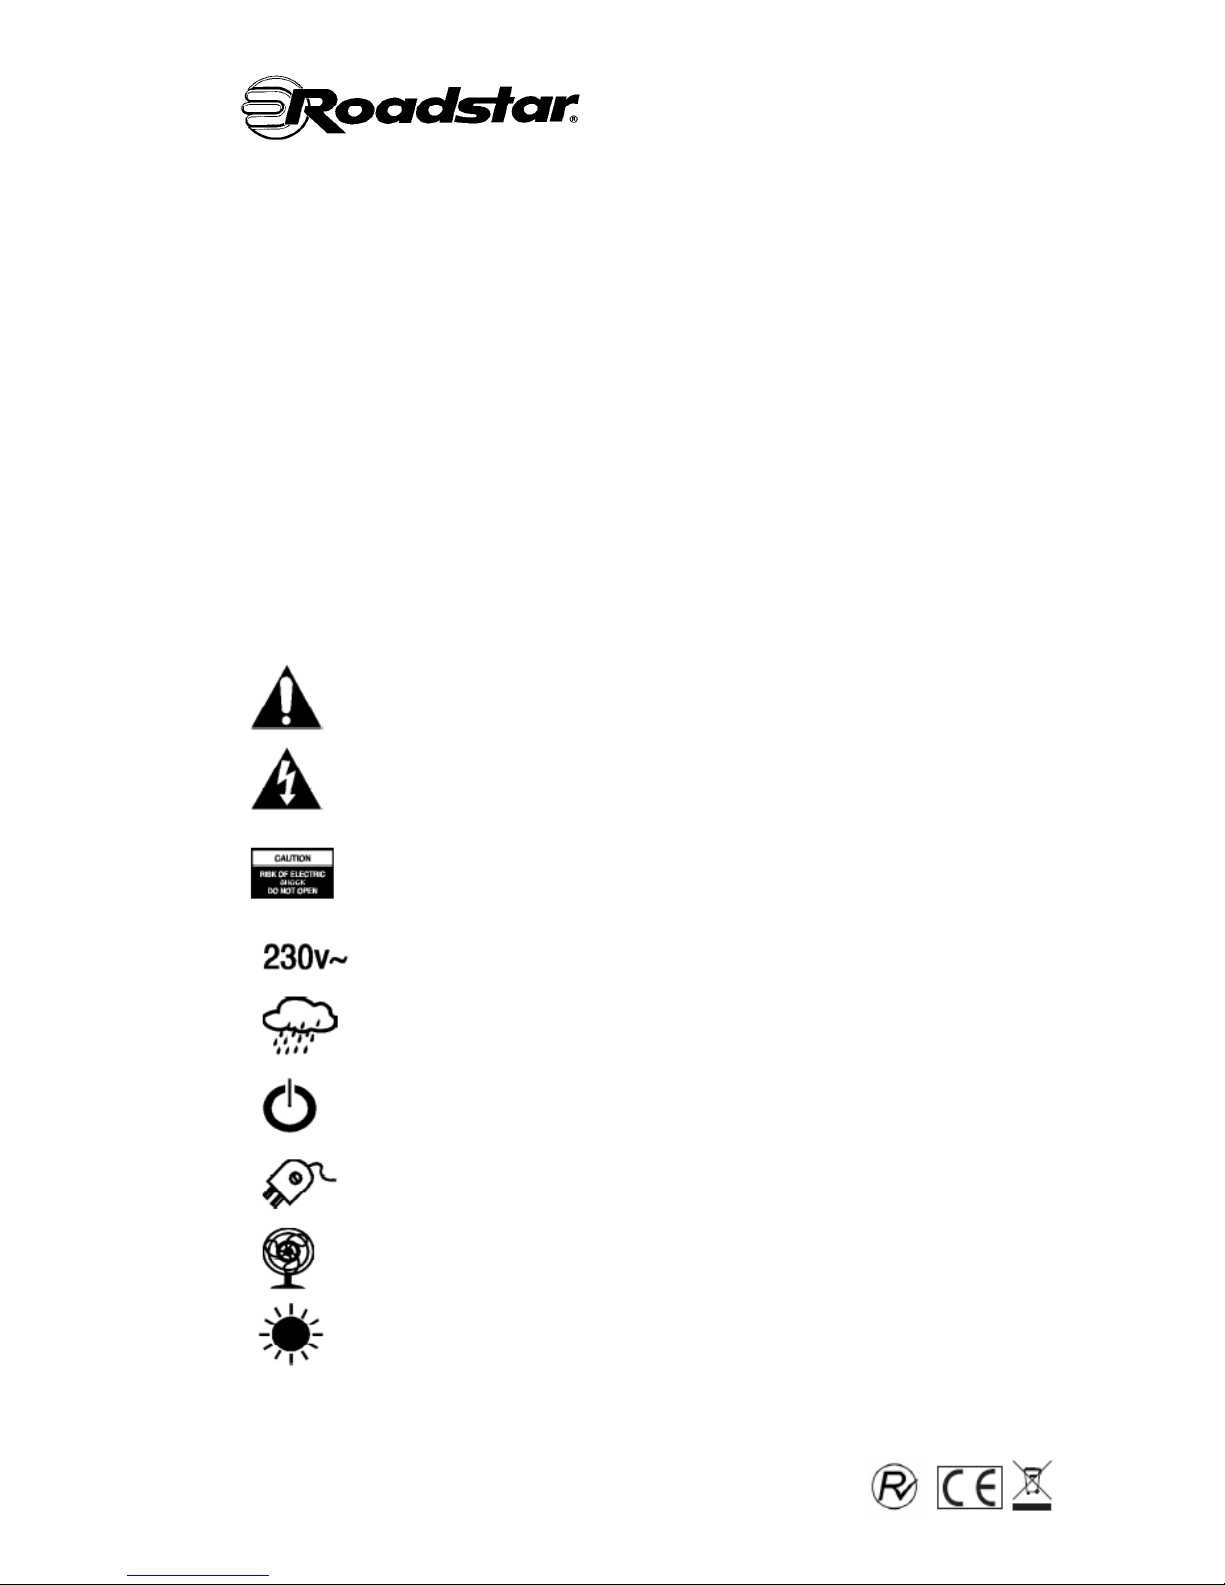
The exclamation point within the triangle is a warning sign alerting the
user of important instructions accompanying the product.
The lightening flash with arrowhead symbol within the triangle is a warning
sign alerting the user of “dangerous voltage” inside the unit.
To reduce the risk of electric shock, do not remove the cover. No user
serviceable parts inside the unit. Refer all servicing to
qualified personnel.
This unit operates on 230V ~ 50Hz. If the unit is not used for a long period
of time, remove the plug from the AC mains.
This unit must not be exposed to moisture or rain.
The power switch in this unit is mounted on the secondary circuit and
does not disconnect the whole unit from the mains in OFF position.
Ensure all connections are properly made before operating the unit.
This unit should be positioned so that it is properly ventilated. Avoid placing
it, for example, close to curtains, on the carpet or in a built-in installation
such as a bookcase.
Do not expose this unit to direct sunlight or heat radiating sources.
CAUTION
RISKOF ELECTRIC
SHOCK
DONOT OPEN
230v~
HIF-9088TUMPN
CD/MP3 PLAYER WITH TURNABLE STEREO RADIO, CASSETE T APE AND
USB/SD ENCODING
INSTRUCTION MANUAL
Please read this instruction manual carefully and familiarize yourself with your new HiFi
system before using it for the first time. Please retain this manual for future reference.
LOCATION OF CONTROLS
1) DUST COVER
2) CD PLAY/PAUSE BUTT ON
3) CD SKIP UP
4) MP3 ALBUM BUTTON
5) DOWN
BUTTON
6) CASSETTE EJECT BUTTON
7) VOLUME KNOB
8) MODE BUTTON
9) RECORD BUTTON
10) CD DOOR
11) CD DOOR OPEN BUTTON
12) MAIN POWER SWITCH
13) USB SOCKET
14) SD/MMC CARD SLOT
15) POWER OFF/FUNCTIONS SELECTOR
16) RADIO BAND SELECTOR
17) POWER LED INDICATOR
18) LCD DISPLAY
19) FM STEREO LED INDICATOR
20) DIAL SCALE
21) TUNING KNOB
22) REMOTE SENSOR
23) SPINDLE ADAPTOR
24) 33/45/78 RPM SPEED SELECTOR
25) PICK-UP HOLDER
26) CASSETTE MECHANISM
27) PLATTER
28) FM ANTENNA
29) AC CORD
30) TONE ARM
31) STOP BUTTON
Page 4
EnglishEnglish
34
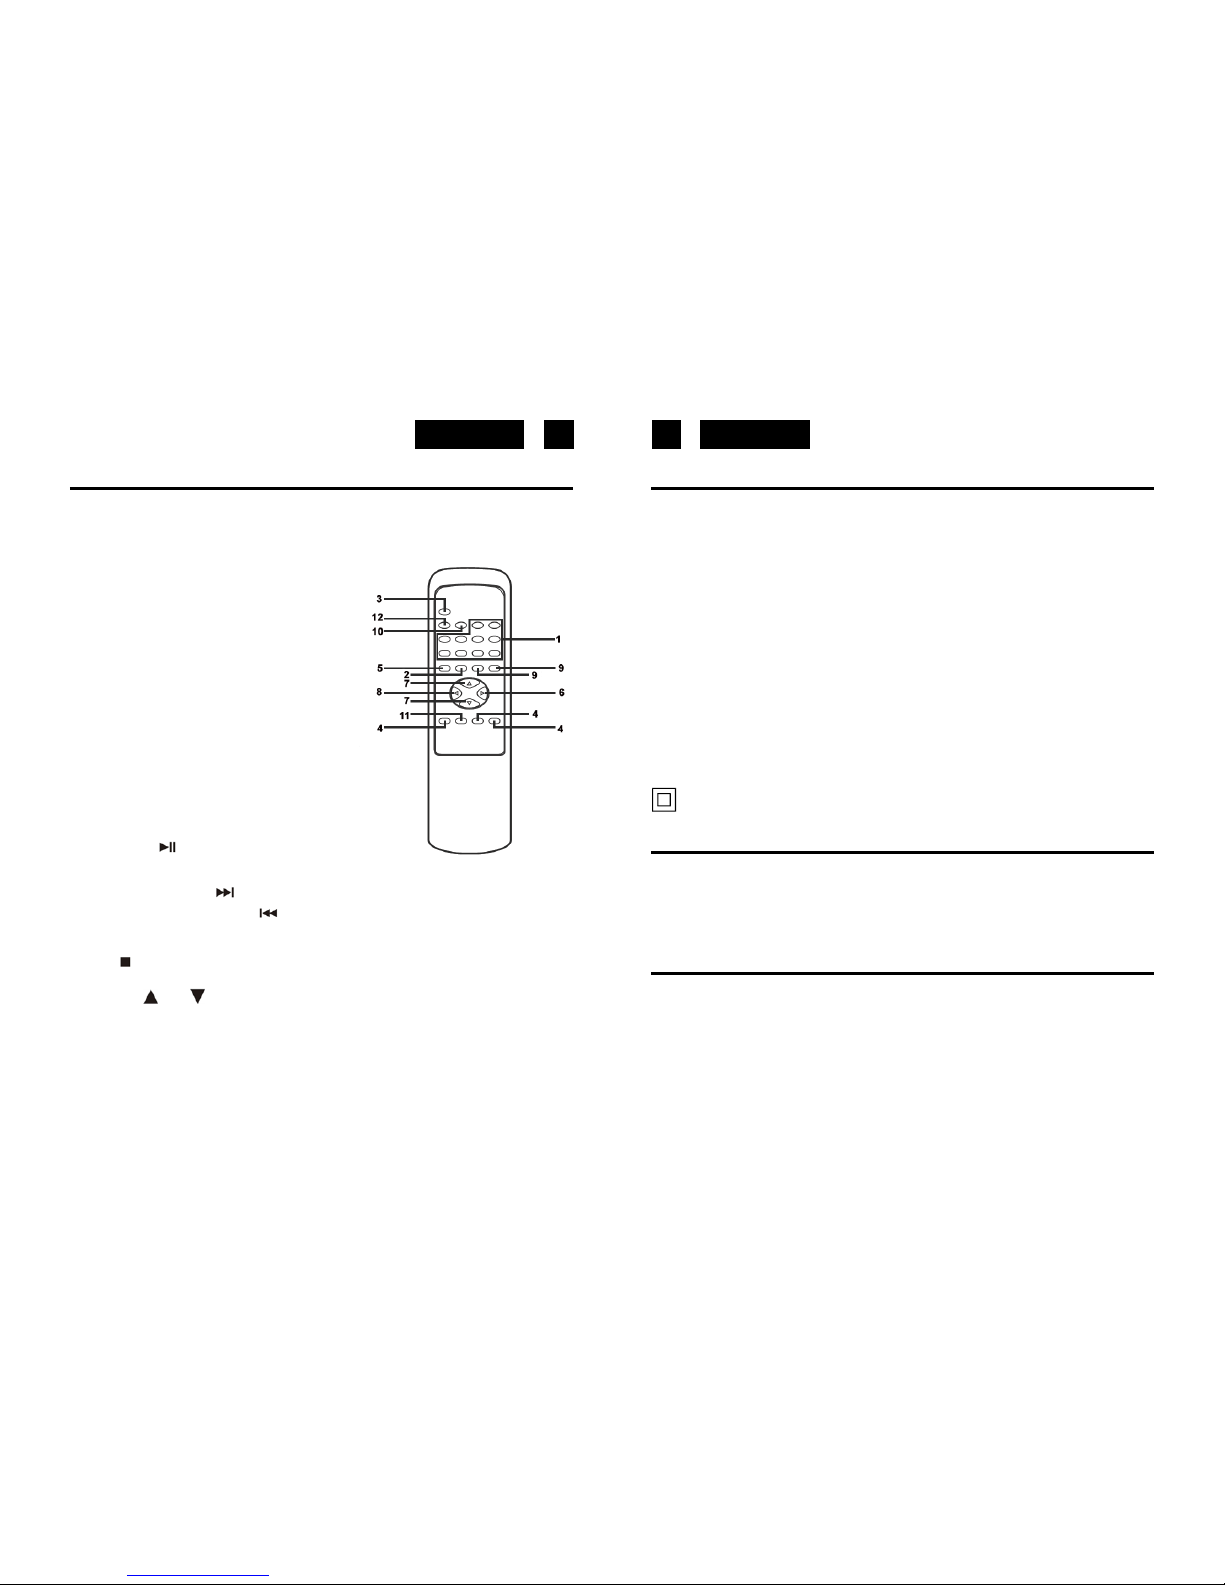
BUTTON DESCRIPTION
1) NUMERIC KEYS.
2) INFO in cd/usb stop mode, press to select
encoding bitrate.
3) REC in cd or phono mode, press to active recrrding
function.
4) REP/INTRO/RAN in cd/usb mode, press to active
repeat / intro / random function.
5) PROGRAM in cd/usb mode, press to active
programming function.
6) PLAY/P AUSE
in cd/usb mode, press once to
start playback. press again to enter pause mode.
11) MUTE
12) BITRATE
CONNECTING TO POWER
Before switching on make sure that the voltage of your electricity supply is the same as
that indicated on the rating plate.
For your own safety read the following instructions carefully before attempting to connect
this unit to the mains.
MAINS (AC) OPERATION
This unit is designed to operate on AC 230V 50Hz current only. Connecting it to other
power sources may damage the unit.
CAUTION
To prevent electric shock disconnect from the mains before removing cover. No user
serviceable parts inside. Refer servicing to qualified service personnel.
SAFETY PRECAUTION
Do not allow this unit to be exposed to rain or moisture.
Mains Supply: 230V 50Hz - AC only
This symbol means that this unit is double insulated. An earth connection is not
required.
POWER SUPPLY
Remove the stereo carefully from the box, retaining the packaging for future use.
AC POWER OPERATION
Connect the plug to a mains power inlet 230V AC ~ 50 Hz.
MW/FM TUNER
Operation
• Set the Function Selector (15) to the RADIO position.
The red Power Indicator (17) will light up.
• Select the desired frequency band with the Band Selector (16).
• Tune to the desired radio station by turning the Tuning control (21).
ANTENNA
• For FM reception there is a built-in FM antenna wire (28) at the rear of the unit. Move the
wire around to obtain the best reception.
• For MW reception the signals are picked up through a built-in ferrite antenna. Your may
have to orient the unit to obtain the best reception.
REMOTE CONTROL
BATTERY INST ALLA TION
the infra-red transmitter requires 2 pcs AAA size battery for operation.
7) SKIP/SEARCH forward
press once to skip to next track, press & hold for search
forward skip/search backward
press once to skip to previous tack.press & hold for
search backward.
8) STOP
in cd/usb mode, press to stop playback or cancel the stored program.
9) ALBUM up
/down in mp3 mode, press to select folder up or down.
10) USB/SD in cd/usb mode, press to select cd or usb or SD function repeatly.
Page 5

EnglishEnglish
56
FM & FM-STEREO RECEPTION
• Stereo reception is possible when the tuned FM station is broadcasting in stereo.
• When in FM Stereo mode and the station is broadscasting in Stereo, the STEREO
indicator (19) lights up.
• When FM stations are weak and are disturbed, listening can be improved by switching
the Band selector to FM (Mono). Reception will then be in MONO.
TURNTABLE OPERA TION
Preparation
Open the Record Player Cover.
Release the Tonearm Clamp, and remove the stylus protector.
Listening to Records
1. Set the Function Selector (15) to the PHONO position.
2. Place a record on the turntable, over the central spindle. Place the EP adapter over the
central spindle when playing 17cm EP records.
3. Set the Speed Selector (24) to 33, 45 or 78 rpm according to the record.
4. Release the tonearm clamp, and remove the protective cap from the stylus.
5. Lift the Tonearm.
6. Move the tonearm to the beginning of the record, or to the start of a particular track.
7. Gently lower the tone arm onto the record o start playing.
8. When the record is finished the tonearm will automatically stop. Lift the tonearm from
the record and return it to the rest .
Notes: Do not stop or turn the platter manually.
Moving or jarring the turntable without securing the Tonearm clamp could result in damage
to the Tonearm. Replace the protective cap on the stylus when not in use.
PLAYING COMPACT DISC
Getting start
1. Turn function selector (15) to CD to select “ CD/USB/SD “ mode.
2. Press “OPEN/CLOSE” button (11) to open the cd door (10).
3. Place a cd with the printed side facing up inside the tray & then close the co door.
4. focus search is performing, the lcd display (18) will show the track 1 playing time.
Play / pause / stop mode
1. Press the “ PLAY/P AUSE “ button (2) to st art playback, the first track will start playback.
2. To interrupt, press the “ STOP “ button (2) once, the playing time will be freeze. Press
again to resume normal playback.
Skip/search mode (skip/search up / skip/search down )
1. During play or pause mode, if “skip up” button (5) is pressed. it will go to next track and
display the track no. and then remain the play or pause mode.
2. During play or pause mode, if “skip down” button (3) is pressed. it will go back to the
beginning of the track, original track no. is display and remain the play or pause
mode.
3. After step 2, press “skip down” button (5) again will go to the previous track and
remain the play or pause mode.
4. if press and hold the “ skip up/down button “ during cd/mp3 playabck, the playing track
will go fast forward or backward until the button being released.
For mp3/wma disc
1. Press “ ALBUM “ button (4), the folder no. will goes up
2. Press “ skip up “ or skip down (5) button, the track no. change.
3. when the desired track is being selected, press the cd “ PLAY/PAUSE “ button (2) to
start playback.
ID3 (TRACK/ALBUM TITLE) FUNCTION (BY REMOTE HANDSET)
1. Press the “ INFO “ button during playback of MP3/WMA disc, the song title is being
displayed. press the “ INFO “ button again to disable the function.
MP3/WMA TRACK FORMA T REQUIREMENT :
- MP3 bit rate : 32 kbps~256 kbps and wma bit rate : 32 kbps ~ 320 kbps
- The performance of playing MP3 disc is various from the quality of recording disc and
the method of recording. Furthermore, the searching lead-time for MP3-CD is longer
than normal cd due to difference format.
Page 6
EnglishEnglish
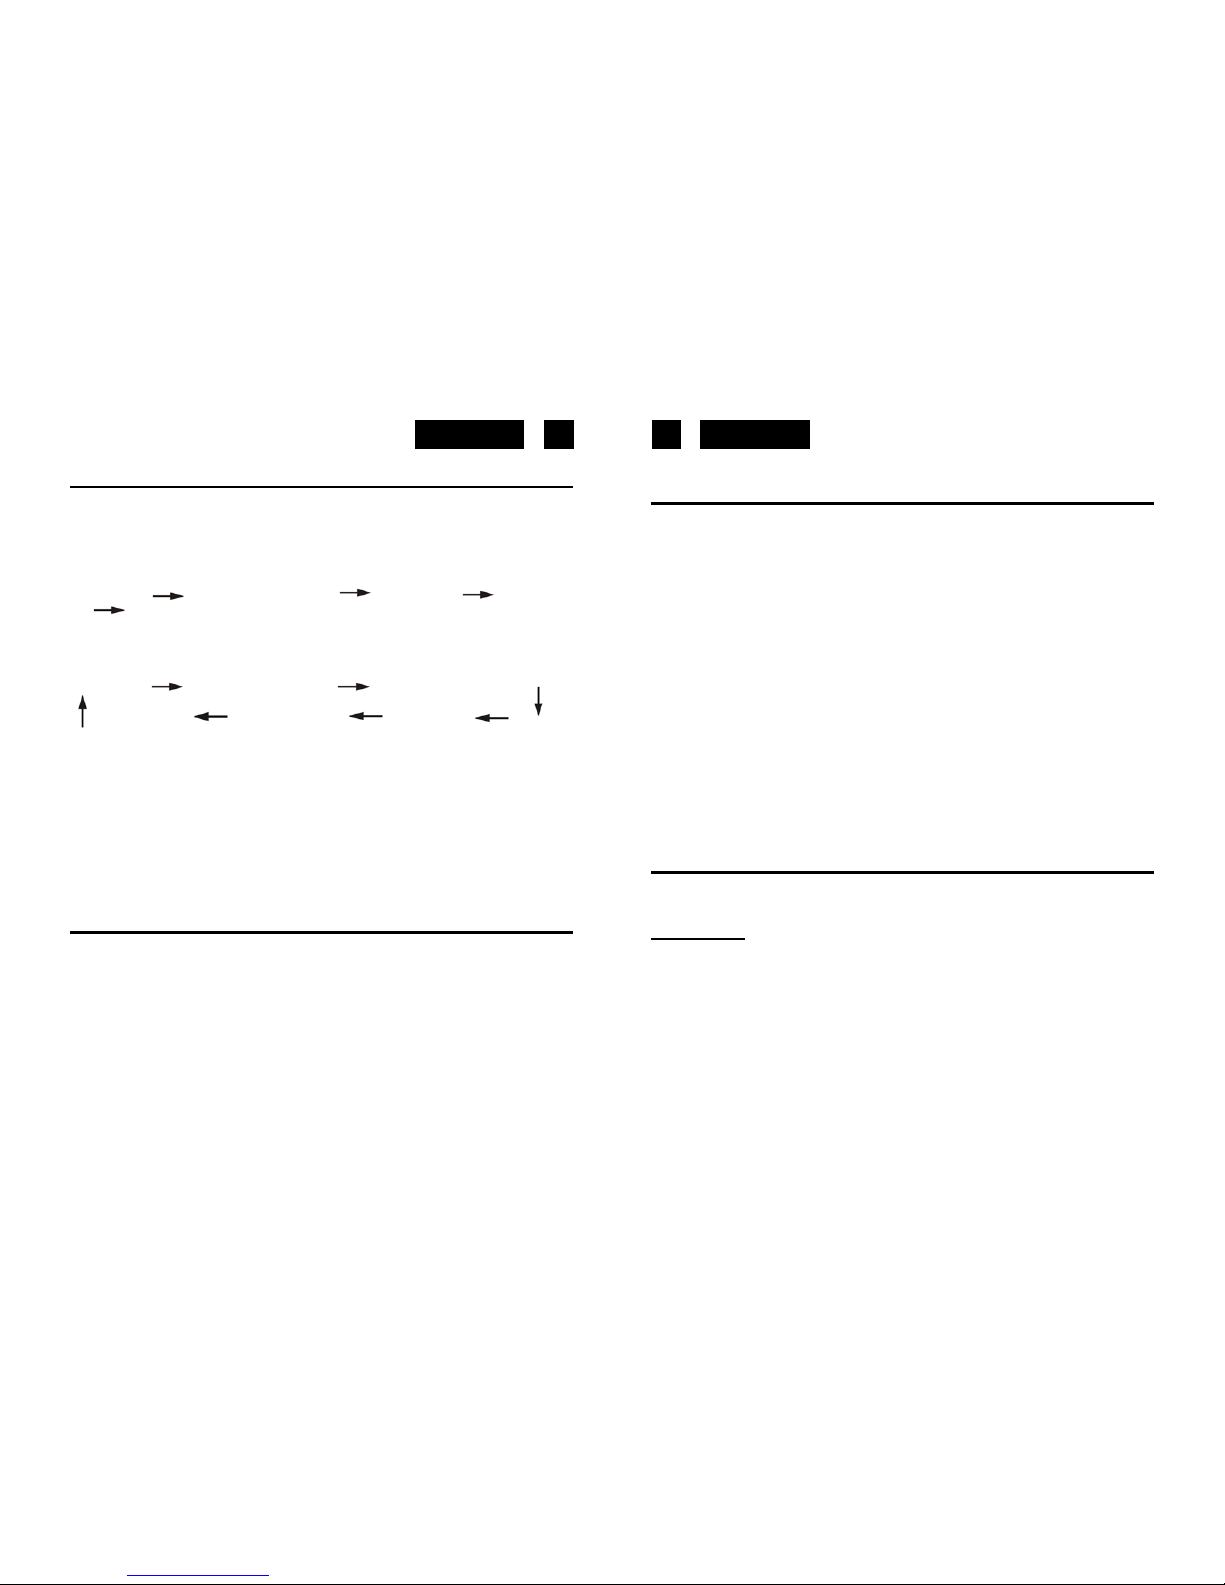
REPEAT/INTRO/RANDOM MODE
Press the repeat/intro/random buttons (4) from Remote Control or press MODE on main
unit before or during playback, a single track, single folder (MP3 only) or all the tracks can
be played in difference mode as follow:
FOR CD
(1) REPEAT 1 (2) REPEAT ALL TRACK (3) RANDOM (4) INTRO
(5) OFF MODE
FOR MP3/WMA DISC
(1) REPEAT 1 (2) REPEAT 1 ALBUM (3) REPEAT ALL ALBUM
(6) OFF MODE (5) INTRO PLAY (4) RANDOM
Repeat play
You can listen the desired tracks or album repeatedly by this function.
Intro play
You can listen the beginning (10 seconds) of each track in a cd by this function & saving
your time to search the desire song
Random play
You can listen all the tracks or folder in a random order by this function
CD DISC PROGRAMMING
Up to 99 tacks can be programmed for CD or MP3 file and play in any order. before use, be
sure the system is at stop mode before programming:
1. Set in CD/USB mode & stop the cd playback.
2. Press the “PROGRAM” button from Remote COntrol or “MODE” from the main unit,
“MEMORY “ will appear on LCD display (18). Moreover, it will indicate program no. and
digits for album no. to be programmed.
3. Select a desired album by pressing ALBUM button.
4. Press the “ program “ or “ mode “ button to store the album into memory.
5. Select a desired track by pressing SKIP + OR SKIP - buttons.
6. Press the “ program “ or “ mode “ button to store the track into memory.
5. Repeat steps 3 / 4 / 5 / 6 to enter the tracks into the memory.
6. When all the desired tracks have been programmed, press cd “ PLAY/PAUSE “
button
(2) to play the disc in assigned order.
7. To cancel the programmed file, press “ST OP” button on remote handset until “ MEMORY
“ is disappear on LCD display (18)
PLAYBACK OF MP3/WMA SONG VIA USB STORAGE MEDIA OR MEMORY
CARD CONNECTING
The system is able to decode and playback all MP3 /WMA file which stored in the memory
media with USB connecting port or SD/MMC memory card.
1. Set function selector (15) to CD mode and then press USB/SD button (10) on remote
control to select “ USB or CARD” mode.
2. Plug-in the USB plug with the face up & make sure it going into completely or insert
the memory card in the direction of the arrow as shown in the label on the underside
of the MEMORY CARD slot cover. Insert straight without bending.
Connecting the USB upside down or backwards could damage the audio system or
the storage media (usb thumb drive / sd/mmc card). Check to be sure the direction is
correct before connection.
3. The system will start reading the storage media automatically after connecting, and
LCD display (18) will show the first MP3/WMA file.
4. Repeat the same playback procedure as playing CD/MP3 disc as above.
78
REMARK
- The system can detect and read the file under mp3 and wma format only though the
usb port.
- If connect the system to MP3 player via the usb socket, due to variances in MP3
encoding format, some mp3 player may not be able to play via the usb socket. this
is not a maul-function of the system.
ENCODING OF CD/PHONO INTO MP3 FILE
The system is able to ENCODE normal CD or TURNTABLE to MP3 format and recording
at memory media with USB connecting port.
CD ENCODING
I) Ecnoding 1 track
1. perform normal playback of the cd track you want to encode & record,
2. press “ REC “ button (9) during the playback of the desire track, unit will display “ USB
“ & “ REC “. Encoding is performing now.
3. After completing of encoding, unit will stop playback automatically.
II) Encoding 1 disc
1. Place a cd with the printed side facing up inside the tray & then close the co door
2. press the “ REC “ button (9) after focus search completed. unit will display “ USB “
& “ REC “. Encoding is performing now.
3. After completing of encoding, unit will stop playback automatically.
REMARK:
- The recording speed is 1:1 and according to the actual plying time of the cd track
- The system will creat a “ AUDIO “ folder and then store the encoding track in it.
Page 7
EnglishEnglish
ENCODING BITRATE (BY REMOTE HANDSET)
You can select the desired BITRATE during ENCODING from CD or PHONO to USB, the
selectable range from 32 / 64 /96 /128 / 192 / 256 Kbps.
1) Set in “ PHONO “ function (15) & remain stop mode.
2) Press the “ BITRATE “ function and the LCD display will show the default bitrate (128
Kbps)
3) Press skip
or buttons (3) to select the desired bitrate for encoding.
4) Press again the “ BITRATE “ to confirm the setting and the lcd display (18) resume to
“ phono “ mode
REMOVING OF USB / MEMORY CARD
To remove the USB / MEMORY CARD, turn off the power or switch the function mode to
either CD, AUX or TUNER first. For USB port – un-plug it by pulling out the USB socket
directly, for memory card – press the memory card inward & then release, now the card
being partially eject and you can remove it by hand.
910
- The recording format is preset at – MP3 bit rate : 128 kbps, sampling rate : 44.1khz
- No song title will be recorded during encoding mode
- To interrupt the recroding, press the “ RECORD “ button again during record mode.
- Recording will be completed only entire song being encoded, if terminate the
encoding process intermediately, there is no track being recorded nor stored to
the USB or SD/MMC card.
III) COPYING OF MP3/WMA FILE
If putting a MP3/WMA disc instead of a CD-DISC, the system will copy the files to the USB
or SD/MMC card if press the “ REC “ button (9). The operation procedures is same as cd
encoding as stipulate on above, and the system will switch to copying mode only if MP3/
WMA file being read.
REMARK:
- The system will store the file to usb sorce first if both usb and sd slot are being
occuplied by storage media.
- If press the “ record “ button during playback of usb or sd source, the file will copy from
usb to sd or sd to usb.
PHONO ENCODING
1) Set the function button to “ PHONO “ mode and then press the “ REC “ button (9)
directly.
2) The LCD display with show the word “
USB “. Now the system is starting the encoding
mode.
3) Start playback at PHONO for the track which you want to record to USB.
4) After finish of recoding, press and hold the “ REC “ button (9) until the LCD return to
“ PHONO “ mode.
CASSETTE ENCODING
1) Set the Function button (15) to “ TAPE “ mode and then press the “ REC “ button (9)
directly.
2) The LCD display with show the word “
USB “or “CARD” flashing, and then display
“REC“ flashing after few seconds. Now the system is starting the encoding mode.
3) Start playback at CASSETTE T APE for the track which you want to record.
4) After finishing of recoding, press and hold the “ STOP “ button (31) until the LCD stops
flashing and returns to “ TAPE “ mode.
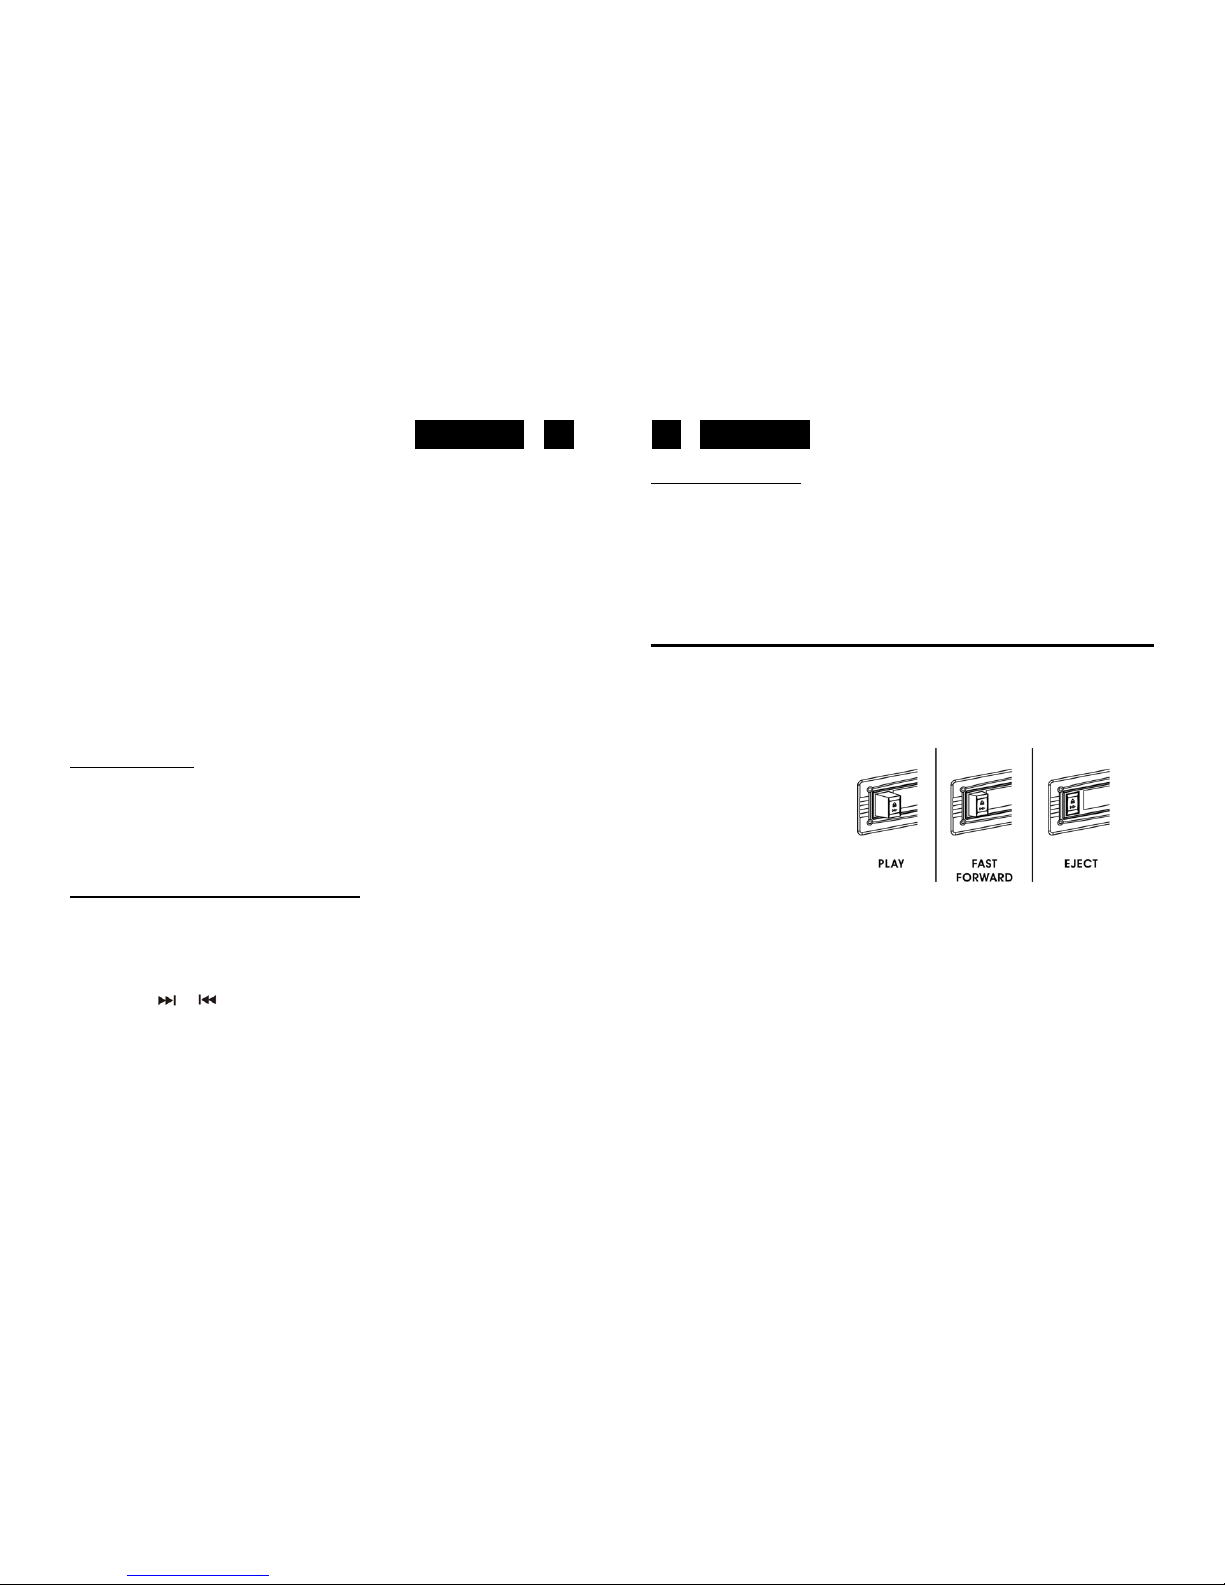
LISTENING TO TAPE
GENERAL OPERATION
Cassette Playback:
Set the Function button (6) to “ TAPE “ mode.
The system will start playback automatically after inserting the cassette tape.
Fast Forward:
Press “ TAPE FORWARD / EJECT “ Button (6) half inwards during playback mode. The
tape will wind forward.
Slightly press the “ TAPE FORWARD / EJECT “ Button (6) again to resume playback.
Stop and Eject :
Press the“ TAPE FORWARD / EJECT “ Button (6) completely inwards and the cassette
tape will be ejected through the cassette door cover.
Page 8
EnglishEnglish
11
12
SPECIFICATIONS
Power Supply
AC: 230V ~ 50Hz
RC Battery: 2 x AAA (UM-4) 1.5V
Radio Frequency Coverage
FM: 87.5 - 108MHz
MW: 522 - 1620kHz
Design and specifications are subject to change without notice.
Correct Disposal of This Product
(Waste Electrical & Electronic Equipment)
This marking shown on the product or its literature, indicates that it should not
be disposed with other household wastes at the end of its working life. To prevent
possible harm to the environment or human health from uncontrolled waste
disposal, please separate this from other types of wastes and recycle it
responsibly to promote the sustainable reuse of material resources.
Household users should contact either the retailer where they purchased this
product, or their local government office, for details of where and how they
can take this item for environmentally safe recycling.
Business users should contact their supplier and check the terms and conditions
of the purchase contract. This product should not be mixed with other commercial
wastes for disposal.
REMOVING OF USB / MEMORY CARD
To remove the USB / MEMORY CARD, turn off the power or switch the function mode to
either AUX or TUNER first. For USB port – un-plug it by pulling out the USB socket directly,
for memory card – press the memory card inward & then release, now the card being
partially eject and you can remove it by hand.
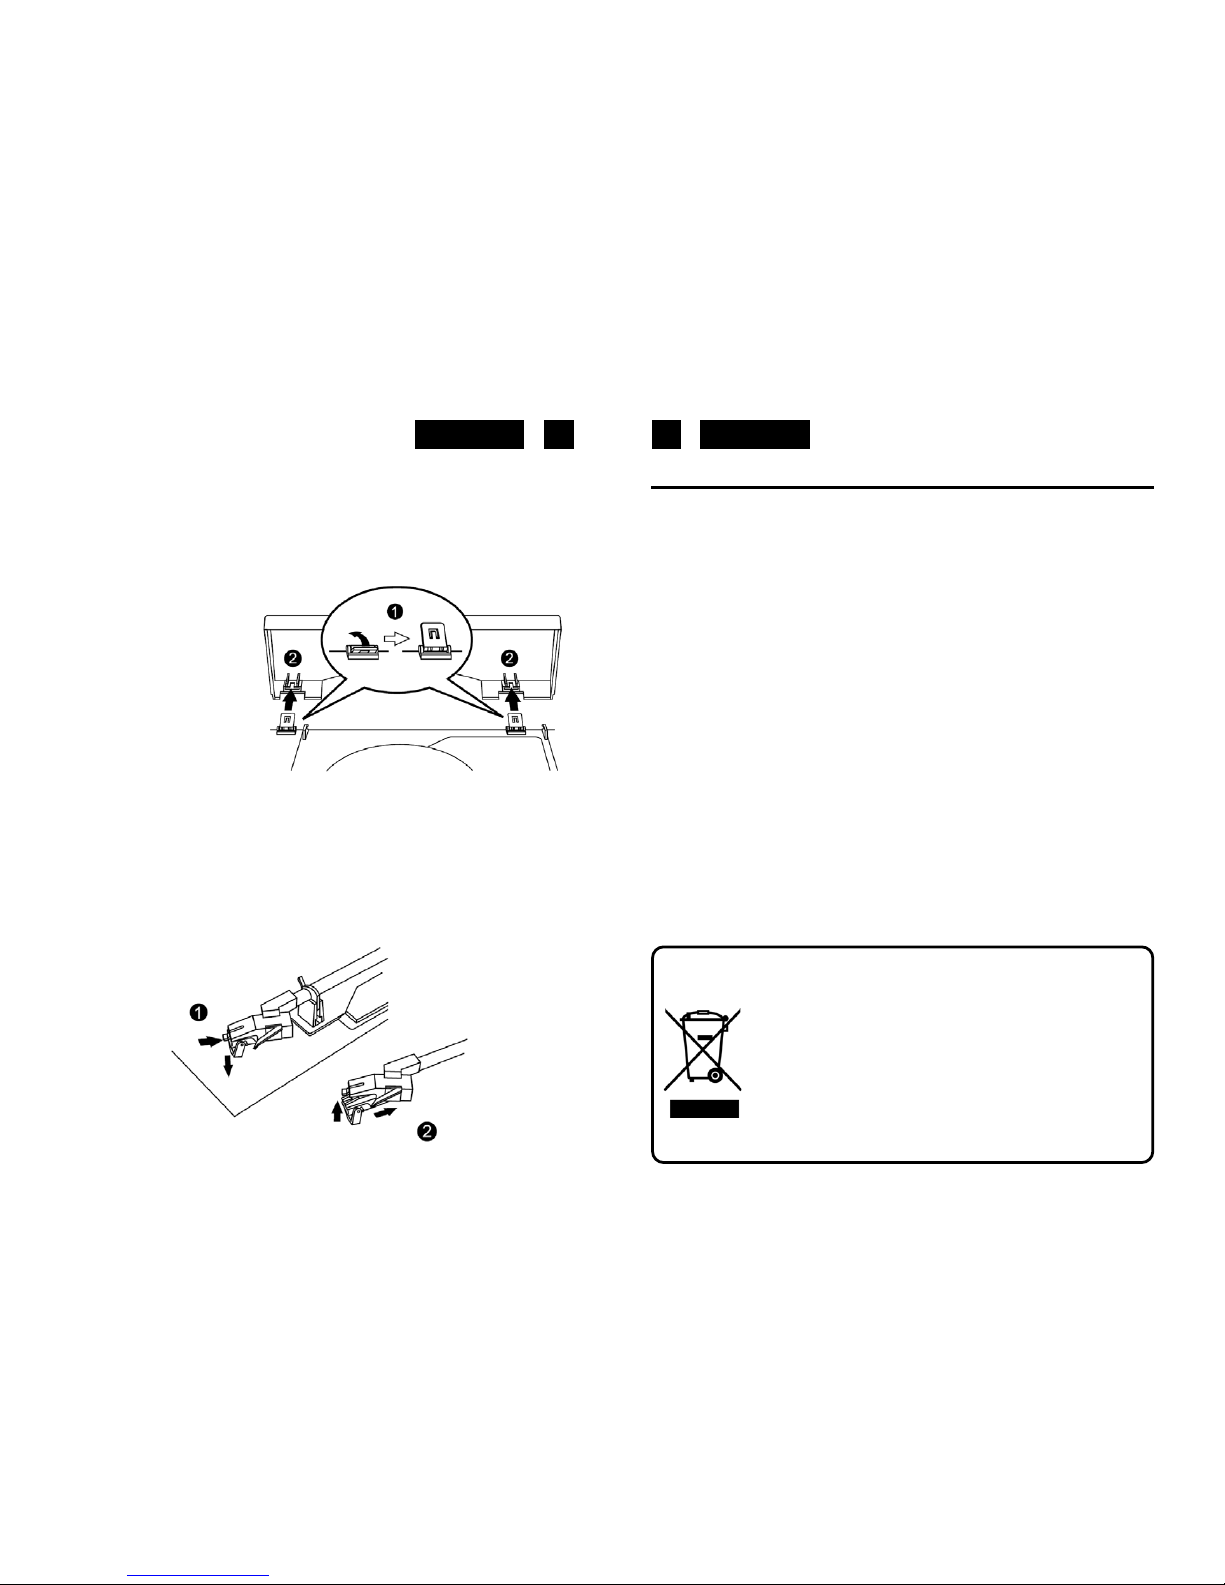
PHONE COVER ASSEMBL Y
1. Push the metal bracket to rear
side.
2. Connect the metal bracket to
the phono cover
STYLUS REPLACEMENT
Replacement of a worn stylus can be easily accomplished as follows:
1. To remove the old stylus, pull out the stylus assembly in direction shown, holding the
head shell with your other hand.
2. Then install the new stylus by pushing it gently into the cartridge ( hold by the edge to
prevent damage to stylus. ) until it clicks into place.
Page 9
AUDIO VIDEO
STEREOFONNÍ SYSTÉM S PŘEHRÁVAČEM CD / CD-R
(RW) MP3 / WMA, S KONEKTOREM USB A SE ČTEČKOU
PAMĚŤOVÝCH KARET SD / MMC, S ROZHLASOVÝM
PŘIJÍMAČEM AM/FM, GRAMOFONEM, S KAZETOVÝM
PŘEHRÁVAČEM A S DÁLKOVÝM OVLADAČEM
HIF-9088TUMPN
Návod k obsluze
(překlad návodu firmy Roadstar – Švýcarsko)
Před instalací, zapnutím a nastavováním přístroje si prosím přečtěte celý návod –
obsahuje důležité informace pro jeho bezpečné používání a využití všech jeho vlastností a
funkcí. Návod uschovejte pro případ jeho další potřeby.
Vykřičník uvnitř trojúhelníka na zadní straně skříňky přístroje upozorňuje uživatele
na důležité pokyny pro obsluhu a údržbu přístroje uvedené v jeho doprovodné
dokumentaci.
Symbol blesku uvnitř trojúhelníka vzadu na přístroji upozorňuje uživatele na riziko
úrazu elektrickým proudem při nevhodném zacházení s přístrojem. Nevyjímejte
přístroj ze skříňky – uvnitř skříňky nejsou díly, které by mohl opravit nebo seřídit
jeho uživatel bez odpovídajícího vybavení a kvalifikace. Bude-li přístroj vyžadovat
seřízení nebo opravu vyhledejte odborný servis. Zásahem do přístroje v době
platnosti záruky se vystavujete riziku ztráty event. záručních plnění.
Přístroj je konstruován pro napájení střídavým napětím 230 V, 50 Hz.
Chraňte přístroj před zmoknutím a nepoužívejte jej ve vlhkém prostředí – riziko
úrazu elektrickým proudem. Nepoužívejte přístroj mimo místnosti.
Vypnutím není přístroj odpojen od elektrické sítě – pro odpojení přístroje ode
elektrické sítě přístroj vypněte a potom vyjměte vidlici síťového kabelu
přístroje ze
síťové zásuvky.
Přehrávač CD používá laserový zářič o malém výkonu. Vzhledem k možnému
poškození zraku laserovým zářením smí být přístroj opravován a seřizován pouze
pracovníky s odpovídající kvalifikací. Nezapínejte přehrávač po vyjmutí přístroje ze
skříňky – po odblokování ochran a uvedení přehrávače do provozu riziko trvalého
poškození zraku laserovým zářením.
Při používání přístroje podle pokynů v návodu přístroj nepředstavuje žádná rizika a
to ani pro jeho bezprostřední okolí.
Nepoužívejte a neukládejte přístroj na přímém slunci nebo v blízkosti zdrojů tepla
(např. v blízkosti těles ústředního topení). Vysokými teplotami riziko poškození
plastových dílů skříňky přístroje.
Page 10

- 2 -
OVLÁDACÍ PRVKY PŘÍSTROJE
Na přístroji jsou uživateli k dispozici následující ovládací a kontrolní prvky:
1. Kryt talíře gramofonu.
2. Tlačítko CD PLAY/PAUSE/STOP () pro zahájení / přerušení / ukončení
přehrávání disku (záznamu z komponenty USB / paměťové karty SD / MMC) popř. pro
ukončení záznamu
3. Tlačítko CD SKIP/SEARCH () pro vyhledání požadovaného místa v záznamu na
disku (komponentě USB / paměťové kartě SD / MMC) vpřed (trvalým stlačením) /
přeskok na začátky skladeb v záznamu na disku (komponentě USB / paměťové kartě
SD / MMC) vpřed (opakovaným stlačováním).
4. Tlačítko MP3 ALBUM pro vyhledání požadované složky se soubory MP3 / WMA
v záznamu na CD-R, komponentě USB popř. paměťové kartě SD (MMC).
5. Tlačítko CD SKIP/SEARCH () pro vyhledání požadovaného místa v záznamu na
disku (komponentě USB / paměťové kartě SD / MMC) vzad (trvalým stlačením) /
přeskok na začátky skladeb v záznamu na disku (komponentě USB / paměťové kartě
SD / MMC) vzad (opakovaným stlačováním).
6. Tlačítko FAST FORWARDS/EJECT pro rychlé převinutí pásku v kazetě vpřed /
vysunutí kazety z přehrávače.
7. Regulátor hlasitosti VOLUME.
Page 11

- 3 -
8. Tlačítko MODE pro výběr požadovaného režimu přehrání disku.
9. Tlačítko RECORD ( ) pro zahájení záznamu na komponentu USB / paměťovou kartu
SD (MMC).
10. Zásuvka pro CD.
11. Tlačítko OPENCLOSE pro otevření / uzavření zásuvky pro CD.
12. Hlavní vypínač pro zapnutí / vypnutí přístroje.
13. Konektor USB pro připojení externí komponenty USB k přístroji.
14. Slot pro paměťovou kartu SD (MMC).
15. Přepínač POWER OFF/FUNCTION pro výběr zdroje signálu / vypnutí přístroje.
16. Přepínač BAND pro výběr rozhlasového pásma.
17. LED POWER – po zapnutí přístroje svítí červeně.
18. LCD displej.
19. LED FM STEREO – svítí po naladění stereofonního vysílače FM.
20. Ukazatel ladění.
21. Knoflík ladění TUNING.
22. Snímač přijímače dálkového ovládání.
23. Adaptér pro přehrání gramofonových desek EP.
24. Přepínač rychlosti otáčení talíře gramofonu s možností nastavení 33 / 45 nebo 78
otáček talíře / minutu).
25. Držák raménka.
26. Slot pro kazetu.
27. Talíř gramofonu.
28. Drátová FM anténa.
29. Síťový kabel.
30. Raménko
gramofonu.
31. Tlačítko STOP pro ukončení přehrávání.
Podrobný popis funkce jednotlivých ovládacích prvků naleznete v dalším textu návodu v
popisech obsluhy jednotlivých funkcí přístroje.
DÁLKOVÝ OVLADAČ
Dálkovým ovladačem můžete pohodlně obsluhovat některé funkce přístroje. Tlačítka na
ovladači mají shodnou funkci se stejně nebo podobně označenými tlačítky na přístroji.
PŘÍPRAVA OVLADAČE
Před použitím ovladače vložte do prostoru pro baterie na spodní straně ovladače 2 ks
baterií AAA. Při vkládání baterií do ovladače pozor na jejich správnou polaritu – je
vyznačena v prostoru pro baterie.
V případě problémů s ovladačem nebo po významném zkrácení jeho účinného dosahu
vyměňte v ovladači obě baterie.
POUŽITÍ OVLADAČE
• Pro použití ovladače nasměrujte ovladač na snímač přijímače dálkového ovládání na
předním panelu přístroje a potom stlačte požadované tlačítko. Účinný dosah ovladače
s novými bateriemi je do cca 5 metrů, postupným vyčerpáváním kapa
city baterií se
účinný dosah ovladače zkracuje.
Page 12

- 4 -
• Funkce ovladače (především jeho dosah) je ovlivňována silným osvětlením místnosti
(slunce, zářivky).
• V okamžiku použití ovladače nesmí být v prostoru mezi přístrojem a ovladačem pevné
překážky.
• Pokud nebudete ovladač delší dobu používat vyjměte z něj obě baterie – zabráníte tak
event. poškození ovladače jejich případným vytečením.
TLAČÍTKA NA OVLADAČI
Na ovladači jsou uživateli k dispozici následující tlačítka - viz
obrázek:
1. Číslicová tlačítka pro přímý výběr skladeb z CD pro jejich
přehrání.
2. INFO - v režimu „Stop“ u přístroje přepnutého na přehrávání
souborů MP3 / WMA pro výběr požadované rychlosti toku
dat pro záznam.
3. REC – pro zahájení záznamu z přehrávané gramofonové
desky nebo z přehrávaného CD. Pro záznam použijte
komponentu USB nebo paměťovou kartu SD (MMC).
4. REP/INTRO/RAN – pro výběr požadovaného režimu
přehrávání CD / komponenty USB / paměťové karty SD
popř. MMC (opakovaného přehrávání / přehrání prvních 10
sekund zá
znamu všech skladeb / přehrání náhodným
výběrem).
5. PROGRAM – v režimech CD / USB / SD (MMC) pro naprogramování skladeb pro
jejich přehrání v pořadí požadovaném uživatelem.
6. PLAY/PAUSE () pro zahájení / přerušení přehrávání CD / komponenty USB /
paměťové karty SD (MMC).
7. SKIP/SEARCH (/) pro vyhledání požadovaného místa v záznamu na disku (v
paměti komponenty USB / paměťové kartě SD (MMC)) vpřed nebo vzad (trvalým
stlačením) / přeskok na začátky skladeb v záznamu na disku (komponentě USB /
paměťové kartě SD / MMC) vpřed nebo vzad (opakovaným stlačováním).
8. STOP pro ukončení přehrávání CD / USB / SD (MMC) popř. pro výmaz programu pro
přehrání skladeb z CD / USB / SD (MMC) v pořadí požadovaném uživatelem.
9. ALBUM / - v průběhu přehrávání MP3/WMA pro výběr požadované složky ze
záznamu na CD-R / USB (SD nebo MMC).
10. USB/SD – v režimu CD pro výběr požadovaného média (komponenty USB nebo
paměťové karty SD (MMC).
11. MUTE pro okamžité umlčení systému / obnovení původní hlasitosti.
12. BITRATE pro nastavení požadované rychlosti toku dat.
INSTALACE A PŘIPOJENÍ PŘÍSTROJE
• Přístroj instalujte na rovnou, pevnou plochu chráněnou před otřesy a vibracemi, mimo
dosah přímého slunce, v dostatečné vzdálenosti od zdrojů tepla a na místě, kde
nemůže být postříkán nebo polit jakoukoliv kapalinou. Okolo přístroje ponechejte
dostatečný volný prostor, nutný pro cirkulaci vzduchu okolo přístroje – je tak odváděno
teplo vznikající během jeho provozu.
Page 13

- 5 -
• Reproduktory rozmístěte symetricky k hlavní jednotce tak, aby se jí nedotýkaly, potom
reproduktory připojte ke svorkám pro připojení reproduktorů vzadu na přístroji. Levý
reproduktor připojte ke svorkám L, pravý reproduktor ke svorkám R. Dodržte
doporučovanou impedanci reproduktorů vyznačenou na zadním panelu hlavní
jednotky.
• Rozviňte drátovou FM anténu. Po zapnutí přístroje a jeho přepnutí na příjem FM
rozhlasu vyhledejte optimální polohu FM antény pro optimální příjem požadovaných
vysílačů FM a v této poloze anténu zajistěte – pro upevnění antény ke stěně nebo
nábytku použijte např. plastovou lepicí pásku.
• Překontrolujte (např. na štítku elektroměru), zda napětí elektrické sítě v místě
instalace přístroje odpovídá napětí specifikovanému výrobcem přístroje pro jeho
napájení a uvedenému na zadní straně jeho skříňky (230 V stříd., 50 Hz) a potom
vložte vidlici síťového kabelu přístroje do síťové zásuvky.
• Symbol
označuje vybavení přístroje dvojitou izolací – přístroj nevyžaduje
uzemnění.
ZAPNUTÍ / VYPNUTÍ PŘÍSTROJE
• Po ukončení instalace přístroje a její kontrole vložte vidlici sítového kabelu přístroje do
síťové zásuvky.
• Pro zapnutí přístroje přepněte přepínač POWER OFF/FUNCTION do polohy RADIO
(pro příjem rozhlasu), PHONO (pro přehrání gramofonové desky) nebo do polohy CD /
USB / SD (pro přehrání CD nebo záznamu z připojené komponenty USB nebo
z paměťové karty SD (MMC) vložené do přístroje). Na přístroji se rozsvítí červená
LED napájení POWER.
• Pro vypnutí přístroje přepněte přepínač POWER OFF/FUNCTION do polohy POWER
OFF.
• Pokud nebudete přístroj delší dobu používat vypněte jej a odpojte jej od elektrické
sítě.
PŘÍJEM ROZHLASU
1. Přepněte přepínač POWER OFF/FUNCTION do polohy RADIO
- přístroj bude
zapnut, přepnut na příjem rozhlasu a na přístroji se rozsvítí červená LED
POWER.
2. Přepínačem BAND vyberte požadované rozhlasové pásmo (FM, FM MONO nebo
AM).
3. Knoflíkem ladění TUNING nalaďte požadovaný vysílač.
4. Regulátorem VOLUME na přístroji nebo tlačítky VOLUME +/- na ovladači nastavte
požadovanou hlasitost.
ANTÉNY
- Pro příjem v rozhlasovém pásmu FM je přístroj vybaven drátovou FM anténou. Anténu
rozviňte, pro optimální příjem požadovaných vysílačů FM je nutno vyhledat její
vhodnou polohu.
- V rozhlasovém pásmu středních vln (AM) přístroj využívá vestavěnou feritovou anténu
– pro optimální příjem požadovaného vysílače je nutné nasměrování (natočení) celého
přístroje.
Page 14

- 6 -
STEREOFONNÍ PŘÍJEM V ROZHLASOVÉM PÁSMU FM
• Po naladění stereofonního vysílače FM se na přístroji rozsvítí kontrolní svítilna FM
STEREO.
• Při nekvalitním stereofonním příjmu přepněte přepínač BAND do polohy FM MONO –
vysílač bude přijímán monofonně avšak kvalitněji. Pro automatický stereofonní příjem
v rozhlasovém pásmu FM (podle přijímaného signálu) přepněte přepínač BAND do
polohy FM.
POUŽITÍ GRAMOFONU
PŘÍPRAVA
• Odklopte kryt talíře gramofonu.
• Uvolněte držák raménka.
• Odklopte kryt hrotu vložky přenosky.
PŘEHRÁNÍ GRAMOFONOVÉ DESKY
1. Přepněte přepínač POWER OFF / FUNCTION do polohy PHONO – přístroj tak bude
zapnut, přepnut na použití gramofonu a na přístroji se rozsvítí červená kontrolní
svítilna POWER.
2. Na talíř položte gramofonovou desku (středový otvor desky nasaďte na osu hřídele
talíře). Pro přehrání desky EP o průměru 17 cm použijte adaptér.
3. Přepněte přepínač 33 / 45 / 78 RPM do polohy odpovídající údaji o rychlosti otáček
gramofonu uvedenému na etiketě přehrávané gramofonové desky.
4. Překontrolujte sejmutí krytu hrotu z vložky přenosky, uvolněte držák raménka a
páčkou pro zvednutí raménka zvedněte raménko.
5. Přemístěte raménko nad zaváděcí rýhy na obvodu gramofonové desky popř. do
mezery před záznamem skladby, kterou chcete přehrát.
6. Pro zahájení přehrávání desky opatrně spusťte r
aménko na gramofonovou desku.
7. Přehráním desky bude automaticky zastaveno otáčení talíře. Páčkou pro zvednutí
raménka zvedněte raménko a vraťte je do klidové polohy. Potom na hrot vložky
přenosky opět nasaďte kryt.
UPOZORNĚNÍ
• V žádném případě nezastavujte nebo nezpomalujte otáčení talíře rukou.
• Nepřenášejte přístroj bez předchozího nasazení krytu na hrot vložky přenosky a
zajištění raménka.
PŘEHRÁNÍ CD
ZÁKLADY OBSLUHY PŘEHRÁVAČE
1. Přepněte přepínač POWER OFF/FUNCTION do polohy CD / USB / SD.
2. Stlačením tlačítka OPEN/CLOSE otevřete zásuvku pro disk.
Page 15

- 7 -
3. Do zásuvky opatrně vložte disk etiketou nahoru (stranou se záznamem dolů) a potom
dalším stlačením tlačítka OPEN/CLOSE zásuvku uzavřete.
Bezprostředně po vložení disku do přehrávače se disk v přehrávači začne otáčet a
bude zahájeno je vyhodnocování. Po vyhodnocení disku bude (u většiny disků)
zahájeno přehrávání počínaje skladbou č. 1, po jejím přehrání budou postupně
přehrány všechny následující skladby z disku, přehráním poslední skladby bude
přehrávání disku ukončeno.
V průběhu přehrávání jsou na displeji zobrazeny údaje označující číslo přehrávané
skladby a její proběhlou hrací dobu (v minutách a v sekundách).
POUŽITÍ JEDNOTLIVÝCH TLAČÍTEK PRO PŘEHRÁNÍ DISKU
Důležité upozornění
V dalším textu popsané funkce tlačítek se odpovídajícím způsobem vztahují rovněž i na
přehrání záznamu z připojené komponenty USB resp. z paměťové karty SD (MMC)
vložené do přístroje.
Tlačítko CD PLAY / PAUSE / ST
OP ()
• Stlačením tlačítka u přehrávače v režimu Stop bude zahájeno přehrávání disku
počínaje skladbou č. 1.
• Dalším stlačením tlačítka bude přehrávání disku přerušeno a na displeji začne blikat
údaj proběhlé hrací doby přehrávané skladby. Pokračování v přerušeném přehrávání
dalším stlačením tlačítka.
• Pro ukončení přehrávání disku tlačítko stlačte a přidržte stlačeno po dobu delší než 2
sekundy.
Přeskok na začátky skladeb v záznamu na CD (tlačítka CD SKIP / SEARCH)
• V průběhu přehrávání krátce stlačte tlačítko CD SKIP/SEARCH () - přehrávač
přeskočí na začátek následující skladby a zahájí její přehrávání. Opakovaným
stlačováním tlačít
ka postupný přeskok na začátky následujících skladeb. Číslo
vybrané skladby bude zobrazeno na displeji.
• Krátkým stlačením tlačítka CD SKIP/SEARCH () přehrávač přeskočí na začátek
aktuálně přehrávané skladby a zahájí její přehrávání. Opakovaným stlačováním
tlačítka postupný přeskok na začátky předcházejících skladeb na CD.
Vyhledání požadovaného místa v záznamu na disku (tlačítka CD SKIP / SEARCH)
• Pro vyhledání požadovaného místa v záznamu na disku (odposlechem při poněkud
zvýšené rychlosti přehrávání a poněkud snížené hlasitosti) stlačte a přidržte v průběhu
přehrávání stlačeno tlačítko CD SKIP/SEARCH () - pro vyhledávání vzad nebo
tlačítko CD SKIP/SEARCH () – pro vyhledávání vpřed.
ZVLÁŠTNOSTI PŘEHRÁNÍ CD-R SE SOUBORY MP3/WMA
Vyhledání požadované složky / souboru
• Stlačte tlačítko ALBUM na přístroji.
• Tlačítky CD SKIP/SEARCH vyhledejte požadovaný soubor.
• Pro přehrání vybraného souboru stlačte tlačítko PLAY/PAUSE/STOP.
Pro vyhledání složky ovladačem použijte tlačítka ALBUM +/-.
Page 16

- 8 -
Zobrazení názvu přehrávaného souboru MP3
V průběhu přehrávání stlačte tlačítko INFO na ovladači. Dalším stlačením tlačítka údaj na
displeji zhasne.
Pokud nejsou soubory nebo složky označeny názvy bude při pokusu o zobrazení názvu
složky / souboru na displeji zobrazen údaj none popř. unknown.
LCD displej přístroje podporuje zobrazování názvů souborů / složek pouze v angličtině.
Požadavky na přenosovou rychlost
• MP3: je možné přehrání souborů se záznamy používajícími rychlost toku dat
v rozsahu od 32 do 256 kb/sek.
• WMA: je možné přehrání souborů se záznamy používajícími rychlost toku dat
v rozsahu od 32 do 320 kb/sek.
Opakované přehrávání / postupné přehrání prvních 10 sekund záznamu všech
skladeb / přehrávání náhodným výběrem
CD
Opakovaným stlačováním tlačítka REPEAT / INTRO / RANDOM na ovladači nebo tlačítka
MODE na přístroji před zahájením přehrávání disku nebo v jeho průběhu budou na
displeji postupně zobrazovány následující údaje:
• REPEAT 1 – pro opakované přehrávání skladby;
• REPEAT ALL – pro opakované přehrávání všech skladeb;
• RANDOM – pro přehrání disku náhodným výběrem přehrávaných skladeb;
• INTRO pro postupné přehrání prvních 10 sekund záznamů všech skladeb z disku
• OFF – disk bude přehráván normálně.
CD-R se záznamy souborů MP3 / WMA
Opakovaným stlačováním tlačítka REPEAT / INTRO / RANDOM na ovladači nebo tlačítka
MODE na přístroji před zahájením přehrávání disku nebo v jeho průběhu budou na
displeji postupně zobrazovány následující údaje:
• REPEAT 1 – pro opakované přehrávání skladby;
• REPEAT 1 ALBUM – pro opakované přehrávání všech skladeb z přehrávané složky;
• REPEAT ALL ALBUM – pro opakované přehrávání všech složek;
• RANDOM – pro přehrání disku náhodným výběrem přehrávaných skladeb;
• INTRO pro postupné přehrání prvních 10 sekund záznamů všech skladeb z disku;
• OFF – disk bude přehráván normálně.
PŘEHRÁNÍ SKLADEB Z CD V POŘADÍ NAPROGRAMOVANÉM UŽIVATELEM
Přehrávač umožňuje přehrání až 99 skladeb (nebo souborů MP3) z disku v pořadí
naprogramovaném uživatelem. Programování skladeb je možné pouze u přehrávače
v režimu „Stop“ (není přehráván disk).
Ukončete přehrávání disku a pokračujte podle následujících pokynů:
1. Stlačením tlačítka PROGRAM na ovladači nebo opakovaným stlačováním tlačítka
MODE na přístroji zobra
zte na displeji údaj MEMORY a údaje označující číslo skladby
a její pořadí v programu.
2. Při programování souborů MP3 uložených ve složkách vyberte tlačítky ALBUM složku
se soubory MP3, které chcete vložit do programu, potvrďte tlačítkem PROGRAM nebo
tlačítkem MODE.
Page 17

- 9 -
3. Tlačítky SKIP/SEARCH ( nebo ) vyberte skladbu nebo soubor, které chcete vložit
do programu, potvrďte stlačením tlačítka PROGRAM nebo tlačítka MODE – vybraná
skladba bude vložena do programu.
4. Opakováním kroků č. 2 – 3 sestavte požadovaný program.
5. Pro přehrání naprogramovaných skladeb stlačte tlačítko CD PLAY/PAUSE/STOP
().
6. Přehráním poslední naprogramované skladby bude přehrávání ukončeno, pro
ukončení přehrávání programu před přehráním poslední skladby stlačte tlačítko CD
STOP () na ovladači.
7. Pro výmaz programu z paměti přehrávače znovu stlačte tlačítko CD STOP ().
PŘEHRÁNÍ PAMĚŤOVÉ KARTY SD / MMC / PŘEHRÁVÁNÍ
KOMPONENTOU USB
1. Přepněte přepínač POWER OFF / FUNCTION do polohy CD / USB / SD a potom
tlačítkem USB/SD přepněte přístroj do režimu USB nebo SD.
2. Do slotu pro paměťovou kartu zasuňte paměťovou kartu SD nebo MMC popř. ke
konektoru USB připojte komponentu USB (flash disk nebo přehrávač MP3).
3. Bezprostředně poté bude zahájeno přehrávání – v jeho průběhu budou na displeji
zobrazeny číslo přehrávaného souboru a jeho proběhlá hrací doba.
4. Pro přehrávání záznamů z komponenty USB resp. paměťové karty SD (MMC) můžete
použít všechny v přecházejícím textu návodu použité funkce.
Doplňující informace
Přístrojem nejsou podporována všechna zařízení USB s rychlou vymazatelnou pamětí
(Flash) všech výrobců.
ZÁZNAM Z CD / GRAMOFONOVÉ DESKY / KAZETY
Přístroj umožňuje záznam z přehrávaného CD audio, gramofonové desky nebo z kazety
do paměti připojené komponenty USB. Zaznamenané soubory jsou do paměti
komponenty USB ukládány jako soubory MP3.
Kromě toho je přístrojem možné překopírování souborů MP3 nebo WMA z CD-R se
záznamy souborů v tomto formátu do paměti připojené komponenty USB nebo na
paměťovou kartu SD (MMC) vloženou do přístroje. Pokud jsou k dispozici obě média
bude záznam uložen do paměti komponenty USB.
ZÁZNAM Z CD AUDIO
Je možný záznam jediné skladby nebo celého disku
• Pro záznam přehrávané skladby zobrazte na displeji stlačením tlačítka RECORD údaj
USB & REC. Po ukončení záznamu bude automaticky ukončeno přehrávání.
• Pro záznam celého disku vložte do přehrávače disk a po jeho vyhodnocení stlačte
tlačítko RECORD. Na displeji bude zobrazen údaj USB & REC.
• Po ukončení záznamu bude automaticky ukončeno přehrávání.
Doplňující informace
• Pro ukládání pořízených souborů záznamů je přístrojem vytvořena složka AUDIO.
Page 18

- 10 -
• Pro záznam jsou používány vzorkovací kmitočet 44,1 kHz a rychlost toku dat 128
kb/sek.
• Není zaznamenáván název skladby.
• Záznam je ukončen automaticky - záznam ukončený uživatelem nebude uložen.
KOPÍROVÁNÍ SOUBORŮ MP3 / WMA
Pokud bude do přehrávače namísto CD audio vložen CD-R se záznamy souborů MP3
resp. WMA budou po stlačení tlačítka RECORD tyto soubory překopírovány na
paměťovou kartu SD (MMC).
ZÁZNAM Z GRAMOFONOVÉ DESKY
• Pro záznam z gramofonové desky přepněte přepínač POWER OFF / FUNCTION do
polohy PHONO, do gramofonu vložte gramofonovou desku a pro zahájení záznamu
stlačte tlačítko RECORD.
• Na displeji bude zobrazen údaj USB a bude zahájen záznam. Zaznamenané soubory
budou ukládány ve formátu MP3 do paměti komponenty USB.
• Po ukončení záznamu stlačte a přidržte stlačeno tlačítko RECORD a vyčkejte na
přepnutí přístroje do režimu PHONO.
Nastavení rychlosti toku dat pro záznam z CD nebo z gramofonové desky do paměti
komponenty USB
1. Přepněte přepínač POWER OFF / FUNCTION do polohy PHONO a ponechejte
přístroj v režimu „Stop“.
2. Stlačte tlačít
ko BITRATE – na displeji bude zobrazen údaj označující výchozí rychlost
toku dat (128 kb/sek).
3. Tlačítky SKIP /SEARCH specifikujte požadovanou rychlost toku dat pro záznam (32;
64; 128; 192 nebo 256 kb/sek).
4. Potvrďte tlačítkem BITRATE.
ZÁZNAM Z KAZETY
1. Přepněte přepínač POWER OFF / FUNCTION do polohy TAPE a potom stlačte
tlačítko RECORD. Na displeji začne blikat údaj USB nebo CARD a potom údaj REC.
2. Zahajte přehrávání kazety.
3. Pro ukončení záznamu stlačte a přidržte stlačeno tlačítko STOP a vyčkejte na
zobrazení údaje TAPE na displeji, potom tlačítko uvolněte.
ODPOJENÍ KOMPONENTY USB OD PŘÍSTROJE / VYJMUTÍ PAMĚŤOVÉ KARTY
Z PŘÍSTROJE
• Vypněte přístroj popř. přepněte přístroj na zpracování signálu z jiného zdroje (např. na
příjem rozhlasu).
• Od přístroje odpojte komponentu USB popř. z přístroje
vyjměte (po předchozím
zatlačení na doraz a následným uvolněním) paměťovou kartu SD (MMC).
PŘEHRÁNÍ KAZETY
1. Pro přehrání kazety přepněte přepínač POWER OFF/ FUNCTION do polohy TAPE.
2. Přehrávání kazety bude po jejím zasunutí do slotu pro kazetu zahájeno automaticky.
Page 19

- 11 -
3. Pro rychlé převinutí pásku v kazetě vpřed stlačte v průběhu přehrávání do poloviny
jeho dráhy tlačítko TAPE FORWARDS / EJECT. Dalším lehkým stlačením tlačítka
bude přehrávání kazety pokračovat.
4. Pro ukončení přehrávání stačte tlačítko TAPE FORWARDS / EJECT na doraz –
přehrávání kazety bude ukončeno a kazeta bude vysunuta ze slotu pro kazetu.
5. Vysunutou kazetu vyjměte ze slotu a uložte ji do jejího obalu.
DOPLŇUJÍCÍ INFORMACE
NASAZENÍ KRYTU TALÍŘE GRAMOFONU
Kryt nasaďte podle obrázku.
VÝMĚNA VLOŽKY PŘENOSKY GRAMOFONU
Pro výměnu vložky přenosky gramofonu jednou
rukou přidržte držák přenosky a tahem druhou
rukou odpojte vložku přenosky od držáku – viz
obrázek (1).
Potom podle obrázku (2) opatrně nasaďte novou
vložku přenosky na držák – musí zaklapnout.
POKYNY PRO SPRÁVNOU LIKVIDACI VÝROBKU
Tento výrobek je označen jako výrobek, na který se vztahuje směrnice 2002/96/EC o
likvidaci použitých elektrických a elektronických zařízení.
Page 20

- 12 -
Tento symbol na výrobku, jeho příslušenství nebo obalu označuje, že při
pozdější likvidaci výrobku (z jakýchkoliv důvodů) nesmí být s výrobkem
zacházeno jako s domovním odpadem. Výrobek zlikvidujte jeho předáním na
sběrné místo pro ekologickou likvidaci použitých elektrických a elektronických
zařízení. Zajištěním jejich správné likvidace zabráníte vzniku potenciálních
rizik pro životní prostředí a lidské zdraví, která by mohla vzniknout
nesprávným zacházením s odpady.
Kromě toho recyklace odpadových materiálů napomáhá udržení přírodních zdrojů surovin
pro příští generace.
Podrobné informace k ekologické likvidaci tohoto výrobku získáte u pracovníka ochrany
životního prostředí místního (městského nebo obvodního) úřadu nebo v prodejně, ve
které jste výrobek zakoupili.
Informace k přehrávání CD-R (RW) se záznamy pořízenými použitím PC přehrávači
CD – výrobky Roadstar
Přehrávač tohoto přístroje umožňuje přehrání CD-R (RW) se záznamy ve formátu DA
(kopie CD audio) a souborů MP3 (komprimované záznamy hudebních souborů,
pořízených prostřednictvím PC a vhodných programů. V závislosti na použitém
záznamovém médiu a metodě záznamu (počítačového programu) je možné, že některé
disky s takto pořízenými záznamy nebude přehrávačem tohoto přístr
oje možné přehrát.
Tento jev neindikuje poruchu přehrávače tohoto přístroje.
TECHNICKÉ ÚDAJE
Napájení
- přístroj
- dálkový ovladač
230 V stříd., 50 Hz
2 ks baterií AAA (UM-4)
Rozhlasový přijímač
- kmitočtové rozsahy FM 87,5 – 108 MHz
AM 522 – 1 620 kHz (pásmo středních vln)
Změny designu a technických údajů vyhrazeny bez předchozího oznámení.
Page 21

AUDIO VIDEO
STEREOFÓNNY SYSTÉM S PREHRÁVAČOM CD / CD-R
(RW) MP3 / WMA, S KONEKTOROM USB A S ČÍTAČKOU
PAMÄŤOVÝCH KARIET SD / MMC, S ROZHLASOVÝM
PRIJÍMAČOM AM/FM, GRAMOFÓNOM, S KAZETOVÝM
PREHRÁVAČOM A S DIAĽKOVÝM OVLÁDAČOM
HIF-9088TUMPN
Návod na obsluhu
(preklad návodu firmy Roadstar – Švajčiarsko)
Pred inštaláciou, zapnutím a nastavovaním prístroja si prosím prečítajte celý návod –
obsahuje dôležité informácie pre jeho bezpečné používanie a využitie všetkých jeho
vlastností a funkcií. Návod uschovajte pre prípad jeho ďaľšej potreby.
Výkričník vovnútri trojuholníka na zadnej strane skrinky prístroja upozorňuje
užívateľa na dôležité pokyny pre obsluhu a údržbu prístroja uvedené v jeho
sprievodnej dokumentácii.
Symbol blesku vo vnútri trojuholníka vzadu na prístroji upozorňuje užívateľa na
riziko úrazu elektrickým prúdom pri nevhodnom zachádzaní s prístrojom.
Nevyberajte prístroj zo skrinky – vo vnútri skrinky nie sú diely, ktoré by mohol
opraviť alebo naszaviť jeho užívateľ bez zodpovedajúceho vybavenia a kvalifikácie.
Ak bude prístroj vyžadovať nastavenie alebo opravu vyhľadajte odborný servis.
Zásahom do prístroja v dobe platnosti záruky sa vystavujete riziku straty event.
záručných plnení.
Prístroj je konštruovaný pre napájanie striedavým napätím 230 V, 50 Hz.
Chráňte prístroj pred zmoknutím a nepoužívajte ho vo vlhkom prostredí – riziko
úrazu elektrickým prúdom. Nepoužívajte prístroj mimo miestnosti.
Vypnutím nie je prístroj odpojený od elektrickej siete – pre odpojenie prístroja od
elektrickej siete prístroj vypnite a potom vyberte vidlicu sieťového kábla prístroja zo
sieťovej zásuvky.
Prehrávač CD používa laserový žiarič s malým výkonom. Vzhľadom k možnému
poškodeniu zraku laserovým žiarením smie byť prístroj opravovaný a nastavovaný
len pracovníkmi so zodpovedajúcou kvalifikáciou. Nezapínajte prehrávač po vybratí
prístroja zo skrinky – po odblokovaní ochrán a uvedení prehrávača do chodu riziko
trvalého poškodenia zraku laserovým žiarením.
Pri používaní prístroja podľa pokynov v návode prístroj nepredstavuje žiadne riziká
a to ani pre jeho bezprostredné okolie.
Nepoužívajte a neukladajte prístroj na priamom slnku alebo v blízkosti zdrojov tepla
(napr. v blízkosti telies ústredného kúrenia). Vysokými teplotami riziko poškodenia
plastových dielov skrinky prístroja.
Page 22

- 2 -
OVLÁDACIE PRVKY PRÍSTROJA
Na prístroji sú užívateľovi k dispozícii nasledujúce ovládacie a kontrolné prvky:
1. Kryt taniera gramofónu.
2. Tlačidlo CD PLAY/PAUSE/STOP () pre zahájenie / prerušenie / ukončenie
prehrávania disku (záznamu z komponentu USB / pamäťovej karty SD / MMC) príp.
pre ukončenie záznamu
3. Tlačidlo CD SKIP/SEARCH () pre vyhľadanie požadovaného miesta v zázname na
disku (komponente USB / pamäťovej karte SD / MMC) vpred (trvalým stlačením) /
preskok na začiatky skladieb v zázname na disku (komponente USB / pamäťovej
karte SD / MMC) vpred (opakovaným stláčaním).
4. Tlačidlo MP3 ALBUM pre vyhľadanie požadovanej zložky so súbormi MP3 / WMA
v zázname na CD-R, komponente USB príp. pamäťovej karte SD (MMC).
5. Tlačidlo CD SKIP/SEARCH () pre vyhľadanie požadovaného miesta v zázname na
disku (komponente USB / pamäťovej karte SD / MMC) vzad (trvalým stlačením) /
preskok na začiatky skladieb v zázname na disku (komponente USB / pamäťovej
karte SD / MMC) vzad (opakovaným stláčaním).
6. Tlačidlo FAST FORWARDS/EJECT pre rýchle previnutie pásky v kazete vpred /
vysunutie kazety z prehrávača.
7. Regulátor hlasitosti VOLUME.
Page 23

- 3 -
8. Tlačidlo MODE pre výber požadovaného režimu prehrania disku.
9. Tlačidlo RECORD ( ) pre zahájenie záznamu na komponente USB / pamäťovú kartu
SD (MMC).
10. Zásuvka pre CD.
11. Tlačidlo OPENCLOSE pre otvorenir / uzavretie zásuvky pre CD.
12. Hlavný vypínač pre zapnutie / vypnutie prístroja.
13. Konektor USB pre pripojenie externého komponentu USB k prístroju.
14. Slot pre pamäťovú kartu SD (MMC).
15. Prepínač POWER OFF/FUNCTION pre výber zdroja signálu / vypnutie prístroja.
16. Prepínač BAND pre výber rozhlasového pásma.
17. LED POWER – po zapnutí prístroja svieti červeno.
18. LCD displej.
19. LED FM STEREO – svieti po naladení stereofónneho vysielača FM.
20. Ukazovateľ ladenie.
21. Gombík ladenie TUNING.
22. Snímač prijímača diaľkového ovládania.
23. Adaptér pre prehranie gramofónových dosiek EP.
24. Prepínač rýchlosti otáčania taniera gramofónu s možnosťou nastavenia 33 / 45 alebo
78 otáčok taniera / minútu).
25. Držiak ramienka.
26. Slot pre kazetu.
27. Tanier gramofónu.
28. Drôtová FM anténa.
29. Sieťový kábel.
30. Ramienko gramofónu.
31. Tlačidlo STOP pre ukončenie prehrávania.
Podrobný popis funkcie jednotlivých ovládacích prvkov nájdete v ďaľšom texte návodu v
popisoch obsluhy jednotlivých funkcií prístroja.
DIAĽKOVÝ OVLÁDAČ
Diaľkovým ovládačom môžete pohodlne obsluhovať niektoré funkcie prístroja. Tlačidlá na
ovládači majú zhodnú funkciu s rovnako alebo podobne označenými tlačidlami na prístroji.
PRÍPRAVA OVLÁDAČA
Pred použitím ovládača vložte do priestoru pre batérie na spodnej strane ovládača 2 ks
batérií AAA. Pri vkladaní batérií do ovládača pozor na ich správnu polaritu – je vyznačená
v priestore pre batérie.
V prípade problémov s ovládačom alebo po významnom skrátení jeho účinného dosahu
vymeňte v ovládači obe batérie.
POUŽITIE OVLÁDAČA
• Pre použitie ovládača nasmerujte ovládač na snímač prijímača diaľkového ovládania
na prednom panely prístroja a potom stlačte požadované tlačidlo. Účinný dosah
ovládača s novými batériami je do cca 5 metrov, postupným vyčerpávaním kapacity
batérií sa účinný dosah ovládača skracuje.
Page 24

- 4 -
• Funkcia ovládača (predovšetkým jeho dosah) je ovplyvňovaná silným osvetlením
miestnosti (slnko, žiarovky).
• V okamihu použitia ovládača nesmia byť v priestore medzi prístrojom a ovládačom
pevné prekážky.
• Pokiaľ nebudete ovládač dlhšiu dobu používať vyberte z neho obe batérie – zabránite
tak event. poškodeniu ovládača ich prípadným vytečením.
TLAČIDLÁ NA OVLÁDAČI
Na ovládači sú užívateľovi k dispozícii nasledujúce tlačidlá - viď
obrázok:
1. Číslicové tlačidlá pre priamy výber skladieb z CD pre ich
prehranie.
2. INFO - v režime „Stop“ u prístroja prepnutého na
prehrávanie súborov MP3 / WMA pre výber požadovanej
rýchlosti toku dát pre záznam.
3. REC – pre zahájenie záznamu z prehrávanej gramofónovej
platni alebo z prehrávaného CD. Pre záznam použite
komponent USB alebo pamäťovú kartu SD (MMC).
4. REP/INTRO/RAN – pre výber požadovaného režimu
prehrávania CD / komponenty USB / pamäťové karty SD
príp. MMC (opakovaného prehrávania / prehranie prvých 10
sekúnd záznamu všetkých skladieb / prehranie náhodným
výberom).
5. PROGRAM – v režimoch CD / USB / SD (MMC) pre naprogramovanie skladieb pre ich
prehranie v poradí požadovanom užívateľom.
6. PLAY/PAUSE () pre zahájenie / prerušenie prehrávania CD / komponentu USB /
pamäťovej karty SD (MMC).
7. SKIP/SEARCH (/) pre vyhľadanie požadovaného miesta v zázname na disku (v
pamäti komponentu USB / pamäťovej karte SD (MMC)) vpred alebo vzad (trvalým
stlačením) / preskok na začiatky skladieb v zázname na disku (komponente USB /
pamäťovej karte SD / MMC) vpred alebo vzad (opakovaným stláčaním).
8. STOP pre ukončenie prehrávania CD / USB / SD (MMC) príp. pre výmaz programu
pre prehranie skladieb z CD / USB / SD (MMC) v poradí požadovanom užívateľom.
9. ALBUM
/ - v
priebehu prehrávania MP3/WMA pre výber požadovanej zložky zo
záznamu na CD-R / USB (SD alebo MMC).
10. USB/SD – v režime CD pre výber požadovaného média (komponentu USB alebo
pamäťovej karty SD (MMC).
11. MUTE pre okamžité umlčanie systému / obnovenie pôvodnej hlasitosti.
12. BITRATE pre nastavenie požadovanej rýchlosti toku dát.
INŠTALÁCIA A PRIPOJENIE PRÍSTROJA
• Prístroj inštalujte na rovnú, pevnú plochu chránenú pred otrasmi a vibráciami, mimo
dosahu priameho slnka, v dostatočnej vzdialenosti od zdrojov tepla a na mieste, kde
nemôže byť postriekaný alebo poliaty akoukoľvek kvapalinou. Okolo prístroja nechajte
dostatočný voľný priestor, nutný pre cirkuláciu vzduchu okolo prístroja – je tak
odvádzané teplo vznikajúce behom jeho chodu.
Page 25

- 5 -
• Reproduktory rozmiestnite symetricky k hlavnej jednotke tak, aby sa jej nedotýkali,
potom reproduktory pripojte k svorkám pre pripojenie reproduktorov vzadu na prístroji.
Ľavý reproduktor pripojte k svorkám L, pravý reproduktor k svorkám R. Dodržte
doporučenú impedanciu reproduktorov vyznačenú na zadnom panely hlavnej
jednotky.
• Rozviňte drôtovú FM anténu. Po zapnutí prístroja a jeho prepnutí na príjem FM
rozhlasu vyhľadajte optimálnu polohu FM antény pre optimálny príjem požadovaných
vysielačov FM a v tejto polohe anténu zaistite – pre upevnenie antény k stene alebo
nábytku použite napr. plastovú lepiacu pásku.
• Prekontrolujte (napr. na štítku elektromera), či napätie elektrickej siete v mieste
inštalácie prístroja zodpovedá napätiu špecifikovanému výrobcom prístroja pre jeho
napájanie a uvedenému na zadnej strane jeho skrinky (230 V stried., 50 Hz) a potom
vložte vidlicu sieťového káblu prístroja do sieťovej zásuvky.
• Symbol
označuje vybavenie prístroja dvojitou izoláciou – prístroj nevyžaduje
uzemnenie.
ZAPNUTIE / VYPNUTIE PRÍSTROJA
• Po ukončení inštalácie prístroja a jej kontrole vložte vidlicu sieťového káblu prístroja
do sieťovej zásuvky.
• Pre zapnutie prístroja prepnite prepínač POWER OFF/FUNCTION do polohy RADIO
(pre príjem rozhlasu), PHONO (pre prehranie gramofónovej platne) alebo do polohy
CD / USB / SD (pre prehranie CD alebo záznamu z pripojeného komponentu USB
alebo z pamäťovej karty SD (MMC) vloženej do prístroja). Na prístroji sa rozsvieti
červená LED napájanie POWER.
• Pre vypnutie prístroja prepnite prepínač POWER OFF/FUNCTION do polohy POWER
OFF.
• Pokiaľ nebudete prístroj dlhšiu dobu používať vypnite ho a odpojte ho od elektrickej
siete.
PRÍJEM ROZHLASU
1. Prepnite prepínač POWER OFF/FUNCTION do polohy RADIO
- prístroj bude
zapnutý, prepnutý na príjem rozhlasu a na prístroji sa rozsvieti červená LED
POWER.
2. Prepínačom BAND vyberte požadované rozhlasové pásmo (FM, FM MONO alebo
AM).
3. Gombíkom ladenia TUNING nalaďte požadovaný vysielač.
4. Regulátorom VOLUME na prístroji alebo tlačidlami VOLUME +/- na ovládači nastavte
požadovanú hlasitosť.
ANTÉNY
- Pre príjem v rozhlasovom pásme FM je prístroj vybavený drôtovou FM anténou.
Anténu rozviňte, pre optimálny príjem požadovaných vysielačov FM je nutné vyhľadať
jej vhodnú polohu.
- V rozhlasovom pásme stredných vĺn (AM) prístroj využíva vstavanú feritovú anténu –
pre optimálny príjem požadovaného vysielača je nutné nasmerovanie (natočenie)
celého prístroja.
Page 26

- 6 -
STEREOFÓNNY PRÍJEM V ROZHLASOVOM PÁSME FM
• Po naladení stereofónneho vysielača FM sa na prístroji rozsvieti kontrolné osvetlenie
FM STEREO.
• Pri nekvalitnom stereofónnom príjme prepnite prepínač BAND do polohy FM MONO –
vysielač bude prijímaný monofónne avšak kvalitnejšie. Pre automatický stereofónny
príjem v rozhlasovom pásme FM (podľa prijímaného signálu) prepnite prepínač BAND
do polohy FM.
POUŽITIE GRAMOFÓNU
PRÍPRAVA
• Odklopte kryt taniera gramofónu.
• Uvoľnite držiak ramienka.
• Odklopte kryt hrotu vložky prenosky.
PREHRANIE GRAMOFÓNOVEJ PLATNE
1. Prepnite prepínač POWER OFF / FUNCTION do polohy PHONO – prístroj tak bude
zapnutý, prepnutý na použitie gramofónu a na prístroji sa rozsvieti červené kontrolné
osvetlenie POWER.
2. Na tanier položte gramofónovú platňu (stredový otvor dosky nasaďte na osu hriadeľa
taniera). Pre prehranie dosky EP s priemerom 17 cm použite adaptér.
3. Prepnite prepínač 33 / 45 / 78 RPM do polohy zodpovedajúcej údaju o rýchlosti otáčok
gramofónu uvedenému na etikete prehrávanej gramofónovej platni.
4. Prekontrolujte vybratie krytu hrotu z vložky prenosky, uvoľnite držiak ramienka a
páčku pre zdvihnutie ramienka zdvihnite ramienko.
5. Premiestnite ramienko nad zavádzacie ryhy na obvode gramofónovej pletne príp. do
medzery pred záznamom skladby, ktorú chcete prehrať.
6. Pre zahájenie prehrávania dosky opatrne spusťte ramienko na gramofónovú dosku.
7. Prehraním dosky bude automaticky zastavené otáčanie taniera. Páčkou pre zdvihnutie
ramienka zdvihnite ramienko a vráťte ho do kľudovej polohy. Potom na hrot vložky
prenosky opäť nasaďte kryt.
UPOZORNENIE
• V žiadnom prípade nezastavujte alebo nespomalujte otáčanie taniera rukou.
• Neprenášajte prístroj bez predchádzajúceho nasadenia krytu na hrot vložky prenosky
a zaistenie ramienka.
PREHRANIE CD
ZÁKLADY OBSLUHY PREHRÁVAČA
1. Prepnite prepínač POWER OFF/FUNCTION do polohy CD / USB / SD.
2. Stlačením tlačidla OPEN/CLOSE otvorte zásuvku pre disk.
3. Do zásuvky opatrne vložte disk etiketu nahor (stranou so záznamom dolu) a potom
ďaľším stlačením tlačidla OPEN/CLOSE zásuvku uzavrite.
Bezprostredne po vložení disku do prehrávača sa disk v prehrávači začne otáčať a
bude zahájené vyhodnocovanie. Po vyhodnotení disku bude (u väčšiny diskov)
Page 27

- 7 -
zahájené prehrávanie počínajúc skladbou č. 1, po jej prehraní budú postupne
prehrané všetky nasledujúce skladby z disku, prehraním poslednej skladby bude
prehrávanie disku ukončené.
V priebehu prehrávania sú na displeji zobrazené údaje označujúce číslo prehrávanej
skladby a jej prebehnutú hraciu dobu (v minutách a v sekundách).
POUŽITIE JEDNOTLIVÝCH TLAČIDIEL PRO PREHRANIE DISKU
Dôležité upozornenie
V ďaľšom texte popísané funkcie tlačidiel so zodpovedajúcim spôsobom vzťahujú rovnako
i na prehranie záznamu z pripojeného komponentu USB resp. z pamäťovej karty SD
(MMC) vloženej do prístroja.
Tlačidlo CD PLAY / PAUSE / STOP ()
• Stlačením tlačidla u prehrávača v režime Stop bude zahájené prehrávanie disku
počínajúc skladbou č. 1.
• Ďaľším stlačením tlačidla bude prehrávanie disku prerušené a na displeji začne blikať
údaj prebehnutej hracej doby prehrávanej skladby. Pokračovanie v prerušenom
prehrávaní ďaľším stlačením tlačidla.
• Pre ukončenie prehrávania disku tlačidlo stlačte a pridržte stlačené po dobu dlhšiu než
2 sekundy.
Preskok na začiatky skladieb v zázname na CD (tlačidlá CD SKIP / SEARCH)
• V priebehu prehrávania krátko stlačte tlačidlo CD SKIP/SEARCH () - prehrávač
preskočí na
začiatok nasledujúcej skladby a zaháji jej prehrávanie. Opakovaným
stláčaním tlačidla postupný preskok na začiatky nasledujúcich skladieb. Číslo vybranej
skladby bude zobrazené na displeji.
• Krátkym stlačením tlačidla CD SKIP/SEARCH () prehrávač preskočí na začiatok
aktuálne prehrávanej skladby a zaháji jej prehrávanie. Opakovaným stláčaním tlačidla
postupný preskok na začiatky predchádzajúcich skladieb na CD.
Vyhľadanie požadovaného miesta v záznamu na disku (tlačidlá CD SKIP / SEARCH)
• Pre vyhľadanie požadovaného miesta v zázname na disku (odposluchom pri o niečo
zvýšenej rýchlosti prehrávania a o niečo zníženej hlasitosti) stlačte a pridržte
v priebehu prehrávania stlačené tlačidlo CD SKIP/SEARCH () - pre vyhľadávanie
vzad alebo tlačidlo CD SKIP/SEARCH () – pre vyhľadávanie vpred.
ZVLÁŠTNOSTI PREHRANIA CD-R SO SÚBORMI MP3/WMA
Vyhľadanie požadovanej zložky / súboru
• Stlačte tlačidlo ALBUM na prístroji.
• Tlačidlami CD SKIP/SEARCH vyhľadajte požadovaný súbor.
• Pre prehranie vybraného súboru stlačte tlačidlo PLAY/PAUSE/STOP.
Pre vyhľadanie zložky ovládačom použite tlačidlá ALBUM +/-.
Zobrazenie názvu prehrávaného súboru MP3
V priebehu prehrávania stlačte tlačidlo INFO na ovládači. Ďaľším stlačením tlačidla údaj
na displeji zhasne.
Page 28

- 8 -
Pokiaľ nie sú súbory alebo zložky označené názvami bude pri pokuse o zobrazenie názvu
zložky / súboru na displeji zobrazený údaj none príp. unknown.
LCD displej prístroja podporuje zobrazovanie názvov súborov / zložiek len v angličtine.
Požiadavky na prenosovú rýchlosť
• MP3: je možné prehranie súborov so záznammi používajúcimi rýchlosť toku dát
v rozsahu od 32 do 256 kb/sek.
• WMA: je možné prehranie súborov so záznammi používajúcimi rýchlosť toku dát
v rozsahu od 32 do 320 kb/sek.
Opakované prehrávanie / postupné prehranie prvých 10 sekúnd záznamu všetkých
skladieb / prehrávanie náhodným výberom
CD
Opakovaným stláčaním tlačidla REPEAT / INTRO / RANDOM na ovládači alebo tlačidla
MODE na prístroji pred zahájením prehrávania disku alebo v jeho priebehu budú na
displeji postupne zobrazované nasledujúce údaje:
• REPEAT 1 – pre opakované prehrávanie skladby;
• REPEAT ALL – pre opakované prehrávanie všetkých skladieb;
• RANDOM – pre prehrsnie disku náhodným výberom prehrávaných skladieb;
• INTRO pre postupné prehranie prvých 10 sekúnd záznamov všetkých skladieb z disku
• OFF – disk bude prehrávaný normálne.
CD-R so záznammi súborov MP3 / WMA
Opakovaným stláčaním tlačidla REPEAT / INTRO / RANDOM na ovládači alebo tlačidla
MODE na prístroji pred zahájením prehrávania disku alebo v jeho priebehu budú na
displeji postupne zobrazované nasledujúce údaje:
• REPEAT 1 – pre opakované prehrávanie skladby;
• REPEAT 1 ALBUM – pre opakované prehrávanie všetkých skladieb z prehrávanej
zložky;
• REPEAT ALL ALBUM – pre opakované prehrávanie všetkých zložiek;
• RANDOM – pre prehranie disku náhodným výberom prehrávaných skladieb;
• INTRO pre postupné prehranie prvých 10 sekúnd záznamov všetkých skladieb
z disku;
• OFF – disk bude prehrávaný normálne.
PREHRANIE SKLADIEB Z CD V PORADÍ NAPROGRAMOVANOM UŽÍVATEĽOM
Prehrávač umožňuje prehranie až 99 skladieb (alebo súborov MP3) z disku v poradí
naprogramovanom užívateľom. Programovanie skladieb je možné len u prehrávača
v režime „Stop“ (nie je prehrávaný disk).
Ukončite prehrávanie disku a pokračujte podľa nasledujúcich pokynov:
1. Stlačením tlačidla PROGRAM na ovládači alebo opakovaným stláčaním tlačidla
MODE na prístroji zobrazte na displeji údaj MEMORY a údaje označujúce číslo
skladby a její poradie v programe.
2. Pri programovaní súborov MP3 uložených v zložkách vyberte tlačidlami ALBUM
zložku so súbormi MP3, ktoré chcete vložiť do programu, potvrďte tlačidlom
PROGRAM alebo tlačidlom MODE.
Page 29

- 9 -
3. Tlačidlami SKIP/SEARCH ( alebo ) vyberte skladbu alebo súubor, ktoré chcete
vložiť do programu, potvrďte stlačením tlačidla PROGRAM alebo tlačidla MODE –
vybraná skladba bude vložená do programu.
4. Opakovaním krokov č. 2 – 3 zostavte požadovaný program.
5. Pre prehranie naprogramovaných skladieb stlačte tlačidlo CD PLAY/PAUSE/STOP
().
6. Prehraním poslednej naprogramovanej skladby bude prehrávanie ukončené, pre
ukončenie prehrávania programu pred prehraním poslednej skladby stlačte tlačidlo CD
STOP () na ovládači.
7. Pre výmaz programu z pamäti prehrávača znovu stlačte tlačidlo CD STOP ().
PREHRANIE PAMÄŤOVEJ KARTY SD / MMC /
PREHRÁVANIE KOMPONENTOV USB
1. Prepnite prepínač POWER OFF / FUNCTION do polohy CD / USB / SD a potom
tlačidlom USB/SD prepnite prístroj do režimu USB alebo SD.
2. Do slotu pre pamäťovú kartu zasuňte pamäťovú kartu SD alebo MMC príp. Ku
konektoru USB pripojte komponent USB (flash disk alebo prehrávač MP3).
3. Bezprostredne potom bude zahájené prehrávanie – v jeho priebehu budú na displeji
zobrazené číslo prehrávaného súboru a jeho prebehnutá hracia doba.
4. Pre prehrávanie záznamov z komponentu USB resp. pamäťovej karty SD (MMC)
môžete použiť všetky v predchádzajúcom texte návodu použitej funkcie.
Doplňujúce informácie
Prístrojom nie sú podporované všetky zariadenia USB s rýchlo vymazateľnou pamäťou
(Flash) všetkých výrobcov.
ZÁZNAM Z CD / GRAMOFÓNOVEJ PLATNE / KAZETY
Prístroj umožňuje záznam z prehrávaného CD audio, gramofónovej platne alebo z kazety
do pamäti pripojeného komponentu USB. Zaznamenané súbory sú do pamäti
komponentu USB ukladané ako súbory MP3.
Okrem toho je prístrojom možné prekopírovanie súborov MP3 alebo WMA z CD-R sa
záznamy súborov v tomto formáte do pamäti pripojené komponenty USB alebo na
pamäťovú kartu SD (MMC) vloženú do prístroja. Pokiaľ sú k dispozícii obe médiá bude
záznam uložený do pamäti komponentu USB.
ZÁZNAM Z CD AUDIO
Je možný záznam jedinej skladby alebo celého disku
• Pre záznam prehrávanej skladby zobrazte na displeji stlačením tlačidla RECORD údaj
USB & REC. Po ukončení záznamu bude automaticky ukončené prehrávanie.
• Pre záznam celého disku vložte do prehrávača disk a po jeho vyhodnotení stlačte
tlačidlo RECORD. Na displeji bude zobrazený údaj USB & REC.
• Po ukončení záznamu bude automaticky ukončené prehrávanie.
Doplňujúce informácie
• Pre ukladanie vytvorených súborov záznamov je prístrojom vytvorená zložka AUDIO.
Page 30

- 10 -
• Pre záznam sú používané vzorkovací kmitočet 44,1 kHz a rýchlosť toku dát 128
kb/sek.
• Nie je zaznamenávaný názov skladby.
• Záznam je ukončený automaticky - záznam ukončený užívateľom nebude uložený.
KOPÍROVANIE SÚBOROV MP3 / WMA
Pokiaľ bude do prehrávača namiesto CD audio vložené CD-R so záznammi súborov MP3
resp. WMA budú po stlačení tlačidla RECORD tieto súbory prekopírované na pamäťovú
kartu SD (MMC).
ZÁZNAM Z GRAMOFÓNOVEJ PLATNI
• Pre záznam z gramofónovej platne prepnite prepínač POWER OFF / FUNCTION do
polohy PHONO, do gramofónu vložte gramofónovú platňu a pre zahájenie záznamu
stlačte tlačidlo RECORD.
• Na displeji bude zobrazený údaj USB a bude zahájený záznam. Zaznamenané súbory
budú ukladané vo formáte MP3 do pamäti komponentu USB.
• Po ukončení záznamu stlačte a pridržte stlačené tlačidlo RECORD a vyčkajte na
prepnutie prístroja do režimu PHONO.
Nastavenie rýchlosti toku dát pre záznam z CD alebo z gramofónovej platni do
pamäti komponentu USB
1. Prepnite prepínač POWER OFF / FUNCTION do polohy PHONO a nechajte prístroj
v režime „Stop“.
2. Stlačte tlačidlo BITRATE – na displeji bude zobrazený údaj označujúci východziu
rýchlosť toku dát (128 kb/sek).
3. Tlačidlami SKIP /SEARCH špecifikujte požadovanú rýchlosť toku dát pre záznam (32;
64; 128; 192 alebo 256 kb/sek).
4. Potvrďte tlačidlom BITRATE.
ZÁZNAM Z KAZETY
1. Prepnite prepínač POWER OFF / FUNCTION do polohy TAPE a
potom stlačte
tlačidlo RECORD. Na displeji začne blikať údaj USB alebo CARD a potom údaj REC.
2. Zahájte prehrávanie kazety.
3. Pre ukončenie záznamu stlačte a pridržte stlačené tlačidlo STOP a vyčkajte na
zobrazenie údaju TAPE na displeji, potom tlačidlo uvoľnite.
ODPOJENIE KOMPONENTU USB OD PRÍSTROJA / VYBRATIE PAMÄŤOVEJ KARTY
Z PRÍSTROJA
• Vypnite prístroj príp. prepnite prístroj na spracovanie signálu z iného zdroja (napr. na
príjem rozhlasu).
• Od prístroja odpojte komponent USB príp. z prístroja vyberte (po predchádzajúcom
zatlačení na doraz a následným uvoľnením) pamäťovú kartu SD (MMC).
PREHRANIE KAZETY
1. Pre prehranie kazety prepnite prepínač POWER OFF/ FUNCTION do polohy TAPE.
2. Prehrávanie kazety bude po jej zasunutí do slotu pre kazetu zahájené automaticky.
Page 31

- 11 -
3. Pre rýchle previnutie pásky v kazete vpred stlačte v priebehu prehrávania do polovice
jeho dráhy tlačidlo TAPE FORWARDS / EJECT. Ďaľším ľahkým stlačením tlačidla
bude prehrávanie kazety pokračovať.
4. Pre ukončenie prehrávania stačte tlačidlo TAPE FORWARDS / EJECT na doraz –
prehrávanie kazety bude ukončené a kazeta bude vysunutá zo slotu pre kazetu.
5. Vysunutú kazetu vyberte zo slotu a uložte ju do jej obalu.
DOPLŇUJÚCE INFORMÁCIE
NASADENIE KRYTU TANIERA GRAMOFÓNU
Kryt nasaďte podľa obrázku.
VÝMENA VLOŽKY PRENOSKY GRAMOFÓNU
Pre výmenu vložky prenosky gramofónu jednou
rukou pridržte držiak prenosky a ťahom druhou
rukou odpojte vložku prenosky od držiaku – viď
obrázok (1).
Potom podľa obrázku (2) opatrne nasaďte novú
vložku prenosky na držiak – musí zaklapnúť.
POKYNY PRE SPRÁVNU LIKVIDÁCIU VÝROBKU
Tento výrobek je označen ako výrobok, na ktorý sa vzťahuje smernica 2002/96/EC o
likvidácii použitých elektrických a elektronických zariadení.
Page 32

- 12 -
Tento symbol na výrobku, jeho príslušenstve alebo obale označuje, že pri
neskoršej likvidácii výrobku (z akýchkoľvek dôvodov) nesmie byť s výrobkom
zachádzané ako s domácim odpadom. Výrobok zlikvidujte jeho predaním na
zberné miesto pre ekologickú likvidáciu použitých elektrických a
elektronických zariadení. Zaistením ich správnej likvidácie zabránite vzniku
potenciálnych rizík pre životné prostredie a ľudské zdravie, ktoré by mohli
vzniknúť nesprávnym zachádzaním s odpadmi.
Okrem toho recyklácia odpadových materiálov napomáha udržaniu prírodných zdrojov
surovín pre budúce generácie.
Podrobné informácie k ekologickej likvidácii tohoto výrobku získate u pracovníka ochrany
životného prostredia miestneho (mestského alebo obvodného) úradu alebo v predajni, v
ktorej ste výrobok zakúpili.
Informácie k prehrávaniu CD-R (RW) so záznammi vytvorenými použitím PC
prehrávača CD – výrobky Roadstar
Prehrávač tohoto prístroja umožňuje prehranie CD-R (RW) so záznammi vo formáte DA
(kópie CD audio) a súborov MP3 (komprimované záznamy hudobných súborov,
vytvorených prostredníctvom PC a vhodných programov. V závislosti na použitom
záznamovom médiu a metóde záznamu (počítačového programu) je možné, že niektoré
disky s takto vytvorenými záznammi nebude prehrávačom tohoto prístroja možné prehrať.
Tento jav neindikuje poruchu prehrávača tohoto prístroja.
TECHNICKÉ ÚDAJE
Napájanie
- prístroj
- diaľkový ovládač
230 V stried., 50 Hz
2 ks batérií AAA (UM-4)
Rozhlasový prijímač
- kmitočtové rozsahy FM 87,5 – 108 MHz
AM 522 – 1 620 kHz (pásmo stredných vĺn)
Zmeny designu a technických údajov vyhradené bez predchádzajúceho oznámenia.
 Loading...