


GC9155CN06EFM1.qxd 2/16/06 09:07 Page 1
Electric Ice Cream Maker
GC9155-CN
Owner’s Guide
READ AND SAVE THESE INSTRUCTIONS
GC9155CN06EFM1.qxd 2/16/06 09:07 Page 2
IMPORTANT SAFEGUARDS
When using electrical appliances, basic safety precautions should always be followed, including the following:
1.Read all instructions before using.
2.To protect against fire, electric shock and personal injury, do not immerse appliance, its cord or plug, in water or other liquid.
3.Close supervision is necessary when any appliance is used by or near children.
4.Unplug from outlet when not in use, before putting on or taking off parts, and before cleaning.
5.Avoid contact with moving parts. Keep hands, hair, clothing, as well as spatulas and other utensils away during operation to reduce the risk of injury to persons and/or damage to the appliance. DO NOT USE
SHARP OBJECTS OR UTENSILS INSIDE THE FREEZER RING AND FREEZER BOWL! Sharp objects will scratch and damage the inside of the Freezer Ring and Freezer Bowl. A rubber spatula or wooden spoon may be used, when the appliance is in the OFF position.
6.Do not operate any appliance with a damaged cord or plug, or after the appliance malfunctions or is dropped or damaged in any manner. See warranty to return for examination, repair or electrical or mechanical adjustment.
7.The use of attachments not recommended or sold by the appliance manufacturer may result in fire, electric shock or personal injury.
8.Do not use outdoors.
9.Do not let cord hang over edge of table or counter, or touch hot surfaces, including the stove.
10.To disconnect press the switch to OFF, then unplug from wall outlet.
11.Do not expose the Freezer Ring and Freezer Bowl to temperatures above 105° F/41°C.
12.Do not place Freezer Ring, Freezer Bowl or Ice Cream Freezer Base in the dishwasher.
SAVE THESE INSTRUCTIONS
This appliance is for HOUSEHOLD USE ONLY. No user-serviceable parts inside. Power Unit never needs lubrication. Do not attempt to service this product.
POLARIZED PLUG
This appliance has a polarized plug (one blade is wider than the other). To reduce the risk of electric shock, this plug is intended to fit into a polarized outlet only one way. If the plug does not fit fully into the outlet, reverse the plug. If it still does not fit, contact a qualified electrician.
Do not attempt to modify the plug in any way. If the plug fits loosely into the AC outlet or if the AC outlet feels warm do not use that outlet.
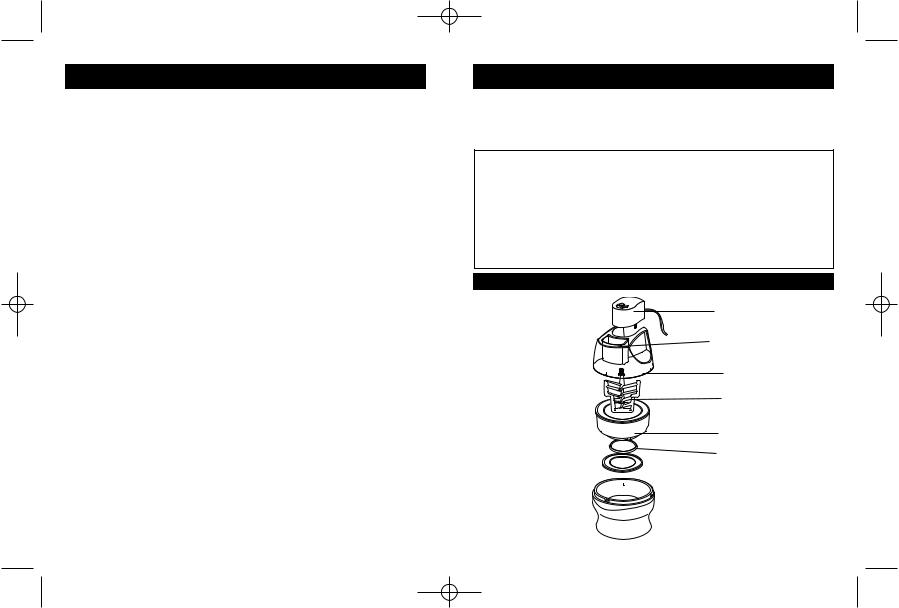
KNOW YOUR ICE CREAM MAKER
FIG. 1
Motor Unit
Ingredient Chute
Cover
Mixing Paddle
Freezer Ring
Sealing Ring
 Freezer Bowl
 Freezer Base
-E2- |
-E3- |

GC9155CN06EFM1.qxd 2/16/06 09:07 Page 4
BEFORE YOU USE YOUR ICE CREAM MAKER
Wash all parts according to the “HOW TO CLEAN YOUR ICE CREAM MAKER” section in this manual.
PREPARING THE FREEZER BOWL
Your Ice Cream Maker features a double insulated Freezer Ring and space-saving Freezer Bowl that require thorough freezing before use. Remove the Sealing Ring from the bottom of the Freezer Ring. Place the Freezer Bowl inside the Freezer Ring (Fig. 2), wrap them in a plastic bag, and store them upright in the back of your freezer where the temperature is the coldest.
Wrapping your Freezer Bowl and Freezer Ring, in a plastic bag, will guard against freezer burn. For optimal freezing results, we recommend a minimum freezing period of 24 hours.
NOTE: Storing the Freezer Bowl and Freezer Ring in the freezer will ensure you are ready to make ice cream on short notice.
HOW TO USE YOUR ICE CREAM MAKER
Your ice cream maker can make up to 1.5 quarts of ice cream. Due to an increase in volume during preparation, the maximum amount must not exceed 1 quart of liquid.
NOTE: It is extremely important that you prepare the ice cream mixture before you remove the Freezer Bowl and Freezer Ring from the freezer. Both the Freezer Bowl and the Freezer Ring must be used immediately when you remove them from the freezer, or they will begin to thaw which will jeopardize making/freezing the ice cream.
FIG. 2
Fig. 6
FIG. 3
HOW TO USE YOUR ICE CREAM MAKER (CONT.)
1.To assemble the ice cream maker, slide the Motor Unit into the Cover until it locks into place; the tabs underneath will "click" when secured (Fig. 3).
2.Insert the Mixing Paddle into the Motor Opening (Fig. 4).
3.Remove the Freezer Bowl and Freezer Ring from freezer.
4.Place the Sealing Ring onto the bottom of the Freezer Ring (Fig. 5). NOTE: Always use this Sealing Ring when making ice cream to ensure a tight seal between the Freezer Ring and Freezer Bowl.
5.Slide the tabs on the top of the Freezer Bowl into the underside of the Freezer Ring. Rotate the Freezer Ring counter-clockwise and lock it onto the Freezer Bowl (Fig. 5).
6.Place the Freezer Bowl assembly into the Freezer Base (Fig.6).
7.Place Cover assembly onto the Freezer Base and turn the Cover counter-clockwise until the tabs lock into place (Fig. 7).
8.Insert the plug into a wall outlet and immediately press the switch to the ON position.
NOTE: Unit must be operating before ice cream mixture is added because ice cream will begin to freeze and the Mixing Paddle will not operate properly.
9.Pour the prepared ice cream mixture through Ingredient Chute.
10.Allow the Ice Cream Maker to run until the mixture reaches the desired consistency. Do not turn the
FIGFig. .7 4
FIG. 5
FigFIG. 5 . 6
FIG. 7
Fig. 8
-E4- |
-E5- |
GC9155CN06EFM1.qxd 2/16/06 09:07 Page 6
HOW TO USE YOUR ICE CREAM MAKER (CONT.)
appliance off during use, as the mixture may freeze and prevent the movement of the Paddle.
NOTE: To add ingredients after the freezing process has begun, gently add through the Ingredient Chute. Additional ingredients such as candy, nuts or cookies should be coarsely chopped.
11.Turn the switch to OFF and unplug from wall outlet. Remove the Cover and Mixing Paddle from the ice cream. Only use rubber, plastic, or wooden utensils to serve from the Freezer Bowl. Metal utensils may damage the Freezer Bowl and Freezer Ring.
12.To further harden the ice cream, you may put the Freezer Bowl and Freezer Ring with its contents into the freezer for 30 minutes or less. However, you should store the ice cream in a separate airtight container.
|
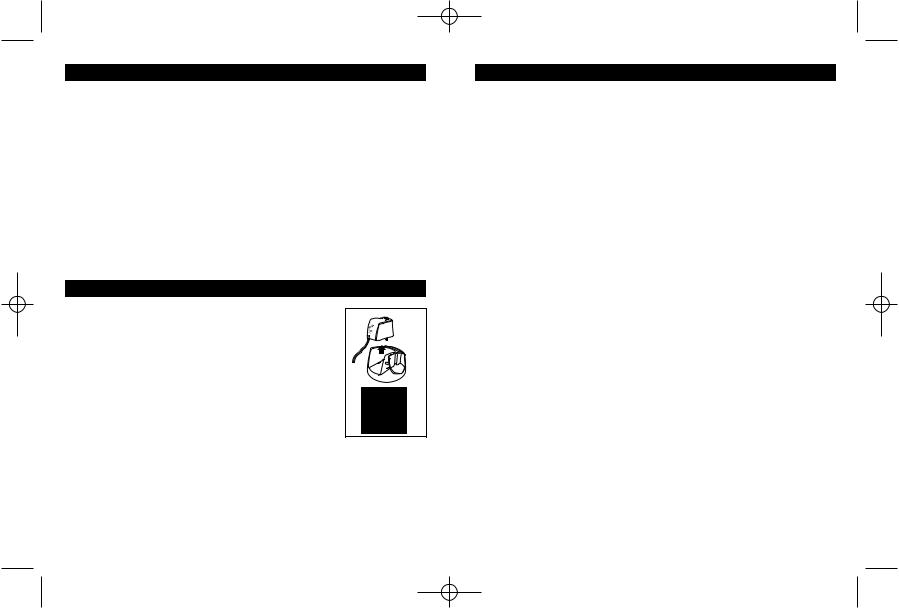
HOW TO CLEAN YOUR ICE CREAM MAKER |
|
1. |
Remove the Motor Unit from the Cover (Fig.8). |
FIG. 8 |
2. |
Disassemble the rest of the Ice Cream Maker and |
Fig 6 |
|
||
|
wash the Cover, Mixing Paddle, Freezer Ring, |
|
|
Sealing Ring, Freezer Bowl, and Freezer Base in |
|
|
warm water with mild detergent; thoroughly dry |
|
|
all parts. |
|
Do not use sharp utensils, scouring pads, or abrasive detergents when cleaning Freezer Bowl and Freezer Ring. Never place the Freezer Bowl or Freezer Ring in the freezer if it is still wet.
3.Clean the Motor Unit with a damp cloth. Never immerse the Motor Unit in water.
Do not wash the Freezer Bowl or Freezer Ring in dishwasher!
HELPFUL HINTS
•Some recipes require the mixture to be pre-cooked. Prepare the recipe, chill it in the refrigerator for at least 2 hours, and mix the recipe well right before adding it to the Ice Cream Maker.
•When pouring mixture into the Freezer Bowl assembly, be sure to stop at least 1" (2.5 cm) from the top of Freezer Ring, as mixture will increase in volume during the freezing process. Do not add more than 1 quart of liquid mixture.
•To include alcohol in a recipe, add alcohol at the end of the freezing process.
•The flavor of a sorbet depends greatly on the ripeness and sweetness of the fruit and/or juice. If fruit is too tart, add sugar; if the fruit is very ripe, decrease or omit the sugar.
•Artificial sweeteners can be used as a substitute for sugar. NOTE: Heat affects the sweetness of artificial sweetener. Only add artificial sweeteners to mixtures that are cold or have been cooled completely. When a recipe calls for heating liquid to dilute sugar, omit the heating process and simply stir in the sweetener until it is dissolved.
•The ice cream mixture should be liquid when the Ice Cream Maker starts churning. Do not use stiff mixtures (i.e. whipped cream, partially frozen mixture).
-E6- |
-E7- |

GC9155CN06EFM1.qxd 2/16/06 09:07 Page 8
HELPFUL HINTS (CONT.)
•Possible reasons for mixture not freezing:
-The Freezer Bowl assembly was not cold enough.
-The mixture was too warm.
-The proportion of ingredients was incorrect.
•To prevent freezer burn, do not store the prepared ice cream in the Freezer Bowl assembly for more than 30 minutes.
AUTO SAFETY SHUTOFF:
The Ice Cream Maker is equipped with an auto safety shutoff. Should the motor become overheated it will turn off. In order to restart the Ice Cream Maker, follow the steps below:
1.Unplug the Ice Cream Maker.
2.Wait at least 20 minutes for the motor to cool.
3.Plug in and operate normally.
WASTE DISPOSAL
The liquid in the Freezer Bowl and Freezer Ring contains no toxic materials. Dispose as normal household waste.
RECIPES
HINT FOR LOWER-FAT RECIPES
For lower fat content, substitute 1% milk for whole milk, whole milk for half and half; and evaporated skim milk for whipping cream. Higher fat dairy products – such as whipping cream – create a smooth, rich and creamy dessert. Lower fat dairy products create a lighter dessert with a slightly different texture.
RECIPES
BUTTERED ALMOND FUDGE ICE CREAM
Scrumptious creamy ice cream swirled with buttered almonds and chocolate fudge topping.
2 cups 10% cream |
1 tbsp pure vanilla extract |
||
4 egg yolks |
2 tbsp butter |
||
3 |
/ cup light brown sugar |
2 |
/ cup slivered almonds |
4 |
3 |
||
1 cup 35% whipping cream |
1 |
/ cup chocolate fudge topping |
|
|
|
2 |
|
In saucepan, heat 10% cream over medium heat, stirring occasionally, just until bubbles form around edge. In bowl, whisk egg yolks and sugar until well blended. Gradually whisk in about 1 cup of hot cream into beaten egg yolks. Return egg mixture into pan; cook over medium-low heat, stirring constantly, until thick enough to coat back of wooden spoon, about 8-10 minutes.
Immediately strain through sieve into large bowl; stir in 35% whipping cream and vanilla. Cover and refrigerate for at least 3 hours or overnight.
In small skillet, melt butter over medium heat; sauté almonds until golden brown, about 3 minutes; cool to room temperature.
Whisk cooled almonds into ice cream mixture. Pour mixture into ice cream canister and follow manufacturer’s instructions as directed on pages 4-5. After 35 minutes of freezing, gradually pour chocolate fudge topping through the mixing feeder, stop machine when all the topping has been added.
Makes about 6 cups
OLD FASHIONED VANILLA ICE CREAM
This is delectable old fashioned vanilla ice cream at its classic best-very soft, rich and creamy.
2 cups 18% table cream |
Dash salt |
|
6 egg yolks |
1 cup whipping cream |
|
2 |
/ cups sugar |
1 tbsp pure vanilla extract |
3 |
|
|
In saucepan, heat 18% cream over medium heat, stirring occasionally, just until bubbles form around the edge. In bowl, whisk egg yolks, sugar and salt until well blended. Gradually whisk about 1 cup of hot cream into beaten egg yolks. Return egg mixture into pan; cook over medium-low heat, stirring constantly, until thick enough to coat back of wooden spoon, about 6 -8 minutes.
Immediately strain through fine sieve into large bowl; cover and refrigerate until well chilled, at least 3 hours or overnight.
Whisk in whipping cream and vanilla. Pour mixture into ice cream canister and follow manufacturer’s instructions as directed on pages 4-5.
Variations: same as in recipe on page 13
Makes 4 cups
-E8- |
-E9- |
 Loading...