

Page 1
OPERATING INSTRUCTIONS
SETUP & ADMINISTRATOR REFERENCE
Read this manual carefully before you use this product and keep it handy for future
reference.
For safety, please follow the instructions in this manual.
Page 2

Introduction
To get maximum versa tility from this machin e all opera tors shoul d carefull y read and f ollow th e instructions in this manual. Please keep this manual in a handy place near the machine.
Please read the Safety Informat ion in the “Operat ing Instruc tions” before u sing this machine. It contains
important information related to USER SAFETY and PREVENTING EQUIPMENT PROBLEMS.
Trademarks
Adobe, Acrobat are registered trademarks of Adobe Systems Incorporated.
IBM, NuOffice are re gistere d trade ma rks of Intern ationa l Busi ness Mach ines Co rpor ation in the United
States.
Lotus, Lotus Notes are registered trademarks of Lotus Development.Corporation.
Microsoft, and Windows are registered trademarks of Microsoft Corporation in the United States and/
or other countries.
Netscape, Netsca pe Navigat or are re gistered tra demarks of Netscap e Communi cations Corporati on in
the United States and/or other countries.
Salutation is a registered trademark of Salutation Consortium Inc..
Other product names us ed herei n are for iden tifica tion purp oses on ly and migh t be tradem arks of th eir
respective companies. We disclaim any and all rights to those marks.
Note
The proper names of Windows operating system are as follows:
®
•Microsoft
Windows® 95 operating system
•Microsoft® Windows® 98 operating system
•Microsoft® Windows NT® Server network operating system Version 4.0
®
•Microsoft
Windows NT® Workstation operating system Version 4.0
Page 3

TABLE OF CONTENTS
Overview..................................................................................................... 1
Setup Order................................................................................................ 4
1.Setup
System Requirements............................................................................... 5
Computer ................ ................................................................................. ..... 5
Mailing Environment........................................... ... ... .. ... .... . ... .... . ... .... . ..... .. . ... 6
ScanRouter Professional Station Setup.................................................. 8
Windows NT Environment Settings............................................................... 9
Administrator Account Settings..................................................................... 9
Installing Option Pack 4.............................................................................. 12
Maximum Connections Setting ................................................................... 14
Installing the Mail Software......................................................................... 15
Reinstalling the Service Pack...................................................................... 16
Mail Software Settings and Transmission/Reception Check....................... 16
ScanRouter Professional Station Software Installation...................... 17
Stopping the WWW Service........................................................................ 17
Installing ScanRouter Professional Station Software.................................. 18
Initial Settings After Installation................................................................... 20
Starting the WWW Service.......................................................................... 24
Setup of Modem and Fax Delivery Application.................................... 26
Modem Installation...................................................................................... 26
Fax Delivery Application Setup................................................................... 27
Uninstalling ScanRouter Professional Station Software..................... 30
ScanRouter for Admin Operations........................................................ 31
Viewing the Menu Page (Top Page)........................................................... 31
Quitting ScanRouter for Admin ................................................................... 32
Initial Settings After Installation............................................................. 33
Setting the Administrator Password............................................................ 33
Setting the Mail Address............................................................................. 34
Selecting a Notification Method................................................................... 35
Selecting a Printer....................................................................................... 35
Creating a User Folder................................................................................ 36
Creating a Group Folder ............................................................................. 38
Configuring the System Environment.......................................................... 40
Fax Delivery Setting................................................................................ 41
Fax Delivery Overview................................................................................ 41
ScanRouter Professional Station Settings for Fax Delivery........................ 45
Sender’s Fax Operations ......................................................... ................... 47
i
Page 4

2.Systems Management and Operations
Starting and Stopping ScanRouter Professional Station.................... 49
Starting the Station...................................................................................... 49
Stopping the Station .................................................................................... 49
Daily Operations...................................................................................... 50
Checking Undelivered Documents.............................. ................... ............. 50
Checking the Fax Reception Folder............................................................ 51
System Maintenance with ScanRouter Maintenance Tool.......................... 52
Partial Backup............................................................................................. 54
Checking the Free Disk Space.................................................................... 54
Address Book Management............................................................. ........... 55
TSI Table Management............. .................. ..................................... ........... 55
Adding a New User................ ..................................................................... 55
ScanRouter Maintenance Tool............................................................... 56
[
Directory
Backup
[
Restore
[
Rescue
[
Optimization
[
Initialization
[
Log
[
Environment Settings
[
]
tab............................................................................................... 56
]
tab................................................................................................. 57
]
tab................................................................................................. 57
]
tab .......................... ....................................................................... 58
]
tab.......................................................................................... 59
]
tab........................................................................................... 59
]
tab ...................................................................................................... 60
]
tab ............................................................................. 60
Notification Messages............................................................................. 61
Error Settings
Notification Messages Defined in
Notification Messages Sent by Mail to the Administrator............................ 62
[
]
.............. ........................... 61
3.Using ScanRouter Professional with Other Systems
Using ScanRouter Plug-in for NuOffice (Salutation Supported)......... 64
System Requirements................................................................................. 64
Settings for Delivering Documents to NuOffice........................................... 67
Settings for Sending Mail to Notes Users ................................................... 68
Delivering a Document to the Shared Folder........................................ 70
System Requirements................................................................................. 70
Settings for Delivering Documents to a Shared Folder............................... 74
ScanRouter Plug-in................................................................................. 75
System Requirements for Installation (when not shared with the Server) ... 75
Installing ScanRouter Plug-in...................................................................... 76
4.Appendix
Troubleshooting...................................................................................... 77
INDEX........................................................................................................ 80
ii
Page 5

Overview
ScanRouter Professional is the paperless document delivery system, which enables you to transmit and integrate messages (scanned or fax documents)
through the network. The main features of ScanRouter Professional are as follows:
❖
Delivering Documents
Documents scanned with the machine or received by fax can be delivered to
the selected destination by mail.
Note
❒
The term "machine" as described in this manual refers to the diverse delivery device for which this application was designed.
FAX
SCN
FAX
SCN
A
D
SCN
FAX
SCN
FAX
D
B
C
C
A. ScanRouter Professional Station
B. Mail Server
C. Client
D. Delivered by mail
Note
❒
Scanned documents are forwarded to ScanRouter Professional Station
through the network.
TNSX031E
❒
Fax documents are forwarded to ScanRouter Professional Station through
the RS232 cable.
1
Page 6

❒
With ScanRouter Professional, you can make a delivery to the following
mail servers by setting for the receiver’s mail environment.
• POP/SMTP Server
• Microsoft Mail Server
• Microsoft Exchange Server
• Lotus Notes Server
❒
Documents are delivered in one of the following file formats as image data.
•TIFF
• TIFF-F
•DCX
•PDF
•JPEG
2
Page 7
❖
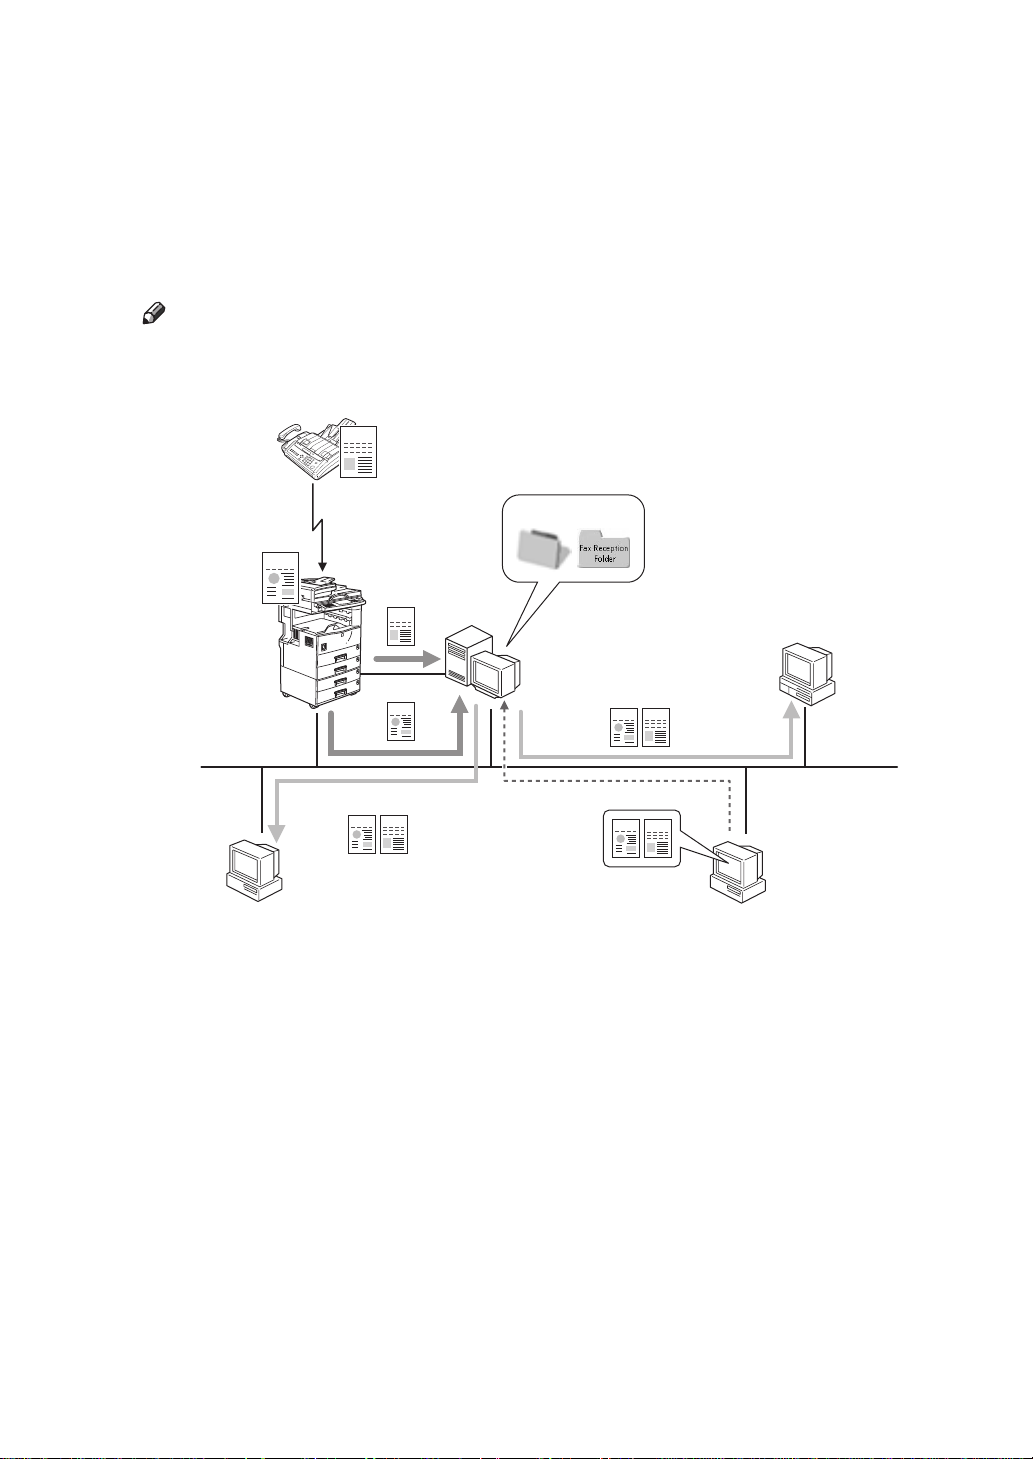
Receiving/Opening Documents
Documents scanned with the machine and documents received by fax can be
saved in ScanRouter Professional Station, and can be displayed from the client computer.
• Saved documents can be received using ScanRouter Client Software and
can be viewed with the appropriate application.
• Saved documents can be viewed using the WWW browser. The documents
can be also downloaded.
Note
❒
For more information about operations from the client computer, see the
“Client Reference”.
FAX
C
SCN
FAX
SCN
E
SCN
FAX
B
A
D
SCN
FAX
F
SCN
FAX
B
B
A. ScanRouter Professional Station
B. Client
C. Saved in Folders
D. Received using Client Software
E. Downloaded using the WWW browser
F. Viewed using the WWW browser
❖
WWW Browser Operations (ScanRouter for Admin)
ScanRouter Professional Station settings can be made using the WWW
browser. You can use this function from a computer on the network, without
installing an exclusive application in the computer.
TNSX041E
3
Page 8

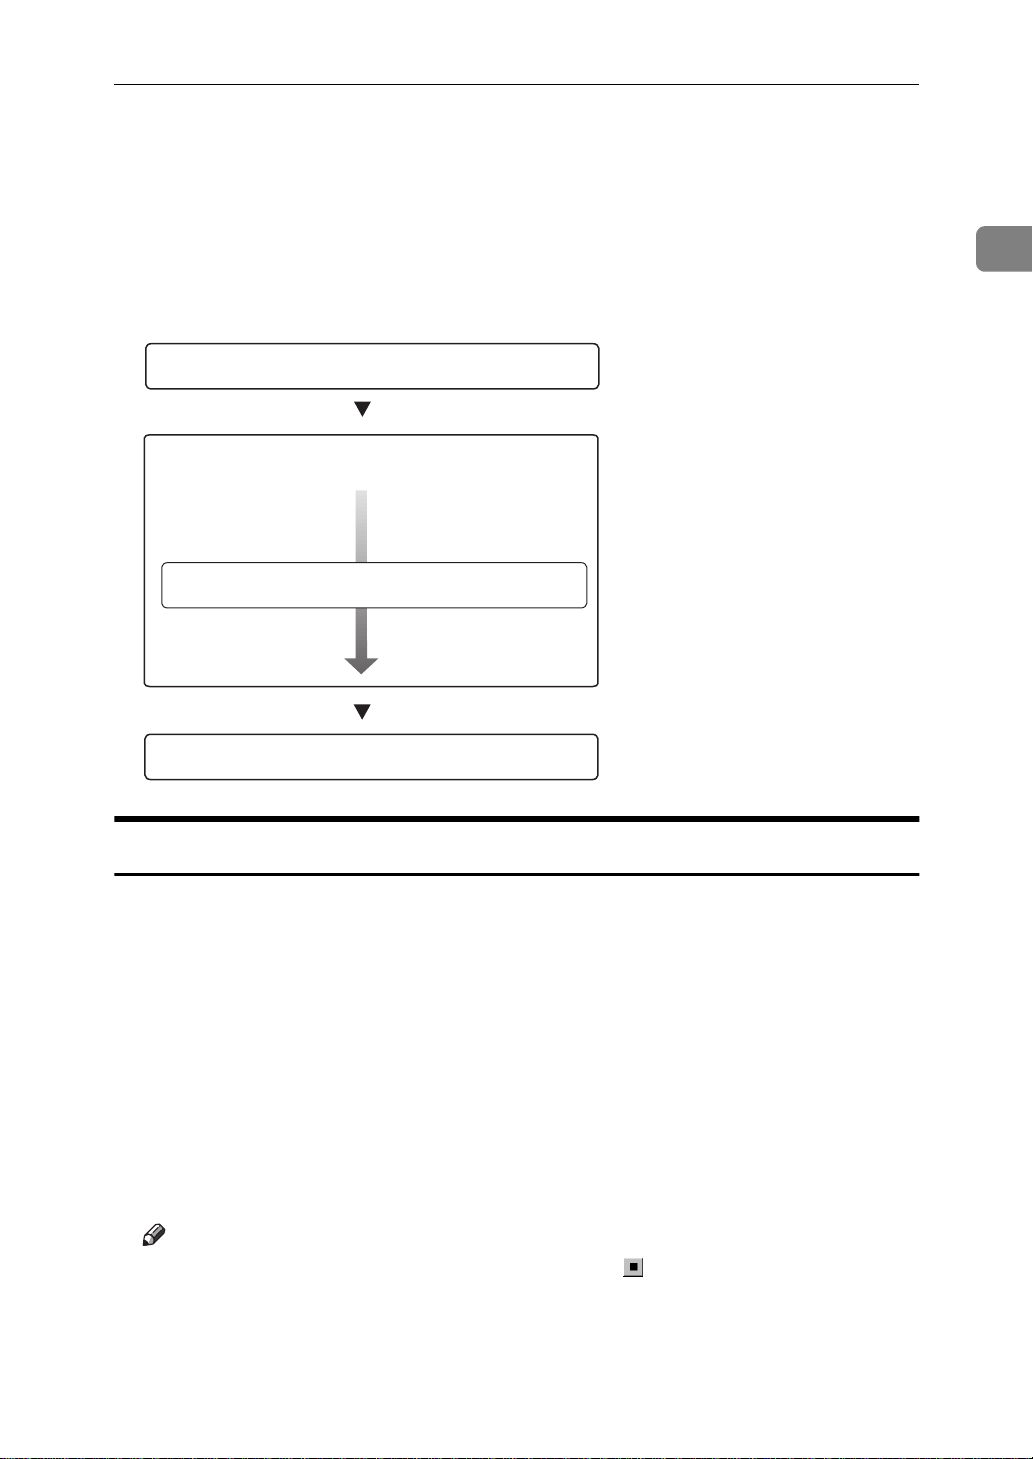
Setup Order
To deliver scanned documents from the machine or fax documents with ScanRouter Professional, follow the procedure below.
A ScanRouter Professional Station Setup
Configure the computer to be used as ScanRouter Professional Station; install
ScanRouter Professional Station Software, and configure the delivery settings
for documents forwarded from the machine.⇒ P.5 “Setup”
B Machine Settings
Configure the delivery settings for scanned or fax documents to be delivered
to ScanRouter Professional Station. For information about settings, see “Scanner & Fax Reference”.
4
Page 9
1. Setup
System Requirements
To use a computer as ScanRouter Professional Station, the computer must meet
the following system requirements.
Computer
Limitation
You cannot install ScanRouter Professional Station Software in a computer where
❒
ScanRouter Station Software is already installed.
Do not install this application in a computer used as a mail server, Web server, da-
❒
tabase, and so on.
❖
CPU
Pentium 233MHz minimum
❖
Operating Systems
• Microsoft Windows NT Workstation 4.0 operating system Version 4.0
• Microsoft Windows NT Server network operating system Version 4.0
Both of the above operating systems require installation of all the following
software.
• Microsoft Windows NT Service Pack 4 or later (Service Pack 5 recommended)
• Microsoft Internet Explorer 4.01
• Microsoft Windows NT Option Pack 4
Note
❒
If installing this application in a Windows NT Server, we recommend that
you install the application in a member server. Do not install this application in a primary domain controller or a backup domain controller.
Limitation
❒
Do not install Microsoft Office 2000, Microsoft Outlook 2000 or Microsoft
Internet Explorer 5.0 into the computer where ScanRouter Professional
Station Software is installed. If these applications have been previously installed on the computer (even if they have been removed since then), Windows NT must be reinstalled before ScanRouter Professional Station
Software is installed.
❒
Under Windows NT, this application does not support RISC based processor (MIPS R Series, Alpha AXP, Power PC).
5
Page 10

1
Setup
❖
RAM
64MB minimum (128MB or more recommended)
❖
Hard Disk Space
At least 32MB of disk space is required for installation.
The computer needs at least 500MB of free disk space (2GB or more recommended) where the application is installed. This space is used for saving documents.
128MB or more disk space is required for virtual memory.
❖
Protocols
TCP/IP protocol
Mailing Environment
Mail Server
When you want to deliver documents by mail, one of the following mail servers
is required.
• POP/SMTP Server
• Microsoft Mail Server
• Microsoft Exchange Server 5.0 or later
• Lotus Notes Server (Release 4.52 to 4.6)
Mail Software
The appropriate mail software for the destination mail server should be installed
for delivery from ScanRouter Professional.
Note
❒
The mail account for ScanRouter Professional Station is required for each mail
software.
❖
Required mail software
Windows Messaging
Note
❒
Windows Messaging can be installed from the Windows NT CD-ROM.
❖
Required mail software depending on the mail server
If you want to use one of the following mail servers, the appropriate mail software for that server is required in addition to Windows Messaging.
A Microsoft Exchange Server 5.0
One of the following clients is required.
• Microsoft Exchange Client 5.0
6
Page 11

• Microsoft Outlook 97
• Microsoft Outlook 98
B Microsoft Exchange Server 5.5
One of the following clients is required.
• Microsoft Outlook 97
• Microsoft Outlook 98
C Lotus Notes Server
• Lotus Notes Client (Release 4.52 to 4.6)
System Requirements
1
7
Page 12
1
Setup
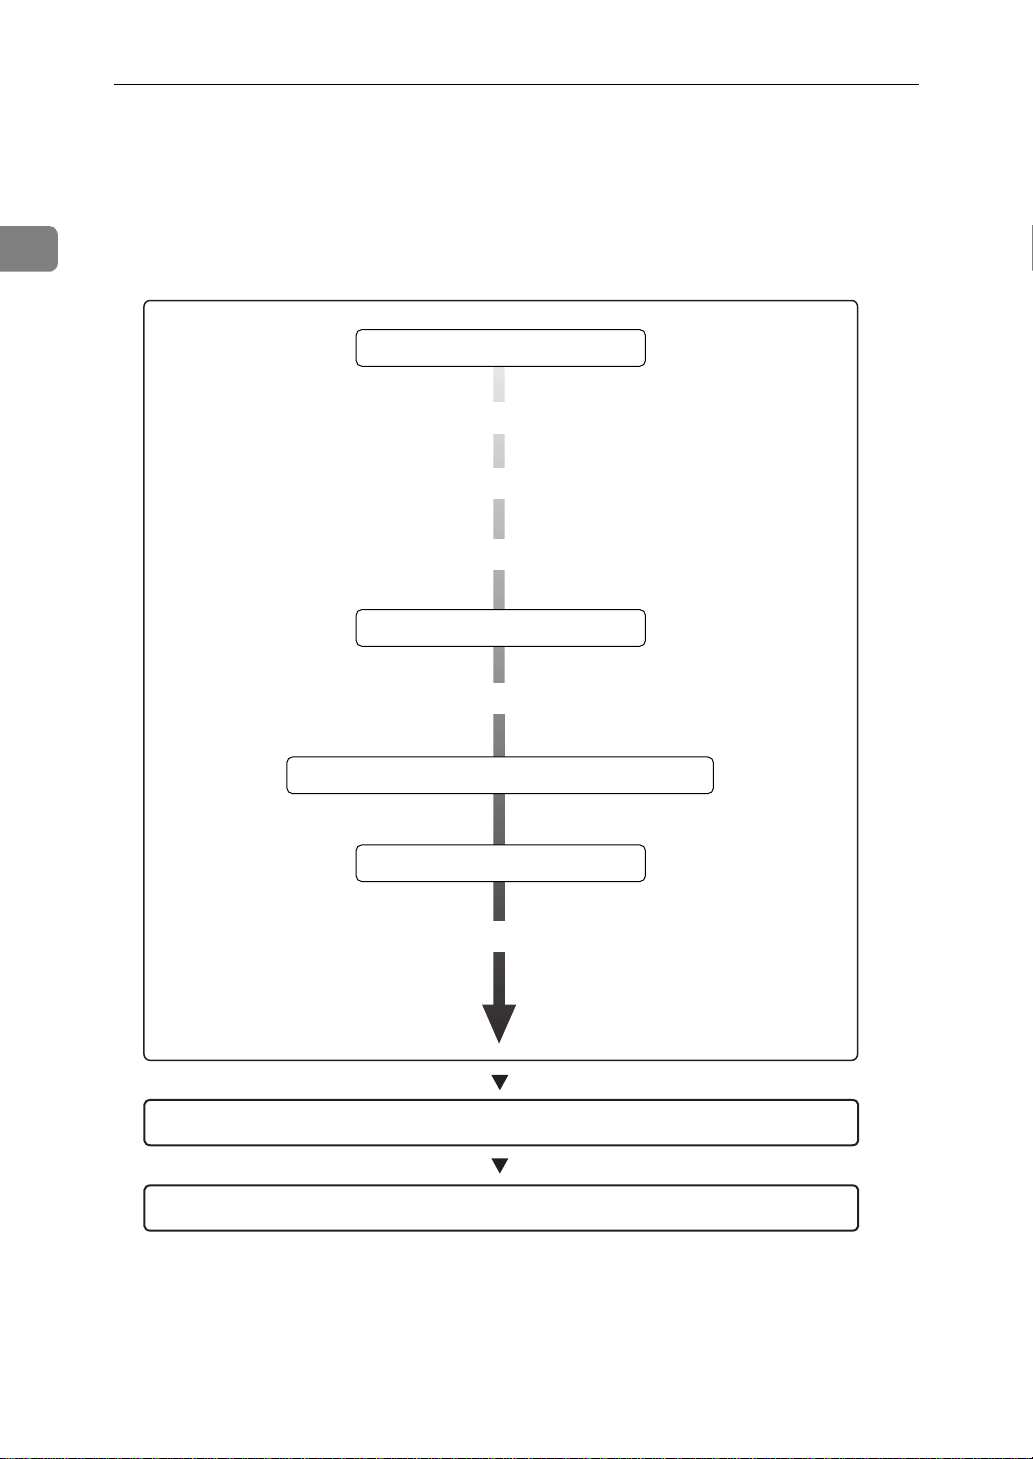
ScanRouter Professional Station Setup
Before installing ScanRouter Professional, you need to set up a computer as
ScanRouter Professional Station.
Follow the steps below after Windows NT installation.
Windows NT installation
Changing the initial value of the virtual memory size
TCP/IP network environment setup
Creating the administrator account
Option Pack 4 installation
Setting the number of maximum connections
Windows Messaging and mail software installation
Service Pack reinstallation
Mail software setup and transmission/reception check
ScanRouter Professional Station installation
Initial setup after installation
8
Page 13

ScanRouter Professional Station Setup
Windows NT Environment Setti ngs
A Install Windows NT 4.0.
Install Windows NT in a computer which meets the system requirements as
described on P.5 “Computer”.
Note
❒
If you want to install Windows NT Server as the operating system in a
computer, do not install Internet Information Server (IIS) in advance. You
will install Internet Information Server later, therefore, be sure not to install it at this time.
B Log on as the Administrator.
C Change the initial value of the Windows NT virtual memory size to 128MB
or higher by opening
tab.
For details about the method of changing, see the Help of Windows NT.
[
System
of
]
[
Control Panel
and clicking the
]
[
Performance
1
]
D Restart the computer.
E Log on as the Administrator.
F Configure the network environment settings.
The TCP/IP protocol is required to use ScanRouter Professional. Get an IP address and configure the TCP/IP settings in Windows NT.
Reference
For more information about the TCP/IP settings, ask the network administrator.
Administrator Account Settings
Create the ScanRouter administrator account for Windows NT, and give the account Administrator permission. You can use an existing account, however, we
recommend to create a new account, “ScanAdmin”, to be used only by ScanRouter Professional.
The procedure for creating an account and setting the permissions is different
depending on whether the station is a member of a domain.
Note
❒
This account is also used for starting ScanRouter Professional.
9
Page 14

1
Setup
When a member of a domain
Preparation
If you want to create a new account, ask the network administrator to create
an account to be used only by ScanRouter Professional.
A Log on as a member of the Administrators group.
B Click
folder and click
C Click to select the
menu, click
User
]
[
The local group properties are displayed.
D Click
A list of the users and groups which belong to the domain is displayed in the
Add Users and Groups
[
[
Start
[
Add
, point to
]
[
User Manager
.
]
[
Programs
[
Administrators
[
Properties
dialog box.
]
]
, point to the
]
or
]
[
User Manager for Domains
from the groups list, and then from the
]
.
[
Administrative Tools (Common)
.
]
E Click to select the ScanRouter Professional administrator name from the
Names
[
If the account is not displayed, check if the correct domain server is selected
from the
list, and then click
]
List Names From
[
drop-down menu.
]
F After the ScanRouter Professional administrator name is added to the
Names
box, click
]
[OK]
.
[
Add
.
]
[
Add
G Make sure that the ScanRouter Professional administrator has been added
to the
Members
[
box, and then click
]
[OK]
.
H Close User Manager.
]
10
Page 15

ScanRouter Professional Station Setup
When not a member of a domain
A Log on as a member of the Administrators group.
B Click
folder and click
C From the
The
[
New User
D Click to clear the
ter the other items.
E Click
F Click to select
.
Add
]
[
Administrators
[
G Click
H Click
, point to
[
Start
]
[
User Manager
menu, click
[
User
]
dialog box appears.
]
[
User Must Change Password a t Next Logon
[
Groups
[
OK
[
OK
.
]
[
Administrators
is added to the
]
.
]
, and then close the
]
I Close User Manager.
[
Programs
[
, point to the
]
.
]
New User
from the
]
[
Member of
[
New User
.
]
[
Administrative Tools (Common)
[
Not member of
list.
]
dialog box.
]
check box, and en-
]
list, and then click
]
]
1
11
Page 16

1
Setup
Installing Option Pack 4
Before installing Option Pack 4, you need to install Service Pack 3 or later and
Internet Explorer 4.01.
Note
❒
You can select to install Service Pack 3 at this time, however, you must install
Service Pack 4 or later afterwards.
❒
Service Pack, Internet Explorer 4.01 and Option Pack 4 are not provided with
this product.
A Install Service Pack 3 or later.
B Install Internet Explorer 4.01.
C Install Option Pack 4.
Note
❒
If you install Service Pack 4 or later in step A, the message informing you
that the operation of Service Pack 4 is not guaranteed appears. However,
you can continue installation.
❒
Select
ing components depending on the operating system you are using.
• Windows NT Workstation
[
Custom
Components Subcomponents Sub-subcomponents
Personal Web Server
(PWS)
Microsoft Data Access
Components 1.5
Microsoft Management Console
NT Option Pack Common Files
Transaction Server Transaction Server Core
as the type of installation, and be sure to install the follow-
]
Internet Service Manager
Personal Web Manager
World Wide Web Server
Data Sources Jet and Access(ODBC)
Oracle
SQL Server
MDAC: ADO, ODBC,
and OLE DB
Components
MDAC Core Files:
ADO, ODBC, and OLE
DB
12
Windows Scripting
Host
Page 17

ScanRouter Professional Station Setup
• Windows NT Server
Components Subcomponents Sub-subcomponents
Internet Information
Server (IIS)
Microsoft Data Access
Components 1.5
Microsoft Management Console
NT Option Pack Common Files
Transaction Server Transaction Server Core
Windows Scripting
Host
❒
You can install additional components not listed in the table above as re-
Internet Service Manager
World Wide Web Server
Data Sources Jet and Access(ODBC)
Oracle
SQL Server
MDAC: ADO, ODBC,
and OLE DB
Components
MDAC Core Files:
ADO, ODBC, and OLE
DB
quired.
1
❒
When the message asking to select
type of installation appears, select
[
Upgrade Only
[
Upgrade Plus
or
]
[
Upgrade Plus
.
]
as the
]
13
Page 18

Setup
Maximum Connections Setting
Set the number of maximum simultaneous connections to the WWW service.
1
A Log on as the ScanRouter Professional administrator.
If logged on with another account, log off the station and then log on as the
ScanRouter Professional administrator.
B Click
to the WWW service folder, and then click
C Double-click the
puter running ScanRouter Professional Station.
D Click to select
menu.
E Click
for the connections depending on the operating system you are using.
• Windows NT Workstation: 40
• Windows NT Server: 60
If you exceed the limit value, a message will be displayed notifying that the
setting is prohibited, however no problems will occur if you set the values cited above.
Note
❒
Since each client unit uses four connections, up to 10 client units can simultaneously connect to ScanRouter Professional Station via the WWW
browser when using Windows NT Workstations, and up to 15 client units
when using Windows NT Server. Thus, configure the above-cited number
of connections.
, point to
[
Start
]
[
Limited To
[
Programs
[
Internet Information Server
[
Default Web Site
in the
]
[
Connections
, point to
]
, and then click
]
[
Windows NT 4.0 Option Pack
[
Internet Service Manager
folder and double-click the com-
]
[
Properties
group and enter the following number
]
from the
]
]
.
]
[
, point
Action
]
F Click
[
OK
.
]
G Close Internet Service Manager.
14
Page 19

ScanRouter Professional Station Setup
Installing the Mail Software
Install the mail software which is used for mail delivery. Windows Messaging
must be installed.
Important
❒
Ask the administrators responsible for each mail system to create an account/
ID for ScanRouter Professional to deliver documents.
❒
The user must log on as the ScanRouter Professional administrator. If logged
on with another account, mail delivery cannot be made correctly.
Note
❒
To deliver mail with Lotus Notes, Notes Client should be installed after installing Windows Messaging. If Notes Client has already been installed, uninstall the software before installing Windows Messaging. Be sure to make a
backup of User ID file, desktop.dsk, and names.nsf, because these files will be
required after the installation.
A Log on as the ScanRouter Professional administrator.
1
If logged on with another account, log off the station and then log on as the
ScanRouter Professional administrator.
B Double-click the
[
C When the confirmation message appears, click
instructions.
Windows Messaging is installed.
icon on the desktop.
Inbox
]
, and then follow the
[
Yes
]
D Install the necessary mail software which is appropriate for the mail server
being used.
15
Page 20

Setup
Reinstalling the Service Pack
After the mail software is installed, at this time install the Service Pack 4 or later.
1
Note
❒
After reinstalling the Service Pack, Windows Messaging will be updated.
Mail Software Settings and Transmission/Reception Check
If you want to deliver documents by mail, log on as the ScanRouter Professional
administrator to configure the mail settings and to check for transmission/reception status.
Note
❒
The user must log on as the ScanRouter Professional administrator.
❒
Select the account/ID for each mail system which is created for ScanRouter
Professional.
❒
Settings depend on the mail software being used. For information about the
settings, consult with the person responsible for the mail.
16
Page 21
ScanRouter Professional Station Software Installation
ScanRouter Professional Station Software
Installation
This section describes ScanRouter Professional Station Software installation.
The installation is made with the following steps. Make sure that all prepara-
tions for the station have been completed before beginning the installation.
Preparing the Station
Stopping the WWW Service
Installing ScanRouter Professional Station Software
Initial Settings after Installation
1
Stopping the WWW Service
Stop the WWW service.
A Log on as the ScanRouter Professional administrator.
If logged on with another account, log off the station and then log on as the
ScanRouter Professional administrator.
B Click
to the WWW service folder, and then click
C Double-click the
puter running ScanRouter Professional Station.
D Click to select
Note
❒
You can also stop the service by clicking the button on the taskbar.
E Double-click the
Computers
[
[
Start
, point to
]
[
Internet Information Server
[
Default Web Site
[
Microsoft Transaction Server
folder.
]
[
Programs
, point to
]
, and then click
]
[
Windows NT 4.0 Option Pack
folder and double-click the com-
]
]
[
Action
.
]
]
[
Internet Service Manager
from the
[
Stop
]
folder and double-click the
]
, point
menu.
17
Page 22

Setup
1
F Click to select
the
[
Action
menu.
]
[
My Computer
, and then click
]
[
Shut Down Server Processes
from
]
G Exit Internet Service Manager.
Installing ScanRout er Professional Station Software
A Insert the CD-ROM that comes with this application into the computer.
The language selection dialog box appears.
If the window doesn’t appear, double-click on “Setup.exe” located on the root
directory of the CD-ROM, to start the Installer.
B Select the language of the application to be installed, and click
C Click
The station installation menu window appears.
D Click
[
ScanRouter Software for Station PCs
[
ScanRouter Professional Station Software
E When the installation confirmation message appears, click
.
]
.
]
[
Yes
F After seeing the information about available free disk space, click
continue.
[
.
]
OK
.
]
[
Yes
]
to
G When the
The license contract for this application is displayed.
H Click
[
Yes
[
Welcome
.
]
dialog box appears, click
]
[
Next
.
]
I Enter the name, the company name and the serial number, and then click
.
Next
]
[
Enter the serial number which is listed on the CD-ROM case.
J When the
nation if required, and then click
Note
❒
With ScanRouter Professional, documents are saved in the drive where
this application is installed. 500MB or more free disk space is required for
saving documents in addition to the space for the application. Check available free disk space.
The installation starts.
[
Choose Destination Location
dialog box appears, change the desti-
]
.
[
Next
]
18
Page 23
ScanRouter Professional Station Software Installation
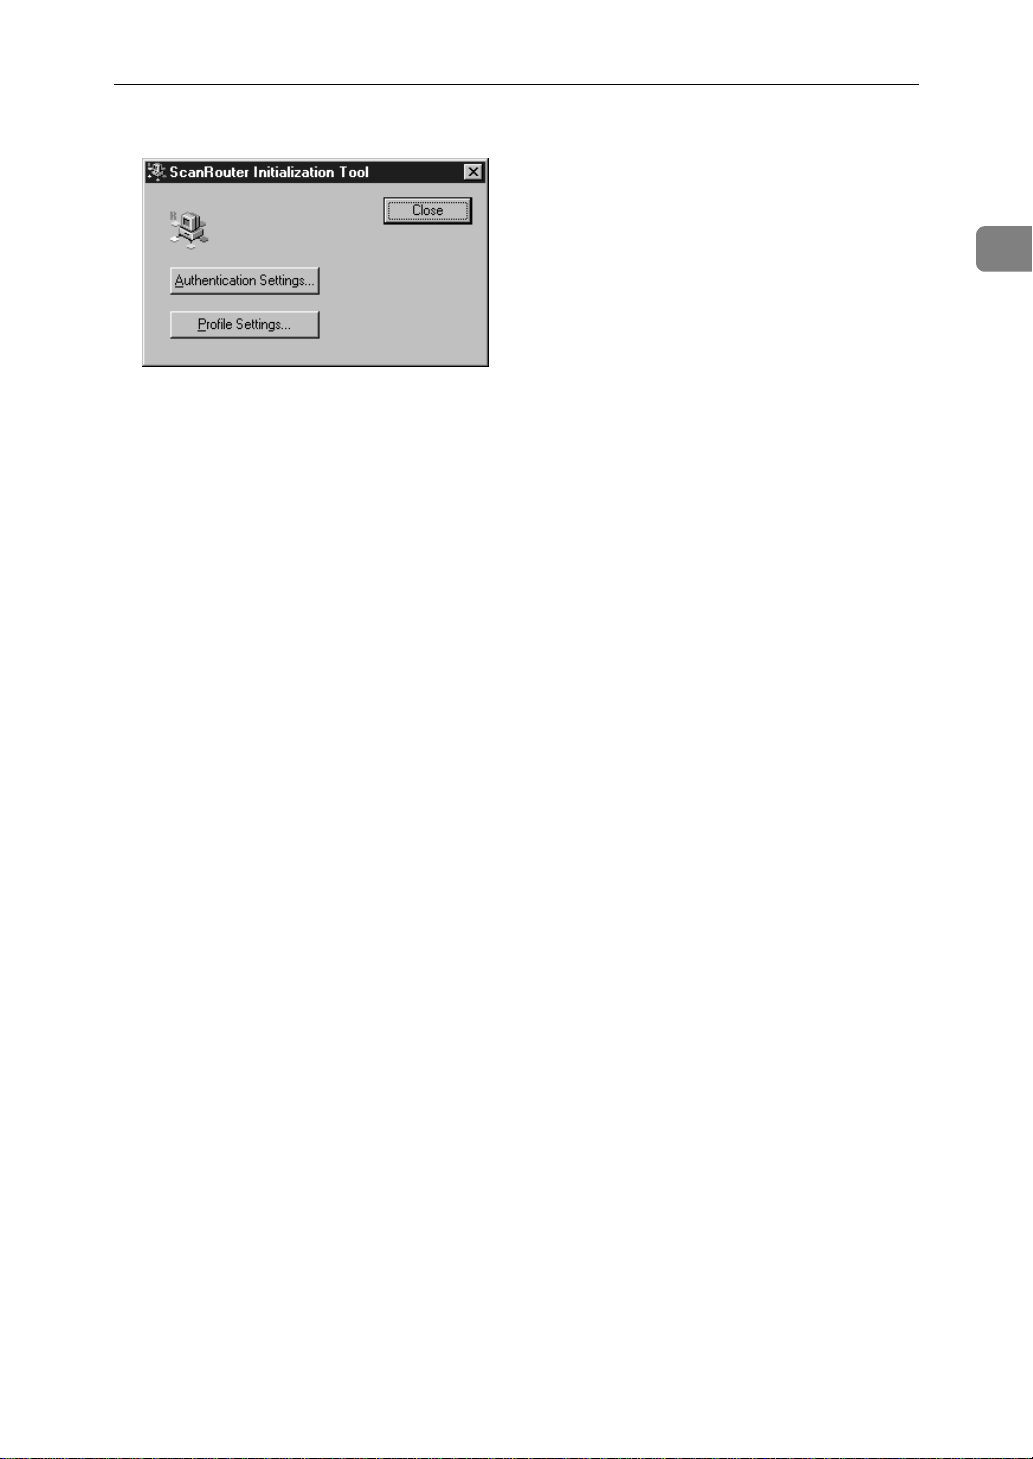
After the installation, ScanRouter Initialization Tool starts automatically.
For the following steps, see P.20 “Initial Settings After Installation”.
1
19
Page 24
1
Setup
Initial Settings After Installation
After the installation of this application is complete, change the Windows NT
settings and create the profiles necessary for mail transmission with Initial Settings Tool.
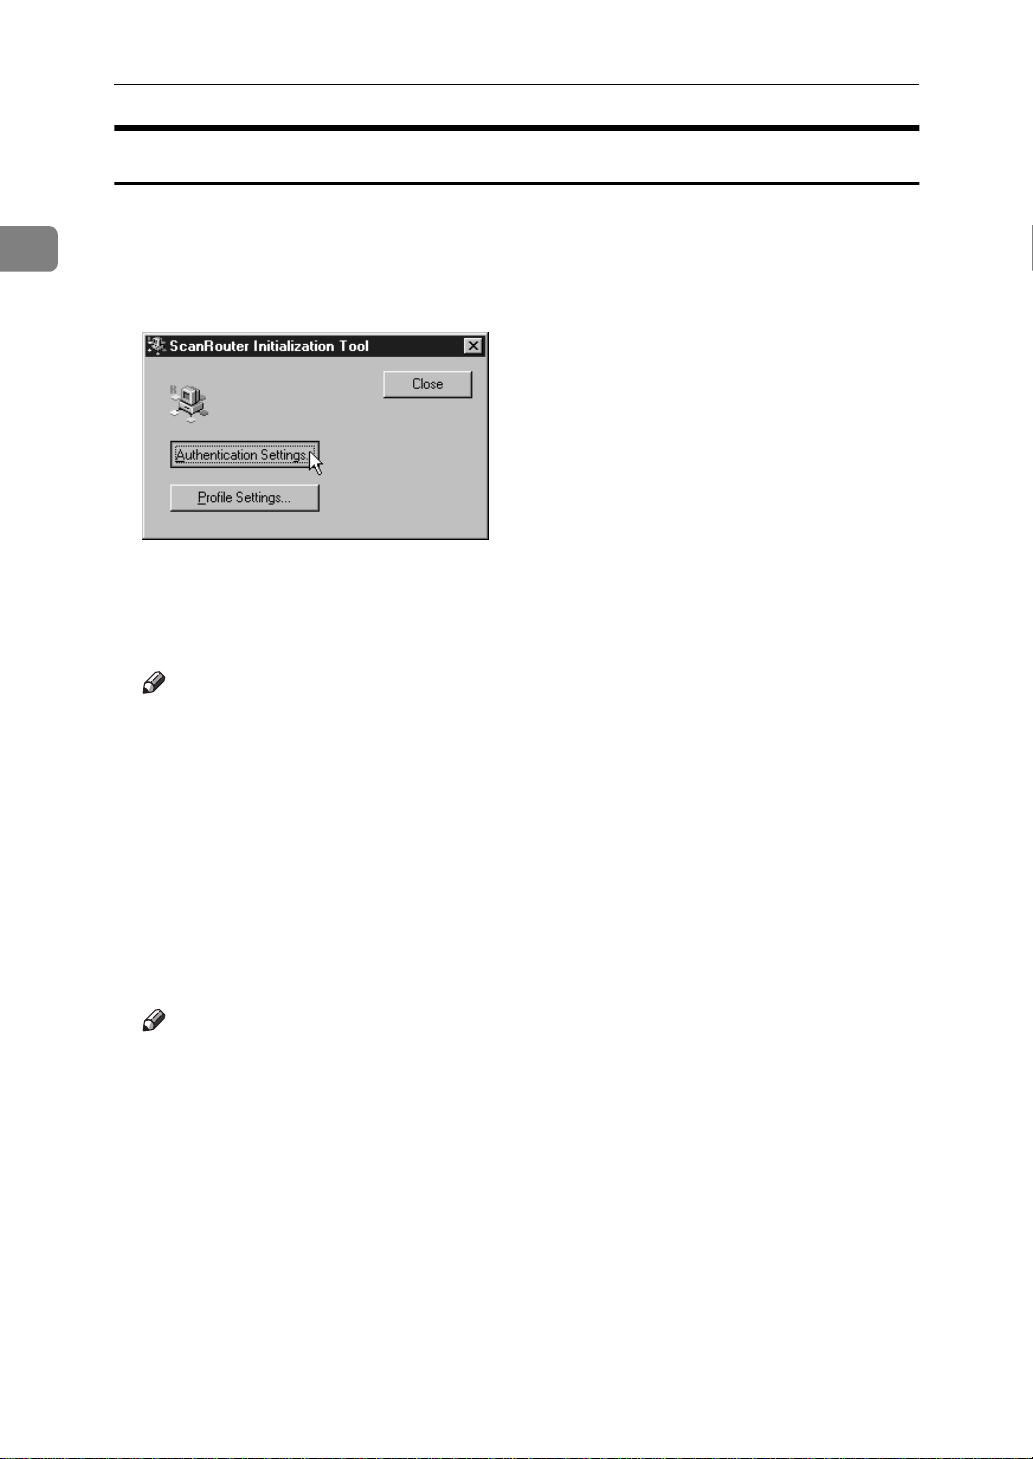
A Click
The password request dialog box appears.
[
Authentication Settings
.
]
B Enter the password of the user currently logged on to Windows NT in the
Password
[
Note
❒
The ScanRouter Professional administrator account is currently used to log
on to Windows NT.
C Click
The Windows NT settings, which are required to run ScanRouter Professional, are changed automatically. After a few seconds, when the shape of the
mouse pointer changes from an hourglass to an arrow, the settings are complete.
box and the
]
.
[
OK
]
[
Confirm Password
box.
]
20
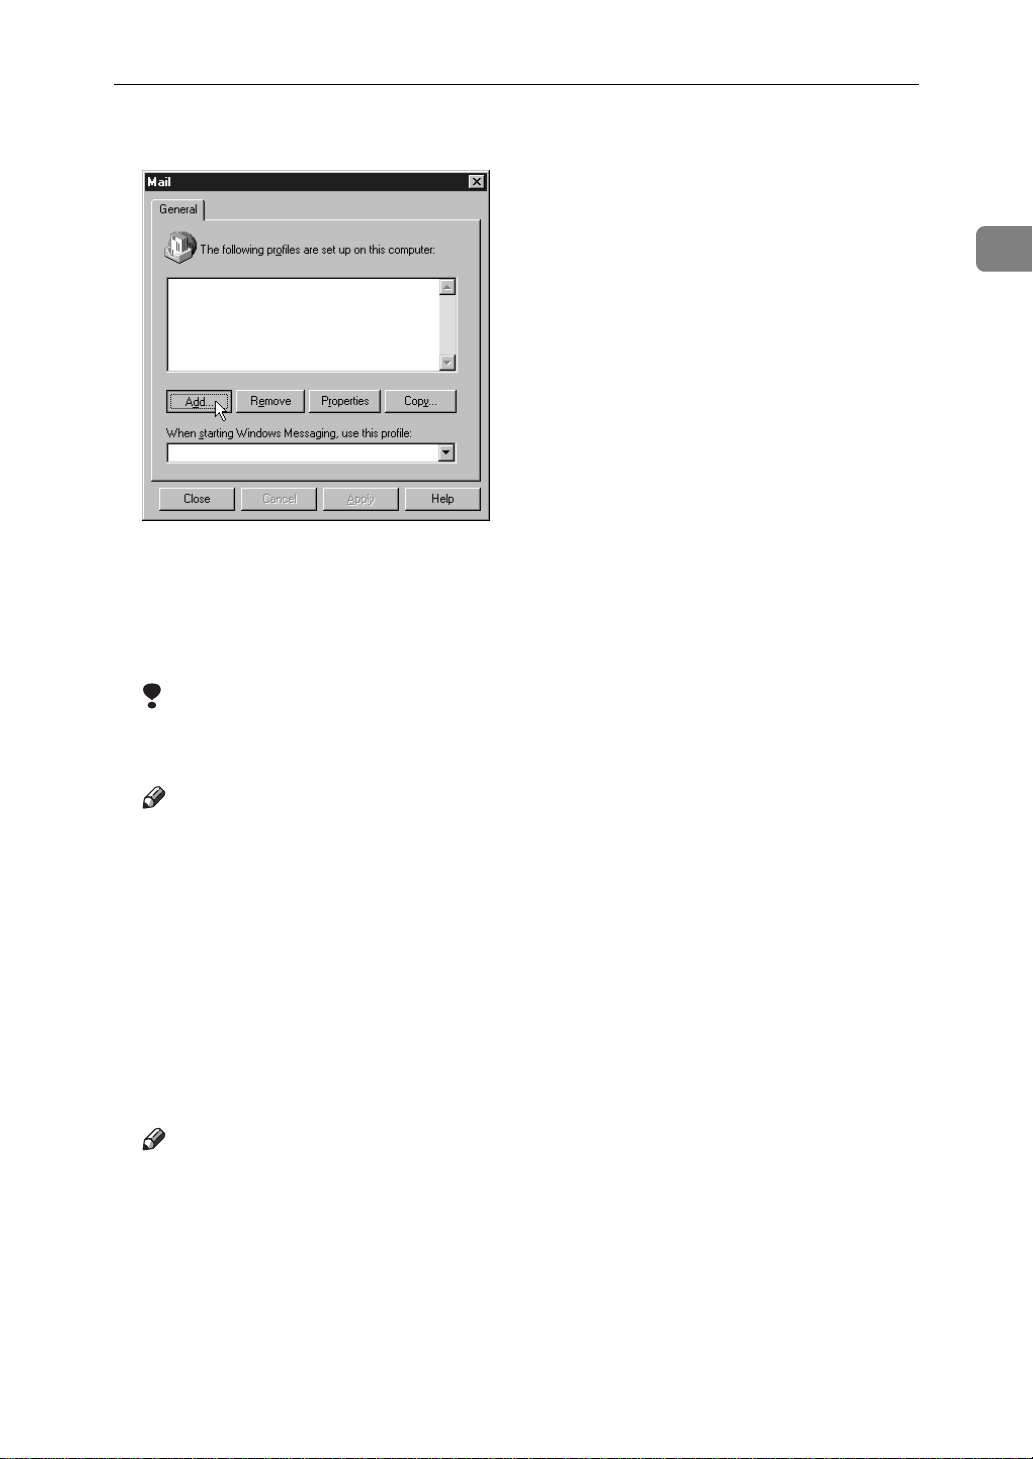
D Click
The
❒
[
Profile Settings
dialog box appears.
[
Mail
]
Note
If another profile has been already created, a window of the profile settings
appears. In this case, click
.
]
[
Show Profiles
.
]
Page 25
ScanRouter Professional Station Software Installation
E Click
The setup wizard window appears.
[
Add
.
]
F Click to select the mail services to be used with ScanRouter Professional
Station.
Select all the services to be used.
Limitation
❒
Make sure that
lect
[
Manually configure information services
[
Use the following information services
.
]
is selected. Do not se-
]
1
Note
❒
Mail software available for ScanRouter Professional is displayed with the
following names:
• POP/SMTP Server…Internet Mail
• Microsoft Mail Server…Microsoft Mail
• Microsoft Exchange Server…Microsoft Exchange Server
• Lotus Notes Server…Lotus Notes Mail
❒
If you will not use a mail service, see P.25 “Information Service Settings Without a Mail Service” for setup. After the setup is complete, go to step O.
G Click
Note
❒
If another profile has been already created in step D, a message appears requesting a new profile name. In this case, enter “ScanRouter Profile” in the
Profile Name
[
considered to be the same, however, a space is required between “ScanRouter” and “Profile”.
[
Next
.
]
box and click
]
. A capital letter and a lower-case letter are
[
Next
]
21
Page 26
Setup
H Configure the necessary settings in the displayed settings dialog box.
Select the account/ID for each mail system to be created for ScanRouter Professional, and follow the instructions to be displayed.
1
Settings depend on the mail software to be used. Consult with the person responsible for the mail software for information about the settings.
After the settings are complete, the profile is automatically saved. The default
profile name is usually “Windows Messaging Settings”, however, sometimes
the name is “Microsoft Exchange Settings” depending on the version.
Note
❒
If “ScanRouter Profile” is entered in step G, the profile name to be saved
will be “ScanRouter Profile”. In this case, go to step K.
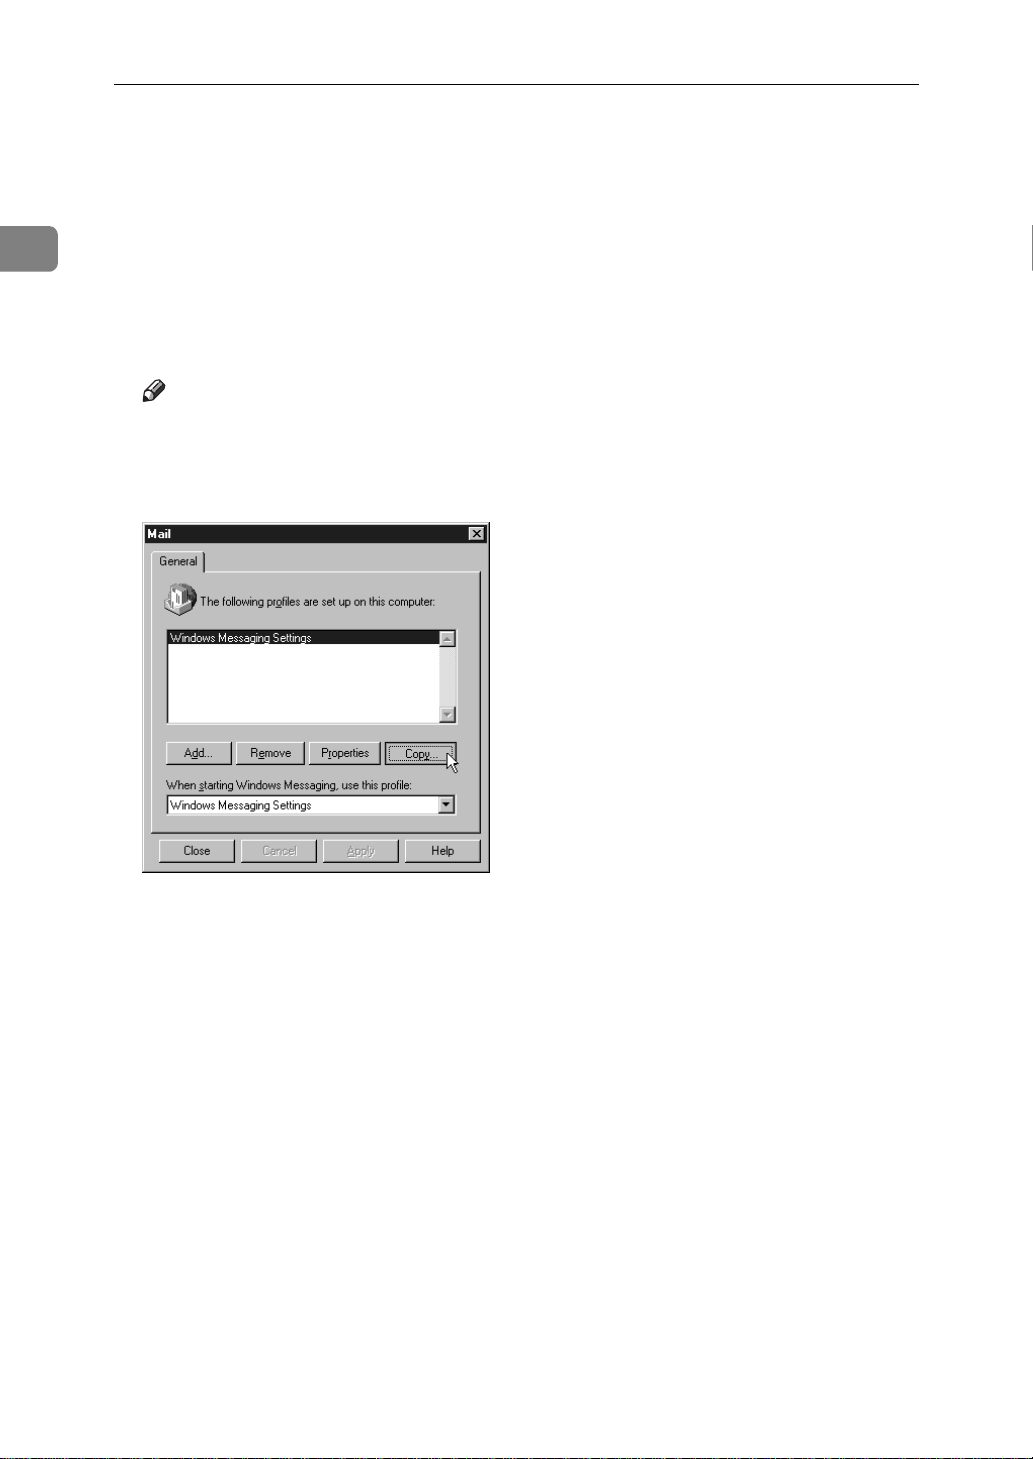
I Click
[
Copy
.
]
J Enter “ScanRouter Profile” in the
A capital letter and a lower-case letter are considered to be the same, however, a space is required between “ScanRouter” and “Profile”.
The “ScanRouter Profile” has been created.
22
K If
[
Interne t Mail
Click to select
A
Click to select
B
this profile
Click
C
Click to clear the
D
click
[
Click
E
L Click
[
Delivery
is selected in step F, follow the steps below.
]
[
ScanRouter Profile
[
Internet Mail
, and then click
]
[
Message Format
[
.
OK
]
to close the Internet Mail settings window.
[
OK
]
tab.
]
[
New Profile Name
, and then click
]
in
]
[
The following information services are set up in
[
Properties
in the
]
Use MIME when sending messages
[
General
.
]
tab.
]
box, and then click
]
[
Properties
[OK]
.
]
check box, and then
]
.
Page 27

ScanRouter Professional Station Software Installation
M From the drop-down menu in the
select
If there is no
using the
N In the
ing order
below.
❒
•Internet Mail
• Microsoft Mail
• Microsoft Exchange
• Lotus Notes
Arrange the services by the following method.
A
B
O Click
[
Personal Folders
[
Personal Folders
[
Services
[
Recipient addresses are pr ocessed by these inf ormation servi ces in the follow-
box, arrange the services you use in the descending order shown
]
Note
Only the services selected in Step F are displayed.
Click to select a service desired to move.
To move the selected service upward, click or to move it downward,
click .
.
[
OK
]
tab.
]
.
]
[
Deliver new mail to the following location
in the drop-down menu, add
]
[
Personal Folders
box,
]
]
1
P From the drop-down menu in
, select
]
file
Q Click
The settings after the installation are complete. Now you can use ScanRouter
Professional.
Note
❒
To make sure that the profile has been set correctly, do a transmission test
with Windows Messaging to a client of each mail service before using
ScanRouter Professional.
R Click
[
ScanRouter Profile
[
[
to close the
Close
]
to close ScanRouter Initialization Tool.
Close
]
[
S When the StartUp registration window appears, click
If clicking
logging on to Windows NT.
, ScanRouter Professional Station starts automatically after
[
Yes
]
T When a message asks if you want to read the ReadMe file, click
[
.
]
dialog box.
Mail
]
When starting Windows Messaging, use this pro-
.
[
Yes
]
.
[
Yes
]
U After reading the ReadMe file, quit the application which is used for open-
ing the file.
V Click to select the option to restart the computer, and then click
After the computer restarts, go to P.24 “Starting the WWW Service”.
[
Finish
.
]
23
Page 28

Setup
Starting the WWW Service
A Log on as the ScanRouter Professional administrator.
1
B Double-click
C From the
Stop
[
[
Service
.
]
[
Services
in
]
[
Control Panel
box, click to select “IIS Admin Service”, and then click
]
.
]
D After the dialog box confirming whether you want to stop appears, click
.
OK
]
[
E When IIS Admin Service stops, click
F When IIS Admin Service restarts, close the
close
[
Control Panel
G Click
to the WWW service folder, and then click
[
Start
, point to
]
H Double-click the
puter running ScanRouter Professional Station.
I Click to select
.
]
[
Programs
[
Internet Information Server
[
Default Web Site
, point to
]
, and then click
]
to restart IIS Admin Service.
[
Start
]
[
Services
[
Windows NT 4.0 Option Pack
[
Internet Service Manager
folder and double-click the com-
]
[
Start
dialog box and then
]
from the
]
[
Action
]
.
]
menu.
]
, point
J Exit Internet Service Manager.
24
Page 29

ScanRouter Professional Station Software Installation
Information Service Settings Without a Mail Service
-
If you don’t want to use a mail service with ScanRouter Professional, follow the
steps below to add “Personal Address Book” and “Personal Folders”.
A Click
B Enter “ScanRouter Profile” in the
[
Manually configure inf ormation services
wizard window, and click
Next
[
]
.
[
Profile Name
in the Windows Messaging setup
]
box and click
]
[
Next
.
]
A capital letter and a lower-case letter are considered to be the same, however, a space is required between “ScanRouter” and “Profile”.
1
C Click
D Click to select
click
E After the
F Click
, and click
es
]
G Select the name and location of the personal folder file, and click
.
[
Add
]
[
Personal Address Book
.
OK
]
[
[
Personal Address Book
, and click to select
[
Add
]
.
[OK]
in
]
[
Available information services
dialog box appears, click
]
[
Personal Folders
in
]
[
Availab le info rmati on se rvic -
[OK]
.
[
Open
For example, if the location is the same as displayed, the file name would be
“ScanRouter.pst”.
H After the
I Click
J Click
[
OK
[
Finish
[
Personal Folders
.
]
.
]
dialog box appears, click
]
[OK]
.
, and
]
.
]
25
Page 30

Setup
Setup of Modem and Fax Delivery Application
1
If you want to deliver fax documents as well as scanned documents, install the
machine as an external modem in ScanRouter Professional Station, and then setup the fax delivery application.
Modem Installation
Note
❒
Before beginning the installation, connect the computer to be used as ScanRouter Professional Station to the machine with a RS232 cable. For more information about connecting them, see the manual that comes with PC-FAX
Expander.
A Turn on the main power switch of the machine.
B Turn on the switch of the computer to be used as ScanRouter Professional
Station, and log on to the station as the ScanRouter Professional administrator.
C Double-click
[
Install New Modem
If the
[
Modems Properties
[
Modems
in
]
appears.
]
]
[
Control Panel
window appears, click
.
]
[
Add
.
]
D Click
The search for the modems starts.
[
Next
.
]
E After “Standard Modem” is displayed as being detected, click
F Click ”(Standard Modem Types)” in the
lect “Standard 14400 bps Modem“ in the
G Click
[
Next
.
]
[
Manufacturers
[
Models
list and then click
]
list, and click to se-
]
H After the message informing you that the setup of the modem has complet-
.
]
dialog box appears.
]
.
]
dialog box appears, make the necessary set-
]
[
Dialing Location
dialog box ap-
]
I Click
J When the
26
ed appears, click
The
[
Modems Properties
[
Dialing Properties
[
Location Information
tings.
If you have set up the location in advance, the
pears. Change the settings if necessary.
Finish
[
[
Change
[OK]
.
]
.
Page 31

Setup of Modem and Fax Delivery Application
K Click
L Click
The modem installation is now complete.
[
[
Close
Close
]
]
.
to close the
[
Modem Properties
dialog box.
]
Fax Delivery Application Setup
A Stop ScanRouter Professional Station and ScanRouter Client Manager.
Reference
“Stopping the Station” ⇒ P.49
B Stop the WWW service.
Reference
“Stopping the WWW Service” ⇒ P.17
C By the following procedure, stop services related to ScanRouter Profession-
al.
Open
A
Click to select “IcsMngS” in the
B
Stop “ScanRouterDriver” and “FsxGPro” by the same method described
C
in B.
When “ScanRouter FaxProxy” also is started, be sure to also stop “ScanRouter FaxProxy”.
Click
D
[
Services
Close
[
in
]
[
Control Panel
to close the
]
[
Services
.
]
[
Service
dialog box.
]
list, and then click
]
[
Stop
.
]
1
D Install the fax delivery application.
Insert the CD-ROM that comes with this application into the computer.
A
The language selection dialog box appears.
If the window doesn’t appear, double-click on “Setup.exe” located on the
root directory of the CD-ROM, to start the Installer.
Select the language of the application to be installed, and click
B
Click
C
The station installation menu window appears.
Click
D
When the installation confirmation message appears, click
E
When the
F
The installation starts.
When the completion message appears, click
G
E Open
[
ScanRouter Software for Station PCs
[
Fax Delivery Software
[
Welcome
in
[
Mail
]
[
Control Panel
dialog box appears, click
]
.
]
.
]
.
]
[
.
[
Next
]
[
Finish
.
]
Yes
[
]
OK
.
.
]
27
Page 32

Setup
1
F Click
[
Show Profiles
G From the profiles list, click to select
.
erties
]
H Click
I From the
and then click
The
[
ScanRouter Fax Properties
Important
❒
Do not click
.
[
Add
]
[
Available information services
OK
]
[
[
Cancel
.
]
[
ScanRouter Profile
.
dialog box appears.
]
or
]
during steps J to N.
[No]
J Configure the required settings in the
Note
❒
Your full name
[
❒
Enter the machine’s fax number in
K Click the
Make sure that
A
not selected with the “'” mark.
[
Modem
and
]
[
Fax number
tab.
]
[
Let other people on the network use my m odem to send faxes
must be entered.
]
[
, and then click
]
list, click to select
]
tab.
[
User
]
Fax number
.
]
[
Prop-
[
ScanRouter Fax
,
]
is
]
If this option is selected, click to clear the “'” mark.
Click
B
Click to select
C
You can set ScanRouter Fax to answer after a fixed number of rings (a setting of 3 rings is common).
Click
D
Click to select
E
Click
F
After the message informs you that you need to restart the mail software
G
being used to make the changes effective, click
Click
H
Click
I
L Click the
[
Properties
[
Advanced
to close the
[
OK
]
to close the fax modem properties dialog box.
[
OK
]
to close the ScanRouter Fax properties dialog box.
[
OK
]
[
Delivery
.
]
[
Answer after
.
]
[
Use Class 2 if available
tab.
]
in
]
[
Advanced
[
Answer mode
]
]
.
]
dialog box.
.
.
[
OK
]
28
Page 33

Setup of Modem and Fax Delivery Application
M Click to select “ScanRouter Fax Transport” in the
cessed by these information services in the following order
change the location of this option to the top of the box.
N Click
O Click
to close ScanRouter Profile properties dialog box.
[
OK
]
[
Close
to close the
]
dialog box.
[
Mail
]
P Restart the computer.
[
Recipient addresses a re pro-
box. Next, click to
]
1
Q When the computer restarts, start the WWW service.
Reference
“Starting the WWW Service” ⇒ P.24
29
Page 34

Setup
Uninstalling ScanRouter Professional Station Software
1
This section describes how to uninstall ScanRouter Professional Station Software.
Important
❒
Before beginning uninstallation, you must back up the system and various information.
Reference
“ScanRouter Maintenance Tool” ⇒ P.56
A Stop ScanRouter Professional Station and ScanRouter Client Manager.
Reference
“Stopping the Station” ⇒ P.49
B Stop the WWW service.
Reference
“Stopping the WWW Service” ⇒ P.17
C Open
and “FsxGPro”.
When “ScanRouter FaxProxy” also is started, be sure to also stop “ScanRouter
FaxProxy”.
[
Services
in
]
[
Control Panel
, and stop “IcsMngS”, “ScanRouterDriver”,
]
D Remove ScanRouter Professional Station using
Control Panel.
[
Add/Remove Programs
E Remove the directory in which ScanRouter Professional Station was in-
stalled.
If the default directory was used during installation, the path would be “ProgramFiles\ScanRouter\ScanRouterPro”.
30
]
in
Page 35

ScanRouter for Admin Operations
ScanRouter for Admin Operations
After ScanRouter Station setup is complete, you need to set up ScanRouter as a
delivery system. These settings can be made with ScanRouter for Admin.
Viewing the Menu Page (Top Page)
The menu page (Top Page) of ScanRouter for Admin can be viewed by accessing
ScanRouter Professional Station with the WWW browser.
Note
❒
If the appropriate browser is installed in the server, you can use this function
directly on the server.
A Start the WWW browser.
B Enter the URL as follows:
http://ScanRouter Station name/scanrouter/
The following can be used for ScanRouter Professional Station name.
1
• IP address (for example, http://192.168.15.16/scanrouter/)
• Domain name (if the domain name is “server.sc-r.com”, the URL is http:/
/server.sc-r.com/scanrouter/)
• Host name (if the host name is “server”, the URL is http://server/scanrouter/)
Note
❒
Use the host name set in ScanRouter Professional Station in Windows NT.
❒
For more information about the names which can be used, ask the network
administrator.
The ScanRouter Professional title page appears.
Note
❒
There is a link to the ScanRouter for Admin notes on the lower left side of
this page. Each browser’s limitation and required settings are described in
these notes, therefore, click here to read them when using this application
for the first time.
31
Page 36

Setup
1
C Click
The menu page (Top Page) of ScanRouter for Admin appears.
The graphic folder icons, which are the folders you can view with ScanRouter
for Admin, are displayed on the menu page.
❒
[
for Admin
Important
Do not quit ScanRouter for Admin with the browser’s
located on the upper-right corner of the page.
.
]
button, which is
[
X
]
Quitting ScanRouter for Admin
A Click
Note
❒
The
click on this button on any page to quit ScanRouter for Admin.
B After the confirmation message appears, click
The title page of ScanRouter Professional appears.
on the upper right of the page.
[
Quit
]
button exists on pages in addition to the user list page. You can
[
Quit
]
[
OK
.
]
C Close the WWW browser.
32
Page 37

Initial Settings After Installation
The following steps are required to complete the setup.
Initial Settings After Installation
Setting the administrator password
Setting the mail address
Selecting a notification method
Selecting a printer
Creating a user folder
Creating a group folder
Configuring the system environment settings
Setting the Administrator Password
To edit or configure settings with ScanRouter for Admin, a password is required. To prevent an inadvertent settings change, use the administrator password for ScanRouter for Admin.
1
A Start the WWW browser, and display the menu page (Top Page) of Scan-
Router for Admin.
B Click
A password request dialog box appears.
❒
C Click
The browser sometimes displays a security warning message. If the message
appears, select the option to continue the process.
After the password is confirmed, the user/group list appears.
D Click
E Click
[
Users/Groups
Note
Once the password is entered, no password is required until you exit from
this application.
because no password has been set as a default.
[
OK
]
[
Admin
[
Password
.
]
.
]
on the administrator settings page.
]
33
Page 38

Setup
1
F Enter the new password (up to 8 characters) to both
Be sure to enter the same password in the second
the first
tion.
G Click
H Click
The password has been set.
[
Password
.
[
OK
]
.
[
OK
]
box, because the second password is used for confirma-
]
[
Password
[
Password
boxes.
]
box as entered in
]
Setting the Mail Address
The following notification messages, which are required for the system operations, will be sent by mail:
• Auto-delete notification
• Insufficient capacity notification
• Logoff notification
Reference
For more information about the notification messages, see P.61 “Notification
Messages”.
The following steps describe how to set the mail address of the administrator as
a destination.
A Click
[
Users/Groups
B Enter the administrator password and click
C Click
[
Admin
.
]
D Click to select the
E Select an e-mail type from the
Note
❒
If clicking
books on the system.
❒
A large address book (about 1000 entries or more) requires more time to be
displayed on the screen.
❒
To open the address book quickly, it may be convenient for you to register
the necessary addresses into the personal address book of the mail software in advance, and then browse the personal address book.
[
Address Book
F Enter the mail address to the
on the menu page (Top Page) of ScanRouter for Admin.
]
.
[
OK
]
check box.
[
Set
]
[
Mail Type
here, you can select the address from the address
]
[
Mail Address
menu.
]
box.
]
34
G Click
[
OK
.
]
Page 39

Initial Settings After Installation
Selecting a Notification Method
There are two ways to be notified when document delivery fails; by mail or by
printed message. Notification messages are of the following types:
• Undelivered notification
• Delivery not possible notification
Reference
For more information about the notification messages, see P.61 “Notification
Messages”.
1
A Click
Admin.
[
Environment Settings
B Enter the administrator password and click
C Click
[
Error Settings
which is located on the left frame.
]
on the menu page (Top Page) of ScanRouter for
]
.
[
OK
]
D Select the notification method.
• No Notification
No notification is made.
• Mail to Administrator
Sends an e-mail to the administrator mail address as set in P.34 “Setting the
Mail Address”.
• Output to Printer
A notification message is printed out.
E Click
[
Update
Selecting a Printer
If you want to use
to be used.
.
]
[
Output to Printer
as the notification method, select the printer
]
Note
❒
To use the printer, the printer driver must be installed in Windows NT where
ScanRouter is installed and should be configured for printing properly in advance.
A Click
Admin.
[
Environment Settings
B Enter the password and click
C Click
[
Printer Settings
]
on the menu page (Top Page) of ScanRouter for
]
.
[
OK
]
which is located on the left frame.
35
Page 40

Setup
1
D Select the printer from the drop-down menu in the
All printers registered in the
in the menu.
E Click
[
Update
.
]
[
Printers
folders in Windows NT are displayed
]
[
Printer to Use
box.
]
Creating a User Folder
The way documents are saved and delivered depends on the user settings. After
registering a user in ScanRouter Professional Station, a user folder is created on
the station and the folder can be selected as a destination.
Note
❒
It may be convenient for you to create a group if you want to deliver the same
document to multiple users. For more information about registering a group,
see P.38 “Creating a Group Folder”.
❒
We recommend that you set a password on user folders. If no password is set,
anyone can receive or view the documents saved in the user folder.
❒
The user information registered in ScanRouter can be imported into ScanRouter Professional. For more information about importing, see P.37 “Import-
ing the ScanRouter user information”.
Limitation
❒
The maximum number of users/groups that can be registered is 200.
A Click
[
Users/Groups
B Enter the administrator password and click
on the menu page (Top Page) of ScanRouter for Admin.
]
.
[
OK
]
C Click to select the check box on the left of the Short ID number (001-200),
to which you want to register the user.
The Short ID can be used to select the delivery destination from the machine.
You can select the delivery destination easily with this number.
D Click
[
Register/Edit
E When the
[
New
.
]
page appears, click
]
[
User
.
]
F Make the appropriate settings for each item.
For more information about each item, click on the left-side area to see
Help.
Note
❒
Fax Forwarding ID
[
warding ID, see P.41 “Fax Delivery Setting”.
is used for delivering fax documents. To set the Fax For-
]
36
❒
The registered user name and Fax Forwarding ID are listed on the machine
panel display as a delivery destination.
Page 41

G Enter the password if required.
Initial Settings After Installation
Click
A
Enter the password (up to 8 characters) to both
B
Be sure to enter the same password in the second
in the first
mation.
Click
C
H Click
The user has been registered. An icon representing the user is displayed.
[
Password
OK
[
[
OK
]
.
]
.
.
]
[
Password
[
Password
[
Password
box, because the second password is used for confir-
]
boxes.
]
box as entered
]
I Repeat steps C-H until all users have been registered.
Importing the ScanRouter user information
-
When importing in ScanRouter Professional the user information exported by
ScanRouter, you can import the user information by the following procedure.
Note
❒
For the method of exporting user information by ScanRouter, see the “ScanRouter Operating Instructions”.
1
Limitation
❒
Only the Short ID, User Name, and the delivery format settings are imported.
Other items are not imported.
❒
Importing and exporting are not available with Internet Explorer 3.02.
A Click
B Enter the administrator password and click
C Click
D Select the full path for the CSV file to be imported. If clicking
E Click
[
Users/Groups
[
Import
The file selection dialog box appears.
you can select the full path in the file selection dialog box.
[
OK
The browser sometimes displays a security warning message. If the message
appears, select the option to continue the process.
After the importing has been completed successfully, the completion message appears.
.
]
.
]
on the menu page (Top Page) of ScanRouter for Admin.
]
.
[
OK
]
[
Browse
here,
]
37
Page 42

1
Setup
Creating a Group Folder
You can register multiple users to a group. It may be convenient for you to create
a group when delivering the same document to multiple users.
If you select a group for the delivery destination, documents are delivered to
each of the users in the group. The delivery type varies depending on the settings of each user.
G
D
SCN
G
B
SCN
F
A
E
C
TNSX081E
A. ScanRouter Professional Station
B. Client A
C. Client B
D. Destination: Group 1
SCN
E. Group 1
F. Client A: Mail
G. Client B: Saved in Folder
If selecting Group 1 as a destination, a document is delivered to Client A by mail
and is saved in the user folder of Client B.
Limitation
❒
The maximum number of users/groups that can be registered is 200.
38
Page 43

Initial Settings After Installation
A Click
[
Users/Groups
B Enter the administrator password, and click
on the menu page (Top Page) of ScanRouter for Admin.
]
.
[
OK
]
C Click to select the check box on the left of the Short ID number (001-200),
to which you want to register the group.
D Click
[
Register/Edit
E When the
[
New
.
]
page appears, click
]
[
Group
.
]
F Enter the Group Name and Fax Forwarding ID.
On the panel display of the machine;, a group name and a user name are displayed with no distinction. Make sure that the name of the group can be recognized as a group.
G Click
All users registered in ScanRouter Professional Station are displayed.
[
Add Member
.
]
H Click to select a check box on the left of the user you want to add to the
group.
Multiple users can be selected here, so select all users you want to add to the
group.
1
I Click
J Click
A group has been registered. An icon representing the group is displayed.
[
Add Member
.
[
OK
]
.
]
K Repeat steps C-J until all groups have been registered.
39
Page 44

Setup
Configuring the System Envir onment
The following steps describe how to configure the system environment.
1
A Click
Admin.
[
Environment Settings
B Enter the administrator password and click
on the menu page (Top Page) of ScanRouter for
]
.
[
OK
]
C Click the button on the left frame.
When the items to be configured appear on the right frame, configure the settings if required.
Reference
For more information on each item, see Help.
D Click
❒
[
Update
Important
If you click the buttons on the left frame before clicking
tings will not be saved. Be sure to click
before going to another page.
.
]
, the set-
]
[
Update
[
Update
to save the setting changes
]
E Repeat steps C-D until settings of all items have been completed.
40
Page 45

Fax Delivery Setting
Fax Delivery Setting
If you want to deliver fax documents in addition to scanned documents, the fax
delivery setting must be configured. If you don’t need a fax document delivery,
this setting is not required.
Limitation
❒
When the machine forwards received fax documents to ScanRouter Professional Station via PC-FAX Expander, documents scanned by the sender's fax
at Super Fine (400x400dpi) or Fine (200x400dpi) resolution are changed to Detail (200x200dpi) resolution when received.
Fax Delivery Overview
There are two methods of selecting a delivery destination; sending with the Fax
Forwarding ID, and sending with the TSI. Select the appropriate method for the
receiver’s fax machine.
❖
Sending with the Fax Forwarding ID
A sender can select a delivery destination when sending a fax. Register the
Fax Forwarding ID (4 digits) for each user/group in advance, and request a
sender to select the ID number when sending a fax.
1
Limitation
❒
To deliver faxes with this method, the sender’s fax machine must support
“F Code (SUB)” or the “Confidential Transmission with Personal ID (ID
Override)” function. If the machine doesn’t support either function, select
the TSI for transmission. If using G4 for transmission, only Confidential
Transmission with Personal ID (ID Override) is available for use.
❒
When receiving a document using the Confidential Transmission, ScanRouter Professional regards the Confidential ID registered in the machine
as the Fax Forwarding ID.
41
Page 46

1
Setup
FAX
1234
➁
FAX
0078
FAX
1234
FAX
0078
➃
FAX
0078
➀
1234
B
A
➂
B
FAX
1234
C
D
TNSX051E
A. ScanRouter Professional Station
B. Client A
C. Client B
D. Client C
A Register the Fax Forwarding ID in the user/group folder.
B A sender uses the receiver’s Fax Forwarding ID for transmission.
C A fax is forwarded to the user/group folder, whose Fax Forwarding ID has
been selected for transmission. The way of delivering fax documents depends on the folder’s delivery type.
D If the selected Fax Forwarding ID is not registered in any folder, the docu-
ments are saved in the non-forwarding folder.
Note
❒
For information about accessing documents saved in the non-forwarding
folder, see P.50 “Checking Undelivered Documents”.
❒
For information about selecting the Fax Forwarding ID when transmitting
a document, see P.47 “Sender’s Fax Operations”.
42
Page 47

Fax Delivery Setting
❖
Sending with the TSI
With this method, the forwarding destination for the documents sent from
the sender’s fax machine should be selected in advance. The combination of
the sender’s TSI and the forwarding destination should be registered in the
TSI table.
Note
❒
TSI stands for Transmitting Station Identification, and is the information
registered in a fax machine as a RTI or a CSI.
❒
A CSI (Called Station Identification) is registered information which notifies a receiver or sender when you send or receive a fax, by showing on the
panel display or by printing out a report.
❒
An RTI is exclusive information supported only in some fax machines. The
maximum length of the RTI is 20 characters. If the sender's machine supports this information, the RTI information will be used as a TSI.
❒
For a transmission with G4, use a TID (Terminal IDentifier) instead of a
TSI. A TID is similar to the CSI used with G3.
❒
With ScanRouter Professional, the first 18 characters are used as the TSI.
1
FAX
➁
FAX
FAX
FAX
➃
A
FAX
TSI : 81312340002
TSI : 81450129999
A. ScanRouter Professional Station
B. Client A
C. Client B
D. Client C
➀
81312340001
81312340002
B
FAX
➂
CD
TNSX061E
43
Page 48

Setup
A Register a sender’s TSI and forwarding destination to the TSI table.
B A fax is sent by the sender using a receiver’s fax number.
The TSI will be sent automatically to the receiver with no additional operations.
1
C If the TSI of the sender’s fax machine has been registered to the TSI table,
the applicable user folder or group folder becomes a forwarding destination.
The way a document is delivered depends on the delivery type set in the
folders.
D If the combination of the sender’s TSI and the forwarding destination are
not registered in the TSI table, the documents will be saved in the “fax reception folder”.
Note
❒
If sending with the TSI, documents received from the same fax machine are
delivered to the same user folder or group folder. However, if the Fax Forwarding ID is used, the documents are delivered to the selected destination.
❒
For information about accessing documents saved in the fax reception
folder, see P.51 “Checking the Fax Reception Folder”.
44
Page 49

Fax Delivery Setting
ScanRouter Professional Station Settings for Fax Delivery
Setting the Fax Forwarding ID
If you want to deliver fax documents with the Fax Forwarding ID, register the
Fax Forwarding ID to the user/group folder as follows:
A Click
[
Users/Groups
B Enter the administrator password and click
on the menu page (Top Page) of ScanRouter for Admin.
]
.
[
OK
]
C Click to select the button on the left of the user you want to select as a des-
tination.
D Click
[
Register/Edit
E Enter the Fax Forwarding ID (4 digits) in the
The fax forwarding ID is a unique number for each user. Please select a number which is not used by other users.
F Click
[
OK
.
]
.
]
[
Fax Forwarding ID
box.
]
1
45
Page 50

1
Setup
Creating a TSI Table
When delivering a fax using a TSI, create a TSI table as described below. You can
add the TSI directly to the table, or define a forwarding destination after receiving a fax.
Note
❒
If you don’t know the sender’s TSI, ask the sender to send a fax to you. When
receiving a fax from a person for the first time, ScanRouter Professional will
add the TSI of the sender to the TSI table automatically.
A Click
for Admin.
[
Manage Fax Information
B Enter the administrator password and click
The TSI table list appears.
The TSI appears in the
[
on the menu page (Top Page) of ScanRouter
]
.
[
OK
]
column if you have received a fax from that TSI.
TSI
]
When the TSI has been already added to the table
Click to select the button on the left of the TSI you want to use as a send-
A
er.
B
Click
[
Change
.
]
When the TSI has not been added to the table
Click
A
Enter the TSI of the sender’s fax machine in the
B
Enter the TSI correctly for proper delivery.
Note
❒
If both the RTI and the CSI of the sender’ fax machine are registered, enter the RTI.
❒
If you add a TSI which has been already registered, the existing contents
will be replaced with the new one.
[
New
.
]
box.
[
TSI
]
C Enter a name which represents a sender in the
The name entered here is used as a sender when viewing the document information received by fax with ScanRouter for Admin or ScanRouter for Client.
D Click the button of the destination folder.
E Click
46
[
OK
.
]
[
Sender
box.
]
Page 51

Sender’s Fax Operations
The operations depend on the method of selecting the destination:, using
the Fax Forwarding ID, or using the
TSI.
When using the Fax Forwarding ID for delivery
You should have the receiver’s fax
number and the Fax Forwarding ID
before sending a fax. Two ways to select the fax forwarding ID are as follows:
Limitation
❒
To deliver faxes with this method,
the sender's fax machine must support "F Code (SUB)" or "Confidential Transmission with Personal ID
(ID Override)" function. If the machine doesn't support either function, select the TSI for
transmission. If using G4 for transmission, only Confidential Transmission with Personal ID (ID
Override) is available for use.
Fax Delivery Setting
❖
Selecting by the F Code (SUB)
If your fax machine supports the F
Code (SUB), enter the Fax Forwarding ID as the F Code (SUB).
Note
❒
The method of selecting the F
Code depends on the type of fax
machine. For more information,
see the manual of the fax which
is being used.
When using the TSI for delivery
The transmission operations are the
same as normal transmission. ScanRouter Professional selects a delivery
destination based on the RTI or CSI
information which is registered in the
sender’s fax machine.
1
❖
Selecting by Confidential Transmission with Personal ID
A fax can be sent using Confidential Transmission with Personal ID
(ID Override) function. With Confidential Transmission with Personal ID (ID Override), you can
use a 4-digit number called the
Confidential ID. Select the Fax Forwarding ID as the Confidential ID.
Note
❒
The delivery method with the
Confidential ID depends on the
type of fax machine. For more
information, see the manual of
the fax which is being used.
47
Page 52

1
Setup
48
Page 53

2. Systems Management and
Operations
Starting and Stopping ScanRouter Professional Station
Starting t h e S tation
If you placed a shortcut to ScanRouter Professional Station Software in the Windows NT
al Station starts automatically after you log on using the administrator’s account.
If you want to start the station manually, follow the steps below.
[
Startup
folder when installing the application, ScanRouter Profession-
]
A Click [Start], point to
folder and click
[
ScanRouter Professional Station
[
Programs
, then point to the
]
.
]
[
ScanRouter Professional
B If ScanRouter Client Software is used with the client computer, follow step
A and click
er.
ScanRouter Client Manager
[
from the
]
[
ScanRouter Professional
Stopping the Station
Preparation
Before stopping ScanRouter Professional Station and ScanRouter Client Manager, be sure to close the client software of all clients. Also, start client software only after starting ScanRouter Professional Station and ScanRouter
Client Manager.
A Click
B Click
ScanRouter Professional Station stops.
[
ScanRouter Professional Station
in the displayed dialog box.
[
Exit
]
C If ScanRouter Client Manager is running, right-click the
Manager
icon on the taskbar, and then click
]
on the taskbar.
]
[
Exit
]
[
ScanRouter Client
from the pop-up menu.
fold-
]
]
49
Page 54

2
Systems Management and Operations
Daily Operations
To use ScanRouter Professional Station, the administrator should complete the
following tasks on a daily basis.
Important
❒
The documents in folders are saved in the hard disk where ScanRouter Professional is installed. A shortage of free disk space may cause problems such
as stopping the station or preventing delivery of documents to the destination
folder. Check the amount of available hard disk space periodically to make
sure the required amount of free space is available.
Checking Undelivered Documents
If
[
Mail to Administra tor
vironment Settings
messages by mail or by printout when a document delivery fails.
When receiving a notification message, check the undelivered document and
take the appropriate action for that document.
❖
Delivery not possible notification
Notifies the administrator that the mail server returned an error message after trying to send a document to the selected destination.
❖
Undelivered notification
Notifies the administrator that the delivery cannot be processed due to an incorrect mail address setting or an internal error.
The location where undelivered documents depends on the setting in
in the
tings
]
ing Settings
Follow the steps below.
Note
❒
If
[
Forward to Sender’s Folder
saved in the sender’s folder, and are saved in the receiver’s folder if
to Receiver’s Folder
❒
A fax document with a Fax Forwarding ID that hasn’t been configured properly is also saved in the non-forwarding folder.
❒
For more information about moving or deleting undelivered documents, see
ScanRouter for Admin Help.
[
Environment Settings
, undelivered documents are saved in the non-forwarding folder.
]
or
]
[
Output to Printer
page, the administrator will receive the following notification
]
page. If
]
is selected in
]
is selected.
]
is selected in
]
[
Do Not Forward
[
Forwarding Settings
[
Error Set ti ngs
is selected in
]
, documents are
]
in the
]
[
Folder Set-
[
Forward-
[
Forward
[
En-
A Click
Admin.
[
Non-forwarding Folder
on the menu page (Top Page) of ScanRouter for
]
B Enter the administrator password and click
The Image list appears and undelivered documents are displayed.
50
[
OK
.
]
Page 55

C Take the appropriate action for that type of document.
Daily Operations
To move documents to the sender’s or receiver’s folder, click
to remove unnecessary documents from the folder. Click
lete
]
lete all the documents in the folder.
Reference
For more information about using the
Reference” or ScanRouter for Admin Help.
Note
❒
A document delivery failure may occur when the mail server is down, or
an incorrect mail address has been set in the folder. Correct the mail address if necessary.
[
Document View
[
mode, see “Client
]
. Click
Move
]
[
Delete All
[
to de-
]
De-
Checking the Fax Recepti on Folder
If the forwarding destination is not registered in the TSI table, fax documents
with no Fax Forwarding ID will be saved in the fax reception folder. Check the
documents saved in the fax reception folder periodically to take the appropriate
action for the documents.
Note
❒
Documents saved in the fax reception folder can be accessed with ScanRouter
for Client in the client computer.
2
❒
For more information about moving or deleting undelivered documents, see
ScanRouter for Admin Help.
A Click
Admin.
The Image list appears and undelivered documents are displayed.
[
Fax Reception Folder
on the menu page (Top Page) of ScanRouter for
]
B Take the appropriate action for that type of document.
To move documents to the sender’s or receiver’s folder, click [Move]. Click
[Delete] to remove unnecessary documents from the folder. Click
to delete all the documents in the folder.
[
Delete All
]
51
Page 56

2
Systems Management and Operations
System Maintenance with ScanRouter Maintenance Tool
With ScanRouter Maintenance Tool which comes with ScanRouter Professional,
you can make a backup or optimize the database. For maximum efficiency, do
the following system maintenance procedures regularly.
Important
❒
To use Maintenance Tool, you must restart Windows NT first, then stop ScanRouter Professional Station, ScanRouter Client Manager, and the WWW service.
Reference
For information about the functions of ScanRouter Maintenance Tool other
than backup and optimization, see P.56 “ScanRouter Maintenance Tool”.
System Backup
Backs up all the registered information and the saved documents. All backup information can be restored later.
Reference
For information about restoring the backup data, see P.56 “ScanRouter Maintenance Tool”.
A Shut down Windows NT 4.0 and restart the system.
B Stop ScanRouter Professional Station first and then stop the WWW service.
The above steps must be done in the correct order.
Reference
“Stopping the Station” ⇒ P.49
⇒
“Stopping the WWW Service”
C Click
folder and click
The password request dialog box appears.
[
Start
, point to
]
ScanRouter Maintenance Tool
[
[
Programs
D Enter the administrator password and click
E Select the directory to be used for backup in the
Note
❒
Select a directory which contains no files. If there is a file in the selected directory, the backup cannot be completed successfully.
F Click the
The backup starts.
[
Backup
tab, and click
]
P.17
, then point to the
]
.
]
.
[
OK
]
[
Start Backup
.
]
[
ScanRouter Professional
[
Directory
tab.
]
]
52
Page 57

Daily Operations
G After the backup is complete, resume the WWW service and start Scan-
Router Professional Station.
Reference
“Starting the WWW Service” ⇒ P.24
⇒
“Starting the Station”
P.49
Optimizing the Database
Repeatedly saving and deleting documents causes the database to become fragmented, and access speeds to slow down. You can optimize the database to reduce the fragmentation.
A Shut down Windows NT 4.0 and restart the system.
B Stop ScanRouter Professional Station first and then stop the WWW service.
The above steps must be done in the correct order.
Reference
“Stopping the Station” ⇒ P.49
⇒
“Stopping the WWW Service”
C Click
folder and click
The password request dialog box appears.
[
Start
, point to
]
[
ScanRouter Maintenance tool
[
Programs
D Enter the administrator password and click
E Click
The optimization starts.
[
Start Opti mization
in the
]
P.17
, then point to the
]
.
]
[
OK
[
Optimization
tab.
]
[
ScanRouter Professional
.
]
2
]
F After the optimization is complete, resume the WWW service and start
ScanRouter Professional Station.
53
Page 58

2
Systems Management and Operations
Partial Backup
Besides a complete backup for ScanRouter Professional using Maintenance Tool,
you can back up only the following information. For example, if the registered
information has been changed by mistake, you can restore only the needed information.
• User/Group folder information
• TSI Table information
The information above can be backed up with the export function of ScanRouter
for Admin. For more information about exporting, see ScanRouter for Admin
Help.
Checking the Free Disk Space
The documents in folders are saved in the hard disk where ScanRouter Professional is installed. A shortage of free disk space may cause problems such as
stopping the station or preventing delivery of documents to the destination folder. Check the amount of available hard disk space periodically to make sure the
required amount of free space is available.
The amount of free disk space is displayed on the status bar of ScanRouter for
Admin.
Note
❒
If multiple drives are created in a computer, the amount of free space in the
drive where ScanRouter is installed can be used to save documents.
❒
If the free disk space becomes less than 200MB, the “insufficient capacity notification” is sent to the administrator. When receiving this notification message, delete the unnecessary documents to make the required amount of free
space immediately. If the free disk space has not become available within 20
minutes after the message was sent, the “logoff notification” is sent to the administrator. The station will be stopped if the amount of free disk space is still
the same after 10 minutes have passed.
❒
In case ScanRouter Professional Station is stopped, delete unnecessary documents to make more than 200MB of free space available, and then restart the
system.
❒
To avoid keeping unneeded documents in the station, set the number of days
for saved documents to remain in the station when
in
Delivery Type
[
deleted automatically.
. When
]
[
Automatically Delete
is selected, the document will be
]
[
Save in Folder
is selected
]
54
Page 59

Daily Operations
Address Book Management
If creating an address book for ScanRouter Professional users only, you can use
the address book when selecting a delivery destination. When the information
in the address book is changed, or a user is added or deleted, update the address
book.
The address book settings can be made in
page of ScanRouter for Admin.
]
tings
For more information about address book settings, see ScanRouter for Admin
Help.
[
Address Book
in the
]
[
Environment Set-
TSI Table Management
Update the TSI table information for delivering fax documents if necessary. For
correct delivery, the TSI table should be changed in the following cases:
• When the sender’s TSI is changed
• When you want to change the name of the sender
2
• When you want to add or change the delivery destination of fax documents
• When you want to deliver a fax document from a new sender
The TSI table settings can be made in the
Router for Admin.
For more information about TSI table settings, see ScanRouter for Admin Help.
[
Manage Fax Information
page of Scan-
]
Adding a New User
Follow the steps below to make settings for a new user of ScanRouter Professional.
A Install the appropriate applications in the client computer which a new user
will use.
For more information about client computer setup, see “Client Reference”.
B If the mail delivery is required, get a mail account from the network admin-
istrator.
C Add the user’s address to the ScanRouter Professional address book.
D Register the user and adjust the folder settings. ⇒ P.36 “Creating a User Folder”
If you want to add the user to a group, the group settings are also required.
⇒ P.38 “Creating a Group Folder”
E If the delivery of fax documents with the TSI table is required, update the TSI
table information.
55
Page 60

2
2
4
3
7
Systems Management and Operations
ScanRouter Maintenance Tool
With ScanRouter Maintenance Tool which comes with ScanRouter Professional,
you can make a backup or optimize the database. In this section, functions in
each tab of Maintenance Tool are described.
Important
❒
To use Maintenance Tool, you must restart Windows NT first, then stop ScanRouter Professional Station, ScanRouter Client Manager, and the WWW service. For information about stopping ScanRouter Professional Station and
ScanRouter Client Manager, see P.49 “Stopping the Station”, and for informa-
tion about stopping the WWW service, P.17 “Stopping the WWW Service”.
❒
Before stopping ScanRouter Professional Station and ScanRouter Client Manager, be sure to close the Client Software of all clients. Also, start Client Software only after starting ScanRouter Professional Station and ScanRouter
Client Manager.
[
Directory] tab
Select a directory for system backup, or for restoring the data to be backed up.
1
56
Directory
1.
If you want to make a backup, select a
destination directory. Select a directory
which contains no files. If there is a file in
the selected directory, the backup cannot
be completed successfully.
When restoring, select the directory where
the backup data to be restored is saved.
[
Version
2.
Displays version and copyright information of ScanRouter Maintenance Tool.
[
Map Network Drive
3.
Maps a network drive to a folder on the
network.
56
]
]
[
Disconnect Network Drive
4.
Releases a network drive.
[
Make New Directory
5.
Creates a new directory.
[
Clear Backup
6.
Click this button after selecting the directory used for backup to clear the backup
data.
File list
7.
All files saved in the selected directory
are displayed.
]
]
]
Page 61

ScanRouter Maintenance Tool
2
2
[
Backup] tab
You can start the backup procedure using the button in this tab.
If an empty directory is not selected in the
dimmed.
Reference
For more information about the backup procedure, see P.52 “System Backup”.
1
[
Directory
tab, this tab appears
]
2
[
Start Backup
1.
Click to start backup to the directory selected in the [
[
Restore] tab
Restores all information of the system that was backed up.
If a directory where the backup data was stored is not selected in the
tab, this tab appears dimmed.
[
Start Restore
1.
Click to restore the backup data from the
directory selected in the [
]
Directory
1
]
] tab.
Directory
] tab.
Log display area
2.
The backup log is displayed.
[
Directory
]
Log display area
2.
The restore log is displayed.
57
Page 62

2
Systems Management and Operations
[
Rescue] tab
Some accidents, such as a power failure or a network error, may cause problems
such as the forwarding data is lost or the system will not start. In such a case, use
the functions in this tab to solve the problem.
Limitation
❒
Depending on the status of the system, system or data rescue may not be possible.
1
2
[
Start Rescue
1.
Click to start [
tem
], depending on the selection.
[
Rescue Data][Rescue System
2.
If you want to restore the internal data of
the system, click [
cue System
which cannot be forwarded successfully.
File list
3.
All files saved in the selected directory
are displayed.
[
Make New Directory
4.
Creates a new directory under the currently selected directory.
]
Rescue Data
] or [
Rescue Sys-
]
Rescue Data
] if you want to restore data
]. Click [
Res-
]
3
4
5
6
7
[
Map Network Drive
5.
Maps a network drive to a folder on the
network.
[
Disconnect Network Drive
6.
Releases a network drive.
Directory
7.
Select the directory to save the document
restored with the [
Select a directory which does not contain
any sub-directories or files. When you select a directory available for saving documents, the path is displayed in green.
]
]
Rescue System
] option.
58
Page 63

ScanRouter Maintenance Tool
2
[
Optimization] tab
Repeatedly saving and deleting documents causes the database to become fragmented, and access speeds to slow down. You can optimize the database to reduce the fragmentation.
1
2
[
Start Optimization
1.
Click to start optimization.
[
Initialization] tab
You can return the system settings to their default values, the way they were immediately after installation.
Important
❒
All information about registered users, and all saved documents are deleted.
[
Start Initialization
1.
Click to start initialization.
]
1
]
Log display area
2.
The optimization log is displayed.
59
Page 64

Systems Management and Operations
4
5
6
7
2
3
[
Log] tab
The saved error log can be exported to CSV file format.
2
1
2
3
[
Start Writing Log Information
1.
Writes the selected log information in
CSV file format.
Log selection
2.
Click to select the type of log to be exported.
Directory
3.
Select the directory to save the exported
log file.
[
Environment Settings] tab
]
[
Make New Directory
4.
Creates a new directory in the currently
selected directory.
[
Map Network Drive
5.
Maps a network drive to a folder on the
network.
[
Disconnect Network Drive
6.
Releases a network drive.
File list
7.
All files saved in the selected directory
are displayed.
]
]
]
You can change the administrator password for the ScanRouter for Admin.
1
Password
1.
Enter a new password. First, enter the
password in the text box and press the
key. After the second text box ap-
Enter
pears, enter the password again.
60
[
Password
2.
Click to set the administrator password
which was entered in the [
word
] box.
[
Clear
3.
Click to clear the text entered in the password text box.
]
]
Change Pass-
Page 65

Notification Messages
Notification Messages
ScanRouter notifies the administrator when an error occurs which requires the
administrator’s attention. The two types of notification are as follows:
• Notification by mail or by printout, depending on the selection in
in the
]
tings
• Notification by mail to the administrator
[
Environment Settings
page.
]
Error Set-
[
2
Notification Messages Defined in [Error Settings
If
[
Mail to Administrator
the following notification messages by mail. If
notification messages will be printed out. When receiving a notification message, check the undelivered document and take the appropriate action for that
document.
The notification messages are as follows:
❖
Delivery not possible notification
Notifies the administrator that the mail server returned an error message after trying to send a document to the selected destination.
Note
❒
If the notification message is sent by mail, the document to be delivered is
attached to the mail.
❒
If the notification message is a printout, the document to be delivered is
also printed after the notification.
Reference
For information about responding to a notification message, see P.50
“Checking Undelivered Documents”.
is selected in
]
[
Error Settings
, the administrator will receive
]
[
Output to Printer
]
is selected, the
]
❖
Undelivered notification
Notifies the administrator that the delivery cannot be processed due to an incorrect mail address setting or an internal error.
Note
❒
If the notification message is sent by mail, the document to be delivered is
attached with the mail.
❒
If the notification message is a printout, the document to be delivered is
also printed after the notification.
Reference
For information about responding to a notification message, see P.50
“Checking Undelivered Documents”.
61
Page 66

2
Systems Management and Operations
Notification Messages Sent by Mail to the Administrator
The following notification messages are sent to the administrator.
❖
Auto-delete notification
ScanRouter deletes log entries exceeding the maximum number to be saved,
everyday at midnight. The results are sent to the administrator.
❖
Insufficient capacity notification, Logoff notification
If the free disk space becomes less than 200MB, the “insufficient capacity notification” is sent to the administrator. When receiving this notification message, delete the unnecessary documents to make the required amount of free
space immediately. If the free disk space has not become available within 20
minutes after the message was sent, the “logoff notification” is sent to the administrator. The station will be stopped if the amount of free disk space is still
the same after 10 minutes have passed.
In case ScanRouter Professional Station is stopped, delete the unnecessary
documents to make more than 200MB of free space, and then restart the system.
Note
❒
You can use ScanRouter for Admin and ScanRouter for Client while ScanRouter Professional Station is stopped. Delete unnecessary user folders
and documents to increase the available free disk space.
62
Page 67

3.
Using ScanRouter Professional
with Other Systems
ScanRouter Professional supports document delivery to other systems as described below.
❖
NuOffice (Salutation supported)
By using ScanRouter Professional Station as a Salutation supporting machine,
you can add documents saved in ScanRouter Professional Station to a Lotus
Notes database which is used in IBM NuOffice.
❖
Save to File
Documents saved in the ScanRouter Professional Station can be delivered to
a shared folder located on other machines such as a file server.
To view these documents from the client computer, connect to the folder
where the documents are delivered through the network, and then use the
applications appropriate for those file types.
Note
❒
If you want to use these functions, follow the instructions in this chapter to
install ScanRouter Plug-in.
❒
The setup instructions after installing ScanRouter Plug-in are provided as the
HTML file. To open this file, click
ScanRouter Professional
[
❒
At this printing (Dec. 1999), IBM NuOffice is only available in the United
States and Canada.
folder and then click
]
[
Start
, point to
]
[
ScanRouter Plug-in Help
[
Programs
, point to the
]
.
]
63
Page 68

Using ScanRouter Professional with Other Systems
Using ScanRouter Plug-in for NuOffice (Salutation Supported)
By using ScanRouter Professional Station as a Salutation supporting machine,
you can add documents saved in ScanRouter Professional Station to a Lotus
Notes database which is used in IBM NuOffice.
System Requirements
3
To use this function, the following hardware and software is required in addition to ScanRouter.
• IBM NuOffice (Version 1.2 or later)
• Lotus Notes Server (Release 4.52 to 4.6)
• A computer where ScanRouter Plug-in is installed
Reference
“ScanRouter Plug-in” ⇒ P.75
Note
❒
Windows NT Workstation must be used as the operating system for the computer where IBM NuOffice is installed.
❒
Lotus Notes Client must be installed in the computer where IBM NuOffice is
installed.
❒
For more information about the setup for IBM NuOffice or Lotus Notes Server, see the operating instructions for each product. Those products are not included in the CD-ROM which comes with this product.
❒
ScanRouter Plug-in is the application used to deliver the saved documents located on ScanRouter Professional Station to NuOffice. This application can be
installed with the CD-ROM which comes with this product.
64
Page 69

Using ScanRouter Plug-in for NuOffice (Salutation Supported)
Basic Configuration Example
We recommend that ScanRouter Professional Station, NuOffice, and Lotus
Notes Server be installed in different computers, and ScanRouter Plug-in be installed in the computer where NuOffice has been installed.
Note
❒
Install ScanRouter Plug-in after the NuOffice installation has been completed.
A
B
C
3
A. ScanRouter Professional Station
B. ScanRouter Plug-in + NuOffice
C. Notes Server
D. Notes Client
D
D
TNSX091E
65
Page 70

3
Using ScanRouter Professional with Other Systems
Another Configuration Example
Install NuOffice and ScanRouter Professional Station in the same computer.
Note
❒
The installation order is as follows:
A ScanRouter Professional Station
B NuOffice
C ScanRouter Plug-in
❒
If you want to use this setup, ScanRouter Professional Station Software must
be installed in a computer which satisfies the following system requirements.
• CPU: PentiumII 300MHz equivalent or faster
• Memory: 128MB or more
❒
If utilizing the system by this configuration, use Windows NT Workstation as
the OS of ScanRouter Professional Station.
A
B
C
A. ScanRouter Professional Station + ScanRouter Plug-in + NuOffice
B. Notes Server
C. Notes Client
C
TNSX101E
66
Page 71

Using ScanRouter Plug-in for NuOffice (Salutation Supported)
Settings for Delivering Documents to NuOffice
To deliver documents to NuOffice, select the destination database and the mail
address using ScanRouter Plug-in.
Note
❒
This section describes a summary of operations with ScanRouter Plug-in. For
more information about the operations, see ScanRouter Plug-in Help.
A Open the ScanRouter Plug-in properties dialog box and select ScanRouter
Professional Station from the drop-down menu in the
A user folders list in ScanRouter Professional Station appears.
[
Delivery Station
box.
]
B Click to select the name of the user folder where documents will be deliv-
ered.
C Enter the password, and select “Salutation” from the drop-down menu in
the
[
Plug-in
box.
]
3
D Click
[
Browse
in the
]
[
Forwarding Output
box.
]
E Select the database or the address where documents will be delivered.
Note
❒
If a database is selected, the setup is complete. The delivered documents
will be registered automatically in the database.
❒
If sending documents to the address by mail, Notes settings must be configured in advance. See P.68 “Settings for Sending Mail to Notes Users”.
67
Page 72

Using ScanRouter Professional with Other Systems
Settings for Sending Mail to Notes Users
When sending documents by mail from ScanRouter Professional through NuOffice, create a personal address book and register the users with Notes Client on
the NuOffice Server.
Creating a Personal Address Book
A Start Notes on the computer where NuOffice is installed.
3
B Double-click the
C From the
[
Create
D Follow the steps below for the
An ID number which is not being used appears in the
A
Change the ID number if required.
Enter the appropriate name in the
B
[
Doc Manager Folder's ID V1.2
menu, click
]
[
New folder
[
Folder Definition
[
Owner name
icon to open the database.
]
.
]
]
group settings.
[
Folder ID
field.
]
field.
]
E Follow the steps below to configure the settings for the
section.
file?
]
68
Select
A
Enter “names.nsf“ in the
B
Enter distinguishing information about the folder in the
C
ments
❒
[
field.
]
Important
The word “address” must be included in the name using capital or lower-case letters as in the examples below. (For example, ScanRouter Address Book)
• “ADDRESS”
• “Address”
• “address”
Local
.
]
[
File name
field.
]
[
What is the folder
[
Folder com-
Page 73

Using ScanRouter Plug-in for NuOffice (Salutation Supported)
F Follow the steps below to enter the correct information in the
setting
A
B
C
G Click
in the
]
Enter “FullName” in the
Enter “Department” in the
Enter “Person” in the
[
Exit
[
Customization information
.
]
[
Owner name
[
Comment
[
Form name
section.
]
field.
]
field.
]
field.
]
[
Notes fields
H After a message appears asking if you want to save the document, click
.
Yes
]
[
A new icon representing the personal address book is added to the workspace.
Adding Users to the Personal Address Book
Add users who will receive documents to the personal address book.
A Open the Notes public address book.
B Click the name of the user you want to add to the personal address book,
and then click
The user is copied to the personal address book. If you want to add multiple
users, copy all the users to be added.
[
Copy to Personal Address Book
button.
]
3
C Open the personal address book.
D Double-click the user who was copied from the public address book.
The user information is displayed.
E Check the
the field, select one name which includes an organization name and delete
the rest of them.
Note
❒
Be sure to delete the abbreviated names to use a name which includes an
organization name. For example, if both “John Smith/COMPANY” and
“John Smith” are registered, delete “John Smith”.
User ID Settings
Configure the user ID settings. If these settings have not been made, a password
request dialog box appears when sending mail.
A From the
B When the
C Click to select
[
Full user name
menu, point to
[
File
]
[
Enter Password
[
Share password with Notes add-ins
field in
]
[
Tools
dialog box appears, enter the password.
]
. If several names are registered in
[
Mail
]
, and click
]
[
User ID
.
]
.
]
D Click
[
Done
.
]
69
Page 74

Using ScanRouter Professional with Other Systems
Delivering a Document to the Shared Folder
Documents saved in the ScanRouter Professional Station can be delivered to a
shared folder located on other machines such as a file server.
To view these documents from the client computer, connect to the folder where
the documents are delivered through the network, and then use the applications
appropriate for those file types.
3
System Requirements
To use this function, the following hardware and software is required in addition to ScanRouter Professional.
• A computer where ScanRouter Plug-in is installed.
Reference
“ScanRouter Plug-in” ⇒ P.75
Note
❒
ScanRouter Plug-in is the application used to deliver documents located on
ScanRouter Professional Station to a shared folder located on other machines
such as a file server. This application can be installed with the CD-ROM
which comes with this product.
❒
ScanRouter Plug-in can be installed either in ScanRouter Professional Station
or other computers.
❒
For information about the system requirements for ScanRouter Plug-in, see
P.75 “ScanRouter Plug-in”.
70
Page 75

Delivering a Document to the Shared Folder
❖
Example of installing ScanRouter Plug-in in ScanRouter Professional Station
A
B
C
A. ScanRouter Professional Station + ScanRouter Plug-in
B. File Server
C. Client
3
C
TNSX160E
71
Page 76

Using ScanRouter Professional with Other Systems
❖
Example of Installing ScanRouter Plug-in in a Computer not used as a ScanRouter
Professional Station or File Server
3
A
A. ScanRouter Professional Station
B. ScanRouter Plug-in
C. File Server
D. Client
B
C
D
D
TNSX170E
72
Page 77

Delivering a Document to the Shared Folder
❖
Example of Installing ScanRouter Plug-in in the File Server
A
A. ScanRouter Professional Station
B. File Server + ScanRouter Plug-in
C. Client
B
3
C
C
TNSX180E
73
Page 78

3
Using ScanRouter Professional with Other Systems
Settings for Delivering Documents to a Shared Folder
Creating a Shared Fol d er as a Desti n at io n Fold er
To deliver documents to a selected folder, you must first create a folder in the
destination computer and set it as a shared folder.
A destination folder can be selected from two kinds of folder.
• A shared folder in the computer where ScanRouter Plug-in is installed.
• A shared folder in another computer on the network.
Note
❒
The user who starts ScanRouter Plug-in must have the following access
permission depending on the operating system in use where the shared
folder is located.
• Windows 95/98:
• Windows NT 4.0:
Note
❒
To deliver documents to the file server, a network drive must be mapped to
the selected folder which is located on the file server.
Settings for Delivering Documents to a Shared Folder
Select a shared folder as the destination for using ScanRouter Plug-in.
Note
❒
This section describes a summary of operations with ScanRouter Plug-in. For
more information about the operations, see ScanRouter Plug-in Help.
access permission
[
Full
]
or
[
Full
]
[
Change
access permission
]
A Open the ScanRouter Plug-in properties dialog box and select ScanRouter
Professional Station from the drop-down menu in the
A user folders list in ScanRouter Professional Station appears.
Delivery Station
[
box.
]
B Click to select the name of the user folder where documents are to be re-
ceived and saved.
C Enter the password, and select “Folder” from the drop-down menu in the
Plug-in
[
box.
]
D Click
[
Browse
in the
]
[
Forwarding Output
box.
]
E Select the folder where documents will be delivered.
74
Page 79

ScanRouter Plug-in
ScanRouter Plug-in
System Requirements for Instal lation (when not shared with the Server)
If you want to install ScanRouter Plug-in in a computer where ScanRouter Professional Station is not installed, the computer must meet the following system
requirements.
Note
❒
If installing this application in a computer where ScanRouter Professional
Station is installed, the computer must meet the system requirements for each
station’s installation in addition to the following system requirements.
❖
CPU
Pentium 166MHz or faster
❖
Operating Systems
• Microsoft Windows 95 operating system (with Service Pack 1, or OSR2 or
later)
• Microsoft Windows 98 operating system
• Microsoft Windows NT Workstation operating system Version4.0 (with
Service Pack 4 or later)
• Microsoft Windows NT Server network operating system Version4.0 (with
Service Pack 4 or later)
Limitation
❒
Under Windows NT, this application does not support RISC based processor (MIPS R Series, Alpha AXP, Power PC).
❖
RAM
64MB or more
3
Note
❒
If using ScanRouter Station with ScanRouter Plug-in (Salutation supported), 96MB or more RAM is required.
❖
Hard Disk Space
About 4MB of disk space is required for installation. When using this application, be sure to keep 100MB or more of free disk space available as a workspace.
75
Page 80

3
Using ScanRouter Professional with Other Systems
Installing ScanR outer Plug-in
Note
❒
If using Windows NT, you must logon as a member of the Administrators to
install ScanRouter Plug-in.
A Insert the CD-ROM which comes with this software into the computer.
The language selection dialog box appears.
If the window doesn’t appear, double-click on “Setup.exe” located on a root
directory of the CD-ROM, to start the installer.
B Select the language of the application to be installed, and click
C Click
When the installation confirmation message appears, click
D When the
The license contract for this application is displayed.
E Click
[
ScanRouter Plug-in Software
dialog box appears, click
]
[
Yes
[
Welcome
.
]
.
]
[
Yes
]
.
[
Next
]
.
[
OK
]
.
F Enter the user name, the company name and the serial number, and then
click
The serial number is listed on the CD-ROM case.
G When the confirmation message appears, click
H When the
nation if required, and then click
I When the
component to be installed, and then click
The installation starts.
Next
[
.
]
[
Choose Destination Locatin
[
Select Components
dialog box appears, enter a “'” mark for the
]
.
[
Yes
]
dialog box appears, change the desti-
]
.
[
Next
]
.
[
Next
]
Limitation
❒
If Salutation Manager is not installed in the computer, the components
supported by this application are not displayed.
J When the completion message appears, click
The installation is complete. Start ScanRouter Plug-in to configure the settings.
Reference
The setup instructions after installing the ScanRouter Plug-in are provided
as a HTML file. To open this file, click
76
the
[
ScanRouter Professional
folder and then click
]
[
Start
[
Finish
, point to
]
.
]
[
Programs
[
ScanRouter Plug-in Help
, point to
]
.
]
Page 81

Troubleshooting
Problem Cause / Action
4. Appendix
When starting
ScanRouter Professional Station, the
message “The profile name is not valid. Enter a valid
profile name.” appears.
When starting
ScanRouter Professional Station, the
message “There is
nowhere to receive
messages.” appears.
This message appears when the name of the mail profile is not
OK
“ScanRouter Profile”. Click [
create a new profile.
Start
Click [
A
fessional
See P.20 “Initial Settings After Installation”, to create a profile.
B
Follow the steps below.
Log on as the ScanRouter Professional administrator.
A
Click [
B
fessional
Click [
C
The profile settings dialog box appears.
Make sure that [
D
tion service set in this profile.
Personal Folders
If [
E
click to select [
es
], and then click [OK].
Select the location and the name of the personal folder file,
F
and click [
For example, the location is the same as displayed, and the
file name is “ScanRouter.pst”.
After the [
G
Click [
H
], point to [
] folder, then click [
Start
], point to [
] folder, then click [
Profile Settings
Open
Personal Folders
OK
].
].
Personal Folders
] is not displayed in the box, click [
Personal Folders
].
], and follow the steps below to
Programs
Programs
], point to the [
ScanRouter Initialization Tool
], point to the [
ScanRouter Initialization Tool
] is displayed as the informa-
] in [
Available information servic-
] dialog box appears, click [OK].
ScanRouter Pro-
ScanRouter Pro-
].
].
Add
] and
77
Page 82

Appendix
Problem Cause / Action
4
When starting
ScanRouter Professional Station just
after the installation, NsUserMgr
Create Dispatch Error appears.
When starting
ScanRouter Professional Station just
after the installation, Make icsregistry DB Create Error
appears.
Follow the steps below.
Open the [
A
ry where ScanRouter Professional Station is installed, and
then enter the following command:
Command Prompt
] window and move to the directo-
C:> NSUserMgr.exe /RegServer
Start
Click [
B
fessional
Click [
C
Enter the password of the user currently logged on to Win-
D
dows NT in the [
once again
], point to [
] folder, then click [
Authentication Settings
] box.
Programs
Password
], point to the [
ScanRouter Initialization Tool
].
] box and the [
ScanRouter Pro-
Enter your password
Note
The ScanRouter Professional administrator account is cur-
❒
rently used to log on to Windows NT.
OK
Click [
E
Follow the steps below.
Click [
A
Prompt
Move to the Icsmng directory in the directory where Scan-
B
Router Professional Station is installed.
If the destination directory was not changed, this directory
should be “Program Files\ScanRouter\ScanRouterPro\Icsmng”.
Enter these commands in the following order.
C
].
Start
], point to [
].
Programs
], and then click [
Command
].
78
C:> regsvr32 IcsMngC.dll
C:> regsvr32 IcsMngSps.dll
C:> regsvr32 NsIcsMng.dll
After the each command is executed successfully, “succeed”
is displayed on the screen.
Page 83

Problem Cause / Action
Troubleshooting
Cannot receive or
deliver correctly
fax documents forwarded from the
machine, even
though the fax delivery settings have
been configured.
Follow the steps below.
Log on as the ScanRouter Professional administrator.
A
Start
Click [
B
fessional
Click [
C
], point to [
] folder, then click [
Profile Settings
Programs
].
], point to the [
ScanRouter Pro-
ScanRouter Initialization Tool
The profile settings dialog box appears.
Make sure that [
D
Personal Address Book
] and [
Person al Folder s
are displayed as the information service set up in this profile.
Personal Address Book
If [
E
[
Add
] and click to select [
formation services
When the [
F
[
OK
].
OK
Click [
G
Personal Folders
If [
H
].
click to select [
es
], and then click [OK].
Select the location and the name of the personal folder file,
I
and click [
], and then click [OK].
Personal Address Book
Personal Folders
Open
].
] is not displayed in the box, click
Personal Address Book
] in [
Available in-
] dialog box appears, click
] is not displayed in the box, click [
] in [
Available information servic-
Add
For example, the location is the same as displayed, and the
file name is “ScanRouter.pst”.
When the [
J
Click [
K
Personal Folders
OK
].
] dialog box appears, click [OK].
].
]
4
] and
79
Page 84

INDEX
A
,
55
,
55
,
,
9
62
Adding a New User
Address Book
Administrator Account
Auto-delete notification
B
Backup
, 52,
54
C
,
36
38
,
54
,
40
Checking the Free Disk Space
Configuring
Systems Environment Settings
Configuring the Systems Environment
,
Settings
Creating
Creating a Group Folder
Creating a User Folder
40
Group Folder
TSI Table
User Folder
,
46
,
,
38
36
,
D
Daily Operations
Delivery not possible notification
domain
,
10
,
50
,
61
F
Fax Delivery
Fax Forwarding ID
Fax Reception Folder
,
41
,
45
,
51
I
Information Service Settings Without a
Mail Service
Initialization
Installation
ScanRouter Professional Station
Insufficient capacity notification
,
,
25
20
,
,
62
17
L
,
63
,
62
Logoff notification
Lotus Notes
M
,
61
,
34
,
56
,
31
Mail Address
Maintenance Tool
Menu Page (Top Page)
Messages
N
Notification Method
NuOffice
,
63
,
35
O
,
,
53
1
Optimizing
Overview
P
,
20
,
33
Password
profile
Q
Quitting
,
ScanRouter for Admin
32
S
Salutation
ScanRouter for Admin
ScanRouter Professional supports
Selecting
Selecting a Printer
Sender’s Fax Operations
Sending with the Fax Forwarding ID
Sending with the TSI
Service Pack
Setting
Setup
Shared Folder
Starting
Stopping
,
63
,
31
,
34
35
,
43
,
,
45
35
47
,
,
9
33
,
Notification Method
,
,
16
Administrator Account
Administrator Password
Fax Forwarding ID
,
,
74
Mail Address
,
5
Create
ScanRouter Client Manager
ScanRouter Professional Station
49
,
,
63
,
49
41
80
Page 85

ScanRouter Professional Station
System Requirements
T
,
,
49
5
46
,
77
,
55
Troubleshooting
TSI Table
TSI Table Management
,
U
Undelivered Documents
Undelivered notification
,
,
50
61
W
Windows NT Environment Settings
,
9
81
Page 86

82 EE GE UE USA B365
Page 87

Copyright © 1999
Page 88

ScanRouter Professional OPERATING INSTRUCTIONS
Printed in Japan
UE USA B365-8500
 Loading...