

Renault Espace Quick Guide

ESPACE
(
www.renault.co.uk
)(
www.renault.ie
)(
www.renault.is
)
QUICK GUIDE

1
WELCOME TO YOUR ESPACE
Note
Congratulations on your choice: in your Espace, the pleasure of travel reaches new heights as you enjoy its generous space in exceptional comfort.
In order to make your experience of your new vehicle as pleasant as possible, we suggest you use this document to find out about the main functions of your
Espace.
This document does not replace the driver’s handbook.
Please read the complete driver’s handbook for more detailed information on the equipment mentioned in the reference guide for your Espace.

Fro nt an d engin e compa r tment
3
Pas senge r side
4
Rea r seats
5
Rea r
6
Access ing the veh icle
7
Star t ing/Sto pping t he en gi ne
8
Drivin g posit ion
9
Dashbo ard
11
Instrum ent pan el
13
Lighti ng/Wiper s
14
Electr oni c par king bra ke
15
Cr uise contr ol/Spee d lim it er
15
Heating and air condit ioning
system
16
Multim edia sy stems
17
Fuel
20
Gadget s
21
3
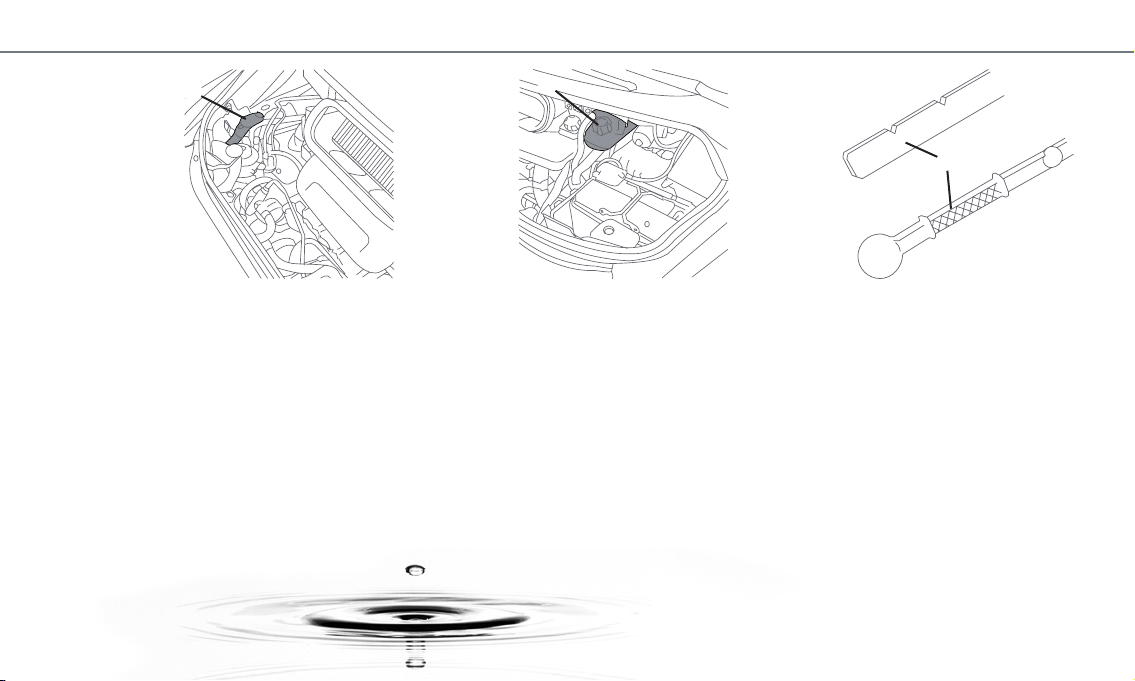
F R O N T A N D E N G I N E C O M P A R T M E N T
Screen washer fluid level
Add some fluid in the reservoir 1 if necessary.
Coolant level
The level indicated on tank 2 should be between
MINI and MAXI.
If it is necessary to top up this level, it is essential
to do so when the engine is cold.
Engine oil level
To check the oil level, use dipstick 3. The level indicated on the dipstick should be between MINI
and MAXI.
The oil level may also be checked on the instrument panel.
$
Refer to Section 4 of your driver’s handbook for
details of the precautions to be taken when checking the oil level and topping up the oil.
2
1
3
4
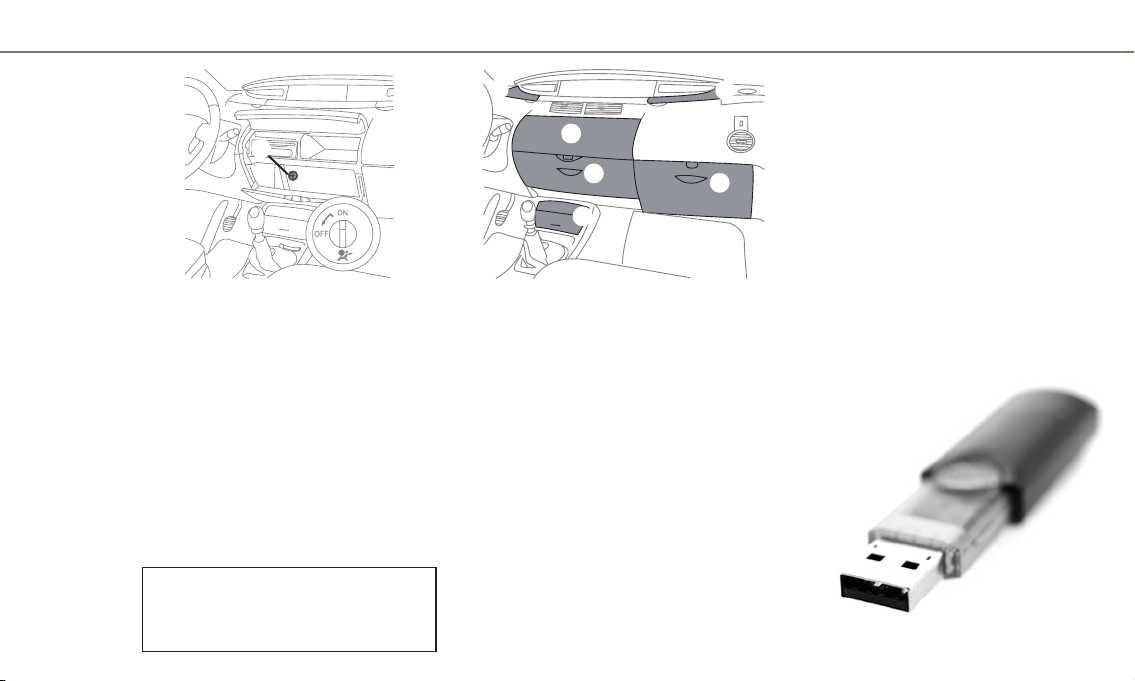
Deactivating the front
passenger air bag
If you wish to fit a rear-facing child seat on the
front passenger seat, you must deactivate the air
bag: with the vehicle stationary, turn switch 1 to
OFF.
Storage compartments
Upper storage compartments A
Centre storage compartment B
Centre storage compartment
C
Passenger storage compartment
D
Cup holders E
P A S S E N G E R S I D E
Immediately reposition the switch to ON as soon
as you stop using the child seat.
1
A
A
B
C
D
E
Sockets for audio
connection
Depending on the version, you have the option
to connect your portable audio devices, USB key,
and MP3 player to your vehicle. Specially designed
sockets are located in the central storage compartment C.
Refer to the instructions for the equipment for details of the connections.
5
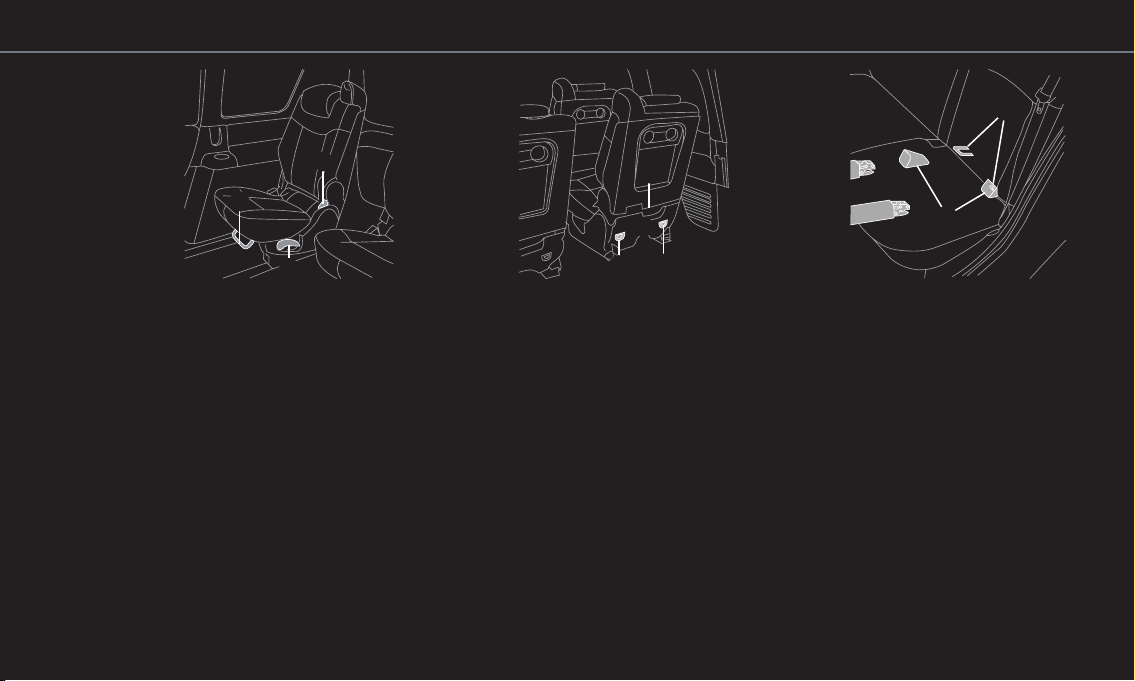
R E A R S E A T S
7
ISOFIX system
Each rear seat is fitted with the ISOFIX child seat
mounting system.
Depending on the type of child seat used, installation requires specific precautions.
The two rings
7 are located between the seatback
and the seat base of the seat and are identified by
a marking on the seat base. To ensure your child
seat can be easily fitted and locked on rings 7, use
access guides 8 on the child seat.
Consult your approved dealer to find out about the
equipment available for your vehicle.
Pull release
5 fully, and move the seat forwards,
pulling it off the rails.
To remove the seat from the vehicle, use bar
4 lo-
cated behind trim A
To refit a seat
Slide the front of the seat in the correct rails, then
tilt it backwards. It will lock into the rails under its
own weight. Finally, adjust the position of the seat
by moving it forward/back.
Check that there are no objects stored behind
trim
A.
8
1
2
4
6
5
A
3
The modularity of your vehicles allows numerous
combinations thanks to the sliding seats with automatic locking positions.
To adjust a seat
Move a seat backwards or forwards: lift one of
controls 1 or 3 or pull strap 5.
Adjust the seatback (or table position): lift control 2 or pull strap 6.
To remove a seat
Lower the headrest and tilt the seatback into the
table position.
6
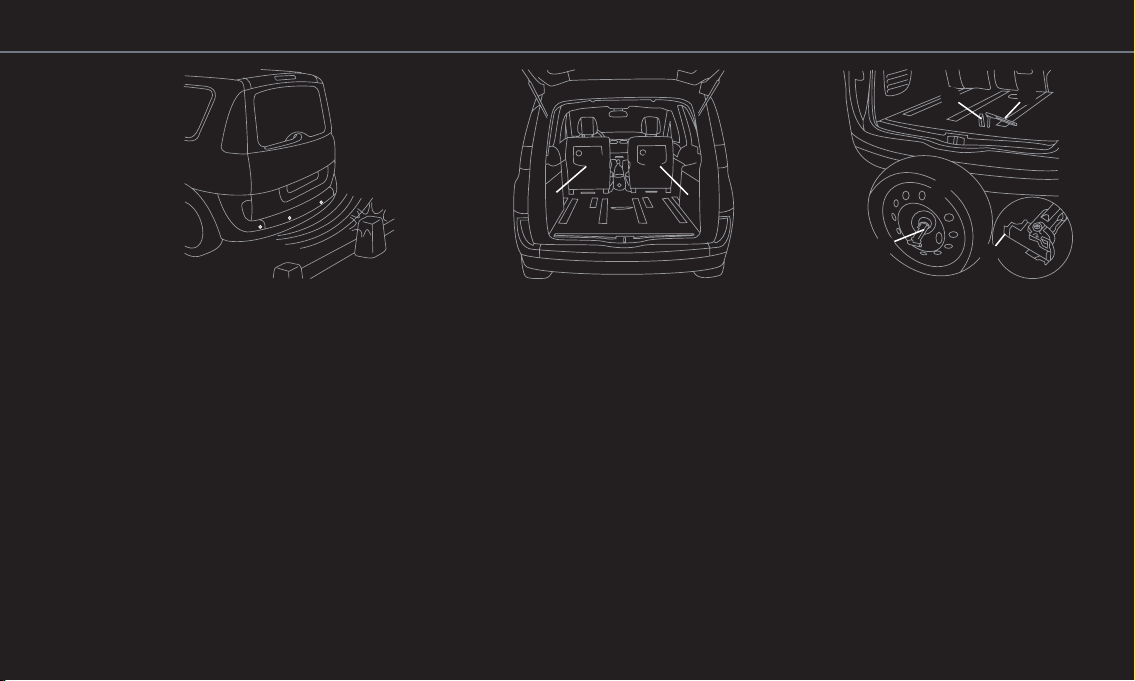
R E A R
1
Tyre pressure kit
Depending on the vehicle, in the event of a puncture, use the tyre inflation kit. The compressor
adapter and the bottle are located in rear storage
compartment 1 (for vehicles with a standard chassis) or 2 (for vehicles with a long chassis);
Refer to Section 5 of your driver’s handbook.
Parking distance control
On equipped vehicles, the parking distance control
measures the distance between the rear (and, depending on the vehicle, the front) of the vehicle and
any obstacles that are nearby.
When approaching an obstacle during manoeuvres,
the beeps become faster and then sound continuously when 25 cm from the obstacle.
The parking distance control can be deactivated
using the switch located on the dashboard.
Emergency spare wheel
Depending on the vehicle, there is an emergency
spare wheel 3 provided in the event of a puncture
underneath the vehicle.
– In the luggage compartment, lift cover 5;
– remove the blanking cover;
– use tool 6 to fully unscrew the nut so that the
wheel retaining cable unwinds and the wheel
drops to the ground;
– stand the wheel up outside the vehicle;
– press on lock 4 and turn it a quarter of a turn;
– run the retaining cable across the wheel rim and
release the wheel;
– depending on the vehicle, take out the shim from
inside the wheel rim.
2
5
4
4
3
6
 Loading...