

Page 1

43-120 3.fm Page 1 Wednesday, August 18, 1999 8:37 AM
Cat. No. 43-1203
OWNER’S MANUAL
Please read before using this equipment.
TFX-1031
Fax Machine/Telephone
Page 2

y
g
g
y
y
j
g
y
g
43-120 3.fm Page 2 Wednesday, August 18, 1999 8:37 AM
INTRODUCTION
Your Radio Shack TFX -1031 Fa x Machine/telephone uses advanced telephone and computerized imaging
technology to send copies of your important documents. Your fax machine’s microprocessor-controlled
functions make it easy to install and
use.
The TFX-1031 includes these advanced features:
Memor
Dialin
— lets you program
up to 35 phone numbers into mem ory
for rapid dialing.
Built-In Te lephone
— lets you make
regular phone calls or talk to the op erator of the other fax machine.
Call Request
— lets you request
voice contact with the party at the other fax machine (if their fax machine
also has the call request feature).
Built-In Answerin
Switch
— lets you connect an an-
Machine/Fax
swering machine to the fax machine
so it can automatically route voice
calls to the answering machine.
Fax Information St am p
— prints your
name, phone number, and the date
and time on faxes you sen d s o the f ax
recipient can identify the fax source.
S
stem Reports
— let you print out
the numbers stored in memory, transmission and reception journals, and
user-selected settings. You can also
print a quick reference guide (help list)
for the fax machine’s basic functions.
Copier Fea ture
— lets you use your
fax machine as a personal copier.
Group 3 Capabilit
— permits faster
fax transmission.
Fine Mo de
— lets you adjust the machine for sending documents with
lighter/smaller type, such as from a
dot-matrix printer.
ustable Resolution and Contrast
Ad
— lets you send the best possible fax
according to the document type.
— speed-dials t he l as t num ber
Redial
dialed.
Automatic Reception Mode
— lets
you set the fax mac hine to automatically receive documents.
Pollin
— allows you to retrieve documents from an unattended rem ote fax
machine.
Tempo rar
Tone Dialing (LDT)
—
lets you use tone-access services,
such as alternate long distance, from
a pulse line.
Hearin
Aid Compatible
— lets you
use the telephone with hearing aids
that have a T (telephone) switch.
We recommend you record the fax
machine’s serial number here. The serial number is on the fax machine’s
bottom panel.
Serial Number: _________________
© 1996 Tandy Corporation.
Radio Shack is a registered trademark used by Tandy Corporation.
All Rights Reserv ed .
2
Page 3
CAUTION
43-120 3.fm Page 3 Wednesday, August 18, 1999 8:37 AM
READ THIS BEFORE
INSTALLATION
The Telephone Consumer Protection
Act of 1991 makes it illegal to use a
computer or other electron ic device to
send a message via a fax machine unless the message clearly cont ain s in a
margin at the top or bottom of each
transmitted page or on the first page:
• The transmission’s date and time
• The name of the individual, business, or other entity sending the
message
• The sending machine or business’
phone number
To program this information into your
TFX-1031, complete t he steps in “Entering Basic Information” on Page 11.
We designed your fax machine to conform to federal regulations, and you
can connect it to most phone lines.
However, each fax machin e (and other device, such as a phone or answering machine) that you con nect to the
phone line draws power. We refer to
this power draw as the ring er equivalence number, or REN. The REN is on
the fax machine’s bottom panel.
If you use more than one phone or
other device on the line, add up all the
RENs. If the total is more than five,
phones might not ring. In rural areas,
a total of three might impair ringer o peration. If ringer operation is impaired,
disconnect a device from the line.
FCC STATEMENT
Your fax machine complies with Part
FCC Rules
68 of
quest, provide the FCC registration
number and the REN to your telephone company. Both numbers are
shown on the fax machine’s bottom
panel.
Note:
You must not connect your fax
machine to:
• Coin-operated systems
• Party-line systems
• Most electronic key systems
Warning
: To prevent fire or shock hazard, do not expose t his product to rain
or moisture.
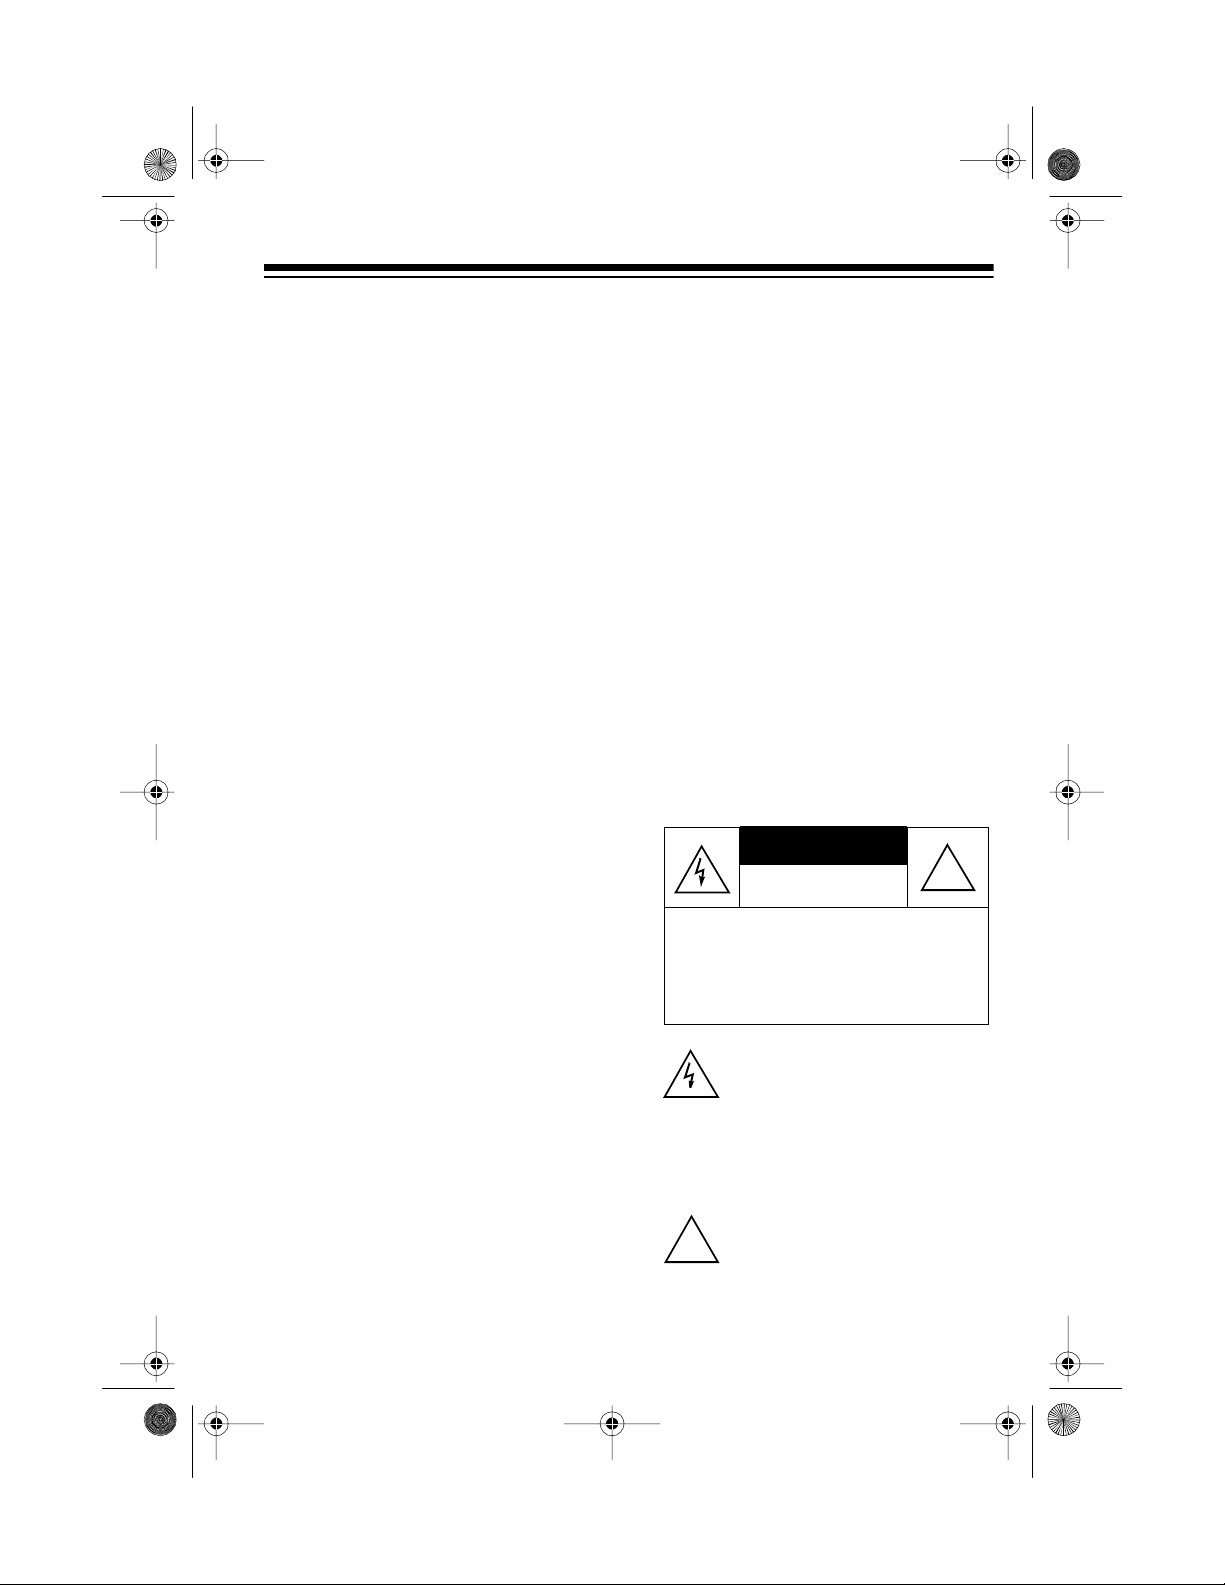
CAUTION
ELECTRIC SHOCK, DO NOT REMOVE
COVER OR BACK. NO USER-SERVICEABLE PARTS INSIDE. REFER SERVICING TO QUALIFIED PERSONNEL.
This symbol is inten ded to alert yo u
to the p r es en c e o f un in su lated d an gerous voltage within the product’s
enclosure that mi ght be of suff icient
magnitude to constitute a risk of
electric shock. Do not open the
product’s case.
This symbol is intended to inform
you that important operating and
!
maintenance instructions are included in the literature accompanying this product.
. You must, upon re-
RISK OF ELECTRIC SHOCK.
DO NOT OPEN.
: TO REDUCE THE RISK OF
!
3
Page 4

g
g
g
g
43-120 3.fm Page 4 Wednesday, August 18, 1999 8:37 AM
CONTENTS
Unpacking . . . . . . . . . . . . . . . . . . . . . . . . . . . . . . . . . . . . . . . . . . . . . . . . . . . . . . . 6
Installation . . . . . . . . . . . . . . . . . . . . . . . . . . . . . . . . . . . . . . . . . . . . . . . . . . . . . . 7
Choosing a Location . . . . . . . . . . . . . . . . . . . . . . . . . . . . . . . . . . . . . . . . . . . . 7
Connecting the Handset Cord . . . . . . . . . . . . . . . . . . . . . . . . . . . . . . . . . . . . . 7
Connecting to the Phone Line . . . . . . . . . . . . . . . . . . . . . . . . . . . . . . . . . . . . . 7
Connecting to Power . . . . . . . . . . . . . . . . . . . . . . . . . . . . . . . . . . . . . . . . . . . . 8
Using the One-Touch Memory Labels . . . . . . . . . . . . . . . . . . . . . . . . . . . . . . . 8
Connecting an Extension Phone or Answering Machine . . . . . . . . . . . . . . . . . 8
Settin
Enterin
Usin
Usin
Advanced Features . . . . . . . . . . . . . . . . . . . . . . . . . . . . . . . . . . . . . . . . . . . . . . 24
Up the Fax Machine . . . . . . . . . . . . . . . . . . . . . . . . . . . . . . . . . . . . . . . . 9
Setting the Telephone Dialing Mode . . . . . . . . . . . . . . . . . . . . . . . . . . . . . . . . 9
Setting the Ringer Switch . . . . . . . . . . . . . . . . . . . . . . . . . . . . . . . . . . . . . . . . 9
Loading and Replacing Paper . . . . . . . . . . . . . . . . . . . . . . . . . . . . . . . . . . . . 10
Basic Information . . . . . . . . . . . . . . . . . . . . . . . . . . . . . . . . . . . . . . . . 11
Setting the Date and Time . . . . . . . . . . . . . . . . . . . . . . . . . . . . . . . . . . . . . . . 11
Setting Your Phone Number and Name . . . . . . . . . . . . . . . . . . . . . . . . . . . . 11
Entering Names . . . . . . . . . . . . . . . . . . . . . . . . . . . . . . . . . . . . . . . . . . . . . . . 13
Character Code Table . . . . . . . . . . . . . . . . . . . . . . . . . . . . . . . . . . . . . . . . . . 14
Storing Numbers for Automatic Dialing . . . . . . . . . . . . . . . . . . . . . . . . . . . . . 15
the Telephone . . . . . . . . . . . . . . . . . . . . . . . . . . . . . . . . . . . . . . . . . . . . . 17
Making a Call . . . . . . . . . . . . . . . . . . . . . . . . . . . . . . . . . . . . . . . . . . . . . . . . . 17
Adjusting the Speaker Volume . . . . . . . . . . . . . . . . . . . . . . . . . . . . . . . . . . . 17
Redialing . . . . . . . . . . . . . . . . . . . . . . . . . . . . . . . . . . . . . . . . . . . . . . . . . . . . 17
Using Flash . . . . . . . . . . . . . . . . . . . . . . . . . . . . . . . . . . . . . . . . . . . . . . . . . . 17
Switching from Pulse to Tone Dialing . . . . . . . . . . . . . . . . . . . . . . . . . . . . . . 18
Chain Dialing . . . . . . . . . . . . . . . . . . . . . . . . . . . . . . . . . . . . . . . . . . . . . . . . . 18
the Fax Machine . . . . . . . . . . . . . . . . . . . . . . . . . . . . . . . . . . . . . . . . . . . 19
Making a Copy . . . . . . . . . . . . . . . . . . . . . . . . . . . . . . . . . . . . . . . . . . . . . . . . 19
Sending Faxes . . . . . . . . . . . . . . . . . . . . . . . . . . . . . . . . . . . . . . . . . . . . . . . . 20
Receiving Faxes . . . . . . . . . . . . . . . . . . . . . . . . . . . . . . . . . . . . . . . . . . . . . . 23
Using Call Request . . . . . . . . . . . . . . . . . . . . . . . . . . . . . . . . . . . . . . . . . . . . 24
Receiving a Fax at an Extension Telephon e . . . . . . . . . . . . . . . . . . . . . . . . . 25
Polling . . . . . . . . . . . . . . . . . . . . . . . . . . . . . . . . . . . . . . . . . . . . . . . . . . . . . . 25
Using Help Features . . . . . . . . . . . . . . . . . . . . . . . . . . . . . . . . . . . . . . . . . . . 25
Using the Function Menu . . . . . . . . . . . . . . . . . . . . . . . . . . . . . . . . . . . . . . . . 26
Printing a Report . . . . . . . . . . . . . . . . . . . . . . . . . . . . . . . . . . . . . . . . . . . . . . 26
Setting User Options . . . . . . . . . . . . . . . . . . . . . . . . . . . . . . . . . . . . . . . . . . . 27
Clearing Memory . . . . . . . . . . . . . . . . . . . . . . . . . . . . . . . . . . . . . . . . . . . . . . 28
4
Page 5

43-120 3.fm Page 5 Wednesday, August 18, 1999 8:37 AM
Troubleshooting . . . . . . . . . . . . . . . . . . . . . . . . . . . . . . . . . . . . . . . . . . . . . . . . 29
Error Messages . . . . . . . . . . . . . . . . . . . . . . . . . . . . . . . . . . . . . . . . . . . . . . . 29
Clearing a Document Jam . . . . . . . . . . . . . . . . . . . . . . . . . . . . . . . . . . . . . . 29
Clearing a Paper Jam . . . . . . . . . . . . . . . . . . . . . . . . . . . . . . . . . . . . . . . . . . 30
Care and Maintenance . . . . . . . . . . . . . . . . . . . . . . . . . . . . . . . . . . . . . . . . . . . 32
Cleaning the Roller and Scanning Glass . . . . . . . . . . . . . . . . . . . . . . . . . . . 33
The FCC Wants You to Know . . . . . . . . . . . . . . . . . . . . . . . . . . . . . . . . . . . . 34
Lightning . . . . . . . . . . . . . . . . . . . . . . . . . . . . . . . . . . . . . . . . . . . . . . . . . . . . 34
Specifications . . . . . . . . . . . . . . . . . . . . . . . . . . . . . . . . . . . . . . . . . . . . . . . . . . 35
5
Page 6

0
0
0
0
0
0
0
0
0
0
0
0
0
0
0
0
01
02
03
04
05
01
02
03
04
05
43-120 3.fm Page 6 Wednesday, August 18, 1999 8:37 AM
UNPACKING
Locate the following items as you unpack the f ax machine. We recommend you
keep the packing material in case you need to move the fax machine in the future.
Fax Machine
Paper Roll
Handset
Modular Phone Cord
AC Power Cord One-Touch Memory Labels
6
Page 7

0
43-120 3.fm Page 7 Wednesday, August 18, 1999 8:37 AM
INSTALLATION
CHOOSING A LOCATION
Select a location for your fax machine
that:
• Is not in direct sunlight
• Is near an AC power outlet and
modular phone line jack
• Is at least 4 inches from other
objects
• Is not near heating or air conditioner units
CONNECTING TO THE
PHONE LINE
• Does not block the ventilation
openings
Also note these important considerations:
• Keep cords out of the way of normal activities.
• Do not place objects on top of or
under the fax machine.
• Do not place the fax machine on a
rugged surface or on a thick carpet, which might cause a jam
when you feed a document.
CONNECTING THE
HANDSET CORD
Connect one end of the supplied
coiled cord to the jack on the handset .
Then plug the other end into the
HANDSET
fax machine. Place the hand set in its
cradle.
jack on the left side of the
Plug one end of t he supplied modular
telephone cord into the
on the back of the fax machine. Plug
the other end of the cord into a modular telephone line jack.
If the phone line does n ot have
Note:
a modular jack, you must update the
wiring. You can convert the wiring
yourself or have the telephone company update it for you.
• Radio Shack stores sell jacks and
adapters to convert older wiring
methods to modular wiring.
• The telephone company charges
to install the necessary jacks.
• The USOC number o f the jack to
be installed is RJ11C.
• This fax machine might not be
compatible with external in-line
telephone amplifiers.
TEL LINE
jack
7
Page 8
0
0
0
0
0
0
0
0
0
0
43-120 3.fm Page 8 Wednesday, August 18, 1999 8:37 AM
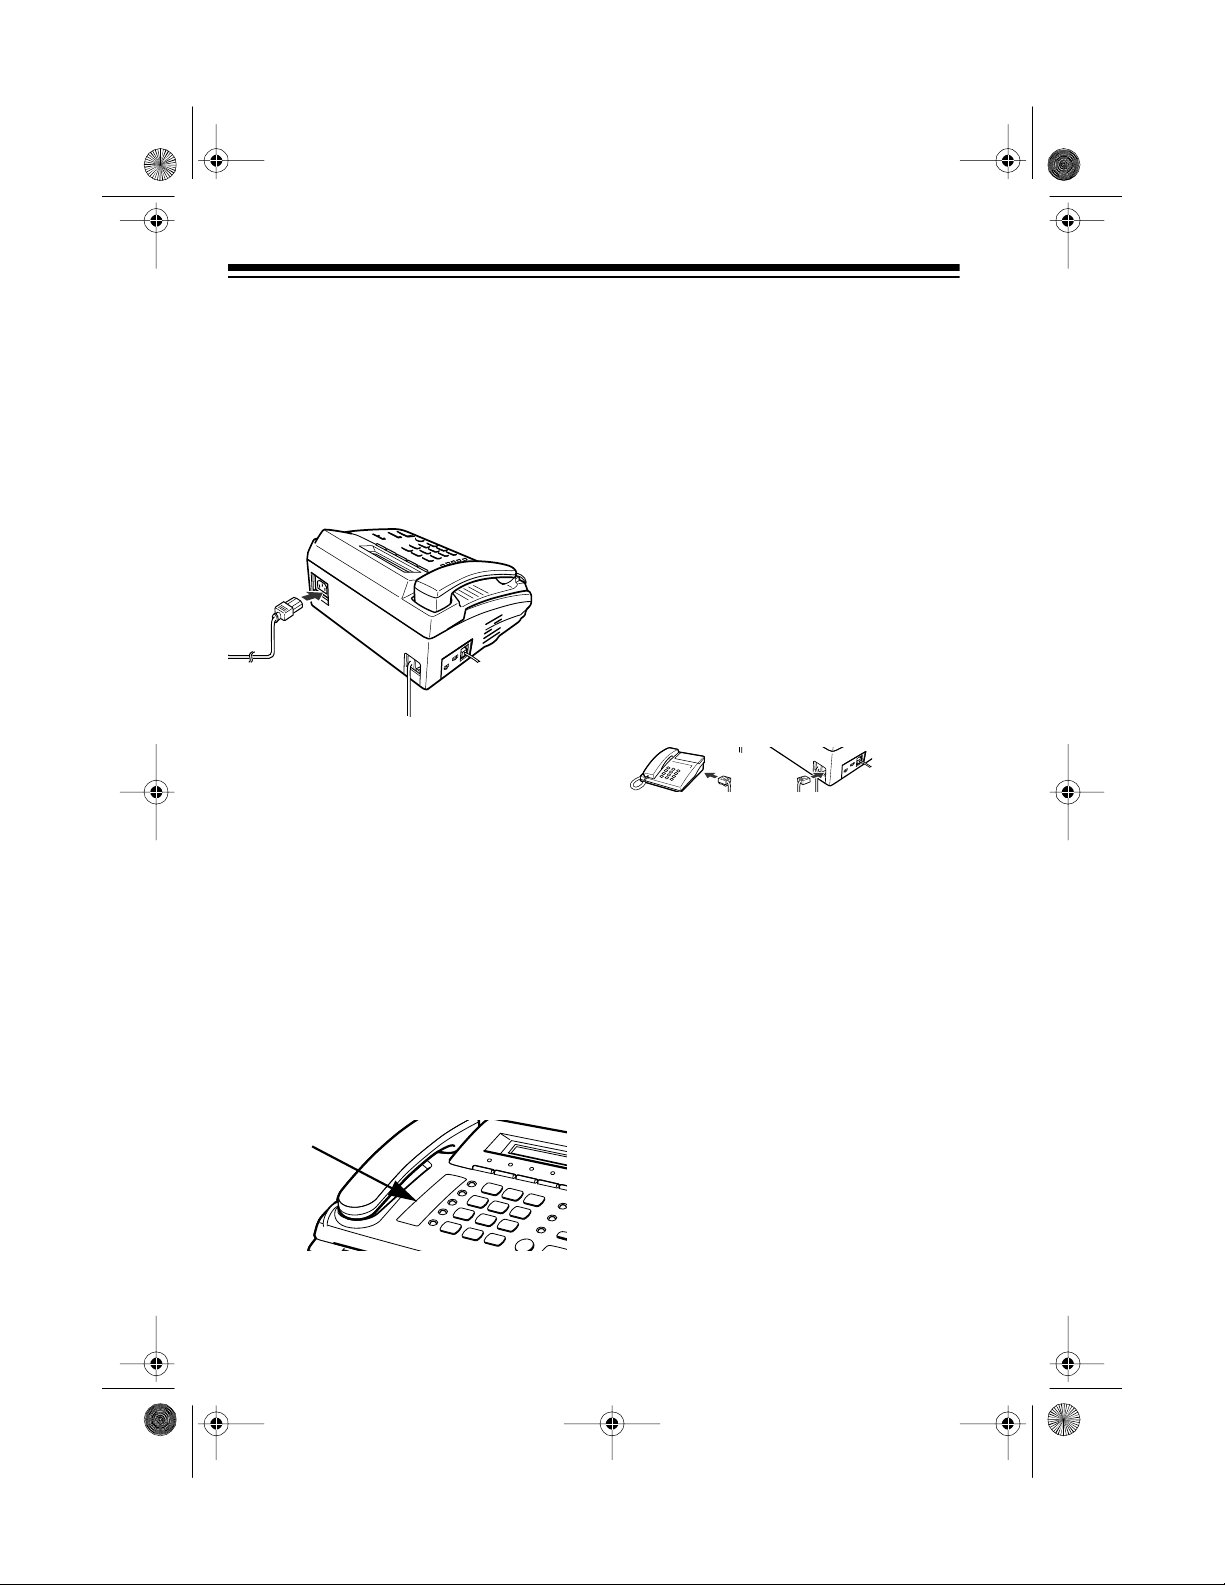
CONNECTING TO
POWER
Plug one end of t he supplied 3-prong
AC power cord into the AC power jack
on the back of the fax machine. Then
plug the other end into a standard
grounded 3-prong AC power outlet.
0
0
0
0
0
0
0
0
0
0
0
0
0
0
0
0
0
0
0
0
0
0
0
0
0
0
0
0
0
0
0
0
0
0
0
0
0
0
0
0
0
0
0
0
0
0
0
0
0
0
0
0
0
0
0
0
0
0
0
Caution:
The polarized 3-prong plug
only fits in 3-prong outlets. If the AC
outlet does not have holes for all three
prongs, have an electrician install a
properly grounded outlet.
USING THE ONE-TOUCH
MEMORY LABELS
CONNECTING AN
EXTENSION PHONE OR
ANSWERING MACHINE
To connect an ex tension tele phone or
answering machine to your fax machine, plug one end of a modular telephone cord (not supplied) into the
LINE
jack on the fax machine’s left
side. Then plug the cord’s other end
into the telephone you want to use as
an extension or into an answering machine.
Note:
Connecting the fax to an answering machine lets you use the answering machine/fax switch feature.
See “Receiving Faxes” on Page 23.
EXT
Peel off the backing from one of the
one-touch memory labels and stick
the label next to the o ne-to uch m emory keys.
One-Touch
Memory
Label Area
0
0
0
0
0
0
0
0
0
0
0
0
0
0
0
8
Page 9
0
0
0
43-120 3.fm Page 9 Wednesday, August 18, 1999 8:37 AM
SETTING UP THE FAX MACHINE
SETTING THE
TELEPHONE DIALING
MODE
Set / (Tone/Pulse) on the fax
machine’s left side for the type of service you have.
If you are not sure what type you
have, do this test.
1. Lift the handset and listen for a
dial tone.
2. Set / to .
3. Press any number other than 0.
If the dial tone stops, you have
touch-tone service. Leave /
set to .
SETTING THE
RINGER SWITCH
The ringer switch on the left side
of the fax machine lets you set the
ringer volume.
Set the switch all the way toward the
back of the fax machine for a louder
ring. Set the switch to the dot if you do
not want the ringer to sound.
You can still make calls with the
Note:
ringer off, and answer calls if you hear
an extension phone ring.
If the dial tone continues, you
have pulse service. Set /
to .
9
Page 10
0
0
0
0
0
0
0
0
0
0
0
0
0
0
0
0
0
0
0
0
0
0
0
0
0
0
0
0
0
0
0
0
0
0
0
0
0
0
0
0
0
0
0
0
0
0
0
0
0
0
0
0
0
0
0
43-120 3.fm Page 10 Wednesday, August 18, 1999 8:37 AM
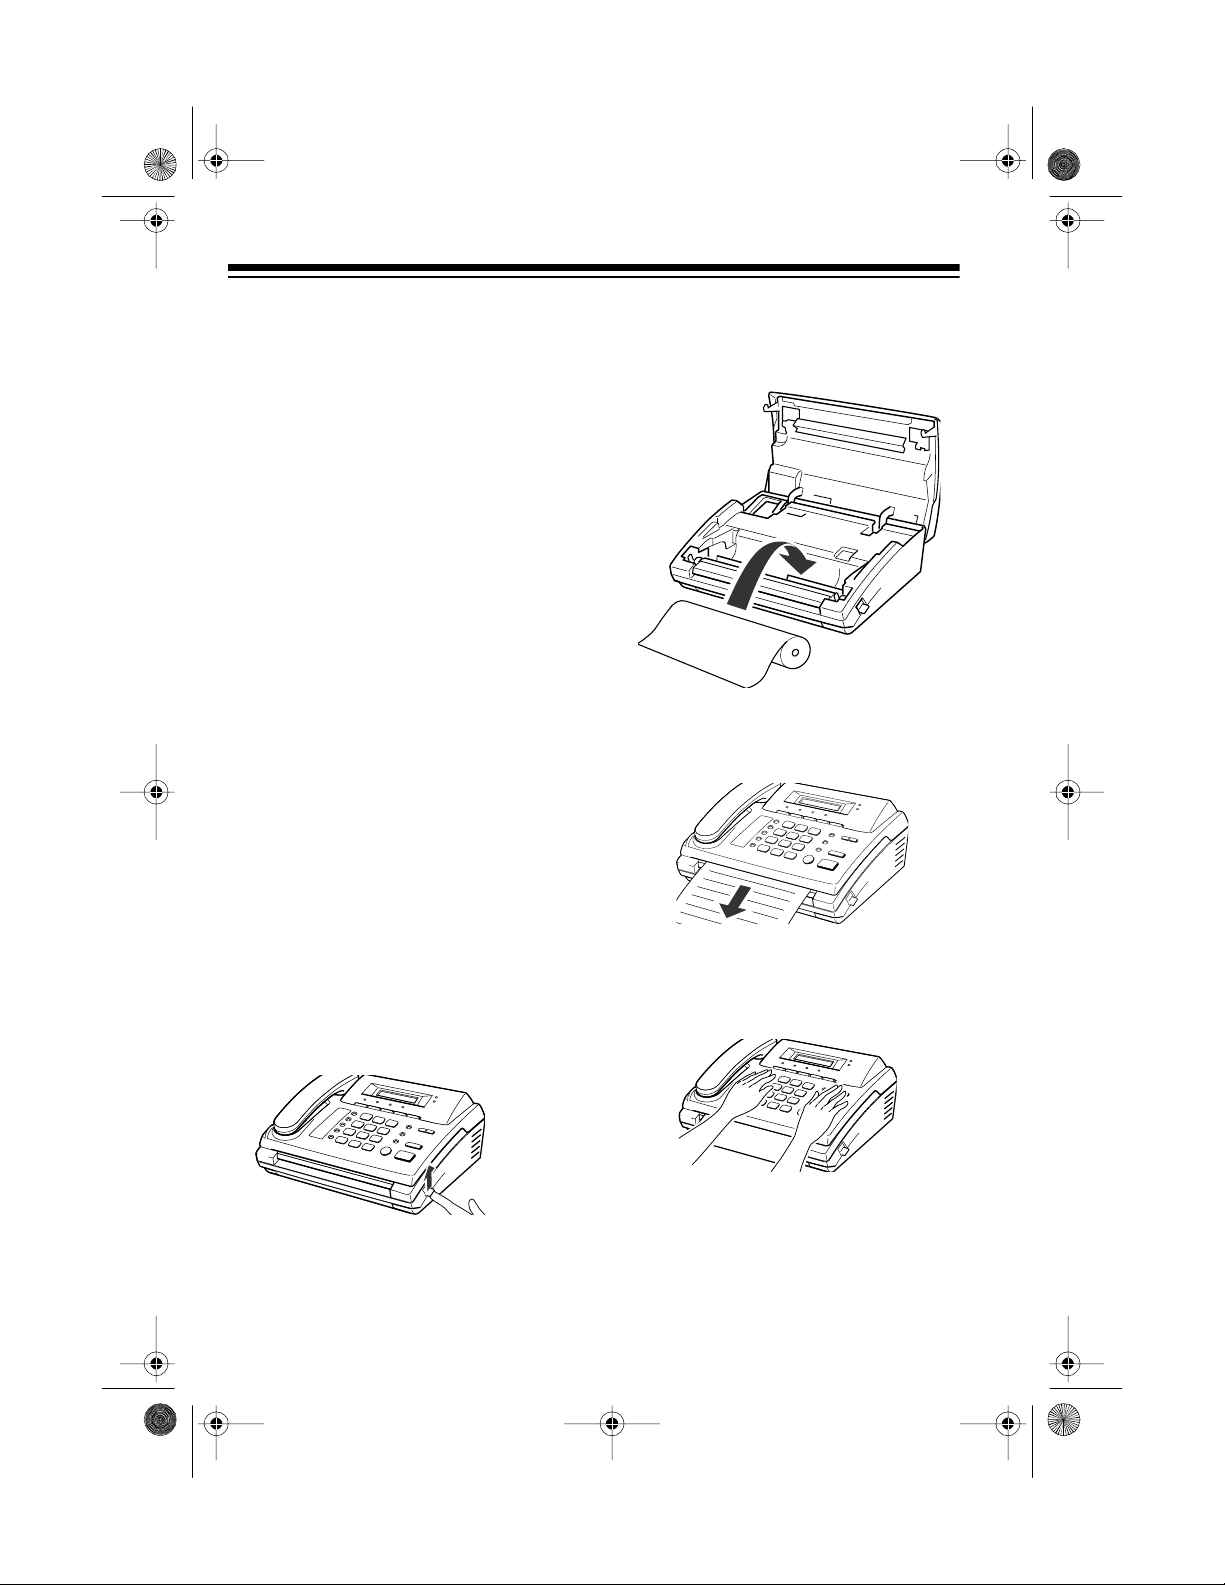
LOADING AND
REPLACING PAPER
Before you use your machine, load
the supplied fax paper roll. Replace
the paper when the ERROR in dicator
lights and the fax machine displays
PAPER
. Your fax machine uses up to
a 98-foot (30-meter) roll.
Notes:
• The outer diameter of the paper
roll cannot be more than 2 inches.
• For the best results, use only
Radio Shack fax paper. Other
papers can cause poor results
and even damage the fax
machine.
• Thermal fax paper is sensitive to
heat and sunlight and eventually
fades. If you need to keep a faxed
document for a long time, we suggest you make a photocopy of it.
NO
2. Place the paper roll in the compartment so the paper exits from
the top of the roll.
3. Pull out the paper edge from the
edge of the fax machine as
shown.
Follow these steps to load the paper
roll.
1. Open the cover by lifting the
release lever on the side of the fax
4. Press down on both sides of the
cover until it clicks shut.
machine.
0
0
0
0
0
0
0
0
0
0
0
0
0
0
0
0
0
0
0
0
0
The fax machine sounds a tone and
feeds out about another inch of paper.
Tear off the paper.
10
Page 11

43-120 3.fm Page 11 Wednesday, August 18, 1999 8:37 AM
ENTERING BASIC INFORMATION
The TFX-1031 has several basic settings that help you track the documents you send and receive.
SETTING THE DATE AND
TIME
Set the date and time so they appear
in the top margin of all sent faxes.
To cancel the date and time set-
Note:
ENTER
, then 1.
.
.
STOP
any time
. Your fax ma-
or <, then
ting procedure, press
before you press
chine returns to standby.
1. Press
FUNCTION
: [1] DATE & TI ME
2. Press
ENTER
: [MM-DD] DD-MM
3. Select the date format (month
then day, or day then month) by
pressing
press
DIRECTION >
ENTER
: 10-27-9 6 07 :0 5
• If you make a mistake, use
DIRECTION <
cursor to the incorrect number,
then enter the correct number.
6. When you finish, press
or > to move the
ENTER
.
: 10-15 16:30 TEL
The fax machine displays the date
and time, then returns to standby.
SETTING YOUR PHONE
NUMBER AND NAME
You must enter your phone number
and name before you send a fax, so
your fax recipients can identify the f ax
source.
Notes:
• It is illegal to send a fax without
identifying the individual/entity
sending the fax and their phone
number.
• The phone num ber and name can
be 20 characters each.
4. Press
DIRECTION <
the cursor under the digit you
want to change.
or > to mo ve
: 10-2 7-9 6 07 :0 5
5. Use the keypad to enter the correct digit.
Notes:
• Set the time using the 24-ho ur
format (add 12 hours to times
after 12 noon; for example,
enter 4:30 PM as 16:30).
: 10-15-9 6 16 :3 0
• To stop setting the phone number
and name, press
before you press
machine returns to standby.
1. Press
FUNCTION
STOP
ENTER
, then 0.
any time
. Your fax
: [0] TERM.ID
2. Pres s
ENTER
.
: TEL.:
11
Page 12

43-120 3.fm Page 12 Wednesday, August 18, 1999 8:37 AM
3. Use the key pad to enter your telephone number.
: TEL.:74 5 00 84
You can enter up to 20 digits,
including special characters
(space, hyphen, or plus sign).
To enter a space, press
PAUSE
press
press
4. Press
. To enter a hyphen (-),
#
. To ente r a plus sign (+),
*
.
ENTER
when the number
REDIAL/
appears correctly.
: NAME:
5. Enter your name using the number keys and
DIRECTION
buttons.
(For details on entering the name,
see “Entering Names” on Page
13.)
: NAME:SM IT H CO
6. Press
appears correctly.
ENTER
when the name
Notes:
• If you make a mistake, press
DIRECTION
or > to move the cur-
<
sor to the incorrect number or
character, then enter the correct
one.
• If there is a number or name
already assigned, the fax machine
displays the number or name.
• To insert one character or number,
move the cursor to the position
you want to insert, press
INS
enter the new character or number. The cursor moves to the next
position .
• To delete one character or number, move the cursor to the position you want to delete, then press
DEL
.
, then
:10-15 16:30 TEL
The fax machine returns to standby.
12
Page 13

43-120 3.fm Page 13 Wednesday, August 18, 1999 8:37 AM
ENTERING NAMES
Some options require you to select
and store characters — for example,
entering your name or storing names
for memory dialing.
Follow these steps when the fax machine prompts you to enter a name.
1. Repeatedl y press the num ber but ton labelle d with t he character you
want until that character appears.
For example, to enter O, repeatedly press
6
(labeled
time you press
shows a different character — first
M
, then N, O, and finally 6.
Note:
For a list of characters and
their corresponding buttons, see
the character code table.
2. When the character you want
appears in the display, select the
next character in the same way
(pressing the next number button
the appropriate number of times).
MNO
). Each
6
, the display
3. When you are finished entering
characters, press
ENTER
.
: NAME:0
• If you press a different number
button, the cursor moves to the
right and the next character
appears at the next position.
• If the next character uses the
same number button, first press
DIRECTION >
to advance to the
next position.
: NAME:0P
13
Page 14

43-120 3.fm Page 14 Wednesday, August 18, 1999 8:37 AM
CHARACTER CODE TABLE
The table shows how many times to press eac h button to select a cha racter, symbol, or number.
1234567890
1st press space A D G J M P T W +
2nd press 1 B E H K N Q U X –
3rd press space C F I L O R V Y ,
4th press 1 2 3 4 5 6 S 8 Z .
5th press space A D G J M 7 T 9 /
6th press 1 B E H K N P U W *
7th press space C F I L O Q V X #
8th press 1 2 3 4 5 6 R 8 Y &
9th press space A D G J M S T Z 0
For example: To enter ‘MY CO.’:
6
1. Press
2. Press
3. Press
4. Press
5. Press
6. Press
once to select ‘M’.
9
three times to select ‘Y’.
1
once to select ‘ ‘ (space).
2
three times to select ‘C’.
6
three times to select ‘O’.
0
four times to select ‘.’
(period).
14
Page 15

43-120 3.fm Page 15 Wednesday, August 18, 1999 8:37 AM
STORING NUMBERS
FOR AUTOMATIC
DIALING
Storing a Number for
One-Touch Dialing
You can store up to five tele phone or
fax numbers for one-touch dialing.
You can then qu ickly dial the number
by pressing the one-touch button
where you stored it.
Note:
To stop storing a number, press
STOP
at any time before Step 4. The
fax machine returns to standby. If necessary, start over again.
1. Press a nd hold the one-touch button (next to the handset cradle)
where you want to store a number
until the fax machine displays:
: STORE ONETOUCH x
Note:
x
is the number of the on etouch button where you are storing the number.
2. Enter the telephone number (up to
34 digits).
: TEL.:9P 46 02 77 8
Note:
Press
insert a 4-second pause between
numbers. The fax machine dis-
P
plays
for the pause.
REDIAL/PAUSE
to
4. If desired, enter a name (up to 20
characters). For details on entering the name, see “Entering
Names” on Page 13.
: NAME:ABC
5. When the name appears correctly,
ENTER
press
The fax machine returns to standby.
To store more tele phone num bers , repeat these steps.
Notes:
• If you make a mistake, use
TION <
the incorrect digit/character and
enter the new one. You can also
INS
use
digits/characters.
• If there is a number or name
already assigned to the selected
one-touch button, the fax machine
displays that number or name. If
you want to change the number or
name, enter the new number or
name over the old one. Otherwise,
STOP
press
• Write down the names for each
one-touch dialing number on the
supplied name card. (Use a pencil
in case you want to change the
numbers later.) Then peel the
backing from the card and stick it
next to the memory buttons.
.
DIREC-
or > to move the cursor to
DEL
or
to insert or delete
.
3. When the number appears correctly, press
ENTER
.
: NAME:
15
Page 16

43-120 3.fm Page 16 Wednesday, August 18, 1999 8:37 AM
Storing a Number for
Memory Dialing
You can store up to 30 telephone or
fax numbers into two-digit memory
dial locations. You can then dial the
number by pressing
then entering the two-digit number
where you stored it.
To stop storing a number, press
Note:
STOP
any time before S tep 4. The f ax
machine returns to standby. If necessary, start over again.
1. Press and hold
fax machine displays:
: STORE MEM. DIAL
: MEM. NO[01-30] ??
2. Enter a two-digit locat ion number
(01 through 30) where you want to
store the number.
: MEM.NO[01-30] 01
3. Enter the number you want to
store (up to 34 digits).
MEMORY
MEMORY
and
until the
5. If desired, enter the name (up to
20 characters). For details on
entering the name, see “Entering
Names” on Page 13.
: NAME:XYZ
6. Pres s
appears correctly. The fax
machine returns to the display
shown in Step 2.
Notes:
• If you make a mistake, use
TION <
the incorrect digit/character and
enter the new one over it. You can
also use
delete digits/characters.
• If there is a number or name
already assigned to the selected
two-digit memory dial location, the
fax machine displays the number
and name. If you want to chan ge
the number or name, enter the
new number or name over the old
one. Otherwise, press
ENTER
when the name
DIREC-
or > to move the cursor to
INS
or
DEL
to insert or
STOP
.
: TEL.:9P 46 02 77 8
Note:
Press
insert a 2-second pause between
numbers. The fax machine dis-
P
plays
at the pause entry.
4. When the number appears correctly, press
REDIAL/PAUSE
ENTER
.
: NAME:
16
to
Page 17

43-120 3.fm Page 17 Wednesday, August 18, 1999 8:37 AM
USING THE TELEPHONE
MAKING A CALL
1. Pick up the handset, or press
DIAL
. Y ou hear a dial tone.
2. Dial the telephone number.
If you stored the number in mem -
ory, press the one-touch button
(next to the handset cradle) or
MEMORY
press
location number.
3. When the receiving party
answers, pick up the handset (if
necessary) and begin your conversation.
4. Replace the handset.
and the two-digit
ADJUSTING THE
SPEAKER VOLUME
When the fax machine is making a
call, you hear the dial tone, the dialing
signals, and the ringing or busy signal
through the built-in speaker. Press
VOLUME <
sound to adjust the speaker volume to
a comfortable level.
or > while you hear the
REDIALING
To save time when you make a pho ne
call or send a document, you can redial a busy or unanswered number as
many times as you want by pressing
REDIAL/PAUSE
Your fax machine dials the last num ber dialed, and you can hear the dialing process through the speaker.
If you get a bus y signal or there is no
answer, press
.
DIAL
to end the call.
USING FLASH
FLASH
provides the electronic equivalent of the switchhook signal required
by many special services such as call
waiting (a service available from most
telephone companies).
For example, if you hav e call waiting,
you can press
call on hold and t ak e a s econd incoming call on the same line. Pressing
FLASH
again lets you alternate between the two calls.
FLASH
to put the first
If you do not subscribe to a s er-
Note:
vice that uses a switchhook signal, do
not press
might disconnect the call.
FLASH
during a call. You
17
Page 18

43-120 3.fm Page 18 Wednesday, August 18, 1999 8:37 AM
SWITCHING FROM
PULSE TO TONE
DIALING
If you have pulse (rotary) service, you
can still use touch-tone services, such
as alternate long distance, by following these steps.
1. Enter the special service’s number using pulse dialing.
2. When the special service
LDT (*
answers, press
*
pad.
appears in the display.
3. Enter the remaining numbers
required by the service. The num bers are sent as tone signals.
The fax machine returns to the pulse
mode after you hang up.
Note:
entry can be stored i n memory . When
you memory dial the number, dialing
stops at the LDT entry. To dial the remaining numbers, press
PAUSE
The LDT (long distance tone)
.
) on the key-
REDIAL/
CHAIN DIALING
Notes:
• You can combine manual, onetouch, and memory dialing.
• The length of time before the computer answers varies, so we suggest you do not use a preprogrammed pause after a service
number.
• If you have pulse-dialing service,
be sure to include a pulse-to-tone
mode change (LDT) in front of the
numbers that you want to dial
after the service answers.
Follow these steps to chain-dial.
1. If you want to send a document
using chain dialing, load a document face down into the document feeder. See “Loading a
Document” on Page 20.
2. Pick up the handset or press
DIAL
.
: PHONE
3. Enter a telephone number.
For example, enter the long-
distance carrier’s number, using
either manual, one-touch, or
memory dialing.
When using special services, such as
alternate long-distance or bank-byphone, enter the phone number of the
special service first. Then, when the
computer answers, enter the remaining information, such as a longdistance number. This procedure is
called chain dialing.
18
: 5551234
Note:
If necessary, wait for a sec-
ond dial tone before continuing.
4. Enter the additional numbers,
using manual, one-touch, or memory dialing.
: 55512349879543
Page 19

0
0
0
0
43-120 3.fm Page 19 Wednesday, August 18, 1999 8:37 AM
USING THE FAX MACHINE
MAKING A COPY
Your fax machine can copy documents. This lets you make test copi es
so you can check your fax machine’s
transmission quality before sending
documents.
1. Place the first page of the document face down with the top edge
going into the feeder slot and gently insert the leading edge into the
feeder slot.
0
0
0
0
0
0
0
0
0
0
0
0
0
0
0
0
0
0
0
0
The fax machine automatically
pulls in the page.
4. Wh en the copy is completed, the
fax machine beeps several times.
: INSERT DOCUMENT
If you want to copy more documents, insert the next page while
the fax machine is bee ping. If you
insert a page before the fax
machine beeps, the fax machine
displays the
error message and might stop
copying.
The fax machine copies the next
page.
If you do not insert another page,
the fax machine sounds two short
beeps.
DOCUMENT JAM
: DOCUMEN T LO AD IN G
2. If you are making a copy of photographs or other half tone images,
press
machine displays
more information on
PHOTO
FINE/PHOTO
until the fax
PHOTO
FINE
. For
and
, see “Setting the Resolu-
tion and Contrast” on Page 21.
Note:
matically set to
The print quality is auto-
FINE
when you are
making a copy.
3. Press
START/COPY.
: FINE COPY P:01
19
Page 20

0
0
0
0
0
0
0
0
0
0
0
0
0
0
0
0
0
0
0
0
0
0
0
0
43-120 3.fm Page 20 Wednesday, August 18, 1999 8:37 AM
SENDING FAXES
Fax Tips
To ensure the best fax transmission
results:
• Never send documents that are
excessively curled, thin, torn,
coated, or crumpled.
• Let wet ink or correction fluid on
documents dry com pletely before
you send them.
• Never use carbon-type paper.
Make a plain-paper copy of any
questionable documen t and send
the copy.
• Remove staples, pape r clips, and
tape before you load a document .
Failure to do so might damage the
fax machine.
• The fax machi ne sends any d oc ument from 6 (W) × 5 (L) inches to
81/2 (W) × 59 (L) inches.
• If a communication error occurs,
the fax machine sounds a long
warning tone. Send the fax again.
Loading a Document
Note:
You can load only one sheet at
a time.
1. Turn the document face down and
gently insert the leading edge into
the feeder slot.
The fax machine automatically
pulls in the page.
2. When the document is loaded
properly, the fax machine displays:
: DOCUMENT LOADING
3. If necessary, adjust the resolution
and contrast setting according to
the type of documents. See “Setting the Resolution and Contrast”
on Page 21.
: NORMAL
4. You can now send the document.
See “Dialing Fax Numbers” on
Page 21.
20
Page 21

g
43-120 3.fm Page 21 Wednesday, August 18, 1999 8:37 AM
Setting the Resolution and
Contrast
You can use the
CONTRAST
lution and contrast, so you can send
high-quality documents or docum ents
with unusual contrast characteristics,
including photographs.
•Press
ments that have small or light type
(such as a newspaper or diagrams). The FINE indicator lights.
Press
a document containing photographs or shades of grey. The
PHOTO indicator lights.
The display alternates between
the selected resolution and the
standby display.
buttons to adjust the reso-
FINE/PHOTO
FINE/PHOTO
: FINE
: PHOTO
•Press
contrast setting. The fax machine
displays the current contrast setting.
CONTRAST
: CNTRST [* ** *- -- ]
To increase contrast for light originals, press
ber of asterisks. To decrease the
contrast for originals on colored
paper, press
number of asterisks.
FINE/PHOTO
once for docu-
again to send
to adjust the
>
to increase the num -
<
to decrease the
and
Dialing Fax Numbers
After you load a document and set the
desired resolution and contrast, dial
the fax number using either manual,
one-touch, or two-digit memory dialing.
Manual Dialin
1. Pick up the handset or press
DIAL
.
: PHONE
2. Dial the number.
: 5552777_
Note:
phone, tell the person you are
sending a fax.
3. Press
hear the fax tone from the receiving fax machine.
: SENDING
The fax machine displays the
name or number of the receiving
party, then the transmission
begins.
: SENDING P:01
When the transmission ends, t he
fax machine sounds several
beeps.
: INSERT DOCUMENT
4. If you want to send more pages,
insert the next page while t he fax
machine is beeping. The fax
machine sends the next sheet.
a Fax Number:
If someone answers the
ST ART/COPY
when you
21
Page 22

43-120 3.fm Page 22 Wednesday, August 18, 1999 8:37 AM
If you do not insert another page
within 5 seconds, the fax machine
sounds a long beep and en ds the
call.
: OK
Note: You can confirm the transmission result by printing out a confirmation report. You can set your fax
machine to automatically p rint the report after sending a fax or only when a
problem occurs (see “Setting User
Options” on Page 27).
One-Touch Dialing a Fax Number:
Note: To use this feature, you first
must store numbers in the on e-touch
memories. See “Storing Numbers for
One-Touch Dialing” on Page 15.
Press the desired one-touch memory
button (next to the phone cradle).
: DIALING
: 5552777 _
The fax machine dials the number
stored in the selected one-touch memory and transmission begins.
1. Pres s
MEMORY
.
: MEM.NO[01-30] ??
2. Enter a two-digit memory number.
: MEM.NO[01-30] 01
The fax machine dials the number
stored in the selected memory,
and transmission begins.
: DIALING
: 5552777_
Note: If you have not stored a
number in that memory, the fax
machine displays
ASSIGNED
Searching Memory for a Fax
Number:
If you do not remember the two-digit
memory number where you stored a
number, you can search for it.
1. Pres s
2. Pres s
backward or forward through the
memories until you find the
desired number.
.
MEMORY
DIRECTION <
.
or > to search
NOT
If you have not stored a number in that
memory, the fax machine displays
NOT ASSIG NE D
Two-Digit Memory Dialing a Fax
Number:
Note: To use this feature, you first
must store numbers into two-digit
memory dial locations.
22
.
Note: When you search past the
last number in memory, the fax
machine starts over again at the
beginning.
number.
ENTER
to dial the displayed
3. Press
Page 23

43-120 3.fm Page 23 Wednesday, August 18, 1999 8:37 AM
Canceling a Transmission
If you do not want to finish sending a
document, you can press
time to cancel it.
STOP
at any
RECEIVING FAXES
Reception Modes
Your fax machine has four reception
modes. To select a reception mode,
.
RECEIVE
until the fax
repeatedly press
machine displays the desired selection.
TEL
—The fax machine never answers incoming calls. You can recei ve
a fax only by manually pressing
START/COPY
FAX
—The fax machine answers all
incoming calls on the second ring and
immediately goes into the receive
mode, expecting a f ax to be sent. You
can change the number of rings (see
“Setting User Options” on Page 27).
Notes:
When the fax machine is standing by,
it displays the currently selected reception mode.
• Select
an answering machine to
LINE
machine.
• If your answering machine does
not answer the call within six
rings, the fax machine answers
the call and immed iately goes into
the receive mode.
• If you rarely use the phone line for
voice conversations, set the fax
machine to automatically receive
faxes by selecting either
AUTO
TAD
only if you connec ted
EXT
on the back of the fax
FAX
or
.
Canceling Reception
You can stop receiving a fax at any
time by pressing
STOP
.
TAD
—Your answering machine answers all calls. If the fax ma chine detects a fax tone, it cuts off the
answering machine and automatically
starts receiving the fax.
AUTO
— The fax machine a nswers all
calls. If it does not det ec t a f ax tone, it
sounds a secondary ring tone to advise you of a voice call.
23
Page 24

43-120 3.fm Page 24 Wednesday, August 18, 1999 8:37 AM
ADVANCED FEATURES
USING CALL REQUEST
If you are sending or receiving a document and you need to speak to the
other person during the same phone
call, use call request to alert the person at the remote fax machine. You
can also respond to a call request
made by the p erson at the remote f ax
machine.
Sending a Call Request
1. Press
sending or receiving a document.
The indicator lights and a call
request signal is sent to the
remote fax machine after the document has been sent or received.
2. When the phone rings, pick up the
handset and talk.
3. When you are finished, replace
the handset.
Notes:
CALL/POLL
while you are
• When you finish talking, if you
have another document to send,
load the document and tell the
other person to press
their remote machine. When you
hear a fax tone, press
COPY
.
• You can cancel a call request by
pressing
indicator turns off.
CALL/POLL
START
on
START/
again. The
Answering a Call Request
1. When the phone rings immediately after you send or receive a
fax, pick up the handset and begin
talking.
2. When you are finished, replace
the handset.
If you do not answer the call re-
Note:
quest within 15 s econds, the fax machine prints out the n umb er th at ma de
the call request, and the time and date
of the request.
• The person at the remote fax
machine has 15 seconds to pick
up the handset and begin talking
to you. If no one answers, your fax
machine returns to standby.
• C all request does no t work if the
remote fax machine does not
have the call request feature.
24
Page 25

43-120 3.fm Page 25 Wednesday, August 18, 1999 8:37 AM
RECEIVING A FAX AT AN
EXTENSION TELEPHONE
You can receive a fax from someone
you are talking to on a telephone connected to the
having to go to the fax machine.
1. When you hear a fax tone, press
on the extension telephone.
*9*
The fax machine receives the documents.
2. Hang up the telephone’s handset.
Notes:
• Press the buttons slowly in
sequence. If you still he ar the fax
tone from the remote machine, try
pressing
is the remote receive start
•
*9*
code preset at the factory. The
first and the last asterisks are
fixed, but you can change the middle number. For more information,
see “Setting User Options” on
Page 27.
EXT LINE
again.
*9*
jack, without
The person who wants to receive the
document calls the fa x machine holding the original and requests that the
document be sent. In other words, it
“polls” the fax machine holding the
original.
Notes:
• No documents should be loaded
in your machine, and the remote
machine must be ready for your
call and have the polling feature.
• Your TFX-1031 can only receive
polled documents. You cannot poll
documents from it to another fax
machine.
1. Lift the handset or press
2. Dial the remote fax machine’s
number.
3. When you hear a fax tone from
the remote fax machine, press
CALL/POLL
4. Your machine starts to receive the
document.
.
DIAL
.
• This feature only works from the
telephone connected to the
LINE
jack.
EXT
POLLING
Polling is when one fax machine requests that another fax machine send
a document. This is useful when the
person with the original document is
not in the office.
USING HELP FEATURES
You can print a help list of the f ax m achine’s basic functions and commands to use as a quick reference
guide. You can also use the function
menu to remind you how t o use a particular function.
25
Page 26

43-120 3.fm Page 26 Wednesday, August 18, 1999 8:37 AM
Printi ng Out the Help List
To print the help list, press
the time and date appear on the display.
HELP
while
USING THE FUNCTION
MENU
1. Press
2. Press the button (0–4) corre-
3. Press
Manually Scrolling through
the Function Menu
Instead of waiting for the function
menu to cycle through each choice,
you can manually scroll through the
menu to quickly view your choices.
FUNCTION
The fax machine scrolls a display
of all the settings you can change.
.
: [0] TERM. ID
: [1] DATE & TI ME
: [2] SYSTE M DA TA
: [3] REPOR T
: [4] MEMOR Y CL EA R
sponding to the function you want
to change.
If you do not press a button, the
fax machine cycles through all
choices for 60 seconds, then
returns to the date and time.
STOP
at any time to exit the
function menu.
1. Pres s
2. Each time you press the button,
3. When the fax machine displays
4. Pres s
FUNCTION
or > while the function menu is
displayed.
the fax machine displays the next
function you can change.
the function you want, press
ENTER
function menu.
.
STOP
at any time to exit the
DIRECTION <
or
PRINTING A REPORT
To help you maintain records of the
documents you send and receive, or
check/recall the one-touch and twodigit memory numbers or optional user
settings, the fax machi ne c an print out
several different reports.
1. Pres s
2. Pres s
3. Select the re port you want to print
FUNCTION
, then 3.
: [3] REPORT
ENTER
.
: CONFIRM.REPORT
by pressing
DIRECTION <
or >.
: TX/RX JOURNAL
Confirmation Report:
manually print this report or, by
selecting the appropriate user
option, you can have a confirmation report printed automatically
after each document you send.
You can
26
Page 27

43-120 3.fm Page 27 Wednesday, August 18, 1999 8:37 AM
TX/RX Journ al: This report gives
specific information concerning
faxes you have sent and received.
System Data List: This list shows
the status of user selectable
options. After you change t he settings, print out this list to confirm
your changes.
Tel. Number List: This list shows
all numbers currently stored in
one-touch and two-digit memory
locations. Before changing or adding memory numbers, print this
report to check which numbers
are currently stored. After making
changes, print this report to confirm the new settings.
4. Press
ENTER
.
: PRINTIN G
The fax machine prints the selected
report.
SETTING USER
OPTIONS
Your fax machine has many user-selectable options. These options are
preset at the factory. To find out how
the options are current ly set, print the
System Data List. (See “Printing a Report” on Page 26.)
Setting an Option
1. Press
2. Pres s
3. Select the desired feature by
4. Press
FUNCTION
, then 2.
: [2] SYSTEM DATA
ENTER
.
: CONFIRM.REPORT
pressing
DIRECTION <
or >.
: RING COUNT
ENTER
displays the feature’s current setting.
Confirmation Report — A confirmation report shows whether the
transmission was successful or
not, how many pages were sent,
and so on.
DIRECTION <
Press
the desired setting.
• Select
print a confirmation report each
time you send a fax.
• Select
ture.
• Select
print a confirmation repo rt only
when a transmission error
occurs.
Ring Count — Enter a number
from 1 – 7 t o sel ec t th e number of
times your fax machine rings
before answering a call, then
ENTER
press
. The fax machine
or > to select
YES
to automatically
NO
to disable this fea-
ERROR
to automatically
.
27
Page 28

43-120 3.fm Page 28 Wednesday, August 18, 1999 8:37 AM
Note: If you use your fax m achine
as both a telephone and a fax
machine, we suggest you set the
ring count to at least 4 t o give you
time to answer.
Remote Receive Code—The
remote receive code lets you start
receiving a fax from a phone
plugged into the
you pick up the phone and hear
fax tones, you can enter the
remote receive code so the fax
machine starts receiving the fax.
The receive code i s pres et t o
You can change the middle character (0–9), but you cannot
change the asterisks (
Enter the number you want to use,
then press
Auto Print —Select
the fax machine automatically
print a report after every 30 faxes
(received and sent). Select
disable this feature.
5. To exit and return to standby,
press
machine stores the options you
have changed.
STOP
EXT LINE
ENTER
.
twice. The fax
).
*
YES
jack. If
to ha ve
NO
*9*
to
CLEARING MEMORY
You can clear all or part of the information you have stored in your fax
machine’s memory.
1. Press
2. Pres s
3. Select the items you want to clear
.
4. When the desired item appears,
5. Pres s
FUNCTION
, then 4.
: [4] MEMORY CLEAR
ENTER
by pressing
.
DIRECTION <
: TERM.ID
You c an choos e from these items:
1. TERM. ID
2. TX/RX JOURNAL
3. SYSTEM DATA
4. ONE TOUCH DIAL
5. MEMORY DIAL
ENTER
press
.
: ARE YOU SURE ?
ENTER
the item.
if you want to clear
: MEMORY CLEARED !
The selected memory is cleared.
or >.
28
6. Repeat Steps 3–5, if necessary, to
clear other items.
STOP
7. Pres s
to return to standby.
Page 29

43-120 3.fm Page 29 Wednesday, August 18, 1999 8:37 AM
TROUBLESHOOTING
ERROR MESSAGES
COMM.ERROR
with a fax comm unication. This could
be caused by a poor-quality phone
connection or by som eone picking up
a telephone on the same line as one
of the fax machines. Try again.
NO ANSWER
tried to call did not answer.
POLLIN G ERRO R
machine you want to poll is not rea dy
to respond to your poll. Your fax m achine cannot receive a fax during poll ing.
DOCUME NT J AM
ument is jammed in the feeder.
NO PAPE R
of recording paper or the cover is
open.
— There is a problem
— The fax machine you
— The remote fax
— The original doc-
— The fax machine is out
CLEARING A
DOCUMENT JAM
If a document jams during transmission, do NOT pull th e docum ent out of
the slot. Doing so could harm the fax
machine. Follow these steps to remove the document.
1. Unplug the fax machine’s power
cord.
2. Open the cover by lifting up the
release lever on the side of the fax
machine.
OVERHEAT
when the fax machine receives several all-black pages. When the machine
cools down, it automatically returns to
standby.
— This could happen
3. Press the roller’s tabs outward
and lift the roller out of the fax
machine.
29
Page 30

0
0
0
0
0
0
43-120 3.fm Page 30 Wednesday, August 18, 1999 8:37 AM
4. Remove the jammed document.
5. Replace t he roller. Make sure the
roller’s tabs lock int o pla c e.
6. Close the cover so it clicks shut,
then plug in the fax machine’s
power cord.
CLEARING A
PAPER JAM
If the thermal paper jams, do NOT pull
the paper out of the slot. Doing so
could harm the fax machine. Follow
these steps to clear the paper jam.
1. Unplug the fax machine’s power
cord.
2. Open the cover by lifting up the
release lever on the side of the fax
machine.
3. Press the roller’s tabs outward
and lift the roller out of the fax
machine.
0
0
0
0
0
0
0
0
0
0
0
0
0
0
0
0
0
0
0
30
Page 31

0
0
0
0
0
0
43-120 3.fm Page 31 Wednesday, August 18, 1999 8:37 AM
4. Remov e the jammed paper.
5. Replace t he roller. Make sure the
roller’s tabs lock in p lac e .
6. Close the cover so it clicks shut,
then plug in the fax machine’s
power cord.
0
0
0
0
0
0
0
0
0
0
0
0
0
0
0
0
0
0
0
31
Page 32

43-120 3.fm Page 32 Wednesday, August 18, 1999 8:37 AM
CARE AND MAINTENANCE
Your Radio Shack TFX -1031 Fax Mac hine/Telephone is an example of superior
design and craftsmanship. The following suggestions will help you care for your fax
machine so you can enjoy it for years.
Keep the fax machine dry. If it gets wet, wipe it dry immediately. Liquids can contain minerals that corrode the electronic circuits.
Handle the fax machine g ently and carefully. Dropping it ca n damage circuit boards and case and cause the ma chine t o work improperly.
Use and store the fax mac hine only i n normal temperature e nvironments. Temperature extrem es can shorten t he life of electronic devices, distort or melt plastic parts, and ruin the thermal fax paper.
Keep the fax machine away from dust and dirt, which can cause premature wear of parts.
Wipe the fax machine with a dry cloth occasionally to keep it looking
CLEANER
new. Do not use harsh che micals or strong detergents t o clean the
fax machine.
Modifying or tampering with the fax machine’s internal components can cause a
malfunction and invalidate the fax machin e’s warranty and voi d your FCC authorization to operate it. If your fax machine is not performing as it should, take it to your
local Radio Shack store for assistance. If the problem is harming the telephone
lines, the phone company might ask that you disconnect the fax machine until the
problem is resolved.
32
Page 33

43-120 3.fm Page 33 Wednesday, August 18, 1999 8:37 AM
CLEANING THE ROLLER
AND SCANNING GLASS
Occasionally clean the white roller and
the scanning glass to ensure a clear
fax reproduction. If you see a black
line on incoming faxes or if your sent
faxes have black vertical lines on
them, clean the roller and scanning
glass immediately.
1. Unplug the fax machine’s power
cord.
2. Open the cover by lifting up the
release lever on the side of the fax
machine.
4. Releas e the guide by pulling it in
the direction of the arrow.
5. Gently wipe the white roller and
the scanning glass surface with
fax cleaning wipes, available at
your local RadioShack store.
6. Replac e the roller. Make sure the
roller’s tabs lock into place.
3. Press the roller’s tabs outward
and lift the roller out of the fax
machine.
7. Replace the guide. Make sure it
locks in place.
8. Close the cover so it clicks shut,
then plug in the fax machine’s
power cord.
33
Page 34

43-120 3.fm Page 34 Wednesday, August 18, 1999 8:37 AM
THE FCC WA NTS YOU
TO KNOW
This equipment complies with the limits for a Class B digital device as specified in Part 15 of
limits provide reasonable protection
against radio and TV interference in
residential areas. However, your
equipment might cause TV or radio interference even when it is operating
properly. To eliminate interference,
you can try one or more of the following corrective measures:
• R eorient or relocate the receiving
antenna.
• Increase the distance between the
equipment and the radio or TV.
• Use outlets on different electrical
circuits for the equipment and the
radio or TV.
Consult your local Radio Shack s tore
or an experienced radio /TV tec hnician
if the problem still exists.
In the unlikely event that your fax machine causes problems on the telephone line, the telephone company
can disconnect your service. T he telephone company attempts to not ify you
in advance. If advance notice is not
practical, the telephone compan y notifies you as soon as pos sible and advises you of your right to file a
complaint with the FCC.
FCC Rules
. These
Also, the telephone company can
make changes t o its lines, equipment,
operations, or procedures that could
affect the operation of this fax machine. The telephone company notifies you of these changes in a dvance
so you can take the necessary steps
to prevent interruption of your telephone service.
LIGHTNING
Your Radio Shack TFX-1031 F ax Machine has built-in protection circuits to
reduce the risk of d amage from surges in telephone and power line current. These protection circuits meet or
exceed FCC requirements. However,
lightning striking the telephone or
power lines can damage your fax machine.
Lightning damage is not common.
Nevertheless, if you live in an area
that has frequent electrical storms, we
suggest that you unplug yo ur fax machine during storms to reduce the possibility of damage.
34
Page 35

43-120 3.fm Page 35 Wednesday, August 18, 1999 8:37 AM
SPECIFICATIONS
Type . . . . . . . . . . . . . . . . . . . . . . . . . . . . . . . . . . . . . . . . . Desktop Fax Transceiver
Compatibility . . . . . . . . . . . . . . . . . . . . . . . . . . . . . . . . . . . . . . . . . . CCITT Group 3
Data Compression System . . . . . . Modified Huffman (MH), Modified READ (MR)
Modem Speed . . . . . . . . . . . . . . . . 9600/7200/4800/2400 bps; Automa tic Fallback
Scanning Method . . . . . . . . . . . . . . . . . . . . . . . . . . . . Contact Image Sensor (CIS)
Resolution
Horizontal . . . . . . . . . . . . . . . . . . . . . . . . . . . . . . . . . . . . . . . . 203 Pels/Inch
Vertical . . . . . . . . . . . . . . . . . . . . . . . . . . . . . . . . . . . Standa rd 98 Lines/Inch
Fine . . . . . . . . . . . . . . . . . . . . . . . . . . . . . . . . . . . . . . . . . . . . 196 Lin es/Inc h
Recording System . . . . . . . . . . . . . . . . . . . . . . . . . . . . . . . . . . . . . . Thermal Paper
Display . . . . . . . . . . . . . . . . . . . . . . . . . . . . . . Liquid Crystal, 16 Character × 1 Line
1
Printing Paper Size . . . . . . . . . . . . . . . . . . . . . . . . 8
Effective Printing Width . . . . . . . . . . . . . . . . . . . . . . . . . . . . . . . . . . . . . . . 8
/2 Inch ( le tter) × 98 ft Capacity
1
/4 Inch
Halftone (Grayscale) . . . . . . . . . . . . . . . . . . . . . . . . . . . . . . . Standard (16 Levels)
Power Requirements . . . . . . . . . . . . . . . . . . . . . . . . . . . . . . . . . . . 120 VAC, 60 Hz
Power Consumption . . . . . . . . . . . . . . . . . . . . . . Standard 7 W, Maximum 120 W
Operating Environment . . . . . . . . . . . . . . . . . . . . . . . . . . . . 41–9 5°F, 20–80% RH
Dimensions (HWD) . . . . . . . . . . . . . . . . . . . . . . . . . . . . . . 4
3
× 11
/
8
7
/16 × 95/8 Inches
111 × 290 × 244 mm
Weight (without paper) . . . . . . . . . . . . . . . . . . . . . . . . . . . . . . . About 5 lbs, 15 oz
2.7 kg
Specifications are typical; individual units m ight vary. Specifications are subj ect to
change and improvement without notice.
35
Page 36

43-120 3.fm Page 36 Wednesday, August 18, 1999 8:37 AM
RADIO SHACK LIMITED WARRANTY
This telephone product is warranted against manufacturing defects in material and
workmanship for one (1) year from the date of purchase from Radio Shack company
owned stores and authorized Radio Shack franchisees and dealers. Within this period
bring your Radio Sha ck sales slip
store.
This warranty does not cover damage or failure caused by or attributable to Acts of
God, abuse, misuse, improper or abnormal usage, faulty installation, improper maintenance, lightning or other incidence of excess voltage, or any repairs other than those
provide d by a Ra dio Sh ack Auth orize d Serv ice Faci lity, or tran spor tation co sts.
Shack is not responsible or liable for indirect, special, or consequential damages
arising out of or in con nection with the us e or performa nce of the pr oduct or
other damages with respect to loss of property, loss of revenue or profit, or costs
of removal, instal lat ion or reins ta lla tion.
EXCEPT AS PROVI DED HE REIN, RADI O SHA CK M AK ES NO EXPRESS WARRANTIES AND ANY IMPLIED WARRANTIES ARE LIMITED IN DURATION TO THE DURATION OF THE WRITTEN LIMITED WARRANTIES CONTAINED HEREIN. Some states
do not allow the limitation or exclusion of incidental or consequential damages and
some states do not allow limitation or exclusion of implied warranties; therefore, the
aforesaid limitation(s) or exclusion(s) may not apply to the purchaser. There will be
charges rend ered for repair s to the p roduct made a fter th e expira tion o f the af oresaid
one (1) year warranty period.
This warranty gives you specific l egal rights and y ou may also h ave other rights which vary from
state to state.
We Se rvi ce What We Sell
as p roof-of-pur chase da te to any R adio Shack
Radio
9/94
RADIO SHACK
A Division of Tandy Corpor ation
Fort Worth, Texas 76102
JF68-600027A
6A6 Printed in Korea
 Loading...