

Page 1
49-351 .fm Page 1 Wednesday , A ugust 18, 1999 4:37 P M
Cat. No.
49-351
OWNER’S MANUAL
CENTRAL 2000
Easy Installation Monitored Motion Detector
Security System
Please read before using this equipment.
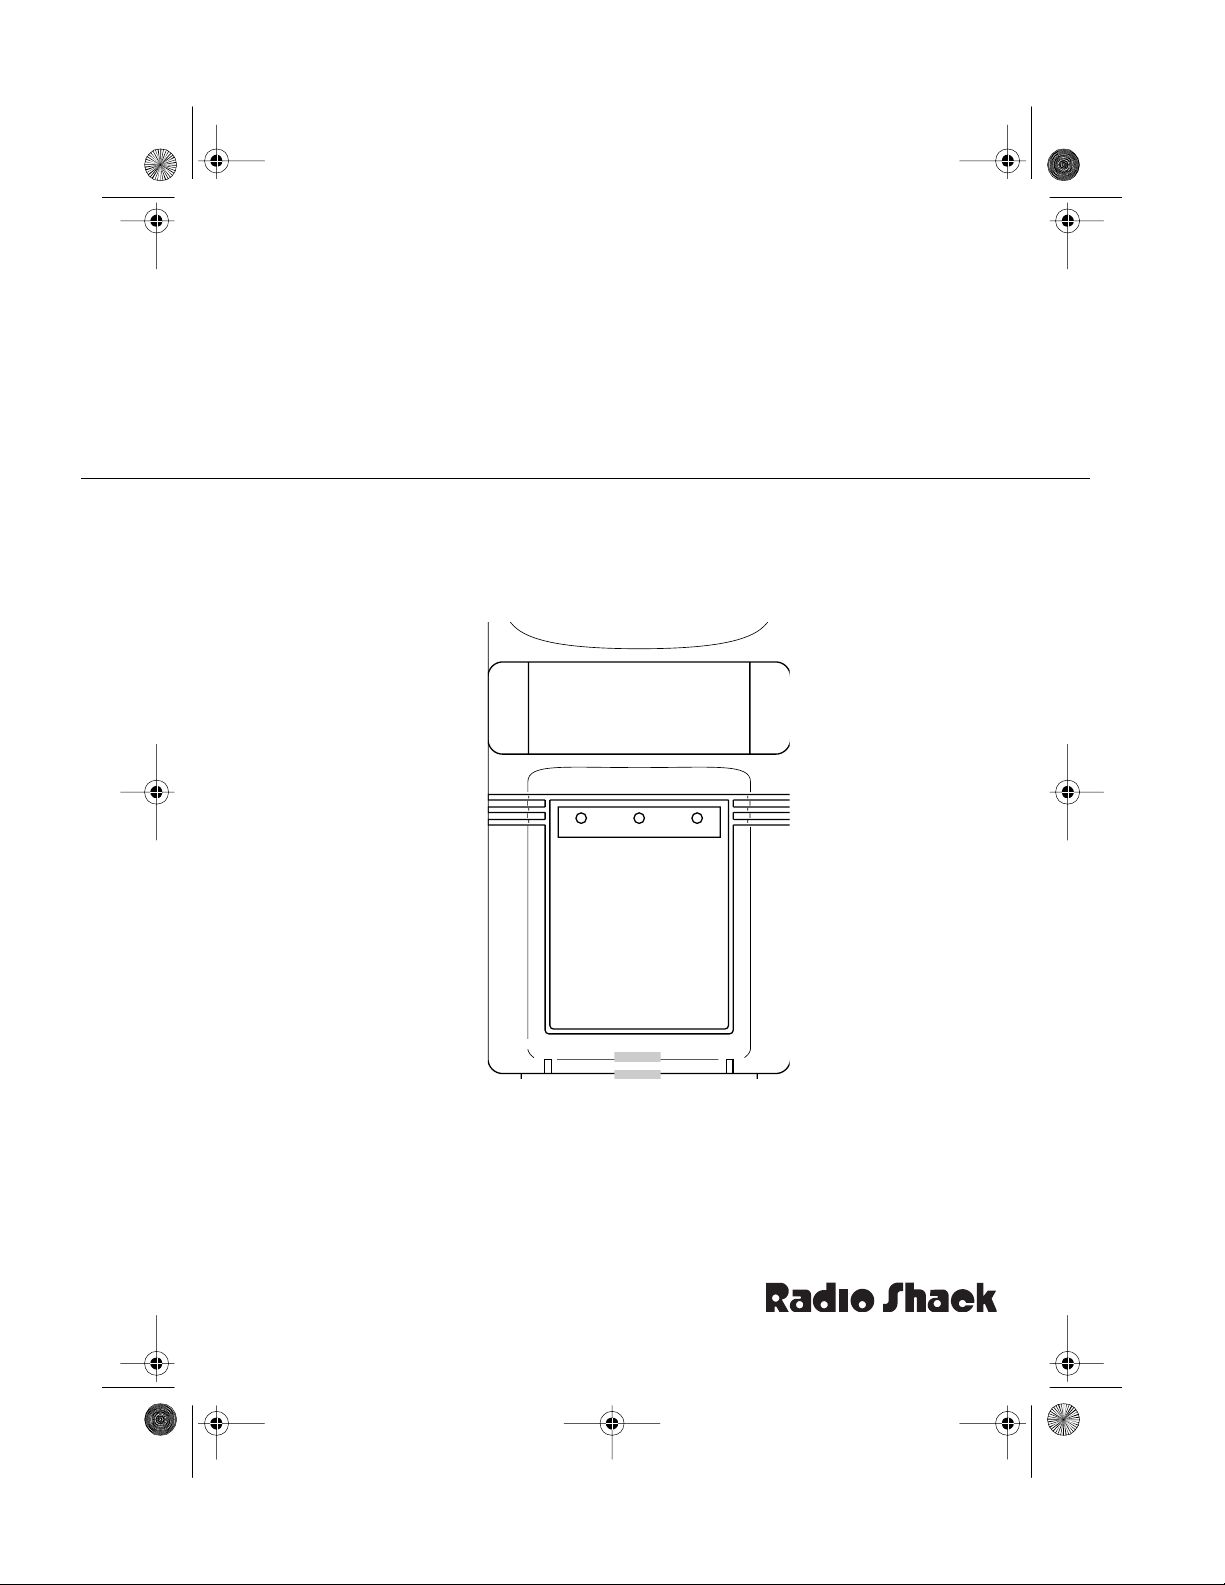
ARMED POWERSERVICE
Page 2

g
y
g
y
49-351 .fm Page 2 Wednesday , A ugust 18, 1999 4:37 P M
FEATURES
Your Radio Shack Central 2000 Easy
INCLUDED ITEMS
Installation Monitored Motion Detector
Security System brings a new level of
protection to your home. It s PIR (Passive InfraRed) motion sensor gives a full
180 degrees of coverage. Once armed,
it reports movement to ORCA
®
Monitoring Service’s trained staff of security
professionals who call you to verify the
Your Central 2000 inlcudes the following accessories. Be sure you remove all
accessories before you dispose of the
packing materials.
• Central 2000 Motion Sensor
• Modular T elephone Cord
problem and then call the police and up
to three other people you designate.
• Duplex T elephone Adapter
• AC Power Adapter
Your system includes the se fe atu r es:
• Quick Reference Card
Simp le In st all at io n
ing the system by simply connecting it to
—lets you s tart us-
• ORCA Monitoring Service Agreement and Preprinted Envelope
power and a telephone line and setting
up your account with ORCA Monitoring
Services.
Built-In 100 dB Alarm
— sounds when
the system is armed and detects motion.
• Four Window Stickers
• Wall Mounting Bracket with Screws
In addition, you need one 9-volt battery
(Radio Shack Cat. No. 23-553, not supplied) to power your system during a
power failure.
Warnin
Stickers
— discourag e potential burglars by alerting them to the presence of an alarm system.
LOCAL PERMIT
REQUIREMENTS
Eas
Arming and Disarmin
the telephones in your home for quick
arming and disarming.
ORCA-Monitored Securit
you get 24-hour monitoring, which
alerts the police, neighbors, or you at
work if the system detects un authorized
motion.
Radio Shack and ORCA, the security monitoring company, are independant of one another.
No warranty or guarantee of performance of the ORCA Monitoring Services Agreement
Radio Shack is a registered trademark used by Tandy Corporation.
ORCA is a registered trademark of ORCA Technology, Inc.
2
—uses
Some cities and municipalities require
you to fill out a registration form and get
a permit for monitored alarm service.
—means
We recommend that you contact your
local police or sheriff’s department and
inquire about local permit requirements.
is provided by Radio Shack.
© 1995 Tandy C orporation.
All Rights Reserved.
Page 3
49-351 .fm Page 3 Wed nesday, August 18, 1999 4:37 PM
Warning: To prevent fire or shock h azard, do not expose t his product to rain
or moisture.
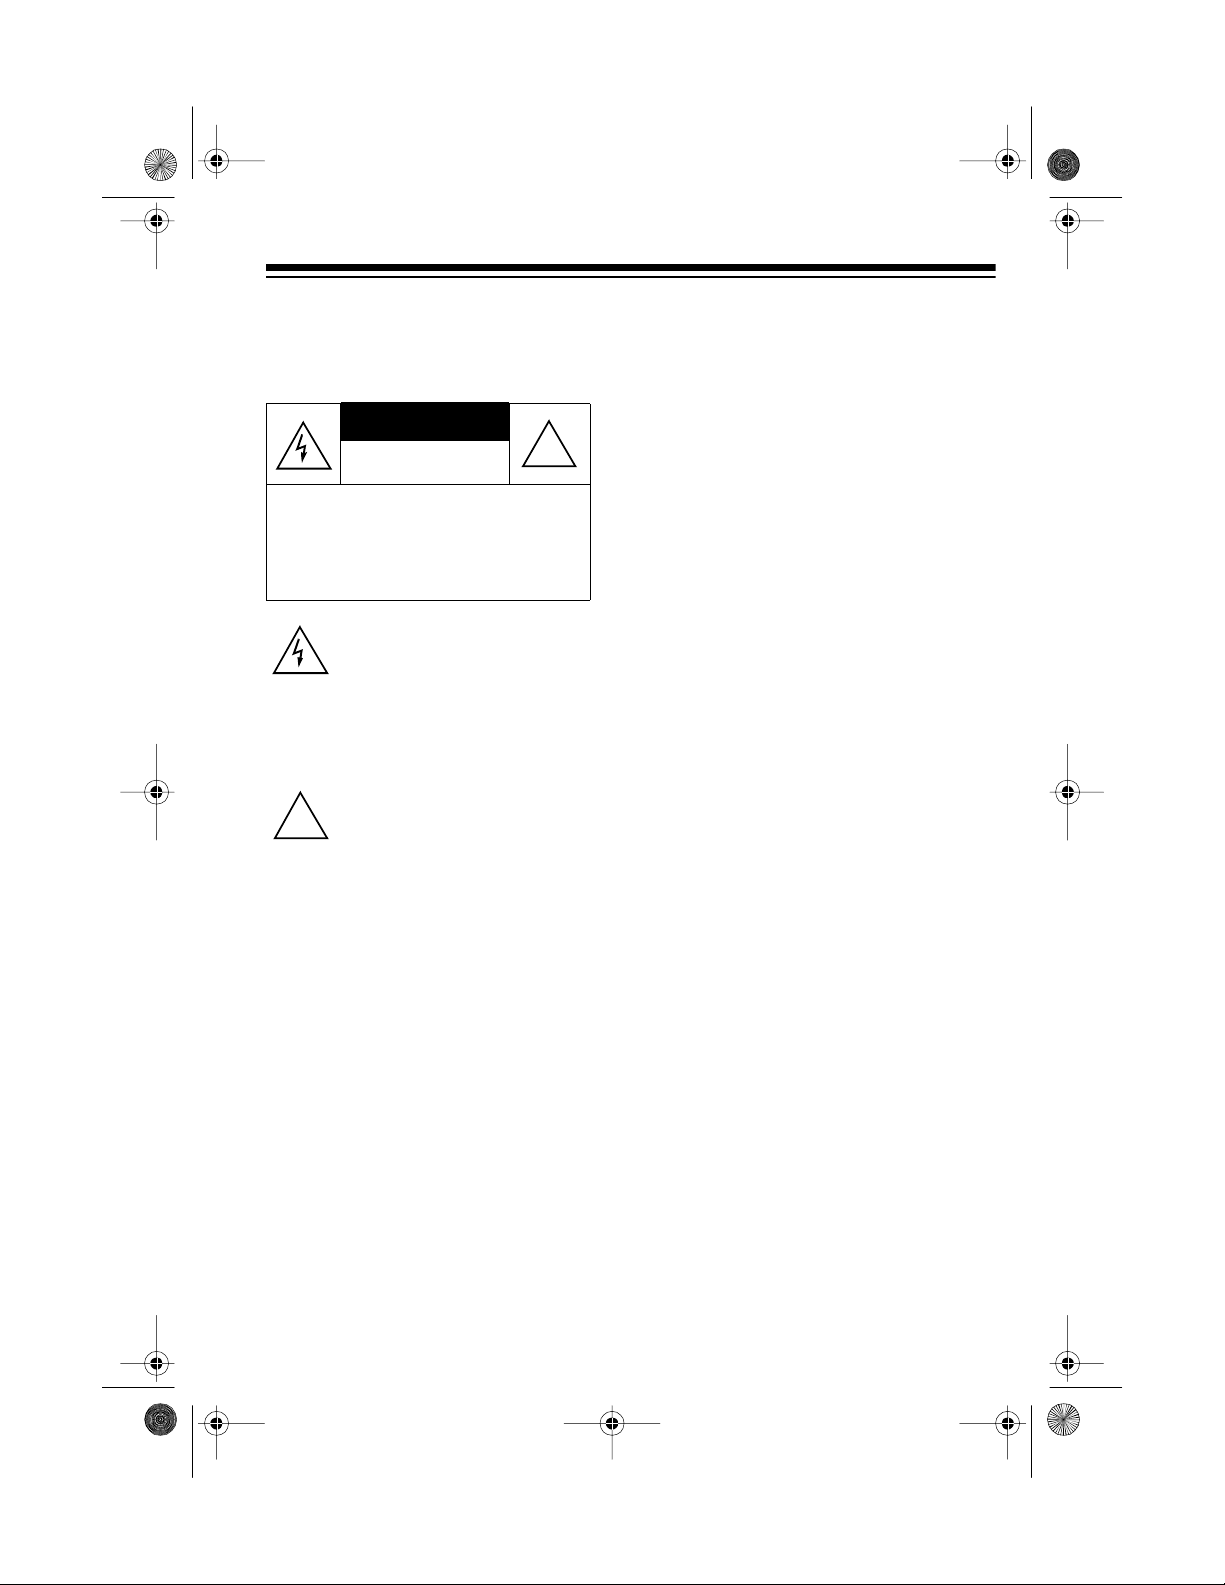
CAUTION
RISK OF ELECTRIC SHOCK.
DO NOT OPEN.
CAUTION: TO REDUCE THE RISK OF
ELECTRIC SHOCK, DO NOT REMOVE
COVER OR BACK. NO USER -SERVICEABLE PARTS INSIDE. REFER SERVICING TO QUALIFIED PERSONNEL.
This sym bol i s int ende d to ale rt y ou to
the presence of uninsulated dangerous voltage within the product’s enclosure that might be of sufficient
magnit ude t o c on st itu te a r i sk of el ec tric shock. Do not open the product’s
case.
This symb ol is int e nd ed to i nf orm you
that important operating and mainte-
!
nance in str uc t ions a r e i nclu de d i n the
literature accompanying this product.
!
Note: The securi ty f unctions of this sys-
tem have not been tested by UL.
READ THIS BEFORE
INSTALLATION
We have designed your secu rity system
to conform to federal regulations, and
you can connect it to most telephone
lines. However, each device that you
connect to the phone line draws p ower
from the phone line. We refer to this
power draw as the device’s Ringer
Equivalence Number, or REN (shown
on the back of your system).
If you are using more than one phone or
other device on the line, add up all the
RENs. If the total is more than five, your
phones might not ring. In rural areas, a
total REN of three might impair ringer
operation. If ringer operation is impaired, disconnect one of the devices
from the line.
This security system complies with Part
FCC Rules
68 of
quest, provide the FCC registration
number and the REN to your phone
company. Both numbers are show n on
the back of the system.
. You must, upon re-
Note: You must not connect this system
to:
• Coin-operat e d syste ms
• Party-line syste ms
• Most electronic key telephone systems
3
Page 4

g Sy
g
g
49-351 .fm Page 4 Wed nesday, August 18, 1999 4:37 PM
CONTENTS
How the System Works ...................................................................................... 5
Setting Up Monitored Service ......................................................................... 5
Preparation ...... .................................................................................................... 7
Selecting a Location ....................................................................................... 7
Testing the Location ........................................................................................ 8
Mounting the System ...................................................................................... 9
Installing a Backup Battery ............................................................................. 9
Connecting to Power ....................................................................... .......... ... 10
Connecting to the Telephone Line ................................................................ 10
Using the Warning Stickers ........................................................................... 11
Operation ........................................................................................................... 12
Arming the System ....................................................................................... 12
Disarming the System .................................................................................. 12
Remote Arm/Di sa rmi n g ...... .......................................................................... 13
Alarm Conditions .......................................................................................... 13
Understandin
Clearing the Service Indicator ...................................................................... 14
Testin
Care and Maintenance ...................................................................................... 16
Troubleshootin
the System ........................................................................................... 15
Testing Coverage .......................................................................................... 15
Testing the Siren ........................................................................................... 15
Testing the Monitoring Service ..................................................................... 15
The FCC Wants You to Know ....................................................................... 17
Lightning ....................................................................................................... 17
stem Indicators ................................................................... 14
.......... ...................................................................................... 18
4
Page 5

49-351 .fm Page 5 Wed nesday, August 18, 1999 4:37 PM
HOW THE SYSTEM WORKS
Your security system detects movement within a 180° arc up to 36 feet
away. Once your system is armed, any
movement within this range automatically triggers the alarm.
After you set up your account with
ORCA Monitoring Services, your system calls and reports alarms to their
trained staff of security professionals.
The ORCA Monitoring Services staff
first tries to contact you to verify that it is
not a false alarm. By calling you first,
ORCA Monitoring Services ensures
that the police are not contacted if you
accidentally set off your alarm.
In alarm situations, the monitoring cen ter dispatches the police to your address and tries to contact someone you
listed on your emergency call list. (You
might want to list your work phone number as the first number.)
ORCA Monitoring Services tries each
number once in the order that you listed
them on your monitoring a greement. If
ORCA Monitoring Services contacts
one of the people listed, they do not disturb the other people on the list.
SETTING UP MONITORED
SERVICE
To set up service, you need to:
• Fill out the enclosed monitoring
agreement and mail or fax it to
ORCA Monitoring Services.
Monitored service does not begin
until ORCA Monitoring Services
receives and processes your monitoring agreement. Allow 24 hours
for faxed requests and 5 days for
mailed requests.
• Install the system
• Call ORCA Monitoring Services at
1-800-FOR-ORCA (1-800-367-
6722) from a telephone on the
same line as yo ur system to have
the system initia li zed .
During the call, ORCA Monitoring
Services programs the PIN and
other settings (listed on Page 6)
into the system. The preferred settings work best for m ost situations.
However, you can ask ORCA Monitoring Services to change these
settings to make the system work
best for you.
5
Page 6

49-351 .fm Page 6 Wed nesday, August 18, 1999 4:37 PM
Place a check mark next to any settings you want to discuss with ORCA Monitoring
Services, and refer to this page when you call them to set up service.
Your Personal Identifica-
o
tion Number (PIN)
Preferred setting:
4-digit PIN you use to control your
system.
Do not select a PIN that
Note:
starts with 0, 911, or 411.
Your PIN: ______________
Entry and Exit Delays
o
Preferred setting:
delay; 30-second entry delay.
Each can be set from 20 to 275
seconds.
Entry Delay Warning Beeps
o
Preferred setting:
the entry delay.
Can be set to sound onl y one beep
at the beginning of the entry delay.
You select the
60-second exit
Beeping during
Touch Tone Dialing
o
Preferred setting:
dialing.
Can be set to use rotary dialing if
you do not subscribe to touch-tone
service from your local telephone
company.
Silent Alarm
o
Preferred setting:
Can be set to only call ORCA Monitoring Services and not sound the
sir en at all.
Security System Answer
o
Preferred setting:
answers the phone in 8 rings.
Can be set not to answer or to
answer in 1 to 10 rings.
Touch-tone
Audible alarm.
The system
Alarm Delay
o
Preferred setting:
until ORCA Monitoring Services is
notified.
Can also be set to sound immediatly after the alarm is triggered.
6
Delay siren
Page 7

49-351 .fm Page 7 Wed nesday, August 18, 1999 4:37 PM
PREPARATION
SELECTING A LOCATION
For your security system to be most effective, you need to install it in a location
that meets all of the following conditions:
• Is near an AC outlet.
Note:
near an AC outlet, you can have an
electrician install an outlet for you.
• Is near a modular telephone jack.
Note:
near a modular telephone jack, you
can install a modular jack yourself
or have the telephone company
install one for you.
– Radio Shack stores sell jacks,
– The telephone company charges
– The USOC number of the jack to
If your best location is not
If your best location is not
adapters, and telephone wiring.
to install the necessary jacks.
be installed is RJ-11C (or RJ11W for a wall plate jack).
• Overlooks an area that an intruder
would most likely cross when
entering or moving through your
home.
You can place the system on a
shelf or table, or mount it on a wall
or in the corner of a room. The system detects movement by sensi ng
a change in temperature within its
field of view. When someone walks
past the system, it detects the temperature change and triggers the
alarm.
Also, note that the system is m ore
sensitive to movement across its
coverage area than to movement
directly toward or away from it.
Direction
Most Sensitive
of entry
Less sensitive
Least Sensitive
7
Page 8

(f
M
49-351 .fm Page 8 Wed nesday, August 18, 1999 4:37 PM
• Does not directly face a window,
heating or air conditioning vent,
appliance, outside wall, or other
heat source.
These sources could produce rapid
temperature changes that the system might incorrectly identify as an
intruder.
• Is high enough not to be triggered
by pets, yet is low enough to be
triggered by someone of average
height walking across the area.
To help prevent false alarms
caused by pets, the system senses
motion at or above its mounted
location. It does not sense motion
below where you mount it. In most
installations, a location about 3
feet off the floor provides the best
security.
ounting
Height (ft)
10
5
10 2005 15 25 30 35 40
Range
TESTING THE LOCATION
Once you select a location and b efore
you mount it, follow these steps to tes t
the system’s coverage.
Note:
To test the location, you do not
need to connect the system to the
phone line, install a backup battery, or
set up service.
1. Plug the power adapter’s barrel
plug into the jack on the back of the
system as shown on Page 10.
2. Plug the po wer adapt er into a n AC
outlet as shown on Page 10.
Notes:
1
/
2
• If you have not installed a
backup battery, the POWER
indicator flashes.
• If you have not connected the
system to the phone line, the
system chirps once per second.
3. Place the system at the selected
location. If you selected a location
on a wall, place the system on a
stepladder or something similar to
position it as close as possible to
its final mounting location.
4. Walk around the area you want to
protect. When the system detects
your movement, its ARM ED indi cator flashes .
5. Adjust the system’s position until
you are satisfied with its coverage.
8
Page 9

49-351 .fm Page 9 Wed nesday, August 18, 1999 4:37 PM
MOUNTING THE SYSTEM
You can mount the system on a wal l o r
simply place it on a desk, table, or shelf.
To mount the system on a wall, use the
supplied screws, or screws suitable to
the mounting surface, to secure the
mounting bracket a t the selected lo cation.
Mounting on a Wall
After you connect the system to power,
install a battery, and connect it to the
telephone line, you will simply hang the
system on the bracket.
Mounting in the Corner
INSTALLING A BACKUP
BATTERY
If AC power is disconnected or fails,
your system operates for up to 24 hours
from a 9-volt alkaline battery (Radio
Shack Cat. No. 23-553, not supplied).
Warning:
shock, always disconnect the system
from the phone line before you install or
replace the battery.
To prevent a possible electric
Follow these steps to install the battery.
1. Lift off the battery compartment
ARMED POWERSERVICE
cover.
2. Clip a 9-volt alkaline battery onto
the battery contacts, then place the
battery into the compartment.
3. Replace the cover.
When the battery becomes low, the
POWER indicator blinks. Replace the
battery immediately.
9
Page 10

49-351 .fm Page 10 We dnesday, August 18, 1999 4:37 PM
CONNECTING TO POWER
1. Plug the power adapter’s barrel
plug into the jack on the back of the
system.
2. Plug the power adapter into an AC
outlet.
CONNECTING TO THE
TELEPHONE LINE
Follow these steps to use the supplied
duplex adapter to connect the alarm
system and a telephone to the same
jack.
From
TELEPHONE
Telephone
CORD
1. Unplug the telephone’s cord from
the jack.
2. Plug the duplex adapter into the
jack.
3. Plug the telephone’s cord into one
of the adapter’s jacks.
4. Plug one end of t he supplied mod ular telephone cord into the jack on
the back of the system.
1. Plug one end of the supplied m odular telephone cord into the jack on
the back of the system.
2. Plug the other end of the cord into
a modular telephone jack.
10
5. Plug the other end of the cord into
the other jack on the adapter.
If the phone line is disconnected while
the system has power, the system
chirps once per second.
Page 11

49-351 .fm Page 11 We dnesday, August 18, 1999 4:37 PM
USING THE WARNING
STICKERS
The four enclosed warning stickers are
an important part of your security system. Statistics show that homes with a
security system are 15 times less likely
to be burglarized than homes that do
not have a securi ty system. T he stickers
are a first line of defense, warning a potential burglar that you have a system
installed.
Place a sticker at areas where intruders
would most likely enter your home, such
as:
• The front door (most burglars ente r
this way)
• The back door
• Front and rear windows
• Fire escape windows (in apartm ent
buildings)
• Side windows
Radio Shack stores sell additional stickers if you need m ore than the four sup plied.
11
Page 12

y
y
y
49-351 .fm Page 12 We dnesday, August 18, 1999 4:37 PM
OPERATION
ARMING THE SYSTEM
You can arm your system for either delayed or instant alert.
When
la
try delay before sounding the alarm.
The default entry delay is 30 seconds,
but you can have ORCA Monitoring
Services set it to be from 20 to 275 seconds. The system beeps once per second during the entry delay , unless you
have selected to have it beep only once.
When
alert,
detects motion. If you select instant
alert, be sure you can get to a telephone
to disarm the system without moving
through the protected area.
The system provides an exit delay f or
both delayed and instant alert arming.
The default exit delay is 60 seconds, but
you can have ORCA Monitoring Services set this to be from 20 to 275 seconds.
Follow these steps to arm the system.
1. Lift your phone’s handset and dial
2. Press A (2) on your phone’s key-
ou arm the system for de-
ed alert,
1-800-YOUR PIN. For example, if
your PIN is 6864, dial 1-800-6864.
pad to arm the system for delayed
alert or I (4) to arm the system for
instant alert.
You hear one beep through the
phone.
the system waits for the en-
ou arm the system for instant
the alarm sounds instantly when it
Note:
descending tones when you arm it,
it has detected a fault with the
system—either the AC power is
disconnected, the backup battery is
dead, or the SERVICE indicator is
flashing. Disarm the system. Then
correct the problem and try again.
3. Hang up the handset within 60 seconds of entering the command.
The system beeps once and the
ARMED indicator turns on. After
the exit delay (60 seconds default),
the system responds to motion.
If the system beeps three
DISARMING THE SYSTEM
To disarm the system, lift your phone’s
handset and dial 1-800-YOUR PIN and
D (3). The system beeps twice through
the phone. Hang up the phone within 60
seconds. The system beeps twice to
confirm, then disarms.
Notes:
• If the system beeps three steady
tones, the alarm sounded while you
were away. Call ORCA Monitoring
Services to get details about the
alarm.
• If the system beeps three descending tones, it has detected a fault
with the system—either the AC
power is disconnected, the backup
battery is dead, or the SERVICE
indicator is flashing. Correct the
problem as soon as possible.
12
Page 13

49-351 .fm Page 13 We dnesday, August 18, 1999 4:37 PM
• If you armed the system for instant
alert, you must disarm the system
from a phone you can reach without setting off the alarm.
• If the entry delay has elapsed, you
must wait for the system t o c ontac t
ORCA Monitoring Services and
begin sounding the siren before
you can disarm the system.
REMOTE ARM/DISARM
You can arm and disarm your system
by calling your home. If you have an answering machine, wait for the answering machine to answ er, then enter the
arm or disarm code (1-800 -YOUR PIN
+ A (2) to arm with an entry delay, I (4)
to arm for instant alert, or D (3) to disarm). The system sounds one tone to
verify arming, two tones to verify disarming, or three tones if there is a problem.
ALARM CONDITIONS
When the system detects a violation, it
calls ORCA Monitoring Services then
starts a 5-minute alert siren. ORCA
Monitoring Services first calls your
home to try to confirm the alarm. If no
one answers, or if the person who answers does not know your password,
ORCA Monitoring Services notifies the
police and also tries to co ntact at least
one person you listed on your monitoring service agreement.
After 5 minutes, the system stops
sounding the siren and rearms. The
next time you disarm the system, it
sounds three tones to let you know that
the system was violated.
Note:
If your system has repeated false
alarms, ORCA Monitoring Services
might temporarily disarm your system
until the problem is resolved.
If you do not have an answering machine, ORCA Monitoring Services can
have your system answer the phone after a specified number (the preferred
setting is 8 rings). Enter t he arm or di s arm sequence when ringing stops.
Notes:
does not work if you have voice mail,
call forwarding, another telephone service that routes unanswered calls to another number, or an answering machine
that holds the line for more than 60 seconds after you hang up, and might not
work with all remote-controlled answering machines.
Remote arming and disarming
CLEARING THE SERVICE
INDICATOR
After you start service with ORCA Monitoring Services, the yellow indicator
flashes when ORCA Monitoring Services needs to contact you. If the SERVICE indicator flashes, call 1-800-FORORCA to find out how to clear the indicator. The system still functions as a
stand alone alarm when the indicator is
flashing, but it does not call ORCA Monitoring Services during an alert.
13
Page 14

g
g
g
g
g
49-351 .fm Page 14 We dnesday, August 18, 1999 4:37 PM
UNDERSTANDING SYSTEM INDICATORS
Your system has three indicators and five alert tone pat terns. The following t ables
describe each.
Indicator On Off Flashing
Servi ce (Yellow) N/A All Ok.
Power (Green) Power OK. No power . Battery problem.
Armed (Red) System armed. System disarmed.
Beep Pattern Meaning
You armed the system.
One beep
Two beeps
Three steady
beeps
Three descendin
beeps
Continuous beeps
The entry del ay warnin
started the entry delay.
You disa rmed the system and there were no alerts since it was last
armed.
You disarmed the system and there has been an alert since it was
last armed.
You armed or disarmed the system, and there is an AC power or
backup battery pr oblem.
You armed or disarmed the system, and the SERVICE indicator is
flashin
The system is soundin
line is discon nected.
.
beeps are disabled, and the system
entry delay warning beeps or the phone
Call ORCA Monitor-
in
Services.
System disarmed,
motion detected.
14
Page 15

49-351 .fm Page 15 We dnesday, August 18, 1999 4:37 PM
TESTING THE SYSTEM
There are three ways to test your system:
• Testing Coverage
• Testing the Siren
• Testing the Monitoring Service
TESTING COVERAGE
Periodically test the coverage to be sure
your system will detect intruders. To do
this, disarm the system. Then walk
around the covered area. When the
system detects y our movement, the red
ARMED indicator flashes. If the system
does not sense your movement, reread
“Installation” to be sure it is properly installed .
TESTING THE SIREN
Periodically test the siren to be sure it
will sound when triggered. To do this, lift
the handset of any ph one c onn ec ted to
the same line as the system. Then dial
1-800-YOUR PIN and T (8) then hang
up within 60 seconds. The system waits
for the exit delay. Then, when it detects
motion, it sounds the siren for 3 seconds.
TESTING THE
MONITORING SERVICE
Periodically have the system call the
monitoring service to confirm they are
properly receiving its signals during an
alert. Before you do this, have your
password handy. First call O RCA M onitoring Services at 1-800-FOR-ORCA to
let them know you are going to t est the
system. Then arm the system, wait for
the exit delay to expire, and walk
through the covered area.
ORCA Monitoring Services should cal l
you within a few minutes of the alert.
Give them the password and advise
them again that you were testing the
system.
15
Page 16

49-351 .fm Page 16 We dnesday, August 18, 1999 4:37 PM
CARE AND MAINTENANCE
Your Radio Shack Central 2000 Easy Installation Monitored Motion Detector Security System is an example of superior design and craftsmanship. Follow these guidelines to keep it working properly for years.
Keep the system dry. If it gets wet, wipe it dry immediately. Liquids
can contain minerals that corrode electronic circuits.
Use and store the system only in normal temperature environments.
Temperature extremes can shorten the life of electronic devices and
distort or melt plastic parts.
Handle the system gently and carefully. Dropping it can damage circuit boards and cases and can cause the system to work improperly.
Keep the system away from dust and dirt, which can cause premature wear of parts.
Use only a fresh 9V alkaline battery in the system. An old or weak
battery can leak chemicals that could damage electronic circuits.
Wipe the system with a damp cloth occasionally to keep it looking
CLEANER
new. Do not use harsh chemicals, cleaning solvents, or strong detergents to clean your system.
Modifying or tampering with the sytem’s internal components can cause a malfunction and invalidate your sytem’s warranty and v oid your FCC aut horizat ion to op erate it. If your system is not performing as it should, take it to your local Radio Shack
store or contact ORCA M oni toring S ervices at 1-800-FOR-ORCA for assistance. If
the trouble is harming the phone lines, the telephone company might ask you to disconnect the system until you resolve the problem.
16
Page 17

49-351 .fm Page 17 We dnesday, August 18, 1999 4:37 PM
THE FCC WANTS Y OU TO
KNOW
In the unlikely event that your system
causes problems on the phone line, the
phone company can disconnect your
service. The phone compa ny attempts
to notify you in advance. If advance notice is not practical, the phone company
notifies you of y our right to file a com plaint with the FCC.
Also, the phone company can make
changes to its li nes, equipmen t, operations, or procedures that could affect
the operation of your system. The
phone company notifies you in advance, so you can take steps to prevent
interruption of your phone service.
LIGHTNING
Your system has built-in protection circuits to reduce the risk of damage from
surges in phone and power line current.
These protection circuits meet or exceed FCC requirements. However,
lightning striking the phone or power
lines can damage your system.
Lightning damage is not common. However, if you live in an a rea that has frequent electrical storms, we suggest that
you unplug your system during storms
to reduce the possibility of damage.
17
Page 18

49-351 .fm Page 18 We dnesday, August 18, 1999 4:37 PM
TROUBLES HOOTING
We do not expect you to hav e any problems with your system. However, if you do,
try the suggestions in this section first . If you still cannot solve t he problem, call 1800-FOR-ORCA or contact any Radio Shack store for assistance.
Frequent False Alarms
• Always disar m the syste m as soon as you get home.
• Do not let children arm and disarm the system.
• If you are not sure whether the system is armed or disarmed, disarm it.
• Be sure everyone authorized t o be in yo ur hom e kn ows bot h the PIN and your
password.
• Periodically test your system. See “Testing the System” on Page 15.
Three Tones When You Arm or Disarm the System
• Be sure the system is properly connected to AC power and a backup battery is
installed.
• If the yellow SERVICE indicator is flashing, call 1-800-FOR-ORCA for instructions. Th e system does not call ORCA Monit o ring Services duri n g a n alert if the
SERVICE indicator is flashing.
Cannot Arm or Disarm the System
• Be sure you are using the correct PIN.
• Be sure the system is properly connected to the phone line and that either AC
power or the backup battery is connected (or both).
• Slow down. Even if the s ystem is soun ding the alarm , you have p lenty of time
to enter the PIN.
Indicators are Flashing
• See “Understanding System I ndicators” on P ag e 14 for a complete description
of all indicators.
18
Page 19

49-351 .fm Page 19 We dnesday, August 18, 1999 4:37 PM
NOTES
19
Page 20

49-351 .fm Page 20 We dnesday, August 18, 1999 4:37 PM
RADIO SHACK LIMITED WARRANTY
This security product is warranted against manufacturing defects in material and workmanship for ninety (90) days from the date of purchase from Radio Shack company
owned stores and authorized Radio Shack franchisees and dealers. Within this period
Radio Shack will repair the security product without charge for parts and labor. Simply
bring you r Radio Shack sales slip as pr oof-of-pu rchase da te to any Radio Sha ck
store.
This warranty does not cover damage or failure caused by or attributable to Acts of
God, abuse, misuse, improper or abnormal usage, faulty installation, improper maintenance , lightn ing or other incide nce of exces s volta ge, or any rep airs other th an th ose
provided by a R adio Shack Authorized Service Facility, or transportation costs. Radio
Shack is not responsible or liable for indirect, special, or consequential damages
arising out of or in conne ction with the use or performance o f the product or
other damages with respect to loss of property, loss of revenues or profi t, or
cost s of removal, i nstallation or reinstallatio n.
EXCEPT AS PROV IDED HEREI N, RA DIO SHACK MAKES NO E XPRES S WARRANTIES AND ANY IMPLIED WARRANTIES ARE LIMITED IN DURATION TO THE DURATION OF THE WRITTEN LIMITED WARRANTIES CONTAINED HEREIN. Some states
do not allow the limitation or exclusion of incidental or consequential damages and
some states do not allow limitation or exclusion of implied warranties; therefore, the
aforesaid limitation(s) or exclusion(s) may not apply to the purchaser. There will be
charge s rend ered for repair s to the produ ct made after th e expira tion of the af oresai d
ninety (90) day warranty period.
This warranty gives you specific legal rights and you may have other rights which vary from state to
state.
We Service What We Sell
9/94
RADIO SHACK
A Division of Tandy Corporation
Fort Worth, Texas 76102
10A5 Printed in Hong Kong
 Loading...