


17-110 5.fm Page 1 We dnesday, July 21, 1999 11:06 AM
Cat. No.
OWNER’S MANUAL
Please read before using this equipment.
CT-600
Lightweight Flip-Style
75-Memory Cellular Phone
17-1105

17-110 5.fm Page 2 We dnesday, July 21, 1999 11:06 AM
FEATURES
Your RadioShack CT-600 Lightweight Flip-Style 75Memory Cellular Phone combines advanced technology with design simplicity. Even though it is
small, the CT-600 provides a full range of features.
Easy-To-Read Di git al Display
— the supe rtwist liquid-crystal display provides essential call information and can be easily read from almost any angle.
Special Cellular Service Features
— the phone is
preprogrammed to work with special (subscriptiononly) messaging services offered by many cellular
carriers, including calling line ID and voice mail notification.
One-Touch Diali ng Memories
— let you dial an im-
portant number at the touch of a single button.
Memory Dialing and Scrolling
— you can store
and rapidly search for up to 75 phone numbers in
memory, and dial any stored number by simply entering its one- or two-digit memory number (1–75).
Last Number Redial
— lets you quickly di splay and
redial any of the last 15 phone numbers dialed.
©
1998 Tandy Corporation.
RadioShack is a trademark used by Tandy Corporation.
All Rights Reserved.
2

17-110 5.fm Page 3 We dnesday, July 21, 1999 11:06 AM
One-Touch Emergency Dialing — lets you dial the
emergency number preprogrammed into your
phone, by briefly holding down the key.
WXYZ
9
Security Features — to prevent unauthorized
phone use, you can set up to five different levels of
call restrictions (to allow only incoming calls, for example) while still allowing calls to the preprogrammed emergency number.
Scratchpad Me m ory — lets you temporarily stor e a
number (during a call, for example), then easily dial
it or store it in memo ry.
Ample Talk and Standby Time — the suppli ed battery (fully charged) provides about 2 hours of talk
time or 30 hours of stand by time.
Vibration and Silent Alert Modes — let you set the
phone to vibrate gently (instead of ring) when it receives a call, or make no sound or movement at all,
to avoid disturbing others. See “Ringing Options” on
Page 52.
Call Timers — lets you keep track of the individual
and cumulative call times (air time) for each active
number that you can reset at any ti m e. Also includes
a cumulative timer for both active numbers (cannot
be reset).
3
17-110 5.fm Page 4 We dnesday, July 21, 1999 11:06 AM
Two Phone Number Capa bility — lets you use t his
one phone with two di fferent cellular services, wit h a
different phone num ber for each.
We recommend you record your phone’s Electronic Serial Number (ESN) here. The number is
under the phone’s battery.
4

17-110 5.fm Page 5 We dnesday, July 21, 1999 11:06 AM
CONTENTS
A Look at the Display ......................................... 8
Preparation ........................................................ 10
Installing the Battery .................................... 10
Important Battery Tips ................................. 10
Charging the Battery .................................... 13
When to Recharge the Battery ............. 14
Discharging Batteries .................................. 15
Basic Operation ................................................ 17
Turning the Phone On and Off .................... 17
Making a Call ............................................... 17
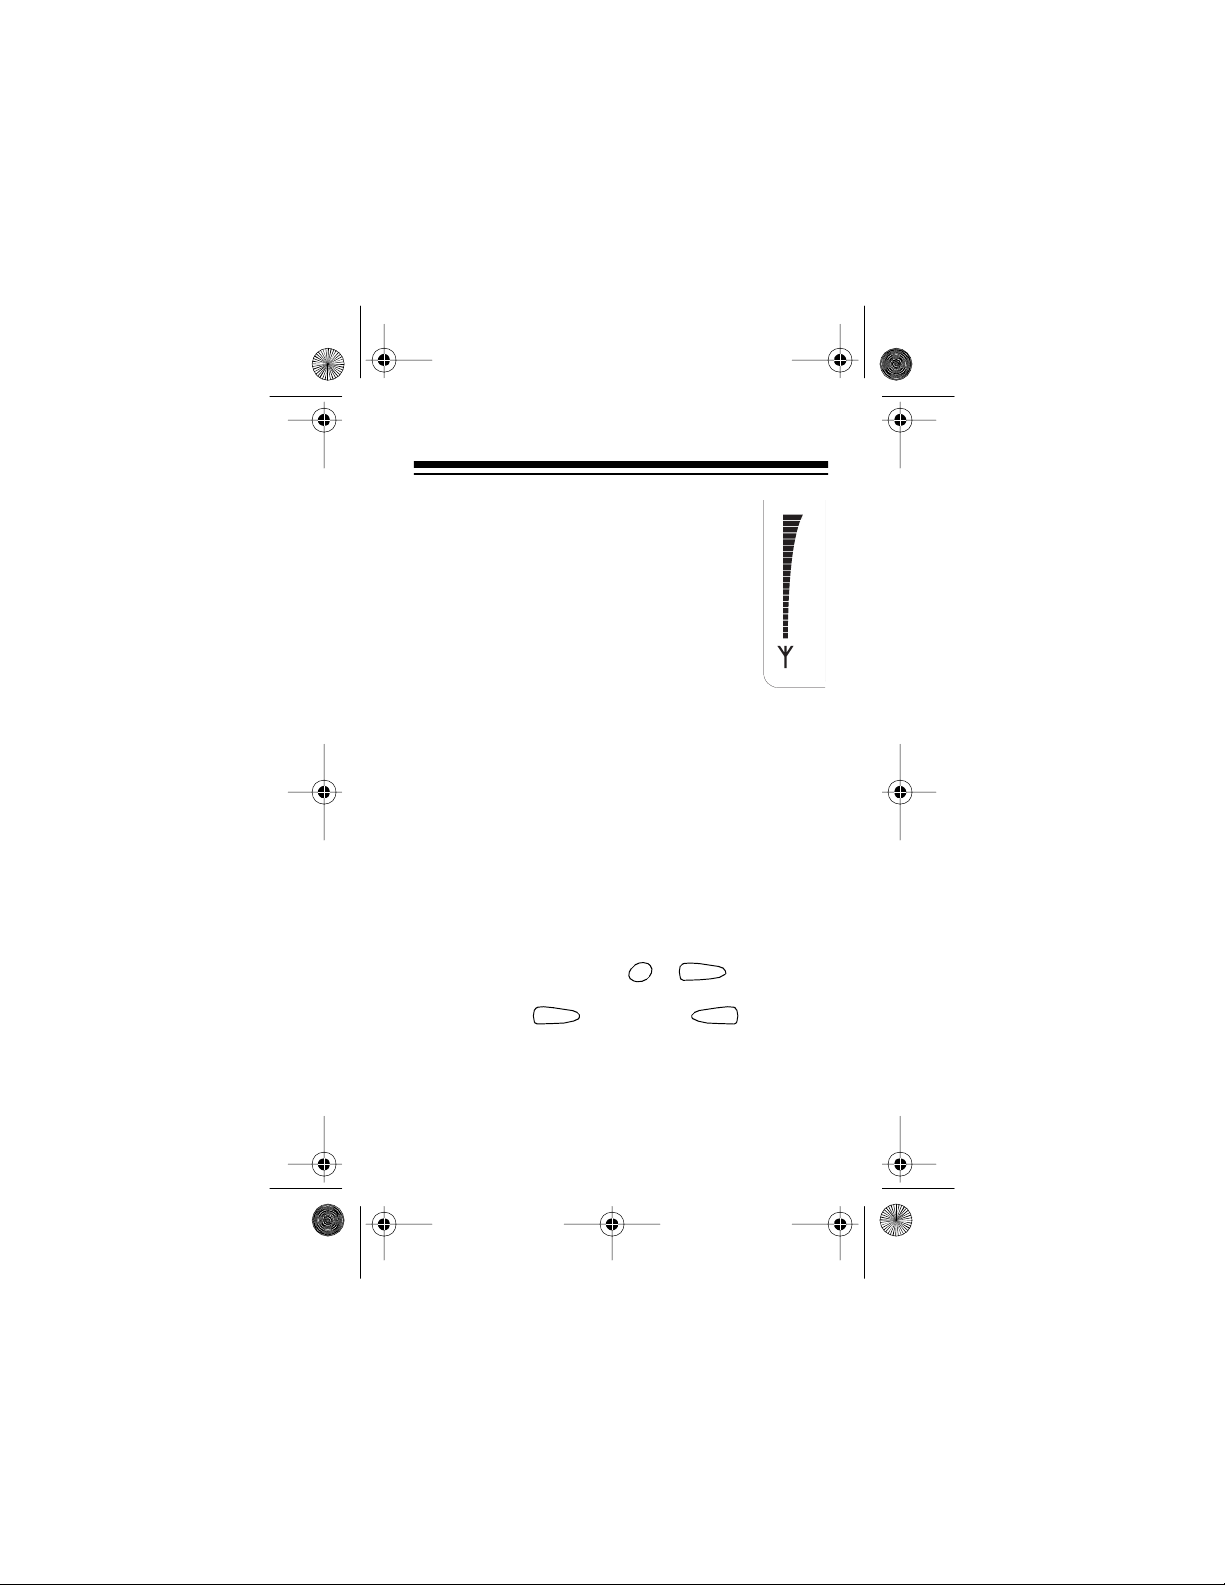
Signal Strength ..................................... 18
Receiving a Call ........................................... 19
Adjusting the Volume ................................... 21
Using Mute .................................................. 21
Making Emergency Calls ............................. 22
Using the Call Log ....................................... 23
Clearing the Call Log ................ .......... .. 25
Turning Automatic Redial On/Off ................. 25
Menu Overview ................................................. 27
Security Features .............................................. 32
Using Your Security Code .......................... . 32
Changing the Lock Code ................. ............ 33
Locking Your Phone .................................... 34
Selecting a Call Restriction Level ................ 35
Restoring Factory Settings .......................... 37
5

17-110 5.fm Page 6 We dnesday, July 21, 1999 11:06 AM
Turning One-Touch Emergency
Dialing O n /Off ...... ......... ... .......... ......... ... ....... 38
Turning Keyguard On/Off ............................. 38
Cellul a r S ystems ...... ......... ... .......... ......... ... ....... 40
Selecting the Active Phone Number ............ 40
Setting the Cellular System Type ................. 41
Roamin g ...... .......... ... ......... .......... .. .......... ..... 45
Special Phone Services ............................... 46
Calling Li n e ID ......... .......... .. .......... ....... 46
Call Waiting .. .. ... ......... .......... .. .......... ..... 46
Message Waiting .............. ........... ......... 47
Other Se rv ices ...... .......... ... ......... .......... 48
Special Features ................................................ 49
Call Timers ..... .. .......... .......... .. .......... .......... .. 49
Backlight Control .......................................... 50
Keypad Tone s ........ .................. ........... ......... 51
Ringing Options ............................................ 52
Ringing T one ................................................ 53
Ring Volume ................................................. 54
Using Calling Card Dialing ........................... 54
Storing/Clearing a Calling
Card Number ........................................ 54
Usin g a Stored Calling
Card Number ........................................ 57
Using Touch-Tone Services .. .. .......... .......... .. 59
Adding a Pause .................................... 59
Adding a Wait ........................................ 60
Sendi ng Touch-Tones ... .. ... ......... .......... 60
6

17-110 5.fm Page 7 We dnesday, July 21, 1999 11:06 AM
Data Mode ................................................... 60
PIN Code Dialing ......................................... 62
Reminder Message ......... ........... .......... ....... 64
Changing the Display Language ................. 65
Using Automatic Answer ............................. 65
Turning One-Touch Dialing On/Off .............. 66
Memory Features .............................................. 68
Storing a Number and Name in Memory ..... 68
Using Number Quick Store ................... 70
One-Touch Speed Dialing ............................ 70
Memory Scrolling ......................................... 71
Moving a Number to a Different
Memory Location ......................................... 72
Editing a Stored Name or Number .............. 72
Clearing Memory Locations ......................... 73
Using Scratchpad Memory ................... ....... 74
Accessories ...................................................... 76
Safety Information ............................................ 77
Traffic Safety ............................................... 77
Operating Environment ................................ 77
Emergency Calls ......................................... 79
FCC Regulations ......................................... 80
Trou bleshooting ................... .......... .. ................. 81
Care and Maintenance ...................................... 82
Specifications ................................................... 84
7
17-110 5.fm Page 8 We dnesday, July 21, 1999 11:06 AM
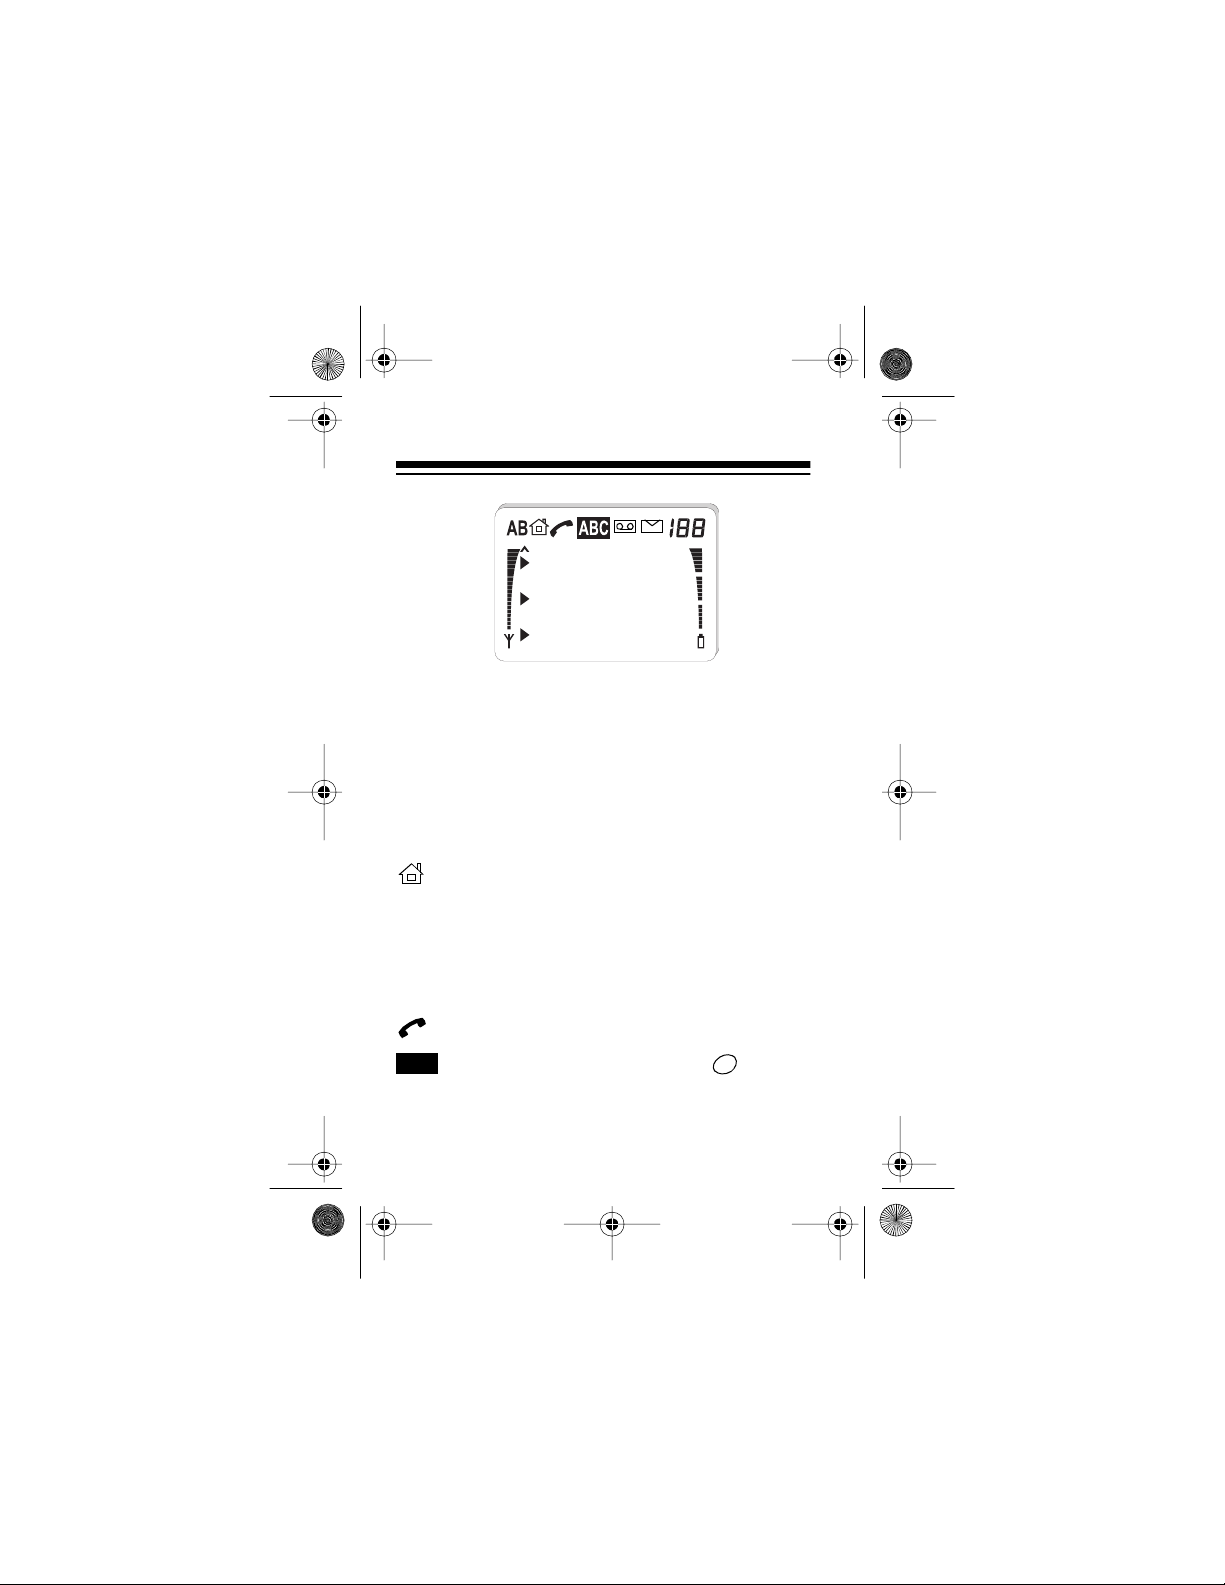
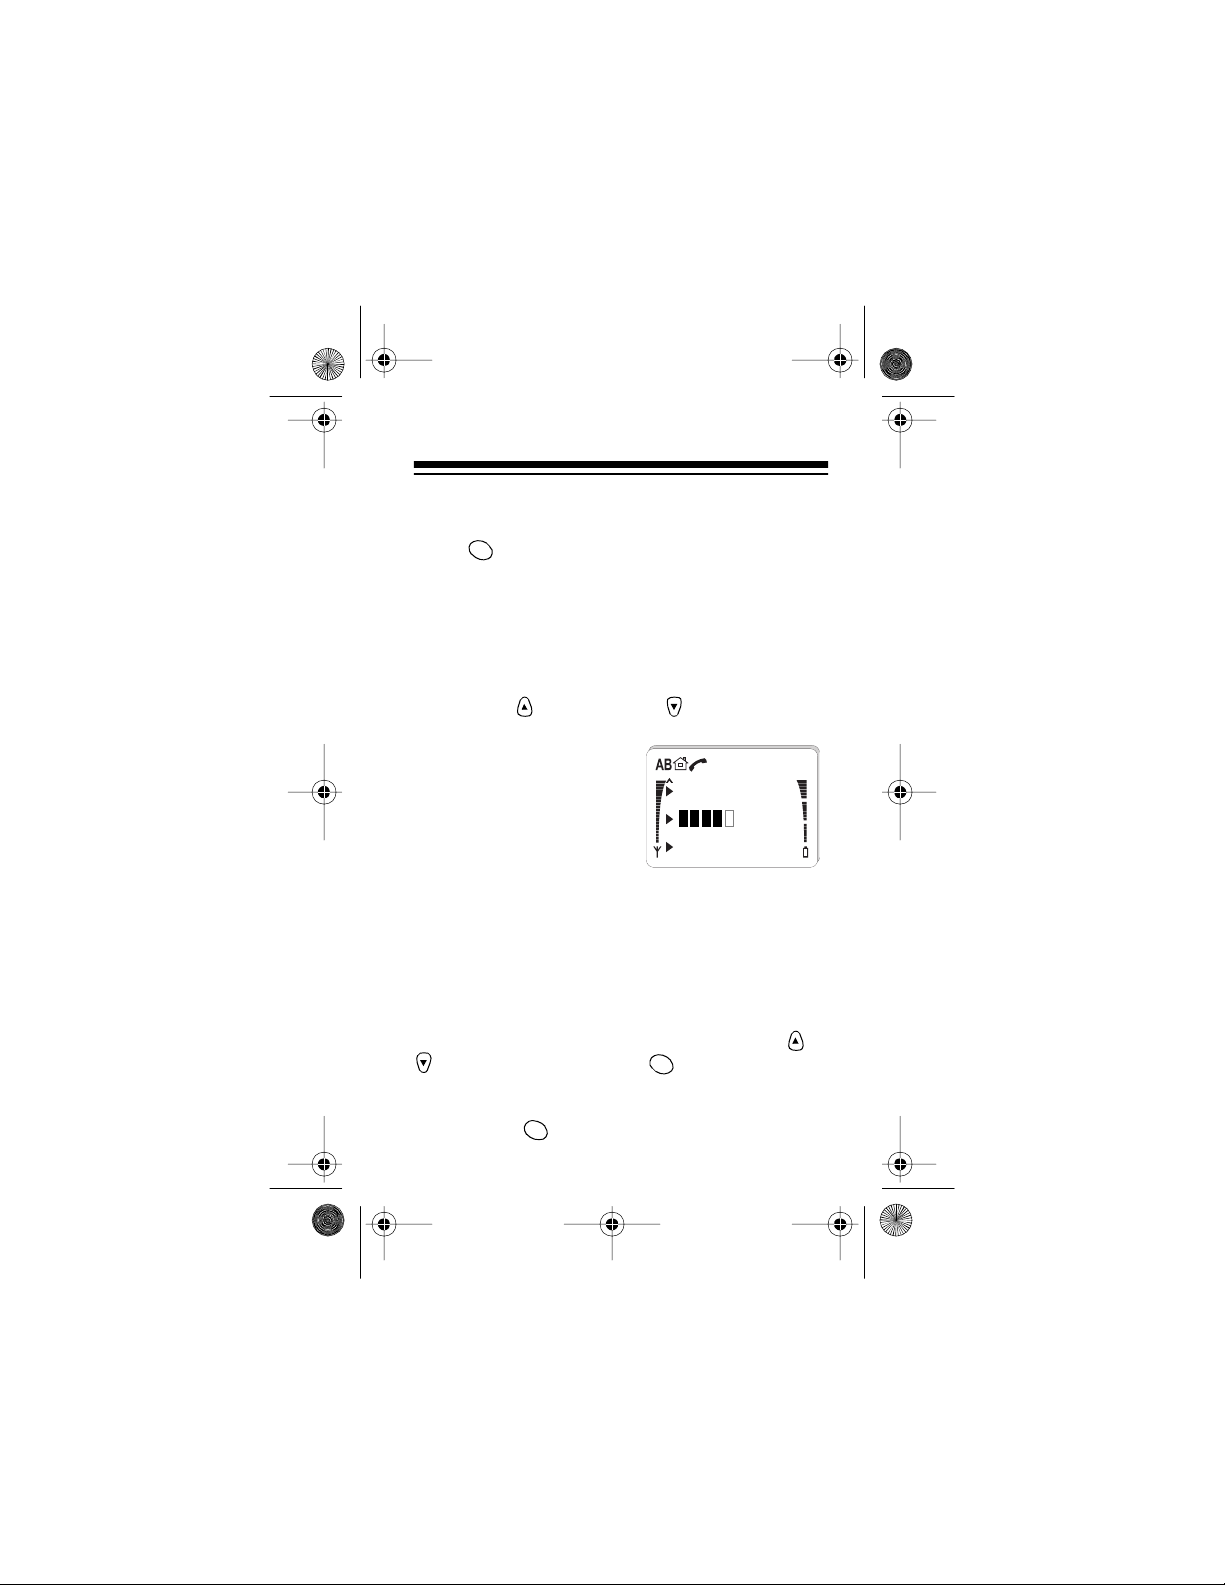
A LOOK AT THE DISPLAY
AB
ABC
8
Indicates t he type of network selected :
........ .......... .. A system only
A
........ .......... .. B system only
B
.................. Both systems
AB
No Indicator
..... Home area only
See “Setting the Cellular System Type”
on Page 41.
Flashes if the phone is using a Home
type system (not the Home system) or
when the phone is using a “preferred”
network.
This icon does not appear if the phone
is using a non-pre fer red network.
A call is in progress .
Appears when you press to enter
letters.
ABC
See “Storing a Number and Name in
Memory” on Page 68.

17-110 5.fm Page 9 We dnesday, July 21, 1999 11:06 AM
Appears when you have a message
waiting in your voice mailbox (if your
cellular ser vice supports it).
See “Message Wait ing” on Page 47.
Not used on this phone.
188
Indicates the number of a selected
menu or memory function.
See “Menu Overview” on Page 27 or
“Memory Feat ures” on Page 68.
Indicates the cellular signal strength.
The higher the bar, the stronger the signal.
See “Signal Strength” on Page 18.
Indicates the battery charge level. The
higher the bar, the more charge left in
the battery.
See “When to Recharge the Battery ” on
Page 14.
9
17-110 5.fm Page 10 Wednesday, July 21, 1999 11:06 AM
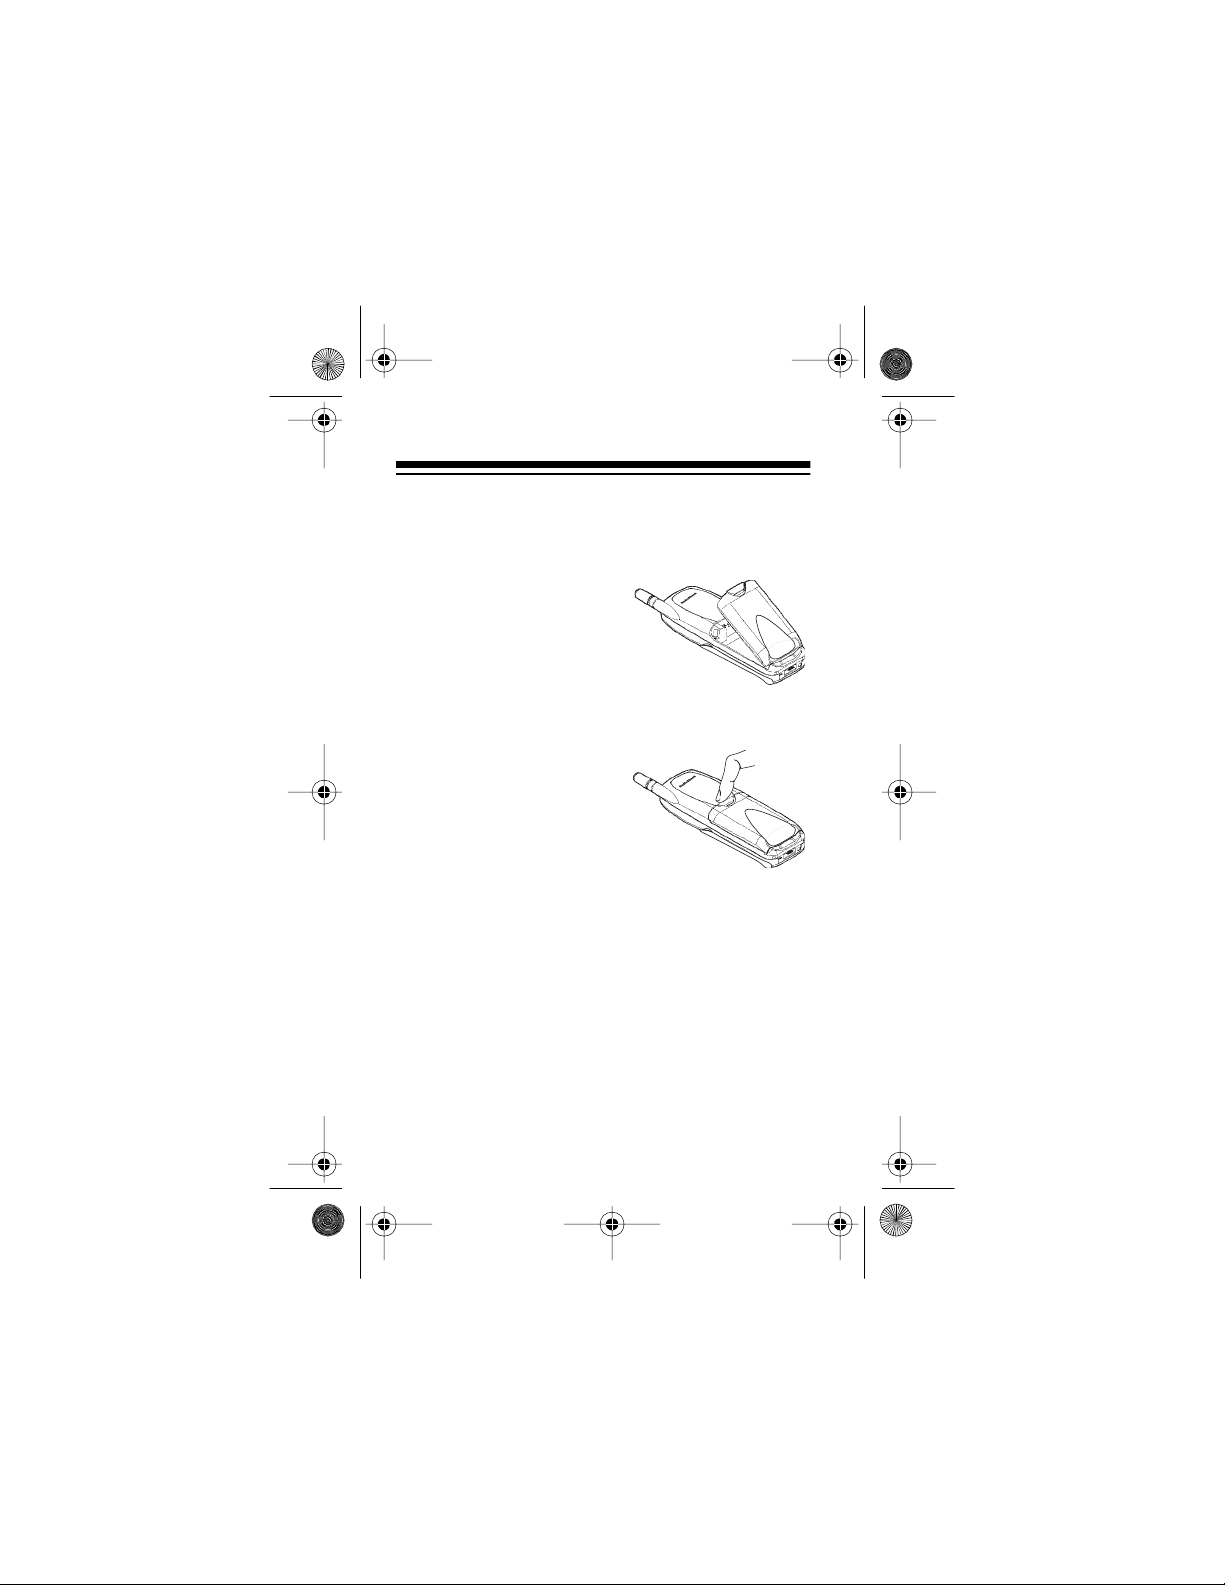
PREPARATION
INSTALLING THE BATTERY
To install the battery, place
the tabs on the bottom of
the battery into the slots on
the back of the phone (near
the bottom). Then move the
top of the battery towar d the
phone until it locks into
place.
To remove the battery, first
be sure the phone is turned
off. Then gently push down
on the battery’s lat ch and lift
the battery away from the
phone.
IMPORTANT BATTERY TIPS
• You must fully charge a new battery for at least
24 hours before you first use it. See “Charging
the Battery” on Page 13.
• Use only the supplied charger and use only batteries recommended for this phone.
• The battery is a sealed unit with no serviceable
parts. Do not try to open t he case.
10

17-110 5.fm Page 11 Wednesday, July 21, 1999 11:06 AM
• A new battery’s full performance is achieved
only after two or three complete charge and dis charge cycles.
• When you are not using the charge r, di sconnect
it from power. Do not leave a battery charging
on the charger for more than a week, since
overcharging could shorten the battery’s life.
• If left unused, a fully charged battery discharg-
es itself in about a week.
• When a battery is not in use, store it uncharged
in a cool and dark place.
• You can purchase additional standard or ex-
tended capacity batteries through your local
RadioShack store.
• A battery can be charged and discharged hun-
dreds of times, but it eventually wears out.
When the operating time (talk time and standby
time) is noticeably shor ter than norma l, it is time
to get a new battery.
• Occasionally, allow the battery pack to fully dis-
charge. Otherwise, the battery pack loses its
ability to fully recharge. See “Discharging Batteries” on Page 15.
• Leaving the battery in a hot or cold place, such
as in a closed car in the summer or winter, reduces the battery’s capacity and life. Always try
11
17-110 5.fm Page 12 Wednesday, July 21, 1999 11:06 AM
to keep the battery between 41° and 95°F (5°
and 35°C). A phone wit h a batter y that is too hot
or too cold might not work, even when the battery is fully charged, until the battery returns to
a normal temperature. Nickel metal hydride
(NiMH) batteries are particularly limited in temperatures bel ow 14° F (–10°C).
• Use the battery only for its inten ded purpose.
• Never use any charger or battery that is damaged or worn out.
• Do not short circuit the battery. Accidental short
circuiting can occur when a metal object (coin,
paper clip, pen, or similar) directly connects the
battery’s + and – terminals (the metal strips on
the back of the battery), such as when you carry a spare battery in your pocket or purse. Short
circuiting the terminals might damage the battery or the object connected to it.
• Do not dispose of batteries in a fire!
12
NiCd
NiMH
Nickel Cadmium and Nickel Metal
Hydride batteries must be recycled
or disposed of properly. They must
not be disposed of in municipal
waste.
17-110 5.fm Page 13 Wednesday, July 21, 1999 11:06 AM
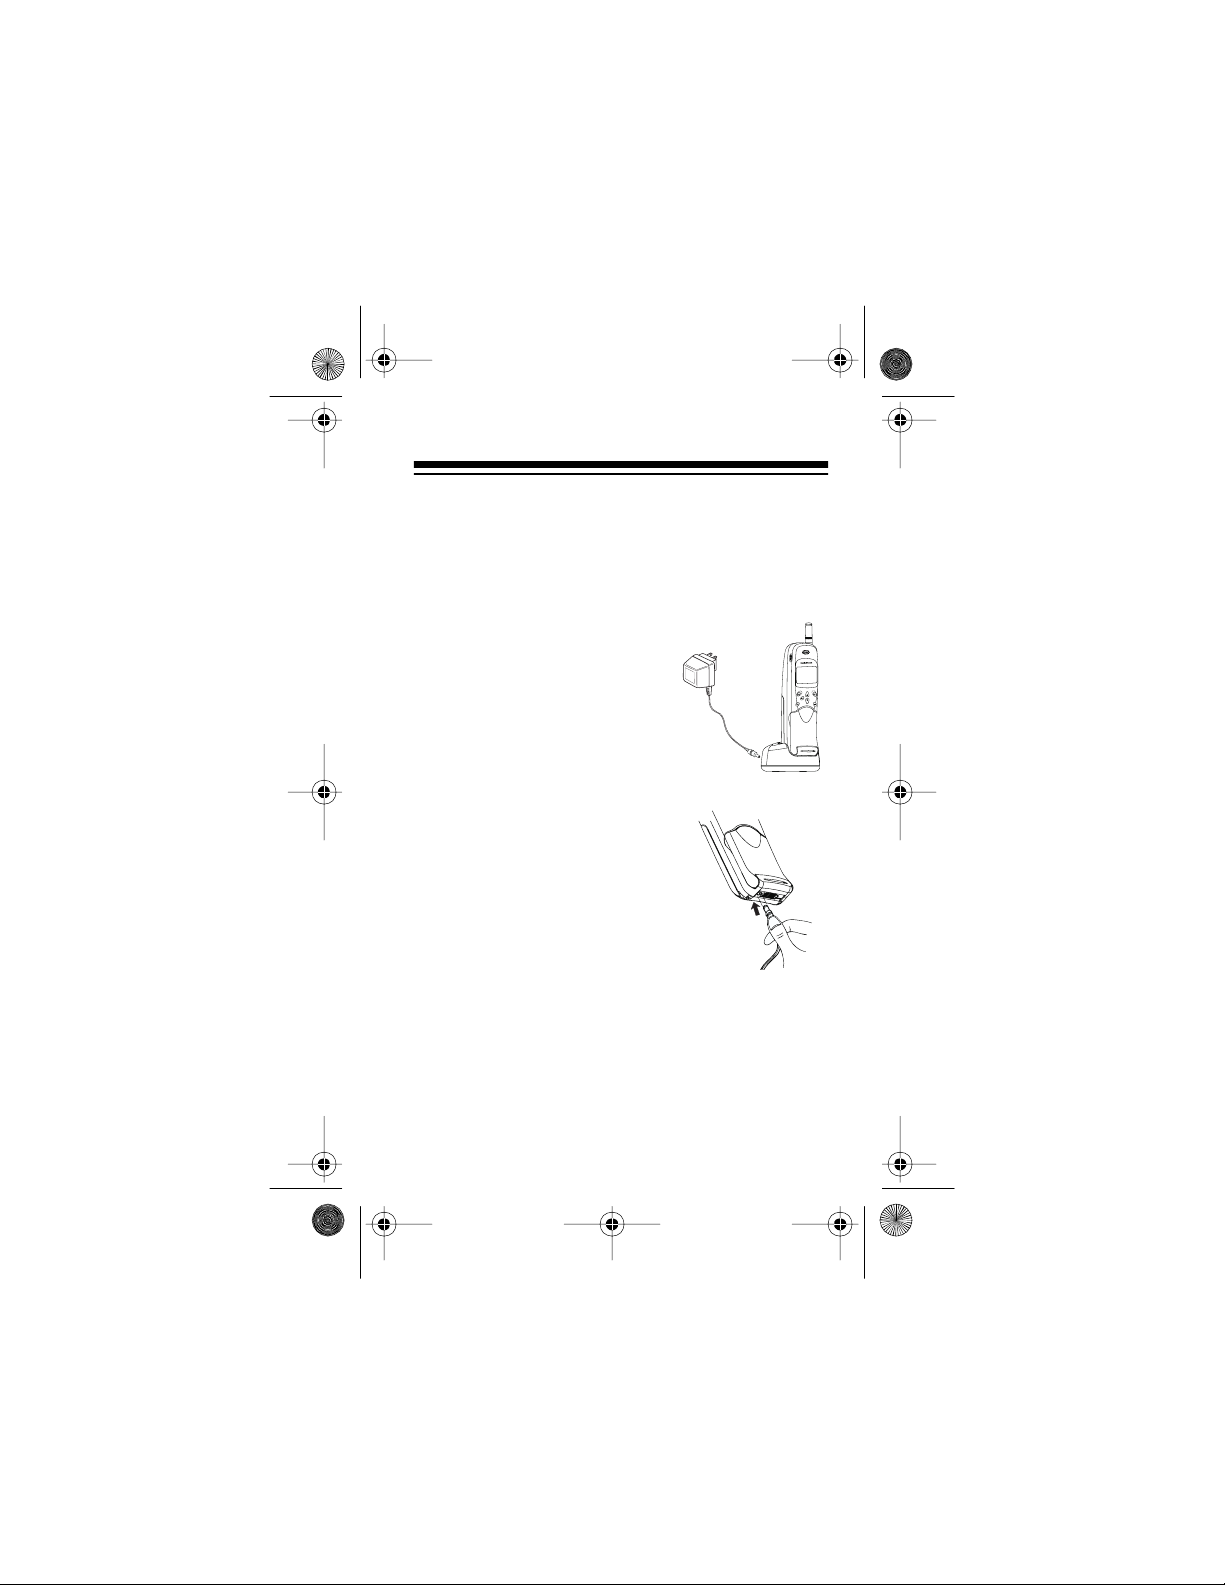
CHARGING THE BATTERY
Once you install the battery on the phone, follow
these steps to charge or recharge the battery using
the supplied charger.
1. Insert the charger’s barrel plug into the jack on
the back of the supplied stand, then set the
phone on the stand with
the phone’s keypad facing out.
Or, to charge the phone
without the stand (so
you can use the phone
while it is charging, for
example), insert the
charger’s barrel plug
into the jack on the bottom of the phone.
2. Connect the charger’s AC plug to a standard
AC outlet. The battery charge indicator bar appears and begins to scro ll .
Notes:
• For the fastest charging, be sure the phone
is turned off during charging.
13

17-110 5.fm Page 14 Wednesday, July 21, 1999 11:06 AM
• If you use the phone while it is charging,
charging takes longer.
• If the battery is too hot or cold, charging
stops until the battery temperature returns to
normal.
• With a new or comp let ely discharged battery,
the phone may take up to 45 minutes to
show that chargi ng is i n progress.
3. The battery indicator bar stops scrolling when
the battery is fully charged. Remove the phone
from the charging stand or disconnect the
charger from the AC outlet and the phone.
Using the supplied battery (fully charged), you have
about 2 hours of talk time or 30 hours of standby
time.
When to Recharge th e B attery
Your phone displays th e battery charge bar whenever the phone is on to keep you informed about the
battery’s power level. The higher the bar, the more
power left in the battery.
You can recharge the battery (as described in
“Charging the Battery” on Page 13) at any time.
However, when your phone gi ves you these l ow bat-
14
17-110 5.fm Page 15 Wednesday, July 21, 1999 11:06 AM
tery indications, recharge the battery as soon as
possible:
• When only a few minutes of talk time remain,
the phone sounds a warning tone and displays
BATTERY LOW
at regular intervals.
• When the battery charge level is too low for the
phone to operate, the phone displays
CHARGE
BATTERY
and sounds a warning
RE-
tone. The phone automatically turns off about
10 seconds later.
Note: The phone does
not
sound low battery warning tones if silent service or vibrate is selected (see
“Ringing Option s” on Page52).
DISCHARGING BATTERIES
Rechargeable batteries last longer and perform better if occasionally allowed to fully discharge. Your
phone reminds you to discharge the battery with a
series of battery advice messages, such as
and
LOW
TERY
OK
, or to page through the information, or press
CLR
to clear the message s.
RECHARGE BATTERY
BAT-
. Press ,
You can discharge the battery by leaving the phone
on until the phone automatically turns off or you can
15

17-110 5.fm Page 16 Wednesday, July 21, 1999 11:06 AM
use the battery discharge feature of any approved
accessory available for your phone.
To fully discharge the battery, wait at least 30 minutes after the phone turns off before you connect it
to the charger.
16
17-110 5.fm Page 17 Wednesday, July 21, 1999 11:06 AM
BASIC OPERATION
TURNING THE PHONE ON AND
OFF
Note:
Extend the antenna fully during a call. Avoid
unnecessary contact with the antenna when the
phone is turned on.
The phone must be turned on before you can make
or answer calls. To turn on the phone, hold down
PWR
(below and to the bottom left of the display) until
the phone beeps. The phone performs a short selftest, then it briefly displays the active phone number
(see “Selecting the Active Phone Number” on
Page 40). The phone is ready to use when the signal strength and battery charge bars appear.
PWR
To turn off the phone, hold down
beeps.
until the phone
MAKING A CALL
1. Open the flip cover. Use the number keys to enter the phone number you want to dial. Include
the area code, if necessary.
Note:
If you make a mistake, repeatedly press
CLR
to delete digits one at a time, or hold down
CLR
to clear all digits.
17
17-110 5.fm Page 18 Wednesday, July 21, 1999 11:06 AM
2. Press to dial the phone number. The
SEND
phone displays t he num ber and . When the
number disappears and
appears, your
CALL
call has been connected.
Notes:
•
PIN CALL
appears if PIN code dialing is set
to ON (see “PIN Code Dialing” on Page 62).
Press again after you hear the prompt
SEND
to send your PIN code and complete the call.
•
NO SERVICE
appears and the phone beeps
if you are outside the cellular service area.
See “Signal Strength” below.
•
CALL NOT ALLOWED
briefly appears if you
try to make a restricted call (see “Selecting a
Call Restriction Level” on Page 35), or if the
phone is locked (see “Locking Your Phone”
on Pa ge 34) .
3. To end the call, press .
END
Signal Strength
A cellular phone sends and receives radio signals.
As with all radio equipment, the quality of reception
depends on the strength of the signal in the area
where you are operating your phone.
18
PWR
17-110 5.fm Page 19 Wednesday, July 21, 1999 11:06 AM
The vertical bar on the l eft of your phone’s
display shows the strength of the cellular
signal your phone is receiving. The higher
the bar, the stronger the signal.
If the signal strength is low, try moving to
a different location. If you are using the
phone in a building, try moving closer to a
window.
If
NO SERVICE
appears, your phone is outside the
cellular service area. This means you cannot make
or receive calls until you move the phone back into
the cellular service area.
RECEIVING A CALL
When your phone receives an incoming call, it rings
(or vibrates if a vibrating battery is installed and vibrate is selected) and flashes
call, press any key except
or
phone from ringi ng without ans weri ng the call imm ediately, press , then press when you
END
are ready to answer the call.
Notes:
• After the first ring, if you subscribe to calling line
ID service through your cellular carrier (see
. To answer a
CALL
END
SEND
. To stop the
19
17-110 5.fm Page 20 Wednesday, July 21, 1999 11:06 AM
“Calling Line ID” on Page 46), the phone automatically displays the calling party’s phone
number or, if it is programmed into your phone,
the calling party’ s name (see “Sto ring a Number
and Name in Memory” on Page 68).
• If you selected silent service (see “Ringing Options” on Page 52), the phone does not ring. Instead, the keypad and display backlights flash,
flashes on the display (or caller informa-
CALL
tion appears) , and the phone beeps once.
• If keyguard is set to ON (see “Turning Keyguard
On/Off” on Page 38), you can answer a call
only by pressing .
SEND
To end the call, press . To clear calling line ID
information (if any) from the display, press .
If you do not answer a call, the phone displays
MISSED
CALLS
END
CLR
NN
(where NN is the number of cal ls)
and stores the caller’s number (if available) in the
missed calls list. To review the missed calls list,
press then press or to scroll through the
numbers. Or, press any other key (except ) to
OK
PWR
clear the display. See “Using the Call Log” on
Page 23.
20
17-110 5.fm Page 21 Wednesday, July 21, 1999 11:06 AM
Hint: To quickly store the displayed caller’s number
(if available) into the first empty speed-dial memory,
press twice (see “Using Number Quick Store”
OK
on Page 70).
ADJUSTING THE VOLUME
To increase or decrease the earpiece volum e during
a call, press (to increase) or (to decrease).
Your phone displays
VOLUME
tal bar indicating the vol-
and a horizon-
VOLUME
ume level. The more
filled bar segments, the
higher the volume.
USING MUTE
To turn off the phone’s microphone during a call so
the other party on the phone cannot hear you (so
you can talk privately with someone else in the
room, for example), press
to select
and press .
MUTE
To turn on the microphone again, press
OK
ly then press
.
MUTE OFF
briefly. Use or
MENU
OK
MUTED
appears.
appears.
brief-
MENU
21
17-110 5.fm Page 22 Wednesday, July 21, 1999 11:06 AM
Note: Pressing to end a call also turns the mi-
END
crophone back on.
MAKING EMERGENCY CALLS
The primary local emergency number (such as 911)
is programmed into your phone a t t he time of activation. To prevent unwanted emergency calls, however, your phone’s one-touch emergency dialing
feature is preset to OFF. To set it to ON, see “Turning One-Touch Emergency Dialing On/Off” on
Page 38.
To quickly dial the emergency number
emergency dialing is set to ON), hold down
until the phone displays
.
CALL
CY
ATTEMPTING EMERGEN-
Notes:
• The emergency number programmed into your
phone might not be valid in all areas. (For example, not all areas have 911 service.) If you
use the phone outside its primary service area,
you might have to manually dial an emergency
number if it is different from the one programmed into your phone.
(if one-touch
WXYZ
9
22

17-110 5.fm Page 23 Wednesday, July 21, 1999 11:06 AM
• One-touch emergency dialing does not operate
if keyguard i s turned on ( see “Turning Keyguard
On/Off” on Page 38) or if one-touch emergency
dialing is turned off.
Important: When you make an emergency call,
give your name and cellular phone number, as well
as the location of the incident. Remember that your
phone might be the only means of communication at
the accident scene. Do not end the call until you ar e
advised you may do so.
USING THE CALL LOG
Your phone automatically stores the last fifteen
numbers you dialed. And, if you have calling line ID,
it also stores the phone numbers of the last 15 calls
received and the last 15 cal ls missed.
Follow these steps to view the Call Log.
1. Press
LOG
2. Press when the list you want to view ap-
MENU
then or until you see
. Press .
OK
OK
CALL
pears.
Select
DIALED CALLS
to view the phone
numbers you have dialed.
23
17-110 5.fm Page 24 Wednesday, July 21, 1999 11:06 AM
Select
RECEIVED CALLS
to view the phone
numbers of the calls you received.
Select
MISSED CALLS
to view the phone
numbers of the calls you missed.
3. Press or to scroll through the numbers.
Notes:
•
NO NUMBERS
appears if the selected list is
empty.
• If a number matches a number in one of the
memory locations, the name associated with
the phone number appears.
To dial a displayed number
To quickly redial a number
the display then press . The phone displays
, simply press .
, hold down to clear
SEND
SEND
CLR
the last number dialed. Repeated ly press or to
scroll through the last 15 numbers dialed. When the
number you want to redial appears, press
SEND
again.
Hint: To quickl y store a number into the first empty
speed-dial memory, recall that number, then press
OK
twice (see “Using Number Quick Store” on
Page 70).
24
OKOKCLR
17-110 5.fm Page 25 Wednesday, July 21, 1999 11:06 AM
Clearing the Call Log
Follow these st eps to clear all numbers in the Dial ed
Calls, Received Calls, and Missed Calls lists from
your phone.
MENU
1. Press
LOG
2. Press or until you see
CENT
3. The phone prompts
then or until you see
. Press .
OK
, press again.
CALLS
ARE YOU SURE?
CALL
ERASE ALL RE-
. Press
to erase, or press to exit without eras-
ing.
TURNING AUTOMATIC REDIAL
ON/OFF
Sometimes the cellular network is busy and your call
does not go through. You get a
message and are asked to redial . If Automatic Redial is set to On, the phone automatically tries 3 more
times to connect the call. If the call connects, the
phone beeps to notify you.
SYSTEM BUSY...
25

17-110 5.fm Page 26 Wednesday, July 21, 1999 11:06 AM
Follow these steps to view and change the current
setting.
1. Press then or until you see
2. Press or until you see
3. Press or to move the pointer to
MENU
SETTINGS
. Press .
OK
AUTOMATIC RE-
and the current setting. Press if you
DIAL
want to change it or to exit.
. Press .
Off
OK
CLR
PHONE
OK
On
or
26
17-110 5.fm Page 27 Wednesday, July 21, 1999 11:06 AM
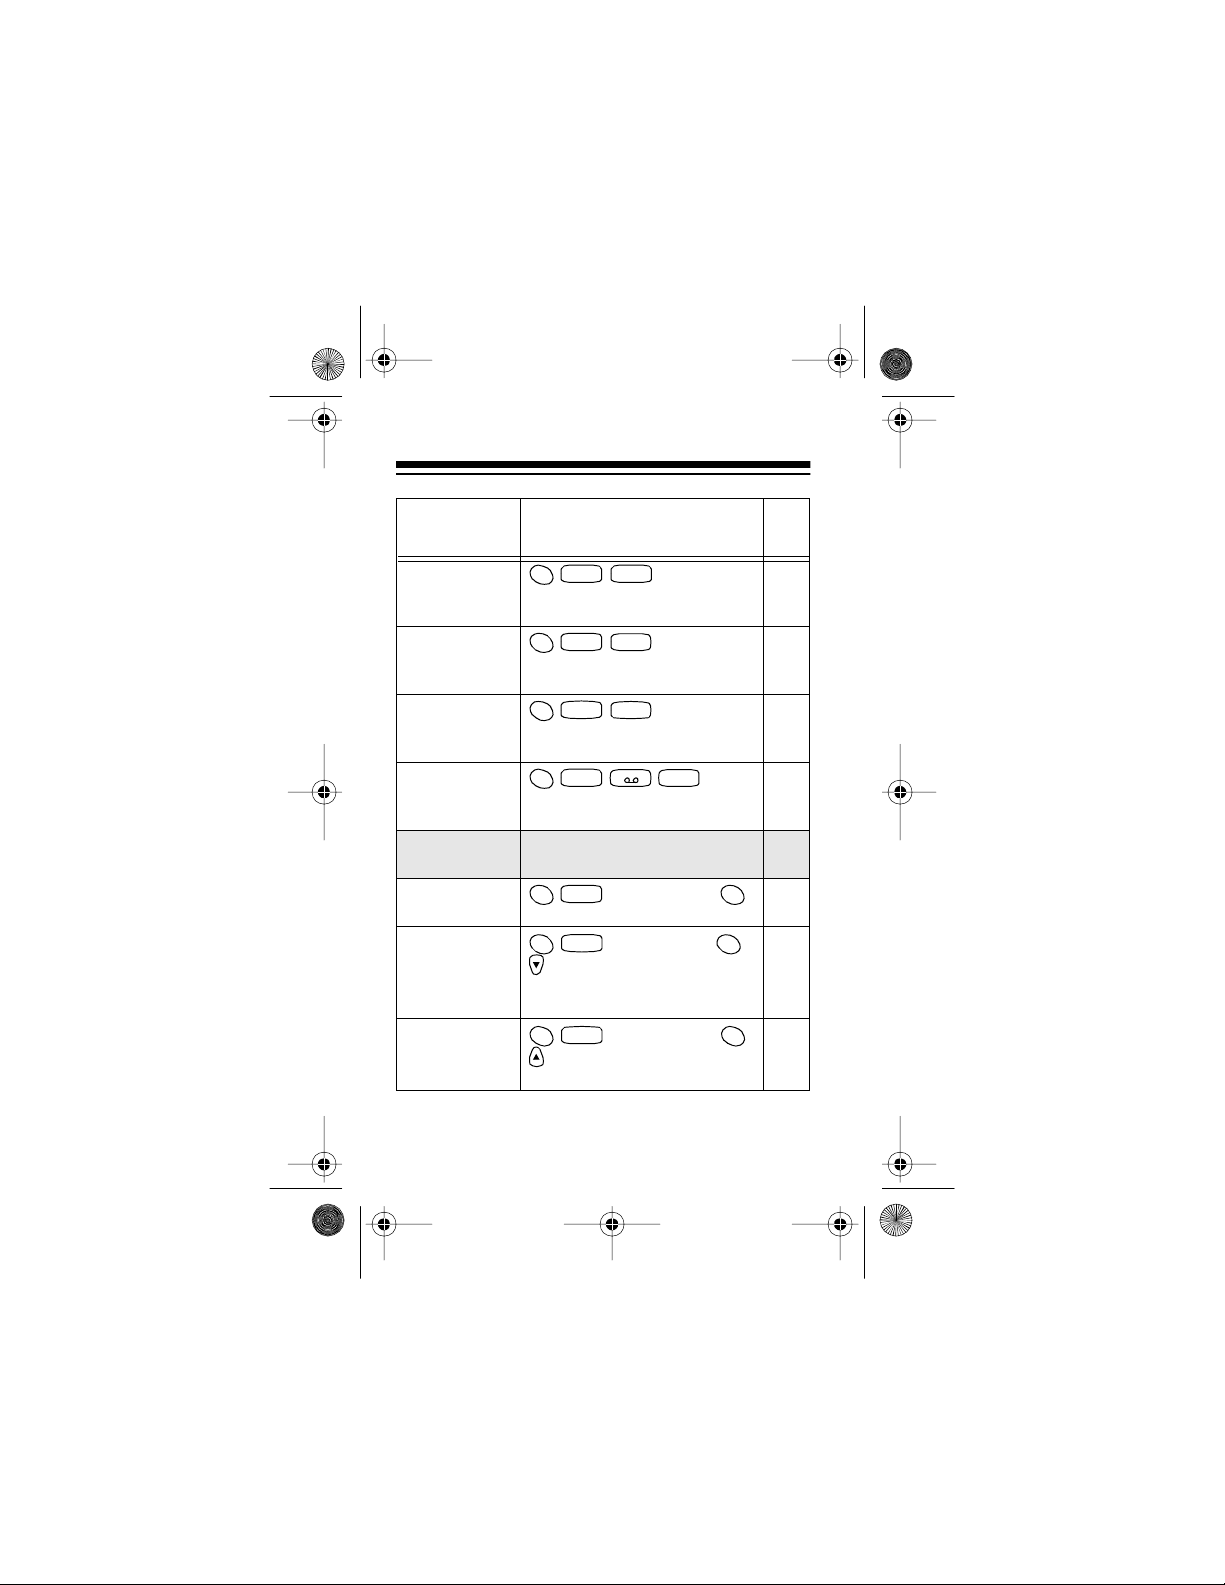
MENU OVERVIEW
This section lists your phone’s menu functions, the
shortcut keys (if any) you can use to access the
functions, and the pages in this manual where you
can find full descri ptions of the functions.
To select a specific menu function
, press that func-
tion’s shortcut keys (if any).
To scroll forward or backward through all menu
functions
, press then (forward) or (back-
ward). Press to select a displayed functi on.
You See Shortcut/Description
PHONE
MENU
OK
Memory storage and recal l
See
Pg.
—
BOOK
MENU
Name:
1 1
71
Find name.
Name:
MENU
ABC
1
2
68
Save name and number
One by one
Erase all
N% OF
MEMORY
AVAILABLE
MENU
1
Erase fr o m ph on e b oo k
MENU
1
% memory available
GHI
4
JKL
5
73
—
27
1
2
ABC
3
DEF
17-110 5.fm Page 28 Wednesday, July 21, 1999 11:06 AM
You See Shortcut/Description
Call Log
Last number
dialed
Last received
number
Last number
missed
ARE YOU
SURE?
CALL
TIMERS
LAST
CALL
(elapsed time)
ALL
CALLS
(elapsed time)
LIFE
TIMER
(elapsed time)
Contains recent call information
MENU2ABC
1
Displays the di aled call numbers
MENU2ABC2ABC
Displays the received call numbers (with calling line ID)
ABC3DEF
MENU
2
Displays the missed call numbers
ABC4GHI
MENU
2
Clears the call log
ABC5JKL
MENU
2
Display s th e len g t h of ca ll s and
reset timers
ABC5JKL
MENU
2
Displays the le ngth of th e last
call for the active number
MENU2ABC5JKL
Displays the total length of all
calls for the acti ve number
MENU2ABC5JKL
Displays the total length of all
calls on all active numbers
See
Pg.
—
25
25
25
25
49
49
49
49
28

17-110 5.fm Page 29 Wednesday, July 21, 1999 11:06 AM
You See Shortcut/Description
ABC5JKL4GHI
MENU
2
CLEAR
TIMERS
Resets the timers (except life
timer)
PHONE
SETTINGS
Silent
Ring
3
Select r ing options
MENU
DEF
1
Ring+Vibra
Increasing
Vibrate
DEF
MENU
3
1 1
ON
OFF
Level N
Type N
Level N
On
Off
On
Off
Select the automatic redial setting
MENU3DEF2ABC
Selects the ringing volume
DEF3DEF
MENU
3
Selects the ringing tone
DEF4GHI
MENU
3
Display and select the keypad
tone volume level
DEF5JKL
MENU
3
Display and select the backlight
setting
DEF6MNO
MENU
3
Display a nd se lect t he one -tou ch
dialin g setting
See
Pg.
49
—
52
54
54
53
51
51
51
29
0
OPER
17-110 5.fm Page 30 Wednesday, July 21, 1999 11:06 AM
You See Shortcut/Description
On
Off
Display and turn on/off one-
DEF7PQRS
MENU
3
touch em er gency dial ing
TUV
DEF
MENU
3
8
Portugues
English
Francais
Phone
Number
Display and select the di splay
language
MENU
Display and select the active
WXYZ
DEF
9
3
phone nu m be r
DEF
MENU
3
1
On
Off
Displa y and se le ct t he a ut omat ic
answer se tting
Security
Accesses the secur ity sett ings
code:
MENU4GHI
CHANGE
LOCK CODE
CHANGE
(security code)
Changes the 4-digit lock code
MENU4GHI
(security code)
SECURITY
CODE
RESTORE
Changes the 5-digit security
code
GHI OK
MENU
4
(security code)
FACTORY
SETTINGS
Restor es factory settings
See
Pg.
38
65
40
65
—
OK
33
OK
33
33
30

OK
17-110 5.fm Page 31 Wednesday, July 21, 1999 11:06 AM
You See Shortcut/Description
CALL
SETTINGS
JKL
MENU
5
1
None
Card A
Card B
CALLING
OPTIONS
Incoming
Allow all
Nat’l o n ly
Local only
Mem. only
Home only
Preferred
Non-pref.
Any
Enter lock
code:
Selects and activates a calling
card op tion
MENU5JKL2ABC
Selects carrier and calling
options
JKL2ABC2ABC
MENU
5
rity code)
Displays and selects a call
restriction level
MENU5JKL2ABC
(security code)
OK
OK
Selects the roaming mode
MENU6MNO
Lock s yo ur phone
(secu-
OK
See
Pg.
—
55
36
35
44
34
31

OK
17-110 5.fm Page 32 Wednesday, July 21, 1999 11:06 AM
SECURITY FEATURES
USING YOUR SECURITY CODE
You use your security code to access all security
settings (s uch as changin g the lock code and securi ty code). The security code prevents unauthorized
changes to your confident ial settings. The phone’s
default security code is 12345.
To change your secu rity code, follo w these steps.
Note:
If you enter an incorrect code in Steps 2 or 5,
CODE ERROR
continue with the next step.
1. Press then or until you see
TY SETTINGS
2. Enter the current securi ty code and press .
3. Press or until you see
RITY
4. Enter a new 5-digit security code and press
OK
5. Enter the new security again code and press
OK
CHANGED
appears. Enter the correct code and
MENU
. Press .
CHANGE SECU-
. Press .
CODE
.
Verify new code:
. Your phone displays
.
OK
appears.
SECURITY CODE
SECURI-
OK
32
OK
17-110 5.fm Page 33 Wednesday, July 21, 1999 11:06 AM
CHANGING THE LOCK CODE
At the time of activation, your phone is programmed
with, and you were given, a 4-digit lock code which
is required to lock your phone and change the settings of some menu functions (such as the call restriction level and calling card dialing). The phone’s
default lock cod e is 1234.
To change y our 4-digit lock code, follow these steps.
Note:
If you enter an incorrect code in Steps 2 or 4,
CODE ERROR
continue with the next step.
1. Press then or until you see
TY
2. Enter your security code and press .
CHANGE LOCK CODE
3. Press again, then enter a new 4-digit lock
code. Press . The phone prompts you to
confirm the new lock code.
4. Enter the new lock code again, then press
to store it.
briefly to confirm the change.
appears. Enter the correct code and
MENU
SETTINGS
. Press .
appears.
OK
OK
LOCK CODE CHANGED
SECURI-
appears
OK
OK
33

17-110 5.fm Page 34 Wednesday, July 21, 1999 11:06 AM
LOCKING YOUR PHONE
When you lock your phone, you can receive incoming calls as usual but you cannot make outgoing
calls, except to the number stored in memory location 75 (see “Storing a Number and Name in Memory” on Page 68) and the emergency number
programmed into your phone (memory location 9).
Also, you cannot access the phone’s memory or
menus.
Follow these steps to lock and unlock your phone.
PHONE
code.
displays
MENU
. Press .
OK
PHONE LOCKED
LOCK
OK
.
1. Press then or until you see
2. The phone prompts you to enter the 4-digit lock
3. Enter the lock code and press . The phone
LOCKED
remains on the display to remind you that
the phone is locked. To unlock the phone, press
MENU
. The phone prompts you for the lock code. Enter
it and press .
OK
PHONE UNLOCKED
appears brief-
ly.
To make a call to the number stored in location 75
when the phone is locked, press then . To
SEND
34

17-110 5.fm Page 35 Wednesday, July 21, 1999 11:06 AM
call the emergency number, dial the entire emerge ncy number then press .
SEND
SELECTING A CALL
RESTRICTION LEVEL
Your phone is preset to let you (or anyone else) dial
any type of number (local or long distance) and freely access any information stored in its memory. To
prevent unauthorized use of your phone, however,
you can enter your 4-digit lock code ( see “Changing
the Lock Code” on Page 33) and set any of these
varying levels of call restrictions.
Important:
gency number
level you select.
Restriction
ALLOW
ALL
NATIONAL
ONLY
You can dial the pre-programmed emer-
regardless
Level
No restrictions (default setting) .
Calls can be made only within your
own country; no international calls
are allowed.
of which call restriction
Description
35
OK
17-110 5.fm Page 36 Wednesday, July 21, 1999 11:06 AM
Restriction
Level
LOCAL
ONLY
You can only make local calls or
calls to toll -free numbers (such as
Description
800, 888, and 877 numbers).
MEMORY
ONLY
All incoming calls can be answered.
Outgoing call s are restricted to numbers stored in memory. The memory
cannot be changed.
INCOMING All incoming calls can be answered.
Your phone will not allow any outgoing calls. The memor y cannot be
accessed or changed.
Follow these steps to view the current setting or select a new call restriction level.
1. Press then or until you see
2. Press or until you see
3. Press or until you see
MENU
SETTINGS
. Press .
OK
CALL
CALLING OP-
TIONS
. Press .
OK
ALLOWED CALLS
and the current setting. Press if you want to
OK
change it.
4. The phone prompts you f or your 5-digit security
code. Enter it and press .
36

OK
OK
17-110 5.fm Page 37 Wednesday, July 21, 1999 11:06 AM
5. Use or to move the pointer to the option
you want, then press to select it.
RESTORING FACTORY
SETTINGS
Follow these steps to reset the phone’s menus to
their default settings.
Note:
The lock code and security code are not
changed when you reset the menu settings.
SETTINGS
TY
MENU
. Press .
SECURI-
OK
RESTORE FAC-
SETTINGS
TORY
set or press
. Press .
CLR
or
ting.
If you press , the phone briefly displays
OK
SETTINGS RESTORED
OK
END
to exit without reset-
.
OK
1. Press then or until you see
2. Enter your security code then press .
3. Press or until you see
4. The phone asks you to confirm. Press to re-
37
17-110 5.fm Page 38 Wednesday, July 21, 1999 11:06 AM
TURNING ONE-TOUCH
EMERGENCY DIALING ON/OFF
One-touch emergency dialing lets you call the primary emergency number programmed into your
phone by holding down for about 2 seconds.
One-touch emergency dialing is preset to OFF. To
turn it on or back off at any time, follow these steps.
1. Press then or until you see
MENU
SETTINGS
. Press .
2. Press or until you see
DIALING
and the current setting. Press if
you want to change it.
3. Use or to move the pointer to
Then press to select it and press or
CLR
to exit.
OK END
WXYZ
9
PHONE
OK
EMERGENCY 9
OK
or
On
Off
.
TURNING KEYGUARD ON/OFF
You can use keyguard to disable the phone’s keypad and prevent accidental keypresses (when the
phone is in a pocket or a purse, for example).
38

SEND
MENU
MENU
17-110 5.fm Page 39 Wednesday, July 21, 1999 11:06 AM
When keyguard is on:
• The phone displays
KEYGUARD ACTIVE
you press a key.
• When you press any key, the phone displays
Press Menu and then
to prompt you
to turn off keyguard.
• To answer a call, you must press . During
SEND
the call, keyguard automatically t urns off.
• When you press to end a call, keyguard
END
automatically turns back on.
• You cannot turn off the phone.
• You cannot use one-touch emergency dialing.
However, you can manually dial the emergency
number programmed into your phone (911 for
example) and press to place the call.
The phone does not display any digit until you
have entered the entire number.
until
To turn on keyguard
END
for about 2 seconds (this is handy when you
, press or hold down
are e nding a call, fo r exam ple).
To turn off keyguard
Now press
plays
KEYGUARD OFF
, press . The phone di splays
. Press . The phone briefly dis-
.
39
17-110 5.fm Page 40 Wednesday, July 21, 1999 11:06 AM
CELLULAR SYST EMS
SELECTING THE ACTIVE PHONE
NUMBER
Every cellular telephone has at least one NAM
(Number Assignment Module), which is used to
store its phone numb er.
Your phone has two NAMS. If you subscribe to two
cellular services (for example, competitive cellular
systems in your area or cellular systems in different
cities), each of your phone’s NAMs was programmed with a different phone number at the time
of activation.
If your phone i s programmed with two different numbers, follow these steps to view the currently active
phone number and select a different active number
(the number you want to use to make and receive
calls ).
1. Press then or until you see
2. Press or until you see
3. Press or to move the pointer to the num-
MENU
SETTINGS
. Press .
OK
PHONE
PHONE NUMBER
and the currently active phone number. Press
OK
if you want to change to the other number.
Or , press to exit the menu.
ber you want to use. Press to select it.
END
OK
40

17-110 5.fm Page 41 Wednesday, July 21, 1999 11:06 AM
Notes:
• You cannot change the active number during a
call. If you t ry to, the phone displays
PROGRESS
• If you want to receive calls on both numbers at
the same time
warding through your cellular service providers,
you can set both numbers on your phone to forward to the other number if not answered. Contact your cell ular service providers for detail s.
and exits the menu.
and
you subscribe to call for-
CALL IN
SETTING THE CELLULAR
SYSTEM TYPE
Every cellular market has two cellular service providers. One of these providers is designated
er A
and the other
Provider B
.
Provid-
Your phone is activated to operate based on your
cellular service provider’s designation (A or B). If
you travel with your phone to a city where you do
not subscribe to cellular service, however, you can
select any of these system settings on your phone
(based on how you want the phone to operate in
that city).
41

17-110 5.fm Page 42 Wednesday, July 21, 1999 11:06 AM
Notes:
• Using the phone in a city where you do not subscribe to a cellular service is referred to as
roaming
. See “Roaming” on Page 45.
• The designation (A or B) that appears with the
setting is based on the selected phone number’s NAM.
• Usually, it is less expensive to use the same
provider type for cellular service when you are
in your home city and when you roam. To do
this, you need to know whether your cellular
service prov ider is type A or B in your home city
and in each city where you plan to travel.
• It is possible for a cellular service provider to be
(or have agreements with) Provider A in some
cities and Provider B in others.
PREFERRED — Your dealer can program a list of
“preferred” networks into your phone (which includes your home system). If so, your phone tries to
use the home system, then the strongest available
network in this list. If not, the phone will try to use a
network that is the same type (A or B) as your home
system. Check wi th your dealer to see if your phone
has been programmed with a list of preferred networks to use. You can still cho ose this option even if
your phone has not been preprogrammed; that way
42

17-110 5.fm Page 43 Wednesday, July 21, 1999 11:06 AM
your phone will use only networks of the same type
(A or B) as your home system.
NON-PREFERRED — Use this setting if you want
your phone to use a network that is of a different
type than your home system.
ANY — Use this setting if you want the phone to use
either
Provider A or Provider B. The phone uses its
home type system when possible an d the non-home
type system when service is not available on its
home type system.
HOME AREA — Use this setting if you do not want
to roam (you can only use the phone within the area
covered by your home cellular service provider).
If the phone is using: Display shows:
Home system (non-flashing)
No text or name of home
system
Preferred network (flashing )
, or name
Home-type (no preferred list in phone)
PREFERRED
of preferred network
(flashing)
ROAMING
43

OK
17-110 5.fm Page 44 Wednesday, July 21, 1999 11:06 AM
If the phone is using: Display shows:
Home-type (phone has
preferred list)
(no icon)
ROAMING
Non-home-type (no icon)
NON PREF.
Follow these steps to view the currently selected
cellular system type and change it.
1. Press then or until you see
2. Press or until you see
3. Press or until you see
4. The phone prompts you f or your 5-digit security
5. Press or to move the pointer to the option
MENU
SETTINGS
. Press .
OK
CALL
CALLING OP-
TIONS
. Press .
OK
CARRIER SE-
LECTION
you want to change it. Or, press or to
and the current setting. Press if
CLR END
exit the menu.
code. Enter it and press .
you want. Press .
OK
CARRIER SELECTION
and the selected setting appears. Press or
END
to exit the menu.
OK
CLR
44

17-110 5.fm Page 45 Wednesday, July 21, 1999 11:06 AM
ROAMING
Using the phone in a city where you do not subscribe to a cellular service is referred to as
When you r oam,
phone is using its home type system, and flashes
when it is using a cellular system that is different
from your hom e system (non-home type system).
In some areas, the cellular system’s computer automatically recognizes roaming telephones. In other
areas, you must contact the service provider before
it can recognize your phone. The operator needs to
know your telephone number, your phone’s ESN
(Electronic Serial Number), and how you plan to pay
for your cal ls. There is normally an additional charge
for roami ng ca lls.
Note:
Your phone’s ESN is under the phone’s battery. (However , the roaming cellular servi ce provider
can usually automatically determine your phone’s
ESN when you call.)
ROAMING
turns on steadily if the
roaming
.
45
17-110 5.fm Page 46 Wednesday, July 21, 1999 11:06 AM
SPECIAL PHONE SERVICES
Calling Line ID
If you subscribe to calling line identification service
with your cellular carrier, your phone is preset to automatically display the caller’s phone number or
name (if available) each t ime it receives a call. If you
stored the caller’ s phone num ber with a name in the
phone’s memory (see “Storing a Number and Name
in Memory” on Page 68), that stored name appears.
Hint:
To quickly store the displayed caller’s number
into the first empty speed-dial memory, display the
record then press twice (see “Using Number
Quick Store” on Page 70).
Call Waiting
If you subscribe to Call Waiting service with your
cellular carrier, your phone displays the caller’s
phone number or name and flashes
answer the call without disconnecting your current
call, press . Press to return to you r orig inal call. Repeat this to switch between the calls
again. To end the current call, press . To return to the other call, press .
SEND SEND
OK
CALLING
END
SEND
. To
46
17-110 5.fm Page 47 Wednesday, July 21, 1999 11:06 AM
If you do not answer the incoming call, the display
clears after 20 seconds and the number appears on
the Missed Calls List. To clear the display without
answering the call, press any key except ,
END PWR
, or .
SEND
Message Waiting
If you subscribe to voice mail service with your cellular carrier, calls you do not answer are sent to your
voice mailbox. A vo ice mail box is somew hat like an
answering machine, because you must call it and
enter a password or personal identification code to
listen to your messages. (For information about using your voice mail box, contact your cellular ca rrier.)
When your phone is turned on and receives voice
mail notification from your cellular carrier, it displays
to notify you that you have one or more messages waiting in your mailbox. When you call your
mailbox and listen to your message(s), disappears.
Hint:
If you subscribe to voice mail service, you can
store the number you call to reach your mailbox in a
one-touch dial location (Memory 1–8) for easy access. See “Storing a Number and Name in Memory”
on Page 68.
47

17-110 5.fm Page 48 Wednesday, July 21, 1999 11:06 AM
Other Se rv i ces
Your cellular service provider might offer other special options that let you receive or make a second
call or conference two calls together using .
Contact your cellular carrier for details about these
special serv ices or billing.
SEND
48
17-110 5.fm Page 49 Wednesday, July 21, 1999 11:06 AM
SPECIAL FEATURES
CALL TIMERS
Your phone has three call timers that let you check
the length of your calls in hours, minutes, and seconds (for example, 04:32:57 equals 4 hours, 32 minutes, and 57 seconds). You can view the timers at
any time (even during a call), and you can reset all
but one.
Follow these steps to view or reset the timers.
1. Press then or until you see
LOG
Note:
seconds during a call to get to the regular
menu.
2. Press or until you see
Press .
3. Press or to scroll through the timer displays.
LAST CALL
current call.
ALL CALLS
on calls on the active phone number since the
timer was last reset.
LIFE TIMER
of all calls you have made using both of your
MENU
. Press .
Make sure you hold for a couple of
OK
MENU
CALL
CALL TIMERS
OK
— Shows the length of the last or
— Shows the length of time spent
— Shows the combined length
.
49

17-110 5.fm Page 50 Wednesday, July 21, 1999 11:06 AM
phone numbers. This number cannot be reset.
You can also view the Life Timer at any time by
holding down for about 4 seconds.
CLEAR TIMERS
#
— Resets all call timers, ex-
cept for the Life Timer.
4. To clear the timers, press when the phone
displays
CLEAR TIMERS
OK
. The phone prompts
you to enter your 5-digit security cod e.
Enter your security code and press . The
phone briefly displays
TIMERS CLEARED
OK
to
confirm that the tim ers have been reset.
CLR
5. To exit the timer display, press or .
END
BACKLIGHT CONTROL
Your phone is preset to turn on its display and keypad backlights each time you press a key, then turn
them off within about 15 seconds after the last keypress.
To view the current backlight setting and set the
phone so the backlights do not turn on (to conserve
battery power, for example), or to set them to turn
on again, follow these steps.
1. Press then or until you see
MENU
SETTINGS
. Press .
OK
PHONE
50
OK
CLR
17-110 5.fm Page 51 Wednesday, July 21, 1999 11:06 AM
2. Press or until you see
LIGHTS
and the
current setting. Press if you want to change
CLR
it. Or, press or to exit the menu.
LIGHTS ON
means the lights turn on for 15
END
seconds when you press a key or receiv e a call.
LIGHTS OFF
means the lights do not turn on at
all, except if silent ringing or vibrate is selected.
Then they turn on and off every few seconds to
indicate an incoming call.
3. Press or to move the pointer to
. Press to select it.
On
OK
Off
or
KEYPAD TONES
Your phone is preset to sound a tone each time a
key is pressed. You can choose between three volume levels for this tone or you can turn it off. To
view the current keypad tone volume setting and
change it at any time, fol low these steps.
1. Press then or until you see
SETTINGS
2. Press or until you see
and the current setting. Press if you want to
change it. Or, press or to exit the
menu.
MENU
. Press .
PHONE
OK
KEYPAD TONES
OK
END
51

OK
17-110 5.fm Page 52 Wednesday, July 21, 1999 11:06 AM
3. Press or to move the pointer to
. As you scroll through the settings, the t one
ON
Off
or
volume changes so you can sample it. Press
OK
to select it.
Notes:
• Your phone sends touch tones even when the
keypad tones are tur ned off.
• Your phone automatically turns off the keypad
tones if you select silent service or vibrate (see
“Ringing Options”).
RINGING OPTIONS
Follow these steps to view the current ring option
and select how your phone alerts you when it receives a call.
1. Press then or until you see
2.
3. Press or to move the pointer to the option
MENU
SETTINGS
. Press .
RINGING OPTIONS
appear. Press it you want to change it. Or,
CLR END
press or to exit the menu.
OK
and the current setting
OK
PHONE
you want to use. Press t o select and store
the setting.
52

CLR
17-110 5.fm Page 53 Wednesday, July 21, 1999 11:06 AM
Notes:
• If you select silent service or vibrate, the phone
displays
SILENT
when there is no call in
progress and when you are not using another
function.
• To use the Ring+Vibra or Vibrate settings, you
must use the supplied vibrating battery (RadioShack Cat. No. 23-1024).
RINGING TONE
Follow these steps to view the current ring tone setting and select from six different tones that your
phone can sound when it receives a call.
1. Press then or until you see
SETTINGS
2. Press or until you see
and the current setting. Press if you want to
change it. Or, press or to exit the
menu.
3. Press or to move the pointer to the ringing
tone you want to use. As you scroll through the
settings, the phone rings so you can hear each
tone. Press to select and store the setting.
MENU
. Press .
PHONE
OK
RINGING TONE
OK
END
OK
53

17-110 5.fm Page 54 Wednesday, July 21, 1999 11:06 AM
RING VOLUME
Follow these steps to view and hear the current ring
volume setti ng or select one o f five different ring volumes for the phone.
1. Press then or until you see
2. Press or until you see
MENU
SETTINGS
. Press .
OK
PHONE
RINGING VOL-
and the current setting. Press if you
UME
want to change it. Or, press or to exit
CLR
OK
END
the menu.
3. Press or to move the pointer to the
desired setting. As you scroll through the volume levels, the phone rings so you can hear
each level. Press to select and store the
OK
setting.
USING CALLING CARD DIALING
Storing/Clearing a Calling Card Number
The calling card feature lets you store up to 2 longdistance calling card numbers into the phone’s
memory, so you can place long-distance calls from
this phone using that number.
54

17-110 5.fm Page 55 Wednesday, July 21, 1999 11:06 AM
Follow these steps to view and enter or change calling card information.
1. Press then or until you see
SETTINGS
2.
CALLING CARD
card name appear. Press to change it. Or,
press or to exit the menu.
3. Press or to move the pointer to
Card A
MENU
. Press .
CLR
, or
Card B
OK
and the currently selected
OK
END
, then press . When the
OK
CALL
None
phone prompts you for your 5-digit security
code, enter it and press .
If you select
None
NO CARD SELECTED
If you select
Card A
OK
, the phone briefly displays
, and no card is selected.
or
Card B
, and you have
never entered information for the card before,
skip to Step 5.
4. If you have already entered information for a
card, you have the option to select, edit, or
erase the information. Use or to move the
pointer to the option you want to use and press
OK
.
Select
The phone briefly displays
Edit
chooses this card as the one to use.
SELECTED
.
allows you to change previously entered
information , described in Steps 5 and 6.
,
55
17-110 5.fm Page 56 Wednesday, July 21, 1999 11:06 AM
deletes the st ored information. To verify
Erase
that you want to do this, press at the
ERASE?
prompt. Or, press if you don’t
OK
CLR
want to erase the stored information.
5. The phone prompts
QUENCE
press or to exit the menu.
. Press to change the setting. Or,
CLR
SELECT DIALING SE-
OK
END
Press or to scroll through these four dialing sequence options, and press to choose
OK
one:
Access No. +Phone No. +Card No.
Use for cards that require you to enter a 1-800
access number first, followed by a phone number after you hear a tone, then a card number
after another tone.
Access No. +Card No. +Phone No.
Use for cards that require you to enter a 1-800
access number first, followed by a card number
after you hear a tone, then a phone number after another tone.
10xxx +Phone No. +Card No.
cards that require you to enter an access number (beginning with 10, then 3 digits), followed
by a phone number after you hear a tone, then
a card number after ano ther tone.
— Use for
—
—
56
17-110 5.fm Page 57 Wednesday, July 21, 1999 11:06 AM
0 +Phone No. +Card No.
that require you to enter 0, then the phone number after you hear a tone, then a card number
after another tone.
6. The phone then prompts you for other card information, which might include (depending on
the dialing sequence option you selected):
PREFIX, Access No:, Card No:
LECT
and
Card name:
•For
SELECT PREFIX
move the pointer to the prefix (
) that your calling card requires you to enter
1
before the phone number. Then press .
•For
Access No:, Card No:
, enter the information, then press
name:
OK
.
The phone briefly displays
, and is set to use the card for which you
USE
just entered information.
.
— Use f or cards
SE-
, press or to
None, O
, and
, or
OK
Card
CARD READY FOR
Using a Stored Calling Card Number
Follow these steps to select a calling card type and
make a long-distance call using the calling card
number you stored.
,
57

17-110 5.fm Page 58 Wednesday, July 21, 1999 11:06 AM
1. Enter the phone number of the party you wish
to call.
2. Hold down until the phone briefly displays
CARD CALL
displays
.
‘OK’
SEND
and the selected card, then
WAIT FOR TONE, THEN PRESS
Note: If no calling card is stored in memory, the
phone displays
and does not complete the call.
ED
NO CALLING CARD SELECT-
3. When you hear a tone or voice prompt, press
OK
FOR
SEND
or . The phone might display
TONE, THEN PRESS ‘OK’
again.
WAIT
If you get another tone or voice prompt, press
SEND
again, then continue with the call as you
normally would.
Note: This procedure might not apply to all calling
card options. For more information, look at the back
of your calling card or contact your long distance
carrier.
You can also make a calling card call during a PIN
call. See “PIN Code Dialing” on Page 62.
58

17-110 5.fm Page 59 Wednesday, July 21, 1999 11:06 AM
USING TOUCH-TONE SERVICES
To use your cellular phone to cont rol answering machines and special telephone services (such as
bank-by-phone or voicemail), simply press the appropriate numbers using your phone’s keypad after
the service answers.
Or, you can store the service’s command sequence
in a speed-dial memory (see “Storing a Number and
Name in Memory” on Page 68), then follow these
steps after the service answers.
1. Recall the memory that contains the command
sequence.
2. Press . The phone sends the commands
as touch tones.
Adding a Pause
SEND
Some services, such as voice mail, require that you
enter an access code and then pause before entering additional digits. To include a pause in a sequence when storing it in memory, press
. The phone displays
the sequence, the phone pauses for 2
. When you send
p
1
/2 seconds
where you entered a pause. If you need a longer
pause, enter multiple pauses, one after the other.
59
SEND
17-110 5.fm Page 60 Wednesday, July 21, 1999 11:06 AM
Adding a Wait
If you do not know in advance how long you must
wait before sending additional commands, insert a
wait in your sequence by pressing
at the appropriate place. The phone
displays
. When you send the sequence, the
w
phone waits for you to press before it sends
the rest of the stored sequence.
Sending Touch-Tones
To send DTMF (touch-tones) strings during a cal l,
first recall the stored string from memory. Then
MENU
press
, and press . The phone sends the DTMF
MF
briefly. Move the pointer to
OK
Send DT-
string.
DATA MODE
The CT-600 automatically uses the dat a mode when
your phone is connected, via a data card and a modem, to a laptop or personal computer. You can
then use your computer to make and receive calls,
and to send and receive data messages, such as email or a fax .
60

17-110 5.fm Page 61 Wednesday, July 21, 1999 11:06 AM
Before using data mode:
• Be sure your phone is on, and that the battery
has enough charge for the duration of your data
call.
• Be sure that you are receiving a strong signal
(see the signal strength indicator on your display).
• Be sure that your computer is on, and is fitted
with a data card.
Connect a data cable (not supplied) to your phone.
DATA CARD CONNECTED
appears. During a call
with the data cable connected, the phone displays
DATA CALL
.
During a data call, only operates; the micro-
END
phone and earpiece also do not operate.
Important! When you ar e in the data mode, do not
turn off the phone. Do not move the phone, or use it
in a moving vehicle (data could be lost if you move
from one cellular cell to another).
To turn off the data mode, simply disconnect the
data cable.
DATA CARD REMOVED
appears.
61

4
GHI
17-110 5.fm Page 62 Wednesday, July 21, 1999 11:06 AM
PIN CODE DIALING
For security, some cellular service carriers require
you to dial a personal identification number (PIN) in
addition to the phone num ber each time you place a
call. This is sometimes referred to as “PIN code dialing.”
Notes:
• This service is not required (or available) on all
networks. Check with your local service provider.
• If you subscribe to this service, a PIN code is
assigned or selected at the time you activate
your phone.
If you subscribe to PIN code dialing with your cellular carrier, you can store the PIN code into your
phone’s memory and set the phone to send the
code at the press of a button each time you place a
call.
Follow these steps to store your PIN code and turn
PIN code dialing on or off.
1.Enter
ABC5JKL
2
(this spells # PIN
#
5
PQRS
7
JKL
#
MNO2ABC
6
CALL #).
62

17-110 5.fm Page 63 Wednesday, July 21, 1999 11:06 AM
The phone prompts you for your PIN Code.
2. To store your PIN code in the phone’s memory
and turn on PIN code dialing, enter your PIN
code (maximum of 4 digits) and press . The
phone briefly displays
PIN CALL ON
OK
.
To turn off PIN code dialing, simply press
without entering a number.
PIN CALL OFF
pears briefl y.
OK
ap-
When PIN code dialing is set to ON, the phone displays
PIN CALL
call.
WAIT FOR PROMPT
the tone, press again to automatically dial
after you press to place a
appears. When you hear
SEND
SEND
your stored PIN code.
The phone displays
SENDING PIN ...
sage remains on the display, press again to
If the mes-
SEND
resend the PIN code. Wait for your call to be connected.
Notes:
• When PIN code dialing is set to ON, you can
place a call to the emergency number programmed into your phone (as usual) without
sending the PIN code.
• If you place a call using a cellular service that
does not support PIN code dialing (and PIN
63

CLR
17-110 5.fm Page 64 Wednesday, July 21, 1999 11:06 AM
code dialing is set to ON),
PIN CALL
appears,
but the call is connected without pressing
SEND
the second time.
REMINDER MESSAGE
You can store a reminder message to appear the
next time you turn on your phone ( it will appear only
once). Follow these steps to store a reminder message.
1. Press and enter your message using the
letters on the keypad.
The key can be used to insert special
characters. Repeatedly press until you
see the special character you want (
:
2. Press then turn off the phone.
When you turn the phone on again, the reminder
message appear s. Hold down to erase the message.
ABC
OPER
0
“ ‘ & $ ( ) 0).
MENU
OPER
0
- ? ! , .
64
CLR
OK
17-110 5.fm Page 65 Wednesday, July 21, 1999 11:06 AM
CHANGING THE DISPLAY
LANGUAGE
Your phone is preset to display its menus and messages in English, but you can set it to use English,
French, Spanish, or Portuguese. Follow these steps
to view the currently selected language and change
it.
1. Press then or until you see
SETTINGS
2. Press or until you see
the current setting. Press if you want to
change it. Or, press or to exit the
menu.
3. Press or to move the pointer to your language choice. Press to select and store it.
MENU
. Press .
PHONE
OK
LANGUAGE
OK
END
and
USING AUTOMATIC ANSWER
Note:
This feature works only if the phone is con-
nected to hands-free car kit.
The automatic answer function lets you set the
phone to automatically answer incoming calls without you having to press a key. When automatic answer is enabled and the phone receives a call, it
65

17-110 5.fm Page 66 Wednesday, July 21, 1999 11:06 AM
automatically answers the call after 4 seconds. Begin your convers ation as usual.
Follow these steps to view the current setting and
turn the automat ic answer function on or off.
1. Press then or until you see
2. Press or until you see
MENU
SETTINGS
. Press .
OK
PHONE
AUTOMATIC AN-
and the current setting. Press if you
SWER
want to change it. Or, press or to exit
CLR END
OK
the menu.
3. Press or to move the pointer to
. Press .
Off
OK
On
or
TURNING ONE-TOUCH DIALING
ON/OFF
One-Touch Dialing enables you to dial important
numbers with the touch of a single button.
Follow these steps to view the current setting and
turn One-Touch Diali ng on or off.
1. Press then or until you see
MENU
SETTINGS
. Press .
OK
PHONE
66

17-110 5.fm Page 67 Wednesday, July 21, 1999 11:06 AM
2. Press or until you see
and the current setting. Press if you
ING
want to change it . Or, press or to exit
1-TOUCH DIAL-
OK
CLR
END
the menu.
3. Press or to move the pointer
Press .
OK
On
or
Off
.
67
2
ABC
17-110 5.fm Page 68 Wednesday, July 21, 1999 11:06 AM
MEMORY FEATURES
STORING A NUMBER AND NAME
IN MEMORY
Your phone has 75 speed-dial memory locations.
Each location can hold a number of up to 32 digits,
and a name of up to 30 characters long. Memory locations 1–8 are used for one-touch speed dialing.
Memory location 9 contains the preprogrammed
emergency number. The number stored in memory
location 75 can be dialed even when the phone is
locked (see “Locking Your Phone” on Page 34). All
other memory locations are for storing names and
numbers in your phone book.
Follow these steps to store a phone number and
name in memory.
1. Press then press while
MENU
is displayed.
2. Press or until you see
NUMBER
, then press .
3. Enter a name at the
OK
.
For each letter of the name you want to enter,
repeatedly press the key ( , , and so
on) that contains that letter. The selected letter
appears.
OK
OK
Name:
PHONE BOOK
SAVE NAME &
prompt and press
DEF
3
68
17-110 5.fm Page 69 Wednesday, July 21, 1999 11:06 AM
For example, to enter the letter F, press
three times (since the letter F is third in the
series of l et t e r s on t h at key).
OPER
0
The key can be used to insert special
OPER
characters. Repeatedly press until you
0
see the special character you want (
“ ‘ & $ ( ) 0).
:
If you make an entry error, press to clear
the character.
4. Enter a phone number at t he
and press .
OK
Number:
The phone prompts the first empty speed-dial
memory location (such as
5?), or if all locations are full, prompts
TION
SAVE IN LOCA-
you to enter a speed-dial memory location.
5.
To store the number in the suggested speeddial memory location
, press .
OK
To store the number in a differ ent memory location
, enter that memory location’s number and
press .
OK
If that memory location is already being used,
REPLACE CONTENT?
appears. To replace the
information in that memory location, press .
If you do not want to replace the information in
that memory location, press .
CLR
NOT SAVED
DEF
3
- ? ! , .
CLR
prompt
OK
69
OK
OK
17-110 5.fm Page 70 Wednesday, July 21, 1999 11:06 AM
appears briefly. Press and store the information in a different memory location.
Using Number Quick Store
1. To quickly store a phone number in the first unused speed-dial memory location, enter the
phone number and press .
2. When
OK
.
SAVE IN LOCATION?
appears, press
The phone stores the number in the first empty
memory location. The memory location appears in
the display’ s upper right corner.
ONE-TOUCH SPEED DIALING
To speed dial a number stored in memory locations
1–8
, hold down the key corresponding to that mem-
ory location for about 2 seconds.
To speed dial a number that is stored in your phone
book
, enter the memory location number and press
SEND
.
If the selected memory is empty, the phone displays
LOCATION EMPTY
.
70
17-110 5.fm Page 71 Wednesday, July 21, 1999 11:06 AM
MEMORY SCROLLING
To scroll forward or backward through all names or
numbers stored in memory
or last memory location), repeatedly press (forward) or (backward). The phone displays the
stored phone number and its corresponding memory number.
(beginning with the first
To begin scrolling from a specific memory location
first enter that number , then press or . If the selected memory is em pty, the phone di splays
TION
EMPTY
, then it displays the next memory in
LOCA-
sequence.
To begin scrolling from a specific name or letter(s)
ABC
press , enter the name or letter(s), then press
or . If the name or letter(s) you entered are not
stored in memory, the phone displays
, then it displays the next name in sequence.
FOUND
To find a specif ic name stored in me mo ry
OK OK
then .
FIND NAME
appears. Press again,
NAME NOT
, press
MENU
then enter the name and press or .
To dial a displayed numbe r, press .
SEND
71
,
,

17-110 5.fm Page 72 Wednesday, July 21, 1999 11:06 AM
MOVING A NUMBER TO A
DIFFERENT MEMORY LOCATION
1. Display the name or number from memory and
OK
press .
2. When the phone prompts
, enter the new location number then
TION?
OK
press . The phone displays
3. Press to move the number (the phone displays
OK
MOVED
and the remaining available
memory), or press to exit without moving
SAVE AT LOCA-
MOVE?
CLR
the number.
EDITING A STORED NAME OR
NUMBER
Follow these steps to edit a stored number and
name in memory.
1. Display the name or number from memory and
OK
press .
2. Press then .
MENU
3. Press or until
appears and press .
OK
EDIT NAME OR NUMBER
OK
72

17-110 5.fm Page 73 Wednesday, July 21, 1999 11:06 AM
To edit the name
, press to delete charac-
CLR
ters and press or to move the cursor and
enter new characters.
To edit the number
, press . The current
number appears. Press to delete charac-
ABC
CLR
ters and press or to move the cursor and
enter new characters.
4. Press .
pears. Press to store the number in that lo-
OK
SAVE IN LOCATION XX?
OK
cation.
If you did not change the name or the name you
entered matches one already stored,
PLACE?
appears. Press .
OK
CLEARING MEMORY
LOCATIONS
1. Press then .
MENU
2. Press or until
appears, then press .
BOOK
3. Press or to move the pointer to
(to clear one memory location) or
one
(to clear all memory locations) then press
all
OK
.
OK
ERASE FROM PHONE
OK
ap-
RE-
One by
Erase
73

END
17-110 5.fm Page 74 Wednesday, July 21, 1999 11:06 AM
Note: Erase functions cannot be undone, so be
careful!
4. If you selected
One by one
, enter the name or
memory location number to be erased or press
or to scroll thr ough the list.
Note: If you have stored phone numbers without corresponding names, press to view the
ABC
phone numbers.
If you selected
Erase all, ARE YOU SURE?
appears.
5. Press to erase the selected (or all) memory
locations. Or, press or to exit without
OK
CLR
erasing any inform ation.
USING SCRATCHPAD MEMORY
Your phone’s scratchpad memory lets you temporarily store a phone number at any time. This is useful, for example, when you don’t have a pencil and
paper handy!
Follow these steps to store a number in the scratchpad memory.
1. Enter the phone number and name, then press
OK
.
74

17-110 5.fm Page 75 Wednesday, July 21, 1999 11:06 AM
2. When
SAVE IN LOCATION?
appears, press
to choose the scratchpad memory, then press
OK
.
To recall the scratchpad memory
, press then
#
or . (If the scratchpad memory is empty, the
phone displays
LOCATION EMPTY
.)
To dial the number stored in scratchpad memory
recall it, then press .
SEND
To quickly copy a number from the scratchpad
memory to the f irst empty speed-dial memory
the scratchpad memory, then press twice (see
, recall
OK
“Using Number Quick Stor e” on Page70).
#
,
75

17-110 5.fm Page 76 Wednesday, July 21, 1999 11:06 AM
ACCESSORIES
A new, extensive range of accessories is available
for your phone t hrough your loc al RadioShack store.
You can select the accessories that best meet your
needs.
Important:
phone manufacturer. Using any other type invalidates any approval or warranty applying to the
phone, and might be dangerous.
Here are a few practical rules for accessory operation:
• Keep the accessor ies out of the reach of chil-
dren.
• When you disconnect any accessory’s power
cord, pull the plug, not the cord.
• Regularly check all cellular phone equipment in
your vehicle to be sure it is mounted and operating properly.
• Have only qualified personnel install complex
car accessories.
Use only accessories approved by the
76

17-110 5.fm Page 77 Wednesday, July 21, 1999 11:06 AM
SAFETY INFORMATION
TRAFFIC SAFETY
• Do not use a handheld phone while driving a
vehicle. If using a handheld phone, park the vehicle before taking or making a call.
• Always secure the phone in its holder; do not
place the phone on the passenger seat or
where it can break loose in a collision or sudden stop.
• Never use a phone alert device that operates
your vehicle’s lights or horn. This is illegal in
most areas.
Remember, always put road safety first!
OPERATING ENVIRONMENT
• Remember to follow all special regul ations and
always turn off your phone whenever you are
required to do so, or when it might cause interference or be dangerous .
• Any radio trans mitting equipment, i ncluding cel-
lular phones, might interfere with inadequately
protected medical devices. Consult a physician
or the manufactur er of the medical device if you
have any questions. Other electronic equipment might also be subjec t to interference .
77

17-110 5.fm Page 78 Wednesday, July 21, 1999 11:06 AM
• As with other mobile radio transmitting equipment, for your safety, only use your phone in
the normal operating position (held to your ear
with the antenna pointing over your shoulder).
• Turn off the phone while getting gasoline (at a
filling station). Observe restrictions on the use
of radio equipment in fuel depots (fuel storage
and distribution areas), chemical plants, or
around blasting operations.
• Do not store or carry f lammable liquids, gases,
or explosive materials in the same compartment as a cellular phone or any of its parts or
accessories.
• Only qualified personnel should install or service the phone in a vehicle. Faulty installation or
service might be dangerous and could invalidate the phone’s warranty.
• Electronic fuel injection systems, electronic
anti-lock braking systems, electronic cruise
control systems, and other electronic systems
can malfunction due to the lack of protection
from radio signals. Check regularly that all cellular phone equipment in your vehicle is mounted and operating properly.
• Turn off your cellular phone when in an aircraft.
The use of cellular phones in an aircraft might
78

17-110 5.fm Page 79 Wednesday, July 21, 1999 11:06 AM
be dangerous to the operation of the aircraft,
disrupts the cellular networks, and is illegal.
Failure to observe these instructions could lead to
suspension or denial of cellular telephone services,
legal action, or both.
EMERGENCY CALLS
IMPORTANT!
operates using radio signals, cellular, and land line
networks, as well as user-programmed functions.
These factors make it impossible to guarantee connection in all conditions. Therefore, you should never rely solely upon any cellular phone for essential
communications (such as medical emergencies).
Remember, to make or receive any calls, the phone
must be turned on and in a service area with adequate cellular signal strength.
You might not be able to make emergency calls on
all cellular phone networks or when certain network
services or phone features are set. Check with your
local service providers.
This phone, like any cellular phone,
79

17-110 5.fm Page 80 Wednesday, July 21, 1999 11:06 AM
FCC REGULATIONS
A cellular phone might cause TV or radio interference, even when it is operating normally. The FCC
can require you to stop using your cellular phone if
you cannot eliminate the interference. If you require
assistance, contact your local Radi oShack store.
This device complies with Parts 15 and 68 of
Rules
. Operation is subject to the condition that this
device does not cause harmful inte rference.
80
FCC

17-110 5.fm Page 81 Wednesday, July 21, 1999 11:06 AM
TROUBLESHOOTING
If the power does not come on or stay on:
• Make sure the battery is properly installed and
charged.
• Be sure the contacts on the battery and the
charging stand are clean. If they are not, clean
them with a soft cloth or penc il eraser.
• The battery charge might be too low for opera-
tion. Check the display and listen for the low
battery warning tone.
If the power comes on, but the phone does not
work:
• Make sure the antenna is properly install ed and
extended to its fu ll length.
• Check to see if there is an error message on
the display after tu rning it on. If so, contact your
local RadioShack store for assist ance.
If the phone displays
• You are out of the cellular service area and you
cannot make calls.
• You have chosen Home Only (see “Setting the
Cellular System Type” on Page 41) and you
have left your Home system.
NO SERVICE
:
81

17-110 5.fm Page 82 Wednesday, July 21, 1999 11:06 AM
CARE AND MAINTENANCE
Your RadioShack CT-600 Lightweight Flip-Style 75Memory Cellular Phone is an example of superior
design and craftsmanship and should be treated
with care. These sugg estions allow you to enjoy this
phone for many year s.
• Keep the phone and all its parts and accessories out of the reach of children.
• Keep the phone dry. Precipitation, humidity and
liquids might contai n minerals that corrode electronic circuits.
• Do not use or store the phone in dusty, dirty areas. Its moving par ts can be damaged.
• Do not store the phone in hot areas. Temperature extremes can shorten the life of electronic
devices, damage batteries, and warp or melt
plastic parts.
• Do not store the phone in cold areas. When the
phone warms up (to its normal operating temperature), moisture can form inside the phone,
which could damage the phone’s electronic circuits .
• Do not attempt to open the phone. Non-expert
handling of the phone can damage it.
• Do not drop, knock, or sha ke the phone. Rough
handling can break internal circuit boards.
82

17-110 5.fm Page 83 Wednesday, July 21, 1999 11:06 AM
• Do not use harsh chemicals, cleaning solvents,
or strong deter gents to clean the phone. Wipe it
with a soft cloth slightly dampened in a mild
soap and water solution.
Modifying or tampering with your phone’s internal
components could violate its warranty and void your
FCC authorization to use it. If the phone or any of its
accessories are not working properly, take them to
your local RadioShack store for assistance.
83

17-110 5.fm Page 84 Wednesday, July 21, 1999 11:06 AM
SPECIFICATIONS
Dimensions (HWD) ........... 69/16 × 17/8 × 15/
(16.6 × 4.6 × 3.4 cm)
Weight (with Supplied Battery) ............... ....... 6.7 oz
Transmitting Power .............. 0.6 W (+2 dB –4 dB)
Operating Voltage ...................................... 3.6V DC
12V DC fo r ca r k it
Frequency Band ......... 824.040–848.970 MHz (TX)
869.040–893.970 MH z (RX)
Number of Channels ........................................ 832
Memory Locations ............................ 75 Speed Dial
Memory Capacity ........ .. 32 numbers and 30 letters
(per memory location)
Specifications are typical; individual units might
vary. Specifications are subject to change and improvement witho ut not ice.
16
Inches
(190 g)
1 Scratchpad
84

17-110 5.fm Page 85 Wednesday, July 21, 1999 11:06 AM
NOTES
85

17-110 5.fm Page 86 Wednesday, July 21, 1999 11:06 AM
86

g
y
g
y
g
g
y
y
g
g
y
y
y
17-110 5.fm Page 87 Wednesday, July 21, 1999 11:06 AM
Limited One-Year Warranty
This product is wa rranted by RadioShack against manufac turin
defects in materi al and wo rkmanshi p und er normal us e for on e ( 1)
ear from the date of purchase from Radio Shack company-owned
stores and authorized Ra dioShack franchisees and deal ers. EXCEPT AS PROVIDED HEREIN, RadioShack MAKES NO EXPRESS WARRANTIES AND ANY IMPLIED WARRANTIES,
INCLUDING THOSE OF MERCHANTABILITY AND FITNESS
FOR A PARTICULAR PURPOSE, ARE LIMITED IN DURATION
TO THE DURATION OF THE WRITTEN LIMITED WARRANTIES
CONTAINED HEREIN. EXCEPT AS PROVIDED HEREIN, RadioShack SHALL HAVE NO LIA BILITY OR RES PONSIBILITY TO
CUSTOMER OR ANY OTHER PERSON OR ENTITY WITH RESPECT TO ANY LIABILITY, LOSS OR DAMAGE CAUSED DIRECTLY OR INDIRECTLY BY USE OR PERFORMANCE OF THE
PRODUCT OR ARISING OUT OF ANY BREACH OF THIS WARRANTY, INCLUDING, BUT NOT LIMITED TO, ANY DAMAGES
RESULTING FROM INCONVENIENCE, LOSS OF TIME, DATA,
PROPERTY, REVENUE, OR PROFIT O R ANY INDIREC T, SPECIAL, INCIDENTAL, OR CONSEQUENTIAL DAMAGES, EVEN IF
RadioShack HAS BEEN ADVISED OF THE POSSIBILITY OF
SUCH DAMAGES.
Some states do not allow the limitations on h ow lon
warrant
lasts or the ex clus ion of inci den tal or cons equ enti al d am-
a
es, so the above limitations or exclusions may not apply to you.
In the event of a product defect durin
product and th e RadioShack sales rec eipt as proof of purc hase
date to an
less otherwise provided b
pair without char
one of the same or similar desi
All replaced parts and products, and products on which a refund is
made, become the pr opert
parts and products ma
RadioShack store. RadioShack will, at i ts option, un-
p
A Division of Tandy Corporation
law: (a) correct the defect by produ ct re-
e for parts and labor; (b) replace the product with
be used in the performance of warr ant
RadioShack
p
the warranty period, take the
n; or (c) refund the purchase price.
of RadioShack. New or recon ditioned
p
p
Fort Worth, Texas 76102
an implied
1/98 Printed in Canada

17-110 5.fm Page 88 Wednesday, July 21, 1999 11:06 AM
(Continued)
caused by or attributable to ac ts of God, abuse , accident, misuse,
improper or abnormal usage, failure to follow instructions, improper
installation or maintenanc e, alterati on, lightnin g or other inciden ce
of excess voltag e or curren t; (b) any re pairs other th an those pro vided by a RadioShack Authorized S ervice Facility; (c) consumables such as fuses or batteries; (d) cosmetic damage; (e)
transportation, shippi ng or insurance costs ; or (f) costs of product
removal, installation, set-up service adjustment or reinstallation.
This warranty gives you specific legal rights, and you may also
have other rights which vary from state to state.
RadioShack Customer Relations, Dept. W, 100 Throckmorton St.,
This warranty does not cover: ( a) damage or failure
Suite 600, Fort Worth, TX 76102
We Service What We Sell
3/97
88
 Loading...