

Pitney Bowes DM50 Series, K700 series Quick Install Manual
DM50 Series Digital Mailing System
(K700 series)
Your new system has been
designed to let you set it
up on your own. It should take
approximately 20-25 minutes to
complete the installation.
It is important that you
carefully read and follow the
sequence of steps in this
guide to successfully install
this product.
Quick Install Guide
UK Version
Step
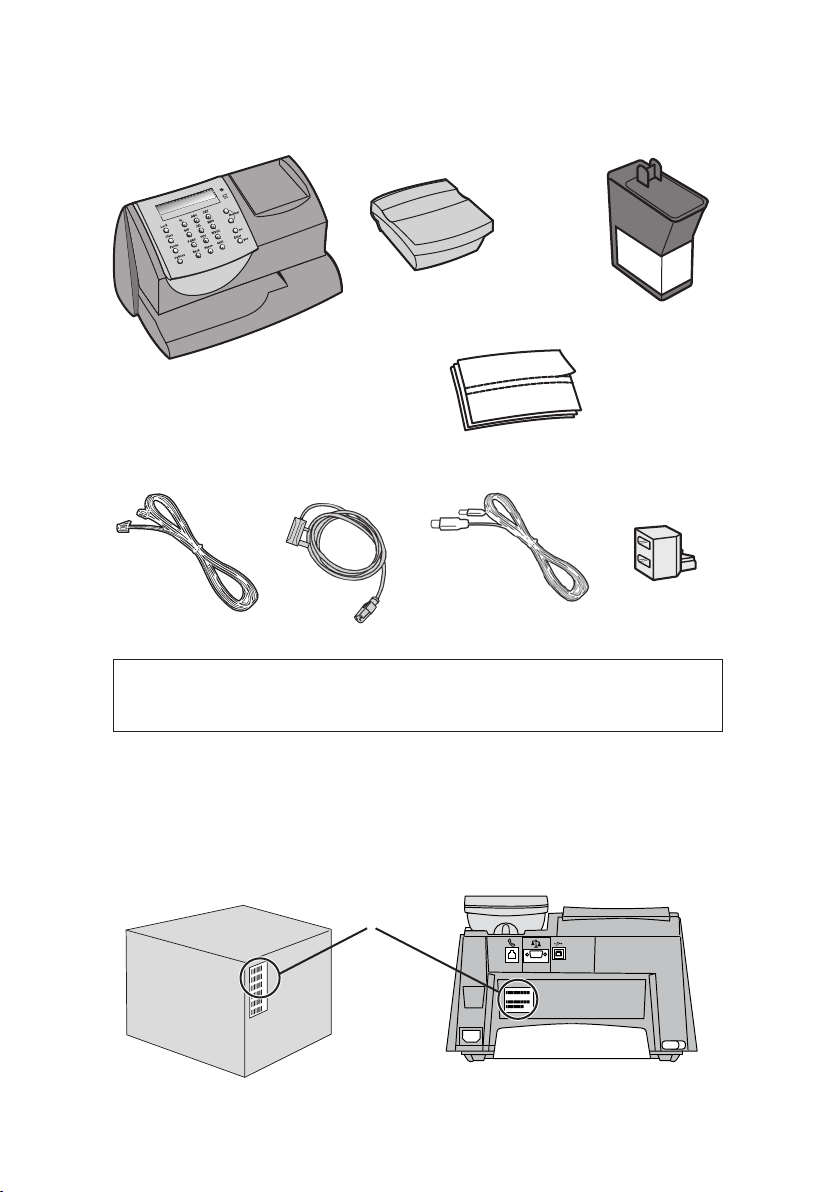
Check you have the following...
1
Mailing Machine Weighing Platform
Pitney Bowes
Postage Meter
Labels
Phone Cord Power Cord Phone Line
NOTE: If you have received a replacement system, you will only
have a Mailing Machine and a Pitney Bowes Ink Catridge.
USB Cable
Ink Cartridge
Splitter
If anything is missing, please contact our support team at:
customerservicesccc@pb.com
Check that the Mailing Machine 'Meter #' matches the meter number
on the side of the packaging:
=
If the numbers do not match, contact Pitney Bowes immediately
and do not continue with the steps in this guide.
2

Step
Position your system
2
Please do not apply power to
your machine until Step 4.
Remove all packing material.
Choose a location for your system where it can remain plugged in and
turned ON at all times. Also, locate the system so that it can be plugged
into an internet enabled PC or an analogue telephone socket. This is
essential for refilling the machine with postage.
Installation requires contact with our Data Centre. The Data Centre is
open from 7am to 8pm Monday to Saturday including Bank Holidays.
Please do not attempt to install your system outside these times.
Position the weighing platform as shown.
Plug the platform's
connector into the
matching connector on
the back of the machine.
Tighten the connector
screws.
Step
Choose a Connection Method
3
You have to connect to the Pitney Bowes Data Centre to add
postage funds, get software updates, and perform required Postal
Authority inspections.
You have the choice of connecting either via an internet enabled
PC using Pitney Bowes PC Meter Connect™ software or via an
analogue telephone line.
Connection using PC Meter Connect™ is much faster and incurs no
telephone call charges. Pitney Bowes therefore recommends this
method.
• To install PC Meter Connect™, go to...
europe.pb.com/PCMeterConnect/setup.exe
Choose the 'Run' option to install the software and be sure to
select 'English (UK)' as your installation language. You will need
administrator rights on your PC to install the software.
When the software is installed, continue with Step 5 of this guide.
• If you choose not to use the PC Meter Connect™ software,
continue with Step 4.
3

Step
Connect to the Phone and Power
4
Only follow this step if you have chosen to connect using an
analogue telephone line and you are not using PC Meter Connect™.
To install your system, you must have an analogue phone line.
The following are usually analogue phone lines:
• Fax lines.
• Lines used by modems or credit card readers.
• Residential phone lines.
Some digital phone lines may damage the machine. If you are
unsure about your phone line, contact your telephone company or
local network administrator.
Connect the phone cord
between the socket on the
rear of the machine and
the analogue phone line
wall socket.
A phone line splitter is
supplied if you want to
share the line with a fax
etc.
Phone
Plug the power cord into a
convenient outlet and into
the machine.
Please wait about 2 minutes
for the machine to initialise.
WARNING:
As no on/off switch is fitted, the power cable is the primary disconnect.
The power cable should be in such a position that access may be
gained to disconnect the machine.
Always plug the equipment into a properly grounded wall outlet.
The socket outlet should be near the equipment and should be easily
accessible.
4
Use the mains lead supplied with your equipment.
Power
 Loading...