

Page 1

X-HM70
-S/-K
XC-HM70
-S/-K
NETWORK CD RECEIVER SYSTEM
MICRO CHAINE CD ET RESEAU
SISTEMA RECEPTOR DE CD EN RED
NETWORK-CD-RECEIVER-SYSTEM
SISTEMA DI RETE CON AMPLIFICATORE E CD
NETWORK CD RECEIVER SYSTEM
СИСТЕМА СЕТЕВОГО РЕСИВЕРА CD
Discover the benefits of registering your product online at http://www.pioneer.co.uk (or http://www.pioneer.eu).
Découvrez les nombreux avantages offerts en enregistrant votre produit en ligne maintenant sur http://www.pioneer.fr (ou http://www.pioneer.eu).
Registre su producto en http://www.pioneer.es (o en http://www.pioneer.eu) Descubra los beneficios de registrarse on-line:
Bitte nutzen Sie die Möglichkeit zur Registrierung Ihres Produktes unter http://www.pioneer.de (oder http://www.pioneer.eu)
Registra il tuo prodotto su http://www.pioneer.it (o http://www.pioneer.eu) e scopri subito quali vantaggi puoi ottenere!
Ontdek nu de voordelen van online registratie! Registreer uw Pioneer product via http://www.pioneer.nl
- http://www.pioneer.be (of http://www.pioneer.eu).
Зарегистрируйте Baшe изделие на http://www.pioneer-rus.ru (или http://www.pioneer.eu).
Oзнакомьтесь с преимуществами регистрации в Интернет
Operating Instructions | Mode d’emploi | Manual de instrucciones | Bedienungsanleitung |
Istruzioni per I’uso | Handleiding |
Инструкции по эксплуатации
NETWORK CD RECEIVER
MICRO CHAINE CD ET RESEAU
RECEPTOR DE CD EN RED
NETWORK-CD-RECEIVER
AMPLIFICATORE CON CD E RETE
NETWORK CD RECEIVER
СЕТЕВОЙ РЕСИВЕР CD
Page 2
10 cm 10 cm
10 cm
10 cm
TIMER
The exclamation point within an equilateral
triangle is intended to alert the user to the
presence of important operating and
maintenance (servicing) instructions in the
literature accompanying the appliance.
The lightning flash with arrowhead symbol,
within an equilateral triangle, is intended to
alert the user to the presence of uninsulated
“dangerous voltage” within the product’s
enclosure that may be of sufficient
magnitude to constitute a risk of electric
shock to persons.
CAUTION:
TO PREVENT THE RISK OF ELECTRIC
SHOCK, DO NOT REMOVE COVER (OR
BACK). NO USER-SERVICEABLE PARTS
INSIDE. REFER SERVICING TO QUALIFIED
SERVICE PERSONNEL.
CAUTION
RISK OF ELECTRIC SHOCK
DO NOT OPEN
IMPORTANT
D3-4-2-1-1_A1_En
WARNING
This equipment is not waterproof. To prevent a fire or
shock hazard, do not place any container filled with liquid
near this equipment (such as a vase or flower pot) or
expose it to dripping, splashing, rain or moisture.
D3-4-2-1-3_A1_En
Operating Environment
Operating environment temperature and humidity:
+5 °C to +35 °C (+41 °F to +95 °F); less than 85 %RH
(cooling vents not blocked)
Do not install this unit in a poorly ventilated area, or in
locations exposed to high humidity or direct sunlight (or
strong artificial light)
D3-4-2-1-7c*_A1_En
WARNING
Before plugging in for the first time, read the following
section carefully.
The voltage of the available power supply differs
according to country or region. Be sure that the
power supply voltage of the area where this unit
will be used meets the required voltage (e.g., 230 V
or 120 V) written on the rear panel.
D3-4-2-1-4*_A1_En
WARNING
To prevent a fire hazard, do not place any naked flame
sources (such as a lighted candle) on the equipment.
D3-4-2-1-7a_A1_En
If the AC plug of this unit does not match the AC
outlet you want to use, the plug must be removed
and appropriate one fitted. Replacement and
mounting of an AC plug on the power supply cord of
this unit should be performed only by qualified
service personnel. If connected to an AC outlet, the
cut-off plug can cause severe electrical shock. Make
sure it is properly disposed of after removal.
The equipment should be disconnected by removing
the mains plug from the wall socket when left unused
for a long period of time (for example, when on
vacation).
D3-4-2-2-1a_A1_En
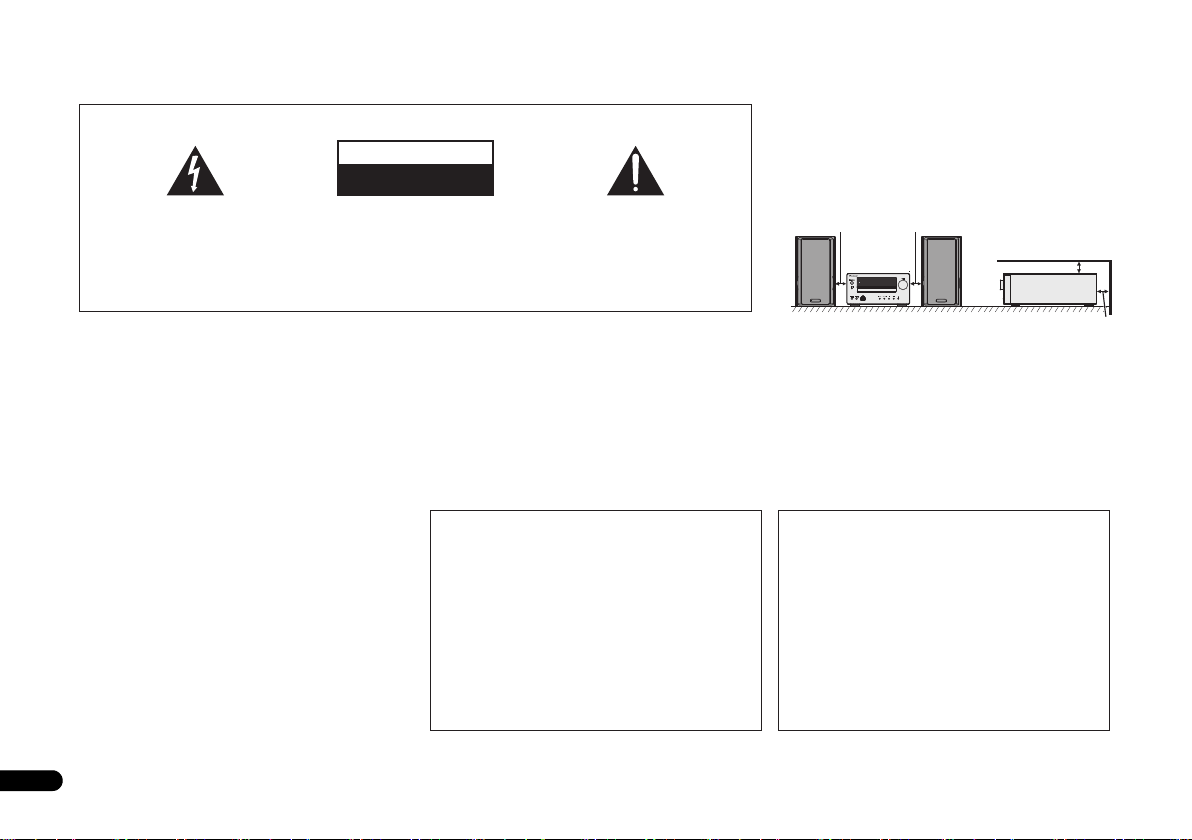
VENTILATION CAUTION
When installing this unit, make sure to leave space
around the unit for ventilation to improve heat radiation
(at least 10 cm at top, 10 cm at rear, and 10 cm at each
side).
WARNING
Slots and openings in the cabinet are provided for
ventilation to ensure reliable operation of the product,
and to protect it from overheating. To prevent fire
hazard, the openings should never be blocked or
covered with items (such as newspapers, table-cloths,
curtains) or by operating the equipment on thick carpet
or a bed.
D3-4-2-1-7b*_A1_En
CAUTION
The STANDBY/ON switch on this unit will not
completely shut off all power from the AC outlet.
Since the power cord serves as the main disconnect
device for the unit, you will need to unplug it from the
AC outlet to shut down all power. Therefore, make
sure the unit has been installed so that the power
cord can be easily unplugged from the AC outlet in
case of an accident. To avoid fire hazard, the power
cord should also be unplugged from the AC outlet
when left unused for a long period of time (for
example, when on vacation).
D3-4-2-2-2a*_A1_En
2
En
Page 3
CAUTION
This product is a class 1 laser product classified
under the Safety of laser products, IEC 60825-1:2007.
CLASS 1 LASER PRODUCT
D58-5-2-2a_A1_En
Condensation
If the player is moved suddenly from a cold place into a
warm room (in winter, for example) or if the
temperature in the room in which the player is installed
rises suddenly due to a heater, etc., water droplets
(condensation) may form inside (on operating parts and
the lens). When condensation is present, the player will
not operate properly and playback is not possible. Let
the player stand at room temperature for 1 or 2 hours
with the power turned on (the time depends on the
extent of condensation). The water droplets will
dissipate and playback will become possible.
Condensation can also occur in the summer if the
player is exposed to the direct wind from an
air-conditioner. If this happens, move the player to a
different place.
This product is for general household purposes. Any
failure due to use for other than household purposes
(such as long-term use for business purposes in a
restaurant or use in a car or ship) and which requires
repair will be charged for even during the warranty
period.
S005_A1_En
K041_A1_En
English Français Español Italiano
Deutsch
Nederlands
3
En
Page 4
Thank you for purchasing this PIONEER product. To obtain the best performance from this product, please read this manual carefully. It will guide you in operating your PIONEER product.
Contents
Accessories. . . . . . . . . . . . . . . . . . . . . . . . . . . . . . 4
Before you start . . . . . . . . . . . . . . . . . . . . . . . . . 5
General . . . . . . . . . . . . . . . . . . . . . . . . . . . . . . . . . . . . . . . 5
Loading the batteries. . . . . . . . . . . . . . . . . . . . . . . . . . . . . 5
Controls and Displays . . . . . . . . . . . . . . . . . . . . . 6
Remote control . . . . . . . . . . . . . . . . . . . . . . . . . . . . . . . . . 6
Front Panel . . . . . . . . . . . . . . . . . . . . . . . . . . . . . . . . . . . . 7
Speaker system (X-HM70 only) . . . . . . . . . . . . . . . . . . . . . 7
Connecting your equipment . . . . . . . . . . . . . . . 8
Aerial connection . . . . . . . . . . . . . . . . . . . . . . . . . . . . . . . 8
Speaker connection . . . . . . . . . . . . . . . . . . . . . . . . . . . . . 9
Using other subwoofer . . . . . . . . . . . . . . . . . . . . . . . . . . .9
Connecting a TV, etc. . . . . . . . . . . . . . . . . . . . . . . . . . . . . 9
Connecting to the network through LAN interface . . . . . 10
AC power connection . . . . . . . . . . . . . . . . . . . . . . . . . . . 10
General control . . . . . . . . . . . . . . . . . . . . . . . . . 11
To turn the power on . . . . . . . . . . . . . . . . . . . . . . . . . . . . 11
Setting the clock . . . . . . . . . . . . . . . . . . . . . . . . . . . . . . . 11
Enhancing your system. . . . . . . . . . . . . . . . . . . . . . . . . . 12
Listening to a CD or MP3/WMA disc. . . . . . . . . 13
Disc playback . . . . . . . . . . . . . . . . . . . . . . . . . . . . . . . . . 13
Various disc functions. . . . . . . . . . . . . . . . . . . . . . . . . . . 13
Advanced CD or MP3/WMA disc playback . . . . . . . . . . .14
MP3/WMA folder mode (only for MP3/WMA files). . . . . . 15
Listening to the iPod, iPhone or iPad . . . . . . . 17
Supported iPod, iPhone and iPad models: . . . . . . . . . . .17
Connecting your iPod/iPhone . . . . . . . . . . . . . . . . . . . . . 17
To remove adaptor for iPod or iPhone . . . . . . . . . . . . . . . 17
To insert iPad adaptor . . . . . . . . . . . . . . . . . . . . . . . . . . . 17
Playing an iPod, iPhone or iPad . . . . . . . . . . . . . . . . . . . 18
Listening to USB mass storage device/
MP3 player. . . . . . . . . . . . . . . . . . . . . . . . . . . . . 19
Connecting a USB device . . . . . . . . . . . . . . . . . . . . . . . . 19
Playing a USB device . . . . . . . . . . . . . . . . . . . . . . . . . . . 19
Playback with NETWORK feature. . . . . . . . . . . 20
Listening to Internet radio stations . . . . . . . . . . . . . . . . . 20
Playing back audio files stored on components on the
network. . . . . . . . . . . . . . . . . . . . . . . . . . . . . . . . . . . . . . 21
Playing back your favorite songs. . . . . . . . . . . . . . . . . . . 21
Network setup menu . . . . . . . . . . . . . . . . . . . . . . . . . . . 21
Network connection requirements . . . . . . . . . . . . . . . . . 22
About network playback . . . . . . . . . . . . . . . . . . . . . . . . . 22
Glossary . . . . . . . . . . . . . . . . . . . . . . . . . . . . . . . . . . . . . 23
Listening to the radio . . . . . . . . . . . . . . . . . . . . 24
Using the Radio Data System (RDS). . . . . . . . . 25
An introduction to RDS . . . . . . . . . . . . . . . . . . . . . . . . . 25
Timer and sleep operation . . . . . . . . . . . . . . . . 26
Setting the wake-up timer. . . . . . . . . . . . . . . . . . . . . . . . 26
Sleep operation . . . . . . . . . . . . . . . . . . . . . . . . . . . . . . . 26
Additional Information . . . . . . . . . . . . . . . . . . 27
Troubleshooting chart . . . . . . . . . . . . . . . . . . . . . . . . . . 27
Condensation . . . . . . . . . . . . . . . . . . . . . . . . . . . . . . . . . 29
If problem occurs . . . . . . . . . . . . . . . . . . . . . . . . . . . . . . 29
Factory reset, clearing all memory . . . . . . . . . . . . . . . . . 29
Before transporting the unit . . . . . . . . . . . . . . . . . . . . . . 29
Care of compact discs . . . . . . . . . . . . . . . . . . . . . . . . . . 29
Cleaning the cabinet. . . . . . . . . . . . . . . . . . . . . . . . . . . . 29
Caution for when the unit is installed in a rack with a glass
door . . . . . . . . . . . . . . . . . . . . . . . . . . . . . . . . . . . . . . . . 29
About playable music file formats . . . . . . . . . . . . . . . . . 30
About status messages . . . . . . . . . . . . . . . . . . . . . . . . . 30
Specifications. . . . . . . . . . . . . . . . . . . . . . . . . . . . . . . . . 31
About iPod/iPhone/iPad . . . . . . . . . . . . . . . . . . . . . . . . . 31
Disclaimer for Third Party Content . . . . . . . . . . . . . . . . . 31
X-HM70 Network CD Receiver System consisting of main unit
and speaker system.
XC-HM70 Network CD Receiver consisting of main unit.
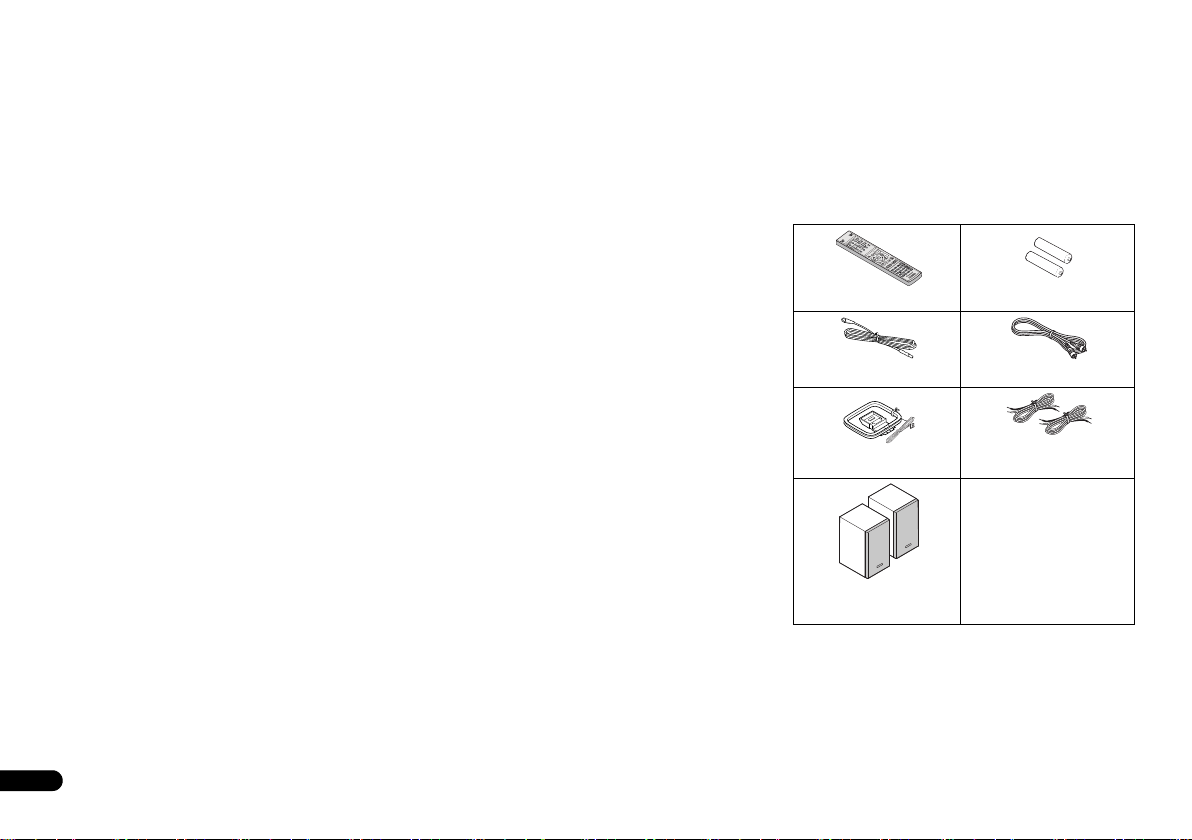
Accessories
Please confirm that the following accessories are included.
o
Remote control x 1
FM aerial x 1
AM loop aerial x 1
Speaker x 2
(X-HM70 only)
“AAA” size battery x 2
Video cable x 1
Speaker wires x 2
(X-HM70 only)
Warranty card
These operating instructions
4
En
Page 5
Before you start
CAUTION
CAUTION
Before you start
General
• Use the unit on a firm, level surface free from vibration.
• Place the speakers at least 30 cm away from any CRT TV
to avoid colour variations across the TV screen. If the
variations persist, move the speakers further away from
the TV. LCD TV is not prone to such variation.
• Keep the unit away from direct sunlight, strong magnetic
fields, excessive dust, humidity and electronic/electrical
equipment (home computers, facsimiles, etc.) which
generate electrical noise.
• Do not place anything on top of the unit.
• Do not expose the unit to moisture, to temperatures
higher than 60°C (140°F) or to extremely low
temperatures.
• If your system does not work properly, disconnect the AC
power lead from the wall socket. Plug the AC power lead
back in, and then turn on your system.
• In case of an electrical storm, unplug the unit for safety.
• Hold the AC power plug by the head when removing it
from the wall socket, as pulling the lead can damage
internal wires.
• The AC power plug is used as a disconnect device and
shall always remain readily operable.
• Do not remove the outer cover, as this may result in
electric shock. Refer internal service to your local
PIONEER service facility.
• The ventilation should not be impeded by covering the
ventilation openings with items, such as newspapers,
tablecloths, curtains, etc.
• No naked flame sources, such as lig hted candles, should
be placed on the apparatus.
• Attention should be drawn to the environmental aspects
of battery disposal.
• The apparatus is designed for use in moderate climates.
• The voltage used must be the same as that specified on
this unit. Using this product with a higher voltage other
than that which is specified is dangerous and may result
in a fire or other type of accident causing damage.
PIONEER will not be held responsible for any damage
resulting from use of this unit with a voltage other than
that which is specified.
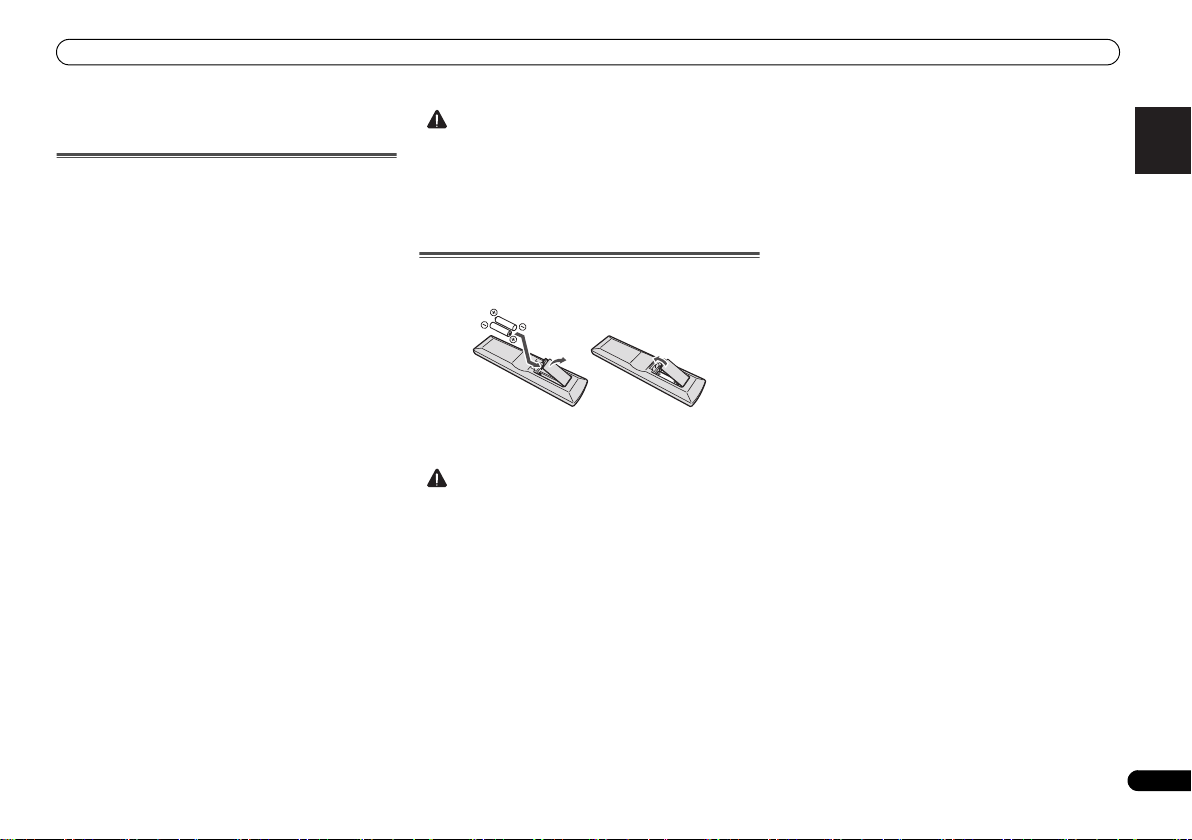
Loading the batteries
The batteries included with the unit are to check initial
operations; they may not last over a long period. We
recommend using alkaline batteries that have a longer life.
• Incorrect use of batteries may result in such hazards as
leakage and bursting. Observe the following precautions:
-
Never use new and old batteries together.
-
Insert the plus and minus sides of the batteries properly
according to the marks in the battery case.
-
Batteries with the same shape may have different
voltages. Do not use different batteries together.
-
When disposing of used batteries, please comply with
governmental regulations or environmental public
instruction’s rules that apply in your country or area.
• Do not use or store batteries in direct sunlight or other
excessively hot place, such as inside a car or near a
heater. This can cause batteries to leak, overheat, explode
or catch fire. It can also reduce the life or performance of
batteries.
English Français Español Italiano
Deutsch
Nederlands
5
En
Page 6
Controls and Displays
Controls and Displays
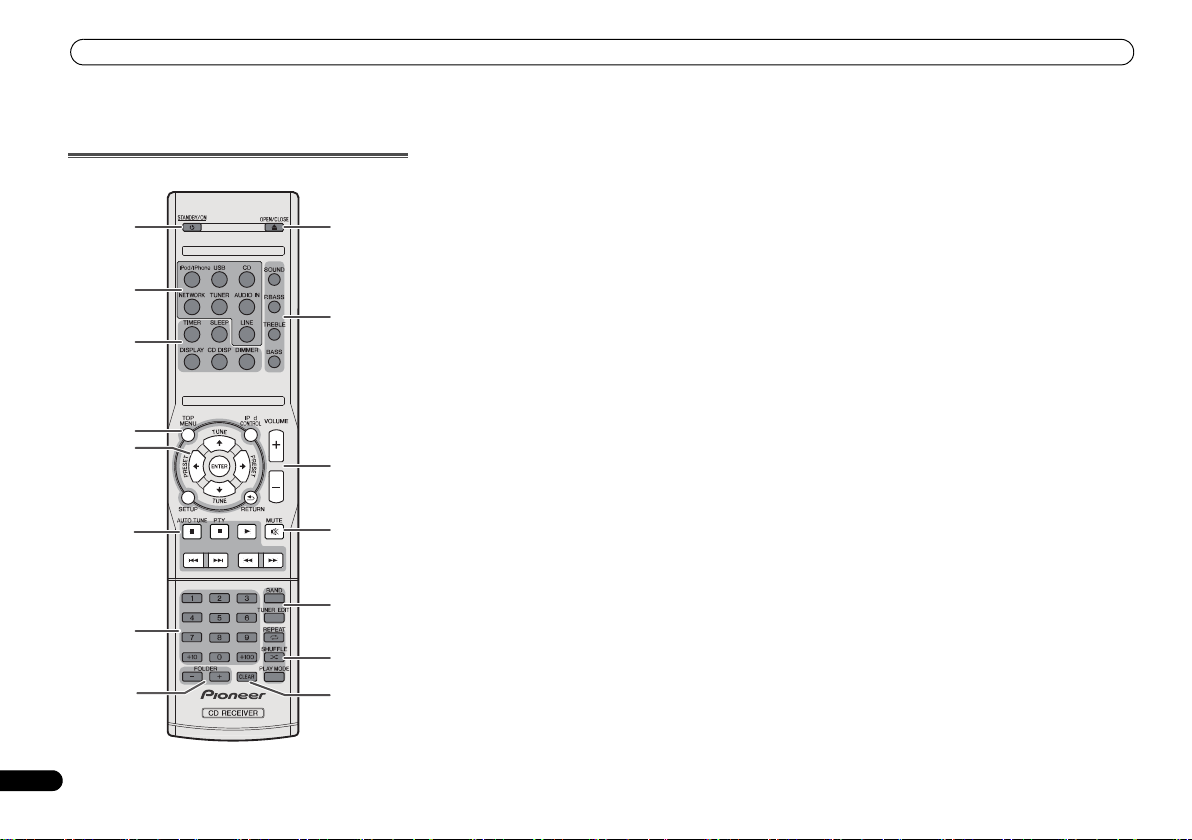
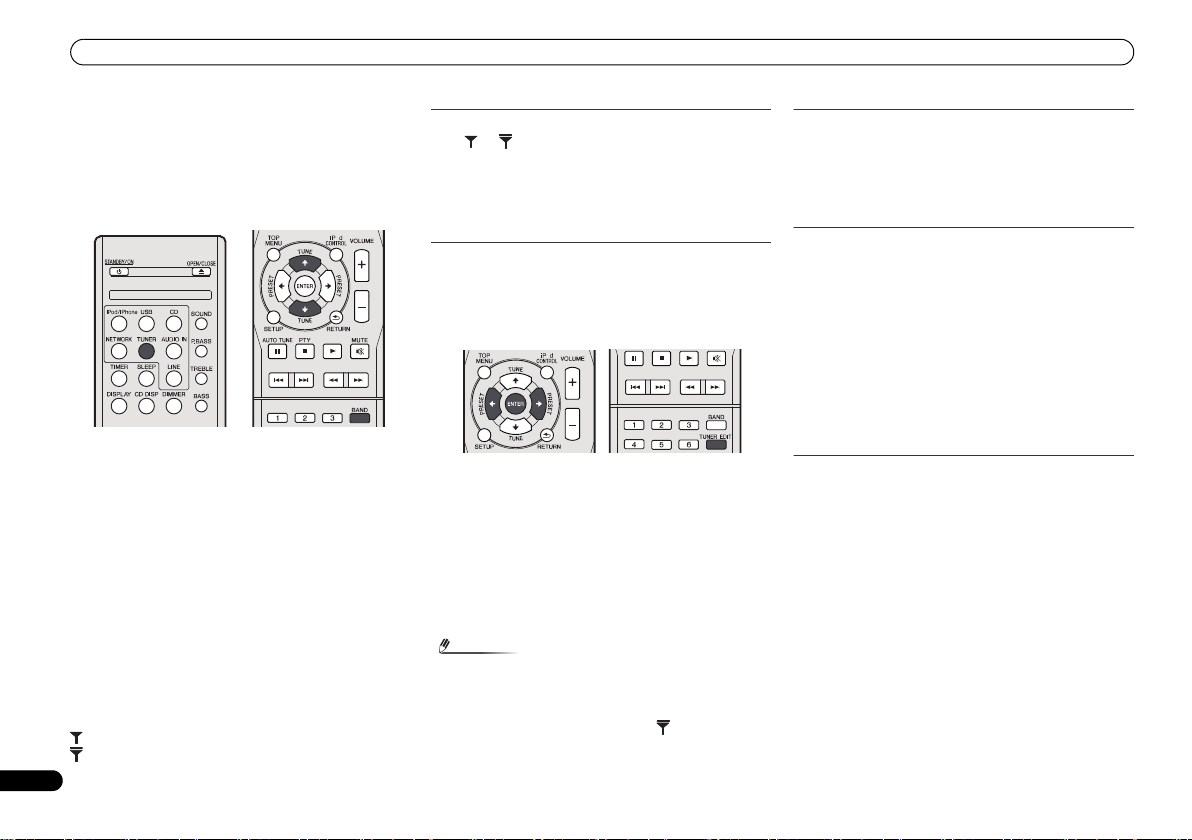
Remote control
1
2
3
4
5
6
7
8
6
En
O
9
10
11
12
13
14
15
1 STANDBY/ON
Switches the receiver between standby and on (page 11).
2 Input function buttons
Use to select the input source to this receiver.
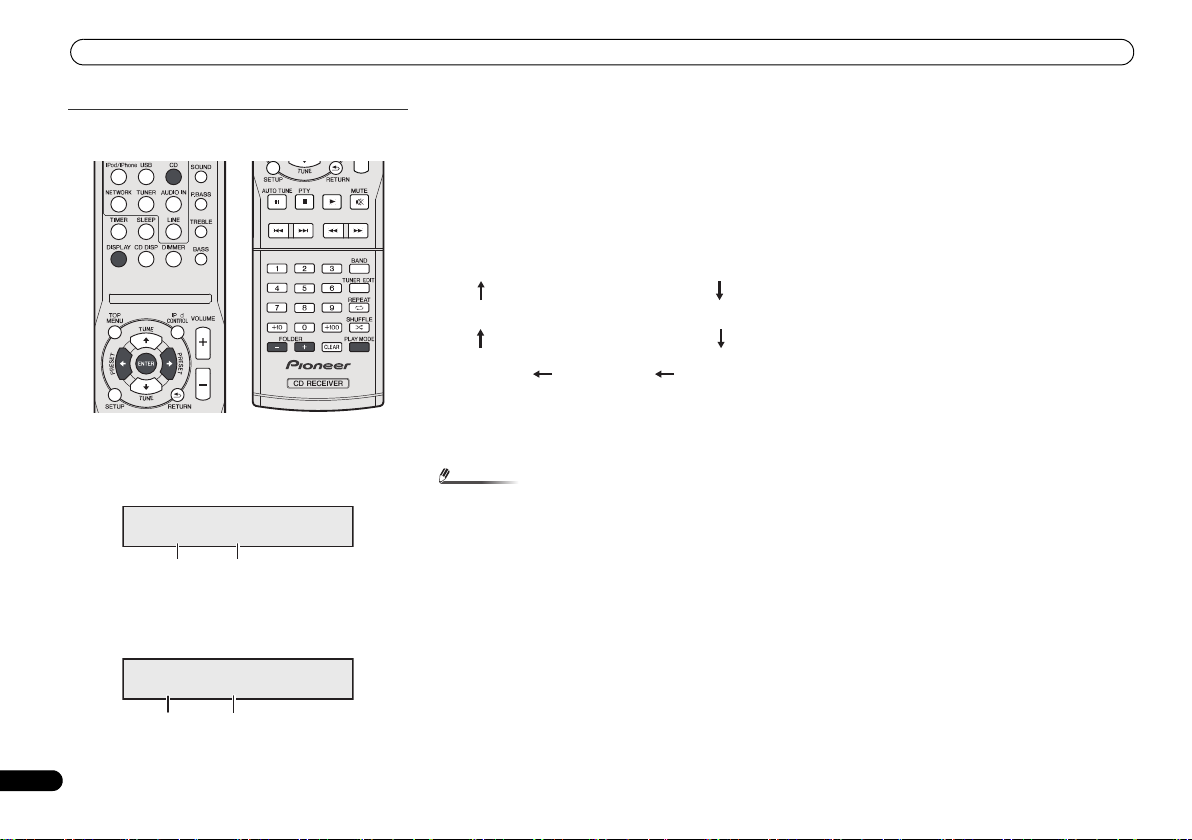
3 CD Receiver control buttons
DIMMER – Dims or brightens the display. The brightness
can be controlled in four steps (page 11).
SLEEP – Press to change the amount of time before the
receiver switches into standby (30 min. – 60 min. – 90
min. – Off). You can check the remaining sleep time at
any time by pressing SLEEP once (page 26).
TIMER – Use for setting the clock, as well as for setting
and checking the timers (page 11, 26).
DISPLAY – Display the MP3/WMA disc or RDS
information.
CD DISP – Display the disc information (page 15).
4 CD Receiver control buttons
TOP MENU – Press to display the iPod Top menu
(page 18).
iPod CONTROL – Switches between the iPod controls
and the receiver controls (page 18).
SETUP – Press to access the receiver setup menu
(page 11, 24).
RETURN – Confirm and exit the current menu screen.
5
///
Use to select/switch system settings and modes, and to
confirm actions.
Use TUNE / can be used to find radio frequencies and
PRESET / can be used to select preset radio stations
(page 24).
6 Playback control buttons
The main buttons (, , etc.) are used to control each
function after you have selected it using the input function
buttons.
PTY – Use to search for RDS program types (page 25).
• AUTO TUNE button is not used with this receiver.
7 Numeric buttons
Use to enter the number (page 14).
8 FOLDER +/-
Use to select the folder of the MP3/WMA disc (page 15).
(TUNE
/
, PRESET
/
), ENTER
9 OPEN/CLOSE
Use to open or close the disc tray (page 13).
10 Sound control buttons
Adjust the sound quality (page 12).
11 Volume control buttons
Use to set the listening volume (page 11).
12 MUTE
Mutes/unmutes the sound (page 12).
13 Tuner control buttons
BAND – Switches between AM, FM ST (stereo) and FM
MONO radio bands (page 24).
TUNER EDIT – Memorizes/names stations for recall
(page 24).
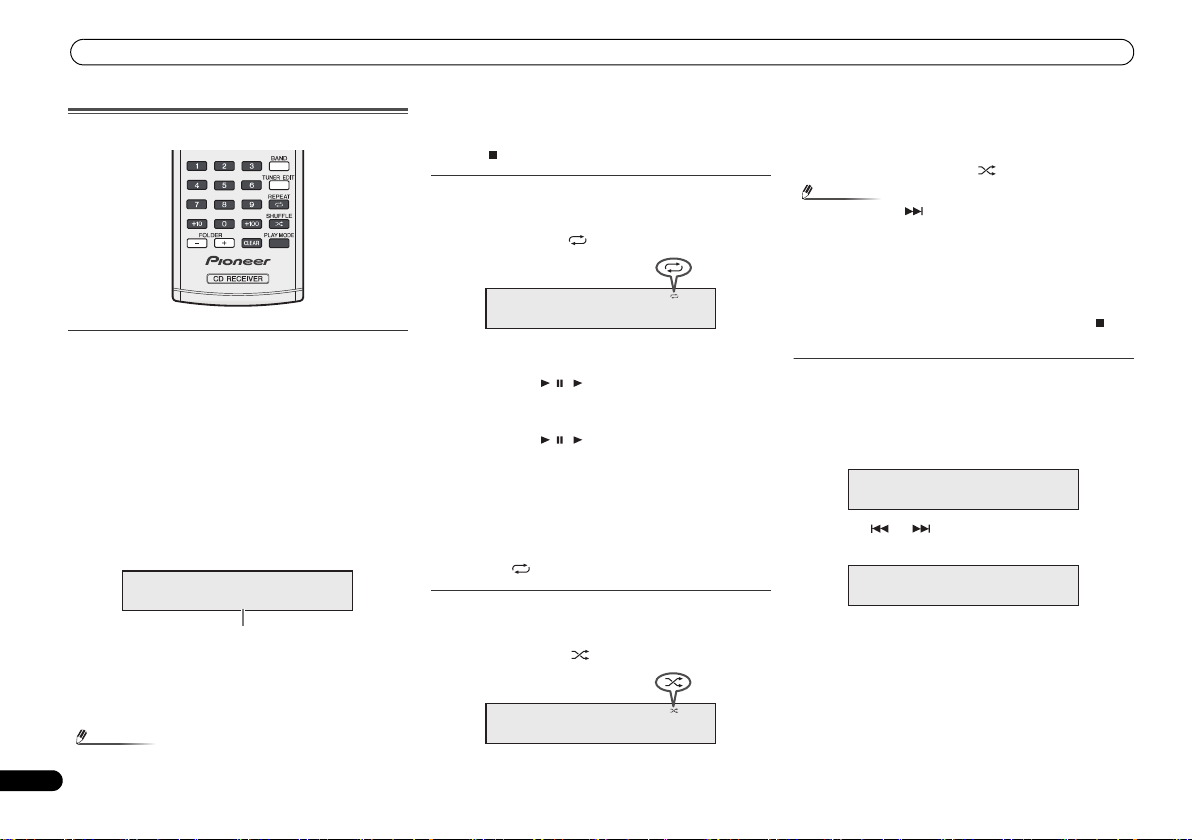
14 Playback mode buttons
REPEAT – Press to change repeat play setting from a CD,
iPod or USB (page 14).
SHUFFLE – Press to change shuffle play setting from a
CD, iPod or USB (page 14).
PLAY MODE – Press to change the playback mode
between CD and MP3/WMA disc (page 14).
15 CLEAR
Use to clear the programmed play (page 15).
Page 7
Controls and Displays
Remote sensor
7 m
TIMER
1
9
6
7
8 11 12 13 14 15
52
3
4
10
2
1
3
4
Make sure nothing comes into contact
with the speaker diaphragms when you
remove the speaker grilles.
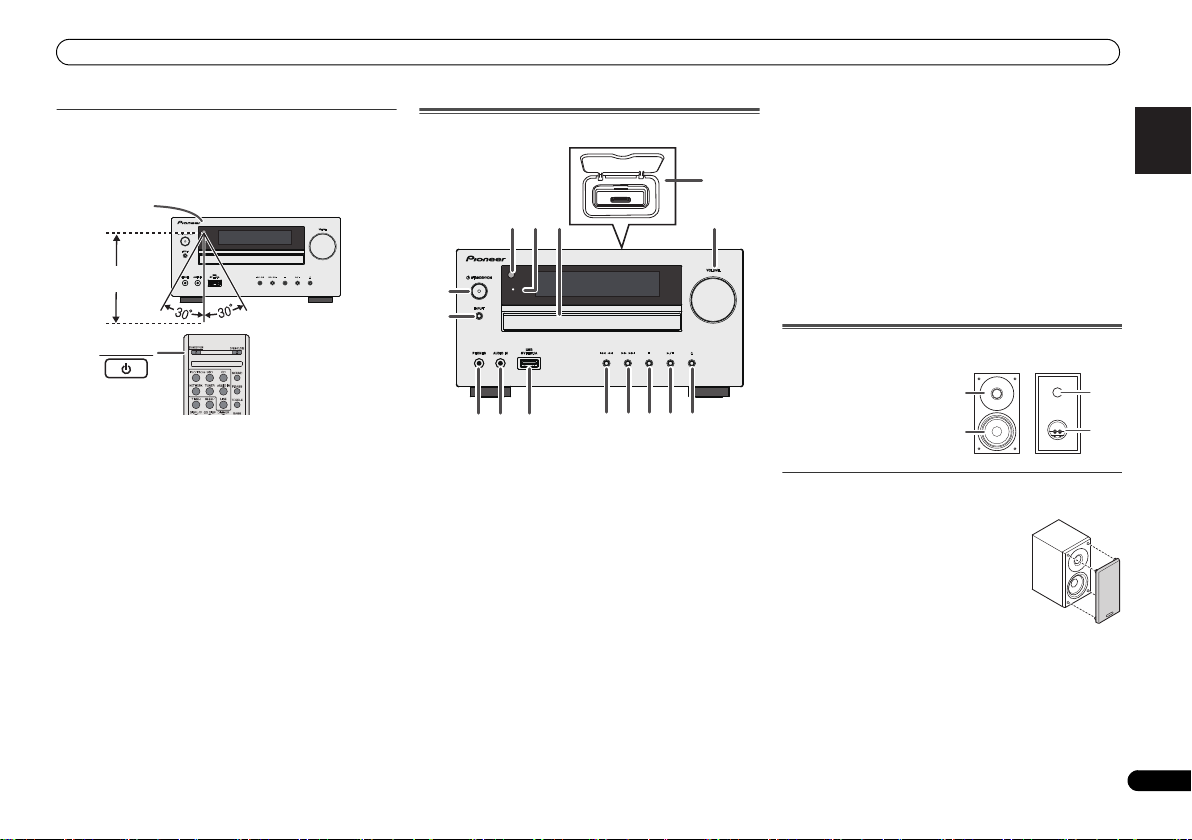
Test of the remote control
Check the remote control after checking all the connections.
Point the remote control directly at the remote sensor on the
unit. The remote control can be used within the range shown
below:
TIMER
STANDBY/ON
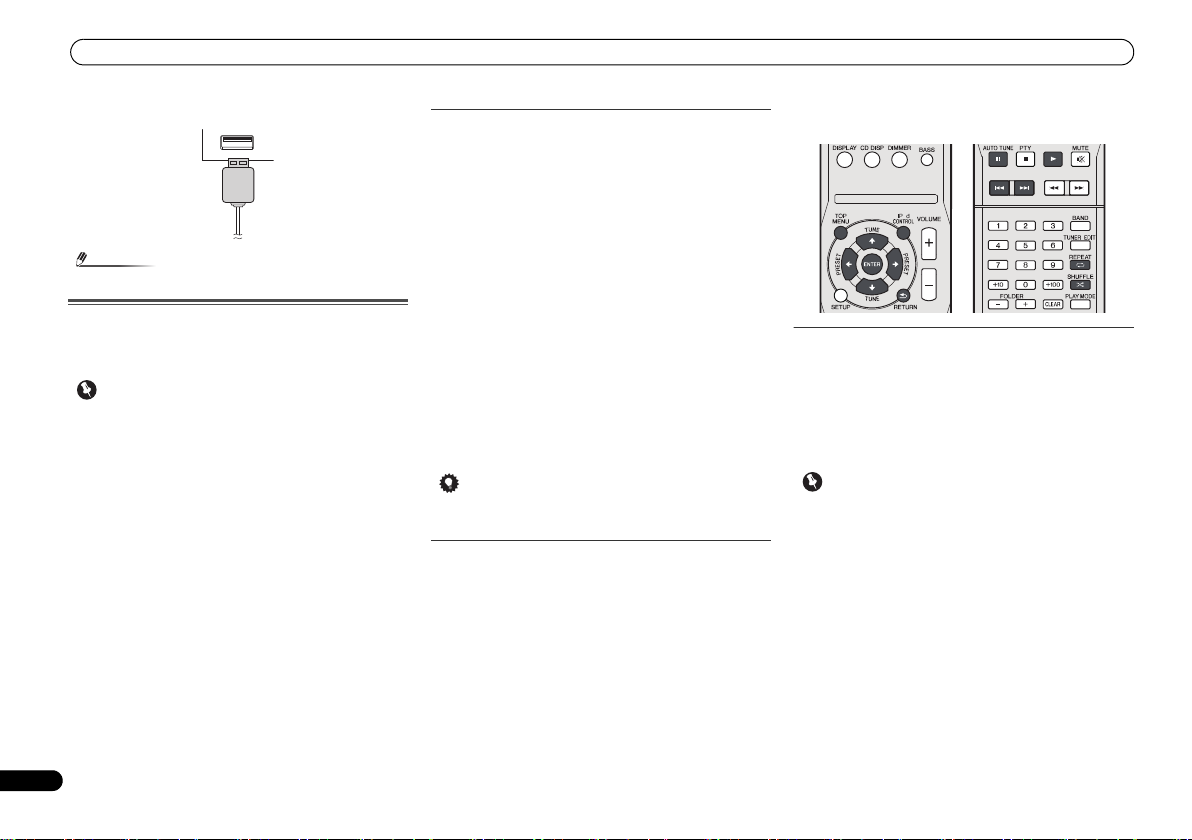
10 USB Terminal
Front Panel
Use to connect your USB mass storage device or Apple iPad
as an audio source (page 19).
11 Tune Down, Skip Down Button
Selects the desired track or folder to be played back.
12 Tune Up, Skip Up Button
Selects the desired track or folder to be played back.
13 Stop Button
Use to stop the playback.
14 Play or Pause Button
Stops playback or resumes playback from the pause point.
15 Disc Tray Open/Close Button
Use to open or close the disc tray (page 13).
Speaker system (X-HM70 only)
1 Dome-Tweeter
2 Woofer
3 Bass Reflex Duct
4 Speaker Terminal
1 Remote Sensor
Receives the signals from the remote control.
2 Timer Indicator
Lights when the timer is set (page 26).
3 Disc Tray
Place the disc, label side up (page 13).
4 iPod or iPhone Docking Station
Dock iPod/iPhone (page 17).
5 Volume Control
Use to set the listening volume (page 11).
6 STANDBY/ON Button
Switches the receiver between standby and on (page 11).
7 INPUT Button
Selects the input source (page 12).
8 Headphone Socket
Use to connect headphones. When the headphones are
connected, there is no sound output from the speakers
(page 12).
9 AUDIO IN Socket
Use to connect an auxiliary component using a stereo
minijack cable (page 12).
Speaker grilles are removable
English Français Español Italiano
Deutsch
Nederlands
7
En
Page 8
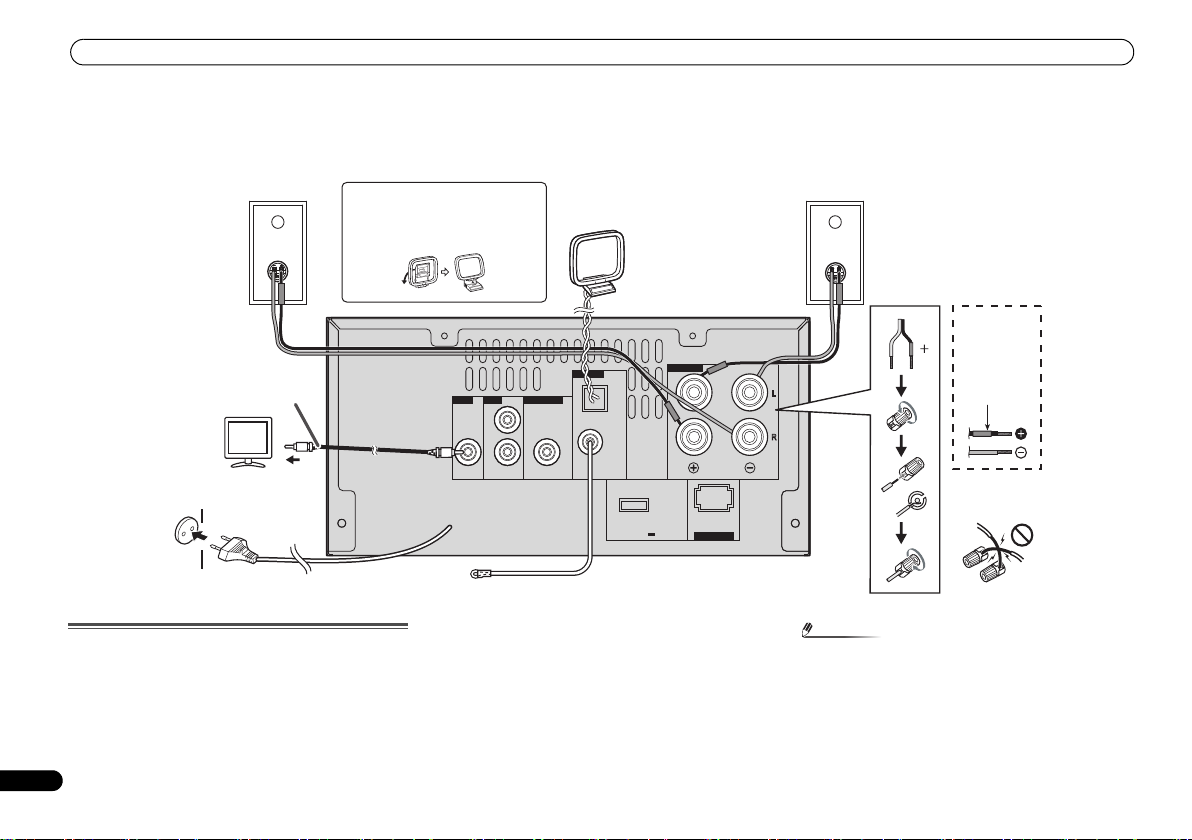
Connecting your equipment
Note
DC OUTPUT
for WIRELESS LAN
(OUTPUT 5 V
0.6 A MAX)
LAN(10/100
)
FM
UNBAL
75
Ω
SPEAKERS
AM
LOOP
ANTENNA
OUT
IN
PREOUT
L
R
VIDEO LINE
SUBWOOFER
Right
speaker
FM aerial
Left
speaker
TV
To video input
socket
AM loop
aerial
< Assembling >
Installing the AM loop aerial
Video cable
Wall socket
(AC 220 V to 240 V,
50 Hz)
Red tube
X-HM70
provided
speaker wire
Incorrect
Connecting your equipment
Before making or changing the connections, switch off the power and disconnect the power cord from the AC outlet.
Aerial connection
Supplied FM aerial:
Connect the FM aerial wire to the FM 75 ohms socket and
position the FM aerial wire in the direction where the
strongest signal can be received.
8
En
External FM aerial:
Use an external FM aerial (75 ohms coaxial cable) for better
reception. When an external FM aerial is used, disconnect
the supplied FM aerial wire.
Supplied AM loop aerial:
Connect the AM loop aerial to the AM terminal. Position the
AM loop aerial for optimum reception. Place the AM loop
aerial on a shelf, etc., or attach it to a stand.
• Placing the aerial on the unit or near the AC power lead
may cause noise pickup. Place the aerial away from the
unit for better reception.
Page 9
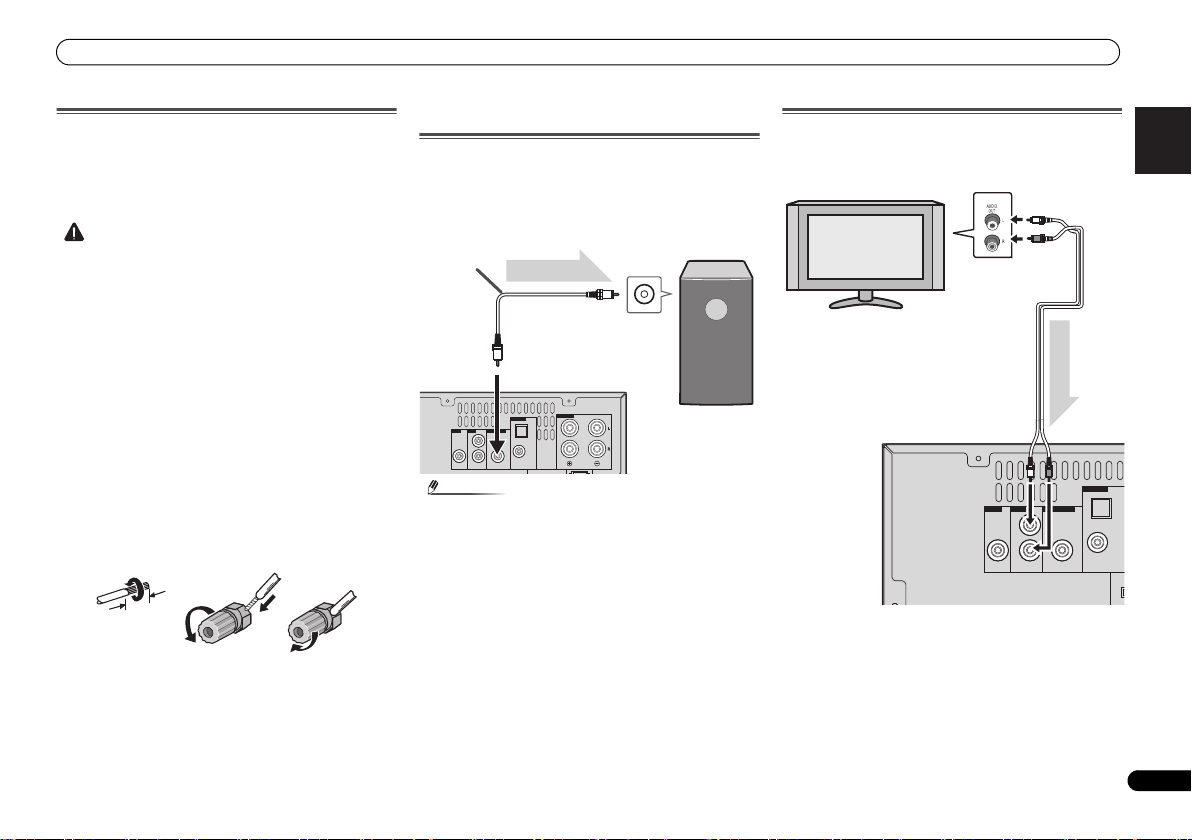
Connecting your equipment
CAUTION
Note
10 mm
FM
UNBAL
75
Ω
SPEAKERS
AM
LOOP
ANTENNA
OUT
IN
PREOUT
L
R
VIDEO LINE
SUBWOOFER
Main unit
Audio cable
(commercially
available)
Audio signal
To audio input
socket
To SUBWOOFER
PREOUT socket
Commercially
available subwoofer
(amplifier built in)
FM
UNBAL
75
Ω
SPEAKERS
AM
LOOP
ANTENNA
OUT
IN
PREOUT
L
R
VIDEO LINE SUBWOOFER
Audio signal
TV To audio
output sockets
Audio cable
(commercially
available)
Main unit
To LINE
input
sockets
Speaker connection
• The provided speaker wir e with the red tube is for the plus
(+) terminal. Connect the wire with red tube to the plus
(+) terminal, and other wire to the minus (
• Use speakers with an impedance of 4 ohms as lower
impedance speakers can damage the unit.
• These speaker terminals carry HAZARDOUS LIVE
voltage. To prevent the risk of electric shock when
connecting or disconnecting the speaker cables,
disconnect the power cord before touching any
uninsulated parts.
• Do not mistake the right and the left channels. The right
speaker is the one on the right side when you face the
unit.
• Do not let the bare speaker wires touch each other.
• Make sure that all the bare speaker wire is twisted
together and inserted fully into the speaker terminal. If
any of the bare speaker wire touches the back panel, it
may cause the power to cut off as a safety measure.
If not using the provided speaker wire
Bare wire connections
1 Twist exposed wire strands together.
2 Loosen terminal and insert exposed wire.
3 Tighten terminal.
12 3
X-HM70 only:
• Do not install your speakers overhead on the ceiling or
wall. The grill is designed to be detachable, and as such it
may fall and cause damage or personal injury if installed
overhead.
• Do not allow any objects to fall into or to be placed in the
bass reflex ducts.
–) terminal.
• Do not stand or sit on the speakers. You may be injured.
Using other subwoofer
You can connect a subwoofer with an amplifier to the
SUBWOOFER PREOUT socket.
Connecting a TV, etc.
Connect to the TV using an audio cable.
English Français Español Italiano
Deutsch
• No sound is heard from the subwoofer without a built-in
amplifier.
To select Line In function:
• On main unit: Press INPUT button repeatedly until Line In
is displayed.
• On remote control: Press LINE button.
Nederlands
9
En
Page 10
Connecting your equipment
Note
CAUTION
DC OUTPUT
for WIRELESS LAN
(OUTPUT 5 V
0.6 A MAX)
LAN(10/100
)
FM
UNBAL
75
Ω
SPEAKERS
AM
LOOP
ANTENNA
to LAN port
LAN cable
(sold separately)
Router
Modem
Internet
DC OUTPUT
for WIRELESS LAN
(OUTPUT 5 V
0.6 A MAX)
LAN(10/100
)
FM
UNBAL
75
Ω
SPEAKERS
AM
LOOP
ANTENNA
DC 5V WPS
Ethernet
WAN
RT
Internet
Modem
Router
Wireless LAN converter (AS-WL300)
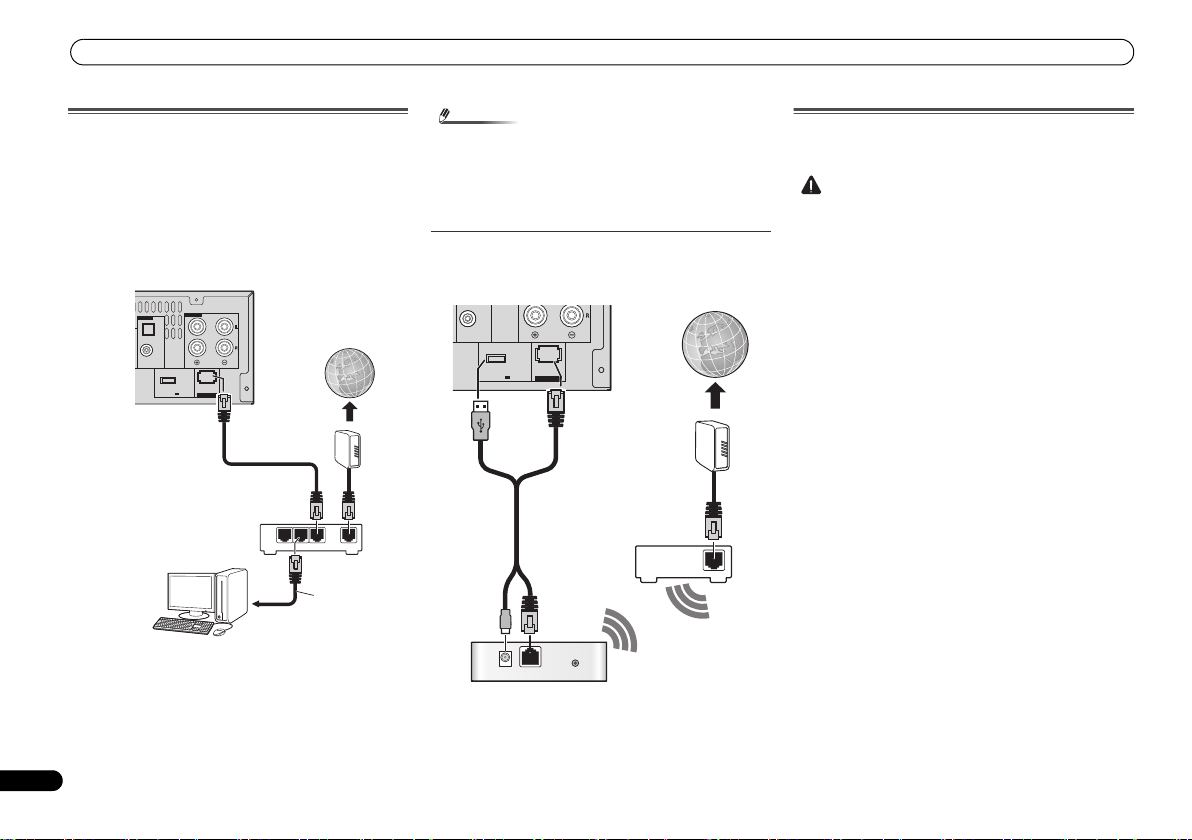
Connecting to the network through LAN
interface
By connecting this receiver to the network via the LAN
terminal, you can listen to Internet radio stations. To listen to
Internet radio stations, you must sign a contract with an ISP
(Internet Service Provider) beforehand.
When connected in this way, you can play audio files stored
on the components on the network, including your computer,
using NETWORK functions.
Connect the LAN terminal on this receiver to the LAN
terminal on your router (with or without the built-in DHCP
server function) with a straight LAN cable (CAT 5 or higher).
Turn on the DHCP server function of your router. In case your
router does not have the built-in DHCP server function, it is
necessary to set up the network manually. For details, see
Network setup menu on page 21.
10
En
LAN
321
• Refer to the operation manual of the equipment you have
as the connected equipment and connection method
may differ depending on your Internet environment.
• When using a broadband Internet connection, a contract
with an Internet service provider is required. For more
details, contact your nearest Internet service provider.
Connecting to a wireless LAN
Wireless connection to the network is possible through a
wireless LAN connection. Use the separately sold AS-WL300
for connection.
WAN
For details, refer to the operating instructions of the wireless
LAN converter (AS-WL300).
AC power connection
After checking all the connections have been made correctly,
plug the AC power lead of this unit into the wall socket.
• Unplug the AC power lead from the wall socket if the unit
will not be in use for a prolonged period of time.
• Handle the power cord by the plug. Do not pull out the
plug by tugging the cord and never touch the power cord
when your hands are wet as this could cause a short
circuit or electric shock. Do not place the unit, a piece of
furniture, etc., on the power cord, or pinch the cord. Never
make a knot in the cord or tie it with other cords. The
power cords should be routed such that they are not likely
to be stepped on. A damaged power cord can cause a fire
or give you an electrical shock. Check the power cord
once in a while. When you find it damaged, ask your
nearest PIONEER authorized service center or your dealer
for a replacement.
Page 11
General control
Note
Note
CAUTION
General control
To turn the power on
Press the STANDBY/ON button to turn the power on.
After use:
Press the STANDBY/ON button to enter the power stand-by
mode.
• However, if iPod/iPhone is docked, the unit turns charge
mode. “iPod charge” will be displayed.
• During iPod charge mode, press the STANDBY/ON
button to turn the power on.
• Remove iPod to turn the power stand-by mode.
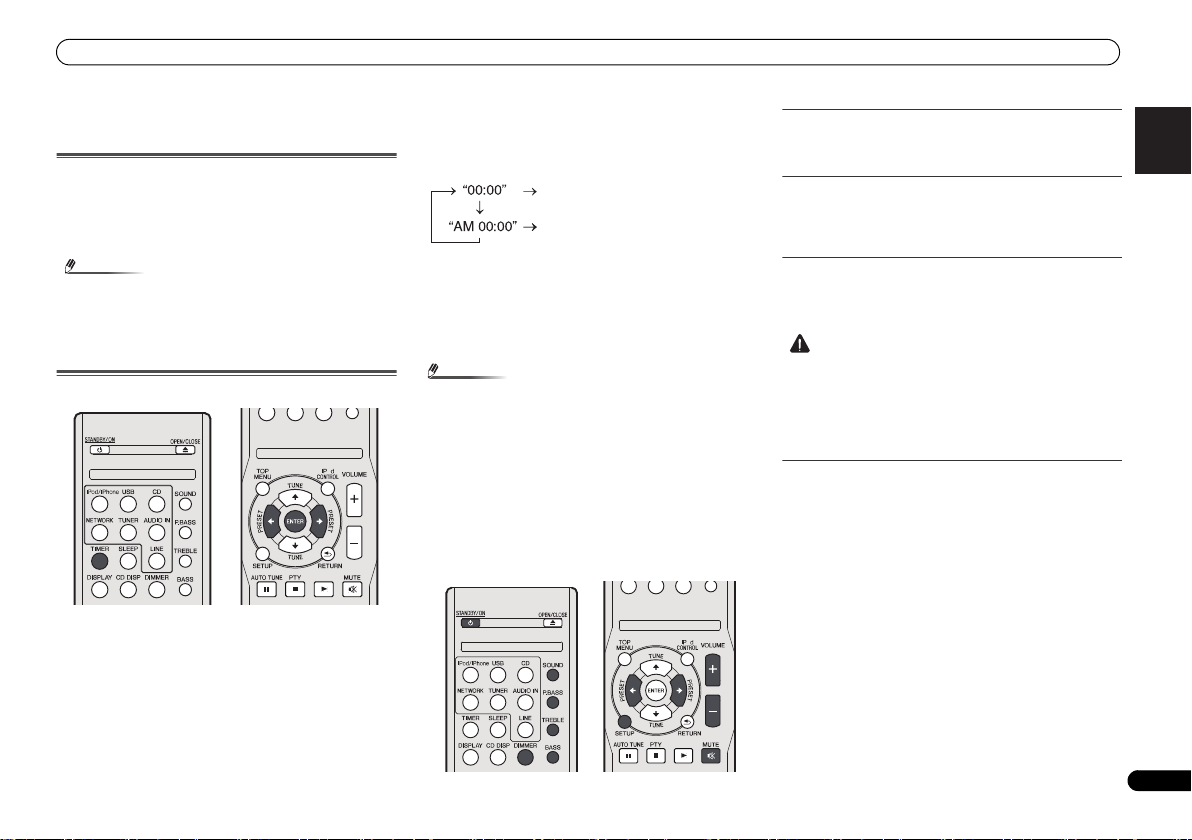
Setting the clock
O
In this example, the clock is set for the 24-hour (00:00)
display.
1 Press TIMER button on the remote control.
The current date and time are displayed.
The first time you use the clock, you are taken to the clock
adjust mode.
2 Press ENTER button.
/
3Use
4Use
press ENTER.
5Use
6Use
confirm.
To confirm the time display:
Press the TIMER button. The time display will appear for
about 10 seconds.
• When power supply is restored after unit is plugged in
again or after a power failure, reset the clock (See below).
To readjust the clock:
Perform “Setting the clock” from step 1. If the “Clock” does
not appear in step 2, step 4 (for selecting the 24-hour or 12hour display) will be skipped.
to set the day, then press ENTER.
/
to select 24-hour or 12-hour display, then
The 24-hour display will appear.
(00:00 - 23:59)
The 12-hour display will appear.
(AM 00:00 - PM 11:59)
/
to set the hour, then press ENTER.
/
to set the minute, then press ENTER to
To change the 24-hour or 12-hour display:
1 Clear all the programmed contents.
Refer to Factory reset, clearing all memory on page 29 for
details.
2 Perform “Setting the clock” from step 1 onwards.
O
Display brightness control
Press DIMMER button to dims the display brightness. The
brightness can be controlled in four steps.
Volume auto fade-in
If you turn off and on the main unit with the volume set to 41
or higher, the volume starts at 40 and fades in to the last set
level.
Volume control
Turn the volume knob towards VOLUME (on main unit) or
press VOLUME +/- (on remote control) to increase or
decrease the volume.
• The sound level at a given volume setting depends on
speaker efficiency, location, and various other factors. It
is advisable to avoid exposure to high volume levels. Do
not turn the volume on to full at switch on. Listen to music
at moderate levels. Excessive sound pressure from
earphones and headphones can cause hearing loss.
Auto power down setup
Set to automatically turn off the receiver after a specified time
has passed (when the power has been on with no operation
for several hours).
• Default setting: 6H
1 Press SETUP on the remote control.
•If APD does not appear, press / to select APD.
2Use
/
to specify the amount of time to allow before
the power is turned off (when there has been no
operation).
• You can select 2, 4 or 6 hours, or off (if no automatic
shutoff is desired).
3 When you’re finished, press RETURN.
English Français Español Italiano
Deutsch
Nederlands
11
En
Page 12
General control
Note
Note
FM
Stereo
NETWORK
CD AM USB
iPodLINEAUDIO IN
TIMER
Portable audio player, etc.
Audio cable (not supplied)
Muting
The volume is muted temporarily when pressing the MUTE
button on the remote control. Press again to restore the
volume.
P.bass control
When the power is first turned on, the unit will enter the
P.bass mode which emphasises the bass frequencies. To
cancel the P.bass mode, press the P.BASS button on the
remote control.
Bass control
Press the BASS button, then press / to adjust the bass.
Treble control
Press the TREBLE button, then press / to adjust the
treble.
Equaliser
When the SOUND button is pressed, the current mode
setting will be displayed. To change to a different mode, press
the SOUND button repeatedly until the desired sound mode
appears.
No equalization.
FLAT
Equaliser off.
JAZZ
For rock music.
For game.
For classical music.
For classical music.
For pop music.
For pop music.
Vocals are enhanced.
Vocals are enhanced.
For jazz.
For jazz.
GAME
CLASSIC
POPS
VOCAL
Input function
When the INPUT button on main unit is pressed, the current
function will change to different mode. Press the INPUT
button repeatedly to select desired function.
• The backup function will protect the memorised function
mode should there be a power failure or the AC power
lead becomes disconnected.
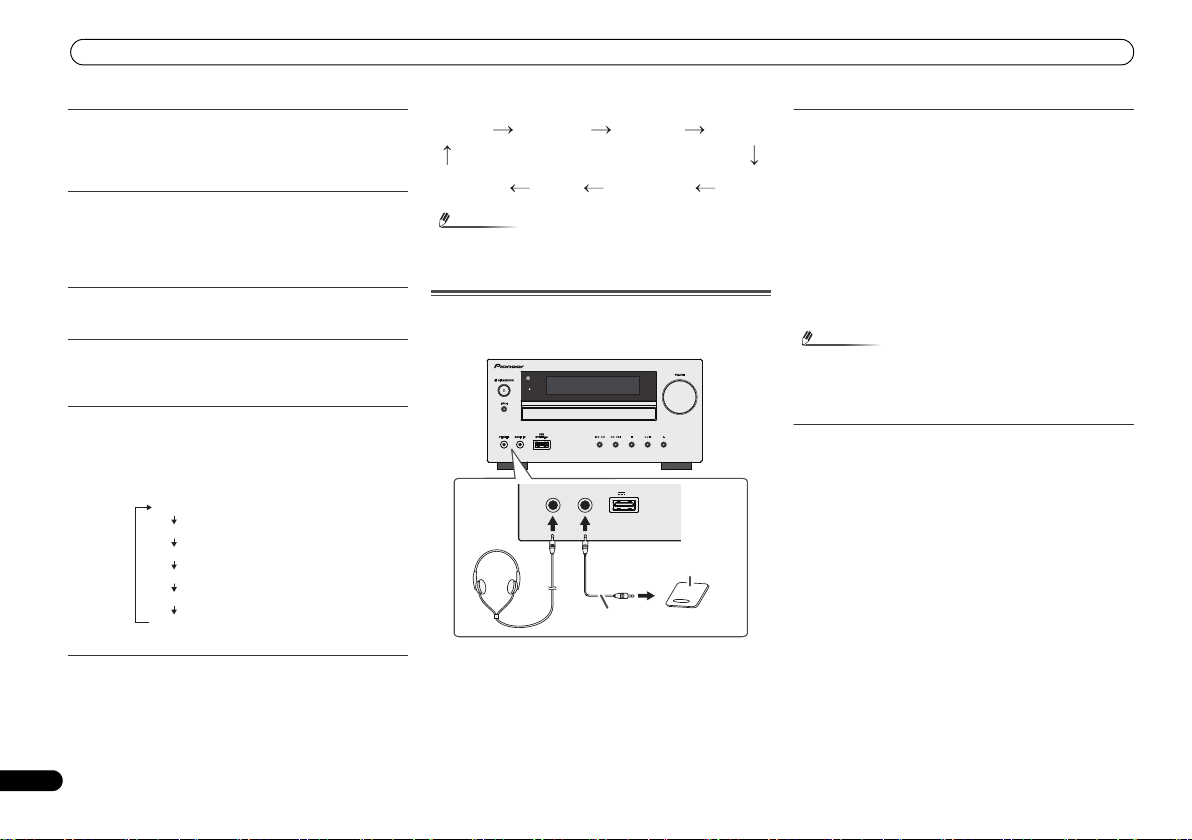
Enhancing your system
The connection lead is not included. Purchase a
commercially available lead as shown below.
PHONES AUDIO IN
USB
5V 2.1A
Listening to the playback sounds of portable
audio player, etc.
1 Use a connection lead to connect the portable audio
player etc. to the AUDIO IN socket.
2 Press the STANDBY/ON button to turn the power on.
3 Press the AUDIO IN button on the remote control or
INPUT button repeatedly on main unit to select AUDIO
IN function.
4 Play the connected equipment.
• If volume level of the connected device is too high, sound
distortion may occur. Should this happen, lower the
volume of the connected device. If volume level is too low,
increase the volume of the connected device.
• To prevent noise interference, place the unit away from
the television.
• When using video equipment, connect the audio output
to this unit and the video output to a television.
Headphones
• Do not turn the volume on to full at switch on and listen
to music at moderate levels. Excessive sound pressure
from earphones and headphones can cause hearing loss.
• Before plugging in or unplugging the headphone, redu ce
the volume.
• Be sure your headphone has a 3.5 mm diameter plug and
impedance between 16 and 50 ohms. The recommended
impedance is 32 ohms.
• Plugging in the headphone disconnects the speakers
automatically. Adjust the volume using the VOLUME
control.
12
En
Page 13
Listening to a CD or MP3/WMA disc
CAUTION
Note
Listening to a CD or MP3/
WMA disc
STANDBY/ON
STANDBY/ON
INPUT
INPUT
This system can play back a standard CD, CD-R/RW in the CD
format and CD-R/RW with MP3 or WMA files, but cannot
record on them. Some audio CD-R and CD-RW discs may not
be playable due to the state of the disc or the device that was
used for recording.
MP3:
MP3 is a form of compression. It is an acronym which stands
for MPEG Audio Layer 3. MP3 is a type of audio code which is
processed by significant compression from the original audio
source with very little loss in sound quality.
• This system supports MPEG-1/2/2.5 Audio Layer 3
(Sampling rates: 8 kHz to 48 kHz; Bit rates: 32 kbps to 320
kbps).
• During VBR file playback, time counter in the display may
differ from its actual playback time.
WMA:
WMA files are Advanced System Format files that include
audio files which are compressed with Windows Media
Audio codec. WMA is developed by Microsoft as an audio
format file for Windows Media Player.
• This system supports WMA (Sampling rates: 32 kHz/44.1
kHz/48 kHz; Bit rates: 32 kbps to 320 kbps).
TIMER
TIMER
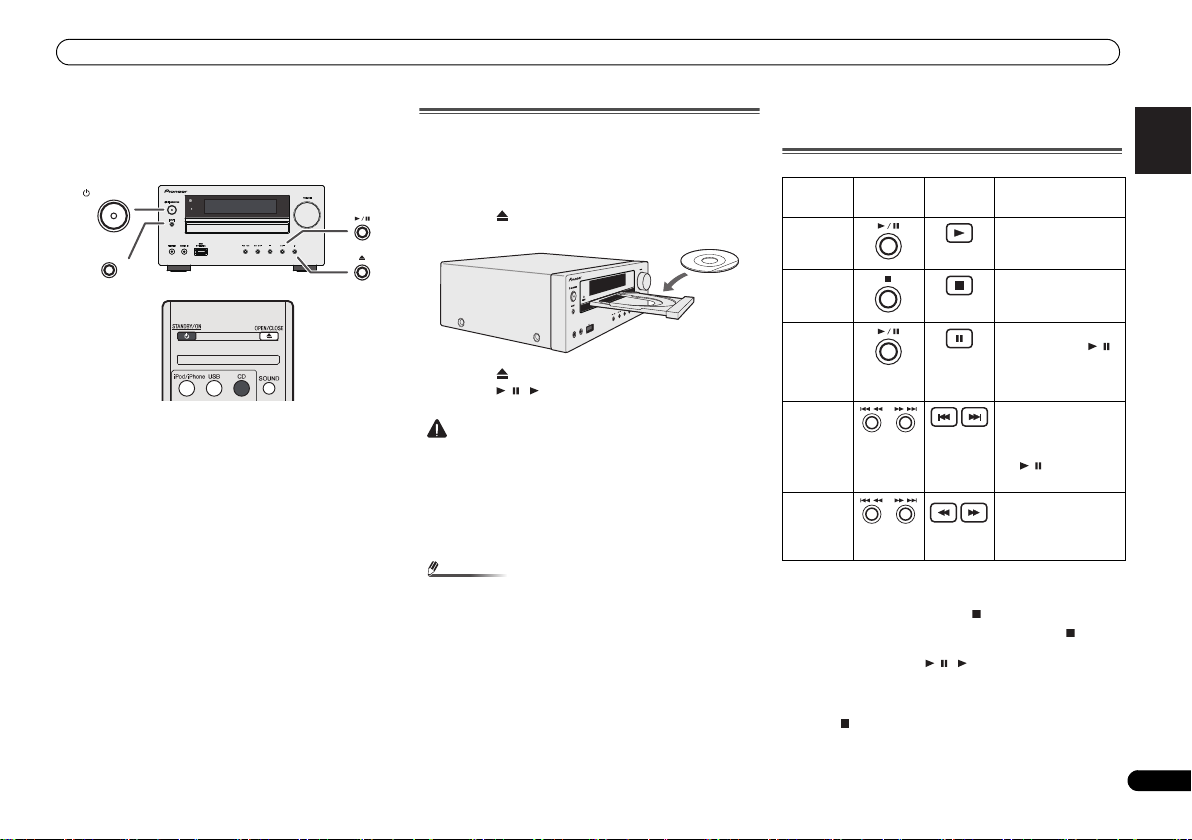
Disc playback
1 Press the STANDBY/ON button to turn the power on.
2 Press the CD button on the remote control or INPUT
button repeatedly on the main unit to select CD
function.
3 Press the button to open the disc tray.
4 Place the disc on the disc tray, label side up.
USB
2.1A
5V
AUDIO IN
PHONES
5 Press the button to close the disc tray.
6 Press the / ( ) button to start playback. After the
last track is played, the unit will stop automatically.
• Do not place two discs in one disc tray.
• Do not play discs of special shapes (heart, octagon, etc).
It may cause malfunctions.
• Do not push the disc tray whilst it is moving.
• If the power fails whilst the tray is open, wait until the
power is restored.
• Be sure to place 8 cm disc in the middle of the disc tray.
• Due to the structure of the disc information, it takes
longer to read an MP3/WMA disc than a normal CD
(approximately 20 to 90 seconds).
• “MP3” or “WMA” will appear after the unit reads
information on an MP3 or WMA disc.
• When the end of the last track is reached during fast
forward, “END” will appear on the display and CD
operation will be paused. When the beginning of the first
track is reached during fast reverse, the unit will enter the
playback mode (only for CD).
• Rewritable multi-session discs with unfinished writing,
can still be played.
• If TV or radio interference occurs during CD operation,
move the unit away from the TV or radio.
Various disc functions
Remote
control
Operation
Press in the stop mode.
Press in the playback
mode.
Press in the playback
mode. Press the /
button to resume
playback from the
paused point.
Press in the playback
or stop mode.
If you press the button
in the stop mode, press
the / button to start
the desired track.
Press in the playback
mode.
Release the button to
resume playback.
Function Main unit
Play
Stop
Pause
Track up/
down
Fast
forward/
reverse
Resume:
1 You can resume the track you stopped.
While a disc is playing, press the button.
2 The system stores the track you stopped and is
blinking on the display.
To restart play, press the / ( ) button.
Play resumes from the beginning of the track you stopped.
To cancel the resume playback:
Press the button.
English Français Español Italiano
Deutsch
Nederlands
13
En
Page 14
Listening to a CD or MP3/WMA disc
Note
Note
Selected track number
PROGRAM
P - 01 ← T005
Advanced CD or MP3/WMA disc playback
Direct track search
By using the numeric buttons, the desired tracks on the
current disc can be played.
Use the numeric buttons on the remote control to select
the desired track whilst playing the selected disc.
• The numeric buttons allow you to select up to number 9.
• When selecting number 100 or higher, use the “+100”
button.
• When selecting number 10 or higher, use the “+10”
button.
A. For example, to choose 13
1 Press the “+10” button.
2 Press the “3” button.
CD
F008 T001 00:00
B. For example, to choose 130
1 Press the “+100” button.
2 Press the “+10” button three times.
3 Press the “0” button.
• A track number higher than the number of tracks on the
disc cannot be selected.
14
En
• During shuffle play, direct track search is not possible.
To stop playback:
Press the button.
Repeat play
Repeat play can play one track, all tracks or a programmed
sequence continuously.
• During repeat play, “ ” appears.
CD
F008 T001 00:00
To repeat one track:
Press the REPEAT button repeatedly until “Repeat One”
appears. Press the / ( ) button.
To repeat all tracks:
Press the REPEAT button repeatedly until “Repeat All”
appears. Press the / ( ) button.
To repeat desired tracks:
Perform steps 1 - 5 in “Programmed play” section on this
page and then press the REPEAT button repeatedly until
“Repeat All” appears.
To cancel repeat play:
Press the REPEAT button repeatedly until “Repeat Off”
appears and “ ” disappears.
Shuffle play
The tracks on the disc can be played in shuffle order
automatically.
• During shuffle play, “ ” appears.
CD
F008 T001 00:00
To shuffle play all tracks:
Press the SHUFFLE button on the remote control.
To cancel shuffle play:
Press the SHUFFLE button and “ ” disappears.
• If you press the button during shuffle play, you can
move to the track selected next by the shuffle operation.
On the other hand, the button does not allow you to move
to the previous track. The beginning of the track being
played will be located.
• In shuffle play, the unit will select and play tracks
automatically. (You cannot select the order of the tracks.)
• After performing repeat play, be sure to press the
button. Otherwise, the disc will play continuously.
Programmed play (CD)
You can choose up to 32 selections for playback in the order
you like.
1 Whilst in the stop mode, press the PLAY MODE button
on the remote control to enter the programming save
mode.
PROGRAM
P - 01 ← T--
2 Press the or button or numeric buttons on the
remote control to select the desired track.
Page 15
Listening to a CD or MP3/WMA disc
Note
PROGRAM
P - 01 ← F--- T---
Media layer example
Folder
Audio file
Root
Layer 1 Layer 2 Layer 3 Layer 4 Layer 5
Session order
3 Press the ENTER button to save the track number.
4 Repeat steps 2 - 3 for other tracks. Up to 32 tracks can
be programmed. If you make a mistake, the
programmed tracks can be cleared by pressing the
CLEAR button.
5 Press the / ( ) button to start playback.
Programmed play (MP3/WMA)
1 Whilst in the stop mode, press the PLAY MODE button
until ‘PROGRAM’ appears to enter the programming
save mode.
Every time you press the PLAY MODE button, the playback
mode changes.
2 Press the or , or numeric buttons on the
remote control to select the desired folder.
PROGRAM
P - 01 ← F002 T---
Then press the or button or numeric buttons on the
remote control to select the desired tracks.
P - 01 ← F002 T005
3 Press the ENTER button to save the folder and track
number.
4 Repeat steps 2 - 3 for other folder/tracks. Up to 32 tracks
can be programmed.
5 Press the / ( ) button to start playback.
Adding tracks to the programme:
Stop the playing mode, then follow steps 2 - 3 to add tracks.
The new tracks will be stored after the last track of the
previous programme.
To cancel the programmed play mode:
During programmed stop mode, press the button. Press
the PLAY MODE button to select the basic play mode, and all
the programmed contents will be cleared.
PROGRAM
Displaying disc information:
Press CD DISP repeatedly to change to the display of the
elapsed playback time and the remaining playback time of
the CD.
Various track information can be displayed while an MP3/
WMA disc is playing. Press DISPLAY.
• When a disc is ejected, the programme is automatically
cancelled.
• If you press the STANDBY/ON button to enter the standby mode or change the function from CD to another, the
programmed selections will be cleared.
• During the programme operation, shuffle play is not
possible.
• The control buttons to change displays differ between the
discs: for CD, CD DISP is used; for MP3/WMA disc,
DISPLAY is used.
MP3/WMA folder mode (only for MP3/WMA
files)
To play back MP3/WMA (Windows Media Audio) file
There are many music sites on the internet that you can
download MP3/WMA (Windows Media Audio) music files.
Follow the instructions from the website on how to download
the music files. You can then play back these downloaded
music files by burning them to a CD-R/RW disc.
• Your downloaded song/files are for personal use only. Any
other usage of the song without owner’s permission, is
against the law.
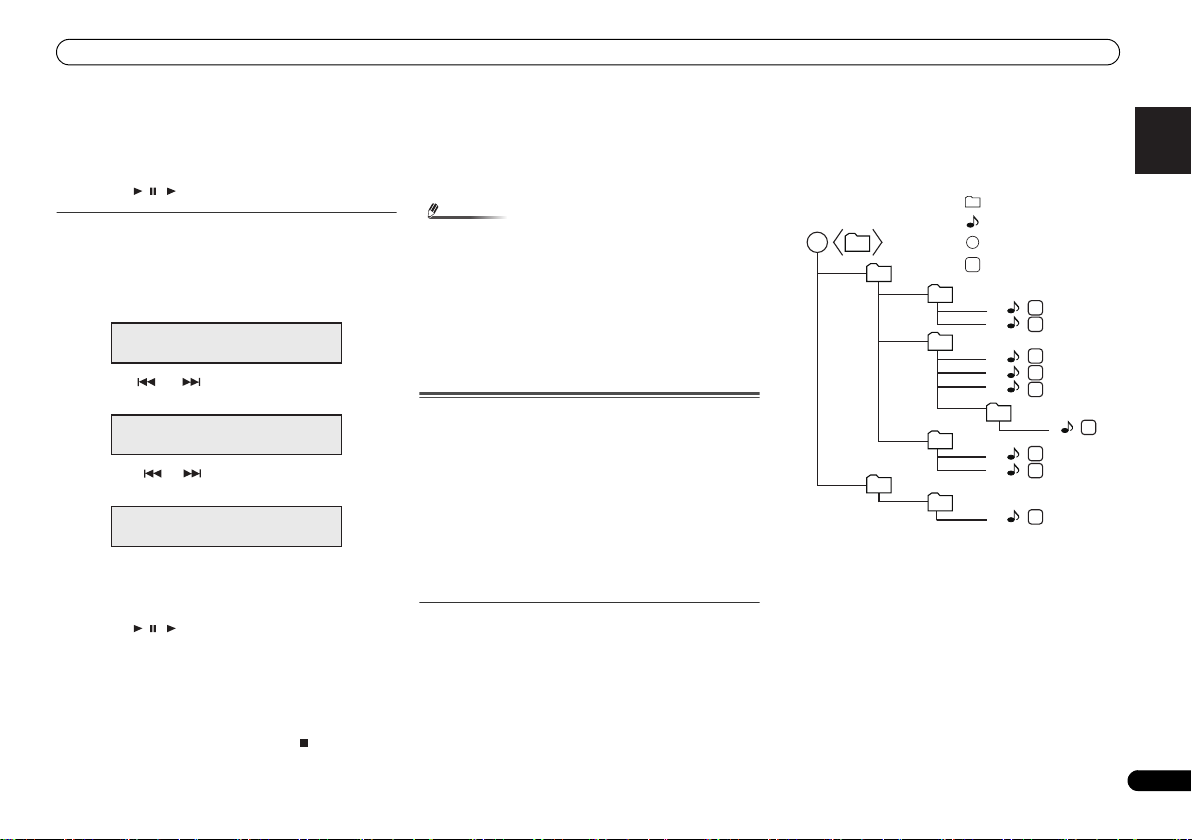
About folder playback order
If MP3/WMA files are recorded in several folders, a folder
number will be set to each folder automatically.
Press PLAY MODE to select the folder playback mode.
These folders can be selected by the FOLDER +/- button on
the remote control. If there is no supported file formats inside
the selected folder, the folder is skipped and the next folder
will be selected.
Example: How to set folder number if MP3/WMA format files
are recorded as below figure.
1 ROOT folder is set as folder 1.
2 Playback will be in the order of the diagram below.
3 For CD MP3/WMA, 255 numbers of folders and files
inclusive of the folders which have non playable files
can be read.
1
2
3
1
1
2
4
6
7
8
2
3
1
2
4
3
5
5
1
2
1
6
7
8
9
English Français Español Italiano
Deutsch
Nederlands
15
En
Page 16
Listening to a CD or MP3/WMA disc
Note
Total folders
Total tracks
Folder number First track number in the
folder
File name display
Folder name
display
Music title
display*
Artist name
display*
Album name display*
Total folders and Total tracks (Stopping)
Folder number and Track number (Playing)
Procedure to playback MP3/WMA disc with folder
mode on
O
To play back CD-R/RW.
1 Press the CD button, and load an MP3/WMA disc. Press
the PLAY MODE button to select the folder playback
mode.
Disc info will be displayed.
FOLDER
F008 T005
2 Press FOLDER +/- to select desired playback folder.
(Folder mode on)
Playback will start.
FOLDER
F005 T003 00:01
• Title, Artist and Album name are displayed if they are
recorded on the disc.
• In case of playback with the folder mode on, press
FOLDER +/-, and the folder can be selected even though
it is in playback/pause mode. It will continue playback/
pause mode in the 1st track of the selected folder.
• Display content can be changed by pressing the DISPLAY
button.
*The song title, artist name, and the album name will only be
displayed during playback.
To cancel the folder playback mode, stop the playback, press
the PLAY MODE button, and select the normal playback
mode.
• If “Can’t Play” is displayed, it means “Copyright protected
WMA file” or “Not supported playback file” is selected.
16
En
Page 17
Listening to the iPod, iPhone or iPad
Important
Note
CAUTION
iPhone
iPhone (bottom)
Dock connector
iPhone dock
iPhone connector
Insert the tip of a screwdriver ("–" type, small)
into the adaptor hole as shown and lift upward
to remove.
Listening to the iPod,
iPhone or iPad
Supported iPod, iPhone and iPad models:
• iPod touch (4th/3rd/2nd/1st generation)
• iPod classic
• iPod with video
• iPod nano (6
• iPhone 4/3GS/3G
•iPad
• Pioneer cannot under any circumstances accept
responsibility for any direct or indirect loss arising from
any inconvenience or loss of recorded material resulting
from the iPod failure.
• This system has been developed and tested for the
software version of iPod/iPhone/iPad indicated on the
website of Pioneer (http://pioneer.jp/homeav/support/ios/
eu/).
• Installing software versions other than indicated on the
website of Pioneer to your iPod/iPhone/iPad may result in
incompatibility with this system.
• Once iPod or iPhone is connected to the unit it will begin
charging.
• You can recharge the iPad when t he power is on or during
iPod Charge Mode.
• When connecting the iPad, use only an iPad dedicated
cable.
• Connect iPad to the USB terminal.
• iPod and iPhone are licensed for reproduction of noncopyrighted materials or materials the user is legally
permitted to reproduce.
• Features such as the equalizer cannot be controlled using
this receiver, and we recommend switching the equalizer
off before connecting.
th/5th/4th/3rd/2nd/1st
generation)
Connecting your iPod/iPhone
• When connecting an iPod/iPhone units, always use the
universal dock adapter provided with your iPod/iPhone, or
a commercially adapter designed to support iPod/iPhone.
The iPod/iPhone cannot be connected without a universal
dock adapter; attempting to connect an iPod/iPhone
without a universal dock adapter will cause damage or
malfunction.
• Unplug all accessories from the iPod or iPhone before
inserting it into the dock.
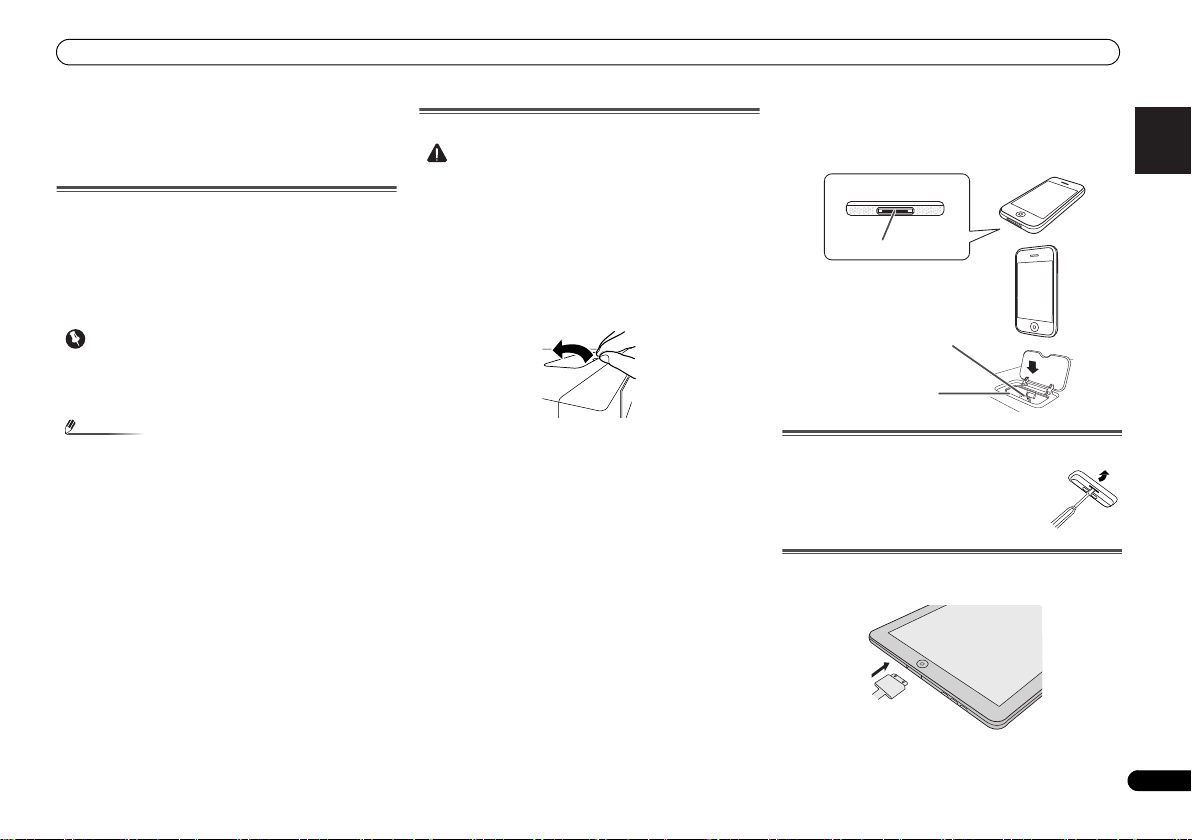
1 Open the dock cover by pulling up.
2 Attach the Universal dock adapter to iPod/iPhone
connector port on this unit.
• An iPod/iPhone universal dock adapter is not supplied
with this unit.
When attaching the Universal dock adapter, be sure to orient
the front-back directions of the Universal dock adapter
correctly. To attach, first place the protruding tabs on the
front side of the adapter into the depressions on the iPod/
iPhone connector port and press into position. When
attaching the adapter, be careful not to strike the connectors.
3 Connect your iPod/iPhone.
• If an iPod/iPhone is connected when this unit is in
standby mode, the power will turn on and playback of the
iPod/iPhone will begin.
To remove adaptor for iPod or iPhone
To insert iPad adaptor
1 Insert the iPad connector to the iPad.
English Français Español Italiano
Deutsch
Nederlands
17
En
Page 18
Listening to the iPod, iPhone or iPad
Note
Important
Tip
Important
2 Connect the iPad to the unit via USB connector.
• USB connector do not support VIDEO out.
Playing an iPod, iPhone or iPad
This receiver has a dedicated iPod terminal that will allow you
to control playback of audio content from your iPod using the
controls of this receiver.
• If you connect your iPod to the receiver and it doesn’t
work properly, switch off the receiver and reconnect the
iPod to it. If this doesn’t seem to work, try resetting your
iPod.
1 Switch on the receiver and your TV.
2 Switch the TV input so that it connects to the receiver.
3 If iPod or iPhone is connected via the iPod dock, press
iPod/iPhone to select the iPod input.
If iPad (or iPod/iPhone) is connected via the USB
terminal, press USB to select the USB input.
The front panel display shows Please Wait while the receiver
verifies the connection and retrieves data from the iPod.
When the display shows Top Menu you’re ready to play
music from the iPod.
•If after pressing
Disconnected, try switching off the receiver and
reconnecting the iPod to the receiver.
• The controls of your iPod will be inoperable when
connected to this receiver.
iPod/iPhone
the display shows iPod
Playing back files stored on an iPod
To navigate songs on your iPod, you can take advantage of
the OSD of your TV connected to this receiver. You can also
control all operations for music in the front panel display of
this receiver.
• Note that non-roman characters in the title are displayed
as ‘*’.
• This feature is not available for photos or video clips on
your iPod.
Finding what you want to play
When your iPod is connected to this receiver, you can browse
songs stored on your iPod by playlist, artist, album name,
song name, genre or composer, similar to using your iPod
directly.
1Use
/
to select a category, then press ENTER to
browse that category.
• To return to the previous level any time, press RETURN.
2Use
/
to browse the selected category (e.g.,
albums).
•Use / to move to previous/next levels.
3 Continue browsing until you arrive at what you want to
play, then press
• If you’re in the song category, you can also press ENTER
to start playback.
to start playback.
Basic playback controls
This receiver’s remote control buttons can be used for basic
playback of files stored on an iPod.
•Press iPod/iPhone to switch the remote control to the
iPod/iPhone operation mode.
O
Switches between the iPod controls and the
receiver controls
This allows you to switch between performing iPod
operations via the receiver remote control or on the iPod
itself.
Press iPod CONTROL to switch to the iPod controls.
•Press iPod CONTROL again to switch back to the receiver
controls when you’re done.
• You cannot use this function, when an iPod of fifth
generation or iPod nano of first generation is connected.
18
En
Page 19

Listening to USB mass storage device/MP3 player
Important
Note
Important
USB mass
storage device
Listening to USB mass
storage device/MP3
player
Connecting a USB device
It is possible to listen to two-channel audio using the USB
interface on the front of this receiver.
Switch the receiver into standby then connect your USB
device to the USB terminal on the front panel of this
receiver.
• This receiver does not support a USB hub.
• If iPad is connected, the unit will begin charging.
TIMER
Playing a USB device
• Pioneer cannot guarantee compatibility (operation and/or
bus power) with all USB mass storage devices and
assumes no responsibility for any loss of data that may
occur when connected to this receiver.
• Compatible USB devices include external magnetic hard
drives, portable flash memory (particularly keydrives) and
digital audio players (MP3 players) of format FAT16/32. It
is not possible to connect this receiver to a personal
computer for USB playback.
• With large amounts of data, it may take longer for the
receiver to read the contents of a USB device.
• If the file selected cannot be played back, this receiver
automatically skips to the next file playable.
• When the file currently being played back has no title
assigned to it, the file name is displayed in the OSD
instead; when neither the album name nor the artist
name is present, the row is displayed as a blank space.
• Note that non-roman characters in the playlist are
displayed as ‘*’.
• Make sure the receiver is in standby when disconnecting
the USB device.
1 Switch on the receiver and your TV.
2 Switch the TV input so that it connects to the receiver.
3 Press USB on the remote control to switch the receiver
to the USB function.
Please Wait appears in the OSD as this receiver starts
recognizing the USB device connected. After the recognition,
a playback screen appears in the OSD and playback starts
automatically.
Basic playback controls
This receiver’s remote control buttons can be used for basic
playback of files stored on USB devices.
• Press USB to switch the remote control to the USB
operation mode.
O
If a USB Error message lights in the display, try following the
points below:
• Switch the receiver off, then on again.
• Reconnect the USB device with the receiver switched off.
• Select another input source (like CD), then switch back to
USB.
• Use a dedicated AC adapter (supplied with the device) for
USB power.
If this doesn’t remedy the problem, it is likely your USB device
is incompatible.
English Français Español Italiano
Deutsch
Nederlands
• This includes playback of WMA/MP3/MPEG-4 AAC files
(except files with copy-protection or restricted playback).
19
En
Page 20
Playback with NETWORK feature
Important
Note
Playback with NETWORK
feature
This receiver is equipped with the LAN terminal and you can
enjoy the following features by connecting your components
to these terminals.
• Listening to Internet radio stations
You can select and listen to your favorite Internet radio
station from the list of Internet radio stations created,
edited, and managed by the SHOUTcast database
service.
See Listening to Internet radio stations below.
• Playback the music files stored in PCs
You can playback a lot of musics stored in your PCs using
this unit.
See Playing back audio files stored on components on
the network on page 21.
-
Besides a PC, you can also play back audio files stored
on your other components with the built-in media server
function based on DLNA 1.0 or DLNA 1.5 framework and
protocols (i.e. network-capable hard disks and audio
systems).
• When you play back audio files, ‘Please Wait’ is displayed
before playback starts. The display may continue for
several seconds depending on the type of file.
• In case a domain is configured in a Windows network
environment, you cannot access a PC on the network
while you are logged onto the domain. Instead of logging
onto the domain, log onto the local machine.
• There are cases where the time elapsed may not be
correctly displayed.
1 Switch on the receiver and your TV.
See Connecting to the network through LAN interface on
page 10.
2 Switch the TV input so that it connects to the receiver.
3 Press NETWORK on the remote control to switch the
receiver to the NETWORK function.
It may take several seconds for this receiver to access the
network. The following screen appears when the NETWORK
is selected as the input function.
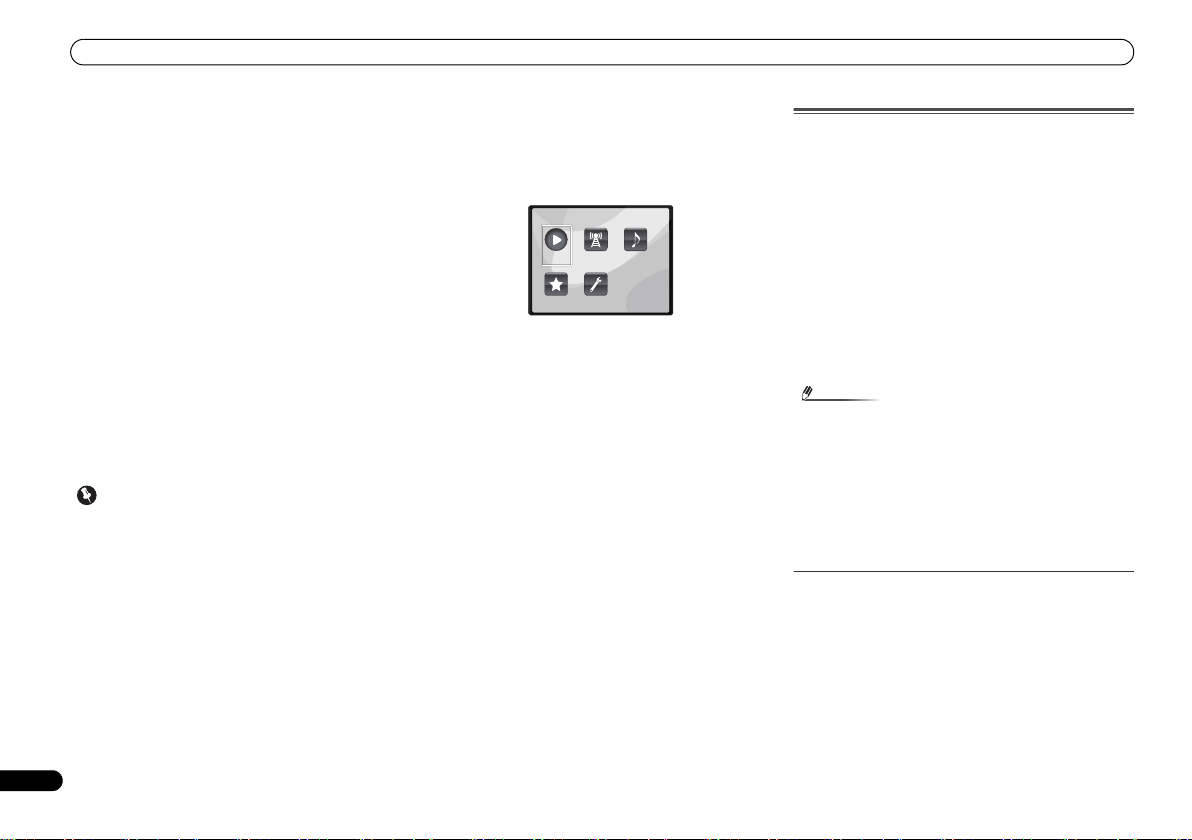
Main Menu
Internet
Now Playing
Favorites Settings
4Use
/
to select the category you want to play back,
and then press ENTER.
Select a category from the following list:
• Now Playing – Display the Current status and station
information.
• Internet Radio – Listening the SHOUTcast internet radio
via network.
Music
Radio
Library
• Music Library – Playback the music files stored in PCs.
• Favorites – Favorite songs currently being registered.
• Settings – Perform NETWORK function settings.
5Use
/
to select the folder, music files or Internet
radio station to play back, and then press ENTER.
Press / to scroll up and down the list and select the
desired item. When you press ENTER, playback starts with
the playback screen being displayed for the selected item. To
return to the list screen, press RETURN.
When the items are displayed over multiple pages, use /
to quickly display different pages.
6 Repeat step 5 to play back the desired song.
For detailed operating instructions, refer to the section
shown below.
• Internet radio stations – See Listening to Internet radio
stations below.
• Music files stored in PCs – See Playing back audio files
stored on components on the network on page 21.
Listening to Internet radio stations
Internet radio is an audio broadcasting service transmitted
via the Internet. There are a large number of Internet radio
stations broadcasting a variety of services from every corner
of the world. Some are hosted, managed, and broadcast by
private individuals while others are by the corresponding
traditional terrestrial radio stations or radio networks.
Whereas terrestrial, or OTA (over-the-air), radio stations are
geographically restricted on the range of radio waves
broadcast from a transmitter through the air, Internet radio
stations are accessible from anywhere in the world, as long
as there is a connection to the Internet, as services are not
transmitted through the air but are delivered over the World
Wide Web. On this receiver you can select Internet radio
stations by genre as well as by region.
Depending on the Internet line conditions, the sound may not
be smooth when playing Internet radio.
• To listen to Internet radio stations, you must have highspeed broadband Internet access. With a 56 K or ISDN
modem, you may not enjoy the full benefits of Internet
radio.
• The port number varies depending on the Internet radio
station. Check the firewall settings.
• Broadcasts may be stopped or interrupted depending on
the Internet radio station. In this case, you cannot listen
to a radio station selected from the list of Internet radio
stations.
About list of Internet radio
The list of Internet radio stations on this receiver is created,
edited, and managed by the SHOUTcast database service.
20
En
Page 21
Playback with NETWORK feature
Note
Main Menu
Now Playing
Favorites Settings
Internet
Radio
Music
Library
Playing back audio files stored on
components on the network
You can perform the following operations with the remote
control of this receiver. Note that some buttons are not
available for operation depending on the category currently
being played back.
•Press NETWORK to switch the remote control to the
NETWORK operation mode.
O
/
2Use
3Use
– Selected item will begin playing
to select audio file or Internet radio station,
and then press ENTER.
/
to select playback or delete options and then
press ENTER.
– Deletes selected item from Favorites folder
• Select to undo previous operation.
Network setup menu
Setting up the network to listen to Internet radio on this
receiver.
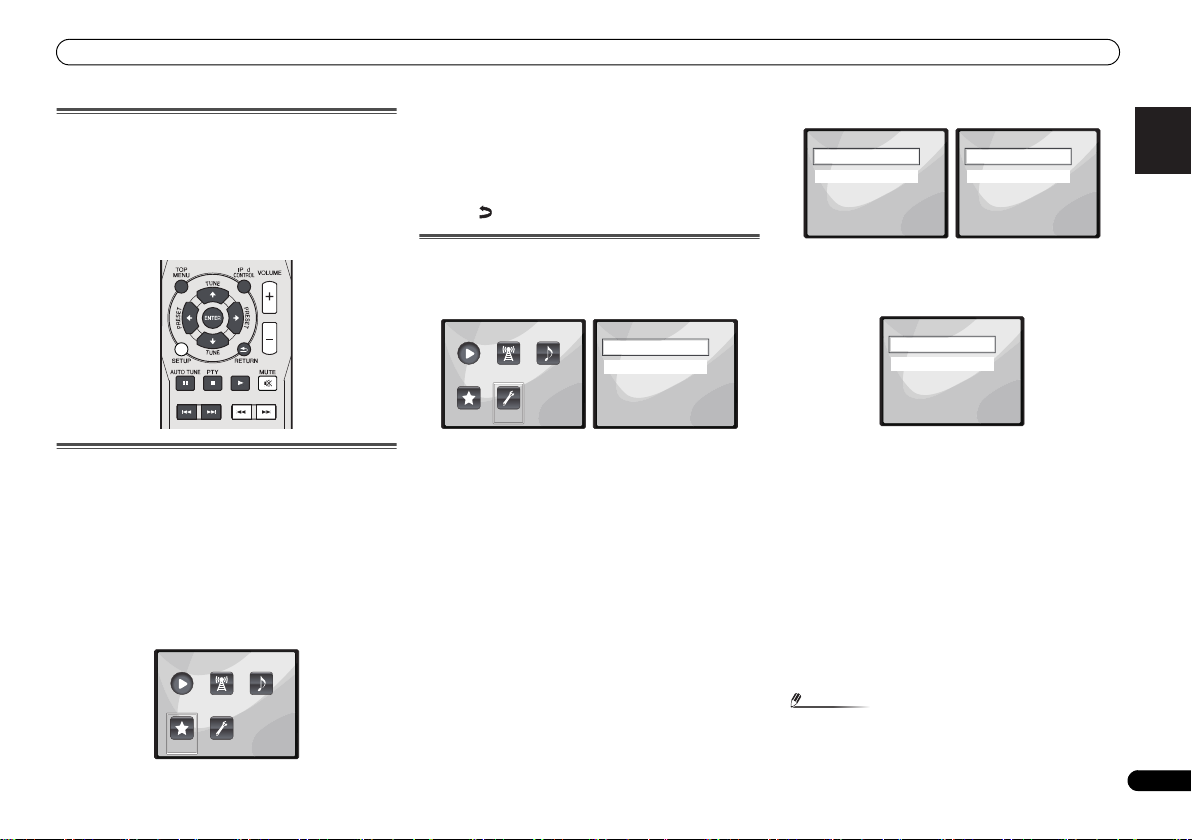
1 Select ‘Settings’ from the Main Menu.
Main Menu
Now Playing
Internet
Radio
Library
Settings
Network
Music
General
1 Select ‘Network’ from the Settings menu.
Settings
Network
General
2 Select ‘Modes’ from the Network Settings menu.
In case you make changes to the network configuration
without the DHCP server function, make the corresponding
changes to the network settings of this receiver.
Network Modes
1 of
1
DHCP
STATIC
Network Settings
Modes
Status
1 of
1
English Français Español Italiano
Deutsch
Playing back your favorite songs
Registering audio files and Internet radio stations
While Playing back a song, press
Favor”, and then press ENTER.
The selected song is then registered in the Favorites folder.
Note that only the audio files stored on components on the
network can be registered.
Playing and deleting audio files and Internet radio
stations in and from the Favorites folder
1 Select ‘Favorites’ from the Main Menu.
/
to select “Add to
Favorites Settings
2 Select the setting you want to adjust.
• Network – Adjust settings for the network (see Network
settings below).
• General – Use to reset all network connection settings to
their initial, factory-setting condition (see General settings
on page 22).
Network settings
In case the router connected to the LAN terminal on this
receiver is a broadband router (with a built-in DHCP server
function), simply turn on the DHCP server function, and you
will not need to set up the network manually. You must set up
the network as described below only when you have
connected this receiver to a broadband router without a
DHCP server function. Before you set up the network, consult
with your ISP or the network manager for the required
settings. It is advised that you also refer to the operation
manual supplied with your network component.
1 of
1
1 of
1
• DHCP (default setting) – Select if the server is DHCP
compatible.
-
When DHCP is selected, connection will begin
automatically. Connection is complete when network
connection details are displayed. Press ENTER to return
to the previous screen.
• STATIC – To connect to the server manually, follow the
instructions listed below.
-
Press to delete the immediately preceding character.
-
Press to switch between character types.
-
Press / to choose the desired character from those
displayed and press ENTER.
-
Once input is complete, or if you wish to cancel the
input operation, press until OK/CANCEL is
displayed, then use / to choose either OK or
CANCEL and press ENTER.
•If STATIC is selected, the settings will be as follows.
Nederlands
21
En
Page 22
Playback with NETWORK feature
-
IP (IP address)
The IP address to be entered must be defined within the
following ranges. If the IP address defined is beyond the
following ranges, you cannot play back audio files
stored on components on the network or listen to
Internet radio stations.
Class A: 10.0.0.1 to 10.255.255.254
Class B: 172.16.0.1 to 172.31.255.254
Class C: 192.168.0.1 to 192.168.255.254
-
MASK (Subnet Mask)
In case an xDSL modem or a terminal adapter is directly
connected to this receiver, enter the subnet mask
provided by your ISP on paper. In most cases, enter
255.255.255.0.
-
Gateway (Default Gateway)
In case a gateway (router) is connected to this receiver,
enter the corresponding IP address.
-
DNS (DNS server)
Enter the DNS server address you received in writing
from your internet service provider.
• Select Status from the Network Settings menu to show
your current network connection mode and details.
General settings
1 Select ‘General’ from the Settings menu.
Settings
Network
General
2 Select the item you want to set up from the General
Settings menu.
• Factory Settings – Use to reset all network connection
settings to their initial, factory-setting condition.
-
When “Warning: All Settings will be lost! Are you
sure?” is displayed, select and press ENTER. While
the settings are being reset, the screen will display a
“Please Wait” message. Resetting is complete once the
screen returns to the Main Menu.
-
To quit the resetting, select .
1 of
1
General Settings
Factory Settings
About
22
En
• About – Displays the MAC address of this receiver.
DLNA
Network connection requirements
The NETWORK allows you to play music on media servers
connected on an identical Local Area Network (LAN) as the
receiver. This unit allows for the playing of files stored on the
following:
• PCs running Microsoft Windows Vista or XP with
Windows Media Player 11 installed
• PCs running Microsoft Windows 7 with Windows Media
Player 12 installed
• DLNA-compatible digital media servers (on PCs or other
components)
To play back audio files stored on components on the
network or listen to Internet radio stations, you must turn on
the DHCP server function of your router. In case your router
does not have the built-in DHCP server function, it is
necessary to set up the network manually. Otherwise, you
cannot play back audio files stored on components on the
network or listen to Internet radio stations. Network setup
menu on page 21 for more on this.
Authorizing this receiver
In order to be able to play with NETWORK, this receiver must
be authorized. This happens automatically when the receiver
makes a connection over the network to the PC. If not, please
authorize this receiver manually on the PC. The authorization
(or permission) method for access varies depending on the
type of server currently being connected. For more
information on authorizing this receiver, refer to the
1 of
instruction manual of your server.
1
About network playback
The network playback function of this unit uses the following
technologies:
Windows Media Player
See Windows Media Player 11/ Windows Media Player 12 on
page 23 for more on this.
DLNA CERTIFIED™ Audio Player
The Digital Living Network Alliance (DLNA) is a crossindustry organization of consumer electronics, computing
industry and mobile device companies. Digital Living
provides consumers with easy sharing of digital media
through a wired or wireless network in the home.
The DLNA certification logo makes it easy to find products
that comply with the DLNA Interoperability Guidelines. This
unit complies with DLNA Interoperability Guidelines v1.5.
When a PC running DLNA server software or other DLNA
compatible device is connected to this player, some setting
changes of software or other devices may be required. Please
refer to the operating instructions for the software or device
for more information.
TM
DLNA
, the DLNA Logo and CERTIFIEDTM are trademarks,
service marks, or certification marks of the Digital Living
Network Alliance.
Content playable over a network
• Even when encoded in a compatible format, some files
may not play correctly.
• Movie or Photo files cannot be played back.
• There are cases where you cannot listen to an Internet
radio station even if the station can be selected from a list
of radio stations.
• Some functions may not be supported depending on the
server type or version used.
• Supported file formats vary by server. As such, files not
supported by your server are not displayed on this unit.
For more information check with the manufacturer of
your server.
Page 23

Playback with NETWORK feature
About playback behavior over a network
• Playback may stall when the PC is switched off or any
media files stored on it are deleted while playing content.
• If there are problems within the network environment
(heavy network traffic, etc.) content may not be displayed
or played properly (playback may be interrupted or
stalled). For best performance, a 100BASE-TX connection
between player and PC is recommended.
• If several clients are playing simultaneously, as the case
may be, playback is interrupted or stalled.
• Depending on the security software installed on a
connected PC and the setting of such software, network
connection may be blocked.
Pioneer is not responsible for any malfunction of the player
and/or the NETWORK features due to communication error/
malfunctions associated with your network connection and/
or your PC, or other connected equipment. Please contact
your PC manufacturer or Internet service provider.
“Windows Media™” is a trademark of Microsoft Corporation.
This product includes technology owned by Microsoft
Corporation and cannot be used or distributed without a
license from Microsoft Licensing, Inc.
Microsoft®, Windows®7, Windows®Vista, Windows®XP,
Windows®2000, Windows®Millennium Edition, Windows®98,
and WindowsNT® are either registered trademarks or
trademarks of Microsoft Corporation in the United States and/
or other countries.
Glossary
aacPlus
AAC decoder uses aacPlus developed by Coding Technologies.
(www.codingtechnologies.com)
FLAC
FLAC (Free Lossless Audio Codec) is an audio format allows
lossless codec. Audio is compressed in FLAC without any
loss in quality. For more details about FLAC, visit the
following website: http://flac.sourceforge.net/
Windows Media
Windows Media is a multimedia framework for media
creation and distribution for Microsoft Windows. Windows
Media is either a registered trademark or trademark of
Microsoft Corporation in the U.S. and/or other countries. Use
an application licensed by Microsoft Corporation to author,
distribute, or play Windows Media formatted content. Using
an application unauthorized by Microsoft Corporation is
subject to malfunction.
Windows Media DRM
Windows Media DRM is a DRM (Digital Rights Management)
service for the Windows Media platform. It is designed to
provide secure delivery of audio and/or video content over an
IP network to a PC or other playback device in such a way that
the distributor can control how that content is used. The
WMDRM-protected content can only be played back on a
component supporting the WMDRM service.
Windows Media Player 11/
Windows Media Player 12
Windows Media Player is software to deliver music, photos
and movies from a Microsoft Windows computer to home
stereo systems and TVs.
With this software, you can play back files stored on the PC
through various devices wherever you like in your home.
This software can be downloaded from Microsoft’s website.
• Windows Media Player 11 (for Windows XP or Windows
Vista)
• Windows Media Player 12 (for Windows 7)
For more information check the official Microsoft website.
English Français Español Italiano
Deutsch
Nederlands
23
En
Page 24
Listening to the radio
Note
Listening to the radio
The following steps show you how to tune in to FM and AM
radio broadcasts using the automatic (search) and manual
(step) tuning functions. Once you are tuned to a station you
can memorize the frequency for recall later. See Saving
station presets below for more on how to do this.
1 Press TUNER to select the tuner.
2 Use BAND to change the band (FM or AM), if necessary.
Each press switches the band between FM (stereo or mono)
and AM.
3 Tune to a station.
There are three ways to do this:
Automatic tuning
To search for stations in the currently selected band,
press and hold TUNE / for about a second. The
receiver will start searching for the next station, stopping
when it has found one. Repeat to search for other
stations.
Manual tuning
To change the frequency one step at a time, press
TUNE /.
High speed tuning
Press and hold TUNE / for high speed tuning.
Release the button at the frequency you want.
– Lights when a normal broadcast channel.
– Lights when a stereo FM broadcast is being received in
auto stereo mode.
24
En
Improving FM sound
If the or indicators don’t light when tuning to an FM
station because the signal is weak, set the receiver to the
mono reception mode.
Press BAND to select FM MONO.
This should improve the sound quality and allow you to enjoy
O
the broadcast.
Saving station presets
If you often listen to a particular radio station, it’s convenient
to have the receiver store the frequency for easy recall
whenever you want to listen to that station. This saves the
effort of manually tuning in each time. This unit can
memorize up to 40 stations.
O
1 Tune to a station you want to memorize.
See Listening to the radio above for more on this.
2 Press TUNER EDIT.
The preset number is blinking.
3 Press PRESET
want.
You can also use the numeric buttons. See Direct track search
on page 14.
4 Press ENTER.
The preset number stop blinking and the receiver stores the
station.
• If the receiver is left disconnected from the AC power
outlet for over a month, the station memories will be lost
and will have to be reprogrammed.
• Stations are stored in stereo. When the station is stored
in the FM MONO mode, it shows as when recalled.
/
to select the station preset you
Listening to station presets
You will need to have some presets stored to do this. See
Saving station presets above if you haven’t done this already.
Press PRESET
want.
You can also use the numeric buttons.
/
to select the station preset you
Naming preset stations
For easier identification, you can name all of your preset
stations.
1 Choose the station preset you want to name.
See Listening to station presets above for how to do this.
2 Press TUNER EDIT twice.
The cursor at the first character position is blinking on the
display.
3 Input the name you want.
Choose a name up to eight characters long.
•Use / to select character position.
•Use / to select characters.
• The name is stored when ENTER is pressed.
Changing the noise cut mode
If you find that the AM sound quality is bad even after trying
the above, you may be able to improve it using a different
noise cut mode. Just choose the one that sounds best.
Default setting: Mode1
1 Press SETUP button after tuning to an AM radio station.
/
2Press
3Press
press ENTER.
to select “Noise Cut”.
/
to choose a Noise cut mode (1, 2 or 3) then
Page 25
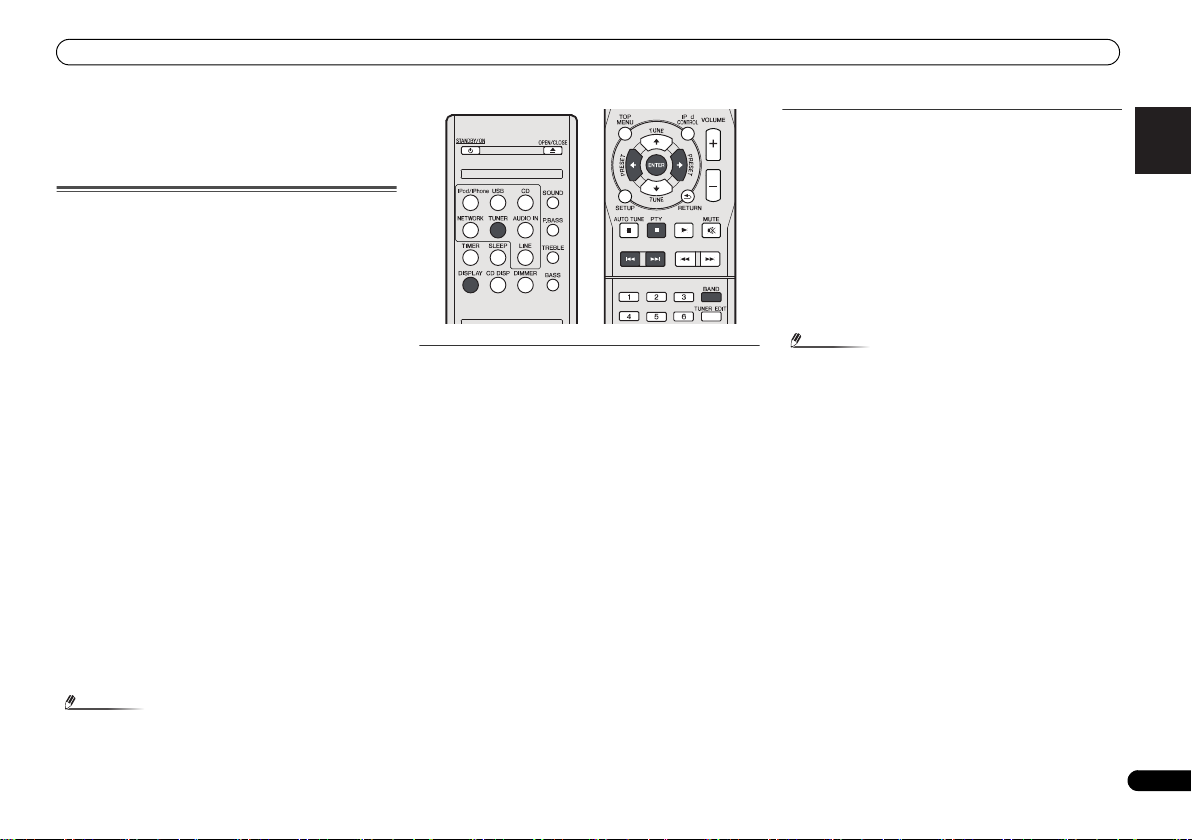
Using the Radio Data System (RDS)
Note
Note
Using the Radio Data
System (RDS)
An introduction to RDS
Radio Data System (RDS) is a system used by most FM radio
stations to provide listeners with various kinds of
information—the name of the station and the kind of show
they’re broadcasting, for example.
On e fe at ure of R DS is t hat yo u ca n se ar ch b y ty pe of p ro gra m.
For example, you can search for a station that’s broadcasting
a show with the program type, JAZZ.
You can search the following program types:
NEWS – News
AFFAIRS – Current Affairs
INFO – General Information
SPORT – Sport
EDUCATE – Educational
DRAMA – Radio plays, etc.
CULTURE – National or
regional culture, theater, etc.
SCIENCE – Science and
technology
VARIED – Usually talk-based
material, such as quiz shows
or interviews.
POP M – Pop music
ROCK M – Rock music
EASY M – Easy listening
LIGHT M – ‘Light’ classical
music
CLASSICS – ‘Serious’ classical
music
OTHER M – Music not fitting
above categories
WEATHER – Weather reports
FINANCE – Stock market
reports, commerce, trading,
etc.
CHILDREN – Programs for
children
SOCIAL – Social affairs
RELIGION – Programs
concerning religion
PHONE IN – Public expressing
their views by phone
TRAVEL – Holiday-type travel
rather than traffic
announcements
LEISURE – Leisure interests
and hobbies
JAZZ – Jazz
COUNTRY – Country music
NATION M – Popular music in
a language other than English
OLDIES – Popular music from
the ’50s and ’60s
FOLK M – Folk music
DOCUMENT – Documentary
O
Searching for RDS programs
You can search for a program type listed above.
1 Press TUNER then press BAND to select the FM band.
• RDS is only possible in the FM band.
2 Press PTY.
SEARCH shows in the display.
3 Press PRESET
want to hear.
4 Press ENTER to search for the program type.
The system starts searching through the station presets for a
match, stopping when it was found one. Repeat to search for
other stations.
If NO PTY is displayed it means the tuner couldn’t find that
program type at the time of the search.
• RDS searches station presets only. If no stations have
been preset, or if the program type could not be found
among the station presets NO PTY is displayed. FINISH
means the search is complete.
/
to select the program type you
Displaying RDS information
Use the DISPLAY button to display the different types of RDS
information available.
Press DISPLAY for RDS information.
Each press changes the display as follows:
• Radio Text (RT) – Messages sent by the radio station. For
example, a talk radio station may provide a phone number
as RT.
• Program Service Name (PS) – The name of the radio
station.
•Program Type (PTY) – This indicates the kind of program
currently being broadcast.
• Current tuner frequency (FREQ)
• If any noise is picked up while displaying the RT scroll,
some characters may be displayed incorrectly.
• If you see NO TEXT in the RT display, it means no RT data
is sent from the broadcast station. The display will
automatically switch to the PS data display (if no PS data,
NO NAME is displayed).
• In the PTY display, NO PTY may be shown.
English Français Español Italiano
Deutsch
Nederlands
• In addition, there are three other program types, ALARM,
ALARMTST, and NO TYPE. ALARM and ALARMTST are
used for emergency announcements. NO TYPE appears
when a program type cannot be found.
25
En
Page 26
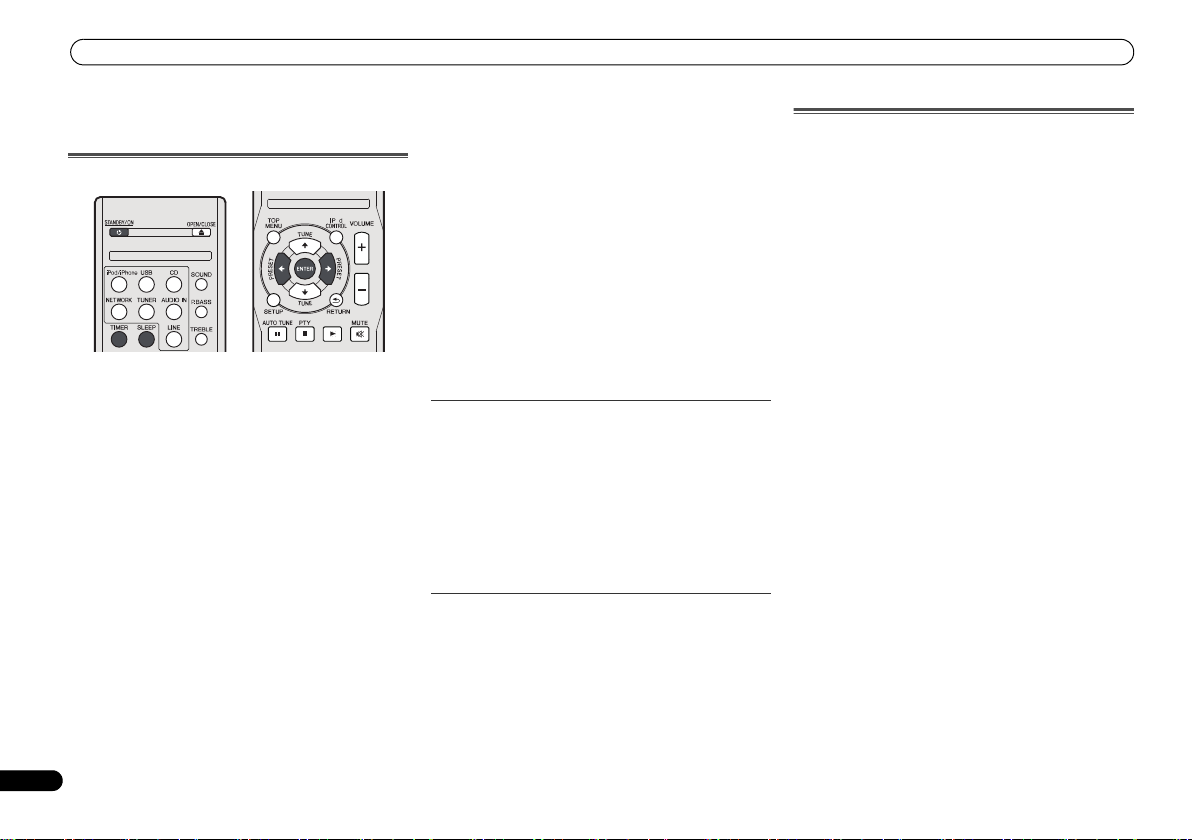
Timer and sleep operation
O
Timer and sleep operation
Setting the wake-up timer
Timer playback:
The unit turns on and plays the desired source (CD, TUNER,
USB or iPod/iPhone) at a preset time.
Before setting timer:
• Check that the clock is set to the correct time (Setting the
clock on page 11). If it is not set, you cannot use the timer
function.
• For timer playback: Plug in USB or load discs or iPod to
be played.
1 Press STANDBY/ON button.
2 Press and hold TIMER button for more than two
seconds.
/
3Press
seconds, then press ENTER.
4 Select the source you want played.
Use / button to select CD, TUNER, USB or iPod/iPhone
function.
5 Press ENTER.
6 Set the day(s) of the week.
Use /button to choose the day(s).
button to select ‘Timer Set’ within ten
The timer can be set as follows.
EVERYDAY SUNDAY MONDAY
TUESDAY WEDNESDAY THURSDAY
FRIDAY SATURDAY MON-FRI
TUE-SAT SAT-SUN
7 Press ENTER.
8 Set the switch-on time.
Use /button to set the hour, then press ENTER.
Set the minute in the same way, pressing ENTER when you’re
done.
9 Set the switch-off time.
Set as above, pressing
10 Use
/
11 Press ENTER.
The TIMER indicator light, and the settings are confirmed in
the display.
12 Press STANDBY/ON to enter the power stand-by mode.
ENTER
button to set the volume.
when done.
Turning the wake-up timer on/off
If you have already set the wake-up timer, you can switch it
on/off.
1 When the power is on, press and hold TIMER button for
two seconds.
2Press
/
within ten seconds, then press ENTER.
When ‘
the settings are confirmed in the display.
3 When ‘Timer On’ is selected, press STANDBY/ON to set
the stand-by mode.
button to select ‘Timer On’ or ‘Timer Off’
Timer On
’ is selected, the timer indicator light, and
Reusing the memorised timer setting
The timer setting will be memorised once it is entered. To
reuse the same setting, perform the following operations.
1 When the power is on, press and hold TIMER button for
two seconds.
/
2Press
seconds, then press ENTER.
The TIMER indicator light, and the settings are confirmed in
the display.
button to select ‘Timer Call’ within ten
Sleep operation
Press SLEEP to change the amount of time before the
receiver switches into standby (30 min. – 60 min. – 90
min. – Off).
• You can check the remaining sleep time at any time by
pressing SLEEP once.
26
En
Page 27

Additional Information
Additional Information
Troubleshooting chart
Many potential problems can be resolved by the owner
without calling a service technician.
If something is wrong with this product, check the following
before calling your authorized PIONEER dealer or service
centre.
General
The clock is not set to the correct time.
Did a power failure occur?
Reset the clock. (Refer to page 11)
When a button is pressed, the unit does not respond.
Set the unit to the power stand-by mode and then turn it back
on.
If the unit still malfunctions, reset it. (Refer to page 29)
No sound is heard.
Is the volume level set to “Min”?
Are the headphones connected?
Are the speaker wires disconnected?
CD player
Playback does not start.
Playback stops in the middle or is not performed properly.
Is the disc loaded upside down?
Does the disc satisfy the standards?
Is the disc distorted or scratched?
Playback sounds are skipped, or stopped in the middle of a
track.
Is the unit located near excessive vibrations?
Is the disc very dirty?
Has condensation formed inside the unit?
Remote control
The remote control does not operate.
Is the AC power lead of the unit plugged in?
Is the battery polarity correct?
Are the batteries dead?
Is the distance or angle incorrect?
Does the remote control sensor receive strong light?
Tuner
The radio makes unusual noises continuously.
Is the unit placed near the TV or computer?
Is the FM aerial or AM loop aerial placed properly? Move the
aerial away from the AC power lead if it is located nearby.
USB
Device cannot be detected.
Is there any MP3/WMA file available?
Is the device properly connected?
Is it an MTP device?
Does the device contain AAC file only?
Playback does not start.
Is it a copyright protected WMA file?
Is it a false MP3 file?
iPod and iPhone
No sound is produced. No image appears on the TV/monitor.
The iPod or iPhone is not playing.
The iPod or iPhone is not properly connected to the unit.
Is the AC power lead of the unit plugged in?
The video cable is not properly connected.
The TV/monitor’s input selection is not properly set.
Audio from the iPod/iPhone cannot be heard via the
headphones connected to the unit.
iPod or iPhone will not charge.
The iPod or iPhone is not making full contact with the
connector.
Using iPod (3rd generation).
The iPod or iPhone is not supported. Refer to Supported iPod,
iPhone and iPad models: on page 17 for compatible models.
“This accessory is not made to work with iPhone” or “This
accessory is not supported by iPhone” appears on iPhone
screen.
The iPhone battery is low. Please charge the iPhone.
iPhone is not properly docked.
NETWORK feature
Cannot access the network.
The LAN cable is not firmly connected. Firmly connect the
LAN cable (page 10).
The router is not switched on. Switch on the router.
Internet security software is currently installed in the
connected component. There are cases where a component
with Internet security software installed cannot be accessed.
The audio component on the network which has been
switched off is switched on. Switch on the audio component
on the network before switching on this receiver.
Playback does not start while ‘Please Wait’ continues to be
displayed.
The component is currently disconnected from this receiver or
the power supply. Check whether the component is properly
connected to this receiver or the power supply.
The PC or Internet radio is not properly operated.
The corresponding IP address is not properly set. Switch on
the built-in DHCP server function of your router, or set up the
network manually according to your network environment
(page 21).
The IP address is being automatically configured. The
automatic configuration process takes time. Please wait.
The audio files stored on components on the network, such
as a PC, cannot be played back.
Windows Media Player 11 or Windows Media Player 12 is not
currently installed on your PC. Install Windows Media Player
11 or Windows Media Player 12 on your PC.
Audio files were recorded in formats other than MP3, WAV
(LPCM only), MPEG-4 AAC, FLAC, and WMA. Play back audio
files recorded in MP3, WAV (LPCM only), MPEG-4 AAC, FLAC,
or WMA. Note that some audio files recorded in these formats
may not be played back on this receiver.
Audio files recorded in MPEG-4 AAC or FLAC are being played
back on Windows Media Player 11 or Windows Media Player
12. Audio files recorded in MPEG-4 AAC or FLAC cannot be
played back on Windows Media Player 11 or Windows Media
Player 12. Try using another server. Refer to the operation
manual supplied with your server.
The component connected to the network is not properly
operated.
-
Check whether the component is affected by special
circumstances or is in the sleep mode.
-
Try rebooting the component if necessary.
The component connected to the network does not permit file
sharing. Try changing the settings for the component
connected to the network.
The folder stored on the component connected to the network
has been deleted or damaged. Check the folder stored on the
component connected to the network.
English Français Español Italiano
Deutsch
Nederlands
27
En
Page 28

Additional Information
Cannot access the component connected to the network.
The component connected to the network is not properly set. If
the client is automatically authorized, you need to enter the
corresponding information again. Check whether the
connection status is set to “Do not authorize”.
There are no playable audio files on the component connected
to the network. Check the audio files stored on the component
connected to the network.
Audio playback is undesirably stopped or disturbed.
The audio file currently being played back was not recorded in
a format playable on this receiver.
-
Check whether the audio file was recorded in a format
supported by this receiver.
-
Check whether the folder has been damaged or corrupted.
-
Note that there are cases where even the audio files listed as
playable on this receiver cannot be played back or displayed
(page 22).
The LAN cable is currently disconnected. Connect the LAN
cable properly (page 10).
There is heavy traffic on the network with the Internet being
accessed on the same network. Use 100BASE-TX to access
the components on the network.
Cannot access Windows Media Player 11 or Windows Media
Player 12.
In case of Windows Media Player 11: You are currently logged
onto the domain through your PC with Windows XP or
Windows Vista installed. Instead of logging onto the domain,
log onto the local machine (page 20).
In case of Windows Media Player 12: You are currently logged
onto the domain through your PC with Windows 7 installed.
Instead of logging onto the domain, log onto the local
machine (page 20).
Cannot listen to Internet radio stations.
The firewall settings for components on the network are
currently in operation. Check the firewall settings for
components on the network.
You are currently disconnected from the Internet. Check the
connection settings for components on the network, and
consult with your network service provider if necessary
(page 21).
The broadcasts from an Internet radio station are stopped or
interrupted. There are cases where you cannot listen to some
Internet radio stations even when they are listed in the list of
Internet radio stations on this receiver (page 20).
28
En
The NETWORK function cannot be operated with the
buttons on the remote control.
The remote control is not currently set to the NETWORK
mode. Press NETWORK to set the remote control to the
NETWORK mode (page 20).
Troubleshooting of wireless LAN
Network cannot be accessed via wireless LAN.
Wireless LAN converter’s power is not on (Wireless LAN
converter’s “Power”, “WPS” and “Wireless” indicators are not
all lit). Check that the USB cable connecting the wireless LAN
converter to the receiver’s DC OUTPUT for WIRELESS LAN
terminal is properly connected.
The LAN cable is not firmly connected. Firmly connect the
LAN cable (page 10).
Wireless LAN converter and base unit (wireless LAN router,
etc.) are too far apart or there is an obstacle between them.
Improve the wireless LAN environment by moving the wireless
LAN converter and base unit closer together, etc.
There is a microwave oven or other device generating
electromagnetic waves near the wireless LAN environment.
-
Use the system in a place away from microwave ovens or
others device generating electromagnetic waves.
-
Avoid using devices generating electromagnetic waves as
much as possible when using the system with the wireless
LAN.
Multiple wireless LAN converters are connected to the
wireless LAN router. When connecting multiple wireless LAN
converters, their IP addresses must be changed. For example,
if the wireless LAN router’s IP address is “192.168.1.1”, set the
first wireless LAN converter’s IP address to “192.168.1.249”,
the second wireless LAN converter’s IP address to
“192.168.1.248”, using values between 2 and 249 (such as
“249” and “248”) that are not assigned to other wireless LAN
converters or to other devices.
Wireless LAN connections cannot be established between the
wireless LAN converter and base unit (wireless LAN router,
etc.).
-
With the wireless LAN converter connected to the receiver,
turn the receiver’s power off, unplug the power cord from the
power outlet, then plug the power cord back in and turn the
receiver’s power on.
-
The wireless LAN converter must be set in order to establish
wireless LAN connections. For details, refer to the operating
instructions of the wireless LAN converter.
The wireless LAN converter is properly connected to the
receiver and the wireless LAN converter’s indicators are lit,
but the wireless LAN converter cannot be set from the receiver
(the settings screen cannot be displayed).
If Network Modes in the receiver’s Network Settings is set
to STATIC and the IP address has been set manually, the IP
address set in the wireless LAN converter may not match. In
the receiver’s Network Settings, set Network Modes to
DHCP. After the setting is completed, turn the receiver’s
power off. Next, turn the receiver’s power back on and check
whether the wireless LAN converter’s settings can be
displayed with the receiver.
If the settings can be displayed, change the IP address
settings of the receiver and wireless LAN converter as
necessary.
The IP address settings of the receiver and wireless LAN
converter do not match the settings of the wireless LAN
router, etc.
Check the IP address settings of the receiver and wireless
LAN converter (including the Network Modes).
If the receiver’s Network Modes is DHCP, turn the receiver’s
power off, then turn the power back on.
Check that the IP addresses of the receiver and wireless LAN
converter match the settings of the wireless LAN router, etc.
If the receiver’s Network Modes is STATIC, set an IP address
matching the network of the base unit (wireless LAN router,
etc.).
For example, if the wireless LAN router’s IP address is
“192.168.1.1”, set the receiver’s IP address to “192.168.1.XXX”
(*1), the subnet mask to “255.255.255.0”, the gateway and
DNS to “192.168.1.1”.
Next, set the wireless LAN converter’s IP address to
“192.168.1.249” (*2).
(*1) Set the “XXX” in “192.168.1.XXX” to a number between 2
and 248 that is not assigned to other devices.
(*2) Set the “249” in “192.168.1.249” to a number between 2
and 249 that is not assigned to other devices.
Try making the wireless LAN converter’s advanced settings.
The wireless LAN converter can be connected to a computer
to make the advanced wireless LAN settings. For details, see
the CD-ROM included for the wireless LAN converter. Check
the settings of the wireless LAN router, etc., then change the
settings of the wireless LAN converter.
Note, however, that making the advanced wireless LAN
settings will not necessarily improve the wireless LAN
environment. Be careful when changing the settings.
The access point is set to conceal the SSID. In this case, the
SSID may not be displayed on the access point list screen. If
Page 29
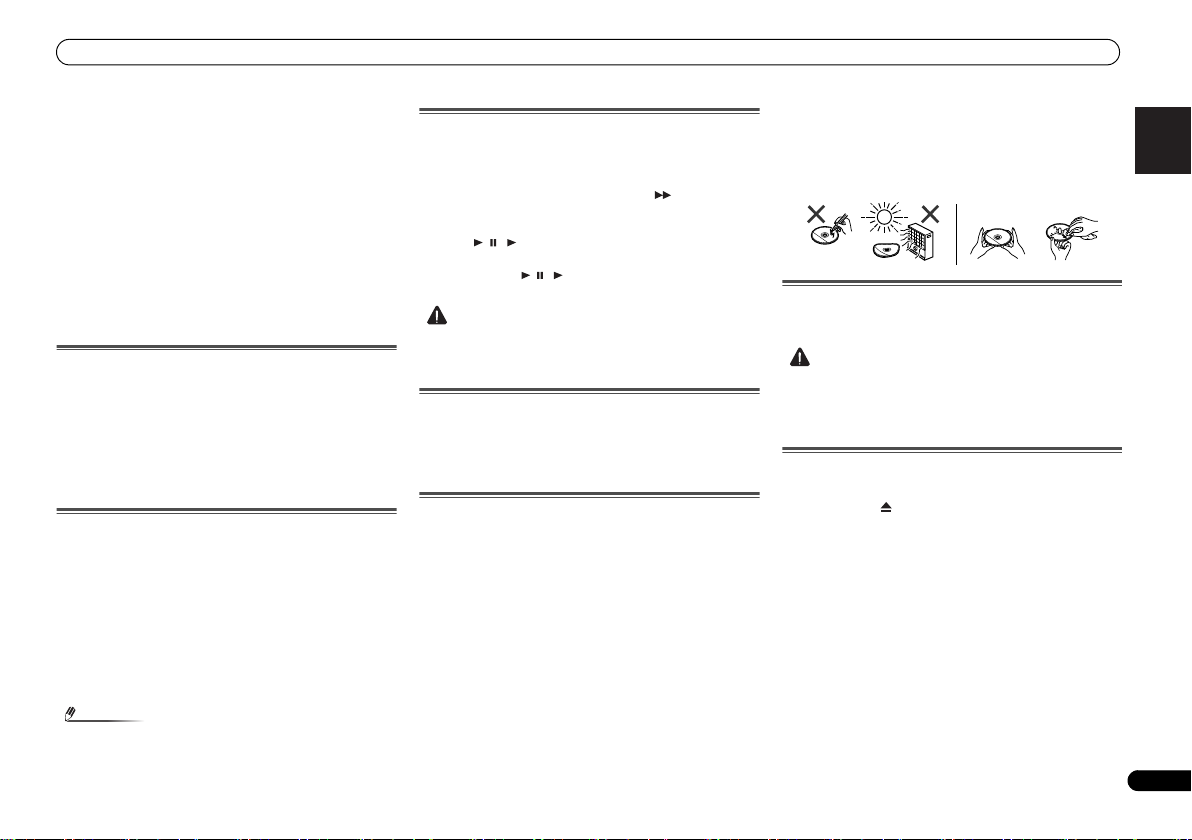
Additional Information
Note
CAUTION
CAUTION
YES
Correct
NO
not, set the SSID, etc., by making the wireless LAN converter
settings on the receiver manually.
The access point’s security settings use WEP 152-bit length
code key or shared key authentication. The receiver does not
support WEP 152-bit length code key or shared key
authentication.
Network connections cannot be established even when the
above measures are taken. Reset the wireless LAN converter.
After this, redo the wireless LAN converter’s settings.
-
About resetting
1. Check that the wireless LAN converter’s power is on.
2. Press the wireless LAN converter’s reset button for at least
3 seconds.
3. Release the reset button.
When the wireless LAN converter is restarted, the resetting
procedure is completed.
Condensation
Sudden temperature changes, storage or operation in an
extremely humid environment may cause condensation
inside the cabinet (CD pickup, etc.) or on the transmitter on
the remote control. Condensation can cause the unit to
malfunction. If this happens, leave the power on with no disc
in the unit until normal playback is possible (about 1 hour).
Wipe off any condensation on the transmitter with a soft
cloth before operating the unit.
If problem occurs
When this product is subjected to strong external
interference (mechanical shock, excessive static electricity,
abnormal supply voltage due to lightning, etc.) or if it is
operated incorrectly, it may malfunction.
If such a problem occurs, do the following:
1 Set the unit to the stand-by mode and turn the power
on again.
2 If the unit is not restored in the previous operation,
unplug and plug in the unit again, and then turn the
power on.
Factory reset, clearing all memory
If iPod or iPhone is connected to the unit, disconnect it.
1 Press the STANDBY/ON button to enter the power
stand-by mode.
2 Press both STANDBY/ON button and button on the
unit.
‘RESET YES?’ appears.
3 Press / ( ) button.
‘RESET...’ appears.
If you don’t press / ( ) button within 10 minutes after
STEP 2, RESET MODE is canceled.
• This operation will erase all data stored in memory
including clock, timer settings, tuner preset, and CD
programme.
Before transporting the unit
Remove the iPod, USB memory device and disc from the
unit. Then, set the unit to the power stand-by mode. Carrying
the unit with iPod or USB memory device left docked or discs
left inside might damage the unit.
Care of compact discs
Compact discs are fairly resistant to damage, however
mistracking can occur due to an accumulation of dirt on the
disc surface. Follow the guidelines below for maximum
enjoyment from your CD collection and player.
• Do not write on either side of the disc, particularly the
non-label side from which signals are read. Do not mark
this surface.
• Keep your discs away from direct sunlight, heat, and
excessive moisture.
• Always hold the CDs by the edges. Fingerprints, dirt, or
water on the CDs can cause noise or mistracking. If a CD
is dirty or does not play properly, clean it with a soft, dry
cloth, wiping straight out from the centre, along the
radius.
Cleaning the cabinet
Periodically wipe the cabinet with a soft cloth and a diluted
soap solution, then with a dry cloth.
• Do not use chemicals for cleaning (petrol, paint thinner,
etc.). It may damage the cabinet.
• Do not apply oil to the inside of the unit. It may cause
malfunctions.
Caution for when the unit is installed in a rack
with a glass door
Do not press the OPEN/CLOSE on the remote control to
open the disc tray while the glass door is closed. The door will
hamper the movement of the disc tray, and the unit could be
damaged.
English Français Español Italiano
Deutsch
Nederlands
• If neither operation above restores the unit, clear all the
memory by resetting it.
29
En
Page 30

Additional Information
About playable music file formats
The USB and NETWORK function of this receiver supports the following music file formats.
• Note that some file formats are not available for playback although they are listed as
playable file formats. Also, the compatibility of file formats varies depending on the type of
server. Check with your server to ensure the compatibility of file formats supported by your
server.
Category Extension Stream
a
MP3
WAV .wav LPCM Sampling frequency 44.1 kHz, 48 kHz, 96 kHz
WMA .wma WMA2/7/8 Sampling frequency 44.1 kHz to 48 kHz
AAC .m4a
.mp3 MPEG-1 Audio
.aac
Layer-3
WMA9 Sampling frequency 44.1 kHz to 48 kHz
MPEG-4 AAC LC
MPEG-4 HE AAC
(aacPlus v1/2)
Sampling frequency 44.1 kHz to 48 kHz
Quantization bitrate 16 bit
Channel 2 ch
Bitrate 32 kbps to 320 kbps
VBR/CBR Supported/Supported
Quantization bitrate 16 bit, 20 bit, 24 bit
Channel 2 ch
Quantization bitrate 16 bit
Channel 2 ch
Bitrate 32 kbps to 320 kbps
VBR/CBR Supported/Supported
Quantization bitrate 16 bit
Channel 2 ch
Bitrate 32 kbps to 320 kbps
VBR/CBR Supported/Supported
Sampling frequency 44.1 kHz to 48 kHz
Quantization bitrate 16 bit
Channel 2 ch
Bitrate 16 kbps to 320 kbps
VBR/CBR Supported/Supported
30
En
Category Extension Stream
FLAC .flac FLAC Sampling frequency 44.1 kHz, 48 kHz, 96 kHz
Quantization bitrate 16 bit, 24 bit
Channel 2 ch
Bitrate —
a “MPEG Layer-3 audio decoding technology licensed from Fraunhofer IIS and Thomson multimedia.”
About status messages
Refer to the following information when you come up with a status message while operating
the NETWORK function.
Status messages Descriptions
List empty, Add from Now Playing... The list is empty. Please add from Now Playing.
No item There are no items.
Rescanning devices... Rescanning. Please wait.
Unsupported Format This format is not supported.
Server Connection Error Cannot connect to server.
Error opening stream This is a stream error.
Already in favorites This is already registered in your favorites.
Unsupported item This item is not supported by this receiver.
Unknown error An unidentified error has occurred.
Connection Error... Cannot connect to network.
Page 31

Additional Information
Specifications
As part of our policy of continuous improvement, PIONEER
reserves the right to make design and specification changes
for product improvement without prior notice. The
performance specification figures indicated are nominal
values of production units. There may be some deviations
from these values in individual units.
*The specifications are applicable when the power supply is
230 V.
Amplifier section
RMS Power Output . . . . . . . . . . . . . . . . . . . . . . .50 W + 50 W
Guaranteed speaker impedance. . . . . . . .4 ohms to 16 ohms
Headphones . . . . . . . . . . . . . . . . . . . recommended: 32 ohms
Tuner section
Frequency Range (FM). . . . . . . . . . . . . . 87.5 MHz to 108 MHz
Antenna Input (FM) . . . . . . . . . . . . . . . . 75 ohms unbalanced
Frequency Range (AM) . . . . . . . . . . . . . . 531 kHz to 1602 kHz
Antenna (AM) . . . . . . . . . . . . . . . . . . . . . . . . . . . Loop antenna
Video section
Signal level (Composite) . . . . . . . . . . . . . . . .1 Vp-p (75 ohms)
Network section
LAN terminal. . . . . . . . . . . . . . . . . . . . . . . . . . . . .Ethernet jack
Other connectors
Power supply
Front USB connector. . . . . . . . . . . . . . . . . . . . . . . 5 V, 2.1 A
iPod connector. . . . . . . . . . . . . . . . . . . . . . . . . . . . 5 V, 1.0 A
Rear DC output connector (for Wireless LAN)
. . . . . . . . . . . . . . . . . . . . . . . . . . . . . . . . . . . . . . . 5 V, 600 mA
Miscellaneous
Power source . . . . . . . . . . . . . . . . . . AC 220 V to 240 V, 50 Hz
Power consumption
Power on. . . . . . . . . . . . . . . . . . . . . . . . . . . . . . . . . . . . .80 W
Power stand-by. . . . . . . . . . . . . . . . . . . . . . . . . 0.5 W or less
Dimensions
Width. . . . . . . . . . . . . . . . . . . . . . . . . . . . . . . . . . . . . 215 mm
Height . . . . . . . . . . . . . . . . . . . . . . . . . . . . . . . . . . . . 111 mm
Depth. . . . . . . . . . . . . . . . . . . . . . . . . . . . . . . . . . . . . 353 mm
(1 kHz, 10 % T.H.D., 4 ohms)
10BASE-T/100BASE-TX
Weight . . . . . . . . . . . . . . . . . . . . . . . . . . . . . . . . . . . . . . . .4.7 kg
Speaker (X-HM70 only)
Type
2-way type speaker system
2.5 cm Dome-Tweeter
12 cm Woofer
Maximum input power. . . . . . . . . . . . . . . . . . . . . . . . . . . .50 W
Impedance . . . . . . . . . . . . . . . . . . . . . . . . . . . . . . . . . . .4 ohms
Dimensions
Width . . . . . . . . . . . . . . . . . . . . . . . . . . . . . . . . . . . . . 148 mm
Height . . . . . . . . . . . . . . . . . . . . . . . . . . . . . . . . . . 263.5 mm
Depth. . . . . . . . . . . . . . . . . . . . . . . . . . . . . . . . . . . . . 208 mm
Weight . . . . . . . . . . . . . . . . . . . . . . . . . . . . . . . . . . . 2.7 kg/each
About iPod/iPhone/iPad
“Made for iPod,” “Made for iPhone” and “Made for iPad”
mean that an electronic accessory has been designed to
connect specifically to iPod, iPhone, or iPad, respectively,
and has been certified by the developer to meet Apple
performance standards. Apple is not responsible for the
operation of this device or its compliance with safety and
regulatory standards. Please note that the use of this
accessory with iPod, iPhone, or iPad may affect wireless
performance.
iPad, iPhone, iPod, iPod classic, iPod nano and iPod touch are
trademarks of Apple Inc., registered in the U.S. and other
countries.
Disclaimer for Third Party Content
Access to content provided by third parties requires a high
speed internet connection and may also require account
registration and a paid subscription.
Third party content services may be changed, suspended,
interrupted, or discontinued at any time without notice, and
Pioneer disclaims any liability in connection with such
occurrences.
Pioneer does not represent or warrant that content services
will continue to be provided or available for a particular
period of time, and any such warranty, express or implied, is
disclaimed.
© 2011 PIONEER CORPORATION.
All rights reserved.
English Français Español Italiano
Deutsch
Nederlands
31
En
Page 32

IMPORTANT
Ce symbole de l’éclair, placé dans un
triangle équilatéral, a pour but d’attirer
l’attention de l’utilisateur sur la présence, à
l’intérieur du coffret de l’appareil, de
“tensions dangereuses” non isolées d’une
grandeur suffisante pour représenter un
risque d’électrocution pour les êtres
humains.
ATTENTION
DANGER D´ELECTROCUTION
NE PAS OUVRIR
ATTENTION :
POUR ÉVITER TOUT RISQUE
D’ÉLECTROCUTION, NE PAS ENLEVER LE
COUVERCLE (NI LE PANNEAU ARRIÈRE).
AUCUNE PIÈCE RÉPARABLE PAR
L’UTILISATEUR NE SE TROUVE À
L’INTÉRIEUR. CONFIER TOUT ENTRETIEN À
UN PERSONNEL QUALIFIÉ UNIQUEMENT.
Ce point d’exclamation, placé dans un
triangle équilatéral, a pour but d’attirer
l’attention de l’utilisateur sur la présence,
dans les documents qui accompagnent
l’appareil, d’explications importantes du
point de vue de l’exploitation ou de
l’entretien.
D3-4-2-1-1_A1_Fr
PRÉCAUTION DE VENTILATION
Lors de l’installation de l’appareil, veillez à laisser un
espace suffisant autour de ses parois de manière à
améliorer la dissipation de chaleur (au moins 10 cm sur
le dessus, 10 cm à l’arrière et 10 cm de chaque côté).
10 cm 10 cm
10 cm
TIMER
10 cm
AVERTISSEMENT
Cet appareil n’est pas étanche. Pour éviter les risques
d’incendie et de décharge électrique, ne placez près de
lui un récipient rempli d’eau, tel qu’un vase ou un pot de
fleurs, et ne l’exposez pas à des gouttes d’eau, des
éclaboussures, de la pluie ou de l’humidité.
AVERTISSEMENT
Avant de brancher l’appareil pour la première, lisez
attentivement la section suivante.
La tension de l’alimentation électrique disponible
varie selon le pays ou la région. Assurez-vous que
la tension du secteur de la région où l’appareil sera
utilisé correspond à la tension requise (par ex. 230
V ou 120 V), indiquée sur le panneau arrière.
AVERTISSEMENT
Pour éviter les risques d’incendie, ne placez aucune
flamme nue (telle qu’une bougie allumée) sur
l’appareil.
2
Fr
D3-4-2-1-3_A1_Fr
D3-4-2-1-4*_A1_Fr
D3-4-2-1-7a_A1_Fr
Milieu de fonctionnement
Température et humidité du milieu de fonctionnement :
De +5 °C à +35 °C (de +41 °F à +95 °F) ; Humidité
relative inférieure à 85 % (orifices de ventilation non
obstrués)
N’installez pas l’appareil dans un endroit mal ventilé ou
un lieu soumis à une forte humidité ou en plein soleil
(ou à une forte lumière artificielle).
Si la fiche d’alimentation secteur de cet appareil ne
convient pas à la prise secteur à utiliser, la fiche doit
être remplacée par une appropriée. Ce
remplacement et la fixation d’une fiche secteur sur le
cordon d’alimentation de cet appareil doivent être
effectués par un personnel de service qualifié. En cas
de branchement sur une prise secteur, la fiche de
coupure peut provoquer une sérieuse décharge
électrique. Assurez-vous qu’elle est éliminée
correctement après sa dépose.
L’appareil doit être déconnecté en débranchant sa
fiche secteur au niveau de la prise murale si vous
prévoyez une période prolongée de non utilisation
(par exemple avant un départ en vacances).
D3-4-2-1-7c*_A1_Fr
D3-4-2-2-1a_A1_Fr
AVERTISSEMENT
Les fentes et ouvertures du coffret sont prévues pour la
ventilation, pour assurer un fonctionnement stable de
l’appareil et pour éviter sa surchauffe. Pour éviter les
risques d’incendie, ne bouchez jamais les ouvertures et
ne les recouvrez pas d’objets, tels que journaux, nappes
ou rideaux, et n’utilisez pas l’appareil posé sur un tapis
épais ou un lit.
ATTENTION
L’interrupteur STANDBY/ON de cet appareil ne
coupe pas complètement celui-ci de sa prise secteur.
Comme le cordon d’alimentation fait office de
dispositif de déconnexion du secteur, il devra être
débranché au niveau de la prise secteur pour que
l’appareil soit complètement hors tension. Par
conséquent, veillez à installer l’appareil de telle
manière que son cordon d’alimentation puisse être
facilement débranché de la prise secteur en cas
d’accident. Pour éviter tout risque d’incendie, le
cordon d’alimentation sera débranché au niveau de
la prise secteur si vous prévoyez une période
prolongée de non utilisation (par exemple avant un
départ en vacances).
D3-4-2-1-7b*_A1_Fr
D3-4-2-2-2a*_A1_Fr
Page 33

Information à destination des utilisateurs sur la collecte et l’élimination des
équipements et batteries usagés
Marquage pour les
équipements
Exemples de marquage
pour les batteries
Pb
Ces symboles qui figurent sur les produits, les emballages et/ou les documents
d’accompagnement signifient que les équipements électriques et électroniques et
batteries usagés ne doivent pas être jetés avec les déchets ménagers et font l’objet
d’une collecte sélective.
Pour assurer l’enlèvement et le traitement appropriés des produits et batteries
usagés, merci de les retourner dans les points de collecte sélective habilités
conformément à la législation locale en vigueur.
En respectant les circuits de collecte sélective mis en place pour ces produits, vous
contribuerez à économiser des ressources précieuses et à prévenir les impacts
négatifs éventuels sur la santé humaine et l’environnement qui pourraient résulter
d’une mauvaise gestion des déchets.
Pour plus d’information sur la collecte et le traitement des produits et batteries
usagés, veuillez contacter votre municipalité, votre service de gestion des déchets
ou le point de vente chez qui vous avez acheté ces produits.
Ces symboles ne sont valables que dans les pays de l’Union Européenne.
Pour les pays n’appartenant pas à l’Union Européenne :
Si vous souhaitez jeter ces articles, veuillez contacter les autorités ou revendeurs
locaux pour connaître les méthodes d’élimination appropriées.
ATTENTION
Cet appareil est un produit laser de Classe 1, classé
selon l’article IEC 60825-1:2007 relatif à la Sécurité
des produits laser.
APPAREIL À LASER DE CLASSE 1
K058a_A1_Fr
Condensation
Si vous transportez sans transition le lecteur d’un
endroit froid dans un pièce chaude (en hiver, par
exemple), ou si la température de la pièce où se trouve
le lecteur augmente rapidement, des gouttelettes d’eau
(condensation) peuvent se former à l’intérieur du
lecteur (sur les pièces et la lentille). En cas de
condensation, le lecteur ne fonctionne pas
correctement et la lecture n’est pas possible. Laissez le
lecteur en service pendant 1 ou 2 heures à la
température ambiante (pour que l’humidité ait le temps
de s’évaporer). Les gouttelettes d’eau se dissiperont et
la lecture sera de nouveau possible.
De la condensation peut aussi se former en été si le
lecteur est exposé à l’air d’un climatiseur. Dans ce cas,
éloignez le lecteur du climatiseur.
Ce produit est destiné à une utilisation domestique
générale. Toute panne due à une utilisation autre qu'à
des fins privées (comme une utilisation à des fins
commerciales dans un restaurant, dans un autocar
ou sur un bateau) et qui nécessite une réparation
sera aux frais du client, même pendant la période de
garantie.
S005_A1_Fr
K041_A1_Fr
English Français Español Italiano
Deutsch
Nederlands
D58-5-2-2a_A2_Fr
3
Fr
Page 34

Nous vous remercions d’avoir porté votre choix sur ce produit PIONEER. Pour en tirer le meilleur parti, veuillez lire ce mode d’emploi très attentivement. Il vous guidera dans l’utilisation de
votre produit PIONEER.
Table des matières
Accessoires. . . . . . . . . . . . . . . . . . . . . . . . . . . . . . 4
Préparatifs . . . . . . . . . . . . . . . . . . . . . . . . . . . . . . 5
Généralités . . . . . . . . . . . . . . . . . . . . . . . . . . . . . . . . . . . . 5
Mise en place des piles. . . . . . . . . . . . . . . . . . . . . . . . . . . 5
Commandes et affichages . . . . . . . . . . . . . . . . . 6
Télécommande . . . . . . . . . . . . . . . . . . . . . . . . . . . . . . . . . 6
Panneau avant . . . . . . . . . . . . . . . . . . . . . . . . . . . . . . . . .7
Système d’enceintes (X-HM70 uniquement) . . . . . . . . . . . 7
Raccordement de votre équipement. . . . . . . . . 8
Raccordement des antennes. . . . . . . . . . . . . . . . . . . . . . . 8
Raccordement des enceintes . . . . . . . . . . . . . . . . . . . . . . 9
Utilisation d’un autre woofer auxiliaire . . . . . . . . . . . . . . . 9
Raccordement d’un téléviseur, etc.. . . . . . . . . . . . . . . . . . 9
Raccordement au réseau par l’interface LAN . . . . . . . . . 10
Branchement du cordon d’alimentation . . . . . . . . . . . . . 10
Commandes générales . . . . . . . . . . . . . . . . . . . 11
Pour allumer l’appareil . . . . . . . . . . . . . . . . . . . . . . . . . . 11
Réglage de l'horloge . . . . . . . . . . . . . . . . . . . . . . . . . . . . 11
Enrichissement du système . . . . . . . . . . . . . . . . . . . . . . 12
Écoute de disques MP3/WMA ou CD . . . . . . . . 13
Lecture de disque . . . . . . . . . . . . . . . . . . . . . . . . . . . . . . 13
Diverses fonctions de disque. . . . . . . . . . . . . . . . . . . . . . 13
Lecture avancée de disques MP3/WMA ou CD . . . . . . . . 14
Mode dossier MP3/WMA (seulement pour des fichiers
MP3/WMA) . . . . . . . . . . . . . . . . . . . . . . . . . . . . . . . . . . . 15
Écoute de l’iPod, iPhone et iPad . . . . . . . . . . . 17
Modèles d’iPod, iPhone et iPad pris en charge : . . . . . . . 17
Connexion de votre iPod/iPhone . . . . . . . . . . . . . . . . . . . 17
Pour retirer l'adaptateur pour iPod ou iPhone . . . . . . . . . 17
Pour insérer l’adaptateur iPad. . . . . . . . . . . . . . . . . . . . . 17
Lecture à partir d’un iPod, iPhone ou iPad . . . . . . . . . . . 18
Lecture mémoire de grande capacité USB/
lecteur MP3 . . . . . . . . . . . . . . . . . . . . . . . . . . . . 19
Raccordement d’un appareil USB. . . . . . . . . . . . . . . . . . 19
Lecture à partir d’un périphérique USB. . . . . . . . . . . . . . 19
Utilisation de la fonction de lecture réseau
(NETWORK). . . . . . . . . . . . . . . . . . . . . . . . . . . . . 20
Écoute des stations radio Internet . . . . . . . . . . . . . . . . . 20
Lecture de fichiers audio enregistrés sur des composants
en réseau . . . . . . . . . . . . . . . . . . . . . . . . . . . . . . . . . . . . 21
Lecture de vos morceaux préférés . . . . . . . . . . . . . . . . . 21
Menu de configuration du réseau. . . . . . . . . . . . . . . . . . 21
Conditions requises pour la connexion réseau . . . . . . . . 22
À propos de la lecture en réseau . . . . . . . . . . . . . . . . . . 22
Glossary . . . . . . . . . . . . . . . . . . . . . . . . . . . . . . . . . . . . . 23
Pour écouter la radio . . . . . . . . . . . . . . . . . . . . 24
Utilisation du système RDS (Radio Data System)
. . . . . . . . . . . . . . . . . . . . . . . . . . . . . . . . . . . . . . 25
Présentation du système RDS . . . . . . . . . . . . . . . . . . . . 25
Utilisation des fonctions d'arrêt automatique et
de réveil . . . . . . . . . . . . . . . . . . . . . . . . . . . . . . . 26
Réglage du minuteur de réveil . . . . . . . . . . . . . . . . . . . . 26
Mise en arrêt différée . . . . . . . . . . . . . . . . . . . . . . . . . . . 26
Informations complémentaires . . . . . . . . . . . . 27
Dépannage. . . . . . . . . . . . . . . . . . . . . . . . . . . . . . . . . . . 27
Condensation . . . . . . . . . . . . . . . . . . . . . . . . . . . . . . . . . 29
Si le problème survient . . . . . . . . . . . . . . . . . . . . . . . . . . 29
Réinitialisation des réglages d’usine, effacement de toute
la mémoire . . . . . . . . . . . . . . . . . . . . . . . . . . . . . . . . . . . 29
Avant de transporter l’appareil . . . . . . . . . . . . . . . . . . . . 29
Entretien de disques compact . . . . . . . . . . . . . . . . . . . . 29
Nettoyage du coffret . . . . . . . . . . . . . . . . . . . . . . . . . . . . 29
Attention si l’appareil est installé dans un meuble avec une
porte en verre . . . . . . . . . . . . . . . . . . . . . . . . . . . . . . . . . 29
À propos des formats de fichiers de musique
lisibles . . . . . . . . . . . . . . . . . . . . . . . . . . . . . . . . . . . . . . 30
À propos des mentions d’état . . . . . . . . . . . . . . . . . . . . . 30
Spécifications. . . . . . . . . . . . . . . . . . . . . . . . . . . . . . . . . 31
À propos de l’iPod/iPhone/iPad . . . . . . . . . . . . . . . . . . . 31
Clause d'exclusion de responsabilite des contenus de
tiers . . . . . . . . . . . . . . . . . . . . . . . . . . . . . . . . . . . . . . . . 31
Avis concernant la licence du logiciel. . . . . . . . . . . . . . . 32
Micro-chaîne CD et réseau X-HM70, composée d'une unité
principale et d'une paire d'enceintes.
Micro-chaîne CD et réseau XC-HM70, composée d'une unité
principale.
Accessoires
Veuillez vérifier la présence des accessoires suivants.
o
Télécommande x 1
Antenne FM x 1
Cadre-antenne PO x 1
Enceintes x 2
(X-HM70 uniquement)
Pile « AAA » x 2
Câble vidéo x 1
Câbles des enceintes x 2
(X-HM70 uniquement)
Carte de garantie
Ce mode d’emploi
4
Fr
Page 35

Préparatifs
ATTENTION
ATTENTION
Mise en place des piles
Généralités
• Installer l’appareil sur un socle stable, horizontal et
exempt de vibrations.
• Placer les enceintes à une distance d’au moins 30 cm de
tout téléviseur CRT afin d’éviter les variations de couleurs
à travers l’écran du téléviseur. Si les variations persistent,
éloigner les enceintes du téléviseur. Le téléviseur LCD
n’est pas enclin à de telles variations.
• Mettre l’appareil à l’abri du solei l, du champ magnétique,
de la poussière excessive ou de l’humidité. On l’écartera
aussi d’un appareil électronique (ordinateur domestique,
télécopieur, etc.) qui provoquerait des parasites.
• Ne rien placer sur l’appareil.
• Mettre l’appareil à l’abri de l’humidité, de la chaleur
excessive (supérieure à 60°C) ou du froid excessif.
• Si le système ne fonctionne pas correctement,
débrancher et rebrancher le système. Rebrancher le
système et le rallumer.
• En cas d’orage, débrancher l’appareil.
• Débrancher le cordon d’alimentation en le tenant par la
fiche pour ne pas abîmer les fils internes.
• La prise CA est utilisée comme dispositif de déconnexion
et doit rester aisément accessible.
• Ne pas ôter l’enveloppe, on s’exposera à la secousse
électrique. Pour toute réparation interne, s’adresser
au revendeur PIONEER.
• Veiller à ne pas couvrir les ouvertures de ventilation de
journaux, de nappes, de rideaux, etc.
• Ne poser aucune source de flamme nue, telle qu’une
bougie, sur l’appareil.
• Il faut traiter une pile usée selon la réglementation
environnementale.
• L’appareil est conçu pour une utilisation en climat
tempéré.
• Respecter la tension indiquée sur l’appareil. Le
fonctionnement sur une tension plus élevée est
dangereux et risque de provoquer un incendie ou tout
autre type d’accident. PIONEER ne sera pas tenu pour
responsable des dommages causés par le non-respect de
la tension spécifiée.
Les piles de la télécommande fournies avec l’appareil
permettent d’effectuer les premières opérations ; il est
possible qu’elles ne durent pas très longtemps. Nous
recommandons l’usage de piles alcalines, dont la durée de
vie est supérieure.
• Une mauvaise utilisation des piles peut provoquer des
accidents tels que fuites ou explosions. Veuillez observer
les recommandations suivantes :
-
N’utilisez jamais des piles neuves et usagées dans le
même appareil.
-
Insérez les piles en respectant les indications de
polarité situées à l’intérieur du boîtier.
-
Des piles de même forme peuvent avoir des voltages
différents. N’utilisez jamais des piles de voltage différent
dans le même appareil.
-
Au moment d’éliminer les piles usagées, veuillez
respecter les réglementations gouvernementales ou les
recommandations publiques relatives à la protection de
l’environnement en vigueur dans votre pays ou région.
• N’utilisez ni ne conservez les piles sous la lumière directe
du soleil ou dans un endroit excessivement chaud,
comme une voiture ou à proximité d’un appareil de
chauffage. Les piles risqueraient de fuir, de surchauffer,
d’exploser ou de s’enflammer. Ceci pourrait aussi réduire
la durée de vie et les performances des piles.
English Français Español Italiano
Deutsch
Nederlands
5
Fr
Page 36

Commandes et affichages
Télécommande
1
2
3
4
O
5
6
7
8
1 STANDBY/ON
Cette touche permet d’allumer le récepteur et de le mettre en
veille (page 11).
2 Touches de fonction d’entrée
Pour sélectionner la source d’entrée de ce récepteur.
6
Fr
9
10
11
12
13
14
15
3 Touches de commande du récepteur
DIMMER – Obscurcit ou éclaircit l’affichage. Quatre
étapes sont nécessaires pour commander la luminosité
(page 11).
SLEEP – Appuyez sur cette touche pour modifier le délai
qui s’écoule avant que le récepteur ne passe en mode
veille (30 min. – 60 min. – 90 min. – Off). Vous pouvez
vérifier le temps restant avant le passage en mode veille
en appuyant une fois sur la touche SLEEP (page 26).
TIMER – Permet de régler l'heure, ainsi que de régler et
de vérifier les minuteries de réveil et d'arrêt automatique
(page 11, 26).
DISPLAY – Afficher les informations disponibles pour les
disques MP3/WMA ou les stations de radio RDS
(page 15).
CD DISP – Affiche les informations du disque.
4 Touches de commande du récepteur
TOP MENU – Appuyez pour afficher le menu principal de
l'iPod (page 18).
iPod CONTROL – Permet de basculer entre les
commandes de l’iPod et celles du récepteur (page 18).
SETUP – Appuyez pour accéder au menu de
configuration du récepteur (page 11, 24).
RETURN – Permet de confirmer et de quitter l’écran du
menu affiché.
5
///
Utilisez ces touches pour sélectionner les paramètres du
système, basculer entre les modes et confirmer les actions.
Les touches TUNE / permettent de rechercher une
fréquence radio et les touches PRESET / servent à
rechercher une station de radio préréglée (page 24).
6 Touches de commande de la fonction de lecture
Les touches principales (, , etc.) servent à contrôler les
fonctions après avoir sélectionné la fonction désirée à l'aide
des touches de fonctions d'entrée.
PTY – Permet de rechercher des programmes de type
RDS (page 25).
• La touche AUTO TUNE n’est pas utilisée sur cet
7 Touches numérotées
Ces touches permettent d'entrer des numéros (page 14).
8 FOLDER +/-
Pour sélectionner un dossier sur un disque MP3/WMA
(page 15).
appareil.
(TUNE
/
, PRESET
/
), ENTER
9 OPEN/CLOSE
Permet d'ouvrir ou de refermer le tiroir disque (page 13).
10 Touches de contrôle du son
Pour ajuster la qualité du son (page 12).
11 Touche de contrôle du volume
Permet de régler le volume d’écoute (page 11).
12 MUTE
Permet de couper/restaurer le son (page 12).
13 Touches de commande du tuner
BAND – Permet de naviguer entre les bandes de signaux
radio AM, FM ST (stéréo) et FM MONO (page 24).
TUNER EDIT – Permet de mémoriser/nommer des
stations de radio à rappeler (page 24).
14 Touches de modes de lecture
REPEAT – Appuyez sur cette touche pour modifier les
paramètres de lecture répétée à partir d'un CD, d'un iPod
ou d'un périphérique USB (page 14).
SHUFFLE – Appuyez sur cette touche pour modifier les
paramètres de lecture aléatoire à partir d'un CD, d'un
iPod ou d'un périphérique USB (page 14).
PLAY MODE – Pour changer le mode de lecture entre CD
et disque MP3/WMA (page 14).
15 CLEAR
Pour effacer la programmation de lecture (page 15).
Page 37

Essai de la télécommande
Capteur
7 m
TIMER
1
9
6
7
8 11 12 13 14 15
52
3
4
10
Veiller à ce que rien n’entre en contact
avec les membranes de haut-parleurs
lorsque les grilles sont retirées.
Vérifier la télécommande après avoir fait correctement tous
les raccordements.
Diriger la télécommande vers le capteur placé sur l’appareil.
La télécommande peut être utilisée dans le rayon illustré cidessous :
TIMER
STANDBY/ON
Panneau avant
11 Bouton Tune Down, Skip Down
Pour sélectionner la piste ou le dossier à lire.
12 Bouton Tune Up, Skip Up
Pour sélectionner la piste ou le dossier à lire.
13 Touche Stop
Pour arrêter la lecture.
14 Bouton Play or Pause
Pour arrêter la lecture ou reprendre la lecture à partir de
l'endroit où elle a été mise en pause.
15 Touche d’ouverture/fermeture de tiroir de disque
Permet d'ouvrir ou de refermer le tiroir disque (page 13).
Système d’enceintes (X-HM70 uniquement)
1 Dôme-Tweeter
2 Grave
3 Évent de baffle réflex
4 Bornes d’enceinte
1
2
3
4
English Français Español Italiano
Deutsch
1Capteur
Reçoit les signaux provenant de la télécommande.
2 Voyant du minuteur
S'allume lorsque la minuterie est activée (page 26).
3 Tiroir dinsertion du disque
Placez le disque côté étiquette vers le haut (page 13).
4 Station d’accueil de l’iPod ou de l’iPhone
Station d'accueil pour iPod/iPhone (page 17).
5 Commande de volume
Permet de régler le volume d’écoute (page 11).
6 Bouton STANDBY/ON
Cette touche permet d’allumer le récepteur et de le mettre en
veille (page 11).
7 Bouton INPUT
Permet de sélectionner la source d’entrée (page 12).
8 Prise casque
Permet de raccorder un casque. Lorsque le casque est
branché, les enceintes ne fournissent aucun son (page 12).
9 Prise AUDIO IN
Pour raccorder un équipement auxiliaire à l’aide d’un câble
stéréo mini-jack (page 12).
10 Prise USB
Permet de raccorder votre périphérique de stockage de
masse USB ou votre iPad pour l'utiliser comme source audio
(page 19).
Les façades des enceintes sont amovibles
Nederlands
7
Fr
Page 38

Raccordement de votre équipement
Remarque
DC OUTPUT
for WIRELESS LAN
(OUTPUT 5 V
0.6 A MAX)
LAN(10/100
)
FM
UNBAL
75
Ω
SPEAKERS
AM
LOOP
ANTENNA
OUT
IN
PREOUT
L
R
VIDEO LINE
SUBWOOFER
Enceinte
droite
Antenne FM
Enceinte
gauche
Téléviseur
Vers la prise
d’entrée vidéo
Cadreantenne PO
< Montage >
Mise en place du cadre PO
Câble vidéo
Prise murale
(220 V à 240 V CA,
50 Hz)
Tube rouge
Câble
d'enceinte
fourni
(X-HM70
uniquement)
Incorrect
Avant d'effectuer ou de modifier les raccordements, mettez l'appareil hors tension et débranchez le cordon d'alimentation au niveau de la prise secteur.
Raccordement des antennes
Antenne FM fournie :
Raccorder l’antenne FM à la prise FM 75 OHMS et diriger
l’antenne FM vers la direction qui assure la meilleure
réception.
Antenne extérieure FM :
Utiliser une antenne extérieure FM (câble coaxial 75 ohms)
pour obtenir une meilleure réception. Déconnecter le câble
d’antenne FM fourni lorsqu’on utilise une antenne FM
extérieure.
8
Fr
Cadre-antenne PO fourni :
Raccorder le cadre-antenne PO à la prise AM. Orientez le
cadre antenne PO de manière à obtenir une réception
optimale. Placez l'antenne AM sur une étagère, etc., ou fixezla sur un support.
• Éloigner l’antenne de l’appareil ou du cordon
d’alimentation pour assurer une meilleure réception.
Placez l’antenne loin de l’unité pour une meilleure
réception.
Page 39

Raccordement des enceintes
ATTENTION
Remarque
10 mm
FM
UNBAL
75
Ω
SPEAKERS
AM
LOOP
ANTENNA
OUT
IN
PREOUT
L
R
VIDEO LINE
SUBWOOFER
Appareil
principal
Câble audio
(disponible dans
le commerce)
Signal audio
Vers la prise
d’entrée audio
Vers la prise
SUBWOOFER PREOUT
Caisson de basse
disponible dans le
commerce (avec
amplificateur
FM
UNBAL
75
Ω
SPEAKERS
AM
LOOP
ANTENNA
OUT
IN
PREOUT
L
R
VIDEO LINE SUBWOOFER
Signal audio
Téléviseur Vers les prises de
sortie audio
Câble audio
(disponible dans
le commerce)
Appareil principal
Vers les prises
d’entrée LINE
Si vous n'utilisez pas les enceintes fournies
• Le fil d'enceinte fourni portant le repère rouge doit être
raccordé à la borne plus (+). Raccordez le fil avec le tube
rouge à la borne plus (+) et l'autre fil à la borne moins (–).
• Utilisez des enceintes de 4 ohms d'impédance au
minimum ; des enceintes d'impédance inférieure
pourraient endommager l'appareil.
• Les bornes des haut-parleurs sont sous une tension
DANGEREUSE. Pour éviter tout risque de décharge
électrique lors du branchement et du débranchement
des câbles de haut-parleur, débranchez le cordon
d’alimentation avant de toucher des parties non isolées.
• Ne pas prendre le canal droit pour le canal gauche.
L’enceinte de droite est celle située à droite quand on se
place devant le système.
• Ne pas laisser se toucher les fils dénudés des enceintes.
• Assurez-vous que tous les brins de fil dénudés du câble
d’enceinte sont torsadés ensemble et insérés
complètement dans la borne de l’enceinte. Si une partie
du fil d’enceinte exposé entre en contact avec le panneau
arrière, l’alimentation peut être coupée par mesure de
sécurité.
Si vous n'utilisez pas les câbles d'enceintes fournis
Branchement des fils nus
1 Torsadez ensemble les brins de fil dénudés.
2 Libérez la borne de l’enceinte et insérez-y le fil.
3 Refermez la borne.
12 3
X-HM70 uniquement :
• N'installez pas les enceintes en hauteur sur un mur ou au
plafond. La grille est conçue pour être démontable, et
pour cette raison elle peut tomber et causer des
dommages ou des blessures si les enceintes sont
suspendues en hauteur.
• Ne rien placer ou laisser pénétrer dans l’évent de baffle
réflex.
• Éviter de monter (ou s’asseoir) sur les enceintes. On
risque de se blesser en tombant.
Utilisation d’un autre woofer auxiliaire
Vous pouvez raccorder un woofer auxiliaire avec un
amplificateur à la prise SUBWOOFER PREOUT.
Raccordement d’un téléviseur, etc.
Raccorder au téléviseur à l’aide d’un câble audio.
English Français Español Italiano
Deutsch
• Aucun son ne sort du woofer auxiliaire dépourvu d’un
ampli intégré.
Pour sélectionner la fonction d'entrée de ligne :
• Sur l'appareil principal : Appuyez de manière répétée sur
la touche INPUT jusqu’à ce que l’indication Line In
s’affiche.
• Sur la télécommande : Appuyez sur la touche LINE.
Nederlands
9
Fr
Page 40

Raccordement au réseau par l’interface LAN
Remarque
ATTENTION
DC OUTPUT
for WIRELESS LAN
(OUTPUT 5 V
0.6 A MAX)
LAN(10/100
)
FM
UNBAL
75
Ω
SPEAKERS
AM
LOOP
ANTENNA
au port LAN
Câble LAN
(vendu
séparément)
Routeur
Modem
Internet
DC OUTPUT
for WIRELESS LAN
(OUTPUT 5 V
0.6 A MAX)
LAN(10/100
)
FM
UNBAL
75
Ω
SPEAKERS
AM
LOOP
ANTENNA
DC 5V WPS
Ethernet
WAN
RT
Internet
Modem
Routeur
Convertisseur de réseau sans fil (WLAN) (AS-WL300)
En connectant cet appareil à votre réseau domestique via la
prise LAN, vous pouvez écouter les stations de radio sur
Internet. Pour pouvoir écouter des stations radio Internet, il
faut s’abonner auprès d’un fournisseur de service Internet
(FSI).
Lorsque le récepteur est connecté de cette manière, il est
possible de lire des fichiers audio stockés sur des
équipements reliés au réseau, tels que votre ordinateur, en
utilisant les fonctions NETWORK.
LAN
321
WAN
• Consultez le manuel d’utilisation de l’équipement
connecté au réseau. La méthode de connexion peut varier
selon votre environnement Internet.
• L’utilisation d’une connexion Internet haut-débit
nécessite un contrat auprès d’un fournisseur d’accès
Internet. Pour plus d’informations, contactez votre
fournisseur d’accès Internet local.
Connexion à un réseau sans fil (WLAN)
Il est possible de connecter le récepteur au réseau via une
connexion sans fil (WLAN). Pour cela, utilisez le
convertisseur AS-WL300, vendu séparément.
Branchement du cordon d’alimentation
Après avoir vérifié tous les raccordements, brancher
l’appareil.
• Débrancher le cordon d’alimentation secteur de la prise
murale si l’appareil doit rester inutilisé pendant une
longue période.
• Tenez le cordon d’alimentation par sa prise lorsque vous
le manipulez. Ne débranchez pas le connecteur
d'alimentation en tirant sur le cordon et ne touchez pas le
cordon d'alimentation avec les mains humides ou
mouillées. Cela risquerait de provoquer un court-circuit
ou un choc électrique. Ne posez pas l'appareil, un meuble
ou tout autre objet, sur le câble, et ne pincez pas le câble.
Ne faites pas de nœud avec le cordon d'alimentation et ne
l'attachez pas avec d'autres cordons ou câbles. Les câbles
d'alimentation doivent être installés de façon à ce que l'on
ne puisse pas marcher dessus. Un câble abîmé peut
provoquer un risque d'incendie ou un choc électrique.
Vérifiez l’état du cordon de temps à autre. En cas
d'endommagement, contactez le service après-vente
PIONEER le plus proche ou votre revendeur local, pour
remplacement.
Raccordez la borne LAN de ce récepteur à la borne LAN de
votre routeur (avec ou sans fonction de serveur DHCP) par un
câble LAN direct (CAT 5 ou supérieur).
Mettez la fonction de serveur DHCP de votre routeur en
service. Si votre routeur ne présente pas cette fonction, il
faudra paramétrer le réseau manuellement. Pour plus de
détails, voir la section Menu de configuration du réseau à la
page 21.
10
Fr
Pour plus d'informations, consultez le mode d’emploi fourni
avec le convertisseur de réseau sans fil (AS-WL300).
Page 41

Commandes générales
Remarque
Remarque
ATTENTION
Pour allumer l’appareil
Appuyez sur la touche STANDBY/ON pour mettre l'appareil
sous tension.
Après utilisation :
Appuyer sur la touche STANDBY/ON pour passer en veille.
• Toutefois, si votre iPod/iPhone est connecté, l'appareil se
met en mode de charge. « iPod charge » s'affichera.
• Lorsque l'iPod est en mode charge, appuyez sur la touche
STANDBY/ON pour mettre le récepteur sous tension.
• Retirez l'iPod pour quitter le mode veille.
Réglage de l'horloge
O
Dans cet exemple, l’horloge est réglée sur l’affichage 24
heures (00:00).
1 Appuyez sur la touche TIMER de la télécommande.
La date et l'heure actuelles sont affichées.
La première fois que vous utilisez l'horloge, le récepteur
passe en mode de réglage de l'horloge.
2 Appuyez sur la touche ENTER.
3 Utilisez les touches
appuyez sur ENTER.
/
pour régler le jour, puis
4 Utilisez les touches
24-heures ou 12-heures, puis appuyez sur ENTER.
5Utilisez
6 Utilisez les touches
Pour vérifier l’heure :
Appuyer sur la touche TIMER. L’afficheur indiquera l’heure
pour 10 secondes environ.
Pour remettre l’horloge à l’heure :
Suivre « Réglage de l’horloge » depuis l’étape 1. Si « Clock »
n’apparaît pas à l’étape 2, sauter l’étape 4 (sélection de
l’affichage 24 ou 12 heures).
/
ENTER.
appuyez sur ENTER pour confirmer.
• Remettre l'horloge à l'heure lorsque l'alimentation est
rétablie après que l'appareil ait été rebranché ou après
une panne d'électricité (Voir ci-dessous).
/
pour choisir entre l'affichage
L’affichage sur 24 heures apparaît.
(00:00 - 23:59)
L’affichage sur 12 heures apparaît.
(AM 00:00 - PM 11:59)
pour régler l'heure, puis appuyez sur
/
pour régler les minutes, puis
Pour passer à l’affichage 24 heures ou 12 heures :
1 Effacer tous les contenus programmés.
Reportez-vous à la section Réinitialisation des réglages
d’usine, effacement de toute la mémoire à la page 29 pour
plus d'informations.
2 Effectuer le « Réglage de l’horloge » à partir de l’étape
1.
O
Contrôle de la luminosité de l’affichage
Appuyez sur la touche DIMMER pour atténuer la luminosité
de l'affichage. Quatre étapes sont nécessaires pour
commander la luminosité.
Augmentation progressive automatique du
volume
Si on met l’appareil principal hors tension ou sous tension
avec le volume réglé sur 41 ou plus, le volume commence au
niveau 40 et augmente jusqu’au dernier réglage de niveau du
volume.
Commande de volume
Tourner le bouton du volume vers VOLUME (sur l’appareil
principal) ou appuyer sur VOLUME +/- (sur la
télécommande) pour augmenter ou baisser le volume.
• Le niveau sonore émis à un réglage donné du volume
dépend, entre autres facteurs, du rendement des
enceintes et du lieu d’utilisation. Il est conseillé d’éviter
l’exposition à des niveaux de volume élevés. Éviter de trop
élever le volume. Écoutez de la musique à des niveaux
modérés. Un volume sonore excessif émis par les
écouteurs et le casque peut endommager l’ouïe.
Configuration de la fonction d'arrêt
automatique
Ce menu permet de mettre le récepteur hors tension après
une durée définie d’inactivité de plusieurs heures.
• Réglage par défaut : 6H
1 Appuyez sur la touche SETUP de la télécommande.
•Si APD ne s'affiche pas, utilisez les touches / pour
sélectionner APD.
2 Utilisez les touches
d'inactivité voulue avant que le récepteur se mette hors
tension.
• Vous pouvez choisir entre les valeurs 2, 4, 6 heures ou
OFF (mise hors tension automatique désactivée).
3 Lorsque vous avez terminé, appuyez sur RETURN.
/
pour définir la durée
English Français Español Italiano
Deutsch
Nederlands
11
Fr
Page 42

Muting
Remarque
Remarque
FM
Stereo
NETWORK
CD AM USB
iPodLINEAUDIO IN
Lecteur audio portable, etc.
Câble audio (non fourni)
Le son est coupé temporairement quand on appuie sur la
touche MUTE de la télécommande. Appuyer de nouveau
pour restaurer le volume.
Commande P.bass
Lors de la première mise sous tension de l’appareil, le mode
P.bass est activé. Ce mode accentue les fréquences graves.
Pour annuler le mode P.bass, appuyez sur la touche P.BASS
de la télécommande.
Commande des graves
Appuyez sur la touche BASS, puis utilisez les touches /
pour régler les graves.
Contrôle des aigus
Appuyez sur la touche TREBLE, puis utilisez les touches /
pour régler les aigus.
Égaliseur
La pression sur la touche SOUND permet de visualiser le
mode d’égaliseur en cours. Pour changer le mode, appuyer
sur la touche SOUND jusqu’à ce que le mode sonore désiré
soit affiché.
No equalization.
FLAT
Equaliser off.
JAZZ
For rock music.
For game.
For classical music.
For classical music.
For pop music.
For pop music.
Vocals are enhanced.
Vocals are enhanced.
For jazz.
For jazz.
GAME
CLASSIC
POPS
VOCAL
Fonction d'entrée
Une pression sur la touche INPUT de l’appareil principal fait
passer de la fonction en cours à un autre mode. Appuyer sur
la touche INPUT à plusieurs reprises pour sélectionner la
fonction désirée.
• La fonction de sauvegarde protège les réglages
mémorisés en cas de panne de courant ou
débranchement du cordon d'alimentation secteur.
Enrichissement du système
Le câble de raccordement n’est pas fourni. Se procurer un
câble vendu dans le commerce.
TIMER
PHONES AUDIO IN
USB
5V 2.1A
Écoute des sons de lecture à partir d’un lecteur
audio portable, etc.
1 Utiliser un câble de raccordement pour brancher un
lecteur audio portable, etc. sur les prises AUDIO IN.
2 Appuyez sur la touche STANDBY/ON pour mettre
l'appareil sous tension.
3 Appuyer sur la touche AUDIO IN de la télécommande ou
sur la touche INPUT à plusieurs reprises sur l’appareil
principal pour sélectionner la fonction de AUDIO IN.
4 Déclencher la lecture sur l’élément raccordé.
• Si le niveau du volume de l’appareil connecté est trop
haut, une distorsion du son peut apparaître. Si cela
arrivait, diminuez le volume de l’appareil connecté. Si le
volume est trop bas, augmentez le volume de l’appareil
connecté.
• Pour supprimer un bourdonnement, mettre l’appareil à
l’écart du téléviseur.
• Lorsqu’il s’agit d’un élément vidéo, relier la sortie audio à
ce système et la sortie vidéo à un téléviseur.
Casque
• Ne pas tourner le volume à fond à la mise en route et
écouter la musique à des niveaux modérés. Un volume
sonore excessif émis par les écouteurs et le casque peut
endommager l’ouïe.
• Avant de brancher ou de débrancher le casque, réduire le
niveau sonore.
• Utiliser un casque muni d’une fiche de 3,5 mm de
diamètre et ayant une impédance de 16 à 50 ohms.
L’impédance préconisée est de 32 ohms.
• Le branchement du casque déconnecte
automatiquement les enceintes. Régler le volume en
agissant sur la commande VOLUME.
12
Fr
Page 43

Écoute de disques MP3/
ATTENTION
Remarque
WMA ou CD
STANDBY/ON
STANDBY/ON
INPUT
INPUT
TIMER
TIMER
Lecture de disque
1 Appuyez sur la touche STANDBY/ON pour mettre
l'appareil sous tension.
2 Appuyez sur la touche CD de la télécommande ou sur la
touche INPUT à plusieurs reprises sur l’appareil principal
pour sélectionner la fonction de CD.
3 Appuyer sur la touche pour ouvrir le tiroir de disque.
4 Placez le disque sur le tiroir disque, côté étiquette vers
le haut.
• En cas de parasites sur télévision ou radio au cours de
l’utilisation de disques, éloigner l’appareil du téléviseur
ou du poste de radio.
Diverses fonctions de disque
Fonction
Lecture
Appareil
principal
Télécommande
Opération
Presser en mode
d’arrêt.
English Français Español Italiano
Ce système peut lire un disque CD standard, un disque CDR/RW en format CD et un CD-R/RW avec un fichier MP3 ou
WMA, mais ne peut pas enregistrer sur ces types de CD.
Certains disques audio CD-R et CD-RW peuvent être illisibles
à cause de l’état du disque ou du dispositif utilisé pour
l’enregistrement.
MP3 :
MP3 est un format de compression. Il s’agit de l’acronyme de
MPEG Audio Layer 3. MP3 est un code audio qui permet de
compresser des données audio de façon significative sans
altérer la qualité sonore.
• Ce système prend en charge les fichiers de type MPEG-1/
2/2.5 Audio Layer 3 (Taux d'échantillonnage : 8 kHz à 48
kHz; Débit binaire : 32 kbps à 320 kbps).
• Pendant la lecture d’un fichier VBR, le compteur sur
l’afficher peut différer du temps de lecture en cours.
WMA :
Les f ichiers WMA son t des fichie rs Advan ced System format
qui comprennent des fichiers audio compressés à l’aide du
codec Windows Media Audio. WMA est développé par
Microsoft comme étant un fichier sonore compatible avec
Windows Media Player.
• Ce système prend en charge le format WMA (Taux
d'échantillonnage : 32 kHz à 44,1 kHz/48 kHz; Débit
binaire : 32 kbps à 320 kbps).
USB
2.1A
5V
AUDIO IN
PHONES
5 Appuyer sur la touche pour fermer le tiroir de disque.
6 Appuyer sur la touche / ( ) pour démarrer la
lecture. Après la lecture de la dernière plage, l’appareil
s’arrête automatiquement.
• Ne placez pas deux disques dans un seul tiroir de disque.
• Ne pas utiliser de disques de formes spéciales (coeur,
octogone, etc.). Ce dernier peut mal fonctionner.
• Ne pas pousser le tiroir en cours de mouvement.
• S’il se produit une panne de courant alors que le tiroir est
ouvert, attendre le rétablissement du courant.
• Penser à placer le disque de 8 cm au centre du tiroir de
disque.
• L’appareil prend plus de temps (environ 20 à 90
secondes) pour lire un disque MP3/WMA qu’un CD
ordinaire à cause de la structure de ses informations.
• L'indication « MP3 » ou « WMA » apparaît après la lecture
des informations sur un disque MP3 ou WMA.
• Lorsque la fin de la dernière piste est atteinte en cours
d’avance rapide, l’indication « END » s’affiche et le CD
s’arrête. Lorsque le début de la première piste est atteint
en cours de retour rapide, l’appareil passe en mode
lecture (uniquement pour les CD).
• Les disques multisessions réinscriptibles non finalisés
peuvent être lus.
Arrêt
Pause
Plage
haut/bas
Avance
rapide/
inversion
Presser en mode de
lecture.
Presser en mode de
lecture. Appuyer sur la
touche / pour
reprendre la lecture
depuis le point d’arrêt.
Presser en mode de
lecture ou d’arrêt. Si
vous appuyez sur ces
touches à l’arrêt,
appuyez sur la touche
/ pour commencer
la lecture de la piste
souhaitée.
Presser en mode de
lecture.
Relâcher la touche
pour reprendre la
lecture.
Reprise de la lecture :
1 Vous pouvez reprendre la lecture de la même piste
après arrêt.
Pendant la lecture d'un disque, appuyez sur la touche .
2 Le système mémorise la piste en cours et le symbole
clignote sur l'affichage.
Pour reprendre la lecture, appuyez sur la touche / ( ).
La lecture reprend au début de la piste que vous aviez arrêtée.
Pour annuler la reprise de la lecture :
Appuyez sur la touche .
Deutsch
Nederlands
13
Fr
Page 44

Lecture avancée de disques MP3/WMA ou CD
Remarque
Remarque
Numéro de la plage choisie
CD
F008 T001 00:00
PROGRAM
P - 01 ← T005
Recherche directe de morceaux
Vous pouvez utiliser les touches numérotées pour
sélectionner et lire les pistes souhaitées du disque inséré
dans le lecteur.
Utilisez les touches numérotées de la télécommande
pour sélectionner la piste souhaitée pendant que
l’appareil est en train de lire le disque.
• Les touches numérotées permettent de sélectionner un
numéro de piste jusqu’à 9.
• Pour sélectionner le numéro 100 ou supérieur, utiliser la
touche « +100 ».
• Pour sélectionner le numéro 10 ou supérieur, utiliser la
touche « +10 ».
A. Par exemple, pour choisir 13
1 Appuyer sur la touche « +10 ».
2 Appuyer sur la touche « 3 ».
CD
F008 T001 00:00
B. Par exemple, pour choisir 130
1 Appuyer sur la touche « +100 ».
2 Appuyez trois fois sur la touche « +10 ».
3 Appuyer sur la touche « 0 ».
• La recherche directe n'est pas possible en mode de
lecture aléatoire.
Arrêt de la lecture :
Appuyer sur la touche .
Lecture répétée
Avec répétition lecture, l’appareil peut relire continuellement
un piste, tous les pistes ou une séquence programmée.
• Pendant la lecture répétée, l'indication « » apparaît.
CD
F008 T001 00:00
Pour répéter la lecture d’un piste :
Appuyez à plusieurs reprises sur la touche REPEAT jusqu'à
ce que l'indication "Repeat One" apparaisse. Appuyer sur la
touche / ( ).
Pour répéter tous les morceaux :
Appuyez à plusieurs reprises sur la touche REPEAT jusqu'à
ce que l'indication "Repeat All" apparaisse. Appuyer sur la
touche / ( ).
Pour répéter des morceaux souhaités :
Suivre les étapes 1 - 5 dans le chapitre « Lecture des
morceaux programmés » sur cette page, puis appuyer sur la
touche REPEAT à plusieurs reprises jusqu’à ce que « Repeat
All » s’affiche.
Pour annuler la répétition :
Appuyez à plusieurs reprises sur la touche REPEAT jusqu'à
ce que l'indication « Repeat Off » apparaisse et que
l'indication « » disparaisse.
Lecture en ordre aléatoire
Cette fonction permet de lire automatiquement les pistes
d'un disque dans un ordre aléatoire.
• Pendant la lecture en ordre aléatoire, l'indication « »
apparaît.
Pour lire toutes les pistes en ordre aléatoire :
Appuyez sur la touche SHUFFLE de la télécommande.
Pour annuler le mode de lecture aléatoire :
Appuyez sur la touche SHUFFLE pour faire disparaître le
symbole « ».
• Vous pouvez passer à la piste suivante sélectionnée par la
fonction de lecture aléatoire en appuyant sur la touche
pendant la lecture aléatoire. Cependant, la touche ne
permet pas de revenir à la plage précédente. Le début de
la plage courante sera repéré.
• En mode de lecture aléatoire, le récepteur choisit et lit
automatiquement les pistes. (Il est impossible de
spécifier un ordre.)
• Après avoir effectué une lecture répétée, veiller à appuyer
sur la touche . Sinon, le disque sera lu continuellement.
Lecture des morceaux programmés (CD)
On peut sélectionner 32 morceaux (maxi) pour la lecture
dans un ordre souhaité.
1 En mode d’arrêt, appuyer sur la touche PLAY MODE de
la télécommande pour passer en mode de sauvegarde
de programme.
PROGRAM
P - 01 ← T--
2 Utilisez les touches ou ou les touches
numérotées de la télécommande pour sélectionner la
piste souhaitée.
• Un numéro de plage supérieur au nombre de plages sur
le disque ne peut pas être sélectionné.
14
Fr
Page 45

3 Appuyer sur la touche ENTER pour stocker le numéro de
Remarque
PROGRAM
P - 01 ← F--- T---
1
1
1
2
1
2
3
1
2
1
2
3
4
5
7
8
9
6
2
4
5
3
7
8
6
Exemple d'arborescence
des dossiers/fichiers
Dossier
Fichier audio
Répertoire racine
Niveau 1 Niveau 2 Niveau 3 Niveau 4 Niveau 5
Ordre de lecture de
la session
morceau.
4 Renouveler les étapes 2 - 3 pour d’autres morceaux. 32
plages au total sont programmables. En cas d’erreur, les
plages programmées peuvent être effacées en
appuyant sur la touche CLEAR.
5 Appuyer sur la touche / ( ) pour démarrer la
lecture.
Lecture des morceaux programmés (MP3/WMA)
1 En mode arrêt, pour accéder au mode de lecture
programmée, appuyez sur la touche PLAY MODE sans la
relâcher jusqu'à ce que l'indication « PROGRAM »
apparaisse.
Chaque fois que vous appuyez sur la touche PLAY MODE, le
mode de lecture change.
2 Utilisez les touches ou ou les touches
numérotées de la télécommande pour sélectionner le
dossier souhaité.
PROGRAM
P - 01 ← F002 T---
Puis utilisez les touches ou ou les touches
numérotées de la télécommande pour sélectionner les pistes
souhaitées.
3 Appuyer sur la touche ENTER pour stocker le numéro du
4 Répéter les étapes 2 - 3 pour programmer d’autres
5 Appuyer sur la touche / ( ) pour démarrer la
Ajout de morceaux au programme :
Arrêtez la lecture, puis suivez les étapes 2 et 3 pour ajouter
des pistes. Ces derniers seront stockés à la suite du
programme précédent.
P - 01 ← F002 T005
dossier et de la plage.
dossiers/plages. 32 plages au total sont programmables.
lecture.
PROGRAM
Pour annuler la lecture des morceaux programmés :
En mode d’arrêt programmé, appuyez sur la touche .
Appuyez sur la touche PLAY MODE pour sélectionner le
mode de lecture de base, et tous les contenus programmés
seront alors effacés.
Affichage des informations du disque :
Appuyez à plusieurs reprises sur CD DISP pour passer à
l'affichage du temps de lecture écoulé et du temps de lecture
restant sur le CD.
Diverses informations sur les pistes peuvent être affichées
pendant la lecture d'un disque MP3/ WMA. Appuyez sur la
touche DISPLAY.
• Lorsqu’un disque est éjecté, le programme est
automatiquement annulé.
• Si vous appuyez sur la touche STANDBY/ON pour entrer
en mode de veille ou pour passer de la fonction CD à une
autre, les sélections programmées seront effacées.
• La lecture aléatoire n'est pas possible en mode de lecture
programmée.
• Les touches de commande à utiliser pour modifier
l'affichage diffèrent selon les disques : pour les CD,
utilisez la touche CD DISP ; pour les disques MP3/WMA,
utilisez la touche DISPLAY.
Mode dossier MP3/WMA (seulement pour des
fichiers MP3/WMA)
Pour lire un fichier MP3/WMA (Windows Media
Audio)
Il y a de nombreux sites de musique sur l’Internet d’où on
peut télécharger des fichiers musicaux MP3/WMA (Windows
Media Audio). Suivre les instructions de ces sites pour
télécharger ce type de fichiers. Il est alors possible de lire ces
fichiers musicaux téléchargés en les gravant sur un disque
CD-R/RW.
• Les chansons/fichiers téléchargés sont pour usage
personnel seulement. Toute autre utilisation d’une
chanson sans la permission du propriétaire est illégale.
Sur l’ordre de lecture des dossiers
Si des fichiers MP3/WMA sont présents dans plusieurs
dossiers, un nombre sera automatiquement attribué à
chaque dossier.
Appuyez sur la touche PLAY MODE pour sélectionner le
mode de lecture par dossier.
On peut sélectionner les dossiers à l’aide de la touche
FOLDER +/- sur la télécommande. Si le dossier sélectionné
contient des formats de fichier qui ne sont pas supportés, le
dossier est sauté et le dossier suivant est sélectionné.
Exemple : Attribution des nombres de dossier si des fichiers
MP3/WMA sont présents, tel que dans la figure ci-dessous.
1 Le dossier ROOT est programmé comme dossier 1.
2 La lecture s'effectuera dans l'ordre du schéma ci-
dessous.
3 Sur un CD MP3/WMA, 255 dossiers et fichiers, y compris
les dossiers ne contenant pas de fichiers lisibles,
peuvent être lus.
English Français Español Italiano
Deutsch
Nederlands
15
Fr
Page 46

Procédure de lecture de disques MP3/WMA avec
Remarque
Nombre total
de dossiers
Nombre total de pistes
Numéro de
dossier
Premier numéro de plage
dans le dossier
Affichage du nom
du fichier
Affichage du
nom du dossier
Affichage
du nom du
morceau*
Affichage du
nom de
l'artiste*
Affichage du nom
de l'album*
Nombre total de dossiers et de pistes (Arrêt)
Numéro de dossier et numéro de piste (Lecture)
le mode dossier activé
O
Pour lire des CD-R/RW.
1 Appuyer sur la touche CD et charge un disque MP3/
WMA. Appuyez sur la touche PLAY MODE pour
sélectionner le mode de lecture par dossier.
Les informations du disque s'affichent.
FOLDER
F008 T005
2 Appuyez sur FOLDER +/- pour sélectionner le dossier de
lecture souhaité. (Mode dossier activé)
La lecture commence.
FOLDER
F005 T003 00:01
• Lorsque le mode dossier est activé, vous pouvez utiliser la
touche FOLDER +/- pour sélectionner le dossier, même si
le récepteur est en mode lecture/pause. Le mode lecture/
pause reprendra à la première piste du dossier
sélectionné.
• Les informations affichées peuvent être changées en
appuyant sur la touche DISPLAY.
*Le nom du morceau, de l'artiste et de l'album peuvent être
affichés uniquement pendant la lecture.
Pour annuler le mode de lecture par dossier, arrêter la
lecture, appuyez sur la touche PLAY MODE et sélectionnez
le mode de lecture normale.
• Si « Can’t Play » s’affiche, cela signifie qu’on a
sélectionné « Copyright protected WMA file » (fichier
WMA protégé par copyright) ou « Not supported playback
file » (le fichier à lire n’est pas supporté).
• Les noms du titre, de l’artiste et de l’album s’affichent
s’ils sont enregistrés sur le disque.
16
Fr
Page 47

Écoute de l’iPod, iPhone
Important
Remarque
ATTENTION
iPhone
iPhone (bas)
Connecteur du logement
Logement
pour iPhone
Connecteur iPhone
et iPad
Modèles d’iPod, iPhone et iPad pris en charge :
• iPod touch (4
• iPod classic
• iPod avec vidéo
• iPod nano (6
• iPhone 4/3GS/3G
•iPad
• Pioneer ne peut en aucun cas accepter de responsabilité
pour toute perte directe ou indirecte résultant d’un
problème ou de la perte de matériel enregistré dus à une
panne de l’iPod.
• Ce système a été développé et testé pour la version du
logiciel iPod/iPhone/iPad indiquée sur le site Web de
Pioneer (http://pioneer.jp/homeav/support/ios/eu/).
• L’installation sur votre iPod/iPhone/iPad de versions de
logiciel autres que celles indiquées sur le site Web de
Pioneer peut provoquer des problèmes d’incompatibilité
avec ce système.
• L'iPod ou l'iPhone commence à se recharger dès qu'il est
raccordé à cet appareil.
• Vous pouvez recharger l'iPad lorsque le récepteur est
sous tension ou en mode recharge (iPod Charge Mode).
• Pour connecter l'iPad, utilisez uniquement un câble
spécial pour iPad.
• Connectez l'iPad à la prise USB.
• Les iPod et iPhone ne peuvent être utilises que pour la
reproduction des matériaux non protégés par des droits
d’auteur ou des matériaux que l’utilisateur peut
légalement reproduire.
• La fonction d’égalisation ne peut pas être commandée à
l’aide de ce récepteur. Nous recommandons de
désactiver l’égaliseur avant de connecter le récepteur.
ème/3ème/2ème/1ème
ème/5ème/4ème/3ème/2ème/1ème
génération)
génération)
Connexion de votre iPod/iPhone
• Si vous raccordez un iPod/iPhone, utilisez toujours
l'adaptateur universel de station d'accueil fourni avec
votre iPod/iPhone ou un adaptateur vendu dans le
commerce et conçu pour recevoir l'iPod/iPhone. L'iPod/
iPhone ne peut pas être connecté sans un adaptateur
universel de station d'accueil ; des dégâts ou un
dysfonctionnement sont à craindre si vous connectez un
iPod/iPhone sans utiliser un adaptateur universel de
station d'accueil.
• Débranchez tous les accessoires du iPod ou du iPhone
avant de l’insérer dans le logement.
1 Ouvrez le couvercle de la station d'accueil en tirant vers
le haut.
2 Fixez l'adaptateur universel à la station d'accueil iPod/
iPhone, située sur le panneau supérieur du récepteur.
• L'adaptateur universel de station d'accueil iPod/iPhone
n'est pas fourni avec cet appareil.
Lors de la fixation de l'adaptateur de station d'accueil,
assurez-vous de l'orienter correctement (avant/arrière) par
rapport à la station d'accueil. Pour fixer l'adaptateur de
station d'accueil, placez d'abord les parties saillantes situées
sur le côté avant dans les creux correspondants de la station
d'accueil d'iPod/iPhone, puis appuyez pour bloquer
l'adaptateur en place. Lors de la fixation de l'adaptateur, faites
attention à ne pas abimer les connecteurs.
3 Connectez votre iPod/iPhone.
• Si un iPod/iPhone est raccordé alors que le récepteur est
en mode veille, le récepteur se met sous tension et la
lecture commencera sur l'iPod/iPhone.
Pour retirer l'adaptateur pour iPod ou iPhone
Pour insérer l’adaptateur iPad
1 Raccordez le connecteur iPad sur l’iPad.
English Français Español Italiano
Deutsch
Nederlands
17
Fr
Page 48

2 Raccordez l’iPad à l’appareil via la prise USB.
Remarque
Important
Astuce
Important
• La prise USB ne prend pas en charge la sortie VIDEO.
Lecture à partir d’un iPod, iPhone ou iPad
Ce récepteur dispose d’une prise spéciale iPod permettant
d’agir sur la lecture des contenus audio de votre iPod par les
commandes de ce récepteur.
• Si vous avez connecté votre iPod au récepteur et qu'il ne
fonctionne pas correctement, mettez le récepteur hors
tension et reconnectez l'iPod au récepteur. Si cela ne
donne aucun résultat, réinitialisez votre iPod.
1 Allumez le récepteur et votre téléviseur.
2 Sélectionnez l’entrée TV de sorte que le téléviseur se
connecte à l’appareil.
3 Si l'iPod/iPhone est connecté via la station d'accueil,
appuyez sur iPod/iPhone pour sélectionner l'entrée
iPod.
Si un iPad (ou un iPod/iPhone) est connecté via la prise
USB, appuyez sur la touche USB pour sélectionner
l'entrée USB.
Le panneau avant affiche Please Wait pendant que le
récepteur vérifie la connexion et lit les données de l’iPod.
Dès que l’affichage indique Top Menu, vous pouvez
commencer à écouter la musique de l’iPod.
• Si, après que vous avez appuyé sur iPod/iPhone,
l’affichage indique iPod Disconnected, essayez
d’éteindre le récepteur et de reconnecter l’iPod au
récepteur.
• Les commandes de votre iPod ne fonctionnent pas
lorsque celui-ci est racordé à ce récepteur.
Lecture de fichiers stockés sur un iPod
Pour naviguer dans les morceaux de musique de votre iPod,
vous pouvez utiliser la fonction d’affichage des messages à
l’écran du téléviseur raccordé à ce récepteur. Vous pouvez
également commander toutes les fonctions relatives à la
musique à partir du panneau avant de ce récepteur.
• Notez que les caractères non romains du titre s’affichent
sous la forme « * ».
• Cette fonction n’est pas disponible pour les photos ou les
clips vidéo enregistrés sur votre iPod.
Recherche des morceaux à écouter
Lorsque votre iPod est raccordé à ce récepteur, vous pouvez
naviguer dans les morceaux de musique enregistrés sur
votre iPod par listes de lecture, artistes, albums, morceaux,
genres ou compositeurs, comme si vous utilisiez
directement votre iPod.
1Utilisez
2Utilisez
3 Poursuivez votre navigation jusqu’à atteindre les
/
appuyez sur ENTER pour naviguer dans cette catégorie.
• Pour revenir au niveau précédent à tout moment, appuyez
sur RETURN.
sélectionnée (par exemple, albums).
• Utilisez / pour passer au niveau précédent/suivant.
éléments que vous souhaitez lire, puis appuyez sur
pour lancer la lecture.
• Si vous êtes dans la catégorie Morceaux, vous pouvez
aussi appuyer sur ENTER pour commencer la lecture.
pour sélectionner une catégorie, puis
/
pour naviguer dans la catégorie
Commandes de lecture de base
Les touches de la télécommande de cet appareil peuvent être
utilisées pour les fonctions de lecture de base des fichiers
stockés sur un iPod.
•Appuyez sur iPod/iPhone pour mettre la télécommande
en mode de fonctionnement iPod/iPhone.
O
Permet de basculer entre les commandes de
l’iPod et celles du récepteur
Cette touche permet de permuter entre le contrôle de l’iPod
via la télécommande ou directement à partir de l’iPod.
Appuyez sur iPod CONTROL pour passer aux
commandes de l’iPod.
• Appuyez à nouveau sur iPod CONTROL pour r éactiver les
commandes du récepteur lorsque vous avez terminé.
• Vous ne pourrez pas utiliser cette fonction, si un iPod de
la cinquième génération ou un iPod nano de la première
génération est raccordé.
18
Fr
Page 49

Lecture mémoire de
Important
Remarque
Important
Périphérique de stockage
de masse USB
grande capacité USB/
lecteur MP3
Raccordement d’un appareil USB
Il est possible d’obtenir un son à deux canaux en utilisant
l’interface USB située à l’avant de ce récepteur.
Mettez ce récepteur en veille et raccordez votre appareil
USB à la prise USB sur le panneau avant de ce récepteur.
• Ce récepteur ne peut pas être raccordé par un
concentrateur USB.
• Lorsqu'un iPad est connecté, il commence à se
recharger.
TIMER
Lecture à partir d’un périphérique USB
• Pioneer n’est pas en mesure de garantir la compatibilité
(fonctionnement et/ou alimentation du bus) avec tous les
périphériques de stockage de masse USB existants et
n’endosse aucune responsabilité quant à la perte
éventuelle de données susceptible de se produire en cas
de raccordement de ces périphériques à ce récepteur.
• Les périphériques USB compatibles sont : disques durs
magnétiques externes, périphériques de mémoire Flash
portables (plus particulièrement des clés de mémoire) et
lecteurs audio numériques (lecteurs MP3) de format
FAT16/32. Il n’est pas possible de raccorder ce récepteur
à un ordinateur personnel pour lancer une lecture USB.
• Le récepteur a besoin de davantage de temps pour lire le
contenu d’un périphérique USB lorsque celui-ci
comporte un grand nombre de données.
• S’il s’avère impossible de lire le fichier sélectionné, ce
récepteur passe automatiquement au fichier lisible
suivant.
• Lorsque le fichier en cours de lecture ne comporte pas de
titre, le nom du fichier apparaît dans l’affichage à l’écran ;
lorsque le nom de l’album et le nom de l’artiste ne sont
pas mentionnés, la rangée reste vide.
• Notez que les caractères non romains de la liste de
lectures sont remplacés pas des astérisques « * » à
l’affichage.
• Assurez-vous que le récepteur en mode veille lorsque
vous déconnectez le périphérique USB.
1 Allumez le récepteur et votre téléviseur.
2 Sélectionnez l’entrée TV de sorte que le téléviseur se
connecte à l’appareil.
3 Appuyez sur la touche USB de la télécommande pour
basculer le récepteur sur l’entrée USB.
Please Wait apparaît dans l’affichage à l’écran lorsque ce
récepteur lance la reconnaissance du périphérique USB
raccordé. Lorsque la reconnaissance est terminée, un écran
de lecture apparaît dans l’affichage à l’écran et la lecture
démarre automatiquement.
Commandes de lecture de base
Les touches de la télécommande de cet appareil peuvent être
utilisées pour les fonctions de lecture de base des fichiers
stockés sur un périphérique USB.
•Appuyez sur USB pour basculer la télécommande en
mode de fonctionnement USB.
O
Si un message USB Error s’affiche, essayez les procédures
suivantes :
• Éteignez le récepteur, puis rallumez-le.
• Raccordez le périphérique USB avec le récepteur éteint.
• Sélectionnez une autre source d’entrée (comme CD),
puis revenez à USB.
• Utilisez un adaptateur CA spécial (fourni avec le
périphérique) pour l’alimentation USB.
Si cela ne résout pas le problème, il est fort probable que
votre périphérique USB soit incompatible.
English Français Español Italiano
Deutsch
Nederlands
• Cela inclut la lecture de fichiers WMA/MP3/MPEG-4 AAC
(à l’exception des fichiers protégés en copie ou restreints
en lecture).
19
Fr
Page 50

Important
Remarque
Main Menu
Now Playing
Favorites Settings
Internet
Radio
Music
Library
20
Fr
Utilisation de la fonction
de lecture réseau
(NETWORK)
Ce récepteur est pourvu d’une borne LAN, et en raccordant
vos composants à cette borne vous pourrez utiliser les
fonctions suivantes.
• Ecoute des stations radio Internet
Vous pouvez sélectionner et écouter vos stations de radio
Internet préférées en accédant à la liste de stations de
radio Internet fournie et gérée par le service de base de
données SHOUTcast.
Consultez la section Écoute des stations radio Internet
ci-dessous.
• Lecture de fichiers de musique enregistrés sur un
ordinateur
Vous pouvez écouter par l’intermédiaire de cet appareil
toute votre musique enregistrée sur ordinateur.
Consultez la section Lecture de fichiers audio
enregistrés sur des composants en réseau à la page 21.
-
Vous pouvez écouter des fichiers audio enregistrés non
seulement sur un ordinateur mais aussi sur d’autres
composants en utilisant le serveur multimédia intégré
fonctionnant selon le logiciel et les protocoles DLNA 1.0
ou DLNA 1.5 (disques durs et chaînes audio capables de
connexion réseau).
• Lors de la lecture de fichiers audio, ‘Please Wait’
s’affiche avant le début de la lecture. Cette indication
peut rester quelques secondes affichée, selon le type de
fichier.
• Si un domaine est configuré dans un environnement
réseau Windows, vous ne pourrez pas accéder à
l’ordinateur en réseau pendant la connexion au domaine.
Au lieu de vous connecter au domaine, connectez-vous
sur la machine locale.
• Dans certains cas, le temps écoulé peut ne pas s’afficher
correctement.
1 Allumez le récepteur et votre téléviseur.
Voir la section Raccordement au réseau par l’interface LAN à
la page 10.
2 Sélectionnez l’entrée TV de sorte que le téléviseur se
connecte à l’appareil.
3 Appuyez sur la touche NETWORK de la télécommande
pour basculer le récepteur sur l’entrée NETWORK.
Il faut quelques secondes au récepteur pour accéder au
réseau. La page suivante apparaît lorsque NETWORK est
sélectionné comme fonction d’entrée.
4Utilisez
Sélectionnez une catégorie dans la liste suivante :
5Utilisez
Appuyez sur / pour monter ou descendre dans la liste et
sélectionner l’élément souhaité. Lorsque vous appuyez sur
ENTER, la lecture commence et la page de lecture de
l’élément sélectionné s’affiche. Pour revenir à la liste,
appuyez sur RETURN.
Dans le cas où les éléments sont affichés sur plusieurs
pages, utilisez les touches / pour accéder aux
différentes pages.
6 Répétez l’étape 5 pour écouter le morceau souhaité.
Pour de plus amples informations, consultez la section
indiquée ci-dessous.
/
voulez lire, puis appuyez sur ENTER.
• Now Playing – Pour afficher la station actuelle ainsi que
des informations sur cette station.
• Internet Radio – Écoute d’une station de radio Internet
SHOUTcast via le réseau.
• Music Library – Lecture de fichiers de musique
enregistrés sur un ordinateur.
• Favorites – Morceaux favoris en cours d’enregistrement.
• Settings – Pour effectuer les réglages de la fonction
réseau (NETWORK).
musique ou la station radio Internet que vous voulez
écouter, puis appuyez sur ENTER.
• Stations radio Internet – Consultez la section Écoute des
stations radio Internet ci-dessous.
• Fichiers de musique stockés sur des PC – Consultez la
section Lecture de fichiers audio enregistrés sur des
composants en réseau à la page 21.
pour sélectionner la catégorie que vous
/
pour sélectionner le dossier, les fichiers de
Écoute des stations radio Internet
La radio Internet est un service radio diffusé par Internet. Il
existe un grand nombre de stations radio Internet diffusant
une grande variété de services dans le monde entier.
Certaines sont hébergées, gérées et diffusées par des
personnes privées tandis que d’autres le sont par les stations
radio hertziennes classiques et les réseaux de
radiocommunication. Alors que les stations radio
hertziennes, ou OTA (over-the-air), sont géographiquement
limitées par la portée des ondes radio transmises par
l’émetteur, les stations radio Internet sont accessibles dans
chaque partie du monde dans la mesure où une connexion
Internet est disponible, car elles transmettent leurs
émissions par la toile et non pas par les ondes. Sur ce
récepteur vous pouvez sélectionner les stations radio
Internet en fonction du genre et de la région.
Lors de l’écoute de la radio par I nternet, le son peut êtr e plus
ou moins bon, selon l’état de la connexion Internet.
• Pour écouter les stations radio Internet, vous devez avoir
un accès haute vitesse à Internet par une large bande.
Avec un modem de 56 K ou ISDN, vous ne pourrez pas
profiter pleinement de la radio Internet.
• Le numéro de port varie selon la station radio Internet.
Vérifiez les réglages de pare-feu.
• Certaines émissions peuvent être arrêtées ou
interrompues sur certaines stations radio Internet. Dans
ce cas, vous ne pouvez plus les écouter lorsque vous les
sélectionnez dans la liste des stations radio Internet.
À propos de la liste de radio Internet
La liste des stations de radio Internet accessibles depuis ce
récepteur est fournie et gérée par le service de base de
données SHOUTcast.
Page 51

Lecture de fichiers audio enregistrés sur des
Remarque
composants en réseau
Vous pouvez utiliser la télécommande de ce récepteur pour
effectuer les opérations suivantes. Notez que, selon la
catégorie en cours de lecture, certaines touches ne seront
pas disponibles.
•Appuyez sur NETWORK pour basculer la télécommande
en mode de fonctionnement NETWORK.
O
Lecture de vos morceaux préférés
Enregistrement de fichiers audio et de stations de
radio Internet
Pendant la lecture d'un morceau, appuyez sur la touche
/
pour sélectionner « Add to Favor » (Ajouter aux
favoris), puis appuyez sur ENTER.
Le morceau sélectionné est consigné dans le dossier
Favorites.
Seuls les fichiers audio enregistrés sur des composants en
réseau peuvent être consignés dans ce dossier.
Lecture et suppression de fichiers audio et de
stations de radio Internet enregistrées dans le
dossier de favoris (Favorites)
1 Sélectionnez ‘Favorites’ sur la page Main Menu.
Main Menu
Internet
Now Playing
Favorites Settings
Music
Radio
Library
2 Utilisez les touches
audio ou une station de radio Internet, puis appuyez sur
ENTER.
3 Utilisez les touches
de lecture ou de suppression, puis appuyez sur ENTER.
– La lecture de l’élément sélectionné commence
– L’élément sélectionné est supprimé du dossier de favoris
(Favorites)
/
pour sélectionner un fichier
/
pour sélectionner les options
• Sélectionnez pour annuler l’opération précédente.
Menu de configuration du réseau
Ce menu permet de configurer les paramètres réseau sur
l’appareil afin d’écouter la radio Internet.
1 Sélectionnez ‘Settings’ sur la page Main Menu.
Main Menu
Internet
Now Playing
Radio
Favorites Settings
2 Sélectionnez le réglage que vous souhaitez ajuster.
• Network – Pour configurer les paramètres du réseau
(vior Paramètres réseau ci-dessous).
• General – Utilisez cette option pour réinitialiser tous les
paramètres de connexion réseau à leur valeur d’usine par
défaut (vior Paramètres généraux à la page 22).
Paramètres réseau
Si le routeur relié à la prise LAN de ce récepteur est un
routeur à large bande (avec serveur DHCP), mettez
simplement la fonction du serveur DHCP en service, et le
paramétrage manuel du réseau sera superflu. Vous devez
paramétrer le réseau de la façon suivante seulement si le
récepteur est connecté à un routeur à large bande sans
serveur DHCP. Avant de paramétrer le réseau, demandez
conseil à votre fournisseur Internet ou à votre gestionnaire de
réseau qui vous indiquera les réglages nécessaires. Il est
conseillé de se référer aussi au mode d’emploi fourni avec le
composant en réseau.
Library
Settings
Network
Music
General
1 of
1
1 Sélectionnez ‘Network’ sur le menu Settings.
Settings
Network
General
2 Sélectionnez ‘Modes’ sur le menu Network Settings.
Si vous changez les réglages réseau sans serveur DHCP,
effectuez les changements correspondants dans les
réglages réseau de ce récepteur.
Network Modes
• DHCP (réglage par défaut) – Sélectionnez cette option si le
serveur prend en charge le protocole DHCP.
-
Lorsque l’option DHCP est sélectionnée, la connexion
s’effectue automatiquement. La connexion est établie
lorsque les informations de connexion réseau
s’affichent. Appuyez sur ENTER pour revenir à l’écran
précédent.
• STATIC – Pour effectuer manuellement la connexion au
serveur, suivez les instructions ci-après.
-
Appuyez sur pour effacer le caractère précédent.
-
Appuyez sur pour changer de type de caractère.
-
Utilisez les touches / pour choisir le caractère voulu
parmi les caractères affichés, puis appuyez sur ENTER.
-
Une fois que la saisie est terminée, ou si vous souhaitez
annuler l’opération, appuyez sur jusqu’à ce que
l’indication OK/CANCEL s’affiche, puis utilisez les
touches / pour sélectionner OK ou CANCEL, et
appuyez sur ENTER.
• Si vous avez sélectionné l’option STATIC, les réglages
doivent être effectués comme suit.
-
IP (IP address)
1 of
1
DHCP
STATIC
Network Settings
Modes
Status
1 of
1
1 of
1
English Français Español Italiano
Deutsch
Nederlands
21
Fr
Page 52

L’adresse IP doit entrer dans les plages suivantes. Si
l’adresse IP ne correspond à ces définitions, vous ne
pourrez pas lire les fichiers audio enregistrés sur les
composants du réseau ni écouter les stations radio
Internet.
Class A : 10.0.0.1 à 10.255.255.254
Class B : 172.16.0.1 à 172.31.255.254
Class C : 192.168.0.1 à 192.168.255.254
-
MASK (Subnet Mask)
Si le modem xDSL ou l’adaptateur de terminal est
directement relié à ce récepteur, désignez le masque de
sous-réseau fourni sur papier par votre fournisseur
Internet. Dans la plupart des cas, il faut saisir
255.255.255.0.
-
Gateway (Passerelle par défaut)
Si une passerelle (routeur) est reliée à ce récepteur,
désignez l’adresse IP correspondante.
-
DNS (DNS server)
Entrez l’adresse de serveur DNS que votre fournisseur
d’accès Internet vous a communiquée.
• Sélectionnez Status dans le menu Network Settings
pour afficher votre mode de connexion réseau actuel et
les informations correspondantes.
Paramètres généraux
1 Sélectionnez ‘General’ sur le menu Settings.
Settings
Network
General
2 Sélectionnez l’élément que vous souhaitez configurer
dans le menu des paramètres généraux (General
Settings).
• Factory Settings – Utilisez cette option pour réinitialiser
tous les paramètres de connexion réseau à leur valeur
d’usine par défaut.
-
Lorsque le message « Warning: All Settings will be
lost! Are you sure? » (Avertissement : Tous les
réglages seront perdus ! Voulez-vous vraiment
continuer ?) s’affiche, cochez la case et appuyez sur
1 of
1
General Settings
Factory Settings
About
22
Fr
ENTER. Pendant la réinitialisation de tous les
paramètres, le message «Please Wait» (Veuillez
patienter) s’affiche. La réinitialisation est terminée
lorsque l’écran revient au menu principal.
-
Pour quitter le processus de réinitialisation,
sélectionnez .
Pour plus d’information à ce sujet, voir la section Windows
Media Player 11/Windows Media Player 12 à la page 23.
DLNA
• About – Affiche l’adresse MAC du récepteur.
Conditions requises pour la connexion réseau
La fonction NETWORK permet d’écouter la musique
disponible sur les serveurs multimédia raccordés au même
réseau local (LAN) que le récepteur. Cet appareil permet de
lire les fichiers enregistrés sur :
• Les ordinateurs fonctionnant sous Microsoft Windows
Vista ou XP pourvus de Windows Media Player 11
• Ordinateurs fonctionnant sous Microsoft Windows 7 avec
Windows Media Player 12 installé
• Les serveurs multimédia numériques compatibles avec la
norme DLNA (sur les ordinateurs ou d’autres
composants)
Pour lire les fichiers audio enregistrés sur des composants
en réseau ou pour écouter les stations radio Internet, la
fonction de serveur DHCP de votre routeur doit être mise en
service. Si votre routeur ne présente pas cette fonction, il
faudra paramétrer le réseau manuellement. Sinon, vous ne
pourrez pas lire les fichiers audio enregistrés sur es
composants en réseau ni écouter les stations radio Internet.
Pour plus d’information à ce sujet, voir la section Menu de
configuration du réseau à la page 21.
Autorisation de ce récepteur
Pour pouvoir lire via la fonction NETWORK, il faut tout
1 of
d’abord autoriser le récepteur. L’autorisation est accordée
1
automatiquement lorsque le récepteur se connecte à
l’ordinateur par le réseau. Si ce n’est pas le cas, autorisez le
récepteur manuellement sur l’ordinateur. La méthode
d’autorisation (ou de permission) d’accès dépend du type de
serveur auquel vous vous connectez. Pour plus
d’informations sur l’autorisation de ce récepteur, reportezvous au mode d’emploi de votre serveur.
À propos de la lecture en réseau
Cet appareil utilise les technologies suivantes pour la lecture
en réseau :
Windows Media Player
Lecteur audio DLNA CERTIFIED™
La DLNA (Digital Living Network Alliance) est une alliance
transindustrielle des sociétés de production d’appareils
électroniques grand public, d’ordinateurs et de
périphériques mobiles. Digital Living permet aux
consommateurs de partager aisément les médias
numériques par leurs réseaux avec ou sans fil.
Le logo DLNA permet de trouver facilement les produits
conformes aux Directives d’interopérabilité DLNA. Cet
appareil est conforme aux Directives d’interopérabilité DLNA
v1.5.
Lorsqu’un ordinateur intégrant un logiciel serveur DLNA ou
un autre périphérique compatible DLNA est relié à ce lecteur,
certains paramètres du logiciel ou du périphérique devront
éventuellement être changés. Veuillez vous reporter au mode
d’emploi du logiciel ou du périphérique pour plus
d’informations à ce sujet.
TM
DLNA
, le logo DLNA Logo et CERTIFIE DTM sont des marques
commerciales, des marques de service ou des marques
d'homologation de Digital Living Network Alliance.
Contenus lisibles via un réseau
• Certains fichiers ne pourront pas être lus correctement
bien qu’ils soient dans un format compatible.
• Les fichiers de films ou de photos n e peuvent pas être lus.
• Dans certains cas vous ne pourrez pas écouter une
station radio Internet bien que vous l’ayez sélectionnée
dans une liste de stations radio.
• Selon le type de serveur ou la version utilisé, certaines
fonctions ne seront pas prises en charge.
• Les formats de fichiers pris en charge varient d’un
serveur à l’autre. C’est pourquoi, les fichiers qui ne sont
pas pris en charge par votre serveur n’apparaissent pas
sur cet appareil. Pour plus d’informations, contactez le
constructeur de votre serveur.
Page 53

Anomalies lors de lecture en réseau
• La lecture peut se bloquer si vous ét eignez l’ordinateur ou
supprimez des fichiers multimédia de l’ordinateur
pendant la lecture de contenu.
• En cas de problèmes de réseau (trafic intense, etc.) le
contenu risque de ne pas s’afficher ou de ne pas être lu
correctement (la lecture peut être interrompue ou
bloquée). Pour éviter ce type de problème, il est conseillé
de relier le lecteur et l’ordinateur par un câble 100BASETX.
• Si plusieurs clients lisent les mêmes fichiers
simultanément, la lecture peut être interrompue ou se
bloquer.
• Selon le logiciel antivirus installé sur l’ordinateur
raccordé et le réglage de ce logiciel, la connexion réseau
peut se bloquer.
Pioneer n’est pas responsable du mauvais fonctionnement
du lecteur et/ou des fonctions NETWORK dû à une erreur ou
à un dysfonctionnement de la communication avec votre
connexion réseau et/ou votre ordinateur, ou un autre appareil
raccordé. Veuillez contacter le fabricant de votre ordinateur
ou votre fournisseur de service Internet.
“Windows Media™” est une marque commerciale de Microsoft
Corporation.
Ce produit intègre une technologie détenue par Microsoft
Corporation, qui ne peut être utilisée ou distribuée que sous
licence de Microsoft Licensing, Inc.
Microsoft®, Windows®7, Windows®Vista, Windows®XP,
Windows®2000, Windows®Millennium Edition, Windows®98,
et WindowsNT® sont des marques commerciales ou des
marques déposées de Microsoft Corporation aux États-Unis et/
ou dans le reste du monde.
Glossary
aacPlus
Le décodeur AAC emploie le aacPlus mis au point par Coding
Technologies. (www.codingtechnologies.com)
FLAC
FLAC (Free Lossless Audio Codec) est un codec de
compression audio sans perte. Le son est compressé en
FLAC sans perte de qualité. Pour plus d’informations sur le
FLAC, consultez le site web suivant : http://
flac.sourceforge.net/
Windows Media
Windows Media est un logiciel intégré multimédia de
Microsoft Windows, conçu pour créer et distribuer des
média. Windows Media est soit une marque déposée soit une
marque commerciale de Microsoft Corporation, enregistrée
aux Etats-Unis et/ou dans d’autres pays. Utilisez une
application autorisée par Microsoft Corporation pour créer,
distribuer ou lire des contenus de format Windows Media.
L’emploi d’une application non autorisée par Microsoft
Corporation entraînera des erreurs de fonctionnement.
Windows Media DRM
Windows Media DRM est un service DRM (Digital Rights
Management) de la plateforme Windows Media. Il est destiné
à assurer la sécurité de la distribution de contenus audio et/
ou vidéo par un réseau IP, à un ordinateur ou un périphérique
de lecture, de manière à ce que le distributeur puisse
s’assurer de la façon dont ce contenu est utilisé. Le contenu
protégé par WMDRM ne peut être lu que sur un composant
compatible avec le service WMDRM.
Windows Media Player 11/Windows Media Player 12
Windows Media Player est un logiciel permettant de
transmettre à une chaîne stéréo ou à un téléviseur de la
musique, des photos et des films enregistrés sur un
ordinateur Microsoft Windows.
Avec ce logiciel, vous pouvez lire des fichiers enregistrés sur
ordinateur avec divers périphériques à l’endroit souhaité de
la maison.
Ce logiciel peut être téléchargé du site Microsoft.
• Windows Media Player 11 (pour Windows XP ou Windows
Vista)
• Windows Media Player 12 (pour Windows 7)
Pour plus d’informations, consultez le site officiel Microsoft.
English Français Español Italiano
Deutsch
Nederlands
23
Fr
Page 54

Pour écouter la radio
Remarque
Les étapes suivantes décrivent la façon de régler les bandes
FM et AM à l’aide de la recherche automatique et des
fonctions de réglage manuel. Une fois que le tuner est réglé
sur une station, vous pouvez mémoriser sa fréquence pour
accéder facilement à cette station plus tard. Voir la section
Mémorisation de stations préréglées ci-dessous pour en
savoir plus sur la façon de procéder.
1 Appuyez sur TUNER pour sélectionner le syntoniseur.
2 Utilisez BAND pour changer la bande (FM ou AM), si
nécessaire.
Chaque pression de la touche fait commuter la bande entre
FM (stéréo ou mono) et AM.
3 Pour régler une station de radio.
Une station peut être réglée de trois façons différentes :
Réglage automatique
Pour rechercher des stations sur la bande actuellement
sélectionnée, appuyez sur les touches TUNE / et
maintenez-les enfoncées pendant une seconde environ.
Le récepteur lance la recherche de la station suivante et
s’arrête à chaque détection de station. Répétez cette
opération pour trouver d’autres stations.
Réglage manuel
Pour modifier la fréquence d’un pas à la fois, appuyez sur
la touche TUNE /.
Réglage rapide
Appuyez sur la touche TUNE / et maintenez-la
enfoncée pour lancer le réglage rapide. Relâchez la
touche à la fréquence souhaitée.
– S’allume lors de la réception d’une émission radio
normale.
24
Fr
– S’allume lors de la réception d’une émission FM stéréo
en mode stéréo automatique.
Amélioration du son FM
Si le voyant ou ne s’allume pas lors du réglage d’une
station FM à cause d’un signal faible, réglez le récepteur sur
le mode de réception mono.
Appuyez sur la touche BAND pour sélectionner FM
MONO.
O
Ceci devrait vous permettre d’obtenir une qualité sonore
acceptable.
Mémorisation de stations préréglées
Si vous écoutez souvent une station de radio, il peut être
pratique d’enregistrer sa fréquence dans le récepteur afin de
pouvoir y accéder facilement lorsque vous le souhaitez. Ceci
vous évite d’avoir à rechercher la fréquence chaque fois que
vous désirez écouter cette station. Cet appareil peut
mémoriser jusqu’à 40 stations.
O
1 Réglez une station que vous souhaitez mémoriser.
Pour plus d’information à ce sujet, voir la section Pour
écouter la radio au-dessus.
2 Appuyez sur la touche TUNER EDIT.
Le numéro de préréglage clignote.
3 Appuyez sur la touche PRESET
la station préréglée que vous désirez.
Pour cela, vous pouvez aussi utiliser les touches numérotées.
Voir la section Recherche directe de morceaux à la page 14.
4 Appuyez sur la touche ENTER.
Le numéro préréglé cesse de clignoter et le récepteur
mémorise la station.
• Si le récepteur reste déconnecté de la prise secteur
pendant plus d’un mois, les stations de radio mémorisées
seront perdues et devront être reprogrammées.
• Les stations radio sont mémorisées en mode stéréo.
Lorsqu’une station est mémorisée en mode FM MONO,
l’indication apparaît néanmoins lorsque la station est
rappelée.
/
pour sélectionner
Pour écouter les stations préréglées
Vous devez mémoriser des stations préréglées pour avoir
accès à cette fonction. Consultez Mémorisation de stations
préréglées au-dessus si vous n’avez pas encore mémorisé de
stations préréglées.
Appuyez sur la touche PRESET
la station préréglée que vous désirez.
Pour cela, vous pouvez aussi utiliser les touches numérotées.
/
pour sélectionner
Attribution de noms aux stations préréglées
Pour faciliter l’identification, vous pouvez attribuer un nom à
toutes vos stations préréglées.
1 Choisissez la station préréglée que vous désirez
nommer.
Voir la section Pour écouter les stations préréglées au-dessus
pour le détail à ce sujet.
2 Appuyez deux fois sur TUNER EDIT.
Le curseur se trouvant au premier caractère clignote sur
l’écran.
3 Saisissez le nom que vous désirez donner à la station.
Le nom peut comporter jusqu’à huit caractères.
• Utilisez les touches / pour sélectionner la position
du caractère.
• Utilisez les touches / pour sélectionner les
caractères.
• Le nom est mémorisé lorsque vous appuyez sur ENTER.
Changement du mode de coupure des parasites
Si vous trouvez que la qualité de réception radio AM est
mauvaise, même après avoir essayé ce qui précède, vous
pourrez peut-être l'améliorer en utilisant un mode différent de
réduction du bruit. Choisissez le mode qui fournit les
meilleurs résultats.
Réglage par défaut : Mode1
1 Appuyez sur la touche SETUP après avoir réglé le tuner
sur une station de radio AM.
2 Utilisez les touches
».
3 Utilisez les touches
réduction de bruit (1, 2 ou 3), puis appuyez sur la touche
ENTER.
/
pour sélectionner « Noise Cut
/
pour sélectionnez un mode de
Page 55

Utilisation du système
Remarque
Remarque
O
RDS (Radio Data System)
Présentation du système RDS
Le système RDS (système de radiocommunication de
données) est utilisé par la plupart des stations de radio FM
pour fournir aux auditeurs différents types d’informations—
notamment le nom de la station et le type d’émissions
diffusées.
L’une des fonctions du système RDS permet d’effectuer une
recherche par type de programme. Par exemple, vous pouvez
rechercher une station qui diffuse une émission ayant pour
type de programme JAZZ.
Vous pouvez rechercher les types de programmes suivants :
NEWS – Informations
AFFAIRS – Analyse de
l’actualité
INFO – Informations d’ordre
général
SPORT – Sport
EDUCATE – Éducation
DRAMA – Pièces
radiophoniques, etc.
CULTURE – Culture nationale
ou régionale, théâtre, etc.
SCIENCE – Science et
technologie
VARIED – Habituellement
programmes de discussion,
quiz ou entretiens.
POP M – Musique pop
ROCK M – Musique rock
EASY M – Écoute aisée
LIGHT M – Musique classique
‘légère’
CLASSICS – Musique classique
‘sérieuse’
OTHER M – Musique ne
correspondant à aucune des
catégories ci-dessus
WEATHER – Bulletins
météorologiques
FINANCE – Rapports de
bourse, commerce, ventes, etc.
CHILDREN – Programmes
pour enfants
SOCIAL – Affaires sociales
RELIGION – Programmes
religieux
PHONE IN – Opinion publique
par téléphone
TRAVEL – Voyages et
vacances, plutôt qu’annonces
de circulation routière
LEISURE – Loisirs et hobbies
JAZZ – Jazz
COUNTRY – Musique country
NATION M – Musique
populaire dans une autre
langue que l’anglais
OLDIES – Musique populaire
des années 50 et 60
FOLK M – Musique folk
DOCUMENT – Documentaires
• De plus, il existe trois autres types de programme :
ALARM, ALARMTST, et NO TYPE. ALARM et
ALARMTST sont utilisés pour diffuser des annonces
d’urgence. NO TYPE apparaît lorsqu’un type de
programme ne peut pas être trouvé.
Recherche de programmes RDS
Vous pouvez rechercher un type de programme répertorié cidessus.
1 Appuyez sur TUNER puis sur BAND pour sélectionner la
bande FM.
• La fonction RDS n’est possible que dans la bande FM.
2 Appuyez sur la touche PTY.
SEARCH apparaît sur l’afficheur.
3 Appuyez sur PRESET
programme à écouter.
4 Appuyez sur la touche ENTER pour lancer la recherche
du type de programme.
Le système commence à rechercher les stations radio
préréglées qui correspondent au type de programme
souhaité et arrête la recherche dès qu’il en a trouvé une.
Répétez cette opération pour trouver d’autres stations.
Si NO PTY est affiché, cela signifie que le tuner n’a pas pu
trouver le type de programme que vous cherchiez au moment
de la recherche.
• RDS n’effectue la recherche que parmi les stations
préréglées. Si aucune station n’a été réglée, ou si le type
de programme n’a pas pu être trouvé parmi les stations
préréglées, NO PTY est affiché. FINISH signifie que la
recherche est terminée.
/
pour sélectionner le type de
Affichage d’informations RDS
La touche DISPLAY permet d’afficher les différents types
d’informations RDS disponibles.
Appuyez sur DISPLAY pour plus d’informations sur le
système RDS.
Chaque pression fait changer l’affichage dans l’ordre suivant
:
• Radio Text (RT) – Messages envoyés par la station de
radio. Par exemple, une station de radio interactive
propose un numéro de téléphone comme données RT.
• Program Service Name (PS) – Nom de la station de radio.
•Program Type (PTY) – Indique le type de programme en
cours de diffusion.
• Fréquence actuelle du syntoniseur (FREQ)
• Si des parasites sont captés pendant que RT défile sur
l’affichage, certains caractères peuvent s’afficher de
façon incorrecte.
• Si vous voyez NO TEXT dans l’affichage RT, cela signifie
qu’aucune donnée RT n’est transmise par la station.
L’affichage bascule automatiquement sur l’écran de
données PS (en cas d’absence de données PS,
l’indication NO NAME apparaît).
• L’affichage PTY peut indiquer NO PTY.
English Français Español Italiano
Deutsch
Nederlands
25
Fr
Page 56

Utilisation des fonctions
d'arrêt automatique et de
réveil
Réglage du minuteur de réveil
O
Lecture programmée :
L’appareil s’allume et lance la lecture de la source (CD,
TUNER, USB ou iPod/iPhone) désirée à une heure
prédéfinie.
Avant de régler la minuterie :
• Vérifiez que l'horloge est réglée à l'heure exacte (Réglage
de l'horloge à la page 11). Si l’horloge n’est pas à l’heure,
on ne peut pas programmer une opération.
• Pour la lecture programmée : Branchez le périphérique
USB ou insérez le disque ou connectez votre iPod, selon
la source que vous voulez lire.
1 Appuyez sur la touche STANDBY/ON.
2 Appuyez sur la touche TIMER pendant plus de deux
secondes.
3 Dans les 10 secondes qui suivent, utilisez la touche
pour sélectionner l'option « Timer Set », puis
appuyez sur la touche ENTER.
4 Sélectionnez la source à lire.
Utilisez les touches / pour sélectionner la fonction CD,
TUNER, USB ou iPod/iPhone.
5 Appuyez sur la touche ENTER.
6 Réglez le jour de la semaine.
Utilisez les touches / pour choisir le jour.
26
Fr
La fonction minuterie peut être réglée comme suit.
EVERYDAY SUNDAY MONDAY
TUESDAY WEDNESDAY THURSDAY
FRIDAY SATURDAY MON-FRI
TUE-SAT SAT-SUN
7 Appuyez sur la touche ENTER.
8 Réglez l’heure de mise en marche.
Utilisez les touches / pour régler l'heure, puis appuyez
sur ENTER.
Réglez les minutes de la même manière et appuyez sur
ENTER lorsque vous avez terminé.
9 Réglez l’heure d’arrêt.
Procédez de la manière indiquée ci-dessus et appuyez sur
ENTER
lorsque vous avez terminé.
10 Utilisez les touches
11 Appuyez sur la touche ENTER.
Le voyant TIMER s'allume et les réglages sont confirmés sur
l'affichage.
12 Appuyez sur STANDBY/ON pour passer en mode veille.
/
pour régler le volume.
Activation et désactivation du minuteur de réveil
Si vous avez déjà réglé la minuterie de réveil, vous pouvez
l'activer ou la désactiver.
1 Lorsque le récepteur est sous tension, appuyez sur la
touche TIMER pendant plus de deux secondes.
2 Dans les 10 secondes qui suivent, utilisez les touches
pour sélectionner l'option « Timer On » ou « Timer
Off », puis appuyez sur la touche ENTER.
Lorsque l'option «
TIMER s'allume et les réglages sont confirmés sur l'affichage.
3 Lorsque l'option « Timer On » est sélectionnée, appuyez
sur STANDBY/ON pour passer en mode veille.
Timer On
» est sélectionnée, le voyant
Réutilisation de l’opération programmée en
mémoire
/
Le paramétrage du programmateur sera mémorisé une fois
entré. Pour réutiliser le même paramétrage, faites les
opérations suivantes.
1 Lorsque le récepteur est sous tension, appuyez sur la
touche TIMER pendant plus de deux secondes.
2 Dans les 10 secondes qui suivent, utilisez les touches
pour sélectionner l'option « Timer Call », puis
appuyez sur la touche ENTER.
Le voyant TIMER s'allume et les réglages sont confirmés sur
l'affichage.
Mise en arrêt différée
Appuyez sur la touche SLEEP pour changer le délai
avant que le récepteur ne passe en mode veille (30 min.
– 60 min. – 90 min. – Off).
• Vous pouvez vérifier le temps restant avant le passage en
mode veille en appuyant une fois sur la touche SLEEP.
/
/
Page 57

Informations
complémentaires
Dépannage
De nombreux problèmes potentiels peuvent être résolus par
l’utilisateur avant de faire appel à un technicien de service.
Si le cas se présente, se reporter au tableau ci-dessous avant
de prendre contact avec un revendeur ou un centre de
réparation agréés par PIONEER.
Généralités
L’horloge n’est pas à l’heure.
Y a-t-il eu une panne de courant ?
Remettre l’horloge à l’heure. (Voir page 11)
L’appareil ne répond pas à la pression d’une touche.
Mettre l’appareil en veille et le rallumer.
S’il fonctionne toujours mal, réinitialiser. (Voir page 29)
Aucun son n’est entendu.
Le volume est-il réglé sur « Min » ?
Le casque est-il branché ?
Les fils des enceintes sont-ils débranchés ?
Lecteur CD
La lecture ne démarre pas.
La lecture s’arrête au milieu ou ne se fait pas correctement.
Le disque est-il mis à l’envers ?
Le disque satisfait-il à la norme ?
Le disque est-il déformé ou rayé ?
La lecture est intermittente ou s’arrête.
L’appareil subit-il des vibrations ?
Le disque est-il encrassé ?
Une condensation est-elle formée dans l’appareil ?
Télécommande
La télécommande ne fonctionne pas.
L’appareil est-il branché sur secteur ?
Les polarités des pile sont-elles respectées ?
Les piles sont mortes ?
La distance et l’angle sont-ils corrects ?
Le capteur de télécommande reçoit-il une forte lumière ?
Syntoniseur
L’émission radiodiffusée est parasitée consécutivement.
L’appareil se trouve-t-il à proximité d’un téléviseur ou d’un PC
?
L’antenne FM ou le cadre-antenne PO est-il placé à proximité ?
Éloigner l’antenne du cordon d’alimentation.
USB
Impossible de détecter le périphérique.
Des fichiers MP3/WMA sont-t-ils disponibles ?
Le périphérique est-il correctement raccordé ?
Le périphérique est-il de type MTP ?
Le périphérique ne contient-il que des fichiers AAC ?
La lecture ne démarre pas.
Le fichier WMA est-il protégé par un copyright ?
Le fichier MP3 est-il endommagé ?
iPod et iPhone
Aucun son n’est produit. Aucune image n’apparaît sur le
téléviseur/écran.
iPod ou iPhone n’est pas lu.
iPod ou iPhone n’est pas correctement raccordé à l’appareil.
L’appareil est-il branché sur secteur ?
Le câble vidéo n’est pas correctement raccordé.
La sélection d’entrée télévision/écran n’est pas correctement
réglée.
Le son d'un iPod/iPhone connecté à l'appareil ne peut pas être
écouté au moyen d'un casque ou d'écouteurs branché(s) sur
la prise casque de l'appareil.
L’iPod ou iPhone ne se charge pas.
Le contact entre iPod ou iPhone et le connecteur n’est pas
complet.
L’iPod utilisé est de (3
L’iPod ou l’iPhone n’est pas pris en charge. Pour des modèles
compatibles, se reporter à la Modèles d’iPod, iPhone et iPad
pris en charge : à la page 17.
« This accessory is not made to work with iPhone » ou « This
accessory is not supported by iPhone » apparaît sur l’écran
de iPhone.
La batterie de iPhone est faible. Veuillez recharger iPhone.
L’iPhone n’est pas raccordé correctement.
ème
génération).
Fonction NETWORK
Impossible d’accéder au réseau.
Le câble LAN n’est pas bien raccordé. Enfoncez bien la fiche
du câble LAN dans la prise (page 10).
Le routeur n’est pas sous tension. Mettez le routeur sous
tension.
Un logiciel antivirus est actuellement installé sur le
composant raccordé. Dans certains cas, il n’est pas possible
d’accéder à un composant sur lequel un logiciel antivirus a
été installé.
Le composant audio en réseau qui a été mis hors tension est
mis sous tension. Mettez le composant audio en réseau sous
tension avant le récepteur.
La lecture ne démarre pas alors que ‘Please Wait’ reste
affiché.
Le composant est actuellement débranché du récepteur ou de
la source d’alimentation. Vérifiez si le composant est
correctement raccordé à ce récepteur ou à la source
d’alimentation.
L’ordinateur ou la radio Internet ne fonctionne pas
correctement.
L’adresse IP n’a pas été désignée correctement. Mettez en
service la fonction de serveur DHCP de votre routeur, ou
paramétrez le réseau manuellement pour votre
environnement réseau (page 21).
L’adresse IP est désignée automatiquement. Le paramétrage
automatique prend un certain temps. Veuillez attendre.
Les fichiers audio enregistrés sur les composants en réseau,
par exemple sur un ordinateur, ne peuvent pas être lus.
Windows Media Player 11 ou Windows Media Player 12 n’est
pas actuellement installé sur votre ordinateur. Installez
Windows Media Player 11 ou Windows Media Player 12 sur
votre ordinateur .
Des fichiers audio ont été enregistrés dans d’autres formats
que MP3, WAV (LPCM seulement), MPEG-4 AAC, FLAC et
WMA. Lisez des fichiers audio enregistrés dans les formats
MP3, WAV (LPCM seulement), MPEG-4 AAC, FLAC et WMA. Il
se peut toutefois que certains fichiers audio enregistrés dans
ces formats ne puissent pas être lus sur ce récepteur.
Les fichiers audio enregistrés en MPEG-4 AAC ou FLAC sont
lus avec Windows Media Player 11 ou Windows Media Player
12. Les fichiers audio enregistrés en MPEG-4 AAC ou FLAC ne
peuvent pas être lus avec Windows Media Player 11 ou
Windows Media Player 12. Essayez un autre serveur. Reportezvous au mode d’emploi fourni avec votre serveur.
Le composant raccordé au réseau ne fonctionne pas
correctement.
-
Vérifiez si le composant est affecté par quelque chose ou s’il
est en veille.
-
Essayez de remettre le composant en marche, si
nécessaire.
Le composant raccordé au réseau ne permet pas le partage
de fichiers. Essayez de changer les réglages du composant
raccordé au réseau.
Le dossier enregistré sur le composant raccordé au réseau a
été supprimé ou endommagé. Vérifiez le dossier enregistré
sur le composant raccordé au réseau.
English Français Español Italiano
Deutsch
Nederlands
27
Fr
Page 58

Impossible d’accéder au composant raccordé au réseau.
Le composant raccordé au réseau n’est pas réglé
correctement. Si le l’autorisation est automatique, vous devez
saisir de nouveau les informations appropriées. Vérifiez si la
connexion n’est pas réglée sur “Do not authorize” (Ne pas
autoriser).
Il n’y a aucun fichier audio lisible sur le composant raccordé
au réseau. Vérifiez les fichiers audio enregistrés sur le
composant raccordé au réseau.
La lecture audio s’arrête ou est perturbée.
Le fichier audio actuellement en cours de lecture n’a pas été
enregistré dans un format lisible par ce récepteur.
-
Vérifiez si le fichier audio a été enregistré dans un format
pris en charge par ce récepteur.
-
Vérifiez si le dossier a été endommagé ou détruit.
-
Il se peut que dans certains cas des fichiers audio ne
puissent pas être lus ou affichés bien qu’ils soient
compatibles avec ce récepteur (page 22).
Le câble LAN est actuellement débranché. Raccordez le câble
LAN correctement (page 10).
Le trafic est très important sur le réseau auquel vous avez
accès par Internet. Utilisez une liaison 100BASE-TX pour
accéder aux composants en réseau.
Impossible d’accéder à Windows Media Player 11 ou
Windows Media Player 12.
Dans le cas de Windows Media Player 11 : Vous êtes
actuellement connecté au domaine par un ordinateur sur
lequel Windows XP ou Windows Vista est installé. Au lieu de
vous connecter au domaine, connectez-vous sur la machine
locale (page 20).
Dans le cas de Windows Media Player 12 : Vous êtes
actuellement connecté au domaine par un ordinateur sur
lequel Windows 7 est installé. Au lieu de vous connecter au
domaine, connectez-vous sur la machine locale (page 20).
Impossible d’écouter des stations radio Internet.
Les réglages de pare-feu des composants en réseau agissent
actuellement. Vérifiez les réglages de pare-feu des
composants en réseau.
Vous êtes actuellement déconnecté d’Internet. Vérifiez les
réglages de connexion des composants en réseau et
adressez-vous à votre fournisseur de réseau, si nécessaire
(page 21).
Les émissions d’une station radio Internet ont été arrêtées ou
interrompues. Il existe des cas où il est impossible d’écouter
des stations radio Internet bien qu’elles figurent dans la liste
des stations radio Internet pouvant être écoutées avec ce
récepteur (page 20).
28
Fr
La fonction NETWORK ne peut pas être contrôlée via la
télécommande.
La télécommande n’est pas réglée sur le mode NETWORK.
Appuyez sur NETWORK pour basculer la télécommande sur
le mode NETWORK (page 20).
Dépannage du réseau local sans fil
Impossible de se connecter au réseau via le convertisseur de
réseau sans fil.
Le convertisseur de réseau sans fil n'est pas sous tension (les
voyants « Power », « WPS » et « Wireless » du convertisseur
ne sont pas tous allumés). Vérifiez que le câble USB reliant le
convertisseur de réseau sans fil à la prise DC OUTPUT for
WIRELESS LAN du récepteur est correctement connecté.
Le câble LAN n’est pas bien raccordé. Enfoncez bien la fiche
du câble LAN dans la prise (page 10).
Le convertisseur de réseau sans fil et l'unité de base (routeur
LAN sans fil, etc.) sont trop éloignés ou il y a un obstacle entre
eux. Améliorez l'environnement du réseau sans fil en
rapprochant le convertisseur de réseau sans fil et l'unité de
base, etc.
Un four à micro-ondes ou un autre appareil générant des
ondes électromagnétiques se trouve dans l'environnement du
réseau sans fil.
-
Utilisez le système dans un endroit à l'écart des fours à
micro-ondes ou d'autres équipements produisant des ondes
électromagnétiques.
-
Évitez autant que possible d'utiliser des appareils générant
des ondes électromagnétiques lors de l'utilisation du
système avec le réseau local sans fil.
Plusieurs convertisseurs de réseau sans fil sont reliés au
routeur LAN sans fil. En cas d'utilisation de plusieurs
convertisseurs de réseau sans fil, leurs adresses IP doivent
être changées. Par exemple, si l'adresse IP du routeur LAN
sans fil est « 192.168.1.1 », réglez l'adresse IP du premier
convertisseur de réseau sans fil sur « 192.168.1.249 » et
l'adresse IP du second convertisseur de réseau sans fil sur
« 192.168.1.248 », en utilisant des valeurs comprises entre 2 et
249 (telles que « 249 » et « 248 ») non affectées à d'autres
convertisseurs de réseau sans fil ou à d'autres équipements.
La connexion réseau sans fil ne peut pas être établie entre le
convertisseur de réseau sans fil et l'unité de base (routeur
LAN sans fil, etc.).
-
Avec le convertisseur de réseau sans fil connecté au
récepteur, mettez le récepteur hors tension, débranchez le
cordon d'alimentation de la prise secteur, puis rebrancher le
cordon d'alimentation et mettez le récepteur sous tension.
-
Le convertisseur de réseau sans fil doit être configuré pour
pouvoir établir une connexion réseau sans fil. Pour plus
d'informations, consultez le mode d’emploi fourni avec le
convertisseur de réseau sans fil.
Le convertisseur de réseau sans fil est correctement connecté
au récepteur et les indicateurs du convertisseur sont allumés,
mais le convertisseur de réseau sans fil ne peut pas être
configuré par le récepteur (l'écran des paramètres ne peut pas
être affiché).
Si l'option Network Modes (modes réseau), dans les
paramètres réseau Network Settings, est réglée sur STATIC
et que l'adresse IP a été entrée manuellement, il se peut que
l'adresse IP définie sur le convertisseur de réseau sans fil ne
corresponde pas. Dans les paramètres réseau Network
Settings, réglez l'option Network Modes sur DHCP. Une fois
le réglage terminé, mettez le récepteur hors tension. Ensuite,
remettez le récepteur sous tension et vérifiez si les paramètres
du convertisseur de réseau sans fil peuvent être affichés avec
le récepteur.
Si les paramètres peuvent être affichés, changez les
paramètres d'adresse IP du récepteur et du convertisseur de
réseau sans fil, si nécessaire.
Les paramètres d'adresse IP du récepteur et du convertisseur
de réseau sans fil ne correspondent pas aux paramètres du
routeur LAN sans fil, etc.
Vérifiez les paramètres d'adresse IP du récepteur et du
convertisseur de réseau sans fil (y compris l'option Network
Modes).
Si l'option Network Modes du récepteur est réglée sur DHCP,
mettez le récepteur hors tension puis de nouveau sous
tension.
Vérifiez que les paramètres d'adresse IP du récepteur et du
convertisseur de réseau sans fil correspondent aux
paramètres du routeur LAN sans fil, etc.
Si l'option Network Modes du récepteur est réglée sur
STATIC, définissez une adresse IP qui corresponde au réseau
de l'unité principale (routeur LAN sans fil, etc.).
Par exemple, si l'adresse IP du routeur LAN sans fil est «
192.168.1.1 », réglez l'adresse IP du récepteur sur «
192.168.1.XXX » (* 1), le masque de sous-réseau sur «
255.255.255.0 », la passerelle et le serveur DNS sur «
192.168.1.1 ».
Ensuite, définissez l'adresse IP du convertisseur de réseau
sans fil sur « 192.168.1.249 » (*2).
(* 1) Réglez la valeur « XXX » dans « 192.168.1.XXX » sur un
nombre compris entre 2 et 248 qui n'est pas affecté à d'autres
équipements.
(* 2) Réglez la valeur « 249 » dans « 192.168.1.249 » sur un
nombre compris entre 2 et 249 qui n'est pas affecté à d'autres
équipements.
Essayez de configurer les réglages avancés sur le
convertisseur de réseau sans fil.
Le convertisseur de réseau sans fil peut être connecté à un
ordinateur pour configurer les réglages de réseau sans fil
avancés. Pour plus d'informations sur le convertisseur de
réseau sans fil, consultez le CD-ROM fourni. Vérifiez les
Page 59

paramètres du routeur LAN sans fil, etc., puis modifiez les
Remarque
ATTENTION
ATTENTION
YES
Correct
NO
paramètres du convertisseur de réseau sans fil.
Notez, cependant, que le fait de configurer les réglages de
réseau sans fil avancés ne garantit pas une amélioration de
l'environnement du réseau sans fil. Soyez prudent lorsque
vous modifiez les paramètres.
Le point d'accès est configuré pour dissimuler le nom du
réseau sans fil (SSID). Dans ce cas, le SSID ne peut être
affiché sur l'écran de la liste des points d'accès. Dans ce cas,
configurez le SSID, etc., en réglant manuellement les
paramètres du convertisseur de réseau sans fil sur le
récepteur.
Les paramètres de sécurité du point d'accès utilisent une clé
de type « WEP 152 bits » ou une authentification par clé
partagée. Ce récepteur ne prend pas en charge les clé de type
« WEP 152 bits » ni l'authentification par clé partagée.
La connexion réseau ne peut pas être établie même après
avoir effectué les procédures ci-dessus. Réinitialisez le
convertisseur de réseau sans fil. Après cela, effectuez de
nouveau la procédure de configuration du convertisseur de
réseau sans fil.
-
À propos de la réinitialisation
1. Vérifiez que le convertisseur de réseau sans fil est sous
tension.
2. Appuyez sur le bouton de réinitialisation du convertisseur
de réseau sans fil pendant au moins 3 secondes.
3. Relâchez le bouton de réinitialisation.
Une fois que le convertisseur de réseau sans fil a
redémarré, la procédure de réinitialisation est terminée.
Condensation
Un changement brusque de température et la conservation
ou l’utilisation dans un lieu très humide peuvent occasionner
une formation de condensation à l’intérieur de l’appareil
(cellule porte-laser CD, etc.) ou sur l’émetteur de la
télécommande. La condensation peut provoquer des
dysfonctionnements de l’appareil. Si cela se produit, laisser
l’appareil allumé sans disque jusqu’à ce qu’une lecture
normale redevienne possible (environ 1 heure). Essuyer toute
condensation sur l’émetteur avec un chiffon doux avant de
faire fonctionner l'appareil.
Si le problème survient
Si l’appareil a subi une force extérieure (chocs, électricité
statique, surtension due à un foudre, etc.) ou une mauvaise
manipulation, il peut mal fonctionner.
Si un tel problème survient, procéder comme suit :
1 On mettra l’appareil en attente et le rallumera.
2 Si la démarche précédente ne permet pas le retour à un
fonctionnement normal de l’appareil, débranchez-le de
la prise de courant et rebranchez-le et enfin rallumer
l’appareil.
• Si l’appareil n’est toujours pas remis en état, il faut le
réinitialiser pour effacer toute la mémoire.
Réinitialisation des réglages d’usine,
effacement de toute la mémoire
Si l'iPod/iPhone est raccordé à l'appareil, débranchez-le.
1 Appuyer sur la touche STANDBY/ON pour passer en
veille.
2 Appuyez simultanément sur les touches STANDBY/ON
et sur le récepteur.
L'indication « RESET YES? » apparaît.
3 Appuyez sur la touche / ( ).
L'indication « RESET... » apparaît.
Si vous n'appuyez pas sur la touche / ( ) dans les
10 minutes qui suivent l'étape 2, le récepteur quitte le mode
RESET MODE.
• Cette opération efface toutes les données en mémoire :
réglages pour horloge, minuterie, présélection de tuner et
programmes CD.
Avant de transporter l’appareil
Retirer l’iPod, le dispositif de mémoire USB et le disque de
l’appareil. Puis mettez l’appareil en mode de veille.
Transporter l’appareil alors que l’iPod ou le dispositif de
mémoire USB est installé ou que des disques sont restés à
l’intérieur peut endommager l’appareil.
Entretien de disques compact
Le compact disc résiste bien aux dommages, mais il peut se
produire un mauvais alignement dû à l’encrassement de la
surface du disque. Afin de profiter au maximum des disques
et de ce lecteur, suivre les conseils ci-dessous.
• Éviter d’écrire sur le disque, notamment sur la face non
munie d’une étiquette. La lecture se fait sur cette face.
• Éviter d’exposer les disques directement au soleil, à la
chaleur et à l’humidité.
• Tenir le compact disc par les bords. Les traces de doigts,
la saleté et l’eau sur le compact disc sont à l’origine de
bruit ou d’un alignement erroné. Si le compact disc est
encrassé ou ne fonctionne pas correctement, nettoyer le
disque avec un chiffon doux et sec. Essuyer du centre
vers la périphérie, en ligne droite.
Nettoyage du coffret
Essuyer régulièrement le coffret à l’aide d’un chiffon doux et
d’une solution d’eau savonneuse, puis essuyer à l’aide d’un
chiffon sec.
• Éviter d’utiliser des produits chimiques (essence, dilu ant,
etc.) pour le nettoyage. Cela pourrait endommager
l’enveloppe.
• Ne pas lubrifier l’appareil. Ce dernier peut mal
fonctionner.
Attention si l’appareil est installé dans un
meuble avec une porte en verre
• N’appuyez pas sur OPEN/CLOSE de la télécommande
pour ouvrir le tiroir à disque lorsque la porte de verre est
fermée. La porte gênerait l’ouverture du tiroir à disque et
le lecteur pourrait être endommagé.
English Français Español Italiano
Deutsch
Nederlands
29
Fr
Page 60

À propos des formats de fichiers de musique lisibles
Les fonctions USB et NETWORK (réseau) de ce récepteur prennent en charge les formats de
fichiers de musique suivants.
• Notez que certains formats de fichiers ne sont pas disponibles pour la lecture bien qu’ils
figurent comme formats de fichiers lisibles. De plus, la compatibilité des formats de
fichiers dépend du type de serveur. Assurez-vous auprès de votre serveur de la
compatibilité des formats de fichiers pris en charge.
Catégorie Extension Flux
a
MP3
WAV .wav LPCM Fréquence
WMA .wma WMA2/7/8 Fréquence
.mp3 MPEG-1 Audio
Layer-3
WMA9 Fréquence
Fréquence
d’échantillonnage
Débit binaire requis pour
la quantification
Canal 2 canaux
Débit binaire 32 kbps à 320 kbps
VBR/CBR Pris en charge/Pris en
d’échantillonnage
Débit binaire requis pour
la quantification
Canal 2 canaux
d’échantillonnage
Débit binaire requis pour
la quantification
Canal 2 canaux
Débit binaire 32 kbps à 320 kbps
VBR/CBR Pris en charge/Pris en
d’échantillonnage
Débit binaire requis pour
la quantification
Canal 2 canaux
Débit binaire 32 kbps à 320 kbps
VBR/CBR Pris en charge/Pris en
44,1 kHz à 48 kHz
16 bits
charge
44,1 kHz, 48 kHz, 96 kHz
16 bits, 20 bits, 24 bits
44,1 kHz à 48 kHz
16 bits
charge
44,1 kHz à 48 kHz
16 bits
charge
30
Fr
Catégorie Extension Flux
AAC .m4a
FLAC .flac FLAC Fréquence
a “Technologie de décodage audio MPEG Layer-3 sous licence de Fraunhofer IIS et Thomson
.aac
Multimedia.”
MPEG-4 AAC LC
MPEG-4 HE AAC
(aacPlus v1/2)
Fréq uenc e
d’échantillonnage
Débit binaire requis pour
la quantification
Canal 2 canaux
Débit binaire 16 kbps à 320 kbps
VBR/CBR Pris en charge/Pris en
d’échantillonnage
Débit binaire requis pour
la quantification
Canal 2 canaux
Débit binaire —
44,1 kHz à 48 kHz
16 bits
charge
44,1 kHz, 48 kHz, 96 kHz
16 bits, 24 bits
À propos des mentions d’état
Reportez-vous aux informations suivantes lorsqu’une mention d’état apparaît pendant
l’utilisation de NETWORK.
Mentions d’état Descriptions
List empty, Add from Now Playing... Cette liste est vide. Veuillez ajouter les éléments à partir
No item Il n'y a aucun élément.
Rescanning devices... Nouvelle analyse en cours. Veuillez attendre.
Unsupported Format Ce format n'est pas pris en charge.
Server Connection Error Connexion au serveur impossible.
Error opening stream Erreur de flux.
Already in favorites Cet élément est déjà enregistré dans vos favoris.
Unsupported item Cet élément n'est pas pris en charge par cet appareil.
Unknown error Une erreur non identifiée s'est produite.
Connection Error... Connexion au réseau impossible.
de la liste Now Playing (en lecture).
Page 61

Spécifications
PIONEER se réserve le droit d’apporter des modifications à la
présentation et aux caractéristiques des appareils à fin
d’amélioration. Les chiffres des spécifications de
performance donnés sont les valeurs nominales des
appareils à la production. Ces valeurs peuvent être
légèrement différentes en fonction de chaque appareil.
*Les spécifications sont valables pour une alimentation de
230 V.
Section amplificateur
Puissance de sortie RMS . . . . . . . . . . . . . . . . . .50 W + 50 W
Impédance garantie des enceintes . . . . . 4 ohms à 16 ohms
Casque . . . . . . . . . . . . . . . . . . . . . . . .recommandé : 32 ohms
Section syntoniseur
Gamme de fréquences (FM) . . . . . . . . . .87,5 MHz à 108 MHz
Entrée antenne (FM) . . . . . . . . . . . . . .75 ohms asymétriques
Gamme de fréquences (AM) . . . . . . . . . . .531 kHz à 1602 kHz
Antenne (AM) . . . . . . . . . . . . . . . . . . . . . . . . . . Antenne cadre
Section vidéo
Niveau de signal (Composite) . . . . . . . . . . . .1 Vp-p (75 ohms)
Section Réseau
Borne LAN. . . . . . . . . . . . . . . . . . . . . . . . . . . . . . Prise Ethernet
Autres connecteurs
Alimentation
Connecteur USB avant . . . . . . . . . . . . . . . . . . . . . 5 V, 2,1 A
Connecteur iPod . . . . . . . . . . . . . . . . . . . . . . . . . . 5 V, 1,0 A
Connecteur d'alimentation (CC) arrière (pour réseau sans
fil). . . . . . . . . . . . . . . . . . . . . . . . . . . . . . . . . . . . .5 V, 600 mA
Divers
Alimentation . . . . . . . . . . . . . . . . . . . . 220 V à 240 V CA, 50 Hz
Consommation
Allumé. . . . . . . . . . . . . . . . . . . . . . . . . . . . . . . . . . . . . . .80 W
En veille. . . . . . . . . . . . . . . . . . . . . . . . . . . . . . . . .0,5 W max.
Dimensions
Largeur . . . . . . . . . . . . . . . . . . . . . . . . . . . . . . . . . . . 215 mm
Hauteur. . . . . . . . . . . . . . . . . . . . . . . . . . . . . . . . . . . 111 mm
Profondeur . . . . . . . . . . . . . . . . . . . . . . . . . . . . . . . . 353 mm
Poids . . . . . . . . . . . . . . . . . . . . . . . . . . . . . . . . . . . . . . . . . 4,7 kg
(1 kHz, 10 % T.H.D., 4 ohms)
10BASE-T/100BASE-TX
Enceintes (X-HM70 uniquement)
Type
Enceinte à 2 voies
Dôme-Tweeter de 2,5 cm
Woofer de 12 cm
Puissance d’entrée max. . . . . . . . . . . . . . . . . . . . . . . . . . .50 W
Impédance . . . . . . . . . . . . . . . . . . . . . . . . . . . . . . . . . . . 4ohms
Dimensions
Largeur . . . . . . . . . . . . . . . . . . . . . . . . . . . . . . . . . . .148 mm
Hauteur . . . . . . . . . . . . . . . . . . . . . . . . . . . . . . . . . 263,5 mm
Profondeur . . . . . . . . . . . . . . . . . . . . . . . . . . . . . . . . 208 mm
Poids . . . . . . . . . . . . . . . . . . . . . . . . . . . . . . . . 2,7 kg (chacune)
À propos de l’iPod/iPhone/iPad
Les accessoires électroniques portant la mention « Made for
iPod », « Made for iPhone » et « Made for iPad » ont été
conçus pour fonctionner respectivement avec un iPod, un
iPhone ou un iPad et sont certifiés conformes aux exigences
d’Apple par le fabricant. Apple n’est pas responsable pour le
fonctionnement de cet appareil ou de sa compatibilité avec
les normes réglementaires et de sécurité. Apple n’est pas
responsable pour le fonctionnement de cet appareil ou de sa
compatibilité avec les normes réglementaires et de sécurité.
Veuillez noter que l’emploi de cet accessoire avec un iPod, un
iPhone, ou un iPad peut affecter les performances sans fil.
iPad, iPhone, iPod, iPod classic, iPod nano et iPod touch sont
des marques déposées d'Apple Inc, enregistrées aux ÉtatsUnis et dans d'autres pays.
Clause d'exclusion de responsabilite des
contenus de tiers
L'acces a du contenu Web requiert un acces internet haut
debit et peut aussi necessiter l'enregistrement de vos
coordonnees et le paiement d'un abonnement sur un site. Le
contenu du site peut etre change, suspendu, interrompu
sans aucun avertissement, Pionner declinant toute
responsabilite quant a d'eventuels changements. Pioneer
decline toute responsabilite quant au contenu, a sa
disponibilite et quant a la continuite du service.
© 2011 PIONEER CORPORATION.
Tous droits de reproduction et de traduction réservés.
English Français Español Italiano
Deutsch
Nederlands
31
Fr
Page 62

Avis concernant la
licence du logiciel
Les licences du logiciel utilisé
dans ce produit sont les
suivantes.
Licence Publique Générale
GNU et Licence Publique
Générale Limitée GNU
Ce produit inclut le logiciel suivant autorisé
selon les termes de la Licence Publique
Général GNU v2, la Licence Publique
Général Limitée GNU v2.1 ou LPGL v2.0.
– Linux Kernel Copyright (C) 2009 Linux
Torvalds. Licensed Under GPLv2
– uClibc Copyr ight (C) 2000-2008 Erik
Andersen. Licensed underLGPLv2.1
– DirectFB (c) Copyright 2001-20 07 The
DirectFB Organization (directfb.org)
(c) Copyright 2000-2004 Convergence
(integrated media) GmbH. Li cenced
under LGPLv2.1
– ffmpeg (c) Copyr ight 2000-2004
Convergence (integrated media)
GmbH. Licenced under LGPLv2.1
– glib Copyri ght 2007-2008 The GTK+
Team. Licenced under GPLv2
– libalsa Copyright 2009 ALSA Project.
Licenced under LGPLv2.1
– libid3tag Copyright (C) 2000-2004
Underbit Technologies, Inc. Licenced
under GPLv2
– libmad Copyright (C) 2000-2004
Underbit Technologies, Inc. Licenced
under GPLv2
– libsoup Copyri ght (C) 2005-2011 The
GNOME Project. Licensed under
GPLv2
– Lite 2002-2 008 (c) Copyright 2001-
2007 The DirectFB Organization
(directfb.org) Copyright (C) 2000-2004
Convergence (integrated media)
GmbH Licensed under LGPLv2.1
– dbus-glib Licenced under GPLv2
– gssdp Licenced under GPLv2
– GnuTLS Copyright (C ) 2006, 2007,
2008, 2009 Simon Josefsson
Copyright (C) 2000, 2001, 2002, 2003,
2004, 2005 Nikos
Mavrogiannopoulos. Licenced under
GPLv2
– gupnp Licenced under LGPLv2
– gupnp-av Licenced under LGPLv2
– libgcry pt Copyright 2000, 2002, 2003,
2004, 2007, 2008, 2009 Free Software
Foundation, Inc. Licenced under
GPLv2
– gee Licenced under LGPLv2.1
– TabLib Licenced under LGPLv2.0
32
Fr
– vlc Copyr ight(C) 1998-2008 the
VideoLAN team. Licensed under
GPLv2
– rygel Licensed under LGPLv2.0
– dbus Licenced under GPLv2
– tslib. Licensed under LGPLv2.0
– FUSE Copyright (C) 2001-2007 Miklos
Szeredi. Licensed under GPLv2
– libiconv C opyright (C) 2007 Free
Software Foundation, Inc. Licensed
under LGPLv2
– Libgpg-error Copyright 2003, 2004,
2005, 2006, 2007 g10 Code GmbH.
Licensed under GPLv2
– busybox Copyrig ht (C) 1998-2008 Erik
Andersen, Rob Landley, Denys
Vlasenko and others. Licensed under
GPLv2
– faad Copy right (C) 2003-2005 M.
Bakker, Nero AG. Licensed under
GPLv2
Téléchargez la copie du code source à
partir de l’adresse Web (URL) ci-dessous.
http://www.oss-pioneer.com/homeav/AVR
Remarque : nous ne pouvons répondre à
aucune question concernant le contenu du
code source.
ABSENCE DE GARANTIE
COMME LA LICENCE DU PROGRAMME
EST CONCEDEE A TITRE GRATUIT, IL N’Y
AUCUNE GARANTIE S’APPLIQUANT AU
PROGRAMME, DANS LA MESURE
AUTORISEE PAR LA LOI EN VIGUEUR.
SAUF MENTION CONTRAIRE ECRITE, LES
DETENTEURS DU DROIT D’AUTEUR ET/O U
LES AUTRES PARTIES METTENT LE
PROGRAMME A DISPOSITON “EN L’ETAT”,
SANS AUCUNE
GARANTIE DE QUELQUE NATURE QUE CE
SOIT, EXPRESSE OU IMPLICITE, Y
COMPRIS, MAIS SANS LIMITATION, LES
GARANTIES IMPLICITES DE
COMMERCIALISATION ET DE L’APTITUDE
A UN OBJET PARTICULIER. C’EST LE
CONCESSIONNAIRE QUI PREND LA
TOTALITE DU RISQUE QUANT A LA
QUALITE ET AUX PERFORMANCES DU
PROGRAMME. SI LE PROGRAMME SE
REVELAIT DEFECTUEUX, C’EST LE
CONCESSIONNAIRE QUI PRENDRAIT A
SA CHARGE LE COUT DE L’ENSEMBLE
DES OPERATIONS NECESSAIRES
D’ENTRETIEN, REPARATION OU
CORRECTION. EN AUCUN CAS, SAUF SI
LA LOI EN VIGUEUR L’EXIGE OU SI UNE
CONVENTION ECRITE EXISTE A CE SUJET ,
AUCUN DETENTEUR DE DROITS
D’AUTEUR, OU AUCUNE PARTIE AYANT
LE POUVOIR DE MODIFIER ET/ OU DE
REDISTRIBUER LE PROGRAMME
CONFORMEMENT AUX AUTORISATIONS
CIDESSUS, N’EST RESPONSABLE VIS-AVIS DU CONCESSIONNAIRE POUR CE QUI
EST DES DOMMAGES, Y COMPRIS TOUS
DOMMAGES GENERAUX, SPECIAUX,
ACCIDENTELS OU INDIRECTS,
RESULTANT DE L’UTILISATION OU DU
PROGRAMME OU DE L’IMPOSSIBILITE
D’UTILISER LE PROGRAMME (Y COMPRIS,
MAIS SANS LIMITATION, LA PERTE DE
DONNEES, OU LE FAIT QUE DES
DONNEES SONT RENDUES IMPRECISES,
OU ENCORE LES PERTES EPROUVEES
PAR LE CONCESSIONNAIRE OU PAR DES
TIERS, OU ENCORE UN MANQUEMENT
DU PROGRAMME A FONCTIONNER AVEC
TOUS AUTRES PROGRAMMES), MEME SI
CE DETENTEUR OU CETTE AUTRE PARTIE
A ETE AVISE DE LA POSSIBILITE DE TELS
DOMMAGES.
Veuillez vous référer à chaque licence pour
plus d’informations
(www.GNU.org/licenses/gpl-
2.0.html,www.GNU.org/licenses/oldlicenses/lgpl-2.1.html,et www.GNU.org/
licenses/oldlicenses/lgpl-2.0.html).
LICENCE PUBLIQUE GÉNÉRALE
GNU
Version 2, juin 1991 Copyright © 1989, 1991
Free Software Foundation, Inc., 51 Franklin
Street, Fifth Floor, Boston, MA 02110-1301,
USA.
Chacun est autorisé à copier et distribuer
des copies conformes de ce document de
licence, mais toute modifi cation en est
proscrite.
Préambule
Les licences de la plupart des logiciels sont
conçues pour vous enlever toute liberté de
les partager et de les modifier. A contrario,
la Licence Publique Générale est destinée à
garantir votre liberté de partager et de
modifier les logiciels libres, et à assurer que
ces logiciels soient libres pour tous leurs
utilisateurs. La présente Licence Publique
Générale s’applique à la plupart des
logiciels de la Free Software Foundation,
ainsi qu’à tout autre programme pour
lequel ses auteurs s’engagent à l’utiliser.
(Certains autres logiciels de la Free
Software Foundation sont couverts par la
GNU Lesser General Public License à la
place.) Vous pouvez aussi l’appliquer aux
programmes qui sont les vôtres.
Quand nous parlons de logiciels libres,
nous parlons de liberté, non de prix. Nos
licences publiques générales sont conçues
pour vous donner l’assurance d’être libres
de distribuer des copies des logiciels libres
(et de facturer ce service, si vous le
souhaitez), de recevoir le code source ou de
pouvoir l’obtenir si vous le souhaitez, de
pouvoir modifier les logiciels ou en utiliser
des éléments dans de nouveaux
programmes libres et de savoir que vous
pouvez le faire.
Pour protéger vos droits, il nous est
nécessaire d’imposer des limitations qui
interdisent à quiconque de vous refuser ces
droits ou de vous demander d’y renoncer.
Certaines responsabilités vous incombent
en raison de ces limitations si vous
distribuez des copies de ces logiciels, ou si
vous les modifiez.
Par exemple, si vous distribuez des copies
d’un tel programme, à titre gratuit ou
contre une rémunération, vous devez
accorder aux destinataires tous les droits
dont vous disposez.
Vous devez vous assurer qu’eux aussi
reçoivent ou puissent disposer du code
source. Et vous devez leur montrer les
présentes conditions afin qu’ils aient
connaissance de leurs droits.
Nous protégeons vos droits en deux étapes
: (1) nous sommes titulaires des droits
d'auteur du logiciel, et (2) nous vous
délivrons cette licence, qui vous donne
l’autorisation légale de copier, distribuer et/
ou modifier le logiciel.
En outre, pour la protection de chaque
auteur ainsi que la nôtre, nous voulons
nous assurer que chacun comprenne que
ce logiciel libre ne fa it l’objet d’aucune
garantie.
Si le logiciel est modifié par quelqu’un
d’autre puis transmis à des tiers, nous
voulons que les destinataires soient mis au
courant que ce qu’ils ont reçu n’est pas le
logiciel d’origine, de sorte que tout
problème introduit par d’autres ne puisse
entacher la réputation de l’auteur originel.
En définitive, un programme libre restera à
la merci des brevets de logiciels.
Nous souhaitons éviter le risque que les
redistributeurs d’un programme libre
fassent des demandes individuelles de
licence de brevet, ceci ayant pour effet de
rendre le programme propriétaire.
Pour éviter cela, nous établissons
clairement que toute licence de brevet doit
être concédée de façon à ce que l’usage en
soit libre pour tous ou bien qu’aucune
licence ne soit concédée.
Les termes exacts et les conditions de
copie, distribution et modification sont les
suivants:
Conditions de copie,
distribution et modification
de la Licence Publique
Générale GNU.
0. La présente Licence s’applique à tout
programme ou tout autre ouvrage
contenant un avis, apposé par le
titulaire des droits d’auteur, stipulant
qu’il peut être distribué au titre des
conditions de la présente Licence
Publique Générale. Ci-après, le
“Programme” désigne l’un quelconque
de ces programmes ou ouvrages, et un
“ouvrage fondé sur le Programme”
désigne soit le Programme, soit un
ouvrage qui en dérive au titre des lois
sur le droit d’auteur : en d’autres
termes, un ouvrage contenant le
Programme ou une partie de ce dernier,
soit à l’identique, soit avec des
modifications et/ou traduit dans un
autre langage. (Ci-après, le terme
“modification” implique, sans s’y
réduire, le terme traduction) Chaque
concessionaire sera désigné par “vous”.
Les activités autres que la copie, la
distribution et la modification ne sont
pas couvertes par la présente Licence ;
elles sont hors de son champ
d’application. L’opération consistant à
exécuter le Programme n'est soumise à
aucune limitation et les sorties du
programme ne sont couvertes que si
leur contenu constitue un ouvrage
fondé sur le Programme
(indépendamment du fait qu’il ait été
réalisé par l’exécution du Programme).
La validité de ce qui précède dépend de
ce que fait le Programme.
1. Vous pouvez copier et distribuer des
copies à l’identique du code source du
Programme tel que vous l’avez reçu, sur
n’importe quel support, du moment que
vous apposiez sur chaque copie, de
manière ad hoc et parfaitement visible,
l’avis de droit d’auteur adéquat et une
exonération de garantie ; que vous
gardiez intacts tous les avis faisant
référence à la présente Licence et à
l’absence de toute garantie ; et que vous
fournissiez à tout destinataire du
Programme autre que vous-même un
exemplaire de la présente Licence en
même temps que le Programme. Vous
pouvez faire payer l’acte physique de
transmission d’une copie, et vous
pouvez, à votre discrétion, proposer une
garantie contre rémunération.
2. Vous pouvez modifier votre copie ou des
copies du Programme ou n’importe
quelle partie de celui-ci, créant ainsi un
ouvrage fondé sur le Programme, et
copier et distribuer de telles
modifications ou ouvrage selon les
termes de l’Article 1 ci-dessus, à
condition de vous conformer également
à chacune des obligations suivantes : a)
Vous devez munir les fichiers modifiés
d’avis bien visibles stipulants que vous
avez modifié ces fichiers, ainsi que la
date de chaque modification ;
b)Vous devez prendre les dispositions
nécessaires pour que tout ouvrage
que vous distribuez ou publiez, et qui,
en totalité ou en partie, contient ou
est fondé sur le Programme - ou une
partie quelconque de ce dernier - soit
concédé comme un tout, à titre
gratuit, à n’importe quel tiers, au titre
des conditions de la présente
Licence.
c)Si le programme modifié lit
habituellement des instructions de
façon interactive lorsqu’on l’exécute,
vous devez, quand il commence son
exécution pour ladite utilisation
interactive de la manière la plus
usuelle, faire en sorte qu’'il imprime
ou affiche une annonce comprenant
un avis de droit d’auteur ad hoc, et un
avis stipulant qu’il n’y a pas de
garantie (ou bien indiquant que c’est
vous qui fournissez la garantie), et
que les utilisateurs peuvent
redistribuer le programme en
respectant les présentes obligations,
et expliquant à l’utilisateur comment
voir une copie de la présente Licence.
(Exception : si le Programme est luimême interactif mais n’imprime pas
habituellement une telle annonce,
votre ouvrage fondé sur le
Programme n’est pas obligé
d’imprimer une annonce).
Ces obligations s’appliquent à l’ouvrage
modifié pris comme un tout. Si des
éléments identifiables de cet ouvrage
ne sont pas fondés sur le Programme et
peuvent raisonnablement être
considérés comme des ouvrages
indépendants distincts en eux mêmes,
alors la présente Licence et ses
conditions ne s’appliquent pas à ces
éléments lorsque vous les distribuez en
tant qu’ouvrages distincts. Mais
lorsque vous distri buez ces mêmes
éléments comme partie d’un tout,
lequel constitue un ouvrage fondé sur le
Programme, la distribution de ce tout
doit être soumise au x conditions de la
présente Licence, et les autorisations
qu’elle octroie aux autres
concessionnaires s’étendent à
l’ensemble de l’ouvrage et par
conséquent à chaque et toute partie
indifférement de qui l’a écrite.
Par conséquent, l’objet du présent
article n’est pas de revendiquer des
droits ou de contester vos droits sur un
ouvrage entièrement écrit par vous; son
objet est plutôt d’exercer le droit de
contrôler la distributio n d’ouvrages
dérivés ou d’ouvrages collectifs fondés
sur le Programme.
De plus, la simple proximité du
Programme avec un autre ouvrage qui
n’est pas fondé sur le Programme (ou
un ouvrage fondé sur le Programme)
sur une partition d’un espace de
stockage ou un support de distribution
ne place pas cet autre ouvrage dans le
champ d’application de la présente
Licence.
Page 63

English Français Español Italiano
Nederlands
Deutsch
3. Vous pouvez copier et distribuer le
Programme (ou un ouvrage fondé sur
lui, selon l’Article 2) sous forme de code
objet ou d’exécutable, selon les termes
des Articles 1 et 2 ci-dessus, à condition
que vous accomplissiez l’un des points
suivants :
a)L’ac compagner de l’intégralité du
code source correspondant, sous une
forme lisible par un ordinateur, lequel
doit être distribué au titre des termes
des Articles 1 et 2 ci-dessus, sur un
support habituellement utilisé pour
l’échange de logiciels; ou,
b)L’accompagner d’une proposition
écrite, valable pendant au moins trois
ans, de fournir à tout tiers, à un tarif
qui ne soit pas supérieur à ce que
vous coûte l’acte physique de réaliser
une distribution source, une copie
intégrale du code source
correspondant sous une forme lisible
par un ordinateur, qui sera distribuée
au titre des termes des Articles 1 et 2
ci-dessus, sur un support
habituellement utilisé pour l’échange
de logiciels; ou,
c)L’accompagner des informations
reçues par vous concernant la
proposition de distribution du code
source correspondant. (Cette
solution n’est autorisée que dans le
cas d’une distribution non
commerciale et seulement si vous
avez reçu le programme sous forme
de code objet ou d’exécutable
accompagné d’une telle proposition en conformité avec le sous-Article b
ci-dessus.)
Le code source d’un ouvrage désigne la
forme favorite pour travailler à des
modifications de cet ouvrage. Pour un
ouvrage exécutable, le code source
intégral désigne la totalité du code
source de la totalité des modules qu’il
contient, ainsi que les éventuels fichiers
de définition des interfaces qui y sont
associés, ainsi que les scripts utilisés
pour contrôler la compilation et
l’installation de l’exécutable.
Cependant, par exception spéciale, le
code source distribué n’est pas censé
inclure quoi que ce soit de
normalement distribué (que ce soit
sous forme source ou binaire) avec les
composants principaux (compilat eur,
noyau, et autre) du système
d’exploitation sur lequel l’exécutable
tourne, à moins que ce composant luimême n'accompagne l’exécutable.
Si distribuer un exécutable ou un code
objet consiste à offrir un accès
permettant leur copie depuis un endroit
particulier, alors l’offre d’un accès
équivalent pour copier le code source
depuis le même endroit compte comme
une distribution du code source - même
si les tiers ne sont pas contraints de
copier le source en même temps que le
code objet.
4. Vous ne pouvez copier, modifier,
concéder en sous-licence, ou distribuer
le Programme, sauf tel
qu’expressément prévu par la présente
Licence. Toute tentative de copier,
modifier, concéder en sous-licence, ou
distribuer le Programme d’une autre
manière est réputée non valable, et met
immédiatement fin à vos droits au titre
de la présente Licence. Toutefois, les
tiers ayant reçu de vous des copies, ou
des droits, au titre de la présente
Licence ne verront pas leurs
autorisations résiliées aussi longtemps
que ledits tiers se conforment
pleinement à elle.
5. Vous n’êtes pas obligé d’accepter la
présente Licence étant donné que vous
ne l’avez pas signée. Cependant, rien
d’autre ne vous accorde l’autorisation
de modifier ou distribuer le Programme
ou les ouvrages fondés sur lui. Ces
actions sont interdites par la loi si vous
n’acceptez pas la présente Licence. En
conséquence, en modifiant ou
distribuant le Programme (ou un
ouvrage quelconque fondé sur le
Programme), vous signifiez votre
acceptation de la présente Licence en le
faisant, et de toutes ses conditions
concernant la copie, la distribution ou
la modification du Programme ou
d’ouvrages fondés sur lui.
6. Chaque fois que vous redistribuez le
Programme (ou n’importe quel ouvrage
fondé sur le Programme), une licence
est automatiquement concédée au
destinataire par le concédant originel
de la licence, l’autorisant à copier,
distribuer ou modifier le Programme,
sous réserve des présentes conditions.
Vous ne pouvez imposer une
quelconque limitation supplémentaire
à l’exercice des droits octroyés au titre
des présentes par le destinataire. Vous
n’avez pas la responsabilité d’imposer
le respect de la présente Licence à des
tiers.
7. Si, conséquement à une décision de
justice ou l’allégation d’une
transgression de brevet ou pour toute
autre raison (non limitée à un probleme
de brevet), des obligations vous sont
imposées (que ce soit par jugement,
conciliation ou autre) qui contredisent
les conditions de la présente Licence,
elles ne vous excusent pas des
conditions de la présente Licence. Si
vous ne pouvez distribuer de manière à
satisfaire simultanément vos
obligations au titre de la présente
Licence et toute autre obligation
pertinente, alors il en découle que vous
ne pouvez pas du tout distribuer le
Programme. Par exemple, si une
licence de brevet ne permettait pas une
redistribution sans redevance du
ra
mme par tous ceux qui reçoivent
Prog
une copie directement ou
indirectement par votre intermédiaire,
alors la seule façon pour vous de
satisfaire à la fois à la licence du brevet
et à la présente Licence serait de vous
abstenir totalement de toute
distribution du Programm e.
Si une partie quelconque de cet article
est tenue pour nulle ou inopposable
dans une circonstance particulière
quelconque, l’intention est que le reste
de l’article s’applique. La totalité de la
section s’appliquera dans toutes les
autres circonstan ces.
Cet article n’a pas pour but de vous
induire à transgresser un quelconque
brevet ou d’autres revendications à un
droit de propriété ou à contester la
validité de la moindre de ces
revendications ; cet article a pour seul
objectif de protéger l’intégrité du
système de distribution du logiciel libre,
qui est mis en oeuvre par la pratique
des licenses publiques. De nombreuses
personnes ont fait de généreuses
contributions au large spectre de
logiciels distribués par ce système en
se fiant à l’application cohérente de ce
système ; il appartient à chaque auteur/
donateur de décider si il ou elle veut
distribuer du logiciel par l’intermédiaire
d’un quelconque autre système et un
concessionaire ne peut imposer ce
choix.
Cet article a pour but de rendre
totalement limpide ce que l’on pense
être une conséquence du reste de la
présente Licence.
8. Si la distribution et/ou l’utilisation du
Programme est limitée dans certains
pays que ce soit par des brevets ou par
des interfaces soumises au droit
d’auteur, le titulaire originel des droits
d’auteur qui décide de couvrir le
Programme par la présente Licence
peut ajouter une limitation
géographique de distribut ion explicite
qui exclue ces pays afin que la
distribution soit permise seulement
dans ou entre les pays qui ne sont pas
ainsi exclus. Dans ce cas, la présente
Licence incorpore la limitation comme
si elle était écrite dans le corps de la
présente Licence.
9. La Free Software Foundation peut, de
temps à autre, publier des versions
révisées et/ou nouvelles de la Licence
Publique Générale. De telles nouvelles
versions seront similaires à la présente
version dans l’esprit mais pourront
différer dans le détail pour prendre en
compte de nouvelles problématiques ou
inquiétudes.
Chaque version possède un numéro de
version la distinguant. Si le Programme
précise le numéro de version de la
présente Licence qui s’y applique et
“une version ultérieure quelconque”,
vous avez le choix de suivre les
conditions de la présente version ou de
toute autre version ultérieure publiée
par la Free Software Foundation. Si le
Programme ne spécifie aucun numéro
de version de la présente Licence, vous
pouvez choisir une version quelconque
publiée par la Free Software Foundation
à quelque moment que ce soit.
10. Si vous souhaitez incorporer des parties
du Programme dans d’autres
programmes libres dont les conditions
de distribution sont différentes, écrivez
à l’auteur pour lui en demander
l’autorisation. Pour les logiciels dont la
Free Software Foundation est titulaire
des droits d’auteur, écri vez à la Free
Software Foundation ; nous faisons
parfois des exceptions dans ce sens.
Notre décision sera guidée par le
double objectif de pré server le statut
libre de tous les dérivés de nos logiciels
libres et de promouvoir le partage et la
réutilisation des logiciels en général.
ABSENCE DE GARANTIE
11. COMME LA LICENCE DU
PROGRAMME EST CONCEDEE A TITRE
GRATUIT, AUCUNE GARANTIE NE
S'APPLIQUE AU PROGRAMME, DANS
LES LIMITES AUTORISEES PAR LA LOI
APPLICABLE. SAUF MENTION
CONTRAIRE ECRITE, LES TITULAIRES
DU DROIT D'AUTEUR ET/OU LES
AUTRES PARTIES FOURNISSENT LE
PROGRAMME “EN L’ETAT”, SANS
AUCUNE GARANTIE DE QUELQUE
NATURE QUE CE SOIT, EXPRESSE OU
IMPLICITE, Y COMPRIS, MAIS SANS Y
ETRE LIMITE, LES GARANTIES
IMPLICITES DE COMMERCIABILITE ET
DE LA CONFORMITE A UNE
UTILISATION PARTICULIERE. VOUS
ASSUMEZ LA TOTALITE DES RISQUES
LIES A LA QUALITE ET AUX
PERFORMANCES DU PROGRAMME.
SI LE PROGRAMME SE REVELAIT
DEFECTUEUX, LE COUT DE
L'ENTRETIEN, DES REPARATIONS OU
DES CORRECTIONS NECESSAIRES
VOUS INCOMBENT INTEGRALEMENT.
12. EN AUCUN CAS, SAUF LORSQUE LA
LOI APPLICABLE OU UNE
CONVENTION ECRITE L’EXIGE, UN
TITULAIRE DE DROIT D’AUTEUR QUEL
QU’IL SOIT, OU TOUTE PARTIE QUI
POURRAIT MODIFIER ET/OU
REDISTRIBUER LE PROGRAMME
COMME PERMIS CI-DESSUS, NE
POURRAIT ETRE TENU POUR
RESPONSABLE A VOTRE EGARD DES
DOMMAGES, INCLUANT LES
DOMMAGES GENERIQUES,
SPECIFIQUES, SECONDAIRES OU
CONSECUTIFS, RESULTANT DE
L’UTILISATION OU DE L’INCAPACITE
D’UTILISER LE PROGRAMME (Y
COMPRIS, MAIS SANS Y ETRE LIMITE,
LA PERTE DE DONNEES, OU LE FAIT
QUE DES DONNEES SOIENT
RENDUES IMPRECISES, OU LES
PERTES EPROUVEES PAR VOUS OU
PAR DES TIERS, OU LE FAIT QUE LE
PROGRAMME ECHOUE A
INTEROPERER AVEC UN AUTRE
PROGRAMME QUEL QU’IL SOIT)
MEME SI LE DIT TITULA IRE DU DROIT
D’AUTEUR OU LE PARTIE
CONCERNEE A ETE AVERTI DE
L’EVENTUALITE DE TELS DOMMAGES.
FIN DES CONDITIONS
Comment appliquer ces
conditions à vos nouveaux
programmes
Si vous développez un nouveau
programme, et si vous voulez qu’il soit de la
plus grande utilité possible pour le public,
le meilleur moyen d’y parvenir est d’en faire
un logiciel libre que chacun peut
redistribuer et modifier au titre des
présentes conditions.
Pour ce faire, munissez le programme des
avis qui suivent. Le plus sûr est de les
ajouter au début de chaque fichier source
pour véhiculer le plus efficacement
possible l’absence de toute garantie ;
chaque fichier devrait aussi contenir au
moins la ligne “copyright” et une indication
de l’endroit où se trouve l’avis complet.
[Une ligne donnant le nom du programme
et une courte idée de ce qu’il fait.]
Copyright (C) [année] [nom de l’auteur] Ce
programme est un logiciel libre ; vous
pouvez le redistribuer et/ou le modifier au
titre des clauses de la Licence Publique
Générale GNU, telle que publiée par la Free
Software Foundation ; soit la version 2 de la
Licence, ou (à votre discrétion) une version
ultérieure quelconque. Ce programme est
distribué dans l’espoir qu’il sera utile, mais
SANS AUCUNE GARANTIE ; sans même
une garantie implicite de
COMMERCIABILITE ou DE CONFORMITE A
UNE UTILISATION PARTICULIERE. Voir la
Licence Publique Générale GNU pour plus
de détails. Vous devriez avoir reçu un
exemplaire de la Licence Publique Générale
GNU avec ce programme ; si ce n’est pas le
cas, écrivez à la Free Software Foundation
Inc., 51 Franklin Street, Fifth Floor, Boston,
MA 02110-1301, USA.
Ajoutez aussi des informations sur la
manière de vous contacter par courrier
électronique et courrier postal.
Si le programme est interactif, faites en
sorte qu’il affiche un court avis tel que celuici lorsqu’il démarre en mode interactif :
Gnomovision version 69, Copyright (C)
année nom de l’auteur Gnomovision n’est
accompagné d’ABSOLUMENT AUCUNE
GARANTIE ; pour plus de détails tapez
“show w”. Ceci est un logiciel libre et vous
êtes invité à le redistribuer en respectant
certaines obligations ; pour plus de détails
tapez “show c”.
Les instructions hypothétiques “show w” et
“show c” sont supposées montrer les
parties ad hoc de la Licence Publique
Générale. Bien entendu, les instructions
que vous utilisez peuvent porter d’autres
noms que “show w” et “show c” ; elles
peuvent même être des clics de souris ou
des éléments d’un menu ou tout ce qui
convient à votre programme.
Vous devriez aussi obtenir de votre
employeur (si vous travaillez en tant que
développeur) ou de votre école, si c’est le
cas, qu’il (ou elle) signe une “renonciation
aux droits d’auteur” concernant le
programme, si nécessaire. Voici un
exemple (changez les noms) :
Yoyodyne, Inc., déclare par la présente
renoncer à toute prétention sur les droits
d’auteur du programme “Gnomovision”
(qui fait des avances aux compilateurs)
écrit par James Hacker. [signature de Ty
Coon], 1er avril 1989 Ty Coon, Président du
Vice
La présente Licence Publique Générale
n’autorise pas l’incorporation de votre
programme dans des programmes
propriétaires. Si votre programme est une
bibliothèque de sous-programmes, vous
pouvez considérer plus utile d'autoriser
l’édition de liens d’applications
propriétaires avec la bibliothèque. Si c’est
ce que vous voulez faire, utilisez la GNU
Lesser General Public License au lieu de la
présente Licence.
LICENCE PUBLIQUE GÉNÉRALE
LIMITÉE GNU
Version 2.1, février 1999
Copyright © 1991, 1999 Free Software
Foundation, Inc.
51 Franklin Street, Fifth Floor, Boston, MA
02110-1301 USA
Chacun est autorisé à copier et distribuer
des copies conformes de ce document de
licence, mais toute modification en est
proscrite.
[Ceci est la première version publiée de la
Licence Générale Publique Limitée (LGPL).
Elle compte en tant que successeur de la
Licence Générale Publique de Bibliothèque
GNU, version 2, d’où le numéro de version
2.1]
33
Fr
Page 64

Préambule
Les licences de la plupart des logiciels sont
conçues pour vous enlever toute liberté de
les partager et de les modifier. À l’opposé,
les Licences Générales Publiques GNU ont
pour but de vous garantir votre liberté de
partager et modifier un logiciel libre, pour
être sûr que le logiciel est bien libre pour
tous les utilisateurs. Cette licence, la
Licence Générale Publique Limitée,
s’applique à certains paquets logiciels
désignés spécifiquement – typiquement
des bibliothèques – de la Free Software
Foundation et d’autres auteurs qui
décident de l’utiliser. Vous pouvez l’utiliser
aussi, mais nous vous suggérons de
considérer d’abord si la présente licence ou
la Licence Générale Publique GNU
ordinaire est la meilleure stratégie à utiliser
dans chaque cas particulier, suivant les
explications données ci-dessous.
Quand nous parlons de logiciels libres,
nous parlons de liberté de l’utiliser, non de
prix. Nos licences publiques générales sont
conçues pour vous donner l’assurance
d’être libres de distribuer des copies des
logiciels libres (et de facturer ce service, si
vous le souhaitez), de recevoir le code
source ou de pouvoir l’obtenir si vous le
souhaitez, de pouvoir modifier les logiciels
ou en utiliser des éléments dans de
nouveaux programmes libres et de savoir
que vous pouvez le faire.
Pour protéger vos droits, il nous est
nécessaire d’imposer des limitations qui
interdisent aux distributeurs de vous
refuser ces droits ou de vous dem ander d’y
renoncer.
Certaines responsabilités vous incombent
en raison de ces limitations si vous
distribuez des copies de la bibliothèque, ou
si vous la modifiez.
Par exemple, si vous distribuez des copies
d’une telle bibliothèque, à titre gratuit ou
contre une rémunération, vous devez
accorder aux destinataires tous les droits
dont vous disposez. Vous devez vous
assurer qu’eux aussi reçoivent ou puissent
disposer du code source. Si vous liez
d’autres codes avec la bibliothèque, vous
devez fournir des fichiers objets complets
aux concessionnaires, de sorte qu’ils
puissent les lier à nouveau avec la
bibliothèque après l’avoir modifiée et
recompilée. Et vous devez leur montrer les
présentes conditions afin qu’ils aient
connaissance de leurs droits. Nous
protégeons vos droits en deux étapes : (1)
nous libellons la bibliothèque avec une
notice de propriété intellectuelle
(copyright), et (2) nous vous délivrons cette
licence, qui vous donne l’autorisation
légale de copier, distribuer et/ou modifier
ce bibliothèque.
34
Fr
Pour protéger chaque distributeur, nous
voulons établir de façon très claire qu’il n’y
a aucune garantie pour la Bibliothèque
libre. Aussi, si la Bibliothèque est modifiée
par quelqu’un d’autre qui la redistribue
ensuite, ses concessionnaires devraient
savoir que ce qu’ils ont n’est pas la version
originale, de sorte que la réputation de
l’auteur original ne sera pas affectée à
cause de problèmes introduits par d’autres.
Enfin, les brevets logiciels constituent une
menace constante contre l’existence
même de tout logiciel libre. Nous voulons
être sûr qu’une société ne peut pas
effectivement restreindre les utilisateurs
d’un programme libre en obtenant une
licence restrictive d’un titulaire de brevet.
Par conséquent, nous insistons pour que
toute licence de brevet obtenue pour une
version de la Bibliothèque soit cohérente
avec sa pleine liberté d’utilisation spécifiée
dans la présente Licence.
La plupart des logiciels GNU, y compris
certaines bibliothèques, sont couverts par
la Licence Générale Publique GNU. La
présente licence s’applique à certaines
bibliothèques et est assez différente de la
Licence Générale Publique ordinaire.
Nous utilisons la présente licence pour
certaines bibliothèques afin de permettre
de lier ces bibliothèques, sous certaines
conditions, à des programmes non libres.
Quand un programme est lié avec une
bibliothèque, que ce soit statiquement ou
avec une bibliothèque partagée, la
combinaison des deux constitue, en termes
légaux, un ouvrage combiné, un dérivé de la
bibliothèque originale. Il s’ensuit que la
Licence Générale Publique ordinaire ne
permet une telle liaison que si l’entière
combinaison rempl it ses critères et
conditions de liberté. La Licence Générale
Publique Limitée permet de desserrer les
critères permettant de lier d’autres codes
avec la bibliothèque.
Nous appelons cette licence la Licence
Générale Publique “Limitée” car elle offre
en fait une protection plus limitée de la
liberté de l’utilisateur que celle offerte par la
Licence Générale Publique ordinaire. Elle
offre aux autres développeurs de logiciels
libres un avantage plus limité face aux
programmes concurrents non libres. Ces
désavantages sont la raison pour laquelle
nous utilisons la Licence Générale
Publique ordinaire pour de nombreuses
bibliothèques. Cependant la licence limitée
offre des avantages dans certaines
circonstances spéciales.
Par exemple, en de rares occasions, il peut
exister le besoin particulier d’encourager
l’utilisation la plus large possible d’une
certaine bibliothèque, afin qu’elle devienne
un standard de facto. Pour arriver à cette
fin, des programmes non libres doivent
pouvoir être autorisés à utiliser la
Bibliothèque. Un cas plus fréquent est
qu’une bibliothèque libre effectue les
mêmes tâches que des bibliothèques non
libres largement utilisées. Dans ce cas, il
n’y a pas grand chose à gagner à limiter la
bibliothèque libre aux seuls logiciels libres,
aussi nous utilisons la Licence Générale
que Limitée.
li
Pub
Dans d’autres cas, l’autorisation d’utiliser
une bibliothèque particulière dans des
programmes non libres permet à un plus
grand nombre de personnes d’utiliser un
corpus très large de logiciels libres. Par
exemple, l’autorisation d’utiliser la
Bibliothèque C GNU dans des programmes
non libres permet à plus de personnes
d’utiliser le système d’exploitation GNU
tout entier, de même que sa variante, le
système d’exploitation GNU/ Linux.
Bien que la Licence Générale Publique
Limitée semble limiter la protection de la
liberté de l’utilisateur, elle assure que
l’utilisateur d’un programme lié avec la
Bibliothèque dispose de la liberté et du
choix d’exécuter ce programme en utilisant
une version modifiée de la Bibliothèque.
Les termes exacts et les conditions de
copie, distribution et modification sont les
suivants. Accordez une attention toute
particulière aux différences entre un
“ouvrage basé sur la Bibliothèque” et un
“ouvrage utilisant la Bibliothèque”. Le
premier contient un code dérivé de la
Bibliothèque, tandis que le second doit être
combiné avec la Bibliothèque afin de
pouvoir être exécuté.
CONDITIONS DE COPIE,
DISTRIBUTION ET
MODIFICATION DE LA LICENCE
PUBLIQUE GÉNÉRALE LIMITÉE
GNU
0. Cet Accord de Licence s’applique à
toute bibliothèque logicielle ou tout
programme contenant une notice
placée par le titulaire de la réservation
de droits (copyright) ou toute autre
partie autorisée indiquant que ce
logiciel peut être distribué suivant les
termes de cette Licence Générale
Publique Limitée (appelée ci-dessous
“cette Licence”). Chaque
concessionaire sera désigné par “vous”.
Une “bibliothèque” signifie une
collection de fo nctions logicielles et/o u
de données préparées de façon à être
liée facilement à des programmes
applicatifs (utilisant tout ou partie de
ces fonctions et données) afin de
former des exécutables.
La “Bibliothèque”, ci-dessous, se réfère
à toute bibliothèque logicielle ou
ouvrage qui a été distribué suivant ces
termes. Un “ouvrage basé sur la
Bibliothèque” signifie soit la
Bibliothèque soit un ouvrage dérivé
pouvant être soumis aux lois de
propriété intellectuelle : c’est-àdire un
ouvrage contenant la Bibliothèque ou
une portion de celle-ci, soit en copie
conforme, soit avec des modifications
et/ou traduite directement dans un
autre langage. (Ci-après, le terme
“modification” imp lique, sans s’y
réduire, le terme traduction.)
“Le code source” d’un ouvrage désigne
la forme favorite pour travailler à des
modifications de cet ouvrage. Pour une
bibliothèque, le code source intégral
désigne la totalité du code source de la
totalité des modules qu’il contient, ainsi
que les éventuels fichiers de définition
des interfaces qui y sont associés et les
scripts utilisés pour contrôler la
compilation et l’installation de la
Bibliothèque.
Les activités autres que la copie, la
distribution et la modification ne sont
pas couvertes par la présente Licence ;
elles sont hors de s on champ
d’application. L’action d’exécuter un
programme utilisant la Bibliothèque
n’est pas restreinte et les résultats
produits par un tel programme ne sont
couverts que si leur contenu constitue
un ouvrage basé sur la Bibliothèque
(indépendamment de l’utilisation de la
Bibliothèque dans un outil utilisé pour
l’écrire). Que ce soit ou non le cas
dépend de ce que réalise la
Bibliothèque, et de ce que fait le
programme utilisant la Bibliothèque.
1. Vous pouvez copier et distribuer des
copies à l’identique du code source
complet de la Bibliothèque tel que vous
l’avez reçu, sur n’importe quel suppo rt,
à condition que vous apposiez sur
chaque copie, de manière ad hoc et
parfaitement visible, l’avis de droit
d’auteur adéquat et une exonération de
garantie ; que vous gardiez intacts tous
les avis faisant référence à la présente
Licence et à l’absence de toute garantie
; et que vous fournissiez un exemplaire
de la présente Licence en même temps
que la Bibliothèque.
Vous pouvez faire payer l’acte physique
de transmission d’une copie, et vous
pouvez, à votre discrétion, proposer une
garantie contre rémunération.
2. Vous pouvez modifier votre copie ou des
copies de la Bibliothèque ou n’i mporte
quelle partie de celui-ci, créant ainsi un
ouvrage fondé sur la Bibliothèque, et
copier et distribuer de telles
modifications ou ouvrage selon les
termes de l’Article 1 ci-dessus, à
condition de vous conformer également
à chacune des obl igations suivantes :
a)L’ouvrage modifié doit être lui-même
une bibliothèque logicielle.
b)Vous devez assurer que les fichiers
modifiés comportent des notices
évidentes, établissant que vous avez
changé les fichiers, et la date de ces
changements.
c)Vous devez assurer que l’ensemble
de l’ouvrage pourra être licencié sans
frais à toute tierce partie suivant les
termes de cette Licence.
d)Si une facilité dans a bibliothèque
modifiée fait référence à une fonction
ou à une table de données à fo urnir
par une application utilisant la
facilité, autre qu’un argument passé
quand la facilité est invoquée, alors
vous devez faire un effort en toute
bonne foi pour vous assurer que,
dans l’éventualité où une application
ne fournirait pas une telle fonction ou
table, la facilité restera opérationnelle
et effectuera une partie quelconque
de sa finalité de façon sensée. (Par
exemple, une fonction dans une
bibliothèque servant à calculer des
racines carrées a une finalité qui est
parfaitement définie
indépendamment de l’application.
Par conséquent, la Sous-section 2d
requiert que toute fonction fournie
par l’application ou table utilisée par
cette fonction doit être optionnelle : si
l’application n’en fournit pas, la
fonction racine carrée doit encore
pouvoir calculer des racines carrées.)
Ces obligations s’appliquent à l’ouvrage
modifié pris comme un tout. Si des
éléments identifiables de cet ouvrage
ne sont pas fondés sur la Bibliothèque
et peuvent raisonnablement être
considérés comme des ouvrages
indépendants distincts en eux mêmes,
alors la présente Licence et ses
conditions ne s’appliquent pas à ces
éléments lorsque vous les distribuez en
tant qu’ouvrages distincts. Mais
lorsque vous distribuez ces mêmes
éments comme partie d’un tout,
él
lequel constitue un ouvrage fondé sur la
Bibliothèque, la distribution de ce tout
doit être soumise aux c onditions de la
présente Licence, et les autorisations
qu’elle octroie aux autres
concessionnaires s’étendent à
l’ensemble de l’ouvrage et par
conséquent à chaque et toute partie
indifférement de qui l’a écrite.
Par conséquent, l’objet du présent
article n’est pas de revendiquer des
droits ou de contester vos droits sur un
ouvrage entièrement écrit par vous ; son
objet est plutôt d’exercer le droit de
contrôler la distributi on d’ouvrages
dérivés ou d’ouvrages collectifs fondés
sur la Bibliothèque.
De plus, la simple proximité de la
Bibliothèque avec un autre ouvrage qui
n’est pas fondé sur la Bibliothèque (ou
un ouvrage fondé sur la Bibliothèque)
sur une partition d’un espace de
stockage ou un support de distribution
ne place pas cet autre ouvrage dans le
champ d’application de la présente
Licence.
3. Vous pouvez choisir d’appliquer les
termes de la Licence Générale Publique
GNU ordinaire au lieu de ceux de cette
Licence à une copie donnée de cette
Bibliothèque. Pour le faire, vous devez
modifier les noti ces qui se réfèrent à
cette Licence, de sorte qu’elles se
réfèrent plutôt à la Licence Générale
Publique GNU version 2, au lieu de cette
Licence. (Si une version officielle plus
récente que la version 2 de la Licence
Générale Publique GNU ordinaire a été
publiée, alors vous pouvez spécifier
plutôt cette version si vous le
souhaitez.) N’effectuez aucun autre
changement à ces notices.
Dès que ce changement a été fait dans
une copie donnée, il est irréversible
pour cette copie et donc la Licence
Générale Publique GNU ordinaire
s’appliquera à toutes les copies
suivantes et à tous travaux dérivés
effectués à partir de cette copie. Cette
option est utile quand vous souhaitez
copier une partie du code de la
Bibliothèque en un programme qui
n’est pas une bibliothèque.
4. Vous pouvez copier et distribuer la
Bibliothèque (ou une portion ou un
dérivé de celle-ci, suivant les termes de
la Section 2) sous forme de code objet
ou exécutable suivant les termes des
Sections 1 et 2 ci-dessus, pourvu que
vous l’accompagniez du code source
correspondant sous forme lisible par
une machine, qui doit être distribué
suivant les termes des sections 1 et 2 cidessus sur un support utilisé
habituellement pour l’échange de
logiciels.
Si l a d ist rib uti on du c ode obj et s e f ait en
offrant l’accès à la copie depuis un
emplacement désigné, alors une offre
d’accès équivalente pour copier le code
source depuis le même emplacement
satisfait à l’obligation de distribuer le
code source, même si des parties
tierces ne sont pas obligées de copier
simultanément le code source en
même temps que le code objet.
5. Un programme qui ne contient aucun
dérivé d’une quelconque partie de la
Bibliothèque, mais est conçu pour
travailler avec la Bibliothèque en étant
compilé ou lié avec cette Bibliothèque,
est appelé un “ouvrage utilisant la
Bibliothèque”. Un tel touvrage, pris
Page 65

English Français Español Italiano
Nederlands
Deutsch
isolément, n’est pas un ouvrage dérivé
de la Bibliothèque et tombe par
conséquent hors du champ
d’application de cette Licence.
Cependant, la liaison avec la
Bibliothèque d’un “ouvrage utilisant la
Bibliothèque” crée un exécutable qui
est un dérivé de la Bibliothèque (car il
contient des parties de la Bibliothèque),
plutôt qu’un “ouvrage utilisant la
Bibliothèque”. L’exécutable est par
conséquent couvert par cette Licence.
La Section 6 établit les termes de
distribution de tels exécutables.
Quand un “ouvrage utilisant la
Bibliothèque” utilise des éléments d’un
fichier d’en-tête faisant partie de la
Bibliothèque, le code objet de cet
ouvrage peut être un ouvrage dérivé de
la Bibliothèque même si son code
source ne l’est pas. Cette définition
prendra son sens tout particulièrement
si l’ouvrage peut être lié sans la
Bibliothèque ou si l’ouvrage est luimême une bibliothèque. Les
délimitations de ce cas ne sont pas
définies de façon précise par la loi.
Si un tel fichier objet utilise uniquement
des paramètres numériques, des
schémas et accesseurs de structures
de données, des petites macros et des
petites fonctions en ligne (dix lignes de
source ou moins en longueur), alors
l’utilisation du fichier objet est non
restreinte, indépendamment du fait que
cela constitue légalement un ouvrage
dérivé. (Les règles de la Section 6
s’appliqueront tout de même aux
exécutables contenant ce code objet
plus des portions de la Bibliothèque.)
Autrement, si l’ouvrage est un dérivé de
la Bibliothèque, vous pouvez distribuer
le code objet pour cet ouvrage suivant
les termes de la Section 6. Les règles de
la section 6 s’appliquent alors à tout
exécutable contenant cet ouvrage, que
ce dernier soit ou ne soit pas lié
directement avec la Bibliothèque ellemême.
6. Par exception aux Sections ci-dessus,
vous pouvez aussi combiner ou lier un
“ouvrage utilisant la Bibliothèque” avec
la Bibliothèque pour produire un
ouvrage contenant des portions de la
Bibliothèque et distribuer cet ouvrage
suivant les termes de votre choix,
pourvu que ces termes permettent la
modification de l’ouvrage pour les
besoins propres du client et l’ingénierie
inverse permettant le déboguage de
telles modifications.
Vous devez donner une notice explicite
et évidente avec chaque copie de
l’ouvrage montrant que la Bibliothèque
est utilisée dans celui-ci et que la
Bibliothèque est couverte par cette
Licence. Vous devez fournir une copie
de cette Licence. Si l’ouvrage lors de
son exécution affiche des notices de
droits et propriétés intellectuelles, vous
devez inclure la notice pour la
Bibliothèque parmi cellesci, ainsi
qu’une référence adressée à
l’utilisateur vers une copie de cette
Licence. Vous devez aussi effectuer
l’une des tâches suivantes :
a)Accompagner l’ouvrage du code
source complet correspondant,
lisible par une machine, pour la
Bibliothèque incluant tout
changement quelconque effectué
dans l’ouvrage (qui doit être distribué
suivant les Sections 1 et 2 ci-dessus) ;
et, si l’ouvrage est un exécutable lié à
la Bibliothèque, fournir la totalité de
“l’ouvrage utilisant la Bibliothèque”,
lisible par une machin e, sous forme
de code objet et/ou source, de sorte
que l’utilisateur puisse modifier la
Bibliothèque et la relier pour produire
un exécutable modifié contenant la
Bibliothèque modifiée. (Il est admis
que l’utilisateur qui change le
contenu de fichiers de définition dans
la Bibliothèque ne sera pas
nécessairement capable de
recompiler l’application pour utiliser
les définitions modifiées.)
b)Utiliser un mécanisme approprié de
bibliothèque partagée pour le lien à la
Bibliothèque. Un mécanisme
approprié est celui qui (1) utilise à
l’exécution une copie de la
Bibliothèque déjà présente sur le
système de l’ordinateur de
l’utilisateur, plutôt que de copier les
fonctions de bibliothèque dans
l’exécutable et (2) fonctionnera
correctement avec une version
modifiée de la Bibliothèque, si
l’utilisateur en installe une, tant que
la version modifiée est compatible au
niveau de l’interface avec la version
avec laquelle l’ouvrage a été réalisé.
c)Accompagner l’ouvrage d’une offre
écrite, valide pour au moins trois ans,
de donner au même utilisateur les
éléments spécifiés dans la Soussection 6a, ci-dessus, contre un
paiement n’excédant pas le coût
requis pour effectuer cette
distribution.
d)Si la distribution de l’ouvrage est faite
en offrant l’accès à une copie depuis
un emplacement désigné, offrir un
accès équivalent depuis le même
emplacement pour copier les
éléments spécifiés ci-dessus.
e)Vérifier que l’utilisateur a déjà reçu
une copie de ces éléments ou que
vous en avez déjà envoyé une copie à
cet utilisateur.
Pour un exécutable, la forme requise de
“l’ouvrage utilisant la Bibliothèque” doit
inclure toutes les données et
programmes utilitaires nécessaires
met
tant de reproduire l’exécutable à
per
partir de ceux-ci. Cependant, par
exception, les éléments à distribuer
n’ont pas besoin d’inclure tout ce qui
est normalement distribué (que ce soit
sous forme source ou binaire) avec les
composants majeurs (compilateur,
noyau, et autres composants similaires)
du système d’exploitation sur lequel
l’exécutable tourne, à moins que ce
composant lui-même n’accompagne
l’exécutable.
Il peut arriver que ces conditions
nécessaires contredisent les
restrictions de licence d’autres
bibliothèques propriéta ires qui
n’accompagnent pas normalement le
système d’exploitation. Une telle
contradiction signifie que vous ne
pouvez pas les utiliser en même temps
que la Bibliothèque dans un exécutable
que vous distribuez.
7. Vous pouvez placer les facilités de
bibliothèque, qui sont un ouvrage basé
sur la Bibliothèque, côte à côte dans
une unique bibliothèque avec d’autres
facilités de bibliothèque non couvertes
par cette Licence et distribuer une
bibliothèque combinée, pourvu que la
distribution séparée de l’o uvrage basé
sur la Bibliothèque et des autres
facilités de bibliothèque soit autrement
permise, et pourvu que vous effectuiez
chacune des deux tâches suivantes :
a)Accompagner la bibliothèque
combinée avec une copie du même
ouvrage basé sur la Bibliothèque, non
combinée avec d’autres facilités de
bibliothèque. Cela doit être distribué
suivant les termes des Sections cidessus.
b)Donner une notice évidente avec la
bibliothèque combinée, du fait
qu’une partie de celle-ci est un
ouvrage basé sur la Bibliothèque, et
expliquer où trouver la forme non
combinée coexistante du même
ouvrage.
8. Vous ne pouvez pas copier, modifier,
concéder en souslicence, lier ou
distribuer la Bibliothèque, autrement
que de la façon décrite expressément
par cette Licence. Toute tentative de
copier, modifier, concéder en souslicence, lier ou distribuer la
Bibliothèque d’une autre manière est
réputée non valable, et met
immédiatement fin à vos droits au titre
de la présente Licence. Toutefois, les
tiers ayant reçu de vous des copies, ou
des droits, au titre de la présente
Licence ne verront pas leurs
autorisations résiliées aussi longtemps
que lesdits tiers se conforment
pleinement à elle.
9. Vous n’êtes pas obligé d’accepter la
présente Licence étant donné que vous
ne l’avez pas signée. Cependant, rien
d’autre ne vous accorde l’autorisation
de modifier ou distribuer la
Bibliothèque ou les ouvrages fondés sur
lui. Ces actions sont interdites par la loi
si vous n’acceptez pas la présente
Licence. En conséquence, en modifiant
ou distribuant la Bibliothèque (ou un
ouvrage quelconque fondé sur la
Bibliothèque), vous signifiez votre
acceptation de la présente Licence, et
de toutes ses conditions concernant la
copie, la distribu tion ou la modification
de la Bibliothèque ou des ouvrages
fondés sur lui.
10. Chaque fois que vous redistribuez la
Bibliothèque (ou n’importe quel
ouvrage fondé sur la Bibliothèque), une
licence est automatiquement concédée
au destinataire par le concédant
original de la licence, l’autorisant à
copier, distribuer, lier ou modifier la
Bibliothèque, sous réserve des
présentes conditions. Vous ne pouvez
imposer une quelconque limitation
supplémentaire à l’exercice des droits
octroyés au titre des présentes au
destinataire. Vous n’avez pas la
responsabilité d’imposer le respect de
la présente Licence à des tiers.
11. Si, par suite d’une décision judiciaire ou
d’une allégation d’infraction d’un brevet
ou pour toute autre raison (non limitée
aux problèmes de brevet s), des
conditions vous sont imposées (que ce
soit par une ordonnance de justice, une
transaction amiable ou contractuelle ou
toute autre raison) qui contredisent les
conditions de cette Licence, elles ne
vous dégagent pas des obligations de
cette Licence. Si vous ne pouvez pas
distribuer de manière à satisfaire
simultanément vos obligations au titre
de la présente Licence et toute autre
obligation pertinente, alors il en découle
que vous ne pouvez pas du tout
distribuer la Bibliothèque. Par exemple,
si une licence de brevet ne permettait
pas une redistribution sans redevance
de la Bibliothèque par tous ceux qui
reçoivent une copie directement ou
indirectement par votre intermédiaire,
alors la seule façon pour vous de
satisfaire à la fois à la licence du brevet
et à la présente Licence serait de vous
abstenir totalement de toute
distribution de la Bibliothèque. Si une
partie quelconque de cet article est
tenue pour nulle ou inopposable dans
une circonstance particulière
quelconque, l’intention est que le reste
de l’article s’applique.
La totalité de la section s’appliquera
dans toutes les autres circonstances.
Cet article n’a pas pour but de vous
induire à transgresser un quelconque
brevet ou d’autres revendications à un
droit de propriété ou à contester la
validité de la moindre de ces
revendications ; cet article a pour seul
jectif de protéger l’intégrité du
ob
système de distribution du logiciel libre,
qui est mis en oeuvre par la pratique
des licences publiques. De nombreuses
personnes ont fait de généreuses
contributions au large spectre de
logiciels distribués par ce système en
se fiant à l’application cohérente de ce
système ; il appartient à chaque auteur/
donateur de décider si i l ou elle veut
distribuer du logiciel pa r l’intermédiaire
d’un quelconque autre système, et un
concessionnaire ne peut imposer ce
choix.
Cet article a pour but de rendre
totalement limpid e ce que l’on pense
être une conséquence du reste de la
présente Licence.
12. Si la distribution et/ou l’utilisation de la
Bibliothèque sont limitées dans
certains pays que ce soit par des
brevets ou par des interfaces soumises
au droit d’auteur, le titulaire original des
droits d’auteur qui déci de de couvrir la
Bibliothèque par la présente Licence
peut ajouter une limitation
géographique de distribution expl icite
qui exclue ces pays, afin que la
distribution soit permise seulement
dans ou entre les pays qui ne sont pas
ainsi exclus. Dans ce cas, la présente
Licence incorpore la limitation comme
si elle était écrite dans le corps de la
présente Licence.
13. La Free Software Foundation peut, de
temps à autre, publier des versions
révisées et/ou nouvelles de la Licence
Publique Générale Limitée. De telles
nouvelles versions seront similaires à la
présente version dans l’esprit mais
pourront différer dans le dé tail pour
prendre en compte de nouvelles
problématiques ou inquiétudes.
Chaque version possède un numéro de
version la distinguant. Si la
Bibliothèque précise le numéro de
version de la présente Licence qui s’y
applique et “une version ultérieure
quelconque”, vous avez le choix de
suivre les conditions de la présente
version ou de toute autre version
ultérieure publiée par la Free Software
Foundation. Si la Bibliothèque ne
spécifie aucun numéro de version de la
présente Licence, vous pouvez choisir
une version quelconque publiée par la
Free Software Foundation à quelque
moment que ce soit.
14. Si vous souhaitez incorporer des parties
de la Bibliothèque dans d’autres
programmes libres dont les conditions
de distribution sont différentes, écrivez
à l’auteur pour lui en demander
l’autorisation. Pour les logiciels dont la
Free Software Foundation est titulaire
des droits d’auteur, écrivez à la Free
Software Foundation ; nous faisons
parfois des exceptions dans ce sens.
Notre décision sera guidée par le
double objectif de pr éserver le statut
libre de tous les dérivés de nos logiciels
libres et de promouvoir le partage et la
réutilisation des logiciels en général.
ABSENCE DE GARANTIE
15. COMME LA LICENCE DE LA
BIBLIOTHÈQUE EST CONCÉDÉE À
TITRE GRATUIT, AUCUNE GARANTIE
NE S’APPLIQUE À LA BIBLIOTHÈQUE,
DANS LES LIMITES AUTORISÉES PAR
LA LOI APPLICABLE. SAUF MENTION
CONTRAIRE ÉCRITE, LES TITULAIRES
DU DROIT D’AUTEUR ET/OU LES
AUTRES PARTIES FOURNISSENT LA
BIBLIOTHÈQUE “EN L’ÉTAT”, SANS
AUCUNE GARANTIE DE QUELQUE
NATURE QUE CE SOIT, EXPRESSE OU
IMPLICITE, Y COMPRIS, MAIS SANS Y
ÊTRE LIMITÉ, LES GARANTIES
IMPLICITES DE COMMERCIABILITÉ ET
DE CONFORMITÉ À UNE UTILISATION
PARTICULIÈRE. VOUS ASSUMEZ LA
TOTALITÉ DES RISQUES LIÉS À LA
QUALITÉ ET AUX PERFORMANCES DE
LA BIBLIOTHÈQUE. SI LA
BIBLIOTHÈQUE SE RÉVÉLAIT
DÉFECTUEUSE, LE COÛT DE
L’ENTRETIEN, DES RÉPARATIONS OU
DES CORRECTIONS NÉCESSAIRES
VOUS INCOMBE INTÉGRALEMENT.
16. EN AUCUN CAS, SAUF LORSQUE LA
LOI APPLICABLE OU UNE
CONVENTION ÉCRITE L’EXIGE, UN
TITULAIRE DE DROIT D’AUTEUR, QUEL
QU’IL SOIT, OU TOUTE PARTIE QUI
POURRAIT MODIFIER ET/OU
REDISTRIBUER LA BIBLIO THÈQUE
COMME PERMIS CI-DESSUS, NE
POURRAIT ÊTRE TENU POUR
RESPONSABLE À VOTRE ÉGARD DES
DOMMAGES, INCLUANT LES
DOMMAGES GÉNÉRIQUES,
SPÉCIFIQUES, SECONDAIRES OU
CONSÉCUTIFS, RÉSULTANT DE
L’UTILISATION OU DE L’INCAPACITÉ
D’UTILISER LA BIBLIOTHÈQUE (Y
COMPRIS, MAIS SANS Y ÊTRE LIMITÉ,
LA PERTE DE DONNÉES, OU LE FAIT
QUE DES DONNÉES SOIENT
RENDUES IMPRÉCISES, OU LES
PERTES ÉPROUVÉES PAR VOUS OU
35
Fr
Page 66

PAR DES TIERS, OU LE FAIT QUE LA
BIBLIOTHÈQUE ÉCHOUE À
INTEROPÉRER AVEC UN AUTRE
LOGICIEL, QUEL QU’IL SOIT) MÊME SI
LE DIT TITULAIRE DU DROIT D’AUTEUR
OU LA PARTIE CONCERNÉE A ÉTÉ
AVERTI DE L’ÉVENTUALITÉ DE TELS
DOMMAGES.
FIN DES CONDITIONS
Comment appliquer ces
conditions à vos nouvelles
Bibliothèques
Si vous développez une nouvelle
bibliothèque et voulez qu’elle soit le plus
possible utilisable par le public, nous
recommandons d’en faire un logiciel libre
que chacun peut redistribuer et changer.
Vous pouvez le faire en permettant la
redistribution suivant ces termes (ou,
éventuellement les termes de la Licence
Générale Publique ordinaire).
Pour appliquer ces termes, attachez les
notices suivantes à la bibliothèque. Le plus
sûr est de les ajouter au début de chaque
fichier source pour véhiculer le plus
efficacement possible l’absence de toute
garantie ; chaque fichier devrait aussi
contenir au moins la ligne “copyright” et
une indication de l’endroit où se trouve
l’avis complet.
<Une ligne donnant le nom de la
bibliothèque et une courte idée de ce
qu’elle fait.>
Copyright © <année> <nom de
l’auteur>
Cette bibliothèque est un logiciel libre ;
vous pouvez la redistribuer et/ou la modifier
au titre des clauses de la Licence Publique
Générale GNU, telle que publiée par la Free
Software Foundation ; soit la version 2.1 de
la Licence, ou (à votre discrétion) une
version ultérieure quelconque.
Cette bibliothèque est distribuée dans
l’espoir qu’elle sera utile, mais SANS
AUCUNE GARANTIE ; sans même une
garantie implicite de COMMERCIABILITÉ
ou DE CONFORMITÉ À UNE UTILISATION
PARTICULIÈRE. Voir la Licence Publique
Générale GNU Limitée pour plus de détails.
Vous devriez avoir reçu un exemplaire de la
Licence Publique Générale GNU Limitée
avec cette bibliothèque ; si ce n’est pas le
cas, écrivez à la Free Software Foundation
Inc., 51 Franklin Street, Fifth Floor, Boston,
MA 02110-1301, USA.
Ajoutez aussi des informations sur la
manière de vous contacter par courrier
électronique et courrier postal.
Vous devriez aussi obtenir de votre
employeur (si vous travaillez en tant que
développeur) ou de votre école, si c’est le
cas, qu’il (ou elle) signe une “renonciation
aux droits d’auteur”concernant la
bibliothèque, si nécessaire. Voici un
exemple (changez les noms) :
Yoyodyne, Inc., déclare par la présente
renoncer à toute prétention sur les
droits d’auteur de la bibliothèque
’Frob’(une bibliothèque destinée à
déplier les coudes) écrit par James
Random Hacker.
<signature de Ty Coon>, 1er avril 1990
Ty Coon, Président du Vice
Voilà tout ce qui est nécessaire !
Ni les termes de la lice nce et de la
distribution des versions mises à
disposition dans le public ni le dérivé de ce
code ne doivent être changés, en particulier
ce code ne peut pas simplement être copié
et mis sous une autre licence de
distribution [y compris la Licence Publique
GNU].
36
Fr
Page 67

English Français Español Italiano
Nederlands
Deutsch
37
Fr
Page 68

A
PRECAUCIÓN PARA LA VENTILACIÓN
IMPORTANTE
La luz intermitente con el símbolo de punta
de flecha dentro un triángulo equilátero.
Está convenido para avisar el usuario de la
presencia de “voltaje peligrosa” no aislada
dentro el producto que podría constituir un
peligro de choque eléctrico para las
personas.
CAUTION
RISK OF ELECTRIC SHOCK
DO NOT OPEN
ATENCIÓN:
PARA PREVENIR EL PELIGRO DE CHOQUE
ELÉCTRICO NO REMOVER LA TAPA NI LAS
PARTES DENTRO NO UTILIZADAS,
LLAMAR UNA PERSONA CUALIFICADA.
El punto exclamativo dentro un triángulo
equilátero convenido para avisar el usuário
de la presencia de importantes
instrucciones sobre el funcionamiento y la
manutención en la libreta que acompaña el
aparato.
D3-4-2-1-1_A1_Es
Cuando instale este aparato, asegúrese de dejar
espacio en torno al mismo para la ventilación con el fin
de mejorar la disipación de calor (por lo menos 10 cm
encima, 10 cm detrás, y 10 cm en cada lado).
10 cm 10 cm
10 cm
TIMER
10 cm
ADVERTENCIA
ADVERTENCIA
Este aparato no es impermeable. Para evitar el riesgo de
incendio y de descargas eléctricas, no ponga ningún
recipiente lleno de líquido (como pueda ser un vaso o un
florero) cerca del aparato ni lo exponga a goteo,
salpicaduras, lluvia o humedad.
D3-4-2-1-3_A1_Es
Entorno de funcionamiento
Temperatura y humedad del entorno de funcionamiento
+5 °C a +35 °C; menos del 85 % de humedad relativa
(rejillas de refrigeración no obstruidas)
No instale este aparato en un lugar mal ventilado, ni en
lugares expuestos a alta humedad o a la luz directa del
sol (o de otra luz artificial potente).
D3-4-2-1-7c*_A1_Es
ADVERTENCIA
ntes de enchufar el aparato a la corriente, lea la sección
siguiente con mucha atención.
La tensión de la red eléctrica es distinta según el
país o región. Asegúrese de que la tensión de la
alimentación de la localidad donde se proponga
utilizar este aparato corresponda a la tensión
necesaria (es decir, 230 V ó 120 V) indicada en el
panel posterior.
D3-4-2-1-4*_A1_Es
ADVERTENCIA
Para evitar el peligro de incendio, no ponga nada con
fuego encendido (como pueda ser una vela) encima del
aparato.
D3-4-2-1-7a_A1_Es
Si la clavija del cable de alimentación de CA de este
aparato no se adapta a la toma de corriente de CA
que usted desea utilizar, deberá cambiar la clavija por
otra que se adapte apropiadamente. El reemplazo y
montaje de una clavija del cable de alimentación de
CA sólo deberá realizarlos personal de servicio
técnico cualificado. Si se enchufa la clavija cortada a
una toma de corriente de CA, puede causar fuertes
descargas eléctricas. Asegúrese de que se tira de la
forma apropiada después de haberla extraído.
El aparato deberá desconectarse desenchufando la
clavija de la alimentación de la toma de corriente
cuando no se proponga utilizarlo durante mucho
tiempo (por ejemplo, antes de irse de vacaciones).
D3-4-2-2-1a_A1_Es
Las ranuras y aberturas de la caja del aparato sirven
para su ventilación para poder asegurar un
funcionamiento fiable del aparato y para protegerlo
contra sobrecalentamiento. Para evitar el peligro de
incendio, las aberturas nunca deberán taparse ni
cubrirse con nada (como por ejemplo, periódicos,
manteles, cortinas) ni ponerse en funcionamiento el
aparato sobre una alfombra gruesas o una cama.
D3-4-2-1-7b*_A1_Es
PRECAUCIÓN
El interruptor de la alimentación STANDBY/ON de
este aparato no corta por completo toda la
alimentación de la toma de corriente de CA. Puesto
que el cable de alimentación hace las funciones de
dispositivo de desconexión de la corriente para el
aparato, para desconectar toda la alimentación del
aparato deberá desenchufar el cable de la toma de
corriente de CA. Por lo tanto, asegúrese de instalar
el aparato de modo que el cable de alimentación
pueda desenchufarse con facilidad de la toma de
corriente de CA en caso de un accidente. Para evitar
correr el peligro de incendio, el cable de
alimentación también deberá desenchufarse de la
toma de corriente de CA cuando no se tenga la
intención de utilizarlo durante mucho tiempo seguido
(por ejemplo, antes de irse de vacaciones).
D3-4-2-2-2a*_A1_Es
2
Es
Page 69

Información para los usuarios en la recogida y tratamiento de los equipos al final de
su vida y de las pilas y baterías usadas.
Símbolo para
equipos
Símbolo para
pilas y baterías
Pb
Estos símbolos en los productos, embalaje, y/o en los documentos que los
acompañan significa que los productos eléctricos y electrónicos al final de su vida, las
pilas y baterías no deben mezclarse con los residuos generales de su hogar.
Para el tratamiento adecuado, recuperación y reciclado de los productos viejos y las
pilas usadas, por favor deposítelos en los puntos de recogida de acuerdo con su
legislación nacional.
Mediante el tratamiento correctamente de estos productos y pilas, ayudará a preservar
los recursos y prevenir cualquier efecto negativo en la salud humana y el medioambiente que podría surgir por una inadecuada manipulación de los desperdicios.
Para más información sobre recogida y reciclado de los productos viejos, pilas y
baterías, por favor contacte con su municipio, sobre localización de los puntos limpios
o diríjase al punto de venta donde compró los productos.
Estos símbolos sólo son válidos en la Unión Europea.
Para países fuera de la Unión europea:
Si desea eliminar estos artículos, por favor contactar con las autoridades locales o el
distribuidor y pida por el método correcto de tratamiento.
K058a_A1_Es
PRECAUCIÓN
Este aparato es un producto de láser de clase 1
clasificado como tal en Seguridad de productos de
láser, IEC 60825-1:2007.
PRODUCTO LASER CLASE 1
Acerca de la condensación
Si el reproductor se traslada repentinamente de un
lugar frío a una habitación caliente (en invierno, por
ejemplo) o si la temperatura de la habitación donde
está instalado el reproductor sube repentinamente
debido a una calefacción, etc., en el interior del aparato
(en las piezas de funcionamiento y en la lente) podrán
formarse gotas de agua (condensación). Cuando haya
condensación, el reproductor no funcionará bien y la
reproducción no será posible. Deje sin funcionar el
reproductor a la temperatura ambiental durante 1 ó 2
horas con la alimentación conectada (el tiempo
depende de la cantidad de condensación). Las gotas de
agua se disiparán y será posible reproducir. La
condensación se puede producir también en el verano
si el reproductor se expone a la salida de aire frío de un
acondicionador de aire. Si pasa esto, traslade el
reproductor a un lugar diferente.
Este producto es para tareas domésticas generales.
Cualquiera avería debida a otra utilización que tareas
domésticas (tales como el uso a largo plazo para
motivos de negocios en un restaurante o el uso en un
coche o un barco) y que necesita una reparación
hará que cobrarla incluso durante el período de
garantía.
S005_A1_Es
K041_A1_Es
English Français Español Italiano
Deutsch
Nederlands
D58-5-2-2a_A1_Es
3
Es
Page 70

Muchas gracias por haber adquirido este producto PIONEER. Lea atentamente este manual para conseguir el mejor rendimiento del aparato. Le servirá también como guía operativa de este
producto PIONEER.
Índice
Accesorios . . . . . . . . . . . . . . . . . . . . . . . . . . . . . . 4
Antes de comenzar . . . . . . . . . . . . . . . . . . . . . . . 5
General . . . . . . . . . . . . . . . . . . . . . . . . . . . . . . . . . . . . . . . 5
Colocación de las pilas . . . . . . . . . . . . . . . . . . . . . . . . . . . 5
Controles e indicadores . . . . . . . . . . . . . . . . . . . 6
Mando a distancia. . . . . . . . . . . . . . . . . . . . . . . . . . . . . . .6
Panel frontal . . . . . . . . . . . . . . . . . . . . . . . . . . . . . . . . . . . 7
Sistema de altavoces (sólo X-HM70) . . . . . . . . . . . . . . . . . 7
Conexión del equipo. . . . . . . . . . . . . . . . . . . . . . 8
Conexión de la antena. . . . . . . . . . . . . . . . . . . . . . . . . . . . 8
Conexión de los altavoces . . . . . . . . . . . . . . . . . . . . . . . . . 9
Utilizar otro bafle. . . . . . . . . . . . . . . . . . . . . . . . . . . . . . . . 9
Conectar una TV, etc. . . . . . . . . . . . . . . . . . . . . . . . . . . . . 9
Conexión a la red mediante la interfaz LAN . . . . . . . . . . .10
Conexión de la alimentación de CA. . . . . . . . . . . . . . . . . 10
Control general . . . . . . . . . . . . . . . . . . . . . . . . . 11
Para conectar la energía . . . . . . . . . . . . . . . . . . . . . . . . .11
Ajuste del reloj . . . . . . . . . . . . . . . . . . . . . . . . . . . . . . . . 11
Mejoramiento de su sistema . . . . . . . . . . . . . . . . . . . . . .12
Escuchando un CD o disco de MP3/WMA. . . . . 13
Reproducción de discos . . . . . . . . . . . . . . . . . . . . . . . . . 13
Distintas funciones de los discos . . . . . . . . . . . . . . . . . . 13
Reproducción avanzada de CD o disco de MP3/
WMA. . . . . . . . . . . . . . . . . . . . . . . . . . . . . . . . . . . . . . . . 14
Modo de carpeta del MP3/WMA (solamente para los
ficheros de MP3/WMA) . . . . . . . . . . . . . . . . . . . . . . . . . . 15
Escuchar el iPod, iPhone o iPad . . . . . . . . . . . . 17
Modelos soportados de iPod, iPhone e iPad:. . . . . . . . . . 17
Cómo conectar un iPod/iPhone . . . . . . . . . . . . . . . . . . . 17
Para retirar el adaptador de iPod o iPhone . . . . . . . . . . . 17
Para insertar un adaptador de iPad. . . . . . . . . . . . . . . . . 17
Reproducción de un iPod, iPhone o iPad . . . . . . . . . . . . 18
Escuchando a través del dispositivo de
almacenamiento USB/ player MP3 . . . . . . . . . . 19
Conexión de un dispositivo USB . . . . . . . . . . . . . . . . . . . 19
Reproducción de un aparato USB. . . . . . . . . . . . . . . . . . 19
Reproducción con opción NETWORK . . . . . . . . 20
Recepción de emisoras de radio de Internet. . . . . . . . . . 20
Reproducción de archivos de audio guardados en un
componente de la red. . . . . . . . . . . . . . . . . . . . . . . . . . . 21
Reproducción de sus canciones favoritas. . . . . . . . . . . . 21
Menú de configuración de red . . . . . . . . . . . . . . . . . . . . 21
Requisitos de conexión de red . . . . . . . . . . . . . . . . . . . . 22
Acerca de la reproducción de la red . . . . . . . . . . . . . . . . 22
Glossary . . . . . . . . . . . . . . . . . . . . . . . . . . . . . . . . . . . . . 23
Recepción de radio . . . . . . . . . . . . . . . . . . . . . . 24
Empleo del sistema de datos radiofónicos
(RDS). . . . . . . . . . . . . . . . . . . . . . . . . . . . . . . . . . 25
Introducción al RDS . . . . . . . . . . . . . . . . . . . . . . . . . . . . 25
Funcionamiento del temporizador y del
temporizador de apagado . . . . . . . . . . . . . . . . 26
Uso del despertador . . . . . . . . . . . . . . . . . . . . . . . . . . . . 26
Operación de desconexión automática. . . . . . . . . . . . . . 26
Información adicional. . . . . . . . . . . . . . . . . . . . 27
Cuadro para localización de averías . . . . . . . . . . . . . . . . 27
Condensación . . . . . . . . . . . . . . . . . . . . . . . . . . . . . . . . 29
Si ocurre algún problema . . . . . . . . . . . . . . . . . . . . . . . . 29
Reinicio de Fábrica, Limpiando Toda la Memoria . . . . . . 29
Antes de transportar el aparato . . . . . . . . . . . . . . . . . . . 29
Cuidados de los discos compactos. . . . . . . . . . . . . . . . . 29
Limpieza del mueble. . . . . . . . . . . . . . . . . . . . . . . . . . . . 29
Cuidados para cuando la unidad se instala en una
estantería cerrada con puerta de cristal . . . . . . . . . . . . . 29
Acerca de los formatos reproducibles de archivos de
música . . . . . . . . . . . . . . . . . . . . . . . . . . . . . . . . . . . . . . 30
Acerca de los mensajes de estado . . . . . . . . . . . . . . . . . 30
Especificaciones. . . . . . . . . . . . . . . . . . . . . . . . . . . . . . . 31
Acerca de iPod/iPhone/iPad. . . . . . . . . . . . . . . . . . . . . . 31
Exención de responsabilidad frente a contenidos de
terceros . . . . . . . . . . . . . . . . . . . . . . . . . . . . . . . . . . . . . 31
Sistema receptor de CD en red X-HM70, consistente en una
unidad principal y un sistema de altavoces.
Receptor de CD en red XC-HM70, consistente en una unidad
principal.
Accesorios
Verifique que estén incluidos los accesorios siguientes.
o
Controlador remoto x 1
Antena de FM x 1
Antena de cuadro de AM x 1
Altavoz x 2
(sólo X-HM70)
Pila del tamaño “AAA” x 2
Cable de vídeo x 1
Cable del altavoz x 2
(sólo X-HM70)
Tarjeta de garantía
Este manual de
instrucciones
4
Es
Page 71

Antes de comenzar
PRECAUCIÓN
PRECAUCIÓN
General
• Use el aparato sobre una superficie nivelada y firme, en
un lugar que no esté expuesto a vibraciones.
• Ubique los altavoces al menos a 30 cm de distancia de
cualquier TV CRT para evitar las variaciones de color en la
pantalla del TV. Si la variación persiste, mueva los
altavoces más lejos del TV. El TV con pantalla LCD no es
susceptible a tal variación.
• Mantenga el aparato apartado de la luz directa del sol,
fuertes campos magnéticos, polvo excesivo, humedad y
de equipos electrónicos/eléctricos (computadoras del
hogar, facsímiles, etc.) que generan ruido eléctrico.
• No ponga nada encima del aparato.
• No exponga el aparato a la humedad, a temperaturas
superiors a 60° ni a temperaturas muy bajas.
• Si su sistema no funciona correctamente, desconecte el
cable de alimentación de CA de la toma de CA. Enchufe
otra vez el cable de alimentación de CA, y luego conecte
la alimentación del sistema.
• Si se produce una tormenta con rayos, desenchufe el
aparato por razones de seguridad.
• Sujete la clavija de alimentación de CA al quitar esta
clavija del tomacorriete. Si la quita tirando del cable
puede romper o estropear los hilos y conexiones internas.
• El enchufe de la corriente CA es utilizado como un
dispositivo de desconexión y seguirá siendo siempre fácil
de operar.
• No quite la tapa exterior dado que pueden
producirse descargas eléctricas. Solicite el servicio
técnico a un centro de servicio local PIONEER.
• La ventilación no debe impedirse al cubrir las aberturas
de ventilación con cosas como periódicos, tapetes,
cortinas, etc.
• Las fuentes de llamas abiertas, tales como velas
encendidas no deben colocarse encima del aparato.
• Deberá prestarse atención a los aspectos del medio
ambiente al deshacerse de las pila.
• El aparato está diseñado para funcionar en climas
moderados.
• Se debe usar la misma tensión que la especificada en el
aparato. Si usa este aparato con una tensión más alta que
la especificada, es peligroso y puede provocar incendios
o accidentes que causen daños. PIONEER no asumirá
responsabilidad alguna por cualquier daño de este
aparato que resulte del uso de una tensión distinta a la
especificada.
Colocación de las pilas
Las pilas suministradas con este equipo le permitirán
comprobar las operaciones iniciales, pero no durarán mucho
tiempo. Se recomienda utilizar pilas alcalinas de larga
duración.
• El uso incorrecto de las pilas puede provocar situaciones
peligrosas tales como fugas y explosiones. Tenga en
cuenta las siguientes precauciones:
-
Nunca utilice pilas nuevas y usadas al mismo tiempo.
-
Instale las pilas correctamente, haciendo coincidir los
polos positivo y negativo de las mismas con las marcas
de polaridad impresas en el compartimiento de las
pilas.
-
Aunque distintas pilas tengan la misma forma, pueden
tener tensiones diferentes. No mezcle pilas de distinto
tipo.
-
Cuando se deshaga de las pilas usadas, asegúrese de
respetar las disposiciones gubernamentales o las
normas de las instituciones medioambientales públicas
que rigen en su país o región.
• No use ni guarde pilas en lugares expuestos a la luz solar
directa o en lugares con un calor excesivo, como el
interior de un coche o cerca de un calefactor. Esto puede
provocar fugas en las pilas, sobrecalentamiento,
explosiones o incendios. También puede reducir la vida o
el rendimiento de las mismas.
English Français Español Italiano
Deutsch
Nederlands
5
Es
Page 72

Controles e indicadores
Mando a distancia
1
2
3
4
5
6
7
8
1 STANDBY/ON
Alterna el receptor entre encendido y modo de espera
(página 11).
2 Botones de función de entrada
Utilícelo para seleccionar la fuente de entrada para este
receptor.
6
Es
O
9
10
11
12
13
14
15
3 Botones de control del receptor de CD
DIMMER – Para reducir o incrementar la luminosidad de
la pantalla. Se pueden seleccionar cuatro niveles de
luminosidad (página 11).
SLEEP – Púlselo para cambiar el tiempo que debe
transcurrir antes de que el receptor se apague (30 min. –
60 min. – 90 min. – Off). Puede comprobar el tiempo de
desconexión restante en cualquier momento pulsando
SLEEP una vez (página 26).
TIMER – Permite ajustar el reloj, así como configurar y
comprobar los temporizadores (página 11, 26).
DISPLAY – Muestra información sobre discos MP3/WMA
o RDS.
CD DISP – Muestra información sobre el disco
(página 15).
4 Botones de control del receptor de CD
TOP MENU – Permite mostrar el menú superior del iPod
(página 18).
iPod CONTROL – Permite cambiar entre los controles del
iPod y los del receptor (página 18).
SETUP – Permite acceder al menú de configuración del
receptor (página 11, 24).
RETURN – Permite confirmar y salir de la pantalla de
menús actual.
5
///
Permite seleccionar/cambiar los modos y la configuración
del sistema, así como confirmar acciones.
Los botones TUNE / se pueden utilizar para buscar
frecuencias de radio y los PRESET / para seleccionar
emisoras de radio presintonizadas (página 24).
6 Botones de control de la reproducción
Los botones principales (, , etc.) permiten controlar cada
función tras haberla seleccionado mediante los botones de
activación de funciones.
PTY – Utilícelo para buscar tipos de programas RDS
(página 25).
•El botón AUTO TUNE no se emplea con este receptor.
7 Teclado numérico
Permite introducir números (página 14).
8 FOLDER +/-
Permite seleccionar la carpeta del disco MP3/WMA
(página 15).
9 OPEN/CLOSE
Permite abrir o cerrar la bandeja del disco (página 13).
(TUNE
/
, PRESET
/
), ENTER
10 Botones de control del sonido
Permite ajustar la calidad del sonido (página 12).
11 Botones de control del volumen
Utilice estos botones para ajustar el nivel de volumen
(página 11).
12 MUTE
Silencia/restablece el sonido (página 12).
13 Botones de control del sintonizador
BAND – Cambia entre las sintonías AM, FM ST (estéreo)
y FM MONO (página 24).
TUNER EDIT – Memoriza nombres o emisoras para
solicitarlos posteriormente (página 24).
14 Botones del modo de reproducción
REPEAT – Pulse este botón para cambiar el ajuste de
reproducción repetida desde un CD, iPod o USB
(página 14).
SHUFFLE – Permite cambiar el ajuste de reproducción
aleatoria desde un CD, iPod o USB (página 14).
PLAY MODE – Permite cambiar el modo de reproducción
entre un disco CD y un disco MP3/WMA (página 14).
15 CLEAR
Permite desactivar la reproducción programada (página 15).
Page 73

Prueba del controlador remoto
Sensor del mando
a distancia
7 m
TIMER
1
9
6
7
8 11 12 13 14 15
52
3
4
10
2
1
3
4
Asegúrese de que no haya nada en
contacto con los diafragmas de los
altavoces al retirar las rejillas.
Compruebe el controlador remoto después de haber
comprobado todas las conexiones.
Oriente directamente el controlador remoto al sensor remoto
del aparato. Se podrá emplear el controlador remoto dentro
del alcance mostrado a continuación:
TIMER
STANDBY/ON
10 Terminal USB
Panel frontal
Permite conectar un dispositivo de almacenamiento masivo
USB o un Apple iPad como fuente de audio (página 19).
11 Botón Tune Down, Skip Down
Permite seleccionar la pista o la carpeta que se desean
reproducir.
12 Botón Tune Up, Skip Up
Permite seleccionar la pista o la carpeta que se desean
reproducir.
13 Botón “Stop”
Permite detener la reproducción.
14 Botón Play or Pause
Detiene la reproducción o reanuda la reproducción desde el
punto en el que se ha detenido.
15 Botón de abertura/cierre de la bandeja de discos
Permite abrir o cerrar la bandeja del disco (página 13).
English Français Español Italiano
Sistema de altavoces (sólo X-HM70)
1 Tweeter en domo
1 Sensor del mando a distancia
Recibe las señales del mando a distancia.
2 Indicador del temporizador
Se enciende cuando el temporizador está activado
(página 26).
3 Bandeja de disco
Coloque el disco con la etiqueta mirando hacia arriba
(página 13).
4 Estación de acoplamiento de iPod o iPhone
Estación de acoplamiento de iPod/iPhone (página 17).
5 Control de volumen
Utilice estos botones para ajustar el nivel de volumen
(página 11).
6 Botón STANDBY/ON
Alterna el receptor entre encendido y modo de espera
(página 11).
7 Botón INPUT
Permite seleccionar la fuente de entrada (página 12).
8 Toma de auriculares
Utilícelo para conectar un par de auriculares. Cuando se
conecta un par de auriculares, los altavoces no emiten
sonido (página 12).
9 Toma de AUDIO IN
Permite conectar un componente auxiliar mediante un cable
con miniclavija estéreo (página 12).
2 Altavoz de graves
3 Conducto de reflexión
de graves
4 Terminal para Altavoz
Las rejillas de los altavoces son extraíbles
Deutsch
Nederlands
7
Es
Page 74

Conexión del equipo
Nota
DC OUTPUT
for WIRELESS LAN
(OUTPUT 5 V
0.6 A MAX)
LAN(10/100
)
FM
UNBAL
75
Ω
SPEAKERS
AM
LOOP
ANTENNA
OUT
IN
PREOUT
L
R
VIDEO LINE
SUBWOOFER
Altavoz
derecho
FM Antena
Altavoz
izquierdo
Televisor
A la toma de
entrada de vídeo
Antena de
cuadro de AM
< Montaje >
Instalación de la antena de
cuadro de AM
Cable de vídeo
Toma de pared
(220 V a 240 V de
CA, 50 Hz)
Conector rojo
Cable de
altavoz
suministrado
con la unidad
X-HM70
Incorrecto
Antes de realizar o cambiar las conexiones, apague el sistema y desenchufe el cable de alimentación de la toma de CA.
Conexión de la antena
Antena de FM suministrada:
Conecte el cable de la antena de FM a la toma FM 75 OHMS
y oriente el cable de la antena de FM en la dirección que
proporcione la mejor recepción posible.
Antena externa de FM:
Utilice una antena de FM externa (cable coaxial de 75
ohmios) para obtener una mejor recepción. Cuando se utilice
una antena externa de FM, desconecte el cable de antena
que viene con el aparato.
8
Es
Antena de cuadro de AM suministrada:
Conecte la antena de lazo al terminal de AM. Coloque el lazo
antena AM de forma tal que la recepción sea óptima.
Coloque la antena de lazo AM en un estante, etc., o fíjela en
un soporte.
• Si pone la antena sobre el aparato o cerca del cable de
alimentación de CA, podrá causarse generación de ruido.
Ponga la antena separada del aparato para obtener una
recepción mejor.
Page 75

Conexión de los altavoces
PRECAUCIÓN
Nota
10 mm
DC OUTPUT
FM
UNBAL
75
Ω
SPEAKERS
AM
LOOP
ANTENNA
OUT
IN
PREOUT
L
R
VIDEO LINE
SUBWOOFER
Unidad
principal
Cable de audio
(comercialmente
disponible)
Señal de audio
A la toma de
entrada de audio
A la toma
SUBWOOFER PREOUT
Subwoofer de venta
en establecimientos
comerciales
(amplificador
incorporado)
FM
UNBAL
75
Ω
SPEAKERS
AM
LOOP
ANTENNA
OUT
IN
PREOUT
L
R
VIDEO LINE SUBWOOFER
Señal de audio
Televisor A las tomas de
salida de audio
Cable de audio
(comercialmente
disponible)
Unidad principal
A las tomas
de entrada
LINE
Si no desea utilizar el altavoz proporcionado
• El cable de altavoz proporcionado, con el tubo rojo, es
para el terminal positivo (+). Conecte el cable con el
conector rojo al terminal positivo (+), y el otro cable al
terminal negativo (–).
• Utilice altavoces con una impedancia de 4 ohms; si utiliza
altavoces con una impedancia inferior, podría dañar la
unidad.
• Por estos terminales de altavoz circula tensión ACTIVA
que es PELIGROSA. Para evitar el peligro de descargas
eléctricas al conectar o desconectar los cables de altavoz,
desenchufe el cable de alimentación antes de tocar las
partes de los cables que no están aisladas.
• No confunda los canales derecho e izquierdo. El altavoz
derecho es el que está en el lado derecho cuando se mira
el aparato desde delante.
• No deje que los cables desnudos de los altavoces se
pongan en contacto entre sí.
• Asegúrese de que no haya hilos expuestos del cable del
altavoz en contacto con el panel trasero mientras el
equipo está encendido. Si alguno de los cables
desprotegidos del altavoz tocara el panel trasero, podría
provocar un corte de corriente como medida de
seguridad.
Si no desea utilizar el cable de altavoz suministrado
Conexiones de cables desnudos
1 Trence los hilos expuestos del cable.
2 Afloje el terminal e inserte el hilo expuesto.
3 Apriete el terminal.
12 3
Sólo X-HM70:
• No instale los altavoces en el techo ni en una pared a gran
altura. La rejilla ha sido diseñada para que se pueda
desmontar; por consiguiente, si se coloca a una altura
elevada, existe el peligro de que se caiga y provoque
daños o lesiones personales.
• No deje que ningún objeto caiga en el interior de los
conductos de reflejo de graves, y no ponga nada en ellos.
• No se suba ni se siente encima de los altavoces. Podría
herirse.
Conectar una TV, etc.
Conectar a la TV con un cable de audio.
English Français Español Italiano
Utilizar otro bafle
Puede conectar un bafle con un amplificador a la toma de
SUBWOOFER PREOUT.
Deutsch
Nederlands
Para seleccionar la función Línea de entrada:
• En la unidad principal: Pulse repetidamente el botón
• No se oirá ningún sonido desde el bafle sin un
amplificador incorporado.
INPUT hasta que aparezca Line In en pantalla.
• En el controlador remoto: Pulse LINE.
9
Es
Page 76

Conexión a la red mediante la interfaz LAN
Nota
PRECAUCIÓN
DC OUTPUT
for WIRELESS LAN
(OUTPUT 5 V
0.6 A MAX)
LAN(10/100
)
FM
UNBAL
75
Ω
SPEAKERS
AM
LOOP
ANTENNA
al un puerto LAN
Cable LAN
(vendido por
separado)
Enrutador
Modem
Internet
DC OUTPUT
for WIRELESS LAN
(OUTPUT 5 V
0.6 A MAX)
LAN(10/100
)
FM
UNBAL
75
Ω
SPEAKERS
AM
LOOP
ANTENNA
DC 5V WPS
Ethernet
WAN
RT
Internet
Modem
Enrutador
Convertidor LAN inalámbrico (AS-WL300)
Al conectar este receptor a la red a través de un terminal
LAN, puede escuchar emisoras de radio de Internet. Para
escuchar emisoras de radio de Internet tendrá que firmar
primero un contrato con un ISP (proveedor de servicios de
Internet).
Conectado de este modo, permite reproducir archivos de
audio guardados en los componentes de la red, incluyendo
su propio ordenador, mediante las funciones NETWORK.
LAN
321
WAN
• Consulte el manual de instrucciones del equipo que ha
conectado puesto que dicho equipo y el método de
conexión pueden variar en función de su entorno de
Internet.
• Cuando u tilice una conexión de Internet de banda ancha,
es necesario un contrato con un proveedor de servicios
de Internet. Para conocer más detalles, póngase en
contacto con su proveedor de servicios de Internet más
cercano.
Conexión a un LAN inalámbrico
La conexión inalámbrica a la red es posible mediante una
conexión de LAN inalámbrico. Utilice el AS-WL300 de venta
por separado para la conexión.
Conexión de la alimentación de CA
Después de comprobar que se hayan hecho correctamente
todas las conexiones, enchufe el cable de alimentación de
CA de este aparato en la toma de la pared.
• Desenchufe el cable de corriente CA del toma de la pared
si no se utilizará la unidad durante un largo período de
tiempo.
• Manipule el cable de corriente por el enchufe. No
desenchufe la unidad tirando del cable de alimentación,
y nunca toque el cable con las manos mojadas, ya que
podría producirse un cortocircuito o una descarga
eléctrica. No coloque la unidad ni ningún mueble, etc.,
encima del cable de alimentación, ni de forma que este
quede aprisionado entre dos superficies. Nunca haga
ningún nudo en el propio cable ni lo ate a otros cables. El
cable de alimentación deberá disponerse de tal modo
que la posibilidad de que alguien lo pise sea mínima. Un
cable de alimentación dañado puede provocar un
incendio o producir una descarga eléctrica. Revise el
cable de alimentación cada cierto tiempo. Si el cable está
dañado, solicite al servicio técnico autorizado PIONEER
más cercano o a su distribuidor que le faciliten uno
nuevo.
Conecte el terminal LAN de este receptor al terminal LAN de
su enrutador (con o sin la función del servidor DHCP
incorporada) con un cable LAN recto (CAT 5 o mejor).
Active la función del servidor DHCP en su enrutador. En el
caso de que su enrutador no tenga la función del servidor
DHCP incorporada, será necesario preparar manualmente la
red. Para obtener más detalles, consulte Menú de
configuración de red en la página 21.
10
Es
Para obtener información detallada, consulte las
instrucciones de funcionamiento del conversor de LAN
inalámbrica (AS-WL300).
Page 77

Control general
Nota
Nota
PRECAUCIÓN
O
Para conectar la energía
Pulse el botón STANDBY/ON para encender el aparato.
Después del uso:
Pulse el botón STANDBY/ON para entrar en el modo de
reserva de alimentación.
• Sin embargo, si el iPod/iPhone se encuentra en la
estación de acoplamiento, la unidad activará el modo de
carga. Aparecerá “iPod charge”.
• Durante el modo de carga del iPod, pulse el botón
STANDBY/ON para encender la unidad.
• Para activar el modo de espera, retire el iPod.
Ajuste del reloj
O
En este ejemplo, el reloj está ajustado para la visualización de
24 horas (00:00).
1 Pulse el botón TIMER del mando a distancia.
Se mostrarán la fecha y hora actuales.
La primera vez que utilice el reloj, irá al modo de
configuración del reloj.
2 Pulse ENTER.
/
3Utilice
ENTER.
para ajustar el día; a continuación, pulse
4Utilice
/
12 horas; a continuación, pulse ENTER.
5Utilice
pulse ENTER.
6Utilice
pulse ENTER para confirmar.
Para comprobar la visualización de la hora:
Pulse el botón TIMER. Aparecerá la visualización de la hora
durante unos 10 segundos.
• Cuando se restablece la alimentación eléctrica después
de volver a conectar la unidad o después de un fallo
eléctrico, configure el reloj (Véase más abajo).
Para reajustar el reloj:
Efectúe “Ajuste del reloj” desde el paso 1. Si “Clock” no
aparece en el paso 2, se saltará el paso 4 (para seleccionar la
visualización de 24 horas o de 12 horas).
para seleccionar el modo de 24 horas o de
Aparecerá el visualizador de 24
horas.
(00:00 - 23:59)
Aparecerá el visualizador de 12
horas.
(AM 00:00 - PM 11:59)
/
para ajustar la hora, y, a continuación,
/
para ajustar los minutos; a continuación,
Para cambiar la visualización de 24 horas o de 12
horas:
1 Borre todo el contenido programado.
Para una información detallada, consulte Reinicio de Fábrica,
Limpiando Toda la Memoria en la página 29.
2 Efectúe “Ajuste del reloj” desde el paso 1 en adelante.
Control de brillo de pantalla
Al pulsar el botón DIMMER, se atenuará la luminosidad de la
pantalla. Se pueden seleccionar cuatro niveles de
luminosidad.
Auto ajuste de aumento de volumen
Si usted apaga y prende la unidad principal con el volumen
ajustado a 41 o más alto, el volumen partirá a 40 e ira
aumentando hasta llegar al nivel ajustado.
Control de volumen
Gire el botón del volumen hacia VOLUME (en la unidad
principal) o presione VOLUME +/- (en el control remoto)
para aumentar o disminuir el volumen.
• El nivel de sonido como una función del volumen
depende de eficiencia del altavoz, de la localización, y de
otros factores. Es recomendable evitar la exposición a
altos niveles de volumen. No ponga el volumen al máximo
cuando lo encienda. Escuche música a niveles
moderados. La presión acústica excesiva de los
auriculares y los cascos puede causar la pérdida del
sentido auditivo.
Configuración de desconexión automática
Está ajustado para apagar automáticamente el receptor una
vez transcurrido un tiempo determinado (cuando la
alimentación ha estado activa sin funcionamiento durante
varias horas).
• Ajuste por defecto: 6H
1 Pulse SETUP en el mando a distancia.
•Si no se muestra APD, pulse / para seleccionar APD.
2Utilice
/
deberá transcurrir antes de que la unidad se desconecte
(cuando no se haya efectuado ninguna operación).
• Puede seleccionar 2, 4 o 6 horas, o apagado (si no desea
que la desconexión se realice automáticamente).
3 Cuando termine, pulse RETURN.
para especificar la cantidad de tiempo que
English Français Español Italiano
Deutsch
Nederlands
11
Es
Page 78

Muting
Nota
Nota
FM
Stereo
NETWORK
CD AM USB
iPodLINEAUDIO IN
Reproductor de audio
portátil, etc.
Cable de audio (no suministrados)
El volumen se silencia temporalmente cuando pulsa el botón
MUTE del telemando. Pulse otra vez para restablecer el
volumen.
Control P.bass
Cuando se activa la alimentación por primera vez, la unidad
entrará en modo P.bass, que enfatiza las frecuencias de
bajos. Para cancelar el modo P.bass, pulse el botón P.BASS
del mando a distancia.
Control de graves
Pulse el botón BASS, y a continuación pulse / para
ajustar los graves.
Control de agudos
Pulse el botón TREBLE, y a continuación pulse / para
ajustar los agudos.
Ecualizador
Cuando se pulse el botón SOUND, se visualizará el ajuste del
modo actual. Para cambiar a un modo distinto, pulse el
botón SOUND repetidamente hasta que aparezca el modo de
sonido deseado.
No equalization.
FLAT
Equaliser off.
JAZZ
For rock music.
For game.
For classical music.
For classical music.
For pop music.
For pop music.
Vocals are enhanced.
Vocals are enhanced.
For jazz.
For jazz.
GAME
CLASSIC
POPS
VOCAL
Función de entrada
Cuando pulse el botón INPUT o la unidad principal, la
función actual cambiará a un modo diferente. Pulse el botón
INPUT repetidamente para seleccionar la función deseada.
12
Es
• En el caso de que se produzca una interrupción en el
suministro eléctrico o de que se desconecte el cable de
alimentación de CA, la función de seguridad protegerá el
modo de funciones memorizadas.
Mejoramiento de su sistema
No está incluido el cable de conexión. Compre un cable
disponible en las tiendas del ramo como se muestra a
continuación.
TIMER
PHONES AUDIO IN
USB
5V 2.1A
Audición de sonidos de reproducción del
reproductor de audio portátil, etc.
1 Emplee un cable de conexión para conectar el Lector de
audio portátil, etc. a la toma AUDIO IN.
2 Pulse el botón STANDBY/ON para encender el aparato.
3 Pulse el botón AUDIO IN del controlador remoto o el
botón INPUT de la unidad principal repetidamente para
seleccionar la función de AUDIO IN.
4 Reproduzca el sonido del equipo conectado.
• Si el nivel de volumen del aparato conectado es
demasiado alto, se podría producir distorsión de sonido.
Si así sucede, baje el volumen del aparato conectado. Si
el nivel de volumen es demasiado bajo, aumente el
volumen del dispositivo conectado.
• Para evitar interferencias de ruido, ponga el aparato
alejado de un televisor.
• Cuando use un equipo de vídeo, conecte la salida de
audio a este aparato y la salida de vídeo a un televisor.
Auriculares
• No gire el interruptor d e volumen al máximo y escuche la
música a niveles moderados. La presión acústica
excesiva de los auriculares y los cascos puede causar la
pérdida del sentido auditivo.
• Antes de enchufar o desenchufar los auriculares, baje el
volumen.
• Asegúrese de que sus auriculares tengan una clavija de
3,5 mm de diámetro y una impedancia de 16 ohmios a 50
ohmios. La impedancia recomendada es de 32 ohmios.
• Si se enchufan los auriculares, se desconectan
automáticamente los altavoces. Ajuste el volumen
empleando el control VOLUME.
Page 79

Escuchando un CD o disco
PRECAUCIÓN
Nota
de MP3/WMA
STANDBY/ON
STANDBY/ON
INPUT
INPUT
TIMER
TIMER
Reproducción de discos
1 Pulse el botón STANDBY/ON para encender el aparato.
2 Pulse el botón CD en el control remoto o el botón INPUT
repetidamente en la unidad principal para seleccionar la
función de CD.
3 Pulse el botón para abrir la bandeja de discos.
4 Coloque el disco en la bandeja del disco, con la etiqueta
mirando hacia arriba.
• Si hay interferencias de televisión o radio durante el
funcionamiento del reproductor de CD, coloque el
aparato alejado de la televisión o de la radio.
Distintas funciones de los discos
Función
Reproduc
ción
Unidad
principal
Mando a
distancia
Funcionamiento
Pulse el modo de
parada.
English Français Español Italiano
Este sistema puede reproducir un CD estándar, CD-R/RW en
el formato CD y CD-R/RW con archivos MP3 o WMA, pero no
puede grabar en ellos. Es posible que algunos discos CD-R y
CD-RW de audio no puedan reproducirse debido al estado
del disco o al aparato utilizado para su grabación.
MP3:
MP3 es una forma de compresión. Es un acrónimo que
significa MPEG Audio Layer 3. MP3 es un tipo de código de
audio que se procesa mediante compresión significante
desde la fuente de audio original con muy poca pérdida en la
calidad del sonido.
• Este sistema es compatible con MPEG-1/2/2.5 Audio
Layer 3 (frecuencias de muestreo: de 8 kHz a 48 kHz;
tasas de bits: de 32 kbps a 320 kbps).
• Dura nte la repro ducci ón de a rchiv os VBR , el co ntado r de
tiempo del visualizador podría diferir del tiempo real de
reproducción.
WMA:
Los archivos WMA son un formato de sistema avanzado de
archivos que incluye archivos de audio que están
comprimidos con un codec de audio de Windows. El WMA
fue desarrollado por Microsoft como un formato de audio
para el reproductor Windows Media.
• Este sistema es compatible con el formato WMA
(frecuencias de muestreo: de 32 kHz a 44,1 kHz/48 kHz;
tasas de bits: de 32 kbps a 320 kbps).
USB
2.1A
5V
AUDIO IN
PHONES
5 Pulse el botón para cerrar la bandeja de discos.
6 Pulse el botón / ( ) para iniciar la reproducción.
Después de la última pista del disco, la unidad parará
automáticamente.
• No ponga dos discos en una misma bandeja de disco.
• No reproduzca discos de formas especiales (en forma de
corazón, octagonales. etc.). Podría causar mal
funcionamiento.
• No empuje la bandeja de discos mientras está moviendo.
• Si hay un corte de alimentación eléctrica mientras la
bandeja está abierta, espere a que se restaure la
alimentación.
• Asegúrese de poner el disco de 8 cm en el centro de las
bandejas de discos.
• Debido a la estructura de la información del disco, tarda
más en leer un disco MP3/WMA que un disco CD normal
(aproximadamente 20 a 90 segundos).
• Cuando la unidad esté leyendo información en un disco
MP3 o WMA, se mostrará “MP3” o “WMA”.
• Cuando se alcanza el final de la última pista en avance
rápido, aparecerá “END” en la pantalla y se pausará el
funcionamiento del CD. Cuando se alcance el principio
de la primera pista en retroceso rápido, la unidad
accederá al modo de reproducción (sólo para CD).
• También pueden reproducirse los discos reescribibles de
múltiples sesiones con escritura inacabada.
Parada
Pausa
Pista
siguiente/
anterior
Avance
rápido/
Retroceso
rápido
Pulse en el modo de
reproducción.
Pulse en el modo de
reproducción. Pulse el
botón / para
reanudar la
reproducción a partir
del punto en el que se
pausó.
Púlselo en el modo de
reproducción o parada.
Si pulsa el botón en
modo de parada, pulse
el botón / para
empezar la pista
deseada.
Pulse en el modo de
reproducción.
Suéltelo para volver a
la reproducción.
Reanudar:
1 Es posible reanudar la reproducción de una pista
previamente detenida.
Durante la reproducción de un disco, pulse el botón .
2 El sistema guarda la pista previamente detenida y se
muestra parpadeando en la pantalla.
Para reanudar la reproducción, pulse el botón / ( ).
La reproducción se reanudará desde el principio de la pista
previamente detenida.
Cómo cancelar la reanudación de la reproducción:
Pulse el botón .
Deutsch
Nederlands
13
Es
Page 80

Reproducción avanzada de CD o disco de MP3/
Nota
Nota
Número de la pista seleccionada
CD
F008 T001 00:00
PROGRAM
P - 01 ← T005
WMA
Búsqueda directa de pistas
Puede reproducir las pistas deseadas del disco actual
mediante los botones numéricos.
Utilice los botones numéricos del mando a distancia
para seleccionar la pista deseada mientras se reproduce
el disco seleccionado.
• Los botones numéricos le permiten elegir hasta el
número 9.
• Para seleccionar el número 100 o superior, emplee el
botón “+100”.
• Para seleccionar el número 10 o superior, emplee el
botón “+10”.
A. Por ejemplo, para seleccionar 13
1 Pulse el botón “+10”.
2 Pulse el botón “3”.
CD
F008 T001 00:00
• Durante la reproducción aleatoria, no es posible realizar
una búsqueda directa de pistas.
Para detener la reproducción:
Pulse el botón .
Repetición de la reproducción
La repetición de lectura de una pista se puede realizar, todas
las pistas o una secuencia programada continuamente.
• Durante la reproducción repetida, se mostrará “ ”.
CD
F008 T001 00:00
Para escuchar nuevamente una pista:
Pulse repetidamente el botón REPEAT hasta que se muestre
“Repeat One”. Pulse el botón / ( ).
Para repetir todas las pistas:
Pulse repetidamente el botón REPEAT hasta que se muestre
“Repeat All”. Pulse el botón / ( ).
Para repetir las pistas deseadas:
Efectúe los pasos 1 - 5 de la sección “Reproducción
programada” de esta página y luego pulse repetidamente el
botón REPEAT hasta que aparezca “Repeat All”.
Para cancelar la repetición de la reproducción:
Pulse repetidamente el botón REPEAT hasta que se muestre
“Repeat Off” y “ ” haya desaparecido.
Reproducción aleatoria
Las pistas del disco se pueden reproducir automáticamente
de forma aleatoria.
• Durante la reproducción aleatoria se mostrará “ ”.
• Si pulsa el botón durante la reproducción aleatoria,
puede avanzar hasta la siguiente pista seleccionada por
la función de reproducción aleatoria. Por otra parte, el
botón no permite ir a la pista anterior. El principio de la
pista a leeer será localizado.
• Durante la reproducción aleatoria, la unidad seleccionará
y reproducirá las pistas automáticamente. (No puede
seleccionar el orden de las pistas.)
• Después de realizar la repetición, asegúrese de apretar el
botón . De lo contrario, el disco se reproducirá
continuamente.
Reproducción programada (CD)
Podrá seleccionar hasta 32 selecciones para la reproducción
en el orden que usted prefiera.
1 Durante el modo de stop, presione el botón de PLAY
MODE del control remoto para introducir el modo y
salvar la programación.
PROGRAM
P - 01 ← T--
2 Para seleccionar la pista deseada, pulse el botón o
, o los botones numéricos del mando a distancia.
B. Por ejemplo, para seleccionar 130
1 Pulse el botón “+100”.
2 Pulse el botón “+10” tres veces.
3 Pulse el botón “0”.
• No puede seleccionar un número de pista más alto que el
número de pistas en el disco.
14
Es
Para reproducir todas las pistas de forma aleatoria:
Pulse el botón SHUFFLE del mando a distancia.
Para cancelar la reproducción aleatoria:
Al pulsar el botón SHUFFLE, “ ” desaparecerá.
Page 81

3 Pulse el botón ENTER para almacenar el número de
Nota
PROGRAM
P - 01 ← F--- T---
Ejemplo de capas de
medios
Carpeta
Archivo de audio
Raíz
Capa 1 Capa 2 Capa 3 Capa 4 Capa 5
Orden de la
sesión
pista.
4 Repita los pasos 2 - 3 para otras pistas. Podrán
programarse hasta 32 pistas. Si se ha cometido un error,
se pueden borrar las pistas programadas pulsando el
botón CLEAR.
5 Pulse el botón / ( ) para iniciar la reproducción.
Reproducción programada (MP3/WMA)
1 Durante el modo de parada, pulse el botón PLAY MODE
hasta que se muestre ‘PROGRAM’ y se active el modo de
guardar programación.
Cada vez que pulse el botón PLAY MODE, el modo de
reproducción cambiará.
2 Para seleccionar la carpeta deseada, pulse el botón
o , o los botones numéricos del mando a distancia.
PROGRAM
P - 01 ← F002 T---
A continuación, para seleccionar las pistas deseadas, pulse
el botón o , o los botones numéricos del mando a
distancia.
3 Pulse el botón ENTER para guardar la carpeta y el
4 Repita los pasos 2 – 3 para otras carpetas/pistas. Podrán
5 Pulse el botón / ( ) para iniciar la reproducción.
Para añadir pistas al programa:
Detenga el modo de reproducción, y a continuación siga los
pasos 2-3 para añadir pistas. Se almacenarán las pistas
nuevas después de la última pista del programa original.
P - 01 ← F002 T005
número de pista.
programarse hasta 32 pistas.
Para cancelar el modo de reproducción programada:
Durante el modo de parada programada, pulse el botón .
Pulse el botón PLAY MODE para seleccionar el modo de
reproducción básico; todos los contenidos programados se
borrarán.
PROGRAM
Visualización de la información de disco:
Pulse CD DISP repetidamente para cambiar a la pantalla del
tiempo de reproducción transcurrido y del tiempo de
reproducción restante del CD.
Durante la reproducción de un disco MP3/WMA, es posible
visualizar distintos tipos de información acerca de las pistas.
Pulse DISPLAY.
• Cuando se expulsa un disco, el programa se cancela
automáticamente.
• Si pulsa el botón STANDBY/ON para entrar en el modo
de reserva o cambia la función desde CD a otra función,
se borrarán las selecciones programadas.
• Durante el funcionamiento programado, la reproducción
aleatoria no estará disponible.
• Los botones de control para cambiar las pantallas varían
de un disco a otro: para los discos CD, se emplea CD
DISP; para los discos MP3/WMA, se emplea DISPLAY.
Modo de carpeta del MP3/WMA (solamente
para los ficheros de MP3/WMA)
Para escuchar los ficheros MP3/WMA (Windows
Media Audio)
Existen muchos sitos internet donde usted puede descargar
ficheros de música MP3/WMA (Audio de los Medios de
Windows). Siga las instrucciones del website acerca de
cómo descargar los archivos de la música. Podrá reproducir
estos archivos de música descargados grabándolos en un
disco CD-R/RW.
• Sus cansiones/ficheros descargados son solamente para
uso personal. Cualquier otro uso de la canción sin la
autorización del dueño es contra la ley.
Sobre el orden de playback de la carpeta
Si los archivos de MP3/WMA están registrados en varias
carpetas, el número de cada una será fijado
automáticamente.
Pulse PLAY MODE para seleccionar el modo de
reproducción de las carpetas.
Estas carpetas se pueden seleccionar a través del botón
FOLDER +/- del mando a distancia. Si no son soportados los
formatos del fichero en el interior de la carpeta seleccionada,
se saltará y se seleccionará la próxima.
Ejemplo: Cómo fijar número de la carpeta si el formato de los
archivos MP3/WMA están registrados como en la figura de
abajo.
1 La carpeta de ROOT se fija como carpeta 1.
2 La reproducción se llevará a cabo en el orden indicado
en el siguiente diagrama.
3 Para CD MP3/WMA, pueden leerse 255 números de
carpetas y archivos incluyendo aquellas carpetas que
contienen archivos no reproducibles.
1
2
3
1
1
2
4
6
7
8
2
3
1
2
4
3
5
5
1
2
1
6
7
8
9
English Français Español Italiano
Deutsch
Nederlands
15
Es
Page 82

Procedimiento para escuchar el disco del MP3/
Nota
Total carpetas
Total pistas
Número de
carpeta
Primer número de pista en la
carpeta
Visualización de
la carpeta
Visualización
del nombre de
la carpeta
Visualización
del título de
música*
Visualización
del nombre
del artista*
Visualización del
nombre del álbum*
Total carpetas y total pistas (deteniéndose)
Número de carpeta y número de pista (reproduciéndose)
WMA con el modo de carpeta activado
O
Para reproducir CD-R/RW.
1 Presione el botón CD y cargue un disco de MP3/WMA.
Pulse el botón PLAY MODE para seleccionar el modo de
reproducción de las carpetas.
Se mostrará información sobre el disco.
FOLDER
F008 T005
2 Pulse FOLDER +/- para seleccionar la carpeta de
reproducción deseada. (Modo carpeta activado)
Dará comienzo la reproducción.
FOLDER
F005 T003 00:01
• En el caso de llevar a cabo una reproducción con el modo
de carpeta activado, pulse FOLDER +/-, y la carpeta se
podrá seleccionar a pesar de que esté en el modo de
reproducción/pausa. Seguirá en modo de reproducción/
pausa en la primera pista de la carpeta seleccionada.
• El contenido del display puede ser cambiado
presionando el botón de DISPLAY.
*El título de la canción, el nombre del artista y el nombre del
álbum solo se mostrarán durante la reproducción.
Para cancelar el modo de reproducción de carpetas, detenga
la reproducción, pulse el botón PLAY MODE y seleccione el
modo de reproducción normal.
• Si no se visualiza “Can’t Play”, significa que está
seleccionado “Copyright protected WMA file” o “Not
supported playback file”.
• Se mostrará el título, artista y nombre del álbum si esa
información está registrada en el disco.
16
Es
Page 83

Escuchar el iPod, iPhone o
Importante
Nota
PRECAUCIÓN
iPhone
iPhone (inferior)
Dock conector
Puerto iPhone
Conector iPhone
–”, pequeño) en el agujero del adaptador del
iPad
Modelos soportados de iPod, iPhone e iPad:
• iPod touch (4a/3a/2a/1a generación)
• iPod classic
• iPod con vídeo
• iPod nano (6
• iPhone 4/3GS/3G
•iPad
• Pioneer no se hace responsable, bajo ninguna
circunstancia, de ninguna pérdida directa o indirecta
como consecuencia de cualquier percance o pérdida de
material grabado como resultado de un fallo del iPod.
• Este sistema se ha desarrollado y probado para la versión
de software de iPod/iPhone/iPad indicada en la página
web de Pioneer (http://pioneer.jp/homeav/support/ios/
eu/).
• Si instala versiones de software distintas de las indicadas
en la página web de Pioneer en su iPod/iPhone/iPad,
puede derivar en la incompatibilidad con este sistema.
• Una vez que el iPod o iPhone estén conectados a la
unidad, empezarán a cargarse.
• Puede cargar el iPad cuando la unidad esté encendida o
durante iPod Charge Mode.
• Cuando conecte un iPad, solo deberá utilizar un cable
dedicado de iPad.
• Conecte el iPad al terminal USB.
• iPod e iPhone tienen licencia para reproducir materiales
sin derechos de autor o materiales que el usuario pueda
reproducir legalmente.
• Algunas funciones, tales como el ecualizador, no se
pueden controlar mediante el receptor, por lo que se
recomienda desactivar el ecualizador antes de realizar la
conexión.
a/5a/4a/3a/2a/1a
generación)
Cómo conectar un iPod/iPhone
• Siempre que conecte un iPod/iPhone, deberá utilizar el
adaptador universal de estación de acoplamiento
incluido con el iPod/iPhone, o un adaptador de venta en
el mercado compatible con iPod/iPhone. No es posible
conectar un iPod/iPhone sin un adaptador universal de
estación de acoplamiento; si intenta conectar un iPod/
iPhone sin un adaptador universal de estación de
acoplamiento, podrían producirse averías o un
funcionamiento defectuoso.
• Desconecte todos los accesorios de iPod o iPhone antes
de insertarlo en el puerto.
1 Para abrir la cubierta de la estación de acoplamiento,
tire de ella hacia arriba.
2 Conecte el adaptador universal de estación de
acoplamiento al puerto de conexión de iPod/iPhone de
esta unidad.
• Esta unidad no se suministra con un adaptador universal
de estación de acoplamiento de iPod/iPhone.
Cuando conecte el adaptador universal de estación de
acoplamiento, asegúrese de que orienta correctamente la
parte frontal y la posterior. Para conectarlo, primero coloque
las pestañas que sobresalen en la parte frontal del adaptador
en las cavidades que encontrará en el puerto de conexión del
iPod/iPhone, y presione hasta que encajen. Al instalar el
adaptador, tenga cuidado de no tocar los conectores.
3 Conecte el iPod/iPhone.
• Si conecta un iPod/iPhone cuando la unidad está en el
modo de espera, esta se encenderá y dará comienzo la
reproducción del iPod/iPhone.
Para retirar el adaptador de iPod o iPhone
Para insertar un adaptador de iPad
1 Inserte el conector de iPad al iPad.
English Français Español Italiano
Deutsch
Nederlands
17
Es
Page 84

2 Conecte el iPad a la unidad mediante un conector USB.
Nota
Importante
Sugerencia
Importante
• El conector USB no es compatible con la salida de
VIDEO.
Reproducción de un iPod, iPhone o iPad
Este receptor cuenta con un terminal iPod exclusivo que le
permitirá controlar la reproducción del contenido de audio
de su iPod usando los controles de este receptor.
• Si conecta el iPod al receptor y no funciona
correctamente, apague el receptor y vuelva a conectar el
iPod. Si con esto no se resuelve, intente reinicializar el
iPod.
1 Encienda el receptor y el televisor.
2 Cambie la entrada de TV para que se conecte con el
receptor.
3 Si el iPod o iPhone está conectados a través de la
estación de acoplamiento del iPod, pulse iPod/iPhone
para seleccionar la entrada del iPod.
Si el iPad (o el iPod/iPhone) están conectados a través
del terminal USB, pulse USB para seleccionar la entrada
USB.
En la pantalla del panel frontal aparece Please Wait
mientras el receptor verifica la conexión y recupera los datos
del iPod.
Cuando en la pantalla aparezca Top Menu, estará listo para
reproducir música del iPod.
• Si después de pulsar iPod/iPhone la pantalla muestra
iPod Disconnected, apague el receptor y vuelva a
conectar el iPod al receptor.
• Los controles de su iPod no servirán cuando lo conecte a
este receptor.
Reproducción de archivos guardados en un iPod
Puede aprovechar la pantalla de un televisor conectado a
este receptor para desplazarse por las canciones del iPod.
También se pueden controlar todas las operaciones
relacionadas con la música desde el panel frontal del
receptor.
• Tenga en cuenta que los caracteres no latinos de la lista
de reproducción se muestran como ‘*’.
• Esta función no está disponible para fotos ni videoclips
del iPod.
Búsqueda del elemento que desea reproducir
Cuando su iPod está conectado al receptor, puede ver las
canciones almacenadas en el iPod por lista de reproducción,
artista, álbum, canción, género o compositor, de forma
similar a como lo haría en el propio iPod.
1Utilice
/
continuación, pulse ENTER para navegar en esa
categoría.
• Para volver al nivel anterior en cualquier momento, pulse
RETURN.
2Utilice
ej., álbumes).
• Utilice / para pasar a los niveles anteriores/
siguientes.
3 Siga buscando hasta que encuentre lo que quiere
reproducir. A continuación, pulse
reproducción.
• Si está en la categoría de canciones, también puede
pulsar ENTER para iniciar la reproducción.
para seleccionar una categoría y, a
/
para examinar la categoría seleccionada (p.
para iniciar la
Controles de reproducción básica
Los botones del mando a distancia de este receptor pueden
utilizarse para la reproducción básica de archivos guardados
en un iPod.
•Pulse iPod/iPhone para poner el mando a distancia en el
modo de operación iPod/iPhone.
O
Permite cambiar entre los controles del iPod y los
del receptor
De este modo puede cambiar entre realizar operaciones de
iPod mediante el mando a distancia del receptor o con el
mismo iPod.
Pulse iPod CONTROL para cambiar los controles del iPod.
• Cuando termine, vuelva a pulsar iPod CONTROL para
devolver el control al receptor.
• No puede usar esta función cuando está conectado un
iPod de quinta generación o un iPod nano de primera
generación.
18
Es
Page 85

Escuchando a través del
Importante
Nota
Importante
Dispositivo de
almacenamiento
masivo USB
dispositivo de
almacenamiento USB/
player MP3
Conexión de un dispositivo USB
Es posible escuchar audio de dos canales utilizando la
interfaz USB de la parte delantera de este receptor.
Ponga el receptor en espera y luego conecte su aparato
USB al terminal USB del panel frontal de este receptor.
• Este receptor no es compatible con un concentrador
USB.
• Si hay un iPad conectado, la unidad comenzará a
cargarse.
TIMER
Reproducción de un aparato USB
• Éste incluye la reproducción de archivos WMA/MP3/
MPEG-4 AAC (excepto archivos con protección de copia
o reproducción restringida).
• Entre los dispositivos USB compatibles se incluyen
discos duros magnéticos externos, dispositivos de
memoria flash portátiles (especialmente keydrives) y
reproductores de sonido digital (reproductores MP3) de
formato FAT16/32. No se puede conectar esta unidad a un
ordenador personal para la reproducción USB.
• Para grandes cantidades de datos, puede que el rec eptor
tarde más tiempo en leer el contenido de un dispositivo
USB.
• Si el archivo seleccionado no se puede reproducir, el
receptor saltará automáticamente al siguiente archivo
reproducible.
• Si el archivo que se está reproduciendo no tiene ningún
título asignado, en la pantalla aparece el nombre del
archivo; si no hay ningún nombre de álbum ni de artista,
la fila aparece vacía.
• Fíjese que los caracteres no latinos de la lista de
reproducción aparecen como ‘*’.
• Asegúrese de que el receptor está en espera cuando
desconecte el dispositivo USB.
1 Encienda el receptor y el televisor.
2 Cambie la entrada de TV para que se conecte con el
receptor.
3 Pulse USB en el mando a distancia para conectar el
receptor a la función USB.
Please Wait aparece en la pantalla en el momento en que el
receptor empieza a reconocer el dispositivo USB conectado.
Después del reconocimiento, aparece una pantalla de
reproducción y la reproducción se inicia de forma
automática.
Controles de reproducción básica
Los botones del mando a distancia de este receptor se
pueden utilizar para la reproducción básica de archivos
guardados en dispositivos de USB.
•Pulse USB para pasar el mando a distancia al modo de
funcionamiento NETWORK.
O
Si en la pantalla se muestra un mensaje de USB Error,
compruebe los siguientes puntos:
• Apague el receptor y, a continuación, vuelva a
encenderlo.
• Vuelva a conectar el dispositivo USB con el receptor
apagado.
• Seleccione otra fuente de entrada (como CD) y, a
continuación, vuelva a USB.
• Utilice un adaptador de CA exclusivo (suministrado con
el dispositivo) para la alimentación USB.
Si el problema persiste, es probable que su dispositivo USB
sea incompatible.
English Français Español Italiano
Deutsch
Nederlands
• Pioneer no puede garantizar la compatibilidad
(funcionamiento y/o potencia de bus) con todos los
dispositivos de almacenamiento de datos USB y no
asume ninguna responsabilidad por cualquier pérdida de
datos que pueda producirse cuando los conecte a este
receptor.
19
Es
Page 86

Importante
Nota
Main Menu
Now Playing
Favorites Settings
Internet
Radio
Music
Library
Reproducción con opción
NETWORK
Este receptor está equipado con el terminal LAN, y
conectando sus componentes a estos terminales puede
disfrutar de las características siguientes.
• Recepción de emisoras de radio de Internet
Puede seleccionar y escuchar su emisora de radio
favorita de Internet a partir de la lista de emisoras de radio
por Internet creada, editada y gestionada por el servicio
de bases de datos SHOUTcast.
Consulte más abajo Recepción de emisoras de radio de
Internet.
• Reproducción de archivos de música guardados en PC
Con esta unidad puede reproducir mucha música
guardada en su PC.
Consulte Reproducción de archivos de audio guardados
en un componente de la red en la página 21.
-
Además de un PC, también puede reproducir archivos
de audio guardados en otros componentes empleando
para ello la función del servidor de medios incorporada
basada en los protocolos y en el marco de DLNA 1.0 o
DLNA 1.5 (es decir, sistemas de audio y discos duros
compatibles con red).
• Cuando reproduce archivos de audio se visualiza ‘Please
Wait’ antes de empezar la reproducción. La visualización
puede continuar varios segundos según el tipo de
archivo.
• En el caso de un dominio configurado en el ambiente de
red de Windows, usted no podrá acceder a un PC de la
red mientras esté conectado al dominio. En lugar de
conectar al dominio, conecte a la máquina local.
• Hay casos en los que el tiempo transcurrido puede no
visualizarse correctamente.
1 Encienda el receptor y el televisor.
Consulte Conexión a la red mediante la interfaz LAN en la
página 10.
2 Cambie la entrada de TV para que se conecte con el
receptor.
3 Pulse NETWORK en el mando a distancia para conectar
el receptor a la función NETWORK.
Este receptor puede tardar varios segundos en tener acceso
a la red. La pantalla siguiente aparece cuando se selecciona
NETWORK como fuente de entrada.
4Use
/
para seleccionar la categoría que quiera
reproducir y luego pulse ENTER.
Seleccione una categoría en la lista siguiente:
• Now Playing – Mostrar el estado actual e información
sobre la estación.
• Internet Radio – Escucha la radio por Internet
SHOUTcast a través de la red.
• Music Library – Reproducción de archivos de música
guardados en PC.
• Favorites – Canciones favoritas que están siendo
registradas.
• Settings – Realiza ajustes en la función NETWORK.
5Use
/
para seleccionar la carpeta, archivos de música
o emisora de radio de Internet que va a reproducir y
luego pulse ENTER.
Pulse / para desplazar la lista hacia arriba y hacia abajo
y seleccione el elemento deseado. Cuando pulsa ENTER, la
reproducción empieza con la pantalla de reproducción que
está siendo visualizada para el elemento seleccionado. Para
volver a la pantalla de listas, pulse RETURN.
Cuando los elementos se visualizan en múltiples páginas,
use / para visualizar rápidamente páginas distintas.
6 Repita el paso 5 para reproducir la canción deseada.
Consulte la sección mostrada abajo para conocer
instrucciones de funcionamiento detalladas.
• Emisoras de radio de Internet – Consulte más abajo
Recepción de emisoras de radio de Internet.
• Archivos de música guardados en PC – Consulte
Reproducción de archivos de audio guardados en un
componente de la red en la página 21.
Recepción de emisoras de radio de Internet
La radio de Internet es un servicio de emisión de audio a
través de Internet. Hay un gran número de emisoras de radio
de Internet que emiten una variedad de servicios desde
cualquier parte del mundo. Algunas pertenecen a individuos
privados, que son quienes presentan los programas, las
administran y se encargan de las emisiones, mientras que
otras son las emisoras o redes de radio terrestres
tradicionales. Mientras que las emisoras de radio terrestres,
u OTA (por el aire), tienen limitaciones geográficas para las
emisiones de ondas de radio desde sus transmisores, a las
emisoras de radio de Internet se puede acceder desde
cualquier parte del mundo, siempre que se disponga de una
conexión a Internet, porque los servicios no se transmiten
por el aire, sino a través de World Wide Web. En este
receptor, usted puede seleccionar emisoras de radio de
Internet por género y también por región.
Dependiendo de las condicones de la línea de Internet, el
sonido puede que la radio de Internet no se oiga bien.
• Para escuchar emisoras de radio de Internet tendrá que
tener acceso a Internet de banda ancha de alta velocidad.
Con un modem de 56 K o ISDN tal vez no pueda disfrutar
de todos los beneficios de la radio de Internet.
• El número del puerto cambia dependiendo de la emisora
de radio de Internet. Compruebe la configuración del
servidor de seguridad.
• Las emisiones pueden detenerse o interrumpirse
dependiendo de la emisora de radio de Internet. En este
caso, usted no podrá oír una emisora de radio
seleccionada desde la lista de emisoras de radio.
Acerca de la lista de radio de Internet
La lista de emisoras de radio por Internet de este receptor se
crea, edita y gestiona mediante el servicio de bases de datos
SHOUTcast.
20
Es
Page 87

Reproducción de archivos de audio guardados
Nota
en un componente de la red
Con el mando a distancia de este receptor puede realizar las
operaciones siguientes. Note que, dependiendo de la
categoría que esté siendo reproducida, algunos botones no
estarán disponibles para la operación.
•Pulse NETWORK para pasar el mando a distancia al
modo de funcionamiento NETWORK.
O
2Use
/
para seleccionar un archivo de audio o una
emisora de radio por Internet y pulse ENTER.
3 Use
/
reproducción o eliminación y luego pulse ENTER.
– Empezará a reproducirse el elemento seleccionado
para seleccionar las opciones de
– Elimina el elemento seleccionado de la carpeta Favoritos
• Seleccione para deshacer la operación anterior.
Menú de configuración de red
Configuración de la red para escuchar la radio por Internet
en este receptor.
1 Seleccione ‘Settings’ desde Main Menu.
Main Menu
Now Playing
Internet
Radio
Library
Settings
Network
Music
General
1 Seleccione ‘Network’ desde el menú Settings.
Settings
Network
General
2 Seleccione ‘Modes’ desde el menú Network Settings.
En el caso de que haga cambios en la configuración de la red
sin la función de servidor DHCP, haga los cambios
correspondientes en los ajustes de red de este receptor.
Network Modes
1 of
1
DHCP
STATIC
Network Settings
Modes
Status
1 of
1
English Français Español Italiano
Reproducción de sus canciones favoritas
Registro de archivos de audio y emisoras de radio
por Internet
Durante la reproducción de una canción, pulse
para seleccionar “Add to Favor”, y a continuación pulse
ENTER.
La canción seleccionada se registra luego en la carpeta
Favorites.
Note que sólo se pueden registrar archivos de audio
guardados en componentes de la red.
Reproducción y eliminación de archivos de audio y
emisoras de radio por Internet en y desde la carpeta
Favoritos
1 Seleccione ‘Favorites’ desde Main Menu.
Main Menu
Internet
Now Playing
Favorites Settings
Music
Radio
Library
/
Favorites Settings
2 Seleccione la opción que desea ajustar.
• Network – Ajusta la configuración de la red (consulte
más abajo Ajustes de red).
• General – Use esta opción para que todos los ajustes de
conexión de red vuelvan a los valores iniciales de fábrica
(consulte Ajustes generales en la página 22).
Ajustes de red
En el caso de que el enrutador conectado al terminal LAN de
este receptor sea de banda ancha (con una función de
servidor DHCP incorporada), active simplemente la función
del servidor DHCP y no tendrá que configurar manualmente
la red. Deberá configurar la red como se describe abajo sólo
cuando haya conectado este receptor a un enrutador de
banda ancha sin una función de servidor de DHCP. Antes de
configurar la red, consulte a su ISP o al administrador de la
red para conocer los ajustes necesarios. Se le recomienda
consultar también el manual de instrucciones suministrado
con su componente de red.
1 of
1
• DHCP (configuración por defecto) – Selecciónela si el
servidor es compatible con DHCP.
-
Cuando se selecciona DHCP, la conexión se iniciará
automáticamente. La conexión se ha completado
cuando se visualizan los detalles de la conexión de red.
Pulse ENTER para volver a la pantalla anterior.
• STATIC – Para conectar el servidor manualmente, siga
las instrucciones siguientes.
-
Pulse para eliminar el carácter inmediatamente
anterior.
-
Pulse para cambiar entre tipos de caracteres.
-
Pulse / para elegir el carácter que desee de entre
los que aparecen en pantalla y pulse ENTER.
-
Una vez concluida la entrada, o bien si desea cancelar
la operación de entrada, pulse hasta que aparezca
en pantalla OK/CANCEL, luego use / para elegir OK
[ACEPTAR] o CANCEL [CANCELAR] y pulse ENTER.
1 of
1
Deutsch
Nederlands
• Si selecciona STATIC, la configuración será la siguiente.
-
IP (IP address)
21
Es
Page 88

La dirección de IP que vaya a introducirse deberá
definirse dentro de los márgenes siguientes. Si la
dirección IP definida sobrepasa los márgenes
siguientes, usted no podrá reproducir archivos de audio
guardados en componentes de la red ni escuchar
emisoras de radio de Internet.
Clase A: 10.0.0.1 a 10.255.255.254
Clase B: 172.16.0.1 a 172.31.255.254
Clase C: 192.168.0.1 a 192.168.255.254
-
MASK (Máscara de subred)
En el caso de que un adaptador de terminal o un
modem xDSL esté conectado directamente a este
receptor, introduzca la máscara de subred provista por
su ISP en papel. En la mayoría de los casos, introduzca
255.255.255.0.
-
Gateway (Puerta de enlace predeterminada)
En el caso de que haya una puerta de enlace (enrutador)
conectada a este receptor, introduzca la dirección IP
correspondiente.
-
DNS (DNS server)
Introduzca la dirección del servidor DNS que recibió por
escrito de su proveedor de servicios de Internet.
• Seleccione Status en el menú Network Settings para
ver su modo de conexión de red actual y los detalles
pertinentes.
Ajustes generales
1 Seleccione ‘General’ desde el menú Settings.
Settings
Network
General
2 Seleccione el elemento que desee configurar desde el
menú General Settings.
• Factory Settings – Use esta opción para que todos los
ajustes de conexión de red vuelvan a los valores iniciales
de fábrica.
1 of
1
General Settings
Factory Settings
About
22
Es
-
Cuando aparezca en pantalla “Warning: All Settings
will be lost! Are you sure?” [Advertencia: Se perderán
todos los ajustes ¿Está seguro?], seleccione y pulse
ENTER. Mientras se reinicializan los ajustes, en pantalla
aparecerá el mensaje “Please Wait” [Por favor, espere].
La reinicialización se ha completado cuando la pantalla
vuelve al menú principal.
-
Para salir de la reinicialización, seleccione .
• About – Muestra en pantalla la dirección MAC de este
receptor
Requisitos de conexión de red
NETWORK le permite reproducir música en servidores de
medios conectados a un Área de Red Local (LAN) idéntica a
la que está conectado el receptor. Esta unidad permite
reproducir los archivos guardados en lo siguiente:
• PC que ejecutan Microsoft Windows Vista o XP con
Windows Media Player 11 instalado
• PC que ejecutan Microsoft Windows 7 con Windows
Media Player 12 instalado
• Servidores de medios digitales compatibles con DLNA
(en PCs o en otros componentes)
Para reproducir archivos de audio guardados en
componentes de la red o para escuchar emisoras de radio de
Internet, usted tendrá que activar la función del servidor
DHCP en su enrutador. En el caso de que su enrutador no
tenga la función del servidor DHCP incorporada, será
necesario preparar manualmente la red. De lo contrario no
podrá reproducir archivos de audio guardados en
componentes de la red ni escuchar emisoras de radio de
Internet. Para más detalles, consulte Menú de configuración
de red en la página 21.
Autorización para este receptor
1 of
A fin de poder reproducir con NETWORK, este receptor
1
necesita autorización. Esto se hace automáticamente
cuando el receptor se conecta al PC a través de la red. Si no,
autorice manualmente a este receptor en el PC. El método de
autorización (o permiso) para el acceso varía dependiendo
del tipo de servidor que esté siendo conectado. Para más
información sobre la autorización de este receptor, consulte
el manual de instrucciones de su servidor.
Acerca de la reproducción de la red
La función de reproducción de la red de esta unidad usa las
tecnologías siguientes:
Windows Media Player
Para más detalles, consulte Windows Media Player 11/
Windows Media Player 12 en la página 23.
DLNA
DLNA CERTIFIED™ Audio Player
La Digital Living Network Alliance (DLNA) es una
organización industrial de compañías de la electrónica para
el consumidor, las computadoras y los aparatos móviles.
Digital Living permite que los consumidores compartan
fácilmente en casa medios digitales mediante una red
alámbrica o inalámbrica.
El logotipo con el certificado DLNA permite encontrar
fácilmente los productos que cumplen las directrices de
interoperabilidad de DLNA. Esta unidad cumple con las
directrices de interoperabilidad v1.5 de DLNA.
Cuando un PC que use software de servidor DLNA u otro
aparato compatible con DLNA se conecte a este reproductor,
puede que sea necesario hacer algunos cambios de software
o de otros aparatos. Consulte el manual de instrucciones que
acompaña al software o aparato para tener más información.
TM
DLNA
, el logotipo de DLNA y CertifiedTM son marcas
registradas, nombres comerciales o marcas de certificación de
Digital Living Network Alliance.
Contenido reproducible en una red
• Puede que algunos archivos no se reproduzcan
correctamente a pesar de estar codificados con un
formato compatible.
• Los archivos de películas o fotos no se pueden
reproducir.
• Hay casos en los que usted no podrá oír una emisora de
radio de Internet aunque la emisora haya sido
seleccionada de una lista de emisoras de radio.
• Dependiendo del tipo de servidor o versión que se use
puede que algunas funciones no sean soportadas.
• Los formatos de archivos soportados cambian según el
servidor. Por lo tanto, los archivos no soportados por su
servidor no se visualizan en esta unidad. Para más
información, consulte con el fabricante de su servidor.
Page 89

Acerca de la reproducción en una red
• La reproducción se puede detener cuando se apaga el PC
o cuando se borra cualquier archivo de medios mientras
se reproduce el contenido.
• Si hay problemas dentro del ambient e de la red (tráfico de
red pesado, etc.) puede que el contenido no se visualice
ni reproduzca correctamente (la reproducción puede
interrumpirse o detenerse). Para obtener el mejor
rendimiento se recomienda una conexión 100BASE-TX
entre el reproductor y el PC.
• Si reproducen simultáneamente varios clientes puede
que la reproducción se interrumpa o se detenga.
• Dependiendo del software de seguridad instalado en un
PC conectado y del ajuste de tal software puede que la
conexión de red se bloquee.
Pioneer no se hace responsable de ningún fallo de
funcionamiento del reproductor o de NETWORK debido a
errores de comunicación/fallos de funcionamiento
asociados con su conexión de red y/o su PC, u otros equipos
conectados. Póngase en contacto con el fabricante de su PC
o con el proveedor de servicios de Internet.
“Windows Media™” es una marca comercial de Microsoft
Corporation.
Este producto incluye tecnología propiedad de Microsoft
Corporation, y no se puede usar ni distribuir sin una licencia de
Microsoft Licensing, Inc.
Microsoft®, Windows®7, Windows®Vista, Windows®XP,
Windows®2000, Windows®Millenium Edition, Windows®98 y
WindowsNT® son marcas registradas o marcas de Microsoft
Corporation en Estados Unidos y/u otros países.
Glossary
aacPlus
El decodificador AAC usa aacPlus desarrollado por Coding
Technologies. (www.codingtechnologies.com)
FLAC
FLAC (Free Lossless Audio Codec) es un formato de audio
que permite la codificación y decodificación sin pérdidas. El
audio se comprime en FLAC sin ninguna pérdida de calidad.
Para conocer detalles acerca de FLAC, visite el sitio Web
siguiente: http://flac.sourceforge.net/
Windows Media
Windows Media es un marco multimedia para la creación y
distribución de medios para Microsoft Windows. Windows
Media es una marca registrada o una marca comercial de
Microsoft Corporation en Estados Unidos y/o en otros países.
Use una aplicación con licencia de Microsoft Corporation
para autorizar, distribuir o reproducir el contenido
formateado con Windows Media. El uso de una aplicación no
autorizada por Microsoft Corporation puede producir fallos.
Windows Media DRM
Windows Media DRM es un servicio de DRM (administración
de derechos digitales) para la plataforma Windows Media.
Ha sido diseñado para proporcionar una entrega segura de
audio y/o vídeo a través de una red IP a un PC o a otro
dispositivo de reproducción de tal forma que el distribuidor
puede controlar cómo se va a usar el contenido. El contenido
protegido por WMDRM sólo se puede reproducir en un
componente compatible con el servicio WMDRM.
Windows Media Player 11/Windows Media Player 12
Windows Media Player es un software para enviar música,
fotos y películas desde una computadora Microsoft Windows
a televisores y sistemas estéreo.
Con este software puede reproducir archivos guardados en
un PC en varios dispositivo ubicados donde usted quiera en
su casa.
Este software puede descargarse desde el sitio Web de
Microsoft.
• Windows Media Player 11 (para Windows XP o Windows
Vista)
• Windows Media Player 12 (para Windows 7)
Consulte el sitio Web oficial de Microsoft para obtener más
información.
English Français Español Italiano
Deutsch
Nederlands
23
Es
Page 90

Recepción de radio
Nota
El siguiente procedimiento describe cómo sintonizar
emisiones de radio de FM o AM utilizando las funciones de
sintonización automática (búsqueda) y sintonización manual
(por pasos). Cuando haya sintonizado una emisora, puede
memorizar la frecuencia para recuperarla más tarde. Para
saber cómo llevar a cabo esta operación, consulte más abajo
más abajo Presintonización de emisoras.
1 Pulse TUNER para seleccionar el sintonizador.
2 Si es necesario, utilice BAND para cambiar la banda (FM
o AM).
Cada pulsación cambia la banda entre FM (estéreo o
monoaural) y AM.
3 Sintonice una emisora.
Hay tres formas de hacerlo:
Sintonización automática
Para buscar emisoras en la banda actualmente
seleccionada, pulse TUNE / durante
aproximadamente un segundo. El receptor comenzará a
buscar la siguiente emisora disponible y se detendrá
cuando localice una. Repita la operación para buscar
otras emisoras.
Sintonización manual
Para cambiar la frecuencia un intervalo cada vez, pulse
TUNE /.
Sintonización rápida
Pulse y mantenga pulsado TUNE / para que la
operación de sintonización se realice a alta velocidad.
Suelte el botón en la frecuencia que desea sintonizar.
– Se enciende con un canal normal de radiodifusión.
24
Es
– Se ilumina durante la recepción de una emisión FM en
modo autoestéreo.
Mejora del sonido de FM
Si los indicadores o no se iluminan al sintonizar una
emisora FM porque la señal es débil, ajuste el receptor al
modo de recepción mono.
Pulse BAND para seleccionar FM MONO.
Esto debería mejorar la calidad del sonido y permitirle
O
disfrutar de la emisión.
Presintonización de emisoras
Si escucha una emisora de radio en particular a menudo,
puede ser conveniente almacenar la frecuencia de la
emisora en el receptor para luego recuperarla fácilmente
cada vez que desee escuchar dicha emisora. Esto le evitará
tener que sintonizar manualmente la emisora cada vez que
desee escucharla. Esta unidad puede memorizar hasta 40
emisoras.
O
Cómo sintonizar emisoras memorizadas
Para poder utilizar esta función, primero deberá
presintonizar algunas emisoras. Consulte Presintonización
de emisoras más arriba si aún no lo ha hecho.
Pulse PRESET
deseada.
También puede utilizar los botones numéricos.
/
para seleccionar la presintonía
Designación de las emisoras presintonizadas
Para una identificación más fácil, puede poner nombre a sus
presintonías.
1 Elija la emisora presintonizada a la que desea asignar un
nombre.
Consulte Cómo sintonizar emisoras memorizadas más arriba
para aprender cómo hacerlo.
2 Pulse TUNER EDIT dos veces.
El cursor parpadea en la posición del primer carácter, en la
pantalla.
3 Introduzca el nombre que desea asignar a esta emisora.
Elija un nombre de hasta ocho caracteres.
• Utilice / para seleccionar la posición del carácter.
• Utilice / para seleccionar los caracteres.
• El nombre se almacena cuando se pulsa ENTER.
Cambio del modo de corte de ruido
1 Sintonice la emisora que desea memorizar.
Para más detalles, consulte Recepción de radio más arriba.
2 Pulse TUNER EDIT.
El número presintonizado está parpadeando.
3 Pulse PRESET
deseada.
También puede utilizar los botones numéricos. Consulte
Búsqueda directa de pistas en la página 14.
4 Pulse ENTER.
El número presintonizado deja de parpadear y el receptor
guarda la emisora.
• Si el receptor permanece desconectado de la toma de
corriente alterna durante un mes aproximadamente, se
perderán las memorias de emisoras y deberán volver a
programarse.
• Las estaciones se guardan en estéreo. Cuando la
estación se guarda en el modo FM MONO, al recuperarla
se muestra como .
/
para seleccionar la presintonía
Si considera que la calidad del sonido AM es deficiente,
incluso después de haber probado lo anterior, es posible que
pueda para mejorarlo utilizando un modo de reducción de
ruido distinto. Simplemente elija el que ofrezca el mejor
sonido.
Ajuste por defecto: Mode1
1 Después de sintonizar una estación de radio AM, pulse
el botón SETUP.
/
2Pulse
3Pulse
ruido (1, 2 o 3); a continuación, pulse ENTER.
para seleccionar “Noise Cut”.
/
para seleccionar un modo de reducción de
Page 91

Empleo del sistema de
Nota
Nota
datos radiofónicos (RDS)
Introducción al RDS
Radio Data System (Sistema de datos de radio), o RDS como
se le conoce comúnmente, es un sistema utilizado por la
mayoría de emisoras de radio FM para proporcionar a los
oyentes informaciones de diversos tipos—el nombre de la
emisora y el tipo de programa que están emitiendo, por
ejemplo.
Una de las funciones del RDS consiste en la posibilidad de
buscar por tipo de programa. Por ejemplo, puede buscar una
emisora que esté emitiendo un programa de tipo JAZZ.
Se pueden buscar los siguientes tipos de programas:
NEWS – Noticias
AFFAIRS – Temas de
actualidad
INFO – Información general
SPORT – Deportes
EDUCATE – Material educativo
DRAMA – Radionovelas, etc.
CULTURE – Cultura nacional o
regional, teatro, etc.
SCIENCE – Ciencia y
tecnología
VARIED – Material basado
normalmente en charlas, tales
como concursos o entrevistas.
POP M – Música pop
ROCK M – Música rock
EASY M – Música ligera
LIGHT M – Música clásica
‘ligera’
CLASSICS – Música clásica ‘no
ligera’
OTHER M – Música no
perteneciente a ninguna de las
categorías anteriores
WEATHER – Informes
meteorológicos
FINANCE – Informes de la
Bolsa de Valores, comercio,
temas financieros, etc.
CHILDREN – Programas para
niños
SOCIAL – Asuntos sociales
RELIGION – Programas
relacionados con religión
PHONE IN – Público en
general expresando sus
opiniones por teléfono
TRAVEL – Programas de
viajes, más que información
sobre el tráfico
LEISURE – Ocio y hobbies
JAZZ – Música jazz
COUNTRY – Música country
NATION M – Música popular
en varios idiomas, salvo inglés
OLDIES – Música popular de
los años 50 y 60
FOLK M – Música folklórica
DOCUMENT – Documentales
O
Búsqueda de programas RDS
Puede buscar un tipo de programa de los enumerados
anteriormente.
1 Pulse TUNER y, a continuación, BAND para seleccionar la
banda FM.
• El sistema RDS sólo se puede utilizar en la banda FM.
2 Pulse PTY.
Aparece SEARCH en la pantalla.
3 Pulse PRESET
programa que desea escuchar.
4 Pulse ENTER para buscar el tipo de programa.
El sistema empieza a buscar a través de las presintonías
hasta que encuentra una que coincide; entonces, se detiene.
Repita la operación para buscar otras emisoras.
Si se muestra NO PTY, significa que el sintonizador no ha
encontrado ese tipo de programa en el momento de la
búsqueda.
• El RDS solamente busca emisoras preajustadas. Si no se
ha ajustado ninguna emisora, o si el tipo de programa no
se pudo encontrar entre las emisoras preajustadas, se
visualizará NO PTY. FINISH significa que la búsqueda se
ha completado.
/
para seleccionar el tipo de
Visualización de la información RDS
Utilice el botón DISPLAY para ver los distintos tipos de
información RDS disponibles.
Pulse DISPLAY para visualizar información RDS.
Cada vez que pulse el botón, la visualización cambiará de la
siguiente forma:
• Texto de la radio (RT) – Mensajes enviados por la emisora
de radio. Por ejemplo, una emisora de programas de
entrevistas puede proporcionar un número de teléfono
como RT.
• Nombre del servicio de programas (PS) – El nombre de la
emisora de radio.
• Tipo de programa (PTY) – Indica el tipo de programa que
se está emitiendo actualmente.
• Frecuencia actual del sintonizador (FREQ)
• Si se capta algún ruido mientras se visualiza la
información RT que se desplaza en la pantalla, es posible
que algunos caracteres no se visualicen correctamente.
• Si aparece NO TEXT en la pantalla RT, significa que no se
está enviando ningún dato RT desde la emisora. La
pantalla mostrará automáticamente los datos de PS (si
no hay datos de PS, aparece en pantalla NO NAME).
• En la visualización PTY, puede que se muestre NO PTY.
English Français Español Italiano
Deutsch
Nederlands
• Además, existen otros tres tipos de programa, ALARM,
ALARMTST y NO TYPE. ALARM y ALARMTST se utilizan
para anuncios de urgencia. NO TYPE aparece cuando no
puede hallarse un tipo de programa.
25
Es
Page 92

Funcionamiento del
temporizador y del
temporizador de apagado
Uso del despertador
O
Reproducción con temporizador:
La unidad se enciende y reproduce la fuente deseada (CD,
TUNER, USB o iPod/iPhone) a la hora predeterminada.
Antes de ajustar el temporizador:
• Compruebe que el reloj marca la hora correcta (Ajuste del
reloj en la página 11). Si no está ajustado, no podrá
emplear la función del temporizador.
• Para reproducción con temporizado: Conecte el
dispositivo USB o cargue los discos o el iPod que desee
reproducir.
1 Pulse STANDBY/ON.
2 Pulse y mantenga presionado el botón TIMER durante
más de dos segundos.
3 Antes de diez segundos, pulse el botón
seleccionar ‘Timer Set’; a continuación, pulse ENTER.
4 Seleccione la fuente que desea reproducir.
Utilice el botón / para seleccionar la función CD,
TUNER, USB o iPod/iPhone.
5 Pulse ENTER.
6 Ajuste el día o los días de la semana.
Utilice el botón / para seleccionar el día o los días.
26
Es
/
para
El temporizador puede ajustarse del siguiente modo.
EVERYDAY SUNDAY MONDAY
TUESDAY WEDNESDAY THURSDAY
FRIDAY SATURDAY MON-FRI
TUE-SAT SAT-SUN
7 Pulse ENTER.
8 Ajuste la hora de encendido.
Utilice el botón / para ajustar la hora; a continuación,
pulse ENTER.
Ajuste los minutos de la misma manera y pulse ENTER
cuando haya terminado.
9 Ajuste la hora de apagado.
Ajuste como en el paso anterior, y pulse
terminado.
10 Utilice el botón
11 Pulse ENTER.
El indicador del TIMER se encenderá, y los ajustes se
confirmarán en la pantalla.
12 Pulse STANDBY/ON para activar el modo de espera.
/
para ajustar el volumen.
ENTER
cuando haya
Encendido y apagado del despertador
Si ya ha configurado el temporizador de encendido, puede
activarlo o desactivarlo.
1 Cuando la unidad esté encendida, pulse y mantenga
presionado el botón TIMER durante dos segundos.
2 Antes de diez segundos, pulse el botón
seleccionar ‘Timer On’ o ‘Timer Off’; a continuación,
pulse ENTER.
Cuando ‘
Timer On
temporizador se encenderá, y los ajustes se confirmarán en
la pantalla.
3 Cuando ‘Timer On’ haya sido seleccionado, pulse
STANDBY/ON para activar el modo de espera.
’ haya sido seleccionado, el indicador del
/
para
Reutilización del ajuste memorizado del
temporizador
El ajuste del temporizador se memorizará una vez se haya
introducido. Para emplear de nuevo el mismo ajuste, efectúe
las operaciones siguientes.
1 Cuando la unidad esté encendida, pulse y mantenga
presionado el botón TIMER durante dos segundos.
2 Antes de diez segundos, pulse el botón
seleccionar ‘Timer Call’; a continuación, pulse ENTER.
El indicador del TIMER se encenderá, y los ajustes se
confirmarán en la pantalla.
/
para
Operación de desconexión automática
Pulse SLEEP para cambiar la cantidad de tiempo que
deberá transcurrir antes de que el receptor se coloque
en el modo de espera (30 min. – 60 min. – 90 min. – Off).
• Puede comprobar el tiempo de desconexión restante en
cualquier momento pulsando SLEEP una vez.
Page 93

Información adicional
Cuadro para localización de averías
Muchos posibles problemas podrán ser solucionados por el
propietario sin tener que llamar al técnico en reparaciones.
Si parece que falla algo en este producto, compruebe la tabla
siguiente antes de llamar a su concensionario PIONEER
autorizado o a un centro de reparaciones.
General
El reloj no está ajustado a la hora correcta.
¿Se ha producido un corte de la alimentación?
Reajuste el reloj. (Consulte la página 11)
Cuando se pulsa un botón, el aparato no responde.
Ponga el aparato en el modo de reserva de alimentación y
entonces vuelva a conectar la alimentación del aparato.
Si el aparato funciona defectuosamente, repóng alo. (Consulte
la página 29)
No se oye ningún sonido.
¿Se ha ajustado el nivel de volumen a “Min”?
¿Están enchufados los auriculares?
¿Están desconectados los cables de los altavoces?
Reproductor de CD
La reproducción no se inicia.
La reproducción se detiene a mitad o no se lleva a cabo
correctamente.
¿Se ha insertado el disco al revés?
¿Satisface el disco las normas?
¿Está deformado o rayado el disco?
Se producen saltos en el sonido de reproducción o se detiene
el sonido de reproducción a mitad de una pista.
¿Está el aparato situado cerca de vibraciones excesivas?
¿Está muy sucio el disco?
¿Se ha formado condensación de humedad en el interior del
aparato?
Mando a distancia
El control remoto no funciona.
¿Está enchufado el cable de alimentación de CA del aparato?
¿Se respeta la polaridad de la pila?
¿Están gastadas las pilas?
¿Es la distancia o ángulo incorrecto?
¿Está el sensor de control remoto recibiendo una luz fuerte?
Sintonizador
La radio produce continuamente ruido anormal.
¿Está el aparato cerca del televisor o de una computadora?
¿La antena de FM o la antena de cuadro de AM están
correctamente situadas? Separe la antena del cable de
alimentación de CA está demasiado cerca.
USB
No se detecta el dispositivo.
¿Hay algún archivo MP3/WMA disponible?
¿Está el dispositivo conectado correctamente?
¿Es un dispositivo MTP?
¿El dispositivo contiene sólo archivos AAC?
La reproducción no se inicia.
¿Está el un archivo WMA protegido por copyright?
¿Es el MP3 falso?
iPod y iPhone
No se produce ningún sonido. No aparece ninguna imagen
en el televisor/monitor.
No se está reproduciendo el iPod o iPhone.
El iPod o iPhone no está conectado adecuadamente a la
unidad.
¿Está enchufado el cable de alimentación de CA del aparato?
El cable de vídeo no está conectado adecuadamente.
La selección de televisor/monitor de entrada no está fijada
adecuadamente.
El audio procedente del iPod/iPhone no puede escucharse a
través de los auriculares conectados a la unidad.
iPod o iPhone no se cargará.
El iPod o iPhone no hace contacto total con el conector.
Utilizando un iPod (3a generación).
No es compatible con el iPod o iPhone. Consulte la Modelos
soportados de iPod, iPhone e iPad: en la página 17 para
obtener información sobre los modelos compatibles.
“This accessory is not made to work with iPhone” o “ This
accessory is not supported by iPhone” Aparece en la
pantalla del iPhone.
La batería del iPhone es baja. Cargue el iPhone.
El iPhone no está correctamente conectado al puerto.
Opción NETWORK
No se puede acceder a la red.
El cable LAN no está conectado firmemente. Conecte
firmemente el cable LAN (página 10).
El enrutador no está encendido. Encienda el enrutador.
El componente conectado tiene instalado software de
seguridad de Internet. Hay casos en los que no se puede
acceder a un componente que tiene instalado software de
seguridad de Internet.
Se enciende el componente de audio de la red que ha sido
apagada. Encienda el componente de audio de la red antes de
encender este receptor.
La reproducción no empieza mientras continúa
visualizándose ‘Please Wait’.
El componente está desconectado de este receptor o de la
fuente de alimentación. Verifique si el componente está
conectado correctamente a este receptor o a la fuente de
alimentación.
El PC o la radio de Internet no se utilizan correctamente.
La dirección IP correspondiente no está bien puesta. Active la
función de servidor DHCP incorporada de su enrutador, o
configure manualmente la red según el ambiente de su red
(página 21).
La dirección IP está siendo configurada automáticamente. El
proceso de configuración automática toma tiempo. Espere.
Los archivos de audio guardados en componentes de la red
como, por ejemplo, un PC no se pueden reproducir.
Windows Media Player 11 o Windows Media Player 12 no está
actualmente instalado en su PC. Instale Windows Media
Player 11 o Windows Media Player 12 en su PC .
Los archivos de audio fueron grabados en otros formatos
diferentes de MP3, WAV (sólo LPCM), MPEG-4 AAC, FLAC y
WMA. Reproduzca archivos de audio grabados en MP3, WAV
(sólo LPCM), MPEG-4 AAC, FLAC o WMA. Note que algunos
archivos de audio grabados en estos formatos pueden no ser
reproducidos en este receptor.
Archivos de audio grabados en MPEG-4 AAC o FLAC están
siendo reproducidos con Windows Media Player 11 ó
Windows Media Player 12. Los archivos de audio grabados en
MPEG-4 AAC o FLAC no se pueden reproducir con Windows
Media Player 11 ó Windows Media Player 12. Pruebe usando
otro servidor. Consulte el manual de instrucciones
suministrado con su servidor.
El componente conectado a la red no se utilizan
correctamente.
-
Verifique si al componente lo afectan circunstancias
especiales o está en el modo de espera.
-
Intente reinicializar el componente si es necesario.
El componente conectado a la red no permite compartir
archivos. Intente cambiar los ajustes del componente
conectado a la red.
La carpeta guardada en el componente conectado a la red ha
sido eliminada o dañada. Verifique la carpeta guardada en el
componente conectado a la red.
English Français Español Italiano
Deutsch
Nederlands
27
Es
Page 94

No se puede acceder al componente conectado a la red.
El componente conectado a la red no están bien ajustado. Si
el cliente es autorizado automáticamente, usted necesitará
introducir de nuevo la información correspondiente.
Compruebe si el estado de la conexión está en “Do not
authorize”.
No hay archivos de audio reproducibles en el componente
conectado a la red. Verifique los archivos de audio guardados
en el componente conectado a la red.
La reproducción de audio se detiene sin querer o se altera.
El archivo de audio que está siendo reproducido no fue
grabado en un formato que pueda reproducirse en este
receptor.
-
Compruebe si el archivo de audio fue grabado en un
formato compatible con este receptor.
-
Compruebe si la carpeta ha sido dañada.
-
Note que hay casos en los que los archivos de audio
listados como reproducibles en este receptor no se pueden
reproducir ni visualizar (página 22).
El cable LAN está desconectado. Conecte correctamente el
cable LAN (página 10).
Hay un tráfico pesado debido al acceso a Internet en la misma
red. Use 100BASE-TX para acceder a los componentes de la
red.
No se puede acceder a Windows Media Player 11 o Windows
Media Player 12.
En el caso de Windows Media Player 11: Está conectado al
dominio a través de su PC con Windows XP o Windows Vista
instalado. En lugar de conectar al dominio, conecte a la
máquina local (página 20).
En el caso de Windows Media Player 12: Está conectado al
dominio a través de su PC con Windows 7 instalado. En lugar
de conectar al dominio, conecte a la máquina local
(página 20).
No se pueden oír las emisoras de radio de Internet.
Los ajustes de seguridad para los componentes de la red
están activados. Compruebe los ajustes del servidor de
seguridad para los componentes de la red.
Está actualmente desconectado de Internet. Compruebe los
ajustes de conexión para los componentes de la red, y
consulte con su proveedor de servicios de la red si es
necesario (página 21).
Las emisiones de una emisora de radio de Internet se
detienen o interrumpen. Hay casos en los que usted no podrá
oír alguna emisora de radio de Internet aunque la emisora
esté en la lista de emisoras de radio de Internet de este
receptor (página 20).
28
Es
La función NETWORK no puede manejarse con los botones
del mando a distancia.
El mando a distancia no está actualmente en el modo
NETWORK. Pulse NETWORK para ajustar el mando a
distancia al modo NETWORK (página 20).
Resolución de problemas con la LAN inalámbrica
No se puede acceder a la red a través de la LAN inalámbrica.
El conversor de LAN inalámbrica no está encendido (los
indicadores de “Power”, “WPS” y “Wireless” de la LAN
inalámbrica no están encendidos). Compruebe que el cable
USB que conecta el conversor de LAN inalámbrica con el
terminal de DC OUTPUT for WIRELESS LAN está
debidamente conectado.
El cable LAN no está conectado firmemente. Conecte
firmemente el cable LAN (página 10).
El conversor de LAN inalámbrica y la unidad base (enrutador
de LAN inalámbrica, etc.) están demasiado alejados entre sí o
hay un obstáculo entre ellos. Mejore el entorno de LAN
inalámbrica colocando el conversor de LAN inalámbrica más
cerca de la unidad base, etc.
Hay un horno microondas u otro dispositivo que genera ondas
electromagnéticas cerca del entorno de LAN inalámbrica.
-
Utilice el sistema en un lugar alejado de hornos microondas
u otros dispositivos que generen ondas electromagnéticas.
-
Cuando utilice el sistema con la LAN inalámbrica, evite
utilizar, en la medida de lo posible, dispositivos que generen
ondas electromagnéticas.
Hay varios conversores de LAN inalámbrica conectados al
enrutador de la LAN inalámbrica. Cuando conecte varios
conversores de LAN inalámbrica, deberá cambiar sus
direcciones IP. Por ejemplo, si la dirección IP del enrutador de
LAN inalámbrica es “192.168.1.1”, la dirección IP del primer
conversor de LAN inalámbrica deberá ser “192.168.1.249”; la
dirección IP del segundo conversor de LAN inalámbrica
deberá ser “192.168.1.248”, utilizando valores comprendidos
entre 2 y 249 (por ejemplo, “249” y “248”) que no estén
asignados a otros conversores de LAN inalámbrica ni a otros
dispositivos.
No se puede establecer ninguna conexión inalámbrica LAN
entre el conversor de LAN inalámbrica y la unidad base
(enrutador de LAN inalámbrica, etc.).
-
Con el conversor de LAN inalámbrica conectado al receptor,
encienda el receptor, desenchufe el cable de alimentación
de la toma de corriente, y a continuación vuelva a conectar
el cable de alimentación y encienda el receptor.
-
Para poder establecer conexiones a través de la LAN
inalámbrica, deberá configurar el conversor de LAN
inalámbrica. Para obtener una información detallada,
consulte las instrucciones de funcionamiento del conversor
de LAN inalámbrica.
El conversor de LAN inalámbrica está correctamente
conectado al receptor y los indicadores del conversor de LAN
inalámbrica están encendidos, pero el conversor de LAN
inalámbrica no se puede configurar desde el receptor (la
pantalla de configuración no se puede mostrar).
Si Network Modes en Network Settings del receptor está
ajustado a STATIC y la dirección IP se ha configurado
manualmente, es posible que la dirección IP configurada en
el conversor de LAN inalámbrica no coincida. En Network
Settings del receptor, ajuste Network Modes a DHCP. Tras
realizar el ajuste, apague el receptor. A continuación, vuelva a
encender el receptor y compruebe si la configuración del
conversor de LAN inalámbrica se visualiza en el receptor.
Si la configuración se puede visualizar, cambie la
configuración de la dirección IP del receptor y del conversor
de LAN inalámbrica según sea necesario.
La configuración de la dirección IP del receptor y del
conversor de LAN inalámbrica no coinciden con la
configuración del enrutador de LAN inalámbrica, etc.
Compruebe la configuración de la dirección IP del receptor y
del conversor de LAN inalámbrica (incluyendo los Network
Modes).
Si los Network Modes del receptor se han ajustado a DHCP,
apague el receptor y vuelva a encenderlo.
Compruebe que las direcciones IP del receptor y del
conversor de LAN inalámbrica coinciden con la configuración
del enrutador de LAN inalámbrica, etc.
Si los Network Modes del receptor se han ajustado a
STATIC, configure una dirección IP que coincida con la red de
la unidad base (enrutador de LAN inalámbrica, etc.).
Por ejemplo, si la dirección IP del enrutador de LAN
inalámbrica es “192.168.1.1”, configure la dirección IP del
receptor como “192.168.1.XXX” (* 1); la máscara de subred
como “255.255.255.0”; la puerta de enlace y DNS como
“192.168.1.1”.
A continuación, configure la dirección IP del conversor de
LAN inalámbrica como “192.168.1.249” (* 2).
(* 1) Sustituya “XXX” en “192.168.1.XXX” por un número
comprendido entre 2 y 248 que no se haya asignado a otros
dispositivos.
(* 2) Ajuste el “249” de “192.168.1.249” a un número
comprendido entre 2 y 249 que no se haya asignado a otros
dispositivos.
Trate de llevar a cabo los ajustes avanzados del conversor de
LAN inalámbrica.
El conversor de LAN inalámbrica se puede conectar a un
ordenador para realizar los ajustes avanzados de LAN
inalámbrica. Para una información detallada, consulte el CDROM que acompaña al conversor de LAN inalámbrica.
Compruebe la configuración del enrutador de LAN
inalámbrica, etc.; después, cambie la configuración del
conversor de LAN inalámbrica.
Page 95

Recuerde, sin embargo, que efectuar los ajustes avanzados
Nota
PRECAUCIÓN
PRECAUCIÓN
YES
Correcto
NO
de LAN inalámbrica no va a mejorar necesariamente el
entorno de LAN inalámbrica. Tenga cuidado al cambiar los
ajustes.
El punto de acceso ha sido configurado para ocultar el SSID.
En este caso, es posible que el SSID no se pueda mostrar en
la pantalla de lista de puntos de acceso. De ser así, ajuste el
SSID, etc., llevando a cabo manualmente los ajustes del
conversor de LAN inalámbrica en el receptor.
Los ajustes de seguridad del punto de acceso utilizan una
clave WEP de 152 bits de longitud o una autenticación de
clave compartida. El receptor no es compatible con una clave
WEP de 152 bits de longitud ni con una clave de autenticación
compartida.
No es posible establecer ninguna conexión de red, ni tan
siquiera después de haber adoptado las medidas anteriores.
Reinicie el conversor de LAN inalámbrica. Después, vuelva a
configurar el conversor de LAN inalámbrica.
-
Acerca de la reinicialización
1. Compruebe que el conversor de LAN inalámbrica está
encendido.
2. Pulse el botón de reinicio del conversor de LAN
inalámbrica durante un mínimo de 3 segundos.
3. Suelte el botón de reinicio.
Cuando el conversor de LAN inalámbrica se haya
reiniciado, el procedimiento de reinicialización habrá
terminado.
Condensación
Los cambios súbitos de la temperatura, y el almacenaje u
operación en lugares muy húmedos pueden causar
condensación de humedad dentro de la caja (Lectura del CD,
etc.) o en el transmisor del controlador remoto. La
condensación puede provocar que el aparato funcione
incorrectamente. Si así sucede, deje la alimentación
conectada sin ningún disco en el aparato hasta que sea
posible la reproducción normal (aproximadamente 1 hora).
Frote la humedad condensada en el transmisor con un paño
suave antes de poner el aparato en funcionamiento.
Si ocurre algún problema
Si se somete este producto a fuertes interferencias externas
(golpes mecánicos, electricidad estática excesiva, tensión de
alimentación anormal debido a rayos, etc.) o si se opera
incorrectamente, puede funcionar mal.
Si ocurre uno de estos problemas, haga lo siguiente:
1 Ponga el aparato en el modo de reserva y conecte de
nuevo la alimentación.
2 Si no se restaura la unidad en la operación previa,
desenchufe y vuelva a enchufar la unidad, a
continuación encienda la unidad.
• Si el aparato no se repone con ninguna de las
operaciones anteriores, borre toda la memoria
reponiéndolo.
Reinicio de Fábrica, Limpiando Toda la
Memoria
Si el iPod o el iPhone están conectados a la unidad,
desconéctelos.
1 Pulse el botón STANDBY/ON para entrar en el modo de
reserva de alimentación.
2 Pulse a la vez el botón STANDBY/ON y el botón de
la unidad.
Se mostrará ‘RESET YES?’.
3Pulse / ().
Se mostrará ‘RESET...’.
Si no pulsa el botón / ( ) antes de 10 minutos después
del STEP 2, el RESET MODE se cancelará.
• Esta operación borrará todos los datos almacenados en
la memoria incluyendo los ajustes del reloj y del
temporizador, preajustes del sintonizador, y el programa
de CD.
Antes de transportar el aparato
Retire el dispositivo de memoria USB, el iPod y el disco de la
unidad. Luego, coloque la unidad en modo de ahorro de
energía. Transportar la unidad con el dispositivo de memoria
del USB o el iPod conectado o con discos adentro de ella
puede provocar daños en la unidad.
Cuidados de los discos compactos
Los discos compactos son bastante resistentes a posibles
daños, sin embargo se puede producir un mal seguimiento
de la pista debido a una acumulación de polvo en la
superficie de los discos. Tenga presente las instrucciones
siguientes para poder disfrutar lo máximo posible de su
colección de discos compactos y de este reproductor.
• No escriba en ninguna cara del disco, particularmente en
la cara que no tiene etiqueta donde se leen las señales
musicales. No estropee esta superficie.
• Mantenga los discos alejados de los rayos directos del
sol, de focos de calor y de humedad excesiva.
• Sujete siempre los discos por sus bordes. Huellas
digitales, polvo o agua en los discos compactos pueden
causar ruidos o un mal seguimiento de la pista. Si un
disco compacto está sucio o no se reproduce
adecuadamente, límpielo con un paño seco y suave,
pasándolo en dirección del centro hacia afuera a lo largo
del radio.
Limpieza del mueble
Limpie periódicamente el mueble con un paño suave y una
solución jabonosa diluida, y luego séquelo con un paño seco.
• No use productos químicos para la limpieza (gasolina,
diluyentes de pintura, etc.). Podría dañar el mueble.
• No aplique aceite al interior del aparato. Podría causar
mal funcionamiento.
Cuidados para cuando la unidad se instala en
una estantería cerrada con puerta de cristal
• No pulse el botón OPEN/CLOSE del control remoto
para abrir la bandeja del disco estando la puerta de
crystal cerrada. La puerta impedirá el movimiento de la
bandeja del disco y la unidad podría dañarse.
English Français Español Italiano
Deutsch
Nederlands
29
Es
Page 96

Acerca de los formatos reproducibles de archivos de música
La función USB y NETWORK de este receptor es compatible con los siguientes formatos de
archivos de música.
• Note que algunos formatos de archivo no podrán reproducirse aunque estén en la lista de
formatos de archivo reproducibles. Además, la compatibilidad de formatos de archivo
cambia dependiendo del tipo de servidor. Consulte con su servidor para asegurarse de
que los formatos de archivo que éste soporta son compatibles.
Categoría Extensión Stream
a
MP3
WAV .wav LPCM Frecuencia de muestreo 44,1 kHz, 48 kHz, 96 kHz
WMA .wma WMA2/7/8 Frecuencia de muestreo de 44,1 kHz a 48 kHz
.mp3 MPEG-1 Audio
Layer-3
WMA9 Frecuencia de muestreo de 44,1 kHz a 48 kHz
Frecuencia de muestreo de 44,1 kHz a 48 kHz
Velocidad de bits de
cuantificación
Canal 2 canales
Velocidad de bits 32 kbps a 320 kbps
VBR/CBR Soportado/Soportado
Velocidad de bits de
cuantificación
Canal 2 canales
Velocidad de bits de
cuantificación
Canal 2 canales
Velocidad de bits 32 kbps a 320 kbps
VBR/CBR Soportado/Soportado
Velocidad de bits de
cuantificación
Canal 2 canales
Velocidad de bits 32 kbps a 320 kbps
VBR/CBR Soportado/Soportado
16 bits
16 bits, 20 bits, 24 bits
16 bits
16 bits
Categoría Extensión Stream
AAC .m4a
FLAC .flac FLAC Frecuencia de muestreo 44,1 kHz, 48 kHz, 96 kHz
a “Tecnología de decodificación de audio MPEG Layer-3 bajo licencia de Fraunhofer IIS y Thomson
.aac
multimedia.”
MPEG-4 AAC LC
MPEG-4 HE AAC
(aacPlus v1/2)
Frecuencia de muestreo de 44,1 kHz a 48 kHz
Velocidad de bits de
cuantificación
Canal 2 canales
Velocidad de bits 16 kbps a 320 kbps
VBR/CBR Soportado/Soportado
Velocidad de bits de
cuantificación
Canal 2 canales
Velocidad de bits —
16 bits
16 bits, 24 bits
Acerca de los mensajes de estado
Si durante la función NETWORK se muestra un mensaje de estado, consulte la siguiente
información.
Mensajes de estado Descripciones
List empty, Add from Now Playing... La lista está vacía. Añada algún elemento de Now
No item No hay elementos.
Rescanning devices... Reescaneando. Espere.
Unsupported Format Este formato no es compatible.
Server Connection Error Imposible conectar con el servidor.
Error opening stream Se trata de un error de secuencia.
Already in favorites Este elemento ya está registrado en sus favoritos.
Unsupported item Este elemento no es compatible con este receptor.
Unknown error Se ha producido un error no identificado.
Connection Error... No se puede conectar con la red.
Playing.
30
Es
Page 97

Especificaciones
Como parte de la política de mejoras continuas, PIONEER se
reserva el derecho de realizar cambios en el diseño y
especificaciones para la mejora del producto sin previo aviso.
Las figuras indicadas que especifican el rendimiento son
valores nominales de los aparatos de producción. Puede
haber algunas desviaciones de estos valores en los aparatos
individuales.
*Las especificaciones son aplicables cuando la alimentación
es de 230 V.
Características del amplificador
Potencia de salida RMS. . . . . . . . . . . . . . . . . . . .50 W + 50 W
Impedancia de altavoces garantizada
. . . . . . . . . . . . . . . . . . . . . . . . . . . . . . . . 4 ohmios a 16 ohmios
Auriculares . . . . . . . . . . . . . . . . . . . recomendado: 32 ohmios
Sección del sintonizador
Intervalo de frecuencia (FM) . . . . . . . . . .87,5 MHz a 108 MHz
Entrada de antena (FM). . . . . . . . . . .75 ohmios sin equilibrio
Intervalo de frecuencia (AM). . . . . . . . . . .531 kHz a 1602 kHz
Antena (AM) . . . . . . . . . . . . . . . . . . . . . . . . .Antena de cuadro
Sección de vídeo
Nivel de señal (compuesto). . . . . . . . . . . . 1 Vp-p (75 ohmios)
Sección de red
Terminal LAN . . . . . . . . . . . . . . . . . . . . . . . Conector Ethernet
Otros conectores
Suministro de energía
Conector USB frontal. . . . . . . . . . . . . . . . . . . . . . . 5 V, 2,1 A
Conector de iPod . . . . . . . . . . . . . . . . . . . . . . . . . . 5 V, 1,0 A
Conector posterior para salida de DC (para LAN
inalámbrica) . . . . . . . . . . . . . . . . . . . . . . . . . . . .5 V, 600 mA
Varios
Fuente de alimentación . . . . . . . . . . . CA 220 V a 240 V, 50 Hz
Consumo eléctrico
Encendido. . . . . . . . . . . . . . . . . . . . . . . . . . . . . . . . . . . .80 W
Modo de espera . . . . . . . . . . . . . . . . . . . . . . 0,5 W o menos
Dimensiones
Ancho . . . . . . . . . . . . . . . . . . . . . . . . . . . . . . . . . . . . 215 mm
Alto . . . . . . . . . . . . . . . . . . . . . . . . . . . . . . . . . . . . . . 111 mm
Profundidad . . . . . . . . . . . . . . . . . . . . . . . . . . . . . . . 353 mm
Peso. . . . . . . . . . . . . . . . . . . . . . . . . . . . . . . . . . . . . . . . . . 4,7 kg
(1 kHz, 10 % T.H.D., 4 ohmios)
10BASE-T/100BASE-TX
Altavoz (sólo X-HM70)
Tipo
Sistema de altavoces del tipo de 2 vías
Tweeter en domo de 2,5 cm
Altavoz de graves de 12 cm
Potencia máxima de entrada. . . . . . . . . . . . . . . . . . . . . . .50 W
Impedancia . . . . . . . . . . . . . . . . . . . . . . . . . . . . . . . . 4 ohmios
Dimensiones
Ancho . . . . . . . . . . . . . . . . . . . . . . . . . . . . . . . . . . . . 148 mm
Alto. . . . . . . . . . . . . . . . . . . . . . . . . . . . . . . . . . . . . 263,5 mm
Profundidad . . . . . . . . . . . . . . . . . . . . . . . . . . . . . . . 208 mm
Peso . . . . . . . . . . . . . . . . . . . . . . . . . . . . . . . . . 2,7 kg/cada uno
Acerca de iPod/iPhone/iPad
“Made for iPod”, “Made for iPhone” y “Made for iPad”
significan que un accesorio electrónico ha sido diseñado
para ser conectado específicamente a un iPod, iPhone o
iPad, respectivamente, y ha sido homologado por quien lo
desarrolló para cumplir con las normas de funcionamiento
de Apple. Apple no es responsable del funcionamiento de
este aparato ni de que cumpla con las normas de seguridad
y reguladoras. Apple no es responsable del funcionamiento
de este aparato ni de que cumpla con las normas de
seguridad y reguladoras. Tenga presente que el empleo de
este accesorio con un iPod, iPhone o iPad puede afectar la
operación inalámbrica.
iPad, iPhone, iPod, iPod classic, iPod nano e iPod touch son
marcas registradas de Apple Inc., registradas en Estados
Unidos y otros países.
Exención de responsabilidad frente a
contenidos de terceros
El acceso a los contenidos proporcionados por terceros
requiere una conexión a Internet de alta velocidad, y es
posible que también exija un registro y pagar una
suscripción.
Los servicios de contenidos de terceros pueden ser
cambiados, suspendidos, interrumpidos o concluidos en
cualquier momento sin previo aviso; Pioneer no asumirá
ninguna responsabilidad al respecto.
Pioneer no declara ni garantiza que los servicios de
contenidos sigan proporcionándose o estando disponibles
durante un período de tiempo determinado, y no asume
ninguna garantía, ya sea expresa o implícita.
© 2011 PIONEER CORPORATION.
Todos los derechos reservados.
English Français Español Italiano
Deutsch
Nederlands
31
Es
Page 98

10 cm 10 cm
10 cm
10 cm
TIMER
Ein Ausrufezeichen in einem Dreieck weist
den Benutzer auf wichtige Bedienungs- und
Wartungsanweisungen in den Dokumenten
hin, die dem Gerät beiliegen.
Das Blitzsymbol in einem Dreieck weist den
Benutzer darauf hin, dass eine
Berührungsgefahr mit nicht isolierten Teilen
im Geräteinneren, die eine gefährliche
Spannung führen, besteht. Die Spannung
kann so hoch sein, dass sie die Gefahr eines
elektrischen Schlages birgt.
ACHTUNG:
UM SICH NICHT DER GEFAHR EINES
ELEKTRISCHEN SCHLAGES
AUSZUSETZEN, DÜRFEN SIE NICHT DEN
DECKEL (ODER DIE RÜCKSEITE)
ENTFERNEN. IM GERÄTEINNEREN
BEFINDEN SICH KEINE VOM BENUTZER
REPARIERBAREN TEILE. ÜBERLASSEN SIE
REPARATUREN DEM QUALIFIZIERTEN
KUNDENDIENST.
CAUTION
RISK OF ELECTRIC SHOCK
DO NOT OPEN
WICHTIG
D3-4-2-1-1_A1_De
WARNUNG
Dieses Gerät ist nicht wasserdicht. Zur Vermeidung der
Gefahr von Brand und Stromschlag keine Behälter mit
Flüssigkeiten (z.B. Blumenvasen und -töpfe) in die
Nähe des Gerätes bringen und dieses vor Tropfwasser,
Spritzwasser, Regen und Nässe schützen.
D3-4-2-1-3_A1_De
Betriebsumgebung
Betriebstemperatur und Betriebsluftfeuchtigkeit:
+5 °C bis +35 °C, 85 % rel. Feuchte max.
(Ventilationsschlitze nicht blockiert)
Eine Aufstellung dieses Gerät an einem unzureichend
belüfteten, sehr feuchten oder heißen Ort ist zu
vermeiden, und das Gerät darf weder direkter
Sonneneinstrahlung noch starken Kunstlichtquellen
ausgesetzt werden.
D3-4-2-1-7c*_A1_De
WARNUNG
Vor dem erstmaligen Anschluss des Gerätes an das
Stromnetz bitte den folgenden Hinweis sorgfältig
beachten.
Die Netzspannung ist je nach Land verschieden.
Vor der Inbetriebnahme des Gerätes sicherstellen,
dass die örtliche Netzspannung mit der auf dem
Typenschild an der Rückwand des Gerätes
angegebenen Nennspannung (z.B. 230 V oder 120
V) übereinstimmt.
D3-4-2-1-4*_A1_De
WARNUNG
Keine Quellen offener Flammen (z.B. eine brennende
Kerze) auf dieses Gerät stellen.
D3-4-2-1-7a_A1_De
Falls der Netzstecker des Netzkabels dieses Gerätes
nicht in die Zusatzsteckdose einer anderen
Komponente passt, muss er gegen einen Netzstecker
der geeigneten Ausführung ausgewechselt werden.
Ein derartiger Austausch des Netzsteckers muss vom
Kundendienstpersonal vorgenommen werden. Wenn
der vom Netzkabel abgeschnittene ursprüngliche
Netzstecker in eine Netzsteckdose eingesteckt wird,
besteht akute Stromschlaggefahr! Daher ist
unbedingt dafür zu sorgen, dass der abgeschnittene
Netzstecker sofort vorschriftsmäßig entsorgt wird.
Vor einem längeren Nichtgebrauch des Gerätes,
beispielsweise während des Urlaubs, sollte der
Netzstecker aus der Netzsteckdose gezogen werden,
um das Gerät vollständig vom Netz zu trennen.
D3-4-2-2-1a_A1_De
VORSICHTSHINWEIS ZUR BELÜFTUNG
Bei der Aufstellung dieses Gerätes muss für einen
ausreichenden Freiraum gesorgt werden, um eine
einwandfreie Wärmeabfuhr zu gewährleisten
(mindestens 10 cm oberhalb des Gerätes, 10 cm hinter
dem Gerät und jeweils 10 cm an der Seite des Gerätes).
WARNUNG
Im Gerätegehäuse sind Ventilationsschlitze und andere
Öffnungen vorgesehen, die dazu dienen, eine
Überhitzung des Gerätes zu verhindern und einen
zuverlässigen Betrieb zu gewährleisten. Um
Brandgefahr auszuschließen, dürfen diese Öffnungen
auf keinen Fall blockiert oder mit Gegenständen (z.B.
Zeitungen, Tischdecken und Gardinen) abgedeckt
werden, und das Gerät darf beim Betrieb nicht auf
einem dicken Teppich oder Bett aufgestellt sein.
D3-4-2-1-7b*_A1_De
ACHTUNG
Der STANDBY/ON-Schalter dieses Gerätes trennt
das Gerät nicht vollständig vom Stromnetz. Um das
Gerät vollständig vom Netz zu trennen, muss der
Netzstecker aus der Netzsteckdose gezogen werden.
Daher sollte das Gerät so aufgestellt werden, dass
stets ein unbehinderter Zugang zur Netzsteckdose
gewährleistet ist, damit der Netzstecker in einer
Notsituation sofort abgezogen werden kann. Um
Brandgefahr auszuschließen, sollte der Netzstecker
vor einem längeren Nichtgebrauch des Gerätes,
beispielsweise während des Urlaubs, grundsätzlich
von der Netzsteckdose getrennt werden.
D3-4-2-2-2a*_A1_De
2
De
Page 99

English Français Español Italiano
K058a_A1_De
Pb
Informationen für Anwender zur Sammlung und Entsorgung von Altgeräten und
gebrauchten Batterien
Diese Symbole auf den Produkten, der Verpackung und/oder Begleitdokumenten
bedeuten, dass gebrauchte elektrische und elektronische Produkte und Batterien
nicht über den Haushaltsmüll entsorgt werden dürfen.
Zur richtigen Handhabung, Rückgewinnung und Wiederverwertung von Altprodukten
und gebrauchten Batterien bringen Sie diese bitte zu den gemäß der nationalen
Gesetzgebung dafür zuständigen Sammelstellen.
Mit der korrekten Entsorgung dieser Produkte und Batterien helfen Sie dabei,
wertvolle Ressourcen zu schonen und vermeiden mögliche negative Auswirkungen
auf die Gesundheit und die Umwelt, die durch eine unsachgemäße Behandlung des
Abfalls entstehen könnten.
Weitere Informationen zur Sammlung und Wiederverwertung von Altprodukten und
Batterien erhalten Sie von Ihrer örtlichen Gemeindeverwaltung, Ihrem Müllentsorger
oder dem Verkaufsort, an dem Sie die Waren erworben haben.
Diese Symbole gelten ausschließlich in der Europäischen Union.
Für Länder außerhalb der Europäischen Union:
Wenn Sie diese Gegenstände entsorgen wollen, wenden Sie sich bitte an Ihre
lokalen Behörden oder Händler und fragen Sie dort nach der korrekten
Entsorungsweise.
Symbolbeispiele
für Batterien
Symbol für
Geräte
ACHTUNG
Bei diesem Gerät handelt es sich zwar um ein
Laserprodukt der Klasse 1, das entsprechend dem
Standard Sicherheit für Laserprodukte IEC
60825-1:2007 klassifiziert ist.
LASER KLASSE 1
D58-5-2-2a_A1_De
Dieses Gerät ist für den Heimgebrauch vorgesehen.
Falls bei Einsatz zu einem anderem Zweck (z.B.
Langzeitgebrauch zu gewerblichen Zwecken in einem
Restaurant oder Betrieb in einem Fahrzeug bzw.
Schiff) eine Funktionsstörung auftritt, die eine
Reparatur des Gerätes erforderlich macht, werden
die Reparaturkosten dem Kunden selbst dann in
Rechnung gestellt, wenn die Garantiefrist noch nicht
abgelaufen ist.
K041_A1_De
Über Kondensation
Wenn der Spieler plötzlich aus der Kälte in einen
warmen Raum gebracht wird (z. B. im Winter) oder
wenn die Temperatur in dem Raum, in dem der Spieler
aufgestellt ist, plötzlich aufgrund eines Heizlüfters usw.
ansteigt, können sich im Inneren des Geräts
Wassertropfen (Kondensation) bilden (auf beweglichen
Teilen und der Linse). Wenn es zu Kondensation
kommt, arbeitet der Spieler nicht ordnungsgemäß, und
die Wiedergabe ist nicht möglich. Lassen Sie den
Spieler für 1 bis 2 Stunden bei Raumtemperatur
eingeschaltet (die erforderliche Dauer hängt vom
Ausmaß der Kondensation ab). Die Wassertropfen
verdampfen und die Wiedergabe ist wieder möglicht.
Zu Kondensation kann es auch im Sommer kommen,
wenn der Spieler direkt dem Luftzug aus einer
Klimaanlage ausgesetzt wird. Stellen Sie den Spieler in
diesem Fall an einem anderen Ort auf.
S005_A1_De
Deutsch
Nederlands
3
De
Page 100

Vielen Dank für den Kauf dieses PIONEER-Produktes. Lesen Sie dieses Handbuch sorgfältig durch, um eine bestmögliche Leistung zu erreichen. Es führt Sie in den Betrieb dieses Produkts
von PIONEER ein.
Inhalt
Zubehör . . . . . . . . . . . . . . . . . . . . . . . . . . . . . . . . 4
Vor der Inbetriebnahme . . . . . . . . . . . . . . . . . . . 5
Allgemeines . . . . . . . . . . . . . . . . . . . . . . . . . . . . . . . . . . .5
Einlegen der Batterien. . . . . . . . . . . . . . . . . . . . . . . . . . . . 5
Bedienelemente und Displays . . . . . . . . . . . . . . 6
Fernbedienung . . . . . . . . . . . . . . . . . . . . . . . . . . . . . . . . . 6
Vorderes Bedienfeld . . . . . . . . . . . . . . . . . . . . . . . . . . . . .7
Lautsprechersystem (nur X-HM70) . . . . . . . . . . . . . . . . . . 7
Anschluss der Geräte . . . . . . . . . . . . . . . . . . . . . 8
Anschluß der Antennen . . . . . . . . . . . . . . . . . . . . . . . . . . 8
Anschluß der Lautsprecher. . . . . . . . . . . . . . . . . . . . . . . . 9
Anschluß des Systems (Fortsetzung) . . . . . . . . . . . . . . . . 9
Anschließen eines Fernsehgeräts, usw. . . . . . . . . . . . . . . 9
Herstellen der Verbindung zum Netzwerk über die LAN-
Schnittstelle . . . . . . . . . . . . . . . . . . . . . . . . . . . . . . . . . .10
Netzanschluß . . . . . . . . . . . . . . . . . . . . . . . . . . . . . . . . .10
Generelle Bedienung . . . . . . . . . . . . . . . . . . . . 11
Einschalten der Stromversorgung. . . . . . . . . . . . . . . . . . 11
Einstellen der Uhr . . . . . . . . . . . . . . . . . . . . . . . . . . . . . . 11
Portablegeräte und Kopfhörer anschließen. . . . . . . . . . . 12
CDs oder MP3/WMA-Discs wiedergeben . . . . . 13
CD/-Wiedergabe . . . . . . . . . . . . . . . . . . . . . . . . . . . . . . . 13
Verschiedene Disc-Funktionen . . . . . . . . . . . . . . . . . . . . 13
Weitere Wiedergabe von CDs oder MP3/WMA-Discs . . .14
MP3/WMA-Ordnermodus (nur bei MP3/
WMA-Dateien). . . . . . . . . . . . . . . . . . . . . . . . . . . . . . . . . 15
iPod, iPhone oder iPad-Wiedergabe . . . . . . . . 17
Unterstützte iPod-, iPhone oder iPad-Modelle: . . . . . . . . 17
Anschließen Ihres iPod/iPhone . . . . . . . . . . . . . . . . . . . .17
Entfernen des Adapters für das iPod oder das
iPhone. . . . . . . . . . . . . . . . . . . . . . . . . . . . . . . . . . . . . . . 17
Einführen eines iPad-Adapters . . . . . . . . . . . . . . . . . . . . 17
Abspielen eines iPod, iPhone oder iPad . . . . . . . . . . . . . 18
Hören von USB-Massenspeicher
MP3-Player. . . . . . . . . . . . . . . . . . . . . . . . . . . . . 19
Anschließen eines USB-Geräts. . . . . . . . . . . . . . . . . . . . 19
Abspielen mit einem USB-Gerät . . . . . . . . . . . . . . . . . . . 19
Wiedergabe mit der NETWORK- Funktion . . . . 20
Internet-Radiosender hören . . . . . . . . . . . . . . . . . . . . . . 20
Wiedergabe von Audiodateien, die auf Komponenten im
Netzwerk gespeichert sind . . . . . . . . . . . . . . . . . . . . . . . 21
Wiedergabe Ihrer bevorzugten Songs. . . . . . . . . . . . . . . 21
Network-Setup-Menü . . . . . . . . . . . . . . . . . . . . . . . . . . . 21
Erfordernisse für die Network- Verbindung. . . . . . . . . . . 22
Über Netzwerk-Wiedergabe . . . . . . . . . . . . . . . . . . . . . . 22
Glossary . . . . . . . . . . . . . . . . . . . . . . . . . . . . . . . . . . . . . 23
Radio hören . . . . . . . . . . . . . . . . . . . . . . . . . . . . 24
Benutzen des Radio-Daten-Systems (RDS) . . . 25
Einführung in das RDS-System . . . . . . . . . . . . . . . . . . . 25
Timer- und Sleep-Funktion . . . . . . . . . . . . . . . . 26
Einstellen des Wake-up-Timers. . . . . . . . . . . . . . . . . . . . 26
Sleep-Funktion . . . . . . . . . . . . . . . . . . . . . . . . . . . . . . . . 26
Zusätzliche Informationen . . . . . . . . . . . . . . . . 27
Fehlersuchtabelle . . . . . . . . . . . . . . . . . . . . . . . . . . . . . . 27
Kondensation . . . . . . . . . . . . . . . . . . . . . . . . . . . . . . . . . 29
Wenn eine Störung auftritt . . . . . . . . . . . . . . . . . . . . . . . 29
Werkseinstellung, Löschen des Speichers . . . . . . . . . . . 29
Vor dem Transportieren des Geräts. . . . . . . . . . . . . . . . . 29
Pflege der Compact Discs . . . . . . . . . . . . . . . . . . . . . . . 29
Reinigen des Gehäuses . . . . . . . . . . . . . . . . . . . . . . . . . 29
Vorsichtsmaßregel, wenn das Gerät in einem Rack mit
Glastür aufgestellt ist . . . . . . . . . . . . . . . . . . . . . . . . . . . 29
Musikdatei-Formate, die wiedergegeben werden
können . . . . . . . . . . . . . . . . . . . . . . . . . . . . . . . . . . . . . . 30
Über die Statusmeldungen. . . . . . . . . . . . . . . . . . . . . . . 30
Technische Daten. . . . . . . . . . . . . . . . . . . . . . . . . . . . . . 31
Über iPod/iPhone/iPad . . . . . . . . . . . . . . . . . . . . . . . . . . 31
Ausschluss für Dienstleistungen Dritter. . . . . . . . . . . . . 31
Das Network-CD-Receiver-System X-HM70 besteht aus der
Haupteinheit und dem Lautsprechersystem.
Der Network-CD-Receiver XC-HM70 besteht aus der
Haupteinheit.
Zubehör
Prüfen Sie, ob die folgenden Zubehörteile vorhanden sind.
o
Fernbedienung x 1
UKW-Antenne x 1
MW-Rahmenantenne x 1
Lautsprecher x 2
(nur X-HM70)
„AAA“-Batterie x 2
Video-Kabel x 1
Lautsprecher-Kabel x 2
(nur X-HM70)
Garantiekarte
Diese Bedienungsanleitung
4
De
 Loading...