

Page 1
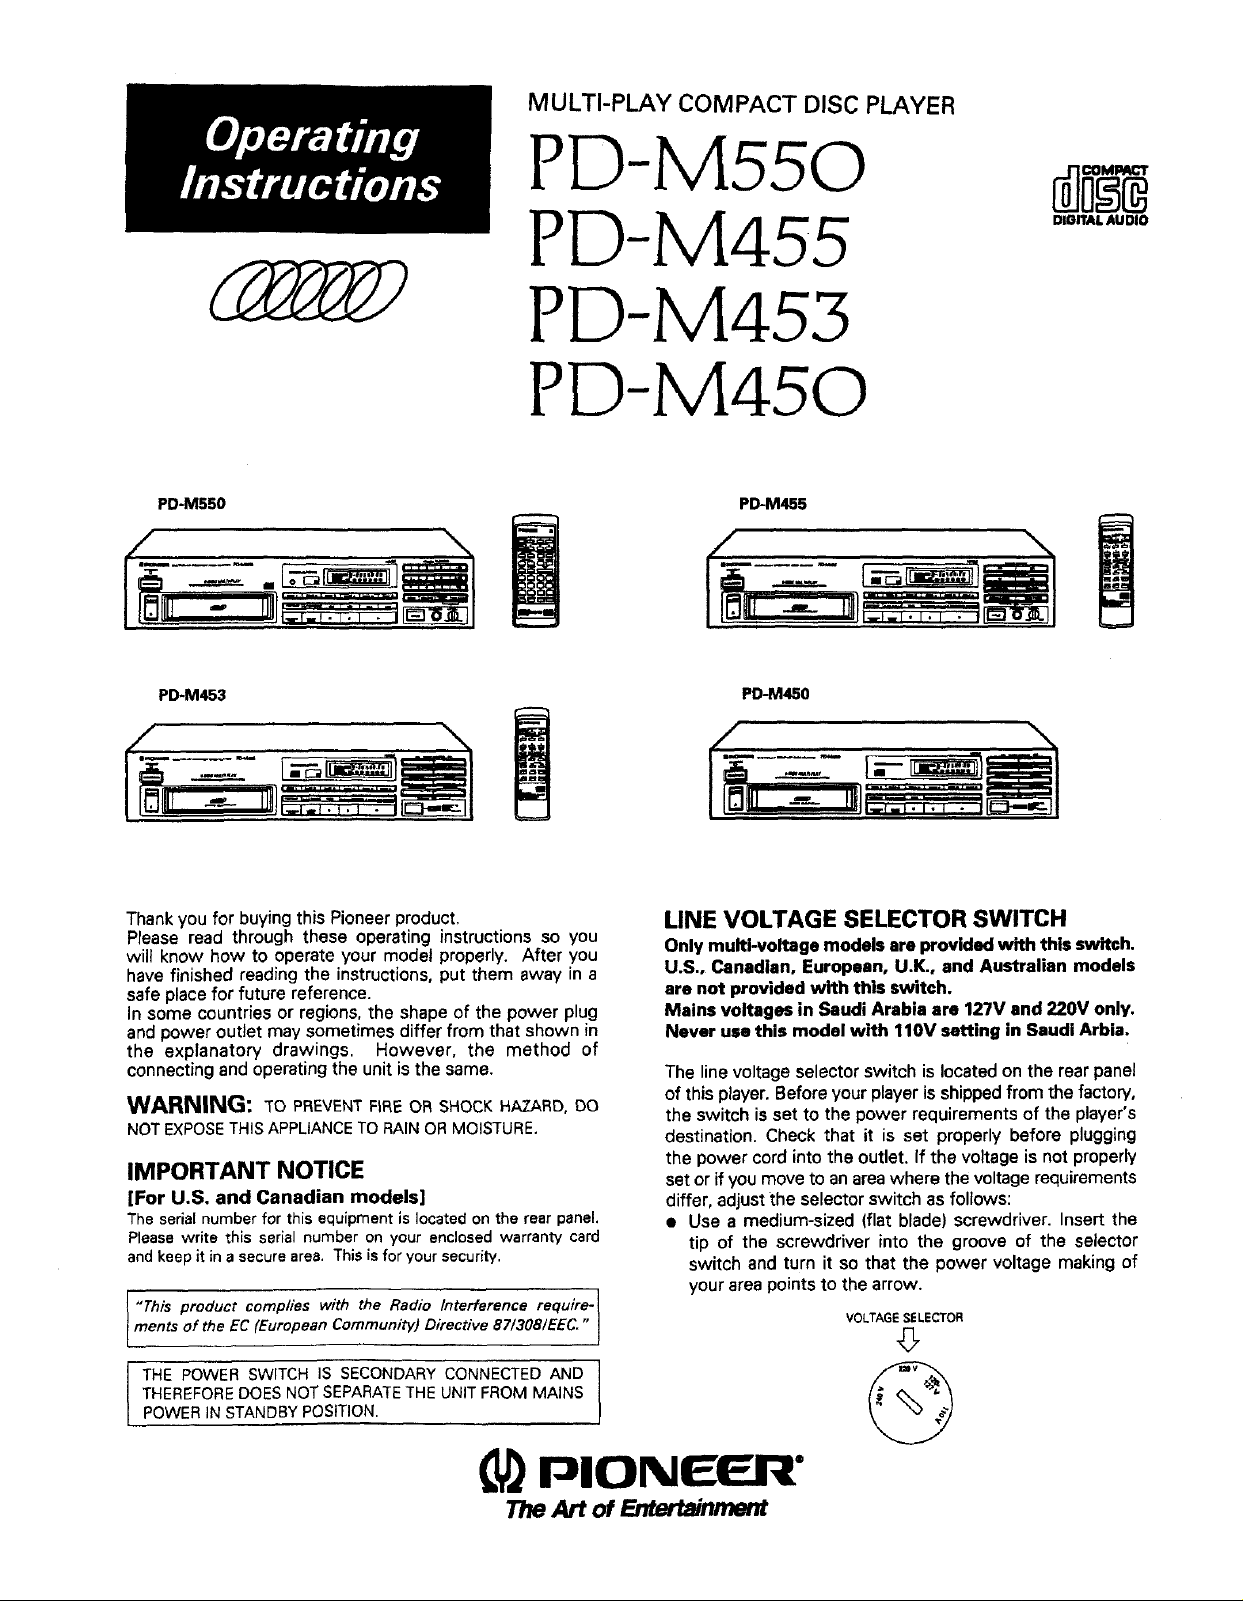
MULTI-PLAY COMPACT DISCPLAYER
PD-M550
PD-M455
PD-M453
PD-M450
PD-M455
DIGITAL AUDIO
Thank you for buying this Pioneer product,
Please read through these operating instructions so you
will know how to operate your model properly. After you
have finished reading the instructions, put them away in a
safe place for future reference.
in some countries or regions, the shape of the power plug
and power outlet may sometimes differ from that shown in
the explanatory drawings. However, the method of
connecting and operating the unit is the same.
WARNING: To PREVENT FiRE OR SHOCK HAZARD, DO
NOT EXPOSE THIS APPLIANCE TO RAIN OR MOISTURE.
IMPORTANT NOTICE
[For U.S. and Canadian models]
The serialnumber for thisequipmentislocated on the rear panel.
Pleasewrite "_hlsserialnumber on your enclosedwarranty card
andkeep it ina securearea. Thisis for yoursecurity.
"This product complies with the Radio interference require-
ments of the EC (EuropeanCommunity)Directive 87/308/EEC."
PD-M450
LINE VOLTAGE SELECTOR SWITCH
Only multi-voltage models are providKI with this switch.
U.S., Canadian, European, U.K., and Australian models
are not provided with this switch.
Mains voltages in Saudi Arabia are 127V and 220V only.
Never use this model with 110V setting in Saudi Arbia.
The line voltage selector switch is located on the rear panel
of this player. Before your player is shipped from the factory,
the switch is set to the power requirements of the player's
destination. Check that it is set properly before plugging
the power cord into the outlet. If the voltage is not properly
set or if you move to anarea where the voltage requirements
differ, adjust the selector switch as follows:
• Use a medium-sized (flat blade) screwdriver. Insert the
tip of the screwdriver into the groove of the selector
switch and turn it so that the power voltage making of
your area points to the arrow.
VOLTAGE SELECTOR
THE POWER SWITCH IS SECONDARYCONNECTED AND ]
THEREFOREDOESNOTSEPARATETHE UNIT FROM MAINS
POWERINSTANDBY POSITION.
PIONEER"
The Art of Entertainment
Page 2
IMPORTANT 1
CAUTION
The lightning flash with arrowhead, withfn an equilateral
triangle, is intended to ater_ ttle user to the presence of
uninsulated "dangerous voltage" within the product's
enclosur e tha_ may be of _u fticient magnitude to constitute
a risk of electric shock to persons
IMPORTANT 2
If the apparatus is fitted with AC mains power outlet(s),
see REAR PANEL FACILITIES for convenient
connection of additional Hi-Fi component(s). Make all
connections to the AC ougetls) and the signal terminals
first. Connect _he _lug to the wall socket last Imake
sure that the power switch is oft.I
SAFETY INSTRUCTIONS
READ INSTRUCTIONS - Ag the safety and operating
instructions should be read before the appliance is
Qperated,
RETAIN INSTRUCTIONS -- The operating instructions
should be reIained for future reference.
HEED WARNING - All warnings on the appgance and in
the operating instructions should be adhered to
FOLLOW INSTRUCTIONS - All operating and use in
structions should be followed,
WATER AND MOISTURE -- The appliance should not
be used near water for example, near a bathtub,
washbowl, kitchen sink, laundry tub, in a wet base-
ment, or near a swirnmlng pool, etc.
LOCATION - The appliance should be installed in a
stable location.
WALL OR CEILING MOUNTING - The appfiance
should not be mounted to a waft or ceiling
VENTILATION - The appliance should be situated SO
that its location or position does not interfere with
its proper ventgatlon. For example, the appliance
should not be situated on a bed, sofa, ru g, or simiiar
surface that may block the ventilation openmgs; or.
placed in a built in installation, such as a bookcase
or cabinet that may impede the flow of air through
the ventilation openings.
HEAT -- The appliance should be situated away from
heat sources such as radiators, heat registers,
stoves, or other abptiances [including amplifiers)
that produce heat.
POWER SOURCES - The appliance should be con-
nected to a power supply only of the type go-
scribed in the operating instructions or as marked
en the appliance
POWER-CORD PROTECTION - Power supply cords
should be routed so that they are not likely [o be
walked on or pinched by items placed upon or
against them Pay particular attention to cords at
plugs, convenience receptacles, and the point
where they exit from the appliance
POLARIZATION - If your purchased product is pro _
vided with a polarized power plug, please read the
following instructions This product is equipped
with a polarized alternating current line plug (a plug
having one blade wider than the other) This plug
will fit into the power outlet only one way. This is a
safety feature if you are unable to insert the plug
fully into the outlet, try reversing the plug If the
plug shoulP still fall to fit, contact your electrician to
replace your obs(;lete outlet, Do not defeat the
safety purpose of the polarized plug
CLEANING - The appliance should be cleaned only
with a polishing cloth or a soft dry cloth. Never
dean with furniture wax, benzine, insecticides or
other volatile liquids since they may corrode the
cabinet
CAUTION:
TO PREVENT THE RISK OF ELECTRIC SHOCK, DO
NOT REMOVE CDVER (DR BACK). NO USER-
SERVICEABLE PARTS INSIDE, REFER SERVICING TD
QUALIFIED SERVICE PERSONNEL.
FOR USE IN THE UNITED
KINGDOM
The wires in this mains lead are coloured in
accordance with the following code:
Due: Neutral
Browm Live
As the colours of the wires in tile mains lead of this
apparatus may not correspond with the coloured
marking identifying the terminals in your plog proceed
as fotIOWS:
POWER LINES - An ou [door antenna should be located
away from power lines,
NONUSE PERIODS - The power cord of the appliance
should be unplugged from the outlet when left un-
used for a long period of time
OBJECT AND LIQUID ENTRY - Care should be taken
so that obiects do not fall and liquids are not spilled
into the enclosure through openings
DAMAGE REQUIRING SERVICE - The appliance
should he se rviced by a Pioneer a uthorized service
center or quafified service personnel when:
• The power-supply cord or the plug has been dam-
aged.
• Objects have fallen, or fiquid has been spiged Lnto
(he appliance
• The appliance has been exposed to rain
• [heappliancedoesnotappeattooperatenormally
or exhibits a marked change in performance.
• The appliance has been d_oppe_ or the enclosure
damaged
SERVICING - The user should not attempt to service
the appliance beyond that described in [he opera-
ting instructions For all other servicing, conta¢I Ihe
nearest Pioneer authorized service center.
_" GROUND_
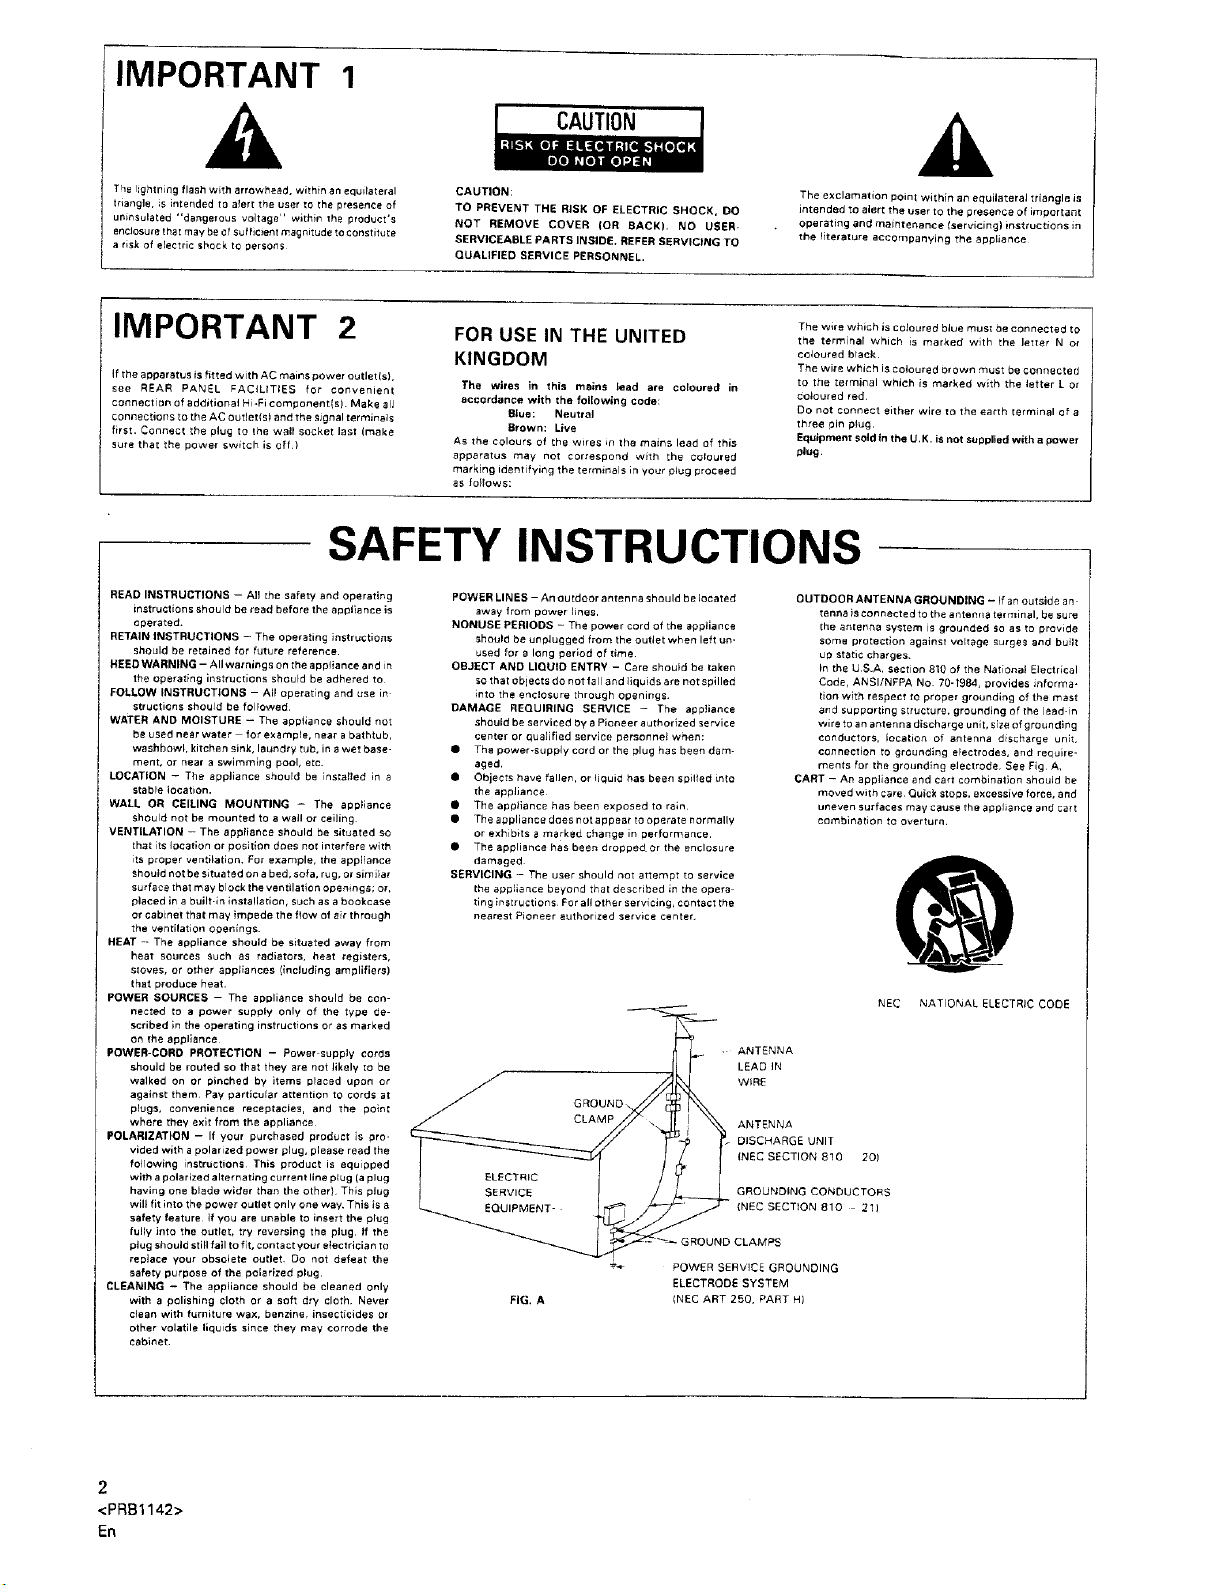
FIG. A
CLAMP
POWER SERVICE GROUNDING
ELECTRODE SYSTEM
(NEC ART 250, PART HI
The exclamation point within an equilateral triangle is
intended to alert the User to the presence of important
operating and mairltenan_te Iservicing) instructions in
the riterature accompanying the appliance
The wire which is co,cured blue mus! he connected to
the terminal which [s marked with the letter N or
coloured black
The wire which is coloured crown must be connected
to the terminal which is marked with the letter L or
co_oured red,
DO not connect either wire to the earth terminal of a
three pin plucJ
Equipment sold in the U,K. is not supplied with a power
plug.
OUTDDDRANTENNA GROUNDING - if an outside an
tenna is connected to the antenna ter rT=inal, be sure
the antenna system is grounded so as to provide
some protection against voltage surges and built
up static charges.
In the US.A, section 810 of the National Electrical
Code, ANSI/NFPA No 70-1984, provides informa-
tion with respect to proper grounding of the mast
and supporting structure, grounding of the lead-in
wire to an antenna discharge unit, size of grounding
conductors, location of antenna discharge unk,
conneetlon tO grounding electrodes, and require-
ments for the grounding electrode See Fig A,
CART - An appfiance and cart combination should he
moved with care Quick stops, excessive force, and
uneven surfaces may cause the appfiance and cart
combination to overturn.
. ANTENNA
LEAD IN
WIRE
ANTENNA
DISCHARGE UNIT
INEC SECTION 810 20)
GROUNDING CONDUCTORS
810 - 211
S
NEC NATIONAL ELECTRIC CODE
2
<PRB1142>
En
Page 3
i
, i
i
'l
[FOR EUROPEAN AND U.K. MODELS]
CAUTION
The following caution label appear on your player.
Location: r_ar of the player
This product contains a laser diode of higher class than
1. To ensure continued safety, do not remove any covers
or attempt to gain access to the inside of the product.
Refer all servicing to qualified personnel.
[FOR U.S. MODEL]
CAUTION
• Use of controls or adjustments or performance of procedures other than those specified herein may result in hazardous radiation
exposure,
• The use of optical instruments with this product will increase eye hazard.
i
i
INFORMATION TO USER [FOR U.S. MODEL]
This equipment generates and uses radio frequency
energy and _f not installed and used propeay, that is, in
strict accordance with the manLJfacturer's instruot;ons,
may Cause interference to radio _tld t_ewsion r_'c_-
ti_n. It has heel1 Wpe {_sted and found to comply with
the limits fo_ a Class a computing clerics'in 'accordance
with the specifications in Subpart J of Part 15 of FCC
Rules. which are designed to provide reasonable pro-
tection against such interference in a _esidentia_ instal-
lation. However, there is no guarantee that interference
will not occur in a particular installation
If this equipment does cause interference to radio !_o
ing the equipment off and _n, the user is encourllged o
television feceptiOnr which can be determined by turfi-
try to c_vrect t_ inteHerence by one m mo_e of t
fOllOwing measu:es: I
• reorient the receiving antenna I
• relocate this equipment with respect to the recelv_r
• move Ibis equipment away from the receiver
• plug this equipment into a different outlet so lh_at
equ=pmen and receiver are on ddferet_ branch cir-
cuits
It necessary, the user should consult the dealer or an
experlenced radio/television technician for additional
suggestions. The user may find the following booklet
prepared by the Federa_ Communications Commission
helpful:
/
"'How to Identify and Resolve Radio-TV interference
Problems"
This booklet is avagable from the US Government
Printing Office, Washington. 0 C, 204OZ. Stock No ,
004o000_003t_5-_,
The above it_struclions apply only to units which will
be Operated in the Umted States
[For Canadian model]
This digital apparatus doesnot exceed the Class B limits for radio noise emissions from digital apparatus set out inthe Ra-
dio Interference Regulations of the Canadian Department of Communication s.
POWER-CORD CAUTION
Handle the power cord by the plug, Do not pull out the plug by tugging
the cord and never touch the power cord when your hands are wet as
this could cause e short circuit or electric shock. Do not place the unit,
a piece of furniiure, etc., on the power cord, or pinch the cord. Never
make a knot in the cord or t_e it with other cords. The power cords
should be routed such that they are not likely to be stepped on. A
damaged Dower cord can cause fire or give you an electrical shock.
Check the power cord once in a while. When you find it damaged, ask
your nearest PIONEER authorized service center or your dealer for a
replacement,
i.
<PRB1142>
3
En
Page 4
I CONTENTS
i
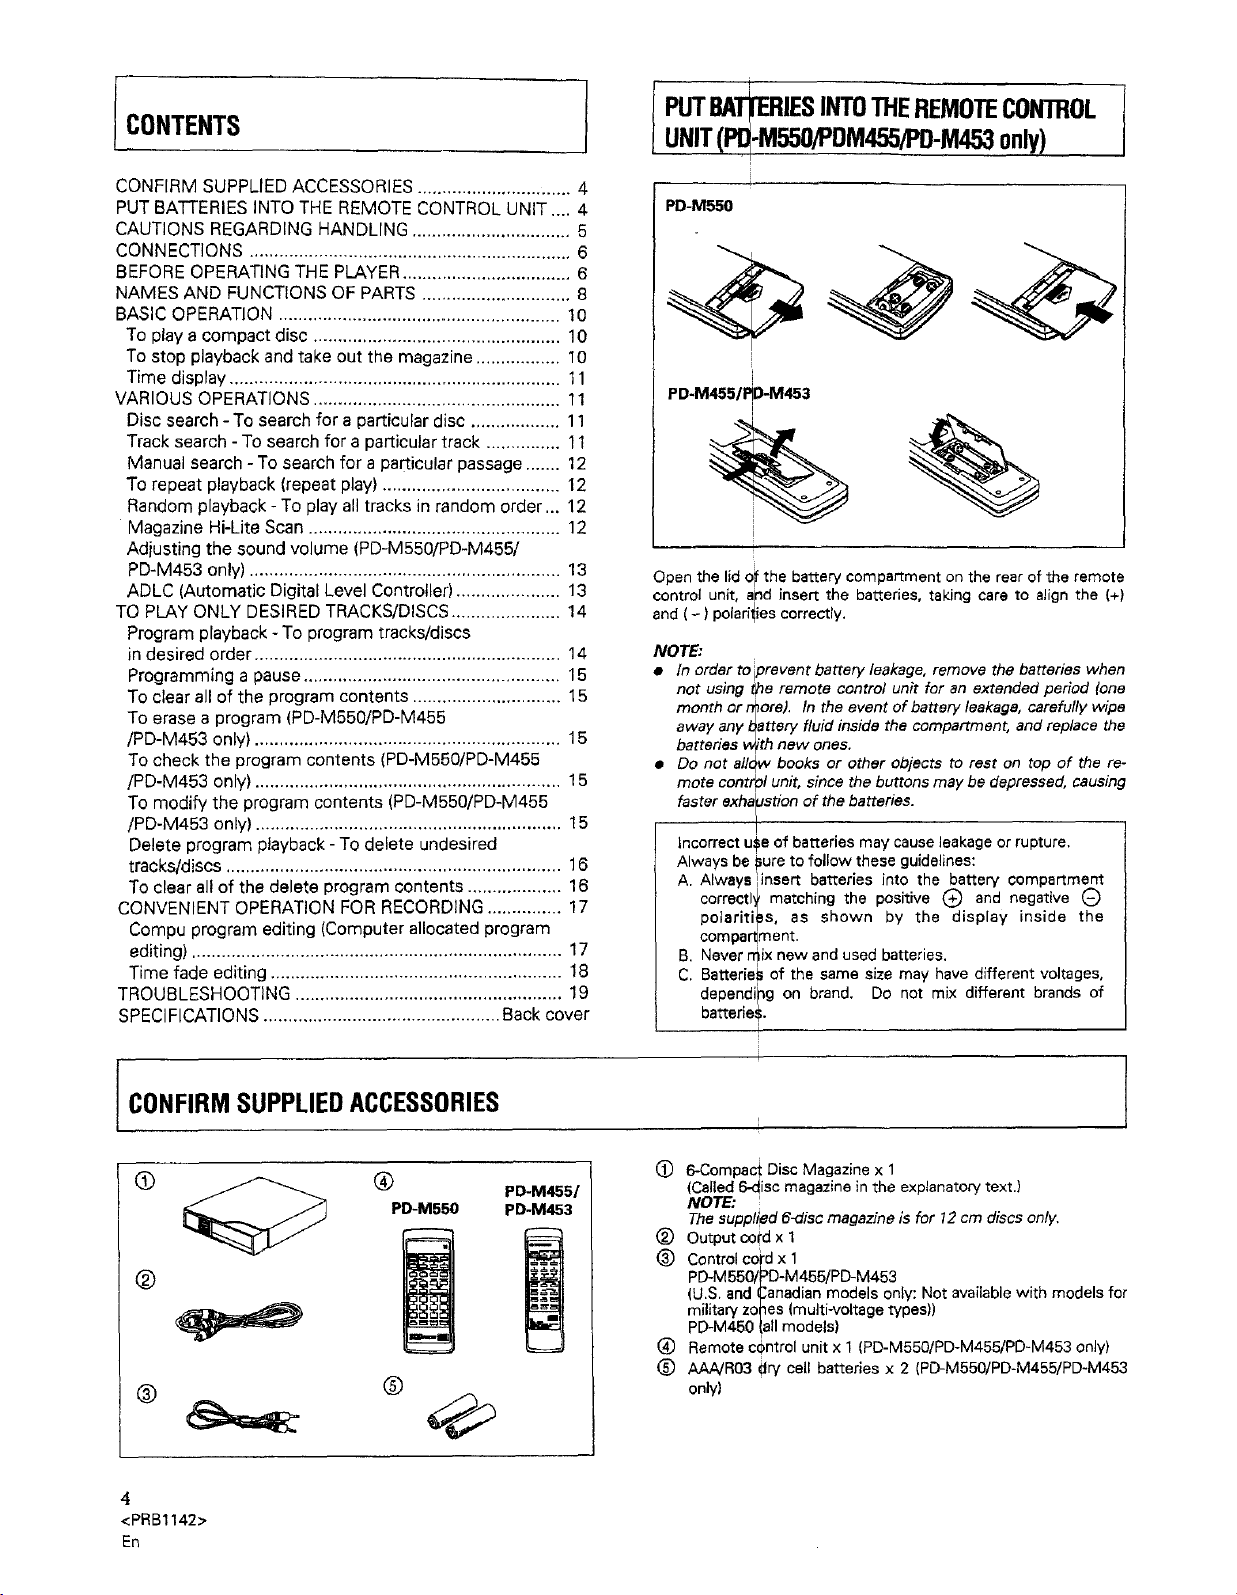
PUTBATTERIESINTOTHEREMOTECONTROL
I
UNIT(Pl -M550/PDM455iPD-M453only)
CONFIRM SUPPLIED ACCESSORIES ............................... 4
PUT BATTERIES INTO THE REMOTE CONTROL UNIT .... 4
CAUTIONS REGARDING HANDLING ................................ 5
CONNECTIONS ................................................................. 6
BEFORE OPERATING THE PLAYER .................................. 6
NAMES AND FUNCTIONS OF PARTS ............................... 8
BASIC OPERATION .......................................................... 10
To play a compact disc ................................................... 10
To stop playback and take out the magazine ................. 10
Time display ................................................................... 11
VARIOUS OPERATIONS .................................................. 11
Disc search - To search for a particular disc .................. 11
Track search -To search for a particular track ............... 11
Manual search - To search for a particular passage ....... 12
To repeat playback (repeat play) .................................... 12
Random playback - To play all tracks in random order ... 12
Magazine Hi-Lite Scan ................................................... 12
Adjusting the sound volume (PD-M550/PD-M455/
PD-M453 only) ............................................................... 13
ADLC (Automatic Digital Level Controller) ..................... 13
TO PLAY ONLY DESIRED TRACKS/DISCS ...................... 14
Program playback - To program tracks/discs
in desired order .............................................................. 14
Programming a pause .................................................... 15
To clear all of the program contents .............................. 15
To erase a program (PD-M550/PD-M455
/PD-M453 only) .............................................................. 15
To check the program contents (PD-M550/PD-M455
/PD-M453 only) .............................................................. 15
To modify the program contents (PD-M550/PD-M455
/PD-M453 only) .............................................................. 15
Delete program playback - To delete undesired
tracks/discs .................................................................... 16
To clear all of the delete program contents ................... 16
CONVENIENT OPERATION FOR RECORDING ............... 17
Compu program editing (Computer allocated program
editing) ........................................................................... 17
Time fade editing ........................................................... 18
TROUBLESHOOTING ....................................................... 19
SPECIFICATIONS ................................................ Back cover
PD-M550
i
I
PD-M455/_D-M453
%
Open the lid oi the battery compartmentonthe rear of the remote
control unit, aindinsertthe batteries, taking care to align the (+)
and( - ) polaritiescorrectly.
NOTE:
• In order to iprevent battery leakage, remove the batteries when
not using t_e remote control unit for an extended period (one
month or r_ore). In the event of battery leakage, carefully wipe
away any _attery fluid inside the compartment, and replace the
batteries _'th new ones.
• Do not allow books or other objects to rest on top of the re-
mote control unit, since the buttons may be depressed, causing
faster exhaustion of the batteries.
Incorrect use of batteries may cause leakage or rupture.
Always be f_ure to follow these guidelines:
A. Always iinsert batteries into the battery compartment
correetl'_ matching the positive (_) and negative C)
polarities, as shown by the display inside the
compa_ment.
B. Never mix new and used batteries.
C. Batteries of the same size may have different voltages,
dependipg on brand. Do not mix different brands of
batterie S.
%
CONFIRM SUPPLIEDACCESSORIES
Q
®
PD-M550
@
®
4
<PRB1142>
En
®
PD-M455/
PD-M453
0
6-Compec_ Disc Magazine x 1
(Called 6-disc magazine in the explanatory text.)
NOTE: '
The supplied 6-disc magazine is for 12 cm discs only.
_) Output cord x 1
(_) Control cord x 1
PD-M550/pD-M455/PD-M453
(U.S. and Canadian models only: Not available with models for
military zo#es (multi-voltage types))
PD-M450 {all models)
(_) Remote cCntrol unit x 1 (PD-M550/PD-M455/PD-M453 only)
(_) AAA/R03 dry cell batteries x 2 (PD-M550/PD-M455/PD-M453
only)
Page 5
I CAUTIONSREGARDINGHANDLING
J
I Location
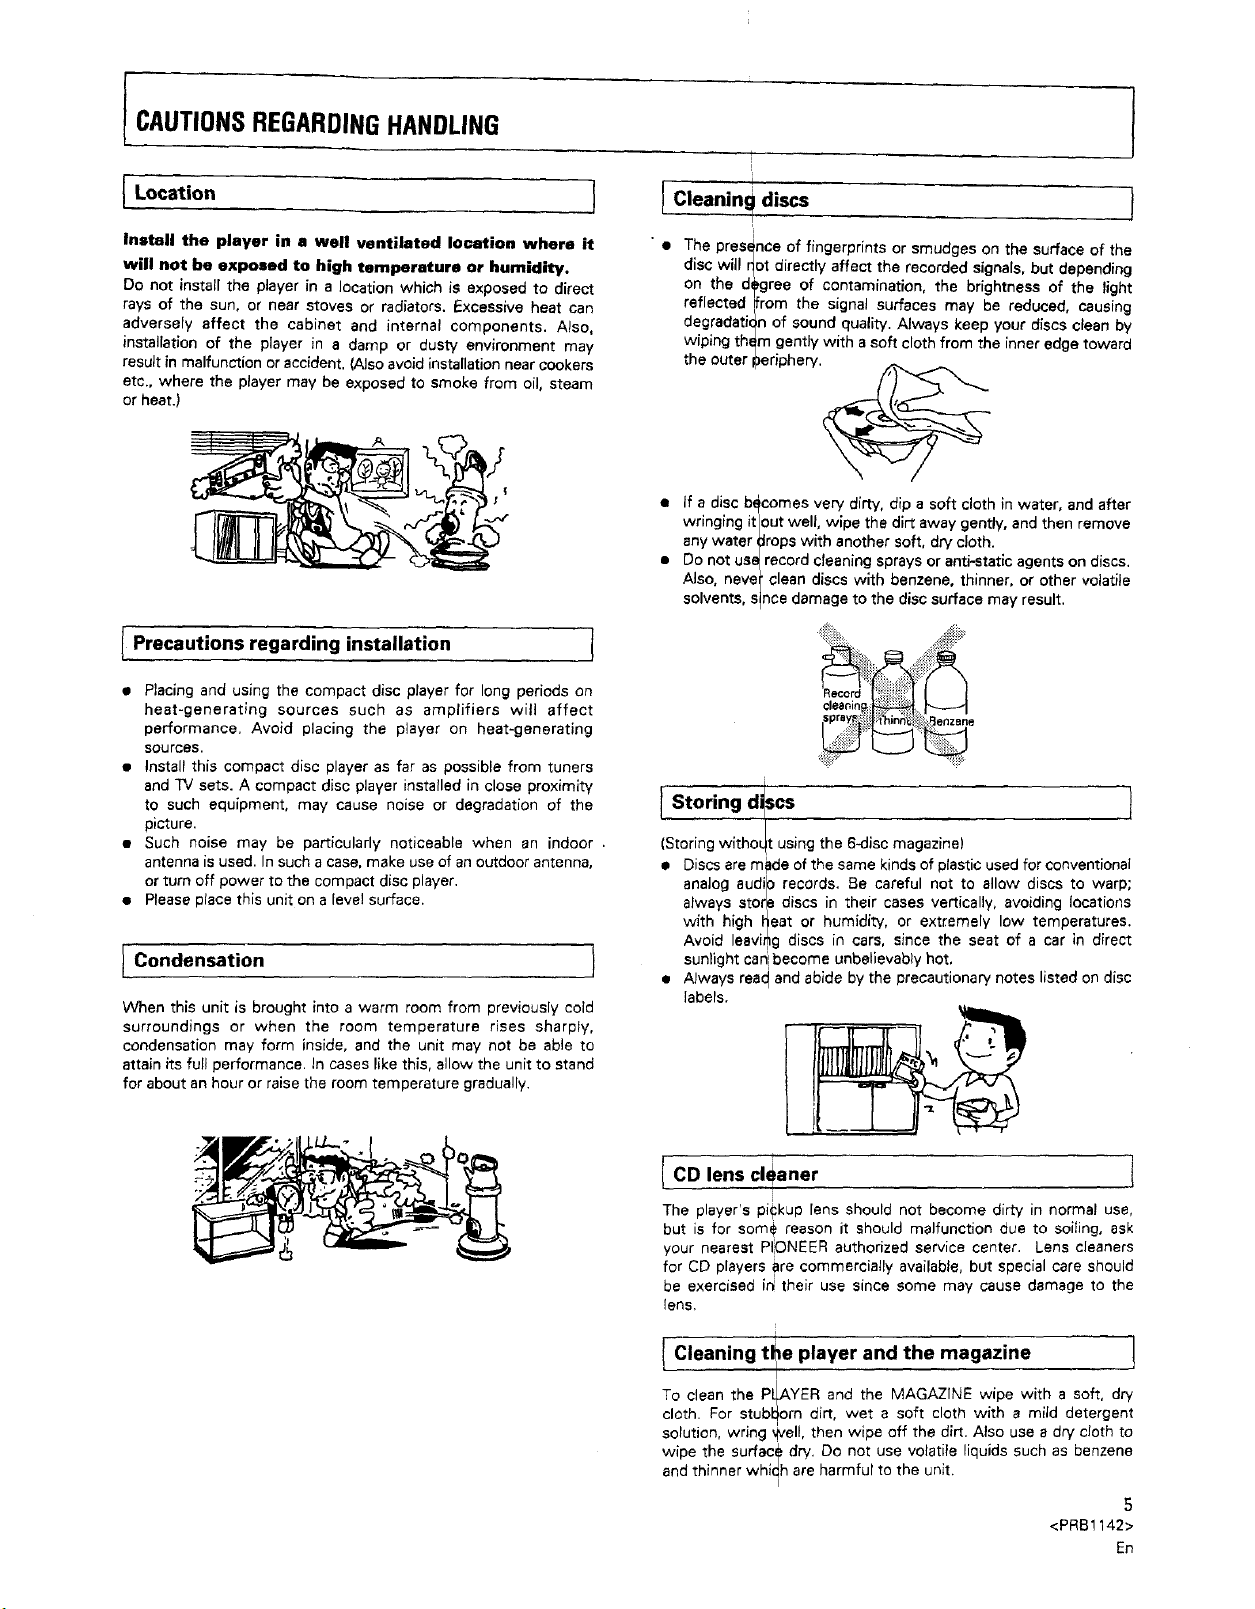
Install the player in a well ventilated location where it
will not be exposed to high temperature or humidity.
Do not install the player in a location which is exposed to direct
rays of the sun, or near stoves or radiators. Excessive heat can
adversely affect the cabinet end internal components. Also.
installation of the player in a damp or dusty environment may
result in malfunction or accident• (Alsoavoid installation near cookers
etc.. where the player may be exposed to smoke from oil, steam
or heat.)
.,,Precautions regarding installation
s Placing and using the compact disc player for long periods on
heat-generating sources such as amplifiers will affect
performance. Avoid placing the player on heat-generating
sources.
• Install this compact disc player as far as possible from tuners
and TV sets. A compact disc player installed in close proximity
to such equipment, may cause noise or degradation of the
picture.
• Such noise may be particularly noticeable when an indoor
antenna is used. In such a case, make use of an outdoor antenna,
or turn off power to the compact disc player.
• Please place this unit on a level surface•
l Condensation
When this unit is brought into a warm room from previously cold
surroundings or when the room temperature rises sharply,
condensation may form inside, and the unit may not be able to
attain its full performance. In cases like this, allow the unit to stand
for about an hour or raise the room temperature gradually.
Cleanin_! discs J
• The pres_'nce of fingerprints or smudges on the surface of the
disc will r at directly affect the recorded signals, but depending
on the d _gree of contamination, the brightness of the light
reflected from the signal surfaces may be reduced, causing
degradat/_ ,n of sound quality. Always keep your discs clean by
wiping th ,m gently with a soft cloth from the inner edge toward
the outer )eriphery.
• if a disc bffcomes very dirty, dip a soft cloth in water, end after
wringing itlout well, wipe the dirt away gently, and then remove
any water _lrops with another soft, dry cloth,
m Do not use_record cleaning sprays or anti-statlc agents on discs•
Also, neve I clean discs with benzene, thinner, or other volatile
solvents, slnce damage to the disc surface may result.
!
• (Storing without using the 6-disc magazine)
• Discaarem_deofthesamekindsofplasticusedforconventionai
analog audilo records. 8e careful not to allow discs to warp;
always starve discs in their cases vertically, avoiding locations
with high Neat or humidly, or extremely low temperatures•
Avoid leavir_g discs in cars, since the seat of a car in direct
J sunlight can'Ibecome unbelievably hot,
• Always roed and abide by the precautionary notes listed on disc
labels.
/_ ";'1 L/-,,-"
7. '
( CO lens cleaner l
The player's pi?kup [ens should not become dirty in normal use,
but is for some reason it should malfunction due to soiling, ask
your nearest PIONEER authorized service center, Lens cleaners
for CD players are commercially available, but special care should
be exercised in their use since some may cause damage to the
lens,
i
( Cleaning tl_e player and the magazine !
To clean the PLAYER and the MAGAZINE wipe with a soft, dry
cloth. For stubl_om dirt, wet a soft cloth with a mild detergent
solution, wnng well, then wipe off the dirt. Also use a dry cloth to
wipe "_hesurfac_ dry, Do not use volatile liquids such as benzene
and thinner which are harmful to the unit.
/
I
<PRB! 142>
En
5
Page 6
CONNECTIONS
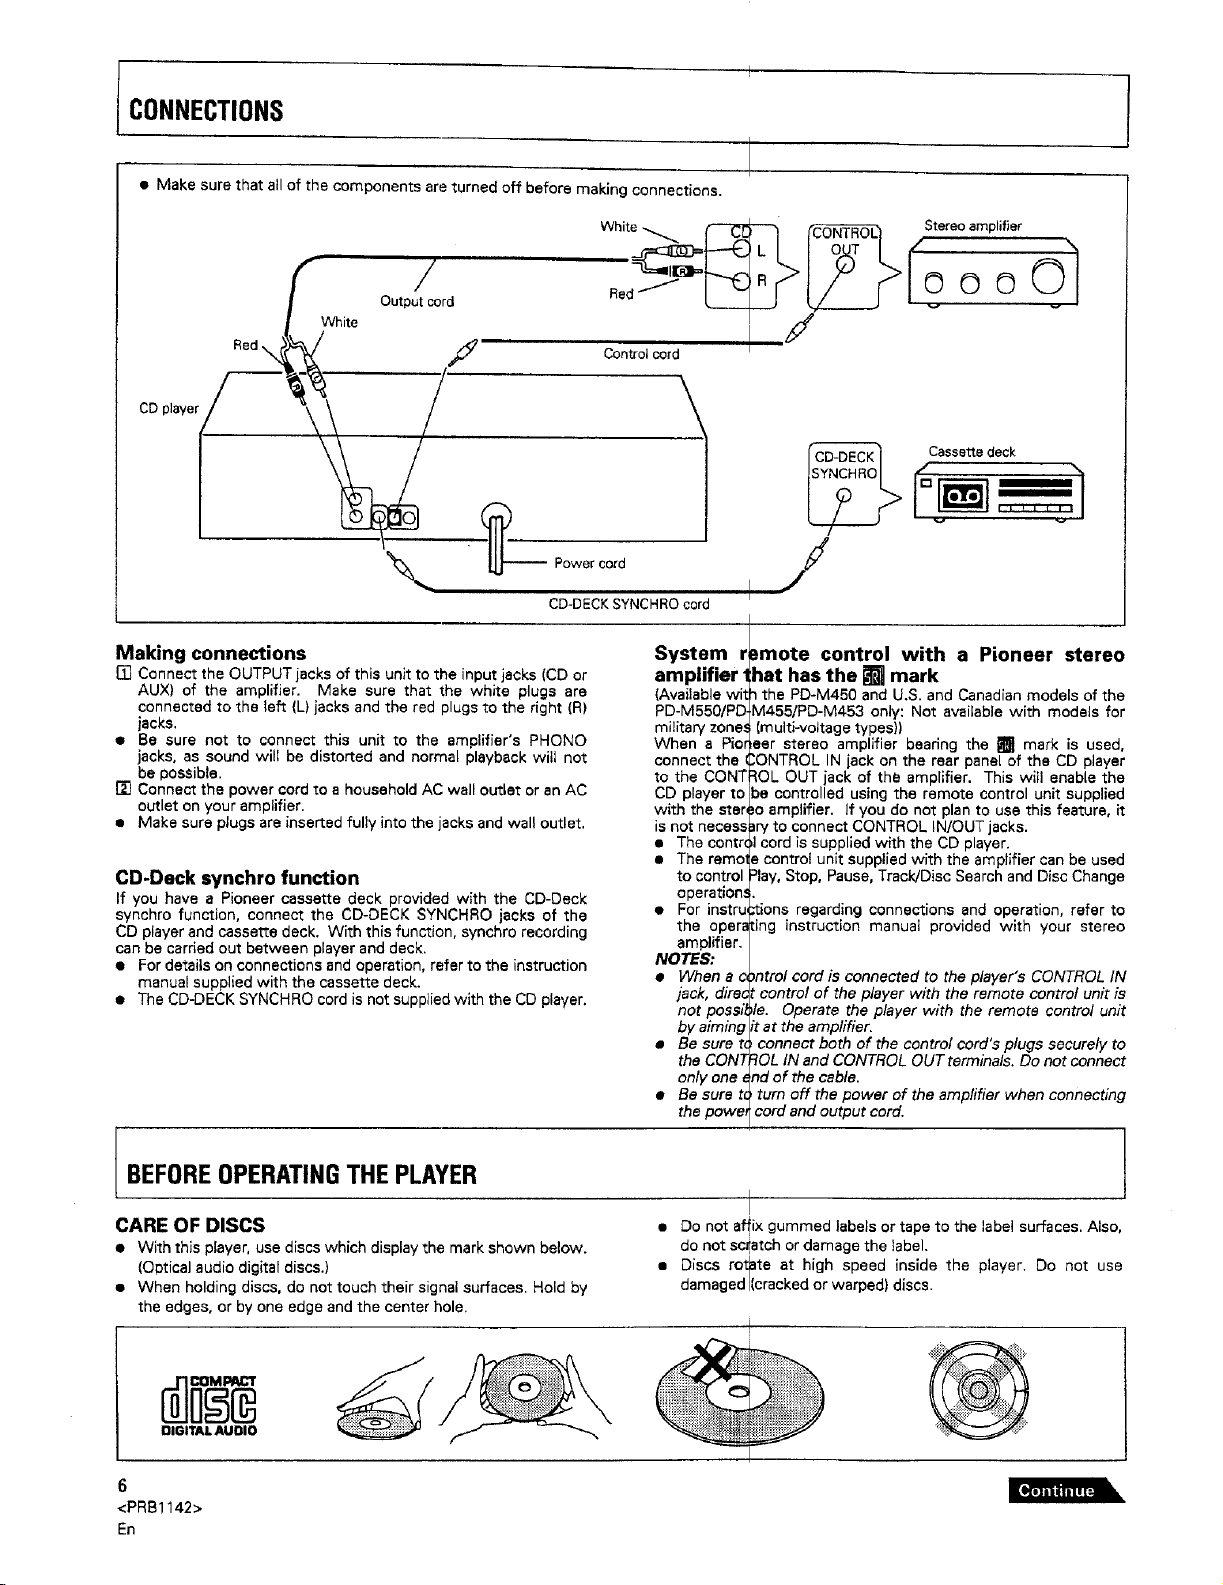
• Make sure that all of the components are turned off before making connections.
F Output c///ord
Red_ White f
CD ,ayo Poworoo,d/
CD-DECK SYNCHRO cord
Making connections
[] Connect the OUTPUT jacks of this unit to the input jacks (CD or
AUX) of the amplifier, Make sure that the white plugs are
connected to the left (L) jacks and the red plugs to the right (R)
jacks.
• Be sure not to connect this unit to the amplifier's PHONO
jacks, as sound will be distorted and normal playback will not
be possible.
[] Connect the power cord to a household AC wall outlet or an AC
outlet on your amplifier.
• Make sure plugs are inserted fully into the jacks and wall outlet.
CD-Dack synchro function
If you have a Pioneer cassette deck provided with the CD-Deck
synchro function, connect the CD-DECK SYNCHRO jacks of the
CD player and cassette deck, With this function, synchro recording
can be carded out between player and deck.
• For details on connections and operation, refer to the instruction
manual supplied with the cassette deck.
• The CD-DECK SYNCHRO cord is not supplied with the CD player.
System r
amplifier 1
(Available wit
PD-M550/PD
military zone,'
When • Pior
connect the
to the CONT
CD player to
with the ster,
is not necess
• The contr(
• The ramp1
to control
operation.'
• For instru
the opera
amplifier.
NOTES:
• When a o
jack, dire€
not possfl
by aiming
• Be sure t(
the CONT
only one
• Be sure t_
the poweJ
Cassettedeck
/
Dmote control with a Pioneer stereo
hat has the [] mark
the PD-M450 and U.S. and Canadian models of the
M455/PD-M453 only: Not available with models for
(multi-voltage types))
ear stereo amplifier bearing the [] mark is used,
;ONTROL IN jack on the rear panel of the CD player
_OL OUT jack of the amplifier. This witl enable the
be controlled using the remote control unit supplied
Jo amplifier, If you do not plan to use this feature, it
Jry to connect CONTROL IN/OUT jacks.
,Icord is supplied with the CD player.
• control unit supplied with the amplifier can be used
Slay,Stop, Pause, Track!Disc Search and Disc Change
;tions regarding connections and operation, refer to
ling instruction manual provided with your stereo
_ntrol cord is connected to the player's CONTROL IN
! control of the player with the remote control unit is
,le. Operate the player with the remote control unit
¢tat the amplifier.
connect both of the control cord's plugs securely to
_OL tN and CONTROL OUT terminals. Do not connect
nd of the cable.
turn off the power of the ampfifier when connecting
cord and output cord,
BEFOREOPERATINGTHEPLAYER
CARE OF DISCS
• With this player, use discs which display the mark shown below.
(Optical audio digital discs.)
• When holding discs, do not touch their signal surfaces. Hold by
the edges, or by one edge and the center hole,
DIGITAL AUDIO
6
<PRB1142>
En
• Do not affix gummed labels or tape to the label surfaces. Also,
do not scratch or damage the label
• Discs rotate at high speed inside the player. Do not use
damaged [cracked or warped) discs.
Page 7

BEFOREOPERATINGTHEPLAYER
NOTE:
1
• In order I
Magazine
sure to re
• 8,cm CD,
It is pose,
standard
It is recor
M108, JD
• Never Ioaq
magazine.
• Do not in.,
magazine,,
play an 8-cm CD you will need a special Multi-Play
(JD-MI08, JD-M308) which is sold separately. Be
ad thoroughly the Operating Instructions before using
daptors
tie that even an adaptor which meets recommended
D specifications wil! not be usable with tt_ CD player.
_mended that the special Multi-Play Magazine 1JD-
_4308) be used.
t an 8-cm CD or its adaptor into a standard 12-cm
This may seriously damage the CD player,
err only an 8-cm disc and adaptor into the supplied
2
B
"CB B
A f--A-H
For U.S. customers only
You may purchase additional Pioneer six-compact-disc magazines
from your dealer. If however, they are not avairable at your
dealer in the United S_ates, you may order from:
PIONEER ELECTRONICS SERVICE, INC.
2265 East 220th Street
P.O. Box 1760, Long Beach
CA. 90801-1760
Phone #(800)421-1404
INSERT DI
Insert any dis_s which you may have into the supplied magazine.
Up to six disc_ may be inserted, The numbering of the discs begins
with 1 at the topmost tray, and then increases in order from 2 to 6
for the lower tl'aya. The magazine has a window through which the
pulled-out dis_ tray can be checked. Even during playback, the
number of the disc being played back can be checked through this
window.
$CS INTO THE 6-DISC MAGAZINE
1 Pull ou_only one disctray.
2 Positioq discs with the label side downward.
3 Put theldisc tray back as it was originally.
4 Insert other discs by repeating steps I to 3.
CAUTION:
• Please mak
a disc tray I
• Ifdiscs are
them to be
label side d
• Objects ot
contents, et
• Do not touc
hands or fin
AFFIXING
• AJways art
Correct op,
attached in
• The followiJ
A: For title
B: For dis(
C: For ¢laE
• Do not atta,
Additional
available as
M108, JD-IV
Please use t
magazines f
* JD-M100/JD.
JD-M 108/JD,
NOTE:
Do not load B-c_n discs into the magazine for 12-cm discs.
sure to only pull out one disc tray at a time. (when
as been pulled out, do not pull out other disc trays.)
inserted label side upward, it will not be possible for
)layed. Please make sure to insert them with the
)wnward.
er than discs (song cards, explanations of disc
;.), must never be inserted into the disc trays.
the playing surface of discs (iridescent side) with
era.
ABELS TO THE MAGAZINE
ch the labeJs provided in the designated locations,
_ration may not be possible if labels or tape are
3that locations,
Dgare convenient ways of using labels:
3
names
sification
;h labels on top of other labels,
lagazines identical to the one supplied are
options (*JD-M100, JD-M200, JD-M300, JD-
308).
1amto make your own disc library, with separate
>reach artist or genre.
M2OO/JD-M300 ......... Magazine for 12-cm discs
M308 ........................... Magazine for 8-cm discs
I
<PR81142>
7
En
Page 8

NAMES AND FUNCTIONSOF PARTS l
PD-M550
PD-M455
I!
PD-M453/PD-M450
FRONT PANEL
O POWER STANDBY/ON switch and STANDBY @ REPEl
indicator (_ RAND
(_ AUTO FADER button @ HI-LIT
TIME button _ Stop !
O Remote sensor (PD-M550/PD-M455/PD-M453 @ Pause
only) _ Manu;
Receives the signal from the remote control unit.
• The PD-M450 is not equipped with the remote sensor. @ Play b
Disc number buttons (DISC 1 - DISC 6) _) Track
_) PGM (program) button _ ADLC
(_ TRACK NUMBER/Digit buttons (1-10, +10,_20) _ DELE7
(PD-M550 only) (_ HeadF
TIME FADE EDIT button only)
_) EJECT button (_A)
(_ Magazine insertion slot
8
<PRB1142>
En
COMF U PGM EDIT button
_) Head ,hones volume (PHONES LEVEL) (PD-
M550 PD-M455 only)
,'I"button
C)MPLAY button
-."SCAN button
,utton (ll)
button (11)
|1search buttons (<1</1_)
,_tton (1_-)
;earch buttons (I<I_I/I_IH)
Automatic Digital Level Controller) button
'E button
hones jack (PHONES) (PD-M550/PD-M455
Page 9

PD-M550
PD-M455/PD-M453
Ill
O
®
(#
REMOTE CONTROL UNIT (PD-M550/PD-M455/PD-
M453 only)
Remote control buttons with the same names or marks as buttons
on the front panel of the player control the same operations as the
corresponding front panel buttons.
(_ POWER button
ADLC (Automatic Digital Level Controller)
button
MANUAL search buttons ( _ / IH_ )
(_ TRACK search buttons [ _ / _ )
PAUSE button ( li )
(_ STOP button ( II )
(_ Track number/Digit buttons (1-10, +10, _ 20)
(PD-M550 only)
PGM (program) button
(_ CHECK button
DISC NUMBER buttons ( 1 - 6 )
OUTPUT LEVEL buttons ( +/- )
RANDOM PLAY button
(_ HI-LITE SCAN button
(_ PLAY button ( I_ )
(_ DELETE button
(_ CLEAR button
FADER button (PD-M455/PD-M453 only)
@
@
@
®
@
REMOTE C
M455/PD.It
When operatin
signal transmitl
on the front par
within a rangeo
within angles c
NOTE:
If the remote c_
strong light su{
possible.
Notes for PD-J
Operate the
accompanies
DI
@
=:_
_j-
@
®
@
DNTROL OPERATIONS (PD-M550/PD-
1453only)
the remote control unit, point the unit's infrared
r at the remote control receiver (REMOTE SENSOR)
el of the player. The remote control unit can be used
=about 7meters (23feet) from the remote sensor, and
Fup to about 30 degrees.
,ntrol sensor window isin aposition where itreceives
h as sunlight or fluorescent light, control may not be
VI460:
=D-M450 using the remote control unit which
e amplifier. (See page 6.)
<PR81142>
9
En
Page 10

BASICOPERATION !
1 2 3
Dil - IIIll ,.I.t
ml i I! i
*: PD-M455/PD-M453 only
**: PD-M455 only **
1
2
3
POWER
STANDBY/ON
@@@@@@
PLAY
PD-M550
PD-M455/
(PD.M4531
PD-M450)
To play _ compact disc
1 Turn on
2 Insert
sound
• Insert
• When
3 Press I_
To pause pla
Pressll. The
Pressing II a_
pause mode_
To stop playl
Press •. Th_
the disc at w_
player retum_
and enters st(
NOTE:
When the po_
player memol
turnedoff. Th
button starts
To stop
Press EJECT,
turn off the pc
Even when t_
by pressing E,
NOTE:
Dome mode
dome mode,
inserting the i
press any but
the power to the player.
magazine, pushing it in until a click
heard.
_ediscs to be played into the magazine beforehand.
(Refer 1
o "BEFORE OPERATING THE PLAYER" on page 6.)
the power is turned off, inserting a magazine
autom_
tically turns on the power (Automatic Power On
functio_
i).
to start playback.
tback temporarily:
I indicator lights and playback is paused at that point.
ain or I_ resumes playback from the position where
vasentered.
_ack:
player returns to the beginning of the first track on
ich playback was stopped. If • is pressed twice, the
to the beginning of the first track on the first disc
,p mode.
ver is turned off while a magazine is in the player, the
rzes which disc was played just before the power was
is, when the power is next turned on, pressing the play
_layback from the first track on the memorized disc.
layback and take out the magazine j
remove the magazine, and then press POWER to
wer,
e power is turned off, the magazine will be ejected
IECT. (Power Down Eject)
llows you to see variation of the display. To enter the
_ress POWER and then _ within 1second without
_agazine. To exit demo mode, insert the magazine or
"on.
D '
U PAUSE:
PAUSE
n
• STOP:
-- a
Operations indicated by the [ _ ] mark are performed with the
remote control unit. (PD-M550/PD-M455/PD-M453 only)
l0
<PRB1142>
En
STOP
Cautions r
• When insc
direction o
• After use,
subjected
• Do not tak
• Be careful
not apply.,
• Applicatior
liquids to
magazines
agarding handling of magazines
rting a magazine into the player, make sure that the
insertion is correct.
store in the case provided. Do not place in locations
:ohigh temperatures or exposed to direct sunlight.
magazines apart.
not to drop, or hit magazines against things. Also do
trong force to trays which have been withdrawn.
of benzene, thinner, insecticide or other volatile
a magazine may damage the surface, so keep
'away from such substances,
I[_t11111"a_k,
Page 11

Timer playback
By using a commercially available audio timer, it is possible to
initiate playback at any time automatically,
1. Insert a magazine into the magazine slot.
2. Set the time at which you wish playback to begin. The timer
will supp{y power to both the amplifier and the p{ayer at the
preset time, turning all the components on and initiating the
playback mode, Playback starts from the first track on the first
disc.
Caution:
• Do not unplug the power cord ordo not turn off the power with an
audio timer during playback, asthis could result in damage to the
disc.
• If a power failure occurs while the power is turned off (standby
mode), the power is automatically turned on with timer playback
function when the power issupplied. THEREFORE, DISCONNECT
THE AC POWER CORD WHEN THE PLAYER IS NOT USED FOR
A LONG PERIOD OF TIME.
BASIC OPERATION
} Time displ, y !
During playback, )ressing the TIME button changes the time display
in the following ,'
track being playe
track being playe,
the playing point
time of the disc).
• With track N,
displayed.
• During progra
ptayback or de
be displayed.
• During Progral
displayed witt"
equence: (_) Time (elapsed playback time of the
J) "_ (_) Remain (remair_ing p_aybacktime of the
I) --* @ AL Remain (remaining playback time from
lo the end of the disc) --* @ Total (total playback
,. 24 or more, the Remain time ® cannot be
m playback, delete program playback, random
lete random playback, AL Rema(n time _) cannot
n playback, the number of program steps can be
the Total setting @.
® ®
I --
t T_ME
JVARIOUSOPERATIONS
I Disc search - To search for a particular disc
During playback or stop mode PD-M550
toJsc1Io=sc__DISC3 [alSO_t OISC_tD_SCS
PD-M455/PD*M453 ]
When DISC NUMBER (DISC 1 - DISC 61 is pressed, the player
searches for the specified disc and playback start& from the
beginning of that disc.
NOTES:
• If "dISC" appears on the display, you have pressed the disc
number of a tray which does not contain a disc.
w During program playback, Disc Search cannot be carried out.
1 2 3
DISC NUMBER
4 5 6
DISC NUMBEFt t
I Track search - To search for a particular track }
During playback or stop mode(PD-M550 only)
{ 1 I 2 I 3 I +10 I]
[I 7 I a I s I lolJ
ES ESI
/2
(_ _ O (PD- _ (PD-M455i
-- I U q
PD-M450) (_
I-- so
To search for tra¢l
buttons (_-
__OJ. To search f
Example To
• When entering
• When _ O
entered should
NOTE:
During program [
with the TRACK A
During playba_
PD-M550 ]
When _ is pre,'
the next track. VVI
to successive trac
When _ is pros
the track being pie
returns to earlier tl
• For PD-M550/F
remote control
NOTES:
• During normal,
disc only.
= During progran
select the pro_
No. from 1 to 10, simply press the corresponding
1L!_0J).To search for track N._or above, use
:)rtrack No. 20 or above u_.
enter track No. 17: [_, LTJ
To,
rater track No. 23: _ [_][[_:_
rater track No. 30:
To 4
20 or above, [_]functions as 0,
• _ is pressed, the digit button to be next
be pressed within 5 secor_ds.
layback, the track search can not be operated
UMBER button.
k or pause mode
I '_ '11 PD-M455 _ _< I _ I1
/
_edonce, playback advances to the beginning of
_enthis button is kept pressed, playback advances
s on the disc.
sod once, playback returns to the beginning of
fed. When this button is kept pressed, p{ayback
acks on the disc.
3-M455/PD-M453, the _ or _ button on the
unit can be used.
#ayback, Track Search can be carried out on one
,playback, the _ orl_,l button can be used to
"ammed track.
(PD-M45&/
PD-M450) ._
TRACK SEARCH
[t_agttt_ L
11
<PRB1142>
En
Page 12

VARIOUSOPERATIONS
Manual search - To search for a particular
passage
During playbackor pausemode
PD-M550
I "_ I ='_""""'l
PD-M455 (PD-M453/PD-M450)
MANUAL SEARCH
W
MANUAL
/?
While _ is kept pressed, playback rapidly advances toward the
end of the disc. When playback reaches the end of the disc, the
player enters pause mode and "End" is displayed. While _ is kept
pressed, playback rapidly reverses toward the beginning of the
disc.
When the desired passage is reached, release _ of" _1. The
player enters original mode (playback or pause) where _ or _1
is released.
NOTES:
• During normal playback, Manual Search can be carried out on
one disc only.
• During program playback, Manual Search can be carried out in
one program step only.
To repeat playback (repeat play): J
1
........Rando
_t playback - To play all tracks in
J rander _ order
RANDOM
PLAY
v_
/9
Press RAN_OM PLAY, The RANDOM indicator lights and all tracks
on all discs[are played in a random order.
To play tra#ks other than the deleted tracks in a random order.
press RAk_DOM PLAY after carrying out the Delete Program
procedure. See "Delete Program Playback" on page 16.
I Mag azi_le Hi'L"e scan ]
When HI-LIrE SCAN is pressed once during stop mode, playback
starts from _point I minute after the beginning of the first track, and
the first trec_ of each disc is played for about 10 seconds. The DISC
SCAN indic,_tor blinks during Disc Scan mode. After the first tracks
of all discs are scanned, the player enters stop mode.
When HI-LI"
starts from a
track is playe
Track Scan r
enters stop
i
i
i
J During stop mode
I
SCAN
HI-LITE I
W
i
/
- SCAN is pressed twice during stop mode, playback
_olnt 1 minute after the beginning of the track, and each
Ifor about 10 seconds. The SCAN indicator blinks during
_ode. After all tracks of all discs are scanned, the player
node.
To repeatedly play the displayed track, press REPEAT once. The
REPEAT [] indicator lights. The REPEAT button can be pressed in
any playback mode.
To repeatedly play all tracks on all of the discs in normal playback
mode or in the specified playback mode (Program playback, Delete
program playback or Random playback), press REPEAT twice. The
REPEAT indicator lights.
• To exit repeat mode, press REPEAT so that the REPEAT [] or
REPEAT indicator goes off.
12
<PRB1142>
En
To exit Ma_
Press e, i_, I
+10, >20)
current poin
only) is pre
beginning,
NOTES: ,
• Hi-Lira S, :ancan be carried out from the desired elapsed time of
the track
want to
minute a
out from
• Each tim
Disc Sca
• Program.
playback
• During Tr,
• WhenRE
• Whenpla
than men
beginnin_
When pl_
is played
azine Hi-Ute Scan mode
)isc number(DISC1 - DISC6) or TRACK NUMBER (1-10,
When I_ is pressed, normal playback starts from the
• When DISC1-DISC 6 or TRACK NUMBER (PD-M550
;sed, the selected disc or track is played from the
During playback, press HI-LITE SCAN at the point you
;tart Hi-Lite Scan playback. The player memorizes the
_dsecond of the point and Track Scan playback is carried
the memorized minute and second on each track.
HI-LITE SCAN ispressed, the mode switches be tween
and Track Scan.
ningof only desired tracks ispossible during TrackScan
See "Directprogram" on page 14.
ick Scan playback, you can skip to the desired track with
or_
_L
=EATis pressed, Hi-Lite Scan playback will be tepee ted.
fback time of a track is less than one minute or is shorter
orized time, Hi,L/te Scan playback is carried out from the
of the track for about 10 seconds.
_'back time of a track is less than 10 seconds, the track
rrorn the beginning to the end.
Page 13

I Adjusting the sound volume (PD-M550/PD-
M455/PD-M453 only)
I _ O_PUT LEVEL
Press OUTPUT LEVEL "-" or "+" to adjust the output level. The
output level can be adjusted between 0 dB end -25 dB in steps of
1 dB.
• The output level at the OUTPUT jacks and PHONES jack will be
adjusted simultaneously.
/2
ADLC (Automatic Digital Level Controller) 1
When the difference of recording level between discs is noticeable,
the volume level should be adjusted for each disc, especially during
program playback or random playback whose tracks are selected
between 2 discs or more. Insuchcases, pressing ADLC automatically
sets the output level to the proper level. When ADLC is turned on,
the ADLC indicator lights.
• ToturnoffADLC, pressAOLCsothattheADLCindicatorgoesoff.
• With some selections, sound becomes unnatural. In such cases,
turn off ADLC.
VARIOUS OPERATIONS
AC power ¢o_d connection and functions
Some function,s cannot be carried out depending on the connection
of AC power c_rd.
Function
Timer playbacl
Programmere _ry
Delete program
memory
Outputlevelm Jmory
Fordetails, refe I to the description of each function of this Operating
Instructions.
I
L
i
l
WhentheACpower
cord isconnected to
the unswitched
outlet of anamplifier
or wall outlet.
No
Yes
Yes
Yes
When the AC power
cord is connected to
the switched outlet of
an amplifier or audio
timer,
Yes
No
No
No
PD-M550/PD-M455 PD-M450/PD-M453
ADLC
C22]
NOTES (PD-M550/PD-M455/PD-M453 only}:
• The setting of the OUTPUT LEVEL buttons am canceled when
ADLC is turned on.
• When ADLC is turned on, the OUTPUT LEVEL buttons cannot be
opera ted.
<PRB1142>
]3
En
Page 14

TOPLAYONLYDESIREDTRACKS/DISCS
PD-M550
PD-M455(PD-M453/ 2 1,3 3
PD-M450) *
R_
o
*: PD-M455/PD-M453 only
**: PD-M455 only
1 PD-M550
PD-M455(PD-M453/PD-M450)
PGM
1,3 3
53
I
I
r Pr°graln playback" T° pr°gram tracksldiscsfindes !! ed order
1 During stop mode, press the Program button.
2 Press ;he Disc number button which contains the
3 Press _ or _ button so that the desired track No.
4
5
i
The PR( IGRAM indicator lights.
track_ be programmed.
To prog am entire discs, enter the desired disc numbers with
the Disc number buttons and go to step 4.
• Whe_ the Disc number button is pressed, "AL" (all tracks}
appears on the display.
appearF on the display and press the Program button.
For PD-M550 only:
Instead of the _ or _ button, the TRACK NUMBER/Digit
button aan be used.
Enter the desired track No. with the TRACK NUMBER/Digit
button. IInthis case, it is not necessary to press PGM.
Repea t steps 2 and 3 for other tracks to be
programmed.
Press I_.
The t_a_ks are played in the programmed order. When all
programi'ned tracks have been played the payer enters stop
mode.
I 2 3
DISC1 IDISC2 DISC3 DSC4 D_SC5 DISC6_
PD-M550
F-_ E--I F-7
DISC NUMBER
8
EEl3r-Z EEl
4 5 6
-, {c q
TRACK NUMBER
or
©@P-l@
@@41@
,"F
PD-M455(PD-M453!PD-M450)
TRACK SEARCH
• For PD-M550 or PD-M455,the PGM andI<_/l_J-I buttons on
the remote control unit can also be used.
To stopP
•ogram playback:
Press II.
• Program
• To go;to
I_1.
• To ente_ track No. 11 or above with the TRACK NUMBERIDigit
buttons, lsee "Track Search" on page 11.
• Each tinge a track is programmed, the display will show the
progremrned number.
#
• I, the m)gazine is in the player, the program contents will not
be erased even if the power is turned off.
Programm!ng while listening to playback (PD-M550 only)
During no_mal playback or program playback, you can program the
desired trac4ks. Enter the disc No, and track No. with DISC NUMBER
and TRACK_ NUMBER buttons during program mode. (While the
PROGRA_indicator lights,)
NOTE:
During Delete programming or Time fade editing the Program button
cannot be dperated.
Direct Program
During normal playback or Magazine Hi-Lite Scan playback, the track
being playe_l can be programmed.
1. Press _h_eProgram button to enter the program mode.
2. Tosearqh for a desired track during normal playback, it is possible
to skip t(psucceeding tracks by pressing _ or _ button. Also,
Magazin!e Hi-Lite Scan function can be used to move from track to
track thrpugh the disc.
3. If you Wish to program the track currently playing, press the
Progra_ button while the track is playing.
• Direct plogramming is not possible during program playback,
containing up to 32 steps can be created.
the previous or next step in a program, press 14t1<1or
I
i
)4
<PRB1142>
En
PLAY
[,mmm'e',Jk,,
Page 15

I Programming a pause
Inserting a pause in your program can be very useful when carrying
out recording. Press II instead of entering a track number. "PA"
appears on the display panel.
• For example, when recording on both sides of a cassette tape,
if you p_ogram a pause after the last track to be recorded on
the first side, program playback will pause at that point to allow
you to switch tape sides. To resume program playback after the
player enters pause mode, press II.
Notes:
s A pause can be programmed only when the program pn_cedure
is performed under stop mode.
• A pause cannot be programmed at the beginning of a program
(P-01), and two pauses cannot be programmed one after the
other.
• A pause inserted in a program is counted as one step.
• If a pause [s programmed as the last step of a program, the
player will not enter the pause mode.
I To clear all of the program contents -_
®
SlOP
CC]
TO PLAY ONLY DESIRED TRACKS/DISCS
i
To checkithe program contents (PD-M550/
I [
PD-M455/PD-M453 only)
gp
I
"[ -.... I
"_ @ @ @@
I@ ..... I
" @ @ @@
i-u9 P- £1
3-D'V P- 0_
i
CHECK
During program mode, set the ptayer to stop mode and press
CHECK. The prpgram contents will be displayed in the programmed
order,
• After confi_fming the last program step, the display will show
"O-O0"
,,,,i
I To modi_ithe program contents (PD-M550/PD-
M455/PD-M453 only)
®
D
(_) During stop mode, press e.
® When the magazine is ejected, the program contents will be
cleared.
I To erase a program (PD-M550/PD-M455/PD-
M453 only)
F-7 ,_ ECI
CLEAR CLEAR
During program mode, press CLEAR on the remote control unit.
The last program step is erased and the contents of the previous
program step are displayed.
NOTE:
Contents of a program can be erased during playback as well.
However, tracks preceding the currently playing track cannot be
erased in this way.
,_ @ @ @ @
PD-M550
5 7
DISC TRACK
PD-M455/pDiM453
NUMBER NUMBER
..,.o 'Aac"-,r
-"- P- 2 t
....
1,
During program mode, set the player to stop mode and press
CHECK so that the program step to be corrected appears on
the display,
2.
To correct th
NUMBER bu
the TRACK I
dPress
isplay. For
No. 3 is cha
DISC NUMB
M550), or I_
Repeat steps
For PD-M55C
the track No
PGM
disc NO., enter the new disc No. with the DISC
tons. For PD-M550, enter the new track No. with
JUMBER/Digit buttons. For PD-M45B/PD-M453,
_1so that the the new disc No, appears on the
)xample.: the programmed track No. 4 on the disc
iged to track No. 7 on the disc No, 5, using the
-_R5 button and TRACK NUMBER 7 button (PD-
I/1_ and PROGRAM (PD-M455/PD-M453).
1 and 2 to change other tracks as desired.
the _ or _ button can also be used to correct
After selecting the track No., be sure to press
TRACK
<PRB1142>
15
En
Page 16

TOPLAY ONLY DESIRED TRACKS/DISCS (Program Playback and Delete Program _layback)
I
PD-M550
2 1.3 3
Delete[ program playback - To
undesi_d tracks/discs
delete
5 3
PD-M455(PD-M453/PD-M450)
li2 =°
*: PD-M455iPD-M453 only
**: PD-M455 only 5 **
1 PD-M550 PD-M455(PD-M453/PD-M450)
2
D!SC NUMBER
F,sc_ID,sc2lo,sc3ID,sc,ID,scsI_Jsc.
1 _ 3
E2:31:2:-IEZ:]
] DISC NUMBER
2)
1 During stop mode, press DELETE.
2 Press,the Disc number button which contains the
• When the Disc number button is pressed, "AL" (all tracks)
3 Press il<HI or _ button so that the track No. to be
4 Repeat steps 2 and 3 for other tracks to be deleted.
5 APl_eral_cl_sother than deleted trackstdiscs are played inthe order
To stopD_lete program playback:
Press R.
• To enter track No. 1! or above with the Track number/Digit
• Tracks tq be deleted should be selected between track No, 1 and
• If the magazine is in the player, the Delete Program contents will
NOTE:
If the Program procedure has been performed, Delete programming
cannot be carried out.
'1
The DELETE indicator lights,
track to be deleted.
To dateta entire discs, enter the desired disc numbers with the
Disc nqmber buttons and go to step 4.
appears on the display.
del_d appears on the display and press DELETE.
For PDI-M550 only:
Instea d of the _ or IHH button, the TRACK NUMBER/Digit
buttoncan be used.
Enter the desired track No. with the TRACK NUMBER/Digit
button.[ In this case, it is not necessary to press DELETE.
of the disc and track numbers. When tracks have been played,
the player enters stop mode.
buttone, jsee "TraCk Search" on page 11.
track Noi 32,
not be e!ased even if the power is turned off.
3
PD-M550
I _,-, I ,-_ IJ
/?
TRACK NUMBER
/?
or
[l,
PD-M455 (PD_M453iPD-M450)
TRACK SEARCH DELETE
_ z:::::31
• For PD-M550, PD-M455 or PD-M453, the DELETE and
buttons onthe remote control unit can also be used.
0
I ESd C5
7 8 9 TO
F-I[-3[Z3
[Z E:::3C3 EZ]
/9
pLAY
/9
i
To clea_ all of the delete program contents
i
/?
®
®
PD-M550/PD*M455/PD-M453 only
CLEAR
EC3
(_) During siop mode_ press II.
® When thhe magazine is ejected, the program contents will be
cleared.
(_ Press CL+EAR on the remote control unit during stop mode or
play mo_e, When CLEAR is pressed during Delete Program
playbaCkJmode, the player enters normal playback mode. (PD-
M550/PD-M455/PD-M453 only)
1G
<PRB1142>
En
Page 17

I CONVENIENTOPERATIONFORRECORDING
i
PD-M550
PD-M455(PD-M453/
PD-M450}
•%T=
*: PD-M455/PD-M453 only
**: PD-M455 only
DISC NUMBER
[I :,is__lD_sc2I_sc3 Io_sc_t_lscs IoJsc_q)
3
3 ,3
OISC NUMBIER
1,3
Compu program editing (Computer allocated
program editing)
Tracks are selected for both sides of the tape,
1 During stpp mode, press COMPU PGM EDIT•
2 Select the disc No. with the Disc number button.
3 Press _ or _ so that the desired playing time
appears _n the display and press COMPU PGM EDIT.
Each time _ is pressed, the time will be changed inthe following
sequence: 46 *-* 54--p 60 --* 74--* 90 (m inutes). With _,il_l,the time
wilt be chaniged in the reverse direction.
For PD-M550 only:
instead of !the _ or _ button, TRACK NUMBER/Digit
buttons {_J - _1} can be used.
Press the 1O's digit button and l's digit button sequentially. To
enter 9 minutes or tess, press _ and then the corresponding digit
button.
The displayed time is memorized. The player now programs the
tracks for the first side of the tape within half the selected playing
time, programs a pause, and then programs the tracks for the
second side iof the tape within half the selected playing time. After
the programming is completed, the display shows all of the
programmed tracks and their praying time in the programmed
order.
Example: The tape playing time 46 minutes is selected.
• The programmed contents are displayed in the programmed
order.
First side
I
3
PD-M550
I _ I '_ II
/¢
TRACK NUMBER
PD*M455 (PD-M453/PD-M450)
TRACK SEARCH
/9 /?
/?
_" 4 5 8 _
L C2 [2
,,,
• , , _b- -- lr--cJu
Second side
NOTES:
• Up to 32 steps can be programmed,
• With discs cbntained 24 tracks or more, programming may not
be correctly performed.
• if the selected time is too short for any track to be programmed,
programming cannot be performed.
• tf you wish t& enter the time with the digit buttons after the time
is already entered with _ or _ in step 3, press _] or
[_ , The dfgit buttons cen now be operated (PD-M550 only).
• [f the magaZine _s in the player, the contents of the Compu
program editing will ndr be erased even if the power is turned oif.
• For PD-M550, PD-Mt,55 or PD-M453, the I-_<ii-I_ button on the
remote control unit can also be used.
]7
<PRB1142>
En
Page 18

CONVENIENT OPERATION FOR RECORDING (Compu Program Editing/Time Fade !Editing/One-touch Fade)
PD-M550
INN i
Jg"-'='-N
3
PD-M455 (PD-M453t
PD-M450)
•%T-=
*: PD-M455iPD-M453 only
**: PD-M455 only *,
PD-M550 PD-M455 (PD-M4531PD-M450)
DISC NUMBER
I msc11msc2 IDisc3 Imsc4 I D)SCSIms__ II
.2 3 1,3
I T,MEFADE I1
DISC NUMBER
/f
z7
1,3
ITime f_de editing
Tracks arelselected within the specified time and playback pauses
with a fad,-out.
1 During stop mode, press TIME FADE EDIT.
2 Select the disc No. with the Disc number button.
3 Press I<< or _ so that the desired playing time
NOTES:
• If Random playback, Track Search, Disc Search or Magazine Hi-
• If a tape playing time beyond the total playing time is selected,
• During Time Fad_ operation, programming for Program Playback/
• If the magazine Js in the player, the contents of the Time Fade
i
appears on the display and press TIME FADE EDIT.
Eachtime _ is pressed, the time will be changed in the following
sequence: 23_ 27 "* 30 --_37 ---*45 (minutes). With I_1_1,the time
will be Changed in the reverse direction.
For PDI-M550 omly:
Instea d of the _ or _ button, the TRACK NUMBER/DIgit
buttonls (m - _bl)can be used.
Press the 10's digit button and 1's digit button sequentially. To
ente_ 9 minutes Orless, press [] and then the corresponding digit
burton.
The displayedtime ismemorlzed. The playernow programs the
trackswithinthe selectedplayingtime.
Lite SCan is done during Time Fade Editing play, Time Fade
Editing will be cleared.
the player cancels the Time Fade Edit mode and enter stop
mode after the specified disc is played.
Delete Program Playback cannot be carried out,
Editing will not be erased even if the power is turned off.
PD-M550
or
TRACK NUMBER
= cbcbcb@
@cbcb#S
cbdhr
PD-M455 (PD-M453/PD-M450)
TRACK SEARCH
II I II
• For PD-M550, PD-M455 or PD-M453, the _ button on the
remote control unit can also be used.
® ®
One-touch fade
Playbac_ can be started from the desired point with a fade-in and
stopped _tithe desired point with a fade-out.
• The Qne-touch Fadefunctioncan becarried outin Normal playback,
Program playback/Delete Program playback, Random playback or
Magazine Hi-Lite Scan mode.
Set the player to the desired playback mode, and then perform
the foil@wing procedure.
(_) During pause mode, press AUTO FADER. The FADER indicator
flashes iand playback starts with a fade-in.
(_) During iplaybacki press AUTO FADER. The FADER indicator
flashes iand playback pauses with a fade-out.
• For PD!M455 and PD-M453, the FADER button on the remote
control Unit can also be used.
18
<PRB1142>
En
Page 19

I
TROUBLESHOOTING
i
Incorrect operations are often mistaken for trouble and malfunctions. If you think that there is something wrong with this component, check
the points below. Sometimes the trouble may lie in another component. Investigate the other components and electrical appliances being
used.
If the trouble cannot be rectified even after exercising the checks listed below, ask your nearest PI(ONEER authorized service center or your
dealer to carry out repair work.
Symptom
Magazine is not expelled when •
EJECT button is pressed.
When playback is started, it stops •
immediately. Pauses or stops
during playback. •
No sound
Sound is distorted, noise is output.
Probable cause
Power plug is disconnected from outlet,
Disc is loaded upside down.
Smudged on the disc, etc.
Output cords are connected incorrectly or
Ioose(y.
o
Incorrect operation of stereo amplifier.
Pin plugs and/or amplifier terminals are dirty.
Player is in pause mode,
Incorrect conne_ions.
Pin plugs and/or amplifier terminals are dirty:
o
Interference is being picked up from a *IV set.
Connect plug to amp(ifier or wall outlet.
• Load the disc correctly with the label side
DOWN.
• Clean the smudges from the disc and then
play it again,
I Connect properly.
• Check the settings of amplifier switches and
sound volume controls.
• Clean away dirt.
m Pressthe im-button.
I
D Connect to amplifier's AUX or CD terminals.
Do not connect to PHONO terminals.
e Clean,way dirt.
m Switch OFF TV set, or move player away from
TV set.
Remedy
With certain discs, loud noise is
produced, or play stops.
The picture of the TV screen is
fluctuated or FM broadcast is
interfered with noise,
Remote control will not function.
(PD-M 550/PD-455/PD*M453 only)
• Disc has bad scratch or warp.
• Disc is extremely dirty.
• Interference is being picked up from the CD
player.
• Dead batteries.
• Too far from player or wrong angle.
• Obstruction between player and remote control
unit.
im ReplaCe the disc.
a Clean idiso.
i
e Turn &ff POWER of the player, or move the
player away from TV or tuner,
e Replace batteries.
e The distance between remote control unit and
player should be no more than about 7 meters.
The operational angle against the front panel
is within 30" from right or left end of player.
a Relocate remote control unit or remove
obstruiction,
<PRB1142>
]9
En
Page 20

SPECIFICATIONS
!
i
1. General
Type .......................................... Compact disc digital audio system
Power requirements
European models ................................ AC 220 -230 V, 50/60 Hz
U.K. and Australian models ...................... AC 230 -:240 V, 60 Hz
U.S, and Canadian models ................................ AC 120 V, 60 Hz
Other models ............ AC 110/120 - 127/220/240 V (switchable),
50/60 Hz
Power consumption ...................................................... 12 W
Operating temperature ................................................ ÷5"C - +35*C
(+41 °F - +95°F)
Weight ................................................................ 3.9 kg (8 Ib, 10 oz)
External dimensions
PD-M550 ..................................... 420(VVJX 291(D) X 101(H) mm
16-9/16(W) X11-7/16(D) X 4{H) in
PD-M455/PD-M453/PD-M450 ......420(W} X 291 (D) X 96(H) mm
16-9/16(W) X 11-7/t 6(D) X 3-12/16(H) in
2. Audio section
Frequency response .................................................. 2 Hz - 20 kHz
S/N ratio .............................................. 102 dB or more (EIAJ)
Dynamic range ....................................... 96 dB or more (EIAJ}
Harmonic distortion ................................ 0.003% or less (EIAJ)
Output voltage ......................................................................... 2.0V
Wow and flutter ............................................ Limit of mesurement
L+-0.001% W.PEAK) or less (EIAJ)
Channels ............................................................. 2-channel (stereo)
3. Output terminal
Audio line output
Headphone jack with volume control (PD-M550/PD-M455 only)
Control input]output jacks (available with the PD-M450 and U.S.
and Canadian models of the PD-M550, PD-M455 end PD-M453: Not
available with models for military zones (multi-voltage types))
CD-DECK SYNCHRO jack
4. Functions
Number of discs to be stored - maximum 6.
Repeat functions
• 1 traokrepeat
• All discs repeat
• Prog_m repeat
• Random play repeat
• Delete play repeat
• Deleterandom play repeat
• Magazine Hi-Lite scan repeat
Random play
• Random p ey (repeat also available)
• Delete random play (repeat also available)
Switching display
Time consumed i remaining time (track!disc), and total time
Timer start
ADLC
Digital level controller PD-M550/PD-M455/PD-M453 only)
Volume control _an be done.
One-touch fade
Fad_n and fade-out possible.
Time fade edit[ng
Selects the tracks within the specified time. Playback pauses
with a fade-out. !
Compu prbgram e_iting
Selects the tracks for both sides within the specified time.
Power ON/OFF function (remote control unit provided with PD-
M550/PD_M455/PD-M453 only)
Automa_o Power On
Power Down Eject
J
Basic operation buttons
• PLAY, PAUSE, STOP
Search function
• Disc search
• Track search
• Manual search
Magazine Hi-Lite Scan
• DISC SCAN
• TRACK SCAN
Programming
• Maximum 32 steps
• Pause
• Program check!correction (remote control unit provided with
PD-M550/PD-M455/PD-M453 only)
• Program clear (single track or alltracks) (remote control unit
provided with PD-M550/PD-M455/PD-M453 only)
• Delete play
5. Accessories
• Remote control unit (PD-M550/PD-M455/PD-M453 onlyl ....... 1
• Size _RO3/d_ batteries
(PD-M550/PD-M455/PD-M453 only) ........................................ 2
• Six-compact-disk magazine ...................................................... 1
• Control cord (pi'ovided with PD-M450 and U.S. and Canadian
models of PD-MBsB/PD-M455/PD-M453 only: Not available with
models for military zones (multi-voltage types)) ....................... 1
• Output cable -..i ......................................................................... 1
• Operating instrqctions .............................................................. 1
NOTE:
Specifications and idesign subject to possible modification without
notice, due to imptrovements.
The Magazine Type Multi-Play CD Players with
mark and the Magazines with the same
mark are compatible for 5-inch (12cm) discs.
Published by Pioneer Electronic Corporation.
Copyright © 1991 Pioneer Electronic Corporation
All rights reserved.
i
PIONEER ELECTRONIC CORPORATION 4-1,Meguro 1-Chome, M_Llro*ku, Tokyo153, Japan
PIONEER ELECTRONICS [USA] INC. 2265 East 220th Street, Long Beach, California 913810U.S.A.
PIONEER ELECTRONICS OF CANADA, INC. 505 Cochrane Drive, Markham, Ontario _3R 8E3, Canada
PIONEER ELECTRONIC [EUROPE] N.V. Keetberglaan1,9120 Beveren,Belgium, TEL 03/750.05;11
PIONEER ELECTRONICS AUSTRALIA PTY. LTD. 178-184 Boundary Road, Braeside,Vi_toria 3195, Australia, TEL: [03] 580-9911
P.O.BOX 1720, LongBeach. California 90801, U,S.A.
(92BO2WF7D16> Printed in Japan <PRB1142-B>
 Loading...