

Page 1

FILE-TYPE COMPACT DISC PLAYER
PD-F19PD-F17
Operating Instructions
Page 2

Thank you for buying this Pioneer product.
Please read through these operating instructions so you
will know how to operate your model properly. After you
have finished reading the instructions, put them away in a
safe place for future reference.
IMPORTANT SAFETY INSTRUCTIONS
READ INSTRUCTIONS — All the safety and operating
instructions should be read before the product is
operated.
RETAIN INSTRUCTIONS — The safety and operating
instructions should be retained for future reference.
HEED WARNINGS — All warnings on the product and
in the operating instructions should be adhered to.
FOLLOW INSTRUCTIONS — All operating and use
instructions should be followed.
CLEANING — Unplug this product from the wall outlet
before cleaning. The product should be cleaned only
with a polishing cloth or a soft dry cloth. Never clean
with furniture wax, benzine, insecticides or other
volatile liquids since they may corrode the cabinet.
ATTACHMENTS — Do not use attachments not
recommended by the product manufacturer as they
may cause hazards.
WATER AND MOISTURE — Do not use this product
near water — for example, near a bathtub, wash
bowl, kitchen sink, or laundry tub; in a wet basement;
or near a swimming pool; and the like.
ACCESSORIES — Do not place this product on an
unstable cart, stand, tripod, bracket, or table. The
product may fall, causing serious injury to a child or
adult, and serious damage to the product. Use only
with a cart, stand, tripod, bracket, or table
recommended by the manufacturer, or sold with
the product. Any mounting of the product should
follow the manufacturer’s instructions, and should
use a mounting accessory recommended by the
manufacturer.
CART — A product and cart combination should be
moved with care. Quick stops, excessive force, and
uneven surfaces may cause the product and cart
combination to overturn.
VENTILATION — Slots and openings in the cabinet are
provided for ventilation and to ensure reliable
operation of the product and to protect it from
overheating, and these openings must not be
blocked or covered. The openings should never be
blocked by placing the product on a bed, sofa, rug,
or other similar surface. This product should not be
placed in a built-in installation such as a bookcase or
rack unless proper ventilation is provided or the
manufacturer’s instructions have been adhered to.
POWER SOURCES — This product should be operated
only from the type of power source indicated on the
marking label. If you are not sure of the type of
power supply to your home, consult your product
dealer or local power company.
LOCATION – The appliance should be installed in a
stable location.
NONUSE PERIODS – The power cord of the appliance
should be unplugged from the outlet when left unused for a long period of time.
GROUNDING OR POLARIZATION
÷ If this product is equipped with a polarized alternating
current line plug (a plug having one blade wider than
the other), it will fit into the outlet only one way. This
is a safety feature. If you are unable to insert the plug
fully into the outlet, try reversing the plug. If the plug
should still fail to fit, contact your electrician to
replace your obsolete outlet. Do not defeat the
safety purpose of the polarized plug.
÷ If this product is equipped with a three-wire
grounding type plug, a plug having a third (grounding)
pin, it will only fit into a grounding type power outlet.
This is a safety feature. If you are unable to insert the
plug into the outlet, contact your electrician to
replace your obsolete outlet. Do not defeat the
safety purpose of the grounding type plug.
POWER-CORD PROTECTION — Power-supply cords
should be routed so that they are not likely to be
walked on or pinched by items placed upon or
against them, paying particular attention to cords at
plugs, convenience receptacles, and the point where
they exit from the product.
OUTDOOR ANTENNA GROUNDING — If an outside
antenna or cable system is connected to the product,
be sure the antenna or cable system is grounded so
as to provide some protection against voltage surges
and built-up static charges. Article 810 of the National
Electrical Code, ANSI/NFPA 70, provides information
with regard to proper grounding of the mast and
supporting structure, grounding of the lead-in wire
to an antenna discharge unit, size of grounding
conductors, location of antenna-discharge unit,
connection to grounding electrodes, and
requirements for the grounding electrode. See Figure
A.
LIGHTNING — For added protection for this product
during a lightning storm, or when it is left unattended
and unused for long periods of time, unplug it from
the wall outlet and disconnect the antenna or cable
system. This will prevent damage to the product
due to lightning and power-line surges.
POWER LINES — An outside antenna system should
not be located in the vicinity of overhead power lines
or other electric light or power circuits, or where it
can fall into such power lines or circuits. When
installing an outside antenna system, extreme care
should be taken to keep from touching such power
lines or circuits as contact with them might be fatal.
OVERLOADING — Do not overload wall outlets,
extension cords, or integral convenience receptacles
as this can result in a risk of fire or electric shock.
WARNING: TO PREVENT FIRE OR SHOCK HAZARD, DO
NOT EXPOSE THIS APPLIANCE TO RAIN OR MOISTURE.
IMPORTANT NOTICE
The serial number for this equipment is located on the rear panel.
Please write this serial number on your enclosed warranty card
and keep it in a secure area. This is for your security.
OBJECT AND LIQUID ENTRY — Never push objects of
any kind into this product through openings as they
may touch dangerous voltage points or short-out
parts that could result in a fire or electric shock.
Never spill liquid of any kind on the product.
SERVICING — Do not attempt to service this product
yourself as opening or removing covers may expose
you to dangerous voltage or other hazards. Refer all
servicing to qualified service personnel.
DAMAGE REQUIRING SERVICE — Unplug this product
from the wall outlet and refer servicing to qualified
service personnel under the following conditions:
÷ When the power-supply cord or plug is damaged.
÷ If liquid has been spilled, or objects have fallen into
the product.
÷ If the product has been exposed to rain or water.
÷ If the product does not operate normally by following
the operating instructions. Adjust only those controls
that are covered by the operating instructions as an
improper adjustment of other controls may result in
damage and will often require extensive work by a
qualified technician to restore the product to its
normal operation.
÷ If the product has been dropped or damaged in any
way.
÷ When the product exhibits a distinct change in
performance — this indicates a need for service.
REPLACEMENT PARTS — When replacement parts
are required, be sure the service technician has used
replacement parts specified by the manufacturer or
have the same characteristics as the original part.
Unauthorized substitutions may result in fire, electric
shock, or other hazards.
SAFETY CHECK — Upon completion of any service or
repairs to this product, ask the service technician to
perform safety checks to determine that the product
is in proper operating condition.
WALL OR CEILING MOUNTING — The product should
not be mounted to a wall or ceiling.
HEAT — The product should be situated away from heat
sources such as radiators, heat registers, stoves, or
other products (including amplifiers) that produce
heat.
ANTENNA
LEAD-IN
WIRE
GROUND
ELECTRIC
SERVICE
EQUIPMENT
Fig. A
CLAMP
ANTENNA
DISCHARGE UNIT
(NEC SECTION 810-20)
GROUNDING CONDUCTORS
(NEC SECTION 810-21)
GROUND CLAMPS
POWER SERVICE
GROUNDING
ELECTRODE SYSTEM
(NEC ART 250, PART H)
NEC — NATIONAL ELECTRICAL CODE
2
<PRB1289>
Page 3
IMPORTANT
The lightning flash with arrowhead symbol, within an
equilateral triangle, is intended to alert the user to the
presence of uninsulated "dangerous voltage" within the
product's enclosure that may be of sufficient magnitude
to constitute a risk of electric shock to persons.
CAUTION
RISK OF ELECTRIC SHOCK
DO NOT OPEN
CAUTION:
TO PREVENT THE RISK OF ELECTRIC SHOCK, DO NOT
REMOVE COVER (OR BACK). NO USER-SERVICEABLE
PARTS INSIDE. REFER SERVICING TO QUALIFIED
SERVICE PERSONNEL.
The exclamation point within an equilateral triangle is
intended to alert the user to the presence of important
operating and maintenance (servicing) instructions in the
literature accompanying the appliance.
[For Canadian model]
CAUTION: TO PREVENT ELECTRIC SHOCK DO NOT
USE THIS (POLARIZED) PLUG WITH AN EXTENSION CORD,
RECEPTACLE OR OTHER OUTLET UNLESS THE BLADES
CAN BE FULLY INSERTED TO PREVENT BLADE EXPOSURE.
This player is for consumer use. If the player is used in a business
(for example, used for a long period at a restaurant), the player will
not be covered under warranty.
CD Video, VIDEO CD, CD graphics, DVD and CD-ROM discs can
not be played with this player.
[Pour le modèle Canadien]
ATTENTION: POUR PREVENIR LES CHOCS ELEC-
TRIQUES NE PAS UTILISER CETTE FICHE POLARISEE AVEC
UN PROLONGATEUR, UNE PRISE DE COURANT OU UNE
AUTRE SORTIE DE COURANT, SAUF SI LES LAMES PEUVENT ETRE INSEREES A FOND SANS EN LAISSER AUCUNE PARTIE A DECOUVERT.
CAUTION
÷ Use of controls or adjustments or performance of procedures other than those specified herein may result in hazardous radiation
exposure.
÷ The use of optical instruments with this product will increase eye hazard.
This equipment has been tested and found to comply with the limits for a Class B digital device, pursuant to Part 15 of the FCC Rules.
These limits are designed to provide reasonable protection against harmful interference in a residential installation. This equipment
generates, uses, and can radiate radio frequency energy and, if not installed and used in accordance with the instructions, may cause
harmful interference to radio communications. However, there is no guarantee that interference will not occur in a particular
installation. If this equipment does cause harmful interference to radio or television reception, which can be determined by turning
the equipment off and on, the user is encouraged to try to correct the interference by one or more of the following measures:
BEFORE
OPERATING
– Reorient or relocate the receiving antenna.
– Increase the separation between the equipment and receiver.
– Connect the equipment into an outlet on a circuit different from that to which the receiver is connected.
– Consult the dealer or an experienced radio/TV technician for help.
Information to User
Alteration or modifications carried out without appropriate authorization may invalidate the user's right to operate the equipment.
[For Canadian model]
This Class B digital apparatus meets all requirements of the
Canadian Interference–Causing Equipment Regulations.
[Pour le modèle Canadien]
Cet appareil numérique de la Classe B respecte toutes les
exigences du Règlement sur le matériel brouilleur du Canada.
CAUTION
This product satisfies FCC regulations when shielded cables and
connectors are used to connect the unit to other equipment. To
prevent electromagnetic interference with electric appliances
such as radios and televisions, use shielded cables and connectors for connections.
<PRB1289>
OPERATIONS
OPERATIONS
3
BASIC
VARIOUS
Page 4

CAUTIONS REGARDING HANDLING
Record
cleaning
sprays
Thinner
Benzene
Location
Install the player in a well-ventilated location where it will not be
exposed to high temperatures or humidity.
Do not install the player in a location which is exposed to direct
rays of the sun, or near stoves or radiators. Excessive heat can
adversely affect the cabinet and internal components. Installation
of the player in a damp or dusty environment may also result in a
malfunction or an accident. (Avoid installation near cookers etc.,
where the player may be exposed to oily smoke, steam or heat.)
Do not install the player on a tottered stand nor in an unstable or
inclined place.
Precautions regarding installation
÷ Placing and using the compact disc player for long periods on
heat-generating sources such as amplifiers will affect performance. Avoid placing the player on heat-generating sources.
÷ Install this compact disc player as far as possible from tuners
and TV sets. A compact disc player installed in close proximity
to such equipment may cause noise or degradation of the picture.
÷ Such noise may be particularly noticeable when an indoor an-
tenna is used. In such cases, make use of an outdoor antenna,
or turn off power to the compact disc player.
÷ Please place this unit on a level surface.
Condensation
When this unit is brought into a warm room from previously cold
surroundings or when the room temperature rises sharply, condensation may form inside, and the unit may not be able to attain
its full performance. If this occurs, allow the unit to stand for about
an hour or raise the room temperature gradually.
Cleaning and handling compact discs
÷ The presence of fingerprints or smudges on the surface of the
disc will not directly affect the recorded signals, but depending
on the degree of contamination, the brightness of the light
reflected from the signal surfaces may be reduced, causing
degradation of sound quality. Always keep your discs clean by
wiping them gently with a soft cloth from the inner edge toward the outer periphery.
÷ If a disc becomes very dirty, dip a soft cloth in water, and after
wringing it out well, wipe the dirt away gently, and then remove
any water drops with another soft, dry cloth.
÷ Do not use record cleaning sprays or anti-static agents on discs.
Also, never clean discs with benzene, thinner, or other volatile
solvents, since damage to the disc surface may result.
Cleaning the player
To clean the PLAYER, wipe with a soft, dry cloth. For stubborn
dirt, wet a soft cloth with a mild detergent solution made by diluting one part detergent to 5 or 6 parts water, wring well, then wipe
off the dirt. Also use a dry cloth to wipe the surface dry. Do not
use volatile liquids such as benzene and thinner which are harmful
to the unit.
Storing discs
÷ Discs are made of the same kinds of plastic used for conven-
tional analog audio records. Be careful not to allow discs to
warp; always store discs in their cases vertically, avoiding locations with high heat or humidity, or extremely low temperatures. Avoid leaving discs in cars, since the seat of a car in
direct sunlight can become unbelievably hot.
÷ Always read and abide by the precautionary notes listed on disc
labels.
CD lens cleaner
The player's pickup lens should not become dirty in normal use, but
if for some reason it should malfunction due to soiling, consult your
nearest PIONEER authorized service center. Lens cleaners for CD
players are commercially available, but special care should be exercised in their use since some may cause damage to the lens.
4
<PRB1289>
With this unit, use a Compact Disc carrying the mark shown
below. Do not use other disc, for this may result in malfunction or damage.
÷ When holding discs, do not touch their signal surfaces. Hold by
the edges, or by one edge and the center hole.
÷ Do not affix gummed labels or tape to the label surfaces. Also,
do not scratch or damage the label.
÷ Discs rotate at high speed inside the player. Do not use dam-
aged (cracked or warped) discs.
CAUTION RE: USE OF SHAPED CD's
This product is designed for use with conventional, fully circular CD's
only.
Use of shaped CD's is not recommended for this product.
Pioneer disclaims all liability arising in connection with the use of
shaped CD's.
'
Re-transporting
When re-transporting this unit in the future, remove all discs from the
rack. Turn off the STANDBY/ON switch, wait for "OFF" to go out from
the display, and unplug the power cord.
Page 5
BEFORE YOU USE THE PLAYER
HERE’S WHAT YOU CAN DO!
Up to 100 CDs can be registered by classifying
them into 3 categories (CUSTOM). [page 12]
For example, if you register you own discs in CUSTOM I, your
mother’s discs in CUSTOM II and your father’s discs in CUSTOM
III or if you select three kinds of music genres or artists and
register them in the three CUSTOM banks, you can play all of the
discs classified under one of the three CUSTOM banks. Addition
of discs to already-registered discs is also possible. Each of the
three CUSTOM banks can register up to 100 discs.
Single Loader slot is provided. [page 11]
If you have a disc borrowed from a friend, you can play only that
disc by loading it in this special slot (Disc No. 0), without replacing
discs stored in the rack.
Immediately access and play your favorite tracks
from among the 100 discs loaded in the player.
[page 16]
The Best Selection Memory function lets you store and play
favorite tracks with the touch of a single button (up to 20 tracks).
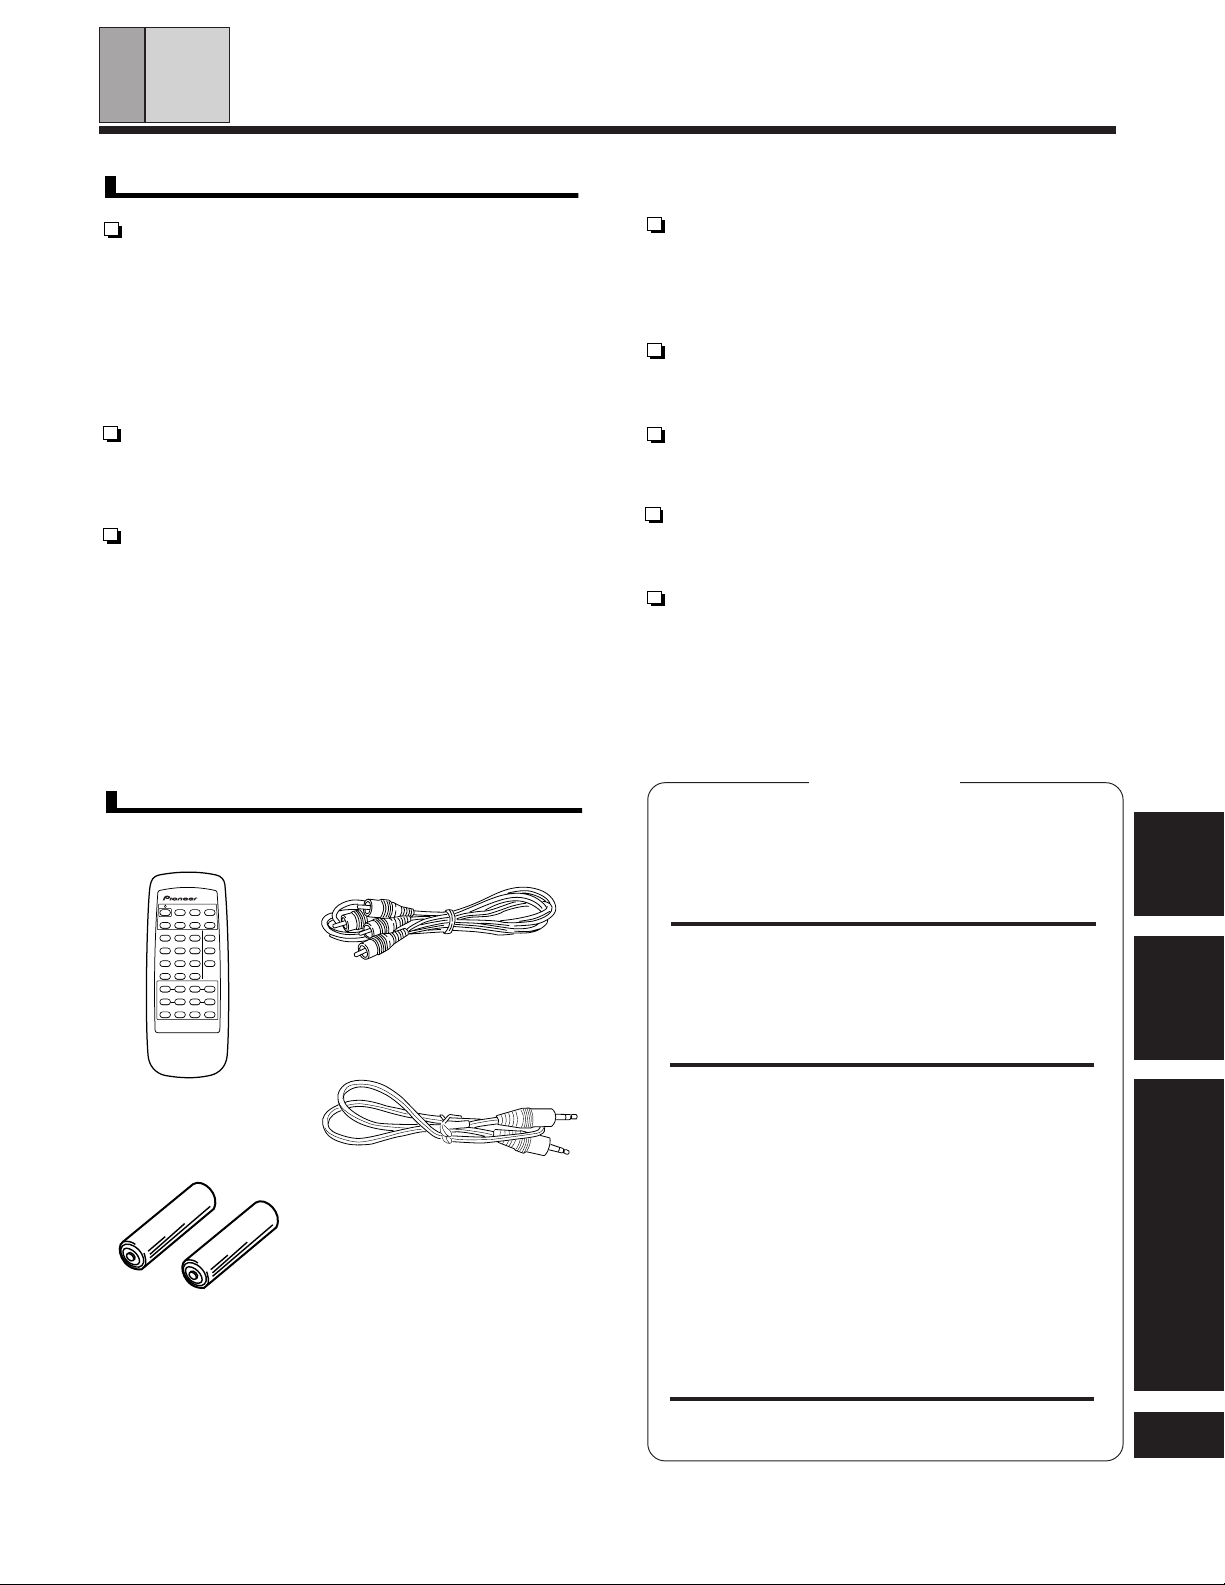
CONFIRM SUPPLIED ACCESSORIES
Remote control unit x 1
PREVIOUS
HI-LITE BEST
MODE CLEARPGMREPEAT
ABC2DEF
TIME/
1
3
CHARA
GHI4JKL
MNO
TITLE
5
6
DISPLAY
TITLE
PQRS7TUV
WXYZ
INPUT
8
9
DISC
TRACK
MARK
SET
SET
0
CURSOR
DISC
<>
–
+
1¡4¢
RANDOM
783
FILE-TYPE CD PLAYER
REMOTE CONTROL UNIT
Î
Output cable x 1
Control cable x 1
Easy access to the disc(s) you've listened to
recently. [page 16]
The Previous Disc Scan function recalls the last disc you played
and then moves one by one through the previously played discs
(auto-memory of last 20 discs played).
Disc Title input [page 18]
The titles of up to 100 discs can be input, which is very convenient
for disc management.
CD TEXT compatibility [page 20]
The disc/track titles and performer names are displayed during
playback of a CD TEXT disc.
Hi-bit Legato Link Conversion
This results in more faithful reproduction of the original sound than
ever before.
Energy-saving design
This product is designed in such a way that power consumption is
reduced when in the standby mode.
For the power consumption in the standby mode, refer to the
specifications on page 23.
CONTENTS
CAUTIONS REGARDING HANDLING ................................. 4
BEFORE YOU USE THE PLAYER ....................................... 5
CONNECTIONS .................................................................. 6
NAMES OF PARTS ............................................................. 7
HOW TO LOAD THE DISCS ............................................... 9
BASIC OPERATIONS
To listen in order from the first track ............................. 10
To select the disc and track .......................................... 10
To select a play mode ................................................... 10
Playing a disc in the Single Loader slot ......................... 11
The hood can be opened or closed during playback ..... 11
BEFORE
BEFORE
OPERATING
OPERATING
BASIC
BASIC
OPERATIONS
OPERATIONS
Size AA/R6P dry cell
batteries x 2
VARIOUS OPERATIONS
To program and play only the discs you want to hear ... 12
To start playback from a specific disc ........................... 13
To play a track you want to hear ................................... 13
To repeat playback ........................................................ 13
To playback tracks/discs at random .............................. 14
To program tracks/discs in a desired order ................... 15
To store your favorite tracks ......................................... 16
To find out which discs you’ve listened to recently ...... 16
To scan quickly through tracks on a disc ....................... 17
Disc Title Input .............................................................. 18
Disc Title Modification ................................................... 19
To use the TIME button ................................................ 21
CD TEXT Data Display
(CD TEXT compatible data only) .................................... 20
To search a disc by the Disc title .................................. 20
TROUBLESHOOTING ....................................................... 22
SPECIFICATIONS .............................................................. 23
<PRB1289>
OPERATIONS
OPERATIONS
5
VARIOUS
VARIOUS
Page 6

CONNECTIONS
Before making or changing the connections, switch off the power switch and disconnect the power cord from the AC outlet.
DIGITAL
INPUT
OPTICAL
Stereo amplifier
CD
L
R
(Be sure to use the supplied CD-DECK SYNCHRO control cord with the cassette deck.)
B
COAXIAL
CONTROL
OUT
White
Red
Optical fiber cable
÷ Control input jack
÷ Control output jack
L
R
A-1
Control cable
C
Output cable
E
Coaxial output cable
B
IN
CONTROL
OUT
White
Red
I/O INTERFACE
CD-DECK SYNCHRO cable
OUT
L
R
Control cable
IN
D
R L
I/O
INTERFACE
To the CONTROL IN jack of
C
the Pioneer component
bearing the Î mark.
CD-DECK
SYNCHRO
LINE OUT
CD-DECK
SYNCHRO
Cassette deck
COAXIAL
OPTICAL
DIGITAL OUT
CD player
A-2
Power cord
A Making connections
1 Connect the OUTPUT jacks of this unit to the input jacks (CD or
AUX) of the amplifier. Make sure that the white plugs are connected to the left (L) jacks and the red plugs to the right (R) jacks.
÷ Be sure not to connect this unit to the amplifier’s PHONO jacks, as
sound will be distorted and normal playback will not be possible.
2 Connect the power cord to a household AC wall outlet.
÷ Make sure plugs are inserted fully into the wall outlet.
Note!!
Do not connect the power cord to an AC outlet on your amplifier.
If you connect the power cord to a "SWITCHED" AC outlet on an
amplifier, you will not be able to use this unit's memory function.
B Connecting to the DIGITAL OUT JACK
This unit can be connected to an amplifier equipped with an optical
digital jack or coaxial digital jack.
Note!!
No sound may be produced if optical connection are made with an
amplifier having different optical signal standard.
When using the OPTICAL DIGITAL OUT jack:
1. Remove the protective dust cap from this unit’s DIGITAL OUT
OPTICAL jack.
2. Use an optical fiber cable to connect the DIGITAL OUT OPTICAL
jack of this unit to the optical input jack of the amplifier.
÷ Align the plug of the optical fiber cable with the optical digital jack and
fully insert the plug to make a secure connection.
Use a separately sold optical fiber cable for the optical digital jack
connections.
Precautions concerning use of optical fiber cables
÷ Fully insert the optical fiber cable plugs all the way into the jacks.
÷ Be careful not to fold or crimp the cable. When coiling an optical fiber cable
for storage, make sure the diameter of the coil is 15 cm (6 in.) or larger.
÷ Use an optical fiber cable with a length of 3 m ( 10 ft.) or less.
÷ Protect the optical fiber cable plugs from scratches and dust.
÷ When the unit is not connected using an optical fiber cable, be
sure to keep the protective dust cap plugged into the optical digital
output jack at all times.
When using the COAXIAL DIGITAL OUT jack:
Use coaxial output cable to connect the COAXIAL DIGITAL OUT jack
of this unit to the coaxial digital input jack of the amplifier.
C
System remote control with a Pioneer stereo amplifier that
has the Î mark
6
<PRB1289>
When a Pioneer stereo amplifier bearing the Î mark is used, connect
the CONTROL IN jack on the rear panel of the CD player to the
CONTROL OUT jack of the amplifier. This will enable the CD player
to be controlled using the remote control unit supplied with the stereo
amplifier. If you do not plan to use this feature, it is not necessary to
connect the CONTROL IN/OUT jacks.
÷ The remote control unit supplied with the amplifier can be
used to control Play, Stop, Pause, Track/Disc Search and Disc
Change operations.
÷ For instructions regarding connections and operation, refer to
the operating instructions provided with your stereo amplifier.
Notes!!
÷
When a control cable is connected to the player’s CONTROL
IN jack, direct control of the player with the remote control unit
is not possible. Operate the player with the remote control unit
by aiming it at the amplifier.
÷
Be sure to connect both of the control cable's plugs securely to
the CONTROL IN and CONTROL OUT jacks. Do not connect
only one end of the cable.
÷
Be sure to turn off the power of the amplifier before connecting
the power cord and output cable.
÷
When only the digital output is connected, the remote sensor of
the amplifier does not function. To operate it, connect the output
cable to the stereo amplifier as well as connecting the digital output.
D CD-Deck synchro function
If you have a Pioneer cassette deck provided with the CD-Deck
synchro function, connect the CD-DECK SYNCHRO jacks of the
CD player and cassette deck. With this function, synchro recording can be carried out between the player and deck.
÷ For details on connections and operation, refer to the operating
instructions supplied with the cassette deck.
÷ The CD-DECK SYNCHRO cable is not supplied with the CD
player.
÷ When CD-Deck synchro recording is carried out on several discs,
use the program playback function. (Refer to page 15 for details
of program playback.)
Note!!
In order to enable the CD-DECK SYNCHRO recording function, the
Output cable must be connected to the stereo amplifier.
E I/O INTERFACE (For PD-AP1 only)
Terminal for connecting the controller (optional). The PD-AP1 is
capable of simultaneous control of up to 3 units of this model.
When using the optional controller, use the I/O interface with the
CONTROL IN jack.(Refer to 21 page)
Page 7
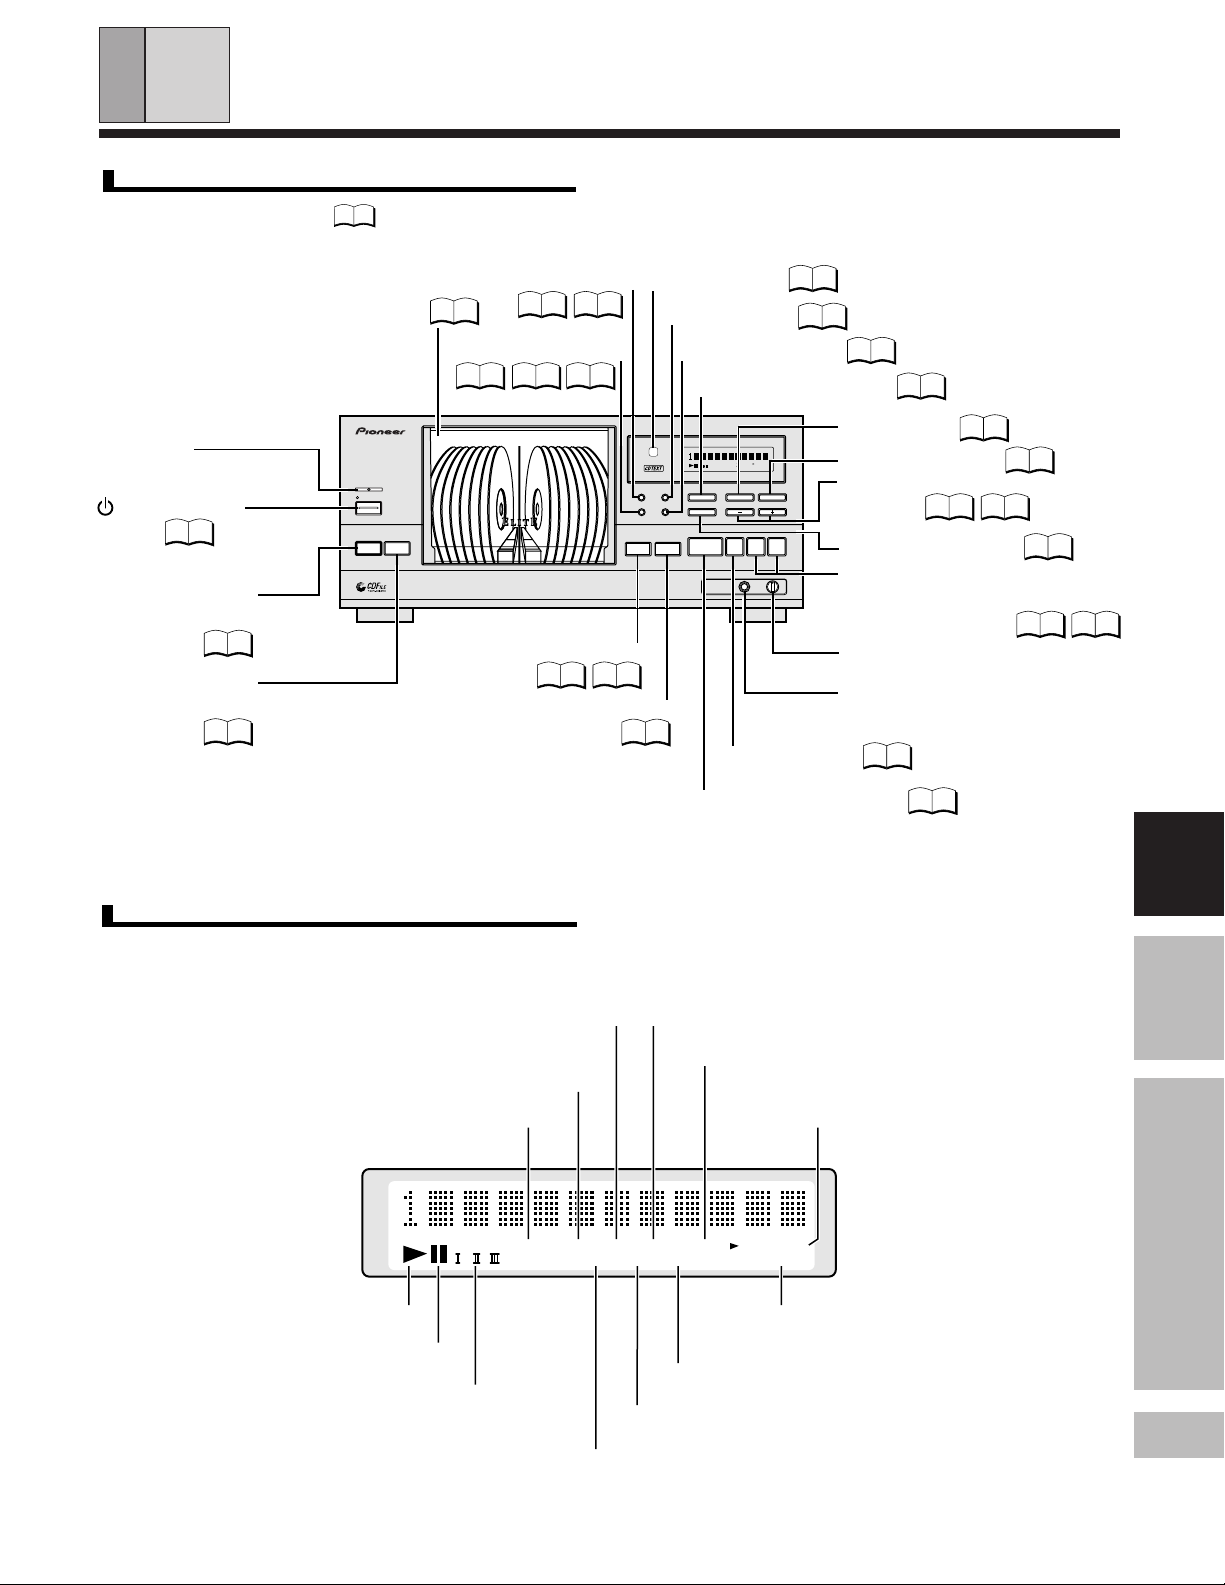
NAMES OF PARTS
FRONT PANEL
÷ The numbers in parenthesis
STANDBY
indicator
STANDBY/ON
switch
P. 10
SINGLE LOADER
ACCESS button
P. 11
SINGLE LOADER
PLAY button
P. 11
P.
are reference pages.
P. 9
Hood
FILE–TYPE
COMPACT DISC PLAYER
◊Û¿X
,7
STANDBY
STANDBY / ON
SINGLE LOADER
ACSESS
PLAY
'
MODE button
P. 10 P. 12
CLEAR button
P. 12 P. 15 P. 19
REFERENCE FILE–TYPE CD PLAYER
OPEN/CLOSE button
P. 11P. 9
UNLOAD button
P. 9
Remote sensor
HI-LITE button
PROGRAM button
TITLE DISPLAY button
Hi-bit Legato Link Conversion
Î
MODE HI-LITE
CLEAR PROGRAM
OPEN/
CLOSE
UNLOAD
TRACK MIN SECDISC
CUSTOM
RDM
ALL BEST CD TEXT
PGM 1
PREVIOUSSINGLE
DISPLAY BEST PREVIOUS
INPUT
6
7
PULSEFLOW
D/A CONVERTER
Stop button (7)
REPEAT
REMAIN
SCANDISC
DISCTITLE
41
PHONES LEVEL
MIN MAX
P. 8
P. 17
P. 15
P. 20
BEST button
PREVIOUS button
P. 16
P. 16
DISC (–/+) buttons
P. 13
P. 9
¡¢
TITLE INPUT button
P. 18
Track/Manual search
buttons (41/¡¢)
P. 10 P. 13
PHONES LEVEL control
Adjust the volume level
PHONES jack
Terminal for inserting
HEADPHONE PLUG
P. 10
DISPLAY
Lights when the PROGRAM (PGM)
button is pressed.
Lights during random play.
Lights when you choose the play mode.
Lights when a CD is being played.
Lights during pause mode.
Lights during custom programming
and play.
CUSTOM
Lights when the BEST button is pressed.
TRACK MIN SECDISC
RDM
ALL BEST
PGM 1
PREVIOUSSINGLE
Blinks during DISC SCAN.
Play/Pause button (6)
Lights during repeat play.
Lights during CD TEXT disc
playback.
REPEAT
SCANDISC
CD TEXT
REMAIN
Lights when the remaining time
is displayed.
Blinks during TRACK SCAN.
P. 10
BEFORE
BEFORE
OPERATING
OPERATING
BASIC
OPERATIONS
VARIOUS
OPERATIONS
Blinks when the PREVIOUS button is pressed.
7
<PRB1289>
Page 8

NAMES OF PARTS
REMOTE CONTROL UNIT
÷ The numbers in parenthesis
HI-LITE button
STANDBY/ON switch
MODE button
REPEAT button
Digit buttons
DISC SET button
CURSOR buttons (</>)
Manual search buttons
(1/¡)
STOP button (7)
Pause button (8)
P.
are reference pages.
P. 17
P. 10
P. 10 P. 12
P. 13
P. 10
P. 15P. 12
P. 18
P. 10
P. 12
P. 15
P. 18 P. 19
P. 10
P. 10
P. 10
PREVIOUS
HI-LITE BEST
MODE CLEARPGMREPEAT
ABC2DEF
1
GHI4JKL
5
PQRS7TUV
8
DISC
MARK
SET
0
CURSOR
<>
1¡4¢
783
FILE-TYPE CD PLAYER
REMOTE CONTROL UNIT
3
MNO
6
WXYZ
9
TRACK
SET
–
DISC
RANDOM
TIME/
CHARA
TITLE
DISPLAY
TITLE
INPUT
+
PREVIOUS button
BEST button
PGM button
CLEAR button
TIME/CHARA button
TITLE DISPLAY button
TITLE INPUT button
TRACK SET button
DISC (–/+) buttons
P. 16
P. 16
P. 15
P. 12 P. 15 P. 19
P. 18 P. 21
P. 20
P. 18
P. 10 P. 15
P. 13
Track search buttons
(4/¢)
Î
RANDOM button
PLAY button (3)
P. 10
P. 14
P. 10
REMOTE CONTROL OPERATIONS
30°
When operating the remote control unit, point the unit's infrared
signal transmitter at the remote control receiver (Remote Sensor) on
the front panel of the player. The remote control unit can be used
within a range of about 7 meters (23 feet) from the remote sensor, and
within angles of up to about 30 degrees.
Note!!
If the remote control sensor window is in a position where it receives
strong light such as sunlight or fluorescent light, control may not be
possible.
7 m (23 ft)
30°
PUT BATTERIES INTO THE REMOTE
CONTROL UNIT
Open the lid of the battery compartment on the rear of the remote
control unit, and insert the batteries, taking care to align the ª and
· polarities correctly.
Notes!!
÷
In order to prevent battery leakage, remove the batteries when
not using the remote control unit for an extended period (one
month or more). If leakage occurs, carefully wipe away any
battery fluid inside the compartment, and replace the batteries
with new ones.
÷
Do not allow books or other objects to rest on top of the remote control unit, since the buttons may be depressed, causing
faster exhaustion of the batteries.
Incorrect use of batteries may cause leakage or rupture.
Always be sure to follow these guidelines:
A. Always insert batteries into the battery compartment cor-
rectly matching the positive ª and negative · polarities,
as shown by the display inside the compartment.
B. Never mix new and used batteries.
C. Batteries of the same size may have different voltages, de-
pending on brand. Do not mix different brands of batteries.
8
<PRB1289>
Page 9

HOW TO LOAD THE DISCS (Be sure to read this before operation)
Loading discs into the rack
÷ You can load up to 100 discs in the rack.
The numbers marked on the rack are used as the disc numbers.
These are marked in the clockwise order from 1 to 100.
÷ The following procedure describes how to load discs from
disc No. 1.
1
STANDBY / ON
2
UNLOAD
Press STANDBY/ON
switch.
÷ Ensure that the disc No.
shown on the display is “1”.
÷ If the displayed disc No. is
not “1”, press DISC(–/+)
to display “1”.
Press UNLOAD.
«
TRACK MIN SECDISC
ALL
The hood will open.
When UNLOAD is pressed,
the hood opens to the disc
corresponding to the disc No.
displayed on the front of the
unit. Therefore, if you want to
load discs from No. 50, use
DISC (+/–) on the unit to display “50”, or enter “50” using
the remote control unit, before
pressing UNLOAD.
3
Load the disc into the
rack with the label side
(printed surface) facing
to the left.
Side to be played faces right
(label side faces left)
Note!!
÷
Inserting more than one disc into the slot will damage the discs
and cause the unit to malfunction.
Tip:
Difference between OPEN/CLOSE and UNLOAD
OPEN/CLOSE: The hood is simply opened or closed.
UNLOAD:The slot corresponding to the disc No. being displayed
rotates to the center position then the hood is opened.
Notes!!
÷÷
Do not attempt to open the hood with your hand.
÷
÷÷
÷
Be careful not to pinch your fingers when opening and closing the
hood.
÷ If a disc is inserted with its label side facing to the right, it cannot
be played back. Be sure to load all discs with their label sides facing
to the left.
WARNING:
Do not put your hand or any other object inside
the rack, otherwise injury or part damage may
result.
÷÷
÷ Do not put anything other than CDs inside the rack.
÷÷
÷÷
÷ Do not use adapters for 8-cm (3-in.) CDs.
÷÷
÷ Load only one disc into each disc slot.
÷ Inserting an 8-cm (3-in.) CDs in between two 12-cm (5-in.) CDs,
will make it difficult to remove the 8-cm (3-in.) CD.
We recommend inserting 12-cm (5-in.) CDs starting from Disc No.
1 (i.e., 1, 2, 3...) and 8-cm (3-in.) CDs starting from Disc No. 100
(i.e., 100, 99, 98...).
÷ The unit will not operate if the hood is opened during playback. Be
sure to close the hood before attempting any operations.
÷ To load or remove a disc in or from the slot which is seen through
the hood, press OPEN/CLOSE. The hood is opened, “HOLD” is
displayed and the disc can be loaded in or ejected from the slot
seen through the hood. Even while “HOLD” is being displayed,
the rack can be rotated by pressing DISC (–/+).
÷ Be sure to remove all discs from the rack, set the STANDBY/ON
switch to off, and unplug the power cord before moving the unit.
BEFORE
BEFORE
OPERATING
OPERATING
BASIC
OPERATIONS
4
DISC
Load other discs into the rack by repeating
5
Press DISC(+) to rotate
the rack.
÷ The rack rotates in the di-
rection of 1,2,3.... Press-
ing DISC(–) rotates the
rack in the opposite direction.
steps 3 and 4 for each of them.
6
OPEN/
CLOSE
Press OPEN/CLOSE.
÷ The hood will close.
To remove the discs...
Press UNLOAD.
1
Select the disc No. to be removed by pressing DISC(–/+).
2
÷ The rack rotates until the selected disc comes in the front of
the unit.
Remove from the rack.
3
Press OPEN/CLOSE.
4
÷ The hood will close.
<PRB1289>
OPERATIONS
9
VARIOUS
Page 10

BASIC OPERATIONS
÷ You can also use the remote control.
2
STANDBY indicator
FILE–TYPE
COMPACT DISC PLAYER
◊Û¿X
,7
STANDBY
1
STANDBY / ON
SINGLE LOADER
ACSESS
PLAY
'
REFERENCE FILE–TYPE CD PLAYER
MODE
Î
MODE HI-LITE
CLEAR PROGRAM
OPEN/
CLOSE
UNLOAD
Hi-bit Legato Link Conversion
TRACK MIN SECDISC
CUSTOM
RDM
ALL BEST CD TEXT
PGM 1
PREVIOUSSINGLE
BEST PREVIOUS
DISPLAY
TITLE
INPUT
6
7
PHONES LEVEL
PULSEFLOW
D/A CONVERTER
HI-LITE BEST
1
MODE
Digit buttons
REPEAT
REMAIN
SCANDISC
¡¢
7
41/¡¢
3
6
DISC
41
DISC SET
1/¡
7
PREVIOUS
MODE CLEARPGMREPEAT
TIME/
ABC2DEF
1
GHI4JKL
PQRS7TUV
DISC
SET
<>
1¡4¢
783
FILE-TYPE CD PLAYER
REMOTE CONTROL UNIT
CURSOR
MARK
CHARA
3
MNO
TITLE
5
6
DISPLAY
TITLE
WXYZ
INPUT
8
9
TRACK
SET
0
DISC
–
RANDOM
+
TRACK SET
4/¢
3
Î
3
8
To listen in order from the first track
1
STANDBY / ON
2
Press STANDBY/ON.
To turn the power off...
Press STANDBY/ON again.
STANDBY indicator lights.
Load discs into the rack.
«
Press OPEN/CLOSE.
Side to be played faces right
(label side faces left)
Note!!
÷
Inserting more than one disc into the slot will damage the discs
and cause the unit to malfunction.
3
6
6
÷ If you choose a play mode beforehand, the tracks/discs are played
back according to the respective play mode.
To stop play
7
To pause play
6
6
To skip to another track
41 ¡¢
To fast forward/reverse.
41 ¡¢
10
<PRB1289>
Press 6 (or 3).
The tracks are played in order starting
from the first track on the disc with the
lowest disc No.
Press 7.
Press 6 (or 8).
To start playback again, press 6.
Tap 41/¡¢ (or 4/¢ on
the remote control unit).
Hold-down 41/¡¢ (or 1/
¡ on the remote control unit).
To select the disc and track
DISC
2
SET
\
TRACK
7
SET
\
Use the digit buttons to select the disc, then press DISC
SET.
Use the digit buttons to select the track, and press
TRACK SET.
To select a play mode
MODE
ALL: All discs are played back.
SINGLE: One disc is played back.
CUSTOM: Only discs stored in the CUSTOM file are played back
(I,II,III)
(see page 12 to create a custom file).
In stop mode:
During playback:
÷ When you select SINGLE during playback, only the current disc
will be played.
÷ If you press MODE during program mode, the program contents
will be erased.
Notes!!
÷
When you turn the power ON, playback starts according to the last
selected play mode.
÷
If you did not select a play mode, playback starts in ALL.
÷
SINGLE is selected automatically when playing the disc loaded in
the Single Loader slot.
<Last disc memory>
When you press 7 or turn the power OFF (STANDBY), the unit
memorizes the disc that was being played. The next time you press
6, playback will start from that same disc. (This feature is available
except in the PROGRAM play, BEST play, PREVIOUS scan, HI-LITE
scan and RANDOM play modes.)
Press MODE during play or
stop mode.
Press a few times to choose the mode
you desire.
Playback occurs according to the chosen mode.
3
ALL SINGLE
CUSTOM(III II I)
3
ALL SINGLE
3
2
22
3
Page 11

BASIC OPERATIONS
FILE–TYPE
COMPACT DISC PLAYER
1
3
◊Û¿X,7
STANDBY / ON
STANDBY / ON
SINGLE LOADER
ACSESS
PLAY
'
Playing a disc in the Single Loader slot
1
ACSESS
2
Press SINGLE LOADER ACCESS.
÷ The hood will open with the single
loader slot located in the front of
the unit.
Loading the disc into the Single Loader slot with the label side (printed surface) facing to the left.
2
REFERENCE FILE–TYPE CD PLAYER
OPEN/CLOSE
Hi-bit Legato Link Conversion
TRACK MIN SECDISC
CUSTOM
REPEAT
PGM 1
RDM
ALL BEST CD TEXT
REMAIN
SCANDISC
PREVIOUSSINGLE
DISPLAY
BEST PREVIOUS
TITLE
DISC
INPUT
41
¡¢
6
7
UNLOAD
PHONES LEVEL
PULSEFLOW
D/A CONVERTER
MODE HI-LITE
CLEAR PROGRAM
OPEN/
CLOSE
Î
The hood can be opened or closed
during playback.
OPEN/
CLOSE
÷ “HOLD” is displayed after the hood is opened.
÷ In this case, the rack does not rotate.
÷ When the playback of the current disc has completed, the unit
enters stop mode. The next disc is played after the hood has been
closed.
Press and hold OPEN/CLOSE
until “OPEN” is displayed.
Side to be played faces right
(label side faces left)
Note!!
÷
Inserting more than one disc into the slot will damage the discs
and cause the unit to malfunction.
3
PLAY
Press SINGLE LOADER
PLAY.
÷ The play mode is set to SINGLE.
Tips:
÷ The disc loaded in the Single Loader slot can also be selected using
DISC(–/+). It is located after disc No. 100 when DISC(+) is used
or disc No. 1 when DISC(–) is used. On the display, it is shown as
“P0”.
÷ If a disc has been loaded in the Single Loader slot, pressing
SINGLE LOADER PLAY allows to play it anytime, even during
playback of a disc stored in the rack.
÷ To play the disc in the Single Loader slot using the remote control
unit, press “0” and DISC SET.
OPEN/
CLOSE
To close the hood, press
OPEN/CLOSE again.
Note!!
If the hood is opened during play, UNLOAD, SINGLE LOADER
ACCESS and DISC (–/+) are defeated.
BEFORE
OPERATING
BASIC
OPERATIONS
BASIC
OPERATIONS
VARIOUS
OPERATIONS
11
<PRB1289>
Page 12

VARIOUS OPERATIONS
÷ The remote control is the most convenient way to perform these
operations.
FILE–TYPE
COMPACT DISC PLAYER
◊Û¿X,7
STANDBY
STANDBY / ON
SINGLE LOADER
ACSESS
MODE
PLAY
'
REFERENCE FILE–TYPE CD PLAYER
Î
MODE HI-LITE
CLEAR PROGRAM
OPEN/
CLOSE
CLEAR
CUSTOM
ALL BEST CD TEXT
DISPLAY
TITLE
INPUT
6
UNLOAD
PULSEFLOW
D/A CONVERTER
Hi-bit Legato Link Conversion
TRACK MIN SECDISC
RDM
REPEAT
PGM 1
REMAIN
SCANDISC
PREVIOUSSINGLE
BEST PREVIOUS
DISC
41
¡¢
7
PHONES LEVEL
DISC (–/+)
6
To program and play only the discs
you want to hear (CUSTOM play)
This unit lets you program up to 100 of your favorite discs. For
example, you can store all the discs of your favorite artist, or some
other group of personal selections, and play only those discs.
You can even add other discs to the custom later on.
Operation example: Storing discs 3 and 12 in the CUSTOM II
file.
1
MODE
During stop mode, press
MODE so that the CUSTOM
II indicator lights.
TRACK MIN SECDISC
MODE
CUSTOM
( )
÷ If some disc number appears, press CLEAR.
2
3
Use the digit buttons to
select disc.
TRACK MIN SECDISC
÷ The parenthesis ( ) show operations for the main unit.
HI-LITE BEST
PREVIOUS
MODE
Digit buttons
DISC SET
MODE CLEARPGMREPEAT
ABC2DEF
1
GHI4JKL
PQRS7TUV
DISC
SET
<>
1¡4¢
783
FILE-TYPE CD PLAYER
REMOTE CONTROL UNIT
CURSOR
MARK
CHARA
3
MNO
5
6
DISPLAY
WXYZ
8
9
TRACK
SET
0
DISC
–
RANDOM
TIME/
TITLE
TITLE
INPUT
+
Î
CLEAR
DISC (–/+)
3
To start playback
MODE
MODE
( = )
\
3
Press MODE to select CUSTOM and press 3.
Playback starts from the lowest
disc No.
6
6
Checking the numbers of the stored discs.
Press TIME repeatedly (3 times) during stop mode so that the display
changes as shown below.
Press DISC(–/+). Each time you press DISC(–/+), a disc number
stored in the CUSTOM file is displayed. When all the disc numbers
have been displayed, the disc number changes to a blank.
TRACK MIN SECDISC
CUSTOM
÷ The disc title can be registered even during checking the discs in
the custom file [Page 18] However, it is not possible to register the
disc title if the disc number is blank.
DISC
CUSTOM
()
ALL BEST
SINGLE
ROM
PREVIOUS
REPEAT REMAINPGM 1
SCANDISC
ADLC CD TEXT
÷ If you use DISC (–/+) to select a disc, it will be programmed
automatically after approximately 2 seconds.
3
DISC
SET
4
1 2
\
DISC
SET
()
DISC
Press DISC SET.
TRACK MIN SECDISC
CUSTOM
Repeat steps 2 and 3 to
store other discs.
TRACK MIN SECDISC
CUSTOM
12
<PRB1289>
Erasing all the discs from the each CUSTOM
file.
Press MODE to choose CUSTOM, then press the CLEAR
button.
Note!!
You cannot change the discs stored in the CUSTOM file. Likewise,
you cannot erase just one disc from the CUSTOM file.
÷ Pressing DISC (–/+) during CUSTOM playback lets you choose
among other discs stored in the CUSTOM file.
÷ If you use the digit buttons and DISC SET on the remote control
during CUSTOM playback to choose a disc not stored in the
CUSTOM file, “ NO DISC” will be displayed for approximately
3 seconds.
÷ When a disc appointed to the CUSTOM file is not loaded in the
rack, “ NO DISC” is displayed for approximately 3 seconds,
the disc is erased from memory, and CUSTOM searches for the
next disc.
÷ The discs stored in the CUSTOM file will not be erased when you
turn off the power.
÷ Items stored in memory are saved, even if the power cord is
unplugged.
(Memory Back-Up Function).
÷ While the hood is open, DISC (–/+) cannot be used for CUSTOM
file entry.
Page 13

VARIOUS OPERATIONS
÷ You can also use the remote control.
FILE–TYPE
COMPACT DISC PLAYER
◊Û¿X,7
STANDBY
STANDBY / ON
SINGLE LOADER
ACSESS
PLAY
'
REFERENCE FILE–TYPE CD PLAYER
Î
MODE HI-LITE
CLEAR PROGRAM
OPEN/
CLOSE
UNLOAD
Hi-bit Legato Link Conversion
CUSTOM
ALL BEST CD TEXT
DISPLAY
TITLE
INPUT
6
PULSEFLOW
D/A CONVERTER
6
TRACK MIN SECDISC
RDM
PREVIOUSSINGLE
PGM 1
REPEAT
REMAIN
SCANDISC
BEST PREVIOUS
DISC
41
7
PHONES LEVEL
DISC (–/+)
¡¢
41 / ¡¢
7
REPEAT
HI-LITE BEST
PREVIOUS
MODE CLEARPGMREPEAT
TIME/
ABC2DEF
1
GHI4JKL
PQRS7TUV
DISC
SET
<>
1¡
7
783
FILE-TYPE CD PLAYER
REMOTE CONTROL UNIT
CURSOR
MARK
5
8
0
CHARA
3
MNO
TITLE
6
DISPLAY
TITLE
WXYZ
INPUT
9
TRACK
SET
DISC
–
4¢
RANDOM
+
DISC (–/+)
4 ¢
Î
3
To start playback from a specific disc
Press DISC (–/+) during play
DISC
or pause to choose a disc
number. During pause,
press 6 (3 or 8 on the
remote control unit) after
choosing the disc.
÷ Playback starts from the first track
of the chosen disc.
To play a track you want to hear
Press 41/¡¢ dur-
41 ¡¢
ing play or pause to choose
the track number you desire (or press 4/¢ on
the remote control).
During pause, press 6 after choosing the track.
To repeat playback (REPEAT play)
Press the REPEAT button
during playback. Each time
you press the button, the
repeat mode changes as
follows.
One track repeat ALL repeat
(ALL/SINGLE/CUSTOM)
OFF 2
(One track repeat)
Repeats the current or a selected
track in during other play operations
than HI-LITE scan and PREVIOUS
scan.
(ALL repeat)
Repeats in one of the following 3
ways according to the play mode .
ALL: Repeats all the tracks
on all the discs (1 - 100).
SINGLE: Repeats all the tracks
on the selected disc.
CUSTOM: All of the discs classified under one of the three CUSTOM banks are played repeatedly.
One track
ALL
SINGLE
CUSTOM
CUSTOM
REPEAT
TRACK MIN SECDISC
ALL REPEAT 1
TRACK MIN SECDISC
ALL REPEAT
TRACK MIN SECDISC
SINGLE
TRACK MIN SECDISC
REPEAT
REPEAT
3
3
BEFORE
OPERATING
BASIC
OPERATIONS
(OFF)
Cancels repeat play and returns the
unit to normal play mode.
÷ To stop repeat playback, press 7.
÷ When none of the ALL, SINGLE or CUSTOM play mode is
displayed (i.e. during PROGRAM play, BEST play, PREVIOUS scan
or HI-LITE scan), the tracks which would be played with these
functions are played repeatedly.
13
<PRB1289>
VARIOUS
OPERATIONS
VARIOUS
OPERATIONS
Page 14

VARIOUS OPERATIONS
÷ The remote control is the most convenient way to perform these
operations.
FILE–TYPE
COMPACT DISC PLAYER
◊Û¿X
,7
STANDBY
STANDBY / ON
SINGLE LOADER
ACSESS
PLAY
'
REFERENCE FILE–TYPE CD PLAYER
CLEAR PROGRAM
OPEN/
CLOSE
Î
MODE HI-LITE
UNLOAD
Hi-bit Legato Link Conversion
TRACK MIN SECDISC
CUSTOM
RDM
ALL BEST CD TEXT
PGM 1
PREVIOUSSINGLE
BEST PREVIOUS
DISPLAY
TITLE
INPUT
6
7
PHONES LEVEL
PULSEFLOW
D/A CONVERTER
REPEAT
REMAIN
SCANDISC
DISC
41
¡¢
7
To playback tracks/discs at random
(RANDOM play)
RANDOM selects tracks at random from the disc(s) in the current play
mode and plays each track once. The selected play mode stops
after its contents are played back. (Refer to chart below)
Play mode selected
ALL
SINGLE
CUSTOM
RANDOM
Plays all tracks in all discs in a
random order.
Plays all the tracks from a single
disc at random.
Plays all tracks in the discs stored
in the CUSTOM file in a random
order.
Play contents
Press RANDOM during either play or stop mode.
÷ The RANDOM indicator lights up
and random play according to
the current play mode starts.
÷ The parenthesis ( ) show operations for the main unit.
HI-LITE BEST
PREVIOUS
MODE CLEARPGMREPEAT
TIME/
ABC2DEF
1
GHI4JKL
PQRS7TUV
DISC
SET
<>
1¡4¢
7 RANDOM
783
FILE-TYPE CD PLAYER
REMOTE CONTROL UNIT
CURSOR
MARK
CHARA
3
MNO
TITLE
5
6
DISPLAY
TITLE
WXYZ
INPUT
8
9
TRACK
SET
0
DISC
–
+
RANDOM
Î
Notes!!
÷
Random play cannot be activated during the program mode. (If you
press RANDOM during program play, the program contents will
be erased and the unit will start to play tracks at random from all
the discs.)
÷
In the ALL or CUSTOM (
I,II or III
) mode, if less than 100 discs are
loaded, the same track may be played more than once.
÷
If you press REPEAT during random play, the contents of the
random mode are repeated. (RANDOM REPEAT)
÷
If you press DISC (–/+) during random play, random play is
canceled.
÷
If you press MODE during random play, random play is switched
to the ALL or SINGLE play.
÷
If all discs contain 17 tracks or less, random play can play every
track in the discs once.
If any of the discs contain more than 17 tracks, random play plays
the same number of tracks as the total number of tracks in the
discs, but the tracks with track number 17 or more are not always
played once.
()
14
<PRB1289>
7
To stop random play, press
7.
7
Page 15

VARIOUS OPERATIONS
To program tracks/discs in a desired
order (PROGRAM play)
÷ The remote control is the most convenient way to perform these
operations.
÷ You can program up to 36 steps.
÷ The parenthesis ( ) show operations for the main unit.
HI-LITE BEST
PREVIOUS
MODE CLEARPGMREPEAT
TIME/
ABC2DEF
1
CHARA
3
GHI4JKL
MNO
TITLE
5
6
3
2
2
DISPLAY
PQRS7TUV
WXYZ
8
9
DISC
TRACK
MARK
SET
SET
0
DISC
CURSOR
<>
–
1¡4¢
RANDOM
783
FILE-TYPE CD PLAYER
REMOTE CONTROL UNIT
TITLE
INPUT
+
Î
1
3
5
Operation example: Programming disc 2, track 7 as step 1,
and disc 5, track 3 as step 2.
1
PGM
Press PGM (PROGRAM) during stop mode.
PROGRAM
()
2
2
«
DISC
SET
DISC
PROGRAM
( = )
3
7
«
TRACK
SET
41 ¡¢
( = )
4
5
PROGRAM
DISC
SET
\
TRACK
3
SET
\
DISC
PROGRAM PROGRAM
( == = )
Use the digit buttons to select the disc, then press DISC
SET.
(Use DISC (–/+) to select the disc
number, then press PROGRAM.)
TRACK MIN SECDISC
PGM
The PGM indicator starts to blink.
Use the digit buttons to select the track, and press
TRACK SET.
(Use 41 /¡¢ to select the
track number, then press PROGRAM.)
TRACK MIN SECDISC
PGM
TRACK MIN SECDISC
PGM
Repeat steps 2 and 3 to program additional discs and
tracks.
Once the track times have been
added, the PGM indicator stops blinking and the following display appears
(Total Time).
TRACK MIN SECDISC
PGM
41 ¡¢
5
3
6
()
6
Press 3.
The program play starts from the
track that was programmed first.
TRACK MIN SECDISC
PGM
÷ Items stored in memory are saved, even if the power cord is
unplugged.
(Memory Back-Up Function).
The following operations can only be performed
during normal play, HI-LITE scan or PREVIOUS scan
<Programming tracks during normal play>
(Direct program)
1. Press PGM (PROGRAM).
• Program mode is activated.
2. Press PGM (PROGRAM) during playback.
• The current track is programmed.
<Programming during normal playback
(Preprogramming)
You can program during normal playback.
(\Operation example )
• The player changes to program play when the current track
finishes playing back.
• To change to program mode directly, press 3.
1
23
(remote control only)
4
The following operations can only be performed
during stop mode
<Programming an entire disc as one step>
(Disc all program)
If you skip step of the operation example, disc 2 is programmed
as step 1.
<Programming a pause
(Pause program)
If you press 8 at step , you can program a pause. When you press
8, “PA” appears in the display instead of the disc number.
÷ For example, when making a program for recording both sides of
a cassette tape, press 8 to insert a pause after programming the
tracks for one side. After turning the tape over, press 8 to resume
recording.
Notes!!
÷
You cannot program a pause as the first step, or program two
pauses in a row.
÷
When you program a pause, it counts as 1 step and reduces the
total number of tracks you can program.
÷ To erase a program...
Press 7 twice during playback (or once in stop mode). You can also
erase the program by pressing MODE, RANDOM, PREVIOUS, or
SINGLE LOADER PLAY in either play or stop mode (or by
pressing BEST in stop mode).
÷ To cancel a program step
In stop mode, each time you press CLEAR, the last step in the
program is erased.
÷ If a programmed disc is missing or inserted backwards
during program play, “ NO DISC” appears in the display,
the step is automatically erased, and playback proceeds to the
next step.
÷ Program contents are stored in memory even when the power
is turned off (STANDBY).
Notes!!
÷
If step is carried out before the accumulated time is displayed,
the program play starts and the time is not displayed.
÷
When UNLOAD is pressed while a program has been entered, the
disc for the 1st program step comes on the center position and the
hood opens.
÷
The display is not shown if the total time of the program is 100
minutes or more.
3
(remote control only)
>
4
5
15
<PRB1289>
>
OPERATING
OPERATIONS
OPERATIONS
OPERATIONS
BEFORE
BASIC
VARIOUS
VARIOUS
Page 16

TRACK MIN SECDISC
ALL
SCANPREVIOUS
VARIOUS OPERATIONS
÷ You can also use the remote control for these operations.
÷÷
÷ These operations can not be performed on the CD inserted into the SINGLE LOADER SLOT.
÷÷
FILE–TYPE
COMPACT DISC PLAYER
◊Û¿X
,7
STANDBY
STANDBY / ON
SINGLE LOADER
ACSESS
BEST
Î
PLAY
'
REFERENCE FILE–TYPE CD PLAYER
MODE HI-LITE
CLEAR PROGRAM
OPEN/
CLOSE
UNLOAD
Hi-bit Legato Link Conversion
TRACK MIN SECDISC
CUSTOM
RDM
ALL BEST CD TEXT
PGM 1
PREVIOUSSINGLE
DISPLAY
BEST PREVIOUS
TITLE
INPUT
6
7
PHONES LEVEL
PULSEFLOW
DIRECT LINEAR CONVERSION
1-BIT DLC
D/A CONVERTER
PREVIOUS
REPEAT
REMAIN
SCANDISC
DISC
41
¡¢
7
6
To store your favorite tracks
To use the one-touch memory, just press the BEST button while
playing a track you like. You can store up to 20 tracks.
(BEST play)
Press BEST while playing a
BEST
<To listen to the memorized tracks>
track you like.
The BEST indicator blinks and the
disc and track number are stored in
memory.
Press BEST during stop
BEST
mode.
The BEST indicator lights and
playback starts from the most
recently memorized track.
PREVIOUS
HI-LITE BEST
MODE CLEARPGMREPEAT
ABC2DEF
MARK
TIME/
3
CHARA
MNO
TITLE
5
6
DISPLAY
TITLE
WXYZ
INPUT
8
9
TRACK
SET
0
DISC
–
+
RANDOM
Î
1
GHI4JKL
PQRS7TUV
DISC
SET
CURSOR
<>
1¡4¢
7
783
FILE-TYPE CD PLAYER
REMOTE CONTROL UNIT
PREVIOUS
BEST
3
To find out which discs you’ve listened
to recently (PREVIOUS scan)
÷ This function scans the discs in reverse order, starting from
the last disc you played.
÷ It can remember up to 20 discs. If the total number of discs
exceeds 20, the oldest disc will be erased to make room for
the new disc.
Example: If you played discs 1, 2, 9, 12 and 13 in order.
PREVIOUS
Press the PREVIOUS button.
÷ Approximately 10 seconds from
one minute into the first track of
each disc is played back, starting
from the last disc you played: 13,
12, 9, 2, 1.
÷ If you press CLEAR during Best playback, the current track is
erased and the next track starts to play.
÷ You cannot memorize a track twice by pressing BEST during Best
playback.
÷ If you press BEST to memorize a track when 20 tracks are already
memorized, the oldest track is erased from memory and the new
track is memorized.
÷ The memorized contents are stored, even when the power is
turned off (STANDBY).
÷ Items stored in memory are saved, even if the power cord is
unplugged.
(Memory Back-Up Function).
Blink
Press 6 (or 3 ) when you
6
6
÷ To cancel the scanning, press 7 .
÷ Discs played during random, program, HI-LITE scan, Best and
Single Loader playback are not included in the PREVIOUS scan.
÷ If the first track is less than 1 minute long, about 10 seconds from
the beginning will be played. If the first track is less than 10
seconds long, the entire track will be played.
÷ Items stored in memory are saved, even if the power cord is
unplugged.
(Memory Back-Up Function).
reach the disc you want to
hear.
÷ Previous disc scan is canceled
and normal play resumes.
16
<PRB1289>
Page 17

VARIOUS OPERATIONS
÷ You can also use the remote control for these operations.
HI-LITE
FILE–TYPE
COMPACT DISC PLAYER
◊Û¿X,7
STANDBY
STANDBY / ON
SINGLE LOADER
ACSESS
PLAY
'
REFERENCE FILE–TYPE CD PLAYER
MODE HI-LITE
CLEAR PROGRAM
OPEN/
CLOSE
Hi-bit Legato Link Conversion
Î
TRACK MIN SECDISC
CUSTOM
RDM
ALL BEST CD TEXT
REPEAT
PGM 1
REMAIN
SCANDISC
PREVIOUSSINGLE
BEST PREVIOUS
DISPLAY
TITLE
DISC
INPUT
41
¡¢
6
7
UNLOAD
PHONES LEVEL
PULSEFLOW
D/A CONVERTER
6
To scan quickly through tracks on a disc
(HI-LITE scan)
This function plays a 10 second portion located 1 minute from the
start of each track on all the discs in the current play mode.
<Disc scan>
HI-LITE
Press once
The ”DISC” and “SCAN” indicator blinks.
<Track scan>
HI-LITE
Press twice
Press HI-LITE during either
play or stop mode.
÷ The unit plays a 10 second por-
tion located 1 minute into the
first track of each CD, starting
from the first CD.
Press HI-LITE twice during
either play or stop mode.
÷ The unit plays a 10 second por-
tion located 1 minute into each
track of each CD, starting from
the first CD.
HI-LITE
HI-LITE BEST
PREVIOUS
MODE CLEARPGMREPEAT
ABC2DEF
1
GHI4JKL
PQRS7TUV
DISC
SET
CURSOR
<>
1¡4¢
783
FILE-TYPE CD PLAYER
REMOTE CONTROL UNIT
MARK
CHARA
3
MNO
5
6
DISPLAY
WXYZ
INPUT
8
9
TRACK
SET
0
DISC
–
RANDOM
TIME/
TITLE
TITLE
+
Î
3
<To return to normal playback>
Press 6 (or 3 ) when you
6
6
reach the track you want
to hear.
HI-LITE scan is canceled and
normal play resumes.
÷ To cancel HI-LITE scan, press 7.
Notes!!
÷
You can use 4 /¢ to skip to another track during track scan.
÷
If the player is in ALL REPEAT mode, the HI-LITE scan will repeat.
÷
If the track is less than 1 minute long, about 10 seconds from the
beginning of the track will be played. If the track is less than 10
seconds long, the entire track will be played.
BEFORE
OPERATING
BASIC
OPERATIONS
The “SCAN” indicator blinks.
<Program scan>
HI-LITE
Press once
The “SCAN” indicator blinks.
<Best selection memory scan>
HI-LITE
Press once
The “SCAN” indicator blinks.
Press HI-LITE during program mode.
÷ The unit plays a 10 second por-
tion located 1 minute into each
track in the program.
Press HI-LITE during best
selection memory playback.
÷ The unit plays a 10 second por-
tion located 1 minute into each
track in the best selection memory.
17
<PRB1289>
VARIOUS
OPERATIONS
VARIOUS
OPERATIONS
Page 18

783
RANDOM
DISC
SET
TRACK
SET
TIME/
CHARA
HI-LITE BEST
PREVIOUS
MODE CLEARPGMREPEAT
Î
FILE-TYPE CD PLAYER
REMOTE CONTROL UNIT
TITLE
DISPLAY
TITLE
INPUT
1¡4¢
PQRS7TUV
8
MARK
0
WXYZ
9
GHI4JKL
5
MNO
6
1
ABC2DEF
3
CURSOR<DISC
–
+
>
VARIOUS OPERATIONS
÷ The parenthesis ( ) show operations for the main unit.
TITLE INPUT
FILE–TYPE
COMPACT DISC PLAYER
◊Û¿X,7
STANDBY
STANDBY / ON
SINGLE LOADER
ACSESS
PLAY
'
REFERENCE FILE–TYPE CD PLAYER
MODE HI-LITE
CLEAR PROGRAM
OPEN/
CLOSE
Hi-bit Legato Link Conversion
Î
TRACK MIN SECDISC
CUSTOM
RDM
ALL BEST CD TEXT
REPEAT
PGM 1
REMAIN
SCANDISC
PREVIOUSSINGLE
BEST PREVIOUS
DISPLAY
TITLE
DISC
INPUT
41
6
7
UNLOAD
PHONES LEVEL
PULSEFLOW
D/A CONVERTER
¡¢
DISC (–/+)
¡¢
Disc Title Input
A disc title can be assigned to a CD loaded in this unit using up to 8
characters. The assigned disc titles will be convenient when you want
to find a desired disc later.
1
2
Remote control
TITLE
INPUT
Press the TITLE INPUT button.
Cursor blinks.
TITLE
INPUT
()
ABC
2
Select each character to be
entered by pressing a digit
button.
The character which can be entered
DISC
()
2
A
B
C
varies every time the button is
pressed.
Main unit
On the main unit, each press of the
DISC (–) button shows characters in
a reverse cycle.
TRACK MIN SECDISC
A...Z
a...z
(space)
1...9,0
(space)...7
(space)
Digit buttons
TIME/CHARA
TITLE INPUT
CURSOR
DISC (–/+)
(</>)
5
TITLE
INPUT
TITLE
INPUT
()
[Example: To input "PIONEER"]
TITLE
INPUT
PQRS
7
GHI
4
MNO
6
CURSOR
MNO
6
DEF
3
CURSOR
DEF
3
PQRS
7
TITLE
INPUT
.
twice.
4 times.
4 times.
>
.
3 times.
3 times.
>
.
3 times.
4 times.
.
1 Press
2 Press
3 Press
4 Press
5 Press
6 Press
7 Press
8 Press
9 Press
10 Press
11 Press
÷ Pressing the stop button (7) during the title input operation returns
to the condition before the input operation .
Press the TITLE INPUT button at the end.
The entered characters are registered as the title of the current disc.
Title displayOperation
1
CURSOR
3
>
Press the CURSOR (>) button.
The cursor moves to the next character position.
÷ If the next character to be entered belong to a different digit button
from the previous character, it is not required to press the
CURSOR (>) button.
4
18
¡¢
()
Repeat steps and .
<PRB1289>
TRACK MIN SECDISC
32
MARK
Symbols available with the MARK button (
0
(Space) ! “ # $ % & ‘ ( ) ∗ + , – . / : ; < = > ? @ [ \ ]
^ _ ` { | } ~
TIME/
TIME/CHARA button (
lowercase letters.
Notes!!
÷
A disc title cannot be entered for a single loader.
÷
It is not possible to perform the title input operation during
playback of a CD TEXT disc.
÷
It is not possible to assign a title to the custom file itself.
CHARA
) switches the uppercase and
)
Page 19

VARIOUS OPERATIONS
÷ The parenthesis ( ) show operations for the main unit.
FILE–TYPE
COMPACT DISC PLAYER
◊Û¿X,7
STANDBY
STANDBY / ON
SINGLE LOADER
ACSESS
CLEAR
PLAY
'
REFERENCE FILE–TYPE CD PLAYER
TITLE INPUT
Î
CUSTOM
MODE HI-LITE
DISPLAY
TITLE
CLEAR PROGRAM
INPUT
6
OPEN/
UNLOAD
CLOSE
D/A CONVERTER
Hi-bit Legato Link Conversion
TRACK MIN SECDISC
RDM
ALL BEST CD TEXT
REPEAT
PGM 1
REMAIN
SCANDISC
PREVIOUSSINGLE
BEST PREVIOUS
DISC
41
¡¢
7
PHONES LEVEL
PULSEFLOW
DISC (–/+)
41/¡¢
Disc Title Modification
After input, the disc title can be modified any time later.
To modify a registered character, first press the TITLE INPUT button.
CURSOR
<
41 ¡¢
()
<To delete a character>
CLEAR
Press either CURSOR(</>)
>
button to move the cursor
to the character to be
changed.
Press the CLEAR button.
Digit buttons
CURSOR
(</>)
HI-LITE BEST
PREVIOUS
MODE CLEARPGMREPEAT
TIME/
ABC2DEF
1
GHI4JKL
PQRS7TUV
DISC
SET
<>
1¡4¢
783
FILE-TYPE CD PLAYER
REMOTE CONTROL UNIT
CURSOR
MARK
CHARA
3
MNO
TITLE
5
6
DISPLAY
TITLE
WXYZ
INPUT
8
9
TRACK
SET
0
DISC
–
RANDOM
CLEAR
TITLE INPUT
+
Î
BEFORE
OPERATING
CLEAR
()
<To insert a character>
ABC
2
DISC
()
Press a digit button to enter a character.
BASIC
OPERATIONS
VARIOUS
OPERATIONS
VARIOUS
OPERATIONS
19
<PRB1289>
Page 20

VARIOUS OPERATIONS
÷ The parenthesis ( ) show operations for the main unit.
TITLE DISPLAY
FILE–TYPE
COMPACT DISC PLAYER
◊Û¿X,7
STANDBY
STANDBY / ON
SINGLE LOADER
ACSESS
PLAY
'
REFERENCE FILE–TYPE CD PLAYER
CLEAR PROGRAM
OPEN/
CLOSE
Î
MODE HI-LITE
UNLOAD
Hi-bit Legato Link Conversion
TRACK MIN SECDISC
CUSTOM
PGM 1
RDM
ALL BEST CD TEXT
PREVIOUSSINGLE
BEST PREVIOUS
DISPLAY
TITLE
INPUT
6
7
PHONES LEVEL
PULSEFLOW
D/A CONVERTER
REPEAT
REMAIN
SCANDISC
DISC
41
¡¢
DISC (–/+)
HI-LITE BEST
PREVIOUS
MODE CLEARPGMREPEAT
TIME/
ABC2DEF
1
GHI4JKL
PQRS7TUV
DISC
SET
<>
1¡4¢
783
FILE-TYPE CD PLAYER
REMOTE CONTROL UNIT
CURSOR
MARK
CHARA
3
MNO
TITLE
5
6
DISPLAY
TITLE
WXYZ
INPUT
8
9
TRACK
SET
0
DISC
–
RANDOM
TITLE DISPLAY
+
DISC (–/+)
Î
CD TEXT Data Display
(CD TEXT compatible data only)
The CD TEXT data including the disc title, track title and performer
name in a CD can be displayed.
The CD TEXT indicator lights up when a CD containing CD TEXT data
is played.
TITLE
DISPLAY
DISPLAY
()
TITLE
÷ Some discs may not have the performer name data.
÷ Even when a disc without the CD TEXT compatibility is played, the
disc title is displayed provided that it has been input previously.
When a disc played does not have a disc title input for it, the disc
title display becomes as shown below.
Press the TITLE DISPLAY
button during playback.
Clock display
=
≠
Disc title
≠
Track title
≠
Performer name
TRACK MIN SECDISC
ALL
To search a disc by the Disc title
1
2
TITLE
DISPLAY
DISPLAY
()
TITLE
DISC
–
()
+
DISC
Press the TITLE DISPLAY
button during playback to
display the title.
Press the DISC (–/+) button.
÷ Each press of the DISC (–/+)
button displays the title of the
next disc.
TRACK MIN SECDISC
ALL
«
TRACK MIN SECDISC
ALL
÷
÷
÷
«
TRACK MIN SECDISC
Note!!
A very long title or performer name (more than about 1000 characters)
may not be displayed completely.
<Title Memory>
Once the disc title of a CD TEXT disc is shown, the top 8 characters
are automatically stored in memory.
Even when another title has been stored, it is automatically overwritten by the new CD TEXT disc title.
Tip:
If the CD TEXT disc title begins with a space character, it will not be
overwritten. Therefore, if you do not want a title to be overwritten,
insert a space character as the first character.
When you want to overwrite a title beginning with a space character,
simply remove the space character.
20
<PRB1289>
ALL
The disc number blinks
Note!!
If the DISC (–/+) button is pressed while the title is scrolled immediately after the start of disc playback, the previous or next disc will be
selected.
3
3
When the desired disc title
is displayed, press the PLAY
(3) button.
The disc desired starts to be
6
()
6
played.
TRACK MIN SECDISC
ALL
Page 21

VARIOUS OPERATIONS
÷ You can use the remote control.
HI-LITE BEST
MODE CLEARPGMREPEAT
ABC2DEF
1
GHI4JKL
5
PQRS7TUV
8
DISC
MARK
SET
0
CURSOR
<>
1¡4¢
783
FILE-TYPE CD PLAYER
REMOTE CONTROL UNIT
To use the TIME button
PREVIOUS
3
MNO
6
WXYZ
9
TRACK
SET
–
DISC
TIME/
CHARA
TITLE
DISPLAY
TITLE
INPUT
RANDOM
TIME/CHARA
+
Î
TIME/
CHARA
Press TIME during playback.
Each time you press TIME, the
display changes as follows.
Disc number, Track number and
=
Elapsed Time.
«
Remaining time (TRACK)
«
Remaining time (DISC)
«
Total elapsed time (TOTAL)
Notes!!
÷
Time remaining on the track may not be displayed for tracks
numbered greater than 24.
÷
Time remaining on the disc is not displayed during RANDOM,
PROGRAM or BEST play.
÷
During PROGRAM play
Disc number, Track number
=
and Elapsed Time.
Remaining time (TRACK)
Total program time and
number of steps (TOTAL)
«
«
÷
During BEST play
Disc number, Track number
=
and Elapsed Time.
Remaining time (TRACK)
«
Total number of steps
memorized in BEST (TOTAL)
«
Caution in use of the optional PD-AP1 File-type
CD Controller
÷ When the PD-AP1 is connected to the PD-F17, disc replace-
ment should be done by using the PD-F17 DISC (+/–) after
opening the hood.
(The PD-F17 DISC (+/–) will not function when the hood is
close.)
Note!!
The PD-F17 DISC (+/–) of the remote control unit cannot be
used.
÷ The disc in the SINGLE LOADER slot can be played only when
the PD-F17 is connected with the PLAYER 1 section of the PDAP1.
Note!!
If the PD-F17 is connected with the PLAYER 2 or 3 section of
the PD-AP1, the disc can be loaded in the SINGLE LOADER slot
but cannot be played.
÷ When the PD-AP1 is connected to the PD-F17, the BEST play,
PREVIOUS scan and HI-LITE scan functions of the PD-F17
cannot be used.
÷ When the PD-AP1 is connected to the PD-F17, the time display
on the PD-F17 will read “– – – – –”.
÷ The ADLC button on the PD-AP1 is not used with the PD-F17.
÷ The PD-AP1 does not display the CD TEXT data and the disc
titles input in the PD-F17.
BEFORE
OPERATING
BASIC
OPERATIONS
21
<PRB1289>
VARIOUS
OPERATIONS
VARIOUS
OPERATIONS
Page 22

TROUBLESHOOTING
Incorrect operations are often mistaken for trouble and malfunctions. If you think that there is something wrong with this component, check the
points below. Sometimes the trouble may lie in another component. Investigate the other components and electrical appliances being used.
If the trouble cannot be rectified even after exercising the checks listed below, ask your nearest PIONEER authorized service center or your dealer
to carry out repair work.
Symptom Cause Remedy
No sound
÷ Output cables are connected incorrectly or loosely.
÷ Incorrect operation of stereo amplifier.
÷ Pin plugs and/or amplifier terminals are dirty.
÷ Player is in pause mode.
÷ The disc is loaded with the label side rightward.
÷ Connect properly.
÷ Check the settings of amplifier switches and
sound volume controls.
÷ Clean away dirt.
÷ Press 3 or 8.
÷ Reload the disc with the label side leftward.
When playback is started, it
stops immediately.
Pauses or stops during playback.
Remote control will not function.
Abnormal functioning of this unit may be caused by static electricity, or other external interference. To restore normal operation, unplug the AC power
cord and then plug it in again.
÷ Disc is inserted in the wrong way.
÷ Smudges, etc., on the disc.
÷ Dead batteries.
÷ Obstruction between player and remote control
unit.
÷ Insert the disc correctly with the label side
leftward.
÷ Clean the smudges from the disc and then play
it again.
÷ Replace batteries.
÷ Relocate remote control unit or remove ob-
struction.
SELF-DIAGNOSTICS FUNCTION
The unit incorporates a self-diagnostic function.
When an abnormality is detected during operation of the unit, an error message (service no.) appears on the unit‘s display automatically. Treat the
error by following the instructions in ”Countermeasures”.
Display on the unit
Service No.
Service No. Unit Status Countermeasures
U1
The disc may not be loaded properly in the rack.
TRACK MIN SECDISC
÷ Reload the discs properly.
(Insert only one disc in a slot.)
÷ Check if there is a foreign object attached onto
the disc.
÷ Check if there is a foreign object in the rack.
U2
U3
If the same display appears again, there may be an error in the mechanical section. When requesting servicing, please also let us know the
service number displayed on the unit.
There is an operation error in the mechanical section.
There is an error related to the hood.
÷ Check if there is a foreign object in the rack.
÷ Unplug the power cord then plug it in again.
÷ Check if the hood is caught by anything.
÷ Unplug the power cord then plug it in again.
POWER-CORD CAUTION
Handle the power cord by the plug. Do not pull out the plug by tugging the cord and never touch the power cord when your hands are wet as
this could cause a short circuit or an electric shock. Do not place the unit, a piece of furniture, etc., on the power cord, or pinch the cord. Never
make a knot in the cord or tie it with other cords. The power cords should be routed such that they are not likely to be stepped on. A damaged
power cord can cause a fire or give you an electrical shock. Check the power cord once in a while. When you find it damaged, ask your nearest
PIONEER authorized service center or your dealer for a replacement.
22
<PRB1289>
Page 23

SPECIFICATIONS
1. General
Type ........................................... Compact disc digital audio system
Power requirements .............................................. AC 120V, 60 Hz
Power consumption ................................................................. 14W
Power consumption in standby mode ........................................ 3W
Operating temperature ............................................... +5°C - +35°C
(+41°F - +95°F)
Weight ( without package ) ................................. 6.5 kg (14 lb 5 oz.)
External dimensions ......................... 420(W) X 402(D) X 193(H) mm
16-9/16(W) X 15-13/16(D) X 7-10/16(H) in.
2. Audio section
Frequency response ................................................... 2 Hz - 20 kHz
S/N ratio ........................................................ 105 dB or more (EIAJ)
Dynamic range ................................................ 96 dB or more (EIAJ)
Channel separation ....................................... 100 dB or more (EIAJ)
Harmonic distortion ....................................... 0.003 % or less (EIAJ)
Level difference between channels ................. 1.0 dB or less (EIAJ)
Output voltage ........................................................... 2 Vrms (EIAJ)
Wow and flutter ............................... less than ±0.001 % (W.PEAK)
( below measurable level ) (EIAJ)
Channels ............................................................ 2-channel ( stereo )
3. Output terminal
Audio line output
Control input jack
Control output jack
CD-DECK SYNCHRO jack
Optical digital output jack
Coaxial digital output jack
I/O interface
Head phone jack with volume control
4. Accessories
÷ Remote control unit .................................................................. 1
÷ Size AA/R6P dry cell batteries ................................................... 2
÷ Output cable ............................................................................. 1
÷ Control cable ............................................................................. 1
÷ Operating instructions ............................................................... 1
Note!!
Specifications and design subject to possible modification without
notice, due to improvements.
We Want You Listening For A Lifetime
Selecting fine audio equipment such as the unit you’ve just purchased is
only the start of your musical enjoyment. Now it’s time to consider how you
can maximize the fun and excitement your equipment offers. This manufacturer and the Electronic Industries Association’s Consumer Electronics
Group want you to get the most out of your equipment by playing it at a safe
level. One that lets the sound come through loud and clear without annoying
blaring or distortion-and, most importantly, without affecting your sensitive
hearing.
Sound can be deceiving. Over time your hearing “comfort level” adapts to
higher volumes of sound. So what sounds “normal” can actually be loud and
harmful to your hearing. Guard against this by setting your equipment at a
safe level BEFORE your hearing adapts.
To establish a safe level:
÷ Start your volume control at a low setting.
÷ Slowly increase the sound until you can hear it comfortably and
clearly, and without distortion.
Once you have established a comfortable sound level:
÷ Set the dial and leave it there.
Taking a minute to do this now will help to prevent hearing damage or loss
in the future. After all, we want you listening for a lifetime.
Used wisely, your new sound equipment will provide a lifetime of fun and
enjoyment. Since hearing damage from loud noise is often undetectable until
it is too late, this manufacturer and the Electronic Industries Association’s
Consumer Electronics Group recommend you avoid prolonged exposure to
excessive noise. This list of sound levels is included for your protection.
Decibel
Level Example
30 Quiet library, soft whispers
40 Living room, refrigerator, bedroom away from traffic
50 Light traffic, normal conversation, quiet office
60 Air conditioner at 20 feet, sewing machine
70 Vacuum cleaner, hair dryer, noisy restaurant
80 Average city traffic, garbage disposals, alarm clock
at two feet.
THE FOLLOWING NOISES CAN BE DANGEROUS UNDER
CONSTANT EXPOSURE
90 Subway, motorcycle, truck traffic, lawn mower
100 Garbage truck, chain saw, pneumatic drill
120 Rock band concert in front of speakers, thunderclap
140 Gunshot blast, jet plane
180 Rocket launching pad
Information courtesy of the Deafness Research Foundation.
BEFORE
OPERATING
BASIC
OPERATIONS
VARIOUS
OPERATIONS
23
<PRB1289>
Page 24

FILE–TYPE
COMPACT DISC PLAYER
◊Û¿X
,7
STANDBY
STANDBY / ON
SINGLE LOADER
ACSESS
PLAY
'
REFERENCE FILE–TYPE CD PLAYER
Î
MODE HI-LITE
CLEAR PROGRAM
OPEN/
CLOSE
UNLOAD
Hi-bit Legato Link Conversion
TRACK MIN SECDISC
CUSTOM
REPEAT
PGM 1
RDM
ALL BEST CD TEXT
SCANDISC
PREVIOUSSINGLE
DISPLAY
BEST PREVIOUS
TITLE
INPUT
6
7
PHONES LEVEL
PULSEFLOW
D/A CONVERTER
41
REMAIN
DISC
¡¢
POWER ON DEMO display
POWER ON DEMO display mode allows you to see
variations of the display. To enter the POWER ON
To cancel the POWER ON DEMO display mode,
press any button.
DEMO display mode, press STANDBY/ON and then
4 1 within 1 second after turning on the power.
Should this product require service in the U.S.A. and you wish to locate the nearest Pioneer
Authorized Independent Service Company, or if you wish to purchase replacement parts,
operating instructions, service manuals, or accessories, please call the number shown
below.
8 0 0 – 4 2 1 – 1 4 0 4
Please do not ship your product to Pioneer without first calling the Customer Service
Department at the above listed number for assistance.
PIONEER ELECTRONICS SERVICE, INC.
CUSTOMER SERVICE DEPARTMENT
P.O. BOX 1760, LONG BEACH,
CA 90801-1760, U.S.A.
For warranty information please see the Limited Warranty sheet included with your product.
PIONEER ELECTRONIC CORPORATION
PIONEER ELECTRONICS [USA] INC.
PIONEER ELECTRONICS OF CANADA, INC.
PIONEER ELECTRONIC [EUROPE] N.V.
PIONEER ELECTRONICS AUSTRALIA PTY. LTD.
24
PIONEER ELECTRONICS DE MEXICO S.A. DE C.V.
<PRB1289>
<99A00ZF0P00>
P.O. BOX 1540, Long Beach, California 90801-1540
300 Allstate Parkway, Markham, Ontario L3R OP2, Canada
Haven 1087, Keetberglaan 1, 9120 Melsele, Belgium TEL: 03/570.05.11
178-184 Boundary Road, Braeside, Victoria 3195, Australia, TEL: [03] 9586-6300
Published by Pioneer Electronic Corporation.
Copyright © 1999 Pioneer Electronic Corporation.
All rights reserved.
4-1, Meguro 1-Chome, Meguro-ku, Tokyo 153-8654, Japan
San Lorenzo Num 1009 3er Piso Desp. 302 Col. Del Valle, Mexico D.F. C.P.03100 TEL: 5-688-52-90
Printed in China <PRB1289-A>
 Loading...