

Page 1
DVD LD PLAYER
English
Français
Lecteur de DVD, LD
DVL-V888
Operating Instructions
Mode d'emploi
…
L
Refer pages 6~7 for
"Contents".
'
Æ
GRAPHICS
NTSC
DISC SIDE
A / B
A B
STANDBY
POWER
STANDBY/ON
KARAOKE
GUIDE
VOCAL
SCORING
ONE-TOUCH
VIDEO CD FUNCTION DVD FUNCTION
VOCAL
PARTNER
SYSTEM
KARAOKE
SINGLE
MODE
PLAY
V-NR PBC
GUIDE VOCAL
MAXMIN
ONE
HI-LITE
CHORUS
MEDLEY
STOP PLAYPAUSE
LOW HIGHKEY CONTROL
ECHO
MIC 2MIC 1
LD-G CD-G
MAXMINMAXMIN
MAXMIN
GUIDE
MELODY
LaserDisk
CD / VIDEO CD
MIC
CONTROL
OPEN/CLOSE
MIC 2MIC 1
LASER DBC
& First refer to “Before using” on page 8 and
“Connecting the Player” on pages 66 – 68.
& Refer to pages 12 – 17 for basic playback.
& Refer to pages 28 – 29 for Karaoke functions.
Page 2

Thank you for buying this Pioneer product.
Please read through these operating instructions so you will
know how to operate your model properly. After you have
finished reading the instructions, put them away in a safe
place for future reference.
IMPORTANT SAFETY INSTRUCTIONS
¶ This player is not suitable for commercial use.
READ INSTRUCTIONS — All the safety and operating
instructions should be read before the product is
operated.
RETAIN INSTRUCTIONS — The safety and operating
instructions should be retained for future reference.
HEED WARNINGS — All warnings on the product and
in the operating instructions should be adhered to.
FOLLOW INSTRUCTIONS — All operating and use
instructions should be followed.
CLEANING — Unplug this product from the wall outlet
before cleaning. The product should be cleaned only
with a polishing cloth or a soft dry cloth. Never clean
with furniture wax, benzine, insecticides or other
volatile liquids since they may corrode the cabinet.
ATTACHMENTS — Do not use attachments not
recommended by the product manufacturer as they
may cause hazards.
WATER AND MOISTURE — Do not use this product
near water — for example, near a bathtub, wash
bowl, kitchen sink, or laundry tub; in a wet basement;
or near a swimming pool; and the like.
ACCESSORIES — Do not place this product on an
unstable cart, stand, tripod, bracket, or table. The
product may fall, causing serious injury to a child or
adult, and serious damage to the product. Use only
with a cart, stand, tripod, bracket, or table
recommended by the manufacturer, or sold with
the product. Any mounting of the product should
follow the manufacturer’s instructions, and should
use a mounting accessory recommended by the
manufacturer.
CART — A product and cart combination should be
moved with care. Quick stops, excessive force, and
uneven surfaces may cause the product and cart
combination to overturn.
VENTILATION — Slots and openings in the cabinet are
provided for ventilation and to ensure reliable
operation of the product and to protect it from
overheating, and these openings must not be
blocked or covered. The openings should never be
blocked by placing the product on a bed, sofa, rug,
or other similar surface. This product should not be
placed in a built-in installation such as a bookcase or
rack unless proper ventilation is provided or the
manufacturer’s instructions have been adhered to.
POWER SOURCES — This product should be operated
only from the type of power source indicated on the
marking label. If you are not sure of the type of
power supply to your home, consult your product
dealer or local power company.
LOCATION – The appliance should be installed in a
stable location.
NONUSE PERIODS – The power cord of the appliance
should be unplugged from the outlet when left unused for a long period of time.
GROUNDING OR POLARIZATION
÷ If this product is equipped with a polarized alternating
current line plug (a plug having one blade wider than
the other), it will fit into the outlet only one way. This
is a safety feature. If you are unable to insert the plug
fully into the outlet, try reversing the plug. If the plug
should still fail to fit, contact your electrician to
replace your obsolete outlet. Do not defeat the
safety purpose of the polarized plug.
÷ If this product is equipped with a three-wire
grounding type plug, a plug having a third (grounding)
pin, it will only fit into a grounding type power outlet.
This is a safety feature. If you are unable to insert the
plug into the outlet, contact your electrician to
replace your obsolete outlet. Do not defeat the
safety purpose of the grounding type plug.
POWER-CORD PROTECTION — Power-supply cords
should be routed so that they are not likely to be
walked on or pinched by items placed upon or
against them, paying particular attention to cords at
plugs, convenience receptacles, and the point where
they exit from the product.
OUTDOOR ANTENNA GROUNDING — If an outside
antenna or cable system is connected to the product,
be sure the antenna or cable system is grounded so
as to provide some protection against voltage surges
and built-up static charges. Article 810 of the National
Electrical Code, ANSI/NFPA 70, provides information
with regard to proper grounding of the mast and
supporting structure, grounding of the lead-in wire
to an antenna discharge unit, size of grounding
conductors, location of antenna-discharge unit,
connection to grounding electrodes, and
requirements for the grounding electrode. See Figure
A.
LIGHTNING — For added protection for this product
during a lightning storm, or when it is left unattended
and unused for long periods of time, unplug it from
the wall outlet and disconnect the antenna or cable
system. This will prevent damage to the product
due to lightning and power-line surges.
POWER LINES — An outside antenna system should
not be located in the vicinity of overhead power lines
or other electric light or power circuits, or where it
can fall into such power lines or circuits. When
installing an outside antenna system, extreme care
should be taken to keep from touching such power
lines or circuits as contact with them might be fatal.
OVERLOADING — Do not overload wall outlets,
extension cords, or integral convenience receptacles
as this can result in a risk of fire or electric shock.
GROUND
CLAMP
ELECTRIC
SERVICE
EQUIPMENT
Fig. A
OBJECT AND LIQUID ENTRY — Never push objects of
any kind into this product through openings as they
may touch dangerous voltage points or short-out
parts that could result in a fire or electric shock.
Never spill liquid of any kind on the product.
SERVICING — Do not attempt to service this product
yourself as opening or removing covers may expose
you to dangerous voltage or other hazards. Refer all
servicing to qualified service personnel.
DAMAGE REQUIRING SERVICE — Unplug this product
from the wall outlet and refer servicing to qualified
service personnel under the following conditions:
÷ When the power-supply cord or plug is damaged.
÷ If liquid has been spilled, or objects have fallen into
the product.
÷ If the product has been exposed to rain or water.
÷ If the product does not operate normally by following
the operating instructions. Adjust only those controls
that are covered by the operating instructions as an
improper adjustment of other controls may result in
damage and will often require extensive work by a
qualified technician to restore the product to its
normal operation.
÷ If the product has been dropped or damaged in any
way.
÷ When the product exhibits a distinct change in
performance — this indicates a need for service.
REPLACEMENT PARTS — When replacement parts
are required, be sure the service technician has used
replacement parts specified by the manufacturer or
have the same characteristics as the original part.
Unauthorized substitutions may result in fire, electric
shock, or other hazards.
SAFETY CHECK — Upon completion of any service or
repairs to this product, ask the service technician to
perform safety checks to determine that the product
is in proper operating condition.
WALL OR CEILING MOUNTING — The product should
not be mounted to a wall or ceiling.
HEAT — The product should be situated away from heat
sources such as radiators, heat registers, stoves, or
other products (including amplifiers) that produce
heat.
ANTENNA
LEAD IN
WIRE
ANTENNA
DISCHARGE UNIT
(NEC SECTION 810-20)
GROUNDING CONDUCTORS
(NEC SECTION 810-21)
GROUND CLAMPS
POWER SERVICE GROUNDING
ELECTRODE SYSTEM
(NEC ART 250, PART H)
2
NEC — NATIONAL ELECTRICAL CODE
Important
Page 3
IMPORTANT
The lightning flash with arrowhead symbol, within an
equilateral triangle, is intended to alert the user to the
presence of uninsulated "dangerous voltage" within the
product's enclosure that may be of sufficient magnitude
to constitute a risk of electric shock to persons.
IMPORTANT
Ce symbole de l'éclair, placé dans un triangle équilatéral,
a pour but d'attirer l'attention de l'utilisateur sur la
présence, à l'intérieur du coffret de l'appareil, de
"tensions dangereuses" non isolées d'une grandeur
suffisante pour représenter un risque d'électrocution
pour les êtres humains.
CAUTION
RISK OF ELECTRIC SHOCK
DO NOT OPEN
CAUTION:
TO PREVENT THE RISK OF ELECTRIC SHOCK, DO
NOT REMOVE COVER (OR BACK). NO USERSERVICEABLE PARTS INSIDE. REFER SERVICING
TO QUALIFIED SERVICE PERSONNEL.
ATTENTION
DANGER D'ELECTROCUTION
NE PAS OUVRIR
ATTENTION: Pour éviter tout risque d'électrocution,
ne pas enlever le couvercle (ni le panneau arrière).
Aucune pièce réparable par l'utilisateur ne se trouve à
l'intérieur. Confier tout entretien à un personnel
qualifieé uniquement.
The exclamation point within an equilateral triangle is
intended to alert the user to the presence of important
operating and maintenance (servicing) instructions in
the literature accompanying the appliance.
Ce point d'exclamation, placé dans un triangle
équilatéral, a pour but d'attirer l'attention de l'utilisateur
sur la présence, dans les documents qui accompagnent
l'appareil, d'explications importantes du point de vue de
l'exploitation ou de l'entretien.
WARNING: TO PREVENT FIRE OR SHOCK HAZARD, DO
NOT EXPOSE THIS APPLIANCE TO RAIN OR MOISTURE.
IMPORTANT NOTICE
[For U.S. and Canadian models]
The serial number for this equipment is located on the rear panel.
Please write this serial number on your enclosed warranty card
and keep it in a secure area. This is for your security.
[For Canadian model]
CAUTION: TO PREVENT ELECTRIC SHOCK DO NOT USE
THIS (POLARIZED) PLUG WITH AN EXTENSION CORD,
RECEPTACLE OR OTHER OUTLET UNLESS THE BLADES CAN
BE FULLY INSERTED TO PREVENT BLADE EXPOSURE.
CAUTION:This product satisfies FCC regulations when
shielded cables and connectors are used to connect the unit
to other equipment. T o prevent electromagnetic interference
with electric appliances such as radios and televisions, use
shielded cables and connectors for connections.
THE POWER SWITCH IS SECONDARY CONNECTED AND
THEREFORE DOES NOT SEPARATE THE UNIT FROM MAINS
POWER IN STANDBY POSITION.
ATTENTION: AFIN DE PREVENIR TOUS RISQUES DE
CHOC ELECTRIQUE OU DE DEBUT D‘ENCENDIE, NE PAS
EXPOSER CET APPAREIL A L‘HUMIDITE OU A LA PLUIE.
REMARQUE IMPORTANTE
Le numéro de série de cet appareil se trouve son panneau arrière.
Pour s‘y référer en cas de besoin, prière d‘inscrire ce numéro
sur la carte de garantie inclue et de la conserver dans un endroit
sûr.
A TTENTION: POUR PREVENIR LES CHOCS ELECTRIQUES
NE PAS UTILISER CETTE FICHE POLARISEE AVEC UN
PROLONGATEUR UNE PRISE DE COURANT OU UNE AUTRE
SORTIE DE COURANT, SAUF SI LES LAMES PEUVENT ETRE
INSEREES A FOND SANS EN LAISSER AUCUNE PARTIE A
DECOUVERT.
L‘INTERRUPTEUR D‘ALIMENTATION EST RACCORDE
SECONDAIREMENT ET PAR CONSEQUENT NE SEPARE PAS
L‘APPAREIL DE L‘ALIMENTATION SECTEUR SUR LA
POSITION D‘ATTENTE.
This equipment has been tested and found to comply with the limits for a Class B digital device, pursuant to Part 15 of the FCC
Rules. These limits are designed to provide reasonable protection against harmful interference in a residential installation.
This equipment generates, uses, and can radiate radio frequency energy and, if not installed and used in accordance with the
instructions, may cause harmful interference to radio communications. However, there is no guarantee that interference will
not occur in a particular installation. If this equipment does cause harmful interference to radio or television reception, which
can be determined by turning the equipment off and on, the user is encouraged to try to correct the interference by one or more
of the following measures:
– Reorient or relocate the receiving antenna.
– Increase the separation between the equipment and receiver.
– Connect the equipment into an outlet on a circuit different from that to which the receiver is connected.
– Consult the dealer or an experienced radio/TV technician for help.
Important
3
Page 4
Information to User
÷
÷
÷
Alteration or modifications carried out without appropriate authorization may invalidate the user's right to operate the equipment.
CAUTION
÷ Use of controls or adjustments or performance of procedures other than those specified herein may result in hazardous radiation
exposure.
÷ The use of optical instruments with this product will increase eye hazard.
[For Canadian model]
This Class B digital apparatus meets all requirements of the Canadian Interference–Causing Equipment Regulations.
[Pour le modèle Canadien]
Cet appareil numérique de la Classe B respecte toutes les exigences du Règlement sur le matériel brouilleur du Canada.
I
N
O
R
T
C
E
L
E
EIA
•
EST 1924
A
S
S
O
I
C
N
D
U
S
T
R
I
E
S
•
N
O
I
T
C
A
I
We
Want You
LISTENING
For A Lifetime
We Want You Listening For A Lifetime
Used wisely, your new sound equipment will provide a
lifetime of fun and enjoyment. Since hearing damage from loud
noise is often undetectable until it is too late, this manufacturer
and the Electronic Industries Association’s Consumer Electronics
Group recommend you avoid prolonged exposure to excessive
noise. This list of sound levels is included for your protection.
Selecting fine audio equipment such as the unit you’ve just
purchased is only the start of your musical enjoyment. Now it’s
time to consider how you can maximize the fun and excitement
your equipment offers. This manufacturer and the Electronic
Industries Association’s Consumer Electronics Group want you
to get the most out of your equipment by playing it at a safe
level. One that lets the sound come through loud and clear
without annoying blaring or distortion—and, most importantly,
without affecting your sensitive hearing.
Sound can be deceiving. Over time your hearing “comfort
level” adapts to higher volumes of sound. So what sounds
“normal” can actually be loud and harmful to your hearing.
Guard against this by setting your equipment at a safe level
BEFORE your hearing adapts.
Decibel
Level Example
30 Quiet library, soft whispers
40 Living room, refrigerator, bedroom away from traffic
50 Light traffic, normal conversation, quiet office
60 Air conditioner at 20 feet, sewing machine
70 Vacuum cleaner, hair dryer, noisy restaurant
80 Average city traffic, garbage disposals, alarm clock
at two feet.
THE FOLLOWING NOISES CAN BE DANGEROUS
UNDER CONSTANT EXPOSURE
90 Subway, motorcycle, truck traffic, lawn mower
100 Garbage truck, chain saw, pneumatic drill
120 Rock band concert in front of speakers, thunderclap
To establish a safe level:
Start your volume control at a low setting.
Slowly increase the sound until you can hear it comfortably
and clearly, and without distortion.
140 Gunshot blast, jet plane
180 Rocket launching pad
Information courtesy of the Deafness Research Foundation.
Once you have established a comfortable sound level:
Set the dial and leave it there.
Taking a minute to do this now will help to prevent hearing
damage or loss in the future. After all, we want you listening for
a lifetime.
N
O
R
T
C
E
L
E
EIA
•
EST 1924
A
S
S
O
I
C
N
I
D
U
S
T
R
I
E
S
•
N
O
I
T
C
A
I
We
Want You
LISTENING
For A Lifetime
4
Page 5
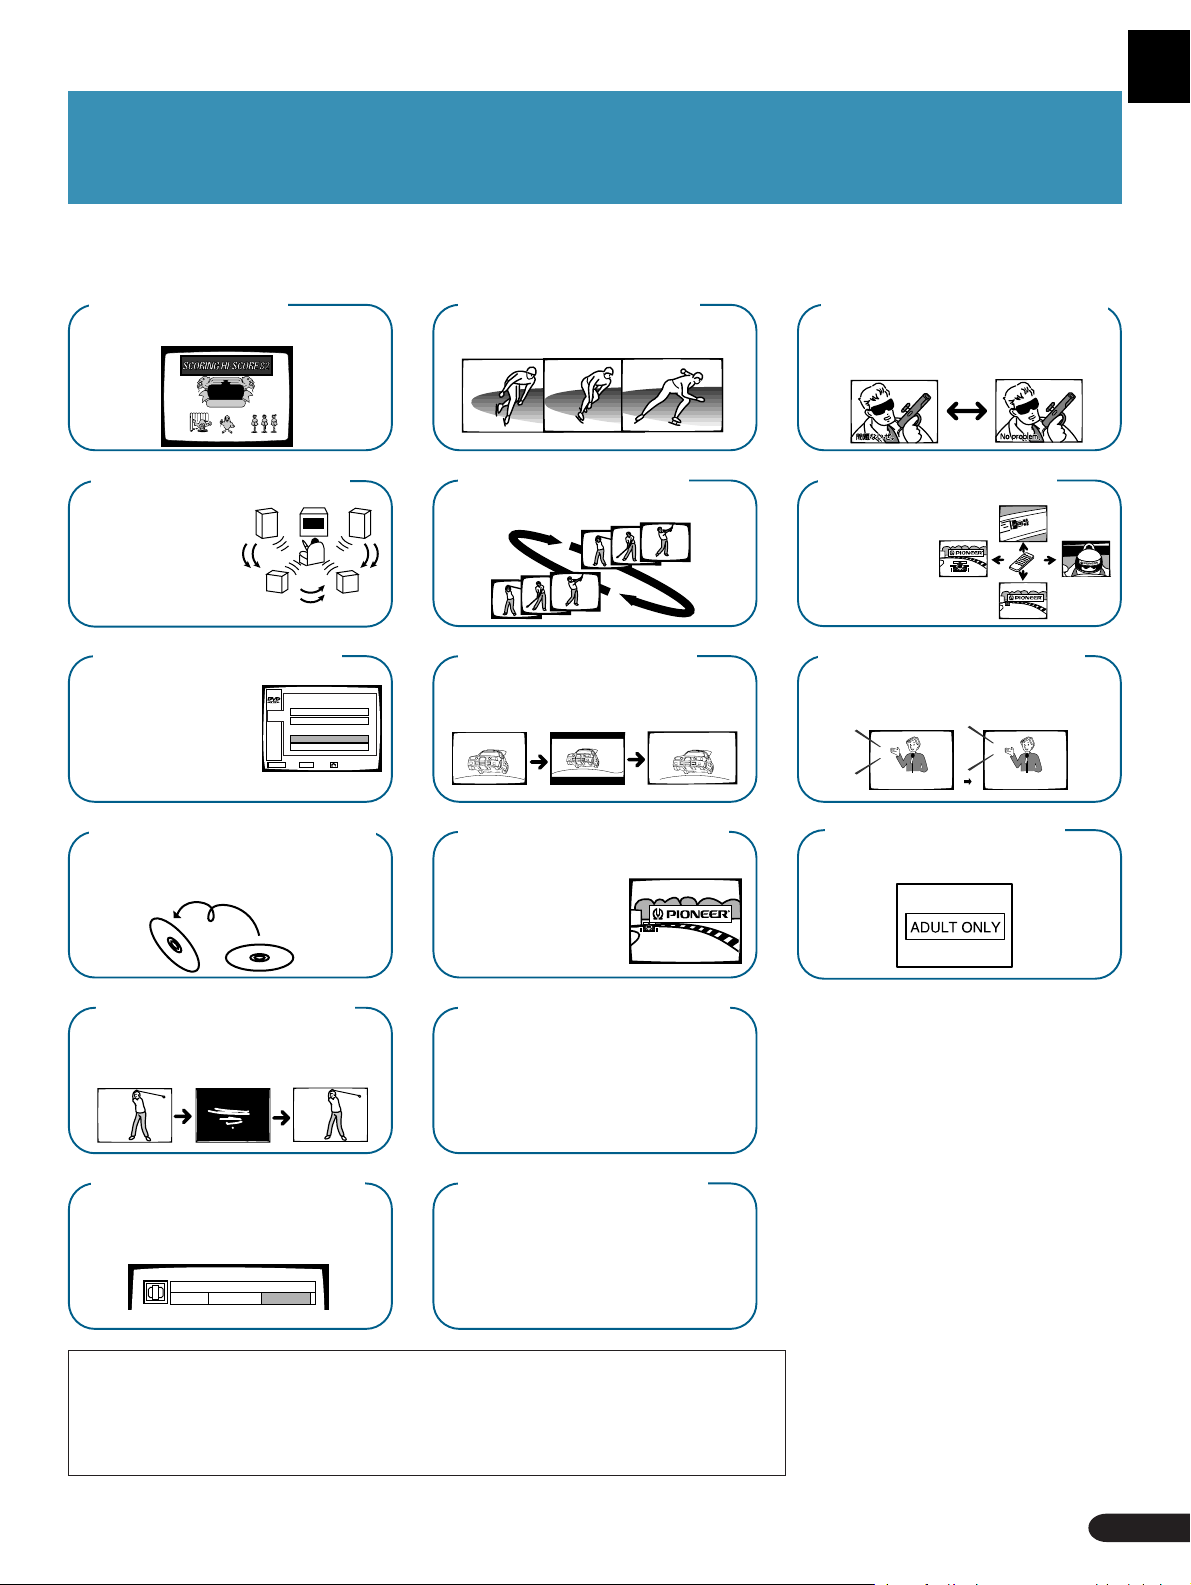
See What You Can Do
100
(P.34)
(P.61)
(P.53)
MAIN
STOP
1
TITLE MENU
2
MENU
SETUP
3
INITIAL
4
OUTPUT
MENU ENTER
EXIT ENTER RETURN
B Side
(P.12)
*
Still Frame*
You can view still frames.
Repeat Play
Wide range of Repeat Play possibilities.
Multi-Aspect
You can select between Regular, Wide, and
Letter Box display formats.
PBC Video CD Compatibility
Ready to play Video CDs
(Version 2.0) with PBC
(Play Back Control). Two
types of playback are
possible depending on
the disc.
SCORING
This function grades your singing ability.
Dolby Digital*
Connect to a Digital
Surround Amp and
Surround Processor
for 5.1ch Dolby Digital
Surround
entertainment.
GUI Operation
While viewing Pioneer’s original
GUI on-screen displays, you can
perform operations by remote
control. Even if there is no menu
recorded on a disc, you can still
perform GUI operation with the
menu provided by the player.
Continuous Play of Both Sides of LDs
You can enjoy continuous playback of both
sides of a laserdisc.
A Side
(P.25)
(P.24)
*
(P.42)
*
(P.14, P.20)
Multi-language Subtitles
Y ou can select a desired subtitle language
when watching movies and other videos.
Multi-Angle*
Lets you view scenes
from different camera
angles.
Multi-Languages
With discs that have multiple language soundtracks
recorded on them, you can select the desired language.
HELLO
AUDIO : 1 English AUDIO : 2 Spanish
Parental Level
Lets you select a “parental level” (user restriction
level) to prevent children from viewing undesirable
material.
HOLA
*
(P.50)
*
(P.61)
*
(P.50)
(P.49)
Last Memory Play
If you stop video playback, this lets you
resume play back from where it was stopped.
*
(P.18)
Cinema Mode & Animation Mode
Lets you select the ideal picture
quality for watching movies and
animation movies.
MODE
CINEMA ANIMATION STANDARD
This product incorporates copyright protection technology that is protected by method claims of
certain U.S. patents and other intellectual property rights owned by Macrovision Corporation and
other rights owners. Use of this copyright protection technology must be authorized by Macrovision
Corporation, and is intended for home and other limited viewing uses only unless otherwise
authorized by Macrovision Corporation. Reverse engineering or disassembly is prohibited.
(P.44)
Power On Demo Display
Switching ON the Power On Display provides
a wide range of indications.
To switch to power ON demo display,
press the power switch while pressing the HI-LITE
MEDLAY button. Press any button to cancel the
demo indications.
Condition Memory
Records and automatically recalls settings for
DVDs you often watch.
• Multi-Aspect
• Cinema Mode/Animation Mode
• Multi-language Subtitles
• Multi-language
• Position
(P.48)
This mark indicates this may not be
*
possible with certain discs.
See What You Can Do
5
Page 6
Applicable discs
DVD CD LD
VIDEO CD
Contents
See What You Can Do 5
Contents 6
Before Using 8
Checking accessories 8
Inserting batteries into the remote control 8
Caution Before Using 9
Disc Types Compatible with this Unit 10
Basic Operation 11 – 18
Playing LDs 12 
Playing DVDs, CDs, and Video CDs with No PBC 13 ¶¶ 
Playing Video CDs (with PBC) 14 
Chapter (Track) Skip Forward/Skip Back 16 ¶¶¶¶
Stopping Playback & Switching Power OFF 17 ¶¶¶¶
Continuing Playback from where you Stopped 18 ¶¶¶
Detailed Operation 19 – 25
Playback by Menu Selection 20 ¶¶
Playing Back CD Graphics 21 
Searching for a Desired Video Scene/Audio Track 22 ¶¶¶¶
Repeat Play 24 ¶¶¶¶
Still Frame 25 ¶¶¶
Karaoke Operation 27 – 39
Karaoke Entertainment 28 ¶¶¶¶
SINGLE PLAY 29 ¶¶¶¶
Creating Singing Venue Atmosphere 29 ¶¶¶¶
Karaoke with connected extarnal components 29
Adjusting to Create the Desired Sound 30
Echo adjustment 30 ¶¶¶¶
Changing performance key 30 ¶¶¶¶
Operation is possible with the mic 30 ¶¶¶¶
Convinient Function for Practicing Karaoke 31
Guide Vocal 31 ¶¶¶¶
DUET MODE/CHORUS MODE 32 
VOCAL PARTNER/ONE-TOUCH KARAOKE 33 ¶¶¶¶
SCORING Grades Your Singing Ability 34 ¶¶¶¶
Simultaneous Scoring for Two Singers (COMPETITION)36 ¶¶¶¶
Consecutive Play of Song Highlights (HI-LITE MEDLEY) 37 
Reserving a Desired Song 38 ¶¶¶¶
One Verse Chorus Play Only (One Chorus) 39 
Sing with Professional Karaoke (GUIDE MELODY) 39 
6
Contents
Page 7
Applicable discs
DVD CD LD
VIDEO CD
Setting 41 – 64
Multi-Aspect Setting for Wide Screen TV Software 42 
Changing Picture and Sound Quality Settings
Changing Picture Quality(mode) 44 ¶¶¶
Switching singing venue atmosphere
Changing Sound Quality(D.R.COMP) 45 
Changing graphics display position 46 
Changing graphics channel 47 
Memorizing Settings for Often Viewed DVDs (Condition Memory)
Selecting Languages (Multi-Language) 49 
Changing Audio Type 49 ¶¶¶
Selecting Subtitle Language (Multi-Language Subtitles)50 
Viewing from a Desired Camera Angle (Multi-Angle) 50 
Viewing Information 51 ¶¶¶¶
Quick LD Side Changing(Quick Turn) 52 
Outline of GUI (Graphical User Interface) Operation 53 ¶¶¶¶
Changing Various Settings 60 ¶ ¶¶¶
Setting the Basic Language and Subtitle Language 62 
(KARAOKE SURROUND)
43 ¶ ¶¶¶
45 ¶ ¶¶¶
48 
Set Up 65 – 72
Connecting the Player
Connection example
Connection example
(AC-3) input 67
Connection example
Names and Functions
Front panel 69
Rear panel 70
Display window 71
Remote control 72
deck or other component to the external input)
1.
To a TV with video input (When connecting a cassette
66
2. To an amp with Dolby Digital
3. AV amp 68
Other Information 73 – 78
Troubleshooting 73
Terms 75
For Proper and Long Use 77
Specifications 78
Contents
7
Page 8
Before Using
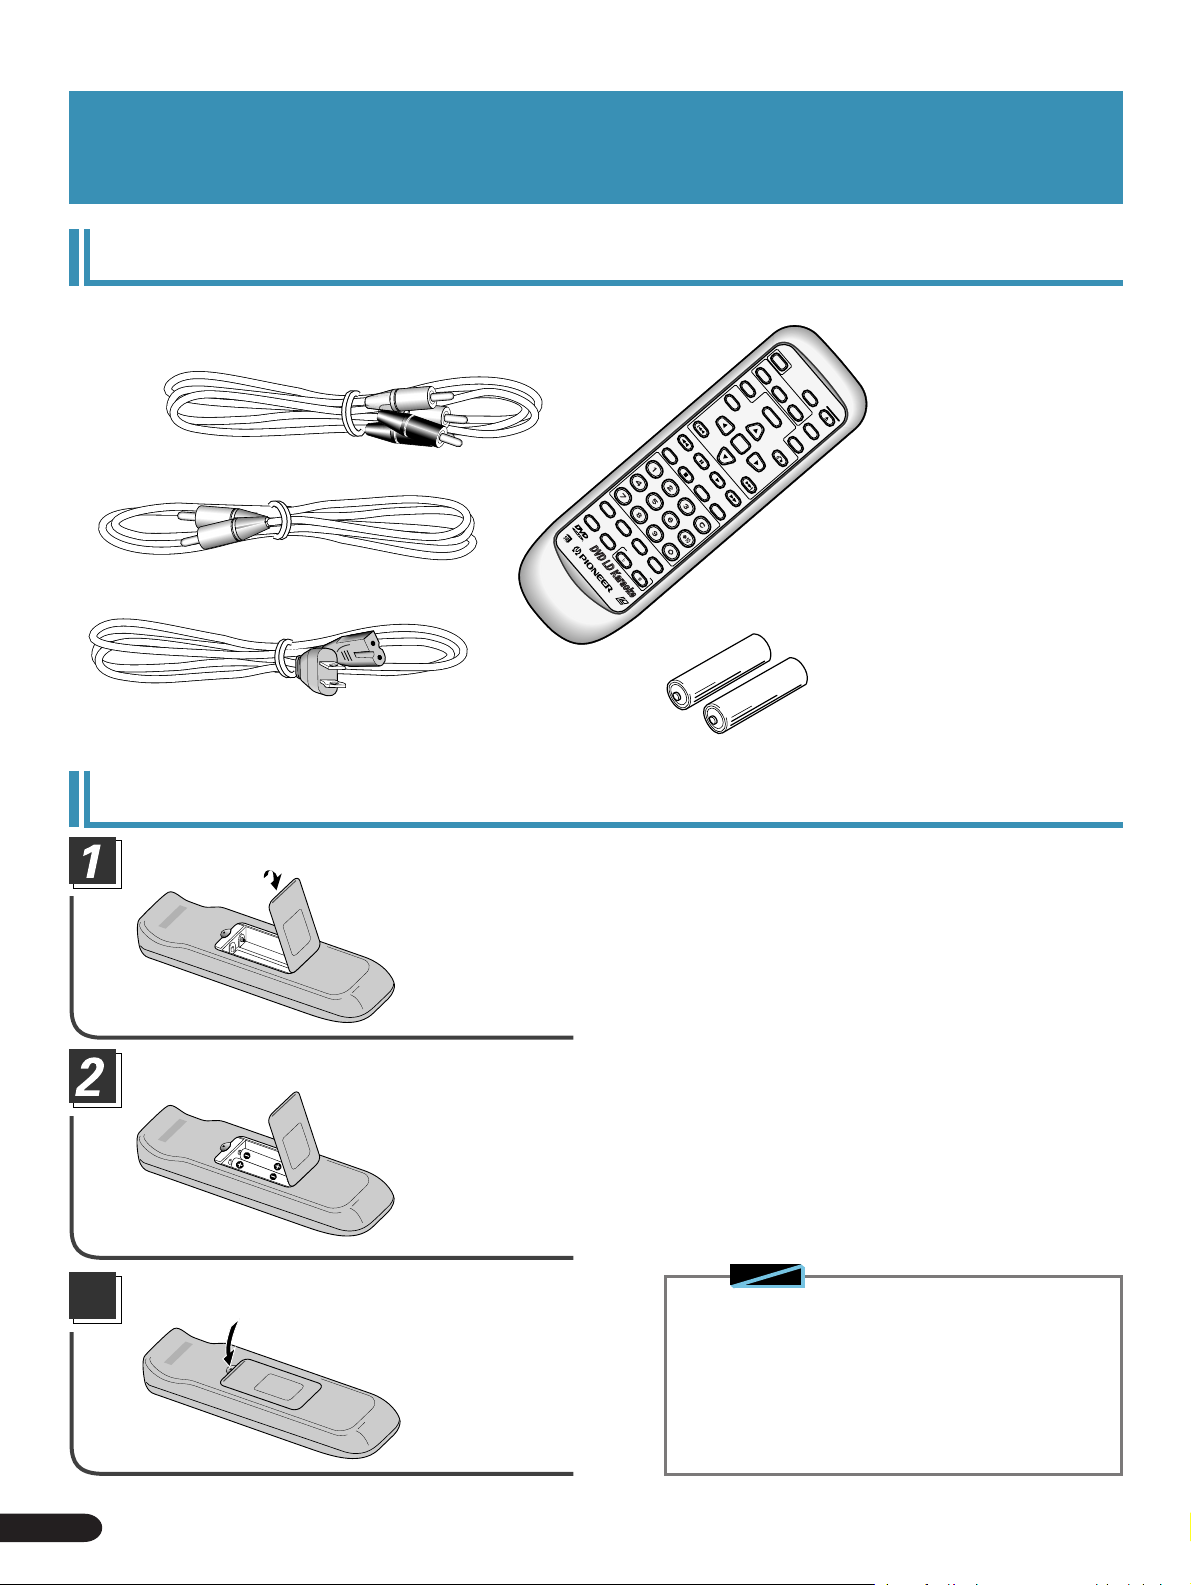
Checking accessories
Audio cord
Video cord
Power cord
Remote control unit
CHP/TIME
MELODY
GUIDE
VOCAL
MODE
PARTNER
VOCAL
CONDITION
KEY CONTROL
PROGRAM
LASER DBC
Batteries....2
PREV
REV FWD
PAUSE
PLAY
REPEATREPEATSTOP
A–B
CLEAR
POWER
AUDIO
MEMORY
LAST
SUBTITLE
TITLE
ENTER
DISC SIDE
A / B
ANGLE
OPEN/
MENU
NEXT
CLOSE
DISPLAY
PLAYBACK
CONTROL
RETURN
Other included items
÷ Warranty card
÷ Operating Instructions
(this manual)
Inserting batteries into the remote control
While pressing the back
cover, pull out in the direction indicated by the arrow.
Insert batteries.
Make sure to match the plus (+) and minus (-) polarity
guides on the batteries with the marks inside the
battery compartment.
Notes
3
Close the cover.
◆ Do not mix old and new batteries.
◆ Even batteries of the same type will differ in voltage.
Do not mix old batteries with new batteries.
◆ When not using the remote control for a long period of
time (over 1 month), remove the batteries to avoid possible
damage from battery corrosion. If battery leakage occurs,
wipe the battery liquid from the battery compartment, then
insert new batteries.
8
Before Using
Page 9
Caution Before Using
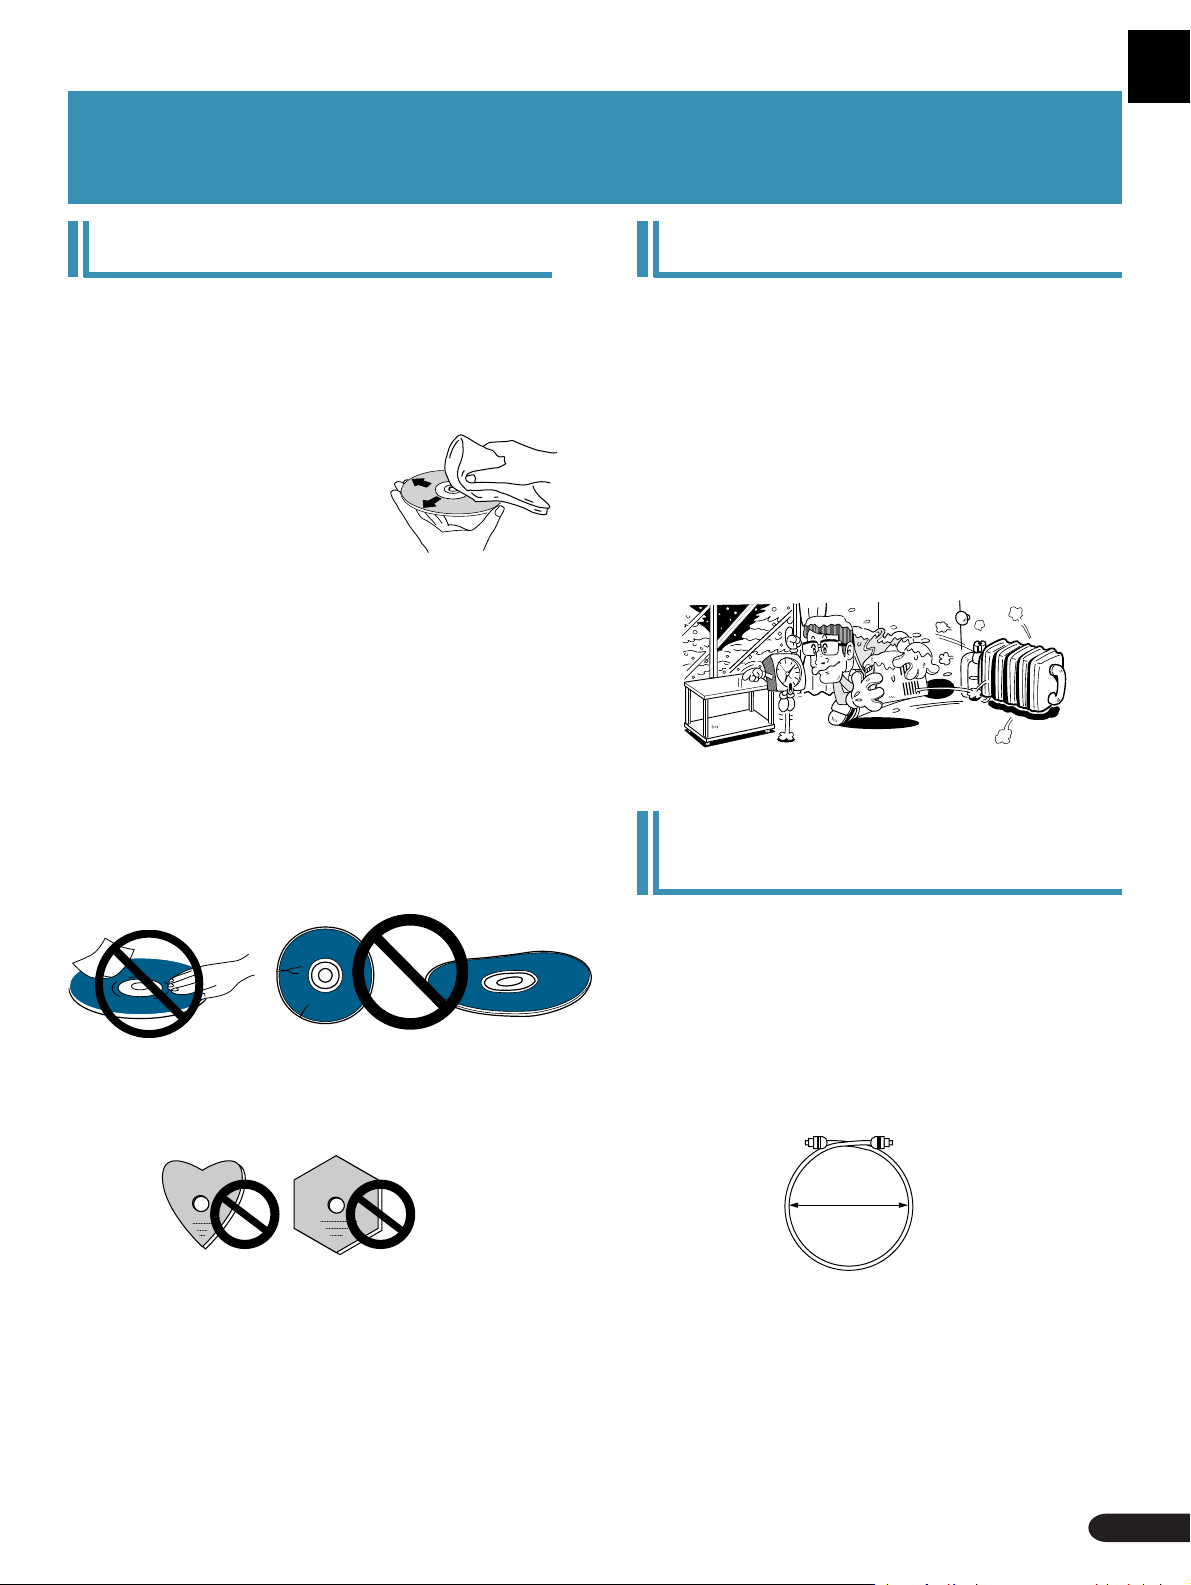
CARE OF DISCS
7How to hold discs
¶ Be sure to store discs in their cases, away from high
temperatures and humidity, direct sunlight, and
extremely low temperatures.
¶ Be sure to read disc instructions.
7Cleaning
¶ Fingerprints or other dirt on the
disc may affect sound and picture
quality. Gently wipe from the inside
toward the outer edge.
¶ Discs must not be cleaned with record cleaning sprays,
or static prevention sprays, etc. Also do not use volatile
liquids such as benzine, or thinner, etc.
¶ You are recommended to use the separately sold JV-
D11 Cleaning Set to clean discs.
¶ For stubborn dirt, soak the cloth in a weak detergent
solution; wring well first and wipe. Use a dry cloth to
wipe it dry.
¶ Never play cracked or warped discs.
¶ Do not scratch or stick paper or seals on the label side of
a disc. Glue may seep out, preventing ejection of a disc
or causing other problems. Rental discs often have
labels, so check that no glue is seeping out before
playing to avoid such problems.
Do not play a CD with a special shape
Do not play a CD having other shape than a circular disc,
such as a heart shaped disc. Otherwise malfunction may
occur.
CONDENSATION
Moisture will form in the operating section of the player if the
player is brought from cool surroundings into a warm room or
if the temperature of the room rises suddenly. When this
happens, the player’s performance will be impaired.
To prevent this, let the player stand in its new surroundings
for about an hour before switching it on, or make sure that the
room temperature rises gradually.
Condensation may also form during the summer if the player
is exposed to the breeze from an air conditioner . In such cases,
change the location of the player.
Notes on using the optional
optical cable
¶ Do not route the cable around sharp objects. When
storing, wind the cable so that it has a diameter of at
least 15 cm.
¶ When connecting, push the plug all the way into the
terminal.
¶ Please don’t use cables with a length of over 3 m.
¶ If moisture or dust has collected on the plug, wipe it
with a soft cloth before connecting.
LD/CD lens cleaner
The player’s pickup lens should not get dirty in normal use,
but if for some reason it should malfunction due to soiling,
consult your nearest PIONEER authorized service center.
Special care should be exercised as some lens cleaning discs
may damage the lens. Ejecting some cleaning discs may also
be impossible after use.
15cm dia. or more
Caution Before Using
9
Page 10
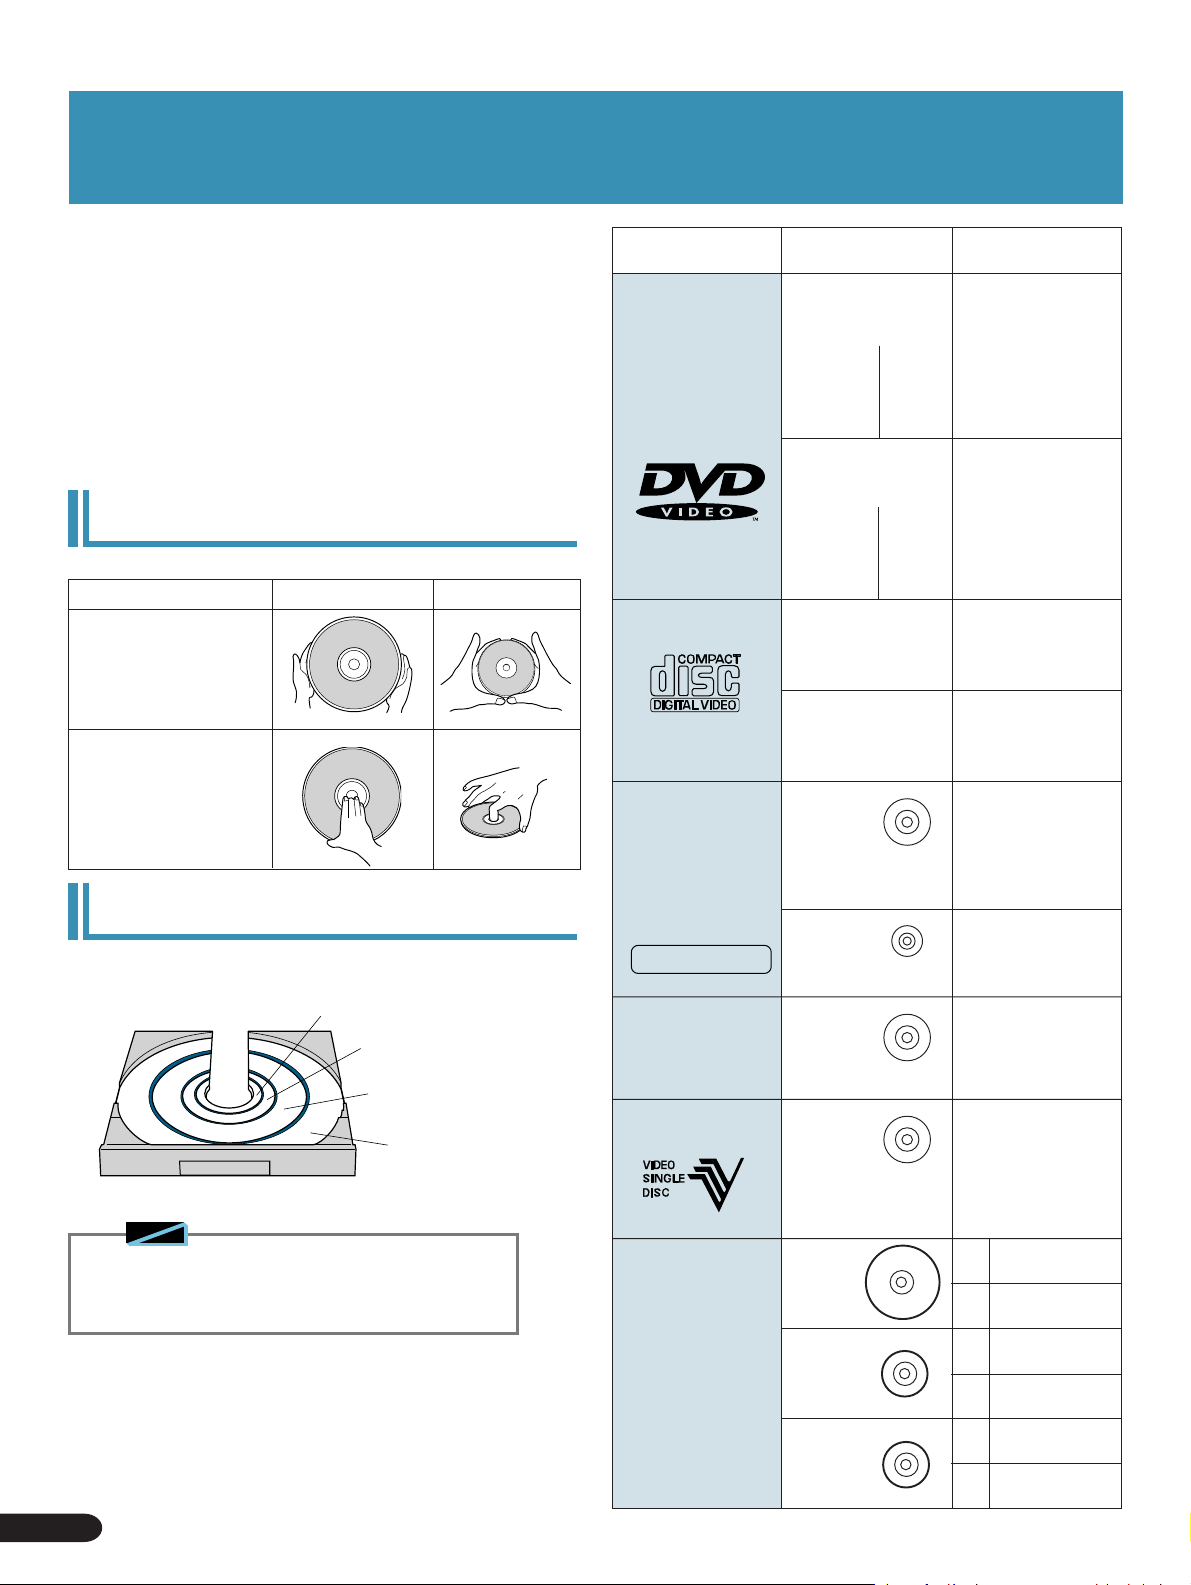
Disc Types Compatible with this Unit
This player is DVD, LD, CD, and Video CD compatible.
The marks shown on the right are found on disc labels or on disc
jackets.
÷ This player can play all discs bearing the marks on the right
without the need for an adaptor.
÷ To prevent malfunction, do not use an 8 cm (3 in.) adaptor (for
CDs).
This unit is NTSC compatible (TV color system).
You cannot use discs other than those shown on the right.
* During DVD playback, data transfer is at 4.7 MBit per second.
Handling the discs
LD DVD, CD, etc.
Holding with both
hands
Holding with one
hand
Types of playable
discs and their marks
DVD VIDEO
VIDEO CD
CD
Diameter/Playable
sides
DVD VIDEO
12 cm (5 in.)/
single-sided
12 cm (5 in.)/
double-sided
DVD VIDEO
8 cm (3 in.)/
single-sided
8 cm (3 in.)/
double-sided
VIDEO CD
12 cm (5 in.)/single-sided
VIDEO CD single
8 cm (3 in.)/single-sided
CD
1 layer
2 layers
1 layer
2 layers
1 layer
2 layers
1 layer
2 layers
Playback time
Digital audio
Digital video
(MPEG 2)
133 min.*
242 min.*
266 min.*
484 min.*
Digital audio
Digital video
(MPEG 2)
41 min.*
75 min.*
82 min.*
150 min.*
Digital audio
Digital video
(MPEG 1)
Max. 74 minutes
Digital audio
Digital video
(MPEG 1)
Max. 20 minutes
Disc Table
DVD Single, CD Single : 8 cm
DVD, CD, Video CD,
CDV, VSD: 12 cm
LD, LD Single: 20 cm
LD: 30 cm
Note
◆ You cannot play DVDs that do not bear the Region No.
(refer to "Terms" on page 76) indicated on the player's
rear panel.
Discs other than those mentioned at right cannot be played.
To prevent damage to the player, do not play a disc type other
than those above.
(Ex.) DVD audio, CD-ROM, LD-ROM, DVD-ROM, High Definition
LD, CD with a special shape etc.
'
CD GRAPHICS
GRAPHICS
CDV
Æ
VSD (Video Single Disc)
LD
L
;
æ
12 cm (5 in.)/
single-sided
CD single
8 cm (3 in.)/
single-sided
CDV
12 cm (5 in.)/
single-sided
VSD
12 cm (5 in.)/
single-sided
LD
30 cm
(12 in.)
LD
20 cm
(8 in.)
LD Single
20 cm
(8 in.)
Max. 74 minutes
Max. 20 minutes
Digital audio (max. 20
min.) (Audio part)
Digital audio + video (max.
5 min.) (Video part)
Digital audio + video
(max. 5 min.) (Video
part)
In these operating
instructions, the VSD is
treated as a kind of CDV.
1 hour on a double-
CAV
sided disc
2 hours on a
CLV
double-sided disc
28 min. on a
CAV
double-sided disc
40 min. on a
CL V
double-sided disc
14 min. on a single-
CAV
sided disc
20 min. on a single-
CL V
sided disc
10
Disc Types Compatible with this Unit
Page 11
Basic Operation
Playing LDs ...............................................................12
Basic Operation
Basic Operation
Playing DVDs, CDs and Video CDs with No PBC.......
13
Playing Video CDs (with PBC) .................................14
Chapter (Track) Skip Forward/Skip Back ................16
Stopping Playback & Switching Power OFF..........17
Continuing Playback from where you Stopped.....18
Operating Instructions
Karaoke OperationDetailed Operation Setting Set Up Other Information
Karaoke OperationDetailed Operation Setting Set Up Other Information
Basic Operation
11
11
Page 12
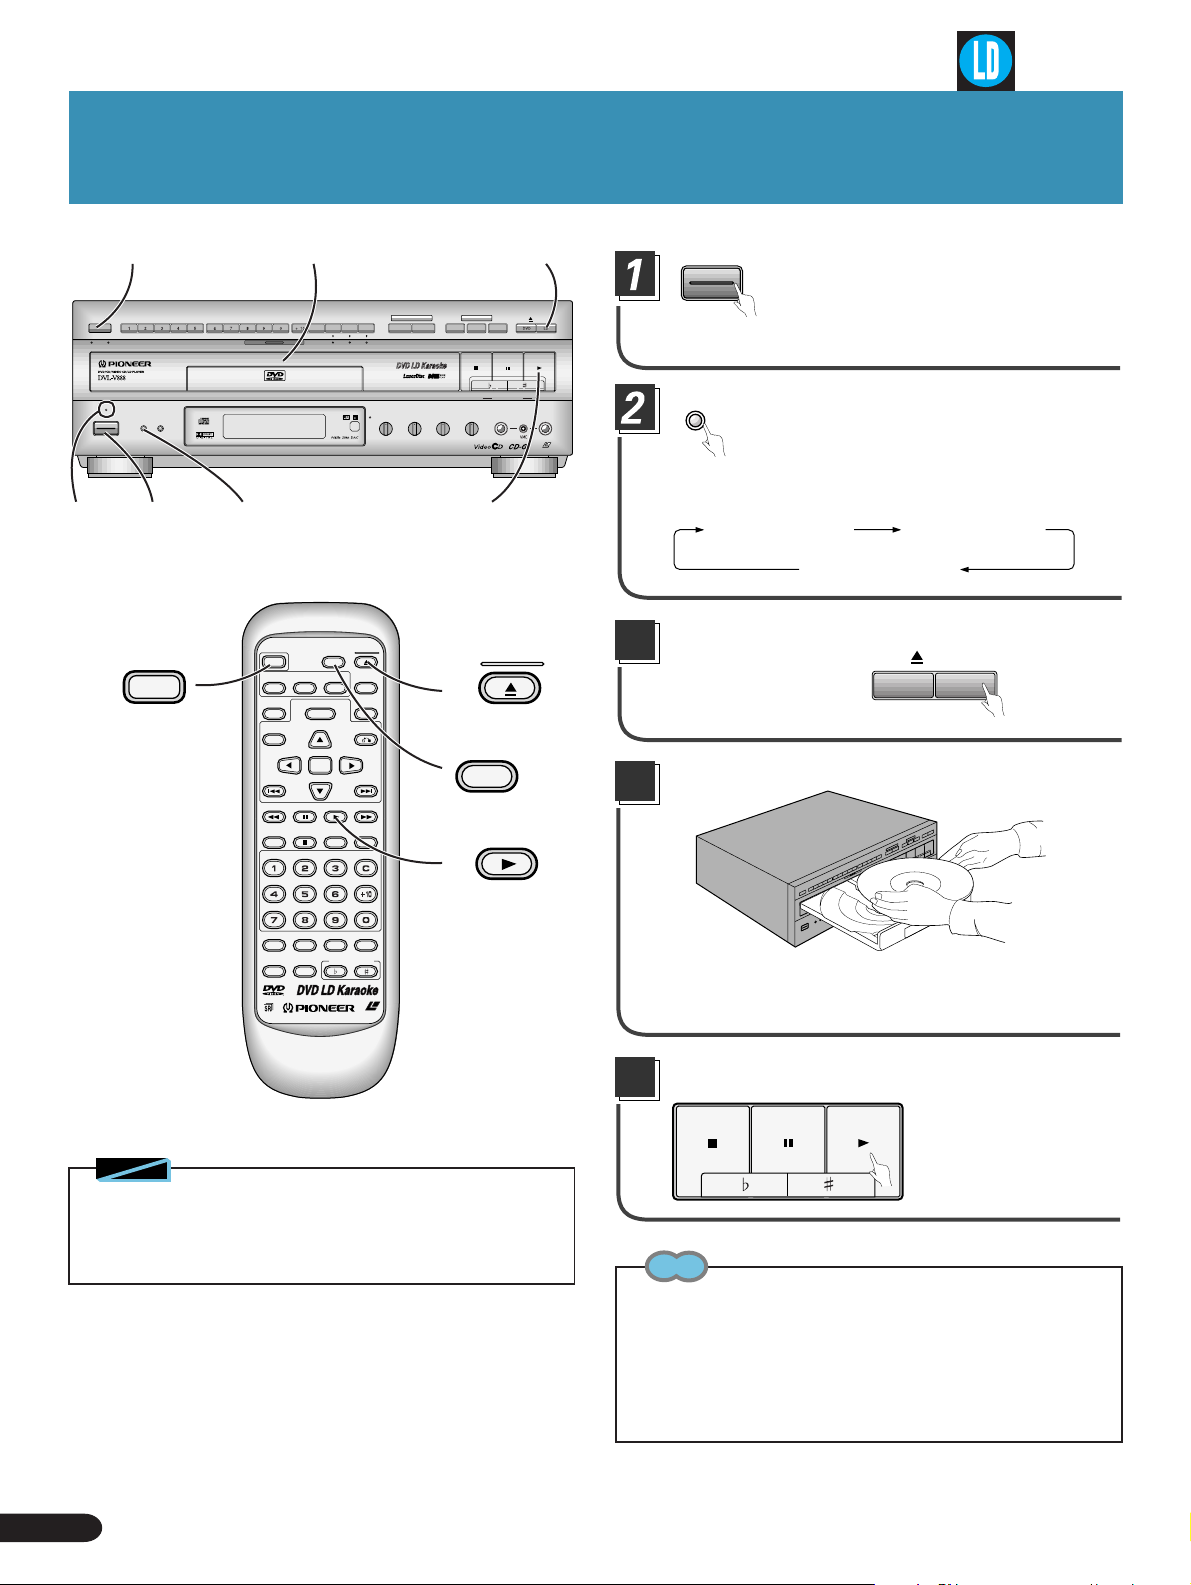
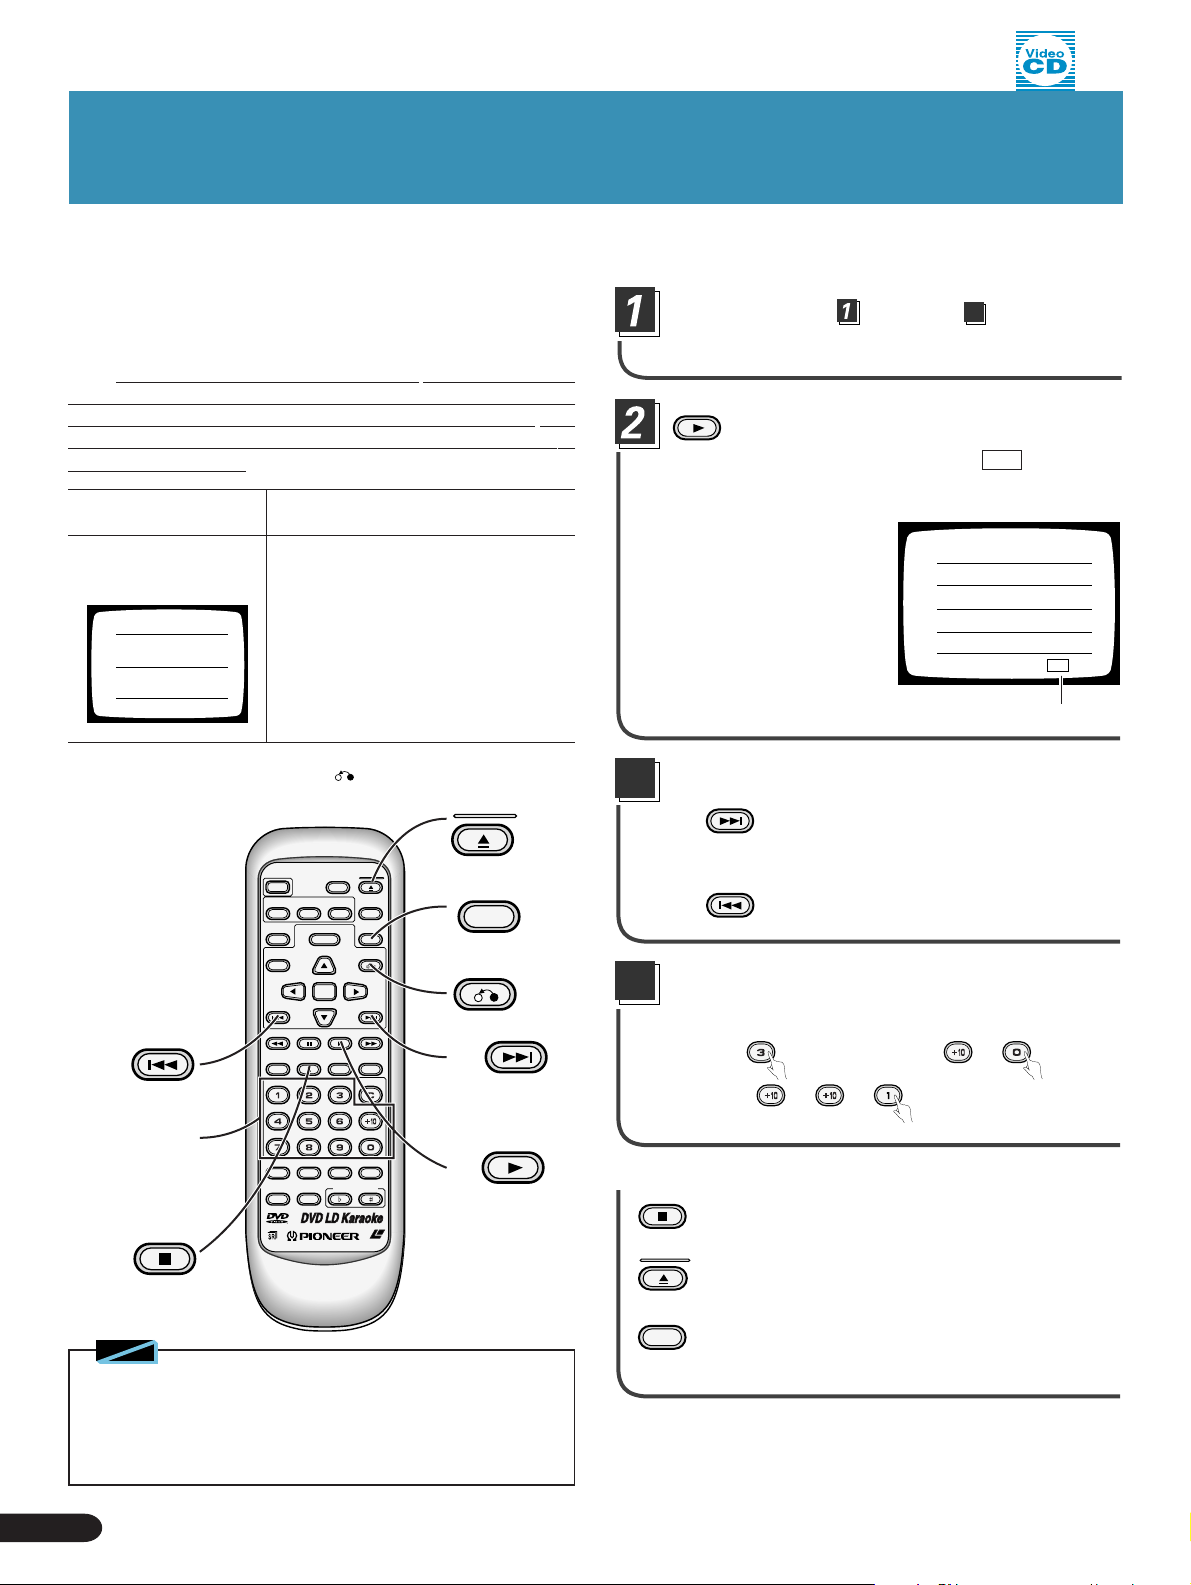
Playing LDs
STOP PAUSE PLAY
DISC SIDE A/B
button
DISC SIDE
A / B
A B
STANDBY
POWER
KARAOKE
SINGLE
MODE
STANDBY/ON
ST ANDBY
indicator
PLAY
1
POWER
1
4
SCORING
SYSTEM
2
POWER
AUDIO
SUBTITLE
LAST
MEMORY
MENU
TITLE
ENTER
PREV
REV FWD
PAUSE
CHP/TIME
PARTNER
DISC SIDE
A / B
ANGLE
3
POWER
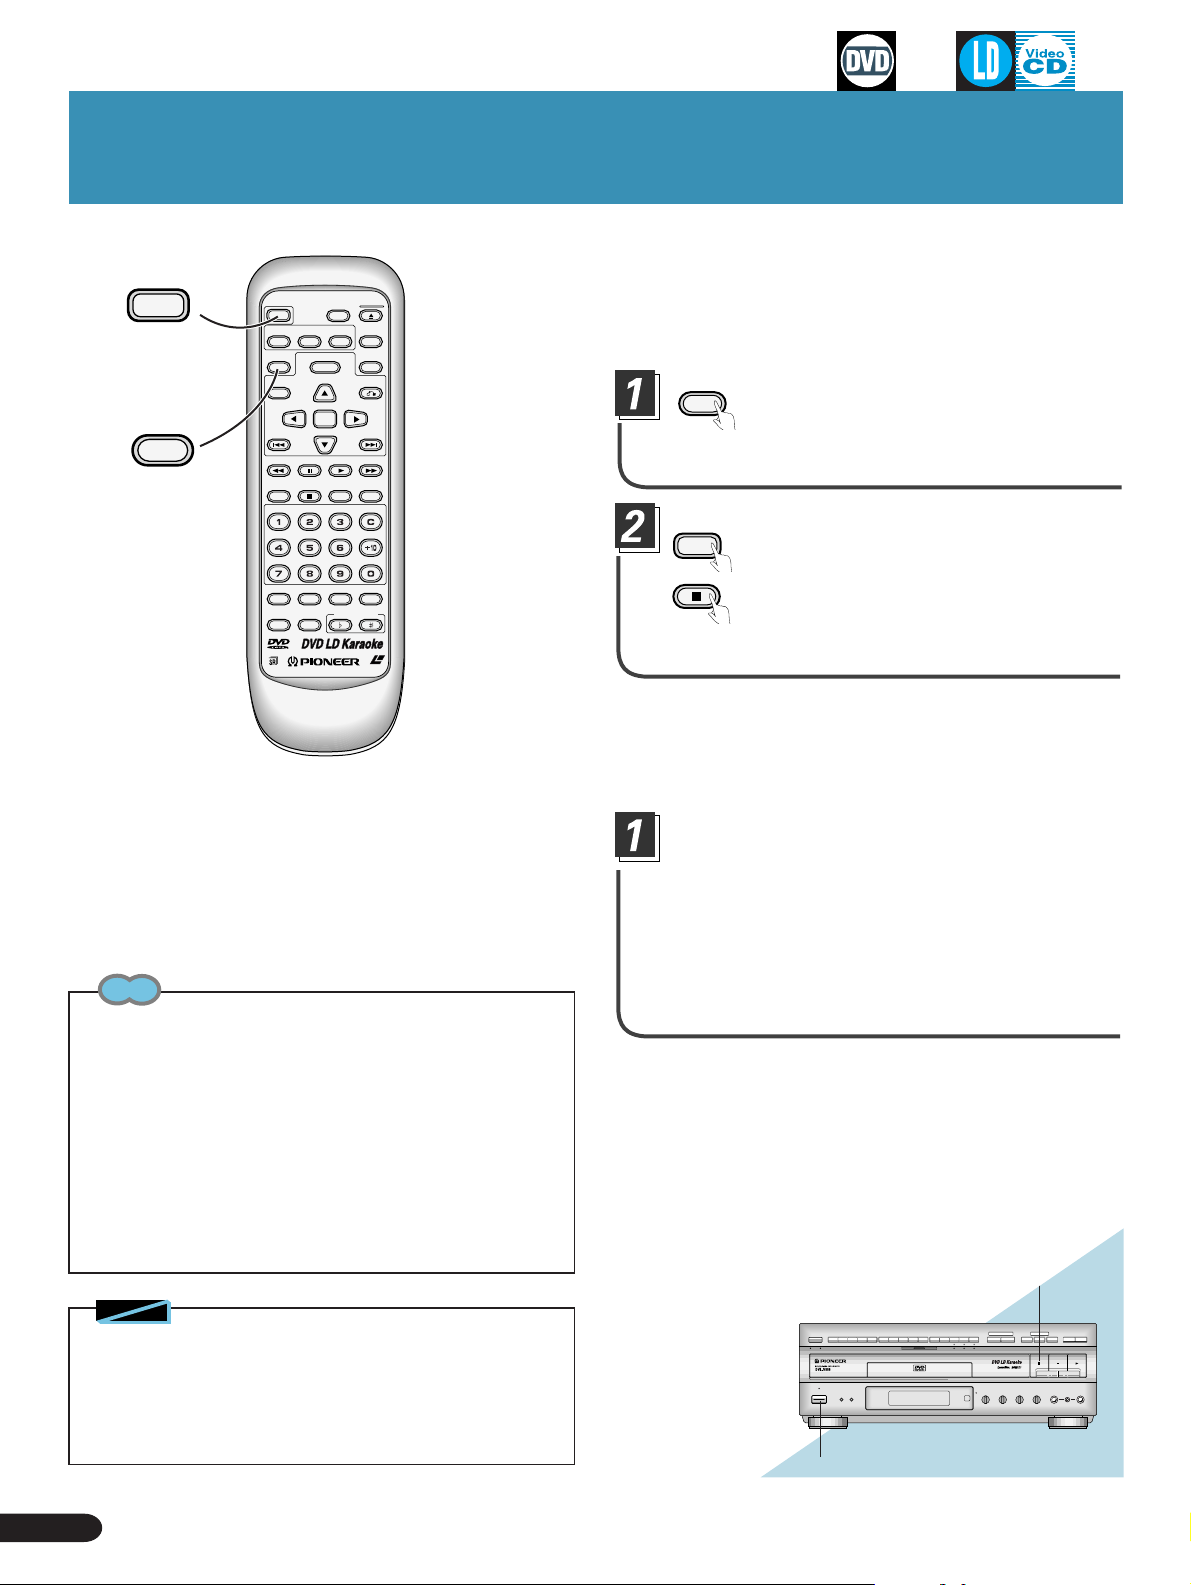
Press the POWER button.
GUIDE
VOCAL
ONE-TOUCH
VOCAL
KARAOKE
VIDEO CD FUNCTION DVD FUNCTION
V-NR PBC
ECHO
GUIDE VOCAL
MAXMIN
MAXMIN
ONE
CHORUS
MIC 2MIC 1
LD-G CD-G
HI-LITE
MEDLEY
STOP PLAYPAUSE
LOW HIGHKEY CONTROL
MAXMINMAXMIN
GUIDE
MELODY
LaserDisk
CD / VIDEO CD
MIC
CONTROL
OPEN/CLOSE
MIC 2MIC 1
LASER DBC
5
OPEN/
CLOSE
DISPLAY
PLAYBACK
CONTROL
RETURN
NEXT
PLAY
REPEATREPEATSTOP
A–B
CLEAR
OPEN/
CLOSE
3
DISC SIDE
A / B
PLAY
3
4
STANDBY/ON
¶ The STANDBY indicator goes out.
KARAOKE
MODE
When playing a Video/Audio disc,
press the KARAOKE MODE button
to select “NORMAL MODE” .
Each time you press the button, the setting changes as follows.
KARAOKE MODE NORMAL MODE
AUX INPUT MODE
Press the LD OPEN/CLOSE 0 button.
OPEN/CLOSE
DVD LD
¶ The disc table comes out.
CD / VIDEO CD
Load a disc.
5
CONDITION
PROGRAM
MODE
MELODY
GUIDE
VOCAL
PARTNER
KEY CONTROL
LASER DBC
VOCAL
Notes
◆ When you switch power to this product ON, it switches to the
KARAOKE MODE, and the KARAOKE MODE button lights.
◆ Not aligning a disc with the disc guide, or loading two discs at once
will result in damage to the disc(s) and player.
12
Playing LDs
¶ Load a single-sided disc with the label facing up, or load a
double-sided disc with the label for the desired side facing
up, using the disc table guide to align the disc.
Press the PLAY 3 button.
5
¶ Playback starts.
¶ When the A side of a dou-
ble-sided disc has finished playing, playback of
the B side automatically
starts.
Tips
¶ Each time you press the Disc side A/B button on the main unit, the
disc side changes from A to B or from B to A. The Side A or Side B
indicator on the main unit lights to indicate the current disc side.
¶ With a double-sided LD, load with the A side facing up and the B
side facing down. Recorded A and B sides are on opposite sides of
the disc itself.
Page 13
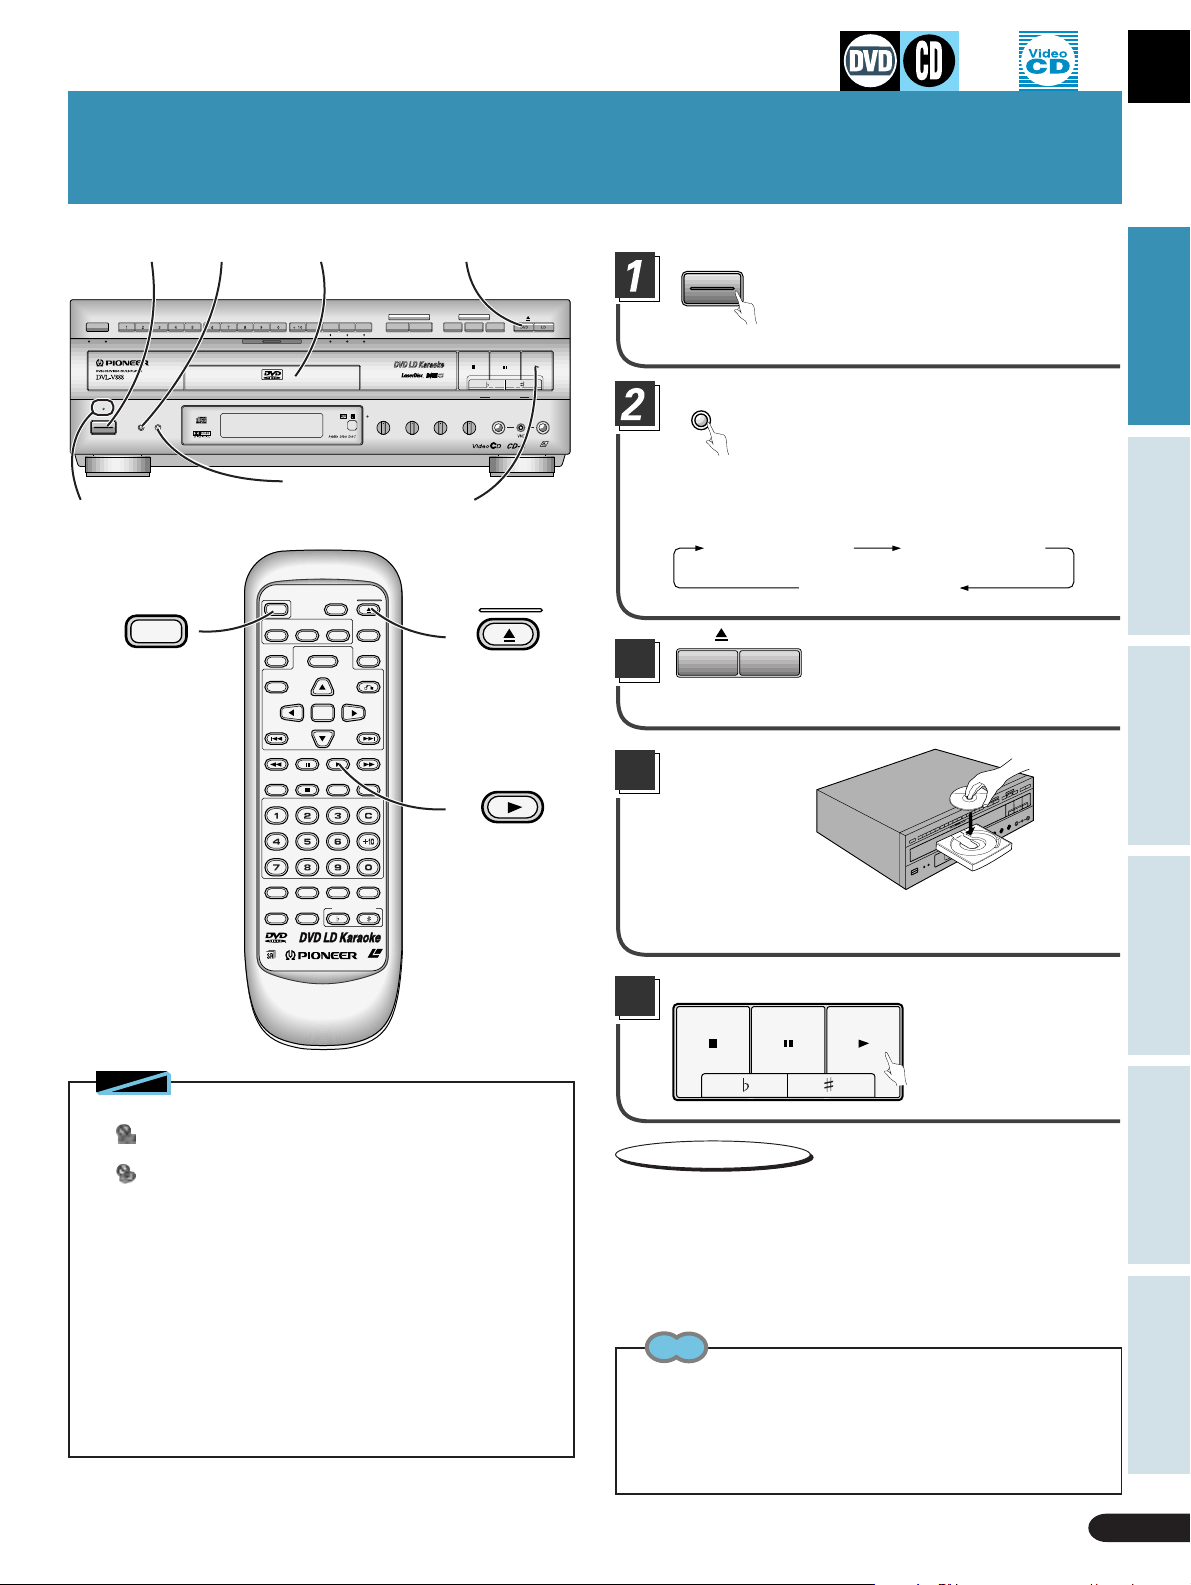
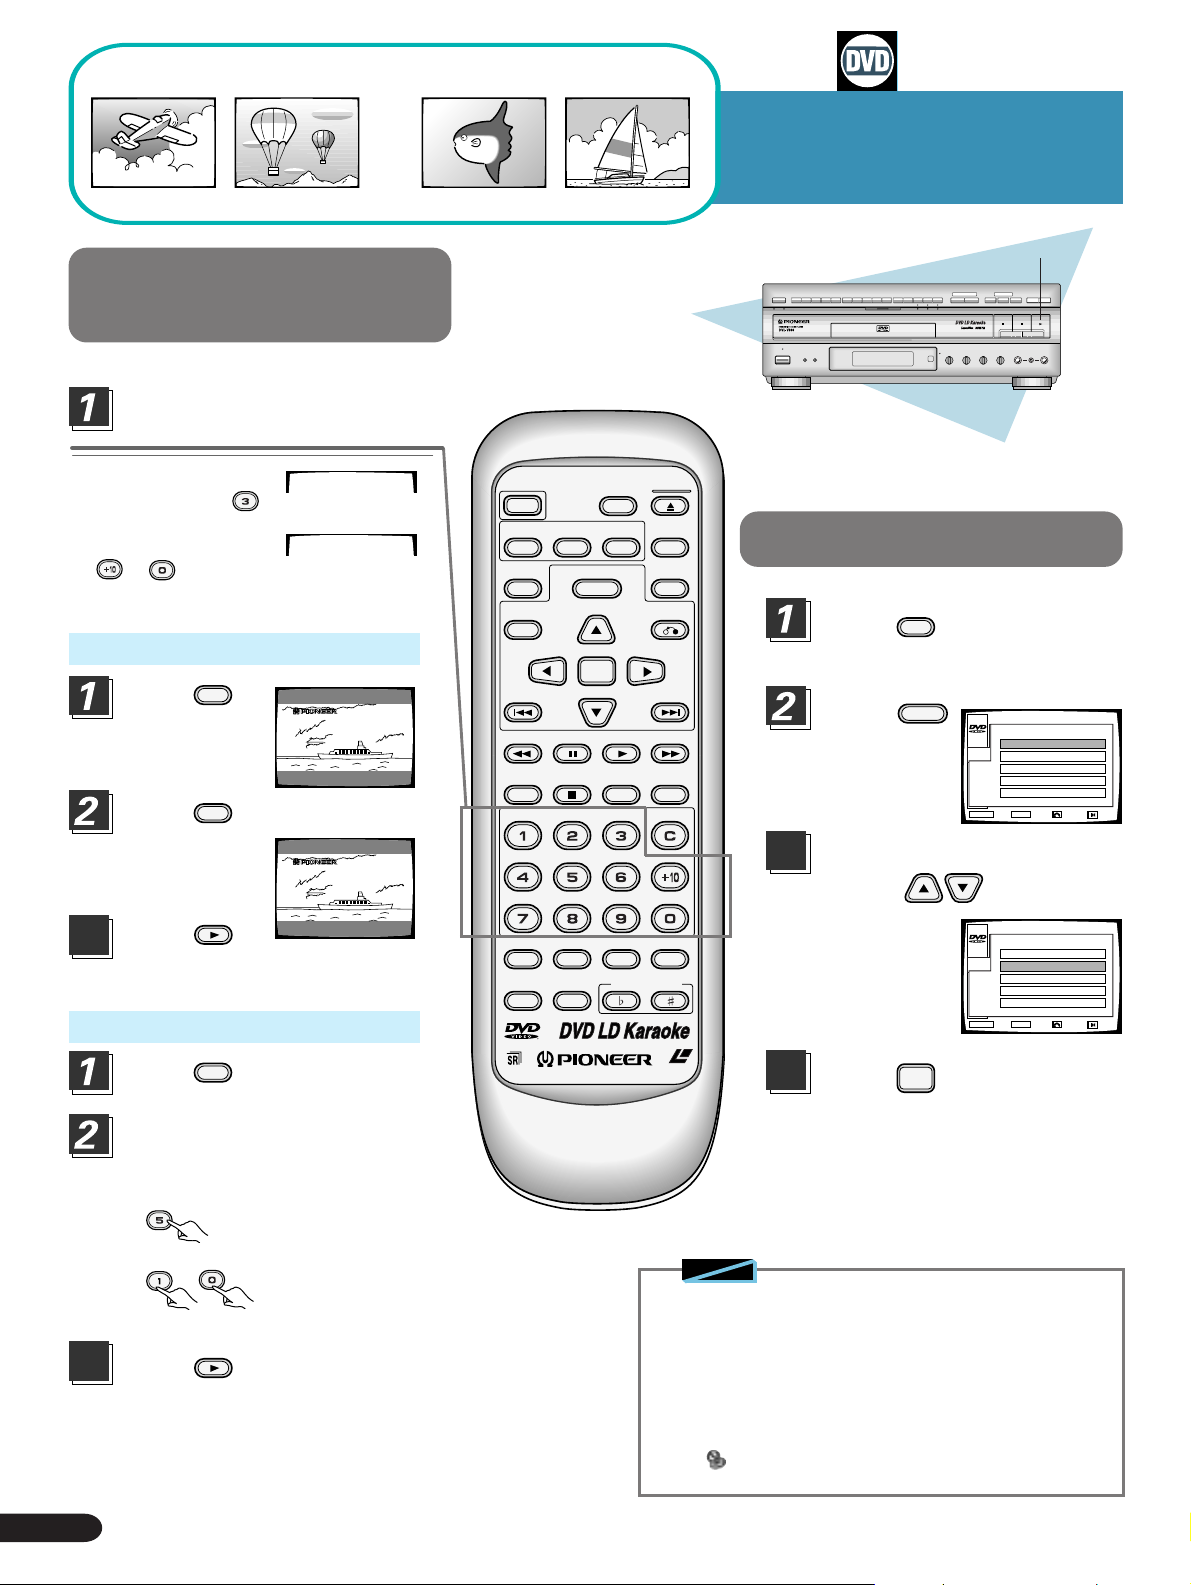
Playing DVDs, CDs and Video CDs with No PBC
Please refer to page 14 for Video CDs with PBC.
DISC SIDE
A / B
A B
1
2
GUIDE
VOCAL
SCORING
ONE-TOUCH
VIDEO CD FUNCTION DVD FUNCTION
VOCAL
PARTNER
SYSTEM
KARAOKE
V-NR PBC
CHORUS
ONE
34
HI-LITE
MEDLEY
STOP PLAYPAUSE
POWER
OPEN/CLOSE
GUIDE
MELODY
CD / VIDEO CD
STANDBY/ON
¶ The STANDBY indicator goes out.
Press the POWER button.
Basic Operation
STANDBY
POWER
KARAOKE
MODE
STANDBY/ON
STANDBY
indicator
POWER
1
SINGLE
PLAY
GUIDE VOCAL
MAXMINMAXMIN
MAXMIN
MAXMIN
LD-G CD-G
LaserDisk
MIC 2MIC 1
CONTROL
LASER DBC
LOW HIGHKEY CONTROL
MIC
MIC 2MIC 1
ECHO
KARAOKE
MODE
When playing a Video/Audio disc,
press the KARAOKE MODE button
to select “NORMAL MODE”.
SINGLE PLAY
button
POWER
DISC SIDE
AUDIO
LAST
MEMORY
TITLE
PREV
CHP/TIME
A / B
ANGLE
SUBTITLE
MENU
ENTER
REV FWD
PLAY
PAUSE
OPEN/
CLOSE
DISPLAY
PLAYBACK
CONTROL
RETURN
NEXT
REPEATREPEATSTOP
A–B
CLEAR
5
3
OPEN/
CLOSE
PLAY
Each time you press the button, the setting changes as follows.
KARAOKE MODE NORMAL MODE
AUX INPUT MODE
3
OPEN/CLOSE
DVD LD
CD / VIDEO CD
Press the DVD/CD/VIDEO
CD OPEN/CLOSE 0 button.
¶ The disc table comes out.
Load a disc.
4
Karaoke OperationDetailed Operation Setting Set Up Other Information
5
CONDITION
PROGRAM
MODE
MELODY
GUIDE
VOCAL
PARTNER
KEY CONTROL
¶ Load a disc with the label side facing up, using the disc table
guide to align the disc.
LASER DBC
VOCAL
Notes
◆ During operation, the following marks may appear on the TV screen.
: When you perform an operation that is not possible with
the player.
: When you perform an operation that is not possible with
the disc.
◆ After stopping DVD play, if you start play without specifying a title
with a menu or other means, the previous title is played.
◆ If you press the SINGLE PLAY button on the front panel to switch
the indicator OFF, you can cancel SINGLE PLAY so that songs are
played continuously, one after another.
◆ With the KARAOKE MODE (when the KARAOKE MODE button on
the front panel is lit), depending on the TV you’re using and mic
volume level, there may be distortion when playing DVDs, CDs or
Video CDs. To prevent this keep analog output sound volume level
low.
◆ The time taken for playback to start may differ depending on the
type of disc previously played and the type of disc currently loaded.
Press the PLAY 3 button.
5
STOP PAUSE PLAY
¶ Playback starts.
¶ With some DVD disks, a
menu may be displayed.
If a menu is displayed,
refer to page 20.
Convenient functions
Auto power ON
¶ When power is switched OFF, to eject the disc table, press the OPEN/
CLOSE button 0 on the front panel. Power is automatically switched
ON for you, and the disc table comes out.
¶ If you switch power OFF when a disc is loaded, just pressing the PLAY
3 button on the front panel or the PLA Y 3 button on the remote control
automatically switches power ON, and starts play of the loaded disc.
Tips
¶ DVDs that do not have the matching region No. that allows play-
back can not be played back (refer to the "Terms" section on page
76).
¶ DVD discs other than DVD Video discs cannot be played.
¶ When you switch power to this product ON, it switches to the
KARAOKE MODE, and the KARAOKE MODE button lights.
Playing DVDs, CDs and Video CDs with No PBC
13
Page 14
Playing Video CDs (with PBC)
What’s a Video CD?
It’s a disc that delivers the MD sound quality and VHS
picture quality. Thanks to digital signal compression
technology (MPEG system), you can enjoy up to 74
minutes of continuous video and audio from a single
disc. There are two kinds of Video CD. To control Video
CD play, one kind of disc (Version 2.0) features a Playback Control signal (hereafter referred to as PBC). The
other kind of disc (Version 1.1) does not feature a recorded PBC signal.
Video CD with no
PBC (Version 1.1)
Video CD with PBC
(Version 2.0)
Menu display
A(1)
B(2)
C(3)
This product enables PBC play using the number, ENTER, Next
¢, Previous 4, and RETURN buttons. (All operations are
possible by remote control)
Video and audio play is possible
with same operations as a CD.
¶ Using on-screen menus enables
easy play of interactive software
and software with reference functions. You also get high-resolution
video and still picture capability.
¶ You can enjoy these discs in the
same way as discs with no PBC
(Switch PBC OFF with the PLAY-
BACK CONTROL button on the
main unit or remote control.)
OPEN/
CLOSE
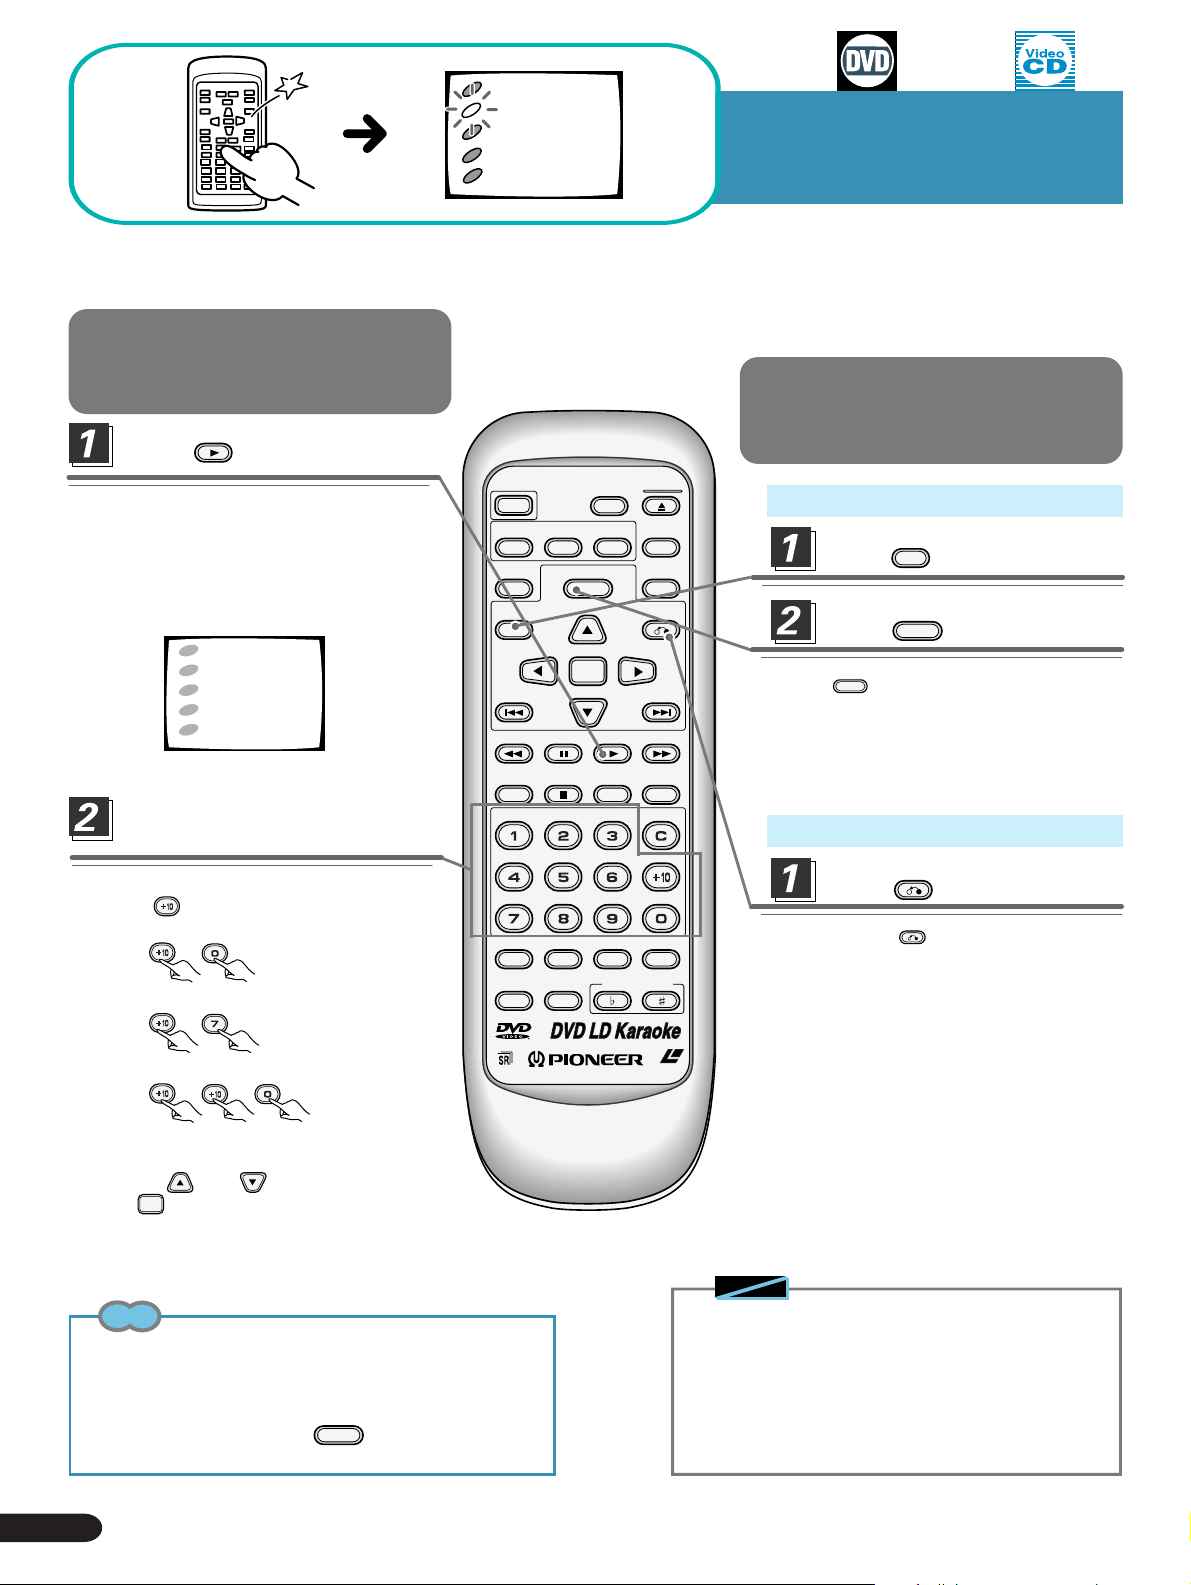
To playback (Video CDs with PBC)
Perform steps through 4 on page 13.
PLAY
Press the PLAY 3 button.
¶ With Video CDs that have playback control, PBC is displayed,
and a menu.
¶ Menus are recorded on discs. Menu displays differ with each
disc.
Ex) Menu display
When there’s another menu
When there’s a following menu
3
NEXT
Press the NEXT ¢ button.
A(1)
B(2)
C(3)
D(4)
E(5)
¢ NEXT
MENU
ENTER
DISC SIDE
A / B
ANGLE
OPEN/
CLOSE
DISPLAY
PLAYBACK
CONTROL
RETURN
NEXT
PLAY
REPEATREPEATSTOP
A–B
CLEAR
PLAYBACK
CONTROL
RETURN
3
NEXT
3
PREV
POWER
AUDIO
SUBTITLE
LAST
MEMORY
TITLE
PREV
PAUSE
REV FWD
CHP/TIME
Digit buttons
(0 – 9, +10)
STOP
MELODY
GUIDE
VOCAL
MODE
VOCAL
PARTNER
CONDITION
KEY CONTROL
PROGRAM
LASER DBC
PLAY
2
Note
◆ NOISE REDUCTION button on the main unit
You can use the noise reduction function with Video CDs. It reduces noise on badly recorded discs for a clearer picture. Press the
button and it lights, indicating the function is operating. Press again
to switch the button light OFF, and cancel noise reduction.
¶ To return to the previous menu
PREV
Press the PREV 4 button.
Select numbers in a menu using the digit
4
buttons
¶ Playback starts.
Ex)To select 3
To select 10 =
To select 21 = =
To stop the player
STOP
OPEN/
CLOSE
PLAYBACK
CONTROL
¶ Press the STOP 7 button.
¶ Press the OPEN/CLOSE 0 button.
¶ Press the PLAYBACK CONTROL button.
(In this case, playback control switches OFF, and
the mode becomes that for playback of Video CDs
with no PBC.)
With discs that have no PBC, play will not stop
even if you press the PLAYBACK CONTROL button.
14
Playing Video CDs (with PBC)
Page 15
Playing Video CDs (with PBC)
Basic Operation
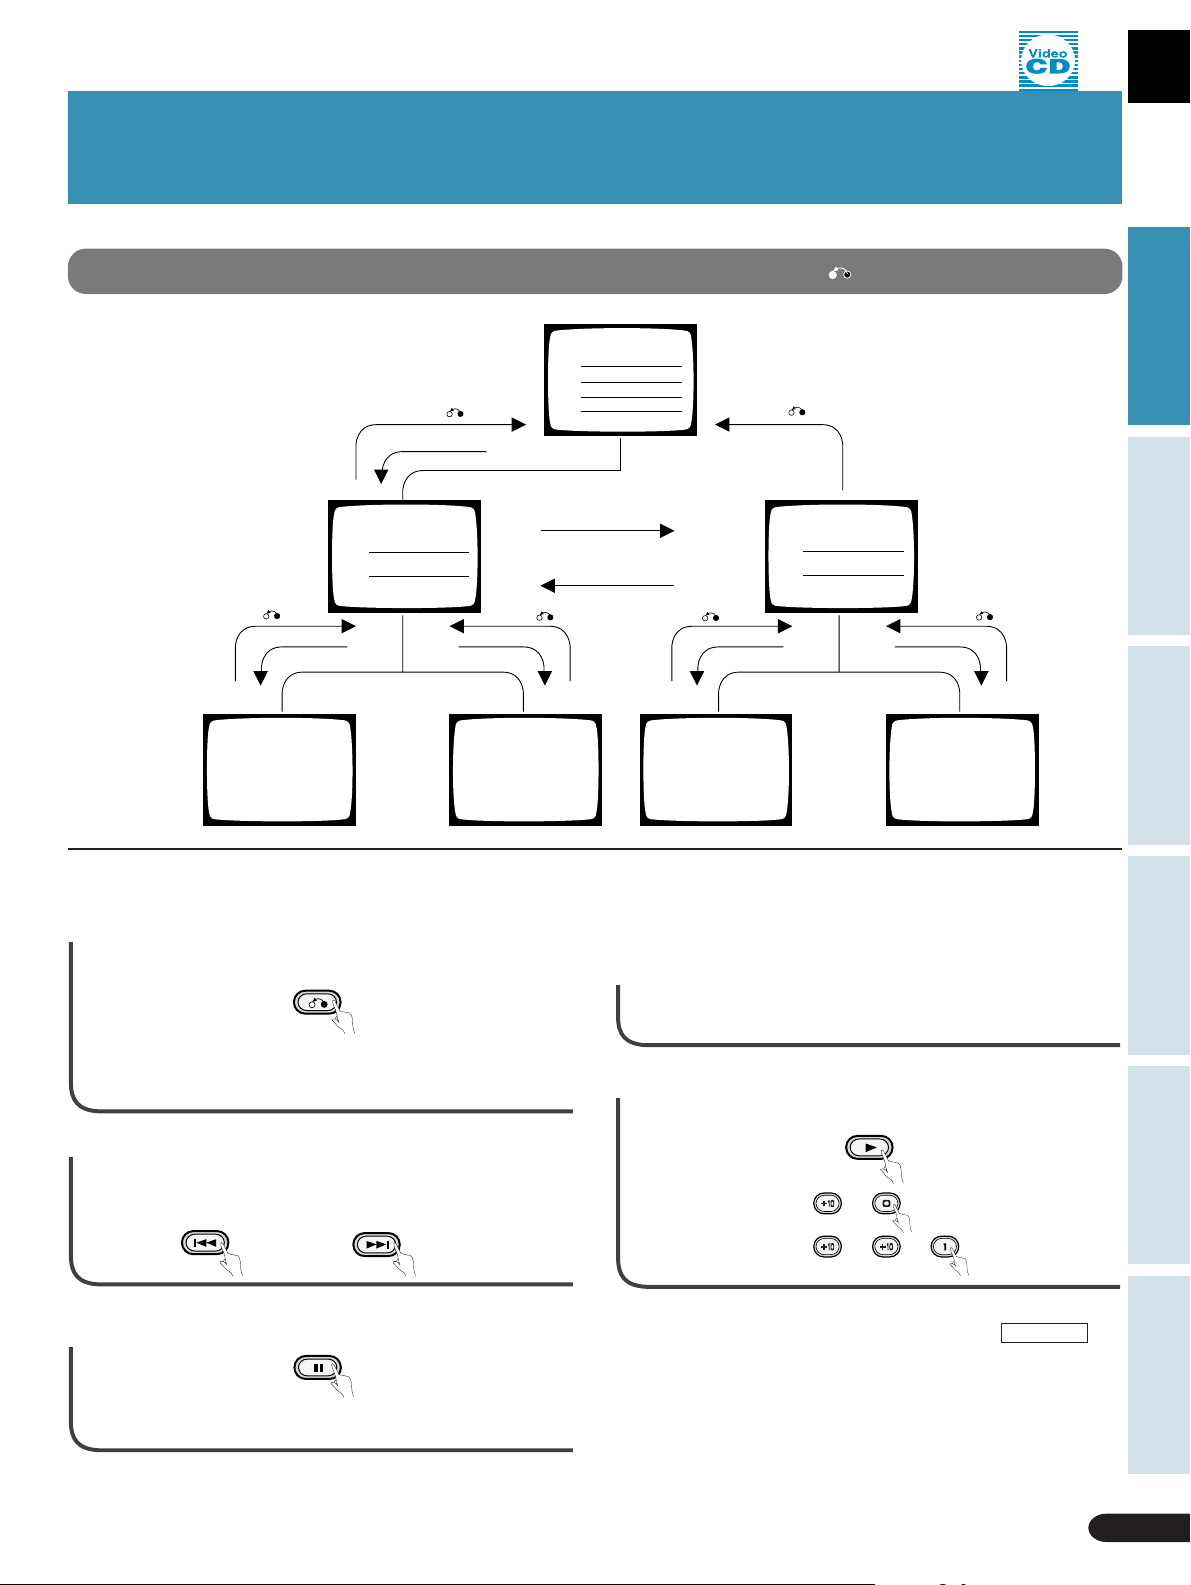
Displays shown when the PLAY 3, PREV 4, NEXT ¢, or RETURN buttons are pressed.
Example of operation of a disc with PBC (Playback Control)
RETURN button
Digit button
MENU Display 2
(1)
(2)
RETURN button
Digit button 1 Digit button 2
(1)
Moving Picture
Still Picture
RETURN button
(2)
Moving Picture
Still Picture
PLAY 3button
MENU Display 1
(1)
(2)
(3)
(4)
NEXT button ¢
PREV button 4
A
B
C
D
RETURN button
RETURN button
(3)
Moving Picture
Still Picture
MENU Display 2
(3)
(4)
Digit button 3
Digit button 4
Moving Picture
RETURN button
(4)
Still Picture
Karaoke OperationDetailed Operation Setting Set Up Other Information
Menu operation
A Press the RETURN button to move back to
the previous menu.
RETURN
¶ Each time you press the button, you move back a menu. If
you repeat pressing the button, you will eventually return to
the first menu.
B Press the ¢ button to move to the next
menu, or the 4 button to move to the
previous menu.
C
Press the P AUSE button to pause video play.
¶ To cancel pause, press the PAUSE 8 button once more.
PREV
NEXT
PAUSE
You can play Video CDs
without using menu displays
1 Press the PLAYBACK CONTROL button .
¶ The PLAYBACK CONTROL indicator on the front of the player
goes out.
2 Press the PLAY 3 button, or select using
digit buttons.
PLAY
Example) To select 10 =
To select 21 = =
The following are functions that do not operate when using menu
operation with a Video CD that has PBC. (When PBC PLAY is lit
in the display window)
¶ SINGLE PLAY..................................................................(P.29)
¶ Track Skip Forward/Skip Back.........................................(P.16)
¶ Reservation..................................................................... (P.38)
¶ Repeat ............................................................................ (P.24)
Playing Video CDs (with PBC)
15
Page 16
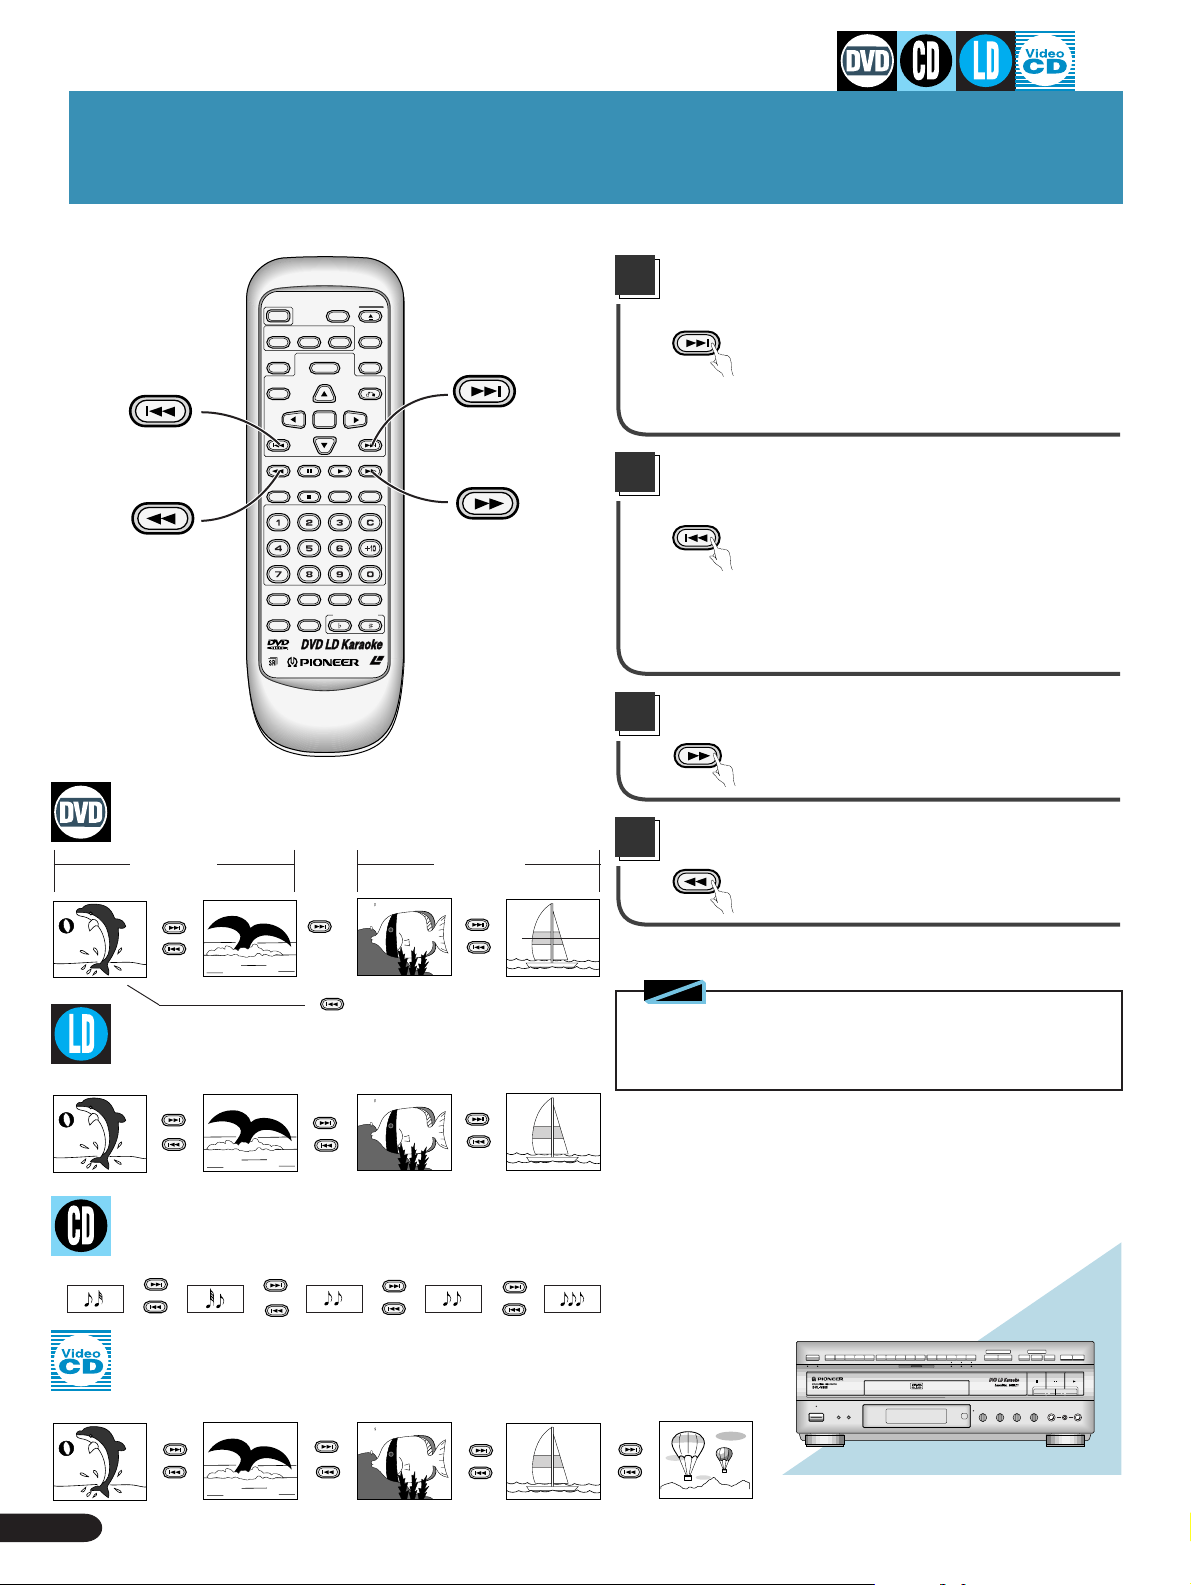
Chapter (Track) Skip Forward/Skip Back
LD-G CD-G
LaserDisk
Skipping forward to the next chapter
PREV
REV
POWER
DISC SIDE
AUDIO
MEMORY
TITLE
PREV
CHP/TIME
A / B
ANGLE
SUBTITLE
LAST
MENU
ENTER
REV FWD
PLAY
PAUSE
OPEN/
CLOSE
DISPLAY
PLAYBACK
CONTROL
RETURN
NEXT
REPEATREPEATSTOP
A–B
CLEAR
NEXT
FWD
(track)
NEXT
Press the NEXT ¢ button.
¶ Moves you ahead to the chapter (track) with the number
equivalent to the number of times you pressed the button.
Skipping back to the previous chapter
(track)
PREV
Press the PREV 4 button.
CONDITION
PROGRAM
MODE
MELODY
GUIDE
VOCAL
PARTNER
KEY CONTROL
LASER DBC
Title 2
VOCAL
Title 1
Chapter 2 Chapter 1 Chapter 2Chapter 1
NEXT
3
PREV
2
2
NEXT
3
PREV
2
NEXT
3
PREV
2
Chapter 1 Chapter 2 Chapter 3 Chapter 4
NEXT
3
PREV
2
NEXT
3
PREV
2
NEXT
3
PREV
2
¶ Press once to skip back to the start of the chapter (track)
currently playing.
¶ Press again to skip back to the start of the previous chapter
(track).
Fast forward to a desired location
FWD
Press the FWD ¡ button.
Fast return to a desired location
REV
Press the REV 1 button.
Note
◆ With LDs (CLV), when you perform FWD ¡ or REV 1 opera-
tion, there may be no color but this does not mean the player is
malfunctioning.
Track 1 Track 2 Track 3 Track 4 Track 5
NEXT
3
PREV
2
Track 1
NEXT
3
PREV
2
16
Chapter (Track) Skip Forward/Skip Back
2
Track 2
NEXT
3
PREV
NEXT
3
PREV
2
NEXT
PREV
2
Track 3 Track 4
NEXT
3
PREV
2
NEXT
33
PREV
2
3
Track 5
NEXT
PREV
2
Page 17
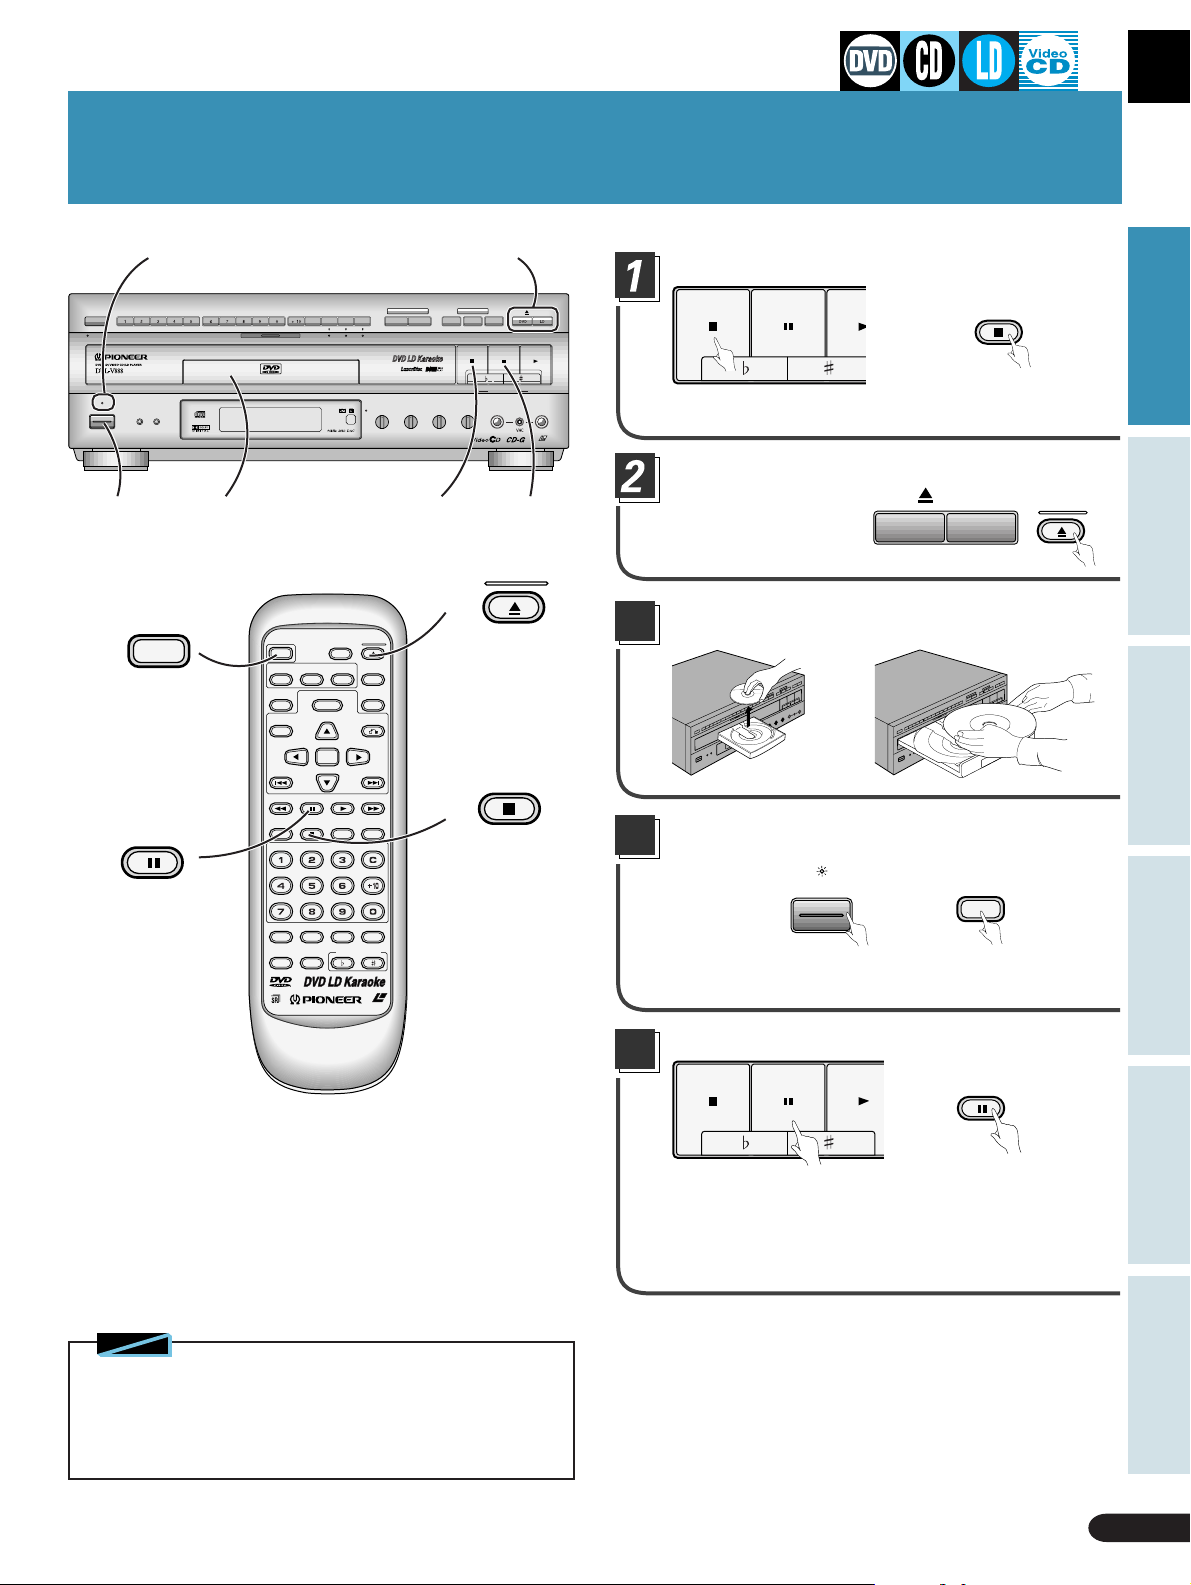
Stopping Playback & Switching Power OFF
A
STANDBY indicator
DISC SIDE
A / B
A B
STANDBY
POWER
KARAOKE
SINGLE
MODE
STANDBY/ON
4
PLAY
3
POWER
4
PAUSE
VOCAL
SCORING
ONE-TOUCH
PARTNER
SYSTEM
KARAOKE
POWER
DISC SIDE
AUDIO
LAST
MEMORY
TITLE
PREV
CHP/TIME
A / B
ANGLE
SUBTITLE
MENU
ENTER
REV FWD
PLAY
PAUSE
GUIDE
VIDEO CD FUNCTION DVD FUNCTION
VOCAL
V-NR PBC
GUIDE VOCAL
MAXMIN
OPEN/
CLOSE
DISPLAY
PLAYBACK
CONTROL
RETURN
NEXT
REPEATREPEATSTOP
A–B
CLEAR
2
MAXMINMAXMIN
GUIDE
MELODY
LaserDisk
CD / VIDEO CD
MIC
CONTROL
OPEN/CLOSE
MIC 2MIC 1
LASER DBC
ONE
HI-LITE
CHORUS
MEDLEY
STOP PLAYPAUSE
LOW HIGHKEY CONTROL
ECHO
MIC 2MIC 1
MAXMIN
LD-G CD-G
Press the STOP 7 button.
STOP PAUSE PL
¶ Playback stops.
STOP
Basic Operation
Press the OPEN/CLOSE 0 button.
OPEN/
CLOSE
Karaoke OperationDetailed Operation Setting Set Up Other Information
1
2
1
PAUSE
button
OPEN/
CLOSE
STOP
OPEN/CLOSE
DVD LD
¶ The disc table comes out.
CD / VIDEO CD
Remove the disc.
3
When removing a DVD/CD When removing an LD
Press the POWER button.
4
Indicator lights
=
STANDBY
POWER
POWER
CONDITION
PROGRAM
MODE
MELODY
GUIDE
VOCAL
PARTNER
KEY CONTROL
LASER DBC
VOCAL
Notes
◆ You can watch a DVD or LD part way through, eject it, and then
when you load it again, start watching from where you left off. For
details, refer to “LAST MEMORY” on page 18.
◆ When moving the unit, be sure to follow the instructions on page
77 (WHEN MOVING THE UNIT).
STANDBY/ON
¶ The disc table goes back in, power switches OFF, and the
STANDBY indicator lights.
Pausing play
STOP PAUSE PLAY
Press the PAUSE button. There’ s no sound, and P AUSE appears
in the display window. Press the PAUSE button again to restart
play.
¶ With DVDs, LDs (CAV only), and Video CDs, pressing PAUSE
gives you still picture display (P.25).
PAUSE
Stopping Playback & Switching Power OFF
17
Page 18
Continuing Playback from where you Stopped
POWER
MENU
ENTER
DISC SIDE
A / B
ANGLE
PLAY
CONDITION
KEY CONTROL
OPEN/
CLOSE
DISPLAY
PLAYBACK
CONTROL
RETURN
NEXT
REPEATREPEATSTOP
A–B
CLEAR
PROGRAM
LASER DBC
LAST
MEMORY
POWER
AUDIO
SUBTITLE
LAST
MEMORY
TITLE
PREV
REV FWD
PAUSE
CHP/TIME
MODE
MELODY
GUIDE
VOCAL
VOCAL
PARTNER
Tips
¶ With DVDs, LAST MEMORY memorizes ASPECT, audio,
POSITION(Wide/Normal), Cinema mode/Animation mode, and other
settings as well as the place where playback stopped.
¶ Even with a disc you have memorized with LAST MEMORY, play-
back begins at the start of the disc if you press the PLAY 3 button.
¶ When you continue playback from the point where you stopped,
LAST MEMORY is automatically canceled for that disc.
¶ If you register more than five DVDs in LAST MEMORY, details of
the latest disc are memorized, while details of the least recent disc
(the disc you registered first) are erased.
¶ If you eject an LD or Video CD, memorized details are erased.
¶ With DVDs, LAST MEMORY may not function with certain titles.
Memorizing the place where
you stopped watching (LAST
MEMORY)
LAST
MEMORY
Press the LAST MEMORY button
during play.
¶ “LAST MEMORY” indication is displayed and the place is
memorized.
POWER
Press the POWER button to
switch power OFF, or press the
STOP
¶ With DVDs, even if you eject a disc, the location where play
stopped is memorized.
STOP 7 button to stop playback.
Resuming playback from
where you stopped
Press the LAST MEMORY button during
STOP.
¶ With DVDs, operation is possible even while the title menu is
displayed.
¶ When power is switched OFF , if you press the LAST MEMORY
button, power is automatically switched ON, and play starts
from the point at which you stopped watching.
¶ When LAST MEMORY is displayed, play resumes from a lit-
tle before the point at which you stopped watching.
STOP 7 button
Notes
◆ If there is a power outage or you disconnect the power cord while
the player is operating, LAST MEMORY settings cannot be memorized.
◆ Resuming play is not possible with CDs.
◆ During Video CD PBC play(P.14), LAST MEMORY play may not be
possible.
18
Continuing Playback from where you Stopped
POWER button
LD-G CD-G
LaserDisk
Page 19
Detailed Operation
Playback by Menu Selection ...................................20
Playing Back CD Graphics .......................................21
Searching for a Desired Video Scene/Audio Track
Basic Operation
Basic Operation
(Search)..................................................................22
Repeat Play ...............................................................24
Still Frame.................................................................25
Karaoke OperationDetailed Operation Setting Set Up Other Information
Karaoke OperationDetailed Operation Setting Set Up Other Information
Detailed Operation
19
19
Page 20
1
POPS
2
JAZZ
3
COUNTRIES
4
R&B
5
CLASSICS
Playback by
Menu Selection
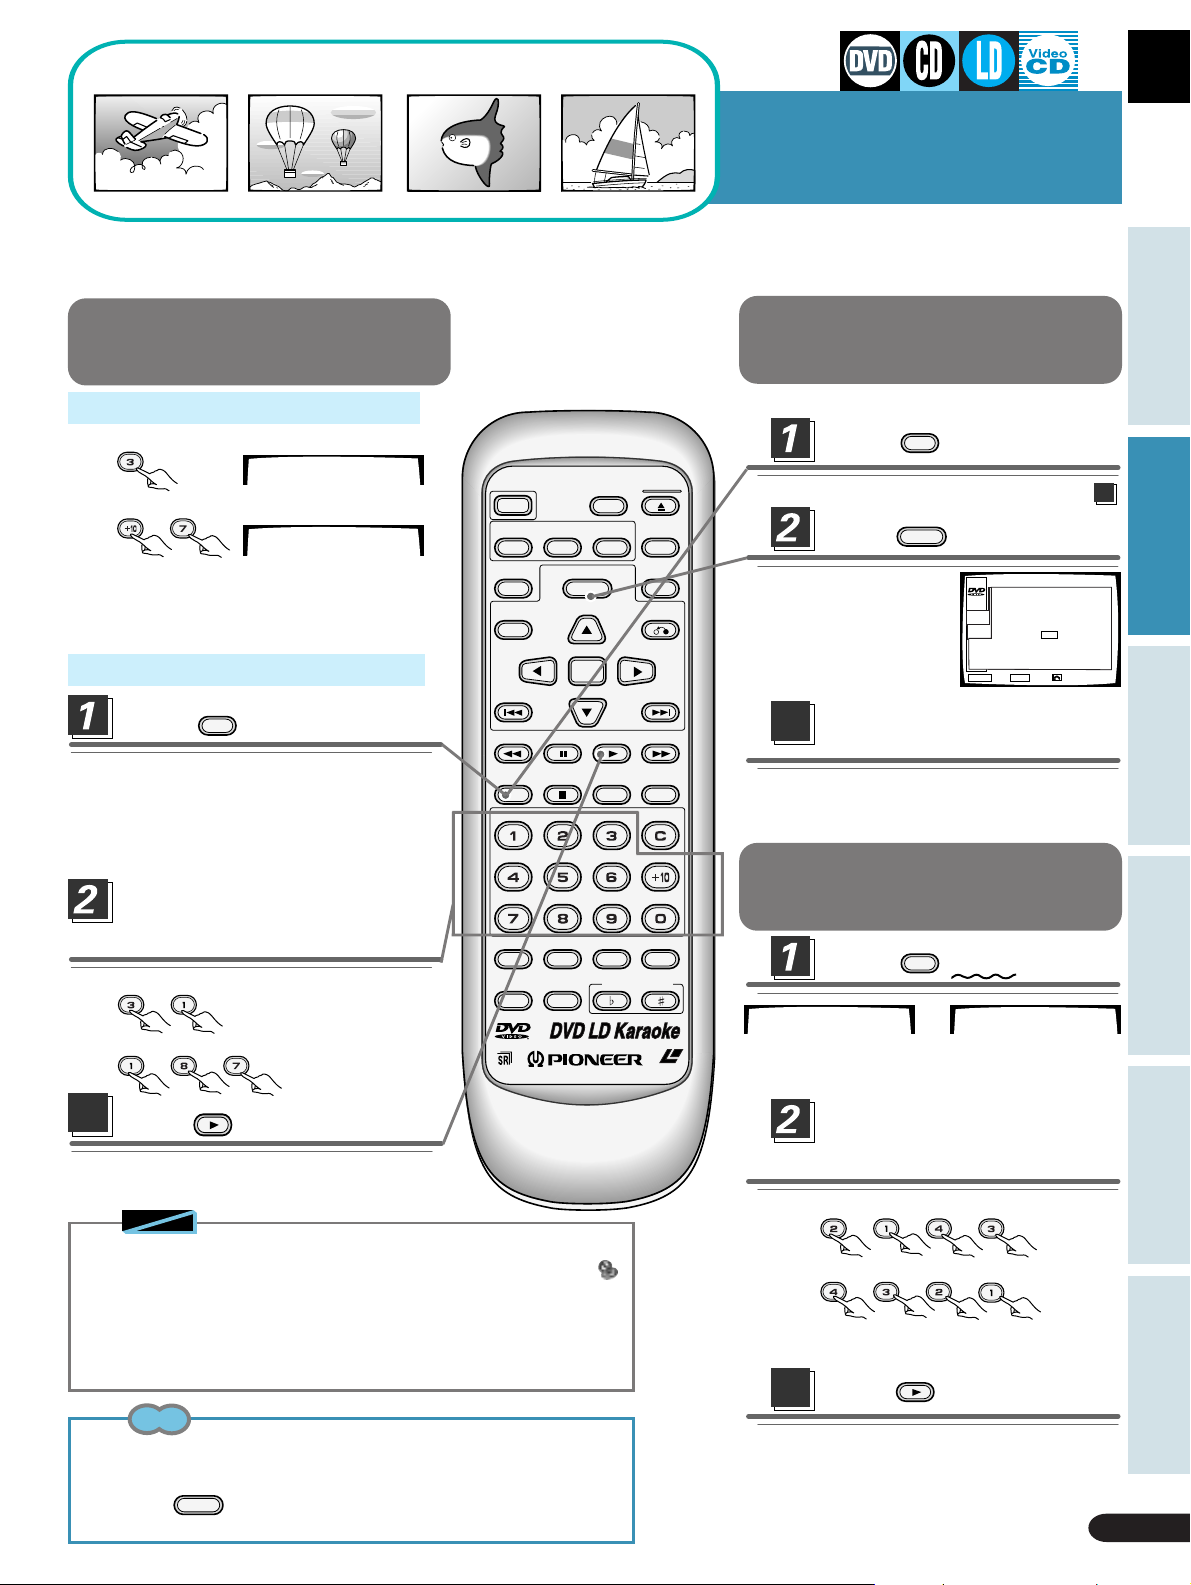
DVDs and Video CDs, depending on the disc, feature selection menus.
This player lets you choose a desired title or track by selecting from a menu.
Playing Back from
Menu Display
Press
¶ A menu is displayed. This menu is recorded
on the disc. Menus differ depending on the
disc.
¶ With Video CDs that have Play Back Control
(P.14), PBC is indicated in the display
window.
Title (track) selection
with the digit buttons.
¶ When selecting a number higher than 10,
use the
• When selecting 10,
press
• When selecting 17,
press
PLAY
1
POPS
2
JAZZ
3
COUNTRIES
4
R&B
5
CLASSICS
button.
→ .
→ .
.
POWER
AUDIO
LAST
MEMORY
TITLE
PREV
REV FWD
CHP/TIME
MELODY
GUIDE
VOCAL
SUBTITLE
PAUSE
MODE
VOCAL
PARTNER
DISC SIDE
A / B
ANGLE
MENU
ENTER
PLAY
CONDITION
KEY CONTROL
OPEN/
CLOSE
DISPLAY
PLAYBACK
CONTROL
RETURN
NEXT
REPEATREPEATSTOP
A–B
CLEAR
PROGRAM
Returning to Menu
Display during Playback
In case of DVDs
TITLE
Press
Press
¶ Press
In case of Video CDs
MENU
again for a menu of title contents.
Perform menu operations following
instructions provided in the menu, or
those in the disc's instructions.(P.53–P57)
Press
Pressing the
play shows the menu.
.
MENU
.
RETURN
.
RETURN
button during the PBC
• When selecting 20,
press → → .
¶ The selected title or track starts playing.
¶ With DVDs, you can also select numbers
with the and buttons and then
ENTER
press
.
Tips
¶ Y ou can play Video CDs without using menu displays. Pr ess
the PLA YBACK CONTROL button on the main unit or remote
control to switch "PBC" OFF.
¶ Depending on the title, you can also make a selection using
a menu. T o do this, press the
are displayed to call up a menu, and select the desired title.
20
Playback by Menu Selection
MENU
button when indications
LASER DBC
Notes
◆ When playing a Video CD with a menu displayed, you
cannot use Reserve play, Repeat play , and T rack/Time
Search functions. This is because interactive operation
using the menu is possible.
◆ With Video CDs when PBC is ON, player operation
differs depending on the disc. For details, read the
instructions that come with the disc.
◆ With DVDs, menu indications may not be displayed.
Page 21
Playing Back CD
Trust me!
Video and audio information is recorded in different areas on a
disc. There's also a subcode area where information such as subtitles and song lyrics can be recorded. Graphics refers to the reading of the signals in this area, and their display.
CD graphics discs bear the
GRAPHICS
mark. Y ou can enjoy graph-
ics when playing discs bearing this mark.
POWER
A / B
ANGLE
PLAY
OPEN/
CLOSE
DISPLAY
PLAYBACK
CONTROL
RETURN
NEXT
Press
.
¶ The STANDBY indicator goes out.
OPEN/
CLOSE
Press the
.
¶ The disc table comes out.
Load a CD graphics disc.
3
POWER
AUDIO
LAST
MEMORY
TITLE
PREV
REV FWD
DISC SIDE
SUBTITLE
MENU
ENTER
PAUSE
Graphics
OPEN/CLOSE 0 button
LaserDisk
LD-G CD-G
POWER button
Switching graphics ON
5
Press
¶ The mode changes as follows.
= OFF = ON
SUBTITLE
PLAY 3 button
.
Basic Operation
Karaoke OperationDetailed Operation Setting Set Up Other Information
¶ Load a disc with the label side facing up,
using the disc table guide to align the disc.
4
Press
PLAY
button.
¶ Playback starts.
¶ Even if the graphics mode is switched
OFF, when you play a CD graphics disc,
the graphics mode is automatically
switched ON, and graphics are displayed.
Notes
◆ There should be graphics but....
If you play CD graphics discs with the graphics mode
switched ON, and still no graphics are displayed, the
problem could be due to inappropriate graphics
channel setting, or because the graphics display is in
the wrong position on the screen. Refer to pages 46
and 47.
◆ When playing a disc with no graphics recorded on it,
in rare cases erroneous graphics may be displayed,
but this does not mean the player is malfunctioning.
When playing discs without recorded graphics, be sure
to switch the graphics mode OFF.
CHP/TIME
MELODY
GUIDE
VOCAL
MODE
VOCAL
PARTNER
CONDITION
KEY CONTROL
REPEATREPEATSTOP
A–B
CLEAR
Switching graphics OFF
SUBTITLE
¶ When graphics is ON, press
PROGRAM
LASER DBC
Tip
During playback of CD graphics discs, performing the following
operations may result in missing subtitles and picture and
subtitle color changes, but this is not a malfunction. Wait a
little, and normal graphics display resumes.
¶ Fast forward/reverse
¶ Pause, Search
¶ Switching graphics ON on the graphics control display
¶ Displaying a menu
.
Playing Back CD Graphics
21
Page 22
Direct Search with
Title Numbers
Selecting title numbers
directly with the digit buttons.
Title 2Title 1
Searching for a Desired Video
Scene/Audio Track (Title
Search) Part 1
PLAY 3 button
LaserDisk
LD-G CD-G
• When selecting title
number 3, press
TITLE 3
.
• When selecting
title number 10, press
TITLE 10
→ .
You can also select a title in these 2 ways.
(Method 1)
Press
¶ Title number
flashes on screen.
Press
¶ Continue pressing
until you reach the
desired number.
Press
3
¶ Playback of the selected title starts.
TITLE
TITLE
PLAY
.
TITLE 1TITLE 1
1-01-02
again.
TITLE 1TITLE 1
1-01-02
.
(Method 2)
Press
TITLE
.
Select title numbers with
the digit buttons.
POWER
AUDIO
LAST
MEMORY
TITLE
PREV
REV FWD
CHP/TIME
MELODY
GUIDE
VOCAL
SUBTITLE
PAUSE
MODE
VOCAL
PARTNER
DISC SIDE
A / B
ANGLE
MENU
ENTER
PLAY
CONDITION
KEY CONTROL
OPEN/
CLOSE
DISPLAY
PLAYBACK
CONTROL
RETURN
NEXT
REPEATREPEATSTOP
A–B
CLEAR
PROGRAM
LASER DBC
Search with Menu
TITLE
Press
(Operates during play only.)
Press
¶ Title menu is
displayed.
May not be displayed
with some discs.
Select a title number
3
using buttons.
¶ You can also make
a direct selection
using the number
buttons.
Your selected title
soon starts playing.
4
Press
¶ Playback of the selected title starts.
MENU
ENTER
.
.
TITLE MENU
PLAY
1
TITLE 1
MAIN
2
TITLE 2
3
TITLE 3
4
TITLE 4
5
TITLE 5
MENU
ENTER
EXIT ENTER
TITLE MENU
PLAY
1
TITLE 1
MAIN
2
TITLE 2
3
TITLE 3
4
TITLE 4
5
TITLE 5
MENU
ENTER
EXIT ENTER
.
RETURN
RETURN
1/4
PREV
1/4
PREV
• When selecting title number 5,
press
.
• When selecting title number 10,
press
3
→ .
Press
PLAY
.
¶ Playback of the selected title starts.
Searching for a Desired Video Scene/
22
Audio Track (Title Search) Part 1
Notes
◆ With some karaoke DVDs, songs are identified by chapter
instead of by title. To select songs with this kind of disc,
use Chapter Search (refer to "When the Chapter/Track
number is high" on p.23).
Perform direct Title Search using the digit buttons on the
player or the remote control. (Refer to p.16 for details
concerning Title and Chapter.)
◆ With certain DVDs, search operation may stop. In this case,
the mark appears.
◆ Depending on the disc, menu may not be displayed.
Page 23
Chapter 1 Chapter 2 Chapter 3 Chapter 4
Searching for a Desired Video
Scene/Audio Track (Chapter/
Track Search) Part2
Three ways to search a DVD or Video CD; normal search, direct search and time search are possible.
For CD, direct search only is possible.
Four ways to search an LD; normal search, frame search(CLVs only), direct search and time search are possible.
Chapter Number Search
(Normal Search)
Direct search using the digit buttons
Example 1: To select chapter/track number 3,
press .
Example 2: To select chapter/track number 17,
press → .
With DVDs, it becomes Title Search. Refer to
"Searching for a Desired Video Scene/Audio
Track (Title Search) Part 1" in page 22.
When the Chapter/Track number is high
Press
¶ Chapter/Track number flashes.
With DVDs, it becomes Title Search. Refer to
"Searching for a Desired Video Scene/Audio
Track (Title Search) Part 1" in page 22.
CHP/TIME
CHP 3
CHP 17
.
POWER
AUDIO
LAST
MEMORY
TITLE
PREV
REV FWD
CHP/TIME
SUBTITLE
PAUSE
DISC SIDE
A / B
ANGLE
MENU
ENTER
PLAY
OPEN/
CLOSE
DISPLAY
PLAYBACK
CONTROL
RETURN
NEXT
REPEATREPEATSTOP
A–B
CLEAR
Chapter Number Search
with Menu
You can perform this with DVDs only.
Press
When in the Stop mode, proceed to step
Press
¶ Chapter menu
is displayed.
Make a selection following
3
on-screen indications.
¶ With certain titles, there may be no menu
display. In this case, perform the operations
described at left.
CHP/TIME
MENU
.
.
STOP
MAIN
MANU
MENU
TITLE 1
CHAPTER
CHAPTER 0 (1~3)
ENTER
EXIT ENTER
RETURN
Basic Operation
3.
Karaoke OperationDetailed Operation Setting Set Up Other Information
Specifying Chapter/Track
numbers with the digit
MODE
buttons.
Example 1: Selecting Chapter/Track 31
press
→ .
MELODY
GUIDE
VOCAL
VOCAL
PARTNER
Example 2: Selecting Chapter 187
press → → .
3
Press
PLAY
.
¶ The selected Chapter/Track starts playing.
Notes
◆ Time Search is not possible with CDs.
◆
With DVDs, Search may not be possible with certain titles. In this case, the
mark is displayed.
◆
When performing DVD or Video CD Time Sear ch, playback may start from a slightly
different time than that specified.
◆
When a DVD is not playing (in the STOP mode), Time Search is not possible.
◆
During Video CD PBC play, search operations described above are not possible.
Tips
To clear Title or Chapter/Track/Time/Frame indications when they are flashing, press
the CLEAR button twice.
¶ Depending on the title, you can also make a selection using a menu. To do this,
press the
the desired title.
MENU
when indications are displayed to call up a menu, and select
CONDITION
KEY CONTROL
PROGRAM
LASER DBC
Time Number Search/
Frame Number Search
CHP/TIME
Press
CHP 0
¶ With DVDs or LDs that have no chapters, time
is displayed after pressing the button once.
Select the desired time
number/frame number
with the digit buttons.
Example 1: T o select 21 minutes 43 seconds,
press
Example 2: To select frame number 4321,
press
¶ With DVDs, you cannot search for chapters
3
¶ Playback starts from the selected elapsed
Searching for a Desired Video Scene/
Audio Track (Chapter/Track Search) Part 2
→ → → .
→ → → .
that overlap titles.
Press
play time or selected frame.
→
PLAY
twice.
TIME 0.00
.
23
Page 24
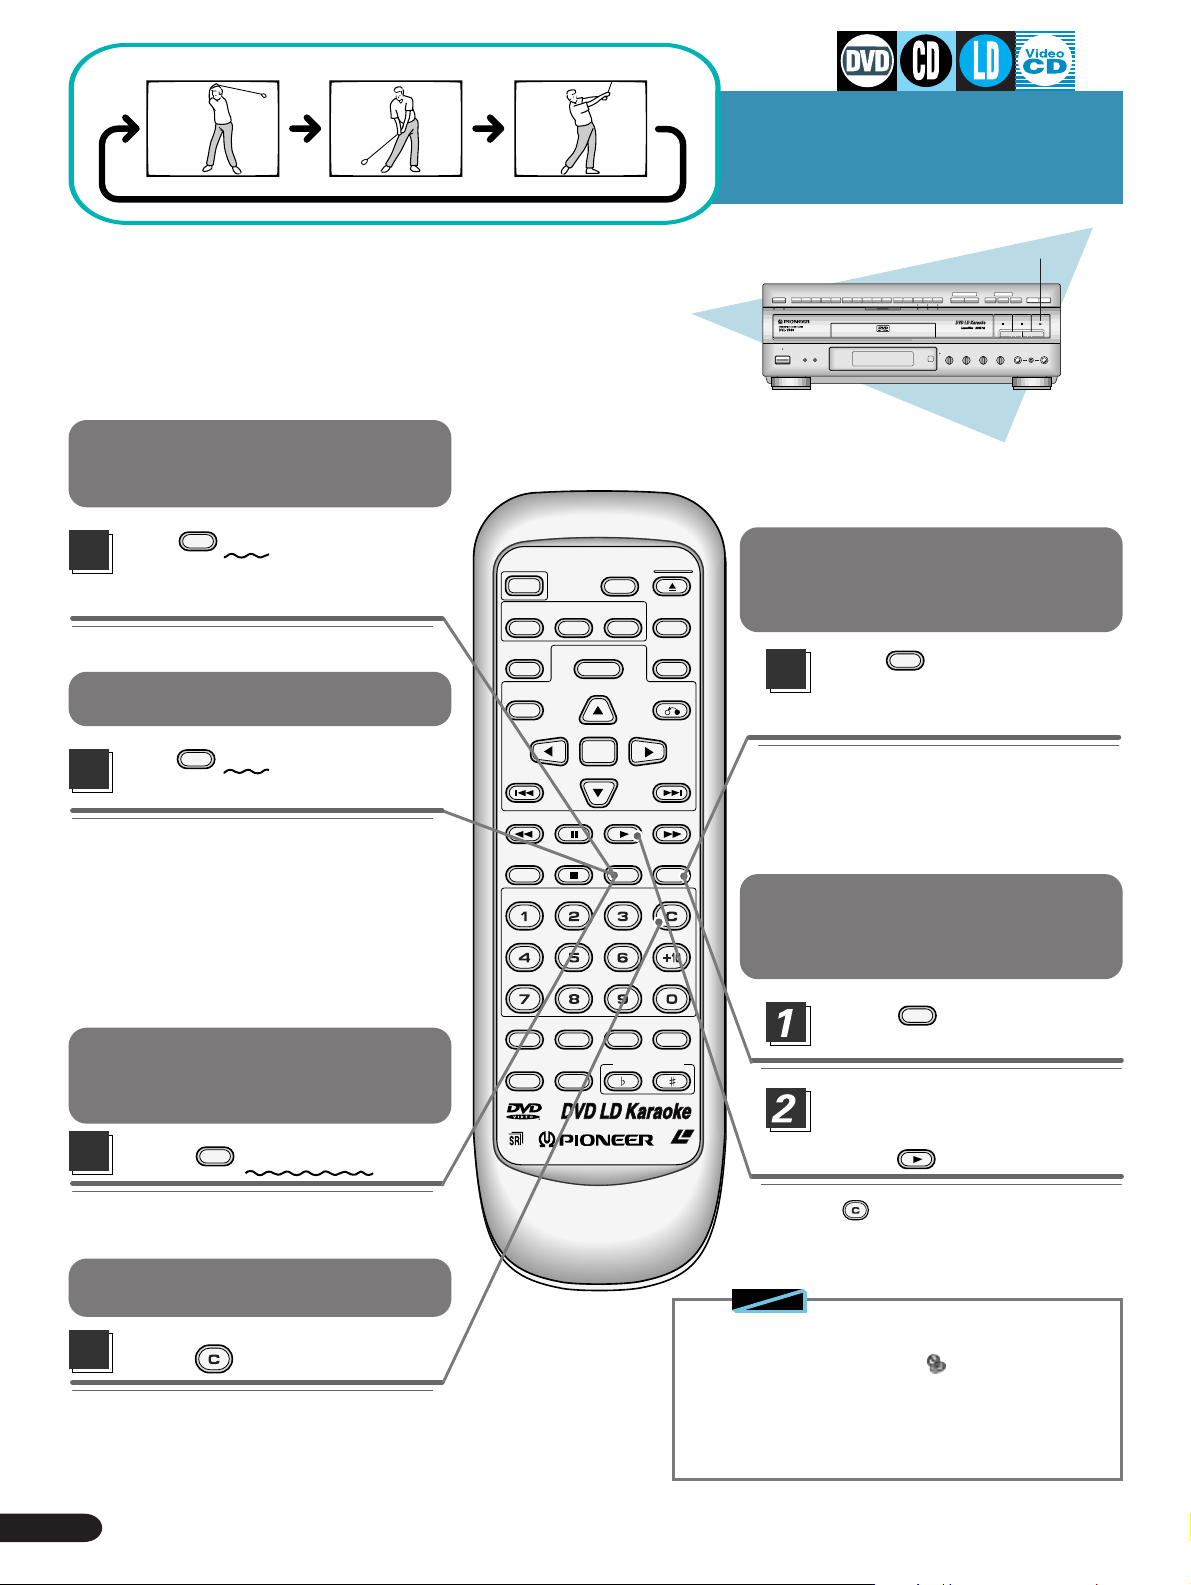
Repeat play of a
chapter/track
REPEAT
Press
once during playback
of the chapter or track you want
to repeat.
Repeat play of a title
REPEAT
Press
twice. during playback
of the title you want to repeat.
¶ With DVDs, the title continues playing until
the end, and then playback starts once
more from the beginning of that title.
¶ With DVDs, Repeat play within the same
title is possible.
¶ With CDs and Video CDs, the entire disc is
repeated.
¶ With LDs, a single side is repeated.
Repeat play of
POWER
AUDIO
LAST
MEMORY
TITLE
PREV
REV FWD
CHP/TIME
MELODY
GUIDE
VOCAL
SUBTITLE
PAUSE
MODE
VOCAL
PARTNER
DISC SIDE
A / B
ANGLE
MENU
ENTER
PLAY
CONDITION
KEY CONTROL
OPEN/
CLOSE
DISPLAY
PLAYBACK
CONTROL
RETURN
NEXT
REPEATREPEATSTOP
A–B
CLEAR
PROGRAM
Repeat Play
PLAY 3 button
LaserDisk
LD-G CD-G
Repeat play of a
specified section.
REPEAT
Press
end of the section you want to
repeat.
Return to a specified
location
Press
location.
A–B
at the beginning and
REPEAT
A–B
at the desired
double-sided LDs
Press
¶ Both sides are repeated, starting on Side
A.
REPEAT
three times.
To Cancel repeat play
CLEAR
Press
¶ The Repeat play mode is canceled, but
playback continues.
¶ With DVDs, everything in the same title is
repeated.
24
Repeat Play
.
When you want to return
LASER DBC
to the selected location,
press
¶ Press
PLAY
.
CLEAR
to clear a specified location.
Notes
◆ With DVDs, Repeat play may not be possible with
certain titles. In this case, the mark is displayed.
◆ With Video CDs, Repeat play is not possible when a
menu is displayed (during PBC operation). To perform
Repeat play, press the PLAYBACK CONTROL button
on the main unit or the remote control to switch "PBC"
OFF.
Page 25

Still Frame
Viewing a still frame
POWER
AUDIO
LAST
MEMORY
TITLE
PREV
SUBTITLE
MENU
ENTER
DISC SIDE
A / B
ANGLE
OPEN/
CLOSE
DISPLAY
PLAYBACK
CONTROL
RETURN
NEXT
PLAY 3 button
PAUSE 8 button
LaserDisk
LD-G CD-G
Basic Operation
Karaoke OperationDetailed Operation Setting Set Up Other Information
PAUSE
Press
.
¶ Press the PAUSE 8 button on the front of
the player.
Tip
¶ With LDs, this operates only with CAV discs.
REV FWD
CHP/TIME
MELODY
GUIDE
VOCAL
PAUSE
MODE
VOCAL
PARTNER
PLAY
CONDITION
KEY CONTROL
To return to normal
REPEATREPEATSTOP
A–B
CLEAR
PROGRAM
LASER DBC
Notes
◆ There is no sound when viewing still frames.
◆ Pause may not be possible with certain discs. In this
case, the mark is displayed.
◆ With LDs, play automatically stops if still frame display
continues for 20 minutes.
playback
Press
¶ Press the PLAY 3 button or PAUSE 8
button on the front of the player.
PLAY
or
PAUSE
.
Still Frame
25
Page 26
2626
Page 27

Karaoke Operation
Karaoke Entertainment ............................................28
SINGLE PLAY/Creating singing venue atmosphere
Karaoke with connected external components ....29
Adjusting to Create the Desired Sound..................30
Echo adjustment......................................................30
Changing performance key ....................................30
Operation is possible with the mic........................30
Convinient Function for Practicing Karaoke .......... 31
Guide Vocal..............................................................31
DUET MODE/CHORUS MODE................................32
VOCAL PARTNER/ONE-TOUCH KARAOKE ........... 33
..........29
Basic Operation
Basic Operation
Karaoke OperationDetailed Operation Setting Set Up Other Information
Karaoke OperationDetailed Operation Setting Set Up Other Information
SCORING Grades Your Singing Ability ..................34
Simultaneous Scoring for Two Singers
(COMPETITION) ....................................................36
Consecutive Play of Song Highlights
(HI-LITE MEDLEY) .................................................37
Reserving a Desired Song
............................................38
One Verse Chorus Play Only (One Chorus)............ 39
Sing with Professional Karaoke
(GUIDE MELODY)..................................................39
Karaoke Operation
27
27
Page 28
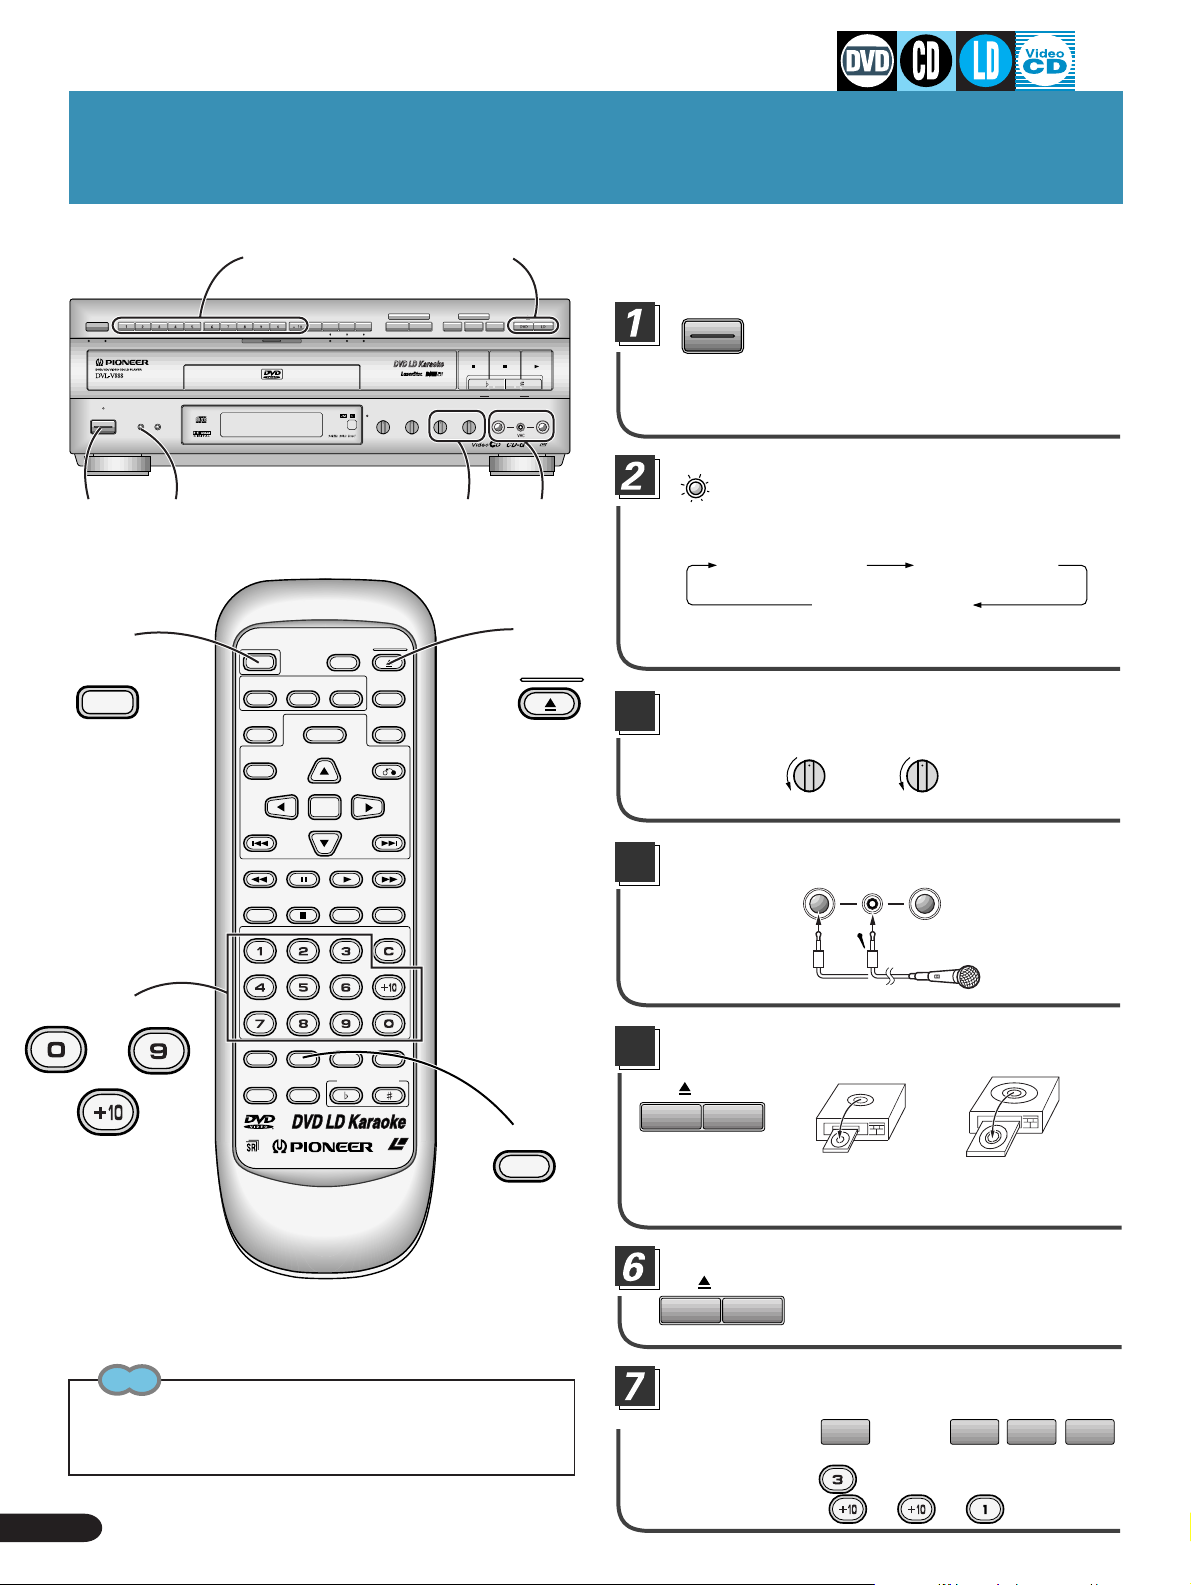
Karaoke Entertainment
DISC SIDE
A / B
A B
STANDBY
POWER
STANDBY/ON
1
1
POWER
KARAOKE
7
5, 6
Let’s sing!!
GUIDE
VOCAL
SCORING
ONE-TOUCH
VIDEO CD FUNCTION DVD FUNCTION
VOCAL
PARTNER
SYSTEM
KARAOKE
SINGLE
MODE
PLAY
GUIDE VOCAL
MAXMIN
2
V-NR PBC
ECHO
ONE
CHORUS
MAXMIN
LD-G CD-G
3, 8
HI-LITE
MEDLEY
STOP PLAYPAUSE
LOW HIGHKEY CONTROL
MIC 2MIC 1
MAXMINMAXMIN
GUIDE
MELODY
LaserDisk
CD / VIDEO CD
MIC
CONTROL
OPEN/CLOSE
4
¶ The KARAOKE MODE button lights, and the mode becomes
MIC 2MIC 1
LASER DBC
Each time you press the button, the setting changes as follows.
POWER
AUDIO
LAST
MEMORY
TITLE
PREV
REV FWD
CHP/TIME
SUBTITLE
PAUSE
MENU
ENTER
DISC SIDE
A / B
ANGLE
PLAY
OPEN/
CLOSE
DISPLAY
PLAYBACK
CONTROL
RETURN
NEXT
REPEATREPEATSTOP
A–B
CLEAR
5, 6
OPEN/
CLOSE
¶ When the KARAOKE MODE button lights, skip this step.
3
4
POWER
STANDBY/ON
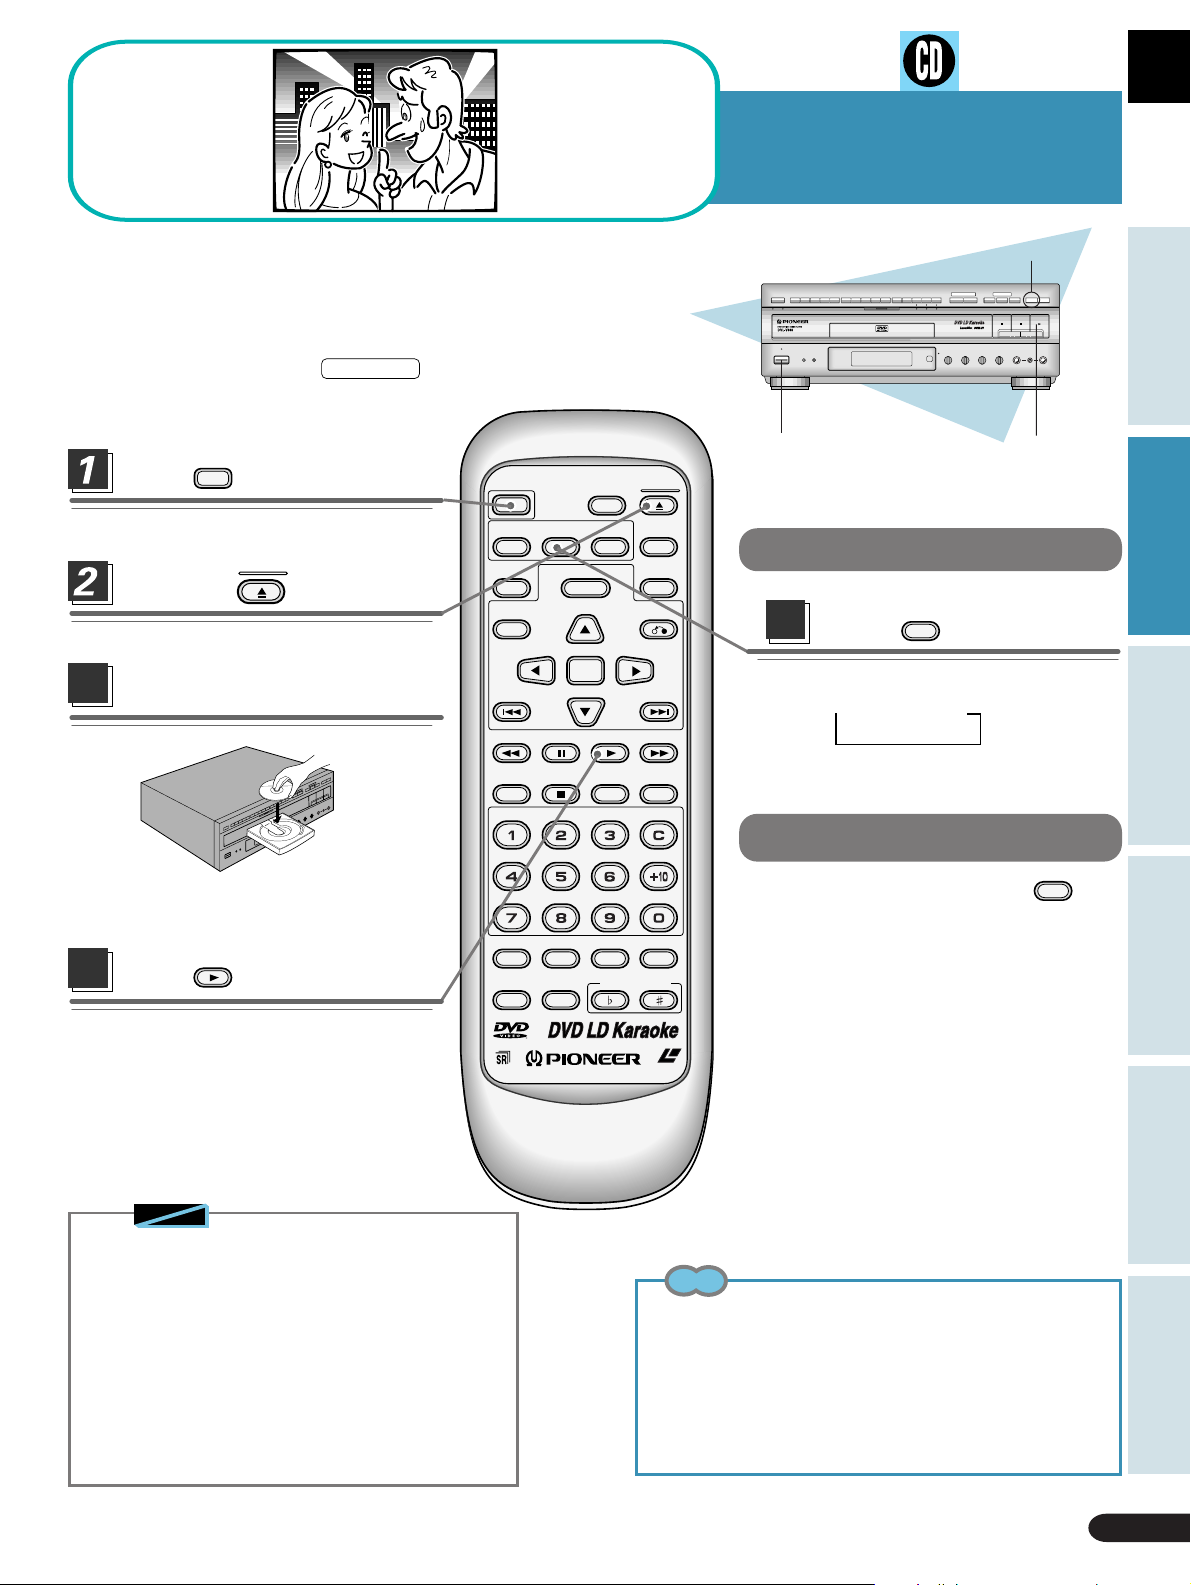
Press the POWER button.
KARAOKE.
KARAOKE
MODE
Press the KARAOKE MODE button
to switch the KARAOKE MODE ON.
KARAOKE MODE NORMAL MODE
AUX INPUT MODE
Set Mic 1 and Mic 2 volume level knobs
to “Low”.
MIC 1
MIC 2
MAXMIN
MAXMIN
Connect the mics, and switch ON.
MIC
MIC 2MIC 1
CONTROL
MIC
7
–
After opening and closing the LD disc table, or after playing an LD,
you can press the OPEN/CLOSE button on the remote control to eject
(open) the LD disc table.
28
Tip
Karaoke Entertainment
MELODY
GUIDE
VOCAL
MODE
VOCAL
PARTNER
CONDITION
KEY CONTROL
PROGRAM
LASER DBC
MODE
Press the OPEN/CLOSE 0 button.
5
¶ The disc table comes out.
OPEN/CLOSE
DVD LD
CD / VIDEO CD
• Load a
disc.
When loading a
DVD/CD/Video CD
When
loading a LD
Press the OPEN/CLOSE 0 button.
OPEN/CLOSE
DVD LD
CD / VIDEO CD
¶ The disc table goes back in.
Select desired songs using the digit
buttons.
(Example) Track 3
3
Remote control operation
(Example) Track 3
Track 21 = =
, track 21
+ 10 + 10 1
Page 29
Karaoke Entertainment
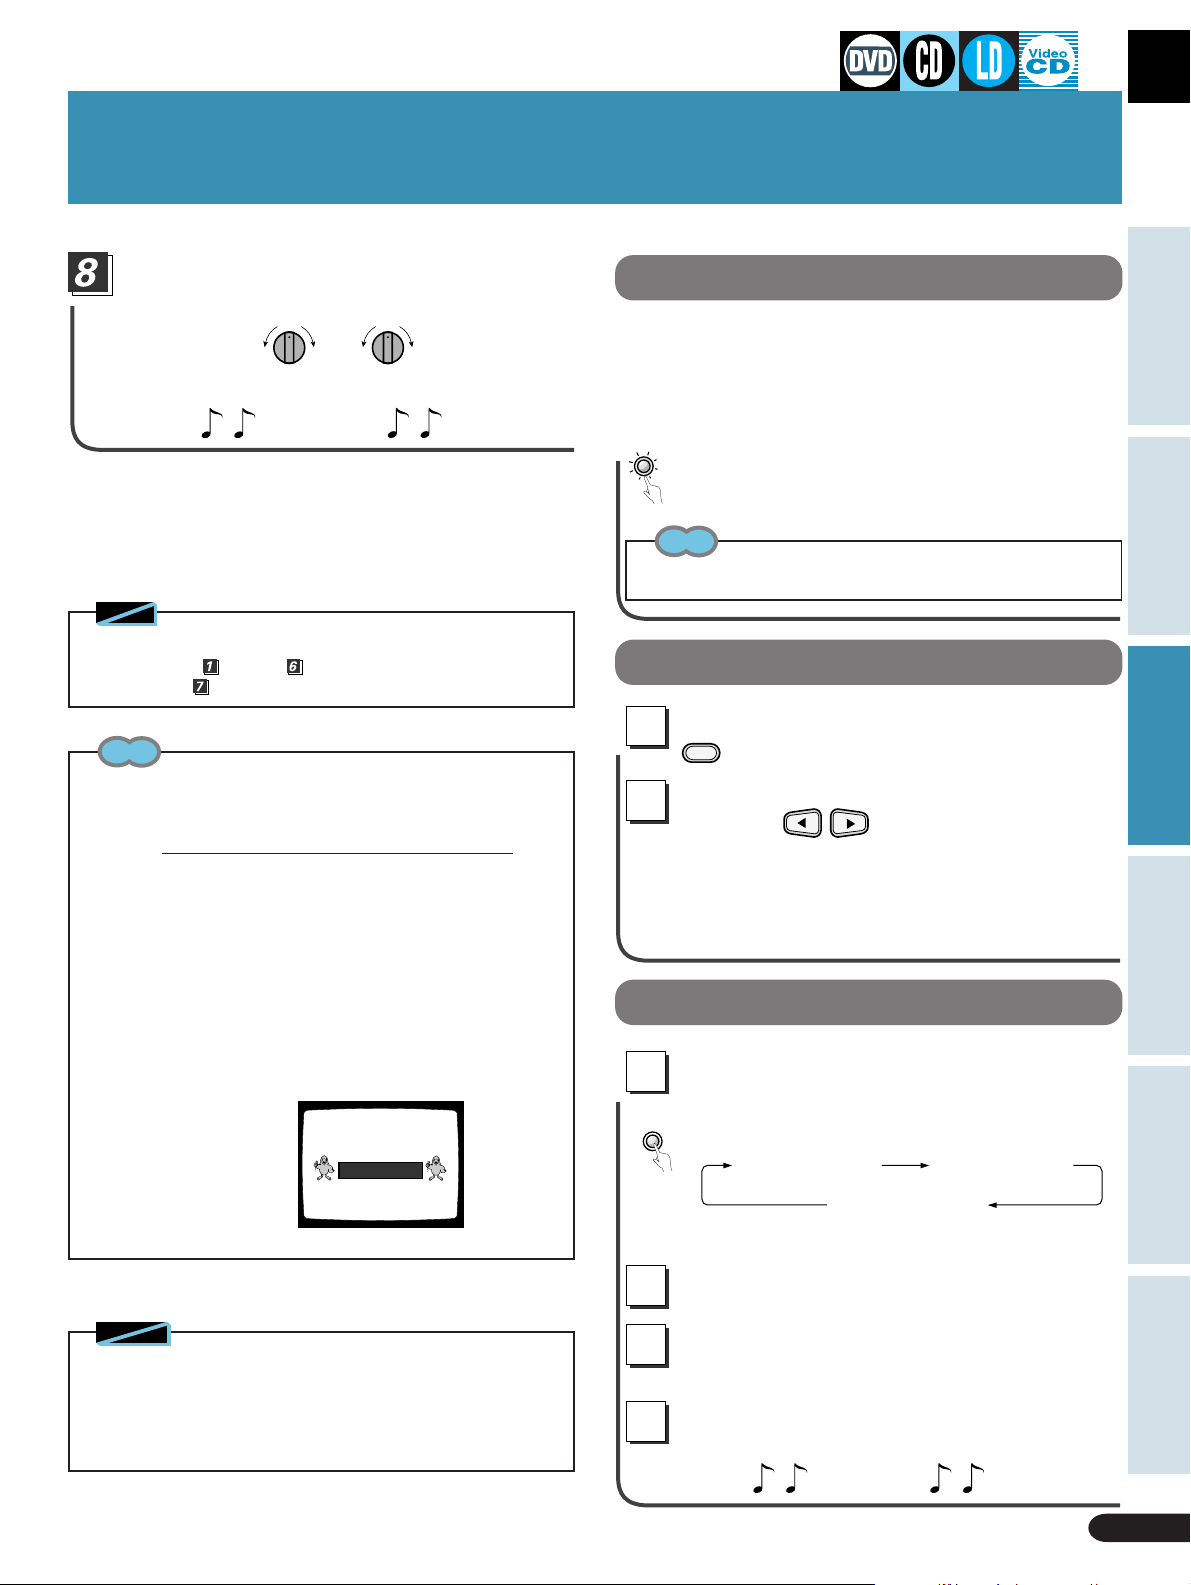
T urn the Mic volume level knob to adjust
volume level.
MIC 1 MIC 2
MAXMIN MAXMIN
¶ Adjust overall volume level with the TV or amp.
Let’s sing!
Note
◆ During PBC play of Video CD with PBC (see page 14), after performing steps through , press the Play 3 button, and then
perform step .
Stopping a song
When the KARAOKE MODE is selected (the KARAOKE MODE
indicator lights), play pauses after a selected song finishes. Press
the SINGLE PLAY button (the SINGLE PLA Y button indicator goes
out), and play continues even after a song finishes, without stopping or pausing.
SINGLE
PLAY
Press the SINGLE PLAY button.
¶ The SINGLE PLAY mode is ON when the indicator is lit.
¶ The Continuous play mode is ON when the light is out.
Tip
When the input switch function is set to “NORMAL” and “AUX
INPUT MODE”, the mode becomes Continuous play.
Creating singing venue atmosphere
Basic Operation
Karaoke OperationDetailed Operation Setting Set Up Other Information
Tips
Howling
If sound from the speakers is picked up by a mic and output again
through the speakers, the result is a screeching sound known as
“howling”. Perform the following steps to eliminate howling.
(1) Move the mic away from speakers.
(2) Turn the Mic volume knob counterclockwise to lower the volume
level.
(3) Turn the Digital Echo level knob (P.30) counterclockwise to lower
the echo level.
Display between songs
(With DVDs, CDs, LDs, and Video CDs.)
When in the KARAOKE MODE (when the KARAOKE MODE indicator
on the front panel is lit), during pause or when a disc has stopped
playing, karaoke bird characters are displayed.
When no discs loaded
INSERT A DISC
During play in the
MODE
1
2
The setting changes as follows.
For details refer to page 45.
to select
Select the desired ambience setting
with the buttons.
OFF j STUDIO j HALL j ARENA
KARAOKE MODE
KARAOKE SURROUND
, press
.
Karaoke with connected external components
Press the KARAOKE MODE button to
1
switch the AUX INPUT MODE ON.
KARAOKE
MODE
2
Each time you press the button, the setting changes
as follows.
KARAOKE MODE NORMAL MODE
AUX INPUT MODE
¶ The KARAOKE MODE indicator and the AUX indicator
in the display window lights.
Connect mics, and switch ON.
Notes
◆ With DVDs, some discs may have a Menu function. With this kind
of disc, since operations are in line with menu selections, there is
no SINGLE PLAY mode, and no enter taining display between songs.
◆ When playing a Video CD with Playback Control ON (see page 14),
you cannot select the SINGLE PLAY mode.
Start play on the externally connected
3
component.
Adjust Mic 1 and Mic 2 volume levels to
4
assure there’s no howling.
Let’s sing
Karaoke Entertainment
29
Page 30
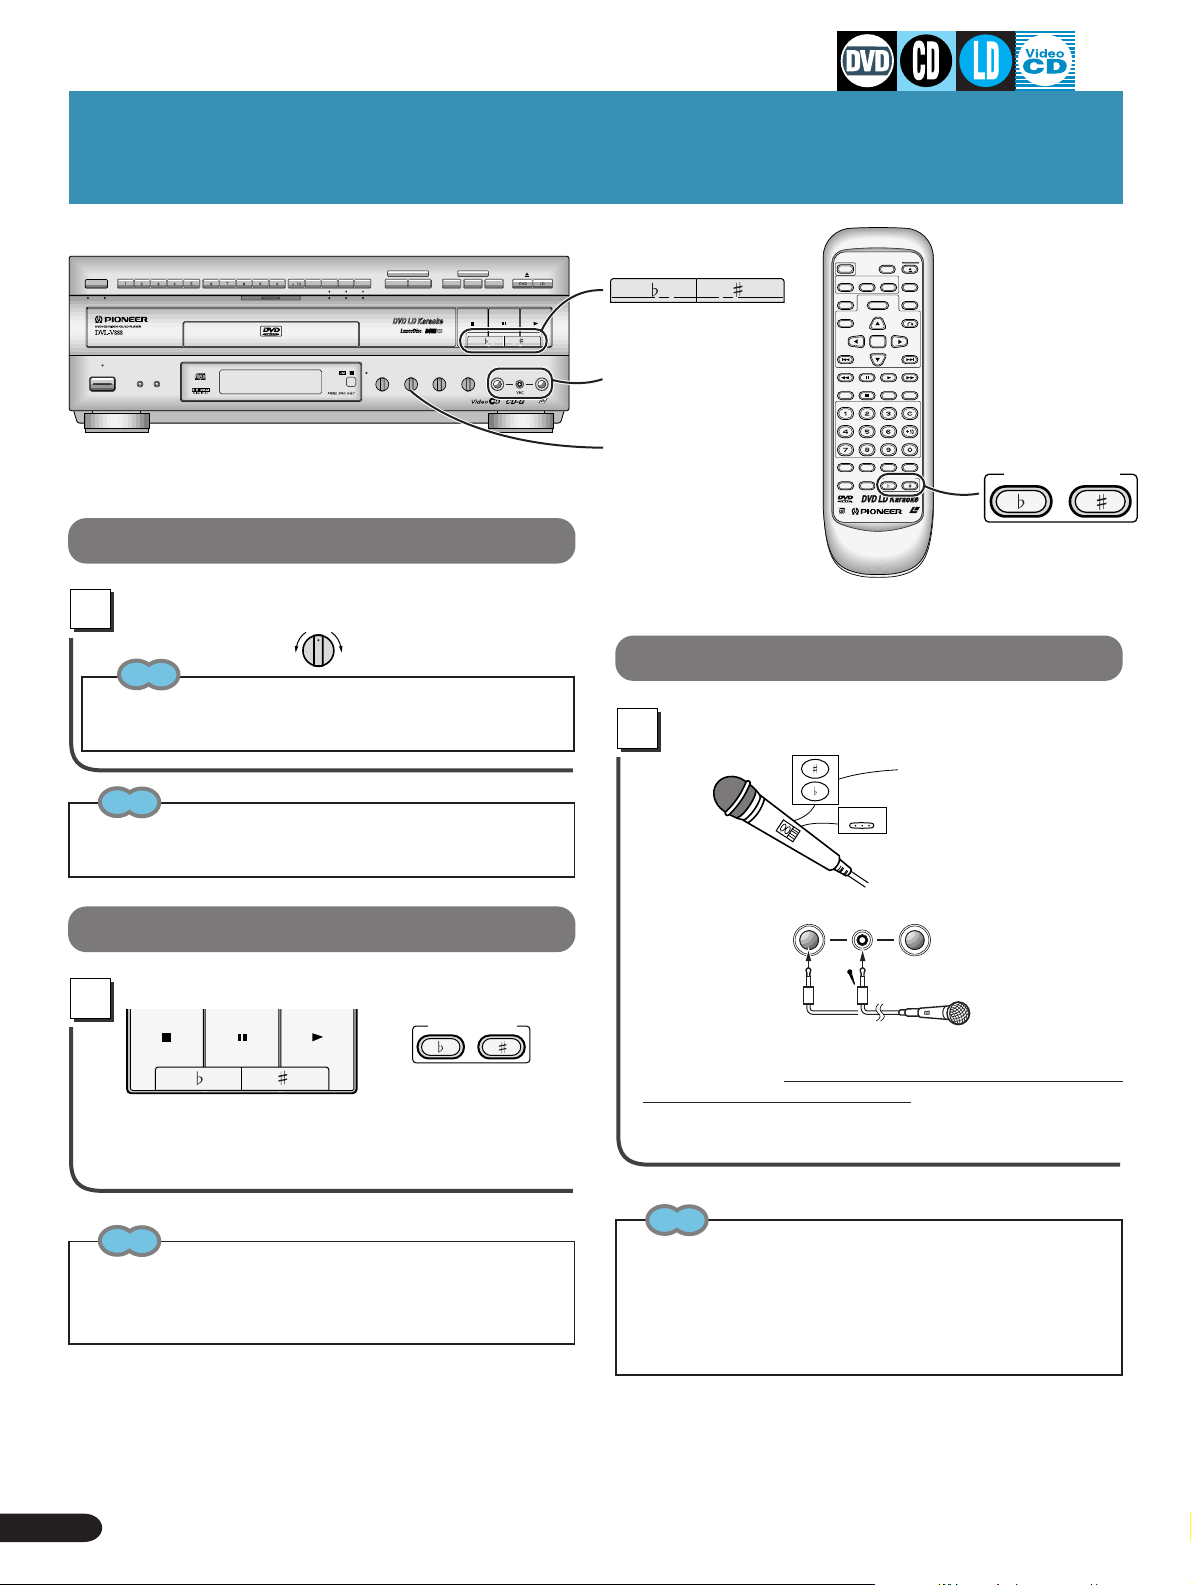
Adjusting to Create the Desired Sound
GUIDE
VOCAL
SCORING
ONE-TOUCH
VIDEO CD FUNCTION DVD FUNCTION
VOCAL
PARTNER
SYSTEM
DISC SIDE
A / B
A B
STANDBY
POWER
STANDBY/ON
KARAOKE
SINGLE
MODE
PLAY
KARAOKE
GUIDE VOCAL
MAXMIN
V-NR PBC
ECHO
ONE
GUIDE
HI-LITE
CHORUS
MELODY
MEDLEY
CD / VIDEO CD
STOP PLAYPAUSE
LOW HIGHKEY CONTROL
MIC
MIC 2MIC 1
CONTROL
MAXMINMAXMIN
MAXMIN
LD-G CD-G
LaserDisk
Echo adjustment
Adjust with the Digital Echo level knob.
Tip
Depending on the room, there may be howling if the echo level is
too high (see page 29).
Tip
Echo...
This provides an echo effect.
ECHO
MAXMIN
KEY CONTROL buttons
OPEN/CLOSE
MIC 2MIC 1
LASER DBC
Mic jacks
Digital ECHO
level knob
Operation is possible with the mic
You can operate Key control and Once
more.
POWER
DISC SIDE
A / B
AUDIO
ANGLE
SUBTITLE
LAST
MEMORY
MENU
TITLE
ENTER
PREV
REV FWD
PLAY
PAUSE
CHP/TIME
CONDITION
MODE
MELODY
GUIDE
VOCAL
KEY CONTROL
VOCAL
PARTNER
ONCE MORE
OPEN/
CLOSE
DISPLAY
PLAYBACK
CONTROL
RETURN
NEXT
REPEATREPEATSTOP
A–B
CLEAR
PROGRAM
KEY CONTROL
LASER DBC
Functions in the
same way as the
KEY CONTROL
button on the
main unit.
Changing performance key
Press a KEY CONTROL button.
STOP PAUSE PLAY
Low — Key control — High
Low: The key is lowered
High: The key is raised
Tips
¶ When you play song to the end, or if you press the STOP 7 button
during play, the key returns to the standard setting. However, with
certain discs, this may not happen. (When displaying a DVD disc
menu)
KEY CONTROL
Each button can
be used to lower
or raise the key in
5 steps.
MIC
MIC 2MIC 1
CONTROL
MIC
¶ Y ou can perform these operation with the separately sold DM-
920 and DM-820. Refer to the mic’s User’s Manual for details
concerning Key control operation.
¶ Operation with the mic cannot be performed when the mic is
not connected to the Mic control jack.
Tips
Once more
¶ Each time you press this during play, you move back a little from
the point you are in the song and the video.
¶ Y ou can use this to repeat difficult sections in songs you are singing
for the first time.
Once more operation may not be possible with some discs.
30
Adjusting to Create the Desired Sound
Page 31

Convenient Functions for Practicing Karaoke
LASER DBC
MENU
ENTER
A / B
A–B
OPEN/
CLOSE
POWER
AUDIO
SUBTITLE
ANGLE
DISPLAY
RETURN
LAST
MEMORY
TITLE
PREV
REV FWD
CLEAR
PLAY
CONDITION
KEY CONTROL
PROGRAM
MODE
PAUSE
CHP/TIME
GUIDE
VOCAL
MELODY
VOCAL
PARTNER
REPEATREPEATSTOP
NEXT
PLAYBACK
CONTROL
DISC SIDE
GUIDE VOCAL button
GUIDE VOCAL indicator
DISC SIDE
A / B
A B
STANDBY
POWER
KARAOKE
SINGLE
MODE
STANDBY/ON
PLAY
GUIDE VOCAL
VIDEO CD FUNCTION DVD FUNCTION
VOCAL
PARTNER
SYSTEM
KARAOKE
GUIDE VOCAL
MAXMIN
V-NR PBC
ECHO
ONE
HI-LITE
CHORUS
MEDLEY
STOP PLAYPAUSE
LOW HIGHKEY CONTROL
MIC 2MIC 1
MAXMIN
LD-G CD-G
GUIDE VOCAL volume level knob
OPEN/CLOSE
GUIDE
MELODY
CD / VIDEO CD
GUIDE
MIC
MIC 2MIC 1
CONTROL
MAXMINMAXMIN
LaserDisk
LASER DBC
VOCAL
GUIDE
VOCAL
SCORING
ONE-TOUCH
volume level indicator
Guide Vocal
With multiplex discs, you can practice karaoke with or without a guide vocal.
<With multiplex karaoke laser discs>
Press the GUIDE VOCAL button.
GUIDE
VOCAL
GUIDE
VOCAL
<With multiplex karaoke Video CDs, CD-G’s, CDs, and external sources>
Press the GUIDE VOCAL button twice.
GUIDE
VOCAL
GUIDE
VOCAL
Basic Operation
Karaoke OperationDetailed Operation Setting Set Up Other Information
GUIDE VOCAL
MAXMIN
Lower Higher
When the indicator above the GUIDE VOCAL volume level knob
is lit, turn the knob to adjust GUIDE VOCAL volume level.
¶ To switch OFF, press until the light goes out.
Tips
¶ The guide vocal is output through the right speaker.
¶ Guide vocal is not output.
¶ Guide vocal volume adjustment is not possible even when the
GUIDE VOCAL indicator is lit.
If this happens, press the GUIDE VOCAL button once more. You will
then be able to use the GUIDE VOCAL volume level knob.
Pressing the GUIDE VOCAL button has no effect if the disc you are
playing does not have a guide vocal recorded on it (it must a multiplex
disc). With this kind of disc, do not press the GUIDE VOCAL button.
Lit =Lit =
GUIDE VOCAL
MAXMIN
Lower Higher
When indicator above the GUIDE VOCAL volume level knob is
lit, turn the knob to adjust GUIDE VOCAL volume level.
¶ To switch OFF, press until the light goes out.
Tips
Concerning the Guide vocal
With LDs (multiplex, without TOC), CDs, CD-Gs, external sources,
and Video CDs, the mode changes each time you press the button as
follows.
OFF Stereo Multiplex
With non-digital audio sources or LDs with a TOC, the mode changes
each time you press the button as follows.
When Quick Turn is ON, switching is the same as above with discs
that have a TOC.
OFF Stereo or Multiplex
What is TOC
Refer to the glossary on page 75.
Guide Vocal (LD/CD/Video CD)
31
Page 32

Convenient Functions for Practicing Karaoke
LASER DBC
MENU
ENTER
A / B
A–B
OPEN/
CLOSE
POWER
AUDIO
SUBTITLE
ANGLE
DISPLAY
RETURN
LAST
MEMORY
TITLE
PREV
REV FWD
CLEAR
PLAY
CONDITION
KEY CONTROL
PROGRAM
MODE
PAUSE
CHP/TIME
GUIDE
VOCAL
MELODY
VOCAL
PARTNER
REPEATREPEATSTOP
NEXT
PLAYBACK
CONTROL
DISC SIDE
GUIDE VOCAL button
GUIDE VOCAL indicator
GUIDE
VOCAL
SCORING
ONE-TOUCH
DISC SIDE
A / B
A B
STANDBY
POWER
STANDBY/ON
KARAOKE
VIDEO CD FUNCTION DVD FUNCTION
VOCAL
PARTNER
SYSTEM
KARAOKE
SINGLE
MODE
PLAY
GUIDE VOCAL
MAXMIN
V-NR PBC
ECHO
ONE
HI-LITE
CHORUS
MEDLEY
STOP PLAYPAUSE
LOW HIGHKEY CONTROL
MIC 2MIC 1
MAXMIN
LD-G CD-G
MAXMINMAXMIN
GUIDE
MELODY
LaserDisk
CD / VIDEO CD
MIC
CONTROL
OPEN/CLOSE
MIC 2MIC 1
LASER DBC
GUIDE
VOCAL
GUIDE VOCAL
GUIDE VOCAL volume level knob
volume level indicator
Guide Vocal
With multiplex discs, you can practice karaoke with or without a guide vocal.
You can enjoy everything from practicing parts of songs to singing a duet alone, and harmony parts only. All this
and more with Dolby Digital multiplex compatible DVD karaoke discs.
<With DVDs>
Press the GUIDE VOCAL button
GUIDE
VOCAL
Lit =
GUIDE VOCAL
MAXMIN
Lower Higher
When the indicator above the GUIDE VOCAL volume level knob
is lit, turn the knob to adjust GUIDE VOCAL volume level.
¶ If the disc provides only Guide vocal 1(or 2) , switching is
between ON and OFF.
¶ Some discs have Guide vocal 1 and Guide vocal 2 recorded
on them. The selected vocal changes each time you press
the button as follows.
Guide Vocal Selection Display
\
1 Guide vocal 1 and 2 (VOCAL 1&2)
2 Guide vocal 1 (VOCAL1)
Tip
¶ With vocals 1 and 2 in 1, Guide vocal 1 is output through the left
channel, and Guide vocal 2 is output through the right channel.
With the mixed vocals in 4, output of Guide vocals 1 and 2 is
monaural.
32
3 Guide vocal 2 (VOCAL2)
4 Guide vocal1&2(mix) (VOCAL MIX)
Off (VOCAL OFF)
Guide Vocal (DVD)
DUET MODE/CHORUS MODE
GUIDE
VOCAL
Duets DUET MODE
Enjoy duets with songs on DVD discs bearing the
mark.
Ex) With discs on which
is male vocal, and Guide vocal 2 is female vocal, you can enjoy duet with
male vocal when you select guide vocal 1, and when you select guide vo-
you can enjoy duet with
cal 2,
vocal.
Guide vocal 1
female
Karaoke with harmonies CHORUS MODE
Enjoy with this with DVD disc songs bearing the
mark.
Ex) With discs on which Guide vocal
1 is a guide vocal, and Guide vocal 2
is a harmony vocal, if you select
Guide vocal 2, the guide vocal is
switched off, letting you enjoy
karaoke with harmony.
¶ You can also use these functions with some songs that do
not bear the above marks.
DUET
VOCAL2
CHORUS
VOCAL2
Page 33

OFF Stereo Multiplex
Convenient Functions for Practicing Karaoke
VOCAL PARTNER button
VOCAL PARTNER
ONE-TOUCH KARAOKE button
ONE-TOUCH KARAOKE indicator
indicator
DISC SIDE
A / B
A B
STANDBY
POWER
KARAOKE
SINGLE
MODE
STANDBY/ON
PLAY
GUIDE VOCAL volume
VIDEO CD FUNCTION DVD FUNCTION
VOCAL
PARTNER
SYSTEM
KARAOKE
GUIDE VOCAL
MAXMIN
V-NR PBC
ECHO
ONE
HI-LITE
CHORUS
MEDLEY
STOP PLAYPAUSE
LOW HIGHKEY CONTROL
MIC 2MIC 1
MAXMIN
LD-G CD-G
GUIDE VOCAL volume level knob
MAXMINMAXMIN
GUIDE
MELODY
LaserDisk
CD / VIDEO CD
MIC
CONTROL
OPEN/CLOSE
MIC 2MIC 1
LASER DBC
GUIDE
VOCAL
SCORING
ONE-TOUCH
level indicator
VOCAL PARTNER
With this function, when you sing, the recorded singer’ s voice cuts out. If you stop singing, the singer’s voice
cuts back in. This is a handy function when practicing
new songs and duets alone.
<With DVDs, LDs (with TOC), and analog audio only LDs >
Press the VOCAL PARTNER button.
VOCAL
PARTNER
VOCAL
PARTNER
OPEN/
CLOSE
DISC SIDE
A / B
DISPLAY
ANGLE
SUBTITLE
PLAYBACK
CONTROL
MENU
RETURN
ENTER
NEXT
PLAY
PAUSE
REPEATREPEATSTOP
A–B
CLEAR
CONDITION
PROGRAM
MODE
VOCAL
KEY CONTROL
PARTNER
LASER DBC
VOCAL
PARTNER
POWER
AUDIO
LAST
MEMORY
TITLE
PREV
REV FWD
CHP/TIME
MELODY
GUIDE
VOCAL
ONE-TOUCH KARAOKE
This lets you use regular DVDs, LDs, CDs, and tapes as
karaoke software by reducing the volume of the recorded vocals. Y ou can also use this function when you
want to sing along with only multiplex CDs, CD-Gs,
Video CDs, and externally input tapes.
<With DVDs and LDs>
Basic Operation
Karaoke OperationDetailed Operation Setting Set Up Other Information
¶ To switch OFF, continue pressing the button until the indica-
Press the ONE-TOUCH KARAOKE button.
tor goes out.
<With multiplex karaoke Video CDs, CD-Gs, CDs and externally input tapes>
¶ To switch OFF, continue pressing the button until the indica-
Press the VOCAL P ARTNER button twice.
¶ To switch OFF, continue pressing the button until the indica-
tor goes out.
<With Video CDs, CD-Gs, CDs, and externally input tapes>
tor goes out.
Press the ONE-TOUCH KARAOKE button.
Tips
¶ With some discs and tapes, even when you sing, the recorded sing-
er’s voice volume level does not decrease.
¶ When the indicator above the GUIDE VOCAL volume level knob is
lit, you can turn the knob to adjust guide vocal volume level.
¶ With LDs (multiplex with no TOC), CDs, CD-Gs, externally input
tapes, and Video CDs, the mode changes as follows when you press
the VOCAL PARTNER or ONE-TOUCH KARAOKE buttons.
OFF Stereo Multiplex
¶ With non-digital audio sources or LDs with TOC, the mode changes
as follows each time you press the button.
OFF Stereo or Multiplex
¶ With DVDs, the VOCAL PAR TNER function operates with the Guide
vocal selected with One-touch Guide-vocal.
Each time you press the button, the mode changes as follows.
¶ To switch OFF, continue pressing the button until the indica-
tor goes out.
Tips
¶ This function may not be very effective with some discs and tapes.
¶ With karaoke discs and tapes (multiplex discs and tapes), when
you can hear the guide vocal from the right channel, press the ONETOUCH KARAOKE button twice. You can cancel the guide vocal.
ONE-TOUCH
KARAOKE
ONE-TOUCH
KARAOKE
VOCAL PARTNER/ONE-TOUCH KARAOKE
33
Page 34

SCORING Grades Your Singing Ability
Enjoy the Scoring function(SCORING/COMPETITION) even with regular CDs (non-multiplex discs).
TITLE
PAUSE
DISC SIDE
A / B
A B
STANDBY
POWER
STANDBY/ON
KARAOKE
3
2
5
Complete steps through (see page
28) to perform settings for disc.
GUIDE
VOCAL
SCORING
ONE-TOUCH
VIDEO CD FUNCTION DVD FUNCTION
VOCAL
PARTNER
SYSTEM
KARAOKE
SINGLE
MODE
PLAY
GUIDE VOCAL
MAXMIN
V-NR PBC
ECHO
ONE
HI-LITE
CHORUS
MEDLEY
STOP PLAYPAUSE
LOW HIGHKEY CONTROL
MIC 2MIC 1
MAXMIN
LD-G CD-G
MAXMINMAXMIN
GUIDE
MELODY
LaserDisk
CD / VIDEO CD
MIC
CONTROL
OPEN/CLOSE
MIC 2MIC 1
LASER DBC
Press the SCORING SYSTEM button
once.
SCORING
SYSTEM
SCORING
PICK A KARAOKE SONG
HI-SCORE
100
Select the desired song number with the
3
digit buttons and DISC SIDE A/B button
(LDs only).
This player (Ex.) Track 5
Remote control Track 10
Track 17
Remote control (Ex.) You can also select songs in this way with DVD.
Title 5
Title 10
Title 17
5
+ 10
+ 10
TITLE
TITLE
0
7
= =
= = =
TITLE
= = =
PLAY
PLAY
PLAY
POWER
DISC SIDE
SUBTITLE
PAUSE
MENU
ENTER
ANGLE
A / B
PLAY
AUDIO
LAST
MEMORY
TITLE
PREV
REV FWD
CHP/TIME
OPEN/
CLOSE
DISPLAY
PLAYBACK
CONTROL
RETURN
NEXT
REPEATREPEATSTOP
A–B
CLEAR
DISC SIDE
A / B
PLAY
34
Digit
buttons
–
CONDITION
MELODY
GUIDE
VOCAL
MODE
VOCAL
PARTNER
PROGRAM
KEY CONTROL
LASER DBC
SCORING Grades Your Singing Ability
Let’s sing!
(The song you want to sing starts playing)
After you have been singing for a minute
4
or so, playback indications, the karaoke
bird characters, and “SCORING” are
displayed on the TV screen.
Tip
With LDs and CD-Gs, the karaoke bird characters, score and other
indications are displayed in black and white.
Page 35

SCORING Grades Your Singing Ability
SCORING
The karaoke bird character’s expression changes to match each
of the indications.
Press the P AUSE 8 button after finishing
5
In tune
When not singing
Out of tune
a song, and your score is displayed.
PAUSE
¶ Y our score is displayed even if you press the P AUSE 8 button
during a song.
PAUSE
Tip
If you do not press the PAUSE 8 button, scoring continues. When a
song ends, be sure to press the PAUSE 8 button.
If you achive a
new high score,
there's applause.
100
\
Returning to the regular KARAOKE mode
¶ Press the KARAOKE SYSTEM button on the main unit to se-
lect OFF.
SCORING COMPETITION OFF
Tips
¶ When a score is being displayed, Play, Skip, Fast forward, and Fast
reverse operation are not possible.
¶ With DVDs, audio becomes monaural.
And when you select Guide vocal 1 and Guide vocal 2, both vocals
are mixed and output through the left and right speakers.
Notes
◆ This function operates only when the mode is KARAOKE MODE.
◆ With some types of disc, some songs, and even some karaoke
discs, accurate vocal key detection may not be possible, making it
hard to achieve high scores. However, this does not mean the player
is malfunctioning. When there is no vocal, (before a song, during
silent passages etc.), if you sing, scoring will not be accurate. On
the other hand, if you do not sing when there is a vocal, you will not
lose any points.
◆ If you use SCORING or have COMPETITION with graphics compatible discs, graphics images and on-screen indications may overlap,
depending on the disc. With LDs and CD-Gs, the karaoke bird characters, score and other indications are displayed in black and white.
◆ If you are using a projection TV, avoid using SCORING and COMPETITION for extended periods of time. This may lead to vacuum tube
burn-in.
◆ With SCORING and COMPETITION, you cannot use the surround
function.
Basic Operation
Karaoke OperationDetailed Operation Setting Set Up Other Information
100
HI-SCORE
SCORING
PICK A KARAOKE SONG
After a few seconds, you return to step 2. You can
then repeat steps 3 through 5.
Tip
How are you scored?
As you sing into the mic, your voice is compared with the vocal recorded on the disc.
Tip
Accurate scoring is not possible with discs that do not feature a recorded vocal track.
The bell rings depending on how many points you score.
(It doesn't ring if you get less than 59 points.)
SCORING Grades Your Singing Ability
35
Page 36

Simultaneous Scoring for Two Singers (COMPETITION)
Enjoy the Scoring function(SCORING/COMPETITION) even with regular CDs (non-multiplex discs).
DISC SIDE
A / B
A B
STANDBY
POWER
KARAOKE
MODE
STANDBY/ON
TITLE
PAUSE
Digit
buttons
–
423
Select the desired song number with the
3
digit buttons and DISC SIDE A/B button
GUIDE
VOCAL
SCORING
ONE-TOUCH
VIDEO CD FUNCTION DVD FUNCTION
VOCAL
PARTNER
SYSTEM
KARAOKE
SINGLE
PLAY
GUIDE VOCAL
MAXMIN
V-NR PBC
ECHO
ONE
HI-LITE
CHORUS
MEDLEY
STOP PLAYPAUSE
MIC 2MIC 1
MAXMIN
LD-G CD-G
GUIDE
MELODY
LOW HIGHKEY CONTROL
MAXMINMAXMIN
LaserDisk
CD / VIDEO CD
MIC
CONTROL
OPEN/CLOSE
MIC 2MIC 1
LASER DBC
(LDs only).
Let’s have a singing competition!
Play starts. (COMPETITION begins)
After you have been singing for a minute or
so, playback indications, the karaoke bird
characters, and scores are displayed on the
TV screen.
1
POWER
DISC SIDE
A / B
AUDIO
ANGLE
SUBTITLE
LAST
MEMORY
MENU
TITLE
ENTER
PREV
REV FWD
PLAY
PAUSE
CHP/TIME
CONDITION
MODE
MELODY
GUIDE
VOCAL
KEY CONTROL
VOCAL
PARTNER
OPEN/
CLOSE
DISPLAY
PLAYBACK
CONTROL
RETURN
NEXT
REPEATREPEATSTOP
CLEAR
PROGRAM
DISC SIDE
A / B
PLAY
A–B
LASER DBC
Scores start from 5,000, with 100
points added or subtracted at a
time.
COMPETITION
6800
5200
Tip
With LDs and CD-Gs, the karaoke bird characters, scores and other
indications are displayed in black and white.
Press the P AUSE 8 button, and scores are
4
displayed on left and right scoreboards.
PAUSE
PAUSE
Complete steps through (see page
28) to perform settings for disc.
Press the SCORING SYSTEM button
twice.
Each time you press the button,
the setting changes as follows.
SCORING COMPETITION OFF
36
Simultaneous Scoring for Two Singers (COMPETITION)
SCORING
SYSTEM
COMPETITION
PICK A KARAOKE SONG
COMPETITION
20000
15000
The karaoke bird
character and
cheerleaders are happy
for the winner, just to
COMPETITION
18000 18000
If scores are even, both
karaoke bird characters
bend their necks, and
the cheerleaders clap.
annoy the loser!
Returning to the regular KARAOKE mode
¶ Press the SCORING SYSTEM button on the main unit
to select OFF.
Tip
If you do not press the PAUSE 8 button, scoring continues. When a
song ends, be sure to press the PAUSE 8 button.
Page 37

Consecutive Play of Song Highlights (HI-LITE MEDLEY)
PLAY
Playing just the highlights of songs lets you search for
desired songs, and is handy for practicing medley
karaoke. Y ou can enjoy this function with discs that bear
the HI-LITE MEDLEY mark on their jackets. (You can
also enjoy it with some discs not bearing the mark.)
HI-LITE
MEDLEY
GUIDE
VOCAL
SCORING
ONE-TOUCH
DISC SIDE
A / B
A B
VIDEO CD FUNCTION DVD FUNCTION
VOCAL
PARTNER
SYSTEM
KARAOKE
V-NR PBC
CHORUS
ONE
HI-LITE
MEDLEY
STOP PLAYPAUSE
OPEN/CLOSE
GUIDE
MELODY
CD / VIDEO CD
Load a disc, and press the HI-LITE
MEDLEY button.
Lit =
The highlights of each song are played from the first song in
order.
HI-LITE
MEDLEY
To skip highlights,
press the Previous or Next button.
PREV
NEXT
Basic Operation
STANDBY
POWER
STANDBY/ON
KARAOKE
PREV
STOP
SINGLE
MODE
PLAY
GUIDE VOCAL
MAXMINMAXMIN
MAXMIN
MAXMIN
LD-G CD-G
LaserDisk
MIC 2MIC 1
CONTROL
LASER DBC
LOW HIGHKEY CONTROL
MIC
MIC 2MIC 1
ECHO
¶ Press the Next ¢ button to skip to the next song’s highlight
section.
¶ Press the Previous 4 button to return to the start of the
highlight section of the song currently playing. Press again to
Karaoke OperationDetailed Operation Setting Set Up Other Information
return to the start of the highlight section of the previous song.
STOP 7
button
POWER
DISC SIDE
A / B
AUDIO
ANGLE
SUBTITLE
LAST
MEMORY
MENU
TITLE
ENTER
PREV
PAUSE
REV FWD
PLAY
CHP/TIME
CONDITION
MODE
MELODY
GUIDE
VOCAL
KEY CONTROL
VOCAL
PARTNER
PLAYBACK
OPEN/
CLOSE
DISPLAY
CONTROL
RETURN
NEXT
REPEATREPEATSTOP
A–B
CLEAR
PROGRAM
PLAY 3
button
NEXT
PLAY
LASER DBC
To stop HI-LITE MEDLEY play,
press the STOP 7 button.
STOP
STOP
To sing a desired song from the
beginning
¶ During HI-LITE MEDLEY play, if you press the PLA Y 3button,
the currently playing song starts playing again from the beginning and HI-LITE MEDLEY play is canceled.
PLAY
Tips
¶ The volume level at the end of a highlight section lowers gradually.
¶ If you press the PLAY 3 button after HI-LITE MEDLEY play ends,
the final song from which a highlight was played starts playing.
Consecutive Play of Song Highlights (HI-LITE MEDLEY)
37
Page 38

PREV
STOP
3
Reserving a Desired Song
For karaoke fun, perform steps
through on page 28.
A / B
ANGLE
PLAY
KEY CONTROL
OPEN/
CLOSE
DISPLAY
PLAYBACK
CONTROL
RETURN
NEXT
REPEATREPEATSTOP
A–B
CLEAR
PROGRAM
LASER DBC
DISPLAY
NEXT
CLEAR
2
PROGRAM
PROGRAM
Press the PROGRAM button.
¶ When reserving a song is possi-
ble, the indication on the right is
displayed.
¶ Reserving songs is not possible
with some DVDs.
Select a song number with the digit
3
buttons.
Example: Reserving song number 9
Input a Title number with DVDs, a
Chapter number with LDs, and a
Track number with CDs and Video
CDs. (Refer to p.16)
Repeat steps and 3 to reserve other
4
songs.
¶ Up to 24 songs can be reserved.
¶ Reserved songs play one after the other, without SINGLE
PLAY pauses between them.
When the reserved songs have played, reservation details are
erased from memory in the order in which songs were reserved.
¶ When the last reserved song finishes playing, the player
pauses or stops.
¶ Press the Next ¢ button, and the next reserved song starts
playing. Even if you press the Previous 4 button, you do
not return to the previous reserved song. Instead, you return
to the start of the currently playing song.
POWER
AUDIO
LAST
MEMORY
TITLE
PREV
REV FWD
CHP/TIME
MELODY
GUIDE
VOCAL
SUBTITLE
PAUSE
MODE
VOCAL
PARTNER
DISC SIDE
MENU
ENTER
CONDITION
PROGRAMMING OK
TRACK 9
PROGRAM
Flash
Tips
¶ Reserving songs is not possible with DVDs that have a Menu func-
tion.
¶ Chapter reservation is not possible with DVDs.
¶ With Video CDs (Version 2.0 with PBC), if you do not switch Play-
back Control OFF with the remote control or on the main unit (the
PLAYBACK CONTROL indicator on the front panel goes out), you
cannot reserve a song. (Refer to page 14)
¶ If you reserve a song during play, the reserved song starts playing
after the current song finishes.
38
Reserving a Desired Song (DVD, LD, CD, Video CD)
MIC 1 MIC 2
5
MAXMIN MAXMIN
Adjust Mic 1 and 2
volume level.
Let’s sing
To stop playback.
STOP
Press the STOP 7 button.
To confirm reservation details
DISPLAY
Press the DISPLAY button.
PLAY
KARAOKE
¶ Press the button once more, and
the display is switched OFF.
PROGRAM
Page 39
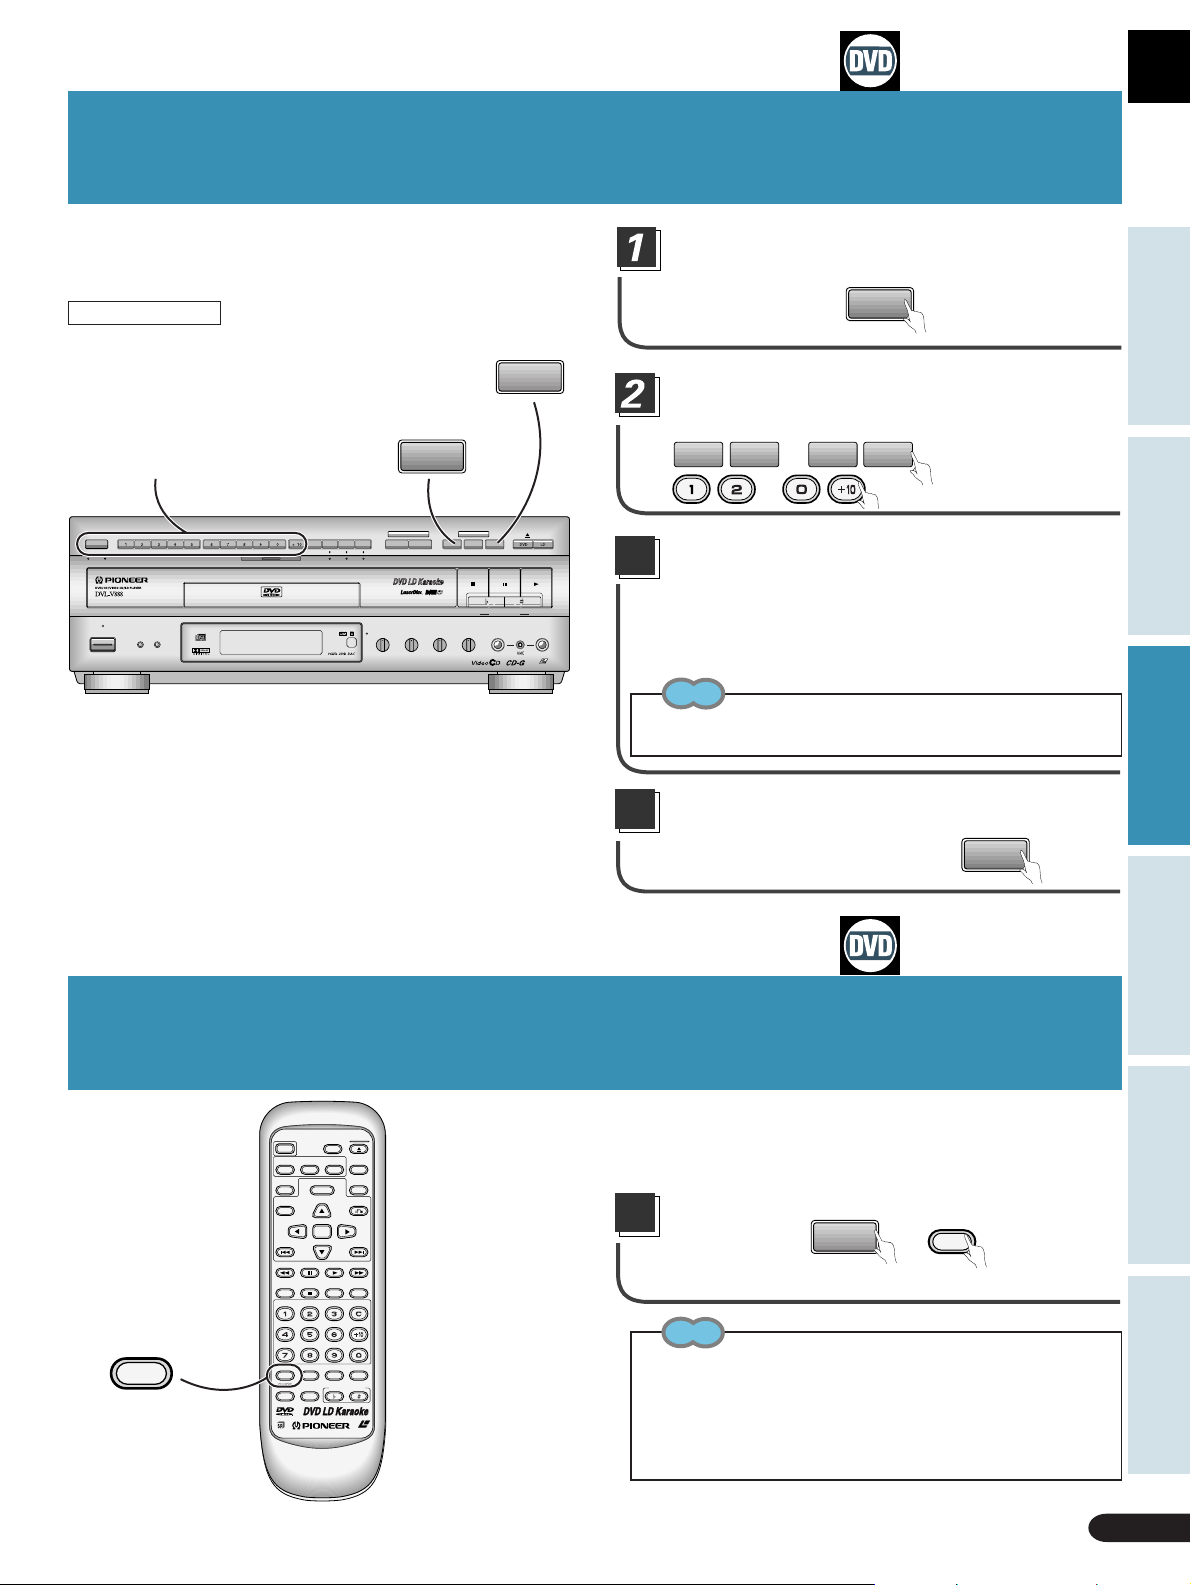
One Verse and Chorus Play Only (One Chorus)
Use this function when enjoying karaoke. This is a
handy function when practicing a lot of songs. Y ou can
take advantage of it with DVDs bearing the
ONE CHORUS mark on their disc jackets. (You can
also enjoy it with some discs not bearing the mark.)
GUIDE
MELODY
1
2
Digit buttons
DISC SIDE
A / B
A B
STANDBY
POWER
KARAOKE
SINGLE
MODE
STANDBY/ON
PLAY
GUIDE
VOCAL
SCORING
ONE-TOUCH
VOCAL
PARTNER
SYSTEM
KARAOKE
ONE
CHORUS
VIDEO CD FUNCTION DVD FUNCTION
V-NR PBC
ECHO
GUIDE VOCAL
MAXMIN
MAXMIN
ONE
CHORUS
MIC 2MIC 1
LD-G CD-G
GUIDE
HI-LITE
MELODY
MEDLEY
STOP PLAYPAUSE
LOW HIGHKEY CONTROL
MAXMINMAXMIN
LaserDisk
CD / VIDEO CD
MIC
CONTROL
OPEN/CLOSE
MIC 2MIC 1
LASER DBC
Load a disc, and press the ONE CHORUS
button.
Lit =
ONE
CHORUS
Select the desired song number with the
digit buttons.
1
...
2
0 + 10
...
The selected song starts playing from
3
the beginning, and then the volume level
gradually diminishes after the first
chorus.
¶ When SINGLE PLAY is ON, play pauses.
Tip
Even if you continue selecting and playing songs, One chorus continues operating.
Canceling One chorus...
Press the ONE CHORUS button.
Goes out =
ONE
CHORUS
Basic Operation
Karaoke OperationDetailed Operation Setting Set Up Other Information
Sing with Professional Karaoke (GUIDE MELODY)
You can switch GUIDE MELODY ON/OFF. With it switched ON,
you can enjoy singing along with a professional singer.
Press the GUIDE MELODY button
Goes out =
GUIDE
MELODY
MELODY
¶ When the indicator goes out, GUIDE MELODY is OFF.
Tips
¶ When you switch power to the unit ON, GUIDE MELODY
switches ON.
¶ To switch GUIDE MELODY ON after it has been switched OFF,
press the GUIDE MELODY button once more.
¶ With discs that do not feature a separately recorded guide melody,
the GUIDE MELODY cannot be switched ON/OFF.
39
MELODY
SUBTITLE
PARTNER
OPEN/
CLOSE
DISC SIDE
A / B
DISPLAY
ANGLE
PLAYBACK
CONTROL
MENU
RETURN
ENTER
NEXT
PLAY
PAUSE
REPEATREPEATSTOP
A–B
CLEAR
CONDITION
PROGRAM
MODE
VOCAL
KEY CONTROL
LASER DBC
POWER
AUDIO
LAST
MEMORY
TITLE
PREV
REV FWD
CHP/TIME
MELODY
GUIDE
VOCAL
One Verse and Chorus Play Only (One Chorus)/Sing with Professional Karaoke (GUIDE MELODY)
Page 40

4040
Page 41

Setting
Multi-Aspect Setting for Wide Screen
TV Software...........................................................42
Basic Operation
Basic Operation
Changing Picture, Sound Quality and Graphics Settings .........
43
Changing Picture Quality(mode) ...........................44
Switching singing venue atmosphere
(KARAOKE SURROUND) ...........
45
Changing Sound Quality(D.R.COMP)....................45
Changing graphics display position......................46
Changing graphics channel....................................47
Memorizing Settings for Often Viewed DVDs
(Condition Memory) .............................................48
Selecting Languages (Multi-Language) ................. 49
Changing Audio Type ..............................................49
Selecting Subtitle Language
(Multi-Language Subtitles) ..................................50
Viewing from a Desired Camera Angle
(Multi-Angle) .........................................................50
Viewing Information ................................................51
Karaoke OperationDetailed Operation Setting Set Up Other Information
Karaoke OperationDetailed Operation Setting Set Up Other Information
Quick LD Side Changing(Quick Turn) .....................52
Outline of GUI (Graphical User Interface)
Operation...............................................................53
Changing Various Settings......................................60
Setting the Basic Language
and Subtitle Language .........................................62
Setting
41
41
Page 42

MAIN
SETUP
1
TITLE MENU
2
MENU
3
INITIAL
4
OUTPUT
STOP
MENU ENTER
EXIT ENTER RETURN
Multi-Aspect Setting for Wide
MENU ENTER
ASPECT
1
PAN&SCAN
2
LETTER BOX
3
WIDE
MAIN
SETUP
STOP
EXIT ENTER RETURN
MENU ENTER
ASPECT
1
PAN&SCAN
2
LETTER BOX
3
WIDE
MAIN
SETUP
STOP
EXIT ENTER RETURN
LAST
Screen TV Software
Setting is possible when a DVD is loaded.
Certain DVDs feature image data recorded with the
“squeeze” recording system for wide screen viewing. When
watching this kind of DVD on a conventional TV, the picture
may appear vertically squeezed. If this occurs, you can use
the Multi-Aspect function to achieve a normal picture.
Press
MENU
when the player is in the
STOP mode.
¶ Main Menu indications are displayed.
Select initial setting with .
MAIN
STOP
1
TITLE MENU
2
MENU
SETUP
3
INITIAL
4
OUTPUT
MENU ENTER
EXIT ENTER RETURN
¶ Initial setting button is blue.
3
Press
¶ Initial setting indications are displayed.
ENTER
.
INITIAL
STOP
1
OSD SET.
MAIN
2
SAVER
3
B.G.COLOR
4
PARENTAL
5
SOFT MENU
MENU ENTER
EXIT NEXTENTER RETURN
1/2
OSD SET.
LAST
MEMORY
MENU
TITLE
ENTER
PREV
REV FWDPLAYPAUSE
LAST
MEMORY
MENU
TITLE
ENTER
PREV
REV FWDPLAYPAUSE
LAST
MEMORY
MENU
TITLE
ENTER
PREV
REV FWD
PLAYPAUSE
CHP/TIME
PLAYBACK
CONTROL
RETURN
NEXT
PLAYBACK
CONTROL
RETURN
PLAYBACK
CONTROL
RETURN
REPEATREPEATSTOP
5
Press
ENTER
.
LAST
MEMORY
TITLE
PREV
REV FWDPLAYPAUSE
CHP/TIME
MENU
ENTER
PLAYBACK
CONTROL
RETURN
NEXT
REPEATREPEATSTOP
A–B
¶ Aspect indications are displayed.
Select the desired mode (Pan & Scan,
Letterbox, Wide) with .
MENU
ENTER
MENU
ENTER
PLAYBACK
CONTROL
RETURN
NEXT
REPEATREPEATSTOP
PLAYBACK
CONTROL
RETURN
NEXT
REPEATREPEATSTOP
A–B
MEMORY
NEXT
Press
ENTER
.
¶ Switch to the desired screen.
NEXT
A–B
CLEAR
TITLE
PREV
REV FWDPLAYPAUSE
CHP/TIME
LAST
MEMORY
TITLE
PREV
REV FWDPLAYPAUSE
CHP/TIME
4
42
Select Aspect with .
INITIAL
STOP
6
LANG SET.
MAIN
7
ASPECT
MENU ENTER
EXIT PLEVENTER
Multi-Aspect Setting for Wide
Screen TV Software
ASPECT
WIDE
2/2
3/3
LAST
MEMORY
TITLE
PREV
REV FWDPLAYPAUSE
MENU
ENTER
PLAYBACK
CONTROL
RETURN
NEXT
Page 43

Multi-Aspect Setting for Wide Screen TV Software
With DVDs that enable switching between different aspect ratios,
select the appropriate setting for your TV.
Aspect
Disc Wide TV (16:9)
switching
Wide
16 : 9
Pan & Scan
Letterbox
4 : 3
Selecting in the chart above assures correct aspect ratio for the TV
used.
Whether or not aspect ratio can be changed depends on the disc. Confirm
by referring to the disc’s jacket.
With disc not enabling aspect ratio changing, make adjustments with
the TV.
Regular TV (4:3)
Note
◆ If there is a power outage or the power cord is disconnected
while power to the player is ON, memorized settings are erased.
When disconnecting the power cord, be sure to press POWER
button on the main unit and the remote control until “-- OFF --”
is no longer indicated in the display.
Tip
¶ The width-to-height ratio of conventional TVs is 4:3, while the
width-to-height ratio of wide screen and Hi-Vision TVs is 16:9.
This width-to-height ratio is called the aspect ratio.
Basic Operation
Karaoke OperationDetailed Operation Setting Set Up Other Information
Changing Picture, Sound Quality and Graphics Settings
Each time you press
(When in the KARAOKE MODE)
(With DVDs)
(With CDs)
(With LDs)
Displays with black
and white during play
(With Video CDs)
MODE
, settings change as follows.
KARAOKE SURROUND
OFF STUDIO HALL ARENA
KARAOKE SURROUND
OFF STUDIO HALL ARENA
KARAOKE SURROUND
OFF STUDIO HALL ARENA
KARAOKE SURROUND
OFF STUDIO HALL ARENA
\
\
D.R.COMP
ON OFF
GRAPHICS
ON OFF
Multi-Aspect Setting for Wide Screen TV Software
Changing Picture, Sound Quality and Graphics Settings
43
Page 44

A / B
Changing Picture, Sound Quality and Graphics Settings
Each time you press
MODE
, settings change as follows.
(When in the NORMAL MODE)
(With DVDs)
MODE
CINEMA ANIMATION STANDARD
(With LDs)
Displays with black
and white during play
MODE
CINEMA STANDARD
(With CDs)
GRAPHICS
ON OFF
(With Video CDs)
MODE
CINEMA ANIMATION STANDARD
Changing picture quality (mode)
MODE
Press
during play and select
\
D.R.COMP
ON OFF
MODE.
MODE
(DVD, Video CD)
(LD)
2
Select the desired mode with the
MODE
CINEMA ANIMATION STANDARD
MODE
CINEMA STANDARD
MELODY
VOCAL
GUIDE
VOCAL
PARTNER
and buttons.
Each time you press a button,
the mode changes as follows.
DVD, Video CD: CINEMA →
ANIMATION → STANDARD
LD: CINEMA → STANDARD
MEMORY
AUDIO
SUBTITLE
LAST
TITLE
PREV
MENU
ENTER
CONDITION
KEY CONTROL
ANGLE
PROGRAM
DISPLAY
PLAYBACK
CONTROL
RETURN
NEXT
LASER DBC
CINEMA:
Picture quality: Provides clear picture with clear black and white
definition.
ANIMA TION:
Picture quality: Provides beautiful images with bright, clear
colors.
STANDARD:
Picture quality: Returns you to standard picture and function
settings.
Note
◆ Picture quality may be poor depending on the software and the
TV used. In this case, select the Standard mode.
Tips
¶ You cannot use the Animation mode for the video part of LDs
and CDVs.
¶ You can use the same setting for CDV video part as for LDs.
¶ This operates only when using the NORMAL MODE.
44
Changing Picture, Sound Quality and Graphics Settings
Changing picture quality (mode)
Page 45

D.R.COMP
ON
MIN MAX
MEMORY
CONTROL
Changing Picture, Sound Quality and Graphics Settings
Switching singing venue atmosphere
(KARAOKE SURROUND)
Basic Operation
You can select different ambience settings.
MODE
During play, press
KARAOKE SURROUND
KARAOKE SURROUND
OFF STUDIO HALL ARENA
2
Select the desired atmosphere
.
to select
CONDITION
MELODY
GUIDE
VOCAL
MODE
PARTNER
PROGRAM
VOCAL
KEY CONTROL
LASER DBC
setting with the buttons.
The setting changes as follows.
OFF j STUDIO j HALLj ARENA
MENU
ENTER
RETURN
NEXT
TITLE
PREV
Changing sound quality (D.R.COMP)
D.R.COMP stands for Dynamic Range Compression.
On the DVDs, sound has a wide dynamic range. Use
D.R.COMP when sounds such as dialog are hard to hear on
your stereo system or TV speakers.
MODE
Press
during play, and select
D.R.COMP.
CONDITION
PROGRAM
MODE
D.R.COMP
ON OFF
MELODY
GUIDE
VOCAL
VOCAL
PARTNER
KEY CONTROL
4
Tip
¶ This operates only when using the KARAOKE MODE or the AUX
INPUT MODE.
(Before settings, press the KARAOKE MODE button on the front
of this player.)
Adjust the degree of change with
the and buttons.
ENTER
RETURNTITLE
NEXT
D.R.COMP
ON
MIN MAX
PREV
REV FWDPLAYPAUSE
Karaoke OperationDetailed Operation Setting Set Up Other Information
2
3
Switch ON or OFF with the
and buttons.
RETURNTITLE
ENTER
If you select ON, press
PREV
REV FWDPLAYPAUSE
PREV
REV FWDPLAYPAUSE
ENTER
ENTER
NEXT
.
RETURNTITLE
NEXT
LAST
5
Press
ENTER
.
MEMORY
TITLE
PREV
REV FWDPLAYPAUSE
MENU
ENTER
Tip
¶ Pressing the or button at step 4 switches between ON
and OFF.
Switching singing venue atmosphere
Changing sound quality (D.R.COMP)
PLAYBACK
CONTROL
RETURN
NEXT
45
Page 46

LAST
Changing Picture, Sound Quality and Graphics Settings
DISC SIDE
MEMORY
CONTROL
Changing graphics settings
Video and audio information is recorded in different areas on a disc.
There's also a subcode area where information such as subtitles
and song lyrics can be recorded. Graphics refers to the reading of
the signals in this area, and their display.
You can set the graphics channel (between 0 and 15) to select the
desired information for display, and set the Scroll setting (from
Normal to Step 17) to select the on-screen position of graphics
indications.
Changing graphics display position
MODE
During play, press
and select
4
Press
GRAPHICS
SCROLL NORMAL
ENTER
.
MENU
ENTER
RETURN
NEXT
TITLE
PREV
REV FWDPLAYPAUSE
GRAPHICS.
GRAPHICS
ON OFF
2
Select ON with the buttons .
GRAPHICS
ON OFF
3
Press
ENTER
.
GRAPHICS
MELODY
GUIDE
VOCAL
AUDIO
LAST
MEMORY
TITLE
PREV
REV FWDPLAYPAUSE
AUDIO
LAST
MEMORY
TITLE
PARTNER
SUBTITLE
SUBTITLE
CONDITION
PROGRAM
MODE
VOCAL
KEY CONTROL
LASER DBC
Select display position with the
5
MEMORY
buttons.
GRAPHICS
SCROLL STEP1
MENU
TITLE
ENTER
PREV
REV FWD
CHP/TIME
¶ You can select from 18
PLAYBACK
CONTROL
RETURN
NEXT
PLAYPAUSE
REPEATREPEATSTOP
A–B
CLEAR
positions between Normal and
Step 17.
MENU
ENTER
MENU
¶ T o return to the normal display
A / B
DISPLAY
ANGLE
PLAYBACK
CONTROL
RETURN
NEXT
position, press
Press ENTER.
Graphics are displayed in the
selected position.
DISPLAY
ANGLE
PLAYBACK
CONTROL
RETURN
CLEAR
.
LAST
MEMORY
TITLE
PREV
REV FWDPLAYPAUSE
CHP/TIME
MENU
ENTER
PLAYBACK
CONTROL
RETURN
NEXT
REPEATREPEATSTOP
SCROLL
CHANNEL
Scroll flashes.
PREV
REV FWDPLAYPAUSE
CHP/TIME
ENTER
NEXT
Note
REPEATREPEATSTOP
A–B
If graphics are not displayed even if you perform these operations,
try changing the channel (refer to page 47).
46
Changing graphics display position
Tip
To return to the previous display, press
RETURN
on the remote control.
Page 47

DISC SIDE
Changing Picture, Sound Quality and Graphics Settings
Changing graphics channel
MODE
During play, press
and select
GRAPHICS.
MODE
MELODY
GUIDE
VOCAL
VOCAL
PARTNER
GRAPHICS
ON OFF
2
Select ON with the buttons.
LAST
MEMORY
MENU
TITLE
GRAPHICS
3
Press
Scroll flashes.
ON OFF
ENTER
.
GRAPHICS
SCROLL
CHANNEL
PREV
REV FWDPLAYPAUSE
LAST
MEMORY
MENU
TITLE
PREV
REV FWD
CHP/TIME
CONDITION
ENTER
ENTER
KEY CONTROL
PLAYPAUSE
PROGRAM
LASER DBC
PLAYBACK
CONTROL
RETURN
PLAYBACK
CONTROL
RETURN
REPEATREPEATSTOP
Basic Operation
5
Press
GRAPHICS
CHANNEL
00 01 02 03
04 05 06 07
08 09 10 11
12 13 14 15
ENTER
A / B
MENU
ENTER
ANGLE
DISPLAY
PLAYBACK
CONTROL
RETURN
NEXT
AUDIO
.
LAST
MEMORY
TITLE
PREV
REV FWDPLAYPAUSE
SUBTITLE
Select a channel number with the
digit buttons.
GRAPHICS
00 01 02 03
04 05 06 07
08 09 10 11
12 13 14 15
NEXT
NEXT
A–B
¶ The selected channel number
is displayed in reverse.
¶ Pressing the same number
again switches it OFF.
¶ To select channel numbers 10
through 15, first press
then
Press
through .
ENTER
.
and
The selected channel's graphics
are displayed.
REV FWD
CHP/TIME
MELODY
GUIDE
VOCAL
LAST
MEMORY
TITLE
PREV
REV FWDPLAYPAUSE
CHP/TIME
PAUSE
MODE
VOCAL
PARTNER
PLAY
CONDITION
KEY CONTROL
MENU
ENTER
REPEATREPEATSTOP
CLEAR
PROGRAM
PLAYBACK
CONTROL
RETURN
NEXT
REPEATREPEATSTOP
A–B
Karaoke OperationDetailed Operation Setting Set Up Other Information
Press
4
Channel flashes.
ENTER
.
GRAPHICS
SCROLL
CHANNEL
Note
If graphics are not displayed even if you perform these operations,
try changing the display position (refer to page 46).
Tips
¶ If the power to the player is cut, changed graphics scroll and
channel setting return to the initial settings. This is to prevent
problems such as no display of graphics occurring when a different
disc is played.
¶ T o return to the previous display, press
Changing graphics channel
RETURN
on the remote control.
47
Page 48

Memorizing Settings for
LASER DBC
CONDITION
KEY CONTROL
PROGRAM
MODE
GUIDE
VOCAL
MELODY
VOCAL
PARTNER
Often Viewed DVDs
(Condition Memory)
You can store settings for DVDs you often watch in
memory. Settings remain in memory even if you remove
the disc from the player, or switch power to the player OFF.
If you load a disc that has its settings memorized, the
Condition indicator lights. When you start playing the disc,
the memorized settings are automatically recalled.
The Condition indicator in the display section
lights. You can memorize details for the
following five settings.
Multi-Aspect (page 42)
Cinema mode/Animation mode (page 44)
Multi-language (page 49)
Multi-language subtitles (page 50)
OSD SET.(POSITION) (page 60)
CONDITION
Press
during Play.
“CONDITION”is
indicated in the display.
When a memorized disc is loaded
“CONDITION” is indicated, and previous settings are displayed.
Notes
◆ If there is a power outage or the power cord is disconnected
while power to the player is ON, memorized settings are erased.
When disconnecting the power cord, be sure to press POWER
button on the main unit and the remote control until “OFF” is no
longer indicated in the display.
◆ This operates only when using the NORMAL MODE.
Tips
¶ Settings are stored in memory for use any time.
¶ You can store settings for up to 30 DVDs in memory. If you
memorize settings for more than 30 DVDs, previously memorized
settings are erased in order from the least recently memorized
settings.
¶ To make changes to ASPECT , Cinema mode/Animation mode,
Multi-language subtitles, Multi-language, and POSITION settings,
CONDITION
press
¶ This player memorizes multi-language subtitles and multi-
languages as languages not numbers. With DVDs that have
multiple settings for the same language, playback starts from the
first number.
during playback.
Erasing memorized settings
Load a memorized disc, and while “CONDITION” is indicated,
CLEAR
press
The recorded details for that disc are erased.
48
.
Memorizing Settings for Often Viewed
DVDs (Condition Memory)
Page 49

Selecting Languages
(Multi-Language)
Dolby Digital, PCM, and other audio data is recorded on
DVDs in a number of languages, letting you choose the
desired language.
Press
2
Press
language.
HELLO
AUDIO
during playback.
HELLO
AUDIO : 1 English
AUDIO
to select the desired
HOLA
AUDIO : 1 English AUDIO : 2 Spanish
POWER
MEMORY
Basic Operation
Notes
◆ You cannot switch languages if there is only one language
recorded on the disc.
OPEN/
CLOSE
DISC SIDE
A / B
MENU
DISPLAY
ANGLE
PLAYBACK
CONTROL
RETURN
AUDIO
SUBTITLE
LAST
TITLE
◆ Language number and setting differ with each disc, so refer to
the disc's instructions.
◆ Some titles may not enable switching between languages. If this
happens, the mark is displayed.
Tip
POWER
AUDIO
MEMORY
Depending on the title, you can also make a selection using a menu. T o
do this, press the
menu, and select the desired title.
OPEN/
CLOSE
DISC SIDE
A / B
DISPLAY
ANGLE
SUBTITLE
LAST
TITLE
MENU
PLAYBACK
CONTROL
RETURN
MENU
when indications are displayed to call up a
Karaoke OperationDetailed Operation Setting Set Up Other Information
Changing Audio Type
AUDIO
Press
during playback.
LD CD, Video CD
ANALOG STEREO DIGITAL STEREO
ANALOG 1/L
ANALOG 2/R
DIGITAL 2/R DIGITAL 2/R
DIGITAL 1/L
DIGITAL 1/L
DIGITAL STEREO
MENU
DISC SIDE
OPEN/
CLOSE
A / B
DISPLAY
ANGLE
PLAYBACK
CONTROL
RETURN
POWER
MEMORY
AUDIO
SUBTITLE
LAST
TITLE
¶ Audio type changes each time you press the button.
Notes
◆ Y ou cannot select digital audio if digital audio data is not recorded
on the LD.
◆ Y ou cannot switch audio type when using digital output of V ideo
CD output (optical, coaxial) (∂ RF output).
◆ With the NORMAL MODE only, you can change audio type.
◆ With LDs, switching to the CX System is possible with some
discs. In this case, you can perform switching with this operation.
Selecting Languages (Multi-Language)
Changing Audio Type
49
Page 50

Selecting Subtitle Language
(Multi-Language Subtitles)
You can select a desired subtitle language with DVDs that
have subtitle data in multiple languages recorded on them.
SUBTITLE
2
Press
SUBTITLE : 1 English
Press
during playback.
HELLO!
SUBTITLE
to select the desired
language.
HELLO!
SUBTITLE : 1 English SUBTITLE : 2 Spanish
You can also make your selection from a menu.
HOLA!
POWER
AUDIO
MEMORY
Notes
◆ You cannot switch subtitle languages with discs that do not have
subtitle data recorded on them, or discs that feature subtitle data
OPEN/
CLOSE
DISC SIDE
A / B
DISPLAY
ANGLE
SUBTITLE
LAST
TITLE
MENU
ENTER
PLAYBACK
CONTROL
RETURN
POWER
AUDIO
MEMORY
DISC SIDE
SUBTITLE
LAST
MENU
TITLE
ENTER
in only one language.
◆ Some titles may not enable switching between subtitles
languages. If this happens, the mark is displayed.
Tips
To clear subtitles during playback, when there's a display press
after first pressing
in the subtitle menu display.
¶ If the basic subtitle is set to “OFF” in the initial setting menu,
you can cancel subtitles.
Depending on the title, you can also make a selection using a menu. T o
do this, press the
menu, and select the desired title.
OPEN/
CLOSE
A / B
DISPLAY
ANGLE
PLAYBACK
CONTROL
RETURN
SUBTITLE
. You can also clear subtitles by selecting OFF
MENU
when indications are displayed to call up a
CLEAR
Viewing from a Desired
Camera Angle (Multi-Angle)
Press
ANGLE
during playback.
\
ANGLE : 1
ANGLE : 2
\
\
R
ANGLE : 4
R
\
ANGLE : 3
Tips
¶ Y
ou can use the Multi-Angle function only with discs featuring recordings
of images shot from different camera angles.
During Multi-Angle playback, the Angle indicator on the player lights.
:
This mark indicates the disc provides scenes shot from four angles.
4
Depending on the title, you can also make a selection using a menu. T o
do this, press the
menu, and select the desired title.
MENU
when indications are displayed to call up a
POWER
AUDIO
SUBTITLE
LAST
MEMORY
MENU
TITLE
ENTER
PREV NEXT
¶ The camera angle
changes each time you
press the button.
¶ You can also make
your selection from a
menu.
DISC SIDE
With DVDs featuring recordings of images shot from
different angles, you can choose a desired viewing angle.
OPEN/
CLOSE
A / B
DISPLAY
ANGLE
PLAYBACK
CONTROL
RETURN
To confirm whether multi-angle
information is recorded on a disc
The disc jacket bears the 4 mark. When a disc played on this
player has sections that include multi-angle information, display
of the
is also possible.
Setting without displaying angle mark
(When DVD is in the STOP mode.)
1. Press
2.Select the "INITIAL"
MENU
.
setting ( ) by pressing
the digit button.
¶ The initial setting menu
is displayed.
3. Press the button.
¶ The OSD setting menu is
displayed.
4. Press the button.
¶ The angle mark menu is
displayed.
5. Press the button.
You can turn the displayed logo mark ON by selecting Angle
ON at step 5 above.(Press
button.)
Note
◆ Some titles may not enable switching between angles. If this
happens, the mark is displayed.
50
Selecting Subtitle Language
Viewing from a Desired Camera Angle
Page 51

Viewing Information
1-1 6.26 PLAY
RE·RATE:
9.2
1 3450 A PLAY
DISC TIME
2.17
MENU
ENTER
DISC SIDE
OPEN/
CLOSE
A / B
DISPLAY
ANGLE
PLAYBACK
CONTROL
RETURN
Press
DISPLAY
during playback.
¶ Each time you press the
POWER
AUDIO
LAST
MEMORY
TITLE
DISPLAY
, setting changes as follows.
SUBTITLE
¶ If you press during the Stop mode, all the disc's information is displayed.
< DVD >
1-1 3.51 PLAY
Chapter number
Title number
(With some discs, indications may not be displayed.)
1-1 4.57 PLAY
TITLE REMAIN
TITLE TOTAL 4
Title remain:
Remaining time of the
title currently playing
Title total:
Total chapter number
and total play time of the
title currently playing
Elapsed time
1-1 4.08
PLAY
CHAPTER TIME
CHAPTER REMAIN
== =
Chapter time:
Elapsed time of the
chapter currently
playing
Chapter remain:
Remaining time of
the chapter currently
playing
4.08
33.29
32.58
38.06
< LD >
CLV: Extended play disc
2 5.25 A PLAY
Elapsed Time
Chapter number
3 5.47 A PLAY
ALL REMAIN
TOTAL TIME 12
==
All remain:
Remaining time from
the current location on
the disc playing
Total time:
Total chapter number
and total disc play time
51.45
57.59
DIGITAL STEREO
Disappear
< CD >
Notes
◆ To prevent TV screen burn-in, the display automatically
switches OFF after about 80 minutes.
◆ Not displayed with LDs that do not have a TOC (refer to page
75) or after playback of side B finishes.
◆ There is also no display if Quick Turn is switched ON.
1-1 5.41 PLAY
SUBTITLE OFF
AUDIO 1 ENGLISH
LINEAR PCM 96/24
Subtitles:
Subtitle imformation
Audio:
Audio information
CAV: Standard play disc
1 1234 A PLAY
=
Frame number
Chapter number
==
Play rate:
Level meter showing
play rate
==
Disc time:
Elapsed time from
start of disc
Disappear
1 4560 A PLAY
ALL REMAIN
TOTAL TIME 8
All remain:
Remaining time from
the current location on
the disc playing
Total time:
Total chapter number
and total disc play time
27.03
29.58
DIGITAL STEREO
Basic Operation
Karaoke OperationDetailed Operation Setting Set Up Other Information
Disappear
13 1.07 PLAY 13 1.25 PLAY
< Video CD >
(PBC off)
13 1.07 PLAY
Track number
Elapsed time
Track number
Elapsed time
TRACK REMAIN
=
Track remain:
Remaining time of
the track currently
playing
13 1.25 PLAY
TRACK TIME
TRACK REMAIN
=
Track time:
Elapsed time of the
track currently
playing
Track remain:
Remaining time of
the track currently
playing
2.47
2.59
2.59
13 1.50 PLAY
ALL REMAIN
TOTAL TIME
=
=
13
DIGITAL STEREO
All remain:
Remaining time from
the current location on
the disc playing
Total time:
Total track number and
total disc play time
13 1.50 PLAY
ALL REMAIN
TOTAL TIME
13
DIGITAL STEREO
All remain:
Remaining time from
the current location on
the disc playing
Total time:
Total track number and
total disc play time
2.34
58.27
2.34
58.27
Disappear
=
Disappear
=
(PBC on)
PLAY
PLAY
=
DIGITAL STEREO
Viewing Information
Disappear
=
51
Page 52
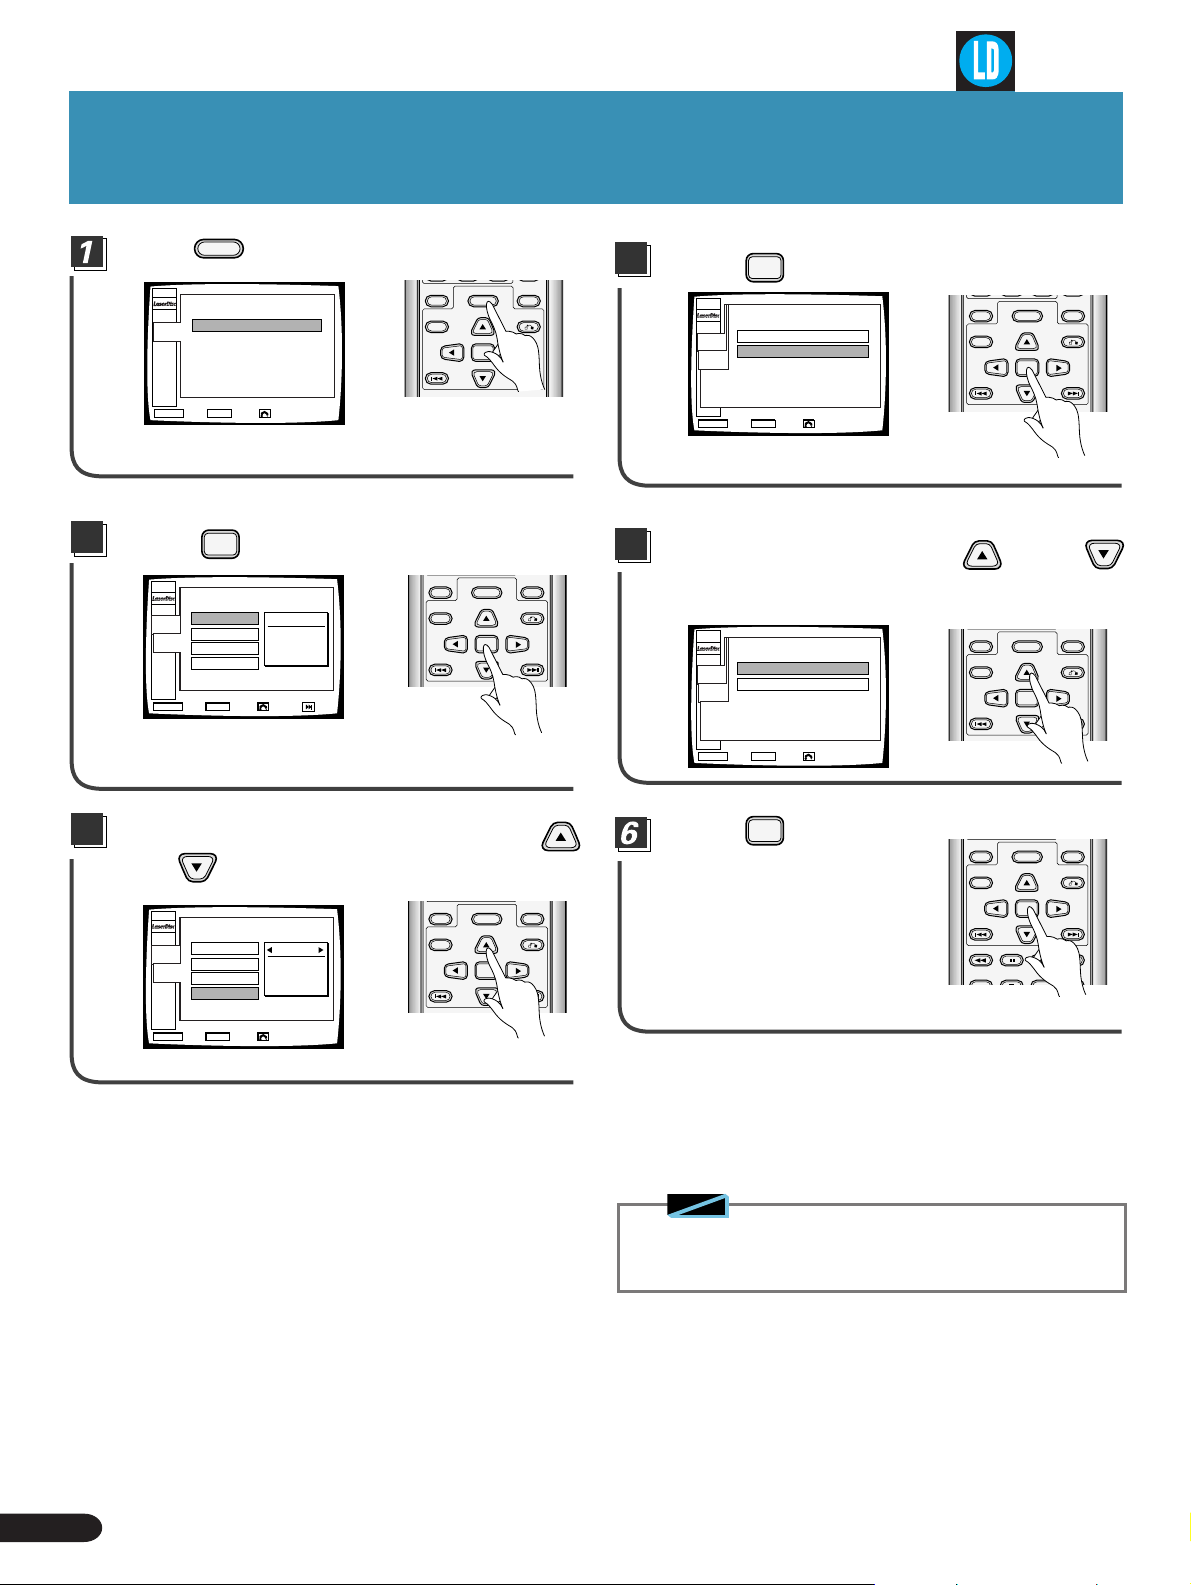
Quick LD Side Changing
MAIN
1
INITIAL
STOP
MENU ENTER
EXIT ENTER RETURN
MAIN
SETUP
QUICK TURN
1
ON
2
OFF
MENU ENTER
EXIT ENTER RETURN
STOP
MAIN
SETUP
QUICK TURN
1
ON
2
OFF
MENU ENTER
EXIT ENTER RETURN
STOP
Note
(Quick Turn)
This function shortens the time required to change
from A to the B side, or from the B to the A side when
playing an LD.
2
Press
MENU
when play has stopped.
Main Menu indications are displayed.
Press
ENTER
.
INITIAL
STOP
1
OSD SET.
MAIN
2
SAVER
3
B.G.COLOR
4
QUICK TURN
MENU ENTER
EXIT NEXTENTER RETURN
OSD SET.
Initial setting indications are displayed.
LAST
MEMORY
TITLE
PREV
REV FWDPLAYPAUSE
LAST
MEMORY
TITLE
PREV
MENU
ENTER
MENU
ENTER
PLAYBACK
CONTROL
RETURN
NEXT
PLAYBACK
CONTROL
RETURN
4
Press
ENTER
.
LAST
MEMORY
TITLE
PREV
REV FWDPLAYPAUSE
MENU
ENTER
PLAYBACK
CONTROL
RETURN
NEXT
Displays the selection menu of Quick Turn.
5
Select ON with the and
buttons.
LAST
MEMORY
NEXT
TITLE
PREV
MENU
ENTER
PLAYBACK
CONTROL
RETURN
NEXT
3
Select Quick Turn with the
and buttons.
LAST
MEMORY
TITLE
PREV
INITIAL
STOP
1
OSD SET.
MAIN
2
SAVER
3
B.G.COLOR
4
QUICK TURN
MENU ENTER
EXIT ENTER RETURN
1/2
QUICK TURN
ON
1/2
NEXT
MENU
ENTER
PLAYBACK
CONTROL
RETURN
NEXT
Press
Quick Turn is set to ON.
ENTER
.
LAST
MEMORY
TITLE
PREV
REV FWDPLAYPAUSE
CHP/TIME
MENU
ENTER
PLAYBACK
CONTROL
RETURN
NEXT
REPEATREPEATSTOP
When Quick Turn is ON, On-screen display of remaining and total
play time cannot be used.
52
Quick LD Side Changing
Page 53

Outline of GUI (Graphical User Interface) Operation
On this player, various settings can be selected while watching menu screens and using the remote controller.
Here we will explain how to access menu screens. Because menu screen access differs according to the type of disc being used, or the playback mode
(playback mode, stop mode etc.), refer to the following menu map when accessing.
L D
MAIN
STOP
1
INITIAL
MENU ENTER
EXIT ENTER RETURN
STOP
MAIN
MENU ENTER
ENTER
INITIAL
1
OSD SET.
2
SAVER
3
B.G.COLOR
4
QUICK TURN
EXIT ENTER RETURN
OSD SET.
INITIAL
STOP
1
OSD SET
MAIN
2
SAVER
3
B.G.COLOR
4
QUICK TURN
MENU ENTER
EXIT ENTER RETURN
INITIAL
STOP
1
OSD SET.
MAIN
2
SAVER
3
B.G.COLOR
4
QUICK TURN
MENU ENTER
EXIT ENTER RETURN
OSD SET.
SAVER
ON
INITIAL
STOP
1
OSD SET.
MAIN
2
SAVER
3
1/2
B.G.COLOR
4
QUICK TURN
MENU ENTER
EXIT ENTER RETURN
B.G.COLOR
INITIAL
STOP
1
OSD SET.
MAIN
2
SAVER
3
B.G.COLOR
4
QUICK TURN
MENU ENTER
EXIT ENTER RETURN
QUICK TURN
OFF
Basic Operation
Karaoke OperationDetailed Operation Setting Set Up Other Information
OSD SET.
STOP
1
DISPLAY
MAIN
2
POSTION
SET UP
MENU ENTER
EXIT ENTER RETURN
DISPLAY
STOP
1
ON
MAIN
2
OFF
SETUP
OSD
SETUP
MENU
ENTER
EXIT ENTER
STOP
MAIN
SETUP
ENTER
OSD SET.
STOP
1
DISPLAY
ON
1/2
ENTER ENTER
RETURN
DISPLAY
MAIN
2
POSTION
SET UP
MENU ENTER
EXIT ENTER RETURN
POSITION
STOP
1
WIDE
MAIN
2
NORMAL
SETUP
OSD
SETUP
MENU
ENTER
EXIT ENTER RETURN
MENU
POSITION
NORMAL
ENTER
SAVER
1
ON
2
OFF
ENTER
EXIT ENTER RETURN
2/2
ENTER ENTER
STOP
MAIN
SETUP
MENU
Press
B.G.COLOR
ENTER
EXIT ENTER RETURN
RETURN
and you return to the display
QUICK TURN
STOP
1
ON
MAIN
2
OFF
SETUP
MENU
ENTER
EXIT ENTER RETURN
you had before you pressed
ENTER
.
Outline of GUI (Graphical
User Interface) Operation
53
Page 54

Outline of GUI (Graphical User Interface) Operation
DVD
MAIN
STOP
1
TITLE MENU
2
MENU
SETUP
3
INITIAL
4
OUTPUT
MENU ENTER
EXIT ENTER RETURN
21 3 4
CHAPTER
AUDIO
SUBTITLE
ANGLE
ENTER
CHAPTER
1/2
1/2
ENTER
1/2
TITLE MENU
STOP
1
TITLE 1
2
TITLE 2
3
TITLE 3
4
TITLE 4
5
TITLE 5
MENU
ENTER
EXIT ENTER
MENU
STOP
1
CHAPTER
MAIN
MENU ENTER
CHAPTER
2
AUDIO
3
SUBTITLE
4
ANGLE
5
ENTER
EXIT ENTER RETURN
ENTER ENTER ENTER ENTER ENTER
1/2
TITLE 1TITLE 1
MENU
STOP
1
CHAPTER
MAIN
2
AUDIO
3
SUBTITLE
4
ANGLE
5
ENTER
MENU ENTER
EXIT ENTER RETURN
AUDIO
English
DOLBY DIGITAL
1/1
MENU
STOP
1
CHAPTER
MAIN
2
AUDIO
3
SUBTITLE
4
ANGLE
5
ENTER
MENU ENTER
EXIT ENTER RETURN
SUBTITLE
English
STOP
MAIN
1/2
MENU ENTER
1/5
RETURN
PREV
MENU
1
CHAPTER
ANGLE
2
AUDIO
3
SUBTITLE
4
ANGLE
5
ENTER
EXIT ENTER RETURN
STOP
MAINMAIN
1/2
MENU
1
CHAPTER
2
AUDIO
3
SUBTITLE
4
ANGLE
5
ENTER
MENU ENTER
EXIT ENTER RETURN
TITLE 1TITLE 1TITLE 1
MENU
STOP
1
MAIN
2
3
4
5
MENU ENTER
EXIT ENTER RETURN
INITIAL
STOP
1
OSD SET.
MAIN
2
SAVER
3
B.G.COLOR
4
PARENTAL
5
SOFT MENU
MENU ENTER
EXIT NEXTENTER RETURN
INITIAL
STOP
1
OSD SET.
MAIN
2
SAVER
3
B.G.COLOR
4
PARENTAL
5
SOFT MENU
MENU ENTER
EXIT NEXTENTER RETURN
OSD SET.
OSD SET.
1/2
1/2
OUTPUT
STOP
1
DIG.OUTPUT
MAIN
2
DOWN SAMP
MENU ENTER
EXIT ENTER RETURN
INITIAL
STOP
1
OSD SET.
MAIN
2
SAVER
3
B.G.COLOR
4
PARENTAL
5
SOFT MENU
MENU ENTER
EXIT NEXTENTER RETURN
ENTER
DIG.OUTPUT
PCM
/DOLBY DIGITAL
1/2
1/2
SAVER
OFF
1/2
STOP
MAIN
MANU
MENU
Press
TITLE 1
CHAPTER
CHAPTER 0 (1~3)
ENTER
RETURN
EXIT ENTER
TITLE 1 TITLE 1 TITLE 1
STOP
MAIN
DISPALY
LANGUAGE
SETUP
MENU
EXIT ENTER
AUDIO
1
DOLBY DIGITAL
2
Englich/PCM
ENTER
RETURN
STOP
MAIN
DISPALY
LANGUAGE
SETUP
MENU
EXIT ENTER
SUB TITLE
1
Englich
2
Jpanese
ENTER
RETURN
ANGLE
STOP
1
ANGLE1
MAIN
2
ANGLE2
SETUP
3
ANGLE3
OSD
4
ANGLE4
SETUP
MENU
ENTER
EXIT ENTER RETURN
1/5
OSD SET.
STOP
1
MAIN
2
SET UP
3
MENU ENTER
EXIT NEXTENTER RETURN
ENTER ENTER
DISPLAY
STOP
1
MAIN
2
SETUP
OSD
SETUP
MENU
EXIT ENTER
RETURN
and you return to the display you had before you pressed
DISPLAY
POSITION
ANGLE MARK
ON
OFF
ENTER
DISPLAY
RETURN
OSD SET.
STOP
1
DISPLAY
DISPLAY
POSITION
ANGLE MARK
OSD SET.
1
DISPLAY
2
POSITION
3
ANGLE MARK
1
WIDE
2
NORMAL
ENTER
ENTER
ON
POSITION
NORMAL
.
1/2
2/2
MAIN
2
SET UP
3
MENU ENTER
EXIT NEXTENTER RETURN
STOP
MAIN
ON
SETUP
1/2
MENU ENTER
EXIT ENTER RETURN
POSITION
STOP
MAIN
SETUP
OSD
SETUP
MENU
EXIT ENTER RETURN
STOP
MAIN
SETUP
MENU
EXIT ENTER RETURN
OSD SET.
STOP
1
DISPLAY
MAIN
2
POSITION
SETUP
3
ANGLE MARK
MENU ENTER
EXIT ENTER RETURN
ENTER
ANGLE MARK
STOP
1
ON
MAIN
2
OFF
SETUP
OSD
SETUP
MENU
ENTER
EXIT ENTER RETURN
SAVER
1
ON
2
OFF
ENTER
ANGLE MARK
ON
2/2
54
Outline of GUI (Graphical
User Interface) Operation
Page 55
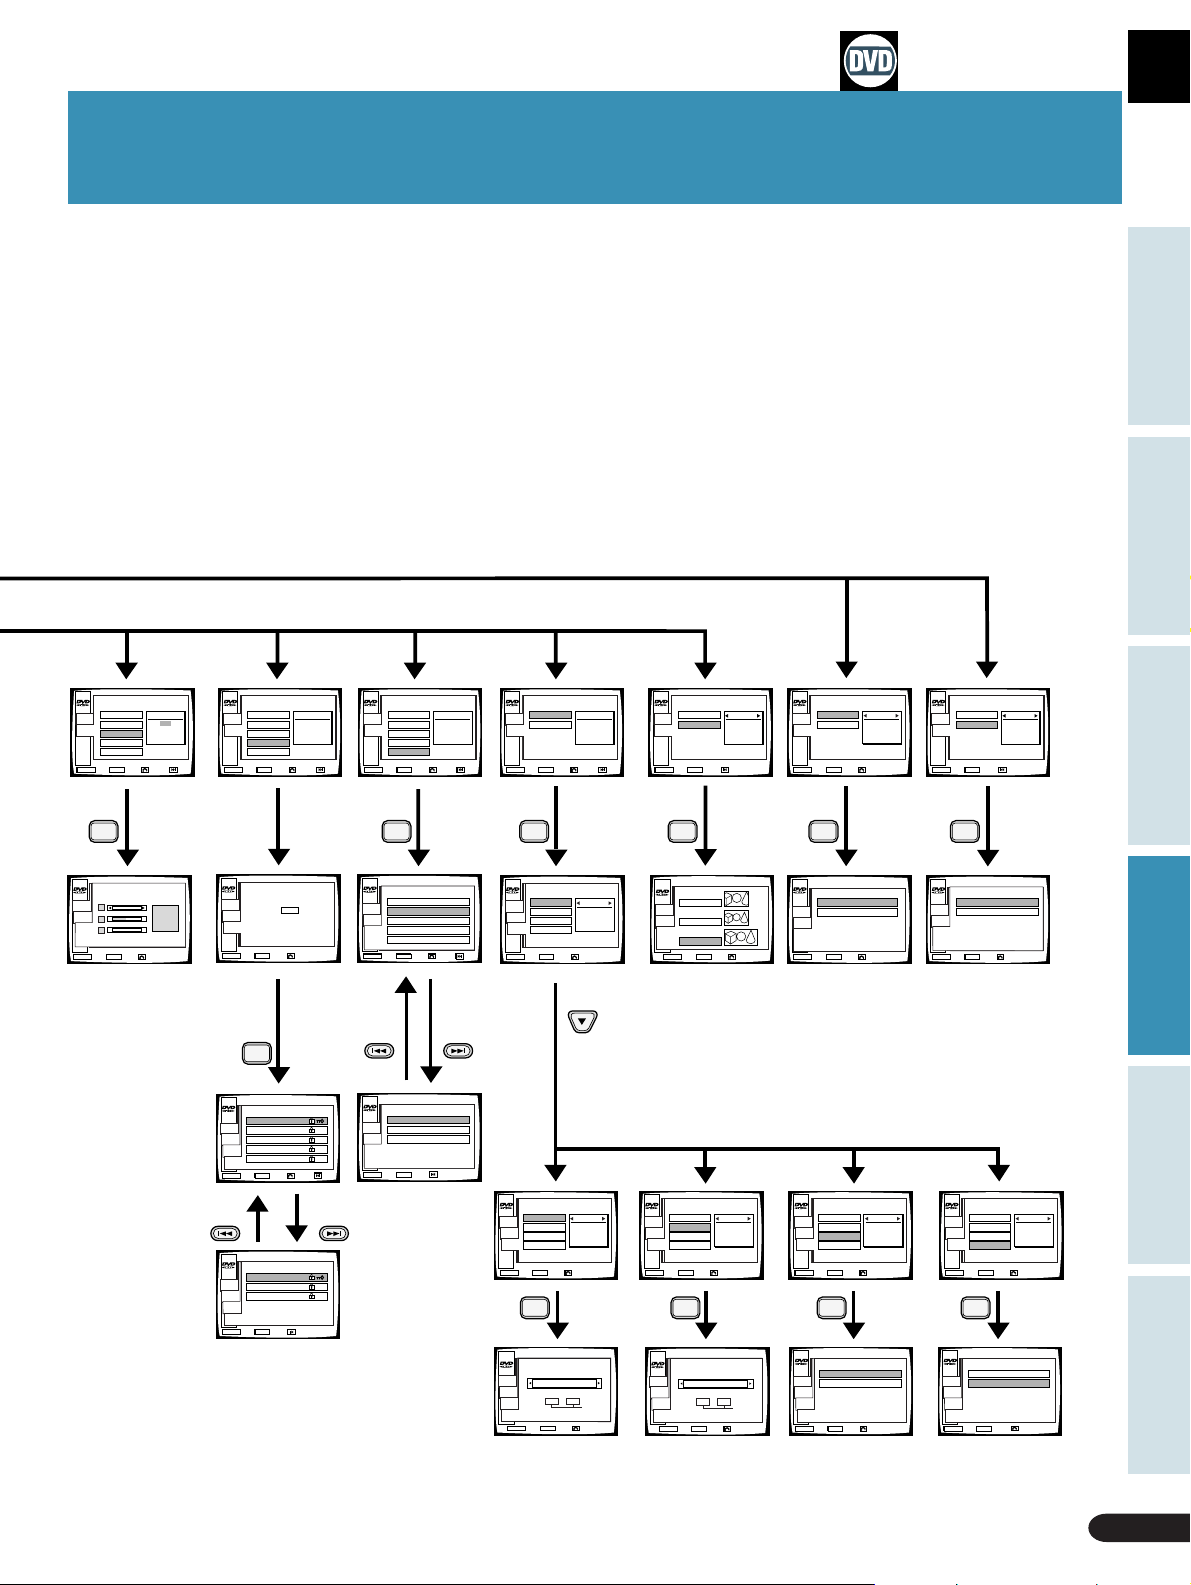
Outline of GUI (Graphical User Interface) Operation
Basic Operation
Karaoke OperationDetailed Operation Setting Set Up Other Information
INITIAL
STOP
1
OSD SET.
MAIN
2
SAVER
3
B.G.COLOR
4
PARENTAL
5
SOFT MENU
MENU ENTER
EXIT NEXTENTER RETURN
ENTER
B.G.COLOR
STOP
MAIN
SETUP
MENU
ENTER
EXIT ENTER RETURN
B.G.COLOR
1/2
INITIAL
STOP
1
OSD SET.
MAIN
2
SAVER
3
B.G.COLOR
4
PARENTAL
5
SOFT MENU
MENU ENTER
EXIT NEXTENTER RETURN
PARENTAL
LEVEL8
1/2
8/8
INITIAL
STOP
1
OSD SET.
MAIN
2
SAVER
3
B.G.COLOR
4
PARENTAL
5
SOFT MENU
MENU ENTER
EXIT NEXTENTER RETURN
SOFT MENU
English
1/2
1/1
INITIAL
STOP
6
LANG SET.
MAIN
7
ASPECT
MENU ENTER
EXIT NEXTENTER RETURN
LANG SET
1/2
1/1
INITIAL
STOP
6
MAIN
7
MENU ENTER
EXIT PREVENTER
LANG SET.
ASPECT
ASPECT
PAN&SCAN
2/2
1/3
OUTPUT
STOP
1
DIG.OUTPUT
MAIN
2
DOWN SAMP
MENU ENTER
EXIT ENTER RETURN
DIG.OUTPUT
PCM
/DOLBY DIGITAL
1/2
OUTPUT
STOP
1
MAIN
2
MENU ENTER
EXIT PREVENTER
DIG.OUTPUT
DOWN SAMP
DOWN SAMP
48KHz
2/2
ENTER ENTER ENTERENTER ENTER
PARENTAL
STOP
CURENT LEVEL · LEVEL6
MAIN
CODE
0000
SETUP
ENTER CODE NUMBER
TO CHANGE THE LEVEL.
MENU ENTER
EXIT ENTER RETURN
SOFT MENU
STOP
1
Japanese
MAIN
2
English
SETUP
3
French
4
German
5
Italian
MENU
ENTER
EXIT ENTER RETURN
NEXT
LANG SET
STOP
1
AUDIO
MAIN
2
SUBTITLE
SET UP
3
AUTO
4
SUBT.OFF
MENU ENTER
EXIT ENTER RETURN
AUDIO
English
ASPECT
STOP
1
PAN&SCAN
MAIN
SETUP
2
2/136
LETTER BOX
3
WIDE
MENU ENTER
EXIT ENTER RETURN
DIGITAL OUTPUT
STOP
1
PCM/DOLBY DIGITAL
MAIN
2
PCM
SETUP
MENU ENTER
EXIT ENTER RETURN
DOWN SAMP
STOP
1
96KHz
MAIN
2
48KHz
SETUP
MENU
ENTER
EXIT ENTER RETURN
ENTER
PARENTAL LEVEL
STOP
1
LEVEL 1
MAIN
2
LEVEL 2
SETUP
3
LEVEL 3
4
LEVEL 4
PARENTAL
5
LEVEL 5
MENU
ENTER
EXIT ENTER RETURN
PARENTAL LEVEL
STOP
6
LEVEL 6
MAIN
7
LEVEL 7
SETUP
8
LEVEL 8
PARENTAL
MENU
ENTER
EXIT ENTER
1/2
NEXT
2/2
PREV
STOP
MAIN
SETUP
MENU
EXIT ENTER
SOFT MENU
6
Spanish
7
Dutch
8
Chinese
ENTER
PREV
LANG SET
STOP
1
AUDIO
MAIN
2
SUBTITLE
SET UP
3
AUTO
4
SUBT.OFF
MENU ENTER
EXIT ENTER RETURN
AUDIO
English
2/136
LANG SET
STOP
1
AUDIO
MAIN
2
SUBTITLE
SET UP
3
AUTO
4
SUBT.OFF
MENU ENTER
EXIT ENTER RETURN
SUBTITLE
English
LANG SET
STOP
1
AUDIO
2
SUBTITLE
3
AUTO
4
SUBT.OFF
AUTO
ON
2/136
MAIN
SET UP
2/136
MENU ENTER
EXIT ENTER RETURN
ENTER ENTER ENTER ENTER
AUDIO
STOP
MAIN
en : English
SETUP
LANGUAGE
CODE
SETUP
MENU ENTER
EXIT ENTER RETURN
HIGH LOW
05 14
(1~26)
SUBTITLE
STOP
MAIN
en : English
SETUP
OSD
CODE
SETUP
DISPLAY ON
ASS.SUBTIT OFF
MENU ENTER
EXIT ENTER RETURN
HIGH LOW
05 14
(1~26)
AUTO
STOP
1
ON
MAIN
2
OFF
SETUP
LANGUAGE
SETUP
MENU
ENTER
EXIT ENTER RETURN
LANG SET
STOP
1
AUDIO
MAIN
2
SUBTITLE
SET UP
3
AUTO
4
SUBT.OFF
MENU ENTER
EXIT ENTER RETURN
SUBT.OFF
STOP
1
WITH AUDIO
MAIN
2
SEL.SUBTL
SETUP
LANGUAGE
SETUP
MENU
ENTER
EXIT ENTER
SUBT.OFF
SEL.SUBTL
RETURN
2/136
Outline of GUI (Graphical
User Interface) Operation
55
Page 56

Outline of GUI (Graphical User Interface) Operation
CD,Video CD
STOP
MENU ENTER
MAIN
SET UP
1
INITIAL
EXIT ENTER RETURN
ENTER
STOP
MAIN
SET UP
OSD SET.
1
DISPLAY
2
POSTION
INITIAL
STOP
1
OSD SET.
MAIN
2
SAVER
3
B.G.COLOR
MENU ENTER
EXIT ENTER RETURN
OSD SET.
INITIAL
STOP
1
OSD SET.
MAIN
2
SAVER
3
B.G.COLOR
MENU ENTER
EXIT ENTER RETURN
SAVER
OFF
STOP
1/2
ENTER ENTER ENTER
OSD SET.
STOP
1
DISPLAY
MAIN
2
POSITION
SET UP
MENU ENTER
EXIT NEXTENTER RETURN
DISPLAY
ON
1/2
DISPLAY
STOP
MAIN
SET UP
ON
OSD SET.
1
2
1/2
DISPLAY
POSTION
SAVER
STOP
1
ON
MAIN
2
OFF
SETUP
MENU
ENTER
EXIT ENTER RETURN
POSITION
NORMAL
1/2
INITIAL
1
OSD SET.
MAIN
2
SAVER
3
B.G.COLOR
MENU ENTER
EXIT ENTER RETURN
B.G.COLOR
STOP
MAIN
SETUP
MENU
ENTER
EXIT ENTER RETURN
B.G.COLOR
56
MENU ENTER
EXIT ENTER RETURN
ENTER ENTER
DISPLAY
STOP
1
ON
MAIN
2
OFF
SETUP
OSD
SETUP
MENU
ENTER
EXIT ENTER
RETURN
Outline of GUI (Graphical
User Interface) Operation
MENU ENTER
EXIT ENTER RETURN
POSITION
STOP
1
WIDE
MAIN
2
NORMAL
SETUP
OSD
SETUP
MENU
ENTER
EXIT ENTER RETURN
Page 57

Outline of GUI (Graphical User Interface) Operation
Button operation within each menu
Button name
MENU button
RETURN button
Digit buttons
Direction button
ENTER button
PREVIOUS button
NEXT button
TITLE
Direct button
AUDIO button
Button shape
MENU
RETURN
–•
ENTER
PREV
NEXT
CHP/TIME
AUDIO
SUBTITLE
ANGLE
Operation
To leave the menu screen (settings are
invalidated)
To return one menu screen back (Set up operation is
completed. However, search cannot be performed.)
Selection and conclusion (In the set up menu,
some items only operate for selection.)
Selection
Setting and implementation (playback mode
is engaged after title or chapter change)
To go to previous menu screen
To go to next menu screen
To go to menus (setting selected before
moving to a new menu will be invalidated)
Basic Operation
Karaoke OperationDetailed Operation Setting Set Up Other Information
SUBTITLE button
TITLE button
ENTER button
DIRECTION button
PREVIOUS button
CHP/TIME button
POWER
AUDIO
LAST
MEMORY
TITLE
PREV
REV FWD
CHP/TIME
MELODY
GUIDE
VOCAL
SUBTITLE
PAUSE
MODE
VOCAL
PARTNER
MENU
ENTER
DISC SIDE
A / B
ANGLE
PLAY
CONDITION
KEY CONTROL
OPEN/
CLOSE
DISPLAY
PLAYBACK
CONTROL
RETURN
NEXT
REPEATREPEATSTOP
A–B
CLEAR
PROGRAM
LASER DBC
ANGLE button
MENU button
RETURN button
DIRECTION button
NEXT button
Digit buttons
Outline of GUI (Graphical
User Interface) Operation
57
Page 58

Outline of GUI (Graphical User Interface) operation
Examples of screen indicators and operation
Ex.1:Display content within menus/Button operation
(Example:DVD)
Indicates you can change setting with the buttons.
TITLE 1
MENU
STOP
1
MAIN
MENU ENTER
CHAPTER
2
AUDIO
3
TITLE
4
ANGLE
5
ENTER
EXIT ENTER RETURN
AUDIO
English
DOLBY DIGITAL
1/2
Audio type
Denominator:Total number
Numerator:Number currently selected.
Item No. is selected with button and can
be changed with buttouns.
Will switch above settings to new settings if they were changed.
Selection item No.
When selection is made by pressing a digit button or the or button, and then pressing
the ENTER button, the selection screens for the various set-up items will be displayed.
Selecting 5[ENTER], however, will select the new setting changes and close the screen.
Ex.2:Display content within set up menus/Button operation
(Example:DVD)
Current settings
Item numbers can be selected with the
buttons and settings changed
with the buttons.
STOP
MAIN
INITIAL
1
OSD SET.
2
SAVER
3
B.G.COLOR
4
PARENTAL
5
SOFT MENU
1/2
SAVER
ON
1/2
\
¶ With CDs and LDs, indications may be different.
NEXT
PREV
\
STOP
MAIN
INITIAL
6
LANG SET.
7
ASPECT
2/2
ASPECT
WIDE
3/3
MENU ENTER
EXIT NEXTENTER RETURN
Selection item No.
Selection can also be made with the digit buttons.
Outline of GUI (Graphical
58
User Interface) Operation
MENU ENTER
EXIT PREVENTER
Page 59

¶ This is displayed if you press
player is in the Stop mode.
About the main menu
¶ With DVDs, LDs and other discs, displayed
details differ depending on the type of disc.
The main menu is the menu used for selecting the Title menu screen,
Menu screen and Set up screen.
In the Title menu screen:
Titles can be selected and played back. (Title search)
In the Menu screen:
MAIN
STOP
1
TITLE MENU
2
MENU
SETUP
3
INITIAL
4
OUTPUT
MENU ENTER
EXIT ENTER RETURN
Chapters (songs), subtitles, audio and angles within a title can be
selected.
In the initial setting menu:
You can perform on-screen setting of each function.
In the output setting menu:
You can select the audio signal output from the player’s digital
output jack.
MENU
when the
Basic Operation
Karaoke OperationDetailed Operation Setting Set Up Other Information
About the title menu
TITLE MENU
STOP
1
MAIN
2
3
4
5
MENU
EXIT ENTER
TITLE 1
TITLE 2
TITLE 3
TITLE 4
TITLE 5
ENTER
RETURN
1/4
NEXT
Menu screen contents
TITLE 1
MENU
STOP
1
CHAPTER
MAIN
2
AUDIO
3
TITLE
4
ANGLE
5
ENTER
MENU ENTER
EXIT ENTER RETURN
Completes the setting of changes
to the above items.
CHAPTER
1/3
Titles can be selected and played back. This selection
screen is the same as the one in “Direct Search with
Title Numbers” on page 22.
To go to the Chapter screen
In the Chapter screen:
One chapter (song) within a title can be selected
and played back.
To go to the Audio screen
In the Audio screen:
Audio contents can be selected on discs that
include more than one audio language or audio type.
To go to the Subtitle screen
In the Subtitle screen:
Subtitle contents can be selected on discs that
include subtitle information.
To go to the Angle screen
In the Angle screen:
The scene angle that you want can be selected on
discs that include scenes that have been filmed
from various angles.
Outline of GUI (Graphical
User Interface) Operation
59
Page 60

Changing Various Settings
Initial setting menu
(Ex:DVD)
INITIAL
STOP
1
MAIN
OSD SET.
2
SAVER
3
B.G.COLOR
4
PARENTAL
5
SOFT MENU
MENU ENTER
EXIT NEXTENTER RETURN
1/2
OSD SET.
1/2
Output setting menu
(only with DVD)
OUTPUT
STOP
1
DIG.OUTPUT
MAIN
2
DOWN SAMP
MENU ENTER
EXIT ENTER RETURN
NEXT
\
PREV
DIG.OUTPUT
PCM
/DOLBY DIGITAL
1/2
ASPECT
WIDE
3/3
2/2
Use to change a
wide range of
settings. On pages
\
STOP
MAIN
INITIAL
6
LANG SET.
7
ASPECT
60 – 61, the details
MENU ENTER
EXIT PLEVENTER
of each item are
provided.
Use when you have selected audio output from the
player via the digital output jack.
Change the setting to match your amplifier.
On pages 60 – 61, the details of each item are provided.
Class
Initial setting
60
Item
DISPLAY
POSITION
OSD setting
ANGLE MARK
SAVER
(Screen saver)
B.G.COLOR
(Background
color)
Switches between display of operation indications (Play, Stop etc.) (ON),
and no display of indications (OFF).
When watching regular software on a wide TV, operation indications may
be displayed outside the area of the screen, so you can’t see them. Changing
the on-screen location of the indications lets you see them even when
watching a wide TV.
recorded angles.
Leaving a still image on screen for a prolonged period can result in screen
“burn”.
This player features a screen saver function that prevents screen “burn”
due to prolonged display (5 minutes or more) of menus and other indications.
It is recommended to leave this function ON.
Lets you select background color for menus and for screen color when no
software is playing. Y ou can set R (red), G (green), and B (blue) independently .
Setting for each color is possible in 21 steps.
Changing Various Settings
Settings Chart
Details
is displayed to clearly indicate when the scene playing has various
Settings status
Initial settings
(factory settings )
ON
Display of operation
indications
Normal
When using a regular
(4: 3) TV.
ON
is indicated.
OFF
The screen saver will
not operate.
Blue Switchable
No display of
OFF
operation indications
Wide
When using a wide TV
(Not compatible with
menu display)
OFF
No indication
ON
The screen saver will
operate.
Page 61

Changing Various Settings
STOP
Class
PARENTAL
LEVEL
SOFT MENU
AUDIO
(Basic language)
SUBTITLE
(Basic subtitle language)
AUTO
Initial setting
Language setting
SUBT. OFF
(Subtitle Off)
ASPECT
QUICK TURN
Graphics
DIG.OUTPUT
(Digital output)
DOWN SAMP
(Down sampling)
Output setting
Item
Details
This function lets you prevent your children viewing unsuitable material.
You can use this handy function if the disc features recorded parental lock
coding. With parental lock discs, this function works by skipping violent or
other scenes you don’t want your children to see. For details, read the
disc’s instructions. Once the secret number has been set, the restricted
viewing level remains the same until the number is reset.
T ry not to forget the secret number. If you do, you must return to the initial
settings. (For detail, see the bottom of this page.)
This lets you select a desired language for menus on discs that have them
in multiple languages.
This lets you select and set the usual language for movies in the same way
as for subtitles. Even if you change the language during play, or change
discs, the language changes to the one set.
This lets you select and set the usual language for subtitles. Even if you
change the subtitle language during play, or change discs, the subtitle
language changes to the one set.
On
This sets basic language and basic subtitle language to the same
language beforehand. When the basic language and basic subtitle language
are not identical, if you switch "DISPLAY" OFF and "ASSIST" ON in the
subtitle menu, it's the same as switching Auto OFF . With Auto on, the
original language and subtitle language are automatically selected. When
the language and subtitle language are the same, subtitles are not displayed.
Language Selection may not operate in this way with certain discs.
¶ Y ou can select a language (see page 49) and select a subtitle language
(see page 50) part way through a movie.
Off Basic subtitle language and basic language are those selected.
The subtitle which is displayed by discs can be selected, when the subtitle is set to "OFF".
W. AUDIO : The selected audio language will be selected.
S. SUBTITLE : The selected subtitle language will be selected.
When watching wide mode software, this lets you adjust aspect ratio to suit your TV .
This shortens the time required to change from A to the B side, or from the
B to the A side when playing an LD. If you use this function, display of
remaining and total time are not possible.
You can select the graphics display position and graphics channel with CD
graphics discs.
Switching between audio output from this product’s optical digital output
jack or digital output (coaxial) PCM/∂ jack is possible. Dolby Digital (sound
system used at cinemas etc.) and Linear PCM (the same digital signal as
CDs) are the two standards for DVDs.
96 kHz: With PCM audio discs that have a sampling frequency of 96 kHz,
this assures high sound quality. However, when in the KARAOKE mode or
AUX INPUT mode, the sampling frequency is compressed to 48 kHz during
play. With discs that have a sampling frequency of 48 kHz, play is performed
with sampling frequency unchanged at 48 kHz.
48 kHz: During play, this compresses sampling frequency of 96 kHz discs
to 48 kHz. 48 kHz discs are played as they are at a sampling frequency of
48 kHz.
¶ Y ou can select the sampling frequency to match that of the audio signal
recorded on a disc. Simultaneous switching between Analog output/Digital
output is performed to match your selected sampling frequency.
¶ Some 96kHz DVDs are copy protected. With this kind of disc, no signal is
output from the digital output terminal.
Initial settings
(factory settings )
Level 8
English
English
English
ON
Wide
See how to set the graphics settings on
PCM/Dolby Digital
Automatically selects between
Dolby Digital and linear PCM to
match the audio signal.
This is when using an amp with
a Dolby Digital (AC-3) decoder.
96kHz
Settings status
Switchable
between 1–8
Selection possible
depend on the disc
Select one from 136
languages.
(See how to set the
language on the next page.)
Select one from 136
languages. (See how to
set the language on the
next page.)
W. AUDIOS. SUBTITLE
Pan&Scan
pages 46 – 47.
Dolby Digital and linear PCM
signals are output in line with
the linear PCM standard. This
is when using a regular amp
or Dolby Pro Logic amp.
Basic Operation
Karaoke OperationDetailed Operation Setting Set Up Other Information
OFF
Letterbox
ONOFF
PCM
48kHz
To return to the initial settings if they have been changed since you purchased the player, perform the following procedures.
If power to the player is ON, switch it OFF. While power is OFF, press the
button while pressing the
POWER
button.
All memorized settings are erased.
STANDBY/ON
Changing Various Settings
61
Page 62

Setting the Basic Language and Subtitle Language
Basic language
Change in order with
LANG SET
STOP
1
AUDIO
MAIN
2
SUBTITLE
SET UP
3
AUTO
4
SUBT.OFF
MENU ENTER
EXIT ENTER RETURN
AUDIO
English
2/136
and
the
buttons on the
remote control.
\
ENTER
With the remote
AUDIO
STOP
MAIN
en : English
SETUP
OSD
SETUP
HIGH LOW
05 14
CODE
MENU ENTER
EXIT ENTER RETURN
(1~26)
Language code chart
Language Language Input code Input code
code (upper) (lower)
control number
buttons, input the
appropriate upper
and lower language
code input numbers
as shown in the chart
below.
Basic subtitle language
LANG SET
STOP
1
AUDIO
MAIN
2
SUBTITLE
SET UP
3
AUTO
4
SUBT.OFF
MENU ENTER
EXIT ENTER RETURN
SUBTITLE
English
2/136
\
ENTER
SUBTITLE
STOP
MAIN
en : English
SETUP
OSD
SETUP
Some discs provide subtitles offering
explanations of scenes for those who are hard
of hearing. Switching "ASS.SUBTIT" ON assures
these subtitles are displayed from the
beginning.
Language Language Input code Input code
HIGH LOW
05 14
CODE
DISPLAY ON
ASS.SUBTIT OFF
MENU ENTER
EXIT ENTER RETURN
(1~26)
code (upper) (lower)
Press the remote control
and buttons to
make it flash, and then you
can switch indication
display ON or OFF with the
and buttons.
Japanese ja 10 01
English en 05 14
French fr 06 18
German de 04 05
Italian it 09 20
Spanish es 05 19
Dutch nl 14 12
Russian ru 18 21
Chinese zh 26 08
Korean ko 11 15
Greek el 05 12
Afar aa 01 01
Abkhazian ab 01 02
Afrikaans af 01 06
Amharic am 01 13
Arabic ar 01 18
Assamese as 01 19
Aymara ay 01 25
Azerbaijani az 01 26
Bashkir ba 02 01
Belorussian be 02 05
Bulgarian bg 02 07
Bihari bh 02 08
Bislama bl 02 09
Bengali, Bangla bn 02 14
Tibetan bo 02 15
Breton br 02 18
Catalan ca 03 01
Corsican co 03 15
Czech cs 03 19
Welsh cy 03 25
Danish da 04 01
Bhutani dz 04 26
Esperanto eo 05 15
Estonian et 05 20
Basque eu 05 21
Persian fa 06 01
Finnish fi 06 09
Fiji fj 06 10
Faroese fo 06 15
Frisian fy 06 25
Irish ga 07 01
62
Setting the Basic Language
and Subtitle Language
Page 63

Setting the Basic Language and Subtitle Language
Language Language Input code Input code
code (upper) (lower)
Scottish Gaelic gd 07 04
Galician gl 07 12
Guarani gn 07 14
Gujarati gu 07 21
Hausa ha 08 01
Hindi hi 08 09
Croatian hr 08 18
Hungarian hu 08 21
Armenian hy 08 25
Interlingua ia 09 01
Interlingue ie 09 05
Inupiak ik 09 11
Indonesian in 09 14
Icelandic is 09 19
Hebrew iw 09 23
Yiddish ji 10 09
Javanese jw 10 23
Georgian ka 11 01
Kazakh kk 11 11
Greenlandic kl 11 12
Cambodian km 11 13
Kannada kn 11 14
Kashmiri ks 11 19
Kurdish ku 11 21
Kirghiz ky 11 25
Latin la 12 01
Lingala ln 12 14
Laotian lo 12 15
Lithuanian lt 12 20
Latvian, Lettish lv 12 22
Malagasy mg 13 07
Maori mi 13 09
Macedonian mk 13 11
Malayalam ml 13 12
Mongolian mn 13 14
Moldavian mo 13 15
Marathi mr 13 18
Malay ms 13 19
Maltese mt 13 20
Burmese my 13 25
Nauru na 14 01
Nepali ne 14 05
Norwegian no 14 15
Occitan oc 15 03
(Afan) Oromo om 15 13
Oriya or 15 18
Panjabi pa 16 01
Language Language Input code Input code
code (upper) (lower)
Polish pl 16 12
Pashto, Pushto ps 16 19
Portuguese pt 16 20
Quechua qu 17 21
Rhaeto-Romance rm 18 13
Kirundi rn 18 14
Rumanian ro 18 15
Kinyarwanda rw 18 23
Sanskrit sa 19 01
Sindhi sd 19 04
Sango sg 19 07
Serbo-Croatian sh 19 08
Singhalese si 19 09
Slovak sk 19 11
Slovenian sl 19 12
Samoan sm 19 13
Shona sn 19 14
Somali so 19 15
Albanian sq 19 17
Serbian sr 19 18
Siswati ss 19 19
Sesotho st 19 20
Sundanese su 19 21
Swedish sv 19 22
Swahili sw 19 23
Tamil ta 20 01
Telugu te 20 05
Tajik tg 20 07
Thai th 20 08
Tigrinya ti 20 09
Turkmen tk 20 11
Tagalog tl 20 12
Setswana tn 20 14
Tongan to 20 15
Turkish tr 20 18
Tsonga ts 20 19
Tartar tt 20 20
Twi tw 20 23
Ukrainian uk 21 11
Urdu ur 21 18
Uzbek uz 21 26
Vietnamese vi 22 09
Volapük vo 22 15
Wolof wo 23 15
Xhosa xh 24 08
Yoruba yo 25 15
Zulu zu 26 21
Basic Operation
Karaoke OperationDetailed Operation Setting Set Up Other Information
Setting the Basic Language
and Subtitle Language
63
Page 64

6464
Page 65

Set Up
Connecting the Player
Connection example 1. To a TV with
video input.............................................................66
Connection example 2. To an amp with
Dolby Digital (AC-3) inputs ..................................67
Connection example 3. AV amp.............................. 68
Names and Functions
Front panel................................................................69
Basic Operation
Basic Operation
Karaoke OperationDetailed Operation Setting Set Up Other Information
Karaoke OperationDetailed Operation Setting Set Up Other Information
Rear panel.................................................................70
Display window........................................................71
Remote control.........................................................72
Other Information
Troubleshooting .......................................................73
Terms.........................................................................75
For Proper and Long Use ........................................77
Specifications ...........................................................78
Set Up
Other Information
65
65
Page 66

Connecting the Player
Note
Precautions when connecting the player
This product is compatible with the Copy Guard analog copy protect system. Some discs feature a copy
protect signal. If you connect this player to a TV via a VCR, and record this kind of disc and play back
the recording on the VCR, the Copy Guard system may prevent you from getting a normal picture.
Connect the DVD player either directly to the television or through an A/V amplifier.
Select the appropriate connection for your TV.
Connection example 1.
To a TV with
video input
When connecting a
cassette deck or
other component to
the external input
Audio cord
White
LR
Red
S Video
cable
INPUT
OUTPUT
AUDIO
VIDEO
L
R
If your TV has a video input, and it is
available for use, this is the easiest way
to hook up the player.
Follow the instructions in the TV's
(monitor TV's) User's Manual.
Connect like this when hooking up to
the external input jack for karaoke
entertainment with another component.
66
V
V
Yellow
Audio cord
Yellow
V
VIDEO
AUDIO
IN
IN
Monoral TV Stereo TV with
S video input terminal
Connecting the Player
Red
Yellow
White
V
VIDEOINLR
L
R
RR
White
Supplied video cord
L R
Red
AUDIO
IN
Stereo cassatte deck
S video
cable
S2 IN
OUT PUT
L
R
Connect either one of these.
}
White
R
Red
L
indicates the use of separately sold cords.
¶ Match jack colors (white, red, yellow) and plug colors when
connecting.
¶ Connect a TV's S Video input to this product's S2 Video output.
¶ Follow the instructions in the User's Manual of the TV (monitor TV)
you're connecting.
¶ When the TV has multiple video inputs, select the desired source
(Video 1, Video 2, etc.)
Finally,connect
to a wall outlet.
Page 67

Connection example 2.
AV amplifier or AV receiver
enabling Dolby Digital (AC-3)
To an amp with Dolby Digital
(AC-3) input
¶ Connect this player’s digital output PCM/∂ jack to the Dolby Digital input jack of an amplifier or a receiver with Dolby Digital
capability. Use coaxial digital output or optical digital output depending on the amplifier’s or receiver's inputs.
¶ Connect this player’s ∂RF output (for LD) jack to the Dolby Digital (AC-3) RF input jack on an amplifier or receiver with Dolby
Digital capability.
¶ Perform the settings in the “Digital output” section on page 70, making sure to select PCM/DOLBY DIGITAL. (When
shipped from factory, PCM/DOLBY DIGITAL is selected.)
¶ Digital output of LD analog audio is not possible, so also connect this players audio output jack and the amp audio input jack.
digital input and RF input in
the same function.
Note
indicates the use of separately sold cords.
Basic Operation
Karaoke OperationDetailed Operation Setting Set Up Other Information
Notes
Karaoke sound (mic sound, key control etc.) is not output as digital
sound. When using for karaoke,
◆ Be sure to connect the DVD player’s AUDIO OUT to the
amplifier’s AUDIO IN.
◆ Switch the amplifier’s SIGNAL SELECT setting to ANALOG.
(When SIGNAL SELECT is set to AUTO, because digital sound
is given priority, the karaoke function cannot be used.)
Some DVD format discs feature copy protect. With this kind of
disc, when a sampling frequency of 96 kHz is selected, no signal
is output from the digital output (see page 61).
When playing a disc with this player, switch the
function to the connected input jack on the player.
In the case of diagram above, select LD/SAT
terminals.
Connecting the Player
Other Information
67
Page 68

Connection example 3.
By connecting to a regular A V
amp or stereo amp, you can
AV amplifier
enjoy playback with improved
sound quality.
¶ Connect this player’s audio output jacks to an amp’ s CD, LD, AUX or other audio input jacks. (Do not connect to PHONO jacks.)
¶ Connect this player’s video output jack to the amplifier’s or receiver's video input jack.
¶ When connecting to a digital output, refer to page 70.
¶ When connecting to a component bearing the Pioneer Î mark.
If you use a commercially available cord with mini plugs (no resistance) to connect this player’s contr ol input jack to the control
output jack of the component bearing the Î mark, you can control the player as though it were a component in a system
(system control).
¶ If you connect for system control, you cannot operate the player directly by pointing the remote control at it and pressing
buttons.
¶ When controlling the unit as part of a system, be sure to connect to the amplifier with audio cord even if you are using only
digital components.(System control is not possible if you connect using only cables with mini plugs.)
¶ If your AV amplifier is a Dolby Pro Logic decoder, you can enjoy surround sound.
¶ For more details, refer to the connected component’s operating instructions.
When connecting to a digital output, refer to page 70.
Connect either
one of these.
Yellow
CONTROL
OUT
V
Supplied video cord
VIDEO
IN
AUDIO
IN
L
R
Yellow
V
White
L
R
Red
Red
Supplied
audio cord
LR
White
Cord with mini plugs (no resitance)
S video
cable
68
AV amplifier
Connecting the Player
S2
IN
Note
indicates the use of separately sold cords.
Page 69

Names and Functions
Front panel See page (P. ) for instructions.
NOISE REDUCTION
button (P.14)
GUIDE VOCAL button
and indicator (P.31,32)
ONE-TOUCH KARAOKE button
and indicator (P.33)
VOCAL PARTNER button
and indicator (P.33)
SCORING SYSTEM
Digit buttons (P.28,34,36)
Disc Side A/B
button (P.12)
Disc Side A/B
indicator
STANDBY
indicator
DISC SIDE
A / B
A B
STANDBY
POWER
STANDBY/ON
button (P.34,36)
KARAOKE
SINGLE
MODE
PLAY
SCORING
SYSTEM
VOCAL
PARTNER
ONE-TOUCH
KARAOKE
GUIDE
VIDEO CD FUNCTION DVD FUNCTION
VOCAL
V-NR PBC
GUIDE VOCAL
MAXMIN
Basic Operation
PLAYBACK CONTROL
button (P.14)
ONE CHORUS button (P.39)
HI-LITE MEDLEY button (P.37)
GUIDE MELODY
button (P.39)
DVD/CD/Video CD
OPEN/CLOSE
button (P.13)
LD OPEN/CLOSE
button (P.12)
STOP
button
PAUSE
button
CHORUS
ONE
GUIDE
HI-LITE
MELODY
MEDLEY
STOP PLAYPAUSE
OPEN/CLOSE
CD / VIDEO CD
PLAY
LOW HIGHKEY CONTROL
LaserDisk
CONTROL
MIC
MIC 2MIC 1
LASER DBC
ECHO
MAXMIN
MIC 2MIC 1
MAXMINMAXMIN
LD-G CD-G
button
Key
control
buttons
(P.30)
Karaoke OperationDetailed Operation Setting Set Up Other Information
POWER switch (P.12)
KARAOKE MODE
button (P.12)
SINGLE PLAY
button (P.29)
DVD/CD/
Video CD
disc table
(P.13)
LD disc table (P.12)
Display window
(P.71)
Remote sensor
(P.72)
Mic 1 and Mic 2 volume
level knobs (P.28,29)
GUIDE VOCAL volume
level knobs and
Digital Echo knob
(P.30)
indicator (P.31, 32 )
Disc illumination
This light is off when playing discs other than DVDs.
Names and Functions
Mic 1 , Mic 2 and Mic
control jacks (P.28,30)
Other Information
69
Page 70

Names and Functions
Rear panel
Digital Output Jack (Coaxial•Optical)
This is used for output of the digital audio signal
recorded on DVDs, CDs, Video CDs and digital audio
LDs.
Depending on the components connect, noise may
be generated.
Switching between PCM/∂ and PCM output is
possible. If your amp is not Dolby Digital(AC-3)
compatible, you should switch to PCM output.
(Refer to the chart on the right).
Performing settings
1 Turn amp volume down (to MIN).
2 Load a DVD disc and set to the Stop mode, press the
on the remote control.
¶ Main menu is displayed.
3 Select the OUTPUT setting with the button on the remote
control.
4 Press digit button on the remote control, and select
DIG.OUTPUT .
5 Press digit button on the remote control, and select PCM .
Dolby Digital (AC-3)
compatible amp
MENU
button
Connect to the PCM/∂ jack, and select PCM from a menu.
Connect to the optical jack, and select PCM from the menu.
Connect to the PCM/∂ jack, and select PCM/DOLBY DIGITAL from the menu.
Connect to the optical jack, and select PCM/DOLBY DIGITAL from the menu.
Note
Output of karaoke sound (sound from mics, Key control etc.) is not
digital, so be sure to connect this player's audio output jack to your
amp's audio input jack (AUDIO IN).
Tip
When switched for PCM output.... For digital output to a regular amp
When switched for PCM/DOLBY DIGITAL output
that is not Dolby Digital(AC-3)
compatible, even audio recorded
in Dolby Digital is converted to
PCM output.
.... PCM audio is output as
PCM, and Dolby Digital
audio is output as Dolby
Digital.
Digital Output
Audio digital output. Switchable
between PCM/∂ and PCM
output.
External
input jack
For connecting
external karaoke
sources such as a
cassette deck or MD
player.
S2 Video
output jacks
Video
output
jacks
Optical Digital Output
Audio optical digital output. Switchable
between PCM/∂ and PCM output.
AC-3 RF output (for LDs)
Control output jack
Control input jack
Audio output jacks
There are two sets of outputs, 1 and 2, which you
can simultaneously connect. Connect 1 to the TV,
and 2 to your AV amp.
Power cord
connection terminal
70
Using the attenuator switch
OFF ON OFF
Usually set to the OFF
switch.
Names and Functions
=
ON
When enjoying karaoke,
switch it ON if the sound
is distorted.
Page 71

Names and Functions
Display window
Indicates GUI operation
is being performed.
This lights during play of
a disc with a sampling
frequency of 96 kHz.
Indicates that title is
being displayed.
Indicates playback mode,
title, type of disc, etc. as
shown below.
Sample Display
:Laser Disc
:Compact disc
:CD video
:DVD
:Video CD
:Disc table is opening or is open
:Disc table is closing
:Program playback
:Repeat playback of the track
:Start point of 2 point repeat playback
:2 point repeat playback
:Repeat playback of the title
Indicates location for
Last Memory is being
recorded in memory.
Indicates
Multi-Angle
playback is in
progress.
Indicates that
chapter/track is
being displayed.
Indicates remaining
playback time.
Indicates Condition Memory
operation is being performed.
Indicates Dolby
Digital playback.
PLAY
STOP
PAUSE
TITLE
Basic Operation
Indicates total
playback time of side.
Karaoke OperationDetailed Operation Setting Set Up Other Information
:Playback
:Stop
:Pause
:No disc
:Power is turned off
:Menu mode
:Title menu
:Set-up menu
:AUX function
:Condition Memory
:Last Memory
:Repeat playback of the chapter
:Both sides of LD repeat playback
:Stereo
:During Video CD PBC play
Names and Functions
Other Information
71
Page 72
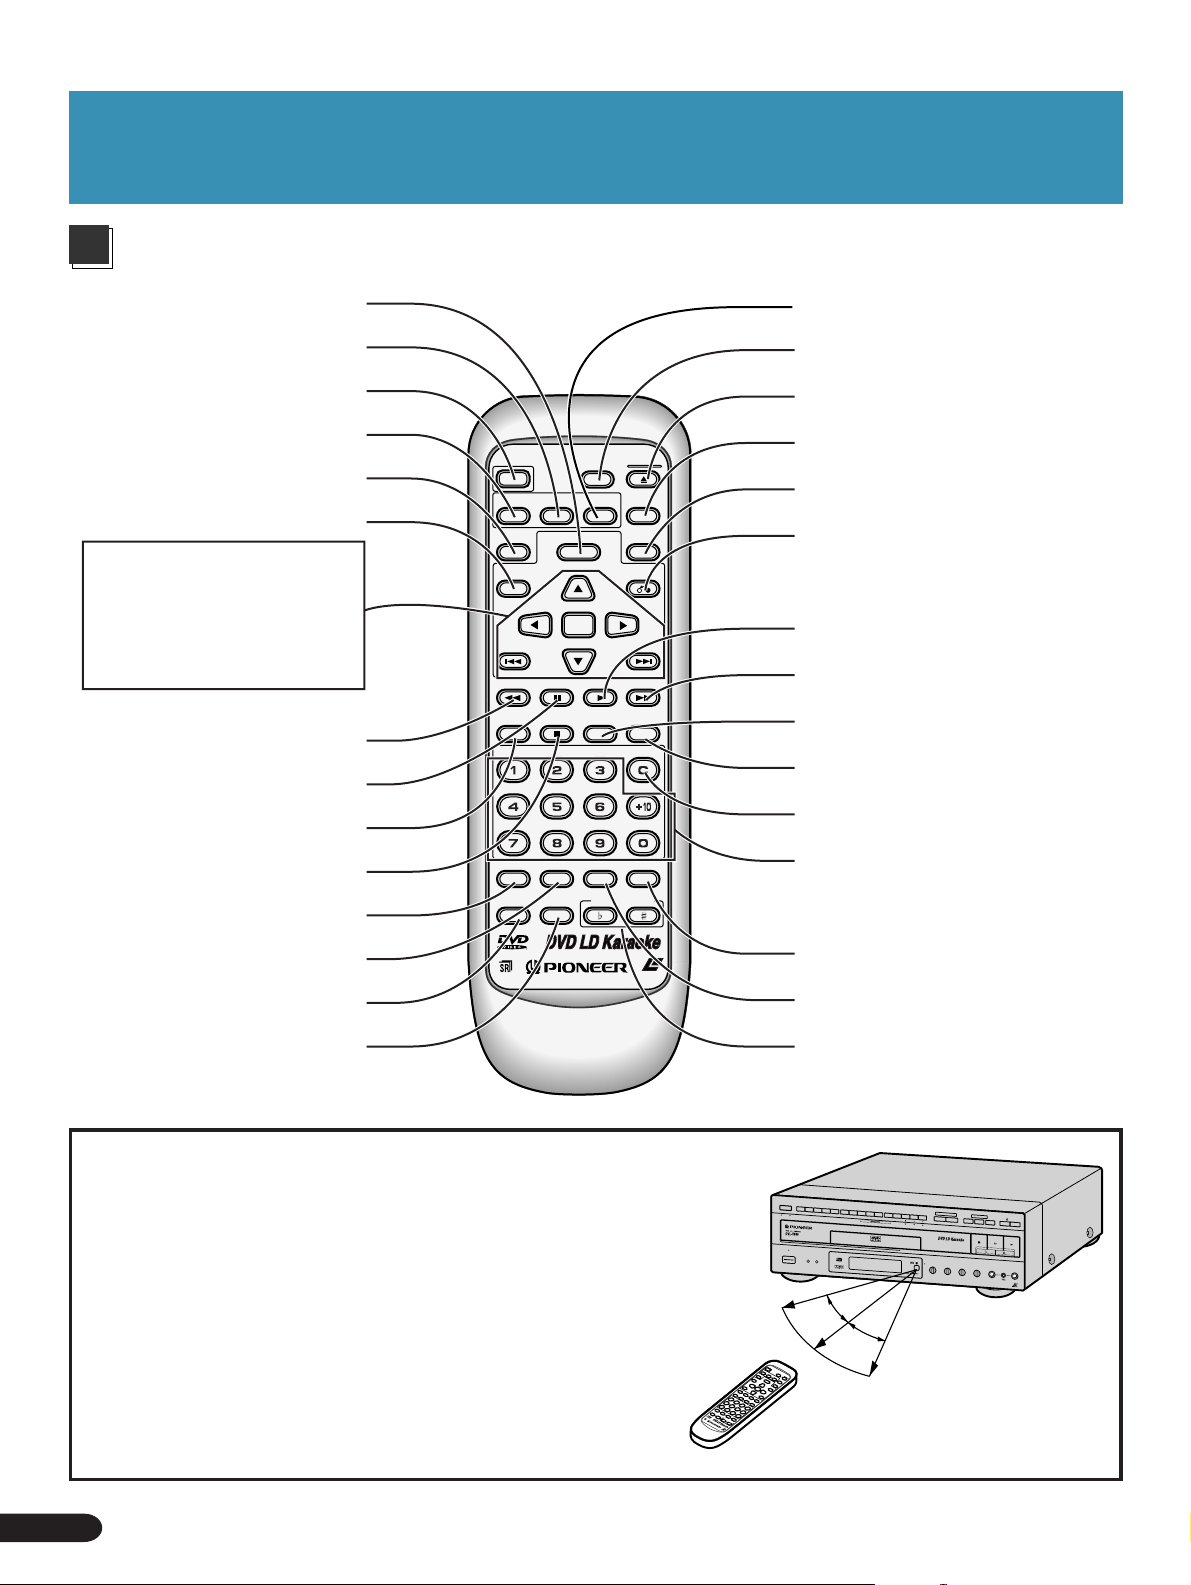
Names and Functions
Remote control
Menu button (MENU)
Subtitles button (SUBTITLE)
(P.21, 50)
Power button (POWER)
Audio switching button (AUDIO)
(P.49)
Last Memory button
(LAST MEMORY) (P.18)
Title button (TITLE) (P.22, 23)
Menu operation buttons
Direction button (5,∞,2,3)
Enter button (ENTER)
Previous button (PREV 4)
Next button (NEXT¢)
Fast reverse button (REV 1)
Pause button (PAUSE 8)(P.25)
Chapter/time button (CHP/TIME)
(P.23)
Stop button (STOP 7)
Guide Melody button (MELODY)
(P.39)
Mode button (MODE) (P.44, 45)
Guide Vocal button (GUIDE VOCAL)
(P.31, P32)
Vocal Partner button
(VOCAL PARTNER) (P.33)
POWER
AUDIO
LAST
MEMORY
TITLE
PREV
REV FWD
CHP/TIME
MELODY
GUIDE
VOCAL
SUBTITLE
PAUSE
MODE
VOCAL
PARTNER
MENU
ENTER
DISC SIDE
A / B
ANGLE
PLAY
CONDITION
KEY CONTROL
OPEN/
CLOSE
DISPLAY
PLAYBACK
CONTROL
RETURN
NEXT
REPEATREPEATSTOP
A–B
CLEAR
PROGRAM
LASER DBC
Angle button (ANGLE) (P.50)
Disk side A/B button (DISK SIDE)
(P.12)
Open/close button (OPEN/CLOSE0)
Display button (DISPLAY) (P.51)
Playback control button
(PLAYBACK CONTROL) (P.14)
Return button (RETURN)
Play button (PLAY 3)
Forward button (FWD ¡)
Repeat button (REPEAT) (P.24)
Repeat A-B button (REPEAT A-B)
(P.24)
Clear button (CLEAR)
Digit buttons (1-9, 0, +10)
Program button (PROGRAM)
(P.38)
Condition button (CONDITION)
(P.48)
Key control buttons (I, i)(P.30)
72
Remote control operation
When operating the remote control, point it at the remote sensor
located on the player’s front panel. The remote control can be
used up to 23 feet (7 m) from the player and within a 30° angle
each side of the sensor.
¶ Exposing the remote sensor to direct sunlight or strong light
may cause faulty operation.
¶ If the CONTROL IN jack on the player’s rear panel is connected
to another component, point the remote control at that
component for operation. Operation is not possible when
pointed at this player. (Refer to page 68.)
¶ When using the remote control, first press the POWER switch
to turn on the player’s power.
Names and Functions
7m
30˚
30˚
(23 feet)
Page 73

Troubleshooting
Incorrect operations are often mistaken for trouble and malfunctions. If you think that there is something wrong with this component,
check the points below. Sometimes the trouble may lie in another component. Inspect the other components and electrical appliances
being used. If the trouble cannot be rectified even after exercising the checks listed below, ask your nearest PIONEER authorized
service center or your dealer to carry out repair work.
Symptom Possible causes Reference page
Basic Operation
Operation ¶ Edges of the disc are dirty.
Remote control ¶ The rear panel control input jack on the player is being
Audio ¶ Plugs are not pushed in sufficiently, or plugs are
1. The disc table doesn’t stay in even
when it is closed.
2. Playback is not possible.
3. The picture is unclear during DVD play.
4. If I record a DVD on a VCR and play it
back, or play a DVD through a VCR,
the picture is unclear.
5. Even if you play a Video CD with
Playback Control, there's no menu
displayed. Detailed still images are not
possible.
6. The mark appears on screen.
7. The picture stops, and operation
buttons do not function.
8. The remote control doesn’t operate.
9. TV and other components operate
incorrectly.
10.There’s no sound. Sound is distorted.
11.DVD, Video CD volume is low.
12.DVD sound volume level is low.
¶ The disc is not correctly loaded in the disc table.
¶ The region number is different.
¶ There’s condensation inside the player.
¶ The TV system setting is not compatible with the
application region.
¶ This player is compatible with copy guard analog copy
protect system.
Some discs may feature a copy protect signal. Playing this
kind of disc with some TVs may result in horizontal lines
in part of the picture and other picture defects, but this
does not mean the player is malfunctioning.
¶ This player is compatible with copy guard analog copy
protect system.
Some discs may feature a copy protect signal. If you record
this kind of disc on a VCR and play it back, or play this kind
of disc through a VCR, the copy guard system prevents
normal playback.
¶ Playback Control is switched OFF.
¶ The selected operation is not possible with that disc.
¶ Press the STOP 7 button, and then press PLAY again.
used.
¶ You are too far from the player. Or the angle between the
remote control and the remote control reception window
is too large.
¶ The remote control’s batteries are dead.
¶ Some TVs with wireless remote capability operate
incorrectly with this player’s remote control.
disconnected.
¶ Connection plugs and jacks are dirty.
¶ Audio cable connection is incorrect.
¶ Stereo amp operation is incorrect.
(In particular, check that input selection for CD, LD etc. is
correct.)
The player is connected to a stereo amp’ s PHONE input jack.
Play
is paused.
¶ Digital output is set for 96kHz. Digital output may not be
possible with certain discs.
In the KARAOKE mode,
volume level is low.
¶ DVD sound volume level may sound lower than other
discs, but this is due to the disc’s recording system, and
is not due to the player malfunctioning.
DVD,
CD and Video CD analog sound
P.9
P.12, 13
P.76
P.9
P.10
P.66
P.66
P.14
P.68
P.72
P.66 – 68
P.13
Karaoke OperationDetailed Operation Setting Set Up Other Information
Troubleshooting
73
Page 74

Troubleshooting
Symptom Possible causes Reference page
Karaoke operations ¶ The GUIDE VOCAL volume knob is set to a low level.
13.GUIDE VOCAL volume level is low.
14.Key control and Once more are not
possible with a mic featuring controls.
15.Even when playing a multiplex disc,
the singer's voice cannot be heard.
16.There's howling.
17.The HI-LITE MEDLEY and ONE
CHORUS functions do not operate.
¶ The mic is not connected to the Mic control jack.
¶ ONE-TOUCH KARAOKE is ON.
¶ The GUIDE VOCAL volume knob is set to a low level.
¶ The mic is too close to the speakers.
¶ These are DVD karaoke disc functions only. Y ou can enjoy
them with discs bearing the HI-LITE MEDLEY and
ONE CHORUS marks. (These functions do not operate
with CDs, Video CDs and other discs)
18."PICK A KARAOKE SONG" is
automatically displayed.
19.Key control and other karaoke related
buttons do not operate.
20.Reserving songs is not possible with
a DVD.
21.Song reservation is not possible with
a Video CD with Playback Control.
¶ The KARAOKE MODE is ON.
¶ When a menu is open during play, remote control buttons
related to karaoke operation do not function. (Only song
selection and reservation buttons operate)
¶ The DVD playing has a Menu function.
¶ Playback Control is switched OFF.
P.31, 32
P.30
P.33
P.29
P.37, 39
P.29
P.30
P.38
P.38
22.Karaoke operations aren't possible.
22.There's no sound from the mic.
¶ The selected mode is NORMAL. Press the KARAOKE
MODE button on the main unit to select the KARAOKE
MODE.
¶ The audio output jack is not connected to an amp with a
digital input or the amp's SIGNAL SELECT setting is
switched to AUTO.
P.28
P.67
Caution:
Abnormal functioning of this unit may be caused by static electricity, or other external interference. To restore normal operation,
unplug the AC power cord and then plug it in again.
74
Troubleshooting
Page 75

Terms
Dolby Digital (AC-3)*
Dolby Digital (AC-3) delivers up to 5.1 channels of discrete
multi-channel audio. This is the same system that is used for
surround sound in Dolby Digital equipped movie theaters.
DOLBY
T
DIG
AL
I
For DVD discs, the digital output PCM/∂ jack (coaxial or
optical) must be connected to the amplifier or processor’s
digital input AC-3/PCM jack.
For LD discs, the AC-3 RF OUT (LD) jack must be connected
to the amplifier’s AC-3 RF IN jack.
PCM
PCM stands for Pulse Code Modulation and is digital audio.
The digital audio of CD, LD or DVD discs is PCM.
Title number
T itle numbers refer to titles of movies etc. As DVD discs have
a large capacity, many movies can be recorded on one disc.
For example, when 3 different movies are recorded on a disc,
they are divided into TITLE 1, TITLE 2 and TITLE 3. Playback
can be operated by selecting the title number.
Chapter number
Chapter numbers are the numbers assigned to sections on a
title of the disc, similar to chapters in a book. If the disc includes
these numbers, you can locate the section you want very
quickly using chapter search and other functions.
¶ Some discs may not include chapter numbers.
or
DOLBY SURROUND
AC–3 D I G I T A L
LD(Laserdisc)
Depending on the signal recording method used, there are
two types of Laserdiscs; standard discs (CAV) and extended
playing discs (CLV).
CAV
CAV disc jackets or labels are marked with “Standard disc/
CAV” or “Standard Play”.
CLV
CLV disc jackets or labels are marked with “Extended playing
disc/CLV” or “Extended Play”.
Laserdiscs with digital audio
These type of discs are recorded with digital audio signals in
addition to the analog audio signals. This allows you to enjoy
high quality digital sound along with the laser disc’ s high quality
picture.
¬ or :
Multi audio discs with digital sound
These type of discs are recorded with different types of digital
audio and analog audio content.
¬ and MUL TI AUDIO or k
Digital audio or analog audio can be enjoyed by switching
between them.
Basic Operation
Karaoke OperationDetailed Operation Setting Set Up Other Information
Frame number
This is the number recorded in each frame on a standard CA V
disc. Y ou can use frame numbers for such operations as Frame
Search for a desired frame.
Time number
The time number is the playback lapse time of a title in the
disc from its beginning. The scene you want to locate can be
searched for with the time number using the time number
function etc.
Surround
This is a surround effect for karaoke fun with a more expansive
sound and added atmosphere.
Echo
This provides an echo effect.
* Manufactured under license from Dolby Laboratories.
”Dolby”,”AC-3” and the double-D symbol are trademarks of
Dolby Laboratories. Confidential Unpublished Works.© 19921997 Dolby Laboratories,Inc. All rights reserved.
Graphics Discs
Besides video and audio signals, discs feature recorded
subcode data. This data includes recorded graphics
information.
CD graphics discs: Feature information such as karaoke lyrics
and graphics (pictures) for more karaoke fun.
The mark on the right is displayed on the
disc jacket or on the disc label.
TOC
TOC (Table Of Contents) information is data other than audio
signal data, recorded at the beginning of a disc. As the name
implies, it’ s like the list of contents in a book, with information
such as the number of songs and playback time.
¶ Some LDs also feature a TOC.
¶ LDs and CDVs with a TOC belong to the “optical digital
audio video disc system” family of discs.
GRAPHICS
Set Up
Terms
75
Page 76

Terms
Video CDs
These discs provide MD quality sound, and VHS quality video
images. Thanks to MPEG1, the digital signal compression
system, a single disc provides up to 74 minutes of continuous
digital audio and video. There are also Video CDs with Playback
Control (PBC) that let you select playback of desired scenes
using menus, and view still images.
Playback Control (PBC)
This refers to signals recorded on a Video CD (Version 2.0)
enabling playback control.
You can use menus recorded on discs with PBC for easy,
interactive Search for desired scenes, and playback.
You can also enjoy viewing high-resolution/standard resolution
still images.
High-resolution images
If the high-resolution still images are recorded in the Video CD,
you can enjoy viewing them with four times the resolution of
moving images.
Screen saver
When a still picture is displayed for a long period a phenomena
know as “screen burn” may occur.
To avoid this, computers are equipped with screen savers.
Although reducing the brightness of the screen will produce
the same effect, the screen saver on a computer automatically
darkens the screen or produces a moving image that prevents
strong light rays (bright colors) from being able to concentrate
in one spot on the screen.
Multi-angle
When you watch regular TV programs you are watching the
image filmed through the TV camera. Because of this the picture
is displayed on your TV from the view point of the TV camera’ s
position. In a TV studio the image is filmed by many cameras at
the same time, and one of those images is selected by the
program director and transmitted to your household TV. If all
the filmed images were transmitted to your TV you would be
able to select the camera image you want. Some DVD discs
are recorded with the angles of all camera’s used for filming
and these can be selected using this player. These types of
discs are called multi-angle discs.
Aspect ratio
Aspect ratio refers to the length to height ratio of TV screens.
The ratio of a normal TV is 4:3, while the ratio of a Hi-vision TV
or wide TV is 16:9. This allows you to enjoy a picture with a
wider perspective.
Parental level
This function was suggested by parents. Parental level
restrictions are restrictions incorporated into scenes that parents
do not wish their children to view.
Condition memory
“Condition” refers to the various mode settings etc. On this
player, various conditions, such as those set during playback
etc. can be memorized. This function allows you to play back
the same disc at any time without having to reset the condition
settings.
Subtitle
Subtitles are language titles superimposed on movies etc. Up
to 32 different subtitle languages can be recorded on a DVD
disc. The subtitle function can be used to select the language
of your choice.
Regional restriction codes (region number)
Regional restriction codes are built-in to DVD players and DVD
discs for each sales region. If the regional code of the DVD
player does not match one of the regional codes of the DVD
disc, playback will not be possible. At this time an indicator
will appear on the screen.
The region number is described on the rear panel.
Playable
Player Disc
1
2
4
3
1
1
2
4
Optical digital output
Normally, audio is converted to an electric signal and
transmitted through an electric wire from the player to the
amplifier etc. Changing this signal to a digital signal and
transmitting it through an optical fibre cable is called optical
digital output. (Optical digital input is the side receiving the
signal such as the amplifier etc.)
¶ PCM/∂: Choose this setting when connecting to the Dolby
Digital (AC-3) optical digital input of an amp equipped with a
Dolby Digital (AC-3) decoder.
¶ PCM: Choose this setting when connecting to the optical
digital input of a regular amp, a Dolby Pro Logic amp etc.
Dynamic range
Dynamic range refers to the difference between the maximum
conversion level for transmission/conversion of distortion free
signals and noise and/or the minimum level limited by the
equipment’s characteristics. Decibel units (dB) are used.
Unplayable
Player Disc
2
4
1
2
3
5
3
76
Terms
Page 77

For Proper and Long Use
7
DO NOT MOVE THE UNIT DURING PLAYBACK
During playback, the disc rotates at high speed. Do NOT lift
or move the unit during playback. Doing so may damage the
disc.
7 WHEN MOVING THE UNIT
When changing places of installation or packing the unit for
moving,
table to its original position in the player. Then, switch the
power OFF .
goes off, then disconnect the power cord. Leaving a disc
loaded may result in damage when the unit is moved.
be sure to remove the disc and return the disc
Check that the “OFF” indication on the display
7 INSTALLATION PLACE
¶ Select a stable place to the side of a TV set or stereo
system to be connected to the unit.
¶ When using the unit with a stereo system, install the
speakers a little bit away from the TV.
¶ Do NOT install the unit on top of a TV or color monitor.
Install the unit away from equipment that may be affected
by magnetism, such as a cassette deck.
7 CAUTION: WHEN PLACING THE
UNIT IN A STEREO RACK WITH
GLASS DOORS
Be sure there is ample space between the unit and the
glass doors when opening the disc table using the remote
control.
If the disc table opens against strong resistance, such as
a closed glass door, damage to the unit may result.
7 SWITCH POWER OFF WHEN NOT US-
ING THE UNIT
Depending on the strength of the TV or radio broadcast signal,
having the TV or radio ON while power to the unit is ON may
result in stripes on the TV screen or noise. However, this is
not a malfunction of this unit or the TV or radio. In such a
case, switch power to the unit OFF.
Basic Operation
Karaoke OperationDetailed Operation Setting Set Up Other Information
7 A VOID INSTALLING IN A PLACE THAT IS:
¶ Exposed to direct sunlight
¶ Exposed to humidity or where ventilation is poor
¶ Extremely hot or cold
¶ Exposed to vibration
¶ Exposed to dust
¶ Exposed to oily smoke, steam or heat (for example, a
kitchen)
7 DO NOT PLACE AN OBJECT ON TOP
Do NOT place an object on the unit.
7 DO NOT BLOCK VENTS
Do NOT use the player on top of a long-fibered carpet, bed or
sofa, and do not cover it with a cloth etc. This will prevent
heat radiation and could result in damage.
7 AVOID HEAT
Do NOT place the unit on equipment generating heat, such
as an amplifier.
When installing the unit in a rack, place it on the lowest shelf
possible (however, not where it is exposed to dust) and
separated from the amplifier to avoid the heat generated by
the amplifier or other audio equipment.
When the DVD/LD player's audio output is connected to a
TV , VTR, or other component's audio input, excessively high
signal input from a mic when enjoying karaoke may result in
distortion and other adverse effects. If this happens, turn mic
volume down, or switch the Attenuator switch on the rear of
the player ON. (See P.70.)
POWER-CORD CAUTION
Handle the power cord by the plug. Do not pull out the plug
by tugging the cord and never touch the power cord when
your hands are wet as this could cause a short circuit or
electric shock. Do not place the unit, a piece of furniture,
etc., on the power cord, or pinch the cord. Never make a
knot in the cord or tie it with other cords. The power cords
should be routed in such a way that they are not likely to be
stepped on. A damaged power cord can cause a fire or give
you an electrical shock. Check the power cord once in a while.
When you find it damaged, ask your nearest PIONEER
authorized service center or your dealer for a replacement.
Set Up
For Proper and Long Use
77
Page 78

Specifications
General
System......................... DVD system, LaserVision DIsc system and
Compact Disc digital audio system
Laser ............... Semiconductor laser: wavelength 650 nm, 780 nm
Power requirements: .................................................... 120V / 60Hz
Power consumption................................................................. 57 W
Weight ............................................................... 8.6 kg (18 lb 15 oz)
Dimensions ....................................420 (W) x 466 (D) x 146 (H) mm
(16-9⁄16 (W) x 18-3⁄16 (D) x 5-3⁄4 (H) in.)
(Not including protruding cables, etc.)
Operating temperature ............................................. +5°C to +35°C
(+41°F to +95°F)
Operating humidity ........................... 5% to 85% (no condensation)
S2-Video Output level
Y (luminance) - Output level ........................................1 Vp-p (75 Ω)
C (color) - Output level ......................................... 286 mVp-p (75 Ω)
Jacks ......................................................................... S-VIDEO jacks
Video Output (2 pairs)
Output level ...... 1 Vp-p (75 Ω when loaded, synchronous negative)
Jacks ................................................................................ RCA jacks
Audio Output (2 pairs)
Output level
During analog audio output.......................200 mVrms (1 kHz, 40%)
During digital audio output.................... 200 mVrms (1 kHz, –20 dB)
Number of channels .......................................................................2
Jacks ................................................................................ RCA jacks
Digital audio characteristics
Frequency response 4 Hz to 22 kHz (DVD fs: 48 kHz)
4 Hz to 20 kHz (LD, CD)
S/N ratio 115 dB (EIAJ)
Dynamic range 97 dB (EIAJ)
Wow and flutter Limit of measurement
(±0.001% W. PEAK) or lower (EIAJ)
Other Terminals
Optical digital output (PCM/∂(optical)) .............. Optical digital jack
Coaxial digital output (PCM/∂)......................................... RCA jack
AC-3 RF output (for LD) ..................................................... RCA jack
CONTROL IN ............................................................ Minijack (3.5ø)
CONTROL OUT ........................................................ Minijack (3.5ø)
AUX Input .......................................................................... RCA jack
Accessories
Remote control unit ........................................................................1
AA/R6P dry cell batteries ................................................................2
Audio cord...................................................................................... 1
Video cord ...................................................................................... 1
Power cord .................................................................................... 1
Warranty card................................................................................. 2
Operating Instructions ....................................................................1
NOTE:
The specifications and design of this product are subject to change
without notice, due to improvement.
Parental Lock Secret Number
¶ Make a record of your secret number in case you forget it.
78
Specifications
Published by Pioneer Electronic Corporation.
Copyright 1998 Pioneer Electronic Corporation.
All rights reserved.
Page 79

Basic Operation
Karaoke OperationDetailed Operation Setting Set Up Other Information
79
Page 80

Nous vous remercions pour cet achat d'un produit Pioneer.
Nous vous demandos de lire soigneusement ce mode
d'emploi;vous serez ainsi à même de faire fonctionner
l'appareil correctement. Aprés avoir bien lu le mode d'emploi,
le ranger dans un endroit sûr pour pouvoir s'y référ
ultérieurement.
¶ Cet appareil n'a pas ètè conçu pour un usage commercial.
Pour "Table des
matières",
reportez-vous à la
page 82-83.
80
DISC SIDE
A / B
A B
STANDBY
POWER
STANDBY/ON
KARAOKE
GUIDE
VOCAL
SCORING
ONE-TOUCH
VIDEO CD FUNCTION DVD FUNCTION
VOCAL
PARTNER
SYSTEM
KARAOKE
V-NR PBC
SINGLE
MODE
PLAY
GUIDE VOCAL
MAXMIN
ONE
HI-LITE
CHORUS
MEDLEY
STOP PLAYPAUSE
LOW HIGHKEY CONTROL
ECHO
MIC 2MIC 1
LD-G CD-G
MAXMINMAXMIN
MAXMIN
GUIDE
MELODY
LaserDisk
CD / VIDEO CD
MIC
CONTROL
OPEN/CLOSE
MIC 2MIC 1
LASER DBC
& Reportez-vous tout d’abord à la section “Avant d’utiliser
l’appareil” (page 84) puis à la section “Raccordements
de l’appareil” (pages 142 à 144).
& Pour les opérations de base concernant la lecture,
reportez-vous aux pages 88 à 93.
& Pour les functions de Karaoké, reportez-vous à la page
104-105.
Page 81

Ce que vous pouvez faire
NOTE
Cette fonction
attribue une note
chiffrée à votre
manière de chanter.
Dolby Digital*
Relier l’appareil à un
amplificateur et
processeur d’ambiance
pourvu de “5.1” voies de
manière à profiter des
possibilités offertes par
Dolby Digital.
Interface graphique
Utiliser la télécommande pour
définir les conditions de
fonctionnement en vous servant de
l’interface graphique utilisateur.
Même si le disque, lui, n’affiche
aucun menu, vous pouvez
employer l’interface graphique et
les menus affichés par le lecteur.
Lecture enchaînée des deux faces du LD
Vous pouvez regarder un film sans
interruption due au passage de la face A à la
face B.
Face A
(P.110)
100
(P.137)
(P.129)
MAIN
STOP
1
TITLE MENU
2
MENU
SETUP
3
INITIAL
4
OUTPUT
MENU ENTER
EXIT ENTER RETURN
Face B
(P.88)
*
Arrêt sur image*
Utiliser l’un des ces trois effets
spéciaux.
Répétition de la lecture
Employer l’une des nombreuses
possibilités de
répétition qui
s’offrent à vous.
Format d’affichage*
Choisir le format d’affichage qui vous semble
le plus naturel: normal, allongé, large
Compatibilité VIDEO CD
Regarder un disque
VIDEO CD (version 2.0) et
utiliser le système “Play
Back Control”. Deux
types de lecture sont
possibles selon le disque.
(P.101)
*
(P.100)
(P.118)
(P.90, P.96)
Choix de la langue de sous-titres
Choisir la langue dans laquelle
doivent être affichés les sous-titre.
Angle de prise de vues
Choisir l’angle de prise de
vues de la scène.
*
Choix de la langue
Choisir la langue des dialogues lorsque le
disque porte une piste son multivoie.
HELLO
AUDIO : 1 English AUDIO : 2 Spanish
HOLA
Restriction parentale
Définir le niveau
des oeuvres que
vos enfants sont
autorisés à voir.
(P.126)
(P.125)
*
*
(P.137)
*
(P.126)
Reprise de la dernière scène
*
(P.94)
Arrêter la lecture d’un disque et la reprendre
ultérieurement à partir de la même scène.
Mode Cinéma et mode Dessin animé
(P.120)
Choisir les conditions de fonctionnement pour
que les images des films ou des dessins
animés soient aussi bonnes que possible.
MODE
CINEMA ANIMATION STANDARD
Cet appareil fait appel à divers circuits et principes destinés à interdire la piraterie des oeuvres
protégées par des droits d’auteurs, circuits et principes qui sont couverts aux Etats-Unis soit par
des brevets détenus par Macrovision Corporation et d’autres sociétés, soit par d’autres formes de
propriété intellectuelle appartenant également à Macrovision et à d’autres sociétés. L ’utilisation de
la technologie visant à la protection des droits d’auteur doit être autorisée par Macrovision Corporation,
et doit être limitée à des fins domestiques, ou similaires, sauf accord préalable de Macrovision
Corporation. La rétro-technique et le désassemblage sont proscrits.
Démonstration à la mise sous tension
Si vous mettez en service la démonstration à la mise sous
tension, vous pouvez profiter de nombreuses indications
variées.
Pour mettre la démonstration en service à la mise sous tension,
appuyez sur l’interrupteur d’alimentation tout en maintenant
la pression d’un doigt sur la touche HI-LITE MEDLEY. Appuyez
sur une touche quelconque pour arrêter la démonstration.
Mémoire de fonctionnement
Définir les conditions de lecture des DVD que
vous regardez fréquemment, les mettre en
mémoire et les rappeler le moment venu.
• Format d’affichage
• Mode Cinéma ou mode Dessin animé
• Sous-titrage
• Langue parlée
• Emplacement d’affichage
(P.124)
* Cette possibilité n’est pas
offerte par tous les disques.
Ce que vous pouvez faire
81
Page 82

Disques concernés
DVD CD LD
VIDEO CD
Table des matières
Ce que vous pouvez faire 81
Table des matières 82
Avant d'utiliser l'appareil 84
Assures-vous de la présence des accessoires 84
Mettez en place des piles 84
Précaution avant utilisation 85
Disques compatibles avec cet appareil 86
Opérations de base 88– 94
Lecture d'un LD 88 
Lecture d'un DVD, CD ou VIDEO CD sans menu(PBC) 89 ¶¶ 
Lecture des VIDEO CD(portant un signal PBC) 90 
Saut dans un sens ou dans l'autre des chapitres ou des plages musicals
Arrêt de la lecture et mise en veille de l'appareil 93 ¶¶¶¶
Reprise de la lecutre à partir d;un point d'arrêt 94 ¶¶¶
Fonctionnement détaillé 96– 101
Commande de la lecture à partir d'un menu 96 ¶¶
Lecture d’un CD “graphiques” 97 
Recherche d’une scène ou d’une plage musicale données
Répétition de la lecture 100 ¶¶¶¶
Arrêt sur image 101 ¶¶¶
Fonctionnement Karaoké 104– 115
Plaisir de la pratique du karaoké 104 ¶¶¶¶
SINGLE PLAY 105 ¶¶¶¶
Restitution de l'atmosphére d'une salle de music-hall
Pratiquer le karaoké en utilisant des appareils extérieurs
Réglage requis pour créer les sonorités désirées
Réglage de l'écho 106 ¶¶¶¶
Choix de la tonalité d'exécution 106 ¶¶¶¶
Opérations qu'il est possible de commander à l'aide du microphone
Fonction commodes pour la pratique du karaoké
Guide Vocal 107 ¶¶¶¶
DUET MODE/CHORUS MODE 108 
Partenaire vocal/Karaoké par touche unique 109 ¶¶¶¶
SCORING juge votre aptitude au chant 110 ¶¶¶¶
Attribution simultanée d'une note à deux chanteurs (COMPETITION)
Pot-pourri de morceaux choisis(HI-LITE MEDLEY) 113 
Mise en attente d'une chanson
Un vers et un choeur uniquement (One Chorus)
Pratiquer le karaoké avec un professionnel(GUIDE MELODY)
92 
98 ¶¶¶¶
105 ¶¶¶¶
105 ¶¶¶¶
106
106 ¶¶¶¶
107
112 ¶¶¶¶
114 ¶¶¶¶
115 
115 
82
Table des matières
Page 83

Disques concernés
DVD CD LD
VIDEO CD
Choix des conditions de fonctionnenet 118– 130
Choix du format d'affichage sur un grand écran 118 
Choix des caractéristiques de l'image, du son et des éléments graphiques
Choix des caractéristiiques de l'image(mode)
Choix d'une atmosphére pour la chanson(KARAOKE SURROUND)
Choix des caractéristiques du son(D.R.COMP) 121 
Choix de l'emplacement d'affichage 122 
Choix de l'emplacement d'affichage 123 
Mise en mémoire des réglages pour DVD (Mémoire des conditions de fonctionnement)
Choix de la langue (Disques multilingues) 125 
Choix de la nature du signal sonore 125 ¶¶¶
Choix de la langue de sous-titres (Sous-titres multilingues)
Choix de l'angle de prise de vues (Prises de vues par plusieurs caméras)
Affichage des informations concernant le disque 127 ¶¶¶¶
Changement rapide de face de LD (Fonction "Quick Turn")
Généralités sur l'interface graphique utilisateur(IGU)
Modification de divers réglages 136 ¶ ¶¶¶
Choix de la langue de base parlée et de celle des sous-titre
119 ¶ ¶¶¶
120 ¶¶¶
121 ¶ ¶¶¶
124 
126 
126 
128 
129 ¶ ¶¶¶
138 
Configutarion 142– 149
Raccordement du lecteur
Exemple 1. de raccordement. Téléviseur pourvu d'une entré vidéo
Exemple 2. de raccordement. Vers un amplificateur possédant
une entrée Dolby digital (AC-3)
Exemple 3. de raccordement. Amplificateur audiovisuel
Rôle des commandes
Face avant 145
Panneau arrière 146
Afficheur 147
Télécommande 148
142
143
144
Autres informations 149– 154
Guide de dépannage 149
Glossaire 151
Pour utiliser l'appareil correctement et pendant longtemps
Caractéristiques techniques 154
153
Table des matières
83
Page 84

Avant d’utiliser l’appareil
Remarques
Assurez-vous de la présence des accessoires
Cordon audio
Boîtier de télécommande
Cordon vidéo
Cordon d’alimentation
Mettez en place des piles
Appuyez sur le couvercle, au
MELODY
GUIDE
VOCAL
MODE
PARTNER
VOCAL
KEY CONTROL
LASER DBC
Piles ... 2
CONDITION
PROGRAM
REV FWD
CHP/TIME
POWER
AUDIO
MEMORY
LAST
SUBTITLE
TITLE
PREV
ENTER
PAUSE
PLAY
REPEATREPEATSTOP
A–B
CLEAR
DISC SIDE
A / B
ANGLE
OPEN/
MENU
NEXT
CLOSE
DISPLAY
PLAYBACK
CONTROL
RETURN
Autres articles fournis
÷ Carte de garantie
÷ Mode d’emploi (le
présent document)
3
dos du boîtier, et faites-le
pivoter dans le sens de la
flèche.
Introduisez les piles.
Veillez à respecter les polarités (+) et (–) indiquées sur
les piles et dans leur logement.
◆ N’utilisez pas tout à la fois une pile neuve et une pile
usagée.
◆ Des piles de même forme peuvent présenter des tensions
Fermez le
couvercle.
différentes.
◆ Si vous envisagez de ne pas utiliser le boîtier de
télécommande pendant une longue période (environ un
mois), retirez les piles pour éviter tout dommage que
pourrait causer leur corrosion. En cas de fuite de
l’électrolyte, essuyez soigneusement le logement des piles
et remplacez les piles en mauvais état par des piles neuves.
84
Avant d’utiliser l’appareil
Page 85

Précaution avant utilisation
Soins à apporter aux diszues compavts
7Comment tenir un disque
¶ Veillez à ranger les disques dans leur coffret, à l’abri des
températures élevées, de l’humidité de la lumière directe
du soleil et du froid.
¶ Prenez soin de lire les instructions qui accompagnent le
disque.
7Nettoyage
¶ Les empreintes digitales et les
taches peuvent, selon leur
importance, entraîner une altération
de la qualité du son et de l’image.
Pour nettoyer un disque, essuyezle au moyen d’un chiffon doux que
vous déplacerez de l’intérieur vers
l’extérieur de la surface.
¶N’utilisez aucun produit de nettoyage pour les
microsillons. Pareillement, ne tentez pas de nettoyer un
disque avec de l’essence, du diluant pour peinture ou
tout autre solvant volatil.
¶ Nous conseillons l’emploi du lot de nettoyage JV-D11.
¶ Si le disque est très sale, humectez d’eau un chiffon et
après l’avoir bien essoré, éliminez les taches en
procédant avec soin et sans frotter. Essuyez le disque
au moyen d’un chiffon sec et doux.
¶ N’utilisez aucun disque fissuré ou voilé.
¶ Ne rayez pas la face portant l’étiquette, ne posez sur
cette face aucun autocollant. La colle peut déborder et
empêcher, le moment venu, l’éjection du disque ou
d’autres anomalies. Les disques loués portent souvent
des autocollants de référence; assurez-vous, avant
de mettre en place un tel disque, que la colle n’a pas
débordée.
N’utilisez aucun CD ayant une forme spéciale
N’introduisez dans l’appareil aucun disque qui ne soit pas
circulaire, par exemple un disque en forme de coeur. Dans le
cas contraire, une anomalie de fonctionnement se produirait.
Condensation
La vapeur d’eau peut se condenser à l’intérieur des parties
nobles de l’appareil si vous le transporter d’une pièce froide
vers une pièce chaude, ou encore si la température de la pièce
dans laquelle il se trouve augmente rapidement. La
condensation de l’humidité a pour effet d’altérer les
performances de l’appareil.
Pour l’éviter, conserver l’appareil dans son nouvel
environnement pendant au moins une heure avant de le mettre
sous tension, ou bien veiller à ce que la température
n’augmente que progressivement.
L ’été, l’humidité peut également se condenser si l’appareil est
placé dans le courant d’air frais d’un climatiseur. En ce cas,
changez la place de l’appareil.
Précautions concernant
l’utilisation des câbles à fi-
bres optiques
¶ Veillez à ce que le câble ne chemine pas à proximité d’un
objet tranchant et ne soit pas écrasé. Si vous désirez le rouler ,
faites en sorte que le diamètre de la bobine soit au moins
égal à 15 cm (6 pouces).
¶ N’utilisez pas de câble dont la longueur est supérieure à 3
m.
¶ Veillez à ce que les fiches du câble soient engagées à fond
dans les prises (10 pieds).
¶ Si de la condensation s’est formée sur une prise, essuyez-
la soigneusement à l’aide d’un chiffon doux avant d’y
brancher la fiche.
Nettoyage de l’optique du capteur LD/CD
En temps normal, l’optique du capteur n’a aucune raison de
se salir; toutefois, si cela devait arriver, consultez le centre
d’entretien PIONEER.
Nous conseillons de procéder avec la plus grande prudence
dans l’utilisation des disques de nettoyage car certains peuvent
endommager l’optique, tandis que d’autres ne peuvent plus
être éjectés après utilisation.
Diamètre minimal 15 cm
Précaution avant utilisation
85
Page 86

Disques compatibles avec cet appareil
Cet appareil accepte les DVD, CD et VIDEO CD.
Les marques ci-contre sont apposées sur les disques et leur coffret
ou pochette.
÷ Cet appareil peut, sans utilisation d’un quelconque adaptateur,
procéder à la lecture de tous les disques portant l’une des
marques ci-contre.
÷ Pour éviter toute anomalie de fonctionnement, n’utilisez aucun
adaptateur avec les disques compacts de 8 cm (3 pouces).
Cet appareil est compatible avec le standard de télévision
couleur NTSC.
Il n’est pas prévu pour la lecture de disques autres que ceux
mentionnés ci-contre.
* Pendant la lecture d’un DVD, les données sont échangées à
raison de 4,7 Mo par seconde.
Manipulation des disques
LD DVD, CD, etc.
Pour tenir un disque
avec les deux mains
Types de disques
acceptables
DVD VIDEO
VIDEO CD
CD
Diamètre et nombre de
faces gravées
DVD VIDEO
12 cm (5 pouces),
une face
12 cm (5 pouces),
deux faces
DVD VIDEO
8 cm (3 pouces),
une face
8 cm (3 pouces),
deux faces
VIDEO CD
12 cm (5 pouces), une
face
VIDEO CD Single
8 cm (3 pouces), une
face
CD
une couche
deux couches
une couche
deux couches
une couche
deux couches
une couche
deux couches
Temps de lecture
Audionumérique
Vidéonumérique
(MPEG 2)
133 mn*
242 mn*
266 mn*
484 mn*
Audionumérique
Vidéonumérique
(MPEG 2)
41 mn*
75 mn*
82 mn*
150 mn*
Audionumérique
Vidéonumérique
(MPEG 2)
Maximum 74 minutes
Audionumérique
Vidéonumérique
(MPEG 1)
Maximum 20 minutes
Pour tenir un disque
avec une seule main
Plateau pour disques
DVD Single, CD Single,
Video CD Single: 8 cm
DVD, CD, Video CD,
CDV: 12 cm
LD, LD Single: 20 cm
LD: 30 cm
Remarque
◆ Cet appareil ne permet pas la lecture de DVD qui portent
un numéro de région autre que celui indiqué sur le
panneau arrière (reportez-vous à la page 152,
“Glossaire”).
Les disques autres que ceux mentionnés ci-dessus ne sont
pas compatibles avec cet appareil.
Pour éviter tout dommage, n’introduisez dans ce lecteur aucun
disque autre que ceux mentionnés ci-dessus.
'
CD graphique
GRAPHICS
CDV
Æ
VSD (Video Single Disc)
LD
L
;
æ
12 cm (5 pouces),
une face
CD Single
8 cm (3 pouces),
une face
CDV
12 cm (5 pouces), une
face
VSD
12 cm (5 pouces),
une face
LD
30 cm
(12 pouces)
LD
20 cm
(8 pouces)
LD Single
20 cm
(8 pouces)
Maximum 74 minutes
Maximum 20 minutes
Audionumérique
(maximum 20 minutes)
(partie son)
Audionumérique + vidéo
(maximum 5 minutes)
(partie image)
Audionumérique + vidéo
(maximum 5 minutes)
(partie image)
Dans ce mode d’emploi,
le VSD est traité comme
un CDV.
1 heure, 2 faces
CAV
2 heures, 2 faces
CLV
CAV
28 minutes, 2 faces
CLV
40 minutes, 2 faces
14 minutes, une
CAV
face
20 minutes, une
CLV
face
86
Disques compatibles avec cet appareil
Page 87

Opérations de base
Opérations de base
Opérations de base
Lecture d'un LD ........................................................88
Lecture d'un DVD, CD ou VIDEO CD sans menu(PBC) ...
Lecture des VIDEO CD(portant un signal PBC)......90
Saut dans un sens ou dans l'autre des
chapitres ou des plages musicals .......................92
Arrêt de la lecture et mise en veille de l'appareil.. 93
Reprise de la lecutre à partir d'un point d'arrêt..... 94
89
Fonctionnement
Fonctionnement
détaillé
détaillé
Fonctionnement
Fonctionnement
Karaoké
Karaoké
Choix des conditions
Choix des conditions
de fonctionnement
de fonctionnement
Mode d'emploi
Opérations de base
Autres informationsConfiguration
Autres informationsConfiguration
87
87
Page 88

Lecture d’un LD
STOP PAUSE PLAY
Touche DISC SIDE
A/B
DISC SIDE
A / B
A B
STANDBY
POWER
KARAOKE
SINGLE
MODE
STANDBY/ON
Témoin
ST ANDBY
PLAY
1
POWER
1
4
SCORING
SYSTEM
2
POWER
AUDIO
SUBTITLE
LAST
MEMORY
MENU
TITLE
ENTER
PREV
REV FWD
PAUSE
CHP/TIME
DISC SIDE
PARTNER
A / B
ANGLE
3
GUIDE
VOCAL
ONE-TOUCH
VOCAL
KARAOKE
VIDEO CD FUNCTION DVD FUNCTION
V-NR PBC
ECHO
GUIDE VOCAL
MAXMIN
MAXMIN
ONE
CHORUS
MIC 2MIC 1
LD-G CD-G
HI-LITE
MEDLEY
STOP PLAYPAUSE
LOW HIGHKEY CONTROL
MAXMINMAXMIN
GUIDE
MELODY
LaserDisk
CD / VIDEO CD
MIC
CONTROL
OPEN/CLOSE
¶ Le témoin STANDBY s’éteint.
MIC 2MIC 1
LASER DBC
POWER
STANDBY/ON
KARAOKE
MODE
Appuyez sur la touche POWER.
Pour la lecture d’un disque audio
ou vidéo, appuyez sur la touche
KARAOKE MODE pour choisir le
mode Normal.
5
OPEN/
CLOSE
DISPLAY
PLAYBACK
CONTROL
RETURN
NEXT
PLAY
REPEATREPEATSTOP
A–B
CLEAR
OPEN/
CLOSE
3
DISC SIDE
A / B
PLAY
Chaque pression sur cette touche change le réglage comme
suit.
MODE KARAOKÉ MODE NORMAL
MODE ENTRÉE AUX
Appuyez sur la touche OPEN/CLOSE 0 .
3
¶ Le tiroir pour disque s’ouvre.
Déposez un disque dans le tiroir.
4
OPEN/CLOSE
DVD LD
CD / VIDEO CD
5
CONDITION
PROGRAM
MODE
MELODY
GUIDE
VOCAL
PARTNER
KEY CONTROL
LASER DBC
VOCAL
Remarques
◆ Lorsque vous mettez cet appareil sous tension, il adopte le mode
Karaoké et la touche KARAOKE MODE s’éclaire.
◆ Ne pas poser le disque dans son alvéole, ou déposer en même
temps deux disques dans le tiroir entraînent l’endommagement du
disque et du lecteur.
88
Lecture d’un LD
¶ Si le disque n’est gravé que sur une seule face, posez-le de
manière que l’étiquette soit tournée vers le haut; si le disque
est gravé sur les deux faces, posez-le de manière que la face
à lire soit tournée vers le haut.
Appuyez sur la touche PLAY 3 .
5
¶ La lecture commence.
¶ Lorsque est atteinte la fin
de la face A d’un disque
gravé sur les deux faces,
la lecture de la face B
commence sans intervention de votre part.
Notes
¶ Lorsque vous appuyez sur la touche de sélection A/B de l’appareil,
vous provoquez la sélection de la face A ou de la face B. Le témoin
correspondant à la face choisie, A ou B, s’éclaire sur l’appareil.
¶ Dans le cas d’un disque gravé sur les deux faces, veillez à ce que la
face A soit tournée vers le haut. Les faces A et B sont les faces
opposées du disque.
Page 89

Lecture d’un DVD, CD ou VIDEO CD sans menu (PBC)
DISC SIDE
A / B
A B
STANDBY
POWER
KARAOKE
SINGLE
MODE
STANDBY/ON
PLAY
Témoin STANDBY
POWER
1
GUIDE
VOCAL
SCORING
ONE-TOUCH
VOCAL
PARTNER
SYSTEM
KARAOKE
Touche SINGLE
PLAY
MENU
ENTER
DISC SIDE
OPEN/
CLOSE
A / B
DISPLAY
ANGLE
PLAYBACK
CONTROL
RETURN
NEXT
PLAY
REPEATREPEATSTOP
A–B
CLEAR
POWER
AUDIO
SUBTITLE
LAST
MEMORY
TITLE
PREV
REV FWD
PAUSE
CHP/TIME
VIDEO CD FUNCTION DVD FUNCTION
V-NR PBC
ECHO
GUIDE VOCAL
MAXMIN
MAXMIN
3421
ONE
CHORUS
MIC 2MIC 1
LD-G CD-G
5
3
5
GUIDE
HI-LITE
MELODY
MEDLEY
STOP PLAYPAUSE
LOW HIGHKEY CONTROL
MAXMINMAXMIN
LaserDisk
OPEN/
CLOSE
PLAY
CD / VIDEO CD
MIC
CONTROL
OPEN/CLOSE
LASER DBC
Pour la lecture d’un VIDEO CD commandée par
menu, reportez-vous à la page 90.
POWER
STANDBY/ON
Appuyez sur la touche POWER.
Opérations de base
¶ Le témoin STANDBY s’éteint.
KARAOKE
MODE
MIC 2MIC 1
Pour la lecture d’un disque audio
ou vidéo, appuyez sur la touche
KARAOKE MODE pour choisir le
Fonctionnement
mode Normal.
Chaque pression sur cette touche change le réglage comme
suit.
MODE KARAOKÉ MODE NORMAL
MODE ENTRÉE AUX
3
OPEN/CLOSE
DVD LD
CD / VIDEO CD
Appuyez sur la touche
DVD/CD/VIDEO CD
détaillé
Fonctionnement
OPEN/CLOSE 0 .
¶ Le tiroir s’ouvre.
Karaoké
Déposez un disque dans le tiroir.
4
CONDITION
PROGRAM
MODE
MELODY
GUIDE
VOCAL
PARTNER
KEY CONTROL
LASER DBC
VOCAL
Remarques
◆ Pendant le fonctionnement, les marques suivantes peuvent
apparaître sur l’écran du téléviseur.
: Cette marque apparaît lorsque vous effectuez une opération
interdite.
: Cette marque apparaît lorsque vous effectuez une opération
◆ Après l’arrêt de la lecture d’un DVD, si vous commandez la lecture
◆ Si vous appuyez sur la touche SINGLE PLAY placée sur la face avant
◆ Après adoption du mode Karaoké (le témoin KARAOKE MODE placé
◆ L’attente avant le début de la lecture dépend du disque
qui n’est pas possible pour le disque concerné.
sans préciser le titre par l’intermédiaire d’un menu ou de tout autre
moyen mis à votre disposition, la lecture du titre précédemment lu
reprend.
de l’appareil de manière à éteindre le témoin, vous annulez la lecture d’une seule chanson et toutes les chansons sont lues, l’une
après l’autre.
sur la face avant de l’appareil est éclairé), des distorsions peuvent
se faire entendre selon le téléviseur que vous possédez, le microphone que vous utilisez et les disques (DVD, CD ou VIDEO CD) que
vous écoutez. Pour éviter cela, conservez le niveau de sortie
analogique à une valeur basse.
précédemment utilisé et du tiroir choisi dans le cas présent.
¶ Posez le disque dans l’alvéole convenable et de manière que
l’étiquette soit tournée vers le haut.
Appuyez sur la touche PLAY 3 .
5
STOP PAUSE PLAY
Fonctions pratiques
Mise en service automatique
¶ Pour éjecter le disque lorsque l’appareil n’est pas en service, appuyez
sur la touche OPEN/CLOSE 0 placée sur la face avant. L’appareil est
automatiquement mis en service et le tiroir s’ouvre.
¶ Si vous mettez l’appareil hors service alors qu’il contient un disque,
une simple pression sur la touche PLAY 3 de la face avant, ou la tou-
che PLAY 3 de la télécommande, provoque la mise en service de
l’appareil et la lecture du disque qu’il contient.
¶ La lecture commence.
¶ Dans le cas de certains
DVD, un menu s’affiche.
Si un menu s’affiche,
reportez-vous à la page
96.
Notes
¶ Si le DVD ne porte pas le numéro de région convenable, sa lecture
sur cet appareil est impossible (reportez-vous à la page
152“Glossaire”).
¶ La lecture de DVD autres que DVD Video n’est pas possible.
¶ Lorsque vous mettez cet appareil sous tension, il adopte le mode
Karaoké et la touche KARAOKE MODE s’éclaire.
Lecture d’un DVD, CD ou VIDEO CD sans menu (PBC)
Choix des conditions
de fonctionnement
Autres informationsConfiguration
89
Page 90

Lecture des VIDEO CD (portant un signal PBC)
Qu’est-ce qu’un VIDEO CD?
C’est un disque qui fournit des sons de qualité comparable à un MD et des images de qualité comparable à
un magnétoscope VHS. Grâce à la compression des
signaux numériques (Système MPEG), il est possible
d’enregistrer 74 minutes d’images et de sons sur un
seul disque. Il existe deux sortes de VIDEO CD. L’une,
la version 2.0, porte un signal de commande de lecture
(appelé PBC); l’autre, la version 1.1, ne porte pas ce
signal de commande.
VIDEO CD avec signal
PBC (version 1.1)
VIDEO CD avec signal
PBC (version 2.0)
Affichage d’un menu
A(1)
B(2)
C(3)
Cet appareil permet la lecture commandée par menu (PBC) grâce
à ses touches ENTER, Suivant ¢, Précédent 4, et RETURN
. (La télécommande permet également toutes les opérations.)
La lecture des signaux audio et vidéo
s’obtient de la même manière que
dans le cas d’un CD.
¶ L’affichage d’un menu facilite
toutes les opérations et permet
d’utiliser des enregistrements
interactifs ou référençables. Bien
entendu, le signal vidéo est à haute
définition, et il est possible
d’obtenir des images fixes.
¶ Vous pouvez utiliser ces disques
comme s’ils ne portaient pas de
signal PBC. (Pour cela, éteignez le
témoin PBC au moyen de la tou-
che PLAYBACK CONTROL de
l’appareil ou de la télécommande.)
Commande de la lecture (VIDEO
CD portant un signal PBC)
Procédez aux opérations à 4 de la
page 89.
PLAY
Appuyez sur la touche PLAY 3 .
¶ Si la lecture du VIDEO CD peut être commandée par un menu,
l’indication PBC et un menu s’affichent.
¶ Les menus sont enregistrés sur le disque. Ils varient d’un
disque à l’autre.
Ex. Menu affiché
S’il existe un autre menu
3
NEXT
Appuyez sur la touche NEXT ¢.
¶ Pour revenir au menu précédent
PREV
Appuyez sur la touche PREV 4.
S’il existe un autre menu
A(1)
B(2)
C(3)
D(4)
E(5)
¢ NEXT
90
MENU
ENTER
DISC SIDE
ANGLE
OPEN/
CLOSE
A / B
DISPLAY
PLAYBACK
CONTROL
RETURN
NEXT
PLAY
REPEATREPEATSTOP
A–B
CLEAR
3
PREV
POWER
AUDIO
SUBTITLE
LAST
MEMORY
TITLE
PREV
PAUSE
REV FWD
CHP/TIME
Touches
numérotés
CONDITION
PROGRAM
MODE
(0 – 9, +10)
STOP
Lecture des VIDEO CD (portant un signal PBC)
MELODY
GUIDE
VOCAL
VOCAL
PARTNER
KEY CONTROL
LASER DBC
OPEN/
CLOSE
PLAYBACK
CONTROL
RETURN
3
PLAY
2
NEXT
Choisissez une option d’un menu au
4
moyen des touches numérotées
¶ La lecture commence.
Ex.Pour choisir 3 Pour choisir 10 =
Pour choisir 21 = =
Pour arrêter la lecture
STOP
OPEN/
CLOSE
PLAYBACK
CONTROL
¶ Appuyez sur la touche STOP 7.
¶ Appuyez sur la touche OPEN/CLOSE 0.
¶ Appuyez sur la touche PLAYBACK CONTROL.
(Dans ce cas, la lecture commandée par menu
devient indisponible et tout se passe comme si le
disque ne portait pas de signal PBC.)
Dans le cas des disques qui ne portent pas de signal PBC, la lecture ne cesse pas si vous appuyez
sur la touche PLAYBACK CONTROL.
Remarque
◆ Touche NOISE REDUCTION de l’appareil
Au cours de la lecture des VIDEO CD, vous pouvez faire usage de
la fonction de réduction de bruit. Si l’enregistrement que porte le
disque est de mauvaise qualité, l’image est sensiblement améliorée
par cette fonction. Appuyez sur la touche; le témoin associé s’éclaire,
indiquant ainsi que la fonction est en service. Appuyez une nouvelle
fois sur la touche pour éteindre le témoin et mettre la fonction de
réduction de bruit hors service.
Page 91

Lecture des VIDEO CD (portant un signal PBC)
Opérations de base
Indications affichées lorsque vous appuyez sur la touche PLAY 3, PREV
Exemple de lecture d’un disque portant un signal PBC.
Touche
RETURN
Touches numérotés
MENU Display 2
(1)
(2)
Touche
RETURN
Touches numérotés1
(1)
Images animées
Images fixes
Touches numérotés2 Touches numérotés3
Touche
(2)
Images animées
Images fixes
Utilisation du menu
A Appuyez sur la touche RETURN pour
afficher le menu précédent.
RETURN
Touche PLAY 3
MENU Display 1
(1)
(2)
(3)
(4)
Touche NEXT ¢
Touche PREV 4
RETURN
A
B
C
D
Touche
RETURN
(3)
Images animées
Images fixes
Vous avez la possibilité de
commander la lecture d’un
VIDEO CD sans utiliser les
Touche
4
RETURN
MENU Display 2
(3)
(4)
menus.
¶ Chaque pression sur cette touche, conduit à l’affichage du
menu précédent. Après un certain nombre de pression sur
cette touche, le menu initial s’affiche.
B Appuyez sur la touche ¢ pour passer au
menu suivant, ou sur la touche 4 pour
passer au menu précédent.
PREV
NEXT
1 Appuyez sur la touche PLAYBACK
CONTROL.
¶ Le témoin PLAYBACK CONTROL, sur la face avant du lecteur ,
s’éteint.
2 Appuyez sur la touche PLAY 3 ou utilisez
les touches numérotées.
, NEXT
¢
Touche
Touches numérotés4
Images animées
Images fixes
PLAY
ou RETURN
.
Fonctionnement
détaillé
RETURN
Fonctionnement
Karaoké
(4)
Choix des conditions
de fonctionnement
C Appuyez sur la touche PAUSE pour
interrompre la lecture vidéo.
PAUSE
¶ Pour abandonner la pause, appuyez une nouvelle fois sur la
touche PAUSE 8.
Exemple) Pour choisir 10 =
Pour choisir 21 = =
Les fonctions suivantes sont indisponibles lors de l’utilisation d’un
menu pour la commande de la lecture d’un VIDEO CD portant un
signal PBC. (L’indication PBC PLAY figure sur l’afficheur.)
¶ Lecture d’une seule chanson .......................................(P.105)
¶ Saut des plages musicales dans les deux sens.............. (P.92)
¶ Mise en attente ............................................................ (P.114)
¶ Répétition ..................................................................... (P.100)
Lecture des VIDEO CD (portant un signal PBC)
Autres informationsConfiguration
91
Page 92

LD-G CD-G
LaserDisk
Saut dans un sens ou dans l’autre des
chapitres ou des plages musicales
Localiser le début du chapitre (plage
PREV
REV
POWER
DISC SIDE
AUDIO
MEMORY
TITLE
PREV
CHP/TIME
MELODY
GUIDE
VOCAL
A / B
ANGLE
SUBTITLE
LAST
MENU
ENTER
REV FWD
PAUSE
MODE
VOCAL
PARTNER
PLAY
CONDITION
KEY CONTROL
OPEN/
CLOSE
DISPLAY
PLAYBACK
CONTROL
RETURN
NEXT
REPEATREPEATSTOP
CLEAR
PROGRAM
NEXT
FWD
A–B
LASER DBC
musicale) suivant
NEXT
Appuyez sur la touche NEXT ¢.
¶ Cette touche permet de passer au chapitre (à la plage
musicale) suivant dont vous êtes séparé d’un nombre égal au
nombre de pressions sur la touche.
Localiser le début du chapitre (plage
musicale) précédent
PREV
Appuyez sur la touche PREV 4.
¶ Appuyez une fois sur cette touche pour localiser le début du
chapitre (plage musicale) en cours de lecture.
¶ Appuyez une nouvelle fois sur cette touche pour localiser le
début du chapitre (plage musicale) précédent
Titre 1
Titre 2
Chapitre 2 Chapitre 1 Chapitre 2Chapitre 1
NEXT
3
PREV
2
2
NEXT
3
PREV
2
NEXT
3
PREV
2
Chapitre 1 Chapitre 2 Chapitre 3 Chapitre 4
Plage
musicale
NEXT
3
PREV
2
Plage
NEXT
musicale
3
PREV
2
2
NEXT
PREV
NEXT
PREV
2
Plage
musicale
3
3
NEXT
PREV
2
Plage
musicale
3
NEXT
3
PREV
2
Plage
NEXT
musicale
3
PREV
2
Déplacement rapide vers un point donné
FWD
Appuyez sur la touche FWD ¡.
Retour rapide à un point donné
REV
Appuyez sur la touche REV 1.
Remarque
◆ Dans le cas d’un LD (CL V), le déplacement rapide du capteur vers la
fin du disque FWD ¡, ou vers le début du disque REV 1,
s’accompange parfois d’une disparition de couleurs, mais cela ne
traduit pas un défaut de fonctionnement.
92
Plage
musicale
Plage
musicale
NEXT
3
PREV
2
NEXT
PREV
2
3
Plage
musicale
Saut dans un sens ou dans l’autre des
chapitres ou des plages musicales
Plage
musicale
NEXT
33
PREV
2
NEXT
PREV
2
Plage
musicale
Page 93

Arrêt de la lecture et mise en veille
A
de l’appareil
Témoin STANDBY
DISC SIDE
A / B
A B
GUIDE
VOCAL
SCORING
ONE-TOUCH
VIDEO CD FUNCTION DVD FUNCTION
VOCAL
PARTNER
SYSTEM
KARAOKE
V-NR PBC
CHORUS
ONE
2
GUIDE
HI-LITE
MELODY
MEDLEY
STOP PLAYPAUSE
CD / VIDEO CD
OPEN/CLOSE
Appuyez sur la touche STOP 7 .
STOP PAUSE PL
Opérations de base
STOP
4
STANDBY
POWER
STANDBY/ON
4
KARAOKE
MODE
POWER
PAUSE
LOW HIGHKEY CONTROL
ECHO
SINGLE
PLAY
GUIDE VOCAL
MAXMIN
MAXMIN
LD-G CD-G
MIC
MIC 2MIC 1
MAXMINMAXMIN
LaserDisk
MIC 2MIC 1
CONTROL
LASER DBC
¶ La lecture s’arrête.
Fonctionnement
Appuyez sur la touche OPEN/CLOSE 0 .
détaillé
Fonctionnement
Karaoké
Choix des conditions
de fonctionnement
3
POWER
DISC SIDE
AUDIO
LAST
MEMORY
TITLE
PREV
CHP/TIME
MELODY
GUIDE
VOCAL
A / B
ANGLE
SUBTITLE
MENU
ENTER
REV FWD
PLAY
PAUSE
CONDITION
MODE
VOCAL
KEY CONTROL
PARTNER
CLOSE
DISPLAY
PLAYBACK
CONTROL
RETURN
NEXT
REPEATREPEATSTOP
CLEAR
PROGRAM
OPEN/
A–B
LASER DBC
1
2
1
Touche
PAUSE
OPEN/
CLOSE
STOP
OPEN/CLOSE
OPEN/
CLOSE
DVD LD
¶ Le tiroir pour disque s’ouvre.
CD / VIDEO CD
Retirez le disque.
3
Pour retirer un DVD ou un CD Pour retirer un LD
Appuyez sur la touche POWER.
4
Le témoin
s’éclaire.
¶ Déposez un disque dans le tiroir, face portant l’étiquette
tourneé vers le haut; utilisez les découpes du tiroir pour centrer
le disque.
STANDBY
=
POWER
STANDBY/ON
POWER
Remarques
◆ Vous pouvez interrompre la lecture d’un DVD, ou d’un LD, éjecter
le disque puis le déposer une nouvelle fois dans le tiroir et
commandez à nouveau sa lecture, cette fois-ci à partir du point où
vous vous êtes arrêté. Pour de plus amples détails, reportez-vous à
la page 94, “Mémoire de la dernière image”.
◆ Lors du déplacement de l’appareil, respectez les instructions qui
figurent à la page 153, Déplacement de l’appareil.
Pause de la lecture
STOP PAUSE PLAY
Appuyez sur la touche PAUSE. Les sons sont coupés et
l’indication P AUSE apparaît sur l’afficheur . Pour reprendre la lecture appuyez une nouvelle fois sur la touche PAUSE.
¶ Dans le cas des DVD, LD (CAV uniquement) et des VIDEO
CD, une pression sur la touche PAUSE provoque l’affichage
d’une image fixe (P.101).
Arrêt de la lecture et mise en veille de
PAUSE
l’appareil
Autres informationsConfiguration
93
Page 94

Reprise de la lecture à partir d’un point d’arrêt
POWER
LAST
MEMORY
POWER
DISC SIDE
AUDIO
MEMORY
PREV
CHP/TIME
MELODY
GUIDE
VOCAL
A / B
ANGLE
SUBTITLE
LAST
MENU
TITLE
ENTER
REV FWD
PLAY
PAUSE
CONDITION
MODE
VOCAL
KEY CONTROL
PARTNER
OPEN/
CLOSE
DISPLAY
PLAYBACK
CONTROL
RETURN
NEXT
REPEATREPEATSTOP
A–B
CLEAR
PROGRAM
LASER DBC
Mise en mémoire du point
d’arrêt (Mémoire de la
dernière image)
LAST
MEMORY
¶ L ’indication “LAST MEMORY” s’affiche et l’emplacement du
point d’arrêt est mis en mémoire.
POWER
STOP
¶ Dans le cas d’un DVD, l’emplacement du point d’arrêt
demeure en mémoire même si le disque est éjecté.
Pendant la lecture du disque,
appuyez sur la touche LAST
MEMORY.
Appuyez sur la touche POWER
pour mettre l’appareil en veille,
ou sur la touche STOP 7 pour
arrêter la lecture.
Reprise de la lecture à partir
du point d’arrêt
Notes
¶ Dans le cas des DVD, outre le point d’arrêt, la mémoire de la dernière
image conserve les données relatives au format d’image, aux
réglages sonores, à l’emplacement du menu, (Wide/Normal), au
mode Cinéma/Animation et à d’autres réglages.
¶ Si vous appuyez sur la touche PLAY 3, la lecture commence au
début du disque, même si vous l’aviez interrompue et mis en
mémoire le point d’arrêt.
¶ Après reprise de la lecture à partir du point d’arrêt, le contenu de la
mémoire de la dernière image est effacé.
¶ Si vous avec procédé à la mise en mémoire d’un point d’arrêt pour
cinq DVD, les données concernant le disque le plus anciennement
traité de la sorte sont effacées et remplacées par les données du
sixième disque et ainsi de suite.
¶ Après l’éjection d’un LD ou d’un VIDEO CD, les données mises en
mémoire sont effacées.
¶ La mémoire de la dernière image n’est pas disponible pour certains
titres.
Remarques
◆ Si, pendant la lecture d’un disque, se produisent une panne de
secteur ou un débranchement de la fiche du cordon d’alimentation,
vous ne pouvez pas employer la mémoire de la dernière image.
◆ La reprise de la lecture n’est pas possible avec les CD.
◆ Lors de la lecture d’un VIDEO CD à l’aide du système “Play Back
Control (PBC)” (P.90), la mémoire de la dernière image ne donne
pas toujours satisfaction.
L’appareil étant à l’arrêt, appuyez sur la
touche LAST MEMORY.
¶ Dans le cas des DVD, cette opération est possible même si
le menu de titre est affiché.
¶ L’appareil étant en veille, au moment où vous appuyez sur la
touche LAST MEMORY il se met de lui-même en service et
la lecture reprend à partir du point d’arrêt.
¶ Lorsque l’indication LAST MEMORY est affichée, la lecture
reprend un peu avant le point d’arrêt.
Touche STOP 7
LaserDisk
LD-G CD-G
Touche POWER
94
Reprise de la lecture à partir d’un point d’arrêt
Page 95

Opérations de base
Opérations de base
Fonctionnement détaillé
Commande de la lecture à partir d'un menu.........96
Lecture d’un CD “graphiques”................................97
Recherche d’une scène ou d’une plage musicale
données (Recherche)............................................98
Répétition de la lecture..........................................100
Arrêt sur image.......................................................101
Fonctionnement
Fonctionnement
détaillé
détaillé
Fonctionnement
Fonctionnement
Karaoké
Karaoké
Choix des conditions
Choix des conditions
de fonctionnement
de fonctionnement
Fonctionnement détaillé
Autres informationsConfiguration
Autres informationsConfiguration
95
95
Page 96

Remarques
1
POPS
2
JAZZ
3
COUNTRIES
4
R&B
5
CLASSICS
Commande de la lecture
à partir d’un menu
Certains DVD, de même que certains VIDEO CD, proposent des menus. Ce lecteur est en mesure
d’afficher ces menus et vous offre le moyen d’effectuer la sélection des options.
Lecture commandée
par le menu
Appuyez sur la touche
PLAY
.
¶ Un menu s’affiche. Ce menu fait partie de
la gravure que porte le disque. Le contenu
de chaque menu varie avec le disque.
¶ Dans le cas des VIDEO CD prévus pour le
système “Play Back Control (PBC)” (P.90),
la mention PBC est affichée sur l’appareil.
1
POPS
2
JAZZ
3
COUNTRIES
4
R&B
5
CLASSICS
Sélection d’un titre (d’une
plage musicale) au moyen
des touches numérotées.
¶ Si le nombre est supérieur à 10, utilisez la
touche
• Pour le nombre 10,
utilisez
• Pour le nombre 17,
utilisez
• Pour le nombre 20,
utilisez → → .
→
→ .
POWER
AUDIO
LAST
MEMORY
TITLE
PREV
REV FWD
CHP/TIME
MELODY
GUIDE
VOCAL
SUBTITLE
PAUSE
MODE
VOCAL
PARTNER
DISC SIDE
A / B
ANGLE
MENU
ENTER
PLAY
CONDITION
KEY CONTROL
OPEN/
CLOSE
DISPLAY
PLAYBACK
CONTROL
RETURN
NEXT
REPEATREPEATSTOP
A–B
CLEAR
PROGRAM
LASER DBC
Retour au menu
pendant la lecture
Dans le cas d’un DVD.
Appuyez sur la touche
TITLE
.
Appuyez sur la touche
MENU
.
¶ Appuyez une nouvelle fois sur la touche
MENU
pour afficher les titres disponibles.
Procédez avec le menu comme vous
êtes invité à le faire, ou bien comme il
est dit dans les instructions qui
accompagnent le disque (P.129-P.133).
Dans le cas des VIDEO CD
Appuyez sur la touche
RETURN
.
¶ Si vous appuyez sur la touche
la lecture commandée par menu (PBC), ce
menu s’affiche.
RETURN
pendant
¶ La lecture du titre choisi, ou de la plage
musicale choisie, commence.
¶ Dans le cas des DVD, vous pouvez
également sélectionner un numéro au
moyen des touches
en appuyant sur la touche
¶ Vous pouvez commander la lecture des VIDEO CD sans faire
¶ Certains titres autorisent également la sélection par un menu.
96
et puis valider
ENTER
.
Notes
usage des menus. Appuyez sur la touche PLAYBACK
CONTROL de l’appareil ou de la télécommande de manière
que l’indication “PBC” s’éteigne.
Pour cela, appuyez sur la touche
afficher le menu puis choisissez le titre désiré.
Commande de la lecture à
partir d’un menu
MENU
de manière à
◆ Pendant la lecture d’un VIDEO CD pour lequel un
menu est affiché, vous ne pouvez pas utiliser les
fonctions de lecture inversée ou répétée ni les
fonctions de recherche par indication d’un numéro
de plage musicale ou d’un temps. Cela tient à ce
que ces fonctions sont interactives et supposent
donc l’usage de l’écran.
◆ Si la lecture d’un VIDEO CD commandée par menu
est en service, le fonctionnement du lecteur
dépend alors du disque. Pour de plus amples
détails, reportez-vous à la notice qui accompagne
le disque.
◆ Certains DVD ne donnent pas lieu à l’affichage d’un
menu.
Page 97

Lecture d’un CD
Trust me!
Les données son et les données image occupent des zones
différentes du disque. Il existe également une zone, dite des souscodes, qui peut contenir des données telles qu’un sous-titrage, ou
les paroles de chansons. Nous disons d’un disque qu’il est
“graphique” lorsqu’il contient ce genre d’information.
Un CD graphique porte la marque
GRAPHICS
. Vous pouvez profiter
des graphiques lorsque le disque porte cette marque.
Appuyez sur la touche
POWER
A / B
ANGLE
PLAY
CONDITION
OPEN/
CLOSE
DISPLAY
PLAYBACK
CONTROL
RETURN
NEXT
REPEATREPEATSTOP
A–B
CLEAR
PROGRAM
.
¶ Le témoin STANDBY s’éteint.
Appuyez sur la touche
OPEN/
CLOSE
.
OPEN/
CLOSE
¶ Le tiroir pour disque s’ouvre.
3
Déposez un CD graphiques.
¶ Posez le disque dans un des alvéoles du
tiroir, de manière que l’étiquette soit
tournée vers le haut.
POWER
AUDIO
LAST
MEMORY
TITLE
PREV
REV FWD
CHP/TIME
MELODY
DISC SIDE
SUBTITLE
MENU
ENTER
PAUSE
MODE
“graphiques”
Touche OPEN/CLOSE 0
LaserDisk
LD-G CD-G
Touche PLAY 3Touche POWER
Mise en service de la
lecture des informations
graphiques
Appuyez sur la touche
5
SUBTITLE
.
¶ Le mode change comme ceci.
= OFF = ON
Mise hors service de la
lecture des informations
graphiques
¶ Si la lecture est en service, appuyez sur
la touche
SUBTITLE
.
Opérations de base
Fonctionnement
détaillé
Fonctionnement
Karaoké
Choix des conditions
de fonctionnement
4
Appuyez sur la touche
PLAY
.
¶ La lecture commence.
¶ Même si vous n’avez pas adopté le mode
de fonctionnement permettant l’affichage
des informations graphiques, le lecteur lit
ces informations et les affiche.
Remarques
◆Vous devriez voir des informations graphiques mais...
Vous avez mis en place un disque graphique et mis en
service le mode de fonctionnement qui lui convient, mais
aucune information graphique ne s’affiche; cela peut
provenir de ce que le canal graphique choisi ne convient
pas, ou bien de ce que les informations graphiques
n’occupent pas la position appropriée sur l’écran,
Reportez-vous aux pages 122 et 123.
◆ Il se peut que pendant la lecture d’un disque qui ne porte
aucune information graphique, de telles informations
s’affichent malgré tout; cela ne traduit une anomalie de
fonctionnement du lecteur. Lors de la lecture d’un disque
ne contenant aucune information graphique, veillez à ce
que le mode de fonctionnement choisi soit convenable.
GUIDE
VOCAL
VOCAL
PARTNER
KEY CONTROL
LASER DBC
Note
Si, pendant la lecture d’un CD, portant des informations graphiques,
vous effectuez une des opérations suivantes, il se peut que le soustitrage et les images disparaissent, ou que des changements de
couleur se constatent au niveau des sous-titres; cela ne traduit pas
une anomalie. Patientez quelques instants; l’affichage correct des
informations graphiques doit reprendre.
¶ Déplacement rapide du capteur dans un sens ou dans l’autre.
¶ Pause, recherche.
¶ Mise en service de la lecture des informations graphiques grâce à
la page écran prévue à cet effet.
¶ Affichage d’un menu.
Lecture d’un CD
“graphiques”
Autres informationsConfiguration
97
Page 98

Direct Search with
Recherche directe par
Title Numbers
le numéro du titre
Choisissez le titre au
moyen des touches
numérotées.
• Pour choisir le titre 3
.
• Pour choisir le titre 10
→
Pour choisir un titre, vous disposez
également des deux méthodes ci-dessous.
(Méthode 1)
Appuyez sur la touche
TITLE
.
¶ Le numéro du titre
clignote sur l’écran.
Appuyez une nouvelle
TITLE 3
TITLE 10
TITLE 1TITLE 1
1-01-02
TITLE
fois sur la touche
¶ Maintenez la pression
d’un doigt sur cette
touche jusqu’à ce que le
TITLE 1TITLE 1
numéro du titre qui vous
intéresse, s’affiche.
Appuyez sur la touche
3
PLAY
.
1-01-02
¶ La lecture du titre choisi commence.
(Méthode 2)
Appuyez sur la touche
TITLE
.
Précisez le numéro du titre
au moyen des touches
numérotées.
• Pour le titre numéro 5,
appuyez sur
•Pour le titre numéro 10,
appuyez sur
Appuyez sur la touche
3
PLAY
.
¶ La lecture du titre choisi commence.
98
Recherche d’une scène ou d’une plage musicale
données (Recherche par titre) Partie 1
.
→ .
Titre 2Titre 1
Recherche d’une scène ou
d’une plage musicale données
(Recherche par titre) Partie 1
Touche PLAY 3
LaserDisk
LD-G CD-G
A / B
ANGLE
PLAY
CONDITION
KEY CONTROL
OPEN/
CLOSE
DISPLAY
PLAYBACK
CONTROL
RETURN
Recherche par menu
Appuyez sur la touche
(Uniquement pendant la lecture)
Appuyez sur la touche
MENU
.
TITLE MENU
PLAY
1
MAIN
2
3
4
5
MENU
EXIT ENTER
TITLE 1
TITLE 2
TITLE 3
TITLE 4
TITLE 5
ENTER
Choisissez le titre en
RETURN
REPEATREPEATSTOP
NEXT
¶ Le menu's affiche.
¶ Ceci ne s’affiche pas
avec tous les disques.
A–B
CLEAR
3
utilisant les touches
.
PROGRAM
LASER DBC
¶ Vous pouvez
également effectuer
une recherche directe
au moyen des touches
numérotées. La
lecture du titre choisi
commence presque
aussitôt.
Appuyez sur la touche
4
¶ La lecture du titre choisi commence.
TITLE MENU
PLAY
1
MAIN
2
3
4
5
MENU
EXIT ENTER
TITLE 1
TITLE 2
TITLE 3
TITLE 4
TITLE 5
ENTER
RETURN
Remarques
◆ Sur certains DVD prévus pour le karaoké, les chansons sont
identifiées par chapitre et non pas par titre. En ce cas, pour
choisir une chanson utilisez la recherche par chapitre (reportezvous à la page 99, “Si le numéro du chapitre, ou de la plage
musicale, est élevé”).
Pour la recherche directe par titre, utilisez les touches
numérotées que portent le lecteur et la télécommande. (Pour
de plus amples détails concernant les titres et les chapitres,
reportez-vous à la page 92.)
◆ Dans le cas de certains DVD, la recherche peut s’interrompre.
Le signe s’affiche alors sur l’écran.
◆ Dans le cas de certains disques, aucune menu ne s’affiche.
TITLE
ENTER
.
1/4
PREV
1/4
PREV
.
POWER
AUDIO
LAST
MEMORY
TITLE
PREV
REV FWD
CHP/TIME
DISC SIDE
SUBTITLE
MENU
ENTER
PAUSE
.
MODE
MELODY
GUIDE
VOCAL
VOCAL
PARTNER
Page 99

Chapitre 1 Chapitre 2 Chapitre 3 Chapitre 4
Recherche d’une scène ou d’une plage
musicale données (Recherche d'un
chaptire,d'une plage musicale)Partie 2
Trois méthodes de recherche existent pour les DVD et les VIDEO CD; recherche normale, recherche directe et
recherche par indication d’un temps.
Dans le cas des CD, seule la recherche directe est possible.
Quatre méthodes de recherche existent pour les LD; recherche normale, recherche directe et recherche par indication d’un temps/numéro d’image.
Recherche par numéro de
chapitre musicale
(Recherche normale)
Recherche directe au moyen des touches numérotées
Exemple 1: Pour choisir le chapitre
(la plage musicale) 3
.
Exemple 2: Pour choisir le chapitre
(la plage musicale) 17
→ .
¶ Dansle cas d’un DVD, cela devient une
recerche par titre. Reportez-vous à la page
98, Recherche d’une scène vidéo/d’une
plage musicale (Recherche par titre) Partie
1.
CHP 3
CHP 17
POWER
AUDIO
SUBTITLE
LAST
MEMORY
TITLE
PREV
REV FWD
PAUSE
DISC SIDE
MENU
ENTER
A / B
ANGLE
PLAY
OPEN/
CLOSE
DISPLAY
PLAYBACK
CONTROL
RETURN
NEXT
Recherche d’un numéro de
chapitre à partir d’un menu
Cette recherche ne peut concerner que les DVD.
Appuyez sur la
touche
Si l’appareil est à l’arrêt, passez à l’opération 3.
Appuyez sur la touche
MENU
¶ Le menu des
chapitres
s’affiche.
Effectuez la sélection désirée en
3
tenant compte des indications
affichées sur l’écran.
CHP/TIME
.
.
TITLE 1
CHAPTER
STOP
MAIN
MANU
CHAPTER 0 (1~3)
MENU
ENTER
RETURN
EXIT ENTER
Si le numéro du chapitre, ou de la plage musicale, est élevé
¶ Dans le cas de certains titres, aucun menu
ne s’affiche. Vous devez alors procéder
comme indiqué à gauche.
Appuyez sur la touche
CHP/TIME
.
CHP/TIME
REPEATREPEATSTOP
A–B
CLEAR
Opérations de base
Fonctionnement
détaillé
Fonctionnement
Karaoké
¶ Le numéro du chapitre, ou de la plage
musicale, clignote.
¶ Dans le cas des DVD, vous pouvez afficher
un menu alors que le lecteur est à l’arrêt.
Cela fait, reportez-vous à droite, “Recherche
d’un numéro de chapitre à partir d’un menu”.
Indication d’un numéro de
chapitre, ou de plage musicale,
au moyen des touches
numérotées.
Exemple 1: Pour choisir le chapitre, ou la
plage musicale, 31 appuyez sur la touche
→ .
Example 2: Pour choisir le chapitre, 187
appuyez sur la touche → → .
Appuyez sur la touche
3
PLAY
.
¶ La lecture du chapitre, ou de la plage
musicale, choisis commence.
Notes
Pour effacer les indications de titre, chapitre,
plage musicale, temps et image alors qu'elles
clignotent, appuyez deux fois sur la touche
CLEAR.
¶ Certains titres autorisent également la
sélection par un menu. Pour cela, appuyez
sur la touche
le menu puis choisissez le titre désiré.
MENU
de manière à afficher
CONDITION
MELODY
GUIDE
VOCAL
MODE
VOCAL
PARTNER
PROGRAM
KEY CONTROL
LASER DBC
Remarques
◆
La recherche par indication de temps n'est
pas possible sur les CD et VIDEO CD.
◆
Certains DVD ne permettent pas une
recherche par indication d'un temps.En
ce cas, le signe s'affiche sur l'écran.
◆
Après une recherche par indication de
temps sur un DVD ou un VIDEO CD, la
lecture peut commencer à partir d'un
point très proche du point théorique.
◆
La recherche par indication d’un temps
n’est pas possible en dehors de la
lecture du DVD (lecteur à l’arrêt).
◆
Pendant la lecture d'un VIDEO CD
commandée par menu(PBC), les
opérations de recherche mentionnées
cidessous ne sont pas possibles.
Recherche par indication d’un
Choix des conditions
de fonctionnement
temps/Recherche par indication
d’un numéro d’image
Appuyez deux fois sur la
touche
CHP 0
Dans le cas des DVD et des LD qui ne sont
pas divisés en chapitre, le temps est indiqué
après une première pression sur cette touche.
A l'aide des touches numérotées,
précisez la valeur du temps ou le
numéro de l'image.
Exemple 1: Pour précisez 21 minutes 43
secondes,
Exemple 2: Pour choisir l’image 423,
→ → → .
¶ La recherche d’un chapitre d’un DVD n’est
possible que si le chapitre appartient au
titre actuellement concerné.
Press
3
¶ La lecture commence à partir du point précisé.
Recherche d’une scène ou d’une plage musicale données
(Recherche d'un chaptire,d'une plage musicale)Partie 2
CHP/TIME
.
→
TIME 0.00
→ → → .
PLAY
.
Autres informationsConfiguration
99
Page 100

Répétition de la
lecture d’un chapitre,
d’une plage musicale
Appuyez une fois sur la touche
REPEAT
pendant la lecture du
chapitre ou de la plage musicale
à répéter.
Répétition de la
lecture
Touche PLAY 3
LD-G CD-G
LaserDisk
Répétition de la
lecture d’un titre
Appuyez deux fois sur la
touche
¶ Dans le cas d’un DVD, la lecture du titre se
poursuit jusqu’à la fin puis reprend au début
du titre.
¶ Dans le cas des DVD, la répétition de la
lecture d'un passage du même titre est
possible.
¶ Dans le cas d’un CD ou VIDEO CD, il faut
considérer que le disque lui-même est un
titre et donc que tout le disque sera répété.
¶ Dans le cas d’un LD, seule une face est
répétée.
REPEAT
.
Répétition de la lecture
d’un LD gravés sur les
deux faces
Appuyez trois fois sur la
touche
¶ La répétition de la lecture des deux faces
commence par la face A.
REPEAT
.
POWER
AUDIO
LAST
MEMORY
TITLE
PREV
REV FWD
CHP/TIME
MELODY
GUIDE
VOCAL
SUBTITLE
PAUSE
MODE
VOCAL
PARTNER
DISC SIDE
A / B
ANGLE
MENU
ENTER
PLAY
CONDITION
KEY CONTROL
OPEN/
CLOSE
DISPLAY
PLAYBACK
CONTROL
RETURN
NEXT
REPEATREPEATSTOP
A–B
CLEAR
PROGRAM
LASER DBC
Répétition de la lecture
d’un intervalle donné
REPEAT
Appuyez sur la touche
A–B
au
début et à la fin de l’intervalle
concerné.
Retour à un point
donné
Appuyez sur la touche
REPEAT
le moment venu.
A–B
Pour revenir au même
point, appuyez sur la
touche
¶ Appuyez sur la touche
mémoire du point.
PLAY
.
CLEAR
pour effacer la
Pour abandonner la
répétition de la lecture
Appuyez sur la touche
¶ La répétition de la lecture est abandonnée
mais la lecture normale reprend.
¶ Dans le cas des DVD, tout le contenu du
titre choisi est répété.
100
Répétition de la lecture
CLEAR
Remarques
.
◆ La lecture répétée de certains titres de DVD n’est pas
possible. En ce cas, le signe s’affiche sur l’écran.
◆ La lecture répétée d’un VIDEO CD n’est pas possible
si elle a été commandée par un menu (emploi de ”Play
Back Control (PBC)”). Pour obtenir la répétition de la
lecture, appuyez sur la touche PLAYBACK CONTROL
de l’appareil ou de la télécommande de manière à
éteindre le témoin PBC.
 Loading...