

Page 1

Operation Manual
Mode demploi
High power CD player with FM/AM tuner
Lecteur CD de grande puissance avec syntoniseur
FM/AM
DEH-2700
English EspañolFrançais
Page 2
Contents
Thank you for buying this Pioneer product.
Please read through these operating instructions so you will know how to operate
your model properly. After you have finished reading the instructions, keep this man-
ual in a safe place for future reference.
Before You Start
Information to User 4
For Canadian model 4
About this unit 4
After-sales service for Pioneer products 4
Product registration 5
Protecting your unit from theft 5
Removing the front panel 5
Attaching the front panel 5
Whats What
Head unit 6
Power ON/OFF
Turning the unit on and selecting a
source 7
Turning the unit off 7
Tuner
Listening to the radio 8
Storing and recalling broadcast
frequencies 8
Tuning in strong signals 8
Storing the strongest broadcast
frequencies 9
Built-in CD Player
Playing a CD 10
Playing tracks in a random order 10
Repeating play 10
Pausing CD playback 10
Adjusting loudness 12
Front image enhancer (F.I.E.) 13
Adjusting source levels 13
Other Functions
Setting the clock 14
Turning the clock display on or off 14
Additional Information
Understanding built-in CD player error
messages 15
CD player and care 15
CD-R/CD-RW discs 15
Specifications 17
Audio Adjustments
Introduction of audio adjustments 11
Using balance adjustment 11
Using the equalizer 11
Recalling equalizer curves 11
Adjusting equalizer curves 12
Fine-adjusting equalizer curve 12
2
En
Page 3

Selecting fine audio equipment such as the unit you’ve just purchased is only the start of your
p
.
bel
Leve
e
30
s
0
L
c
50
Lig
musical enjoyment. Now it’s time to consider how you can maximize the fun and excitement your
equipment offers. This manufacturer and the Electronic Industries Association’s Consumer
Electronics Group want you to get the most out of your equipment by playing it at a safe level. One
that lets the sound come through loud and clear without annoying blaring or distortion—and, most
importantly, without affecting your sensitive hearing.
Sound can be deceiving. Over time your hearing “comfort level” adapts to higher volumes of
sound. So what sounds “normal” can actually be loud and harmful to your hearing. Guard against
this by setting your equipment at a safe level BEFORE your hearing adapts.
To establish a safe level:
• Start your volume control at a low setting.
• Slowly increase the sound until you can hear it comfortably and clearly, and without distortion.
Once you have established a comfortable sound level:
• Set the dial and leave it there.
Taking a minute to do this now will help to prevent hearing damage or loss in the future. After
all, we want you listening for a lifetime.
We Want You Listening For A Lifetime
Used wisely, your new sound equipment will provide a lifetime of fun and enjoyment. Since
hearing damage from loud noise is often undetectable until it is too late, this manufacturer and the
Electronic Industries Association’s Consumer Electronics Group recommend you avoid prolonged
ex
osure to excessive noise. This list of sound levels is included for your protection
Deci
l Exampl
Quiet library, soft whisper
4
60 Air conditioner at 20 feet, sewing machine
70 Vacuum cleaner, hair dryer, noisy restaurant
80 Average city traffic, garbage disposals, alarm clock at two feet
THE FOLLOWING NOISES CAN BE DANGEROUS UNDER CONSTANT EXPOSURE
90 Subway, motorcycle, truck traffic, lawn mower
100 Garbage truck, chain saw, pneumatic drill
120 Rock band concert in front of speakers, thunderclap
140 Gunshot blast, jet plane
180 Rocket launching pad
Information courtesy of the Deafness Research Foundation.
iving room, refrigerator, bedroom away from traffi
ht traffic, normal conversation, quiet office
English
3
En
Page 4
Section
01
Before You Start
Information to User
Alteration or modifications carried out without
appropriate authorization may invalidate the
users right to operate the equipment.
For Canadian model
This Class B digital apparatus complies with
Canadian ICES-003.
About this unit
The tuner frequencies on this unit are allocated for use in North America. Use in other
areas may result in poor reception.
WARNING:
Handling the cord on this product or cords associated with accessories sold with the product will
expose you to lead, a chemical known to the
State of California and other governmental entities to cause cancer and birth defects or other reproductive harm. Wash hands after handling.
CAUTION:
USE OF CONTROL OR ADJUSTMENT OR
PERFORMANCE OF PROCEDURES
OTHER THAN THOSE SPECIFIED HEREIN
MAY RESULT IN HAZARDOUS RADIATION
EXPOSURE.
CAUTION:
THE USE OF OPTICAL INSTRUMENTS
WITH THIS PRODUCT WILL INCREASE
EYE HAZARD.
CAUTION
! Do not allow this unit to come into contact
with liquids. Electrical shock could result.
Also, this unit damage, smoke, and overheat
could result from contact with liquids.
! Keep this manual handy as a reference for op-
erating procedures and precautions.
! Always keep the volume low enough so that
you can hear sounds from outside the vehicle.
! Protect this unit from moisture.
! If the battery is disconnected or discharged,
the preset memory will be erased and must be
reprogrammed.
Important (Serial number)
The serial number is located on the top of this
unit. For your own security and convenience, be
sure to record this number on the enclosed warranty card.
After-sales service for
Pioneer products
Please contact the dealer or distributor from
where you purchased this unit for after-sales
service (including warranty conditions) or any
other information. In case the necessary information is not available, please contact the
companies listed below:
Please do not ship your unit to the companies
at the addresses listed below for repair without
advance contact.
4
En
Page 5
Before You Start
Section
01
U.S.A.
Pioneer Electronics (USA) Inc.
CUSTOMER SUPPORT DIVISION
P.O. Box 1760
Long Beach, CA 90801-1760
800-421-1404
CANADA
Pioneer Electronics of Canada, Inc.
CUSTOMER SATISFACTION DEPARTMENT
300 Allstate Parkway
Markham, Ontario L3R OP2
1-877-283-5901
For warranty information please see the Limited Warranty sheet included with this unit.
Product registration
Visit us at the following site:
1 Register your product. We will keep the details
of your purchase on file to help you refer to
this information in the event of an insurance
claim such as loss or theft.
2 Receive updates on the latest products and
technologies.
3 Download owners manuals, order product
catalogues, research new products, and
much more.
Important
! Never use force or grip the display and the
buttons too tightly when removing or attaching.
! Avoid subjecting the front panel to excessive
shocks.
! Keep the front panel out of direct sunlight and
high temperatures.
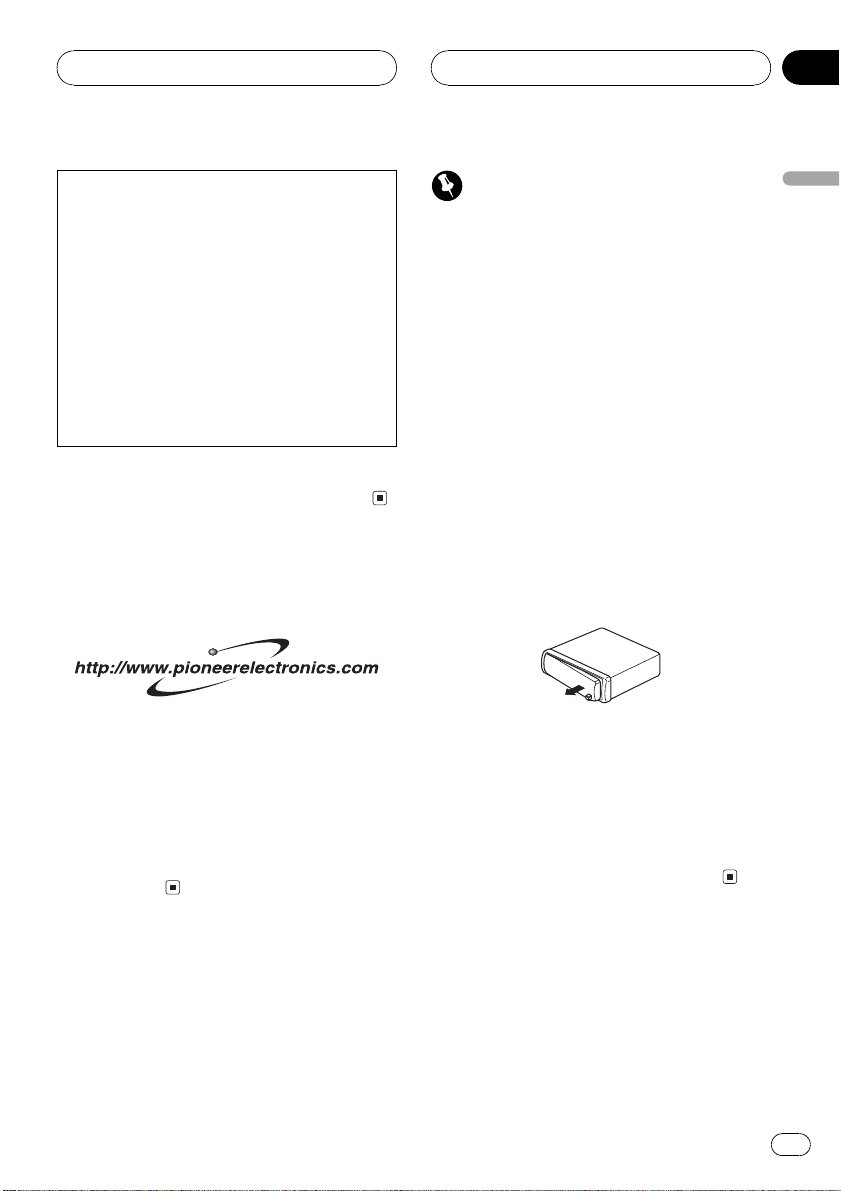
Removing the front panel
1 Press DETACH to release the front
panel.
Press DETACH and the right side of the panel
is released from the head unit.
2 Grab the front panel and remove.
Grab the right side of the front panel and pull
away to the left. The front panel will be detached from the head unit.
Attaching the front panel
1 Place the front panel flat against the
head unit.
2 Press the front panel into the face of
the head unit until it is firmly seated.
English
Protecting your unit from
theft
The front panel can be detached from the
head unit to discourage theft.
En
5
Page 6
1
3
8
9ab
c
4
6
2
5
7
d
e
Section
02
Whats What
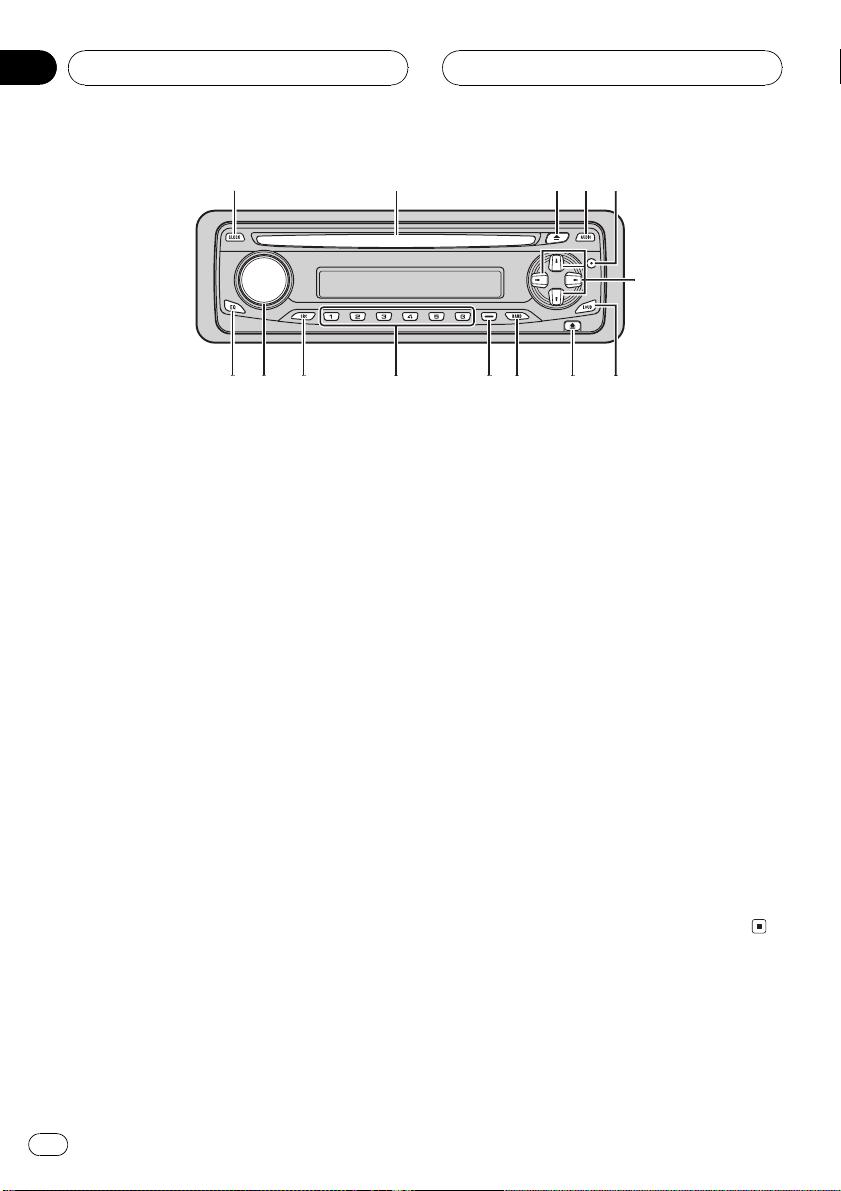
Head unit
1 CLOCK button
Press to change to the clock display.
2 Disc loading slot
Insert a disc to play.
3 EJECT button
Press to eject a CD from your built-in CD
player.
4 AUDIO button
Press to select various sound quality controls.
5 PAUSE button
Press to turn pause on or off.
6 a/b/c/d buttons
Press to do manual seek tuning, fast forward, reverse and track search controls.
Also used for controlling functions.
7 LOUDNESS button
Press to turn loudness on or off.
8 DETACH button
Press to remove the front panel from the
head unit.
9 BAND button
Press to select among three FM bands and
one AM band and to cancel the control
mode of functions.
a LOCAL/BSM button
Press to turn local function on or off.
Press and hold to turn BSM function on or
off.
b 16 buttons
Press for preset tuning.
c SOURCE button
This unit is turned on by selecting a source.
Press to cycle through all the available
sources.
d VOLUME
Rotate it to increase or decrease the volume.
e EQ button
Press to select various equalizer curves.
6
En
Page 7

Power ON/OFF
Section
03
Turning the unit on and
selecting a source
You can select a source you want to listen to.
To switch to the built-in CD player, load a disc
in the unit (refer to page 10).
% Press SOURCE to select a source.
Press SOURCE repeatedly to switch between
the following sources:
Built-in CD playerTuner
When you select a source the unit is turned
on.
Notes
! When no disc has been set in the unit, the
source will not switch to the built-in CD player.
! When this units blue/white lead is connected
to the vehicles auto-antenna relay control
terminal, the vehicles antenna extends when
this units source is turned on. To retract the
antenna, turn the source off.
Turning the unit off
% Press SOURCE and hold until the unit
turns off.
English
En
7
Page 8
Section
04
Tuner
Listening to the radio
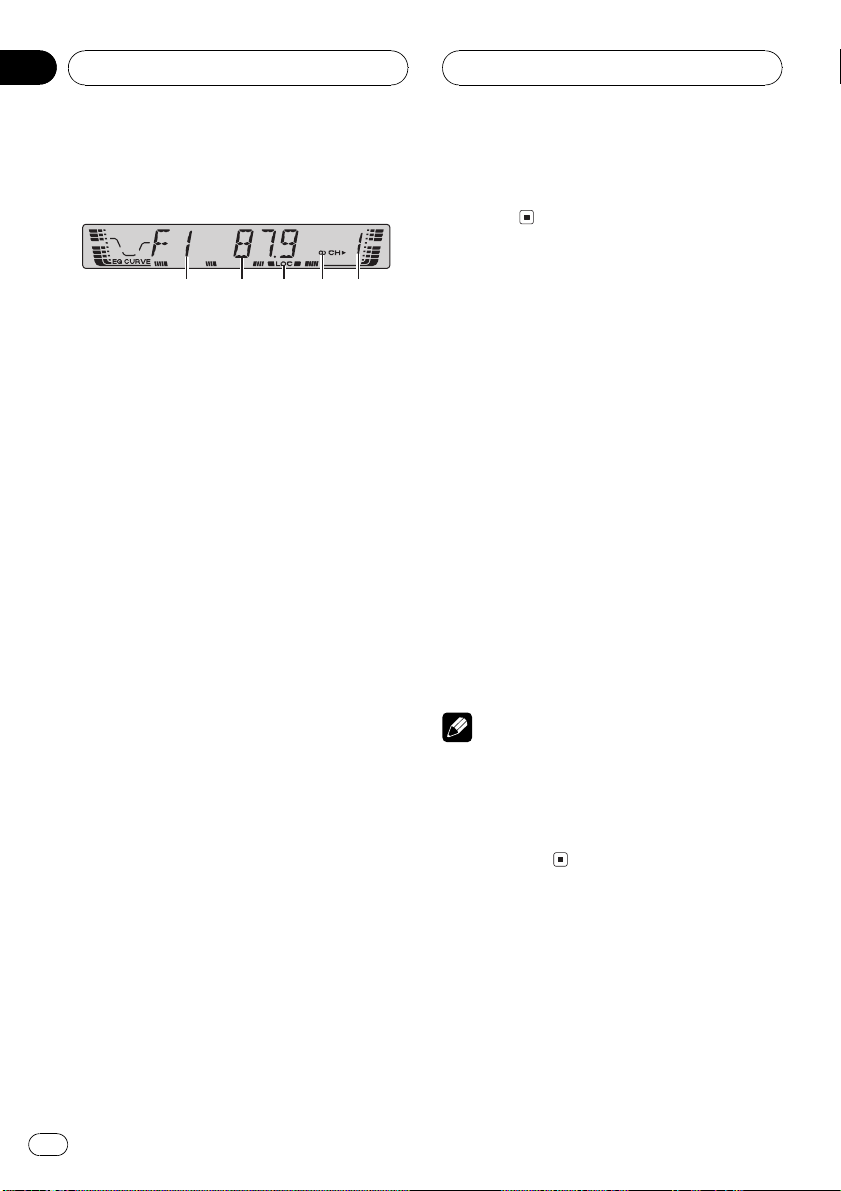
1 2 4 53
1 Band indicator
Shows which band the radio is tuned to, AM
or FM.
2 Frequency indicator
Shows to which frequency the tuner is
tuned.
3 LOC indicator
Shows when local seek tuning is on.
4 Stereo (5) indicator
Shows that the frequency selected is being
broadcast in stereo.
5 Preset number indicator
Shows which preset has been selected.
1 Press SOURCE to select the tuner.
2 Use VOLUME to adjust the sound level.
3 Press BAND to select a band.
Press BAND until the desired band is displayed, F1, F2, F3 for FM or AM.
4 To perform manual tuning, briefly press
c or d.
# If you press and hold c or d you can skip sta-
tions. Seek tuning starts as soon as you release
the button.
Storing and recalling
broadcast frequencies
If you press any of the preset tuning buttons
16 you can easily store up to six broadcast
frequencies for later recall with the touch of a
button.
% When you find a frequency that you
want to store in memory press one of preset tuning buttons 16 and hold until the
preset number stops flashing.
The number you have pressed will flash in the
preset number indicator and then remain lit.
The selected radio station frequency has been
stored in memory.
The next time you press the same preset tuning button the radio station frequency is recalled from memory.
Notes
! Up to 18 FM stations, six for each of the three
FM bands, and six AM stations can be stored
in memory.
! You can also use a and b to recall radio sta-
tion frequencies assigned to preset tuning
buttons 16.
5 To perform seek tuning, press and hold
c or d for about one second and release.
The tuner will scan the frequencies until a
broadcast strong enough for good reception is
found.
# You can cancel seek tuning by briefly pressing
either c or d.
8
En
Tuning in strong signals
Local seek tuning lets you tune in only those
radio stations with sufficiently strong signals
for good reception.
Page 9
Tuner
Section
04
% Press LOCAL/BSM repeatedly to turn
local seek tuning on or off.
When local seek tuning is on, LOC appears in
the display.
Storing the strongest
broadcast frequencies
BSM (best stations memory) lets you automatically store the six strongest broadcast frequencies under preset tuning buttons 16 and
once stored there you can tune in to those frequencies with the touch of a button.
! Storing broadcast frequencies with BSM
may replace broadcast frequencies you
have saved using buttons 16.
% Press LOCAL/BSM and hold until the
BSM turns on.
BSM begins to flash. While BSM is flashing
the six strongest broadcast frequencies will be
stored under preset tuning buttons 16 in the
order of their signal strength. When finished,
BSM stops flashing.
# To cancel the storage process, press
LOCAL/BSM.
English
En
9
Page 10
Section
05
Built-in CD Player
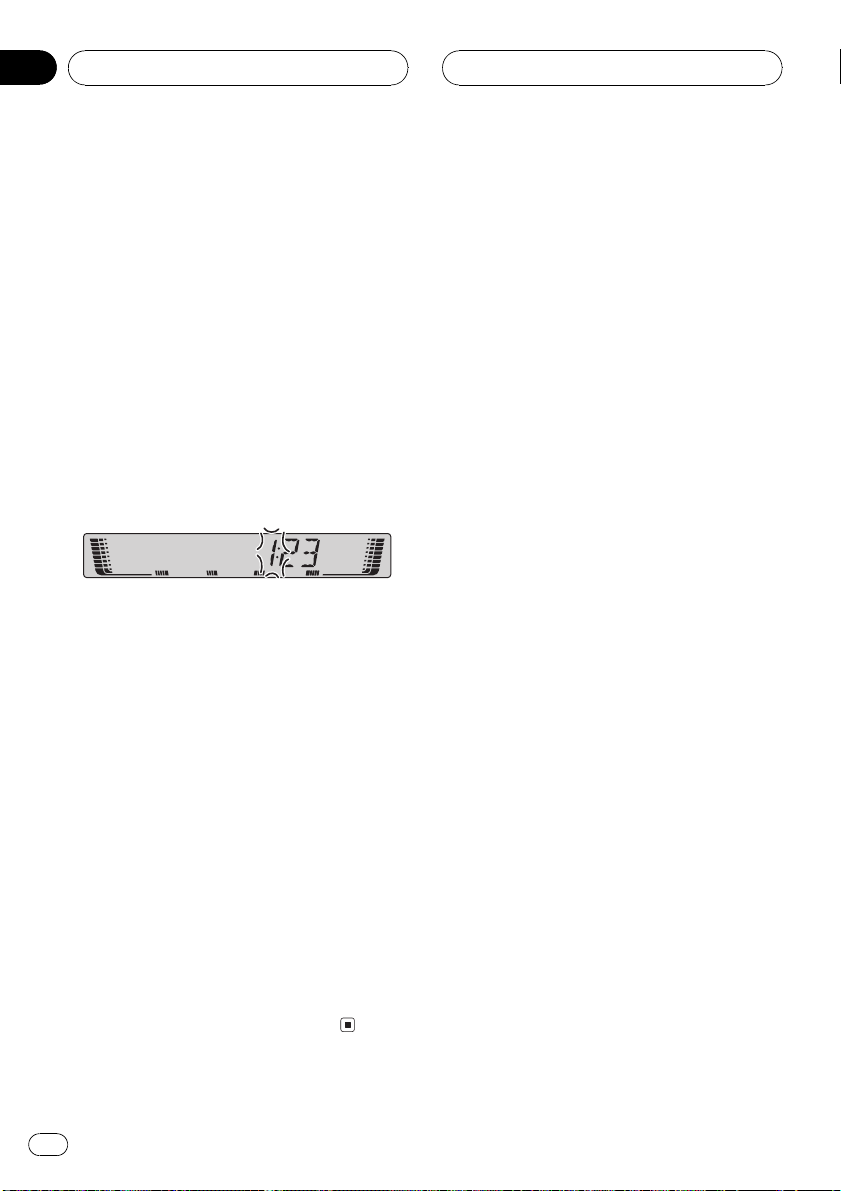
Playing a CD
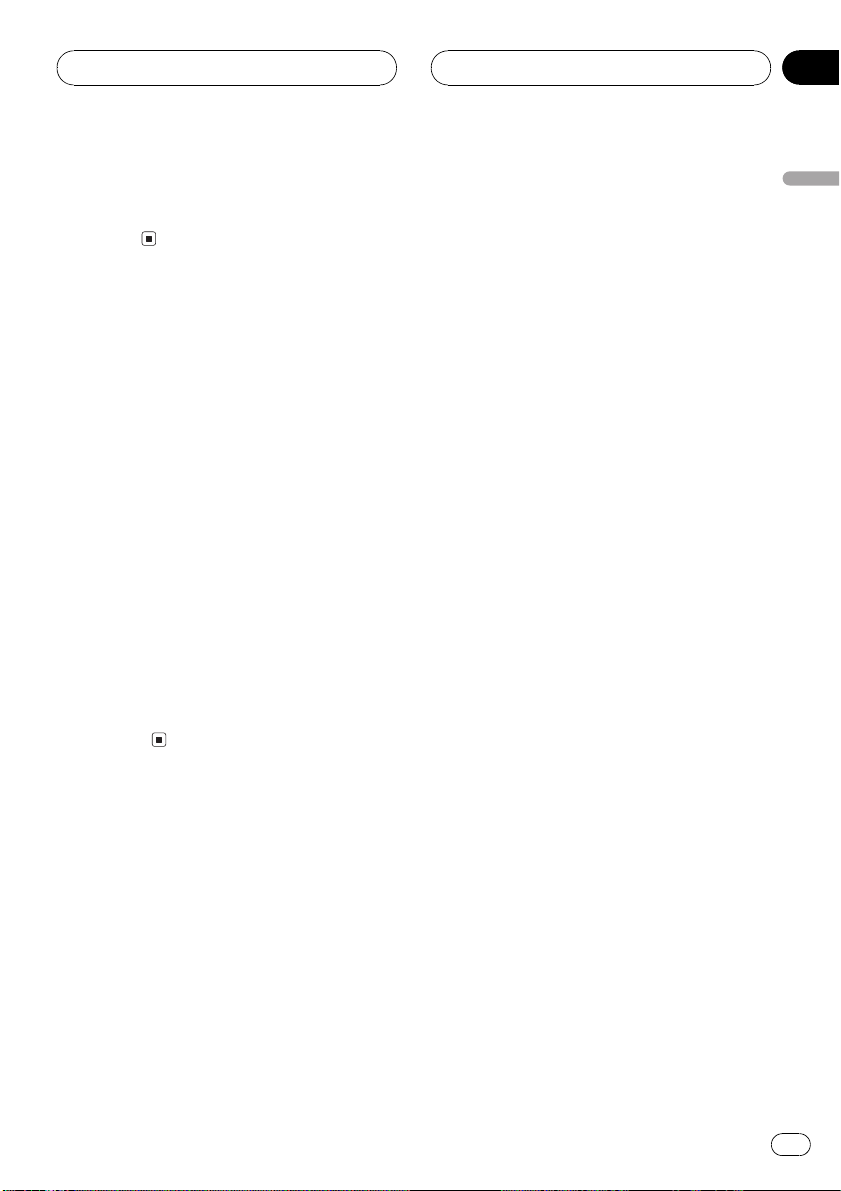
1 2 3
1 RPT indicator
Shows when repeat play is turned on.
2 Track number indicator
Shows the track currently playing.
3 Play time indicator
Shows the elapsed playing time of the current track.
1 Insert a CD into the CD loading slot.
Playback will automatically start.
# Be sure to turn up the label side of a disc.
# After a CD has been inserted, press SOURCE
to select the built-in CD player.
# You can eject a CD by pressing EJECT.
2 Use VOLUME to adjust the sound level.
3 To perform fast forward or reverse,
press and hold c or d.
4 To skip back or forward to another
track, press c or d.
Pressing d skips to the start of the next track.
Pressing c once skips to the start of the current track. Pressing again will skip to the previous track.
! If an error message such as ERROR-11 is dis-
played, refer to Understanding built-in CD
player error messages on page 15.
Playing tracks in a random
order
Random play lets you play back tracks on the
CD in a random order.
% Press 4 repeatedly to turn random play
on or off.
When random play is on, RDM appears in the
display.
Repeating play
Repeat play lets you hear the same track over
again.
% Press 5 repeatedly to turn repeat play
on or off.
When repeat play is on, RPT appears in the
display.
# If you perform track search or fast forward/reverse, repeat play is automatically cancelled.
Pausing CD playback
Pause lets you temporarily stop playback of
the CD.
Notes
! The built-in CD player plays one, standard, 12-
cm or 8-cm (single) CD at a time. Do not use
an adapter when playing 8-cm CDs.
! Do not insert anything other than a CD into
the CD loading slot.
10
En
% Press PAUSE repeatedly to turn pause
on or off.
When pause is on, PAUSE appears in the display.
Page 11
Audio Adjustments
Section
06
Introduction of audio
adjustments
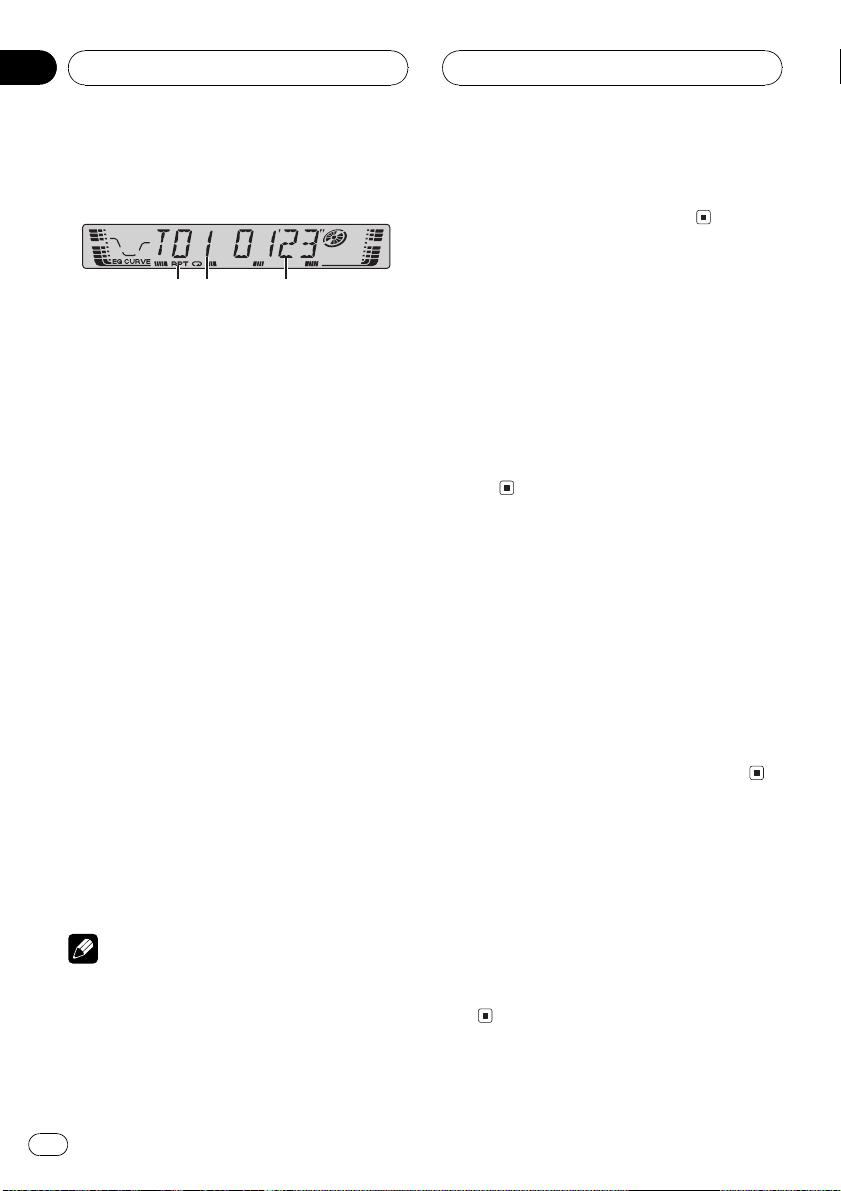
1 2 43
1 CUSTOM indicator
Shows when custom equalizer curve is currently selected.
2 Audio display
Shows the audio adjustments status.
3 FIE indicator
Shows when the front image enhancer is
turned on.
4 LOUD indicator
Appears in the display when loudness is
turned on.
% Press AUDIO to display the audio function names.
Press AUDIO repeatedly to switch between
the following audio functions:
FAD (balance adjustment)EQ (equalizer)
LOUD (loudness)FIE (front image enhan-
cer)SLA (source level adjustment)
# When selecting the FM tuner as the source,
you cannot switch to SLA.
# If you do not operate the audio function within
about 30 seconds, the display is automatically returned to the source display.
# To return to the display of each source, press
BAND.
Using balance adjustment
You can select a fader/balance setting that
provides an ideal listening environment in all
occupied seats.
1 Press AUDIO to select FAD.
# If the balance setting has been previously adjusted, BAL will be displayed.
2 Press a or b to adjust front/rear speaker balance.
FAD F15 FAD R15 is displayed as the front/
rear speaker balance moves from front to rear.
# FAD 0 is the proper setting when only two
speakers are used.
3 Press c or d to adjust left/right speaker
balance.
BAL L9 BAL R9 is displayed as the left/right
speaker balance moves from left to right.
Using the equalizer
The equalizer lets you adjust the equalization
to match car interior acoustic characteristics
as desired.
Recalling equalizer curves
There are six stored equalizer curves which
you can easily recall at any time. Here is a list
of the equalizer curves:
Display Equalizer curve
SPR-BASS Super bass
POWERFUL Powerful
NATURAL Natural
VOCAL Vocal
CUSTOM Custom
EQ FLAT Flat
English
En
11
Page 12
Section
06
Audio Adjustments
! CUSTOM is an adjusted equalizer curve
that you create.
! When EQ FLAT is selected no supplement
or correction is made to the sound. This is
useful to check the effect of the equalizer
curves by switching alternatively between
EQ FLAT and a set equalizer curve.
% Press EQ to select the equalizer.
Press EQ repeatedly to switch between the following equalizers:
SPR-BASSPOWERFULNATURAL
VOCALCUSTOMEQ FLAT
Adjusting equalizer curves
You can adjust the currently selected equalizer
curve setting as desired. Adjusted equalizer
curve settings are memorized in CUSTOM.
! If you make adjustments when a curve
other than CUSTOM is selected, the newly
adjusted curve will replace the previous
curve. Then a new curve with CUSTOM appears on the display while selecting the
equalizer curve.
1 Press AUDIO to select EQ.
2 Press c or d to select the equalizer
band to adjust.
EQ-L (low)EQ-M (mid)EQ-H (high)
3 Press a or b to adjust the level of the
equalizer band.
+6 6 is displayed as the level is increased
or decreased.
# You can then select another band and adjust
the level.
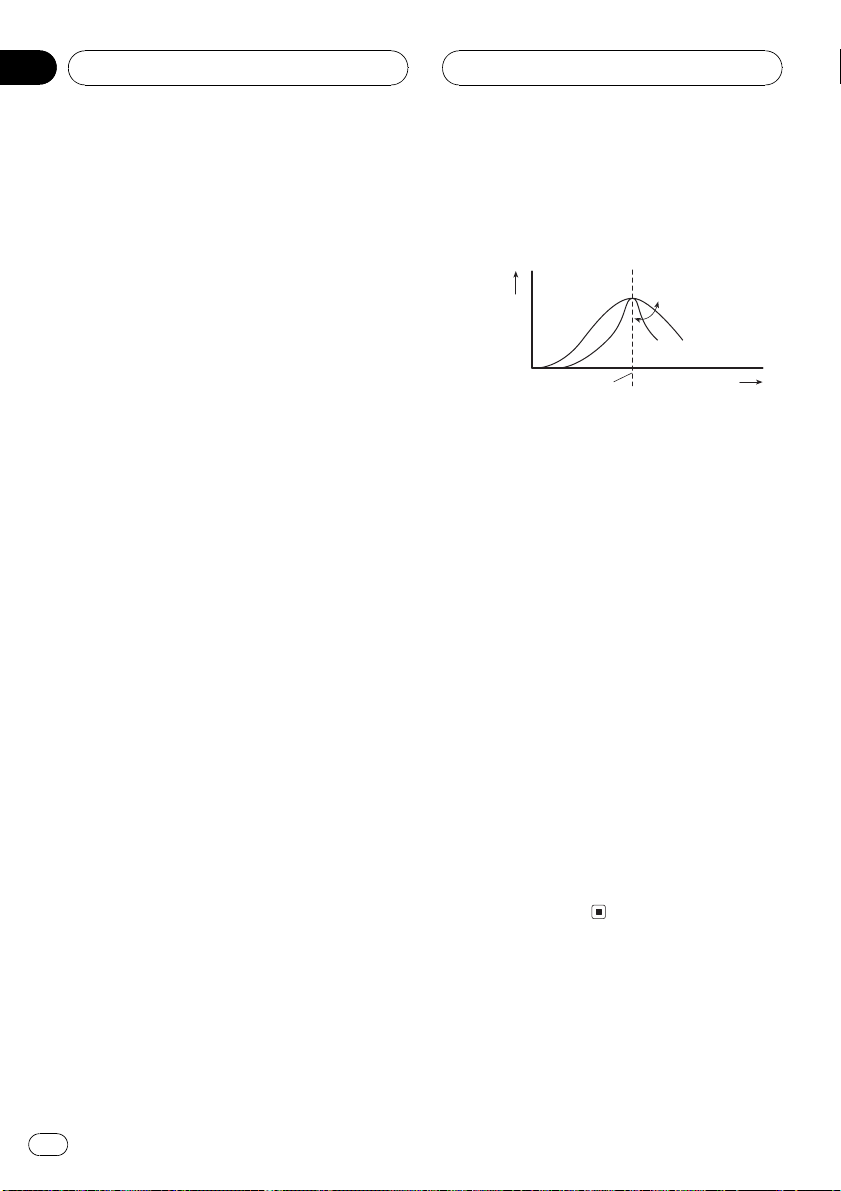
Fine-adjusting equalizer curve
You can adjust the center frequency and the Q
factor (curve characteristics) of each currently
selected curve band (EQ-L/EQ-M/EQ-H).
Level (dB)
Q=2W
Q=2N
Center frequency
! If you make adjustments when a curve
other than CUSTOM is selected, the newly
adjusted curve will replace the previous
curve. Then a new curve with CUSTOM appears on the display while selecting the
equalizer curve.
1 Press AUDIO and hold until frequency
and the Q factor (e.g., F- 80 Q 1W) appears
in the display.
2 Press AUDIO to select the desired band
for adjustment.
LowMidHigh
3 Press c or d to select the desired frequency.
Low: 4080100160 (Hz)
Mid: 2005001k2k (Hz)
High: 3k8k10k12k (Hz)
4 Press a or b to select the desired Q factor.
2N1N1W2W
Frequency (Hz)
12
Adjusting loudness
Loudness compensates for deficiencies in the
low- and high-sound ranges at low volume.
1 Press AUDIO to select LOUD.
En
Page 13
Audio Adjustments
Section
06
2 Press a to turn loudness on.
LOUD indicator is displayed.
# To turn loudness off, press b.
# You can also turn loudness on or off by press-
ing LOUDNESS.
3 Press c or d to select a desired level.
LOW (low)MID (mid)HI (high)
Front image enhancer (F.I.E.)
The F.I.E. (Front Image Enhancer) function is a
simple method of enhancing front imaging by
cutting mid- and high-range frequency output
from the rear speakers, limiting their output to
low-range frequencies. You can select the frequency you want to cut.
Precaution
When the F.I.E. function is deactivated, the rear
speakers output sound of all frequencies, not just
bass sounds. Reduce the volume before disengaging F.I.E. to prevent a sudden increase in volume.
1 Press AUDIO to select FIE.
Adjusting source levels
SLA (source level adjustment) lets you adjust
the volume level of each source to prevent radical changes in volume when switching between sources.
! Settings are based on the FM tuner volume
level, which remains unchanged.
! The AM tuner volume level can also be ad-
justed with source level adjustments.
1 Compare the FM tuner volume level
with the level of the source you wish to adjust.
2 Press AUDIO to select SLA.
3 Press a or b to adjust the source volume.
SLA +4 SLA 4 is displayed as the source vo-
lume is increased or decreased.
English
2 Press a to turn F.I.E. on.
# To turn F.I.E. off, press b.
3 Press c or d to select a desired frequency.
100160250 (Hz)
Notes
! After turning the F.I.E. function on, use the bal-
ance adjustment (refer to page 11) and adjust
front and rear speaker volume levels until they
are balanced.
! Turn the F.I.E. function off when using a 2-
speaker system.
En
13
Page 14
Section
07
Other Functions
Setting the clock
Use these instructions to set the clock.
1 Press SOURCE and hold until the unit
turns off.
2 Press AUDIO and hold until clock appears in the display.
3 Press c or d to select the segment of
the clock display you wish to set.
Pressing c or d will select one segment of the
clock display:
HourMinute
As you select segments of the clock display
the segment selected will blink.
4 Press a or b to set the clock.
Pressing a will increase the selected hour or
minute. Pressing b will decrease the selected
hour or minute.
# To cancel clock settings, press BAND.
# You can also cancel clock settings by holding
down AUDIO until the unit turns off.
Turning the clock display on or
off
You can turn the clock display on or off.
% Press CLOCK to turn the clock display
on or off.
Each press of CLOCK turns the clock display
on or off.
# The clock display disappears temporarily
when you perform other operations, but the clock
display appears again after 20 seconds.
14
En
Page 15
Additional Information
Appendix
Understanding built-in CD
player error messages
When you contact your dealer or your nearest
Pioneer Service Center, be sure to record the
error message.
Message Cause Action
ERROR-11, 12,
17, 30
ERROR-11, 12,
17, 30
ERROR-10, 11,
12, 17, 30, A0
ERROR-44 All tracks are
Dirty disc Clean disc.
Scratched disc Replace disc.
Electrical or mechanical
skip tracks
Turn the ignition
ON and OFF, or
switch to a different source, then
back to the CD
player.
Replace disc.
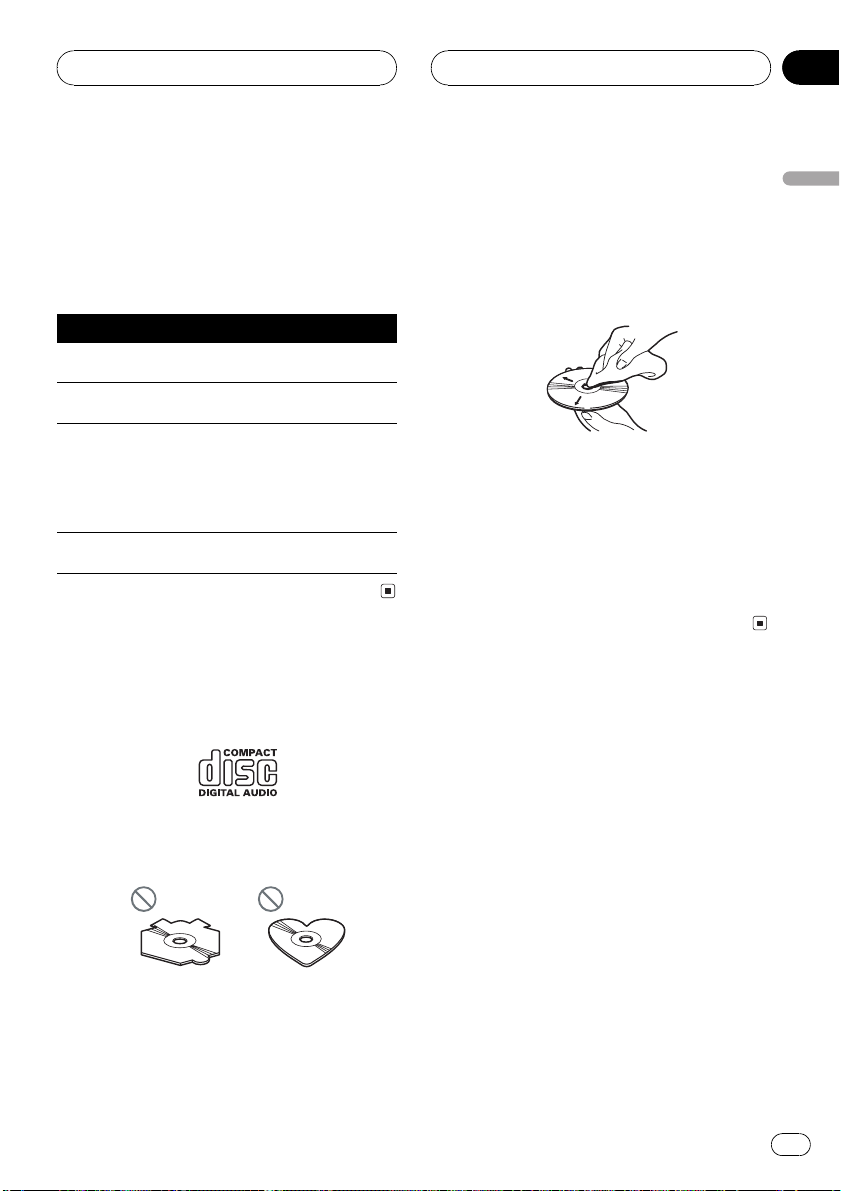
CD player and care
! Use only CDs that have the Compact Disc
Digital Audio mark as show below.
! Use only normal, round CDs. If you insert ir-
regular, non-round, shaped CDs they may
jam in the CD player or not play properly.
! Check all CDs for cracks, scratches or
warping before playing. CDs that have
cracks, scratches or are warped may not
play properly. Do not use such discs.
! Avoid touching the recorded (non-printed)
surface when handling the disc.
! Store discs in their cases when not in use.
! Keep discs out of direct sunlight and do
not expose the discs to high temperatures.
! Do not attach labels, write on or apply che-
micals to the surface of the discs.
! To clean a CD, wipe the disc with a soft
cloth outward from the center.
! If the heater is used in cold weather, moist-
ure may form on components inside the
CD player. Condensation may cause the CD
player to malfunction. If you think that condensation is a problem turn off the CD
player for an hour or so to allow it to dry
out and wipe any damp discs with a soft
cloth to remove the moisture.
! Road shocks may interrupt CD playback.
CD-R/CD-RW discs
! When CD-R/CD-RW discs are used, play-
back is possible only for discs which have
been finalized.
! It may not be possible to play back CD-R/
CD-RW discs recorded on a music CD recorder or a personal computer because of
disc characteristics, scratches or dirt on
the disc, or dirt, condensation, etc., on the
lens of this unit.
! Playback of discs recorded on a personal
computer may not be possible, depending
on the application settings and the environment. Please record with the correct format. (For details, contact the manufacturer
of the application.)
English
En
15
Page 16

Appendix
Additional Information
! Playback of CD-R/CD-RW discs may be-
come impossible in case of direct exposure
to sunlight, high temperatures, or the storage conditions in the vehicle.
! This unit conforms to the track skip func-
tion of the CD-R/CD-RW disc. The tracks
containing the track skip information are
skipped automatically.
! If you insert a CD-RW disc into this unit,
time to playback will be longer than when
you insert a conventional CD or CD-R disc.
! Read the precautions with CD-R/CD-RW
discs before using them.
16
En
Page 17

Additional Information
Appendix
Specifications
General
Power source .............................14.4 V DC (10.8 15.1 V al-
lowable)
Grounding system ................... Negative type
Max. current consumption
..................................................... 10.0 A
Dimensions (W × H × D):
DIN
Chassis ..................... 178 × 50 × 157 mm
(7 × 2 × 6-1/8 in.)
Nose ........................... 188 × 58 × 19 mm
(7-3/8 × 2-1/4 × 3/4 in.)
D
Chassis ..................... 178 × 50 × 162 mm
(7 × 2 × 6-3/8 in.)
Nose ........................... 170 × 48 × 14 mm
(6-3/4 × 1-7/8 × 1/2 in.)
Weight .......................................... 1.3 kg (2.9 lbs)
Audio
Continuous power output is 20 W per channel minimum
into 4 ohms, both channels driven 50 to 15,000 Hz with
no more than 5% THD.
Maximum power output .......45 W × 4
Load impedance ...................... 4 W (4 8 W allowable)
Preout max output level/output impedance
..................................................... 2.2 V/1 kW
Equalizer (3-Band Parametric Equalizer):
Low
Frequency ................ 40/80/100 /160 Hz
Q Factor .................... 0.35/0.59/0.95/1.15 (+6 dB
when boosted)
Gain ............................ ±12dB
Mid
Frequency ................ 200/500/1k/2k Hz
Q Factor .................... 0.35/0.59/0.95/1.15 (+6 dB
when boosted)
Gain ............................ ±12dB
High
Frequency ................ 3.15k/8k/10k/12.5k Hz
Q Factor .................... 0.35/0.59/0.95/1.15 (+6 dB
when boosted)
Gain ............................ ±12dB
Loudness contour
Low ....................................... +3.5 dB (100 Hz), +3 dB (10
kHz)
Mid ....................................... +10 dB (100 Hz), +6.5 dB
(10 kHz)
High ..................................... +11 dB (100 Hz), +11 dB
(10 kHz)
(volume: 30 dB)
CD player
System .......................................... Compact disc audio system
Usable discs .............................. Compact disc
Signal format:
Sampling frequency ..... 44.1 kHz
Number of quantization bits
........................................... 16; linear
Frequency characteristics ...5 20,000 Hz (±1 dB)
Signal-to-noise ratio ............... 94 dB (1 kHz) (IHF-A net-
work)
Dynamic range ......................... 92 dB (1 kHz)
Number of channels .............. 2 (stereo)
FM tuner
Frequency range ...................... 87.9 107.9 MHz
Usable sensitivity ..................... 8 dBf (0.7 µV/75 W, mono,
S/N: 30 dB)
50 dB quieting sensitivity ..... 10 dBf (0.9 µV/75 W, mono)
Signal-to-noise ratio ............... 75 dB (IHF-A network)
Distortion ..................................... 0.3 % (at 65 dBf, 1 kHz,
stereo)
0.1 % (at 65 dBf, 1 kHz,
mono)
Frequency response ............... 30 15,000 Hz (±3 dB)
Stereo separation .................... 45 dB (at 65 dBf, 1 kHz)
Selectivity .................................... 80 dB (±200 kHz)
Three-signal intermodulation (desired signal level)
..................................................... 30 dBf (two undesired sig-
nal level: 100 dBf)
AM tuner
Frequency range ...................... 530 1,710 kHz (10 kHz)
Usable sensitivity ..................... 18 µV (S/N: 20 dB)
Signal-to-noise ratio ............... 65 dB (IHF-A network)
Note
Specifications and the design are subject to possible modifications without notice due to improvements.
English
En
17
Page 18

Table des matières
Nous vous remercions davoir acheté cet appareil
Pioneer.
Nous vous prions de lire ces instructions dutilisation afin que vous sachiez utiliser
votre appareil correctement. Quand vous aurez fini la lecture de ces instructions,
rangez ce mode demploi dans un endroit sûr pour référence ultérieure.
Avant de commencer
Pour le modèle canadien 20
Quelques mots sur cet appareil 20
Service après-vente des produits Pioneer 20
Enregistrement du produit 20
Protection de lappareil contre le vol 21
Détache de la face avant 21
Pose de la face avant 21
Description de lappareil
Appareil central 22
Mise en service, mise hors service
Mise en service de lappareil et sélection
dune source 23
Mise hors service de lappareil 23
Syntoniseur
Écoute de la radio 24
Mise en mémoire et rappel des fréquences
des stations 24
Accord sur les signaux puissants 25
Mise en mémoire des fréquences des
émetteurs les plus puissants 25
Réglage des courbes
dégalisation 28
Réglage fin de la courbe
dégalisation 28
Réglage de la correction physiologique 29
Optimiseur dimage sonore avant (F.I.E.) 29
Ajustement des niveaux des sources 30
Autres fonctions
Réglage de lhorloge 31
Mise en service ou hors service de
laffichage de lhorloge 31
Informations complémentaires
Signification des messages derreur du
lecteur de CD intégré 32
Soins à apporter au lecteur de CD 32
Disques CD-R et CD-RW 33
Caractéristiques techniques 34
Lecteur de CD intégré
Écoute dun CD 26
Écoute des plages musicales dans un ordre
quelconque 26
Répétition de la lecture 26
Pause de la lecture dun CD 26
Réglages sonores
Introduction aux réglages sonores 27
Réglage de léquilibre sonore 27
Utilisation de légalisation 27
Rappel dune courbe
dégalisation 27
18
Fr
Page 19

La sélection d’un équipement audio de qualité comme l’unité que vous venez d’acheter n’est que
le début de votre plaisir musical. Maintenant, il est temps de penser à la manière de profiter au
maximum des plaisirs que vous offre votre équipement. Ce fabricant et le Groupe “Consumer
Electronics Group” de l’Association des Industries Electroniques veut que vous profitiez au maximum de votre équipement en l’utilisation à un niveau sûr. Un niveau qui permet au son d’être fort
et clair, sans beuglement ennuyant ou distorsion — et, ce qui est plus important, sans affecter votre
ouïe sensible.
Le son peut être décevant. Avec le temps, le “niveau de confort” de votre ouïe s’adapte aux volumes
sonores plus élevés. Ainsi, les sons “normaux” peuvent en fait être forts et affecter votre ouïe. Protégezvous contre cela en réglant votre équipement à un niveau sûr AVANT l’adaptation de votre ouïe.
Pour établir un niveau sûr:
• Démarrer votre commande de volume à un réglage bas.
• Augmentez lentement le son jusqu’à ce que vous l’entendiez confortablement et clairement, sans
distorsion.
Lorsque vous avez établi un niveau sonore confortable:
• Réglez le cadran et laissez-le tel quel.
En prenant une minute pour faire cela, vous pourrez éviter des dommages ou des pertes de sensibilités d’écoute dans le futur. Après tout, nous voulons que vous écoutiez pendant toute votre vie.
Nous voulons que vous écoutiez pendant toute votre vie
Utilisé avec sagesse, votre nouvel équipement sonore sera une source de plaisir pendant toute
votre vie. Comme les dommages de l’ouïe provenant d’un bruit fort ne sont souvent détectables que
lorsqu’il est trop tard, ce fabricant et le Groupe “Consumer Electronics Group” de l’Association des
Industries Electroniques vous recommandent d’éviter toute exposition prolongée à un bruit excessif.
Cette liste de niveaux sonores est incluse pour votre protection.
Niveau de
Décibels Exemple
30 Bibliothèque tranquille, chuchotement
40 Salon, réfrigérateur, chambre à distance de la circulation
50 Circulation légère, conversation normale, bureau tranquille
60 Climatiseur à 20 pieds, machine à coudre
70 Aspirateur, sèche-cheveux, restaurant bruyant
80 Circulation moyenne en ville, évacuateurs de déchets, réveils à deux pieds
LES BRUITS SUIVANTS PEUVENT ETRE DANGEREUX DANS LE CAS D’UNE EXPOSITION CONSTANTE
90 Métro, motocyclette, circulation de camion, tondeuse à gazon
100 Collecteurs de poubelle, scie à chaîne, perceuse pneumatique
120 Concert de groupe rock devant les haut-parleurs, coup de tonnerre
140 Coup de pistolet, avion à réaction
180 Aire de lancement d’une fusée
Ces informations ont été gracieusement fournies par la Fondation de la Recherche pour les Sourds.
Français
19
Fr
Page 20

Section
01
Avant de commencer
Pour le modèle canadien
Cet appareil numérique de la classe B est
conformé à la norme NMB-003 du Canada.
Quelques mots sur cet appareil
Les fréquences du syntoniseur de cet appareil
sont attribuées pour une utilisation en Amérique du Nord. Lutilisation de lappareil dans
dautres régions peut provoquer une réception
de mauvaise qualité.
PRÉCAUTION
! Ne laissez pas cet appareil venir en contact
avec de liquides. Cela pourrait provoquer une
électrocution. Tous contact avec des liquides
pourrait aussi provoquer des dommages, de
la fumée et une surchauffe de lappareil.
! Conservez ce mode demploi à portée de main
afin de vous y référer pour les modes opératoires et les précautions.
! Maintenez toujours le niveau découte à une
valeur telle que vous puissiez entendre les
sons provenant de lextérieur du véhicule.
! Protégez lappareil contre lhumidité.
! Si la batterie est débranchée, ou déchargée, le
contenu de la mémoire sera effacé et une
nouvelle programmation sera nécessaire.
Service après-vente des
produits Pioneer
Veuillez contacter le revendeur ou le distributeur chez qui vous avez acheté cet appareil
pour le service après-vente (y compris les
conditions de garantie) ou pour toute autre information. Au cas où les informations néces-
saires ne sont pas disponibles, veuillez
contacter les sociétés indiquées ci-dessous :
Nexpédiez pas lappareil pour réparation à
lune des adresses figurant ci-dessous sans
avoir pris un contact préalable.
États-Unis.
Pioneer Electronics (USA) Inc.
CUSTOMER SUPPORT DIVISION
P.O. Box 1760
Long Beach, CA 90801-1760
800-421-1404
CANADA
Pioneer électroniques du Canada, Inc.
Département de service aux consommateurs
300 Allstate Parkway
Markham, Ontario L3R OP2
1-877-283-5901
Pour connaître les conditions de garantie, reportez-vous au document, Garantie limitée,
qui accompagne cet appareil.
Enregistrement du produit
Rendez-nous visite sur le site suivant :
1 Enregistrez votre produit. Nous conserverons
sur fichier les détails de votre achat pour vous
permettre de vous reporter à ces informations
en cas de déclaration à votre assurance pour
perte ou vol.
2 Recevez les mises à jour sur les derniers pro-
duits et les plus récentes technologies.
3 Téléchargez les modes demploi, commandez
les catalogues des produits, recherchez de
nouveaux produits, et bien plus.
20
Fr
Page 21

Avant de commencer
Protection de lappareil
contre le vol
La face avant peut être détachée de l appareil
central pour décourager les vols.
Important
! Nexercez aucune force excessive, ne saisis-
sez pas lafficheur ni les touches trop fort
pour retirer ou fixer la face avant.
! Évitez de heurter la face avant.
! Conservez la face avant à labri des tempéra-
tures élevées et de la lumière directe du soleil.
Détache de la face avant
1 Appuyez sur DETACH pour libérer la
face avant.
Appuyez sur DETACH; le côté droit de la face
avant se trouve libéré de lappareil central.
Section
01
Français
2 Saisissez la face avant et retirez-la.
Saisissez le côté droit de la face avant et tirezla vers la gauche. La face avant sera détachée
de lappareil central.
Pose de la face avant
1 Placez la face avant bien à plat sur lappareil central.
2 Appuyez sur la face avant de manière
quelle se loge fermement dans lappareil
central.
21
Fr
Page 22

1
3
8
9ab
c
4
6
2
5
7
d
e
Section
02
Description de lappareil
Appareil central
1 Touche CLOCK
Appuyez sur cette touche pour modifier laffichage de lheure.
2 Fente de chargement des disques
Insérez un disque à lire.
3 Touche EJECT
Appuyez sur cette touche pour éjecter le CD
que contient le lecteur de CD intégré.
4 Touche AUDIO
Appuyez sur cette touche pour choisir les diverses commandes de correction sonore.
5 Touche PAUSE
Appuyez sur cette touche pour mettre en
service ou hors service la pause.
6 Touches a/b/c/d
Appuyez sur ces touches pour exécuter les
commandes daccord manuel, avance rapide, retour rapide et recherche de plage
musicale. Utilisées aussi pour contrôler les
fonctions.
7 Touche LOUDNESS
Appuyez sur cette touche pour mettre en
service, ou hors service, la correction physiologique.
8 Touche DETACH
Appuyez sur cette touche pour retirer la
face avant de lappareil central.
9 Touche BAND
Appuyez sur cette touche pour choisir une
des trois gammes FM ou la gamme AM, ou
encore abandonner la commande des fonctions.
a Touche LOCAL/BSM
Appuyez sur cette touche pour mettre en
service ou hors service la fonction stations
locales.
Maintenez cette touche enfoncée pour mettre en service ou hors service la fonction
BSM.
b Touches 16
Touches de présélection.
c Touche SOURCE
Cet appareil est mis en service en sélectionnant une source. Appuyez sur cette touche
pour parcourir les différentes sources disponibles.
d VOLUME
Tournez ce bouton pour augmenter ou diminuer le niveau sonore.
e Touche EQ
Appuyez sur cette touche pour choisir les diverses courbes dégalisation.
22
Fr
Page 23

Mise en service, mise
hors service
Mise en service de lappareil
et sélection dune source
Vous pouvez sélectionner une source que
vous voulez écouter. Pour passer au lecteur de
CD intégré, chargez un disque dans lappareil
(reportez-vous à la page 26).
Section
03
% Appuyez sur SOURCE pour choisir une
source.
Appuyez de manière répétée sur SOURCE
pour choisir lune après lautre les sources suivantes :
Lecteur de CD intégréSyntoniseur
Le fait de choisir une source met lappareil en
service.
Remarques
! Le lecteur de CD intégré ne sera pas activé sil
ne contient aucun disque.
! Si le fil bleu/blanc de lappareil est relié à la
prise de commande du relais de lantenne
motorisée du véhicule, celle-ci se déploie
lorsque la source est mise en service. Pour rétracter lantenne, mettez la source hors
service.
Mise hors service de lappareil
% Maintenez la pression sur SOURCE
jusquà ce que lappareil séteint.
Français
23
Fr
Page 24

Section
04
Syntoniseur
Écoute de la radio
1 2 4 53
1 Indicateur de gamme
Il signale la gamme daccord choisie, AM
ou FM.
2 Indicateur de fréquence
Il indique la valeur de la fréquence daccord.
3 Indicateur LOC
Indique quand laccord automatique sur
une station locale est en service.
4 Indicateur de stéréophonie (5)
Il signale que la station émet en stéréophonie.
5 Indicateur de numéro de présélection
Il indique le numéro de la présélection choisie.
1 Pour choisir le syntoniseur, appuyez sur
SOURCE.
2 Utilisez VOLUME pour régler le niveau
sonore.
3 Appuyez sur BAND pour choisir la
gamme.
Appuyez sur BAND jusquà ce que la gamme
désirée, F1, F2, F3 en FM ou AM (PO/GO), soit
affichée.
4 Pour effectuer un accord manuel, appuyez brièvement sur c ou d.
5 Pour effectuer un accord automatique,
appuyez continûment sur c ou d pendant
environ une seconde puis relâcher.
Le syntoniseur examine les fréquences
jusquà ce que se présente une émission dont
la réception est jugée satisfaisante.
# Vous pouvez annuler laccord automatique en
appuyant brièvement sur c ou d.
# Si vous appuyez sur c ou d et maintenez la
pression, vous pouvez sauter des stations. Laccord automatique démarre dès que vous relâchez
la touche.
Mise en mémoire et rappel
des fréquences des stations
Grâce aux touches de présélection 16 vous
pouvez aisément mettre en mémoire six fréquences que vous pourrez ultérieurement rappeler par une simple pression sur la touche
convenable.
% Lorsque se présente une fréquence que
vous désirez mettre en mémoire, maintenez la pression sur une des touches de présélection 16 jusquà ce que le numéro de
la présélection cesse de clignoter.
Le nombre sur lequel vous avez appuyé clignote sur lindicateur de numéro de présélection puis reste allumé. La fréquence de la
station de radio sélectionnée a été enregistrée
en mémoire.
Lorsque vous appuyez à nouveau sur cette
même touche de présélection, la fréquence en
mémoire est rappelée.
Remarques
! Vous pouvez enregistrer en mémoire jusquà
18 stations FM, six pour chacune des trois
gammes FM, et six stations AM.
24
Fr
Page 25

Syntoniseur
Section
04
! Vous pouvez également utiliser les touches a
et b pour rappeler une fréquence mise en mémoire grâce aux touches de présélection
16.
Accord sur les signaux
puissants
Laccord automatique sur une station locale
ne sintéresse quaux émetteurs dont le signal
reçu est suffisamment puissant pour garantir
une réception de bonne qualité.
% Appuyez de façon répétée sur
LOCAL/BSM pour mettre laccord automatique sur une station locale en service ou
hors service.
Quand laccord automatique sur une station
locale est en service, LOC saffiche sur
lécran.
Mise en mémoire des
fréquences des émetteurs
les plus puissants
La fonction BSM (Mémoire des meilleures stations) vous permet dutiliser automatiquement
les touches de présélection 16 pour mémoriser les six fréquences des émetteurs les plus
puissants, émetteurs que vous pouvez ultérieurement rappeler par une simple pression
sur une de ces touches.
! La mise en mémoire de fréquences à laide
de la fonction BSM peut provoquer le remplacement dautres fréquences déjà
conservées grâce aux touches 16.
% Maintenez la pression sur LOCAL/BSM
jusquà ce que la fonction BSM soit en service.
BSM commence à clignoter. Pendant que
BSM clignote, les six stations démission plus
fortes sont enregistrées dans les touches de
présélection 16 dans lordre de la force du signal. Quand lenregistrement est terminé,
BSM cesse de clignoter.
# Pour annuler la mise en mémoire, appuyez
sur LOCAL/BSM.
Français
25
Fr
Page 26

Section
05
Lecteur de CD intégré
Écoute dun CD
1 2 3
1 Indicateur RPT
Indique quand la répétition de lecture est en
service.
2 Indicateur de numéro de plage
Il indique la plage en cours de lecture.
3 Indicateur de temps de lecture
Il indique le temps de lecture depuis le
début de la plage en cours de lecture.
1 Introduisez un CD dans le logement
pour CD.
La lecture commence automatiquement.
# Assurez-vous de mettre le côté étiquette
du disque vers le haut.
# Après avoir introduit un CD, appuyez sur
SOURCE pour choisir le lecteur de CD.
# Vous pouvez éjecter le CD en appuyant sur
EJECT.
2 Utilisez VOLUME pour régler le niveau
sonore.
3 Pour une avance rapide ou un retour rapide, appuyez sur c ou d et maintenez la
pression.
4 Pour atteindre une plage précédente
ou suivante, appuyez sur c ou d.
Appuyer sur d fait sauter au début de la plage
suivante. Appuyer sur c fait passer au début
de la plage en cours. Appuyer une nouvelle
fois fera passer à la plage précédente.
Remarques
! Le lecteur de CD intégré joue un CD standard
12 cm ou 8 cm (single) à la fois. Nutilisez pas
un adaptateur pour jouer des CD 8 cm.
! Nintroduisez aucun objet dans le logement
pour CD autre quun CD.
! Si un message derreur tel que ERROR-11
saffiche, reportez-vous à la page 32, Significa-
tion des messages derreur du lecteur de CD
intégré.
Écoute des plages musicales
dans un ordre quelconque
Les plages musicales du CD sont jouées dans
un ordre quelconque, choisi au hasard.
% Appuyez de façon répétée sur 4 pour
mettre alternativement en service ou hors
service la lecture au hasard.
Quand la fonction lecture au hasard est en
service, RDM est affiché sur lécran.
Répétition de la lecture
La répétition de la lecture vous permet découter à nouveau la même plage musicale.
% Appuyez sur 5 pour mettre alternativement en service ou hors service la répétition de la lecture.
Quand la fonction répétition de la lecture est
en service, RPT est affiché sur lécran.
# La répétition de la lecture est automatiquement abandonnée dès que commence la recherche dune plage musicale,une avance rapide ou
un retour rapide.
Pause de la lecture dun CD
La pause est un arrêt momentané de la lecture
du CD.
% Appuyez de façon répétée sur PAUSE
pour mettre la pause alternativement en
service ou hors service.
Quand la fonction pause est en service,
PAUSE est affiché sur lécran.
26
Fr
Page 27

Réglages sonores
Section
06
Introduction aux réglages
sonores
1 2 43
1 Indicateur CUSTOM
Indique quand la courbe dégalisation personnalisée est sélectionnée actuellement.
2 Affichage des réglages sonores
Indique létat des réglages sonores.
3 Indicateur FIE
Il indique que le renforcement de limage
avant est en service.
4 Indicateur LOUD
Apparaît sur lafficheur quand la correction
physiologique est en service.
% Appuyez sur AUDIO pour afficher le
nom des fonctions audio.
Appuyez de manière répétée sur AUDIO pour
choisir une des fonctions suivantes :
FAD (équilibre sonore)EQ (égaliseur)
LOUD (correction physiologique)FIE (opti-
miseur dimage sonore avant)SLA (réglage
du niveau sonore de la source)
# Si le syntoniseur FM a été choisi comme
source, vous ne pouvez pas afficher la fonction
SLA.
# Si vous ne réglez aucun paramètre de la fonction pendant environ 30 secondes, lafficheur indique à nouveau létat de la source.
# Appuyez sur BAND pour revenir à laffichage
de létat de chaque source.
Réglage de léquilibre sonore
Vous pouvez régler léquilibre avant-arrière et
droite-gauche de manière que lécoute soit optimale quel que soit le siège occupé.
1 Appuyez sur AUDIO pour choisir FAD.
# Si le réglage déquilibre a été effectué précé-
demment, BAL est affiché.
2 Appuyez sur a ou b pour régler léquilibre sonore entre les haut-parleurs avant
et arrière.
FAD F15 FAD R15 sont les valeurs qui saffi-
chent tandis que léquilibre entre les haut-parleurs avant et arrière se déplace de lavant à
larrière.
# FAD 0 est le réglage convenable dans le cas
où seulement deux haut-parleurs sont utilisés.
3 Appuyez sur c ou d pour régler léquilibre sonore entre les haut-parleurs gauche
et droit.
BAL L9 BAL R9 sont les valeurs qui saffi-
chent tandis que léquilibre entre les haut-parleurs gauche et droit se déplace de la gauche
à la droite.
Utilisation de légalisation
Légalisation vous permet de corriger les ca-
ractéristiques sonores de lhabitacle du véhicule en fonction de vos goûts.
Rappel dune courbe dégalisation
Il existe six courbes dégalisation enregistrées
que vous pouvez rappeler facilement à nimporte quel moment. Voici une liste des courbes dégalisation :
Français
27
Fr
Page 28

Section
06
Réglages sonores
Afficheur Courbe dégalisation
SPR-BASS Accentuation des graves
POWERFUL Accentuation de la puissance
NATURAL Sonorité naturelle
VOCAL Chant
CUSTOM Correction personnelle
EQ FLAT Absence de correction
! CUSTOM est une courbe dégalisation pré-
réglée que vous avez créée.
! Quand EQ FLAT est sélectionné aucune ad-
dition ni correction nest effectuée sur le
son. Ceci est utile pour tester leffet des
courbes dégalisation en basculant entre
EQ FLAT et une courbe dégalisation défi-
nie.
% Appuyez sur EQ pour sélectionner lé-
galisation.
Appuyez de manière répétée sur EQ pour choisir lun des réglages dégalisation suivants :
SPR-BASSPOWERFULNATURAL
VOCALCUSTOMEQ FLAT
Réglage des courbes dégalisation
Vous pouvez ajuster le réglage de la courbe
dégalisation sélectionnée selon vos désirs.
Les réglages de la courbe dégalisation ajustée
sont mémorisés dans CUSTOM.
! Si vous effectuez des modifications alors
quune courbe autre que CUSTOM est sélectionnée, la courbe nouvellement réglée
remplacera alors la précédente et une nouvelle courbe CUSTOM apparaîtra sur laffi-
cheur lorsque vous sélectionnerez la
courbe de légaliseur.
1 Appuyez sur AUDIO pour choisir EQ.
2 Appuyez sur c ou d pour choisir la
bande de légaliseur à régler.
EQ-L (bas)EQ-M (moyen)EQ-H (élevé)
3 Appuyez sur a ou b pour régler lamplitude de la bande dégalisation.
Les valeurs +6 6 saffichent tandis que le niveau augmente ou diminue.
# Vous pouvez ensuite choisir une autre bande
dégalisation et régler son amplitude.
Réglage fin de la courbe
dégalisation
Vous pouvez ajuster la fréquence centrale et le
facteur Q (caractéristiques de la courbe) de
chacune des bandes de fréquence actuellement sélectionnée (EQ-L/EQ-M/EQ-H).
Niveau (dB)
Q=2W
Q=2N
Fréquence centrale
! Si vous effectuez des modifications alors
quune courbe autre que CUSTOM est sélectionnée, la courbe nouvellement réglée
remplacera alors la précédente et une nouvelle courbe CUSTOM apparaîtra sur lafficheur lorsque vous sélectionnerez la
courbe de légaliseur.
1 Appuyez sur AUDIO et maintenez lappui jusquà ce que la fréquence et le facteur
Q (par exemple F- 80 Q 1W) apparaisse sur
lafficheur.
2 Appuyez sur AUDIO pour choisir la
plage que vous voulez régler.
BasseMoyenneÉlevée
Fréquence (Hz)
28
Fr
Page 29

Réglages sonores
Section
06
3 Appuyez sur c ou d pour sélectionner
la fréquence désirée.
Basse : 4080100160 (Hz)
Moyenne : 2005001k2k (Hz)
Elevée : 3k8k10k12k (Hz)
4 Appuyez sur a ou b pour sélectionner
le facteur Q désiré.
2N1N1W2W
Réglage de la correction
physiologique
La correction physiologique a pour objet daccentuer la basse et les aigus à bas niveaux découte.
1 Appuyez sur AUDIO pour choisir LOUD.
2 Appuyez sur a pour mettre en service
la correction physiologique.
Lindicateur LOUD saffiche.
# Appuyez sur b pour mettre hors service la cor-
rection physiologique.
# Vous pouvez également mettre en service, ou
hors service, la correction physiologique en appuyant sur LOUDNESS.
3 Appuyez sur c ou d pour sélectionner
le niveau désiré.
LOW (bas)MID (moyen)HI (élevé)
quences. Vous pouvez sélectionner la fréquence que vous voulez couper.
Précaution
Lorsque la fonction F.I.E. est désactivée, les hautparleurs arrières émettent toutes les fréquences,
pas seulement les sons graves. Vous devez donc
réduire le volume avant de désactiver la fonction
F.I.E. pour éviter une augmentation brutale du niveau sonore.
1 Appuyez sur AUDIO pour choisir FIE.
2 Appuyez sur a pour mettre en service
la fonction F.I.E.
# Appuyez sur b pour mettre hors service la
fonction F.I.E.
3 Appuyez sur c ou sur d pour choisir la
fréquence souhaitée.
100160250 (Hz)
Remarques
! Après avoir mis en service la fonction F.I.E.,
utilisez le réglage de léquilibre sonore (reportez-vous à la page 27) et réglez le volume des
haut-parleurs avants et arrières jusquàce
quils soient équilibrés.
! Mettez la fonction F.I.E. hors service si vous
utilisez un système à 2 haut-parleurs.
Français
Optimiseur dimage sonore
avant (F.I.E.)
La fonction F.I.E. (optimiseur dimage sonore
avant) est une méthode simple pour améliorer
limage sonore à lavant en coupant les médiums et les aigus des haut-parleurs arrières,
limitant ainsi leur émission aux basses fré-
29
Fr
Page 30

Section
06
Réglages sonores
Ajustement des niveaux
des sources
Lajustement des niveaux des sources au
moyen de la fonction SLA, évite que ne se produisent de fortes variations damplitude sonore lorsque vous passez dune source à
lautre.
! Les réglages sont basés sur le niveau du si-
gnal FM qui, lui, demeure inchangé.
! Le niveau du syntoniseur AM peut égale-
ment être réglé à laide de cette fonction.
1 Comparez le niveau du volume du syntoniseur FM au niveau de la source que
vous voulez régler.
2 Appuyez sur AUDIO pour choisir SLA.
3 Appuyez sur a ou b pour régler le volume de la source.
SLA +4 SLA 4 sont les valeurs affichées
tandis que le niveau de la source augmente
ou diminue.
30
Fr
Page 31

Autres fonctions
Section
07
Réglage de lhorloge
Utilisez ces instructions pour régler lhorloge.
1 Maintenez la pression sur SOURCE
jusquà ce que lappareil séteint.
2 Appuyez sur la touche AUDIO et maintenez-la enfoncée jusquà ce que lhorloge
apparaisse sur lafficheur.
3 Appuyez sur c ou d pour sélectionner
le segment de laffichage de lhorloge que
vous voulez régler.
Appuyer sur c ou d sélectionnera un segment de laffichage de lhorloge :
HeureMinute
La partie sélectionnée clignote sur laffichage
de lhorloge.
4 Appuyez sur a ou b pour régler lhorloge.
Appuyer sur a augmente la valeur du réglage
heure ou minute choisi. Appuyer sur b diminue la valeur du réglage heure ou minute choisi.
# Pour annuler le réglage de lheure, appuyez
sur BAND.
# Vous pouvez également annuler le réglage de
lheure en maintenant AUDIO enfoncée jusquà
ce que lappareil se mette hors service.
% Appuyez sur CLOCK pour mettre laffi-
chage de lhorloge en service ou hors service.
Chaque pression sur CLOCK provoque laffi-
chage de lhorloge ou son extinction.
# Laffichage de lhorloge disparaît momentané-
ment quand une autre opération est réalisée; il
apparaît à nouveau 20 secondes plus tard.
Français
Mise en service ou hors service
de laffichage de lhorloge
Vous pouvez mettre laffichage de lhorloge en
service ou hors service.
31
Fr
Page 32

Annexe
Informations
complémentaires
Signification des messages
derreur du lecteur de CD
intégré
Quand vous contactez votre distributeur ou le
Service dentretien agréé par Pioneer le plus
proche, noubliez pas de noter le message
derreur.
Message Causes possi-
ERROR-11, 12,
17, 30
ERROR-11, 12,
17, 30
ERROR-10, 11,
12, 17, 30, A0
ERROR-44 Toutes les plages
bles
Disque sale Nettoyez le disque.
Disque rayé Utilisez un autre
Anomalie électrique ou mécanique
musicales sont
ignorées
Action corrective
disque.
Mettez et coupez le
contact au moyen
de la clé ou choisissez une autre
source puis revenez au lecteur de
CD.
Utilisez un autre
disque.
Soins à apporter au lecteur
de CD
! Nutilisez que les disques portant la
marque Compact Disc Digital Audio ci-dessous.
! Utilisez seulement des CD normaux, circu-
laires. Lutilisation de disques ayant une
forme irrégulière non circulaire peut provoquer un blocage du lecteur de CD ou rendre la lecture incorrecte.
! Examinez tous les CDs à la recherche de
fentes ou de rayures, et vérifiez sils ne sont
pas gondolés. Les CDs qui présentent des
fentes, des rayures, ou qui sont gondolés,
peuvent ne pas être lus correctement. Ne
les utilisez pas.
! Pendant la manipulation des disques, évi-
tez de toucher leur face gravée (face ne
portant aucune indication).
! Rangez les disques dans leur coffret dès
que vous ne les écoutez plus.
! Conservez les disques à labri de la lumière
directe du soleil et ne les exposez pas à des
températures élevées.
! Ne posez aucune étiquette à la surface des
disques, nécrivez pas sur un disque, nappliquez aucun agent chimique sur un
disque.
! Pour nettoyer un CD, essuyez le disque
avec un chiffon doux en partant du centre
vers lextérieur.
32
Fr
Page 33

Informations
complémentaires
Annexe
! Si le chauffage est utilisé en période de
froid, de lhumidité peut se former sur les
composants à lintérieur du lecteur de CD.
La condensation peut provoquer un fonctionnement incorrect du lecteur de CD. Si
vous pensez quil y a un problème de
condensation éteignez le lecteur de CD
pendant une heure environ pour lui permettre de sécher et essuyez les disques humides, le cas échéant, avec un tissu doux.
! Les cahots de la route peuvent interrompre
la lecture dun CD.
Disques CD-R et CD-RW
! Quand vous utilisez des disques CD-R/CD-
RW, la lecture nest possible quavec des
disques qui ont été finalisés.
! La lecture de disques CD-R/CD-RW enre-
gistrés sur un enregistreur de CD musical
ou un ordinateur personnel peut ne pas
être possible à cause des caractéristiques
du disque, de rayures ou de poussière sur
le disque, ou de saleté, de condensation,
etc. sur la lentille de lappareil.
! La lecture de disques enregistrés sur un or-
dinateur personnel peut ne pas être possible, selon les paramètres de lapplication
et lenvironnement. Enregistrez les disques
avec le bon format. (Pour les détails,
contactez le fabricant de lapplication.)
! La lecture de disques CD-R/CD-RW peut
devenir impossible en cas dexposition directe à la lumière solaire, de températures
élevées, ou en raison des conditions de
stockage dans le véhicule.
! Cet appareil tient compte des informations
de saut de plage musicale gravées sur un
CD-R/CD-RW. Les plages musicales contenant ces informations sont automatiquement ignorées.
! Lorsque vous introduisez un CD-RW dans
cet appareil, vous constatez que le temps
dattente avant la lecture est beaucoup
plus long quavec un CD ou un CD-R.
! Lisez attentivement les notes qui concer-
nent les CD-R/CD-RW avant de les
utiliser.
Français
33
Fr
Page 34

Annexe
Informations
complémentaires
Caractéristiques techniques
Généralités
Alimentation .............................. 14,4 V DC (10,8 15,1 V ac-
ceptable)
Mise à la masse ....................... Pôle négatif
Consommation maximale ...10,0 A
Dimensions (L × H × P):
DIN
Châssis ..................... 178 × 50 × 157 mm
Panneau avant ...... 188 × 58 × 19 mm
D
Châssis ..................... 178 × 50 × 162 mm
Panneau avant ...... 170 × 48 × 14 mm
Poids .............................................. 1,3 kg
Audio
Puissance de sortie continue: 20 W par canal, minimum, sur 4 Ohms, les deux canaux étant excitées, entre
50 et 15.000 Hz, avec une DHT ne dépassant pas 5%.
Puissance de sortie maximale
..................................................... 45 W × 4
Impédance de charge ........... 4 W (4 à 8 W acceptable)
Niveau de sortie max/impédance de sortie de la sortie
préamp ......................................... 2,2 V/1 kW
Égaliseur (Égaliseur paramétrique à 3 bandes):
Basse
Fréquence ............... 40/80/100/160 Hz
Facteur Q ................. 0,35/0,59/0,95/1,15 (+6 dB
si amplifié)
Gain ............................ ±12 dB
Moyenne
Fréquence ............... 200/500/1k/2k Hz
Facteur Q ................. 0,35/0,59/0,95/1,15 (+6 dB
si amplifié)
Gain ............................ ±12 dB
Élevée
Fréquence ............... 3,15k/8k/10k/12,5k Hz
Facteur Q ................. 0,35/0,59/0,95/1,15 (+6 dB
si amplifié)
Gain ............................ ±12 dB
Correction physiologique
Faible ................................... +3,5 dB (100 Hz), +3 dB (10
kHz)
Moyen ................................. +10 dB (100 Hz), +6,5 dB
(10 kHz)
Fort ....................................... +11 dB (100 Hz), +11 dB
(10 kHz)
(volume : 30 dB)
Lecteur de CD
Système ....................................... Compact Disc Digital Audio
Disques utilisables ................. Disques compacts
Format du signal:
Fréquence déchantillonnage
........................................... 44,1 kHz
Nombre de bits de quantification
........................................... 16; quantification linéaire
Réponse en fréquence .......... 5 20.000 Hz (±1 dB)
Rapport signal/bruit ............... 94 dB (1 kHz) (Réseau
IHF-A)
Dynamique ................................. 92 dB (1 kHz)
Nombre de voies ...................... 2 (stéréo)
Syntoniseur FM
Gamme de fréquence ............ 87,9 107,9 MHz
Sensibilité utile ......................... 8 dBf (0,7 µV/75 W, mono,
S/B : 30 dB)
Seuil de sensibilité 50 dB .... 10 dBf (0,9 µV/75 W, mono)
Rapport signal/bruit ............... 75 dB (Réseau IHF-A)
Distorsion .................................... 0,3 % (à 65 dBf, 1 kHz, sté-
réo)
0,1 % (à 65 dBf, 1 kHz,
mono)
Réponse en fréquence .......... 30 15.000 Hz (±3 dB)
Séparation stéréophonique
..................................................... 45 dB (à 65 dBf, 1 kHz)
Sélectivité .................................... 80 dB (±200 kHz)
Intermodulation trois signaux (niveau de signal désiré)
..................................................... 30 dBf (niveau deux signaux
non désirés : 100 dBf)
Syntoniseur AM
Gamme de fréquence ............ 530 1.710 kHz (10 kHz)
Sensibilité utile ......................... 18 µV (S/B: 20 dB)
Rapport signal/bruit ............... 65 dB (Réseau IHF-A)
Remarque
Les caractéristiques et la présentation peuvent
être modifiées sans avis préalable à fin
damélioration.
34
Fr
Page 35

Contenido
Gracias por haber comprado este producto Pioneer.
Lea con detenimiento estas instrucciones sobre el funcionamiento del aparato,
para que pueda darle el mejor uso posible. Una vez que las haya leído, guarde este
manual en un lugar seguro para consultarlo en el futuro.
Antes de comenzar
Acerca de esta unidad 36
Servicio posventa para productos
Pioneer 36
Registro del producto 36
Protección del producto contra robo 37
Extracción de la carátula 37
Colocación de la carátula 37
Qué es cada cosa
Unidad principal 38
Encendido y apagado
Encendido de la unidad y selección de una
fuente 39
Apagado de la unidad 39
Sintonizador
Para escuchar la radio 40
Almacenamiento y llamada de
frecuencias 40
Sintonización de señales fuertes 41
Almacenamiento de las frecuencias de radio
más fuertes 41
Reproductor de CD incorporado
Reproducción de un CD 42
Reproducción de las pistas en un orden
aleatorio 42
Repetición de reproducción 42
Pausa de la reproducción de un CD 43
Ajustes de audio
Introducción a los ajustes de audio 44
Uso del ajuste del balance 44
Uso del ecualizador 44
Llamada de las curvas de
ecualización 44
Ajuste de las curvas de
ecualización 45
Ajuste preciso de las curvas de
ecualización 45
Ajuste de la sonoridad 46
Mejora de imagen frontal (F.I.E.) 46
Ajuste de los niveles de la fuente 46
Otras funciones
Ajuste del reloj 47
Activación y desactivación de la
visualización del reloj 47
Información adicional
Comprensión de los mensajes de error del
reproductor de CD incorporado 48
Reproductor de CD y cuidados 48
Discos CD-R/CD-RW 49
Especificaciones 50
Español
35
Es
Page 36

Sección
01
Antes de comenzar
Acerca de esta unidad
Las frecuencias del sintonizador de esta unidad están asignadas para su uso en América
del norte. El uso en otras áreas puede causar
una recepción deficiente.
PRECAUCIÓN
! No permita que esta unidad entre en contacto
con líquidos, ya que ello puede producir una
descarga eléctrica. Además, el contacto con
líquidos puede causar daños en la unidad,
humo y recalentamiento.
! Conserve este manual a mano para que
pueda consultar los procedimientos de operación y las precauciones cuando sea necesario.
! Mantenga siempre el volumen lo suficiente-
mente bajo como para que pueda escuchar
los sonidos que provienen del exterior del
vehículo.
! Proteja esta unidad de la humedad.
! Si se desconecta o se descarga la batería, la
memoria preajustada se borrará y deberá
reprogramarla.
Servicio posventa para
productos Pioneer
Póngase en contacto con el revendedor o distribuidor al que compró este producto para obtener el servicio posventa (incluidas las
condiciones de garantía) o cualquier otra información. En caso de que no esté disponible
la información necesaria, póngase en contacto con las empresas enumeradas abajo.
No envíe su producto para su reparación a las
empresas cuyas direcciones se indican abajo
sin haberse puesto antes en contacto con
ellas.
EE.UU.
Pioneer Electronics (USA) Inc.
CUSTOMER SUPPORT DIVISION
P.O. Box 1760
Long Beach, CA 90801-1760
800-421-1404
CANADÁ
Pioneer Electronics of Canada, Inc.
CUSTOMER SATISFACTION DEPARTMENT
300 Allstate Parkway
Markham, Ontario L3R OP2
1-877-283-5901
Para obtener información sobre la garantía,
véase la hoja de Garantía limitada adjunta a
este producto.
Registro del producto
Visítenos en el siguiente sitio:
1 Registre su producto. Conservaremos los
datos de su compra archivados para que
pueda consultar esta información en el caso
de que deba efectuar un reclamo al seguro
ante una eventualidad tal como pérdida o
robo.
2 Reciba informes actualizados sobre los últi-
mos productos y tecnologías.
3 Descargue manuales de instrucciones, solici-
te catálogos de productos, busque nuevos
productos y disfrute de muchos beneficios
más.
36
Es
Page 37

Antes de comenzar
Protección del producto
contra robo
Se puede extraer la carátula de la unidad principal como medida antirrobo.
Importante
! Nunca presione ni sujete el display y los boto-
nes con fuerza excesiva al extraer o colocar la
carátula.
! Evite someter la carátula a impactos excesi-
vos.
! Mantenga la carátula fuera del alcance de la
luz solar directa y no la exponga a altas temperaturas.
Extracción de la carátula
1 Presione DETACH para soltar la carátula.
Presione DETACH y el lado derecho del panel
se suelta de la unidad principal.
Sección
01
Español
2 Tome la carátula y extráigala.
Tome el lado derecho de la carátula y tire de él
hacia la izquierda. La carátula saldrá de la unidad principal.
Colocación de la carátula
1 Coloque la carátula de modo plano contra la unidad principal.
2 Presione la carátula hacia la cara de la
unidad principal hasta que se asiente
firmemente.
37
Es
Page 38

1
3
8
9ab
c
4
6
2
5
7
d
e
Sección
02
Qué es cada cosa
Unidad principal
1 Botón CLOCK
Presione este botón para cambiar a la visualización del reloj.
2 Ranura de carga de discos
Introduzca el disco para reproducirlo.
3 Botón EJECT
Presione este botón para expulsar un CD
del reproductor de CD incorporado.
4 Botón AUDIO
Presione este botón para seleccionar los diversos controles de calidad del sonido.
5 Botón PAUSE
Presione este botón para activar o desactivar la pausa.
6 Botones a/b/c/d
Presione estos botones para utilizar los controles de sintonización por búsqueda manual, avance rápido, retroceso y búsqueda
de pista. También se usan para controlar las
funciones.
7 Botón LOUDNESS
Presione este botón para activar o desactivar la sonoridad.
8 Botón DETACH
Presione este botón para extraer la carátula
de la unidad principal.
9 Botón BAND
Presione este botón para seleccionar entre
tres bandas FM y una banda AM, y para
cancelar el modo de control de funciones.
a Botón LOCAL/BSM
Presione para activar o desactivar la función
local.
Mantenga presionado para activar o desactivar la función BSM.
b Botones 16
Presione para la sintonización preajustada.
c Botón SOURCE
Esta unidad se enciende al seleccionar una
fuente. Presione este botón para visualizar
todas las fuentes disponibles.
d VOLUME
Haga girar el control para aumentar o disminuir el volumen.
e Botón EQ
Presione este botón para seleccionar las diversas curvas de ecualización.
38
Es
Page 39

Encendido y apagado
Encendido de la unidad y
selección de una fuente
Puede seleccionar la fuente que desea escuchar. Para cambiar al reproductor de CD incorporado, coloque un disco en la unidad
(consulte la página 42).
% Presione SOURCE para seleccionar una
fuente.
Presione SOURCE repetidamente para cambiar entre las siguientes fuentes:
Lector de CD incorporadoSintonizador
Cuando se selecciona una fuente, la unidad
se enciende.
Notas
! Si no hay un disco cargado en la unidad, la
fuente no cambiará al lector de CD incorporado.
! Si el cable azul/blanco de esta unidad está co-
nectado al control del terminal de antena del
vehículo, la antena se extiende cuando se enciende el equipo. Para retraer la antena, apague el equipo.
Sección
03
Español
Apagado de la unidad
% Presione SOURCE y mantenga presionado hasta que se apague la unidad.
39
Es
Page 40

Sección
04
Sintonizador
Para escuchar la radio
1 2 4 53
1 Indicador de banda
Muestra la banda en que la radio está sintonizada: AM o FM.
2 Indicador de frecuencia
Muestra la frecuencia en que la radio está
sintonizada.
3 Indicador LOC
Aparece cuando la sintonización por búsqueda local está activada.
4 Indicador de estéreo (5)
Muestra que la frecuencia seleccionada se
está transmitiendo en estéreo.
5 Indicador del número de presintonía
Muestra la memoria seleccionada.
1 Presione SOURCE para seleccionar el
sintonizador.
2 Utilice VOLUME para ajustar el nivel de
sonido.
3 Presione BAND para seleccionar una
banda.
Presione BAND hasta que visualice la banda
deseada: F1, F2, F3 para FM o AM.
4 Para utilizar la sintonización manual,
presione brevemente c o d.
5 Para utilizar la sintonización por búsqueda, presione c o d y mantenga presionado durante aproximadamente un
segundo, y libere el botón.
El sintonizador explorará las frecuencias hasta
que encuentre una emisora con señales de suficiente intensidad como para asegurar una
buena recepción.
# Se puede cancelar la sintonización por búsqueda presionando brevemente c o d.
# Si presiona c o d y mantiene presionado,
podrá saltar las emisoras. La sintonización por
búsqueda comienza inmediatamente después de
que libera el botón.
Almacenamiento y llamada
de frecuencias
Si se presiona cualquiera de los botones de
ajuste de presintonías 16, se pueden almacenar con facilidad hasta seis frecuencias de
emisoras para llamarlas con posterioridad presionando un solo botón.
% Cuando encuentre la frecuencia que
desea almacenar en la memoria, presione
uno de los botones de ajuste de presintonías 16 y manténgalo presionado hasta
que el número de presintonía deje de destellar.
El número seleccionado destellará en el indicador del número de presintonía y quedará iluminado. Se ha almacenado en la memoria la
frecuencia de la emisora de radio seleccionada.
La próxima vez que presione el mismo botón
de ajuste de presintonías, la memoria recordará la frecuencia de la emisora.
40
Es
Page 41

Sintonizador
Sección
04
Notas
! Se pueden almacenar en la memoria hasta 18
emisoras FM, seis por cada una de las tres
bandas FM, y seis emisoras AM.
! También se pueden usar los botones a y b
para llamar las frecuencias de las emisoras
de radio asignadas a los botones de ajuste de
presintonías 16.
Sintonización de señales
fuertes
La sintonización por búsqueda local le permite
sintonizar sólo las emisoras de radio con señales lo suficientemente fuertes como para asegurar una buena recepción.
% Presione LOCAL/BSM repetidamente
para activar o desactivar la sintonización
por búsqueda local.
Cuando la sintonización por búsqueda local
está activada, en el display aparece LOC.
% Presione LOCAL/BSM y mantenga presionado hasta que se active la función
BSM.
BSM comienza a destellar. Mientras BSM está
destellando, las seis frecuencias de las emisoras más fuertes se almacenarán en los botones de ajuste de presintonías 16, ordenadas
según la intensidad de las señales. Una vez finalizada la operación, BSM deja de destellar.
# Para cancelar el proceso de almacenamiento,
presione LOCAL/BSM.
Español
Almacenamiento de las
frecuencias de radio más
fuertes
La función BSM (memoria de las mejores emisoras) le permite almacenar automáticamente
seis frecuencias de las emisoras más fuertes
en los botones de ajuste de presintonías 16.
Una vez almacenadas, podrá sintonizar esas
frecuencias presionando un solo botón.
! Al almacenar frecuencias con la función
BSM, se pueden reemplazar las frecuencias que ha almacenado con los botones
16.
41
Es
Page 42

Sección
05
Reproductor de CD
incorporado
Reproducción de un CD
1 2 3
1 Indicador RPT
Aparece cuando la repetición de reproducción está activada.
2 Indicador de número de pista
Muestra la pista que se está reproduciendo
actualmente.
3 Indicador de tiempo de reproducción
Muestra el tiempo transcurrido de reproducción de la pista actual.
1 Introduzca un CD por la ranura de carga
de CD.
La reproducción comenzará automáticamente.
# Asegúrese de que el lado de la etiqueta
del disco esté hacia arriba.
# Después de colocar un CD, presione SOURCE
para seleccionar el reproductor de CD incorporado.
# Se puede expulsar un CD presionando EJECT.
2 Utilice VOLUME para ajustar el nivel de
sonido.
3 Para realizar el avance rápido o retroceso, presione c o d y mantenga presionado.
4 Para saltar y retroceder o avanzar hasta
otra pista, presione c o d.
Al presionar d se salta al comienzo de la siguiente pista. Al presionar una vez el botón c,
se salta al comienzo de la pista actual. Si se
vuelve a pulsar este botón, se saltará a la pista
anterior.
Notas
! El reproductor de CD incorporado tiene capa-
cidad para un solo CD estándar de 12 cm u 8
cm (simple) por vez. No utilice un adaptador
al reproducir discos de 8 cm.
! No coloque ningún otro elemento que no sea
un CD en la ranura de carga de CD.
! Si aparece un mensaje de error como
ERROR-11, consulte Comprensión de los men-
sajes de error del reproductor de CD incorporado en la página 48.
Reproducción de las pistas
en un orden aleatorio
La reproducción aleatoria le permite reproducir las pistas del CD en un orden aleatorio.
% Presione 4 repetidamente para activar
o desactivar la reproducción aleatoria.
Cuando la repetición aleatoria está activada,
en el display aparece RDM.
Repetición de reproducción
La repetición de reproducción le permite escuchar la misma pista de nuevo.
% Presione 5 repetidamente para activar
o desactivar la repetición de reproducción.
Cuando la repetición de reproducción está activada, en el display aparece RPT.
# Si se realiza una búsqueda de pista o el avance rápido/retroceso, la repetición de reproducción se cancelará automáticamente.
42
Es
Page 43

Reproductor de CD
incorporado
Pausa de la reproducción
de un CD
La pausa le permite detener temporalmente la
reproducción del CD.
% Presione PAUSE repetidamente para activar o desactivar la pausa.
Cuando la pausa está activada, en el display
aparece PAUSE.
Sección
05
Español
43
Es
Page 44

Sección
06
Ajustes de audio
Introducción a los ajustes
de audio
1 2 43
1 Indicador CUSTOM
Aparece cuando se selecciona la curva de
ecualización personalizada.
2 Visualización de audio
Muestra el estado de los ajustes de audio.
3 Indicador FIE
Aparece cuando la función de mejora de
imagen frontal está activada.
4 Indicador LOUD
Aparece en el display cuando se activa la
sonoridad.
% Presione AUDIO para visualizar los
nombres de las funciones de audio.
Presione AUDIO repetidamente para cambiar
entre las siguientes funciones de audio:
FAD (ajuste del balance)EQ (ecualizador)
LOUD (sonoridad)FIE (mejora de imagen
frontal)SLA (ajuste del nivel de fuente)
# Cuando se seleccione el sintonizador de FM
como fuente, no se puede cambiar a SLA.
# Si no se utiliza la función de audio en unos 30
segundos, el display volverá automáticamente a
la visualización de la fuente.
# Para volver a la visualización de cada fuente,
presione BAND.
Uso del ajuste del balance
Se puede seleccionar el ajuste de fader/balance que proporciona un entorno de audio ideal
en todos los asientos ocupados.
1 Presione AUDIO para seleccionar FAD.
# Si el balance se ajustó con anterioridad, se visualizará BAL.
2 Presione a o b para ajustar el balance
entre los altavoces delanteros/traseros.
Se visualiza FAD F15 FAD R15 mientras el
balance entre los altavoces delanteros/traseros se mueve desde adelante hacia atrás.
# FAD 0 es el ajuste apropiado cuando se usan
sólo dos altavoces.
3 Presione c o d para ajustar el balance
entre los altavoces izquierdos/derechos.
Se visualiza BAL L9 BAL R9 mientras se
mueve el balance entre los altavoces izquierdos/derechos desde la izquierda hacia la
derecha.
Uso del ecualizador
El ecualizador le permite ajustar la ecualización de acuerdo con las características acústicas del interior del automóvil.
Llamada de las curvas de
ecualización
Hay seis curvas de ecualización almacenadas
que se pueden llamar con facilidad en cualquier momento. A continuación se ofrece una
lista de las curvas de ecualización:
44
Visualización Curva de ecualización
SPR-BASS Supergraves
POWERFUL Potente
Es
Page 45

Ajustes de audio
Sección
06
Visualización Curva de ecualización
NATURAL Natural
VOCAL Vocal
CUSTOM Personalizada
EQ FLAT Plana
! CUSTOM es una curva de ecualización
ajustada creada por el usuario.
! Cuando se selecciona EQ FLAT,nosein-
troduce ningún suplemento o corrección al
sonido. Esto es útil para verificar el efecto
de las curvas de ecualización cambiándose
alternativamente entre EQ FLAT y otra
curva de ecualización definida.
% Presione EQ para seleccionar el ecualizador.
Presione EQ repetidamente para cambiar
entre las siguientes opciones:
SPR-BASSPOWERFULNATURAL
VOCALCUSTOMEQ FLAT
Ajuste de las curvas de
ecualización
Puede configurar el ajuste de la curva de
ecualización seleccionado según lo desee. Los
ajustes de la curva de ecualización configurados se memorizan en CUSTOM.
! Si se realizan ajustes cuando hay seleccio-
nada una curva distinta a CUSTOM,la
curva recién ajustada reemplazará a la anterior. Aparecerá una nueva curva con
CUSTOM en el display mientras se selecciona la curva de ecualización.
1 Presione AUDIO para seleccionar EQ.
2 Presione c o d para seleccionar la
banda a ajustar.
EQ-L (bajo)EQ-M (medio)EQ-H (alto)
3 Presione a o b para ajustar el nivel de
la banda de ecualización.
Se visualiza +6 6 mientras se aumenta o
disminuye el nivel.
# Se puede seleccionar otra banda y ajustar su
nivel.
Ajuste preciso de las curvas de
ecualización
Se puede ajustar la frecuencia central y el factor Q (características de las curvas) de cada
banda de curvas seleccionada (EQ-L/EQ-M/
EQ-H).
Nivel (dB)
Q=2W
Q=2N
Frecuencia central
! Si se realizan ajustes cuando hay seleccio-
nada una curva distinta a CUSTOM,la
curva recién ajustada reemplazará a la anterior. Aparecerá una nueva curva con
CUSTOM en el display mientras se selecciona la curva de ecualización.
1 Presione AUDIO y mantenga presionado hasta que la frecuencia y el factor Q (p.
ej., F- 80 Q 1W) aparezcan en el display.
2 Presione AUDIO para seleccionar la
banda deseada para el ajuste.
BajaMediaAlta
3 Presione c o d para seleccionar la frecuencia deseada.
Baja: 4080100160 (Hz)
Media: 2005001k2k (Hz)
Alta: 3k8k10k12k (Hz)
Frecuencia (Hz)
Español
45
Es
Page 46

Sección
06
Ajustes de audio
4 Presione a o b para seleccionar el factor Q deseado.
2N1N1W2W
Ajuste de la sonoridad
La sonoridad compensa las deficiencias en
las gamas de sonido bajas y altas cuando se
escucha a un volumen bajo.
1 Presione AUDIO para seleccionar LOUD.
2 Presione a para activar la sonoridad.
Aparece el indicador LOUD.
# Para desactivar la sonoridad, presione b.
# También se puede activar o desactivar la sono-
ridad presionando LOUDNESS.
3 Presione c o d para seleccionar el nivel
deseado.
LOW (bajo)MID (medio)HI (alto)
Mejora de imagen frontal
(F.I.E.)
La función F.I.E. (mejora de imagen frontal) es
un método sencillo para mejorar la imagen
frontal cortando la salida de la frecuencia de
gamas medias y altas de los altavoces traseros
y limitando su salida a las frecuencias de
gamas bajas. Se puede seleccionar la frecuencia que se desea cortar.
Precaución
Cuando se desactiva la función F.I.E., los altavoces traseros emiten el sonido de todas las frecuencias, no sólo los sonidos graves. Disminuya
el volumen antes de desactivar la F.I.E. para evitar
que el volumen aumente de repente.
1 Presione AUDIO para seleccionar FIE.
2 Presione a para activar la función F.I.E.
# Para desactivar la función F.I.E., presione b.
3 Presione c o d para seleccionar la frecuencia deseada.
100160250 (Hz)
Notas
! Después de activar la función F.I.E., utilice el
ajuste del balance (consulte la página 44) y
ajuste los niveles de volumen de los altavoces
delanteros y traseros hasta que queden equilibrados.
! Desactive la función F.I.E. si utiliza un sistema
de 2 altavoces.
Ajuste de los niveles de la
fuente
La función SLA (ajuste del nivel de fuente) le
permite ajustar el nivel de volumen de cada
fuente para evitar cambios radicales en el volumen cuando se cambia entre las fuentes.
! Los ajustes se basan en el nivel de volumen
del sintonizador de FM, que se mantiene
inalterado.
! El nivel del volumen del sintonizador de
AM también se puede regular con el ajuste
del nivel de fuente.
1 Compare el nivel de volumen del sintonizador de FM con el de la fuente que
desea ajustar.
2 Presione AUDIO para seleccionar SLA.
3 Presione a o b para ajustar el volumen
de la fuente.
Se visualiza SLA +4 SLA 4 mientras se aumenta o disminuye el volumen de la fuente.
46
Es
Page 47

Otras funciones
Sección
07
Ajuste del reloj
Siga estas instrucciones para ajustar el reloj.
1 Presione SOURCE y mantenga presionado hasta que se apague la unidad.
2 Presione AUDIO y mantenga presionado hasta que el reloj aparezca en la pantalla.
3 Presione c o d para seleccionar el segmento de la visualización del reloj que
desea ajustar.
Al presionar c o d se seleccionará un solo
segmento de la visualización del reloj:
HorasMinutos
Al seleccionar las horas o los minutos de la visualización del reloj, los dígitos seleccionados
destellarán.
4 Presione a o b para ajustar el reloj.
Al presionar a se aumentarán los dígitos de
las horas o los minutos seleccionados. Al presionar b se disminuirán los dígitos de las
horas o los minutos seleccionados.
# Para cancelar los ajustes del reloj, presione
BAND.
# También se pueden cancelar los ajustes del
reloj presionando AUDIO hasta que se apague el
sistema.
% Presione CLOCK para activar o desactivar la visualización del reloj.
Cada vez que se presiona CLOCK, se activa o
desactiva la visualización del reloj.
# La visualización del reloj desaparece momentáneamente cuando se utilizan otras funciones,
pero vuelve a aparecer después de 20
segundos.
Español
Activación y desactivación de la
visualización del reloj
Se puede activar y desactivar la visualización
del reloj.
47
Es
Page 48

Apéndice
Información adicional
Comprensión de los
mensajes de error del
reproductor de CD
incorporado
Al comunicarse con su concesionario o el Servicio Técnico Oficial de Pioneer más próximo
a su domicilio, asegúrese de tener escrito el
mensaje de error.
Mensaje Causa Acción
ERROR-11, 12,
17, 30
ERROR-11, 12,
17, 30
ERROR-10, 11,
12, 17, 30, A0
ERROR-44 Se saltan todas
Disco sucio Limpie el disco.
Disco rayado Reemplace el
Problema eléctrico o mecánico
las pistas
disco.
Cambie la llave de
encendido del
automóvil entre las
posiciones de activación y desactivación, o cambie a
una fuente diferente, y después vuelva a activar el
reproductor de CD.
Reemplace el
disco.
! Sólo utilice discos compactos normales y
redondos. Si se coloca un CD de otra
forma y no redondo, es posible que el CD
se atasque en el reproductor o que no se
reproduzca correctamente.
! Revise todos los discos compactos para ver
si están agrietados, rayados o torcidos
antes de reproducirlos. Es posible que los
CD que se encuentran en estas condiciones no se reproduzcan correctamente. No
utilice estos discos.
! Evite tocar la superficie grabada (sin impre-
sión) cuando maneje los discos.
! Almacene los discos en sus cajas cuando
no los utilice.
! Mantenga los discos fuera del alcance de
la luz solar directa y no los exponga a altas
temperaturas.
! No fije etiquetas, no escriba ni aplique sus-
tancias químicas en la superficie de los
discos.
! Para limpiar un CD, pásele un paño suave
desde el centro hacia afuera.
Reproductor de CD y cuidados
! Utilice solamente CDs que lleven la marca
Compact Disc Digital Audio que se muestra a continuación.
48
Es
! Si se usa un calefactor cuando hace frío,
se puede condensar humedad en las piezas internas del reproductor de CD. La humedad condensada puede causar una falla
del reproductor. En caso de que esto ocurra, apague el reproductor de CD durante
alrededor de una hora para permitir que el
reproductor se seque y limpie los discos
húmedos con un paño suave para eliminar
la humedad.
! Las vibraciones en las carreteras pueden
interrumpir la reproducción de un CD.
Page 49

Información adicional
Discos CD-R/CD-RW
! Cuando se utilizan discos CD-R/CD-RW,
sólo se pueden reproducir los discos finalizados.
! Es posible que no se puedan reproducir los
discos CD-R/CD-RW grabados en un grabador de CD de música o una PC debido a
sus características, por las rayaduras o la
suciedad que pueda tener el disco, o por la
suciedad, condensación, etc. acumulada
en el lente del producto.
! Es posible que no se puedan reproducir los
discos grabados en una PC por los ajustes
de la aplicación y el entorno utilizados.
Grabe los discos con el formato correcto.
(Para obtener información, póngase en
contacto con el fabricante de la aplicación.)
! Puede resultar imposible reproducir los dis-
cos CD-R/CD-RW en caso de exposición a
la luz solar directa, altas temperaturas o debido a las condiciones de almacenamiento
en el vehículo.
! Esta unidad es compatible con la función
de salto de pista de discos CD-R/CD-RW.
Las pistas con información de salto de
pista se saltan automáticamente.
! Si se coloca un disco CD-RW en esta uni-
dad, el tiempo de reproducción será mayor
que el de un disco CD o CD-R convencional.
! Lea las precauciones que se incluyen con
los discos CD-R/CD-RW antes de
utilizarlos.
Apéndice
Español
49
Es
Page 50

Apéndice
Información adicional
Especificaciones
Generales
Fuente de alimentación ........ 14,4 V CC (10,8 15,1 V per-
misible)
Sistema de conexión a tierra
..................................................... Tipo negativo
Consumo máximo de corriente
..................................................... 10,0 A
Dimensiones (An × Al × Pr):
DIN
Bastidor .................... 178 × 50 × 157 mm
Cara anterior .......... 188 × 58 × 19 mm
D
Bastidor .................... 178 × 50 × 162 mm
Cara anterior .......... 170 × 48 × 14 mm
Peso ............................................... 1,3 kg
Audio
La potencia de salida continua es de 20 W por canal,
mínima a 4 ohmios, ambos canales activados, 50 Hz a
15.000 Hz, con una distorsión armónica de no más del
5%.
Potencia de salida máxima
..................................................... 45 W × 4
Impedancia de carga ............. 4 W (4 8 W permisible)
Nivel de salida máx. del preamplificador (Pre-out)/impe-
dancia de salida ....................... 2,2 V/1 kW
Ecualizador (ecualizador paramétrico de 3 bandas):
Baja
Frecuencia .............. 40/80/100/160 Hz
Factor Q .................... 0,35/0,59/0,95/1,15 (+6 dB
si intensificado)
Ganancia ................. ±12 dB
Media
Frecuencia .............. 200/500/1k/2k Hz
Factor Q .................... 0,35/0,59/0,95/1,15 (+6 dB
si intensificado)
Ganancia ................. ±12 dB
Alta
Frecuencia .............. 3,15k/8k/10k/12,5k Hz
Factor Q .................... 0,35/0,59/0,95/1,15 (+6 dB
si intensificado)
Ganancia ................. ±12 dB
Contorno de sonoridad
Bajo ...................................... +3,5 dB (100 Hz), +3 dB (10
kHz)
Medio .................................. +10 dB (100 Hz), +6,5 dB
(10 kHz)
Alto ....................................... +11 dB (100 Hz), +11 dB
(10 kHz)
(volumen: 30 dB)
Reproductor de CD
Sistema ........................................ Sistema de audio de discos
compactos
Discos utilizables .................... Disco compacto
Formato de la señal:
Frecuencia de muestreo
........................................... 44,1 kHz
Número de bits de cuantificación
........................................... 16; lineal
Características de la frecuencia
..................................................... 5 20.000 Hz (±1 dB)
Relación de señal a ruido ....94 dB (1 kHz) (red IHF-A)
Gama dinámica ........................ 92 dB (1 kHz)
Número de canales ................ 2 (estéreo)
Sintonizador de FM
Gama de frecuencias ............ 87,9 107,9 MHz
Sensibilidad utilizable ........... 8 dBf (0,7 µV/75 W, mono,
Señal/ruido: 30 dB)
Umbral de silenciamiento a 50 dB
..................................................... 10 dBf (0,9 µV/75 W, mono)
Relación de señal a ruido ....75 dB (red IHF-A)
Distorsión .................................... 0,3 % (a 65 dBf, 1 kHz, esté-
reo)
0,1 % (a 65 dBf, 1 kHz,
mono)
Respuesta de frecuencia ..... 30 15.000 Hz (±3 dB)
Separación estéreo ................. 45 dB (a 65 dBf, 1 kHz)
Selectividad ................................ 80 dB (±200 kHz)
Intermodulación de tres señales (nivel de señal desea-
do) ................................................... 30 dBf (dos niveles de señal
no deseados: 100 dBf)
Sintonizador de AM
Gama de frecuencias ............ 530 1.710 kHz (10 kHz)
Sensibilidad utilizable ........... 18 µV (Señal/ruido: 20 dB)
Relación de señal a ruido ....65 dB (red IHF-A)
Nota
Las especificaciones y el diseño están sujetos a
posibles modificaciones sin previo aviso.
50
Es
Page 51

PIONEER CORPORATION
4-1, MEGURO 1-CHOME, MEGURO-KU, TOKYO 153-8654, JAPAN
PIONEER ELECTRONICS (USA) INC.
P.O. Box 1540, Long Beach, California 90801-1540, U.S.A.
TEL: (800) 421-1404
PIONEER EUROPE NV
Haven 1087, Keetberglaan 1, B-9120 Melsele, Belgium
TEL: (0) 3/570.05.11
PIONEER ELECTRONICS ASIACENTRE PTE. LTD.
253 Alexandra Road, #04-01, Singapore 159936
TEL: 65-6472-7555
PIONEER ELECTRONICS AUSTRALIA PTY. LTD.
178-184 Boundary Road, Braeside, Victoria 3195, Australia
TEL: (03) 9586-6300
PIONEER ELECTRONICS OF CANADA, INC.
300 Allstate Parkway, Markham, Ontario L3R OP2, Canada
TEL: 1-877-283-5901
PIONEER ELECTRONICS DE MEXICO, S.A. de C.V.
Blvd.Manuel Avila Camacho 138 10 piso
Col.Lomas de Chapultepec, Mexico, D.F. 11000
TEL: 55-9178-4270
HÒ¡ýPlø
=lø : ð-qïµ44_13
ûq : (02) 2521-3588
HÒûP/Plø
/]w/ÎLFm-Ã
9901-6¤
ûq : (0852) 2848-6488
<KMMZX> <04G00000>
Published by Pioneer Corporation.
Copyright © 2004 by Pioneer Corporation.
All rights reserved.
Publié par Pioneer Corporation. Copyright
© 2004 par Pioneer Corporation. Tous
droits réservés.
Printed in China
Imprimé en Chine
<YRD5013-A/U> UC
 Loading...