

indication
Hero Instructions
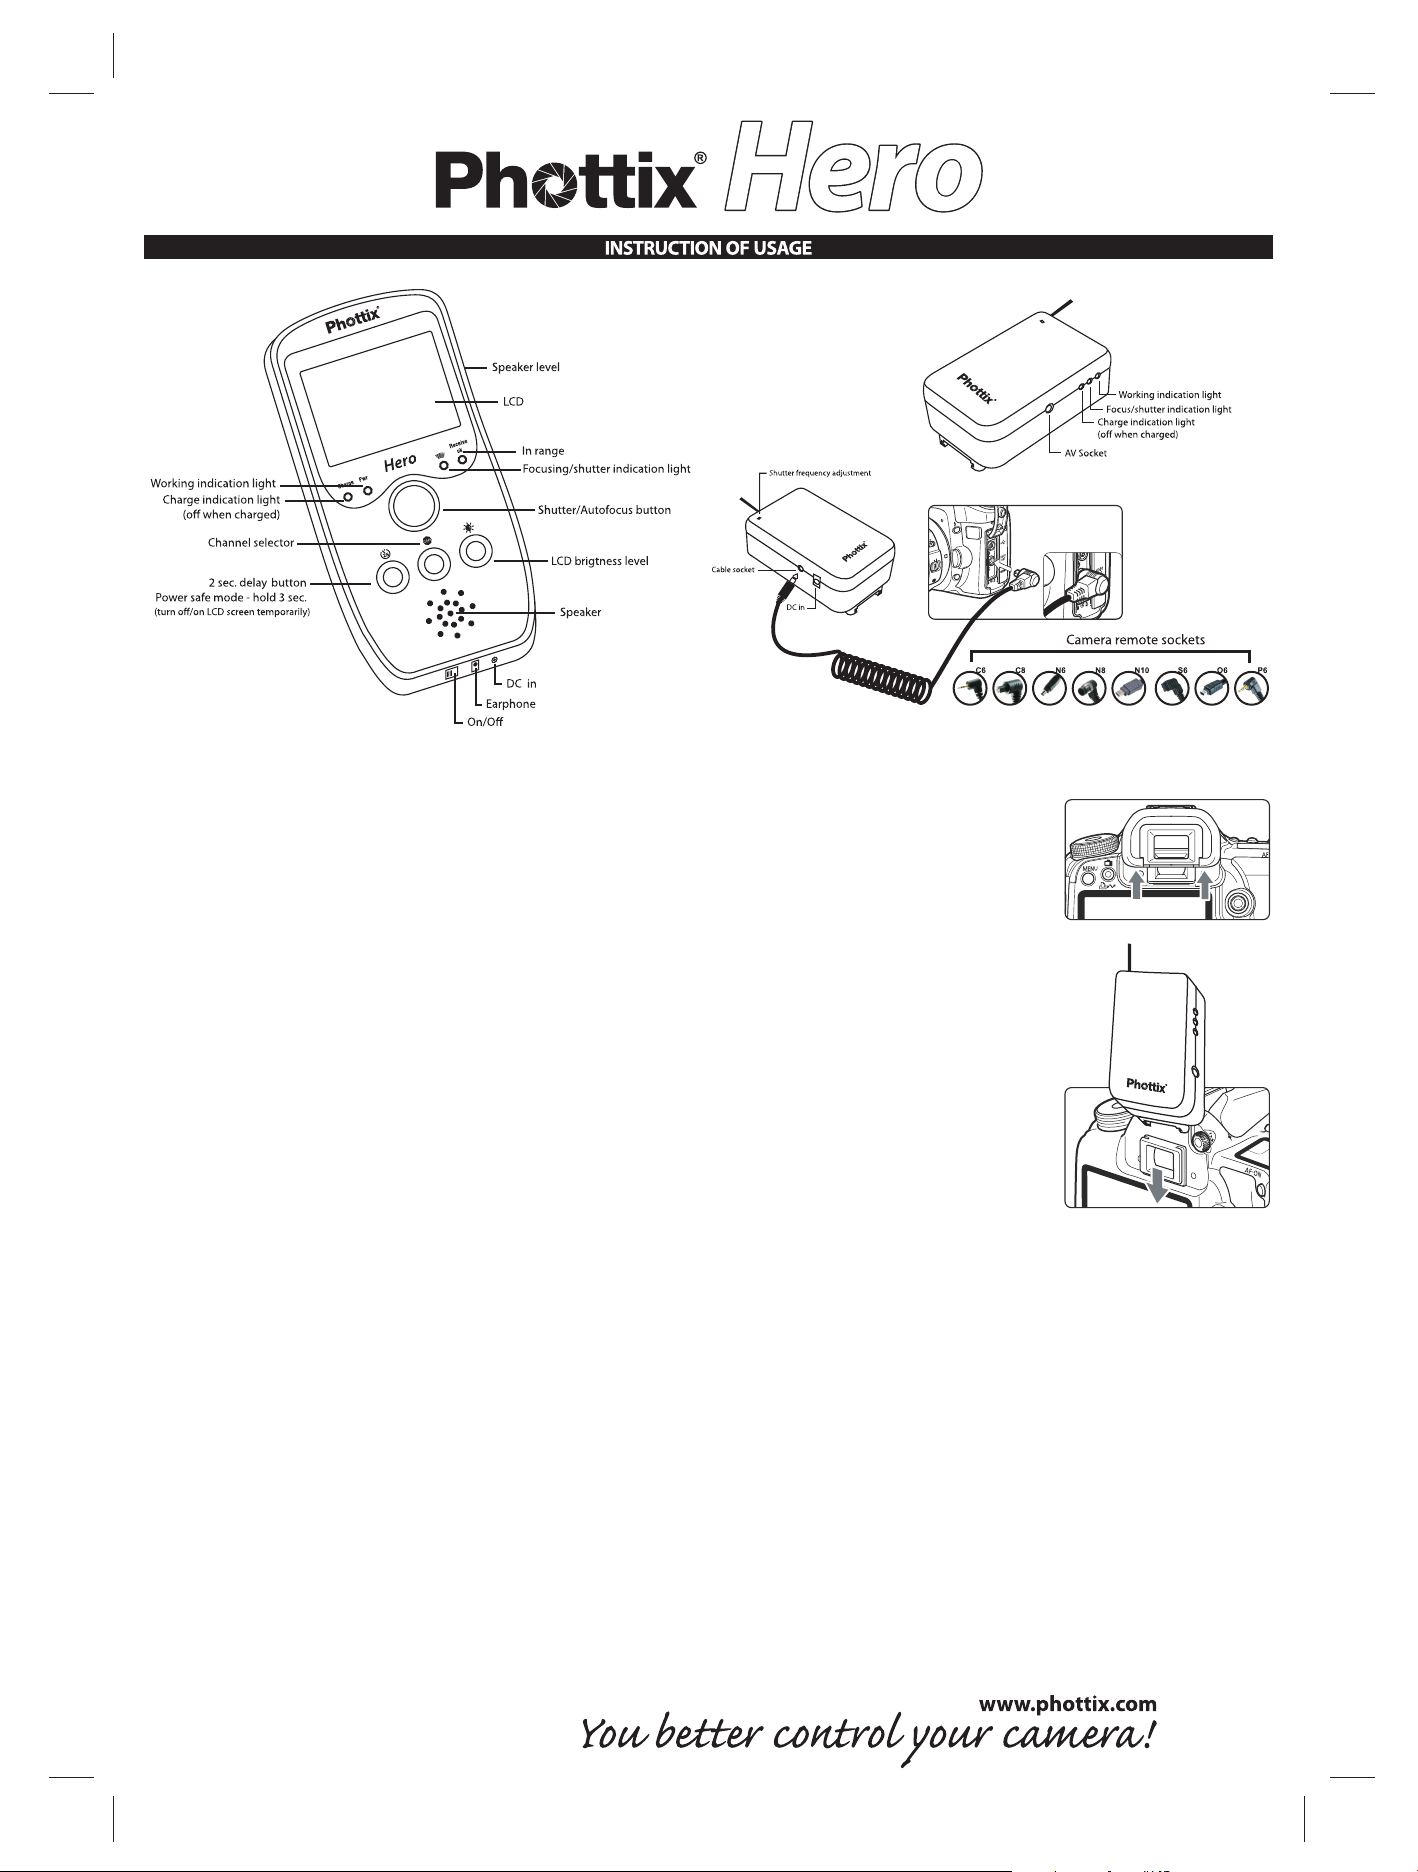
1. The Hero is supplied with two NB-5 L Li-ion batteries. One for the transmitter and one for the receiver.
Fit the two batteries and plug the charger into the DC in plug on each unit. When charging the red light
illuminates and will extinguish when the charge is complete. (Charge for at least 12 hrs for the first charge.)
2. You will find a selection of viewfinder adaptors supplied in the box. Remove the eye-cup from the camera
and fit the appropriate viewfinder adapter for your camera, slide the transmitter onto the adapter.
3. The Hero comes with a number of leads to connect to most popular DSLR cameras. Select the correct lead
and connect from the remote terminal of your camera to the transmitter.
4. Turn on the camera, transmitter and receiver, you will see the image on LCD of the receiver, if it is not in
focus adjust the viewfinder focus wheel on the camera.
5. Press the shutter button half way down on the receiver and check that the green focus indicator light
illuminates. If it does not, using a pin, push the frequency adjustment button, the light will blink.
Press the shutter button once to confirm. As on your camera, half pressing the shutter/autofocus butto
focuses the camera and fully takes a photo.
6. for a 2 second shutter delay. Press the 2 second delay button and camera will take a photo after a 2 second interval.
7. Channel selection. If you experience interference, press the channel selector button to change the channel (4 channels will be
in selected circularly if you press the channel selector)
8. Rotate the volume dial to turn up or down the speaker volume
9. To compensate for different lighting conditions, pressing the LCD brightness button will cycle the receiver through four brightness
levels.
10. AV cable. You can connect the AV and audio cable to any AV device to view and listen to TV or DVD wirelessly on the LCD receiver.
11. For DSLR's with Live-view, connect the AV cable from the AV socket of camera to the AV socket of the transmitter, turn on the
Live-view of the camera and you will see 100% Live-view images on LCD of receiver.
 Loading...