


SMERIGLIATRICE ANGOLARE RICARICABILE
PWSA 20-Li B2
SMERIGLIATRICE ANGOLARE
RICARICABILE
Traduzione delle istruzioni d’uso originali
AKKU-WINKELSCHLEIFER
Originalbetriebsanleitung
IAN 290756
CORDLESS ANGLE GRINDER
Translation of the original instructions

Prima di leggere aprire le due pagine con le immagini e prendere confidenza con le diverse funzioni
dell’apparecchio.
Before reading, unfold both pages containing illustrations and familiarise yourself with all functions of the
device.
Klappen Sie vor dem Lesen die beiden Seiten mit den Abbildungen aus und machen Sie sich anschließend
mit allen Funktionen des Gerätes vertraut.
IT / MT Traduzione delle istruzioni d’uso originali Pagina 1
GB / MT Translation of the original instructions Page 19
DE / AT / CH Originalbetriebsanleitung Seite 37

A
B

DC

BATTERIA COMPATIBILE CON TUTTI I DISPOSITIVI DELLA SERIE
„PARKSIDE X 20V TEAM“
20V max.
18V

Indice
Introduzione .....................................................2
Uso conforme ............................................................... 2
Dotazione .................................................................. 2
Volume della fornitura ........................................................ 3
Dati tecnici ................................................................. 3
Indicazioni generali di sicurezza per elettro utensili .....................4
1. Sicurezza sul posto di lavoro ................................................. 4
2. Sicurezza elettrica ......................................................... 4
3. Sicurezza delle persone ..................................................... 4
4. Uso e manipolazione dell'elettro utensile ........................................ 5
5. Uso e trattamento dell'utensile a batteria ........................................ 5
6. Assistenza ............................................................... 6
Indicazioni relative alla sicurezza per tutte le applicazioni ............................ 6
Contraccolpo e relative indicazioni di sicurezza ....................................7
Indicazioni di sicurezza particolari per la levigatura e la troncatura ..................... 8
Ulteriori indicazioni di sicurezza particolari per la troncatura .......................... 8
Indicazioni relative alla sicurezza per caricabatterie ................................. 9
Accessori consentiti .........................................................10
Conservazione e manipolazione degli utensili di impiego consigliati ................... 10
Indicazioni di lavoro ......................................................... 11
Prima della messa in funzione ......................................12
Carica della batteria (vedi fig. A) ..............................................12
Inserimento / rimozione della batteria nell'apparecchio .............................12
Controllo della carica della batteria ............................................ 12
Montare la calotta di protezione con chiusura rapida ............................... 12
Montare l'impugnatura supplementare .......................................... 13
Montaggio / sostituzione del disco di sgrossatura / troncatura .......................13
Messa in funzione ................................................14
Accensione/spegnimento ..................................................... 14
Regolazione del numero di giri ................................................ 14
Manutenzione e pulizia ...........................................14
Smaltimento ....................................................15
Garanzia della Kompernass Handels GmbH ..........................15
Assistenza ......................................................16
Importatore. . . . . . . . . . . . . . . . . . . . . . . . . . . . . . . . . . . . . . . . . . . . . . . . . . . . . 16
Traduzione della dichiarazione di conformità originale .................17
Ordinazione batteria sostitutiva ....................................18
Ordinazione online ......................................................... 18
Ordinazione telefonica ......................................................18
PWSA 20-Li B2
IT│MT
│
1 ■

SMERIGLIATRICE ANGOLARE
RICARICABILE PWSA 20-Li B2
Introduzione
Congratulazioni per l'acquisto del nuovo apparecchio. È stato scelto un prodotto di alta qualità.
Il manuale di istruzioni è parte integrante del
presente prodotto. Esso contiene importanti indicazioni per la sicurezza, l'uso e lo smaltimento. Prima
di utilizzare il prodotto, acquisire dimestichezza
con tutte le indicazioni relative ai comandi e alla
sicurezza. Utilizzare il prodotto solo come descritto
e per i campi d'impiego indicati. In caso di cessione
del prodotto a terzi, consegnare anche tutta la
relativa documentazione.
Uso conforme
L'apparecchio è destinato alla troncatura, sgrossatura e spazzolatura di metallo, calcestruzzo o
piastrelle senza uso di acqua. Qualunque altro
impiego e qualunque modifica dell'apparecchio
sono da considerarsi non conformi alla destinazione e comportano il rischio di infortuni. Non si
assumono responsabilità per i danni derivanti da
uso non conforme. L'apparecchio non è destinato
all'uso commerciale.
Spiegazione dei simboli:
Prima della messa in funzione,
leggere le istruzioni per l'uso
originali e le indicazioni di
sicurezza.
L'uso di dischi danneggiati per
la troncatura o la sgrossatura è
pericoloso e può causare gravi
lesioni!
Diametro del disco
Smerigliatrice angolare a
batteria
Indossare occhiali di protezione!
Indossare una protezione
acustica!
Indossare scarpe antinfortunistiche!
Indossare guanti protettivi!
Indossare una mascherina
antipolvere!
Non consentito per molatura
a umido
Non consentito per molatura
laterale
Previsto per la molatura di metalli
Dotazione
Interruttore ON/OFF
Tasto per lo sbloccaggio della batteria
Batteria
Tasto del livello di carica della batteria
LED di visualizzazione stato di carica batteria
Rotella di regolazione per la preselezione del
numero di giri
Impugnatura supplementare
Calotta di protezione
Tasto di blocco mandrino
Filettatura (3 x) per l'impugnatura supplementare
Leva di serraggio
Perno di codifica
Bullone di regolazione
Caricabatteria rapido (vedi fig. A)
LED rosso di controllo della carica (vedi fig. A)
LED verde di controllo della carica (vedi fig. A)
Dado di serraggio (vedi fig. C)
Mandrino portamola (vedi fig. C)
Flangia portamola (vedi fig. C)
■ 2 │ IT
│
MT
PWSA 20-Li B2

Scanalatura di codifica (vedi fig. C)
Chiave di montaggio a due fori (vedi fig. D)
Volume della fornitura
1 smerigliatrice angolare ricaricabile
PWSA 20-Li B2
1 caricabatteria rapido PLG 20 A2
1 batteria PAP 20 A3
1 impugnatura supplementare
1 calotta di protezione (premontata)
1 chiave di montaggio a due fori
1 mola (premontata)
1 manuale d'istruzioni
Dati tecnici
Smerigliatrice angolare ricaricabile:
PWSA 20-Li B2
Tensione nominale: 20 V
Numero di giri
nominale: n 2500 - 10000 min
Dimensioni disco: Ø 115 mm
Filettatura: M14
Per il funzionamento dell'utensile a batteria,
utilizzare la seguente batteria: PAP 20 A3
Tipo: IONI DI LITIO
Tensione nominale: 20 V
Capacità: 4 Ah
Celle: 10
Per la carica rapida della batteria, utilizzare
il seguente caricatore rapido:
PLG 20 A2
INGRESSO / Input:
Tensione nominale: 230 - 240 V ~, 50 Hz
Assorbimento nominale: 85 W
Fusibile (interno): 3,15 A
USCITA / Output:
Tensione nominale: 21,5 V
Corrente nominale: 3,5 A
Durata del caricamento: circa 80 min
Classe di protezione: II /
Informazioni sul rumore e sulle vibrazioni:
(corrente
continua)
(corrente
continua)
(corrente alternata)
T3.15A
(corrente
continua)
(isolamento doppio)
-1
Valore misurato relativo al rumore rilevato ai sensi
della norma EN 60745. Valori tipici del livello di
rumore dell'elettroutensile classificato A:
Valore di emissione acustica:
Livello di pressione sonora: L
= 84 dB (A)
PA
Fattore di incertezza: K = 3 dB
Livello di potenza sonora: L
= 95 dB (A)
WA
Fattore di incertezza: K = 3 dB
Indossare una protezione acustica!
Valore complessivo delle vibrazioni:
Mola superficiale impugnatura
principale: a
= 1,83 m/s
h, AG
Fattore di incertezza: K = 1,5 m/s
Mola superficiale impugnatura
supplementare: a
= 1,224 m/s
h, AG
Fattore di incertezza: K = 1,5 m/s
2
2
2
2
NOTA
► Il livello di vibrazioni indicato nelle presenti
istruzioni è stato misurato secondo un procedimento di misurazione normalizzato e
può essere usato per un confronto tra vari
apparecchi. Il coefficiente di emissione delle
vibrazioni può anche essere usato per una
stima introduttiva dell'esposizione.
AVVERTENZA!
► Il livello di vibrazioni cambia in base all'uso
dell'elettroutensile e in alcuni casi può essere
superiore al valore indicato nelle presenti
istruzioni. La sollecitazione da vibrazioni
potrebbe risultare sottostimata se l'elettroutensile viene utilizzato regolarmente in tal
modo. Cercare di ridurre il più possibile la
sollecitazione da vibrazioni. Provvedimenti
adeguati per la riduzione della sollecitazione da vibrazioni prevedono l'uso di guanti
durante l'impiego dell'elettroutensile e la
limitazione dei tempi di lavoro. Occorre
tenere in considerazione tutte le componenti
del ciclo di esercizio (per esempio i tempi nei
quali l'elettroutensile è spento e i tempi in cui
è acceso ma funziona senza carico).
PWSA 20-Li B2
IT│MT
│
3 ■

Indicazioni generali di
sicurezza per elettroutensili
AVVERTENZA!
► Leggere tutte le indicazioni relative alla
sicurezza e le istruzioni. L'errata applicazione
delle indicazioni di sicurezza e delle istruzioni
può causare scosse elettriche, incendi e / o
gravi lesioni.
Conservare le indicazioni di sicurezza e le
istruzioni per uso futuro.
Il termine "elettroutensile" utilizzato nelle indicazioni
di sicurezza si riferisce a elettroutensili collegabili
alla rete elettrica (con cavo di rete) e a elettroutensili a batteria (senza cavo di rete).
1. Sicurezza sul posto di lavoro
a) Mantenere l'area di lavoro pulita e ben illu-
minata. Il disordine e la scarsa illuminazione
dell'area di lavoro potrebbero dare luogo a
infortuni.
b) Non lavorare con elettroutensili in ambienti
a rischio di esplosione, in presenza di liquidi,
gas o polveri infiammabili. Gli elettroutensili
generano scintille che possono incendiare la
polvere o i vapori.
c) Tenere lontani i bambini e altre persone
durante l'uso dell'elettroutensile. In caso di
distrazione, si potrebbe perdere il controllo
dell'apparecchio.
2. Sicurezza elettrica
a) La spina dell'elettroutensile deve essere ido-
nea all'inserimento nella presa. La spina non
deve essere assolutamente modificata.
Non utilizzare connettori adattatori con
elettroutensili collegati a terra. Le spine non
modificate e le prese idonee riducono il rischio
di scosse elettriche.
b) Evitare il contatto corporeo con superfici col-
legate a terra, come tubi, termosifoni, stufe e
frigoriferi. Quando il corpo è a diretto contatto
con la terra sussiste un maggiore pericolo di
scosse elettriche.
c) Tenere gli elettroutensili lontano dalla pioggia
o dall'umidità. La penetrazione di acqua in un
apparecchio elettrico aumenta il rischio di scosse
elettriche.
d)
Non utilizzare il cavo elettrico per scopi non
conformi, come ad es. per trasportare l'elettro-
utensile, per appenderlo o per scollegare
la spina dalla presa. Tenere il cavo lontano
dal calore, dall'olio, da bordi acuminati o da
parti dell'apparecchio in movimento.
Cavi danneggiati o aggrovigliati aumentano il
rischio di scosse elettriche.
e)
Se si lavora all'aperto con un elettroutensile,
utilizzare solo una prolunga indicata anche
per uso all'esterno. L'utilizzo di una prolunga
idonea all'uso esterno riduce il rischio di scosse
elettriche.
f) Se è inevitabile l'uso dell'elettroutensile in
ambiente umido, utilizzare un interruttore
differenziale. L'uso di un interruttore differenzia-
le riduce il rischio di scosse elettriche.
3. Sicurezza delle persone
a) Agire sempre con attenzione, osservare le
proprie azioni e procedere in modo ragione-
vole nel lavoro con un elettroutensile. Non
utilizzare l'elettroutensile se non si è concen-
trati o riposati a sufficienza o se si è sotto
l'effetto di droghe, alcol o farmaci. Un solo
momento di disattenzione nell'uso dell'elettro-
utensile può dare luogo a gravi lesioni.
Indossare dispositivi di protezione individuale
b)
e sempre occhiali di protezione. L'uso di dispo-
sitivi di protezione individuale come mascherina
antipolvere, scarpe antiscivolo, casco protettivo
o protezioni acustiche, a seconda del tipo e
dell'impiego dell'elettroutensile, riduce il rischio
di lesioni.
c) Evitare l'accensione involontaria. Accertarsi
che l'elettroutensile sia spento prima di col-
legarlo all'alimentazione e/o alla batteria,
sollevarlo o trasportarlo. Se si tiene il dito
sull'interruttore mentre si sposta l'elettroutensile
o si collega l'apparecchio alla rete elettrica
con l'interruttore su ON, si possono verificare
infortuni.
■ 4 │ IT
│
MT
PWSA 20-Li B2

d) Rimuovere gli utensili di regolazione o le
chiavi inglesi prima di accendere l'elettroutensile. Un utensile o una chiave lasciati in
una parte rotante dell'apparecchio possono
provocare lesioni.
e) Evitare posture innaturali. Provvedere a una
posizione sicura e mantenere sempre l'equilibrio. In tal modo si può controllare meglio
l'elettroutensile, soprattutto in situazioni impreviste.
f) Indossare un abbigliamento idoneo. Non
indossare abiti ampi o gioielli. Tenere lontani
i capelli, gli abiti e i guanti dalle parti in
movimento. Gli abiti ampi e sciolti, i gioielli o
i capelli lunghi possono impigliarsi nelle parti
mobili.
g) Se è possibile montare aspirapolvere e dispo-
sitivi di raccolta, accertarsi che siano collegati
e che vengano utilizzati correttamente.
L'uso di un aspiratore per polvere può ridurre i
pericoli associati alla polvere.
4. Uso e manipolazione dell'elettroutensile
a) Non sovraccaricare l'apparecchio. Utilizzare
l'elettroutensile idoneo al proprio lavoro. Con
l'elettroutensile adatto si lavora meglio e con
maggiore sicurezza nell'intervallo di potenza
indicato.
b) Non utilizzare elettroutensili con interruttore
guasto. Un elettroutensile che non si riesce
più a spegnere o ad accendere è pericoloso e
deve essere riparato.
c) Disconnettere la spina dalla presa di corrente
e/o rimuovere la batteria prima di eseguire
impostazioni dell'apparecchio, sostituire gli
accessori o riporre l'apparecchio. Questa
misura precauzionale impedisce l'avvio involontario dell'elettroutensile.
d) Conservare gli elettroutensili non utilizzati
fuori dalla portata dei bambini. Non consentire l'uso dell'apparecchio a persone inesperte
o che non abbiano letto le presenti istruzioni.
Gli elettroutensili sono pericolosi se utilizzati da
persone inesperte.
e) Trattare gli elettroutensili con cura.
Controllare che le parti mobili dell'apparecchio funzionino perfettamente e non si
inceppino e che non vi siano elementi rotti o
danneggiati al punto da compromettere la
funzione dell'elettroutensile. Fare riparare le
parti danneggiate prima di utilizzare l'apparecchio. Molti infortuni derivano da una cattiva
manutenzione degli elettroutensili.
f) Mantenere gli utensili da taglio ben affilati e
puliti. Gli utensili da taglio trattati con cura e
con angoli di taglio affilati si inceppano meno
spesso e sono più facili da controllare.
g) Utilizzare elettroutensili, accessori, utensili,
ecc. conformi a queste istruzioni. Tenere conto delle condizioni di lavoro e dell'attività da
eseguire.
L'uso di elettroutensili per applicazioni diverse
da quelle previste può dare luogo a situazioni
di pericolo.
5. Uso e trattamento dell'utensile a
batteria
a) Caricare le batterie solo con i caricabatterie
che vengono consigliati dal costruttore. Se un
caricabatteria adatto a un determinato tipo di
batteria viene utilizzato con batterie diverse, vi
è pericolo di incendio.
b) Utilizzare solo le batterie appositamente
previste per gli elettroutensili. L'utilizzo di altre
batterie può causare lesioni e pericoli di incendio.
c) Tenere la batteria non utilizzata lontano
da graffette, monete, chiavi, chiodi, viti o
altra minuteria in metallo, poiché tali oggetti
potrebbero provocare un cortocircuito fra
i contatti. Un cortocircuito fra i contatti della
batteria può dare luogo a ustioni o incendio.
d) In caso di utilizzo scorretto, potrebbe fuo-
riuscire del liquido dalla batteria. Evitare il
contatto con questo liquido. In caso di contatto
accidentale, sciacquare con acqua. Se il
liquido entra a contatto con gli occhi, consultare un medico. Il liquido che fuoriesce dalla
batteria potrebbe provocare irritazioni cutanee
o ustioni.
PWSA 20-Li B2
IT│MT
│
5 ■

CAUTELA! PERICOLO DI ESPLOSIONE!
Non caricare mai batterie non ricaricabili.
Proteggere la batteria dal calore, per
es. anche da irradiazione solare permanente, fuoco, acqua e umidità.
Sussiste il pericolo di esplosione.
6. Assistenza
a) Fare riparare l'elettroutensile solo da per-
sonale qualificato specializzato e solo con
ricambi originali. In tal modo si garantisce la
sicurezza dell'elettroutensile.
Indicazioni relative alla sicurezza per
tutte le applicazioni
Indicazioni relative alla sicurezza riguardanti
operazioni di levigatura e di troncatura:
a) Questo elettroutensile è previsto per l'uso
come smerigliatrice e troncatrice. Attenersi
a tutte le indicazioni di sicurezza, istruzioni,
raffigurazioni e dati ottenuti insieme all'apparecchio. In caso di mancata osservanza delle
seguenti istruzioni, sussiste il pericolo di scossa
elettrica, incendio e / o gravi lesioni.
b) Questo elettroutensile non è adatto per levi-
gatura con carta vetrata, lavori con spazzole
metalliche o lucidatura. Gli usi per i quali
l'elettroutensile non è previsto possono causare
danni e lesioni.
c) Non utilizzare accessori non previsti e racco-
mandati specificamente dal produttore per
questo elettroutensile. Il semplice fatto che un
accessorio possa essere fissato all'elettroutensile
non è garanzia di impiego sicuro.
d) Il numero di giri ammesso dell'utensile im-
piegato deve essere almeno pari al numero
massimo di giri riportato sull'elettroutensile.
Un accessorio che gira più rapidamente di
quanto consentito potrebbe rompersi e i vari
pezzi potrebbero essere scaraventati nell'ambiente circostante.
e) Il diametro esterno e lo spessore dell'utensile
montato devono corrispondere alle dimensioni
dell'elettroutensile in dotazione. In caso di
utilizzo di utensili di dimensioni sbagliate, non
sarà possibile schermarli oppure controllarli a
sufficienza.
f) Gli utensili con inserto filettato devono essere
esattamente inseriti nella filettatura del mandrino portamola. In caso di utensili montati
tramite flangia, il diametro del foro dell'utensile deve essere adatto al diametro di inserimento della flangia. Gli utensili non fissati con
precisione all'elettroutensile gireranno in modo
sbilanciato, producendo forti vibrazioni e provocando perdita di controllo.
g) Non utilizzare mai utensili danneggiati.
Prima di ogni utilizzo controllare gli utensili
e accertarsi che sulle mole abrasive non
vi siano scheggiature o crepature, che il
platorello non presenti incrinature, crepe o
forte usura e che le spazzole metalliche non
abbiano fili metallici allentati oppure rotti. Se
l'elettroutensile o l'utensile impiegato dovesse
sfuggire di mano e cadere, accertarsi che
non abbia subito nessun danno o utilizzare
un utensile intatto. Una volta controllato e
montato l'elettroutensile, farlo funzionare per
la durata di un minuto al numero massimo di
giri, tenendolo lontano da se stessi e da altre
persone nelle vicinanze. Solitamente, gli uten-
sili danneggiati si rompono nel corso di questo
periodo di prova.
h) Indossare dispositivi di protezione individuale.
A seconda dell'applicazione in corso, utilizzare una visiera completa, una maschera di
protezione per gli occhi oppure occhiali di
protezione. Se necessario, indossare maschera antipolvere, paraorecchie, guanti protettivi
oppure un grembiule speciale in grado di
proteggere da piccole particelle di levigatura
o di materiale. Gli occhi devono essere protetti
da corpi estranei volanti proiettati nel corso
delle diverse applicazioni. La maschera antipolvere e la maschera respiratoria devono filtrare
la polvere generata durante l'applicazione. Se
ci si espone per lungo tempo a un rumore troppo
forte, si potrebbe incorrere in una perdita di
udito.
■ 6 │ IT
│
MT
PWSA 20-Li B2

i) In presenza di altre persone, assicurarsi che
vi sia una distanza di sicurezza dalla propria
area di lavoro. Ogni persona che entra nella
zona di lavoro deve indossare i dispositivi di
protezione individuale.
Frammenti del pezzo di lavoro o utensili rotti
possono volare via e provocare incidenti anche
al di fuori della zona di lavoro diretta.
j) Sostenere l'elettroutensile solo dalle superfici
di impugnatura isolate mentre si eseguono
lavori in cui l'elettroutensile potrebbe entrare
in contatto con linee di tensione nascoste.
Il contatto con un cavo di tensione potrebbe
mettere sotto tensione anche le parti in metallo
dell'apparecchio e provocare così una scossa
elettrica.
k) Tenere lontano il cavo di rete dagli utensili
rotanti. Se si perde il controllo sull'apparecchio,
sussiste il pericolo di troncare o di colpire il
cavo di collegamento elettrico e la mano o il
braccio dell'utente potrebbe finire a contatto
con l'utensile in rotazione.
l) Non poggiare mai l'elettroutensile prima che
si sia fermato completamente. L'utensile in
rotazione può entrare in contatto con la superficie di appoggio, facendo perdere il controllo
sull'elettroutensile.
m) Non trasportare mai l'elettroutensile quando
è ancora in funzione. Gli indumenti dell'operatore possono essere catturati dall'utensile in
rotazione tramite un contatto casuale, causando lesioni fisiche.
n) Pulire regolarmente le feritoie di ventilazione
dell'elettroutensile in dotazione. Il ventilatore
del motore attira polvere nel carter e un forte
accumulo di polvere metallica potrebbe provocare pericoli di natura elettrica.
o) Non utilizzare mai l'elettroutensile nelle vi-
cinanze di materiali infiammabili. Le scintille
potrebbero incendiare questi materiali.
p) Non utilizzare mai utensili che richiedono
refrigeranti liquidi. L'utilizzo di acqua o di altri
liquidi refrigeranti potrebbe provocare
una scossa elettrica.
Contraccolpo e relative indicazioni di
sicurezza
Un contraccolpo è l'improvvisa reazione in seguito
ad agganciamento o blocco dell'utensile rotante,
come ad es. mola abrasiva, platorello, spazzola
metallica ecc. Se l'utensile rotante si incastra o
blocca, esso si ferma improvvisamente. In questo
caso si genera un rimbalzo dell'elettroutensile nella
direzione opposta a quella della rotazione dell'utensile in corrispondenza del punto di blocco.
Se ad es. una mola abrasiva resta agganciata
o bloccata nel pezzo da lavorare, il bordo della
mola abrasiva che viene inserito nel pezzo di
lavoro potrebbe rimanere impigliato provocando
in questo modo una rottura o un contraccolpo
della mola stessa. La mola abrasiva si avvicina o si
allontana dall'operatore a seconda della direzione
di rotazione che ha nel momento in cui si blocca.
In tali situazioni è anche possibile che le mole si
rompano.
Un contraccolpo è la conseguenza di un uso
improprio o erroneo dell'elettroutensile. Lo si può
evitare adottando idonee misure preventive, come
descritto di seguito.
a) Tenere ben fermo l'elettroutensile e portare il
corpo e le braccia in una posizione che consenta di assorbire le forze del contraccolpo.
Se disponibile, utilizzare sempre l'impugnatura supplementare in modo da poter avere
sempre il maggior controllo possibile su
forze di contraccolpo o momenti di reazione
durante la fase di accelerazione. Adottando
appropriate misure di precauzione, è possibile
tenere sotto controllo le forze di contraccolpo e
di reazione.
b) Non avvicinare mai la mano agli utensili in
rotazione. Durante il contraccolpo, l'utensile
potrebbe spostarsi sulla mano.
c) Evitare di avvicinarsi con il corpo alla zona
in cui l'elettroutensile si sposterebbe in caso
di contraccolpo. Un contraccolpo provoca uno
spostamento improvviso dell'elettroutensile nella
direzione opposta a quella della rotazione della mola in corrispondenza del punto di blocco.
PWSA 20-Li B2
IT│MT
│
7 ■

d) Operare con particolare attenzione in prossi-
mità di spigoli, bordi taglienti, ecc. Impedire
che gli utensili possano rimbalzare dal pezzo
di lavoro e incastrarsi. L'utensile in rotazione
ha la tendenza a rimanere bloccato in angoli
e spigoli vivi, oppure in caso di rimbalzo. Ciò
provoca una perdita del controllo oppure un
contraccolpo.
e) Non utilizzare seghe a catena o lame dentel-
late. Questo tipo di accessori provoca spesso
un contraccolpo oppure la perdita del controllo
sull'elettroutensile.
Indicazioni di sicurezza particolari
per la levigatura e la troncatura
a)
Utilizzare esclusivamente smerigliatrici omologate per l'elettroutensile in dotazione e
sempre in combinazione con la calotta di
protezione prevista per ogni smerigliatrice.
Le smerigliatrici non adatte all'elettroutensile non
possono venire sufficientemente schermate e non
garantiscono la sicurezza.
b)
Montare le mole abrasive a gomito in modo
che la superficie di molatura non sporga oltre
il livello del bordo della calotta di protezione.
Una mola abrasiva montata erroneamente e
sporgente oltre il livello del bordo della calotta
di protezione non può essere schermata a sufficienza.
c) La calotta di protezione deve essere appli-
cata in modo sicuro all'elettroutensile e, per
garantire la massima sicurezza possibile, la
parte di smerigliatrice rivolta verso l'operatore deve essere il più possibile ridotta. La calot-
ta di protezione aiuta a proteggere l'operatore
da frammenti, contatto accidentale con la smerigliatrice nonché da scintille che potrebbero
incendiare gli indumenti.
d) Le smerigliatrici devono essere utilizzate
esclusivamente per le applicazioni consigliate.
Ad esempio: non eseguire mai lavori di levigatura con la superficie laterale di una mola
di troncatura. Le troncatrici sono destinate ad
asportare materiale con il bordo. Se si esercitano carichi laterali su questi corpi abrasivi, vi è il
pericolo di romperli.
e) Utilizzare sempre flange di serraggio in per-
fetto stato e di dimensione e forma corrette
per la mola selezionata. Le flange idonee
sostengono la mola riducendo il più possibile il
pericolo di rotture. Le flange per mole di troncatura potrebbero differenziarsi dalle flange per
mole abrasive di altro tipo.
f) Non utilizzare mai mole abrasive usurate
usate con elettroutensili più grandi. Le mole
abrasive per elettroutensili più grandi non sono
idonee al numero di giri superiore degli elettroutensili più piccoli e possono rompersi.
Ulteriori indicazioni di sicurezza
particolari per la troncatura
a) Evitare il blocco della mola di troncatura o
l'impiego di una pressione eccessiva.
Non eseguire tagli eccessivamente profondi.
Sottoponendo la mola a carico eccessivo, se
ne aumenta la sollecitazione e la si rende maggiormente soggetta ad angolature improprie o
a blocchi, con conseguente pericolo di contraccolpo oppure di rottura del corpo abrasivo.
b) Evitare di avvicinarsi alla zona anteriore o
posteriore alla mola di troncatura in rotazione. Spostando lontano da sé la mola di tron-
catura nel pezzo di lavoro, in caso di contraccolpo l'elettroutensile con la mola in rotazione
potrebbe essere proiettato direttamente verso
l'operatore.
c) Se la mola di troncatura si blocca o se si
interrompe il lavoro, spegnere l'apparecchio
e aspettare che la mola si fermi completamente. Non tentare mai di estrarre dal taglio
la mola in funzione poiché si potrebbe provocare un contraccolpo. Cercare ed eliminare la
causa del blocco.
d) Non riaccendere mai l'elettroutensile che sia
ancora inserito nel pezzo di lavoro. Attendere
che la mola arrivi al massimo numero di giri
prima di proseguire cautamente con il taglio.
In caso contrario, la mola può rimanere agganciata, saltare via dal pezzo di lavoro o provocare un contraccolpo.
■ 8 │ IT
│
MT
PWSA 20-Li B2

e) Sostenere i pannelli o i pezzi da lavorare di
grandi dimensioni per ridurre il rischio di contraccolpo a causa di una mola di troncatura
incastrata. I pezzi da lavorare di grosse dimen-
sioni potrebbero deformarsi a causa del peso
intrinseco. Il pezzo da lavorare deve essere
sostenuto da entrambi i lati della mola, sia nelle
vicinanze della mola da taglio sia sui bordi.
Adottare la massima cautela in caso di "tagli a
f)
immersione" da eseguire in pareti già esistenti
oppure in altre parti non visibili. La mola da
taglio che inizia il taglio sul materiale potrebbe
provocare un contraccolpo se dovesse arrivare
a troncare condutture del gas o dell'acqua,
linee elettriche oppure oggetti di altro tipo.
Indicazioni relative alla sicurezza per
caricabatterie
■ Questo apparecchio può essere
utilizzato dai bambini di almeno
8anni di età e da persone con capacità fisiche, sensoriali o mentali
ridotte o insufficiente esperienza o
conoscenza, solo se sorvegliati o
istruiti sull'uso sicuro dell'apparecchio e qualora ne abbiano compreso i pericoli associati. I bambini non
devono giocare con l'apparecchio.
La pulizia e la manutenzione a cura
dell'utente non devono essere eseguite da bambini, a meno che non
siano sorvegliati.
AVVERTENZA!
■ In caso di danni al cavo di rete dell'appa-
recchio, farlo sostituire dal produttore, dal
servizio di assistenza clienti o da personale
altrettanto qualificato, per evitare danni.
■ In caso di danni al cavo di rete
dell'apparecchio, farlo sostituire dal
produttore, dal servizio di assistenza clienti o da personale altrettanto
qualificato, per evitare danni.
Il caricabatterie è indicato solo per l'uso
in ambienti interni.
PWSA 20-Li B2
IT│MT
│
9 ■

Accessori consentiti
Mole da troncatura
Mole da sgrossatura
Spes-
Grandez-
Diametro
massimo
Ø (mm)
115 3 M14 13300 80
115 6 M14 13300 80
sore
massimo
(mm)
za della
filettatura
(mm)
Numero
di giri
max
-1
(min
)
Velocità
periferica
max.
(m/s)
Utensile
Chiave di
montag-
gio a due
fori
Chiave di
montag-
gio a due
fori
Conservazione e manipolazione degli utensili di impiego consigliati
■ Manipolare e trasportare con cautela gli utensili di molatura.
■ Conservare gli utensili di molatura proteggendoli da danni meccanici o influssi ambientali
(ad es. umidità).
Calotta di
protezione
Sì
Sì
■ 10 │ IT
│
MT
PWSA 20-Li B2

Indicazioni di lavoro
NOTA
► Le smerigliatrici devono essere utilizzate
esclusivamente per le applicazioni consigliate.
In caso contrario, potrebbero rompersi,
danneggiarsi e causare lesioni.
Lavori di sgrossatura:
■ Muovere avanti e indietro la smerigliatrice
angolare applicando una pressione moderata
sul pezzo di lavoro.
■ In caso di materiale morbido, condurre la
mola da sgrossatura con un angolo piatto
sopra il pezzo di lavoro, in caso di materiale
duro con un angolo un poco più elevato.
Lavori di troncatura:
■ Utilizzare solo mole da troncatura o abrasive
rinforzate con fibra e omologate, idonee per
una velocità perimetrale non inferiore a 80 m / s.
CAUTELA!
La smerigliatrice continua a girare dopo lo spegnimento. Non frenarla con una contropressione
laterale.
■ Fissare il pezzo da lavorare. Utilizzare dispo-
sitivi di serraggio/morsetti a vite per fissare il
pezzo di lavoro. In tal modo verrà fissato più
saldamente rispetto al fissaggio manuale.
■ Prima di riporre l'apparecchio, spegnerlo
sempre e aspettare che si fermi completamente.
■ Utilizzare l'apparecchio solo per il taglio a
secco o la levigatura a secco.
■ L'impugnatura supplementare
montata durante tutti i lavori eseguiti con
l'apparecchio.
Non utilizzare mai mole da troncatura per lavori di sgrossatura!
Non utilizzare mai mole abrasive
da sgrossatura per la troncatura!
deve essere
■ Non lavorare materiali contenenti amianto.
L'amianto è considerato cancerogeno.
Suggerimento! Questo è il comporta-
mento corretto.
PERICOLO! CONDURRE L'APPA-
RECCHIO SEMPRE IN SENSO CONTRARIO ATTRAVERSO IL PEZZO DA
LAVORARE.
► In caso di direzione opposta, sussiste il peri-
colo di un contraccolpo. L'apparecchio può
venire spinto fuori dal taglio.
■ Condurre l'apparecchio contro il pezzo di
lavoro sempre quando è acceso. Sollevare
l'apparecchio dopo la lavorazione del pezzo
e spegnerlo solo in seguito.
■ Durante la lavorazione, afferrare sempre
l'apparecchio saldamente con entrambe le
mani. Provvedere a un posizionamento stabile.
■ Per un migliore effetto di levigatura, muovere
uniformemente l'apparecchio con un angolo
compreso tra 15° e 30° (tra la mola abrasiva
e il pezzo di lavoro) sul pezzo.
■ Nella lavorazione di superfici inclinate, non
esercitare molta forza con l'apparecchio sul
pezzo di lavoro. Se il numero di giri scende
notevolmente, ridurre la forza di pressione per
consentire una lavorazione sicura ed efficace.
Se l'apparecchio improvvisamente venisse
frenato o si bloccasse, è necessario spegnerlo
immediatamente.
■ Troncatura: lavorare con un avanzamento
moderato e non angolare la mola da troncatura.
■ Le mole da troncatura e sgrossatura si surri-
scaldano durante i lavori: lasciarle raffreddare
completamente prima di toccarle.
■ Non utilizzare mai l'apparecchio per scopi
diversi dalla sua destinazione d'uso.
■ Assicurarsi sempre che l'apparecchio sia
spento prima di inserire la batteria nell'apparecchio.
PWSA 20-Li B2
IT│MT
│
11 ■

■ In caso di pericolo, spegnere immediatamente
l'apparecchio e rimuovere la batteria.
Assicurarsi che l'apparecchio sia facilmente
accessibile e raggiungibile senza problemi in
caso di emergenza.
■ Rimuovere sempre la batteria durante le
pause di lavoro, prima di tutti gli interventi
sull'apparecchio e in caso di mancato utilizzo.
L'apparecchio deve essere sempre pulito, asciutto
e privo di olio o grassi lubrificanti.
■ Prestare sempre la massima attenzione!
Riflettere sempre su ciò che si sta facendo e
agire sempre in modo razionale. Non utilizza-
re mai l'apparecchio senza la massima concentrazione o in caso di malessere fisico.
AVVERTENZA!
Indossare sempre occhiali protettivi.
AVVERTENZA!
Indossare sempre una mascherina
antipolvere.
Prima della messa in funzione
Carica della batteria (vedi fig. A)
CAUTELA!
► Staccare sempre la spina dalla presa di rete
prima di rimuovere o inserire la batteria
nell'apparecchio.
■ Non caricare la batteria
ambiente inferiore a 10 °C o superiore a 40 °C.
♦ Inserire la batteria
(vedi fig. A).
♦ Inserire la spina nella presa di rete. Il LED di
controllo rosso
♦ Il LED di controllo verde
procedimento di carica è concluso e che la
batteria è pronta per l'uso.
ATTENZIONE!
♦ Se il LED di controllo rosso
significa che la batteria è surriscaldata
e non può essere caricata.
♦ Se i LED di controllo rosso e verde
lampeggiano contemporaneamente, la
batteria è guasta.
si accende.
con temperatura
nel caricabatteria rapido
segnala che il
lampeggia,
♦ Spegnere il caricatore per almeno 15 minuti fra
due procedimenti di carica consecutivi. Per farlo,
scollegare la spina dalla presa di corrente.
Inserimento / rimozione della
batteria nell'apparecchio
Inserire la batteria:
♦ Inserire la batteria
gnatura.
Rimozione della batteria:
♦ Premere il tasto per lo sbloccaggio
vere la batteria
in posizione nell'impu-
.
Controllo della carica della batteria
♦ Per controllare il livello della batteria, premere il
tasto del livello di carica della batteria
(v. anche la figura principale).
Lo stato della batteria ovvero la carica residua
vengono indicati come segue sul LED di visualizzazione stato di carica batteria
♦ ROSSO / ARANCIONE / VERDE = carica
massima
ROSSO / ARANCIONE = carica media
ROSSO = carica debole – caricare la batteria
Montare la calotta di protezione con
chiusura rapida
AVVERTENZA! PERICOLO DI LESIONI
► Prima di qualsiasi lavoro sull'apparecchio,
spegnere l'apparecchio e rimuovere la
batteria.
PERICOLO DI LESIONI
► Utilizzare la smerigliatrice angolare sempre
con la calotta di protezione
protezione deve venire applicata in modo
sicuro alla smerigliatrice angolare. Regolarla
in modo da ottenere la massima sicurezza,
ovvero la parte più ridotta della smerigliatrice
è rivolta verso l'operatore. La calotta di protezione protegge l'operatore da frammenti e
dal contatto accidentale con la smerigliatrice.
e rimuo-
:
. La calotta di
■ 12 │ IT
│
MT
PWSA 20-Li B2

PERICOLO DI LESIONI
12
► Assicurarsi che la calotta di protezione
venga montata almeno nella stessa angolazione dell'impugnatura supplementare
(v. fig. B). In caso contrario, ci si potrebbe
ferire con la mola da sgrossatura o troncatura.
♦ Aprire la leva di serraggio .
♦ Inserire la calotta di protezione
con il perno
di codifica nella scanalatura di codifica .
♦ Ruotare la calotta di protezione nella posi-
zione necessaria (posizione di lavoro). Il lato
chiuso della calotta di protezione deve essere
sempre rivolto verso l'operatore.
♦ Chiudere la leva di serraggio per bloccare
la calotta di protezione . Se necessario, è
possibile modificare la forza di serraggio della
chiusura allentando o serrando il bullone di
regolazione . Assicurarsi che la calotta di
protezione sia ben fissata sul collare del
mandrino.
Montare l'impugnatura supplementare
CAUTELA!
► Per motivi di sicurezza, questo apparecchio
può essere usato solo con l'impugnatura
supplementare
. In caso contrario, si
potrebbero riportare lesioni. A seconda della
modalità di lavoro, l'impugnatura supplemen-
può venire avvitata a sinistra, a destra
tare
o sopra la testa dell'apparecchio.
Montaggio / sostituzione del disco di
sgrossatura / troncatura
Durante la sostituzione delle mole di troncatura/
sgrossatura, indossare sempre guanti protettivi.
Tenere conto delle dimensioni delle mole di sgrossatura e troncatura. Il diametro del foro non deve
avere gioco rispetto alla flangia portamola
Non utilizzare riduttori o adattatori.
NOTA
► Utilizzare esclusivamente mole pulite.
.
■ Utilizzare solo smerigliatrici il cui numero di giri
consentito sia almeno uguale al numero di giri
al minimo dell'apparecchio.
■ PERICOLO DI LESIONI! Azionare il tasto di
blocco mandrino solo con il mandrino portamola fermo.
♦ Premere il tasto di blocco mandrino per
bloccare il meccanismo.
♦ Allentare il dado di serraggio
con l'ausilio
della chiave di montaggio a due fori (vedi
fig. D).
♦ Disporre la mola di troncatura o sgrossatura
con il lato scritto verso l'apparecchio sulla
flangia portamola
♦ Inserire quindi il dado di serraggio
.
con il
lato sollevato verso l'alto nuovamente sul
mandrino portamola .
In caso di mole abrasive sottili (vedi fig. 1):
♦ Il collare del dado di serraggio è rivolto
verso l'alto per bloccare in modo sicuro una
mola abrasiva sottile.
≤ 3,2 mm
Fig. 1
♦ Premere il tasto di blocco mandrino
per
bloccare il meccanismo.
♦ Serrare nuovamente il dado di serraggio
con la chiave di montaggio a due fori .
In caso di mole abrasive spesse (vedi fig. 2):
> 3,2 mm
Fig. 2
PWSA 20-Li B2
IT│MT
│
13 ■

Il collare del dado di serraggio
verso il basso per poter applicare la mola abrasiva
in modo stabile al mandrino portamola .
♦ Fermare il mandrino portamola
♦ Stringere il dado di serraggio
di montaggio a due fori ruotando in senso
orario.
NOTA
► Se dopo la sostituzione la mola gira rumo-
rosamente o oscilla, è necessario sostituirla
immediatamente.
♦ Per sicurezza, dopo un cambio di mola fare
funzionare l'apparecchio per 60 secondi alla
massima velocità. Prestare attenzione a rumori
insoliti e allo sviluppo di scintille.
♦ Verificare che tutte le parti di fissaggio siano
applicate correttamente.
♦ Assicurarsi che la freccia della direzione di
rotazione (se presente) sulle mole di troncatura
o sgrossatura (anche mole di diamante) e la
direzione di rotazione dell'apparecchio (freccia
della direzione di rotazione sulla testa dell'apparecchio) coincidano.
è orientato
.
con la chiave
Messa in funzione
Accensione/spegnimento
Prima dell'uso controllare l'utensile inserito per assicurarsi che tutte le parti di fissaggio siano montate
correttamente.
NOTA
► Accendere la smerigliatrice angolare sempre
prima di metterla a contatto con il materiale
e portare l'apparecchio sul pezzo di lavoro
solo dopo l'accensione.
Accensione:
♦ Premere l'interruttore ON/OFF dapprima
verso destra, per poterlo poi spingere in avanti.
Spegnimento:
♦ Rilasciare l'interruttore ON/OFF
.
Attivazione del funzionamento continuato:
♦ Premere
Disattivazione del funzionamento continuato:
♦ Premere
l'interruttore ON/OFF dapprima
verso destra, per poterlo poi spingere in avanti.
Premere poi
e verso il basso finché non si innesta.
l'interruttore ON/OFF in avanti
l'interruttore ON/OFF all'indietro e
verso il basso, quindi rilasciarlo.
Regolazione del numero di giri
Con la rotella di regolazione per la preselezione
del numero di giri è possibile preselezionare il
numero di giri:
(1 = numero di giri inferiore, 6 = numero di giri
maggiore).
Consigliamo di eseguire test pratici per rilevare
il numero di giri idoneo.
Il numero di giri può essere modificato anche
durante il funzionamento.
Manutenzione e pulizia
AVVERTENZA! PERICOLO DI LESIONI!
Prima di qualsiasi lavoro sull'apparecchio, spegnere l'apparecchio e
rimuovere la batteria.
La smerigliatrice angolare a batteria non necessita
di manutenzione.
■ Non utilizzare oggetti acuminati per la pulizia
dell'apparecchio. Impedire la penetrazione
di liquidi all'interno dell'apparecchio. In caso
contrario, l'apparecchio può danneggiarsi irreparabilmente.
■ Pulire regolarmente l'apparecchio, preferibil-
mente sempre subito dopo aver terminato il
lavoro.
■ Pulire l'alloggiamento con un panno asciutto,
non utilizzare assolutamente benzina, solventi
o detergenti che attaccano la plastica.
■ Per la pulizia accurata dell'apparecchio è
necessario un aspirapolvere.
■ Le aperture di aerazione devono essere sempre
libere.
■ Eliminare la polvere più aderente con un pen-
nello.
■ 14 │ IT
│
MT
PWSA 20-Li B2

NOTA
► I pezzi di ricambio non indicati (come ad es.
spazzole di carbone, interruttori) possono
essere ordinati tramite la nostra hotline di
assistenza.
Smaltimento
L'imballaggio consiste di materiali eco-
compatibili che possono essere smaltiti
nei locali contenitori di riciclaggio.
Non smaltire gli elettroutensili assieme
ai normali rifiuti domestici!
In base alla Direttiva europea 2012/19/EU, gli
elettrodomestici usati devono essere raccolti separatamente e conferiti a un centro per il riciclaggio
ecologico.
Non smaltire le batterie assieme ai
normali rifiuti domestici!
Prima dello smaltimento, rimuovere le batterie
dall'apparecchio.
Le batterie difettose o esauste devono essere
riciclate in base alla direttiva 2006/66/EC.
Riconsegnare la batteria e/o l'apparecchio
presso gli appositi centri di raccolta.
Per le possibilità di smaltimento relative a elettroutensili/batterie esausti, informarsi presso il municipio o l'amministrazione comunale di residenza.
Tenere conto dei codici presenti sui
vari materiali di imballaggio ed
eventualmente separare i materiali
effettuando una raccolta differenziata.
I materiali di imballaggio presentano
codici costituiti da abbreviazioni (a) e
numeri (b) con il seguente significato:
1–7: materie plastiche,
20–22: carta e cartone,
80–98: materiali compositi
Garanzia della
Kompernass Handels GmbH
Egregio Cliente,
Questo apparecchio ha una garanzia di 3 anni
dalla data di acquisto. Qualora questo prodotto
presentasse vizi, Le spettano diritti legali nei confronti
del venditore del prodotto. La garanzia qui di seguito
descritta non costituisce alcun limite a tali diritti
legali.
Condizioni di garanzia
Il periodo di garanzia decorre dalla data dell’acquisto. Si prega di conservare lo scontrino di cassa
originale. Tale documento è necessario come
prova di acquisto.
Qualora entro tre anni a partire dalla data
dell’acquisto di questo prodotto si presentasse un
vizio del materiale o di fabbricazione, provvederemo, a nostra discrezione, a riparare o a sostituire
gratuitamente il prodotto. Questa prestazione di
garanzia ha come presupposto che l’apparecchio
difettoso e la prova di acquisto (scontrino di cassa)
vengano presentati entro il termine di tre anni e
che si descriva per iscritto in cosa consiste il vizio e
quando si è presentato.
Se il vizio rientra nell’ambito della nostra garanzia,
il Suo prodotto verrà riparato o sostituito da uno
nuovo. Con la riparazione o la sostituzione del prodotto non decorre un nuovo periodo di garanzia.
Periodo di garanzia e diritti legali di
rivendicazione di vizi
Il periodo di garanzia non viene prolungato da
interventi in garanzia. Ciò vale anche per le parti
sostituite e riparate. Danni e vizi eventualmente già
presenti al momento dell’acquisto devono venire
segnalati immediatamente dopo che l’apparecchio
è stato disimballato. Le riparazioni eseguite dopo
la scadenza del periodo di garanzia sono a
pagamento.
Per lo smaltimento del prodotto una
volta che ha terminato la sua funzione,
informarsi presso l’amministrazione
comunale.
PWSA 20-Li B2
IT│MT
│
15 ■

Ambito della garanzia
L’apparecchio è stato prodotto con cura secondo
severe direttive qualitative e debitamente collaudato
prima della consegna.
La garanzia viene prestata in caso di vizi del
materiale o di fabbricazione. Questa garanzia non
si estende a componenti del prodotto che sono
esposti al normale logorio e possono pertanto essere
considerati come componenti soggetti a usura o a
danni che si verificano su componenti delicati, per
es. interruttori, batterie, stampi da forno o parti
realizzate in vetro.
Questa garanzia decade se il prodotto è stato
danneggiato oppure utilizzato o sottoposto a
interventi di manutenzione in modo non conforme.
Per un utilizzo adeguato del prodotto si devono
rigorosamente rispettare tutte le istruzioni esposte
nel manuale di istruzioni per l’uso. Si devono assolutamente evitare modalità di utilizzo e azioni che
il manuale di istruzioni per l’uso sconsiglia o da cui
esso mette in guardia.
Il prodotto è destinato esclusivamente all’uso domestico e non a quello commerciale. La garanzia
decade in caso di impiego improprio o manomissione, uso della forza e interventi non eseguiti
dalla nostra filiale di assistenza autorizzata.
Trattamento dei casi di garanzia
Per garantire una rapida evasione della Sua richiesta,
La preghiamo di seguire le seguenti istruzioni:
■ Tenga a portata di mano per qualsiasi richiesta
lo scontrino di cassa e il codice dell’articolo
(per es. IAN 12345) come prova di acquisto.
■ Il codice dell’articolo è indicato sulla targhetta
di modello, su un’incisione, sul frontespizio del
manuale di istruzioni per l’uso (in basso a sinistro)
o come adesivo sul lato posteriore o inferiore.
■ Qualora si presentassero malfunzionamenti o
altri tipi di vizi, contatti innanzitutto il reparto
assistenza clienti qui di seguito indicato telefo-
nicamente o via e-mail.
■ Una volta che il prodotto è stato registrato come
difettoso, lo può poi spedire a nostro carico,
provvedendo ad allegare la prova di acquisto
(scontrino di cassa), una descrizione del vizio
e l’indicazione della data in cui si è presentato,
all’indirizzo del servizio di assistenza clienti che
Le è stato comunicato.
NOTA
► In caso di utensili Parkside e Florabest,
inviare esclusivamente l'articolo guasto senza
accessori (es. batteria, valigetta, attrezzi di
montaggio, ecc.).
Al sito www.lidl-service.com si possono
scaricare questo e molti altri manuali di
istruzioni per l’uso, filmati sui prodotti e
software.
Assistenza
Assistenza Italia
Tel.: 02 36003201
E-Mail: kompernass@lidl.it
Assistenza Malta
Tel.: 80062230
E-Mail: kompernass@lidl.com.mt
IAN 290756
Importatore
Badi che il seguente indirizzo non è quello del
servizio di assistenza clienti. Contatti innanzitutto
il servizio di assistenza clienti indicato.
KOMPERNASS HANDELS GMBH
BURGSTRASSE 21
DE - 44867 BOCHUM
GERMANIA
www.kompernass.com
■ 16 │ IT
│
MT
PWSA 20-Li B2

Traduzione della dichiarazione di conformità originale
La Società KOMPERNASS HANDELS GMBH, responsabile della documentazione: nella persona del
Sig. Semi Uguzlu, BURGSTR. 21, DE - 44867 BOCHUM, GERMANIA, dichiara con la presente che
questo prodotto è conforme alle seguenti norme, documenti normativi e Direttive CE:
Direttiva macchine
(2006 / 42 / EC)
Direttiva CE bassa tensione
(2014 / 35 / EU)
Compatibilità elettromagnetica
(2014 / 30 / EU)
Direttiva RoHS
(2011 / 65 / EU)*
*Il produttore è il responsabile esclusivo del rilascio di questa dichiarazione di conformità. L'oggetto della dichiarazione
sopra descritto soddisfa le prescrizioni della Direttiva 2011/65/EU del Parlamento Europeo e del Consiglio Europeo
dell'8giugno 2011 sulla restrizione dell'uso di determinate sostanze pericolose nelle apparecchiature elettriche ed
elettroniche.
Norme armonizzate utilizzate:
EN 60745-1:2009+A11
EN 60745-2-3:2011+A2+A11+A12+A13
EN 55014-1:2006+A1+A2
EN 55014-2:2015
EN 61000-3-2:2014
EN 61000-3-3:2013
EN 60335-2-29:2004+A2
EN 60335-1:2012+A11
EN 62233:2008
EN 50581:2012
Denominazione della macchina:
Smerigliatrice angolare ricaricabile PWSA 20-Li B2
Anno di produzione: 12 - 2017
Numero di serie: IAN 290756
Bochum, 06/12/2017
Semi Uguzlu
- Direttore qualità Con riserva di modifiche tecniche volte al miglioramento del prodotto.
PWSA 20-Li B2
IT│MT
│
17 ■

Ordinazione batteria sostitutiva
Se si desidera ordinare una batteria di ricambio per il proprio apparecchio, lo si può fare comodamente
via Internet sul sito www.kompernass.com o telefonicamente.
Il prezzo della batteria sostitutiva (PAP 20 A3) è di 27,99 € incl. IVA e spedizione. Dato che le scorte
sono limitate, questo articolo potrebbe esaurirsi entro breve tempo.
Ordinazione online
Per ordinare una batteria di ricambio attraverso il negozio di accessori:
■ accedere con il browser al sito www.kompernass.com.
■ Fare clic in alto a sinistra sulla relativa bandiera per selezionare il paese e la lingua desiderati.
■ Per ordinare la giusta batteria di ricambio, fare clic alla voce contenente le marche su "Parkside" e poi
selezionare il relativo apparecchio.
■ Dopo aver messo la batteria di ricambio nel carrello, fare clic sul pulsante "Cassa" e seguire le indica-
zioni sullo schermo per completare l'ordinazione.
NOTA
► In alcuni paesi non è possibile ordinare online i pezzi di ricambio. In questo caso, contattare l'hotline
di assistenza.
■ L'iniziativa promozionale è limitata a una batteria per cliente / apparecchio nonché a un periodo di
due mesi dopo il termine dell'iniziativa. La batteria di ricambio può essere ordinata anche dopo tale
data ma a condizioni diverse.
Ordinazione telefonica
Assistenza Italia
Tel.: 02 36003201
E-Mail: kompernass@lidl.it
Assistenza Malta
Tel.: 80062230
E-Mail: kompernass@lidl.com.mt
Per garantire un'evasione rapida dell'ordine, tenere a portata di mano il numero di articolo (ad es.
IAN 290756) dell'apparecchio. Il codice di articolo è indicato sulla targhetta modello nonché
sulla pagina di copertina del presente manuale.
■ 18 │ IT
│
MT
PWSA 20-Li B2

Contents
Introduction .....................................................20
Intended use ............................................................... 20
Features .................................................................. 20
Package contents ...........................................................21
Technical details ............................................................ 21
General Power Tool Safety Warnings ...............................22
1. Work area safety ......................................................... 22
2. Electrical safety ..........................................................22
3. Personal safety ........................................................... 22
4. Power tool use and care ................................................... 23
5. Use and handling of the cordless electrical power tool ............................ 23
6. Service .................................................................24
Safety instructions for all applications ........................................... 24
Kickback and corresponding safety instructions. . . . . . . . . . . . . . . . . . . . . . . . . . . . . . . . . . . . 25
Special safety instructions for grinding and abrasive cutting ..........................26
Additional special safety instructions for abrasive cutting ............................ 26
Safety guidelines for battery chargers ............................................ 27
Permissible accessories ....................................................... 28
Storage and handling of the recommended accessory tools ..........................28
Working procedures ......................................................... 29
Before use ......................................................30
Charging the battery pack (see fig. A) ........................................... 30
Attaching/disconnecting the battery pack to/from the appliance ...................... 30
Checking the battery charge level ..............................................30
Fitting the blade guard with quick release ........................................30
Fitting the additional handle ................................................... 31
Fitting/changing the roughing/cutting disc ....................................... 31
Operation ......................................................32
Switching on and off ........................................................32
Adjusting the rotational speed ................................................. 32
Maintenance and cleaning .........................................32
Disposal ........................................................33
Kompernass Handels GmbH warranty ..............................33
Service .........................................................34
Importer .......................................................34
Translation of the original Conformity Declaration .....................35
Ordering a replacement battery ....................................36
Online ordering ............................................................ 36
Telephone ordering .........................................................36
PWSA 20-Li B2
GB│MT
│
19 ■

CORDLESS ANGLE GRINDER
PWSA 20-Li B2
Introduction
Congratulations on the purchase of your new appliance. You have chosen a high-quality product. The
operating instructions are part of this product. They
contain important information about safety, usage
and disposal. Before using the product, please
familiarise yourself with all operating and safety
instructions. Use the product only as described and
for the range of applications specified. Please also
pass these operating instructions on to any future
owner.
Intended use
The appliance is intended for cutting, rough cutting
and brushing metal, concrete or tiles without the
use of water. Any other usage or modification of
the appliance is deemed to be improper and carries
a significant risk of accidents. The manufacturer
accepts no responsibility for damage(s) resulting
from improper usage. The appliance is not intended
for commercial use.
Explanation of the symbols used:
Before using the device for
the first time, read the original
operating instructions and
safety instructions.
Using damaged cutting or
roughing discs is dangerous
and may cause serious injury!
Disc diameter
Cordless angle grinder
Wear protective goggles!
Wear hearing protection!
Wear safety shoes!
Wear protective gloves!
Wear a dust mask!
Not approved for wet grinding
Not approved for side grinding
Intended for metal grinding
Features
ON/OFF switch
Release button for the battery pack
Battery pack
Battery charge level button
Battery display LED
Adjusting wheel for speed preselection
Additional handle
Blade guard
Spindle locking button
Screw thread (3 x) for the additional handle
Clamping lever
Coding pin
Adjusting nut
High-speed battery charger (see fig. A)
Red charge control LED (see fig. A)
Green charge control LED (see fig. A)
Clamping nut (see fig. C)
Mounting spindle (see fig. C)
Mounting flange (see fig. C)
Coding groove (see fig. C)
Two-hole mounting spanner (see fig. D)
■ 20 │ GB
│
MT
PWSA 20-Li B2

Package contents
1 cordless angle grinder PWSA 20-Li B2
1 high-speed battery charger PLG 20 A2
1 battery pack PAP 20 A3
1 additional handle
1 blade guard (pre-assembled)
1 two-hole mounting spanner
1 cutting disc (pre-assembled)
1 set of operating instructions
Technical details
Cordless angle grinder: PWSA 20-Li B2
Rated voltage: 20 V
Rated idle speed: n 2500–10000 rpm
Disc width: Ø 115 mm
Thread size: M14
Use the following battery to operate the
cordless tool: PAP 20 A3
Type: LITHIUM ION
Rated voltage: 20 V
Capacity: 4 Ah
Cells: 10
To charge the battery pack rapidly use the
following high-speed battery charger:
PLG 20 A2
INPUT:
Rated voltage: 230–240 V ~, 50 Hz
Rated power
consumption: 85 W
Fuse (internal): 3.15 A
OUTPUT:
Rated voltage: 21.5 V
Rated current: 3.5 A
Charging time: approx. 80 min
Protection class: II /
(DC)
(DC)
(AC)
T3.15A
(DC)
(double insulation)
Noise and vibration data:
Noise measurement value determined in accordance with EN 60745. The A-rated noise level of
the power tool is typically as follows:
Noise emission value:
Sound pressure level: LPA = 84 dB(A)
Uncertainty: K = 3 dB
Sound power level: L
= 95 dB(A)
WA
Uncertainty: K = 3 dB
Wear hearing protection!
Total vibration value:
Surface grinding main
handle: a
= 1.83m/s
h, AG
Uncertainty: K = 1.5 m/s
Surface grinding additional
handle: a
= 1.224 m/s
h, AG
Uncertainty: K = 1.5 m/s
2
2
2
2
NOTE
► The vibration level specified in these instruc-
tions has been measured in accordance with
a standardised measuring procedure and
can be used for equipment comparisons. The
specified vibration emission value can also be
used to make an initial exposure estimate.
WARNING!
► The vibration level varies depending on the
use of the power tool and may be higher
than the value specified in these instructions
in some cases. Regular use of the power tool
in this way may cause the user to underestimate the vibration. Try to keep the vibration
loads as low as possible. Measures to reduce
the vibration load are, e.g. wearing gloves
and limiting the working time. Wherein all
states of operation must be included (e.g.
times when the power tool is switched off and
times where the power tool is switched on but
running without load).
PWSA 20-Li B2
GB│MT
│
21 ■

General Power
Tool Safety Warnings
WARNING!
► Read all safety warnings and all instructions.
Failure to follow the warnings and instructions may result in electric shock, fire and/or
serious injury.
Save all warnings and instructions for future
reference.
The term "power tool" in the warnings refers to your
mains-operated (corded) power tool or batteryoperated (cordless) power tool.
1. Work area safety
a) Keep work area clean and well lit.
Cluttered or dark areas invite accidents.
b) Do not operate power tools in explosive
atmospheres, such as in the presence of flammable liquids, gases or dust. Power tools create
sparks which may ignite the dust or fumes.
c) Keep children and bystanders away while
operating a power tool. Distractions can cause
you to lose control.
2. Electrical safety
a) Power tool plugs must match the outlet.
Never modify the plug in any way.
Do not use any adapter plugs with earthed
(grounded) power tools. Unmodified plugs and
matching outlets will reduce risk of electric shock.
b) Avoid body contact with earthed or grounded
surfaces, such as pipes, radiators, ranges and
refrigerators. There is an increased risk of elec-
tric shock if your body is earthed or grounded.
c) Do not expose power tools to rain or wet
conditions. Water entering a power tool will
increase the risk of electric shock.
Do not abuse the cord. Never use the cord
d)
for carrying, pulling or unplugging the power
tool. Keep cord away from heat, oil, sharp
edges or moving parts. Damaged or entangled
cords increase the risk of electric shock.
e)
When operating a power tool outdoors, use
an extension cord suitable for outdoor use.
Use of a cord suitable for outdoor use reduces
the risk of electric shock.
f) If operating a power tool in a damp location
is unavoidable, use a residual current device
(RCD) protected supply. Use of an RCD reduces
the risk of electric shock.
3. Personal safety
a) Stay alert, watch what you are doing and
use common sense when operating a power
tool. Do not use a power tool while you are
tired or under the influence of drugs, alcohol
or medication. A moment of inattention while
operating power tools may result in serious
personal injury.
b)
Use personal protective equipment. Always
wear eye protection. Protective equipment such
as dust mask, non-skid safety shoes, hard hat, or
hearing protection used for appropriate conditions will reduce personal injuries.
c) Prevent unintentional starting. Ensure the
switch is in the off-position before connecting
to power source and/or battery pack, picking
up or carrying the tool. Carrying power tools
with your finger on the switch or energising
power tools that have the switch on invites
accidents.
d) Remove any adjusting key or wrench before
turning the power tool on. A wrench or a key
left attached to a rotating part of the power tool
may result in personal injury.
e) Do not overreach. Keep proper footing and
balance at all times. This enables better control
of the power tool in unexpected situations.
f) Dress properly. Do not wear loose clothing or
jewellery. Keep your hair, clothing and gloves
away from moving parts. Loose clothes, jewel-
lery or long hair can be caught in moving parts.
g) If devices are provided for the connection of
dust extraction and collection facilities, ensure
these are connected and properly used.
Use of dust collection can reduce dust-related
hazards.
■ 22 │ GB
│
MT
PWSA 20-Li B2

4. Power tool use and care
a) Do not force the power tool. Use the correct
power tool for your application. The correct
power tool will do the job better and safer at
the rate for which it was designed.
b) Do not use the power tool if the switch does
not turn it on and off. Any power tool that cannot be controlled with the switch is dangerous
and must be repaired.
c) Disconnect the plug from the power source
and/or the battery pack from the power tool
before making any adjustments, changing
accessories, or storing power tools. Such
preventive safety measures reduce the risk of
starting the power tool accidentally.
d) Store idle power tools out of the reach of
children and do not allow persons unfamiliar
with the power tool or these instructions to
operate the power tool. Power tools are
dangerous in the hands of untrained users.
e) Maintain power tools. Check for misalignment
or binding of moving parts, breakage of parts
and any other condition that may affect the
power tool’s operation. If damaged, have the
power tool repaired before use. Many acci-
dents are caused by poorly maintained power
tools.
f) Keep cutting tools sharp and clean. Properly
maintained cutting tools with sharp cutting
edges are less likely to bind and are easier to
control.
g) Use the power tool, accessories and tool bits
etc. in accordance with these instructions,
taking into account the working conditions
and the work to be performed.
Use of the power tool for operations different
from those intended could result in a hazardous
situation.
5. Use and handling of the cordless
electrical power tool
a) Charge a rechargeable battery unit using
only the charger recommended by the manufacturer. Chargers are often designed for a
particular type of rechargeable battery unit.
There is the danger of fire if other types of
rechargeable battery units are used.
b) Only the rechargeable battery units supplied
are to be used with an electrical power tool.
The use of other rechargeable batteries may
lead to a risk of injury or fire.
c) When they are not being used, store re-
chargeable battery units away from paperclips, coins, keys, nails, screws or other small
metal objects that could cause the contacts
to be bridged. Short-circuiting the contacts of
a rechargeable battery unit may result in heat
damage or fire.
d) Fluids may leak out of rechargeable battery
units if they are misused. If this happens,
avoid contact with the fluid. If contact occurs,
flush the affected area with water. Seek additional medical help if any of the fluid gets into
your eyes. Escaping battery fluid may cause
skin irritation or burns.
PWSA 20-Li B2
GB│MT
│
23 ■

CAUTION! RISK OF EXPLOSION!
Never charge non-rechargeable
batteries.
Protect the rechargeable battery from
heat, for example from continuous
exposure to sunlight, fire, water and
moisture. There is a risk of explosion.
6. Service
a) Have your power tool serviced by a qualified
repair person using only identical replacement parts. This will ensure that the safety of
the power tool is maintained.
Safety instructions for all applications
Special safety instructions for grinding and
abrasive cutting:
a) This power tool is to be used as a grinder and
abrasive cutting appliance. Please follow all
safety instructions, instructions, diagrams and
data that you receive with the appliance.
If you do not observe the following instructions,
this can lead to an electrical shock, fire and/or
serious injuries.
b) This power tool is not suitable for sandpaper
sanding, working with a steel brush or burnishing. Using the power tool for applications for
which it is not designed can lead to hazards
and injuries.
c) Do not use any accessories that have not
been specifically provided or recommended
by the manufacturer for this power tool. Just
because you can attach the accessories to your
power tool does not guarantee they are safe to
use.
d) The maximum speed of the accessory tool
used must be at least as high as the maximum
speed specified for the power tool. Accessories
that rotate faster than the permissible rate can
break and throw pieces into the air.
e) The external diameter and thickness of the
accessory tool used must comply with the
dimensions of the power tool. Incorrectly di-
mensioned accessory tools cannot be sufficiently shielded or controlled.
f) Attachment tools with a thread insert must
match the thread of the grinding spindle exactly. For attachment tools that are mounted
using a flange, the diameter of the hole on
the attachment tool must correspond to the
width of the fitment on the flange. Accessory
tools that cannot be fitted precisely to the power
tool rotate unevenly, vibrate severely and can
lead to a loss of control.
g) Never use damaged attachment parts. Check
accessory tools such as grinding discs before
each use for chips or cracks, grinding plates
for cracks, wearing or excessive wear and
tear and wire brushes for loose or broken
wires. If the power tool or the accessory tool
in use is dropped, check to see if it is damaged or use an undamaged accessory tool.
When you have checked and inserted the
accessory tool, ensure that you and any other
people in the vicinity remain outside of the
level of the rotating accessory tool and allow
the tool to rotate at maximum speed for one
minute. Damaged accessories usually break
during the test period.
h) Wear personal protective equipment.
Depending on the application, ensure that
you use full face protection, eye protection
or goggles. Use a dust mask, hearing protection, protective gloves or special apron to
protect yourself from grindings and material
particles as required. Protect your eyes from
flying debris that may be created during certain
applications. Dust or filter masks must be used
to filter any dust created by the application. If
you are exposed to loud noise for any length of
time, you can suffer a hearing loss.
■ 24 │ GB
│
MT
PWSA 20-Li B2

i) Ensure that other people remain at a safe dis-
tance to your workspace. Anyone who enters
the workspace must wear personal protective
equipment.
Fragments of the workpiece or broken accessory tools can fly off and cause injury – even
outside the immediate working area.
j) Hold the power tool only by the insulated
handles when you are carrying out work in
which the accessory tool may come into
contact with concealed power cables.
Contact with a live wire may make exposed
metal parts of the power tool live and could
give the operator an electric shock.
k) Keep the power cord away from any rotating
accessories. If you lose control of the appliance,
the cord may get caught or cut and your hand or
arm could get caught in the rotating accessory
tool.
l) Never put the power tool down until the
accessory tool being used has come to a
complete standstill. The rotating accessory tool
could come into contact with the surface and
cause you to lose control of the power tool.
m) Do not leave the power tool running whilst
carrying it. Accidental contact between your
clothing and the rotating accessory tool could
lead to a physical injury.
n) Clean the ventilation slits of your power tool
regularly. The engine fan draws dust into the
housing and a strong accumulation of metal
dust can cause electrical hazards.
o) Never use the power tool in the vicinity of
inflammable materials. Sparks can ignite these
materials.
p) Do not use any accessory tools which require
liquid coolant. The use of water or other liquid
coolants may lead to an electric shock.
Kickback and corresponding safety
instructions
Kickback is a sudden reaction caused when a
rotating accessory tool, e.g. grinding disc, grinding
plate, wire brush, etc., catches or jams. Catching or
jamming leads to an abrupt stop of the rotating accessory tool. If this happens, an uncontrolled power
tool turns rapidly against the direction of rotation of
the accessory tool caught in the blockage.
If, for example, a grinding disc catches or jams in a
workpiece, the edge of the grinding disc projecting
into the workpiece can get caught and break off
the grinding disc or cause a kickback. The grinding
disc can then fly in the direction of the operator
or away from him, depending on the direction of
rotation of the disc at the blockage. This can also
break grinding discs.
A kickback is caused by improper or incorrect use
of the power tool. This can be avoided by taking
proper precautions as given below.
a) Hold the power tool firmly in both hands and
position your body and arms so they can
absorb the force of a kickback. Always use
the additional handle, if available, so that
you have the maximum possible control over
the kickback force or reaction forces at full
speed. By taking adequate precautions, the
operator can stay in control of the kickback
and reaction torques.
b) Never hold your hand close to a rotating
accessory tool. The accessory tool could hit
your hand in the event of a kickback.
c) Avoid having any part of your body in the
region in which the power tool is likely to
move in event of a kickback. The kickback will
force the power tool in the opposite direction to
the direction of rotation of the grinding disc at
the blockage.
d) Take special care when working near corners,
sharp edges, etc. Avoid allowing the accessory tool to bounce back from the workpiece
or jam. The rotating accessory tool is more
likely to jam in corners or sharp edges or if it
rebounds off them. This can cause a loss of
control or kickback.
PWSA 20-Li B2
GB│MT
│
25 ■

e) Do not use chains or toothed saw blades.
Such accessories often cause a kickback or
loss of control over the power tool.
Special safety instructions for
grinding and abrasive cutting
a)
Use only the grinding accessories approved
for your power tool and the appropriate
blade guard for these grinding tools. Grinding
tools which are not designed for the power tool
cannot be sufficiently shielded and are unsafe.
b)
Offset grinding discs must be fitted so that the
grinding surface does not protrude over the
level of the blade guard edge. An improperly
fitted grinding disc which protrudes over the level
of the blade guard edge cannot be properly
guarded.
c) The blade guard must be securely mounted
on the power tool and adjusted to ensure
maximum safety so that the smallest possible
amount of the grinding tool is open to the
operator. The blade guard is designed to
protect the operator from fragments, accidental
contact with the grinding tool and sparks that
could ignite clothing.
d) Grinding tools should only be used for the
recommended applications.
For example: Never grind with the side surface of a cutting disc. Cutting discs are de-
signed to remove material with the edge of the
disc. Any lateral application of force on these
grinding tools can lead to a breakage.
e) Always use an undamaged clamping flange
of the correct size and shape for the selected
grinding disc. Suitable flanges support the
grinding disc and reduce the risk of disc breakage. Flanges for cutting discs can be different
to flanges for other grinding discs.
f) Do not use worn grinding discs from larger
power tools. Grinding discs for larger power
tools are not designed for the higher rotational
speeds of smaller power tools and can break.
Additional special safety instructions
for abrasive cutting
a) Avoid any blockage to the cutting disc or
high contact pressure. Do not make any
excessively deep cuts. Overloading the cut-
ting disc increases the stress and likelihood of
canting or blocking and thus the possibility of a
kickback or a breakage of the grinding tool.
b) Avoid the area in front of and behind the
rotating cutting disc. When you move the cutting disc away from yourself in the workpiece, it
is possible, in the event of a kickback, that the
electrical tool along with the rotating disc is
thrown out directly towards you.
b) If the cutting disc jams or you stop working,
switch the tool off and hold it steadily in
the workpiece until the disc has completely
stopped turning. Never attempt to pull a
rotating cutting disc out of a cut. This could
lead to kickback. Identify and remove the
cause of the jam.
d) Do not switch the power tool back on while
it is located in the workpiece. Allow the cutting disc to reach its full speed before you
carefully continue the cut. Otherwise, the disc
can jam, jump out of the workpiece or cause a
kickback.
e) Support boards or large workpieces to re-
duce the risk of the cutting disc jamming and
causing a kickback. Large workpieces can
bend under their own weight. The workpiece
must be supported on both sides of the disc:
both in the vicinity of the cutting disc and also
at the edge.
f)
Be particularly careful when making pocket
cuts into existing walls or other obscured areas.
The inserted cutting disc may cut into gas or
water pipes, electrical wiring or other objects
that can cause kickback.
■ 26 │ GB
│
MT
PWSA 20-Li B2

Safety guidelines for battery chargers
■ This appliance may be used by
children aged 8 years and above
and by persons with limited physical,
sensory or mental capabilities or
lack of experience and knowledge,
provided that they are under supervision or have been told how to use
the appliance safely and are aware
of the potential risks. Do not allow
children to use the appliance as a
toy. Cleaning and user maintenance
tasks must not be carried out by
children unless they are supervised.
■ To avoid potential risks, damaged
mains cables should be replaced
by the manufacturer, their customer
service department or a similarly
qualified person.
The charger is suitable for indoor use
only.
WARNING!
■ To avoid potential risks, damaged mains
cables should be replaced by the manufacturer, their customer service department or a
similarly qualified person.
PWSA 20-Li B2
GB│MT
│
27 ■

Permissible accessories
Max.
circum-
ferential
speed
(m/s)
Tool Blade guard
Two-hole
mounting
spanner
Two-hole
mounting
spanner
Yes
Yes
Cutting disc
Roughing disc
Max.
diameter
Ø (mm)
115 3 M14 13300 80
115 6 M14 13300 80
Max.
thick-
ness
(mm)
Thread
size (mm)
Max
speed
(rpm)
Storage and handling of the recommended accessory tools
■ Grinding tools are to be treated with care and transported carefully.
■ Grinding tools should be stored in such a way that they are not exposed to mechanical damage or
environmental influences (e.g. moisture).
■ 28 │ GB
│
MT
PWSA 20-Li B2

Working procedures
NOTE
► Grinding tools should only be used for the
recommended applications. Otherwise, they
can break, be damaged or cause injuries.
Rough grinding:
■ While applying moderate pressure, move
the angle grinder back and forth over the
workpiece.
■ For soft material, move the rough grinding
disc at a shallow angle over the workpiece;
for hard material at a slightly steeper angle.
Abrasive cutting:
■ Use only tested fibre-reinforced cutting or
grinding discs that are approved for a circum-
ferential speed of not less than 80 m/s.
CAUTION!
The grinder continues running after being turned
off. Do not try to brake it by applying lateral
counterpressure.
■ Secure the workpiece. Use clamps/a vice to
hold the workpiece firmly in place. This is much
safer than simply holding it in your hand.
■ Always switch off the appliance before put-
ting it down and wait for the appliance to
come to a complete standstill.
■ Use the appliance only for dry cutting or
sanding.
■ The additional handle
on the appliance for all work.
■ Materials containing asbestos may not be
processed. Asbestos is a known carcinogen.
Never use cutting discs for rough
grinding!
Never use roughing discs for
cutting!
must be mounted
Tip! This symbol indicates proper
behaviour.
HAZARD! ALWAYS GUIDE THE
APPLIANCE THROUGH THE WORKPIECE IN REVERSE ROTATION.
► In the opposite direction there is a risk of
kickback. The appliance can be pushed out
of the cut.
■ Always switch the appliance on before apply-
ing it to the workpiece. After completing the
task, lift the appliance from the workpiece and
then switch it off.
■ Always hold the appliance firmly with two
hands while working. Ensure that your stance
is secure and stable.
■ For an optimum grinding effect, move the ap-
pliance evenly at an angle of 15° to 30° (between grinding disc and workpiece) backwards
and forwards.
■ When working on angled surfaces, do not
exert great force on the workpiece. If the
rotational speed drops significantly, you must
reduce the pressure exerted to allow safe and
effective working. If the appliance suddenly
brakes completely or jams, it must be switched
off immediately.
■ Cutting: Work at a moderate feed rate and
do not tilt the cutting disc.
■ Roughing and cutting discs become very
hot – let them cool down completely before
touching them.
■ Never use the appliance for purposes other
than the ones for which it was designed.
■ Always make sure that the appliance is
turned off before inserting the battery into it.
■ Switch the appliance off and remove the
battery immediately in hazardous situations.
Ensure that the appliance is easily and quickly
accessible in the event of an emergency.
PWSA 20-Li B2
GB│MT
│
29 ■
■ Always remove the battery during work
breaks, when servicing the appliance and
when it is no longer in use. The appliance must
be kept clean, dry and free of oil and grease at
all times.
■ Remain alert at all times! Always pay attention
to what you are doing and act with common
sense. Do not use the appliance if you are
distracted or feeling unwell.
WARNING!
Always wear safety goggles.
WARNING!
Always wear a dust mask!
Before use
Charging the battery pack (see fig. A)
CAUTION!
► Always unplug the appliance before you
remove the battery pack
the battery pack to the charger.
■ Never charge the battery pack
ambient temperature is below 10°C or above
40°C.
♦ Connect the battery pack
battery charger (see fig. A).
♦ Insert the power plug into the socket.
The control LED
♦ The green charge control LED
the charging process is complete and the battery pack
ATTENTION!
♦ If the red charge control LED
means that the battery pack has overheated and cannot be charged.
♦ If the red and green charge control LEDs
both flash, this means that the battery
pack is defective.
♦ Switch off the charger for at least 15 minutes
between successive charging sessions. Also
disconnect the power plug from the mains
power socket.
lights up red.
is ready.
from or connect
when the
to the high-speed
indicates that
flashes, this
Attaching/disconnecting the battery
pack to/from the appliance
Attaching the battery pack:
♦ Push the battery pack
clicks into place.
Removing the battery pack:
♦ Press the release button
battery pack
.
into the handle until it
and remove the
Checking the battery charge level
♦ Press the battery charge level button to
check the status of the battery (see also main
diagram).
The status/remaining charge will be shown on
the battery display LED
♦ RED/ORANGE/GREEN = maximum charge
RED/ORANGE = medium charge
RED = low charge – charge the battery
as follows:
Fitting the blade guard with quick
release
WARNING! RISK OF INJURY
► Always switch the appliance off and remove
the battery before carrying out any work on
the appliance.
RISK OF INJURY
► Always use the angle grinder with the blade
guard
securely. Set this so that the highest possible
degree of safety is achieved, i.e. the smallest
possible part of the grinding disc is open to
the operator. The blade guard is designed
to protect the operator from fragments and
accidental contact with the grinding tool.
. The blade guard should be fitted
■ 30 │ GB
│
MT
PWSA 20-Li B2

RISK OF INJURY
12
► Make sure that the blade guard
is fitted
at least at the same angle as the additional
handle (see fig. B). Otherwise, you could
cut injure yourself on the roughing disc or
cutting disc.
♦ Open the clamping lever .
♦ Place the blade guard
with the coding pin
in the coding groove .
♦ Turn the blade guard to the required position
(working position). The closed side of the blade
guard must always be toward the operator.
♦ Close the clamping lever to clamp the blade
guard into position. If necessary, the clamping force of the lock can be changed by loosening or tightening the adjusting nut . Ensure
that the blade guard sits firmly on the neck
of the spindle.
Fitting the additional handle
CAUTION!
► For safety reasons, this appliance may only
be used with the additional handle
. Failure
to do so can lead to serious injury. The
additional handle can be screwed onto
the left, the right or the top, depending on the
job at hand.
Fitting/changing the roughing/
cutting disc
Always wear protective gloves when changing
cutting/rough grinding discs.
Pay attention to the dimensions of the roughing/
cutting disc. The diameter of the hole must fit the
mounting flange
a reducer or adapter.
NOTE
► Use only discs which are free of dirt.
without any play. Do not use
■ Use only grinding discs whose permissible
speed rating is at least as high as that on the
type plate on the power tool.
■ RISK OF INJURY! Press the spindle locking
button
only when the mounting spindle
is at a complete standstill.
♦ Press the spindle locking button to lock the
motor.
♦ Undo the clamping nut
using the two-hole
mounting spanner (see fig D).
♦ Place the rough grinding or cutting disc with
the label side towards the appliance on the
mounting flange
♦ Then replace the clamping nut
.
with the raised
side facing up on the mounting spindle .
With thin grinding discs (see fig. 1):
♦ The collar of the clamping nut faces upwards
so that a thin grinding disc can be fitted safely.
≤ 3,2 mm
Fig. 1
♦ Press the spindle locking button
to lock the
motor.
♦ Tighten the clamping nut
using the two-hole
mounting spanner .
With thick grinding discs (see fig. 2):
> 3,2 mm
Fig. 2
The collar of the clamping nut
faces downwards
so that the grinding disk can be fitted securely onto
the mounting spindle .
PWSA 20-Li B2
GB│MT
│
31 ■
♦ Lock the mounting spindle
♦ Tighten the clamping nut
rection using the two-hole mounting spanner .
NOTE
If the disc does not turn smoothly or vibrates
►
after the change, the disc must be replaced
immediately.
♦ For safety's sake, run the appliance at maximum
speed for 60 seconds after every disc change.
Be aware of unusual noises and sparks.
♦ Check whether all the fastening elements are
correctly fitted.
♦ Make sure that the arrow showing the direction
of rotation (if any) on the cutting or rough grinding discs (including diamond cutting discs) and
the direction of rotation of the appliance (arrow
showing the direction of rotation on the head)
match.
.
in a clockwise di-
Operation
Switching on and off
Check the inserted tool to ensure that all mounting
parts are correctly attached before use.
NOTE
Always switch on the angle grinder before
►
making contact with the material, then apply
it to the workpiece.
Switching on:
♦ First press the ON/OFF switch to the right so
that you can then press it forwards.
Switching off:
♦ Let go of the ON/OFF switch
Switching to continuous operation:
♦ First press the
that you can then press it forwards. Then press
the
ON/OFF switch forwards and down
until it engages.
ON/OFF switch to the right so
.
Switching off continuous operation:
♦ Press the
ON/OFF switch to the rear and
downwards and release it.
Adjusting the rotational speed
You can use the adjusting wheel for speed preselection to preselect the rotational speed:
(1 = slower speed, 6 = faster speed).
We recommend you carry out practice tests to
determine the correct speed.
The speed can also be changed during operation.
Maintenance and cleaning
WARNING! RISK OF INJURY!
Always switch the appliance off and
remove the battery before carrying
out any work on the appliance.
The battery angle grinder is maintenance-free.
■ Do not use any sharp objects for cleaning
the appliance. Never allow any liquids to
penetrate inside the appliance. Otherwise the
appliance could be damaged.
■ Clean the appliance regularly, preferably im-
mediately after completion of the work.
■ Clean the housing with a dry cloth – do NOT
use petrol, solvents or cleaners which can attack
the plastic.
■ A vacuum cleaner is required for thorough
cleaning of the appliance.
■ Ventilation openings must never be obstructed.
■ Remove any sanding dust stuck to the appliance
with a brush.
NOTE
► Replacement parts not listed (such as carbon
brushes, switch) can be ordered via our
service hotline.
■ 32 │ GB
│
MT
PWSA 20-Li B2

Disposal
The packaging consists of environmentally
friendly material. It can be disposed of in
the local recycling containers.
Do not dispose of power tools in
your normal domestic waste!
European Directive 2012/19/EU requires that
worn-out power tools be collected separately and
recycled in an environmentally compatible manner.
Do not dispose of batteries in your
normal household waste!
Remove the batteries from the appliance before
disposal.
Defective or worn-out rechargeable batteries must
be recycled according to Directive 2006/66/EC.
Take the battery pack and/or appliance to a nearby collection facility.
Please consult your local authorities regarding
suitable disposal of worn out power tools/battery
packs.
Note the labelling on the packaging
and separate the packaging material
components for disposal if necessary.
The packaging material is labelled
with abbreviations (a) and numbers
(b) with the following meanings:
1–7: Plastics,
20–22: Paper and cardboard,
80–98: Composites
Your local community or municipal
authorities can provide information on
how to dispose of the worn-out
product.
Kompernass Handels GmbH
warranty
Dear Customer,
This appliance has a 3-year warranty valid from
the date of purchase. If this product has any faults,
you, the buyer, have certain statutory rights. Your
statutory rights are not restricted in any way by the
warranty described below.
Warranty conditions
The validity period of the warranty starts from the
date of purchase. Please keep your original receipt
in a safe place. This document will be required as
proof of purchase.
If any material or production fault occurs within
three years of the date of purchase of the product,
we will either repair or replace the product for you
at our discretion. This warranty service is dependent
on you presenting the defective appliance and
the proof of purchase (receipt) and a short written
description of the fault and its time of occurrence.
If the defect is covered by the warranty, your product
will either be repaired or replaced by us. The repair
or replacement of a product does not signify the
beginning of a new warranty period.
Warranty period and statutory claims for
defects
The warranty period is not prolonged by repairs
effected under the warranty. This also applies to
replaced and repaired components. Any damage
and defects present at the time of purchase must
be reported immediately after unpacking. Repairs
carried out after expiry of the warranty period shall
be subject to a fee.
PWSA 20-Li B2
GB│MT
│
33 ■

Scope of the warranty
This appliance has been manufactured in accordance
with strict quality guidelines and inspected meticulously prior to delivery.
The warranty covers material faults or production
faults. The warranty does not extend to product parts
subject to normal wear and tear or fragile parts such
as switches, batteries, baking moulds or parts made
of glass.
The warranty does not apply if the product has been
damaged, improperly used or improperly maintained.
The directions in the operating instructions for the
product regarding proper use of the product are
to be strictly followed. Uses and actions that are
discouraged in the operating instructions or which
are warned against must be avoided.
This product is intended solely for private use and
not for commercial purposes. The warranty shall be
deemed void in cases of misuse or improper handling,
use of force and modifications/repairs which have
not been carried out by one of our authorised
Service centres.
Warranty claim procedure
To ensure quick processing of your case, please
observe the following instructions:
■ Please have the till receipt and the item number
(e.g. IAN 12345) available as proof of purchase.
■ You will find the item number on the type plate,
an engraving on the front page of the instructions
(bottom left), or as a sticker on the rear or
bottom of the appliance.
■ If functional or other defects occur, please
contact the service department listed either by
telephone or by e-mail.
■ You can return a defective product to us free of
charge to the service address that will be provided
to you. Ensure that you enclose the proof of
purchase (till receipt) and information about
what the defect is and when it occurred.
NOTE
► For Parkside and Florabest tools, please send
us only the defective item without the accessories (e.g. battery, storage case, assembly
tools, etc.).
You can download these instructions
along with many other manuals,
product videos and software on
www.lidl-service.com.
Service
Service Great Britain
Tel.: 0871 5000 720 (£ 0.10/Min.)
E-Mail: kompernass@lidl.co.uk
Service Malta
Tel.: 80062230
E-Mail: kompernass@lidl.com.mt
IAN 290756
Importer
Please note that the following address is not the
service address. Please use the service address
provided in the operating instructions.
KOMPERNASS HANDELS GMBH
BURGSTRASSE 21
DE - 44867 BOCHUM
GERMANY
www.kompernass.com
■ 34 │ GB
│
MT
PWSA 20-Li B2

Translation of the original Conformity Declaration
We, KOMPERNASS HANDELS GMBH, document officer: Mr Semi Uguzlu, BURGSTR. 21,
DE - 44867 BOCHUM, GERMANY, hereby declare that this product complies with the following
standards, normative documents and EC directives:
Machinery Directive
(2006/42/EC)
EC Low Voltage Directive
(2014/35/EU)
EMC (Electromagnetic Compatibility)
(2014/30/EU)
RoHS Directive
(2011/65/EU)*
*The manufacturer bears the full responsibility for compliance with this conformity declaration. The object of the
declaration described above complies with the requirements of the Directive 2011/65/EU of the European
Parliament and Council of 8 June 2011 on the limitations of use of certain dangerous substances in electrical
and electronic appliances.
Applied harmonised standards:
EN 60745-1:2009+A11
EN 60745-2-3:2011+A2+A11+A12+A13
EN 55014-1:2006+A1+A2
EN 55014-2:2015
EN 61000-3-2:2014
EN 61000-3-3:2013
EN 60335-2-29:2004+A2
EN 60335-1:2012+A11
EN 62233:2008
EN 50581:2012
Type designation of machine:
Cordless angle grinder PWSA 20-Li B2
Year of manufacture: 12 - 2017
Serial number: IAN 290756
Bochum, 06/12/2017
Semi Uguzlu
- Quality Manager We reserve the right to make technical changes in the context of further product development.
PWSA 20-Li B2
GB│MT
│
35 ■

Ordering a replacement battery
If you want to order a replacement battery for your appliance, you can do so easily via the Internet on
www.kompernass.com or by telephone.
The price of the replacement battery (PAP 20 A3) is €27.99 incl. VAT and shipping. Due to limited stocks,
this item may sell out in a relatively short time.
Online ordering
To order a replacement battery from the Accessories Shop:
■ Use your Internet browser to visit www.kompernass.com.
■ Click on the corresponding flag at the top left of the page to select the desired country and language.
■ Under the heading "Brands", click on "Parkside" and select your appliance to select a suitable replace-
ment battery.
■ After you have placed the rechargeable battery in the shopping basket, click the "Checkout" button
and follow the on-screen instructions to complete the ordering process.
NOTE
► Online ordering of replacement parts might not be possible in some countries. If this is the case,
please contact the Service hotline.
■ The promotion is limited to one battery per customer/appliance and also to a timeline of two months
after the promotion period. Thereafter, the replacement battery can be ordered as a replacement part
under other conditions.
Telephone ordering
Service Great Britain
Tel.: 0871 5000 720 (£ 0.10/Min.)
E-Mail: kompernass@lidl.co.uk
Service Malta
Tel.: 80062230
E-Mail: kompernass@lidl.com.mt
To ensure fast processing of your order, have the article number of your appliance to hand
(e.g. IAN 290756) in case of questions. The article number can be found on the type plate
or the title page of these instructions.
■ 36 │ GB
│
MT
PWSA 20-Li B2

Inhaltsverzeichnis
Einleitung .......................................................38
Bestimmungsgemäßer Gebrauch ...............................................38
Ausstattung ................................................................ 38
Lieferumfang ............................................................... 39
Technische Daten ...........................................................39
Allgemeine Sicherheitshinweise für Elektrowerkzeuge .................40
1. Arbeitsplatz-Sicherheit ..................................................... 40
2. Elektrische Sicherheit ......................................................40
3. Sicherheit von Personen .................................................... 40
4. Verwendung und Behandlung des Elektrowerkzeugs ............................. 41
5. Verwendung und Behandlung des Akkuwerkzeugs ............................... 41
6. Service .................................................................42
Sicherheitshinweise für alle Anwendungen. . . . . . . . . . . . . . . . . . . . . . . . . . . . . . . . . . . . . . . . 42
Rückschlag und entsprechende Sicherheitshinweise ................................. 43
Besondere Sicherheitshinweise zum Schleifen und Trennschleifen ......................44
Weitere besondere Sicherheitshinweise zum Trennschleifen .......................... 44
Sicherheitshinweise für Ladegeräte ............................................. 45
Zulässiges Zubehör ......................................................... 46
Aufbewahrung und Handhabung der empfohlenen Einsatzwerkzeuge .................. 46
Arbeitshinweise. . . . . . . . . . . . . . . . . . . . . . . . . . . . . . . . . . . . . . . . . . . . . . . . . . . . . . . . . . . . . 47
Vor der Inbetriebnahme ..........................................48
Akku-Pack laden (siehe Abb. A) ................................................ 48
Akku-Pack in das Gerät einsetzen / entnehmen .................................... 48
Akkuzustand prüfen ......................................................... 48
Schutzhaube mit Schnellverschluss montieren ..................................... 48
Zusatz-Handgriff montieren ................................................... 49
Schrupp- / Trennscheibe montieren / wechseln .................................... 49
Inbetriebnahme .................................................50
Ein- / ausschalten ...........................................................50
Drehzahl einstellen ..........................................................50
Wartung und Reinigung ...........................................50
Entsorgung .....................................................51
Garantie der Kompernaß Handels GmbH ............................51
Service .........................................................52
Importeur ......................................................52
Original-Konformitätserklärung ....................................53
Ersatz-Akku Bestellung ...........................................54
Online-Bestellung ...........................................................54
Telefonische Bestellung ....................................................... 54
PWSA 20-Li B2
DE│AT│CH
│
37 ■

AKKU-WINKELSCHLEIFER
PWSA 20-Li B2
Einleitung
Wir beglückwünschen Sie zum Kauf Ihres neuen
Gerätes. Sie haben sich damit für ein hochwertiges
Produkt entschieden. Die Bedienungsanleitung ist
Teil dieses Produkts. Sie enthält wichtige Hinweise für
Sicherheit, Gebrauch und Entsorgung. Machen Sie
sich vor der Benutzung des Produkts mit allen Bedienund Sicherheitshinweisen vertraut. Benutzen Sie das
Produkt nur wie beschrieben und für die angegebenen Einsatzbereiche. Händigen Sie alle Unterlagen
bei Weitergabe des Produkts an Dritte mit aus.
Bestimmungsgemäßer Gebrauch
Das Gerät ist zum Trennen, Schruppen und Bürsten
von Metall, Beton oder Fliesen ohne Verwendung
von Wasser geeignet. Jede andere Verwendung
oder Veränderung des Gerätes gilt als nicht
bestimmungsgemäß und birgt erhebliche Unfallgefahren. Für aus bestimmungswidriger Verwendung
entstandene Schäden übernehmen wir keine
Haftung. Das Gerät ist nicht für den gewerblichen
Einsatz bestimmt.
Erklärung der Symbole:
Lesen Sie die Original-Betriebsanleitung und die Sicherheitshinweise vor der Inbetriebnahme.
Die Verwendung von
beschädigten Trenn- oder
Schruppscheiben ist gefährlich
und kann zu schwerwiegenden
Verletzungen führen!
Durchmesser der Scheibe
Akku-Winkelschleifer
Schutzbrille tragen!
Gehörschutz tragen!
Sicherheitsschuhe tragen!
Schutzhandschuhe tragen!
Staubschutzmaske tragen!
Nicht zulässig für Nassschleifen
Nicht zulässig für Seitenschleifen
Vorgesehen für Metallschleifen
Ausstattung
EIN-/AUS-Schalter
Taste zur Entriegelung des Akku-Packs
Akku-Pack
Taste Akkuzustand
Akku-Display-LED
Stellrad für die Drehzahlvorwahl
Zusatz-Handgriff
Schutzhaube
Spindel-Arretiertaste
Gewinde (3 x) für Zusatz-Handgriff
Spannhebel
Codiernase
Justiermutter
Schnell-Ladegerät (siehe Abb. A)
Rote Ladekontroll-LED (siehe Abb. A)
Grüne Ladekontroll-LED (siehe Abb. A)
Spannmutter (siehe Abb. C)
Aufnahmespindel (siehe Abb. C)
Aufnahmeflansch (siehe Abb. C)
Codiernut (siehe Abb. C)
Zweiloch-Montage-Schlüssel (siehe Abb. D)
■ 38 │ DE
│AT│
CH
PWSA 20-Li B2

Lieferumfang
1 Winkelschleifer PWSA 20-Li B2
1 Akku-Schnellladegerät PLG 20 A2
1 Akku-Pack PAP 20 A3
1 Zusatz-Handgriff
1 Schutzhaube (vormontiert)
1 Zweiloch-Montage-Schlüssel
1 Trennscheibe (vormontiert)
1 Betriebsanleitung
Technische Daten
Akku-Winkelschleifer: PWSA 20-Li B2
Bemessungsspannung: 20 V
Bemessungsdrehzahl: n 2500 - 10000 min
Scheibenmaß: Ø 115 mm
Gewindemaß: M14
Verwenden Sie zum Betrieb des Akku-Werkzeugs den folgenden Akku: PAP 20 A3
Typ: LITHIUM-IONEN
Bemessungsspannung: 20 V
Kapazität: 4 Ah
Zellen: 10
Verwenden Sie zum Schnellladen des AkkuPacks folgendes Akku-Schnellladegerät:
PLG 20 A2
EINGANG / Input:
Bemessungsspannung: 230 - 240 V ~, 50 Hz
Bemessungsaufnahme: 85 W
Sicherung (innen): 3,15 A
AUSGANG / Output:
Bemessungsspannung: 21,5 V
Bemessungsstrom: 3,5 A
Ladedauer: ca. 80 min
Schutzklasse: II /
(Gleichstrom)
(Gleichstrom)
(Wechselstrom)
T3.15A
(Gleichstrom)
(Doppelisolierung)
-1
Geräusch- und Vibrationsinformationen:
Messwert für Geräusch ermittelt entsprechend
EN 60745. Der A-bewertete Geräuschpegel des
Elektrowerkzeugs beträgt typischerweise:
Geräuschemissionswert:
Schalldruckpegel: LPA = 84 dB (A)
Unsicherheit: K = 3 dB
Schallleistungspegel: L
= 95 dB (A)
WA
Unsicherheit: K = 3 dB
Gehörschutz tragen!
Schwingungsgesamtwert:
Oberflächenschleifen Hauptgriff: a
Unsicherheit: K = 1,5 m/s
Oberflächenschleifen
Zusatz-Handgriff: a
= 1,224 m/s
h, AG
Unsicherheit: K = 1,5 m/s
= 1,83 m/s
h, AG
2
2
2
HINWEIS
► Der in diesen Anweisungen angegebene
Schwingungspegel ist entsprechend einem
genormten Messverfahren gemessen worden
und kann für den Gerätevergleich verwendet
werden. Der angegebene Schwingungsemissionswert kann auch zu einer einleitenden Einschätzung der Aussetzung verwendet werden.
WARNUNG!
► Der Schwingungspegel wird sich entsprechend
dem Einsatz des Elektrowerkzeugs verändern
und kann in manchen Fällen über dem in diesen
Anweisungen angegebenen Wert liegen. Die
Schwingungsbelastung könnte unterschätzt werden, wenn das Elektrowerkzeug regelmäßig in
solcher Weise verwendet wird. Versuchen Sie,
die Belastung durch Vibraxtionen so gering wie
möglich zu halten. Beispielhafte Maßnahmen
zur Verringerung der Vibrationsbelastung sind
das Tragen von Handschuhen beim Gebrauch
des Werkzeugs und die Begrenzung der
Arbeitszeit. Dabei sind alle Anteile des Betriebszyklus zu berücksichtigen (beispielsweise Zeiten,
in denen das Elektrowerkzeug abgeschaltet ist,
und solche, in denen es zwar eingeschaltet ist,
aber ohne Belastung läuft).
2
PWSA 20-Li B2
DE│AT│CH
│
39 ■

Allgemeine
Sicherheitshinweise
für Elektrowerkzeuge
WARNUNG!
► Lesen Sie alle Sicherheitshinweise und Anwei-
sungen. Versäumnisse bei der Einhaltung der
Sicherheitshinweise und Anweisungen können
elektrischen Schlag, Brand und/oder schwere
Verletzungen verursachen.
Bewahren Sie alle Sicherheitshinweise und
Anweisungen für die Zukunft auf.
Der in den Sicherheitshinweisen verwendete Begriff
„Elektrowerkzeug“ bezieht sich auf netzbetriebene
Elektrowerkzeuge (mit Netzkabel) und auf akkubetriebene Elektrowerkzeuge (ohne Netzkabel).
1. Arbeitsplatz-Sicherheit
a) Halten Sie Ihren Arbeitsbereich sauber und
gut beleuchtet. Unordnung und unbeleuchtete
Arbeitsbereiche können zu Unfällen führen.
b) Arbeiten Sie mit dem Elektrowerkzeug nicht
in explosionsgefährdeter Umgebung, in der
sich brennbare Flüssigkeiten, Gase oder
Stäube befinden. Elektrowerkzeuge erzeugen
Funken, die den Staub oder die Dämpfe entzünden können.
c) Halten Sie Kinder und andere Personen wäh-
rend der Benutzung des Elektrowerkzeugs
fern. Bei Ablenkung können Sie die Kontrolle
über das Gerät verlieren.
2. Elektrische Sicherheit
a) Der Anschlussstecker des Elektrowerkzeuges
muss in die Steckdose passen. Der Stecker
darf in keiner Weise verändert werden.
Verwenden Sie keine Adapterstecker gemeinsam mit schutzgeerdeten Elektrowerkzeugen.
Unveränderte Stecker und passende Steckdosen
verringern das Risiko eines elektrischen Schlages.
b) Vermeiden Sie Körperkontakt mit geerdeten
Oberflächen, wie von Rohren, Heizungen,
Herden und Kühlschränken. Es besteht ein
erhöhtes Risiko durch elektrischen Schlag, wenn
Ihr Körper geerdet ist.
c) Halten Sie Elektrowerkzeuge von Regen oder
Nässe fern. Das Eindringen von Wasser in ein Elektrogerät erhöht das Risiko eines elektrischen Schlages.
d)
Zweckentfremden Sie das Kabel nicht, um das
Elektrowerkzeug zu tragen, aufzuhängen oder
um den Stecker aus der Steckdose zu ziehen.
Halten Sie das Kabel fern von Hitze, Öl,
scharfen Kanten oder sich bewegenden Geräteteilen. Beschädigte oder verwickelte Kabel
erhöhen das Risiko eines elektrischen Schlages.
e)
Wenn Sie mit einem Elektrowerkzeug im
Freien arbeiten, verwenden Sie nur Verlängerungskabel, die auch für den Außenbereich
geeignet sind. Die Anwendung eines für den
Außenbereich geeigneten Verlängerungskabels
verringert das Risiko eines elektrischen Schlages.
f) Wenn der Betrieb des Elektrowerkzeuges in
feuchter Umgebung nicht vermeidbar ist, verwenden Sie einen Fehlerstromschutzschalter.
Der Einsatz eines Fehlerstromschutzschalters vermindert das Risiko eines elektrischen Schlages.
3. Sicherheit von Personen
a) Seien Sie stets aufmerksam, achten Sie dar-
auf, was Sie tun und gehen Sie mit Vernunft
an die Arbeit mit einem Elektrowerkzeug.
Benutzen Sie kein Elektrowerkzeug, wenn
Sie müde sind oder unter dem Einfluss von
Drogen, Alkohol oder Medikamenten stehen.
Ein Moment der Unachtsamkeit beim Gebrauch
des Elektrowerk zeuges kann zu ernsthaften
Verletzungen führen.
Tragen Sie persönliche Schutzausrüstung und
b)
immer eine Schutzbrille. Das Tragen persönlicher
Schutzausrüstung wie Staubmaske, rutschfeste
Sicherheitsschuhe, Schutzhelm oder Gehörschutz,
je nach Art und Einsatz des Elektrowerkzeuges,
verringert das Risiko von Verletzungen.
c) Vermeiden Sie eine unbeabsichtigte
Inbetrieb nahme. Vergewissern Sie sich, dass
das Elektrowerkzeug ausgeschaltet ist, bevor
Sie es an die Stromversorgung und/oder
den Akku anschließen, es aufnehmen oder
tragen. Wenn Sie beim Tragen des Elektrowerk-
zeuges den Finger am Schalter haben oder das
Gerät bereits eingeschaltet an die Stromversorgung anschließen, kann dies zu Unfällen führen.
■ 40 │ DE
│AT│
CH
PWSA 20-Li B2

d) Entfernen Sie Einstellwerkzeuge oder Schrau-
benschlüssel, bevor Sie das Elektrowerkzeug
einschalten. Ein Werkzeug oder Schlüssel, der
sich in einem drehenden Geräteteil befindet,
kann zu Verletzungen führen.
e) Vermeiden Sie eine abnormale Körperhal-
tung. Sorgen Sie für einen sicheren Stand
und halten Sie jederzeit das Gleichgewicht.
Dadurch können Sie das Elektrowerkzeug in
unerwarteten Situationen besser kontrollieren.
f) Tragen Sie geeignete Kleidung. Tragen Sie
keine weite Kleidung oder Schmuck. Halten
Sie Haare, Kleidung und Handschuhe fern
von sich bewegenden Teilen. Lockere Klei-
dung, Schmuck oder lange Haare können von
sich bewegenden Teilen erfasst werden.
g) Wenn Staubabsaug- und -auffangeinrichtun-
gen montiert werden können, vergewissern
Sie sich, dass diese angeschlossen sind und
richtig verwendet werden. Die Verwendung
einer Staubabsaugung kann Gefährdungen
durch Staub verringern.
4. Verwendung und Behandlung des
Elektrowerkzeugs
a) Überlasten Sie das Gerät nicht. Verwenden
Sie für Ihre Arbeit das dafür bestimmte
Elektrowerkzeug. Mit dem passenden Elektro-
werkzeug arbeiten Sie besser und sicherer im
angegebenen Leistungsbereich.
b) Benutzen Sie kein Elektrowerkzeug, dessen
Schalter defekt ist. Ein Elektrowerkzeug, das
sich nicht mehr ein- oder ausschalten lässt, ist
gefährlich und muss repariert werden.
c) Ziehen Sie den Stecker aus der Steckdose
und/oder entfernen Sie den Akku, bevor Sie
Geräteeinstellungen vornehmen, Zubehörteile wechseln oder das Gerät weglegen. Diese
Vorsichtsmaßnahme verhindert den unbeabsichtigten Start des Elektrowerkzeuges.
d) Bewahren Sie unbenutzte Elektrowerkzeuge
außerhalb der Reichweite von Kindern auf.
Lassen Sie Personen das Gerät nicht
benutzen, die mit diesem nicht vertraut sind
oder diese Anweisungen nicht gelesen
haben. Elektrowerkzeuge sind gefährlich, wenn
sie von unerfahrenen Personen benutzt werden.
e) Pflegen Sie Elektrowerkzeuge mit Sorgfalt.
Kontrollieren Sie, ob bewegliche Teile
einwandfrei funktionieren und nicht klemmen,
ob Teile gebrochen oder so beschädigt sind,
dass die Funktion des Elektrowerkzeuges
beeinträchtigt ist. Lassen Sie beschädigte
Teile vor dem Einsatz des Gerätes reparieren.
Viele Unfälle haben ihre Ursache in schlecht
gewarteten Elektrowerkzeugen.
f) Halten Sie Schneidwerkzeuge scharf und
sauber. Sorgfältig gepflegte Schneidwerkzeuge
mit scharfen Schneidkanten verklemmen sich
weniger und sind leichter zu führen.
g) Verwenden Sie Elektrowerkzeug, Zubehör,
Einsatzwerkzeuge usw. entsprechend diesen
Anweisungen. Berücksichtigen Sie dabei die
Arbeitsbedingungen und die auszuführende
Tätigkeit.
Der Gebrauch von Elektrowerkzeugen für andere als die vorgesehenen Anwendungen kann zu
gefährlichen Situationen führen.
5. Verwendung und Behandlung des
Akkuwerkzeugs
a) Laden Sie die Akkus nur in Ladegeräten auf,
die vom Hersteller empfohlen werden. Für
ein Ladegerät, das für eine bestimmte Art von
Akkus geeignet ist, besteht Brandgefahr, wenn
es mit anderen Akkus verwendet wird.
b) Verwenden Sie nur die dafür vorgesehenen
Akkus in den Elektrowerkzeugen. Der Gebrauch
von anderen Akkus kann zu Verletzungen und
Brandgefahr führen.
c) Halten Sie den nicht benutzten Akku fern von Büro-
klammern, Münzen, Schlüsseln, Nägeln, Schrauben
oder anderen kleinen Metallgegenständen, die
eine Überbrückung der Kontakte verursachen
könnten. Ein Kurzschluss zwischen den Akkukontakten
kann Verbrennungen oder Feuer zur Folge haben.
d) Bei falscher Anwendung kann Flüssigkeit aus
dem Akku austreten. Vermeiden Sie den Kontakt damit. Bei zufälligem Kontakt mit Wasser
abspülen. Wenn die Flüssigkeit in die Augen
kommt, nehmen Sie zusätzlich ärztliche Hilfe
in Anspruch. Austretende Akkuflüssigkeit kann
zu Hautreizungen oder Verbrennungen führen.
PWSA 20-Li B2
DE│AT│CH
│
41 ■

VORSICHT! EXPLOSIONSGEFAHR!
Laden Sie nicht aufladbare Batterien
niemals auf.
Schützen Sie den Akku vor Hitze, z. B.
auch vor dauernder Sonneneinstrahlung, Feuer, Wasser und Feuchtigkeit.
Es Besteht Explosionsgefahr.
6. Service
a) Lassen Sie Ihr Elektrowerkzeug nur von quali-
fiziertem Fachpersonal und nur mit OriginalErsatzteilen reparieren. Damit wird sicherge-
stellt, dass die Sicherheit des Elektrowerkzeugs
erhalten bleibt.
Sicherheitshinweise
für alle Anwendungen
Gemeinsame Sicherheitshinweise zum Schleifen und Trennschleifen:
a) Dieses Elektrowerkzeug ist zu verwenden als
Schleifer und Trennschleifmaschine. Beachten
Sie alle Sicherheitshinweise, Anweisungen,
Darstellungen und Daten, die Sie mit dem
Gerät erhalten. Wenn Sie die folgenden
Anweisungen nicht beachten, kann es zu elektrischem Schlag, Feuer und / oder schweren
Verletzungen kommen.
b) Dieses Elektrowerkzeug ist nicht geeignet
zum Sandpapierschleifen, Arbeiten mit
Drahtbürsten und Polieren. Verwendungen,
für die das Elektrowerkzeug nicht vorgesehen
ist, können Gefährdungen und Verletzungen
verursachen.
c) Verwenden Sie kein Zubehör, das vom Her-
steller nicht speziell für dieses Elektrowerkzeug vorgesehen und empfohlen wurde. Nur
weil Sie das Zubehör an Ihrem Elektrowerkzeug
befestigen können, garantiert das keine sichere
Verwendung.
d) Die zulässige Drehzahl des Einsatzwerkzeugs
muss mindestens so hoch sein wie die auf
dem Elektrowerkzeug angegebene Höchstdrehzahl. Zubehör, das sich schneller als zuläs-
sig dreht, kann zerbrechen und umherfliegen.
e) Außendurchmesser und Dicke des Einsatz-
werkzeugs müssen den Maßangaben Ihres
Elektrowerkzeugs entsprechen. Falsch bemes-
sene Einsatzwerkzeuge können nicht ausreichend abgeschirmt oder kontrolliert werden.
f) Einsatzwerkzeuge mit Gewindeeinsatz
müssen genau auf das Gewinde der Schleifspindel passen. Bei Einsatzwerkzeugen, die
mittels Flansch montiert werden, muss der
Lochdurchmesser des Einsatzwerkzeuges
zum Aufnahmedurchmesser des Flansches
passen. Einsatzwerkzeuge, die nicht genau am
Elektrowerkzeug befestigt werden, drehen sich
ungleichmäßig, vibrieren sehr stark und können
zum Verlust der Kontrolle führen.
g) Verwenden Sie keine beschädigten Ein-
satzwerkzeuge. Kontrollieren Sie vor jeder
Verwendung Einsatzwerkzeuge wie Schleifscheiben auf Absplitterungen und Risse,
Schleifteller auf Risse, Verschleiß oder starke
Abnutzung, Drahtbürsten auf lose oder
gebrochene Drähte. Wenn das Elektrowerkzeug oder das Einsatzwerkzeug herunterfällt,
überprüfen Sie, ob es beschädigt ist, oder
verwenden Sie ein unbeschädigtes Einsatzwerkzeug. Wenn Sie das Einsatzwerkzeug
kontrolliert und eingesetzt haben, halten Sie
und in der Nähe befindliche Personen sich
außerhalb der Ebene des rotierenden Einsatzwerkzeuges auf und lassen Sie das Gerät
eine Minute lang mit Höchstdrehzahl laufen.
Beschädigte Einsatzwerkzeuge brechen meist in
der Testzeit.
h) Tragen Sie persönliche Schutzausrüstung.
Verwenden Sie je nach Anwendung Vollgesichtsschutz, Augenschutz oder Schutzbrille.
Soweit angemessen, tragen Sie Staubmaske,
Gehörschutz, Schutzhandschuhe oder Spezialschürze, die kleine Schleif- und Materialpartikel von Ihnen fernhalten. Die Augen sollen
vor herumfliegenden Fremdkörpern geschützt
werden, die bei verschiedenen Anwendungen
entstehen. Staub- oder Atemschutzmaske müssen
den bei der Anwendung entstehenden Staub
filtern. Wenn Sie lange lautem Lärm ausgesetzt
sind, können Sie einen Hörverlust erleiden.
■ 42 │ DE
│AT│
CH
PWSA 20-Li B2

i) Achten Sie bei anderen Personen auf siche-
ren Abstand zu Ihrem Arbeitsbereich. Jeder,
der den Arbeitsbereich betritt, muss persönliche Schutzausrüstung tragen.
Bruchstücke des Werkstücks oder gebrochene
Einsatzwerkzeuge können wegfliegen und
Verletzungen auch außerhalb des direkten
Arbeitsbereichs verursachen.
j) Halten Sie das Elektrowerkzeug nur an den
isolierten Griffflächen, wenn Sie Arbeiten
ausführen, bei denen das Einsatzwerkzeug
verborgene Stromleitungen treffen kann. Der
Kontakt mit einer spannungsführenden Leitung
kann auch metallene Geräteteile unter Spannung setzen und zu einem elektrischen Schlag
führen.
k) Halten Sie das Netzkabel von sich drehen-
den Einsatzwerkzeugen fern. Wenn Sie die
Kontrolle über das Gerät verlieren, kann das
Netzkabel durchtrennt oder erfasst werden
und Ihre Hand oder Arm in das sich drehende
Einsatzwerkzeug geraten.
l) Legen Sie das Elektrowerkzeug niemals
ab, bevor das Einsatzwerkzeug völlig zum
Stillstand gekommen ist. Das sich drehende
Einsatzwerkzeug kann in Kontakt mit der Ablagefläche geraten, wodurch Sie die Kontrolle
über das Elektrowerkzeug verlieren können.
m) Lassen Sie das Elektrowerkzeug nicht laufen,
während Sie es tragen. Ihre Kleidung kann
durch zufälligen Kontakt mit dem sich drehenden Einsatzwerkzeug erfasst werden und das
Einsatzwerkzeug sich in Ihren Körper bohren.
n) Reinigen Sie regelmäßig die Lüftungsschlitze
Ihres Elektrowerkzeugs. Das Motorgebläse
zieht Staub in das Gehäuse, und eine starke
Ansammlung von Metallstaub kann elektrische
Gefahren verursachen.
o) Verwenden Sie das Elektrowerkzeug nicht
in der Nähe brennbarer Materialien. Funken
können diese Materialen entzünden.
p) Verwenden Sie keine Einsatzwerkzeuge, die
flüssige Kühlmittel erfordern. Die Verwendung
von Wasser oder anderen flüssigen Kühlmitteln
kann zu einem elektrischen Schlag führen.
Rückschlag und entsprechende
Sicherheitshinweise
Rückschlag ist die plötzliche Reaktion infolge eines
hakenden oder blockierten drehenden Einsatzwerkzeuges, wie Schleifscheibe, Schleifteller, Drahtbürste usw. Verhaken oder Blockieren führt zu einem
abrupten Stopp des rotierenden Einsatzwerkzeugs.
Dadurch wird ein unkontrolliertes Elektrowerkzeug
gegen die Drehrichtung des Einsatzwerkzeugs an
der Blockierstelle beschleunigt.
Wenn z.B. eine Schleifscheibe im Werkstück hakt
oder blockiert, kann sich die Kante der Schleifscheibe, die in das Werkstück eintaucht, verfangen
und dadurch die Schleifscheibe ausbrechen oder
einen Rückschlag verursachen. Die Schleifscheibe
bewegt sich dann auf die Bedienperson zu oder
von ihr weg, je nach Drehrichtung der Scheibe an
der Blockierstelle. Hierbei können Schleifscheiben
auch brechen.
Ein Rückschlag ist die Folge eines falschen oder
fehlerhaften Gebrauchs des Elektrowerkzeugs. Er
kann durch geeignete Vorsichtsmaßnahmen, wie
nachfolgend beschrieben, verhindert werden.
a) Halten Sie das Elektrowerkzeug gut fest und
bringen Sie Ihren Körper und Ihre Arme in
eine Position, in der Sie die Rückschlagkräfte
abfangen können. Verwenden Sie immer den
Zusatzgriff, falls vorhanden, um die größtmögliche Kontrolle über Rückschlagkräfte
oder Reaktionsmomente beim Hochlauf zu
haben. Die Bedienperson kann durch geeig-
nete Vorsichtsmaßnahmen die Rückschlag- und
Reaktionskräfte beherrschen.
b) Bringen Sie Ihre Hand nie in die Nähe sich
drehender Einsatzwerkzeuge. Das Einsatzwerkzeug kann sich beim Rückschlag über Ihre
Hand bewegen.
c) Meiden Sie mit Ihrem Körper den Bereich, in
den das Elektrowerkzeug bei einem Rückschlag bewegt wird. Der Rückschlag treibt das
Elektrowerkzeug in die Richtung entgegengesetzt zur Bewegung der Schleifscheibe an der
Blockierstelle.
PWSA 20-Li B2
DE│AT│CH
│
43 ■

d) Arbeiten Sie besonders vorsichtig im Bereich von
Ecken, scharfen Kanten usw. Verhindern Sie,
dass Einsatzwerkzeuge vom Werkstück zurückprallen und verklemmen. Das rotierende Einsatz-
werkzeug neigt bei Ecken, scharfen Kanten oder
wenn es abprallt dazu, sich zu verklemmen. Dies
verursacht einen Kontrollverlust oder Rückschlag.
e) Verwenden Sie kein Ketten- oder gezähntes
Sägeblatt. Solche Einsatzwerkzeuge verursachen häufig einen Rückschlag oder den Verlust
der Kontrolle über das Elektrowerkzeug.
Besondere Sicherheitshinweise zum
Schleifen und Trennschleifen
a)
Verwenden Sie ausschließlich die für Ihr Elektrowerkzeug zugelassenen Schleifkörper und die
für diese Schleifkörper vorgesehene Schutzhaube. Schleifkörper, die nicht für das Elektrowerk-
zeug vorgesehen sind, können nicht ausreichend
abgeschirmt werden und sind unsicher.
b)
Gekröpfte Schleifscheiben müssen so montiert
werden, dass ihre Schleiffläche nicht über der
Ebene des Schutzhaubenrandes hervorsteht.
Eine unsachgemäß montierte Schleifscheibe, die
über die Ebene des Schutzhaubenrandes hinausragt, kann nicht ausreichend abgeschirmt werden.
c) Die Schutzhaube muss sicher am Elektro-
werkzeug angebracht und für ein Höchstmaß
an Sicherheit so eingestellt sein, dass der
kleinstmögliche Teil des Schleifkörpers offen
zum Bediener zeigt. Die Schutzhaube hilft,
die Bedienperson vor Bruchstücken, zufälligem
Kontakt mit dem Schleifkörper sowie Funken,
die Kleidung entzünden könnten, zu schützen.
d) Schleifkörper dürfen nur für die empfohlenen
Einsatzmöglichkeiten verwendet werden.
Zum Beispiel: Schleifen Sie nie mit der Seitenfläche einer Trennscheibe. Trennscheiben sind
zum Materialabtrag mit der Kante der Scheibe
bestimmt. Seitliche Krafteinwirkung auf diese
Schleifkörper kann sie zerbrechen.
e) Verwenden Sie immer unbeschädigte Spannflan-
sche in der richtigen Größe und Form für die von
Ihnen gewählte Schleifscheibe. Geeignete Flan-
sche stützen die Schleifscheibe und verringern so
die Gefahr eines Schleifscheibenbruchs. Flansche
für Trennscheiben können sich von den Flanschen
für andere Schleifscheiben unterscheiden.
f) Verwenden Sie keine abgenutzten Schleif-
scheiben von größeren Elektrowerkzeugen.
Schleifscheiben für größere Elektrowerkzeuge sind
nicht für die höheren Drehzahlen von kleineren
Elektrowerkzeugen ausgelegt und können brechen.
Weitere besondere Sicherheitshinweise zum Trennschleifen
a) Vermeiden Sie ein Blockieren der Trennschei-
be oder zu hohen Anpressdruck. Führen Sie
keine übermäßig tiefen Schnitte aus. Eine
Überlastung der Trennscheibe erhöht deren Beanspruchung und die Anfälligkeit zum Verkanten oder Blockieren und damit die Möglichkeit
eines Rückschlags oder Schleifkörperbruchs.
b) Meiden Sie den Bereich vor und hinter der
rotierenden Trennscheibe. Wenn Sie die Trennscheibe im Werkstück von sich wegbewegen,
kann im Falle eines Rückschlags das Elektrowerkzeug mit der sich drehenden Scheibe direkt
auf Sie zugeschleudert werden.
c) Falls die Trennscheibe verklemmt oder Sie die
Arbeit unterbrechen, schalten Sie das Gerät aus
und halten Sie es ruhig, bis die Scheibe zum Stillstand gekommen ist. Versuchen Sie nie, die noch
laufende Trennscheibe aus dem Schnitt zu ziehen,
sonst kann ein Rückschlag erfolgen. Ermitteln und
beheben Sie die Ursache für das Verklemmen.
d) Schalten Sie das Elektrowerkzeug nicht
wieder ein, solange es sich im Werkstück
befindet. Lassen Sie die Trennscheibe erst
ihre volle Drehzahl erreichen, bevor Sie den
Schnitt vorsichtig fortsetzen. Andernfalls kann
die Scheibe verhaken, aus dem Werkstück
springen oder einen Rückschlag verursachen.
e) Stützen Sie Platten oder große Werkstücke
ab, um das Risiko eines Rückschlags durch
eine eingeklemmte Trennscheibe zu vermindern. Große Werkstücke können sich unter
ihrem eigenen Gewicht durchbiegen. Das
Werkstück muss auf beiden Seiten der Scheibe
abgestützt werden, und zwar sowohl in der
Nähe der Trennscheibe als auch an der Kante.
f)
Seien Sie besonders vorsichtig bei „Tauch-
schnitten“ in bestehende Wände oder andere
nicht einsehbare Bereiche. Die eintauchende
Trennscheibe kann beim Schneiden in Gas- oder
Wasserleitungen, elektrische Leitungen oder
andere Objekte einen Rückschlag verursachen.
■ 44 │ DE
│AT│
CH
PWSA 20-Li B2

Sicherheitshinweise für Ladegeräte
■ Dieses Gerät kann von Kindern ab
8 Jahren und darüber sowie von
Personen mit verringerten physischen, sensorischen oder mentalen
Fähigkeiten oder Mangel an Erfahrung und Wissen benutzt werden,
wenn sie beaufsichtigt oder bezüglich des sicheren Gebrauchs des
Gerätes unterwiesen wurden und
die daraus resultierenden Gefahren verstehen. Kinder dürfen nicht
mit dem Gerät spielen. Reinigung
und Benutzer-Wartung dürfen nicht
von Kindern ohne Beaufsichtigung
durchgeführt werden.
■ Wenn die Netzanschlussleitung die-
ses Gerätes beschädigt wird, muss
sie durch den Hersteller oder seinen
Kundendienst oder eine ähnlich
qualifizierte Person ersetzt werden,
um Gefährdungen zu vermeiden.
Das Ladegerät ist nur für den Betrieb im
Innenbereich geeignet.
WARNUNG!
■ Wenn die Netzanschlussleitung dieses
Gerätes beschädigt wird, muss sie durch den
Hersteller oder seinen Kundendienst oder
eine ähnlich qualifizierte Person ersetzt werden, um Gefährdungen zu vermeiden.
PWSA 20-Li B2
DE│AT│CH
│
45 ■

Zulässiges Zubehör
-1
)
max.
Umfangs-
geschwin-
digkeit
(m/s)
Werkzeug Schutzhaube
ZweilochMontage-
Schlüssel
ZweilochMontage-
Schlüssel
Ja
Ja
Trennscheiben
Schruppscheiben
Max.
Durch-
messer Ø
(mm)
115 3 M14 13300 80
115 6 M14 13300 80
Max.
Dicke
(mm)
Gewinde-
maß (mm)
max.
Drehzahl
(min
Aufbewahrung und Handhabung der empfohlenen Einsatzwerkzeuge
■ Schleifwerkzeuge sind mit Vorsicht zu behandeln und zu transportieren.
■ Schleifwerkzeuge sind so zu lagern, dass sie keinen mechanischen Beschädigungen oder Umweltein-
flüssen (z. B. Feuchtigkeit) ausgesetzt sind.
■ 46 │ DE
│AT│
CH
PWSA 20-Li B2

Arbeitshinweise
HINWEIS
► Schleifkörper dürfen nur für die empfohlenen
Einsatzmöglichkeiten verwendet werden. Andernfalls könnten sie zerbrechen, beschädigt
werden und Verletzungen verursachen.
Schruppschleifen:
■ Bewegen Sie den Winkelschleifer mit mäßi-
gem Druck über das Werkstück hin und her.
■ Führen Sie bei weichem Material die
Schruppscheibe in einem flachen Winkel über
das Werkstück, bei hartem Material in einem
etwas steileren Winkel.
Trennschleifen:
■ Verwenden Sie nur geprüfte faserstoffver-
stärkte Trenn- oder Schleifscheiben, die für
eine Umfangsgeschwindigkeit von nicht weniger
als 80 m / s zugelassen sind.
VORSICHT!
Das Schleifwerkzeug läuft nach dem Ausschalten nach. Bremsen Sie es nicht durch seitliches
Gegendrücken ab.
■ Sichern Sie das Werkstück. Benutzen Sie
Spannvorrichtungen / Schraubstock, um das
Werkstück festzuhalten. Es ist damit sicherer
gehalten, als mit Ihrer Hand.
■ Schalten Sie das Gerät vor dem Ablegen
immer aus und warten Sie, bis das Gerät zum
Stillstand gekommen ist.
■ Verwenden Sie das Gerät nur für Trocken-
schnitt bzw. Trockenschliff.
■ Der Zusatz-Handgriff
ten mit dem Gerät montiert sein.
■ Asbesthaltiges Material darf nicht bearbeitet
werden. Asbest gilt als krebserregend.
Verwenden Sie niemals
Trennscheiben zum Schruppen!
Verwenden Sie niemals
Schruppscheiben zum Trennen!
muss bei allen Arbei-
Tipp! So verhalten Sie sich richtig.
GEFAHR! FÜHREN SIE DAS GERÄT
IMMER IM GEGENLAUF DURCH DAS
WERKSTÜCK.
► Bei entgegengesetzter Richtung besteht die
Gefahr eines Rückschlags. Das Gerät kann
aus dem Schnitt gedrückt werden.
■ Führen Sie das Gerät immer eingeschaltet
gegen das Werkstück. Heben Sie das Gerät
nach der Bearbeitung vom Werkstück ab und
schalten Sie es erst dann aus.
■ Halten Sie das Gerät während der Arbeit
immer fest mit beiden Händen. Sorgen Sie für
einen sicheren Stand.
■ Für die beste Schleifwirkung bewegen Sie das
Gerät gleichmäßig in einem Winkel von 15°
bis 30° (zwischen Schleifscheibe und Werkstück) auf dem Werkstück hin und her.
■ Beim Bearbeiten von schrägen Flächen darf
das Gerät nicht mit großer Kraft auf das
Werkstück gedrückt werden. Wenn die Dreh-
zahl stark abfällt, müssen Sie die Andruckkraft
reduzieren, um sicheres und effektives Arbeiten
zu ermöglichen. Sollte das Gerät plötzlich
vollkommen gebremst oder blockiert sein, muss
das Gerät sofort ausgeschaltet werden.
■ Trennen: Arbeiten Sie mit mäßigem Vorschub
und verkanten Sie die Trennscheibe nicht.
■ Schrupp- und Trennscheiben werden beim
Arbeiten sehr heiß – lassen Sie sie vor dem
Berühren vollständig abkühlen.
■ Verwenden Sie das Gerät niemals zweckent-
fremdet.
■ Achten Sie immer darauf, dass das Gerät
ausgeschaltet ist, bevor Sie den Akku in das
Gerät stecken.
■ Schalten Sie bei Gefahr sofort das Gerät aus
und entfernen Sie den Akku. Sorgen Sie dafür,
dass das Gerät leicht zugänglich und im Notfall
problemlos erreichbar ist.
PWSA 20-Li B2
DE│AT│CH
│
47 ■

■ Entfernen Sie bei Arbeitspausen, vor allen
Arbeiten am Gerät und bei Nichtgebrauch
immer den Akku. Das Gerät muss stets sauber,
trocken und frei von Öl oder Schmierfetten sein.
■ Seien Sie stets aufmerksam! Achten Sie immer
darauf, was Sie tun, und gehen Sie stets mit
Vernunft vor. Benutzen Sie das Gerät in keinem Fall,
wenn Sie unkonzentriert sind oder sich unwohl fühlen.
WARNUNG!
Tragen Sie immer eine Schutzbrille.
WARNUNG!
Tragen Sie immer eine
Staubschutzmaske.
Vor der Inbetriebnahme
Akku-Pack laden (siehe Abb. A)
VORSICHT!
► Ziehen Sie immer den Netzstecker, bevor
Sie den Akku-Pack
nehmen bzw. einsetzen.
■ Laden Sie den Akku-Pack
Umgebungstemperatur unterhalb 10 °C oder
oberhalb 40 °C liegt.
♦ Stecken Sie den Akku-Pack
Ladegerät (siehe Abb. A).
♦ Stecken Sie den Netzstecker in die Steckdose.
Die Kontroll-LED
♦ Die grüne Kontroll-LED
dass der Ladevorgang abgeschlossen und der
Akku-Pack einsatzbereit ist.
ACHTUNG!
♦ Sollte die rote Kontroll-LED
ist der Akku-Pack überhitzt und kann nicht
aufgeladen werden.
♦ Sollte die rote und grüne Kontroll-LED
gemeinsam blinken, dann ist der Akku-Pack
defekt.
♦ Schalten Sie das Ladegerät zwischen aufeinan-
derfolgenden Ladevorgängen für mindestens 15
Minuten ab. Ziehen Sie dazu den Netzstecker.
aus dem Ladegerät
nie, wenn die
in das Schnell-
leuchtet rot.
signalisiert Ihnen,
blinken, dann
Akku-Pack in das Gerät
einsetzen / entnehmen
Akku-Pack einsetzen:
♦ Lassen Sie den Akku-Pack
einrasten.
Akku-Pack entnehmen:
♦ Drücken Sie die Taste zur Entriegelung
entnehmen Sie den Akku-Pack
in den Griff
und
.
Akkuzustand prüfen
♦ Drücken Sie zum Prüfen des Akkuzustands die Tas-
te Akkuzustand
Der Zustand bzw. die Restleistung wird in der
Akku-Display-LED wie folgt angezeigt:
♦ ROT / ORANGE / GRÜN = maximale Ladung
ROT / ORANGE = mittlere Ladung
ROT = schwache Ladung – Akku aufladen
(siehe auch Hauptabbildung).
Schutzhaube mit Schnellverschluss
montieren
WARNUNG! VERLETZUNGSGEFAHR
► Schalten Sie vor allen Arbeiten am Gerät das
Gerät aus und entnehmen Sie den Akku.
VERLETZUNGSGEFAHR
► Verwenden Sie den Winkelschleifer immer
mit der Schutzhaube
muss sicher am Winkelschleifer angebracht
werden. Stellen Sie diese so ein, dass ein
Höchstmaß an Sicherheit erreicht wird,
d.h. der kleinstmögliche Teil des Schleifkörpers zeigt offen zur Bedienperson. Die
Schutzhaube soll die Bedienperson vor
Bruchstücken und zufälligem Kontakt mit dem
Schleifkörper schützen.
. Die Schutzhaube
■ 48 │ DE
│AT│
CH
PWSA 20-Li B2

VERLETZUNGSGEFAHR
12
► Achten Sie darauf, dass die Schutzhaube
mindestens im gleichen Winkel wie der
Zusatz-Handgriff montiert wird (siehe
Abb. B). Andernfalls können Sie sich an der
Schrupp- bzw. Trennscheibe verletzen.
♦ Öffnen Sie den Spannhebel
.
♦ Setzen Sie die Schutzhaube mit der Codier-
nase in die Codiernut .
♦ Drehen Sie die Schutzhaube in die erforderli-
che Stellung (Arbeitsposition). Die geschlossene
Seite der Schutzhaube muss stets zum
Bediener zeigen.
♦ Schließen Sie den Spannhebel
zum Festklemmen der Schutzhaube . Falls erforderlich,
kann die Spannkraft des Verschlusses durch
Lösen oder Anziehen der Justiermutter
verändert werden. Stellen Sie sicher, dass die
Schutzhaube fest auf dem Spindelhals sitzt.
Zusatz-Handgriff montieren
VORSICHT!
► Aus Sicherheitsgründen darf dieses Gerät
nur mit dem Zusatz-Handgriff
verwendet
werden. Andernfalls können Verletzungen die
Folge sein. Der Zusatz-Handgriff kann je
nach Arbeitsweise links, rechts oder oben am
Gerätekopf eingeschraubt werden.
Schrupp- / Trennscheibe
montieren / wechseln
Tragen Sie beim Wechseln von
Trenn- / Schruppscheiben immer Schutzhandschuhe.
Die Abmessungen der Schrupp- oder Trennscheiben beachten. Der Lochdurchmesser muss ohne
Spiel zum Aufnahmeflansch
Reduzierstücke oder Adapter verwenden.
HINWEIS
► Verwenden Sie unbedingt nur schmutzfreie
Scheiben.
passen. Keine
■ Verwenden Sie nur Schleifwerkzeuge, deren
zulässige Drehzahl mindestens so hoch ist wie
die Leerlaufdrehzahl des Gerätes.
■ VERLETZUNGSGEFAHR! Betätigen Sie die
Spindel-Arretiertaste
nur bei stillstehender
Aufnahmespindel .
♦ Drücken Sie die Spindel-Arretiertaste zum
Blockieren des Getriebes.
♦ Lösen Sie die Spannmutter
mit Hilfe des
Zweiloch-Montage-Schlüssels (siehe Abb. D).
♦ Setzen Sie die Schrupp- oder Trennscheibe,
mit der beschrifteten Seite zum Gerät, auf den
Aufnahmeflansch
♦ Setzen Sie anschließend die Spannmutter
.
,
mit der erhobenen Seite nach oben, wieder auf
die Aufnahmespindel .
Bei dünnen Schleifscheiben (siehe Abbildung 1):
♦ Der Bund der Spannmutter zeigt nach
oben, damit eine dünne Schleifscheibe sicher
gespannt werden kann.
≤ 3,2 mm
Abb. 1
♦ Drücken Sie die Spindel-Arretiertaste
zum
Blockieren des Getriebes.
♦ Ziehen Sie die Spannmutter
mit dem
Zweiloch-Montage-Schlüssel wieder fest.
Bei dicken Schleifscheiben (siehe Abbildung 2):
> 3,2 mm
Abb. 2
Der Bund der Spannmutter
zeigt nach unten,
damit die Schleifscheibe sicher auf der Aufnahmespindel angebracht werden kann.
PWSA 20-Li B2
DE│AT│CH
│
49 ■

♦ Aufnahmespindel
♦ Die Spannmutter
ge-Schlüssel im Uhrzeigersinn festziehen.
HINWEIS
Wenn die Scheibe nach dem Wechsel unruhig
►
läuft oder schwingt, muss diese Scheibe sofort
wieder ausgewechselt werden.
♦ Lassen Sie das Gerät nach einem Scheiben-
wechsel sicherheitshalber 60 Sekunden auf
Höchstdrehzahl laufen. Achten Sie auf ungewöhnliche Geräusche und Funkenentwicklung.
♦ Überprüfen Sie, ob alle Befestigungsteile korrekt
angebracht sind.
♦ Achten Sie darauf, dass der Drehrichtungspfeil
(falls vorhanden) auf den Trenn-, oder Schruppscheiben (auch Diamant-Trennscheiben) und die
Drehrichtung des Gerätes (Drehrichtungspfeil
auf dem Gerätekopf) übereinstimmen.
arretieren.
mit dem Zweiloch-Monta-
Inbetriebnahme
Ein- / ausschalten
Überprüfen Sie das eingesetzte Werkzeug vor
Gebrauch, ob alle Befestigungsteile korrekt angebracht sind.
HINWEIS
► Schalten Sie den Winkelschleifer immer vor
Materialkontakt ein und führen Sie das Gerät
erst dann auf das Werkstück.
Einschalten:
♦ Drücken Sie den EIN- /AUS-Schalter erst
nach rechts, um ihn dann nach vorne zu
schieben.
Ausschalten:
♦ Lassen Sie den EIN- /AUS-Schalter
los.
Dauerbetrieb einschalten:
♦ Drücken Sie den
nach rechts, um ihn dann nach vorne zu schieben. Drücken Sie den
dann zusätzlich vorne herunter, bis er einrastet.
EIN- /AUS-Schalter erst
EIN- /AUS-Schalter
wieder
Dauerbetrieb ausschalten:
♦ Drücken Sie den
herunter und lassen ihn dann los.
EIN- /AUS-Schalter hinten
Drehzahl einstellen
Mit dem Stellrad für die Drehzahlvorwahl
können Sie die Drehzahl vorwählen:
(1 = geringere Drehzahl, 6 = größere Drehzahl).
Wir empfehlen Ihnen, sie durch praktische Tests zu
ermitteln.
Die Drehzahl kann auch während des Betriebs
verändert werden.
Wartung und Reinigung
WARNUNG! VERLETZUNGSGEFAHR!
Schalten Sie vor allen Arbeiten am
Gerät das Gerät aus und entnehmen
Sie den Akku.
Der Akku-Winkelschleifer ist wartungsfrei.
■ Verwenden Sie keine scharfen Gegenstände
zur Reinigung des Gerätes. Es dürfen keine
Flüssigkeiten in das Innere des Gerätes gelangen. Andernfalls kann das Gerät beschädigt
werden.
■ Reinigen Sie das Gerät regelmäßig, am besten
immer direkt nach Abschluss der Arbeit.
■ Reinigen Sie das Gehäuse mit einem trockenen
Tuch – verwenden Sie auf keinen Fall Benzin, Lösungsmittel oder Reiniger, die Kunststoff angreifen.
■ Zur gründlichen Reinigung des Gerätes wird ein
Staubsauger benötigt.
■ Lüftungsöffnungen müssen immer frei sein.
■ Entfernen Sie anhaftenden Schleifstaub mit
einem Pinsel.
HINWEIS
► Nicht aufgeführte Ersatzteile (wie z. B.
Kohlebürsten, Schalter) können Sie über
unsere Service - Hotline bestellen.
■ 50 │ DE
│AT│
CH
PWSA 20-Li B2
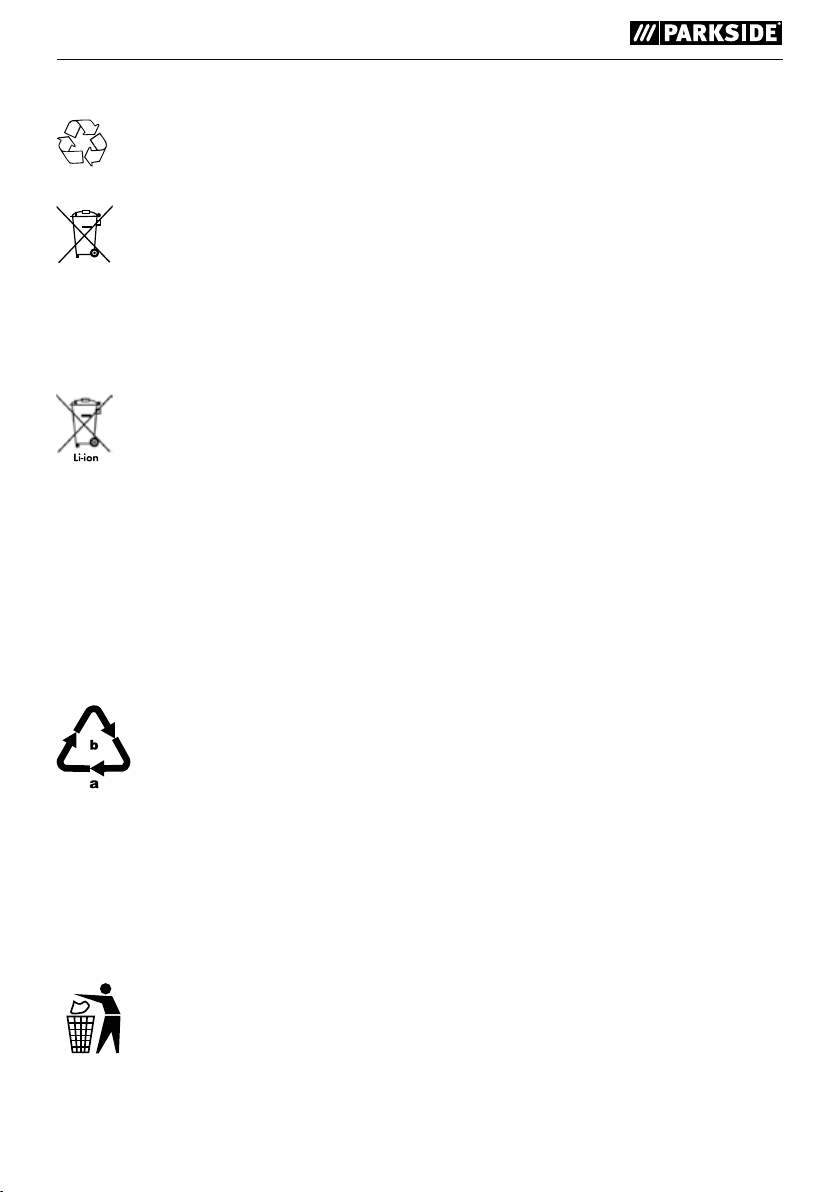
Entsorgung
Die Verpackung besteht aus umwelt-
freundlichen Materialien. Sie kann in den
örtlichen Recyclebehältern entsorgt
werden.
Werfen Sie Elektrowerkzeuge nicht
in den Hausmüll!
Gemäß Europäischer Richtlinie 2012/19/EU
müssen verbrauchte Elektrowerkzeuge getrennt
gesammelt und einer umweltgerechten Wiederverwertung zugeführt werden.
Werfen Sie Akkus nicht in den
Hausmüll!
Entfernen Sie die Akkus vor der Entsorgung aus
dem Gerät.
Defekte oder verbrauchte Akkus müssen gemäß
Richtlinie 2006/66/EC recycelt werden. Geben
Sie Akku-Pack und / oder das Gerät über die angebotenen Sammeleinrichtungen zurück.
Über Entsorgungsmöglichkeiten für ausgediente
Elektrowerkzeuge / Akku-Pack informieren Sie sich
bitte bei Ihrer Gemeinde- oder Stadtverwaltung.
Entsorgen Sie die Verpackung
umweltgerecht.
Beachten Sie die Kennzeichnung auf
den verschiedenen Verpackungsmaterialien und trennen Sie diese gegebenenfalls gesondert. Die Verpackungsmaterialien sind gekennzeichnet mit
Abkürzungen (b) und Ziffern (a) mit
folgender Bedeutung:
1–7: Kunststoffe,
20–22: Papier und Pappe,
80–98: Verbundstoffe
Garantie der
Kompernaß Handels GmbH
Sehr geehrte Kundin, sehr geehrter Kunde,
Sie erhalten auf dieses Gerät 3 Jahre Garantie ab
Kaufdatum. Im Falle von Mängeln dieses Produkts
stehen Ihnen gegen den Verkäufer des Produkts
gesetzliche Rechte zu. Diese gesetzlichen Rechte
werden durch unsere im Folgenden dargestellte
Garantie nicht eingeschränkt.
Garantiebedingungen
Die Garantiefrist beginnt mit dem Kaufdatum. Bitte
bewahren Sie den Original-Kassenbon gut auf.
Diese Unterlage wird als Nachweis für den Kauf
benötigt.
Tritt innerhalb von drei Jahren ab dem Kaufdatum
dieses Produkts ein Material- oder Fabrikationsfehler auf, wird das Produkt von uns – nach unserer
Wahl – für Sie kostenlos repariert oder ersetzt.
Diese Garantieleistung setzt voraus, dass innerhalb
der Drei-Jahres-Frist das defekte Gerät und der
Kaufbeleg (Kassenbon) vorgelegt und schriftlich
kurz beschrieben wird, worin der Mangel besteht
und wann er aufgetreten ist.
Wenn der Defekt von unserer Garantie gedeckt ist,
erhalten Sie das reparierte oder ein neues Produkt
zurück. Mit Reparatur oder Austausch des Produkts
beginnt kein neuer Garantiezeitraum.
Garantiezeit und gesetzliche
Mängelansprüche
Die Garantiezeit wird durch die Gewährleistung
nicht verlängert. Dies gilt auch für ersetzte und
reparierte Teile. Eventuell schon beim Kauf vorhandene Schäden und Mängel müssen sofort nach
dem Auspacken gemeldet werden. Nach Ablauf
der Garantiezeit anfallende Reparaturen sind
kostenpflichtig.
Möglichkeiten zur Entsorgung des
ausgedienten Produkts erfahren Sie
bei Ihrer Gemeinde- oder Stadtverwaltung.
PWSA 20-Li B2
DE│AT│CH
│
51 ■

Garantieumfang
Das Gerät wurde nach strengen Qualitätsrichtlinien
sorgfältig produziert und vor Auslieferung gewissenhaft geprüft.
Die Garantieleistung gilt für Material- oder Fabrikationsfehler. Diese Garantie erstreckt sich nicht auf
Produktteile, die normaler Abnutzung ausgesetzt
sind und daher als Verschleißteile angesehen werden
können oder für Beschädigungen an zerbrechlichen
Teilen, z. B. Schalter, Akkus, Backformen oder Teile,
die aus Glas gefertigt sind.
Diese Garantie verfällt, wenn das Produkt beschädigt, nicht sachgemäß benutzt oder gewartet wurde.
Für eine sachgemäße Benutzung des Produkts sind
alle in der Bedienungsanleitung aufgeführten Anweisungen genau einzuhalten. Verwendungszwecke
und Handlungen, von denen in der Bedienungsanleitung abgeraten oder vor denen gewarnt wird,
sind unbedingt zu vermeiden.
Das Produkt ist nur für den privaten und nicht für den
gewerblichen Gebrauch bestimmt. Bei missbräuchlicher und unsachgemäßer Behandlung, Gewaltanwendung und bei Eingriffen, die nicht von unserer
autorisierten Service-Niederlassung vorgenommen
wurden, erlischt die Garantie.
HINWEIS
► Bei Parkside und Florabest Werkzeugen
senden Sie bitte ausschließlich den defekten
Artikel ohne Zubehör (z. B. Akku, Aufbewahrungskoffer, Montagewerkzeuge, etc) ein.
Auf www.lidl-service.com können Sie
diese und viele weitere Handbücher,
Produktvideos und Software herunterladen.
Service
Service Deutschland
Tel.: 0800 5435 111 (Kostenfrei aus dem
dt. Festnetz/Mobilfunknetz)
E-Mail: kompernass@lidl.de
Service Österreich
Tel.: 0820 201 222 (0,15 EUR/Min.)
E-Mail: kompernass@lidl.at
Service Schweiz
Tel.: 0842 665566 (0,08 CHF/Min.,
Mobilfunk max. 0,40 CHF/Min.)
E-Mail: kompernass@lidl.ch
IAN 290756
Abwicklung im Garantiefall
Um eine schnelle Bearbeitung Ihres Anliegens
zu gewährleisten, folgen Sie bitte den folgenden
Hinweisen:
■ Bitte halten Sie für alle Anfragen den Kassenbon
und die Artikelnummer (z. B. IAN 12345) als
Nachweis für den Kauf bereit.
■ Die Artikelnummer entnehmen Sie bitte dem
Typenschild, einer Gravur, auf dem Titelblatt
Ihrer Anleitung (unten links) oder als Aufkleber
auf der Rück- oder Unterseite.
■ Sollten Funktionsfehler oder sonstige Mängel
auftreten, kontaktieren Sie zunächst die nachfolgend benannte Serviceabteilung telefonisch
oder per E-Mail.
■ Ein als defekt erfasstes Produkt können Sie dann
unter Beifügung des Kaufbelegs (Kassenbon)
und der Angabe, worin der Mangel besteht und
wann er aufgetreten ist, für Sie portofrei an die
Ihnen mitgeteilte Serviceanschrift übersenden.
■ 52 │ DE
│AT│
CH
Importeur
Bitte beachten Sie, dass die folgende Anschrift
keine Serviceanschrift ist. Kontaktieren Sie zunächst
die benannte Servicestelle.
KOMPERNASS HANDELS GMBH
BURGSTRASSE 21
DE - 44867 BOCHUM
DEUTSCHLAND
www.kompernass.com
PWSA 20-Li B2

Original-Konformitätserklärung
Wir, KOMPERNASS HANDELS GMBH, Dokumentenverantwortlicher: Herr Semi Uguzlu, BURGSTR. 21,
DE - 44867 BOCHUM, DEUTSCHLAND, erklären hiermit, dass dieses Produkt mit den folgenden
Normen, normativen Dokumenten und EG-Richtlinien übereinstimmt:
Maschinenrichtlinie
(2006 / 42 / EG)
EG-Niederspannungsrichtlinie
(2014 / 35 / EU)
Elektromagnetische Verträglichkeit
(2014 / 30 / EU)
RoHS Richtlinie
(2011 / 65 / EU)*
*Die alleinige Verantwortung für die Ausstellung dieser Konformitätserklärung trägt der Hersteller. Der oben beschriebene
Gegenstand der Erklärung erfüllt die Vorschriften der Richtlinie 2011/65/EU des Europäischen Parlaments und des Rates
vom 8. Juni 2011 zur Beschränkung der Verwendung bestimmter gefährlicher Stoffe in Elektro- und Elektronikgeräten.
Angewandte harmonisierte Normen:
EN 60745-1:2009+A11
EN 60745-2-3:2011+A2+A11+A12+A13
EN 55014-1:2006+A1+A2
EN 55014-2:2015
EN 61000-3-2:2014
EN 61000-3-3:2013
EN 60335-2-29:2004+A2
EN 60335-1:2012+A11
EN 62233:2008
EN 50581:2012
Typbezeichnung der Maschine:
Akku-Winkelschleifer PWSA 20-Li B2
Herstellungsjahr: 12 - 2017
Seriennummer: IAN 290756
Bochum, 06.12.2017
Semi Uguzlu
- Qualitätsmanager Technische Änderungen im Sinne der Weiterentwicklung sind vorbehalten.
PWSA 20-Li B2
DE│AT│CH
│
53 ■

Ersatz-Akku Bestellung
Wenn Sie einen Ersatz-Akku für Ihr Gerät bestellen möchten, so können Sie dies entweder bequem im
Internet unter www.kompernass.com oder telefonisch abwickeln.
Der Preis des Ersatz-Akkus (PAP 20 A3) beträgt 27,99 € inkl. MwSt. und Versand. Dieser Artikel kann
aufgrund begrenzter Vorratsmenge nach kurzer Zeit ausverkauft sein.
Online-Bestellung
Um einen Ersatz-Akku über den Zubehör-Shop zu bestellen:
■ Rufen Sie mit Ihrem Internetbrowser die Seite www.kompernass.com auf.
■ Klicken Sie links oben auf die entsprechende Flagge, um das gewünschte Land und die Sprache
auszuwählen.
■ Klicken Sie jetzt unter Marken auf „Parkside“ und wählen Sie anschließend Ihr entsprechendes Gerät
aus, um den passenden Ersatz-Akku auszuwählen.
■ Nachdem Sie den Ersatz-Akku in den Warenkorb gelegt haben, klicken Sie auf die Schaltfläche
„Kasse“ und befolgen die auf dem Bildschirm angezeigten Anweisungen, um den Bestellvorgang
abzuschließen.
HINWEIS
► Die Bestellung von Ersatzteilen kann in einigen Ländern nicht online vorgenommen werden. Kontak-
tieren Sie in diesem Fall bitte die Service-Hotline.
■ Die Aktion ist begrenzt auf einen Akku pro Kunde / Gerät, sowie auf eine Laufzeit von zwei Monaten
nach dem Aktionszeitraum. Danach kann der Ersatzakku als Ersatzteil zu anderen Konditionen weiterhin bestellt werden.
Telefonische Bestellung
Service Deutschland
Tel.: 0800 5435 111 (Kostenfrei aus dem dt. Festnetz/Mobilfunknetz)
Service Österreich
Tel.: 0820 201 222 (0,15 EUR/Min.)
E-Mail: kompernass@lidl.at
Service Schweiz
Tel.: 0842 665566 (0,08 CHF/Min., Mobilfunk max. 0,40 CHF/Min.)
E-Mail: kompernass@lidl.ch
Um eine schnelle Bearbeitung Ihrer Bestellung zu gewährleisten, halten Sie bitte für alle Anfragen die
Artikelnummer (z.B. IAN 290756) des Gerätes bereit. Die Artikelnummer entnehmen Sie bitte dem
Typenschild oder dem Titelblatt dieser Anleitung.
■ 54 │ DE
│AT│
CH
PWSA 20-Li B2

KOMPERNASS HANDELS GMBH
BURGSTRASSE 21
DE - 44867 BOCHUM
GERMANY
www.kompernass.com
Versione delle informazioni · Last Information Update
Stand der Informationen:
12 / 2017 Ident.-No.: PWSA20-LiB2-122017-1
IAN 290756
 Loading...