

Panasonic WV-Q29A Operating Instructions
■Assembling
The installation described below should be made by
qualified service personnel or system installers.
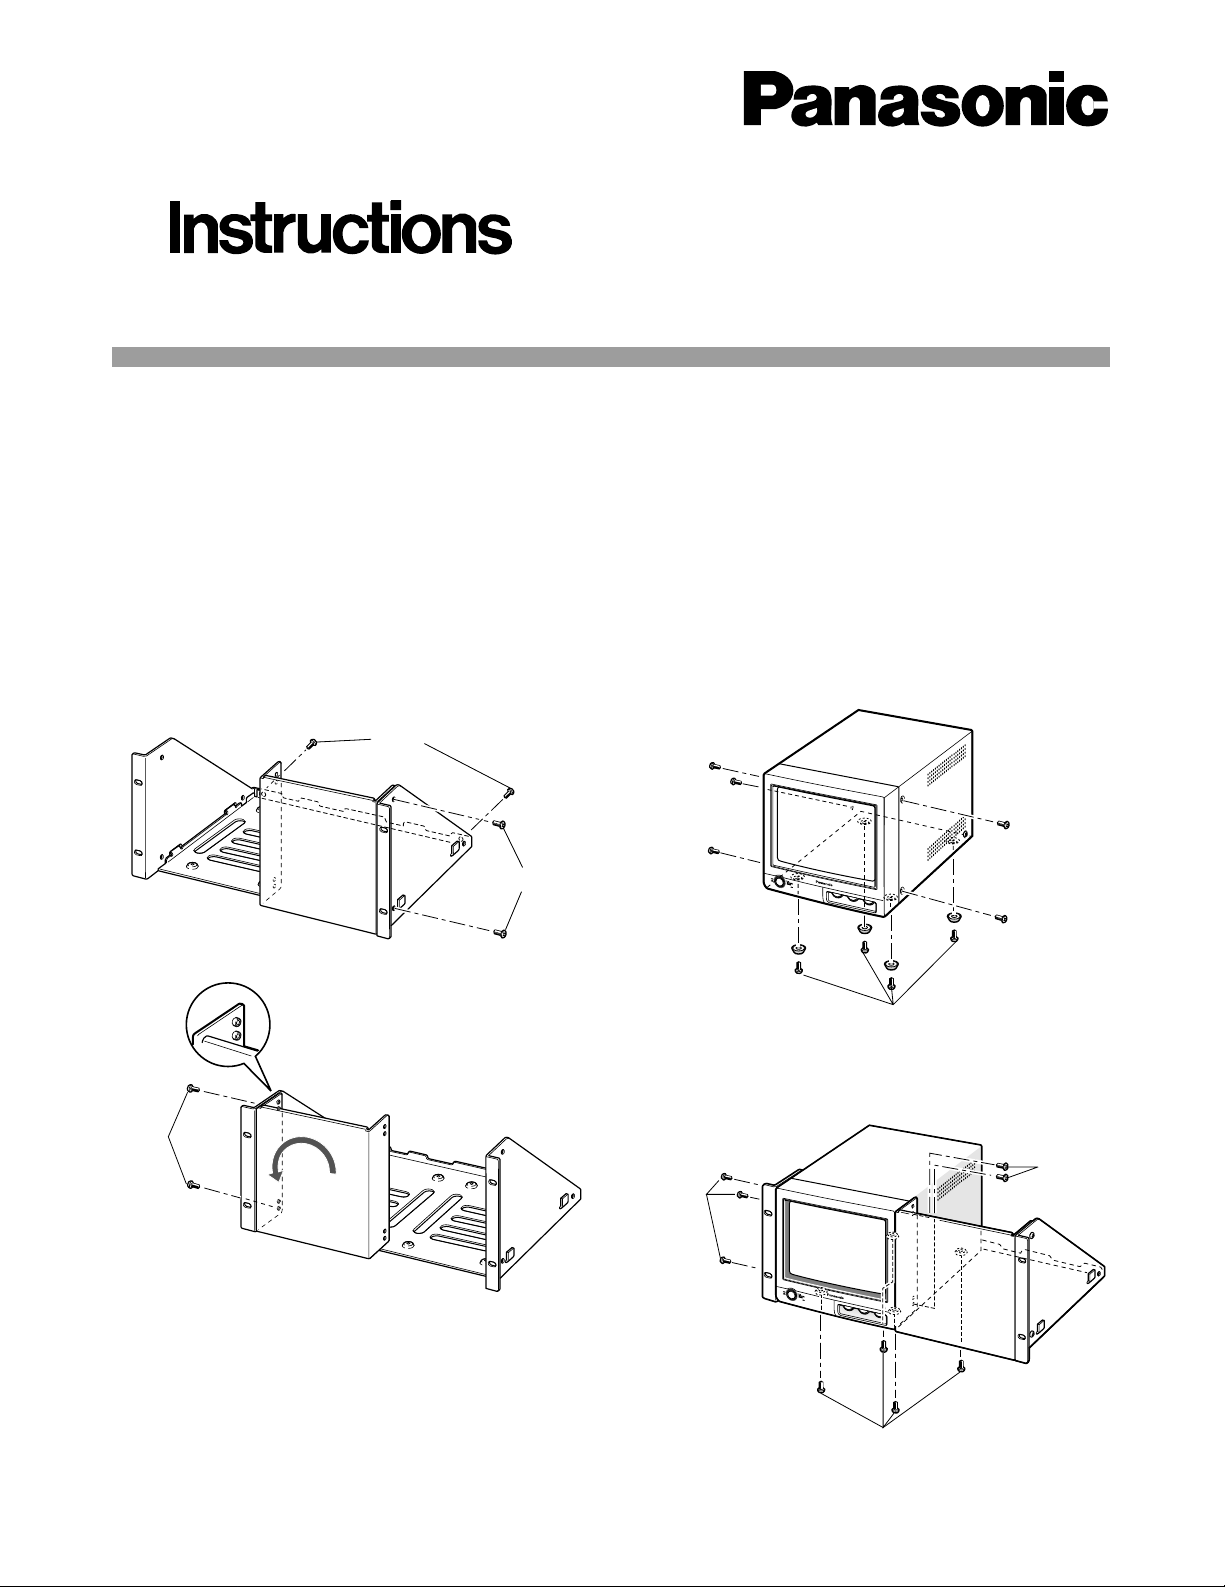
1. Place the panels onto the rack mounting chassis,
then tighten with four screws as shown in the figures.
Before attempting to connect or install this product,
please read these instructions carefully and save this manual for future use.
Rack Mount Bracket
Model No.
WV -Q29A
(M3x6)
(M4x6)
A
B
P
O
W
E
R
V
i
d
e
o
M
o
n
i
t
o
r
W
V
-
B
M
9
9
0
990
O
N
O
F
F
V
H
O
L
D
B
R
I
G
H
T
C
O
N
T
R
A
S
T
Remove rubber feet.
(M3x12)
(M3x6)
(M3x12)
A
B
POWER
V
id
e
o
M
o
n
ito
r
W
V
-
B
M
9
9
0
990
O
N
O
F
F
V HOLD
BRIGHT
C
ONTRAST
(M3x6)
Note: The blank panel is not required when mounting
two monitors.
The blank panel can be mounted on the chassis
either on the right or left of the monitor.
The examples below show the blank panel installed
on the right side of the monitor.
2. Remove the four rubber feet from the monitor by
removing the four screws on the bottom and five
screws on the sides as shown in the figure.
3. Fix the monitor to the blank panel with two screws
(M3x12). Use four screws (M3x6) and three screws
(M3x12) to fix the monitor on the chassis.
■Preface
The WV-Q29A Rack Mounting Bracket is designed for installing the WV-BM990 Video Monitor into the rack.

Rack mounting screws
A
B
P
O
W
E
R
V
id
e
o
M
o
n
ito
r
W
V
-
B
M
990990
O
N
O
FF
V
H
O
L
D
B
R
I
G
H
T
C
O
N
T
R
A
S
T
■Installing the Monitor in the Rack
Install the rack mounting chassis with the monitor in the rack securing it with four screws (not included).
Cautions:
• Do not block the ventilation opening or slots on the cover to prevent the temperature from rising inside the unit.
Always keep the temperature in the rack within 45˚C (113˚F).
• If the rack is subject to vibration, secure the rear of the unit to the rack using additional mounting brackets (procured
locally).
■Specifications
Dimensions: 480 mm (W) x 221 mm (H) x 266 mm (D)
18-7/8” (W) x 8-11/16” (H) x 10-1/2” (D)
Weight: 2.5 kg (5.5 lbs)
Weight and dimensions indicated are approximate.
Specifications are subject to change without notice.
■Standard Accessories
M4x6 screws ......................................................... 2 pcs.
M3x12 screws........................................................ 6 pcs.
M3x6 screws........................................................ 10 pcs.
Nt0500-0 YWV8QA5558AN Printed in China
N 19
© Matsushita Communication Industrial Co., Ltd. 2000
Panasonic Canada Inc.
5770 Ambler Drive, Mississauga,
Ontario, L4W 2T3 Canada (905)624-5010
Panasonic Sales Company
Division of Matsushita Electric of Puerto Rico Inc.
Ave. 65 de Infanteria. Km. 9.5
San Gabriel Industrial Park, Carolina,
Puerto Rico 00985 (809)750-4300
Panasonic Security and Digital Imaging Company
A Division of Matsushita Electric Corporation of America
Executive Office: One Panasonic Way 3E-7, Secaucus, New Jersey 07094
Regional Offices:
Northeast: One Panasonic Way, Secaucus, NJ 07094 (201) 348-7303
Southern: 1225 Northbrook Parkway, Suite 1-160, Suwanee, GA 30024 (770) 338-6838
Midwest: 1707 North Randall Road, Elgin, IL 60123 (847) 468-5211
Western: 6550 Katella Ave., Cypress, CA 90630 (714) 373-7840
 Loading...