

Panasonic WV-CU650, WV-CU950 Instruction Manual
CALIBRATION PROCEDURE
1. Pan / Tilt Calibration
7. Press the [CAM(SET)] key while turning the Joystick to
upper side.
The LCD on the Front Panel will indicate as right.
3 The Pan / Tilt Calibration is required in the fol-
lowing cases.
• After replacing the EEPROM, Pan / Tilt and Zoom wheel
Calibration is required.
(Default software data will be stored in the EEPROM
automatically.)
• In the case of changing of the combination of the Main
Unit and the 3D Joystick Unit as shown in the Exploded
View(10/10).
• In the case of replacing of the Joystick Board (PCB 5) or
VR101 and other parts on it.
• In case of replacing the Main Board (PCB 1) or EEPROM
(IC6 ) and other parts on it.
• In case that calibrated data has been changed by opera-
tion mistake.
3 Procedure
1. Turn off the power.
2. To execute the Pan / Tilt Calibration Mode, Turn on the
power while pressing the [9] and [MON(ESC)] keys
simultaneously.
The LCD on the Front Panel will indicate as right.
Pan/Tilt Calibration
Admin Password _____
U:F1 D:__ TC:__ 7D
R:__ L:__ PC:__
8. Turn and keep the Joystick to fully down side.
The LCD on the Front Panel will indicate as right.
U:F1 D:__ TC:__ 08
R:__ L:__ PC:__
9. Press the [CAM(SET)] key while turning the Joystick to
down side.
The LCD on the Front Panel will indicate as right.
U:F1 D:08 TC:__ 08
R:__ L:__ PC:__
10. Return the Joystick to center.
The LCD on the Front Panel will indicate as right.
Note : It needs your hand to release with flipping.
U:F1 D:08 TC:__ 70
R:__ L:__ PC:__
3. Enter the administrator password.
Notes: • The factory default is "650".
• To delete a character, press the CLEAR button.
Note: Just example, It depends on Unit
4. Press the [CAM(SET)] key.
The LCD on the Front Panel will indicate as right.
U:F2 D:09 TC:78 0
R:E6 L:06 PC:75 0
5. Press the [CAM(SET)] key for the starting adjustment.
The LCD on the Front Panel will indicate as right.
U:__ D:__ TC:__ 72
R:__ L:__ PC:__
Blinking
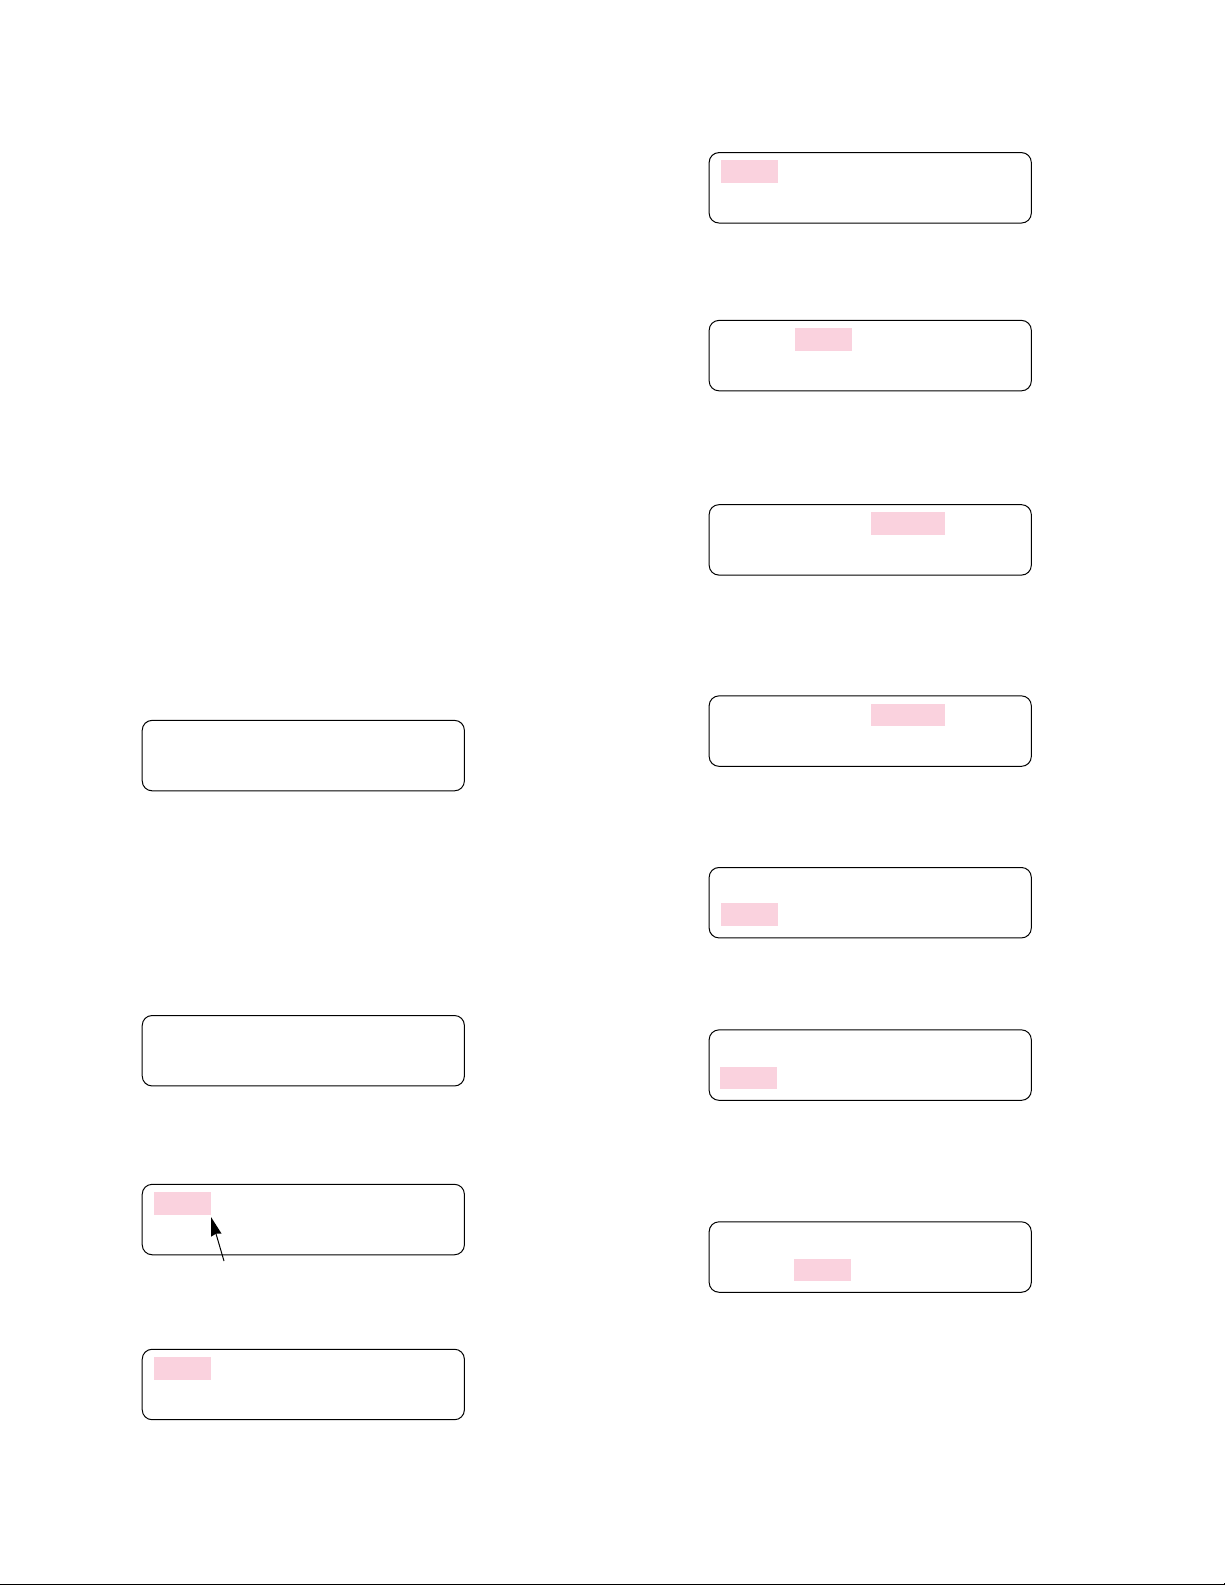
6. Turn and keep the Joystick to fully upper side.
The LCD on the Front Panel will indicate as right.
U:__ D:__ TC:__ F0
R:__ L:__ PC:__
11. Press the [CAM(SET)] key.
The LCD on the Front Panel will indicate as right.
U:F1 D:08 TC:70 79
R:__ L:__ PC:__
12. Turn and keep the Joystick to fully right side.
The LCD on the Front Panel will indicate as right.
U:F1 D:08 TC:70
R:__ L:__ PC:__ F1
13. Press the [CAM(SET)] key while turning the Joystick to
right side.
The LCD on the Front Panel will indicate as right.
U:F1 D:08 TC:70
R:F0 L:__ PC:__ F0
2-1

14. Turn and keep the Joystick to fully left side.
The LCD on the Front Panel will indicate as right.
U:F1 D:08 TC:70
R:F0 L:__ PC:__ 07
15. Press the [CAM(SET)] key while turning the Joystick to
left side.
The LCD on the Front Panel will indicate as right.
U:F1 D:08 TC:70
R:F0 L:07 PC:__ 07
2. Zoom Wheel Calibration
3 The Zoom Wheel Calibration is required in the
following cases
• In case of replacing the Joystick Unit.
• In case of disassembling the Joystick Unit.
• In case of replacing the Main Board.
• In case of replacing the EEPROM (IC6 on the Main
Board).
• In case that calibrated data has been changed by operation mistake.
16. Return the Joystick to center.
The LCD on the Front Panel will indicate as right.
Note : It needs your hand to release with flipping.
U:F1 D:08 TC:70
R:F0 L:07 PC:__ 76
17. Press the [CAM(SET)] key.
The LCD on the Front Panel will indicate as right,
U:F1 D:08 TC:70 0
R:F0 L:07 PC:76 0
18. Confirm the following.
• The LCD on the Front Panel will indicate 64 steps of
each change, when it turns to the upper and lower sides
and right.
• The value of Pan and Tilt on the LCD will return to
ZERO, when the Joystick is returned to the center.
U:F1 D:08 TC:70 0
R:F0 L:07 PC:76 0
3 Procedure
1. Turn off the power.
2. To execute the Pan / Tilt Calibration Mode, Turn on the
power while pressing the [8] and [MON(ESC)] keys
simultaneously.
The LCD on the Front Panel will indicate as right.
Zoom Calibration
Admin Password _____
3. Enter the administrator password.
Notes: • The factory default is "650".
• To delete a character, press the CLEAR button.
Note: Just example, It depends on Unit.
4. Press the [CAM(SET)] key.
The LCD on the Front Panel will indicate as right.
T:BC W:45 ZC:7D 0
5. Press the [CAM(SET)] key for the starting adjustment.
The LCD on the Front Panel will indicate as right.
19. Turn off the power to finish the calibration.
T:__ W:__ ZC:__ 84
6. Turn and keep the Zoom Wheel to fully right (TELE)
side.
The LCD on the Front Panel will indicate as right.
T:__ W:__ ZC:__ BD
2-2
 Loading...