

Panasonic tx-L-19XM6B, tx-L-24xm6b User Manual

Operating Instructions
LCD Television
Model No.
TX-L19XM6B
TX-L24XM6B
Thank you for purchasing this Panasonic product.
Please read these instructions carefully before operating this product and
retain them for future reference.
The images shown in this manual are for illustrative purposes only.
English
UK and Ireland model
Transport only in upright position
Panasonic does not guarantee operation and performance
of peripheral devices made by other manufacturers; and
we disclaim any liability or damage arising from operation
and/ or performance from usage of such other maker’s
peripheral devices.
This product is licensed under the AVC patent portfolio
license for the personal and non-commercial use of a
consumer to (i) encode video in compliance with the AVC
Standard (“AVC Video”) and/or (ii) decode AVC Video that
was encoded by a consumer engaged in a personal and
non-commercial activity and/or was obtained from a video
provider licensed to provide AVC Video. No license is
granted or shall be implied for any other use.
Additional information may be obtained from MPEG LA,
LLC. See http://www.mpegla.com.
Contents
Be Sure to Read
Safety Precautions ...............................................3
Maintenance ..........................................................5
Quick Start Guide
Accessories / Options ..........................................6
Basic Connection ...............................................10
Identifying Controls ...........................................12
Auto Setup ..........................................................13
Notice for DVB / Data broadcasting
This TV is designed to meet the standards (as of August,
2012) of digital services.
● Not all the features are available depending on the
country, area, broadcaster, service provider and network
environment.
● The compatibility with future services is not guaranteed.
● Check the latest information on the available services at
the following website.
http://panasonic.jp/support/global/cs/tv/
Basic Features
Watching TV ........................................................14
How to Use Menu Functions .............................16
Advanced Features
Using Media Player ............................................22
Others
FAQs ....................................................................25
Specications .....................................................26
Licence ................................................................29
2
Be Sure to Read
Safety Precautions
Warning
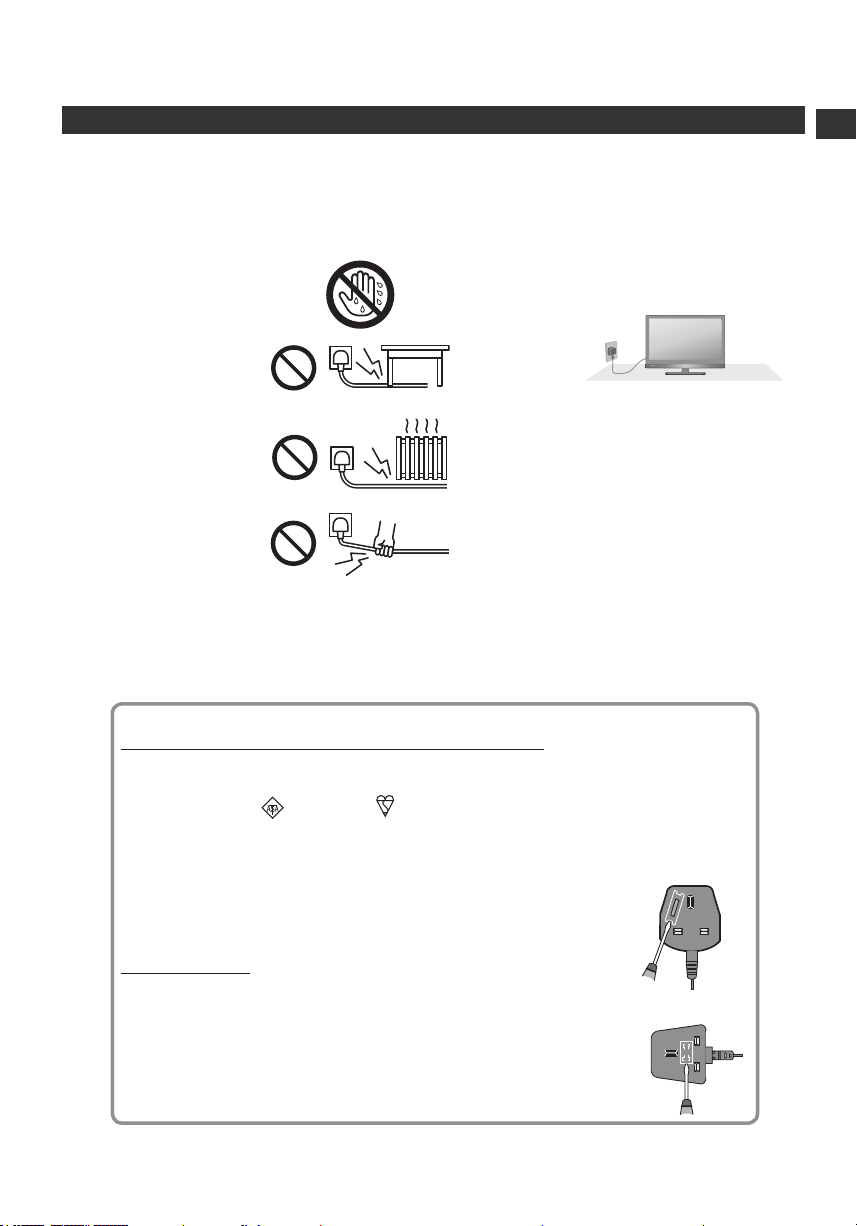
Mains plug and lead
To help avoid risk of electrical shock, re, damage or injury, please follow the warnings below:
● This TV is designed to operate on AC 220-240 V, 50/60 Hz.
● Insert the mains plug fully into the socket outlet.
● Ensure that the mains plug is easily accessible.
● Remove the mains plug when cleaning the TV.
● Do not touch the mains plug
with a wet hand.
● Do not damage the mains
lead.
• Do not place a heavy
object on the lead.
• Do not place the lead
near a high temperature
object.
• Do not pull on the lead.
Hold onto the mains plug
body when disconnecting
the plug.
• Do not move the TV with the lead plugged into a socket outlet.
• Do not twist the lead, bend it excessively or stretch it.
• Do not use a damaged mains plug or socket outlet.
• Ensure the TV does not crush the mains lead.
● Do not use any mains lead other than that provided with this TV.
● If you detect anything unusual, immediately switch
off the mains supply switch and remove the mains
plug.
AC 220-240 V
50/60 Hz
Safety Precautions
.YLLUFERAC TXET GNIWOLLOF EHT DAER ESAELP ,YTEFAS RUOY ROF
A 5 amp fuse is fitted in this mains plug. Shall the fuse need to be replaced, please ensure that the replacement
fuse has a rating of 5 amps and that it is approved by ASTA or BSI to BS1362.
interference and for your safety.
dealer.
securely into the mains plug (see example 1).
then press the fuse cover down securely (see example 2).
kram ATSA eht rof kcehC
or the BSI mark on the body of the fuse.
.gulp sniam eht ffo tuc ton oD
esuf eht ecalper ot woH
:1 elpmaxe ni nwohs epyt gulp roF
:2 elpmaxe ni nwohs epyt gulp roF
.relaed lacol ruoy morf desahcrup eb yam revoc esuf tnemecalper A
.VT siht htiw deilppus eno eht tpecxe dael sniam fo epyt rehto yna esu ton oD
siht htiw desu eb ot dengised era gulp dedluom dna dael sniam deilppus ehT
.ecneinevnoc dna ytefas ruoy rof gulp sniam nip eerht dedluom a htiw deilppus si VT sihT
.deniatbo si revoc tnemecalper a litnu desu eb ton tsum gulp sniam eht revoc esuf eht esol uoy fI
Example 1
diova ot VT
.naicirtcele deifilauq a yb degnahc ti teg ,elbatius ton si emoh ruoy ni teltuo tekcos eht fI
dezirohtua na morf tnemecalper a esahcrup ,degamad semoceb dael sniam ro gulp eht fI
tifer neht ,esuf eht ecalper dna revirdwercs a htiw tnemtrapmoc esuf elbavomer eht tuo tfiL
Example 2
,esuf eht ecalper dna ,revirdwercs a htiw ,gulp sniam eht ni ,tnemtrapmoc esuf eht nepo tfiL
.decalper si esuf eht nehw dettifer si ti taht erusne tsum uoy ,revoc esuf elbavomer a sniatnoc gulp sniam eht fI
3
GULP SNIAM DEDLUOM EHT :TNATROPMI
Warning
Take care
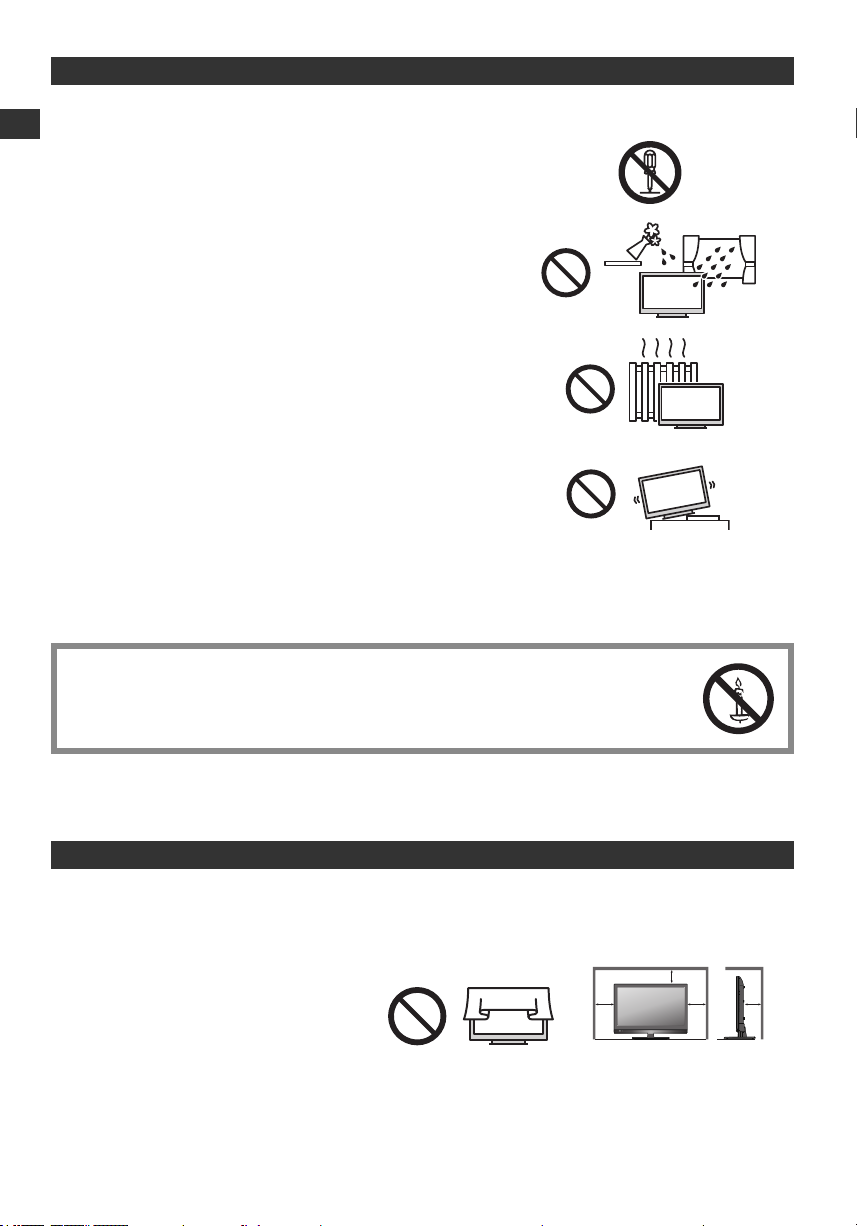
To help avoid risk of electrical shock, re, damage or injury, please follow the warnings below:
Safety Precautions
● Do not remove covers and never modify the TV yourself as live parts
are accessible when they are removed. There are no user serviceable
parts inside.
● Do not expose the TV to rain or excessive moisture. This TV must not
be exposed to dripping or splashing water and objects lled with liquid,
such as vases, must not be placed on top of or above the TV.
● Do not expose the TV to direct sunlight and other sources of heat.
To prevent re never place any type of candle or naked ame on top or
near the TV.
● Do not place the TV on sloped or unstable surfaces, and ensure that
the TV does not hang over the edge of the base.
● Do not insert foreign objects into the TV through the air vents.
● Do not use an unapproved pedestal / mounting equipment. Be sure to ask your local Panasonic dealer to perform
the setup or installation of approved wall-hanging brackets.
● Do not apply strong force or impact to the display panel.
● This TV is designed for Table-top use.
To prevent the spread of re, keep candles or other open
ames away from this product at all times
Small object
This product contains possibly dangerous parts that can be breathed in or swallowed by young children accidentally.
● Keep the dangerous parts out of reach of young children.
Caution
Ventilation
Allow sufcient space around the TV in order to help prevent excessive heat, which could lead to early failure of some
electronic components.
● Ventilation should not be impeded by covering
the ventilation openings with items such as
newspapers, tablecloths and curtains.
● Whether you are using the pedestal or not, always ensure the vents in the bottom of the TV are not blocked and
there is sufcient space to enable adequate ventilation.
Minimum distance
10 cm
10 cm 10 cm 10 cm
4
Moving the TV
Before moving the TV, disconnect all cables.
When not in use for a long time
This TV will still consume some power even in the Off mode, as long as the mains plug is still connected to a live socket
outlet.
● Remove the mains plug from the wall socket when the TV is not in use for a prolonged period of time.
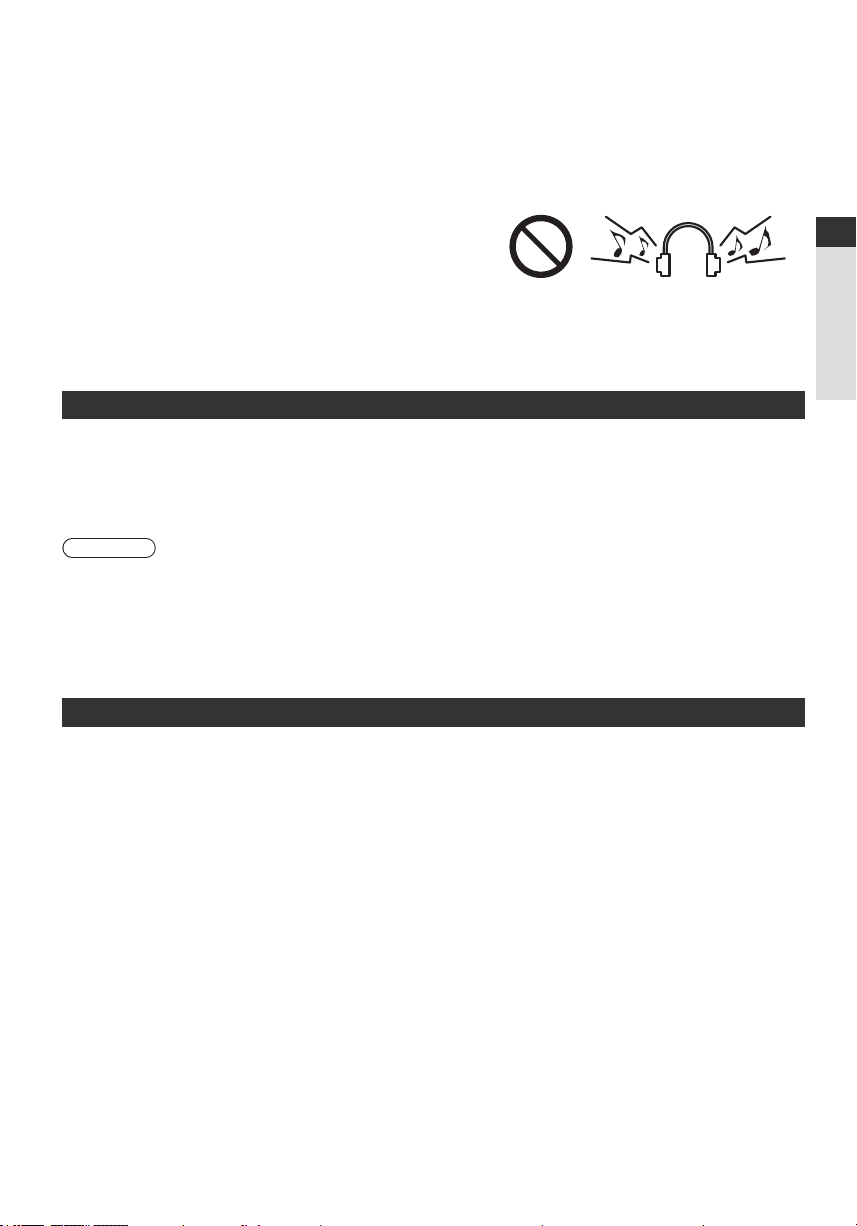
Excessive volume
Do not expose your ears to excessive volume from the headphones.
Irreversible damage can be caused.
Maintenance
First, remove the mains plug from the socket outlet.
Display panel, Cabinet, Pedestal
Regular care:
Gently wipe the surface of the display panel, cabinet,
or pedestal by using a soft cloth to clean the dirt or
ngerprints.
Caution
● Do not use a hard cloth or rub the surface too hard, otherwise this may cause scratches on the surface.
● Take care not to subject the TV’s surfaces to water or detergent. Liquid inside the TV could lead to product failure.
● Take care not to subject the surfaces to insect repellent, solvent, thinner or other volatile substances. This may
degrade surface quality or cause peeling of the paint.
● The surface of the display panel is specially treated and may be easily damaged. Take care not to tap or scratch the
surface with your ngernail or other hard objects.
● Do not allow the cabinet and pedestal to make contact with a rubber or PVC substance for a long time. This may
degrade surface quality.
Mains plug
Wipe the mains plug with a dry cloth at regular intervals. Moisture and dust may lead to re or electrical shock.
For stubborn dirt:
First clean the dust on the surface. Dampen a soft cloth
with clean water or diluted neutral detergent (1 part
detergent to 100 parts water). Wring the cloth and wipe the
surface. Finally, wipe away all the moisture.
Quick Start Guide
Maintenance
5
Quick Start Guide
MEDIA
PLAYER INPUT
TV AV
MENU TEXT STTL GUIDE
EXIT
OK
OPTION
BACK/
RETURN
ASPECT
MUTE
STILL
LAST VIEW
TV
jkl
tuv
abc
mno
wxyz
def
ghi
pqrs
Accessories / Options
Standard accessories
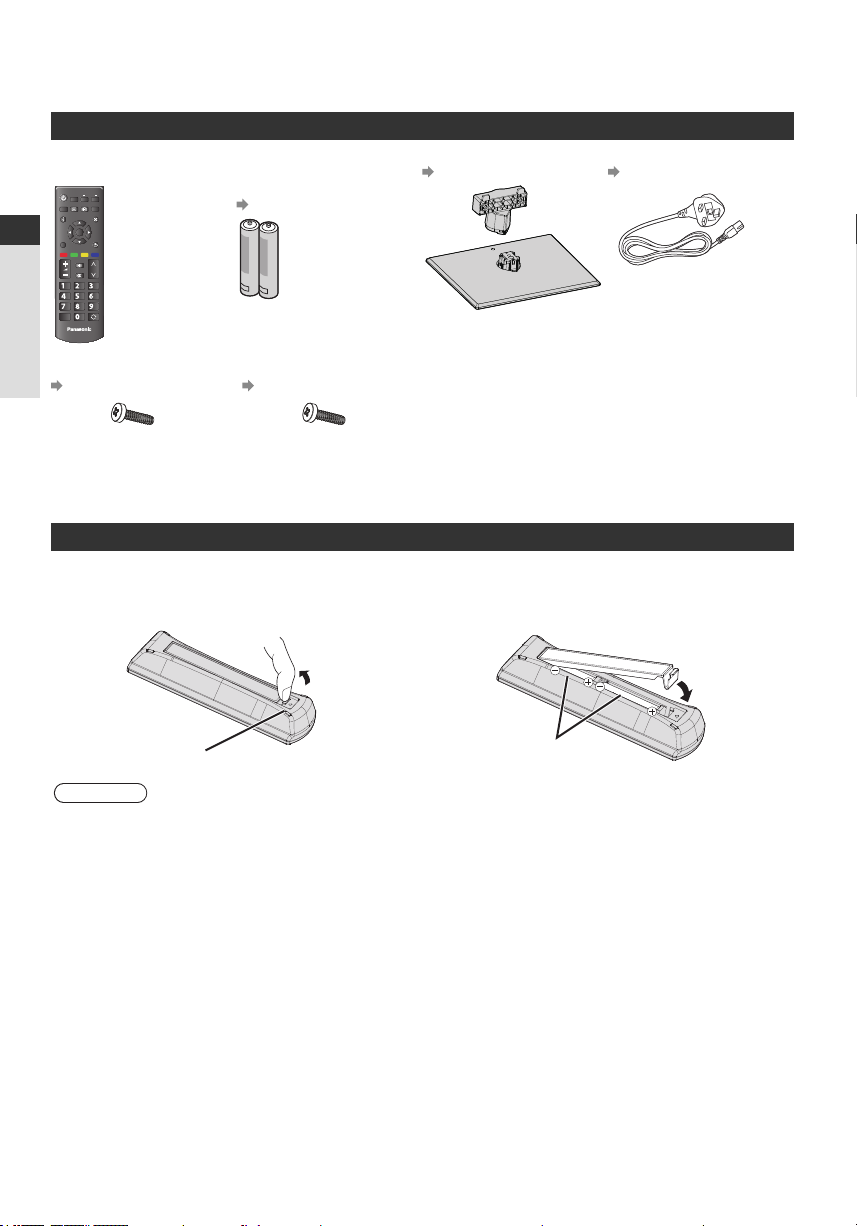
Remote Control
● N2QAYB000816
Quick Start Guide
Batteries for the Remote
Control (2)
● (R6AA)
(p. 6)
Pedestal
(p. 8)
Mains Lead
(p. 10)
Assembly screw for base
(1)
(p. 8)
Accessories / Options
M4 x 18
Assembly screws for
pedestal (2)
(p. 8)
M4 x 18
Operating Instructions Production Registration
Leaet
● Accessories may not be placed all together. Take care not to throw them away unintentionally.
● This product contains possibly dangerous parts (such as plastic bags), that can be breathed in or swallowed by
young children accidentally. Keep these parts out of reach of young children.
Installing / removing remote’s batteries
1 Remove the battery compartment cover. 2 Insert two R6AA batteries (1.5V) according to “+” and
“-” polarity markings inside the battery compartment,
then close the battery compartment cover.
Pull open
Hook
Note the correct
polarity (+ or -)
Caution
● Incorrect installation may cause battery leakage and corrosion, resulting in damage to the remote control.
● Do not mix old and new batteries.
● Replace only with same or equivalent type. Do not mix different battery types (such as alkaline and manganese
batteries).
● Do not use rechargeable (Ni-Cd) batteries.
● Do not burn or break up batteries.
● Do not expose batteries to excessive heat such as sunshine, re or the like.
● Make sure you dispose of batteries correctly.
● Ensure batteries are replaced correctly, there is danger of explosion and re if battery is reversed.
● Do not disassemble or modify the remote control.
Close
6
Optional accessories
Please contact your local Panasonic dealer to purchase the recommended optional accessories.
For additional details, please read the manual of the optional accessories.
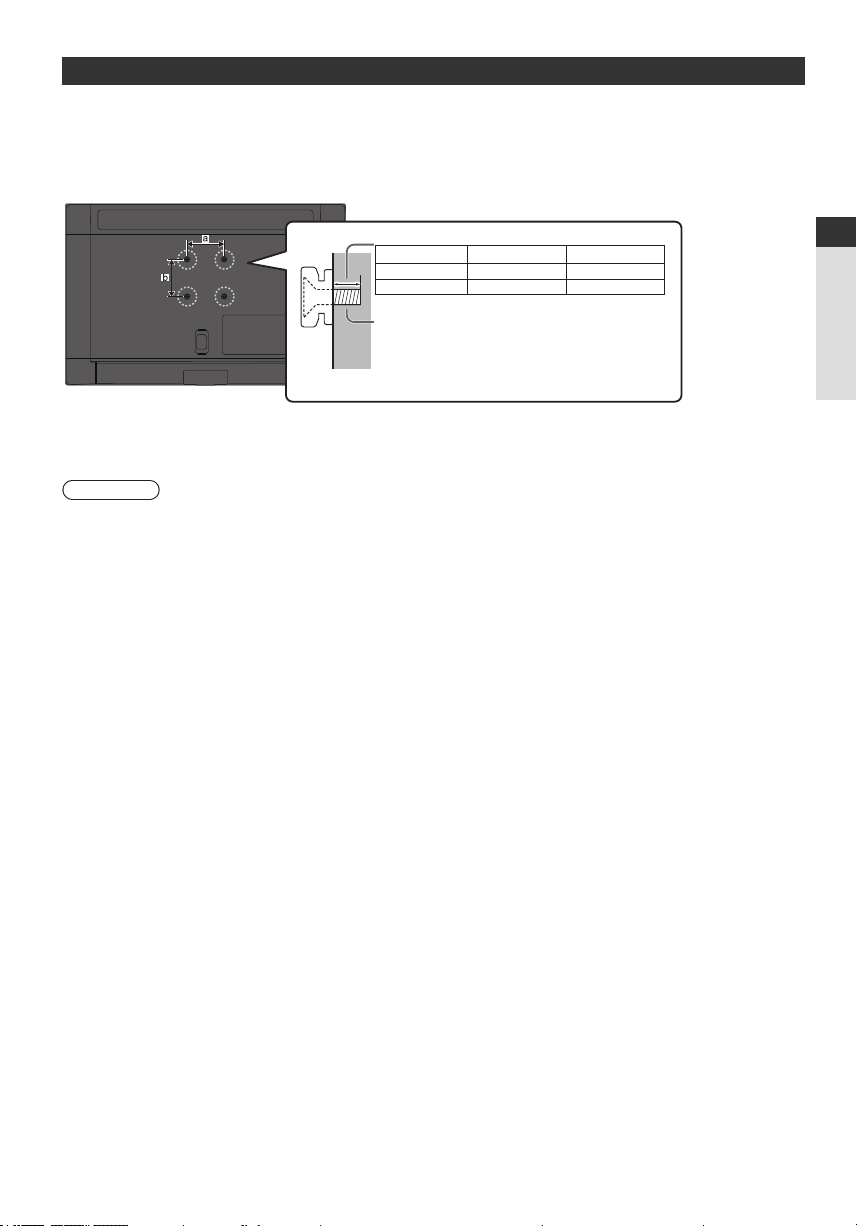
Wall-hanging bracket
Please contact your local Panasonic dealer to purchase the recommended wall-hanging bracket.
● Holes for wall-hanging bracket installation
Depth of screw:
TX-L19XM6B TX-L24XM6B
Rear of the TV
● TX-L19XM6B
a: 75 mm
b: 75 mm
Minimum 6 mm 6 mm
Maximum 7 mm 7 mm
Diameter: M4
Screw for xing the TV onto the wall-hanging
bracket (not supplied with the TV)
● Make sure that all screws are securely
(View from the side)
tightened.
● TX-L24XM6B
a: 75 mm
b: 75 mm
Warning
● Using other wall-hanging brackets, or installing a wall hanging bracket by yourself have the risk of personal injury and
product damage. In order to maintain the unit’s performance and safety, be absolutely sure to ask your dealer or a
licensed contractor to secure the wall-hanging brackets. Any damage caused by installing without a qualied installer
will void your warranty.
● Carefully read the instructions accompanying optional accessories, and be sure to take steps to prevent the TV from
falling off.
● Handle the TV carefully during installation since subjecting it to impact or other forces may cause product damage
which will void your warranty.
● Do not mount the unit directly below ceiling lights (such as spotlights, oodlights or halogen lights) which typically
give off high heat. Doing so may warp or damage plastic cabinet parts.
● Take care when xing wall brackets to the wall. Wall mounted equipment must not be grounded by metal within the
wall. Always ensure that there are no electrical cables or pipes in the wall before hanging bracket.
● To prevent fall and injury, remove the TV from its xed wall position when it is no longer in use for extended period of
time.
Quick Start Guide
Accessories / Options
7
Attaching / removing the pedestal
Warning
Do not disassemble or modify the pedestal.
● Otherwise the TV may fall over and become damaged, and personal injury may result.
Caution
Do not use any pedestal other than the one provided with this TV.
● Otherwise the TV may fall over and become damaged, and personal injury may result.
Do not use the pedestal if it becomes warped or physically damaged.
● If you use the pedestal while it is physically damaged, personal injury may result. Contact your local Panasonic
Quick Start Guide
dealer immediately.
During set-up, make sure that all screws are securely tightened.
● If insufcient care is taken to ensure screws are properly tightened during assembly, the pedestal will not be strong
enough to support the TV, and it might fall over and become damaged, and personal injury may result.
Ensure that the TV does not fall over.
● If the TV is knocked or children climb onto the pedestal with the TV installed, the TV may fall over and personal injury
may result.
Two or more people are required to install and remove the TV.
● If two or more people are not present, the TV may be dropped, and personal injury may result.
Accessories / Options
When removing the pedestal from the TV, do not remove the pedestal by the methods other than the specied
procedure. (See below)
● Otherwise the TV and / or pedestal may fall over and become damaged, and personal injury may result.
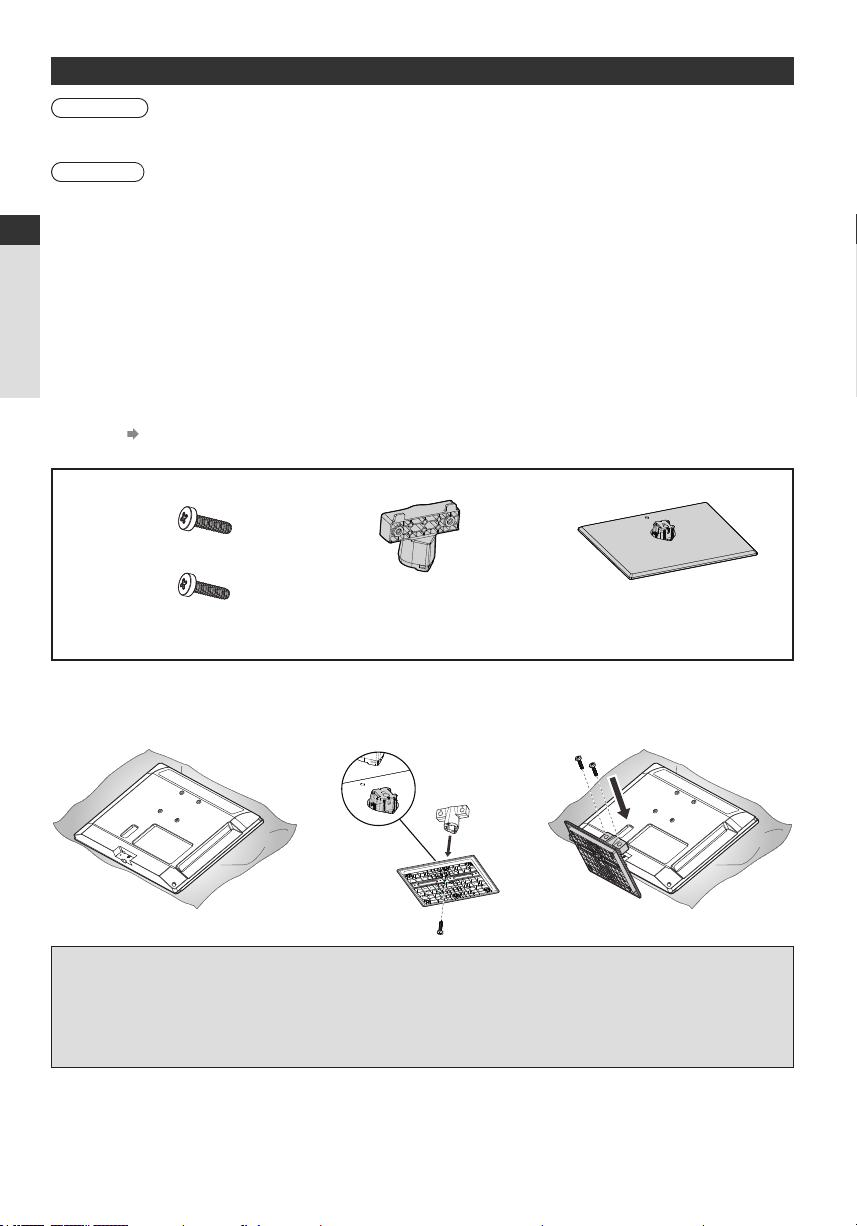
Assembly screws (3) Neck Base
M4 × 18
M4 × 18
Assembly screw for base (1)
Assembly screws for pedestal (2)
1 Place the TV screen face-down
on a cushioned, clean surface to
protect the screen from damages
and scratches.
Removing the pedestal from the TV
Be sure to remove the pedestal in the following way when using the wall-hanging bracket or repacking the TV.
2 Use the assembly screw for base
to fasten the neck to the base
securely.
3 Use the assembly screws for
pedestal to fasten the pedestal
securely to the TV.
1 Place the TV screen facing down on a at surface place where maintained with soft materials (such as a blanket)
for protecting the display screen.
2 Remove assembly screws for pedestal with screw driver.
3 Remove the pedestal from the TV.
8
Indicator / Control panel
Sound Menu 1/2
Mode
Music
Off
Off
Over 30cm
Bass
0
0
20
Treble
Balance
Headphone Volume
Surround
Auto Gain Control
Volume Correction
Speaker Distance to Wall
0
0
Page up
Page down
Select
EXIT
Change
RETURN
OK
BACK/
EXIT
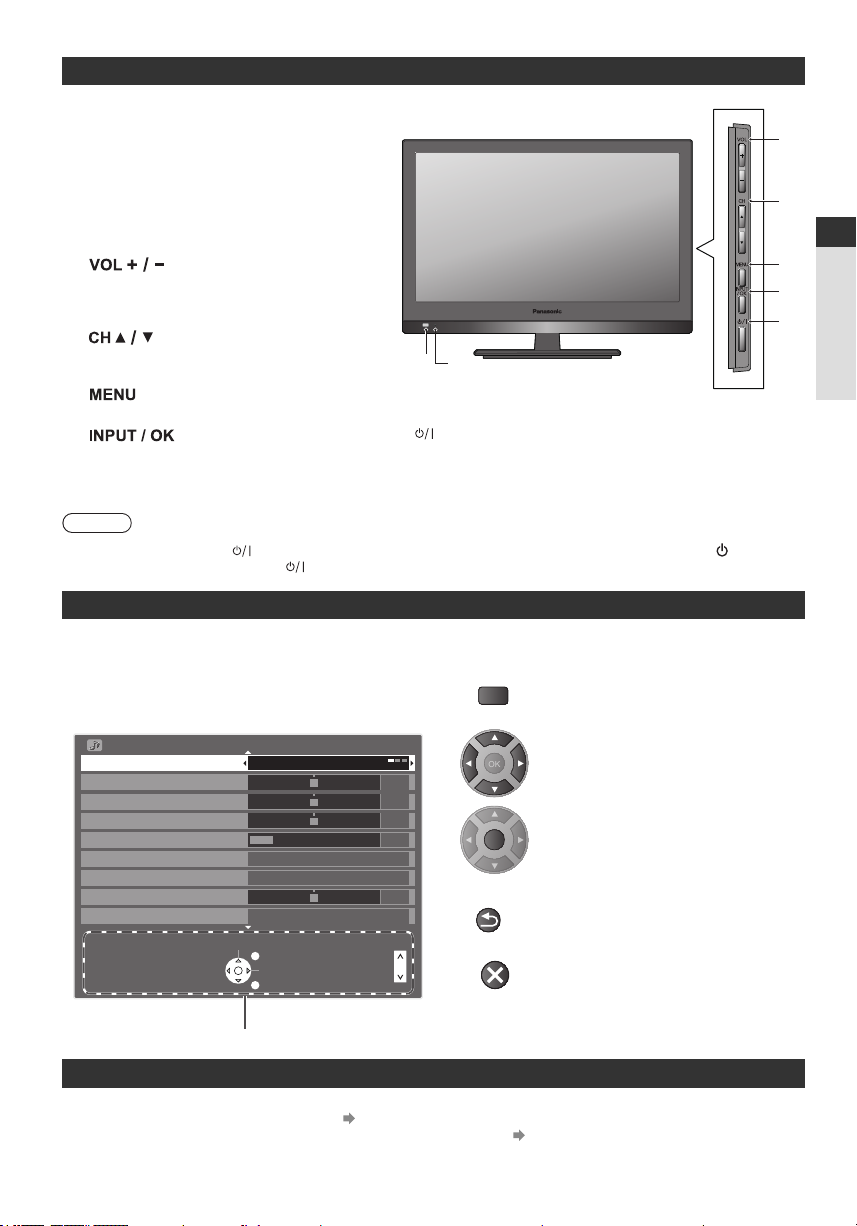
1 Remote control signal receiver
● Do not place any objects between the TV
remote control signal receiver and remote
control.
2 Power indicator
Red: Standby
Green: On
● The LED blinks when the TV receives a
command from the remote control.
3
● Changes volume.
● Adjusts the value of the selected item on the
On-Screen Display Menu.
4
● Changes channels.
● Selects item on the On-Screen Display Menu.
5
● Opens or closes the On-Screen Display Menu.
6
● Selects an input source.
● Conrms and enters a selection on the
On-Screen Display Menu.
1 2
7 (POWER)
● Switches TV on or off.
● To completely turn off the TV, please remove the mains lead
from the wall socket.
Note
● If the TV is turned off by (POWER) button on the side of the TV, you cannot switch TV power on by button of
the remote control. Please press (POWER) button again on the side of the TV to turn the TV on.
Using the On-Screen Displays - Operation guide
Many features available on this TV can be accessed via the On-Screen Display Menu.
Operation guide How to use remote control
Operation guide will help you to operate by using the
remote control.
Example: [Sound Menu]
MENU
OK
● Open the main menu
● Move the cursor / select from a
range of options / select the menu
item (up and down only) / adjust
levels (left and right only)
● Access the menu / store settings
after adjustments have been made
or options have been set
3
4
Quick Start Guide
5
6
7
Accessories / Options
Auto power standby function
The TV will automatically go into Standby mode in the following conditions:
• [Off Timer] is active in the [Setup Menu]. (p. 20)
• No operation is performed for the period selected in [Auto Standby]. (p. 21)
Operation guide
RETURN
● Return to the previous menu
● Exit the menu system and return to
the normal viewing screen
9
 Loading...