

Panasonic SR-TML500, SR-TML510, SR-TMS520 Service Manual
Order No. PAPTH140402CE
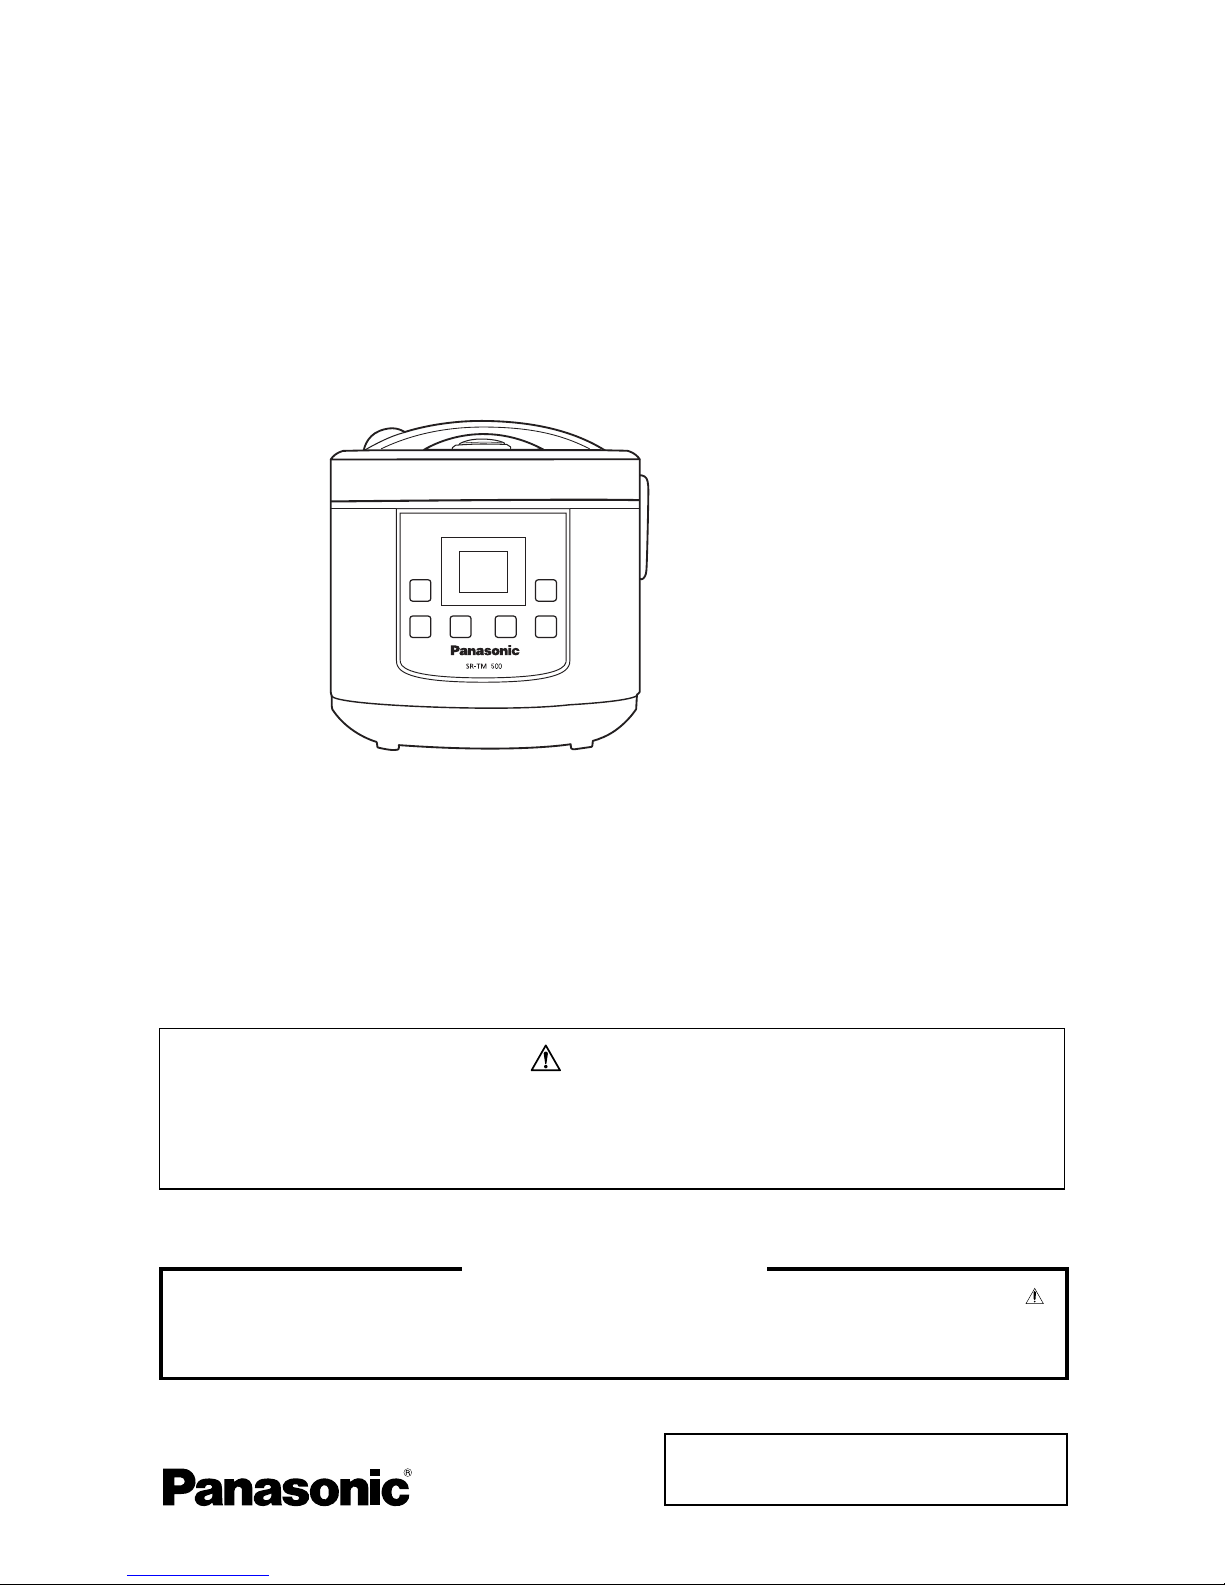
Service Manual
Multi-Cooker
SR-TML500
SR-TML510
SR-TMS520
© Panasonic Appliances (Thailand) Co., Ltd. 2014.
All rights reserved. Unauthorized copying and
distribution is a violation of law.
There are special components used in this equipment which are important for safety. These parts are marked by
in the Schematic Diagrams, Circuit Board Diagrams, Exploded Views and Replacement Parts List. It is essential that
these critical parts should be replaced with manufacturer’s specified parts to prevent shock, fire or other hazards. Do
not modify the original design without permission of manufacturer.
IMPORTANT SAFETY NOTICE
The service information is designed for experienced repair technicians only and is not designed for use by the general
public. It does not contain warnings or cautions to advise non-technical individuals of potential dangers in attempting
to service a product. Products powered by electricity should be serviced or repaired only by experienced professional
technicians. Any attempt to service or repair the product or products dealt within this service information by anyone
else could result in serious injury or death.
WARNING
Destination
Russia / Ukraine / Kazakhstan
Product Colour
Black (BO)
Silver (HS)
Dark Silver (HL)

- 2 -
CONTENT
Page
3
4
5
6 - 7
8
9
9
10
11
11
12
13
13
14
15
16 - 17
1. Specification
2. Schematic Diagram
2.1 Wiring Diagram
2.2 Circuit Diagram
3. Troubleshooting Guide
3.1 Table 1
3.2 Table 2
4. Testing Procedure
4.1 Bubbling Test
4.2 Evaporation Test
4.3 Heat reserving Test
5. Disassembly
5.1 Hinge cover removal
5.2 Inner enclosure and upper frame removal
5.3 Control unit A
5.4 Cast heater and Thermostat Ass’y
5.5 Side heater
6. Parts Exploded View and Replacement Parts List
6.1 Parts Exploded View : Body
6.2 Parts Exploded View : Packing
6.3 Replacement Parts List
SR-TML500 / SR-TML510 / SR-TMS520
- 3 -
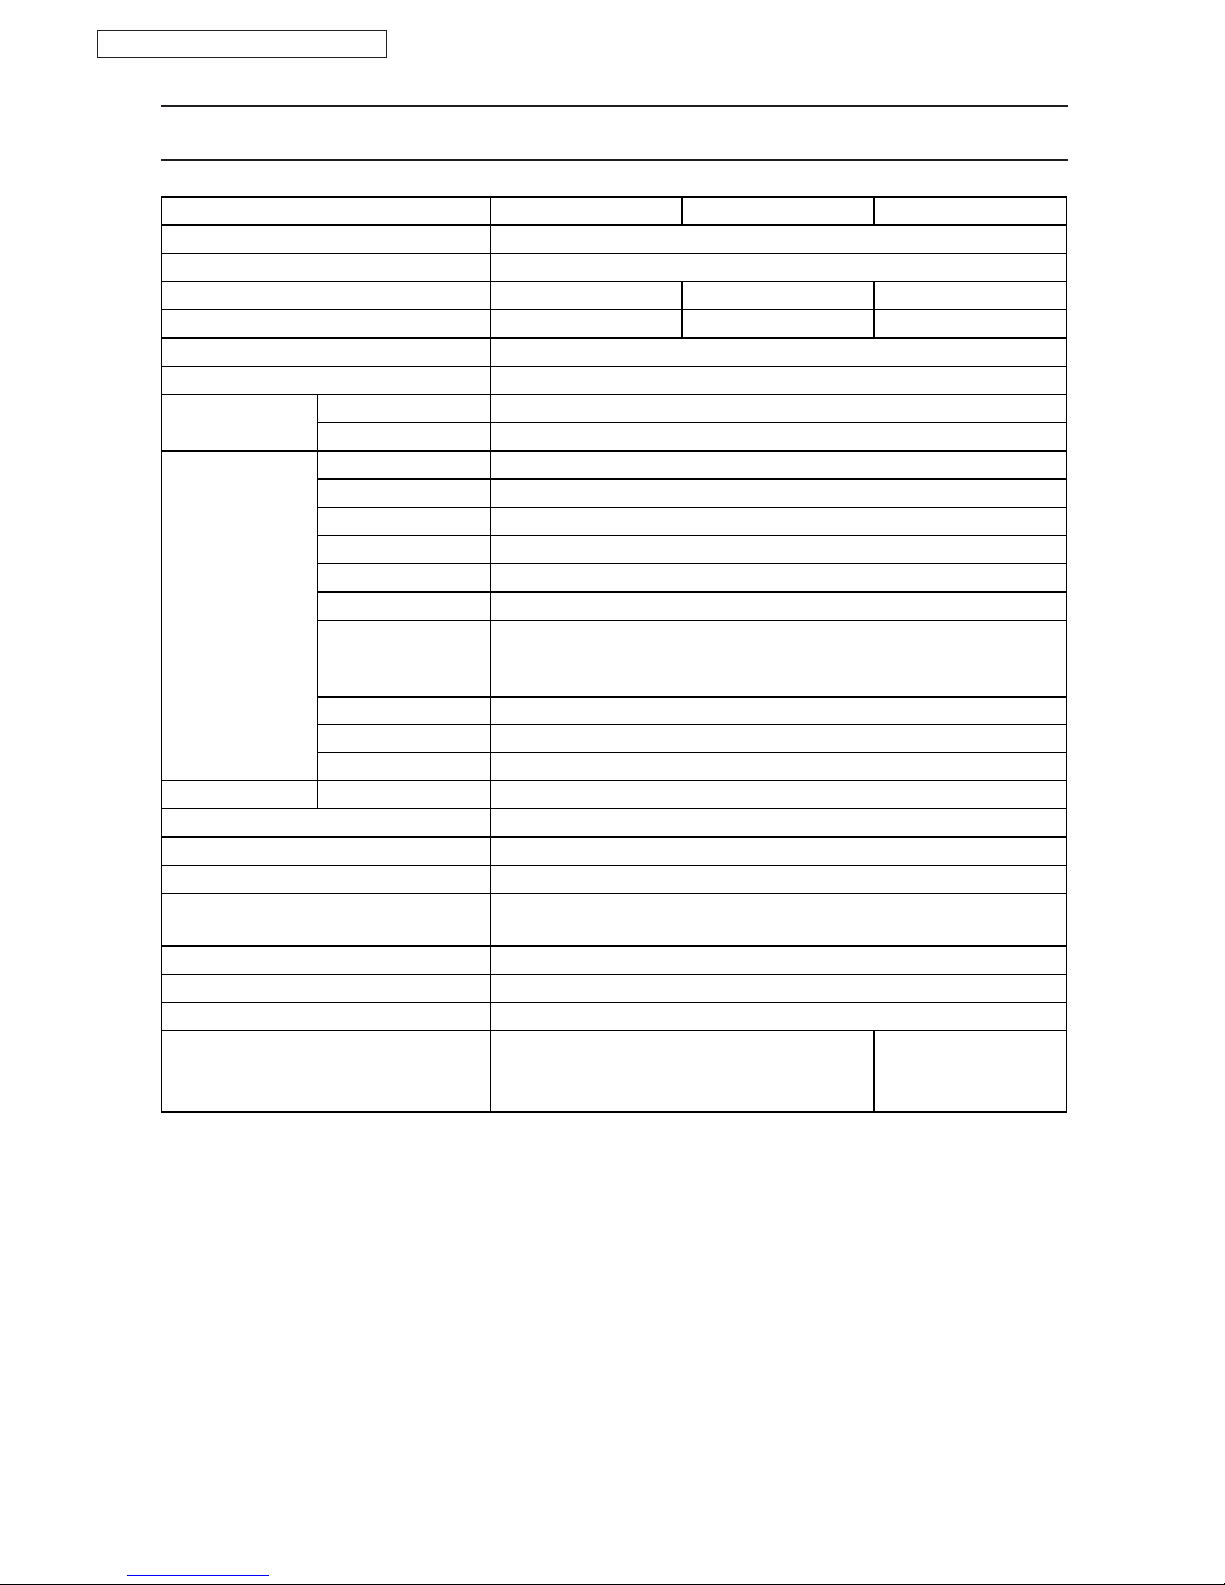
1. SPECIFICATION
MODEL
Countries
Power Supply
* For power cord replacement and product repairing, please contact the authorized service center of Panasonic.
* The design and specifications are subjected to change without prior notice.
SR-TML500 SR-TML510
Russia, Ukraine, Kazakhstan
220V / 50Hz / SH-3
Colour Name SilverDark Silver Black
HL BO
Measuring cup, Yogurt cup,
Steam basket assy,
Pan lid, Porridge scoop
Colour Code HS
Body Material Steel / Pre-coating
Pan Material Aluminium / Non stick coating
Power Consumption Cooking
Warming
Cooking Capacity Milk Porridge
Pilaf
Buckwheat
Yogurt
Baking
Fry
Stew / Soup / Compote
Holodetz / Stuffed /
Confiteur
670W
108W
1 ~ 2 cups
Warming Capacity
2 ~ 3 cups
2 ~ 8 cups
600 g.
900 g.
1.2 Kg.
4.0 L
Steam / Permeni
Plain Rice
4.0 L
Re-heat 1.0 L
Express 4.0 L
3 ~ 10 cups
Cooked rice warming Temperature 71°C ~ 79°C
Thermal fuse Specification 172°C 250V / 10A
Keep Warm (in Buckwheat function) 12 Hours
Weight (Approx.) 3.3 Kgs.
Power Cord (Approx.) 1.0 m.
Accessories Measuring cup, Steam basket assy
TheProduct Dimension
(Width x Depth x Height)
276 x 275 x 274 (mm)
Temperature Detector Sensor thermistor
SR-TMS520
SR-TML500 / SR-TML510 / SR-TMS520

- 4 -
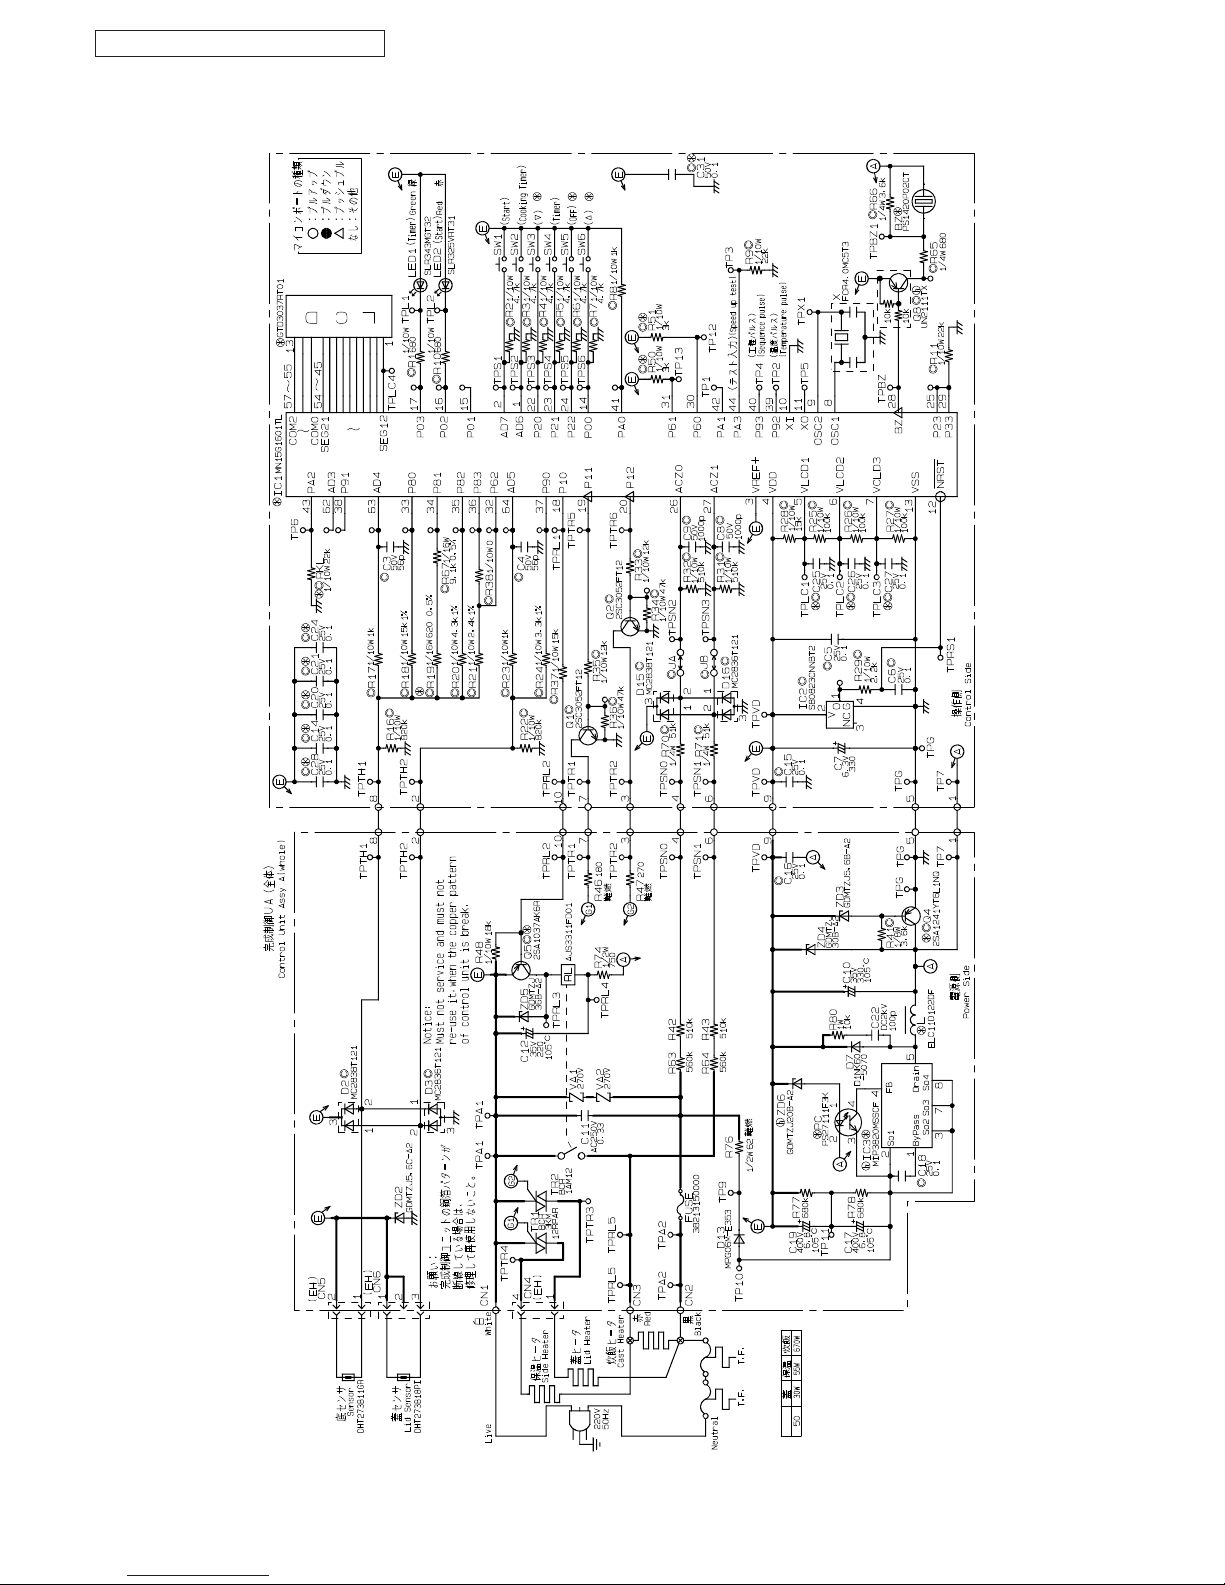
2. SCHEMATIC DIAGRAM
2.1 Wiring Diagram
Glass tape
size 40 X 85 mm
2
Inlet
Inlet
Shall be
closely covered with
tube to the bottom
Body earth lead wire (Green)
PCB lead wire A (White)
Thermal fuse lead wire B (Orange)
The glass tape affixes it from a
top and bottom direction, and
make it sealing up structure.
Impossible power do not be
added to a terminal joint.
5mm, or more
(Tape sealing area)
PCB lead wire B (Black)
Glass tape shall be
wraped around PCB
Thermistor lead wire (Red)
(Twisting 1 time)
Thermostat earth lead wire (Green)
Detail 2 : 1
Thermistor lead wire (Red)
Side heater lead wire A (Blue)
- Twisted vinyly tie 2 times.
- White, blue and black lead wire shall
not over lap PCB base boss.
- This blue wire shall be align in this portion.
Side heater lead wire D (White)
Side heater lead wire C (White)
Side heater lead wire B (Blue)
Terminal shall not be higher
than head of sems screw.
Side heater lead wire C (Black)
PCB lead wireC (Red)
Side heater lead wire D (Red)
Hinge earth lead wire (Green)
Tapping screw for body earth lead wire
Should be above Thermal fuse
lead wire A and then gose below
terminal of side heater lead wire D
Stamping earth
mark on PF.
5mm (around)
(Ø8)
- Twisted vinyly tie 2 times.
- All lead wire must not touch Cast heater terminal.
Thermal fuse
lead wire A (Black)
Thermostat earth lead wire (Green)
After twisted 2 times,
wind down this direction.
(Shall not touch Cast heater)
Vinyly tie
Lead wire
The clearance distance between terminal
& sems screw to other dead metal part
(Protecting frame, Cast heater pipe)
Should minimum 3.6 mm. (Any direction)
After inspection, screw head must be
mark with marker.
(Note) 1. Tightening torque of tapping screw for body earth lead wire and
sems screw for internal wiring : 60 ~ 120N - m
2. Each lead wire shall not contacting with sharp edges, moving parts,
high temperation portion.
3. All lead wire must not be hurt during assembly when apply 2N force.
Technical
Regulation
WARNING
Body earth lead wire
(Green)
Thermal fuse lead wire B (Orange)
PCB lead wire A (White)
SR-TML500 / SR-TML510 / SR-TMS520
- 5 -
SR-TML500 / SR-TML510 / SR-TMS520
2.2 Circuit Diagram
- 6 -
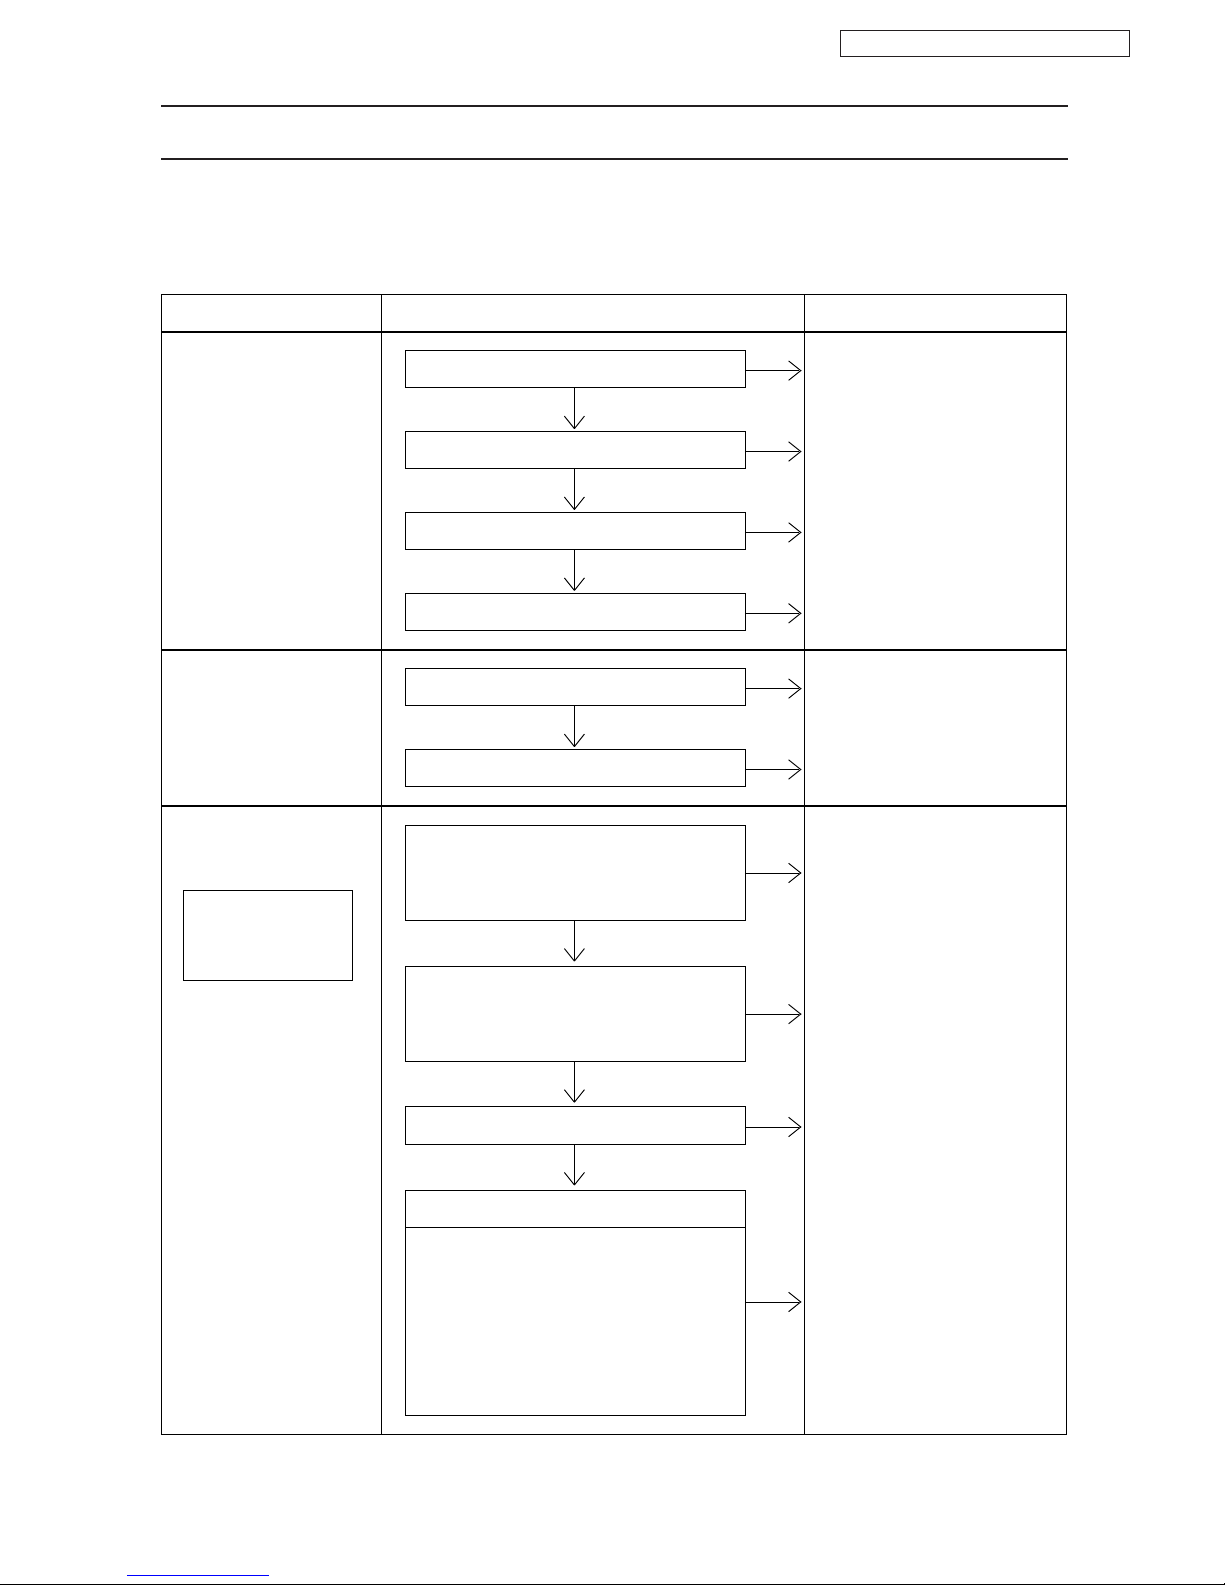
3. TROUBLESHOOTING GUIDE
3.1 Table 1
When receiving a rice boiler to be repaired, be sure to check that the main body is completely provide with the inner pan
and the inner lid, ask the condition (phenomenon) of the trouble in detail. Before troubleshooting single parts, be sure to
disconnect the power supply plug from the receptacle.
Condition
Rice boiling section
Plane rice.
• Rice is not boiling.
(The indicating lamp
does not come on)
• Rice is not boiling.
(The indicating lamp
is lit)
Troubleshooting Remedy
Is the power cord conductive?
• Replace the cord.
• Make sure insert therminal is
fasten.
• Replace the P.C.B. complete.
• Replace the P.C.B. complete.
• Replace the cast heater.
• Replace the center thermostat.
• Replace the inner pan or the
cast heater.
• Seeing at Table 2
• Explain the proper operation.
• Isolate the cause which melt
the thermal fuse, correct
the cause and
• Earlier cut off.
• Poor boiling up.
• Too hard
• Too soft
• Insufficient boiling
• Immediately after the switch is turned
off, open the cap.
• Rice is excessive or insufficient.
• Rice has not been scooped and mixed
well.
• Water is excessive or insufficient.
• The switch is turned off once during
boiling.
Is the pan bottom properly contacted with
the cast heater?
Yes
No
Is the thermal fuse conductive?
Yes
No
Is the therminal conductive?
Yes
Are the parts on the P.C.B. mistake?
Are the parts on the P.C.B. mistake?
Improper operation
No
Yes
No
Yes
Yes
Yes
No
Is the cast heater conductive?
Yes
No
Are the parts on the P.C.B. mistake?
(Check with the bubbling test).
Does the center thermostat operate
properly?
Yes
No
(Check with the operation test).
Yes
SR-TML500 / SR-TML510 / SR-TMS520
 Loading...