

Page 1
Operating
Instructions
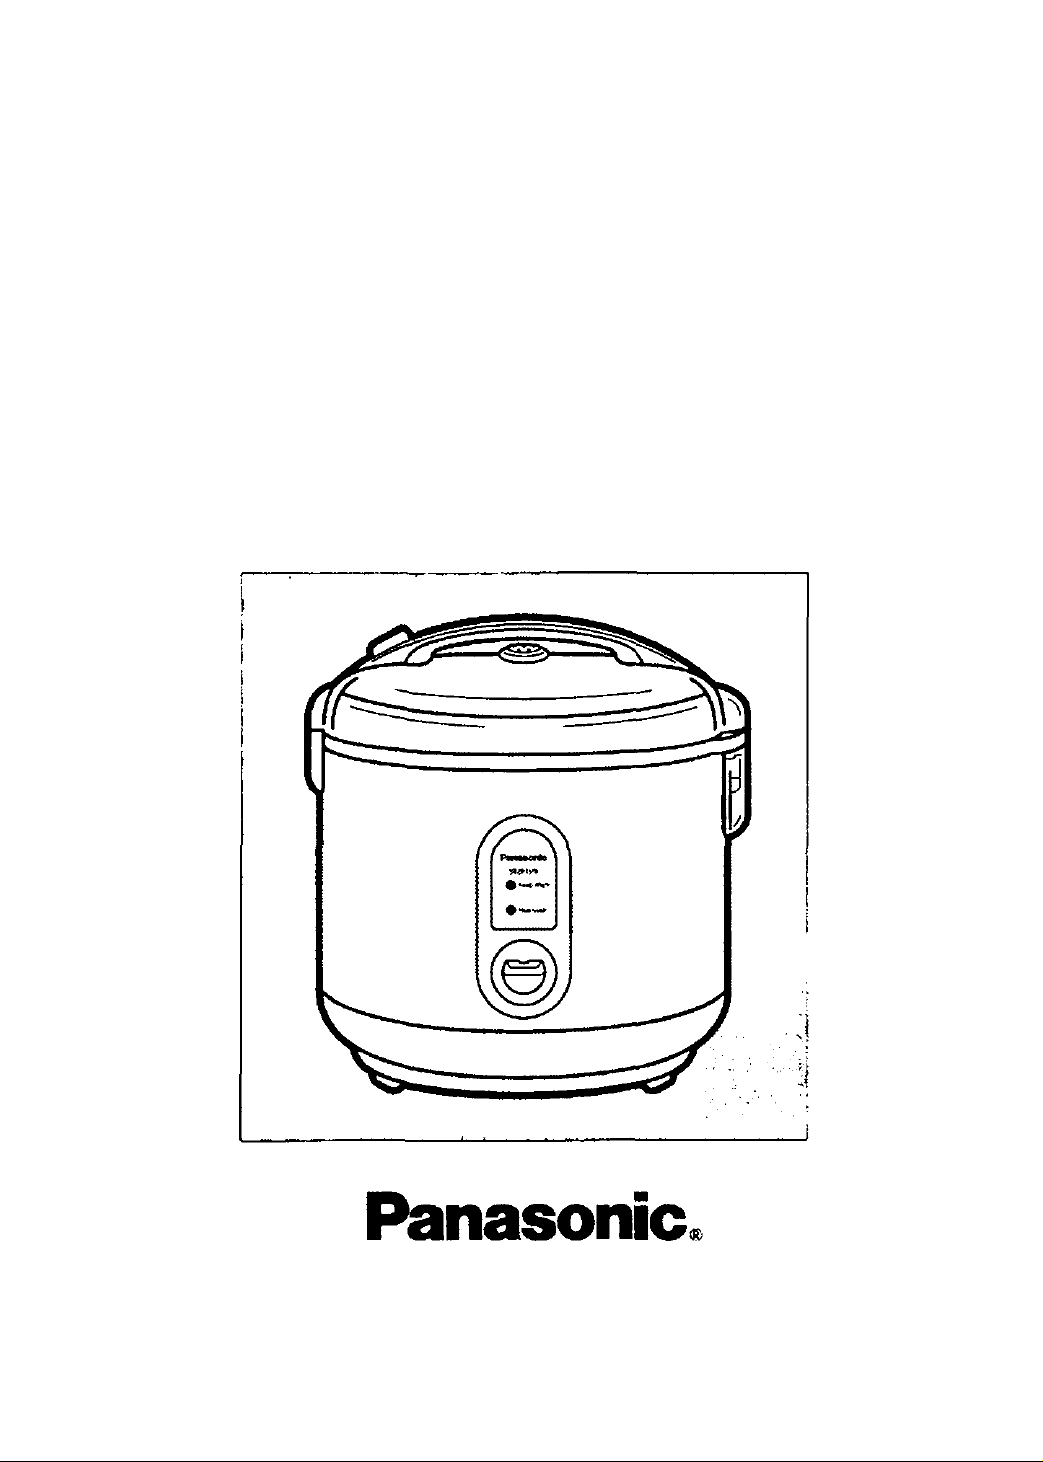
Electric Rice Cooker/Steamer
Olla eléctrica para cocer arroz y conservarlo caliente
SR-SH15PA
(PCP)
Before operating this unit, please read these instructions completely.
Antes de usar la marmita, lea estas instrucciones hasta el final.
Page 2

IMPORTANT SAFEGUARDS
When using electrical appliances, basic safety precautions should
always be followed including the following:
1. Read all instructions.
2. Do not touch hot surfaces. Use handles or knobs.
3. To protect against electrical hazards do not immerse cord, plugs,
and Rice Cooker, except lid and pan, in water or other liquid.
4. Close supervision is necessary when any appliance is used by or
near children.
5. Unplug from outlet when not in use and before cleaning. Allow to
cool before putting on or taking off parts.
6. Do not operate any appliance with a damaged cord or plug or after
the appliance malfunctions, or has been damaged in any manner.
Return appliance to the nearest authorized service facility for
examination, repair, or adjustment.
7. The use of accessory attachments not recommended by the
appliance manufacturer may cause hazards.
8. Do not use outdoors.
9. Do not let cord hang over edge of table or counter, or touch hot
surfaces.
10. Do not place on or near a hot gas or electric burner, or in a heated
oven.
11. Extreme caution must be used when moving an appliance
containing hot oil or other hot liquids.
12. Always attach plug to appliance first, then plug cord into the wall
outlet. To disconnect, turn any control to "off', then remove plug
from wall outlet.
13. Do not use appliance for other than intended use.
14. SAVE THESE INSTRUCTIONS
This product is intended for household use.
NOTE
A. A short power-supply cord (or cord set) is to be provided to reduce
the hazards resulting from becoming entangled in or tripping over
a longer cord.
B. Longer cord set or extension cords are available and may be used
if care is exercised in their use.
C. If a long cord set or extension cord is used,
(1) the marked electrical rating of the cord set or extension cord
should be at least as great as the electrical rating of the appliance.
(2) if the appliance is of the grounded type, the extension cord should
be a grounding-type three-wire cord, and
(3) the longer cord should be arranged so that it will not drape over
the countertop or tabletop where it can be pulled on by children
or tripped over accidentally.
This appliance has a polarized plug: (one blade is wider than the other).
As a safety feature, this plug will fit in a polarized outlet only one way.
If the plug does not fit fully in the outlet, reverse the plug.
If it still does not fit, contact a qualifies electrician.
Do not attempt to defeat this safety feature.
-1-
Page 3

CONTENTS______________________________________________________
CAUTIONS...............................................................................................................................3
PARTS IDENTIFICATION........................................................................................................4
HOW TO USE..........................................................................................................................5
HOW TO CLEAN......................................................................................................................6
TO KEEP COOKED RICE WARM AND TASTY......................................................................6
HOW TO STEAM FOOD..........................................................................................................9
SPECIFICATIONS.................................................................................................................. 11
CONTENIDO
_____________________________________________________
Precauciones...........................................................................................................................3
Identificación de las partes.......................................................................................................4
Como usar................................................................................................................................7
Como limpiar............................................................................................................................8
Para mantener el larroz cocido caliente y guostoso................................................................8
Forma de cocer al vapor alimentos
.......................................................................................
10
Spécifications..........................................................................................................................11
-2-
Page 4
ÍÍADTlONS'\:i.
• ' ''' ^ , r."-' ; -. • " K - r-, . : r, V' J •• * '.t j
PRÉdAÍ©IQNESÍ 1
iPlug into properly wired wall outlet. Before you plug
in, make sure the voltage of the unit is the same as
your local supply.
lEnchute en un tomacorriente de pared apropiadamente
alambrado. Antes de enchutatio asegúrese de que el
voltaje de la unidad es el mismo que el de la corriente
local.
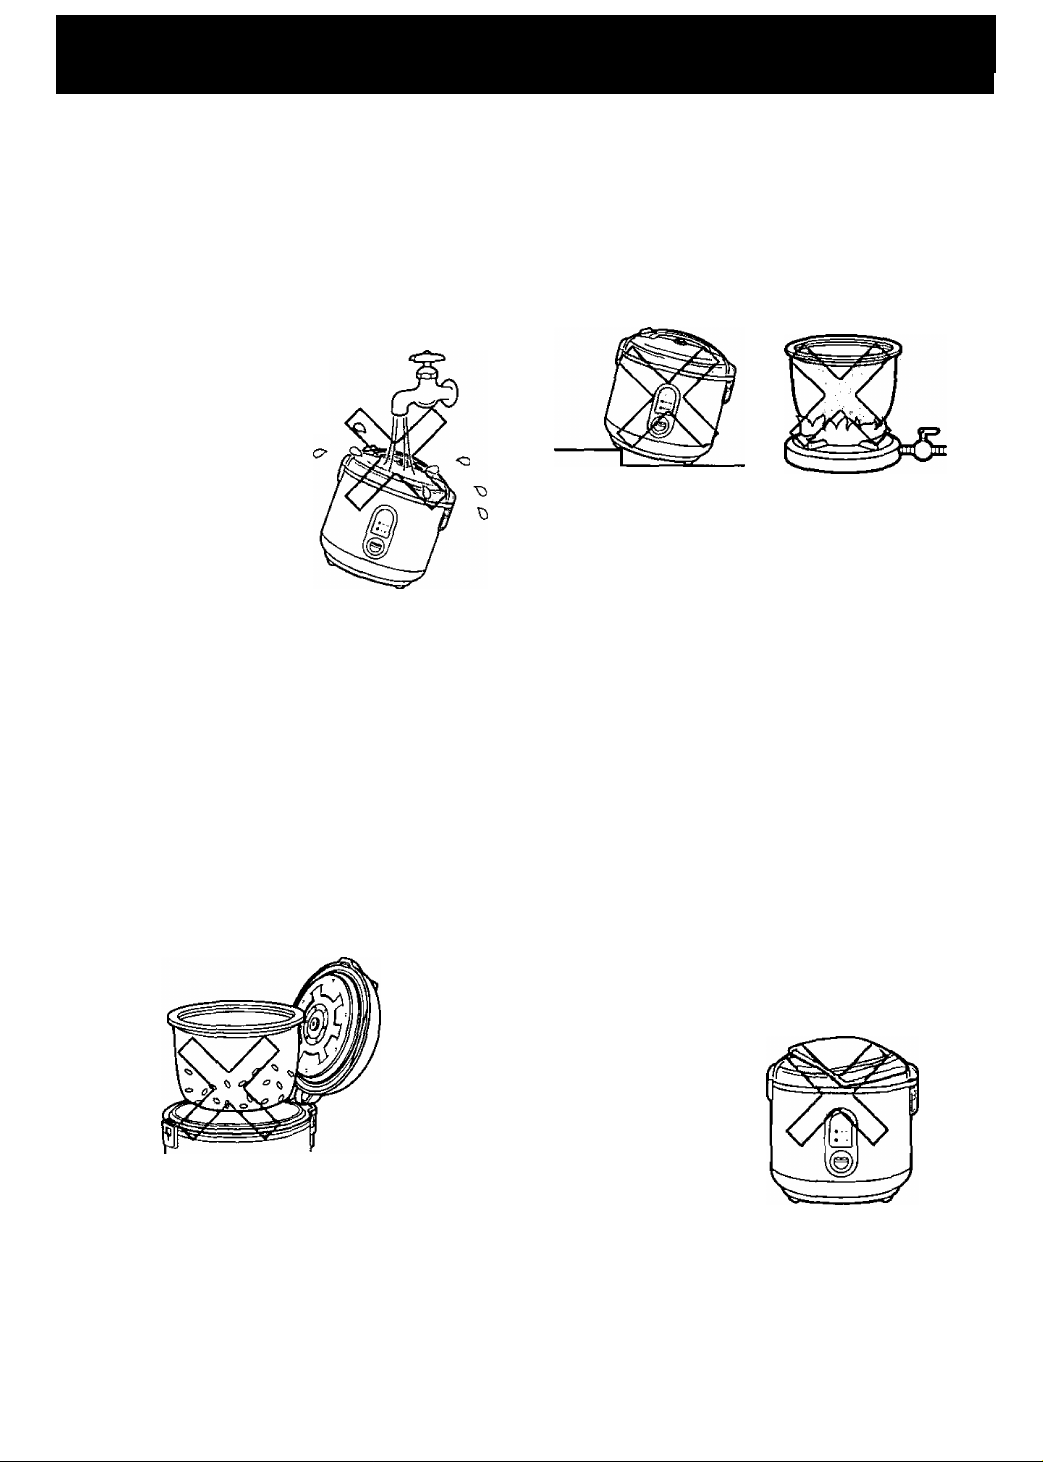
iDo not immerse the unit in water.
iNo sumerja la unidad en el agua.
iPaper located between the pan and the heating
plate should be removed before use.
lEI pape! ubicado entre la olla y la placa para calentar
debe ser removido antes de naar.
iSet the unit on a stable surface.
Do not expose to water, high humidity or heat
sources. Do not use the pan directly on an open flame,
electric burner or in a heated oven.
IColoque la unidad en una superficie estable.
No la exponga al agua, alta humedad o fuentes
de calor. No use la olla directamente sobre el fuege.
iDo not tilt the rice-cooker on its edge or place it
upside down with its power supply plug
connected, as this may cause damage. When
tilting or placing the rice-cooker upside down,
make sure to disconnect the power supply plug.
iNo incline la cocedora de arroz sobre su borde ni la
coloque el revés con su enchufe de alimentación
conectado, ya que podría provocar daños. Antes de
inclinar o colocar al revés la cocedora de arroz,
cercióreso de desconectar el enchufe de alimentación.
■Always keep the outside bottom of the pan and
the heating plate clean and dry. Any foreign
matter between them will cause your cooker to
malfunction.
■Mantenga siempre el londo exterior de la olla y la placa
para calentar limpias y secas. Cualquier material
extraño entre ambas causará el mal funcionamiento de
la olla eléctrica.
iBe sure to keep the cooker out of the reach of
children, especially when cooking.
Serious injury could occur if the unit tips over and
the hot contents are spilled.
Accidentally pressing the keys may stop the cooker.
lAsegárese de mantener la olla eléctricaf uera de!
alcance de los ñiños, especialmente al cocinar arroz.
Presionar accidentalmente la tecla suspenderla el
tuncionam ento de la olla eléctrica.
iThe cooker becomes hot when in use. Do not
cover the lid with your hand or place your face
directly over the steam coming from the cooker.
iLa olla se canienta cuando está en use. No cubra la
tapadera con su mano o coloque la cara directamente
sobre el vapor que sale de la olla eléctrica.
iDo not cover the lid with a cloth. The lid may
deform or change colour.
INo cubra la tapadera con una tera. La tapadera
paeria deformarse o cambiar su color.
-3-
Page 5

» PARTS IDENTIFICATION
I IDENTIFIGACiÓÑ DE LAS PARTES
/Г
Inner lid Тара interior
Dew collector Colector de rocío
¡Slide inner lid onto inner lid shaft. Face large
rubber lip of centre packing towards outer lid.
Small side of centre packing should face you
when outer lid is open.
iDeslice la tapadera interna en su eje. Coloque el
borde grande de caucho del envase central hecia
la tapadera externa. El lado pequene del envase
central debe colocurse hecia ueted cuando la
tapadera externa está abierto.
¡Hold the sides and remove/instali in the direction
of the arrows,
¡Remove and empty dew collector after every use.
¡Sostenga los lados y remueva/lnstale en la
dirección de la fiencha.
¡Hemueva y vasie el colector de rocío después
de cada uso
Scoop holder
Sujetapaleta
Accessories Accesorios
Measuring cup
(approx. 180 ml)
Taza medidora
(aprox. 180 ml)
Rice scoop
Paleta para
sacar el arroz
-4-
Lamparita calentando arroz
“Rice Cook" iamp
Lamparita cociendo arroz
Switch
Interruptor
/Л
:// Scoop holder
■ Sujetapaleta
Steaming
rack
Placa de
vapor
Page 6

HOW TO USE
2
3
4
Measure rice with the measuring
cup provided.
Rinse rice in a separate bowl
until the water becomes relatively
clear.
Place rinsed rice in the pan. Add water.
e.g. For 6 cups rice, add water to LEVEL INDICATOR 6.
LEVEL INDICATOR
MAXIMUM LEVEL
Do not cook with more than this level
of water.
Set the inner lid onto the outer lid.
Place the pan in the body.
Make sure that the pan is directly
in contact with the heating plate
by turning it slightly from right to
left until it seats properly.
Close the outer lid.
The lid is locked properly when it clicks.
Do not rinse rice in the rice
cooker pan.
I Adjust the quantity of water to
your personal taste.
Wipe the surface of the pan
before use. If it is wet, it may
cause noise while cooking.
It may also damage the unit.
If outer fid is not securely closed,
cooking will be affected.
Do not open the outer lid when
in use.
5
6
7
Plug in.
Immediately press the switch. The “Rice Cook” lamp tells
you when cooking has started.
When rice is cooked, the switch will pop up,
“Keep Warm" lamp lights to indicate
“Keep Warm" function is working.
w
After switch pops up, leave the lid closed for at least
15 minutes to steam rice.
-5-
Do not plug in until you get ready
to cook. Otherwise, rice may be
ruined.
If pan is not in the cooker, cooking
will not begin.
“Keep Warm” function
continues until the unit is
unplugged.
Page 7

How TO CLEAN
Unplug the unit before cleaning.
1. Soak the pan and the inner lid in lukewarm water and wash with a sponge.
2. Wipe the body with a damp cloth. Do not immerse the unit in water.
3. The dew collector should be removed and cleaned after every use.
Do not use abrasive cleaners or steel wool. Clean with a non-metal brush or sponge.
Non-Stick coated pan
Use a sponge to clean the pan.
Use a plastic or wooden rice scoop: not metal utensils may damage the surface of the pan.
The non-stick coating may discolour after long use.
This will not affect the non-stick coating or cleanliness of the pan.
Wash the cooker immediately after cooking with any seasoning.
TO KEEP COOKED RICE WARM AND TASTY
Rinse the rice thoroughly, in a separate bowl, until the water becomes relatively clear. Excess starch is
removed during rinsing.
Using Keep Warm function for more than 5 hours may cause discoloration or an objectionable odor
in the rice.
If quantity of rice to be kept warm is less than 4 bowls the rice will gradually dry out and lose taste.
Utensils left in the pan during Keep Warm may affect the smell and taste of the rice.
-6-
Page 8

COMO USAR
1
2
3
4
Medir el arroz con la taza medidora
incluida. Una taza de arroz crudo
proporciona aproximadamente
3 tazas de arroz cocido.
Lavar el arroz en otro recipiente
hasta que el agua se vuelva
relativamente clara.
Introduzca el arroz lavado en el recipiente. Añada agua.
P. ej., Para cocinar 6 tazas de arroz y añada agua hasta
"6" de la INDICACIÓN DE NIVEL DE AGUA.
INDICADOR DE NIVEL
NIVEL MAXIMO.No
cocer mas de esta cantidad
Coloque la olla en la base. Asegúrese de
que la olla está directamente en
contacto con la placa para calentar,
girándola ligeramente de derecha
a izquierda hasta que ésta se
asiente correctamente.
Cierre la tapadora externa.
Asegúrese de cerrar hasta suene.
No lave el arroz en el recipiente
de la olla, ya que el
revestimiento que no se pega
se puede dañar.
[Ajuste la cantidad de agua
a su gusto.
¡Seque la superficie de la olla
antes de usar. Si está
mojada, podría causar ruido
mientras cocina. También
podría dañar la unidad.
ISi la tapadera externa no
está firmemente cerrada, la
cooclón se atectará.
¡No levante la tapadera
externamintras está en uso.
______
5
6
7
Enchufar al suministro
de fuerza.
Inmediatamente presione el interruptor, La lámpara de ia
Olla Eléctrica le indica cuando ha empezado a cocinar.
Cuando el arroz está hecho, el interruptor saitará hacia arriba.
La lámparo de Mantener Tibio {Keep Warm)
se enciende para indicar que esa función
está en operación. ^ '
Después que el interruptor se mueva hacia arriba, dejar la
marmita cubierta durante unos 15 minutos para que el arroz
se sature de vapor.
% >
¡No conectar hasta que el arroz
esté listo para cocer.
De otra manera puede
deteriorarse.
ISi el recipiente on está dentro
de la marmita, no comenzará
la cocción.
¡La función de Mantener
Tibio (Keep Warm) continúa
hasta que se desconecte.
Page 9

COMO LIMPIAR
Desenchufar antes de hacer la limpieza.
1. Remueva y limpiee el colector de rodo después de cada uso.
2. No sumergir la marmita en el agua. Fregarla con un paño húmedo.
3. El colector de roció y el sostén del cucharón deben sser removidos y limpiados después de cada uso.
No usar detergentes abrasivos o estropajos metálicos. Limpiar con un cepillo no metálico o con una esponja.
Olla con revestimiento de teflón.
lUse una esponja para limpiar.
¡Use un cucharón de arroz de plastico o de madera, no utensilios de metal que pudieran dañar
la superficie de la olla.
|EI revestimiento de teflon podria descolorarse después de largo uso. Esto no atectará su
propiedad sanitaria o de no pegarse.
PARA MANTENER EL LARROZ COCIDO
CALIENTE Y COSTOSO
lEnjuague el arroz con agua rápida y cabalmente. El afrecho so remueve el enjuagado.
lUsar la función de Mantener Tibio (Keep Warm) por más de 5 horas podria causar el
descoloramiento y un olor objetable en el arroz.
ISila contidad de arroz para mantener tibio es menor de : 4 Tazas llenas
el arroz gradualmente se secará y perderá eabor.
iLos utensilios dejados dentro de la olla mientras se mantiene tibio podria
afectar el color y el sabor del arroz.
-8-
Page 10

How to Steam Food
Measure 2 cups of water with the
measuring cup provided.
Then put the water into the pan.
2
3
4
Place the steaming rack into the pan.
Then put the food to be steamed on the
steaming rack, or place the contents to be
steamed in a bowl and place the bowl on
the steaming rack.
Attach the inner lid onto the outer lid.
Place the pan inside the body.
Make sure that the pan is directly in
contact with the heating plate by
turning it slightly from right to left
until it seats properly.
Close the outer lid.
The lid is locked property when it clicks.
Cooking time may be varied
according to personal preference.
Less water means the unit will
switch off sooner. To lengthen
cooking time, add 1 tbsp (15 ml)
more water.
Wipe the surface of the pan
before use. If it is wet, it may
cause noise while cooking.
It may also damage the unit.
If the outer lid is not securely
closed, cooking will be affected.
Do not open the outer lid when
in use.
5
6
7
Connect the AC cord.
Press the switch immediately.
The “Rice Cook” indicator lamp will turn on to show the
cooking (steaming) process has started.
Time the cooking manually.
The unit will automatically switch to Keep Warm should
water evaporate.
‘Remember that foods will continue to cook on Keep Warm.
There must be water in the pan.
Turn off the cooker by unplugging.
Remove foods, then the steaming rack,
and finally pour off the water.
-9-
Do not plug in until you get
ready to cook. Otherwise, food
may be ruined.
If the pan is not in the cooker,
cooking will not begin.
Remove and clean the dew
collector and steaming rack
after every use.
Page 11

■ nrnia Hip i
&
Ul I Md
^7-^, .c
- ■ : ■ -..r ■ Ti i'
Mida 2 tazas de agua con la taza de medir suministrada.
1
Luego coloque el agua en la olla.
2
b/Uoui cii VdUl
A/Phi
. . .. 1 .
r ia 1 i rn ¿ n tHc ^ i
dillMcillUo: ;
■■ ■■ ''i'-,
V. -f ’. ■ . /
El tiempo de cocción puede variar
de acuerdo con los gustos
personales.
Cuanto menos agua haya, más
pronto se desconectará la
alimentación de la unidad.
Para prolongar el tiempo de
cocción, añada 1 cucharada
(15 mi) más de agua.
3
4
5
6
Coloque la olla en la base. Asegúrese de
que la olla está directamente en
contacto con la placa para calentar,
girándola ligeramente de derecha
a izquierda hasta que ésta se
asiente correctamente.
Cierre la tapedora externa.
Asegúrese de cerrar hasta suene.
El indicador de "cocción del arroz" le
señalará que se ha iniciado la cocción.
Controle manualmente la cocción.
‘La unidad cambiará automáticamente a mantenimiento
EN CALIENTE si se evapora el agua.
‘Recuerde que la comida seguirá cocinándose en el modo
de mantenimiento EN CALIENTE.
En la marmita deberá haber agua.
I Seque la superficie de la olla
antes de usar. Si está
mojada, podria causar ruido
mientras cocina. También
podría dañar la unidad.
1
Si la tapadera externa no
está firmemente cerrada, la
cocción se atectará.
_____
I No levante la tapadera
externam intras está en uso.
1 No conectar hasta que el arroz
esté listo para cocer.
De otra manera puede
deteriorarse.
ISi el recipiente on está dentro
de la marmita, no comenzará
la cocción.
7
Desenchufe la cocedora de arroz/al vapor.
Quite los alimentos, después el plato de
cocción al vapor, y finalmente vierta
el agua.
-10-
iHemueva y limpie el colector de
rdcio y la placa de vaporización
daspués de cada uso.
Page 12

Power supply
Power
consumed
Capacity
Dimensions (HXWXD)
(approx.)
Weight (approx.)
Accessories
at Rice Cook
at Keep Warm
SR-SH15PA
120V AC
630 W
25 W
0.36-1.5 L
10Vz”X11"XlO>A"
(26.5X28.0X27.5 cm)
3.1 kg(7'Albs.)
rice scoop, scoop holder, measuring cup, steaming rack (optional)
№ de modelo
Alimentación 120V CA
Consumo
en Cocinera de Arroz
en Marrlener Tibio
Capacidad
Dimensions (AlXAnXPrí)
(aprox.)
Peso (aprox.)
Accesorios
SR-SH15PA
630 W
25 W
0,36-1,51
10'A”XirxiCPA"
(26,5X28,0X27,5 cm)
3.1 kg(7'Albs.)
Paleta para sacar el arroz, Support de cuiller sujetapaleía, Taza medidora. Placa de vapor (opción)
Panasonic Consumer Electronic Company,
Division of Matsushita Electric Corporation of America
One Panasonic Way Secaucus, New Jersey 07094
Printed in Thailand
RZ19A509
AP9905-1069
 Loading...