

Panasonic SC-AP01 Owner Manual
P
PC
Getting started
Reference Network settings
Operations
Owner’s Manual
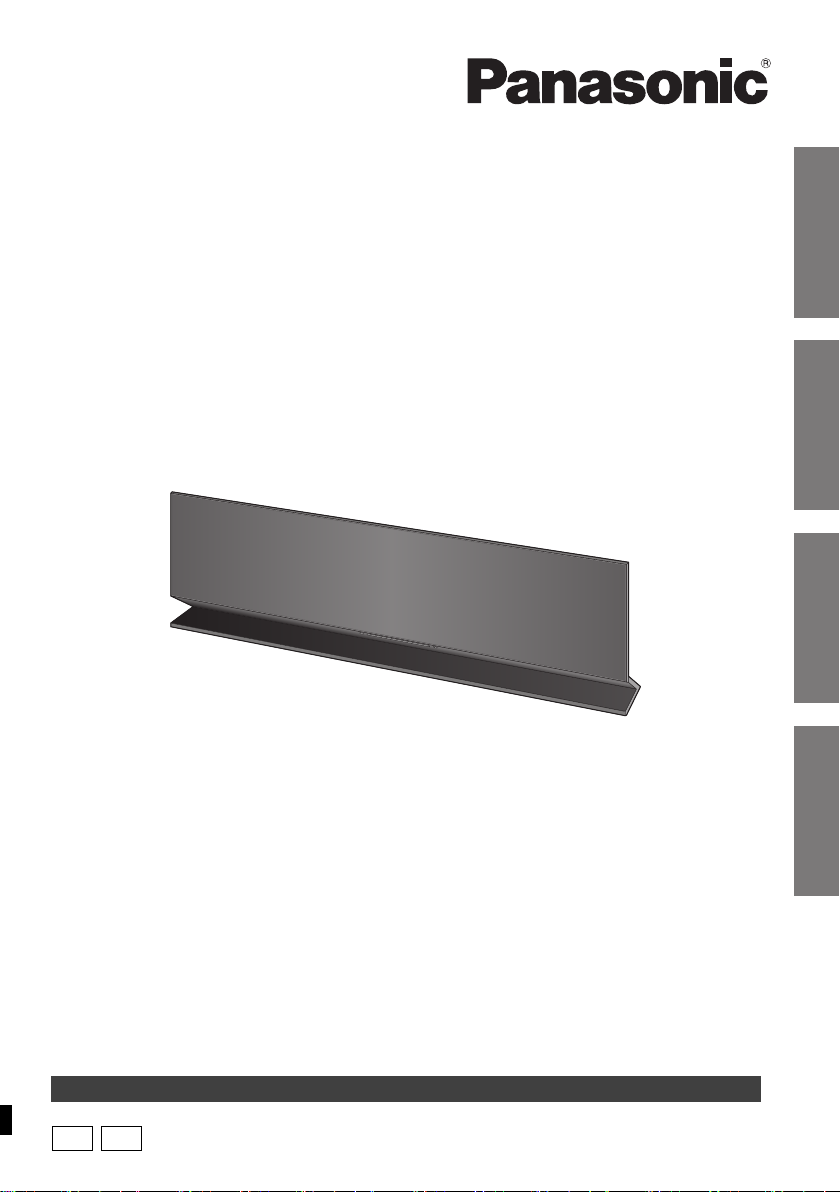
Compact Stereo System
Model No. SC-AP01
Thank you for purchasing this product.
For optimum performance and safety, please read these instructions carefully.
Please keep this manual for future reference.
If you have any questions, contact:
U.S.A. and Puerto Rico: 1-800-211-PANA (7262)
Canada: 1-800-561-5505
La referencia rápida en español se puede encontrar en la página 15 - 17.
RQT9655-1P

IMPORTANT SAFETY INSTRUCTIONS
WARNING CAUTION
Unit
≥ To reduce the risk of fire, electric shock or product
damage,
– Do not expose this unit to rain, moisture, dripping or
splashing.
– Do not place objects filled with liquids, such as vases,
on this unit.
– Use only the recommended accessories.
– Do not remove covers.
– Do not repair this unit by yourself. Refer servicing to
qualified service personnel.
AC adaptor
≥ Install this unit so that the AC adaptor can be unplugged
from the socket outlet immediately if any problem
occurs.
Unit
≥ Do not place sources of naked flames, such as lighted
candles, on this unit.
Placement
≥ To reduce the risk of fire, electric shock or product
damage,
– Do not install or place this unit in a bookcase, built-in
cabinet or in another confined space. Ensure this unit
is well ventilated.
– Do not obstruct this unit’s ventilation openings with
newspapers, tablecloths, curtains, and similar items.
AC adaptor
This AC adaptor operates on AC between 100 V and
240 V.
But
≥ In the U.S.A. and Canada, the AC adaptor must be
connected to a 120 V AC power supply only.
≥ When connecting to an AC supply outside of the U.S.A.
or Canada, use a plug adaptor to suit the AC outlet
configuration.
Product Identification Marking is located on the bottom
of the unit.
2
RQT9655
Getting started
Unit care
Pull out the AC adaptor from the outlet before
maintenance.
∫ Clean this unit with a soft, dry cloth
≥ When the unit is very dirty, wring a cloth
moistened in water tightly to wipe the dirt, and
then wipe it with a dry cloth.
≥ When cleaning the speaker covers, use a fine
cloth. Do not use tissues or other materials
(towels, etc.) that can fall apart. Small grains may
get stuck inside the speaker cover.
≥ Never use alcohol, paint thinner or benzine to
clean this unit.
≥ Before using a chemically treated cloth, carefully
read the instructions that came with the cloth.
Table of contents
IMPORTANT SAFETY INSTRUCTIONS............ 2
Getting started
Unit care............................................................. 3
Licenses............................................................. 3
Accessory .......................................................... 3
About this product ............................................ 4
Control reference guide.................................... 4
Connections ......................................................5
Network settings
Network settings ...............................................6
Operations
∫ To dispose or transfer this unit
The unit may keep the user settings information in
the unit. If you discard this unit either by disposal or
transfer, then follow the procedure to return all the
settings to the factory presets to delete the user
settings. (> 13, “To return all settings to the factory
preset”)
≥ The operation history may be recorded in the
memory of this unit.
Licenses
AirPlay, the AirPlay logo, iPad, iPhone, and iPod touch
are trademarks of Apple Inc., registered in the U.S. and
other countries.
The Wi-Fi CERTIFIED Logo is a certification mark of
the Wi-Fi Alliance.
The Wi-Fi Protected Setup Mark is a mark of the Wi-Fi
Alliance.
“Wi-Fi”, “Wi-Fi Protected Setup”, “WPA” and “WPA2”
are marks or registered marks of the Wi-Fi Alliance.
Using AirPlay with this unit’s speakers .......... 9
Using the remote control app ........................10
Others............................................................... 12
Reference
Troubleshooting.............................................. 13
Specifications.................................................. 14
Spanish Quick Reference /
Referencia rápida en español
Conexiones.....................................................15
Ajustes de red ................................................15
Uso de AirPlay con los altavoces
de esta unidad .............................................17
Limited Warranty (ONLY FOR U.S.A. AND
PUERTO RICO)............................................. 18
Limited Warranty (ONLY FOR CANADA)....... 19
Accessory
Check the supplied accessory before using this
unit.
∏ 1 AC adaptor
(RFEA228C-AG)
≥ Product numbers provided in this Owner’s Manual are
correct as of February 2012. These may be subject to
change.
3
RQT9655
About this product
VOLUM E
231
564
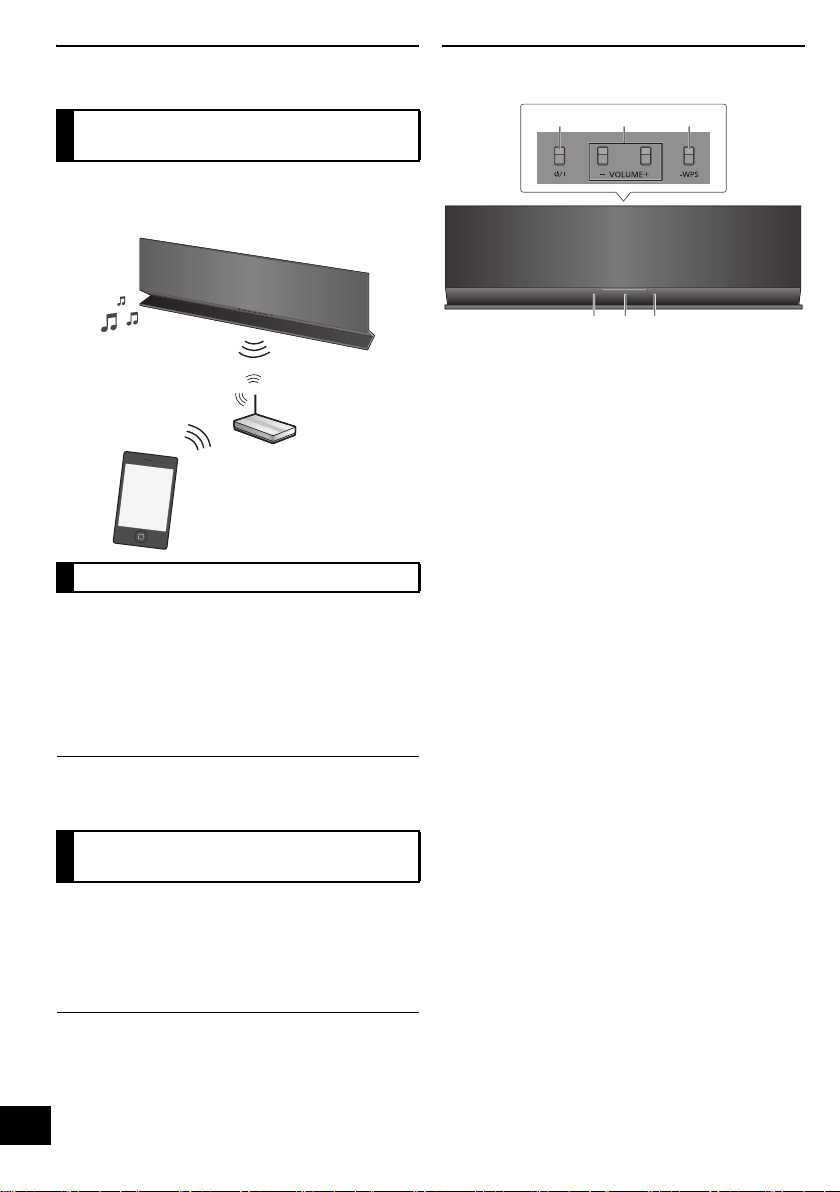
Listening to music with
AirPlay
With this product, you can wirelessly stream music
from the compatible device (> below) to this unit’s
speakers.
Compatible devices
AirPlay works with;
≥ iOS 4.2 or later
jiPod touch (2nd, 3rd, and 4th generation),
jiPhone 4S, iPhone 4, iPhone 3GS,
jiPad 2, iPad
≥ iTunes 10.2 or later
jMac / PC
≥ Please be aware that Panasonic accepts no
responsibility for the loss of data and/or information.
(as of February 2012)
Control reference guide
1 Standby/on switch [Í/I]
Press to switch the unit from on to standby mode or
vice versa.
In standby mode, the unit is still consuming a small
amount of power.
2 Adjust the volume
3 WPS pairing button
4 Power on indicator
5Wi-Fi
6 Operation indicator
®
status indicator
Operations with the remote
control app
It is possible to adjust the volume, turn this unit on
or switch it to standby mode, and adjust various
other features from the screen of your iPhone or
iPod touch.
Install this specific application onto your iPhone or
iPod touch to use this unit. (> 10)
≥ This application is specially made for iPhone and iPod
touch.
4
RQT9655
Getting started
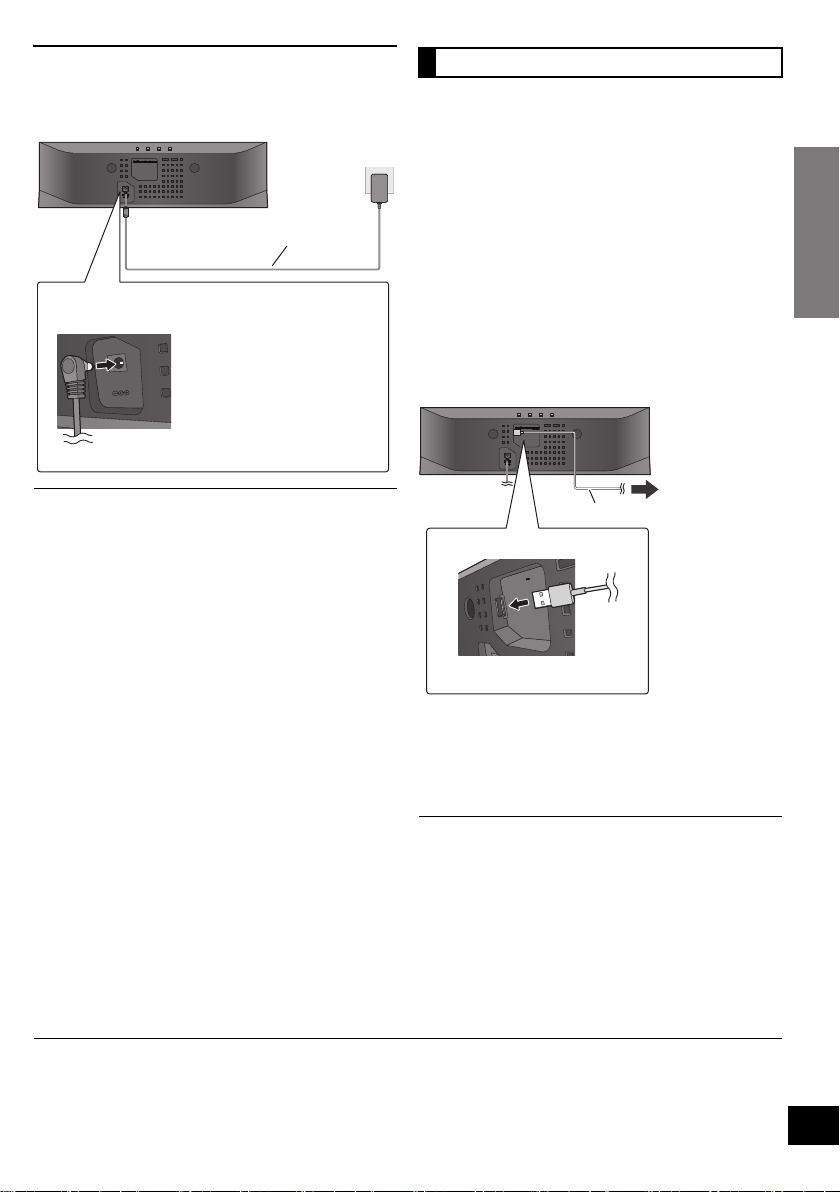
Connections
DC IN 12V
This system consumes a small amount of AC
power (> 14) even when turned off.
≥ When leaving the product
unused for a long time, turn off
the unit and pull the AC
adaptor out of the household
AC outlet for power saving.
AC adaptor (supplied)
(DC IN 12 V)
DC OUT/SORTIE C.C.
5V 2.1A MAX
To the
compatible
device
USB cable*
1
(DC OUT 5 V, 2.1 A MAX)
Connect the AC adaptor to the household AC
outlet.
≥ Do not use any other AC adaptors except the supplied
one.
≥ These speakers do not have magnetic shielding. Do not
place them near a television, personal computer or other
devices easily influenced by magnetism.
≥ When moving this unit, be sure to remove the USB cable
and turn this unit to standby mode.
Charging from the USB port
When this unit is turned on and a portable music
player that is compatible to USB charging is
connected to this unit’s USB port, charging will start
automatically.
≥ It is not possible to play back the music on the
connected device from this unit’s speakers or
operate the device from this unit through this
connection.
≥ Refer to the operating instructions of the device
for details about charging.
Preparation
Turn this unit on.
1 Connect the compatible device to this unit
with an appropriate USB cable.
≥ Refer to the connected device to check if the
device is fully charged.
2 Once fully charged, remove the USB
cable from this unit.
≥ There is no charging during standby mode.
≥ This unit is capable of charging up to a load of 2.1 A.
≥ When fully charged, this unit will not stop the charging
automatically. Remove the USB cable from this unit once
the connected device is fully charged.
*1: The USB cable is not supplied with this unit. Use the USB cable that is supplied with the compatible device. If a USB
cable is not supplied with the device, be sure to use an appropriate USB cable.
Refer to the operating instructions of the device for details about the appropriate USB cable.
5
RQT9655
Network settings
Lights red
Blinks blue
To use the AirPlay function, this unit must join the
same wireless network as the compatible device.
(> 4)
1 Press [Í/I] to turn the unit on.
≥ Only the power on indicator lights when the wireless
network is not set.
2 Check which type of wireless network
router you are using.
∫ “Method 1” :
If your wireless network router supports WPS
(Wi-Fi Protected Setup
∫ “Method 2” :
If your wireless network router does not support
WPS (Wi-Fi Protected Setup
≥ Refer to the operating instructions of the wireless
network router for details.
If you do not know which type of wireless network
router you are using, use “Method 2”.
TM
).
TM
).
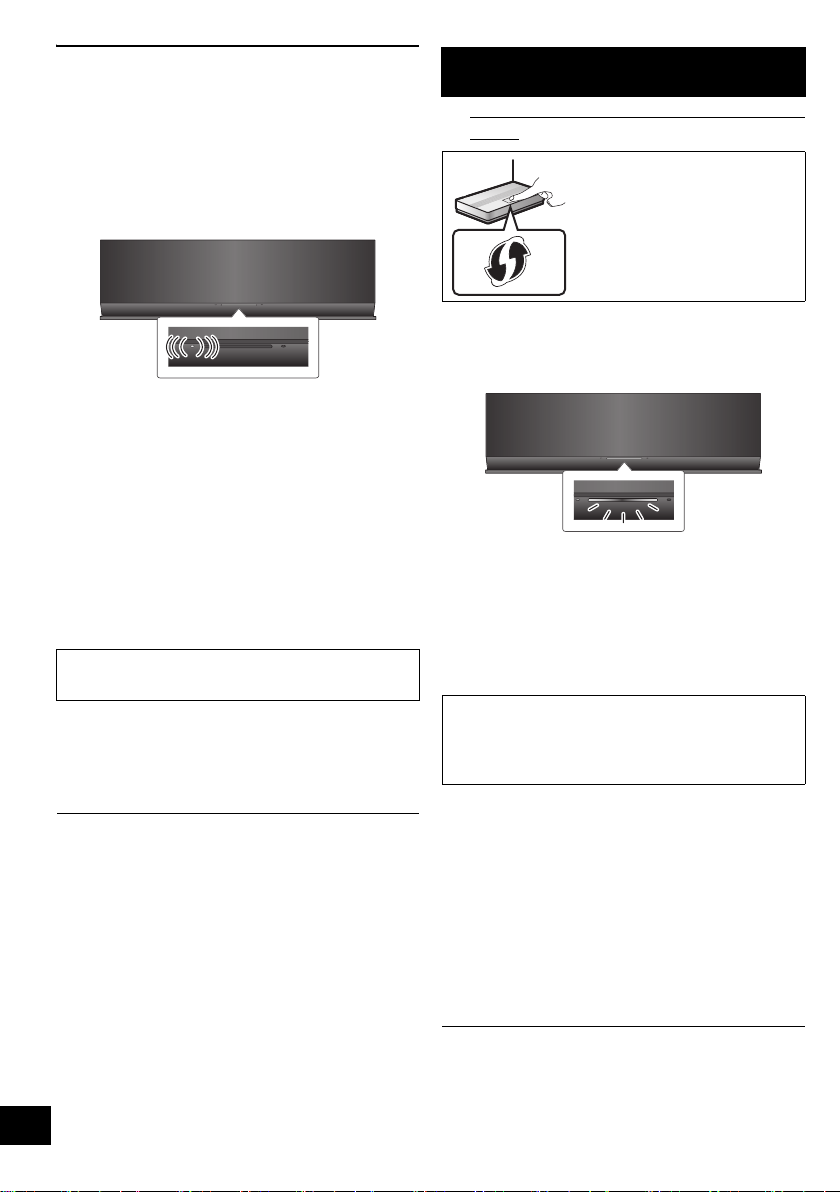
Method 1
If your wireless network router supports WPS.
∫ Using the WPS Push Button Configuration
(PBC)
The WPS identifier mark.
WPS Push Button
Configuration (PBC)
compatible wireless router may
have this mark.
1 Press and hold [– WPS] on the unit for
more than 2 seconds.
≥ Complete step 2 within 2 mins.
2 Press the WPS button on the wireless
router.
3 The unit’s settings are completed when
®
the Wi-Fi
after about 2 minutes and lights blue.
The Wi-Fi
connection was not made within the set time limit.
Try the setting again. If the Wi-Fi
still turns off, try “Method 2”.
status indicator stops blinking
®
status indicator turns off if the
®
status indicator
≥ When performing the network settings, place this unit
close to the wireless router.
≥ Simultaneous use with other 2.4 GHz devices, such as
microwaves, cordless telephones, etc., may result in
connection interruptions.
≥ Immediately after this unit is turned on, the network
setup may take longer to start.
≥ This unit cannot join a wireless network using WEP
security settings with
the wireless network.
≥ To cancel the setting in the middle, press [Í/I] to turn off
the unit.
≥ For up-to-date compatibility information on your Wireless
router refer to
http://panasonic.jp/support/global/cs/
(This site is in English only.)
“Method 1”. Use “Method 2” to join
6
RQT9655
4 To use AirPlay, turn to page 9.
≥ To use the WPS PIN code, refer to the notes on page 8.
≥ To edit this system’s name, it is necessary to use
“Method 2”. (> 8, “Additional settings”)
 Loading...